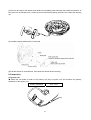
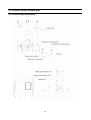
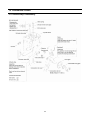
1
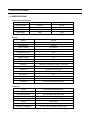
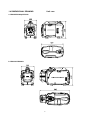
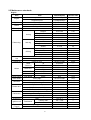
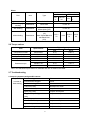
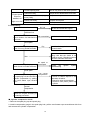
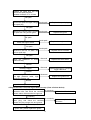
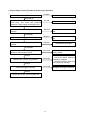
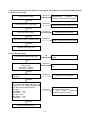
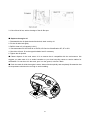
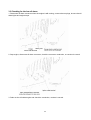
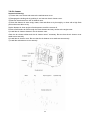
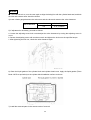
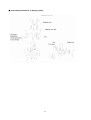
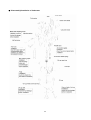
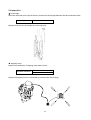
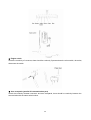
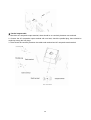
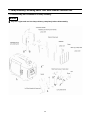
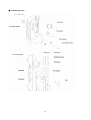
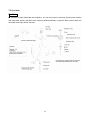
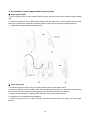
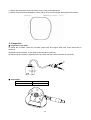
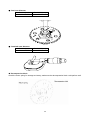
Preface
This manual covers the construction, function and servicing procedure of KIPOR
IG2000/IG2000p/IG2000s/CG2000/CG2000s generators.
Careful observance of these instructions will result in better, safer service work.
All information, illustrations, directions and specifications included in this publication are
based on the latest product information available at the time of approval for printing. KIPOR
POWER CO., LTD, reserves the right to make changes without incurring any obligation. No
part of this publication may be reproduced without written permission.
CONTENTS
1. SPECIFICATIONS
1.1 SPECIFICATIONS
1.2 CHARACTERISTICS
1.3 PERFORMANCE CURVES
1.4 DIMENSIONAL DRAWINGS
1.5 WIRING DIAGRAM
2. SERVICE INFORMATIONS
2.1 THE IMPORTANTANCE OF PROPER SERVICE
2.2 IMPORTANT SAFETY PRECAUTIONS
2.3 SERVICE RULES
2.4 SERIES NUMBER LOCATION
2.5 MAINTENANCE STANDARDS
2.6 TORQUE VALUES
2.7 TROUBLESHOOTING
3. MAITENANCE/REGULATE
3.1 MAITENENCE SCHEDULE
3.2 ENGINE OIL
3.3 OIL ALARM
3.4 AIR CLEANER
3.5 SPARK PLUG
3.6 VALVE CLEARANCE
3.7 FUEL SWITCH/FUEL FILTER
3.8 FUEL TUBE/FUEL PUMP/DIAPHRAGM
3.9 SPARK ARRESTER
4. MUFFLER
5. AIR FILTER, CARBURETOR
5.1 AIR FILTER
5.2 CARBURETOR
5.3 INSPECTION
6. CONTROL PANEL
6.1 CONTROL PANEL
6.2 INSPECTION
7. LAMP CHIMNEY/SIDE COVERS/FUEL TANK/GUIDE PLATE/INVERTER UNIT
7.1 LAMP CHIMNEY
7.2 SIDE COVER
7.3 FUEL TANK
7.4 FAN SHIELD/ENGINE FIXED PLATE
7.5 GUIDE PLATE
7.6 INSPECTION
8. RECOIL STARTER/FAN SHIELD/IGNITION COIL
8.1 DISASSEMBLY, ASSEMBLY
8.2 RECOIL STARTER
8.3 INSPECTION
9. GENERATOR, TRIGGER
9.1 GENERATOR
9.2 CHECK
9.3 REGULATE
10. CYLINDER COVER/ROCKER ARM10.1 DISASSEMBLY, ASSEMBLY
10.2 INSPECTION
11. CRANKCASE COVER/CAM TIMING DRIVING CHAIN WHEEL
11.1 DISASSEMBLY
11.2 CRANKCASE COVER
11.3 ROLLER CHAIN
11.4 CHAIN PALLET AND PRESSURE PLATE
11.5 CRANKCASE COVER
11.6 INSPECTION
12. CRANKSHAFT/PISTON
12.1 DISASSEMBLY/ASSEMBLY
12.2 PISTON
12.3 INSPECTION
1. SPECIFICATIONS
1.1 SPECIFICATIONS
Dimensions and weights
Model
IG2000/IG2000p/CG2000
IG2000s/CG2000s
Overall Length
520mm
665mm
Overall Width
300mm
300mm
Overall Height
425mm
425mm
Net Weight
22Kg
24Kg
Engine
Model
KG158
Type
4-stroke,OVC, single cylinder, Gasoline engine
Displacement
105.6ml
Bore x stroke
58 x 40mm
Maximum horsepower(KVA)
2.2/4500
Compression ratio
8.5:1
Cooling system
Forced air-cooled
Ignition system
T.C.I
Ignition timing
27°B.T.D.C
Spark plug
A7RTC
Carburetor
Float type, Horizontal, butterfly valve type
Air cleaner
Semi-dry type
Governor
Electronic control type
Lubrication system
Forced splash
Oil capacity
0.4L
Starting system
Recoil starter
Stopping system
Primary circuit ground
Fuel used
Automotive unleaded gasoline
Generator
Model
KD20/KD20A/KM20/KM20A
Generator type
Multi pole rotation type
Generator structure
Self-ventilation drip-proof type
Excitation
Self-excitation (Magnet type)
Voltage regulation system
PWM(Plush width modulation)
Phase
Three phase
Rotating direction
Clockwise (Viewed from the generator)
Frequency regulation
AC-DC-AC conversion (Inverter type)
1
1.2 CHARACTERISTICS
Model
IG2000/IG2000s/IG2000p/CG2000/CG2000s
Maximum output AC
2.0KVA
Rated output AC
1.6KVA
Rated output DC
100W
Rated frequency
50Hz
60HZ
60HZ
Rated voltage AC
230V
120V
240V
Rated voltage DC
12V
Rated current AC
7.0A
Rated current DC
13.3A
8.3A
Power factor
1.0cosφ
Voltage variation rate
Momentary
10%max.
Average
1.5%max.
3 sec. max.
Average time
Voltage stability
±1%
1%max.
Frequency variation rate Momentary
1%max.
Average
1 sec. max.
Average time
Frequency stability
±0.1%
Insulation resistance
AC circuit protector
10MΩmin.
9.3A(230V)
17.9A(120V)
DC circuit protector
10A
Fuel tank capacity
3.5L
Fuel consumption
Operating hours
Noise level
6.7A
(at rated load)
500g/KW.h
(at rated load)
3.2h
(Zero load to full load)
58-65dB(A)/7m
2
9.0A(240V)
1.3 PERFORMANCE CURVES
The curves show performance of the generator under average condition.
Performance may vary to some degree depending on ambient temperature and humidity.
The output voltage will be higher than usual when the generator is still cold, immediately after the engine
starts.
● AC External characteristic curves
● DC External characteristic curves
3
1.4 DIMENSIONAL DRAWING
Unit: mm
a. IG2000\IG2000p/CG2000
b. IG2000s/CG2000s
4
1.5 WIRING DIAGRAM
a. IG2000/IG2000s
b: IG2000p
c. CG2000/CG2000s
5
2. Service information
2.1 The importance of proper servicing
■ Proper servicing is essential to the safety of the operator and the reliability of the engine. Any error or
oversight made by the technician while servicing can easily result in faulty operation, damage to the
engine or injury to the operator.
■ Improper servicing can cause an unsafe condition that can lead to serious injury or death.
Follow the procedures and precautions in this shop manual carefully.
■ Some of the most important precautions are given below. However, we cannot warn you of every
conceivable hazard that can arise in performing maintenance or repairs. Only you can decide whether
you should perform a given task.
■ Failure to follow maintenance instructions and precautions can cause you to be seriously hurt or
killed. Follow the procedures and precautions in this shop manual carefully.
2.2 Important safety precautions
Be sure you have a clear understanding of all basic shop safety practices and that you are wearing
appropriate clothing and safety equipment. When performing maintenance or repairs, be especially
careful of the following:
■ Read the instructions before you begin, and be sure you have the tools and skills required to perform
the tasks safely.
■ Be sure that the engine is off before you begin any maintenance or repairs. This will reduce the
possibility of several hazards:
Be careful for carbon monoxide poisoning from engine exhaust.
Be sure there is adequate ventilation whenever you run the engine.
Be careful for burns from hot parts.
Let the engine cool before you touch it.
Be careful for injury from moving parts.
■ Do not run the engine unless the instruction tells you to do so. Even then, keep your hands, fingers,
and clothing away.
■ To reduce the possibility of a fire or explosion, be sure when working around gasoline, use only a
nonflammable solvent, not gasoline, to clean parts. Keep all cigarettes, sparks, and flames away from all
fuel-related parts.
2.3 Service rules
1. Use genuine KIPOR or KIPOR-recommended parts and lubricants or their equivalents. Parts that do
not meet Kipor’s design specifications may damage the engine.
2. Use the special tools designed for the product.
3. Install new gaskets, O-rings, etc. when reassembling.
4. When torque bolts or nuts, begin with larger-diameter or inner bolts first and tighten to the specified
torque diagonally, unless a particular sequence is specified.
5. Clean parts in cleaning solvent upon disassembly. Lubricate any sliding surfaces before reassembly.
6
6. After reassembly, check all parts for proper installation and operation.
7. Many screws used in this machine are self-tapping. Be aware that cross-threading or over tightening
these screws will strip the threads and ruin the hole.
8. Use only metric tools when servicing this engine. Metric bolts, nuts and screws are not interchangeable
with no metric fasteners. The use of incorrect tools and fasteners will damage the engine.
9. Follow the instructions represented by these symbols when they are used.
■ Electric precautions
1. Hold the connector body to disconnect the connector. Do not disconnect by pulling the wire harness.
To disconnect the locking connector, be sure to unlock first, and then disconnect.
2. Check the connector terminals for bend, excessive extrusion, missing terminal, or other abnormalities
before connecting the connector.
3. To connect, insert the connector as full as it goes. If the connector is a locking type, be sure that it is
locked securely.
4. Check the connector cover for breakage and check whether the connector female terminal is open
excessively. Then, connect the connector securely. Check the connector terminal for rust. Remove the
rust using an emery paper or equivalent material before connecting the connector.
5. Set the harness clips in the specified places of the frame securely, and clamp the wire harnesses.
6. Clamp the cables securely.
7. Clamp the wire harnesses securely so that they do not interfere with the rotating parts, moving parts
and the hot parts.
8. Route and connect the wire harnesses properly. Be sure that the harnesses are not slack, twisted or
pulled taut.
9. Route the wire harnesses properly so that they do not contact with the shape edges and corners, and
the end of the bolts and screws on the body.
10. If a wire harness contacts the end of the bolts/screws or sharp edges and corners, protect the
contact part of the harness with a tube or by winding with an electrician’s insulating tape. If the wire
harness has a grommet, set the grommet securely.
11. Take care not to pinch the wire harnesses during installation of a part. If a wire harness has the
damaged insulation, repair by winding with the electrician’s insulating tape.
12. Read the tester manufacture’s operation instructions carefully before operation with tester. Follow
the instructions of the Service Manual. Be sure that the battery built in a tester is fully charged and check
the meter before inspection using the tester.
2.4 Serial number location
The engine serial number is stamped at the underside of engine side cover. Refer to these numbers
when ordering or making technical inquiries.
Serial number
7
2.5 Maintenance standards
Engine
Part
Engine
Item
Standard(mm)
Service limit
Maximum speed without load
4300±100rpm
—
Compress force
0.45Mpa/800rpm
—
58.000-58.020
57.960-57.980
13.002-13.008
12.994-13.000
0.97-0.99
58.105
57.85
13.05
12.95
0.87
Ring side clearance
Ring end clearance
Width t
Height h
Ring side clearance
2nd ring
Ring end clearance
Width t
Height h
Ring side clearance
Oil ring
Ring end clearance
Width t
Small end I.D
Big end I.D
Crank pin O.D.
Valve
IN
clearance
EX
IN
Stem O.D.
EX
Guide I.D.
IN/EX
Seat width
IN/EX
Free length
IN/EX
Cam height
O.D
Camshaft bearing I.D.
0.02-0.06
0.15-0.25
1.95-2.15
1.17-1.19
0.02-0.06
0.15-0.25
2.4-2.6
1.85-1.98
0.03-0.18
0.20-0.50
2.3-2.7
13.006—13.017
24.020—24.033
23.967-23.980
0.10±0.02
0.15±0.02
3.965—3.980
3.955—3.970
4.000—4.030
0.7
26.4
29.026-29.086
8.966-8.975
9.000-9.015
0.15
1.0
1.75
1.07
0.15
1.0
2.2
1.75
0.24
1.0
2.2
13.08
24.09
23.90
----3.90
3.90
4.06
1.8
24.9
28.5
8.92
9.035
I.D(Rocker arm)
6.000-6.012
6.037
5.972-5.980
6.000-6.012
0.60
12
2 turns out
0.6—0.7
0.8—1.3Ω
15 —21kΩ
0.5-0.75
80~130Ω
5.965
6.037
—
—
—
—
—
—
—
—
Cylinder
Sleeve I.D.
Skirt O.D
Pin bore I.D.
O.D
Height h
Piston
Piston pin
1st ring
Piston ring
Connecting
rod
Crankshaft
Valves
Valve spring
Cam wheel
Camshaft
Rocker arm
Carburetor
Spark plug
Ignition coil
Pulse coil
(Trigger)
O.D.(Rocker arm shaft)
I.D.(Rocker arm shaft bearing)
Main jet
Float height
Pilot screw opening
Gap
Primary side
Resistance
Second side
Air gap
Resistance
8
Motor
Part
Item
Type
Standard(Ω)
IG series
CG series
230V/240
120 230V/24
120V
V
0V
V
Ignition winding
Outer charging
winding
Resistance
Green-Yellow/Green
0.40-0.55
Resistance
Blue--Blue
0.12-0.15
Sub winding
Resistance
Main winding
Resistance
White-White (IG)
White-White (CG)
Black—Black-Black
(IG)
Black-Yellow/Black-Gr
een/Black-Red
(CG)
0.15-0.30
1.35-1
.75
5.0-5.5
0.18-0.
21
0.65-0.
90
2.6 Torque values
Item
Specification
Connection rod bolt
Spark plug
Crankcase cover
Flywheel nut
M5X0.8X25
M10X1.0X13
M6X25
M12X1.25
M5 Bolt, nut
Tightening torque
N·m
kgf·m
8-10
0.8-1.0
12-15
1.2-1.5
8-10
0.8-1.0
70-80
7.0-8.0
6-8
0.6-0.8
Standard torque
M6 Blot, nut
8-10
0.8-1.0
M8 Bolt, nut
20-23
2.0-2.3
Note: Use standard torque values for fasteners that are not listed in this table.
2.7 Troubleshooting
a. General symptoms and possible causes
Engine does
not start or
hard starting
Fuel filter clogged
Clean
Fuel tank tube clogged
Clean
Fuel switch clogged
Clean
Carburetor faulty
Readjust and clean
Ignition coil faulty
Inspect and replace
Spark plug faulty
Inspect and replace
Trigger faulty or trigger clearance
Inspect and replace
faulty
Spark plug cap looses
Fix it securely
Low oil alarm faulty
Inspect and replace
Ignitor faulty
Inspect and replace
Ignition winding faulty
Inspect and replace
9
Engine speed
does not
stabilize, too
high or too low
Throttle opening fault
Set in fully close or half close position
Carburetor faulty
Adjust and/or disassemble and clean
Throttle control motor (stepping
Inspect and replace
motor) faulty
Inverter unit faulty
Inspect and replace
Valve clearance misadjusted
Readjust
b. Hard starting
Check the fuel level in the tank.
No fuel
Add fuel and restart the engine.
Sufficient fuel
Loosen the drain screw and Fuel not reached
check whether fuel reached the
carburetor.
Add fuel and restart the engine.
Good spark
Dry
Remove the spark plug and
check for wet or fouled electrode.
Check for blockage in the carburetor
port and nozzle.
Clean the electrode and restart,
taking care that the choke is not
closed too much. If flooding is severe,
check the carburetor float valve.
Wet
No spark or
Remove the spark plug and weak spark
check for wet or fouled electrode.
Perform
the
troubleshooting
ignition
system
Good spark
Install a compression gauge in
the spark plug hole and check the
cylinder compression by pulling
the recoil starter rope several
times
Low cylinder
compression
1. Check the valve clearance
2. Check for carbon deposits in the
combustion chamber.
3. Check for valve cone and base.
4. Check for worn piston, piston ring
or cylinder.
Normal
compression
Install the spark plug securely.
Restart the engine according to
the starting procedure.
■ Cylinder compression check
1. Remove the spark plug cap and spark plug.
2. Install a compression gauge in the spark plug hole, pull the recoil starter rope several times with force
and measure the cylinder compression.
10
Cylinder compression
0.45Mpa/800rpm
11
C. Ignition system
■ Fill in oil to the demanded level.
■ Use the genuine spark plug A7RTC.
■ Spark plug inspection
1. Disassemble spark plug
2. Install spark plug onto spark plug cap.
3. Set the oil switch to the “ON” position. Ground the negative (—) electrode (i.e. threaded part) of the
spark plug against the shroud and pull the recoil starter rope to check the spark plug.
■ Don’t pull the recoil starter while touching the high tension wire with wet hands. High voltage
generates, which is very dangerous.
■ Drain the gasoline from the fuel tank and carburetor.
■ Pull the recoil starter several times to release the unborn gas in the cylinder with the engine switch
OFF.
12
Measure the spark plug gap and
perform the spark plug test.
Standard clearance: 0.6—0.8mm
No spark
Perform the spark test again using a Good spark
new spark plug
Replace the spark plug
No spark
Remove the control panel. Perform Good spark
the spark test using a new ignitor.
Replace the ignitor
No spark
Good spark
Check the engine switch
Replace the engine switch
No spark
Good spark
Disconnect the low oil alarm and
perform spark test
Replace the low oil alarm
No spark
Check the resistance of motor
ignition winding
Abnormal
Replace the motor stator
Normal
Check the trigger
Abnormal
Replace the trigger or readjust
trigger clearance
Normal
Check the ignition coil resistance
and high pressure cable, high
pressure insulation cap.
Abnormal
Replace the ignition coil
Normal
Inspection or replace wire harness.
d. Engine oil level is low, but engine does not stop. (Poor oil alarm device)
Drain out oil completely, disconnect alarm No continuity
connection wire, and check the continuity
Replace the oil level alarm
between alarm outlet terminal and ground.
Continuity
Reset the alarm connection wire, disconnect No continuity
Repair or replace the wire
ignitor plug, and check the continuity
harnesses
between the plug orange wire and ground.
Continuity
Ignitor fault, please replace the ignitor.
13
e. Engine stops running (Throttle is at the correct position)
Check the oil level and oil alarm
Oil alarm
Fill in oil and restart the engine
Sufficient oil
Reset the alarm connection wire, disconnect
ignitor plug, and check the continuity
between the plug orange wire and ground.
No fuel
Fill in fuel and restart the engine
Sufficient fuel
Check the fuel switch and fuel filter for
blockage
Blocked
Clear the fuel switch and fuel
filter
Blocked
Clear or replace the fuel supply
pipe
No blocked
Check the fuel supply pipe for blockage
No blocked
Check the fuel switch and fuel filter for
blockage
Blocked
Disassemble and clear
No blocked
Check sealing of inlet papery gasket and
carburetor heat insulation block
Abnormal
Normal
Measure the cylinder compression
Abnormal
Normal
Check the trigger clearance
Abnormal
Normal
Perform the throttle control system test
14
Screw the nut or replace the
papery gasket
1. Check the valve clearance
2. Check the carbon deposit in
combustion chamber
3. Check the piston, piston ring
and cylinder for damage
Readjust the trigger clearance
f. Engine speed can’t increase or instable (choke is at the correct position)
Blocked
Check the air filter element for blockage
Clear the air filter element
No blocked
Abnormal
Check the valve clearance
Readjust the valve clearance
Normal
Remove the spark plug and check the
electrode clearance for carbon deposit
Abnormal
Clear electrode, adjust clearance
or replace the spark plug
Normal
Check the
blockage
carburetor
and
nozzle
for
Blocked
Disassemble and clear
No blockage
Check sealing of inlet line papery gasket and
carburetor heat insulation block
Abnormal
Normal
Measure the cylinder compression
Abnormal
Normal
Screw the nut, and replace the
papery gasket or heat insulation
block
1. Check the valve clearance
2. Check the carbon deposit in
combustion chamber
3. Check the piston, piston ring
and cylinder for damage
Perform the throttle control system test
g. Throttle control system test
1. Engine speed too high or too low
Check the AC output
Abnormal
Perform
the
generator
troubleshooting
following
the
instruction of “No or low AC output”
Normal
Check the throttle control motor
Abnormal
Replace the throttle control motor
Normal
Replace the inverter unit
15
2. Smart system doesn’t work with zero load, engine speed doesn’t increase with Smart system
on and load connected.
Check the AC output
Abnormal
Perform
the
generator
troubleshooting
following
the
instruction of “No or low AC output”
Normal
Check the throttle control motor
Abnormal
Replace the throttle control motor
Normal
Check the Smart switch
Abnormal
Replace the smart switch
Normal
Check Smart switch connection wire
Abnormal
Repair or replace the wire harness
Normal
Replace the inverter unit
h. No or low AC output
Is the overload indicator light ON?
ON
Disconnect the load, and restart the
engine
OFF
Is the engine speed normal?
Smart switch
ON: 3200±100rpm
OFF:4300±100rpm
Abnormal
Perform the throttle control system
test
Normal
Stop the engine and check the AC
receptacle
Abnormal
Replace the AC receptacle
Normal
Disconnect the 6P connector on inverter
unit, pull the recoil starter with force, and
measure the AC voltage between the
black terminal and white terminal.
120V type:
Black-Black: >30V
White-White: >1V
230V/240V type:
Black-Black: >60V
White-White: >1V
Abnormal
Normal
Replace the inverter unit
16
1. Check and repair stator wire
harness or replace stator
2.
Rotor
inner
magnetism
decreases, replace the rotor
Measure voltage
Model
Item
Voltage
between
phase wires
IG series
CG series
Phase wire color:
Black-Black-Black
Sub winding color:
White-White
Phase wire color:
Yellow-Green-Red
Neutral wire color: Black
Sub winding color: Black-Green
120V
230V\240V
120V
230V\240V
>30V
>60V
>15V
>30V
Sub winding
voltage
>1V
i. No AC output (CG series)
Is the engine speed normal?
Abnormal
Perform the throttle control system
test.
Normal
Check the DC output
Abnormal
Replace the DC receptacle
Normal
Check the DC output
Abnormal
Replace the rectifier.
Normal
Measure the resistance between the
blue terminals of the rectifier.
Resistance: 0.12~0.15Ω
Abnormal
Check the wire harness, or replace
the stator.
Normal
Rotor losses magnetism and replace the
rotor.
j. No DC output
k. Parallel no output
■ Make sure that the two PARALLEL I/O are connected correctly by special communication wire.
■ Make sure that the PARALLEL, OUTPUT are inserted into the parallel cable and connected correctly.
■ If there is any disconnection, when you start the parallel generators, some one will be no output and
17
damaged.
■ The parallel cable is only used for 2 generators with the same model. It can’t be used for 3 or more
than 3 generators.
■ Only KIPOR parallel output cable and communication wire is allowed to use, never try other cables.
Use the receptacle output of parallel cable, don’t use the receptacle of control panel.
■ Don’t disconnect the PARALLEL I/O special communication wire and parallel output cable during
parallel operation. Connect the PARALLEL I/O communication wire and parallel output cable before
starting engine. Don’t disconnect the PARALLEL I/O communication wire and parallel output cable until
stop operation.
18
■ Don’t output current after stopping one generator when the parallel cable is still connected.
■ Do disconnect the parallel output cable and parallel communication wire if operate the generator
separately.
Check whether the two generators could
work well separately.
Abnormal
Perform
single
troubleshooting
generator
Normal
Off
Is one of the over load indicating light
on?
1. Check the parallel output cable
2. Check the parallel output terminal
On
Check the paralleled I/O communication
wire
Abnormal
Replace
the
parallel
communication wire
I/O
Abnormal
Replace
the
parallel
communication receptacle
I/O
Normal
Check the paralleled I/O communication
receptacle
Normal
Replace the inverter unit
19
3. Maintenance
3.1 Maintenance schedule
Regular service period(1)
Item perform at every indicated
month or operating hour interval,
Each use
whichever comes first
Engine Oil
Air filter
Check
Every 3
Every 6
Every
month or
months or
months or
year or
20 Hrs.
50Hrs.
100 Hrs.
300 Hrs.
●
●
Replace
Check
First
●
●
●②
Clean
Spark plug
Clean-Adjust
●
Spark catcher
Clean-Adjust
●
Valve clearance
Check-Adjust
●③
Fuel tank and filter
Clean
●③
Fuel line
Check
Every 2 year (Replace if necessary)
Note:
(1) For commercial use, operation hours are determined by proper maintenance.
(2) Service more frequently when operating in dusty areas, every 10 hrs or every day.
(3) Service by KIPOR authorized agency, unless correct tools or professional specialist is available.
Do service according to the manual.
3.2 Engine oil
■ Checking for the oil level
Stop the engine and check the oil level, be sure to put the engine on a flat floor when checking.
1. Loosen the screws of the maintenance cover and remove the cover.
2. Remove the oil filler cap and check for the oil level.
20
3. If the oil level is low, add to the edge of the oil filler port.
■ Replace the engine oil
1. Disassemble the oil dipstick and oil drain bolt, drain out dirty oil.
2. Fix the oil drain bolt tightly.
3. Refill in clean oil. (oil capacity is 0.4L)
※ Recommended oil: SAE10W-30 or SAE30, API Service Classification SE, SF or SG.
4. Check the oil level; fill to the upper limitation level if necessary.
5. Tighten the oil dipstick.
■ Please dispose of the used motor oil in a manner that is compatible with the environment. We
suggest you take used oil in a sealed container to your local recycling center or service station for
reclamation. Do not throw it in the trash; pour it on the ground, or down a drain.
■ Drain the used oil while the engine is warm. Warm oil drains quickly and completely. Be attention that
the temperature should not be too high to avoid scalding.
21
3.3 Checking for the low oil alarm
1. Disconnect oil alarm connector when the engine is still running, connect the two plugs, be sure that oil
alarm lights and engine stops.
2. Stop engine, disconnect oil alarm connector, check the connector conduction, no conduct is normal.
3. Drain out the oil inside engine and check the conduction, conduct is normal.
22
3.4 Air cleaner
Inspection/Cleaning:
1) Loosen the cover screw and remove the maintenance cover.
2) Disengage the locking tab by pushing it, and remove the air cleaner cover.
3) Remove the element from the air cleaner case.
4) Clean the element in warm soapy water, rinse and allow to dry thoroughly, or clean with a high flash
point solvent and allow to dry.
Dip the element in clean engine oil and squeeze out all the excess oil.
Excess oil will restrict air flow through the foam element and may smoke at the engine start.
5) Install the air cleaner element in the air cleaner case.
Clean the air cleaner rubber and the air cleaner case if necessary. Be sure that the air cleaner cover
seals are set securely.
6) Install the air cleaner cover. Be sure that the air cleaner cover seals are set securely.
7) Install the maintenance cover securely.
23
Caution
■ A dirty air cleaner will restrict air flow to the carburetor, reducing engine performance. If the engine is
operated in dusty areas, clean the air cleaner more often than specified in the Maintenance Schedule.
■ Never run the engine in case there is no element or the filter is damaged, as it will do great harm to
the engine.
3.5 Spark plug
Inspection/Cleaning:
1) Remove the spark plug cap and remove the spark plug.
2) Remove carbon or other deposits with a plug cleaner or stiff ire brush. Check the sealing washer for
damage.
3) Measure the plug resistance; replace the spark plug if the measure is not accord with the asked valve.
Spark plug resistance
3~9KΩ
4) Measure the plug gap with a wire-type feeler gauge. Adjust by bending the side electrode if the
measure is not accord with the asked valve.
Spark plug clearance
0.6~0.7mm
Standard spark plug
A7RTC
0.6-0.7
5). Install the plug finger tight to seat the washer, and then tighten with a plug wrench.
Torque valve is 12~15 N.m
24
3.6 Valve clearance
Caution
■ Valve clearance inspection and adjustment must be performed with the engine cold.
Inspection/Adjustment:
1) Remove the following parts:
―Front cover, control panel
―Rear cover
―Right/left side covers
―Fuel tank
―Inverter unit, engine bed
―Recoil starter, fan cover
―Inlet/Exhaust side baffler
2) Remove the four tighten bolts and disassemble the cylinder cover. Don’t remove the cylinder cover
with excessive force. It can deform the cylinder cover. Replace the cylinder cover if it is deformed.
3) Turn the rotor to set the piston at top dead center of the compression stroke.
Timing line of camshaft driving chain should align with the cylinder head seal, check whether the inlet
and exhaust valve are closed.
25
Caution
■ If the inlet valve is on, turn the rotor again to align the timing line with the cylinder head seal, and both
the inlet and exhaust valve should be closed.
4) Insert a feeler gauge between the rocker arm and the valve and measure the valve clearance.
Valve clearance
IN
0.10±0.02mm
EX
0.15±0.02mm
5) If adjustment is necessary, proceed as follows.
a. Loosen the adjusting screw lock nut and adjust the valve clearance by turning the adjusting screw in
or out.
b. Secure the adjusting screw with a socket wrench and tighten the lock nut to the specified torque.
c. After tightening the lock nut, check the valve clearance again.
6) Clean the liquid gasket of the cylinder block and cylinder head cover. Apply the liquid gasket (Three
Bond 1207B or equivalent) to the cylinder block installation surface as shown.
7) Install the removed parts in the reverse order of removal.
26
3.7 Fuel tank/Fuel filter
Caution
■ Gasoline is highly flammable and explosive. You can be burned or seriously injured when handling
fuel. Keep heat, sparks, and flame away. Wipe up spills immediately.
Cleaning:
1) Drain the fuel from the tank and carburetor, and then remove the following parts.
―Rear cover
―Front cover and control panel
―Right/Left side cover
2) Disconnect the fuel tube from the fuel tank, and remove the fuel filter.
3) Remove the clogged foreign material from the fuel filter, and check the fuel filter for damage. Replace
the fuel filter if necessary.
4) Remove the fuel tank and clean it with cleaning solvent and allow the fuel tank to dry thoroughly.
5) After cleaning, install the fuel tank and set the fuel filter in the tank. Connect the fuel tube.
6) Install the removed parts in the reverse order of removal.
7) Fill the fuel tank with gasoline and check the fuel tube for gasoline leakage.
3.8 Fuel tube/ Fuel pump
Caution
■ Gasoline is highly flammable and explosive. You can be burned or seriously injured when handling
fuel. Keep heat, sparks, and flame away. Wipe up spills immediately.
1) Drain the fuel from the tank and carburetor, and then remove the following parts.
―Rear cover
―Front cover and control panel
―Right/Left side cover
27
2) Check the fuel tube for deterioration, cracks and gasoline leakage. If there is any abnormality in the
fuel tube, replace the tube.
3) Check the diaphragm tube for deterioration, crack and oil leakage. If there is any abnormality in the
diaphragm tube, replace the tube.
4) Check to see whether water or foreign material has been accumulated in the fuel pump.
If there is water or foreign material accumulated in the pump, replace the fuel pump.
5) Check the fuel switch and fuel duct, blow away the foreign matter with high pressure gas with oil
switch turned on.
6) After assembly, check for gasoline leakage from each part.
3.9 Spark catcher
Caution
■ Do the performance after engine cooled completely.
(1) Remove the rear cover
(2) Disassemble the spark catcher from muffler
(3) Remove the carbon from the spark catcher steel net, check for damage, and replace it if necessary.
(4) Install the removed parts in the reverse order of removal.
28
4. Muffler
Caution
■ Muffler removal/installation must be performed with the engine cold.
● Disassembly/Reassembly
29
5. Air filter/Carburetor
Caution
■ Loosen the drain oil bolt and drain out fuel before disassembly.
■ Keep heat, flame and sparks away.
5.1 Disassembly/Installation of Air filter
5.2 Disassembly/Installation of Carburetor
30
● Disassembly/Installation of Stepping motor
31
● Disassembly/Installation of Carburetor
32
5.3 Inspection
● Float height
Place the carburetor as the picture shows, measure the float height between float and carburetor block.
Height
12mm
Replace the float if the float height is not the right size.
● Stepping motor
Measure the resistance of stepping motor lead-out wire.
Standard resistance
Between 1and 3:45~55Ω
Between 2 and 4:45~55Ω
Replace the stepping motor if the resistance excesses the above range.
33
1
2
4
3
6. Control panel
6.1 Removal/Installation
34
IG2000/IG2000s
IG2000p
CG2000/CG2000s
6.2 Inspection
a. Control panel
● AC receptacle
Check the electrode contact disk inside receptacle, if it is burnt or the color changes, replace for it.
● DC receptacle
Connect both terminals of the receptacle with a jumper wire to short. There must be continuity between
the lead wire terminals with the circuit protector ON. Replace the DC receptacle if there is no continuity.
● Smart switch/LOAD SELECT Switch (CG series)
There should be continuity with the switch ON, and no continuity with the switch OFF.
● Ignitor
Pull off the 10P receptacle from ignitor, measure the resistance by connecting one testing pen with the
metal outer case of engine, and the other testing pen with the 10P connector.
Color
Circuit unit
Standard resistance
Blue
Primary coil of the ignition coil
0.8-1.3Ω
Orange
Oil level alarm
Yellow
Trigger coil
80-130Ω
Yellow/Green
Ground wire
Continuity
Green
Ignitor unit power coil winding
0.26-0.28Ω
Red
Engine switch
There should be no continuity with correct
oil level
There should be no continuity with the
switch ON, continuity with the switch OFF
35
● Engine switch
Check the continuity of connector, there should be continuity if presses down the micro switch, otherwise,
disconnect the switch.
● Aero receptacle (parallel I/O communication port)
Check the continuity between connector and aero receptacle, there should be continuity between the
two terminals with the same serial number.
36
● Aero plug (Parallel I/O communication data wire)
Check the continuity of aero plugs, there should be continuity between two plugs with the same serial
numbers.
● Parallel output receptacle
Check the continuity between the two terminals of parallel output receptacle.
37
● Parallel output cable
1. Check the AC receptacle output terminal, there should be no continuity between two terminals.
2. Connect the AC receptacle output terminal with one lead, check the parallel plug; there should be
continuity among the four plugs.
3. There should be continuity between the cable earth terminal and AC receptacle earth terminal.
38
7. Lamp chimney/ Housing case/ Fuel tank/ Baffler/ Inverter unit
7.1 Disassembly and installation of lamp chimney
Caution
■ Stop the engine and cool the lamp chimney completely before disassembly.
39
7.2 Disassembly and installation of housing case
40
● Left housing case
41
7.3 Fuel tank
Caution
■ Gasoline is highly flammable and explosive. You can be burned or seriously injured when handing
fuel. Keep heat, sparks, and flame away. Wipe up spills immediately. Loosen the drain screw to drain the
carburetor thoroughly before removal.
42
7.4 Fan shield/Engine fixed plate
7.5 Guide Plate
7.6 Inspection
(1) Aluminum shell resistor (CG series)
Measure the resistance of aluminum shell resistor. Measuring error is ±5%.
Model
120V
230V\240V
Resistance
\consumption power
5Ω\50W
10Ω\50W
(2) Capacitor (CG series)
Measure the capacitance. Measuring error is ±5%.
Model
120V
230V\240V
Capacity /pressure
40uF\250V
20 uF\250V
43
44
8. Recoil starter/ Air conduct cover/ Ignition coil
8.1 Disassembly/Reassembly
45
8.2 Installation of recoil starter
(1) Set the spring into the starter reel, and hang the spring outer hook inside the reel groove.
(2) Smear lubrication grease on the starter outer shell claw, install the starter reel. Revolve the reel
anticlockwise to hang the spring inner hook on the starter outer shell claw.
(3) Make a “8” knot at one end of the rope, pass the other end through the reel hole. Wind the reel
anticlockwise 4 turns to fix the reel.
46
(4) Pull out rope thrum from starter outer shell hole completely, pass it through the handle and make a “8”
knot, then turn off handle cover. Loosen the reel to rebound the spring, take care not to allow the reel pop
out.
(5) Install the starter pallet and fix it with bolts.
(6) Pull the starter for several times, and check the ratchet wheel returning.
8.3 Inspection
(1) Ignition coil
● Attach the two leads of tester to the primary coil plug of ignition coil, and measure the primary
resistance of the ignition coil.
Primary resistance
0.8—1.3Ω
47
● Attach one lead of the tester to each terminal of primary coil plugs of ignition coil and the other lead to
the spark plug cap,then measure the secondary resistance of the ignition coil.
Secondary resistance
15—21kΩ
(2) Rectifier
Measure the on or off (positive pressure fall) of rectifier with control potentiometer
measurement should accord with the standard as shown in the chart.
Positive
Negative
1
1
2
3
4
OFF
OFF
OFF
OFF
OFF
2
ON
3
ON
ON
4
ON
OFF
ON
OFF
48
, the
9. Generator/ Trigger
9.1 Generator
Disassembly/Reassembly
9.2 Inspection
(1) Ignition winding
Measure the resistance between the green terminal and yellow/green terminal.
Resistance
0.40-0.55Ω
(2) Outer charging winding
Measure the resistance between the two blue terminals.
Resistance
0.12-0.15Ω
(3) Sub winding
Measure the resistance between the two sub winding terminals.
Resistance
(Ω)
IG series
CG series
White-White
Black-White
0.15~0.30
(4) Main winding
Measure the resistance among the main winding terminals.
Resist
IG series
CG series
ance
Black-Yellow\Black-Gree
Black-Black-Black
(Ω)
n\Black-Red
120V
230/240V
120V
49
230/240V
1.35~1.75
5.0~5.5
0.18~0.21
0.65~0.90
(5) Trigger
Attach the two testers in the trigger, and measure its resistance.
Trigger resistance
80-130Ω
50
9.3 Adjustment
Adjust the clearance between trigger and the projection part of rotor.
Trigger clearance
0.50-0.75mm
Insert a feeler gauge between the trigger and the projection part of the rotor; loosen the trigger fixed
plate bolt to adjust the clearance slightly. Never move the plastic part of trigger, to avoid it separates from
the fixed plate and damages the trigger.
51
10. Cylinder cover/ Rocker arm
10.1 Disassembly/ Reassembly
52
10.2 Inspection
● Rocker arm outer diameter
Standard(mm)
Service limit(mm)
5.972-5.980
5.965
● Rocker arm inner diameter of inlet/exhaust valve
Standard(mm)
Service limit(mm)
6.000-6.012
6.037
● Inner diameter of rocker arm bearing
Standard(mm)
Service limit(mm)
6.000-6.012
6.037
53
11. Crankcase cover/ Cam timing drive chain
11.1 Disassembly
11.2 Crankcase cover
54
11.3 Reassembly of roller chain
1. Install the crankshaft, piston and connection rod assembly on the cylinder block.
2. Revolve the crankshaft; align the timing mark of crankshaft timing shaft with the timing mark of
crankcase. (Step 1)
3. Install the roller chain on the cam timing drive chain, level the timing mark upward. (Step 2)
4. Put the roller chain into the crankcase, set the end of roller chain to the crankshaft timing gear. (Step 3)
straighten the chain to align the timing mark of cam timing drive chain with cylinder head sealing face.
Caution
Don’t remove the timing mark of crankshaft timing gear during installation. If the timing mark of cam
timing drive chain is not parallel with cylinder head sealing face, adjust the meshing of chain and cam.
5. Install the O-seal ring into the drive shaft, and then assemble the drive shaft. (Step 4) Pay attention
that the opening of drive shaft should upward.
6. Install chain pressure plate. (Step 5)
55
11.4 Assembly of chain support plate/ pressure plate
● Chain support plate
1. Put the upper groove of chain support plate into block; press the other end to seize the support plate
fully.
2. Insert the location pin into cylinder block location hole and align them, set the support plate and clip
block into cylinder block. Adjust the clip block location to align the clip bolt with cylinder block bolt.
3. Install inner hexagonal bolt and tighten hard.
● Chain press plate
1. Install the spring pin shaft, spring and chain pressure plate as the picture shows.
2. Insert the spring into block location hole, set the chain pressure plate into cylinder block and spring
into location hole. Pay attention that the spring pin should be inserted as far as location.
3. Adjust the block location to align the block bolt hole with cylinder block bolt hole.
4. Install the inner hexagonal bolt and tighten it.
5. Hold the spring free end to seize the block (as picture shows), knock the spring pin with copper
hammer.
56
11.5 Assembly of crankcase cover
1. Clear the remaining seal gum on the cylinder block and crankcase cover with cloth.
2. Smear seal gum on the cylinder block sealing face, as picture shows.
3. Reassemble the crankcase cover in the opposite direction of disassembly.
Caution
Install the crankcase cover on the cylinder block 3 minutes after smearing. Revolve the crankshaft if
necessary.
57
4. Tighten the crankcase cover bolt slowly, screw to the prescribed torque.
5. Wait for 20 minutes after installation, never refill in oil or start the engine during these 20 minutes.
11.6 Inspection
● Inspection of oil alarm
(1) Stand the oil alarm, check the oil alarm output wire and copper earth wire, there should be no
continuity.
(2) Bottom up the oil alarm; check again, there should be continuity.
(3) Bottom up the oil alarm completely in the oil, check the float, there should be no continuity.
● Cam height
Standard(mm)
29.026-29.086
Service limit(mm)
28.15
58
● Cam inner diameter
Standard(mm)
9.000-9.015
Service limit(mm)
9.035
● Camshaft outer diameter
Standard(mm)
8.966-8.975
Service limit(mm)
8.920
● Decompression block
Check the return spring for damage and weary, make sure the decompression block could perform well.
59
12. Crankshaft/ Piston
12.1 Disassembly/ Reassembly
60
12.2 Piston
Assembly of piston ring
Caution
● Set the manufactory label upwards.
● Pay attention not to mix the location of the 1st ring and 2nd ring.
● Check the piston ring for flexibility after installation.
● Stagger each piston ring opening apart piston pin for 120°.
61
12.3 Inspection
● Free length of valve spring
Standard(mm)
Service limit(mm)
26.4
24.9
● Valve seat width
Standard(mm)
Service limit(mm)
0.7
1.8
● Valve rod outer diameter
Standard(mm)
Service limit(mm)
Inlet valve
3.965-3.980
3.90
Exhaust valve
3.955-3.970
3.90
62
● Valve guide pipe inner diameter
Standard(mm)
Inlet/Exhaust valve 4.000-4.030
Service limit(mm)
4.060
● Clearance between valve rod and valve guide pipe
Standard(mm)
Service limit(mm)
Inlet valve
0.020-0.065
0.10
Exhaust valve
0.030-0.075
0.12
● Cylinder inner diameter
Standard(mm)
58.000-58.020
Service limit(mm)
58.105
63
● Piston skirt outer diameter
Standard(mm)
Service limit(mm)
57.960-57.980
57.850
10mm
● Clearance between piston and cylinder
Standard(mm)
0.020-0.042
Service limit(mm)
0.120
● Side clearance of piston ring
Standard(mm)
0.02-0.06
Service limit(mm)
0.15
● Piston ring end clearance
Locate the piston ring into cylinder with piston top, and measure the piston end clearance.
Standard(mm)
0.15-0.25
Service limit(mm)
1.0
64
● Piston ring height
Standard(mm)
Service limit(mm)
0.97-0.99
0.87
1.17-1.19
1.107
st
The 1 ring
nd
The 2
ring
● Piston pin outer diameter
Standard(mm)
12.994-13.000
Service limit(mm)
12.950
● Piston pin hole inner diameter
Standard(mm)
13.002-13.008
Service limit(mm)
13.050
65
● Clearance between piston pin and piston pin hole
Standard(mm)
Service limit(mm)
0.002-0.014
0.080
● Connection rod small end inner diameter
Standard(mm)
Service limit(mm)
13.006-13.017
13.080
● Connection rod big end inner diameter
Standard(mm)
24.020-24.033
Service limit(mm)
24.090
● Crankshaft neck outer diameter
Standard(mm)
23.967-23.980
Service limit(mm)
23.900
66
67
● Connection rod big end side clearance
Standard(mm)
Service limit(mm)
0.1-.0.4
0.8
● Oil film clearance of connection rod big end
(1) Wipe off the oil on the surface of crankshaft neck.
(2) Set the plastic wire feeler at the crankshaft neck and install the connection rod. Tighten the bolt to the
prescribed torque, pay attention that don’t revolve the crankshaft. The tighten torque is 8 to 10N.m.
(3) Disassemble the connection rod, measure the plastic wire feeler thickness.
(4) Replace the connection rod if the clearance exceeds the service limit and measure the clearance
again. Grind the crankshaft neck if the new clearance still exceeds the service limit, and use the
connection rod less than the standard valve.
Standard(mm)
0.040-0.066
Service limit(mm)
0.120
68
● Bearing vibration
Clear the bearing and dry it, check the clearance between crankshaft journal and connecting rod big end
by revolving bearing by hands. Replace for a new bearing if there is abnormal noise or vibration.
69