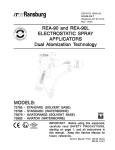
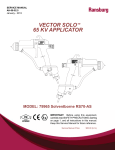
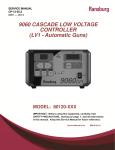
Download Voltage Master 2 (Serv. Man CP-02-02.6)
Transcript
Ransburg SERVICE MANUAL CP-02-02.6 (Replaces CP-02-02.5) March - 2013 VOLTAGE MASTER HIGH VOLTAGE POWER SUPPLY SYSTEM CONTROL PANEL MODEL: 78789 POWER SUPPLY MODEL: LEPS5001 IMPORTANT: Before using this equipment, carefully read SAFETY PRECAUTIONS, starting on page 1, and all instructions in this manual. Keep this Service Manual for future reference. Service Manual Price: €25.00 (Euro) $30.00 (U.S.) Ransburg Voltage Master 2 - Contents NOTE: This manual has been changed from revision CP-02-02.5 to revision CP-02-02.6. Reasons for this change are noted under “Manual Change Summary” inside the back cover of this manual. CP-02-02.6 Voltage Master 2 - Contents Ransburg CONTENTS SAFETY: PAGE 1-6 SAFETY PRECAUTIONS......................................................................................................... 1 HAZARDS / SAFEGUARDS..................................................................................................... 2-5 ATEX: 6-7 EUROPEAN ATEX DIRECTIVE............................................................................................... 6 EUROPEAN ATEX LABELS..................................................................................................... 7 INTRODUCTION: 8-11 GENERAL DESCRIPTION....................................................................................................... 8-9 SPECIFICATIONS..................................................................................................................... 9 ELECTRICAL NOISE................................................................................................................ 10 CABLE CONNECTION EXAMPLES........................................................................................ 11 INSTALLATION: 12-23 BLOCK DIAGRAM OF TYPICAL REA III AUTOMATIC APPLICATOR INSTALLATION................................................................................................. 12 BLOCK DIAGRAM OF TYPICAL AEROBELL 33 INSTALLATION..........................................................................................................................13 LOCATION.................................................................................................................................14 SAFETY GROUND....................................................................................................................14 INPUT POWER..........................................................................................................................14-15 SYSTEM INSTALLATION..........................................................................................................15 78789-XX CONTROL PANEL SCHEMATIC............................................................................ 16 POWER SUPPLY CONNECTIONS......................................................................................... 17 INTERLOCK CONNECTIONS.................................................................................................. 17-18 AC REMOTE I/O........................................................................................................................19 DC PUMP I/O.............................................................................................................................19 DC REMOTE I/O........................................................................................................................19-20 PNEUMATIC CONNECTIONS................................................................................................. 21 HIGH VOLTAGE CABLE........................................................................................................... 21-22 MOTOR CONTROL BOARD CONFIGURATION.................................................................... 23 MASTER CONTROL BOARD CONFIGURATION.................................................................. 23 OPERATION: 24-32 HIGH VOLTAGE ON CONTROL SEQUENCE........................................................................ 24 HIGH VOLTAGE OFF CONTROL SEQUENCE...................................................................... 24 OVERLOAD SEQUENCE.........................................................................................................24 MOTHER BOARD FUNCTIONS...............................................................................................25 MASTER CONTROL BOARD FUNCTIONS............................................................................ 26 FRONT PANEL BOARD FUNCTIONS..................................................................................... 26 MOTOR CONTROL BOARD.................................................................................................... 26 (Continued On Next Page) CP-02-02.6 Ransburg Voltage Master 2 - Contents CONTENTS (Cont.) OPERATION (Cont.): PAGE 24-32 FRONT PANEL BOARD FUNCTIONS..................................................................................... 26 MOTOR CONTROL BOARD.................................................................................................... 26 FRONT PANEL BOARD............................................................................................................27 FRONT PANEL CONTROLS AND INDICATORS................................................................... 28-29 LEPS5001 HIGH VOLTAGE POWER SUPPLY....................................................................... 30 OVERLOAD ADJUSTMENT PROCEDURES......................................................................... 31-32 MAINTENANCE: 33-38 GENERAL..................................................................................................................................33-34 OVERLOAD PROCEDURE......................................................................................................34 TROUBLESHOOTING..............................................................................................................35-36 TROUBLESHOOTING GUIDE................................................................................................. 37-38 PARTS IDENTIFICATION: 39-44 CONTROL PANEL PARTS LIST - FRONT VIEW................................................................... 39 CONTROL PANEL PARTS LIST - INSIDE DOOR VIEW....................................................... 40 CONTROL PANEL PARTS LIST - INSIDE VIEW.................................................................... 41 78789 CONTROL PANEL PARTS LIST................................................................................... 42 POWER SUPPLY / PARTS LIST.............................................................................................. 43-44 RECOMMENDED SPARE PARTS LIST.................................................................................. 44 WARRANTY POLICIES: 45 LIMITED WARRANTY...............................................................................................................45 CP-02-02.6 Ransburg Voltage Master 2 - Safety SAFETY SAFETY PRECAUTIONS Before operating, maintaining or servicing any Ransburg electrostatic coating system, read and understand all of the technical and safety literature for your Ransburg products. This manual contains information that is important for you to know and understand. This information relates to USER SAFETY and PREVENTING EQUIPMENT PROBLEMS. To help you recognize this information, we use the following symbols. Please pay particular attention to these sections. A WARNING! states information to alert you to a situation that might cause serious injury if instructions are not followed. A CAUTION! states information that tells how to prevent damage to equipment or how to avoid a situation that might cause minor injury. A NOTE is information relevant to the procedure in progress. While this manual lists standard specifications and service procedures, some minor deviations may be found between this literature and your equipment. Differences in local codes and plant requirements, material delivery requirements, etc., make such variations inevitable. Compare this manual with your system installation drawings and appropriate Ransburg equipment manuals to reconcile such differences. ! WARNING The user MUST read and be familiar with the Safety Section in this manual and the Ransburg safety literature therein identified. This manual MUST be read and thoroughly understood by ALL personnel who operate, clean or maintain this equipment! Special care should be taken to ensure that the WARNINGS and safety requirements for operating and servicing the equipment are followed. The user should be aware of and adhere to ALL local building and fire codes and ordinances as well as NFPA-33 SAFETY STANDARD, LATEST EDITION, prior to installing, operating, and/or servicing this equipment. ! WARNING The hazards shown on the following pages may occur during the normal use of this equipment. Please read the hazard chart beginning on page 2. Careful study and continued use of this manual will provide a better understanding of the equipment and process, resulting in more efficient operation, longer trouble-free service and faster, easier troubleshooting. If you do not have the manuals and safety literature for your Ransburg system, contact your local Ransburg representative or Ransburg. 1 CP-02-02.6 Ransburg Voltage Master 2 - Safety AREA HAZARD Spray Area Fire Hazard Tells where hazards may occur. Tells what the hazard is. Improper or inadequate operation and maintenance procedures will cause a fire hazard. Protection against inadvertent arcing that is capable of causing fire or explosion is lost if any safety interlocks are disabled during operation. Frequent Power Supply or Controller shutdown indicates a problem in the system requiring correction. SAFEGUARDS Tells how to avoid the hazard. Fire extinguishing equipment must be present in the spray area and tested periodically. Spray areas must be kept clean to prevent the accumulation of combustible residues. Smoking must never be allowed in the spray area. The high voltage supplied to the atomizer must be turned off prior to cleaning, flushing or maintenance. When using solvents for cleaning: •• Those used for equipment flushing should have flash points equal to or higher than those of the coating material. •• Those used for general cleaning must have flash points above 100°F (37.8°C). Spray booth ventilation must be kept at the rates required by NFPA-33, OSHA, country, and local codes. In addition, ventilation must be maintained during cleaning operations using flammable or combustible solvents. Electrostatic arcing must be prevented. Safe sparking distance must be maintained between the parts being coated and the applicator. A distance of 1 inch for every 10KV of output voltage is required at all times. Test only in areas free of combustible material. Testing may require high voltage to be on, but only as instructed. Non-factory replacement parts or unauthorized equipment modifications may cause fire or injury. If used, the key switch bypass is intended for use only during setup operations. Production should never be done with safety interlocks disabled. Never use equipment intended for use in waterborne installations to spray solvent based materials. The paint process and equipment should be set up and operated in accordance with NFPA33, NEC, OSHA, local, country, and European Health and Safety Norms. CP-02-02.6 2 Ransburg Voltage Master 2 - Safety AREA Tells where hazards may occur. Spray Area HAZARD Tells what the hazard is. SAFEGUARDS Tells how to avoid the hazard. Explosion Hazard Improper or inadequate operation and maintenance procedures will cause a fire hazard. Protection against inadvertent arcing that is capable of causing fire or explosion is lost if any safety interlocks are disabled during operation. Frequent Power Supply or Controller shutdown indicates a problem in the system requiring correction. Electrostatic arcing must be prevented. Safe sparking distance must be maintained between the parts being coated and the applicator. A distance of 1 inch for every 10KV of output voltage is required at all times. Unless specifically approved for use in hazardous locations, all electrical equipment must be located outside Class I or II, Division 1 or 2 hazardous areas, in accordance with NFPA-33. Test only in areas free of flammable or combustible materials. The current overload sensitivity (if equipped) MUST be set as described in the corresponding section of the equipment manual. Protection against inadvertent arcing that is capable of causing fire or explosion is lost if the current overload sensitivity is not properly set. Frequent power supply shutdown indicates a problem in the system which requires correction. Always turn the control panel power off prior to flushing, cleaning, or working on spray system equipment. Before turning high voltage on, make sure no objects are within the safe sparking distance. Ensure that the control panel is interlocked with the ventilation system and conveyor in accordance with NFPA-33, EN 50176. Have fire extinguishing equipment readily available and tested periodically. General Use and Maintenance Improper operation or maintenance may create a hazard. Personnel must be given training in accordance with the requirements of NFPA-33, EN 60079-0. Personnel must be properly trained in the use of this equipment. Instructions and safety precautions must be read and understood prior to using this equipment. Comply with appropriate local, state, and national codes governing ventilation, fire protection, operation maintenance, and housekeeping. Reference OSHA, NFPA-33, EN Norms and your insurance company requirements. 3 CP-02-02.6 Ransburg AREA Tells where hazards may occur. Spray Area / High Voltage Equipment Voltage Master 2 - Safety HAZARD Tells what the hazard is. SAFEGUARDS Tells how to avoid the hazard. Electrical Discharge There is a high voltage device that can induce an electrical charge on ungrounded objects which is capable of igniting coating materials. Inadequate grounding will cause a spark hazard. A spark can ignite many coating materials and cause a fire or explosion. Parts being sprayed and operators in the spray area must be properly grounded. Parts being sprayed must be supported on conveyors or hangers that are properly grounded. The resistance between the part and earth ground must not exceed 1 meg ohm. (Refer to NFPA-33.) Operators must be grounded. Rubber soled insulating shoes should not be worn. Grounding straps on wrists or legs may be used to assure adequate ground contact. Operators must not be wearing or carrying any ungrounded metal objects. When using an electrostatic handgun, operators must assure contact with the handle of the applicator via conductive gloves or gloves with the palm section cut out. NOTE: REFER TO NFPA-33 OR SPECIFIC COUNTRY SAFETY CODES REGARDING PROPER OPERATOR GROUNDING. All electrically conductive objects in the spray area, with the exception of those objects required by the process to be at high voltage, must be grounded. Grounded conductive flooring must be provided in the spray area. Always turn off the power supply prior to flushing, cleaning, or working on spray system equipment. Unless specifically approved for use in hazardous locations, all electrical equipment must be located outside Class I or II, Division 1 or 2 hazardous areas, in accordance with NFPA-33. CP-02-02.6 4 Ransburg Voltage Master 2 - Safety AREA Tells where hazards may occur. Electrical Equipment HAZARD Tells what the hazard is. Tells how to avoid the hazard. Electrical Discharge An electrical arc can ignite coating materials and cause a fire or explosion. Unless specifically approved for use in hazardous locations, the power supply, control cabinet, and all other electrical equipment must be located outside Class I or II, Division 1 and 2 hazardous areas in accordance with NFPA-33 and EN 50176. Turn the power supply OFF before working on the equipment. Test only in areas free of flammable or combustible material. Testing may require high voltage to be on, but only as instructed. Production should never be done with the safety circuits disabled. Before turning the high voltage on, make sure no objects are within the sparking distance. Certain material may be harmful if inhaled, or if there is contact with the skin. Follow the requirements of the Material Safety Data Sheet supplied by coating material manufacturer. High voltage equipment is utilized in the process. Arcing in the vicinity of flammable or combustible materials may occur. Personnel are exposed to high voltage during operation and maintenance. Protection against inadvertent arcing that may cause a fire or explosion is lost if safety circuits are disabled during operation. Frequent power supply shutdown indicates a problem in the system which requires correction. Toxic Substances SAFEGUARDS Adequate exhaust must be provided to keep the air free of accumulations of toxic materials. Use a mask or respirator whenever there is a chance of inhaling sprayed materials. The mask must be compatible with the material being sprayed and its concentration. Equipment must be as prescribed by an industrial hygienist or safety expert, and be NIOSH approved. Spray Area Explosion Hazard – Incompatible Materials Halogenated hydrocarbon solvents for example: methylene chloride and 1,1,1,-Trichloroethane are not chemically compatible with the aluminum that might be used in many system components. The chemical reaction caused by these solvents reacting with aluminum can become violent and lead to an equipment explosion. 5 Aluminum is widely used in other spray application equipment - such as material pumps, regulators, triggering valves, etc. Halogenated hydrocarbon solvents must never be used with aluminum equipment during spraying, flushing, or cleaning. Read the label or data sheet for the material you intend to spray. If in doubt as to whether or not a coating or cleaning material is compatible, contact your coating supplier. Any other type of solvent may be used with aluminum equipment. CP-02-02.6 Ransburg Voltage Master 2 - Atex EUROPEAN ATEX DIRECTIVE 94/9/EC, ANNEX II, 1.0.6 The following instructions apply to equipment covered by certificate number Sira 08ATEX5040X: 8. The certification of this equipment relies upon the following materials used in its construction: 1. The equipment may be used with flammable gases and vapors with apparatus groups II and with temperature class T6. If the equipment is likely to come into contact with aggressive substances, then it is the responsibility of the user to take suitable precautions that prevent it from being adversely affected, thus ensuring that the type of protection provided by the equipment is not compromised. 2. The equipment is only certified for use in ambient temperatures in the range +12.8°C to +40°C and should not be used outside this range. 3.Installation shall be carried out by suitably trained personnel in accordance with the applicable code of practice e.g. EN 60079-14:1997. 4. Inspection and maintenance of this equipment shall be carried out by suitably trained personnel in accordance with the applicable code of practice e.g. EN 60079-17. 5. Repair of this equipment shall be carried out by suitable trained personnel in accordance with the applicable code of practice e.g. EN 60079-19. 6.Putting into service, use, assembling, and adjustment of the equipment shall be fitted by suitably trained personnel in accordance with the manufacturer's documentation. Refer to the "Table of Contents" of this service manual: a. b. c. d. Installation Operation Maintenance Parts Identification 7. Components to be incorporated into or used as replacement parts of the equipment shall be fitted by suitably trained personnel in accordance with the manufacturer's documentation. CP-02-02.6 Aggressive substances: e.g. acidic liquids or gases that may attack metals, or solvents that may affect polymeric materials. Suitable precautions: e.g. regular checks as part of routine inspections or establishing from the material's data sheets that it is resistant to specific chemicals. Refer to "Specifications" in the "Introduction" section: a. b. All fluid passages contain stainless steel or nylon fittings. High voltage cascade is encapsulated with a solvent resistant epoxy. 9. A recapitulation of the certification marking is detailed in the "Atex" section, on the next page, drawing numbers: 78886 and 78894-04. 10. The characteristics of the equipment shall be detailed e.g. electrical, pressure, and voltage parameters. The manufacturer should note that, on being put into service, the equipment must be accompanied by a translation of the instructions in the language or languages of the country in which the equipment is to be used and by the instructions in the original language. 6 Ransburg Voltage Master 2 - Atex Voltage Master 2 High Voltage Power Supply System ATEX Product Marking Definitions Label 78789 Ex Certificate Number: Sira 08ATEX5040X Sira = Notified Body performing EC-type examination 08 = Year of certification ATEX = Reference to ATEX Directive 5 = Protection Concept Code (code 5 is titled Encapsulation) 040 = Document serial number X = Special conditions for safe use apply Product Marking II 2 G Ex = Specific marking of explosive protection II = Equipment Group hazardous area charac-teristics 2 = Equipment Category G = Type of explosive atmosphere (gases, vapors, or mists) Label LEPS5001 EEx 0.24mJ = The 78789 and LEPS5001 Power Supplies are suitable for use in electrostatic spraying installations complying with EN 50050 as they are a Type A class with a discharge energy limit of 0.24mJ. 7 CP-02-02.6 Ransburg Voltage Master 2 - Introduction INTRODUCTION GENERAL DESCRIPTION The Voltage Master 2 high voltage power supply system includes a control panel and power supply unit in combination to produce up to 100kV DC continuous operating voltage while delivering up to 1,500 microamps load current. This heavy duty, high power system provides for rugged and reliable operation in a variety of industrial finishing applications. The Voltage Master 2 system also includes the necessary system interfaces for complete remote control and monitoring functions. Voltage Master 2 systems can include, but are not limited to, the following: • Power Supply Control Panel The control panel contains all of the necessary control circuitry, operator interface controls and remote I/O interfaces. A single cable connects the control panel to the power supply unit. • LEPS5001 HV Power Supply Tank The power supply tank contains the high voltage transformer, voltage multiplier, and other components necessary to generate a high voltage output and to return actual voltage and current feedback signals to the control panel. All components of the power supply were design selected for reliable, heavy duty service. The components, including the high voltage transformer, operate immersed in high quality (non-pcb) dielectric oil for electrical insulation and to provide heat dissipation. The power supply is supplied as a separate unit in order that it can be installed as close to the applicators as possible. This minimizes the amount of high voltage cable and routing hardware, resulting in improved system safety and reliability. (non-pcb) dielectric oil. Consult the appropriate junction tank service manual or your authorized Ransburg representative for further information. • HV Cable The Ransburg high voltage cable is specially formulated and constructed to offer a maximum level of dielectric protection while maintaining a small diameter and bending radius for easy routing. • Remote Pneumatic ON/OFF Switch Station This is provided to serve as a simple, industrial ON/OFF control that can be located at the system operator stations in a convenient location, including classified areas. (Contact your Ransburg representative or Ransburg customer service for details.) • Air Logic Stations These standard system panels include all of the necessary controls for disk or bell system integration. (Contact your Ransburg representative or Ransburg customer service for details.) The Voltage Master 2 system supplies a high degree of safety by continuously monitoring the output current and rapidly de-energizing high voltage in the event that the user selected maximum output current level (overload setting) is exceeded. The safety circuit is sufficient to eliminate most possible arcing conditions, however, the overload current setting must be properly set as described in "Overload Adjustment Procedures" in the "Operation" section of this manual, to ensure safe operation. The Voltage Master 2 system, with control panel 78789-02, is listed by Factory Mutual for use with • HV Junction Tanks High voltage junction tanks receive an input from the power supply, split the input, and provide multiple outputs. Each junction tank output can be connected to a single applicator or station of applicators. The internal components of the each junction tank are immersed in high quality CP-02-02.6 8 Ransburg Voltage Master 2 - Introduction Aerobell 33 and REA-III automatic systems. Additional features, described later in this manual, include remote analog control of the high voltage and overload setpoints. Analog output signals are also supplied for remote monitoring of the actual high voltage and current outputs. SPECIFICATIONS Environmental / Physical Operating Temperature: 0°C to 45°C Storage Temperature:-40°C to 85°C Humidity: 85% non-condensing CONTROL PANEL AC Input: Model 78789-02 (Standard) 105-130 Volts AC 50/60 Hz, Single Phase Fuse Protected at 5 Amps Model 78789-04* 210-260 Volts AC 50/60 Hz, Single Phase Fuse Protected at 2.5 Amps * Not Listed With Factory Mutual AC Output: 0-120 Volts AC at 4 Amps max. (To Power Supply) Dry Contacts: 10A, 1/3HP, 120VAC max. CONTROL PANEL Analog Inputs: 0-10 Volts DC or 4-20ma (Jumper Selectable) Size: 20" H x 16" W x 8" D (50.8cm x 40.6cm x 20.3cm) Analog Outputs: 0-10 Volts DC or 4-20ma (Jumper Selectable) Weight: 76 lbs. (20.4kg) POWER SUPPLY Input Pressure: 100 psi max. (6.9 bar) AC Input: 0-120 Volts AC at 4 Amps max. (From Control Panel) HV Output: 0 to negative 100kV DC POWER SUPPLY 9 Electrical Size: 21" Dia. x 28" H (.53m Dia. x .71m H) Current Output: 1,500 microamps max. at 100kV Weight: 254 lbs. (115.2 kg) Analog Outputs: 0-10 Volts DC CP-02-02.6 Ransburg ELECTRICAL NOISE Electrical noise refers to stray electrical signals in the atmosphere at various signal strengths and frequencies that can affect the operation of equipment. One of the best ways to prevent this is to shield the equipment and cables within a continuous ground envelope, such that any incident noise will be conducted to earth ground before it can affect the circuit conductors. For conductors inside the control panel and power supply tank, the grounded enclosures provide this envelope. A conductive gasket has been used on the control panel door to ensure a continuous ground envelope between the door and cabinet. For the control cable that runs from the control panel to the power supply tank, a shielded cable has been used. The shield consists of an overall foil shield in combination with an overall braided shield. This provides the most effective shielding, as the foil covers the "holes" in the braid, and the braid allows for practical 360° termination at both ends of the cable. Voltage Master 2 - Introduction pump control, eternal HV ON/OFF, external alarm) be run in conduit. If desired and codes permit, cabling may be used for these signals, but for maximum noise immunity the cabling must contain overall foil and braided shields and be terminated as described in the previous paragraph. Cable is recommended for the DC I/O (analogkV setpoint in, overload current setpoint in, analog kV out, analog current out). Again, for maximum noise immunity the cabling must contain overall foil and braided shields and be terminated in a continuous 360° manner as previously described. Special fittings have been provided on the control panel for termination of these cables where they enter the cabinet. The use of these fittings is described under "DC Remote I/O" in the "Installation" section of this manual. Using the methods described above, the Voltage Master 2 has been successfully tested to the stringent standards of the Electromagnetic Compatibility Directive of the European Union. The results conclude that the Voltage Master 2 is neither a source of electrical noise nor affected by electrical noise when the previous methods are utilized. The AC input cord is not shielded, but instead is directed to an AC line filter as soon as it enters the cabinet. This filter filters out any noise that comes in on the AC line. For maximum noise immunity the AC line should connect to the filter as soon as it enters the cabinet with as short of leads as pos-sible. Additional noise protection is provided by running the AC input line to the control panel in grounded conduit, which is the recommended method and is required by most codes. For maximum noise protection any user supplied input/output (I/O) wiring should be made using shielded cable or conduit which is connected to earth ground in a continuous 360° fashion at both ends. The best way to do this is to use a connector/ fitting at each end of the cable/conduit that makes contact to the grounded enclosure in this manner. Connecting the drain wire of a shield to a ground point on or in the cabinet (usually referred to as pigtailing) is not an effective method of shielding and actually making things worse (see Figure 1). It is recommended tha all AC I/O (interlocks, DC CP-02-02.6 10 Voltage Master 2 - Introduction Ransburg Figure 1: Cable Connection Examples 11 CP-02-02.6 Ransburg Voltage Master 2 - Installation INSTALLATION Figure 2: Block Diagram Of A Typical Rea Iii Automatic Applicator Installation CP-02-02.6 12 Voltage Master 2 - Installation Ransburg Figure 3: Block Diagram Of A Typical Aerobell 33 Installation 13 CP-02-02.6 Ransburg Voltage Master 2 - Installation LOCATION ! WARNING > The 78789 control panel and the LEPS5001 power supply MUST be located outside the hazardous area (see NFPA-33). Power Supply Tank Ground the power supply tank by connecting the supplied ground wire assembly from the power supply ground stud to the nearest true earth ground (structural steel, pipes, or driven ground rod). For maximum protection from electrical noise make this connection as short as possible. > This manual MUST be read and thor- oughly understood by ALL personnel who operate, clean, or maintain this equipment. Special care should be taken to ensure that the WARNINGS and requirements for operating and servicing safely, are followed. Install the control panel in a convenient area outside the hazardous location, where it will be protected from the possibility of any contact with water, vapor or high humidity, and ambient temperatures in excess of 120oF. The area should be clean, dry, and well ventilated. Locate the power supply tank in a convenient area as close to the applicator(s) as possible in order to minimize the amount of high voltage cable required. ! CAUTION > Do not locate the control panel or power supply near or adjacent to heat producing equipment such as ovens, high wattage lamps, steam pipes, etc. SAFETY GROUND Control Panel Ground the control panel by mounting to structural steel that is at earth ground potential. If this is not possible, ground the control panel by connecting the supplied ground wire assembly from the control panel ground stud to the nearest true earth ground (structural steel, pipes, or driven ground rod). For maximum protection from electrical noise make this connection as short as possible. CP-02-02.6 NOTE > To shorten the ground wire assembly, use a screwdriver to remove the lug (at end opposite clamp) from the end of the assembly, cut the wire to the length needed, strip insulation 1" from cut and reattach the lug. ! CAUTION > Ensure that the control panel and power supply tank are properly grounded to a true earth ground as described above. INPUT POWER The AC Input power routing and connections to the control panel should be supplied from a FUSED DISCONNECT and should meet all applicable National Electrical Code (NEC) guidelines and any other requirements as suitable for the location. LOCKOUT/ TAGOUT procedures should be put in place for the fused disconnect. Using conduit, route the input power wiring through the AC power opening in the top left corner of the control panel. For greatest noise immunity the AC input should be located as close as possible to the AC line filter (see Figure 4). For this reason, it is recommended that the AC input not be relocated to another position on the control panel. Route the input wiring through the conduit and attach to terminal block TB7 as shown in Figure 4. 14 Voltage Master 2 - Installation The use of a constant voltage transformer (CVT) is recommended. This will improve high voltage regulation, especially if there are large AC line voltage fluctuations or voltage transients such as those typically produced by heavy electric machinery or welding equipment. CVT's are available from local electrical suppliers and can be used between the fused disconnect and the control panel. The CVT should be rated for 750VA or greater and be properly rated for the voltage and frequency of the source power supplied by the fused disconnect. Ransburg SYSTEM INSTALLATION The 78789 control panel can be interfaced with Ransburg Air Logic Stations. Air Logic Stations send and receive pneumatic signals for the purpose of remote control from hazardous locations such as inside the spray booth. Contact your local Ransburg representative or customer support for more detailed information on the Air Logic Stations or additional control options. Figure 4: AC Power Input Connections 15 CP-02-02.6 Ransburg Voltage Master 2 - Installation Figure 5: 78789-Xx Control Panel Schematic CP-02-02.6 16 Ransburg Voltage Master 2 - Installation POWER SUPPLY CONNECTIONS Route the control cable from the power supply tank through the connector opening labeled HV POWER SUPPLY at the top right of the control panel and connect to TB4 (see Figure 6 for TB4 location) of the Mother Board printed circuit assembly as detailed in Table 1. Route the interlock wiring through the connector opening labeled INTERLOCK I/O on the bottom of the cabinet and make the appropriate connections as described above. Since the interlock wiring will be carrying 120 volts AC it should be run in con-duit. It may be necessary to remove the cable grommet to fit the control cable through the opening. If so, slide the grommet hardware onto the control cable in the order shown in Figure 6 before pulling the cable through the connector housing. Tighten the cable grommet ensuring the grommet spring makes 360° contact with the exposed braid of the control cable fro maximum noise immunity. INTERLOCK CONNECTIONS Interlock terminals are provided for external fans, conveyors, etc. Section 9-3.5 of NFPA- 33 requires that automatic electrostatic equipment be interlocked with the exhaust air and conveyor. These terminals are factory jumpered for test purposes and identified by orange wire. The corresponding factory installed jumper must be removed when installing the desired interlock. Refer to system installation drawings, the schematic in Figure 5, and the electrical system connections shown in Table 2 to determine the appropriate exhaust air and conveyor interlocks for your system. All electrical interlocks are externally activated by dry contact closure to the interlock terminals. The dry contacts of the external interlock device should have a contact resistance of no more than 1000 ohms and a minimum current rating of 2 Amps. The combined series contact resistance should not exceed 3000 ohms if multiple devices are used in series. 17 Figure 6: Inside View of Control Panel ! CAUTION > The high voltage ON signal supplied across terminals TB2 #3 to TB2 #5 or TB6 #3 to TB6 #5 MUST be a momentary contact closure and not a maintained closure. The overload circuit is inhibited as long as the high voltage ON signal is supplied and does not time-out until the signal is removed. Therefore, if the HV ON contacts remain closed, the power supply will not overload. CP-02-02.6 Ransburg Voltage Master 2 - Installation TABLE 1 - POWER SUPPLY CONNECTIONS Wire # Color To Control Panel 1 17 31 34 Shield White Black Black Red Bare TB4-1 TB4-17 TB4-31 TB4-34 TB4-GND TABLE 2 - ELECTRICAL SYSTEM CONNECTIONS Terminal Number Description External HV ON (PLC or Panel Switch) External HV OFF/RESET (PLC or Panel Switch) External System Interlocks (Exhaust Air, Conveyor, Reciprocator, etc.) External Alarm DC Pump Control Output kV Setpoint IN (0-10 VDC = 0-100 kV) kV Setpoint IN (4-20 ma = 0-100 kV) Actual kV OUT (0-10 VDC = 0-100 kV) OL Setpoint IN (0-10 VDC or 4-20 ma = 0-1500 µa) Actual Current OUT (0-10 VDC or 4-20 ma = 0-2000 µa) Actual kV OUT (4-20 ma = 0-100 kV) TB2-3 to TB2-5 TB2-8, TB2-8A, TB2-9, TB2-10 TB2-12, TB2-13, TB2-14 TB2-15 TB2-20 TB3-58 TB3-59 TB3-60 TB3-63 TB3-64 TB3-65 TABLE 3 - PNEUMATIC SYSTEM CONNECTIONS Description External HV ON External HV OFF/RESET External Interlock HV ON Output (Normally used for Air Logic Station HV ON indicator) CP-02-02.6 Terminal Number PS1 PS2 PS3 SOL1 18 Ransburg Voltage Master 2 - Installation AC REMOTE I/O DC REMOTE I/O If required by the application, the following AC remote I/O connections can be made. The wiring for these connections should be supplied through conduit to the REMOTE I/O (AC) opening in the bottom left corner of the control panel. If required by the application, the following DC remote I/O connections can be made. High Voltage On As shown in Table 2 and the schematic of Figure 5, an external momentary, normally open switch or PLC contact can be wired from terminals TB2-3 to TB2-5 to initiate turn on of high voltage. The switch or contact should be rated for at least 2 amps at 120 VAC. High Voltage Off As shown in Table 2 and the schematic of Figure 5, an external momentary, normally closed switch or PLC contact can be wired from terminals TB28A to TB2-10 to initiate turn off of high voltage. The switch or contact should be rated for at least 2 amps at 120 VAC. External Alarm When the front panel kV Local/Remote switch is in the Remote position and high voltage is enabled, a 0 to 10 VDC or 4 to 20 mADC signal (see Table 4) on this input produces 0 to 100 kV output from the power supply tank. Current Overload Setpoint Analog Input When the front panel OL Local/Remote switch is in the Remote position, a 0 to 10 VDC or 4 to 20 mADC signal (see Table 4) on this input produces a 0 to 1500 microamp current overload setpoint. Actual kV Analog Output Output signal which varies proportionately from 0 to 10 VDC or 4 to 20 mA DC (see Table 4) as power supply tank output voltage varies from 0 to 100 kVDC. As shown in Table 2 and the schematic of Figure 5, an external alarm horn can be wired from terminals TB2-15 to TB2-chassis. This external, user supplied alarm must be rated for 120 VAC and have an operating current of less than 0.5 amps. Actual Current Analog Output DC PUMP I/O For maximum noise immunity, all analog I/O wiring should be run in cable having a foil shield with an overall braided shield. The foil shield provides 100% shielding, while the braid provides a means of making proper 360° shield terminations at the cable to cabinet connection points. To make analog control connections perform the following: In applications utilizing the Ransburg 9966 DC Fluid Pump Drive Assembly, terminal TB2-20 (see Table 2 and Figure 5) can be connected to the controller of the DC Pump. In this manner, the DC pump is activated whenever high voltage (CR2) is on. Also, by supplying air to pressure switch PS2, the high voltage can be disabled while keeping the DC pump on. This allows for checking of flow rates without high voltage. The wiring for the DC pump should be supplied through conduit to the DC PUMP I/O opening in the bottom left corner of the control panel. 19 High Voltage Setpoint Analog Input Output signal which varies proportionately from 0 to 10 VDC or 4 to 20 mA DC (see Table 4) as power supply tank output current varies from 0 to 2000 microamps DC. 1. Remove the cable grommet hardware from the connector housing(s) labeled REMOTE I/O (DC) on the bottom of the control panel (see Figure 6). Two connectors are provided so 2 separate cables can be used if the connections opposite to the control panel are in different locations. CP-02-02.6 Ransburg Voltage Master 2 - Installation 2. Route the desired length of analog I/O cables(s) through the connector housing(s) and mark 1" span of cable that passes through connector housing to be stripped to braid (see Figure 7). 5. Route the cable(s) back through the connector housing(s) and connect to TB3 (see Figure 6 for TB3 location) as detailed in Table 4. 6. Tighten the cable grommet ensuring the grommet spring makes 360° contact with the exposed braid of the cable for maximum noise immunity. 7. For maximum noise immunity, connect the braid of the cable to earth ground at the end opposite to the control panel. Figure 7: Stripping of DC I/O Cable 3. Remove cable and strip marked 1" section to cable braid. 4. Slide the cable grommet hardware onto the cable in the order shown in Figure 6. 8. Ensure switches and jumpers are set as described in Table 4 for the correct input/output (0-10 VDC or 4-20 mADC). The safety cover shown in Figure 6 must be removed in order to gain access to the Motor and Master Control PC boards. ! WARNING > Removing the safety cover allows exposure to hazardous potentials. Ensure AC power is OFF and locked out before removing the safety cover. TABLE 4 - ANALOG CONTROL SETTINGS Signal *KV Setpoint IN (0-10 V = 0-100 kV) KV Setpoint IN (4-20 ma = 0-100 kV) *OL Setpoint IN (4-20 ma = 0-1500 µa) OL Setpoint IN (0-10 V = 0-1500 µa) Actual KV OUT (0-10 V = 0-100 kV) Actual KV OUT (4-20 ma = 0-100 kV) *Actual I OUT (4-20 ma = 0-2000 µa) Actual I OUT (0-10 V = 0-2000 µa) Earth Ground Terminal # TB3-58 Setting TB3-60 *Motor control board SW1 in left position (See Figure 8) Motor control board SW1 in right position (See Figure 8) *Master control board JP4, 1-2 (See Figure 9) Master control board JP4, 2-3 (See Figure 9) No setting required TB3-65 No setting required TB3-64 *Master control board JP5, 1-2 (See Figure 9) Master control board JP5, 2-3 (See Figure 9) No setting required TB3-59 TB3-63 TB3-63 TB3-64 TB3-GND * Factory default setting CP-02-02.6 20 Ransburg Voltage Master 2 - Installation PNEUMATIC CONNECTIONS If required by the application, the following pneumatic connections can be made using 1/4" OD tube. Reference Figure 5 and Table 3. Pneumatic High Voltage On Assuming AC power is on and no faults are present, momentary activation of pressure switch PS1 will turn high voltage on. Pneumatic High Voltage Off/Reset Momentary activation of pressure switch PS2 will turn high voltage off or reset faults. If a DC pump is used in the application, maintained activation of pressure switch PS2 will turn high voltage off while maintaining voltage to the DC pump. This is convenient for fluid flow rate checks without high voltage. HIGH VOLTAGE CABLE According to OSHA standard 1910.107,(h)(5), high voltage cable “shall be properly insulated and protected from mechanical injury or exposure to destructive chemicals”. It is extremely important to route the high voltage cable according to the following guidelines and to maintain the cables properly. This is due to the fact that dielectric type high voltage breakdowns of high voltage cables CANNOT be detected in time to prevent an arc from occurring. To facilitate compliance with this code, the following recommendations MUST be followed: 1. NEVER route cables so that they lie on the floor or are subject to vehicular traffic. 2. NEVER route cables from different power ! WARNING > Sheathing is NOT a safe method of protecting a cable from wear or traffic! Air Interlock Pressure switch PS3 can be used to interlock the high voltage with some other function using a pneumatic signal. This interlock is most commonly used in isolated waterborne systems where the air signal to PS3 is lost when the safety enclosure around the isolated fluid is opened, thereby disabling high voltage. Pneumatic High Voltage On Output Solenoid SOL1 turns on whenever high voltage (CR2) is on, thereby passing air from its input to its output. This output is most commonly used to connect to the high voltage indicator of Ransburg pneumatic panels to indicate when high voltage is active. 21 supplies along parallel paths unless they are separated by at least 18 inches. 3. ALWAYS route cable along appropriate insulators. 4. ALWAYS properly support cables at least 12 inches from metal beams. The support should be made of a material that does not conduct electricity, such as most plastics. Ransburg part number 45773-011 is one such support. 5. ALWAYS route cables from overhead, down to the applicator(s). Cut the high voltage cable (SSW-1064) according to the length required and screw an EPS-4245 CP-02-02.6 Ransburg Voltage Master 2 - Installation ! CAUTION > Do NOT make the approach to the ap- ! WARNING > Whenever removing high voltage plicator at or below floor level. Route high voltage cables from overhead down to the applicator. Routing the cables up and out of the way will result in less exposure to dirt and traffic. cable(s) from equipment, ground the plug end of the cable(s) by contacting the plug to electrical ground. Do not touch the plug until it has been grounded. This will eliminate the possibility of residual charge, causing electrical shock. 6. If an insulating sheathing is used around the cable, it MUST be of a non-absorbent material, such as polyethelyne, and should be routed to prevent contact with, or entrapment of, solvents or cleaning solutions. The cable should NOT be sheathed from its last point of physical support after it enters the spray area, to the applicator! connector (included with the power supply or as part of the LKIT0003 Connection Kit) onto the cable end which will be inserted into the power supply. Be careful to keep the connector centered in the middle of the cable as it is installed. Thread the cable end through the metal nut and then through the rubber bushing. Insert the cable fully into a high voltage output of the power supply and then tighten the nut until the cable is secure. Tighten the nut retaining screw with very light force (see Figure 8). 7. If a cable must be routed through a metal (or conductive) surface, cut an opening with a minimum radius of five inches and mount a nonconductive bulkhead therein. Route the cable through the center of the bulkhead and secure it with a suitable, nonconductive strain relief. (The opening may be any configuration as long as there is at least five inches from the nearest conductor.) 8. Make cable runs as short as possible by mounting the power supply as close to the spray device(s) as codes and the physical envionment allow. Important: For initial installation, add approximately 1/2 to 1 ounce of dielectric oil in each high voltage tube. Use only the oil as supplied with the power supply, part number 70863-00. Reference the "Maintenance" section for more details. NOTE > If a high voltage junction tank is used in the system, refer to the appropriate service manual for cable terminations and installation requirements. Figure 8: High Voltage Connections CP-02-02.6 22 Voltage Master 2 - Installation Ransburg Figure 9: Motor Control Board Configuration Figure 10: Master Control Board Configuration 23 CP-02-02.6 Ransburg Voltage Master 2 - Operation OPERATION Reference the control panel schematic in Figure 5, the power supply schematic in Figure 14 and any system installation drawings. The following explanations assume that all external interlocks or jumpers are installed and that the power supply is operating normally. The following is intended for those that have a basic understanding of electrical circuits and schematics. HIGH VOLTAGE ON CONTROL SEQUENCE When the front panel HV ON/OFF momentary switch or external HV ON signal (PLC or push-button) is supplied across terminals TB2-3 and TB2-5, voltage is supplied to the CR1 coil through the Master Control circuit board interlock (J3-1 & J3-4) and one set of normally closed (NC) CR3 contacts. Voltage is also supplied through a series of interlocks, pressure switch(es), and operator controls, depending on the system installation requirements, to CR2 and the HV ON lamp, any of which will turn HV OFF or not allow HV to be turned ON if broken. The voltage supplied to CR1 energizes the coil causing NO CR1 contacts (#11 to #12) to close, which then energizes the CR2 coil and the HV ON indicator. Activation of CR2 then causes one set of NO CR2 contacts to close (#11 to #12) which latches the CR2 coil ON. Another set of NO CR2 contacts supply voltage from a set of NC CR3 contacts through the Motor Control PCB interlock (J2-5 to J2-6) to the variable control transformer (VAT1). VAT1 then supplies AC voltage to the Power Supply via TB4 and then through the control cable (supplied as part of the power supply). The overload circuit is activated upon application of a momentary HV ON contact closure across wires #3 and #5. When the contact closure opens, the inhibit timer keeps the overload circuit disabled for approximately 3-4 seconds, allowing the power supply to reach normal operating voltage without CP-02-02.6 causing nuisance or unpredictable overloads at start-up. The LED, located on the Master Control board (see Figure 10), indicates that the inhibit condition is active. HIGH VOLTAGE OFF CONTROL SEQUENCE When the front panel HV ON/OFF/RESET, external pushbutton, external interlock, or external PLC HV OFF opens the circuit to wire #10, voltage is removed from the coil of CR2. Thus, the NO CR2 contacts open and remove voltage from VAT1 to the power supply and the HV ON indicator. OVERLOAD SEQUENCE The current return from the power supply tank is compared to the overload setting within the Master Control board circuit. If the actual output current exceeds the overload setting, then a set of the Control board overload relay contacts open (wire #10 to J3-25, 27) disconnecting voltage from the CR2 coil through the latched CR2 contacts (wire #11 to #12) to VAT1 and therefore the power supply tank. Another set of Control PCB overload contacts close (wire #10 to #15) supplying voltage to the CR3 coil, HV OL light, Horn, and external alarm. One set of NO CR3 contacts (wire #10 to #15) will then latch CR3 ON until a RESET command is given which removes voltage at wire #10 and therefore the CR3 coil. Another set of NC CR3 contacts open to ensure that the CR1 coil cannot be energized again with a HV ON command until a HV RESET (HV OFF) command has first been received. 24 Ransburg Voltage Master 2 - Operation MOTHER BOARD FUNCTIONS The Mother PC Board simply supplies a convenient means to mount and interconnect the different control components such as the relays, Master and Motor Control PC Boards. It contains the low voltage power supply fuse (F2). The power supply generates +15VDC and -15VDC required by the Control and Front Panel PC Boards. The +15VDC and -15VDC outputs each have an LED to indicate that they are functioning properly. Figure 11: Motherboard PCB 25 CP-02-02.6 Ransburg Voltage Master 2 - Operation MASTER CONTROL BOARD FUNCTIONS MOTOR CONTROL BOARD A general description of the Master Control Board operation only is included in the following. The Master Control PC Board performs the following functions: The LECU4013-00 Motor Control PC Board Assembly receives the 0-10VDC KV feedback signal from the power supply through wire #34. This signal is compared to the requested KV setpoint signal supplied from the control unit front panel or from a remote source. The resulting error signal is used to drive the bi-directional motor, that is connected to the variable transformer (VAT1) shaft, in the direction required to produce the requested high voltage. 1. Filtering and transient protection of the power supply KV and current feedback signals. 2. Properly scaled and buffered output signals to the front panel digital displays. 3. Conversion and buffering of the remote control input and output signals. 4. Supplies the HV ON overload inhibit timer so that the system can initially charge to voltage without nuisance overloads. An LED located on the board is active during the inhibit cycle. 5. Compares the overload setting with the actual high voltage output current and generates a latched overload condition that results in high voltage shutdown. A factory set potentiometer is located on the board that fine tunes the overload trip point. This should only be adjusted by trained Ransburg personnel or with instruction from Ransburg or an Ransburg representative. FRONT PANEL BOARD FUNCTIONS (Refer to Figure 12) The front panel Door Board contains the local operator controls, digital display interfaces, display scaling adjustments (factory set), and the overload full scale range select switch. A buffered +5VDC supply voltage is generated from +15VDC input for the displays. CP-02-02.6 A limit switch, located in the box that surrounds the variable transformer, rides on a cam that is attached to VAT1. The cam will activate the limit switch in the “home” position and in the “over-voltage” position. The motor control board will always rotate VAT1 counterclockwise to the “home” position when KV is turned OFF or AC power is supplied to the control panel. It is important to note that the overload inhibit timer is activated only on the HV ON command signal and not at the point where VAT1 starts from the “home” position. Therefore, if a HV ON command is given BEFORE VAT1 has had a chance to reach “home” from a previous HV OFF or overload reset, the inhibit timer may elapse before VAT1 can reach the “home” position and return to the HV setting. This may cause an overload to occur since the overload timer elapsed before the system has had a chance to initially charge. The Motor Control Board will cause a power supply overload in the event of an overvoltage condition or if there is a loss of the power supply feedback signal. Also located on the Motor Control board is a selector switch that determines if the analog output signal for actual KV is 0-10VDC or 4-20ma. Refer to "Analog Control and Monitoring Signals" in the "Installation" section of this manual and Figure 9. 26 Ransburg Voltage Master 2 - Operation Figure 12: Front Panel Board 27 CP-02-02.6 Ransburg FRONT PANEL CONTROLS AND INDICATORS Digital Displays The KILOVOLTS and MICROAMPS meters are both 3-½ digit, high intensity LED digital displays. The kilovolt meter displays voltage in thousands of volts (kV) present at the power supply tank output. The microamp meter displays current in millionths of amps (µA) leaving the power supply output. KV Adjust Knob When the KV Local/Remote Switch is in the local position, the KV adjust knob supplies a command voltage to the Motor Control PC Board. The motor control board then regulates the high voltage output accordingly. KV Local/Remote Switch When placed in the LOCAL (up position), the KV output is controlled by the KV ADJUST knob. When placed in the REMOTE (down position), the KV output is controlled by the remote analog input supplied by an external source. OL Adjust Knob When the OL Local/Remote Switch is in the local position, this knob sets the current level at which the power supply will enter an overload condition. OL Local/Remote Switch When placed in the LOCAL (up position), the overload setpoint is controlled by the OL ADJUST knob. When placed in the REMOTE (down position), the setpoint is controlled by the remote analog input supplied by an external source. ACTUAL/SETPOINT Switch This switch simply determines whether the actual HV output current or the overload setpoint is displayed on the MICROAMPS meter. CP-02-02.6 Voltage Master 2 - Operation KV ON, OFF/RESET Switch This is a three position, spring return switch for manually turning high voltage on and off. The OFF position is also used to reset the power supply in the event of an overload alarm condition. The switch is illuminated red when high voltage is ON. Power ON/OFF Switch Supplies incoming AC power to the control panel. The switch is illuminated green to indicate voltage is present. Horn The alarm horn sounds when an overload condition occurs. Overload Indicator This indicator glows red when an overload condition occurs. High Voltage Ready Indicator This indicator glows yellow when the system is in ready mode. Ready mode occurs when AC power is on, high voltage is not yet enabled and no faults are present. Overload Range Select Switch (Refer to Figure 12) This is a small slide switch located behind the control panel door on the printed circuit board. It is identified as SW4, OVERLOAD ADJUST RANGE. The purpose of this switch is to give the operator a greater level of adjustment sensitivity at lower current levels. The switch setting DOES NOT effect the remote analog control scaling. Placing this switch in the LOW (up) position results in a full scale OL current range of approximately 500 microamps. Placing this switch in the HIGH (bottom) position results in a full scale OL current range of approximately 1500 microamps. When using overload setpoints of 500 microamps or less, the LOW setting allows more resulution of the µA Adjust Knob potentiometer, so that desired settings can be more easily obtained. 28 Voltage Master 2 - Operation Ransburg Figure 13: Front Panel Controls And Indicators 29 CP-02-02.6 Ransburg Voltage Master 2 - Operation LEPS5001 HIGH VOLTAGE POWER SUPPLY high voltage output is nearly double the peak voltage from the transformer. 0-120 VAC is supplied to power supply terminals, wires #1 (neutral) and #17 (hot) from the control panel through the cable supplied with the power supply. The input voltage is connected to the primary of the high voltage transformer, T1. Diode banks D1 and D2 in conjunction with capacitors C1 and C2 form a full-wave voltage doubling circuit. Alternate halves of the AC voltage output, from the secondary of T1, charge the capacitors. Since the capacitors are in series, the resulting High voltage from the doubling circuit is connected to an output series resistor, R2, as protection against output transients. A voltage feedback signal is supplied through R1, which is connected to the control panel through wire #34. The ground return from the isolated transformer secondary, wire #31, supplies the current feedback signal. Zener diodes, connected across the terminal blocks, serve as voltage limiting and transient suppressors in the event that the KV or current feedback wires become disconnected from the control panel. This prevents further damage to the power supply system in the case of a failure. Figure 14: Power Supply Schematic CP-02-02.6 30 Ransburg Voltage Master 2 - Operation OVERLOAD ADJUSTMENT PROCEDURES The overload adjustment is not as critical for FM listed systems such as the Aerobell 33 or REA- III atomizers since safety is built into the applicators through the use of fixed resistors and/or specially formulated semi-conductive bell cup coatings. However, the overload circuit is still important, even if set to the least sensitive setting, in the event that a HV cable should fail or other electrical discharge should occur, or if the output current increases due to contamination of the applicators or an abnormal increase through the fluid supply lines to the applicators. Procedure for FM Listed Systems For FM listed systems, it is only necessary to set the current overload to approximately 50 microamps above the highest observed operating current. Procedure for Unlisted Systems The following presumes that all components of the system have been correctly installed and checked. 1. Fill all fluid lines with the material that will be used to coat the production parts. ! WARNING ! WARNING > Since most coating materials are flam- mable and the possibility of arcing may exist during this adjustment procedure, DO NOT trigger the fluid on during this procedure. 2. Position production parts in front of the applicator at the distance that will be used during production. If more than one applicator or applicator station is connected to the power supply, then position parts in front of all applicators. 3. Place the ACTUAL/SETPOINT switch in the SETPOINT position. Set the current overload range switch to HIGH (see following note). Turn the control panel on. Set the current overload adjustment fully clockwise to the maximum reading of approximately 1500. NOTE > There are two full-scale overload cur- rent ranges available, 0-500 microamps and 0-1,500 microamps. The ranges are selected by a slide switch located on the inside of the control unit door on the printed circuit board (see Figure 12). The switch setting indicated by LOW corresponds to the 0-500 micro-amp range and HIGH corresponds to the 0-1,500 microamp range. > The current overload MUST be adjust- ed as described in the following. Protection against inadvertent arcing that is capable of causing a fire or explosion is lost if the current overload is not properly set. Frequent power supply overloads indicate a problem in the system that requires immediate correction. 4. Adjust the KV ADJUST knob fully counter-clockwise to the minimum setting. 5. Make sure all system interlocks to the power supply are activated. The yellow HV READY indicator should be on. 6. Turn HV on by rotating the HV ON/OFF switch to the HV ON position and release. The yellow KV READY indicator should turn off and the HV ON/ OFF switch should be illuminated red. KV should now be displayed on the KILOVOLTS meter. 31 CP-02-02.6 Ransburg Voltage Master 2 - Operation 7. Turn the KV ADJUST knob until the desired production voltage is reached. 8. Place the ACTUAL/SETPOINT switch in the ACTUAL position. Observe the actual output current as displayed on the MICROAMP meter. This should now represent the approximate operating output current during production. 9. Turn HV off by rotating the HV ON/OFF switch to the HV OFF position. ! WARNING > The overload circuit is inhibited for approximately 3-4 seconds each time high voltage is turned on. This is necessary due to the larger output currents required to initially charge a system. Care should be taken to make sure that the system is properly inspected and configured before each startup. 10. If the actual output current was below approx-imately 400 microamps, move the CURRENT OVERLOAD RANGE switch to the LOW position. 11. Put the ACTUAL/SETPOINT switch in the SETPOINT position and adjust the OVERLOAD adjust knob to approximately 50 micro-amps above the actual current observed in step 8. The overload setting may need to be increased if normal production current draw varies enough to cause overloads or in higher current applications. ! CAUTION > Coating material electrical conductivity, different part-to-applicator distances, and varying part geometries will all effect the resulting output current and therefore may impact the required current overload setting to achieve maximum safety. The current overload adjustment procedure should be repeated for changes in any of the above. If normal operating current increases and none of the above system parameters have changed, then there could be a problem. Perform maintenance and/or troubleshooting before increasing the overload setpoint. Adjusting the overload setting is critical for systems that are NOT FM listed such as TurbodiskTM installations. For FM listed systems, it is still recommended to set the current overload to approximately 50 microamps above the highest observed operating current. CP-02-02.6 32 Ransburg Voltage Master 2 - Maintenance MAINTENANCE ! WARNING > Electrical shock hazard. ALWAYS turn power OFF prior to cleaning or servicing any part of the system. Failure to do so could result in serious injury or death. > Whenever removing high voltage cable(s) from equipment, ground the plug end of the cable(s) by contacting the plug to electrical ground. Do not touch the plug until it has been grounded. This will eliminate the possibility of residual charge causing electrical shock. > Whenever the high voltage cable is removed from the Power Supply tank, ALWAYS discharge any residual electrical charge from the power supply by attaching an appropriate ground wire to the grounded power supply container and then inserting it down the free end of the high voltage output tube. > To ensure continuous, efficient, trou- ble-free operation of the Power Supply and to extend its service life, keep the exterior clean and dry. It is also very important to keep the areas around the high voltage cable connections clean to protect against static discharges. GENERAL Developing a good preventive maintenance (PM) program is key to keeping any system operating properly, the frequency of which is determined by each individual installation. Contact your Ransburg representative or the Service department for guidelines or assistance for establishing a preventative maintenance program. There is very little maintenance for the Control Panel or the Power Supply tank other than good housekeeping practices. These include: 1. Keeping the control panel door closed at all times. This will maintain the dust-tight environment required by the electronic printed circuit boards. 2. Plug all unused access holes into the control panel in order to keep contamination out. 3. Use the following guidelines for cleaning the Control Panel and Power Supply tank. • Ensure that the high voltage is OFF and turn OFF the power source to the Control Panel. • Clean the exterior with a clean, dry, lint-free cloth. If necessary, isopropyl alcohol or other mild cleaning solutions can be used. • Open the panel door and clean internally by using a stream of clean, dry factory air to remove any traces of moisture and foreign matter. • Check interior for evidence of contamination from either moisture or foreign matter. • Visually inspect components. Look for loose wiring connections and for visible evidence of component deterioration. • Restore the unit to operation. 33 CP-02-02.6 Ransburg Voltage Master 2 - Maintenance For maintenance of system components other than the Voltage Master 2 Power Supply, refer to the appropriate manual or contact your Ransburg representative or Ransburg Customer Service. 1. Turn ON high voltage to the applicator. Remove any high voltage cables and make sure that they are clean and undamaged. The oil level in the HV tubes should be high enough to cover the metal plug located on the end of each HV cable. The oil level can be seen on the cables as they are removed, much like a dipstick. Use only the dielectric oil (70863-00) as supplied with the power supply. Clean the cables and reinsert into the power supply. Make sure to tighten the high voltage cable nuts. 3. Slowly approach the applicator with a grounded wand and verify that an overload occurs. 2. Adjust the KV and Current Overload setting to that normally encountered during production. ! W A R !N I N G > Ensure that the ground wand is suf- ficiently grounded before performing this test. Approaching the applicator with an improperly grounded wand can result in serious injury or even death. NOTE > Make sure that the high voltage cables are fully inserted into the power supply and that any strain relief connections are secure. OVERLOAD PROCEDURE Periodically check for proper operation of the overload circuit as follows: 4. Turn off high voltage to the applicator. If an overload does not occur or significant arcing is evident before an overload occurs, reduce the overload setting as described in “Overload Adjustment Procedures” in the "Operation" section of this manual and repeat the above test. If this does not solve the problem, the Control PC Board Assembly may need to be replaced and/or the Control Panel or Power Supply tank serviced. ! WARNING > Electrical shock hazard. Always turn ! WARNING > Since most coatings are flammable and arcing may occur during this test, do NOT trigger fluid of any kind on during this test. Ensure that the atmosphere is free of flammable vapors before performing this test. CP-02-02.6 power to equipment OFF before cleaning or servicing any part of the system. Failure to do so could result in serious injury or death. 34 Ransburg Voltage Master 2 - Maintenance TROUBLESHOOTING ! WARNING > Field repair and troubleshooting of the Voltage Master 2 system may require exposure to potentials that can cause SERIOUS BODILY INJURY or DEATH if proper procedures are not followed. For this reason, troubleshooting and field repair should only be accomplished with specific test equipment by qualified electronics technicians or authorized Ransburg representatives. > All safety precautions listed in the "Safety" section of this manual must be followed. > Field repair of the Power Supply tank is NOT to be performed unless by specifically trained and qualified Ransburg personnel with access to instrumentation that is certified traceable to NIST standards. Removal of the lead seal located on the power supply tank voids warranty unless the above is followed. ! W A R !N I N G > DO NOT attempt to remove or insert printed circuit board assemblies when power is supplied to the control panel. Contacting your Ransburg Representative or Ransburg Customer Service Before contacting your Ransburg repre-sentative or the customer service department, be prepared with the following specific information that will help resolve problems quicker. • Control panel model and serial numbers. 35 • The basic system configuration including typeof applicators, coating used, etc. • The type of problem that is occurring and the frequency that it occurs if applicable. • Anything in the system that has changed when the problem started. • Any troubleshooting that has already been attempted. Basic System Troubleshooting When tracing problems, refer to the control panel schematic in Figure 5, the Troubleshooting Guide in this section, the “Operation” section, and the “Parts Identification” section of this manual. The following section outlines the most common problems encountered and gives suggestions that may shorten the time involved in troubleshooting the system. More detailed information is offered in the troubleshooting guide. Most Common Problems Most problems encountered with the high voltage supply do not involve faulty equipment but are attributed to one of the following: 1. Coating/paint buildup or residue on system components 2. Fluid supply or dump lines 3. Improper part grounding 4. High voltage cable failure 5. Improper power supply overload setting or system interface problems If a high voltage output problem is suspected such as low output voltage, no voltage, or repeated overloads, perform the following basic trouble-shooting procedure. Equipment Required: Ransburg High Voltage Test Probe and Meter (76652-01) and an AC RMS Voltmeter. A high voltage problem may be associated with any one of the components that make up the entire electrostatic system. First, try to isolate generally where in the system that the problem lies. CP-02-02.6 Ransburg 1. With voltage turned OFF, disconnect the high voltage output cable(s) from the power supply tank. Inspect the high voltage cable end for contamination or any unusual signs of wear such as pitting or discoloration. Clean or replace as necessary. Voltage Master 2 - Maintenance NOTES: 2. Turn high voltage ON while the high voltage cables are still disconnected. If there is still a problem with high voltage or overloads then refer to the troubleshooting guide, otherwise, if the power supply now seems to be operating properly, continue to the next step. 3.If multiple applicators are connected to the power supply through a high voltage junction tank, then reconnect the high voltage cable from the power supply output to the junction tank. Now disconnect each high voltage output cable from the junction tank to the applicators. Again, inspect each cable end for obvious signs of contamination or wear. 4. Turn high voltage ON. If the high voltage is now operating correctly, then try connecting one applicator (or station) at a time to the junction tank in order to isolate the problem to a specific output. 5. Once a specific HV output is identified as causing the problem, then perform system maintenance and diagnosis. This may include replacing the high voltage cable(s) or junction tank as appropriate. CP-02-02.6 36 Ransburg Voltage Master 2 - Maintenance TROUBLESHOOTING GUIDE General Problem Procedure Solution The High Voltage (kV) 1. Activate HV ON. Check for 1. Check wires and wire connections from the approximately 120VAC power supply terminals to the external HV Will Not Turn On from terminal TB2 #5 to ON control device. If wiring is OK, check TB2 chassis ground. the output of the control device being used. Yellow kV READY Light is ON, But Red kV ON Light Does Not Come 2. In the HV ON condition, check for 120VAC from ON When kV is wire #10 to TB2 chassis Requested ground. No Power Green Power Switch Light Does Not Come On and Displays are Black 2. One of the normally closed contacts that make up the HV OFF circuit is open. Check any external equipment connected to wires #3,35,8A,9 or 10. Also check any pneumatic signals connected to PS2 and PS3. PS2 should have a 0 psi input and PS3 should have greater than 30 psi pressure. 3. In the HV ON condition, check for 120VAC from Master Control board J3- 25 or 27 to TB2 chassis ground. 3. Replace the Master Control PC Board. 4. In the HV ON condition, check for 120VAC from TB2 #12 to TB2 chassis ground. 4. Replace the Motor Control Board. 1. Check for approximately 120VAC from TB7(L) to TB7(N). 1. Check factory voltage from the external fused disconnect or constant voltage transformer (CVT) if used. 2. Check for approximately 120VAC from TB7-F1 to TB7 - F2. 2. Replace Fuse F1 and/or F2. 1. Disconnect the HV cables 1. If no overload occurs, inspect and perform Power Supply Over from the power supply and maintenance on the remainder of the sysloads at Each Attempt attempt HV ON. tem. to Turn kV ON 2. Verify that the overload setting is correct. 2. Refer to the "Overload Adjustment Procedures" section of this manual. 3. Reduce the KV setting and 3. If no overload occurs, replace the Master turn HV ON. Control Board and repeat HV ON. If the problem still exists, then there is likely a problem with the power supply tank. Consult your Ransburg representative or the Ransburg Service Department for instructions. 37 (Continued on next page) CP-02-02.6 Ransburg Voltage Master 2 - Maintenance TROUBLESHOOTING GUIDE (Cont.) General Problem Random Overloads Procedure Solution 1. This symptom is most likely 1. Perform system inspection, cleaning, NOT a problem with the and diagnosis. power supply. Inspect and diagnose the entire system first. Refer to the common problems list at the beginning of this "Troubleshooting" section and in the "Mainte- nance" section. 2. Make sure that the overload setting is not too sensitive. Fluctuations in output current can occur due to a number of system variables. Refer to the "Overload Adjustment Procedures" section. 2. Verify that the overload setting is correctly set. If the procedures were followed correctly and overloads still occur, adjust the setting up slightly to compensate for system fluctuations. 3. If a remote analog input 3. Repair cable, wires, or correct problem signal is used to set the with the signal source. overload value, monitor the signal or source controller to make sure that the signal remains stable. 4. If possible, disconnect the 4. If no overloads are observed, then HV cables from the power diagnose and perform maintenance on supply and operate for a the remainder of the system. period of time where an overload would have prev- iously occurred. 5. If a problem still exists, re- place the Master Control Board. 6. If a problem still exists, consult your Ransburg representative or the Service Department for further instructions. CP-02-02.6 38 Voltage Master 2 - Parts Identification Ransburg PARTS IDENTIFICATION Figure 15: Control Panel Parts List - Front View 39 CP-02-02.6 Ransburg Voltage Master 2 - Parts Identification Figure 16: Control Panel Parts List - Inside Door View CP-02-02.6 40 Voltage Master 2 - Parts Identification Ransburg Figure 17: Control Panel Parts List - Inside View 41 CP-02-02.6 Ransburg Voltage Master 2 - Parts Identification 78789 CONTROL PANEL - PARTS LIST (Figure's 15, 16, and 17) Item # Part # 1 78820-00 2 76960-02 3 76960-01 4 LSME0023 5 SSH-409 6 78819-00 7 76948-00 8 78678-02 9 LSME0007 10 LSME0004 11 LSME0005 12 LSME0006 13 74300-00 14 LSME0013 15 77071-02 16 4131-08 17 14684-01 18 LSME0083-00 19 78674-00 20 78676-00 21 LECU4013 22 41-VSO-1002 23 77235-01 24 78880-00 26 A11369-01 27 72771-10 For 240VAC Input 72771-14 For 120VAC Input CP-02-02.6 Description Digital Panel Meter Assembly Pilot Light Lens, Yellow Pilot Light Lens, Red Alarm Horn Knob Switch, 3-Position, Red Switch, 2-Position, Green Door PCB Assy. for Control Panel Pilot Light Block Contact Clip, Triple Contact Block, Normally Open Contact Block, Normally Closed Bulb, 120 VAC Contact Clip, Single AC Line filter Fuse, 3AG, 2/10A, 250V, Time Delay, Motherboard Relay, 120 VAC, 3 PDT Relay, 120 VAC, 3 PDT Mother Control PCB Assembly Master Control PCB Assembly Motor PCB Assembly Solenoid, 120 VAC Pressure Switch Transformer Control Assy Transformer Assembly, Step Down Fuse, 2.5 Amp., Time Delay, 250V, 5 X 20mm, TB7 Fuse, 5 Amp., Time Delay, 250V, 5 X 20mm, TB7 Notation Y R2 HORN SW2 SW1 G, Y, R1, R2 SW1, SW2 SW1, SW2 SW2 G, Y, R1, R2 Y, R2 LF1 F2 CR1, CR2 CR3 SOL1 PS1-PS3 F1, F2 F1, F2 42 Voltage Master 2 - Parts Identification Ransburg Figure 18: Power Supply Parts List 43 CP-02-02.6 Ransburg Voltage Master 2 - Parts Identification LEPS5001 POWER SUPPLY - PARTS LIST (Figure 18) Item # 1 2 3 4 5 6 7 8 9 10 Part # Description A11385-00 A11352-00 LKIT0003-00 18566-05 LSMM0006 7296-00 EPS-4245 8521-06F 18566-11 78908-00 Notation Ground Wire Assembly Kit Cable Assembly Connection Kit (Includes Items 5 thru 8) Transient Suppressor, 10 VDC Rubber Bushing, Tapered Nut High Voltage Cable Connector Nut Retaining Screw Transient Suppressor, 150 VDC Capacitor, 1µF, 250 VAC RECOMMENDED SPARE PARTS LIST Total # of Power Supplies Item # Part # 3 8 13 16 17 18 19 20 21 22 23 27 LKIT0003-00 78678-02 74300-00 4131-08 14684-01 LSME0083-00 78674-00 78676-00 LECU4013 41-VSO-1002 77235-01 72771-10 For 240 VAC Input 72771-14 For 120 VAC Input SSW-1064 LEPS5001-02 Description Connection Kit Door, PC Board Assembly Bulb, 120 VAC Fuse, 3AG, 2/10A, Motherboard Relay, 120 VAC, 3 PDT Relay, 120 VAC, 3PDT Mother Control PC Board Assembly Master Control PC Board Assembly Motor Control Board Assembly Solenoid, 120 VAC Pressure Switch Fuse, 2.5 Amp, Time Delay, 250V, 5 X 20mm, TB7 Fuse, 5 Amp, Time Delay, 250V, 5 X 20mm, TB7 High Voltage Cable Power Supply 1-4 4+ 1 1 2 1 1 1 1 1 1 1 1 5 2 1 4 2 2 1 1 1 1 1 2 10 5 10 * 0 * 1 * Dependent on system configuration CP-02-02.6 44 Ransburg Voltage Master 2 - Warranty Policies WARRANTY POLICIES LIMITED WARRANTY Ransburg will replace or repair without charge any part and/or equipment that falls within the specified time (see below) because of faulty workmanship or material, provided that the equipment has been used and maintained in accordance with Ransburg's written safety and operating instructions, and has been used under normal operating conditions. Normal wear items are excluded. THE USE OF OTHER THAN RANSBURG APPROVED PARTS, VOID ALL WARRANTIES. SPARE PARTS: One hundred and eighty (180) days from date of purchase, except for rebuilt parts (any part number ending in "R") for which the warranty period is ninety (90) days. EQUIPMENT: When purchased as a complete unit, (i.e., guns, power supplies, control units, etc.), is one (1) year from date of purchase. WRAPPING THE APPLICATOR, ASSOCIATED VALVES AND TUBING, AND SUPPORTING HARDWARE IN PLASTIC, SHRINK-WRAP, OR ANY OTHER NON-APPROVED COVERING, WILL VOID THIS WARRANTY. 45 RANSBURG'S ONLY OBLIGATION UNDER THIS WARRANTY IS TO REPLACE PARTS THAT HAVE FAILED BECAUSE OF FAULTY WORKMANSHIP OR MATERIALS. THERE ARE NO IMPLIED WARRANTIES NOR WARRANTIES OF EITHER MERCHANTABILITY OR FITNESS FOR A PARTICULAR PURPOSE. RANSBURG ASSUMES NO LIABILITY FOR INJURY, DAMAGE TO PROPERTY OR FOR CONSEQUENTIAL DAMAGES FOR LOSS OF GOODWILL OR PRODUCTION OR INCOME, WHICH RESULT FROM USE OR MISUSE OF THE EQUIPMENT BY PURCHASER OR OTHERS. EXCLUSIONS: If, in Ransburg's opinion the warranty item in question, or other items damaged by this part was improperly installed, operated or maintained, Ransburg will assume no responsibility for repair or replacement of the item or items. The purchaser, therefore will assume all responsibility for any cost of repair or replacement and service related costs if applicable. CP-02-02.6 Ransburg Voltage Master 2 - Manual Change MANUAL CHANGE SUMMARY This manual was published to replace Service Manual CP-02-02.5, Voltage Master 2 High Voltage Power Supply System, to make the following changes: 1. Added " " to "Front Cover. 2. Added "Atex" section. CP-02-02.6 46 Service Manual Price: €25.00 (Euro) $30.00 (U.S.) Manufacturing 1910 North Wayne Street Angola, Indiana 46703-9100 Telephone: 260/665-8800 Fax: 260/665-8516 Technical/Service Assistance Telephone: 800/ 233-3366 Fax: 419/ 470-2071 www.ransburg.com Technical Support Representative will direct you to the appropriate telephone number for ordering Spare Parts. © 2013 Ransburg. All rights reserved. Models and specifications subject to change without notice. Form No. CP-02-02.6 Litho in U.S.A. 03/13


