1
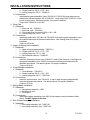
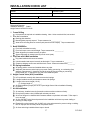
SERVICE MANUAL
FOR FORD F550
RD1350F SUSPENSION
D710242
REV A
03/11/10
TABLE OF CONTENTS
Introduction ................................................................................................................................3
Company Profile..............................................................................................................3
About This Manual..........................................................................................................6
General Information ....................................................................................................................7
Identification...............................................................................................................................7
Controls ......................................................................................................................................8
Parts List .....................................................................................................................................9
Inspection & Maintenance.........................................................................................................12
Height Control Valve Inspection & Adjustment.............................................................12
Torque Specifications ....................................................................................................13
Maintenance Schedule ...................................................................................................15
Maintenance Record ......................................................................................................16
Troubleshooting ........................................................................................................................17
Air Controls ..............................................................................................................................19
-4 System 9930 Height Control Valve System with kneeler valves ................................19
-5 System 9932 Height Control Valve System w/o kneeler valves .................................22
-AB System K706859 Height Control Valve System w/ ping tanks and kneeler valves ..25
-QR System K709308 Quick Recovery Air System .......................................................28
9905 Auxiliary “Ping” Tank Kit ....................................................................................31
Replacement Instructions and Warranty ....................................................................................32
Installation Instruction...............................................................................................................33
Installation Check Sheet ............................................................................................................37
2
D710242
INTRODUCTION
Company Profile
Tuthill Transport Technologies is the “Line of Business” name arising from the acquisition and merger of
two companies in the heavy-duty suspension and off-road axle industries. Fluidrive®, Inc. of Brookston,
IN, which included the Granning® brand; and Reyco® Industries, Inc. operating in Springfield, MO, Mt.
Vernon, MO, and Grimsby, ON, Canada.
Tuthill Transport Technologies is certified to the internationally recognized ISO 9001:2000 Standard.
This certification includes ReycoGranning® operations.
ISO 9001:2000 is the highest international quality standard and is recognized worldwide by all major
countries and corporations. To obtain certification a company must undergo a series of rigorous audits to
remain certified and ensure consistent quality standards are being maintained. This quality standard
was developed by the International Organization of Standardization. Tuthill Corporation is a privately
held manufacturing company with facilities worldwide. Tuthill’s corporate offices are located in Burr
Ridge (Chicago), Illinois.
Granning was founded in Detroit, MI in 1949 and became part of Fluidrive, Inc in 1985. Reyco® was
founded in Springfield, MO in 1924 as Reynolds Mfg Co and assumed the Reyco® Industries, Inc name
in 1956. Reyco Canada was established in 1963 with the opening of a facility located in Grimsby,
Ontario, followed by the opening of another Reyco facility in Mt Vernon, MO in 1973. Most recently, in
2003, the Reyco Springfield facility merged with the Reyco Mt.
Vernon location to consolidate the Reyco line of products.
Tuthill Corporation purchased Fluidrive, Inc. in December
1998 and then purchased Reyco Industries, Inc in February
1999 to offer Reyco Granning® suspension solutions. Reyco
Granning air and steel spring suspensions are sold to truck,
trailer and specialty vehicle OEM’s, as well as truck
equipment distributors. All products are designed, tested,
manufactured and marketed by members of the Reyco
Granning team.
Congratulations on your purchase of a ReycoGranning® AIRGLIDE® drive axle air suspension system.
Founded in 1948 by one of the pioneers of air suspensions, ReycoGranning® Air Suspensions supplies
drive and tag axle air suspension systems to a variety of original equipment manufactures as well as to
the aftermarket industry. The R-Series, trade named AIRGLIDE®, are utilized by OEM customers in
applications such as recreational vehicles, shuttle bus, trailer, chassis builders, Type I and III
ambulances and class 3 through 8 truck applications. This product line now exceeds 25 models that
cover all major chassis utilized in the above applications.
Suspension Description
A ReycoGranning® AIRGLIDE® drive axle air suspension system is a replacement rear suspensions
system that consists of an air control system, air springs, trailing arm beams, brackets, and mounting
hardware. In general, the air suspension works by maintaining a constant ride height by adjusting the
amount air pressure in the air springs. This allows the vehicle to remain level, regardless of loading. By
varying the amount of air pressure in the springs, a comfortable ride is maintained whether lightly or
heavily loaded. This is the major difference between an air suspension and a conventional steel spring
suspension. The steel spring suspension is usually designed for heavily loaded condition and thus yields
a harsh ride in lightly loaded conditions. In addition, the steel spring suspension does not maintain a
constant ride height under varying load conditions.
3
D710242
INTRODUCTION
By maintaining a constant ride height, the horizontal center of gravity, steering geometry, and even the
headlights remain level. The benefits of an air ride are:
1. Driver/passenger comfort,
2. Protection of cargo, chassis and body components,
3. Reduced stress fatigue to chassis frame rails.
4. Greater stability and control.
A unique feature to the ReycoGranning® AIRGLIDE® drive axle air suspension system is the wear towers
and wear blocks. These time proven components prevent unwanted side to side lateral motion without
the use of costly and complex track rods.
Air Control System
A primary subsystem of a ReycoGranning® AIRGLIDE® drive axle air suspension system is the air control
system. Depending on the actual system used, the air control system will provide the ability to
automatically control the amount of air pressure in the air springs, thus automatically control the
suspension ride height.
The major components of an automatic air control system consist of an air compressor, reservoir tank,
height control valve, and air spring. The operation of the system is simple. The compressor supplies air
to the tank, which maintains the air pressure between 95 - 125 psi. Air from the tank is supplied to the
height control valve. The height control valve supplies air to or depletes air from the air spring via a
mechanical linkage based on axle loading. The pressure changes in the air spring but the height
remains the same, thereby giving the optimum ride regardless of load.
A system with a single height control valve supplies both air springs simultaneously while a dual height
control valve system supplies each air spring separately. The dual system increases the sensitivity of
side-to-side distributions of axle loading. A schematic of each system can be found in the Air Control
System Parts List section. See Air Control System - Control Panels and Operation sections.
Located on the bottom of the air tank assembly, is a heated moisture ejector valve. (The valve is heated
to eliminate ice build up.) This valve automatically releases accumulated water from the air tank every
time the driving brake is used. Each time the driver presses the brake pedal, the ejection valve releases
a bit more water, insuring a well drained system.
There is a small round button/port in the center of the underbelly of this valve. Press this button with
your finger to manually drain accumulated water from the tank when the vehicle is turned “off”.
Optional "kneeler" or exhaust valve(s) may be plumbed between the air springs and the height control
valve(s). When power is applied to these valves, they shut off air supply from the height control valve to
the air springs and exhaust air from the air springs. As long as power is supplied to the "kneeler" valve,
usually through the "exhaust" position of the "inflate/exhaust" switch, the air springs will remain
deflated. With the air springs deflated, the rear end of the vehicle will remain lowered, or "kneeled",
with the chassis resting on positive jounce stops. Removing power to the "kneeler" valve allows air to
flow from the height control valve to the air springs and shuts off exhaust from the air spring, thus
inflating the air springs. The rear end of the vehicle is automatically raised to the proper ride height.
Systems with dual height control valves require two "kneeler" valves, one between each air spring and
height control valve, if the exhaust option is equipped.
To further improve the ride of an air suspension, ReycoGranning® offers a dual ping tank kit. One ping
tank is added to each side between the air spring and the height control valve, or "kneeler" dump valve if
installed. These 200 cubic inch ping tanks effectively increase the volume of the air spring, without
4
D710242
INTRODUCTION
having to utilize a larger air spring. The spring rate of a system is directly proportional to the volume of
the air spring. The larger the air spring volume, the lower the spring rate; thus the better the ride.
However, the amount of air flowing between the air spring and ping tank can limit the effective air
volume of the system. Therefore, adding larger and larger ping tanks may not result in significant
changes in the suspension spring rate. ReycoGranning® ping tank kits have been designed to provide
the ideal increase in volume and proper airflow.
A side effect in adding ping tanks is possible increase in air spring inflation times. With a ping tank
system installed, the larger volume of air, which improves the spring rate, must be refilled each time the
system is "kneeled". ReycoGranning® ping tank kits have been designed to minimize this effect, while
improving the ride.
Finally, optional warning light sensors or air pressure gauges may be plumbed to either the air reservoir
tank or to the air springs. These warning devices will indicate possible problems with the air suspension
system prior to operation. Gauges that are plumbed to the reservoir tank will read between 95 and 125
psi, as described above. Any air gauge that is plumbed directly to the air spring will show fluctuations
depending on axle loading and vehicle operation.
5
D710242
INTRODUCTION
About This Manual
This publication is intended to acquaint and assist maintenance personnel in the maintenance,
service, repair and rebuild of the Reyco Granning® RD1350F Rear Suspension. It is important to
read and understand the entire Technical Procedure publication prior to performing any
maintenance, service, repair, or rebuild of this product
Reyco Granning ® Air Suspensions reserves the right to modify the suspension and/or procedures
and to change specifications at any time without notice and without incurring obligation. Contact
customer service at 800-753-1060 for information on the latest version of this manual.
You must follow your company safety procedures when you service or repair the suspension. Be
sure you read and understand all the procedures and instructions before you begin work on the
suspension.
Reyco Granning ® uses the following types of notes to give warning of possible safety problems
and to give information that will prevent damage to equipment.
WARNING
A warning indicates procedures that must be followed exactly. Serious personal injury can
occur if the procedure is not followed.
CAUTION
A caution indicates procedures that must be followed exactly. Damage to equipment or
suspension components and personal injury can occur if the procedure is not followed.
NOTE
A note indicates an operation, procedure or instruction that is important for correct service.
Some procedures require the use of special tools for safe and correct service. Failure to use these
special tools when required can cause personal injury or damage to suspension components.
The latest revision of this publication is available online at http://www.Reyco Granning.com/
Reyco Granning ® Air Suspensions has developed this service manual to aid in the maintenance of
Reyco Granning ® ’s rear suspensions. General Notes
The following table lists the various models and their respective capacities.
Model
Capacity
Axle Capacity
RD1350F
13,500 lbs
13,500 lbs
6
D710242
GENERAL INFORMATION
Overloading the suspension may result in adverse ride and handling characteristics.
Note: The ride height is for the completed vehicle with body and components. See table below for
correct vehicle dimensions. See following pages for the above views.
Chassis
Reyco Granning®
Suspension Model
Ride
Height *
Jounce
Travel
Rebound
Travel
Ford F550 SuperDuty Cab Chassis
RD1350F
10.19”
3.85”
3.13”
Ride height is measured from the axle center (flat and level) to the bottom of the vehicle frame at the
rear of vehicle, behind the axle as shown.
Identification
The suspension model and serial number are stamped on an aluminum tag that is riveted to the driver
side upper Hanger Weldment (See Figure 2). The serial number is used by Reyco Granning ® for
control purposes and should be referred to when servicing the suspension (See Figure 1).
Figure 1: Suspension Identification
7
D710242
CONTROLS
Descriptions of the typical controls are found
below. Note: some original equipment
manufactures (OEM) will use controls
integrated into the instrument panel. While the
appearance may differ, the operation and
description are consistent with below.
switch to "Exhaust" position exhausts all air
from the air springs.
While the switch is in the "Exhaust" position,
the air springs will remain deflated.
Exhausting air from the air springs may be
required to: assist in maintenance and lower
the rear of the vehicle to assist in loading.
Caution: Only operate the exhaust feature
while the vehicle is parked. Never exhaust the
system while the vehicle is in motion.
To inflate the air springs, place the switch in
the "Inflate" position.
Power ON/OFF Switch
This master switch turns the power off and on
to the compressor and other electrical
components of the drive axle suspension. To
activate the compressor and other electrical
components, move the switch to "ON".
The vehicle ignition switch may need to be
turned on to activate this switch.
Gauges, Lights, Buzzers
As an option, the Air Pressure Warning
Light/Buzzer kit may be installed. The gage
will indicate air tank pressure. If air pressure
falls below 20 psi, a warning light and buzzer
will activate. Do not operate the vehicle in this
condition. The buzzer/light will go off once 40
psi air pressure is reached.
Exhaust/Inflate Switch
If the system is equipped with an optional
"kneeler" exhaust valve(s), the control panel will
have an Exhaust/Inflate switch. Moving the
ON
The 5016 Control Panel Assembly, with Power ON/OFF
only. Included with the 9932 Air Control Kit.
OFF
POWER
P
O
W
E
R
ON
OFF
K
N
E
E
L
E
R
INFLATE
EXHAUST
The 5008 Control Panel Assembly, with Power ON/OFF
and “Kneeler” Dump Valve Switches. Also shown is
the 1069 Air Pressure Gauge (0-160 psi) and the 5401
Alarm Light/Buzzer.
The 5008 Control Panel Assembly is included with the
9930 Air Control Kit. The 1069 Gauge and 5401
Light/Buzzer are included in the optional 5703 Warning
Kit. Air pressure sensing may also be performed by and
OEM installed interface (control panel).
Operation of the ReycoGranning® AIRGLIDE®
drive axle suspension utilizing an automatic
height control system is reached through
various control panels. Depending upon options
included with the suspension system, the
control panel should be operated as follows:
Before operating the vehicle:
• Switch the power to "ON", if "OFF".
To exhaust the system, if the suspension is
equipped with an exhaust option:
• Make sure the vehicle is parked.
• Move the Exhaust/Inflate switch to the
"Exhaust" position.
• When exhausted, switch the power to "OFF"
(if desired).
• Make sure the Exhaust/Inflate switch is in
the "Inflate" position, if the suspension is so
equipped.
Although the air suspension master power
switch can be left "ON", ReycoGranning®
recommends turning the system off while the
vehicle is parked for an extended period, if the
suspension system is not switched through the
vehicle ignition switch. This will avoid running
down the battery.
• If equipped, check that the Low Pressure
Warning Light and Buzzer is off.
The vehicle is ready for operation.
8
D710242
INSPECTION & MAINTENANCE
24
33
29
11
53
9
33
31
28
13
26
55
54
56
*17
37
20
52
55
4
54
12
19
D710242
INSPECTION & MAINTENANCE
ITEM # QTY. PART NO.
1
2
100048-P1
DESCRIPTION
ITEM # QTY. PART NO. DESCRIPTION
HHB 1/2-13x1.00 Gr.8 ZN
2
3
100703-P1
LN 1/4-20 STOVER, GR. 8, ZN
3
1
101563-P1
HHB 1/4-20x.75 Gr.5 ZN
4
8
103003
5
2
118
6
2
7
8
9
30
14 702605-01 LFN 3/8-16, Gr. G, ZN
31
2
703095-01 Backing Plate
**32
1
708580-01 Heat Shield, Flexible
HFW 3/4
33
2
709872-01 UPPER AIR SPRING PAD
FW .531 X 1.062 X .095 ZP
*34
2
709953-04 HCV LINK NON-ADJ 7.40"
127
HHB 1/2-20x3.50 Gr.8 ZN
35
1
709971-01 ASY, AXLE WEDGE, LH .
2
188
Pop Rivet 1/8" dia. x .525" long
36
1
709971-02 ASY, AXLE WEDGE, RH
1
2617
Plate-Serial No.
37
2
710075-01 SHOCK ABSORBER
8
276
FHB 1/2-13x1.75 GR.8
38
2
7132
Sleeve, Rebound Strap (1.20)
10
4
298
SFCS 3/8-24 x 2.00 Gr.8
*39
4
8120375
Nut 1/4-20, Gr. 5, ZP
11
14
302
FHB 3/8-16 x 1.25" Gr. 8 ZN
40
2
8120378
N 1/2-13, Gr. 5, ZP
12
8
304
LFN 3/8-24, Gr. F, ZINC
*41
4
8120380
SLW 1/4"
13
8
308
LFN 1/2-13, GR. G ZN
42
2
8120384
SLW 1/2 .523x.873x.135 ZN
14
1
314
HHB 1/4-20x4.00 Gr.8 ZN
*43
4
8180020
HHB 1/4-20 x 3/4, Gr. 5, ZN
15
4
4356
SFCS 3/8-24 x 1.5 GR.8 PH
44
1
8180022
HHB 1/4-20 x 1, Gr. 5, ZN
16
2
5449
Rebound Strap 8.75x1.00
45
2
8219758
JN 3/4-16, Gr. 5, ZP
*17
2
5608
HEIGHT CONTROL VALVE
46
2
8274318
HHB 1/2-20 x 5, GR.8
18
2
6573
Spacer, Rebound Strap (2.937)
*47
4
8454750
LN 1/4-28 GR 5
19
8
6868
HN 3/4-16 Highnut Gr.C
48
2
8455030
HHB 1/2-20 x 2.75, Gr. 8
20
1
700107-01
Asy, Lower Air Spring Pad LH
49
2
8455034
HHB 1/2-20 X 4, GR.8, ZN
21
1
700107-02
Asy, Lower Air Spr. Pad RH
50
2
8628
Clip, Tube/Wire .75, .281 Hole
Brkt. Parking Brake Cable
22
4
701740-01
U-Bolt 3/4-16x13.25
51
1
8876
*23
4
702016-02
ELBOW SWIVEL 1/4Tx1/8MPT
52
1
8877
Asy, Wear Tower LH
24
1
702140-01
Crossmember
53
1
8878
Asy, Wear Tower RH
25
4
702145-01
SHIM-WEAR BLK 5.3W 5.9L X 1/16
54
2
8886
Asy, Axle Saddle
26
1
702149-01
Wear Pad, LH
55
2
8891
Asy, Spring Beam
27
1
702149-02
Wear Pad, RH
56
2
8896
Air Spring
28
1
702150-01
Asy, Backing Plate LH
57
8
89422302
LN 1/2-20, Gr. C
29
1
702150-02
Asy, Backing Plate RH
* K710132
** Not shown
13
D710242
INSPECTION & MAINTENANCE
Perform a thorough visual inspection of the suspension to ensure proper assembly and to
identify broken parts and loose fasteners each time the vehicle suspension is serviced. Do
the following during an inspection.
Fasteners - Using a calibrated torque wrench check that all the fasteners
are tightened to the proper torque.
Wear and Damage - Inspect components of the suspension for wear and
damage. Look for bent or broken components. Replace all worn or damaged
components.
Operation - Check that all components move freely through the complete
turning arc.
CAUTION: Reyco Granning ® recommends replacing any damaged or out-ofspecification components. Reconditioning or field repairs of major rear
suspension components is not allowed.
Note: Refer to Section 1 for identification of components.
NOTE: Reyco Granning ® recommends the use of a maintenance pit or full vehicle
lift during the inspection of components.
WARNING: Never work under a vehicle supported by only a jack. Jacks can
slip or fall over and cause serious personal injury. Always use safety stands.
Height Control Valve Inspection and Adjusting Suspension Ride
Height
The height control valve and linkage should be checked regularly for proper clearance,
operation and adjustment. The ride height of the rear suspension is the distance from the
bottom of the chassis frame rail to the center of the axle. Properly adjusted ride height
results in correct suspension travel and alignment. The ride height should not be adjusted
to adjust chassis rake angle.
To check ride height
1.
2.
3.
4.
Park the vehicle on a level surface.
If the suspension is equipped with kneelers lower the suspension.
Re-inflate the air suspension. Allow the Suspension to settle.
Set the parking brake and block the drive wheels to prevent vehicle
movement.
5. make sure nothing is interfering with the travel of the height control valve
arms,
6. Measure the distance from bottom of chassis to center of axle on each side.
The ride height should be 10.19 inches.
To adjust ride height
1. Loosen nut on side of HCV arm,
2. Slide short arm up or down as needed,
3. Torque nut to 30 to 45 in-lbs,
12
D710242
INSPECTION & MAINTENANCE
4. Repeat steps 1 thru 3 on other side,
5. Recheck ride height as stated in previous section.
Figure 2: Height Control Valve
TORQUE SPECIFICATIONS
Most threaded fasteners are covered by
specifications that define required
mechanical properties, such as tensile
strength, yield strength, proof load, and
hardness. These specifications are
carefully considered in initial selection of Figure 5: Grade Markings on Bolts
fasteners for a given application. To
Lock Nut
Lock Nut:
Grade
assure continued satisfactory vehicle
Grade B, F
Grade C, G
Identification
performance, replacement fasteners used
should be of the correct strength, as well as
6 Dots
3 Dots
the correct nominal diameter, thread pitch,
Figure 6: Grade Markings on Lock Nuts
length, and finish.
13
D710242
INSPECTION & MAINTENANCE
Reyco Granning Recommended Torque Specifications
Item
Assembly
Fastener
Torque (Ft/lbs)
1
Spring Beam Pivot Connection
OEM (HEX FLANGE HEAD, M20X1.50X167.00)
250-339 ft-lbs
2
Upper Air Spring Pad Mount (to Frame)
FHB 1/2-13 X 1.75 GR.8 ZN
90 ft-lbs
3
Lower Air Spring Assembly Mount (to Beam)
HHB ½-13 x 3, Gr. 8 ZN
90 ft-lbs
4
Stud Nut (Air Spring)
N 1/2-13 GR 5 ZP
35 ft-lbs
5
Air Port Nut (Air Spring)
JN 3/4-16 GR 5 ZP
35 ft-lbs
6
Backing Plate to Chassis
FHB 3/8-16 X 1.25 GR8 ZINC
35 ft-lbs
7
Wear Pad to Backing Plate
SFCS 3/8-24 x 2.0 Gr. 8
100 in-lbs
8
Rebound Strap Upper & Lower Mount
1/2-20 Grade G
90 ft-lbs
9
HCV bolts
HHB 1/4-20 X .75 GR 5 ZN
8 ft-lbs
10
U-Bolt Nuts
U-BOLT, AXLE SEAT
250 ft-lbs
11
Shock Bolts (Refer to Vehicle Owners Manual)
See Vehicle Owners
**See Vehicle Owners
12
Wheels (Refer to Vehicle Owners Manual)
See Vehicle Owners
**See Vehicle Owners
**Follow procedures and torques listed in Dodge Maintenance Manual
Note: Torque values listed above apply only if Reyco Granning supplied fasteners are used. For
information regarding component replacement or technical service call 1-800-753-0500
14
D710242
INSPECTION & MAINTENANCE
Maintenance Schedule
GENERAL
MAINTENANCE
SERVICE TO BE PERFORMED
Spring Beam Pivot
Connection
Check bolt torque.
Inspect for contact between Spring Beam
and Hanger.
Inspect for bushing wear.
Air Springs
Inspect for proper clearance (1” minimum
all around).
Check upper mount nut and lower mount
bolt torque.
Inspect for signs of chafing or wear.
Check for air line fitting torque.
Inspect for air leaks using soapy water
solution.
Height Control Valve Inspect for signs of bending, binding, or
Linkage
slippage.
Air Fittings and Air
Inspect for air leaks using soapy water
Lines
solution
Inspect for signs of chafing, cracking, or
wear
Shock Absorbers
Check stud mount and lock nut torque.
Inspect shocks for signs of fluid leak,
broken eye ends, loose fasteners, or worn
bushings.
Axle Connection
Check “U”-bolt nut torque
Wheels2
Check lug nut torque3
Air Compressor
Check air compressor compartment or
enclosure for proper airflow and venting.
Rear Alignment
Inspect (after first 1000-3000 miles)
Air Fittings and Air
Inspect for air leaks using soapy water
Lines
solution.
Inspect for signs of chafing, cracking, or
wear.
MILEAGE IN
THOUSANDS
12 24 36 48 60 72 84 96
X
X
X1
X
X
X
X
X
X
X X1
X
X
X
X
X
X
X X1
X
X
X
X
X
X X1
X
X
X
X
X
X X1
X
X
X
X
X
X
X
X
X
X
X
X
X X1
X
X
X
X
X
X
X
X
X
X
X
X
X
X
X
X
X
X
X
X
X
X
X
X
X
X
X
X
X
X
X
X
X
X
X
X
X
X1
X
X X1
X
X
X
X
X
X
1
Continue to perform specified maintenance every 12,000 miles.
See your vehicle’s owner’s manual for instructions regarding the maintenance of wheels and
tires.
3
Wheel lug nuts must be retightened to proper torque specifications as per the vehicle or
chassis manufacturer’s Owner Guide.
2
15
D710242
INSPECTION & MAINTENANCE
Maintenance Record
Name of Owner
Address of Owner
Date of Purchase
Name and Address of Dealer
Model of Vehicle
Vehicle Identification Number
Suspension Model Number:
Suspension Serial Number:
RD1350F
Inspection and Maintenance
Date
Mileage
Item
16
Service Performed
D710242
TROUBLE SHOOTING
SYMPTOMS
Tires wear out quickly or have
uneven tire tread wear.
Note: Wear pattern will indicate
possible cause(s). Consult tire
manufacturer for guidance.
Vehicle rolls side to side
excessively.
Vehicle ride is too harsh and/or
suspension contacts stops
excessively.
Vehicle ride is too soft.
POSSIBLE CAUSES
1) Tires have incorrect pressure.
2) Tires out of balance.
3) Incorrect ride height.
4) Incorrect rear axle alignment.
5) Improper (mismatched) tires
and wheels.
REMEDIES
1) Put specified air pressure in
tires.
2) Balance or replace tires.
3) Adjust ride height to specified
setting.
4) Align rear axle to specified
thrust angle.
5) Install correct tire and wheel
combination.
1) Shock absorbers worn.
1) Replace shock absorbers as
2) Shock eye bushings worn.
needed.
3) Axle U-bolts are loose
2) Check and replace as needed..
4) Loose or worn Spring Beam
3) Tighten (see previous torque
Pivot connection(s).
chart) or replace as required
5) Loose or worn Spring Beam
4) Tighten (see previous torque
Pivot bushing(s).
chart) or replace as required
6) Check for air leak including the 5) Replace as required
height control valve.
6) Check height control valve and
replace as required.
1) Shock absorbers worn.
1) Replace shock absorbers as
2) Incorrect ride height.
needed.
3) Vehicle overloaded.
2) Adjust ride height to specified
4) Air spring supply lines leaking setting.
or obstructed.
3) Check wheel loads and correct
5) Vehicle system air pressure
as needed.
below specification.
4) Check air line connections and
6) Jounce bumper in air spring
remove obstructions.
worn or broken.
5) Check air pressure and correct
7) Air Suspension not turned on. as needed.
8) Defective Height Control
6) Check and replace air spring as
Valve(s)
required.
9) Height Control Linkage
7) Turn on air suspension.
disconnected or damaged
8) Replace height control valve as
required.
9) Reattach or replace as
required.
1) Shock absorbers worn.
2) Incorrect ride height.
17
1) Replace shock absorbers as
needed.
2) Adjust ride height to specified
setting.
D710242
TROUBLE SHOOTING
SYMPTOMS
POSSIBLE CAUSES
Suspension does not maintain
ride height.
1) Air leak.
2) Internal leak in height control
valve.
3) Height control valve linkage
loose.
4) Air spring chafed or worn.
Air compressor runs excessively
Air leak.
Internal air leak in height control valve.
Moisture ejector valve stuck open.
Check valve installed incorrectly.
Dump valve(s), or “kneeler(s)”, leaking.
Height Control Valve stuck in the exhaust
position.
Air compressor will not start
REMEDIES
1) Check connections with soapy
water solution and repair or
replace as needed.
2) Check height control valve and
replace as required.
3) Check and tighten linkage as
needed.
4) Check air spring and replace as
needed.
Inspect all air lines, fittings, and air springs with
a soapy water solution. Repair, retighten, or
replace as required. Note: Plastic air lines must
be cut square. See Air Control System Parts List
(General Notes) for additional notes.
Insert exhaust tube into a cup of water and
examine for bubbles. This will show evidence of
both inlet and exhaust valve leaks. Replace
components.
Check and replace if necessary.
Arrow should point away from the air
compressor head. Correct if necessary.
Check and replace if necessary.
Locate obstruction and remove or relocate
interference.
Replace or reset.
Inline fuse burnt or circuit breaker tripped.
Inspect and replace as required.
Air compressor motor burnt out.
Inspect and correct or replace if necessary.
Disconnected or broken wire.
Ignition switch and/or suspension power switch Turn on ignition switch and/or suspension
switch.
not on.
18
D710242
-4 SYSTEM 9930 AIR SYSTEM WITH KNEELER VALVES
19
D710242
-4 SYSTEM 9930 AIR SYSTEM WITH KNEELER VALVES
20
D710242
-4 SYSTEM 9930 AIR SYSTEM WITH KNEELER VALVES
Item #
Part #
Description
Item #
Part #
Description
1
702603-01 UNION TEE 1/4T X 1/4T X 1/4T
22
5008
2
0416
23
100702-P1 HHB 1/4-20 X 1 GR 8 ZN
CONNECTOR - 1/4T X 1/8MPT
CONTROL PANEL-POWER/KNLR (RD)
3
0599
CONNECTOR - 1/4T X 1/4FPT
24
100703-P1 LN 1/4-20 STOVER GRC PLATED
4
4017
CHECK VALVE (R-SER COMPRESSOR)
25
700726-01 HWHMS 10-32x1.00 STEEL ZN
5
707413-01 VALVE, KNEELER 12VDC 3-WAY
28
308
LFN 1/2-13 GR G ZINC
6
6115
29
307
FHB 1/2-13 X 1 1/2 GR 8 ZINC
FHB 1/2-13 X 1.25 GR 8 ZINC
MALE CON. (3/16HBx1/8MPT)
7
701799-01 CV TUBING 3/16IDx1/4ODx3.00
30
309
8
5188
COMPRESSOR - 1/3 HP 12VDC
31
702600-01 ELBOW 90 1/4T X 1/4MPT
CONNECTOR - 1/4T X 1/4MPT
9
0428
32
8892
10
K709031 KIT, HCV, RD975D-AB, -4, -5
33
708262-01 Split Convoluted sleeving 3/8"
PRESSURE SWITCH
11
0437
ELBOW 45-ST 1/4MPTx1/4FPT
34
0141
12
8722
3/16 ID X 1/4 OD X 12" CV TUBE
35
704916-01 HEATED AUTO DRAIN VLV, BRK ACT
14
5392
VIBRATION ISOLATOR
36
8614
TANK, AIR RESERVOIR
PLUG- 1/4" PT SQUARE HEAD
15
8120214
SLW 5/16 .328x.586x.088 ZP
37
8625
BRACKET, AIR TANK MOUNT
16
8120393
FW 5/16 .344x.688x.065 ZP
38
8706
SOLENOID, COLE HERSEE #24059
17
8870
FRAME BRKT. KNEELER VALVE
39
8721
CIRCUIT BREAKER 40 AMP (SEALED)
18
89411893 LN 10-32 GR 5 CP
40
703683-01 WIRING HARNESS W/ RELAY
19
89429048 N 5/16-18 GR 8 ZP
--
D705274 Drawing, Air Kit Asy
20
4981
SWITCH-TOGGLE 12 VOLT/35 AMP
--
D9930
21
5157
SWITCH-TOGGLE (RED LIGHT)
DWG, AIR CNTL KIT
1. Airline tubing should be 1/4” D.O.T. plastic airline tubing.
2. The tubing ends must be cut straight and insert the full depth into the fittings otherwise leaks
will result. Check all connections for air leaks.
3. Protective airline loom is recommended.
21
D710242
-5 SYSTEM 9932 AIR SYSTEM WITHOUT KNEELER VALVES
22
D710242
-5 SYSTEM 9932 AIR SYSTEM WITHOUT KNEELER VALVES
23
D710242
-5 SYSTEM 9932 AIR SYSTEM WITHOUT KNEELER VALVES
Item #
Part #
Description
Item #
Part #
Description
1
702603-01 UNION TEE 1/4T X 1/4T X 1/4T
16
307
FHB 1/2-13 X 1 1/2 GR 8 ZINC
2
0599
CONNECTOR - 1/4T X 1/4FPT
17
309
FHB 1/2-13 X 1.25 GR 8 ZINC
3
4017
CHECK VALVE (R-SER COMPRESSOR)
18
702600-01 ELBOW 90 1/4T X 1/4MPT
4
5188
COMPRESSOR - 1/3 HP 12VDC
19
8892
5
0428
CONNECTOR - 1/4T X 1/4MPT
20
708262-01 Split Convoluted sleeving 3/8"
6
K709031
KIT, HCV, RD975D-AB, -4, -5
21
0141
7
0437
ELBOW 45-ST 1/4MPTx1/4FPT
22
704916-01 HEATED AUTO DRAIN VLV, BRK ACT
8
8722
3/16 ID X 1/4 OD X 12" CV TUBE
23
8614
PRESSURE SWITCH
PLUG- 1/4" PT SQUARE HEAD
TANK, AIR RESERVOIR
9
5392
VIBRATION ISOLATOR
24
8625
BRACKET, AIR TANK MOUNT
10
8120214
SLW 5/16 .328x.586x.088 ZP
25
8706
SOLENOID, COLE HERSEE #24059
11
8120393
FW 5/16 .344x.688x.065 ZP
26
8721
CIRCUIT BREAKER 40 AMP (SEALED)
12
89429048
N 5/16-18 GR 8 ZP
27
703683-01 WIRING HARNESS W/ RELAY
13
4981
SWITCH-TOGGLE 12 VOLT/35 AMP
--
D705274
Drawing, Air Kit Asy
14
4910
CONTROL PANEL (RD/RT/RFT)
--
D9932
DWG, AIR CNTRL-DUAL HCV
15
308
LFN 1/2-13 GR G ZINC
1. Airline tubing should be 1/4” D.O.T. plastic airline tubing.
2. The tubing ends must be cut straight and insert the full depth into the fittings otherwise leaks
will result. Check all connections for air leaks.
3. Protective airline loom is recommended.
24
D710242
-AB SYSTEM K706859 AIR SYSTEM WITH KNEELER VALVES,
PING TANKS, & WIRE HARNESS
25
D710242
-AB SYSTEM K706859 AIR SYSTEM WITH KNEELER VALVES,
PING TANKS, & WIRE HARNESS
26
D710242
-AB SYSTEM K706859 AIR SYSTEM WITH KNEELER VALVES,
PING TANKS, & WIRE HARNESS
Item # Part #
Description
Item #
*
Description
*
1
KV2T07-00
25
KV2K07-35S
ELBOW, 45 1/4T X 1/4MPT
***
2
KV2H07-34S Connector, 1/4 T x 1/8 MPT
26
706923-01
WIRING HARNESS, R-SERIES
*
3
KV2F07-35
Connector, Female, 1/4 T x 1/4 FPT
27
707121-01
WIRING HARNESS, R-SERIES
4
4017
CHECK VALVE (R-SER COMPRESSOR)
28
5392
VIBRATION ISOLATOR
5
707413-01
VALVE, KNEELER 12VDC 3-WAY
29
8120214
SLW 5/16 .328x.586x.088 ZP
6
6115
MALE CON. (3/16HBx1/8MPT)
30
8120393
FW 5/16 .344x.688x.065 ZP
7
701799-01
CV TUBING 3/16IDx1/4ODx3.00
31
89411893
LN 10-32 GR 5 CP
8
5188
COMPRESSOR - 1/3 HP 12VDC
32
89429048
N 5/16-18 GR 8 ZP
*
9
KV2L13-37S ELBOW, 90 1/2T X 1/2MPT
33
4981
SWITCH-TOGGLE 12 VOLT/35 AMP
10
K709031
34
700726-01
HWHMS 10-32x1.00 STEEL ZN
*
11
KV2K13-35S ELBOW, 45 1/2T X 1/4MPT
35
400056-P1
SLIDE
12
8706
SOLENOID, COLE HERSEE #24059
37
309
FHB 1/2-13 X 1.25 GR 8 ZINC
LOW PRESSURE SWITCH (5 PSI)
*
Tee, Union, 1/4 T x 1/4 T x 1/4 T
Part #
KIT, HCV, RD975D-AB, -4, -5
13
7457
39
8892
PRESSURE SWITCH
14
KV2L07-34S ELBOW, 90 1/4T X 1/8MPT
40
8614
TANK, AIR RESERVOIR
15
6247
TUBING-1/2ODx.062 WALL THK AB
41
704916-01
HEATED AUTO DRAIN VLV, BRK ACT
16
708263-01
SPLIT CONVOLUTED SLEEVING 5/8"
*
42
KV-109B
PLUG, SQUARE HD 1/4MPT
17
706887-01
LED, RED, 12V
*
43
KV2L07-35S
ELBOW, 90 1/4T X 1/4MPT
18
8721
CIRCUIT BREAKER 40 AMP (SEALED)
44
308
LFN 1/2-13 GR G ZINC
19
706959-01
PALNUT, 5/16”
**
45
707356-01
WELDMENT, COMP. ENCLOSURE
20
8619
TANK, AIR "PING", 200 CU. IN.
**
46
100679-P1
HHB 1/4-20 X 3/4, GR.8, ZN
21
8120371
N 1/2-20 GR 5 ZP
**
47
707030-01
COVER, COMPRESSOR ENCLOSURE
22
8120384
SLW 1/2 .523x.873x.135 ZP
**
48
8120392
FW 1/4 .281x.625x.065 ZP
23
8455028
HHB 1/2-20 X 1 1/2, GR.8, ZN
--
D706859
DWG, AIR CONTROL KIT W/ HARNESS
24
89415543
FW 1/2 .531x1.250x.100 ZP
--
K706855
KIT, LIFT CONTROL FITTINGS
*
K706855
KIT, LIFT CONTROL FITTINGS
**
K707294
KIT, COMPRESSOR ENCLOSURE
***
K706858
KIT, HCV, RD1350F-AB
1. Airline tubing should be 1/4” D.O.T. plastic airline tubing.
2. The tubing ends must be cut straight and insert the full depth into the fittings otherwise leaks
will result. Check all connections for air leaks.
3. Protective airline loom is recommended.
27
D710242
-QR SYSTEM K709308 QUICK RECOVERY AIR SYSTEM
28
D710242
-QR SYSTEM K709308 QUICK RECOVERY AIR SYSTEM
29
D710242
-QR SYSTEM K709308 QUICK RECOVERY AIR SYSTEM
ITEM PART #
1
*2
3
4
5
6
7
8
9
10
11
12
13
14
15
16
17
18
19
20
21
22
23
24
*25
123
141
416
428
441
627
100702-P1
100703-P1
308
309
400056-P1
4017
4981
5157
5188
5392
5608
6115
700726-01
701799-01
704916-01
706887-01
706923-01
706959-01
707069-01
DESCRIPTION
ITEM PART #
REDUCER - 1/2MPT-1/4FPT
PIPE PLUG - 1/2NPT
CONNECTOR - 1/4T X 1/8MPT
CONNECTOR - 1/4T X 1/4MPT
TEE-ST 1/4 FPT X 1/4 MPT
CONNECTOR - 1/2T X 1/4MPT
HHB 1/4-20 X 1, GR. 8, ZN
LN 1/4-20 STOVER, GR. 8, ZN
LFN 1/2-13, GR. G ZN
FHB 1/2-13 x 1 1/4, GR. 8, ZN
TERMINAL, MALE SPADE 22-18AWG
CHECK VALVE
SWITCH, TOGGLE
TOGGLE SWITCH, RED LIGHT
COMPRESSOR - 1/3 HP 12VDC
VIBRATION ISOLATOR
HEIGHT CONTROL VALVE
MALE CON.(3/16HBx1/8MPT)
HWHMS 10-32x1.00 STEEL ZN
CV TUBING 3/16IDx1/4ODx3.00
HEATED AUTO DRAIN VLV, BRK ACT
LED, RED, 12V
WIRING HARNESS IN CAB
PALNUT, 5/16"
CONNECTOR, 1/4T x 1/8MPT
*
K706855
KIT, LIFT CONTROL FITTINGS
**
K707294
KIT, COMPRESSOR ENCLOSURE
***
K706858
KIT, HCV, RD1350F-AB
26
27
28
29
30
31
32
33
34
35
36
37
38
39
40
41
42
43
44
45
*46
*47
*48
*49
*50
707121-01
707294
707413-01
7457
8120214
8120371
8120384
8120392
8120393
8455028
8614
8619
8625
8706
8721
8870
8892
89411893
89415543
89429048
KV2F07-35
KV2K07-35S
KV2L07-34S
KV2L07-35S
KV2T07-00
DESCRIPTION
WIRING HARNESS UNDER HOOD
WELDMENT, COMPONENT ENCLOSURE
VALVE, KNEELER 12VDC 3-WAY
LOW PRESSURE SWITCH (5 PSI)
SLW 5/16"
N 1/2-20 GR 5 ZN
SLW 1/2 .523x.873x.135 ZN
FW 1/4 .281 x .625 x .065, ZN
FW 5/16 .344x.68x.065 ZN
HHB 1/2-20 X 1 1/2, GR.8, ZN
AIR TANK - 500CI 6" DIA
AIR TANK, PING 212 CI
BRACKET, AIR TANK MOUNT
SOLENOID
CIRCUIT BREAKER, 40A SEALED
FRAME BRKT, KNEELER VALVE
PRESSURE SWITCH 95-115 PSI
LN 10-32 GR 5 CP
FW 1/2 .531x1.25x.100 ZN
N 5/16-18 GR 8 ZN
FEMALE CONNECTOR, 1/4T X 1/4FPT
45DEG MALE ELBOW, 1/4T X 1/4MPT
90DEG MALE ELBOW 1/4T X 1/8MPT
90DEG MALE ELBOW, 1/4T X 1/4MPT
TEE, UNION, 1/4T X 1/4T X 1/4T
1. Airline tubing should be 1/4” D.O.T. plastic airline tubing.
2. The tubing ends must be cut straight and insert the full depth into the fittings otherwise leaks
will result. Check all connections for air leaks.
3. Protective airline loom is recommended.
30
D710242
9905 AUXILIARY PING TANK KIT
Item
Part No.
1
2
3
4
5
6
0428
0627
0635
0636
6247
6248
Description
Connector 1/4T x 1/4MPT
Connector 1/2T x 1/4MPT
Connector 1/2T x 1/2MPT
Plug 1/4MPT Countersunk
Tubing 1/2 O.D.
Loom, Braided Nonmetallic
Item
Part No.
Description
7
8
9
10
11
12
8120371
8120384
8455028
8619
89415543
0437
N 1/2-20 Gr. 5 ZP
SLW 1/2 .523 x .873 x .135
HHB 1/2-20 x 1 1/2, Gr. 8
Tank, Air “Ping” 200 cu. in.
FW 1/2 .531 x 1.25 x .100
Elbow 45 deg. 1/4MPTx1/4FPT
Notes:
1.
For best results, the ping tank should be mounted as close to the air spring as possible.
2.
If the air system contains “kneeler” dump valves, the above tank system must be inserted
between the “kneeler” valve and the air spring.
31
D710242
REPLACEMENT INSTRUCTIONS & WARRANTY
R-SERIES
Replacement Instructions
NOTE: Due to the nature of service to be performed it is recommended
that a qualified mechanic do the work.
Limited Warranty
ReycoGranning® warrants its R-Series suspensions to be free from defects in material and workmanship under
normal use and service in the U.S. and Canada.
Main Structural Components -- 24 months or 50,000 miles, whichever occurs first. Defined as: hangers,
beams, clip plates and axle saddles.
Other Air Suspension Components -- 12 months or 24,000 miles, whichever occurs first - valves, fasteners,
bushings, and other components not stated specifically (when provided by ReycoGranning®), and other
fabricated metal components. ReycoGranning® provides no warranties on components such as axles, air
springs, controls, air compressors, brakes, shock absorbers, and hub and drum assemblies, except to the extent
of any warranty provided to ReycoGranning® Suspensions by the manufacturer of such components.
Labor -- 6 months or 12,000 miles whichever comes first. Labor will be allowed on ReycoGranning®
Suspensions estimated time to make repairs at a maximum rate of $50.00 per hour. As used herein, the term
“normal use and service” means that the suspension will be installed, operated, inspected and maintained in
accordance with the applicable ReycoGranning® Suspensions owner’s manual, and any applicable vehicle
owner’s manual or instructions.
Adjustments
The starting date for the above warranty period is the date of purchase of the suspension by the first end user. Proof of
such date is the responsibility of the first end user. If the purchase date is not established to ReycoGranning®
Suspensions satisfaction, the date of manufacture determined from the suspension system’s serial number shall be used
as the effective starting date. When adjustment is sought under this warranty, a claim should be made by contacting the
distributor or manufacturer who installed the suspension, who will coordinate the fix, documentation, parts shipment, etc.
directly with ReycoGranning® Suspensions.
*NOTE* ReycoGranning® Suspensions must be notified in writing using a warranty claim form promptly upon
claimed defect.
INSTALLER AND END USER RESPONSIBILITIES
The Distributor/Installer is responsible for installing the product according to ReycoGranning® Suspensions approved
procedures, the installer is also responsible (either directly or through its agent/dealer) for providing a copy of
ReycoGranning® Suspensions warranty and owner’s manual to the end user, and for advising the end user of proper use,
service and maintenance required for the product. The end user is responsible for operating, inspecting and maintaining
the suspension according to the instructions in the ReycoGranning® Suspensions owner’s manual and any applicable
vehicle owner’s manual, and for properly instructing all operators and maintenance personnel.
*NOTE* Warranty may be denied for improper installation.
LIMITATIONS AND EXCLUSIONS
No warranty applies in the event of: use of components, parts and/or accessories not obtained from or approved by
ReycoGranning® Suspensions or which do not meet ReycoGranning® Suspensions quality and performance
specifications; improper installation, maintenance or repair; misuse or abuse including but not limited to overloading; or
unauthorized alterations or modifications.
THE ABOVE WARRANTIES ARE SUBJECT TO THE “WARRANTY LIMITATIONS” AND “REMEDIES” SECTIONS OR
REYCOGRANNING® SUSPENSIONS INVOICE TERMS AND CONDITIONS.
This policy supersedes any previous warranty statements.
03/2005
32
D710242
INSTALLATION INSTRUCTIONS
Referenced Drawings
RD1370F8 Suspension Installation Drawing, D9931
(Refer to drawing D9931 for all item numbers and views specified in this document.)
Height Control Valve Installation Drawing, D710132
General
Follow the step by step procedure below in the order given for proper installation. Read the
instructions thoroughly before starting installation.
CAUTION: A minimum of 3 inches clearance must be maintained between tailpipe and
air spring. This may require alteration and/or relocation of the tailpipe. All
modifications to the tailpipe must be in accordance with vehicle
manufacturer's recommendations. See Body Builders Layout Book.
VEHICLE PREPARATION:
1.
Secure vehicle by blocking the steering axle wheels and supporting the frame aft of
drive axle.
2.
Raise drive axle to clear tires of ground and support axle.
3.
Remove tires.
4.
Remove the rear helper spring brackets and the leaf springs with rear shackles.
NOTE: Retain all fasteners for air suspension installation.
5.
Remove the jounce bumpers from the frame rails.
6.
Clear all electric, fuel, and hydraulic lines in area of frame of air suspension
mounting. NOTE: Do not brake or disconnect any electrical, fuel or hydraulic lines.
FRAME DRILLING:
1 Wear
• Use backing plate assemblies, items 702150-01 & 702150-02 as templates. Drill
four Ø.431 holes and one Ø.531 per side. See drawing sheet 4 for proper location
on frame. Use existing holes where available and drill out, if necessary.
2 Upper Air Spring Pad Location
• Use upper air spring pad assemblies, items 709872-01 as templates. Drill four
Ø.531 holes per side. See drawing sheet 4 for proper location on frame. Use
existing holes where available and drill out, if necessary.
3 Height Control Valve
• Use the height control valve, items 5608 as templates. Drill two Ø.250 holes per
side. See drawing sheet 4 for proper location on frame. Use existing holes where
available and drill out, if necessary.
AIR SUSPENSION MOUNTING:
1. Backing Plate Assembly Installation
1.1. Materials:
•
•
1 - Backing plate assembly, left - 702150-01
1 - Backing plate assembly, right - 702150-02
33
D710242
INSTALLATION INSTRUCTIONS
•
•
8 – Flange head bolt 3/8-16 x 1.25 – 302
8 – Locking flange nut 3/8-16 - 702605-01
1.2. Instructions
•
•
Install backing plate assemblies, items 702150-01 & 702150-02 using the previously
drilled holes and the fasteners 302 & 702605-01. Install items 302 & 702605-01 in the
jounce bumper holes. See drawing sheet 2 for proper installation.
Torque item 702605-01 to 80 ft-lbs.
2. Wear Pad
2.1. Materials:
•
•
•
•
1 – Wear pad, left - 702149-01
1 – Wear pad, right - 702149-02
8 – Flat countersunk hex screw 3/8-24 x 2.00 – 298
8 – Locking flange nut 3/8-24 – 304
2.2. Instructions:
•
•
Install wear pads, items 702149-01 & 702149-02 to the backing plate assemblies using
the available holes and the fasteners listed above. See drawing sheet 3 for proper
installation.
Torque to 100 in-lbs.
3. Upper Air Spring Pad Installation
3.1. Materials:
•
•
•
•
2 – Upper air spring pad assembly - 709872-01
8 – Flange head bolt 1/2-13 x 1.75 – 276
8 – Locking flange nut 1/2-13 – 308
2 – Reinforcement channel - 703095-01
3.2. Instructions:
•
•
Install the reinforcing channel, item 703095-01, inside of the frame rail. Install upper air
spring pad assemblies, items 709872-01using the previously drilled holes and the
fasteners listed above. See drawing sheet 3 for proper installation.
Torque to 90 ft-lbs.
4. Cross Member Installation
4.1. Materials:
•
•
•
1 – Cross Member – 702140-01
6 – Flange head bolt 3/8-16 x 1.25 – 302
6 – Locking flange nut 3/8-16 – 702605-01
4.2. Instructions:
•
•
Install the cross member, item 702140-01, to top of upper air spring pad assembly
using the fasteners listed above. See drawing sheet 3 for proper installation.
Torque to 35 ft-lbs.
5. Spring Beam Installation
5.1. Materials:
•
•
•
2 – Spring beam assembly – 8891
2 – Existing pivot bolt
2 – Existing nut
5.2. Instructions:
•
Install spring beam assemblies, item 8891 to the hangers using the fasteners listed
above. Do NOT tighten at this time.
6. Axle Wedge Assembly Installation
6.1. Materials:
•
•
1 – Axle wedge assembly, left - 709971-01
1 – Axle wedge assembly, right - 709971-02
34
D710242
INSTALLATION INSTRUCTIONS
6.2. Instructions:
•
Install axle wedge assemblies, items 709971-01 & 709971-02 in between axle seats
and spring beam assemblies. See drawing sheet 3 for proper installation. Be sure
axle wedge assemblies are positioned correctly; they must be centered on spring seats
and parallel to them for proper axle alignment.
7. Wear Tower Assembly Installation
7.1. Materials:
•
•
•
•
•
•
1 – Wear tower assembly LH- 8877
1 – Wear tower assembly RH- 8878
4 – U-bolt – 701740-01
8 – Flat washer 3/4 .812x1.475x.150- 103003
8 – Lock high nut 3/4-16 - 6868
2 – Lower clip plates –8886
7.2. Instructions:
•
•
Install wear tower assemblies, item 8877 & 8878 onto the spring beam assemblies
using the fasteners listed above.
install lower clip plates 8886. See drawing sheet 3 for proper installation. Do NOT
tighten at this time.
8. Lower Air Spring Pad Assembly and Air Spring Assembly Installation
8.1. Materials:
•
•
•
•
•
•
•
•
•
•
1 – Lower air spring pad assembly LH – 700107-01
1 – Lower air spring pad assembly RH – 700107-02
2 – Hex head bolt 1/2-20 x 4.00 – 8455034
2 – Hex head bolt 1/2-20 x 3.30 - 127
4 – Lock nut 1/2-20 - 89422302
2 – Air spring assembly - 8896
2 – Hex head bolt 1/2-13 x 1.00 – 100048-P1
2 – Nut 1/2-13 - 8120378
2 – Slotted lock washer ½ - 8120384
2 – Jam nut 3/4-16 - 8219758
8.2. Instructions:
•
•
•
•
•
•
•
Place lower spring pads items 700107-01 & 700107-02 on spring beams.
Drop hex head bolts, items 127 & 8455034 down in the two inside holes in lower air
spring pad assemblies and tighten using lock nuts 89422302.
Torque to 90 ft-lbs
Place air spring assembly item 8896 on lower air spring pad. Install hex head bolt,
item 100048-P1 up through back hole in lower air spring pad assemblies and attach air
spring assemblies, item 8896. Position air spring assemblies so that the top studs line
up with their mounting holes in the upper air spring pad assemblies. See drawing
sheet 3 for proper installation.
Torque item 100048-P1 to 35 ft-lbs.
Install air spring assemblies to the upper air spring pad assemblies using the available
holes, and nuts, items 8120378, 8120384, & 8219758. See drawing sheet 3 for proper
installation.
Torque to 35 ft-lbs.
9. Axle Alignment
9.1. Materials:
•
None
9.2. Instructions:
35
D710242
INSTALLATION INSTRUCTIONS
•
Make sure the spring beam assemblies are positioned properly. The spring beam
assemblies must be attached properly to the axle wedge assemblies and the axle
wedge assemblies must be attached properly to the axle seats with no space between
any of them. Make sure they are parallel to each other. Position and support the axle
at ride height.
•
Torque spring beam pivot bolts to 380 ft-lbs.
•
Make sure there is no space between the wear tower assemblies and the spring beam
assemblies and they are parallel to each other.
•
Verify the clip plate wear towers are equally spaced on both sides from the wear blocks
and located approximately .090” to .120” away front the wear blocks. If not, adjust axle
location and/or clip plate assembly locations to achieve this. Refer to drawing sheet 1,
section A-A.
•
Torque u-bolt nuts, item 6868 to 250 ft-lbs. A criss-cross pattern must be used to
torque these.
•
AXLE ALIGNMENT NOTE: An improperly aligned axle will result in premature wear of
vehicle’s tires and suspension wear pads.
10. REBOUND STRAP INSTALLATION
10.1.
Materials:
•
2 – Rebound Strap 8.75 – 5449
•
2 – Spacer 2.94” – 6573
•
2 – Spacer 1.20” – 7132
•
2 – Hex head bolt ½-20 x 2.75 – 8455030
•
2 – Hex head bolt ½-20 x 5.00 – 8274318
•
4 – Lock nut 1/2-20 – 89422302
•
2 – Flat Washer ½ - 118
10.2.
Instructions:
•
Install the rebound straps, item 5449 to the backing plate assemblies using the
available holes and items 6573, 8274318, 118, & 89422302. See drawing sheet 3, for
proper installation.
•
Torque item 89422302 to 90 ft-lbs.
•
Install the lower end of the rebound straps to the wear tower assemblies using the
available holes and items 845503089422302, 7132, & 89422302.
•
Torque item 89422302 to 90 ft-lbs
11. Height Control Valve Installation
11.1.
Materials:
•
•
•
•
•
•
11.2.
•
•
•
•
2 – Height control valve – 5608
2 – Height control linkage and studs – 709953-04
4 – Hex head bolt ¼-20 x .75 – 8180020
4 – Nut ¼-20, Gr5 – 8120375
4 – SLW ¼ - 8120380
4 – Lock Nut - 8454750
Instructions:
Install height control valve 5608 using 8180020, 8120375, & 8120380
Torque to 8 ft.lbs.
Install linkage 709953-04 using 8454750
Torque to 10 ft.lbs
36
D710242
INSTALLATION CHECK LIST
Suspension Information: RD1350F
Installer:
Installation Date:
Inspector:
Inspection Date:
Model Number:
Suspension Serial Number:
V.I.N. Number:
Air Kit:
Options:
Referenced Drawings
Installation Drawing
D9931
Height Control Valve Kit D710132
1
2
3
Frame Drilling
Hole position as required on installation drawing. Note: Holes must be drilled, not torched.
Wear Block Installation
Backing plate installed.
Mounting bolts properly torqued. Torque measured at ___________.
Wear block mounting bolts not overtorqued (wear block not warped). Torque measured at
___________.
Beam Installation
Pivot bolts reinstalled correctly.
Pivot bolt torque correct at ride height. Torque measured at ___________.
Beam alignment pin seated correctly in spacer.
Spacer alignment pin seated correctly in axle mount (seat).
4
Clip Plate and U-Bolt Installation
Clip plate installed with correct orientation.
U-bolts installed and torqued correctly at ride height. Torque measured at __________.
Clearance between wear tower and wear block correct. Clearance measured at _________.
5
Air Spring Installation
Air spring position correct and installed without any twist
Adequate clearance around air spring to prevent chafing, puncturing, or overheating (from
exhaust). Recommend 1” clearance around air spring to prevent chafing or puncturing.
Recommend min. 3” clearance to any part of the exhaust system.
6
Height Control Valve (HCV) Installation
HCV positioned correctly with clearance around air springs.
Linkage installed correctly with clearance around air springs.
Linkage is the correct length (10.19”).
(1) Linkage length is ___________.
Air lines installed to proper port on HCV (see Height Control Valve Installation Drawing,
D710132).
7
Air Kit Installation
Air tank assy. installed correctly (Automatic moisture emitter on bottom of tank).
Dump Valve (kneeler valve) installed with exhaust port down.
All air line fittings to be installed with Permatex sealant or equivalent on threads. Teflon tape is
not to be used.
Air line SAE DOT brake line and protected in the installation with loom to prevent chafing or
pinching on sharp edges.
Electrical line wired correctly with 10 AWG. min. wire and protected to prevent cutting or chafing.
NOTE: Improper wire size may cause compressor failure.
Air lines and wiring installed without loops or bends.
37
D710242
INSTALLATION CHECK LIST
Verify check valve orientation out of the compressor head, arrow is to point away from
compressor.
Air Compressor installed in a well ventilated enclosure and wired correctly (positive to terminal
labeled A1 & negative to terminal labeled A2). NOTE: Enclosure must protect the compressor
from adverse environmental conditions (see compressor decal). Failure to do so may void
warranty.
Air compressor higher than tank assy.
Check air compressor operation.
Verify ride height. Remove excess linkage rod to prevent readjustment. _____ Height measured.
Check air system for air leaks using a soapy water solution.
8
8 . Ping Tanks
Ping tanks installed as close as possible to the air springs.
All air line fittings to be installed with Permatex sealant or equivalent on threads. Teflon tape is
not to be used.
Air line SAE DOT brake line and protected in the installation with loom to prevent chafing or
pinching on sharp edges.
9
Additional Observations and Comments
38
D710242