1
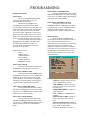
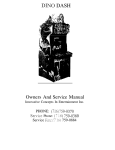
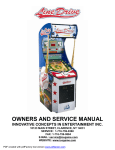
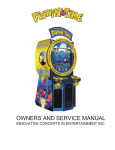
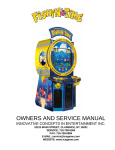
DINO DASH
Owners And Service Manual
Innovative Concepts In Entertainment Inc.
PHONE: (716)759-0370
Service Phone: (716) 759-0360
1
DINO DASH
Service Fax: (716) 759-0884
2
TABLE OF CONTENTS
INTRODUCTION:
Game Features
Game Play
ASSEMBLY:
Set-up
Testing
Volume Control
PROGRAMMING YOUR GAME:
Programming mode
MAINTENANCE:
Cleaning
PARTS LISTING
Mechanical parts
Electrical Parts
Decals/Graphics
SCHEMATICS
WARRANTY INFORMATION
3
INTRODUCTION
Description / Game play:
Players are allowed to choose any of four loveable characters to race. After being
given the ready-set-go, players can run either by holding the Run button, or tapping it
repeatedly, which makes faster speeds possible.
During the race, four obstacles will be presented. Players may attempt to avoid
tripping over the obstacles by pressing their Jump button. Successfully clearing an
obstacle earns the player a few tickets, and also makes the next obstacle that will be
encountered harder, but worth more tickets if cleared.
There is also a ticket on the far side of each obstacle. Landing precisely on top of
the ticket will earn the player an additional ticket bonus. Hitting these tickets is about as
hard as the hardest jump, providing a challenge for the more skilled players. As with the
jumps, the amount each such target is worth depends on the player’s previous success.
At the end of the race, a sign proclaims the number of tickets that the winner of
the race will earn. This number is changing randomly and it’s final value is determined
by the time that the first dino crosses the finish line. The random value gives players of
all levels a chance at the jackpot.
4
ASSEMBLY
SET UP:
To avoid unnecessary movement of the game, setup the game in its permanent location.
The footprint is approximately 33” x 35”.
After completely removing all the packaging from the unit, remove the tape over the coin
return. These keys are for the cash box door. The rest of the keys and power cord will be
in the cash box.
The next step is to simply plug the unit in and turn the switch on. It is a good idea to clean
the game with soapy water.
WARNING
Replace all incandescent bulbs with proper ICE supplied bulbs only.
5
PROGRAMMING
ADJUSTMENTS - provides viewing,
changing, and resetting of system
adjustments.
BEST SCORES - provides viewing and
resetting of best scores, either all at
once or by track.
CREDITS - provides information and
control of current credits.
TESTS - provides a number of system
testing functions, in several groups:
VIDEO TESTS - provides an
ample assortment of test
screens for evaluating the
condition of the monitor.
GRAPHIC USES - primarily
development function that is of
little practical use to operators.
LOADED GRAPHICS - as
previous.
LOADED PALETTES - as
previous.
SOUND TEST - allows
sounds to be played on demand
to test the speakers etc.
SWITCH TEST - shows
open/closed state of all input
switches.
MECHANICAL TEST allows testing of meters, ticket
dispensers, and lamps.
Diagnostics
You will find that Dino Dash comes
with a detailed auditing system that grants a
tremendous degree of control over your machine.
To enter the service mode, locate the small slide
switch on the I/O board and flip it into the 'on'
position. To exit the service mode, flip this
switch back into the 'off' position (certain modes,
such as the switch test, changing adjustments,
and test screens, may need to be also completed
in addition to flipping the switch back.)
Navigating
Use the right set of player switches to
move within the menus. The Jump (left) button
moves left through a menu, and the Run (right)
button moves right through a menu. The left set
of player switches either descend into the next
menu or activate a service function. Both buttons
in the left set have exactly the same operation,
and are called 'action' buttons in this
documentation. Exceptions will be noted. The
currently highlighted menu item is shown in
white, while the other items are shown in shades
of blue.
Menu Overview
Here and throughout the document, text
that appears on screen is shown in ALL CAPS,
just as it is displayed.
Main menu - all other menus descend from this
top level.
INFO - system name, build date, and
version number, as well as at-a-glance
errors and more.
AUDITS - provides viewing and
resetting of the system audits.
6
PROGRAMMING
Main->INFO->AUDIO HW INFO
Pressing an action button while AUDIO
HW INFO is highlighted will switch to the debug
log (as above, see DEBUG INFO) displaying the
capabilities of the audio hardware.
Detailed Descriptions
Main->INFO
The above notation means 'the INFO
item of the main menu' and will be used
throughout these descriptions.
While INFO is highlighted, the
descending menu will show the unit name,
version number, and software creation date. The
elapsed time since system startup is displayed as
well. Also, if there have been any automatic
resets of the audits, adjustments, or best scores
due to error since the last entry to service mode,
those events will be noted here (each will also be
noted on it's own sub-menu of the main menu)
Pressing an action button while INFO is
highlighted will descend into the INFO menu.
The functions available under INFO are
primarily hardware capabilities and of little
practical use to operators.
Main->INFO->MEMORY USEAGE
Pressing an action button while
MEMORY USEAGE is highlighted will switch
to the debug log (as above, see DEBUG INFO)
displaying the peak memory usage of the
program, and the current free physical memory.
Main->AUDITS
While AUDITS is highlighted, the
descending menu will show all system audits, as
well as any tickets awarded, but not yet
dispensed by the ticket dispensers. The pending
tickets will usually be zero unless a ticket
dispenser is currently out of tickets, and unlike
'real' audits, they are not saved if power is lost. If
the audits have been automatically reset due to
error since the last entry to service mode, that
will also be noted.
INFO has these options:
BACK
DEBUG INFO
VIDEO HW INFO
BLIT SPEEDS
AUDIO HW INFO
MEMORY USAGE
Main->INFO->BACK
Pressing an action button while BACK
is highlighted will return to the main menu.
Main->INFO->DEBUG INFO
Pressing an action while DEBUG INFO
is highlighted will switch to a screen showing the
debug log. If no errors have occurred, all that
will be displayed is several lines of information
indicating a successful startup. Press any player
switch to return to the normal service mode.
The system audits are:
COINS IN - number of times the coin
switch signal has been received.
PAID CREDITS - number of credits
granted as a result of the coin switches
receiving coins.
OPERATOR CREDITS - number of
credits granted via
Main->CREDITS->AWARD FREE
CREDIT.
ONE PLAYER GAMES - number of
times a single player has a played a
game.
TWO PLAYER GAMES - number of
times two players have a played a single
game. Each two player game
increments this audit by one, not two.
Main->INFO->VIDEO HW INFO
Pressing an action button while VIDEO
HW INFO is highlighted will switch to the debug
log (as above, see DEBUG INFO) displaying the
capabilities of the video hardware.
Main->INFO->BLIT SPEEDS
Pressing an action button while BLIT
SPEEDS is highlighted will switch to the debug
log (as above, see DEBUG INFO) displaying the
results of simple speed tests on the hardware
blitter.
7
PROGRAMMING
SETTINGS is set to something other than
manual, many of the payout adjustments will be
disabled because their values are being
controlled by the system. If an adjustment has
three defaults listed, those are the defaults under
LOW, MEDIUM, and HIGH payout settings.
PRIZES - number of prizes successfully
dispensed from either dispenser.
AVERAGE GAME TIME - average
number of seconds during each game
spent in the race.
Pressing an action button while
AUDITS is highlighted will descend to the
AUDITS menu. The AUDITS menu has the
following options:
BACK
CLEAR AUDITS
CLEAR PENDING PRIZES
The system adjustments are:
Page One (Misc.):
VOLUME (default: 5, range 0(OFF)10) - controls the software volume for
all sound and music.
ATTRACT SOUNDS (default: OFF,
range OFF, ON) - if OFF the game will
not make any noise when no one is
playing it. If ON, it will regularly play a
piece of music and play random sounds
to grab player’s attention.
SCORE RESET DAYS (default
0(OFF), range 0(OFF)-60) - if this many
days have transpired since the last
automated score reset, all of the best
scores will be reset to factory defaults.
SCORE RESET PLAYS (default
0(OFF), range 0(OFF)-1000 in steps of
100) - if this many games (ONE
PLAYER GAMES + TWO PLAYER
GAMES) have been played since the
last automatic score reset, all of the best
scores will be reset to factory defaults.
PLAY WHILE PRIZES OUT?
(default YES, range NO, YES) whether the game will exit from the
payout screen while one of the
dispensers is empty. If YES, it will exit
after several seconds and allow more
games to be played, but players will not
be able to receive prizes from the empty
dispenser until the prizes are refilled,
and the appropriate dispenser reset
switch is pressed. At that time, all
prizes that have been awarded since the
dispenser ran out will be dispensed.
JUMP SPACING (default MEDIUM,
range SHORT, MEDIUM, LONG) amount of space placed before each
jump on the track. If SHORT is one
unit, then MEDIUM is two units, and
LONG is three units.
JUMP NUMBER (default 4, range 14) - number of jump chances in each
track. If there are fewer than four, the
player will never get a chance at the
hardest jumps.
Main->AUDITS->BACK
Pressing an action button while BACK
is highlighted will return to the main menu.
Main->AUDITS->CLEAR AUDITS
Pressing an action button while CLEAR
AUDITS is highlighted will reset all audits to
zero.
Main->AUDITS->CLEAR PENDING
PRIZES
Pressing an action button while CLEAR
PENDING PRIZES is highlighted will set to zero
the pending, un-dispensed prizes for both
dispensers. This will rarely be needed, except
perhaps if a dispenser malfunction has allowed
an excessive number of prizes to build up.
Main->ADJUSTMENTS
While ADJUSTMENTS is highlighted,
the descending menu will show a subset of the
system adjustments, since there are more than
can fit on the screen at one time. If the
adjustments have been automatically reset due to
error since the last entry to service mode, that
will also be noted. If an adjustment is shown in
blue, it is disabled because of another
adjustment. For instance, while PAYOUT
8
PROGRAMMING
PAYOUT SETTINGS (default
MEDIUM, range MANUAL, LOW,
MEDIUM, HIGH, NEW JERSEY) – In
MANUAL, all settings are available for
operator control for fine tuning. LOW,
MEDIUM, and HIGH allow for easy
setting of common payout levels. NEW
JERSEY payout enables the
IMMEDIATE PRIZES adjustment
(which must them be set by the
operator) and disables all other payouts.
Page Two (Credits):
CS1 COINS IN (default 1, range 1-10)
- number of coins received in coin
switch one needed to trigger CS1
CREDITS and CS1 METER CLICKS.
CS1 CREDITS (default 1, range 1-10)
- number of credits granted each time
coin switch one is triggered by receiving
CS1 COINS IN number of coins.
CS1 METER CLICKS (default 1,
range 1-10) - number of times the coin
meter is advanced each time coin switch
one is triggered by receiving CS1
COINS IN number of coins.
CS2 COINS IN, CS2 CREDITS, CS2
METER CLICKS - as with coin switch
one, but for the second coin switch.
CREDITS NEEDED (default 1, range
1-10) - number of credits need for each
player to play a game. In most cases you
can adjust this value and ignore the coin
switch settings.
MAXIMUM CREDITS (default 30,
range 2-100) - if credits are received in
excess of this number, they will be
ignored.
9
PROGRAMMING
JACKPOT (default 100, range 0(OFF)1000 in steps of 10) - This should be
highest random payout available. It
otherwise functions the same as
RANDOM POINTS x, except that it
goes in steps of ten, and setting it zero
disables the random payout feature. The
jackpot is also shown in bright text
when the sign at the end of the race is
showing possible values.
AVG RANDOM POINTS (default 2,
4, 4, range 0(OFF)-100) - This controls
the average payout for the random
points. It will often pay out lower,
offset by the occasional jackpot or other
high payout. Since the random point
bonus is only paid to the winner of a
race, the overall average payout from
random points should actually be about
half this, but it can be adjusted if it is
found that most players are either
winning or losing.
Page Three (Payout):
IMMEDIATE PRIZES (default 0,
range 0-100) - Number of prizes that are
dispensed as soon as a coin in is
inserted, to support New Jersey style
payout. As the only available crutch for
determining where to dispense the
prizes, a coin inserted in coin switch one
triggers prizes from dispenser one, and
switch two to dispenser two. (Unlike
the other prize adjustments, this one is
independent of ‘points.’)
POINTS TO GET 1 PRIZE (default 1,
range 0(OFF)-100) - Number of points a
player must get to receive each prize.
WINNER POINTS (default 0(OFF),
range 0(OFF)-100) - Number of points
(see POINTS TO GET 1 PRIZE above)
awarded to a player for crossing the
finish line first. This allows for a fixed
amount awarded to the winner. By
default, the random points are awarded
to the winner of a race instead.
LOSER POINTS (default 0(OFF),
range 0(OFF)-100) - Number of points
(see POINTS TO GET 1 PRIZE above)
awarded to a player for crossing the
finish line second (last).
HIGH SCORE POINTS (default 1, 2,
4, range 0(OFF)-100) - Number of
points (see POINTS TO GET 1 PRIZE
above) awarded to a player for getting a
time good enough for the current track's
top-ten table.
MIN RANDOM POINTS (default 0,
1, 1, range 0-100) - Generally works as
RANDOM POINTS x below, expect
that no probability calculations are
done; instead, any time one of the other
random payout levels (or the jackpot) is
not awarded, MIN RANDOM POINTS
is awarded. Therefore, it should
probably not be anything besides zero
or one.
RANDOM POINTS x [2-5] (defaults
2, 5, 10, 20, range 0-100) - These,
together with MIN RANDOM POINTS
and JACKPOT, define the payout levels
for the random points. The chance of
paying out each level is based on the
amount of that value and AVG
RANDOM POINTS, so that a setting of
20 will be paid approximately once for
every ten 2s that are paid, and so on.
10
PROGRAMMING
4TH TARGET POINTS to 0(OFF) will
also disable the target feature.
Page Four (More Payout)
JUMP x POINTS (defaults (1, 1, 1, 2),
(1, 1, 2, 3), (1, 2, 3, 4), range 0 -100) During the game, the player is presented
with up to four obstacles. Clearing an
obstacle earns the player points (which
become prizes). Each successful jump
awards the points and presents the
player with a more difficult obstacle at
his next jump. Since there are four
obstacles and four types of obstacles,
only a player who make all four jumps
will be able to add JUMP 4 POINTS to
his score. If a player misses a jump and
trips, he will be presented with the same
obstacle again and again until either he
makes it or the game ends. A very poor
player who cannot clear jump class 1
will earn no points/prizes from jumps.
A player who can clear jump classes 1,
2, and 3 but not 4 will earn (in medium
settings) 1+ 1 + 2 points, or 4 total from
jumps.
TARGET SIZE (default 80%, 100%,
120%, range 0%(OFF)-200% in steps of
5%) - On the far side of each jump is a
target, in the form of a large ticket.
Landing precisely in the target area will
award the player the number of points
shown on the target. The default
difficulty of hitting the target is
approximately equal to that of clearing
the class 4 obstacle, but because there
are four chances per race, hitting one or
two targets is not unusual, but hitting all
four is nearly impossible. This
adjustment controls the size of (and
therefore difficulty of hitting) each
target. For ease of use it is listed as a
percentage of the default size. At 50%
it is half as small as the default size, at
200% it is twice as big. Due to the
amount of space covered by a player
during a program cycle, sizes below
about 25% may be completely
impossible to hit. A setting of 0%
disables the target feature.
1ST-4TH TARGET POINTS (defaults
(1, 1, 2, 10), (1, 2, 5, 20), (1, 2, 5, 20),
range 0-100) - These control the
payouts of each target. The first target
that a player hits is worth 1ST TARGET
POINTS, the second is worth 2ND
TARGET POINTS, and so on. Setting
Pressing an action button while
ADJUSTMENTS is highlighted will descend
into the ADJUSTMENTS menu. The
ADJUSTMENTS menu has the following
options:
BACK
NEXT PAGE
CHANGE
RESET ADJUSTMENTS
Main->ADJUSTMENTS->BACK
Pressing an action button while BACK
is highlighted will return you to the main menu.
Main->ADJUSTMENTS->NEXT PAGE
Pressing an action button will cycle
through the adjustment pages. It changes from
Page One to Two, Two to Three, Three to Four,
and Four back to One.
Main->ADJUSTMENTS->CHANGE
Pressing an action button while
CHANGE is highlighted will put you into the
adjustment change mode. A highlight box will
appear on the current adjustment, and the
controls will function differently. Pressing an
action button will move you down one to the next
adjustment. Pressing an action button while on
the last adjustment will return you to the normal
ADJUSTMENT menu, with CHANGE
highlighted. Pressing the Jump button on the
right-hand control set while in change
adjustments mode will decrease the current
adjustment by one, and pressing the Run button
on the right-hand control set while in change
adjustments mode will increase the current
adjustment by one.
Main->ADJUSTMENTS->RESET
ADJUSTMENTS
Pressing an action button while RESET
ADJUSTMENTS is highlighted will reset all
adjustments to their factory defaults.
Main->BEST SCORES
While BEST SCORES is highlighted,
the descending menu will show a set of the best
scores. If the best scores have been
automatically reset do to error since the last
service, that will also be shown.
11
PROGRAMMING
Pressing an action button while BEST
SCORES is highlighted will descend into the
BEST SCORES menu. The BEST SCORES
menu has the following options:
BACK
NEXT SET
CLEAR SHOWN
RESET SHOWN
CLEAR ALL
RESET ALL
Main->CREDITS
While CREDITS is highlighted, the
descending menu will show the current number
of unused credits, as well as the value of the
MAXIUM CREDITS adjustment.
Pressing an action button while
CREDITS is highlighted will descend into the
CREDITS menu. The CREDITS menu has the
following options:
BACK
AWARD FREE CREDIT
DEDUCT CREDIT
+ MAX CREDITS
- MAX CREDITS
Main->CREDITS->BACK
Pressing an action button while BACK
is highlighted will return you to the main menu.
Main->BEST SCORES->BACK
Pressing an action button while BACK
is highlighted will return you to the main menu.
Main->BEST SCORES->NEXT SET
Pressing an action button while NEXT
SET is highlighted will change the currently
displayed set of scores, where each set is the ten
best times for one possible track.
Main->CREDITS->AWARD FREE CREDIT
Main->CREDITS->DEDUCT CREDIT
Pressing an action while one of these
menu items is highlighted will increase or
decrease the current unused credits.
Main->BEST SCORES->CLEAR SHOWN
Pressing an action button while CLEAR
SHOWN is highlighted will clear the name fields
and reset the scores to zero in the ten scores
currently displayed.
Main->CREDITS->+ MAX CREDITS
Main->CREDITS->- MAX CREDITS
Pressing an action while one of these
menu items is highlighted will increase or
decrease the MAXIUM CREDITS adjustment.
Main->BEST SCORES->RESET SHOWN
Pressing an action button while RESET
SHOWN is highlighted will reset the scores
currently displayed to factory defaults.
Main->TESTS
While TESTS is highlighted, the
descending menu will show available test
categories.
Pressing an action button while TESTS
is highlighted will descend into the TESTS
menu. The TESTS menu has the following
options:
BACK
VIDEO TESTS
LOADED GRAPHICS
SOUND TEST
SWITCH TEST
MECHANICAL TESTS
Main->BEST SCORES->CLEAR ALL
Pressing an action button while CLEAR
ALL is highlighted will clear the name fields and
reset the scores to zero in all scores stored in the
system.
Main->BEST SCORES->RESET ALL
Pressing an action button while RESET
ALL is highlighted will reset all scores stored on
the system to factory defaults.
12
PROGRAMMING
Main->TESTS->SOUND TEST->BACK
Pressing an action button while BACK
is highlighted will return you to the TESTS
menu.
Main->TESTS->BACK
Pressing an action button while BACK
is highlighted will return you to the main menu.
Main->TESTS->SOUND TEST->PLAY
Pressing an action button while PLAY
is highlighted will play the current sound effect.
Main->TESTS->VIDEO TESTS
While VIDEO TESTS is highlighted,
the descending menu will list the screens which
may be put up.
Pressing an action button while VIDEO
TESTS is highlighted will descend into the
VIDEO TESTS menu. Each item on the VIDEO
TESTS menu is a static screen designed to test
one or more aspects of the monitor. Press the an
action button while the desired test is highlighted
to switch to that screen, and then press any player
switch to return to the VIDEO TESTS menu.
The VIDEO TESTS menu has the following
options:
BACK - not a screen; returns you to the
TESTS menu.
RED - a solid red screen.
GREEN - a solid green screen.
BLUE - a solid blue screen.
GRADIENT - shows gradients of
several basic colors.
COLOR SPACE - shows all possible
colors that may be displayed by the
system.
ALIGNMENT - shows a pattern of
lines and dots for checking monitor
alignment.
Main->TESTS->SOUND TEST->NEXT
Pressing an action button while NEXT
is highlighted will advance to the next sound
effect and then play it.
Main ->TESTS->SOUND TEST->STOP
Pressing an action button while STOP is
highlighted will stop the current sound effect
from playing.
Main->TESTS->SWITCH TEST
While SWITCH TEST is highlighted,
the descending menu will show all input switches
and their current state. Each switch has it's
OPEN/CLOSED displayed, and after
successfully executing the switch test, PASSED
will be displayed for each switch that was seen in
both the OPEN and the CLOSED states. At the
bottom of the switch test box are the raw bits
coming out of the I/O board.
Main->TESTS->GRAPHIC USES
Main->TESTS->LOADED GRAPHICS
Main->TESTS->LOADED PALETTES
These features are largely of use for
development and debugging. << and >> are
short for previous and next.
Pressing an action button while
SWITCH TEST is highlighted will execute the
switch test mode. The highlight will descend to
the switch test box, and any previous PASSED
flags will be cleared. Pressing and then releasing
a switch will cause a PASSED to appear by that
switch, as it has now been seen in both the OPEN
and CLOSED states. You must pass all player
switches (those displayed without parentheses
around them in the switch list) to exit the switch
test and return to the TESTS menu.
Main->TESTS->SOUND TEST
While SOUND TEST is highlighted, the
descending menu will show the available options.
Pressing an action button while SOUND
TEST is highlighted will descend into the
SOUND TEST menu. The SOUND TEST menu
has the following options:
BACK
PLAY
NEXT
STOP
13
PROGRAMMING
Main->TESTS->MECHANICAL TESTS
While MECHANICAL TESTS is
highlighted, the descending menu will show the
current input/output state of all prize dispensers
and meters. Each will show a DRIVE signal if it
is active, and the prize dispensers will also show
a NOTCH signal (though it may be too quick to
appear graphically.) In addition, the
DISPENSER EMPTY state of the prize
dispensers is shown.
Pressing an action button while
MECHANICAL TESTS is highlighted will
descend into the MECHANICAL TESTS menu.
Most functions will simply test the associated
device; COIN METER will increment the coin
meter by one, and so on. The MECHANICAL
TESTS menu has the following options:
BACK - returns you to the TESTS
menu.
COIN METER
DISPENSER METER
DISPENSER 1
DISPENSER 2
LAMPS - turns all lamps on until the
LAMPS item is un-highlighted
CLEAR PENDING PRIZES - sets to
zero the pending prizes for both dispensers.
14
PARTS LISTING
MECHANICAL PARTS:
DD3006
DD3007
DD3027
MZ2005
5001
5008
Marquee housing rock
Marquee letters
Cover glass
Button 4” round
Coin door over/under
Ticket door
ELECTRONIC PARTS:
DD8277
DD8283
DD8284x
MON29v
HD2364
HH5005
Hard drive
Fluorescent 24” HO bulb
Ballast
Monitor 29” VGA
Fan
Ticket dispenser Entropy
GRAPHICS & DECALS
DD7001
DD7002
DD7003
DD7005
DD7013
DD7027
DD9001
Decal side panel right
Decal side panel left
Front panel
Decal button set
Decal control panel
Decal marquee
Service manual
15
WARRANTY
I.C.E warrants all components in the Dino DashÔ game to be free of defects in materials and
workmanship for a period of ninety days from the date of purchase.
This warranty does not cover items damaged due to normal wear and tear, subjected to abuse,
improperly assembled by the end user, modified, repaired, or operated in a fashion other than
that described in the service manual.
If your Dino DashÔ game fails to conform to the above-mentioned warranty, I.C.E.'s sole
responsibility shall be at its option to repair or replace any defective component with a new or
remanufactured component of equal to or greater O.E.M. specification.
I.C.E. will assume no liability whatsoever, for costs associated with labor to replace defective
parts, or travel time associated therein.
I.C.E.'s obligation will be to ship free of charge, replacement parts by U.P.S. Ground, U.S. mail,
or other comparable shipping means. Any express mail or overnight shipping expense is at the
cost of the purchaser.
· Products will be covered under warranty only when:
· The serial number of the game with the defective parts is given.
· The serial number of the defective part, if applicable, is given.
· Defective parts are returned to I.C.E., shipping pre-paid, in a timely fashion, if requested
by I.C.E.
· A copy of the sales receipt is available as proof of purchase upon request of I.C.E.
I.C.E. distributors are independent, privately owned and operated. In their judgment, they
may sell parts or accessories other than those manufactured by I.C.E. We cannot be
responsible for the quality, suitability, or safety of any non-I.C.E. part, or any
modification, including labor, which is performed by such a distributor.