1
● DIGITAL KEY TELEPHONE / Quick Reference Guide
KD, KD/E, LKD Series
Fixed Feature Buttons
●
●
●
●
●
●
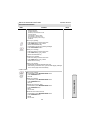
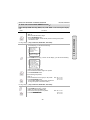
FLASH button is used to terminate an outside call
and re-seize dial tone without having to hang up
the handset.
SPEED button provides you with access to speed
dialing, save number redial and last number redial.
TRANS (TRANSFER) button is used to transfer an
outside call from a station to another.
CALLBK (CALLBACK) button allows you to leave
a callback indication at a station that is busy,
unattended, or in Do Not Disturb.
CONF button is used to establish conference calls.
DND/FWD (Do Not Disturb/FORWARD) button
allows you to forward your calls to another
destination, or make DND mode.
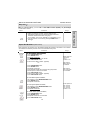
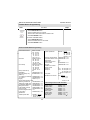
Call Forward
●
●
●
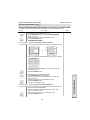
Press MON/SPEAKER button.
button
Press DND/FWD button and dial the desired Call
Forward type.
- 0 : Follow me (not available in GDK-16/20W)
- 1 : Unconditional
- 2 : Busy calls
- 3 : No answer calls
- 4 : Busy/no answer calls
- 5 : Station off-net
- 6 : Incoming outside line to off-net (Sys. ATD only)
- 7 : No Answer DVU forward-1(after 4sec)
- 8 : No Answer DVU forward-2(after predefined time)
- 9 : Busyy DVU forward
- # : Cancel previous call forward
Dial the station number or press DSS button or
intercom group where calls are forwarded.
(Confirmation tone is heard.)
●
●
●
●
●
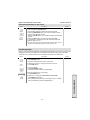
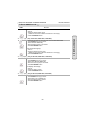
MUTE button allows you to switch the built in
microphone on or off when using the speakerphone
or the handset microphone when using the handset.
MON/SPEAKER button enables you to make a phone
call without lifting handset. It turns the telephone on
and off when using the speakerphone.
HOLD button enables you to place an outside caller
on hold.
REDIAL allows you to make last number redial and
auto call number redial.
▼ VOLUME ▲ bar allows you to adjust speakerphone
and handset volume.
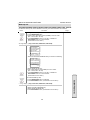
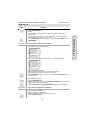
Leaving a Message Waiting Indication
If you dial a station that is unattended or in Do
Not Disturb, you can leave a message waiting
indication.
● Dial the desired intercom station. Busy tone or
DND tone is heard.
● Press CALLBK button. The called party’s CALLBK
button LED will flash.
To answer a Message Waiting Indication,
Press flashing CALLBK button and the station that
left message will be signaled with tone ringing.
● If called station does not answer, press the CALLBK
g
button once to leave a message.
●
Placing an Outside Call on Hold
If you dial a busy station, you may alert it to your call.
● After receiving intercom busy tone, dial * or the last
digit of called station number or press DSS button.
● When the called party answers, consult with them
or hang up to transfer the call, if any.
While connected to an outside line,
● Press HOLD/SAVE button.
- Once for system hold
- Twice for exclusive hold
● Reverse if hold preference is programmed to
system hold.
● Press HOLD/SAVE button. (in GDK-16/20W)
CO line call will be put on hold according to the
Hold Preference.
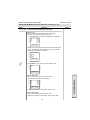
Conference
Last Number Redial
Call Wait (Camp-on)
●
●
●
Call the desired party (internal or outside). When
called party answers, press CONF button.
Add next conference party by selecting another
outside line or intercom station.
When the party answers, press CONF button twice.
All parties are connected.
To terminate a conference,
The conference initiator should be actively in the
conference.
● Hang up, or press CONF button to finish the
conference (only for conference initiator).
The last dialed number on an outside line is saved.
● Press REDIAL button. Or,
● Press SPEED button and dial *.
Save Number Redial (*)
If you wish to save a number you dialed,
● After dialing the number of an outside party, keep
the handset off-hook.
● Press SPEED button twice.
To dial a saved number,
● Press SPEED button and dial #.
Note : The feature which is marked
(*), is not available in GDK-16/20W.
Quick Ref. Guide
Quick Reference Guide for Digital Key Telephone
● DIGITAL KEY TELEPHONE / Quick Reference Guide
KD, KD/E, LKD Series
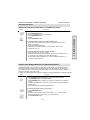
Call Transfer
While connected to an outside call,
● Press TRANS/PGM button.
● Dial station number or DSS button.
(You can select a screened or unscreened transfer.)
Screened Transfer
When that extension answers, announce the transfer
and hang up to complete call transfer.
f
Unscreened Transfer
When the called extension begins to signal, hang up
to complete call transfer.
Storing Speed Dial Numbers
Press TRANS/PGM button and then SPEED button.
Dial the speed number bin.
- Station Speed Number bin : 00~19
01~20 (GDK-16/20W)
- System Speed Number bin : 200~999 (GDK-186)
(Attendant programmed)
200~399 (GDK-100/34i)
21~99 (GDK-16/20W)
● Dial the phone numbers to be stored.
● Press HOLD/SAVE button to save the number.
●
●
To erase an exiting speed bin,
● Press TRANS/PGM button and then SPEED button.
● Dial speed number bin to be erased.
● Press HOLD/SAVE button.
Dialing a Speed Number
●
●
Press SPEED button and dial the speed number
bin.
Wh the
When
th called
ll d party
t answers, pick
i k up the
th h
handset
d t
or use speakerphone.
Voice Over (*)
It is available when the station has been programmed
with voice over.
● When a busy keyset engaged in an internal or
external call is called through camp-on by a caller,
HOLD/SAVE button of busy keyset is flashing.
● After tone, the busy keyset will be connected to
both parties.
Queuing (*)
You see that a particular line is busy and want to be
placed on a list waiting for the first line in the group
or station to become available.
● Lift handset or press MON/SPEAKER button.
● Press the busy outside line button, specific line
group button or DSS button.
● Pressing CALLBK button, your CALLBK button
is lighting and confirmation tone is heard.
● Hang up or press MON/SPEAKER button.
To answer a queue request,
● When the busy outside line button, specific line
group button or DSS button returns to idle, you
hear ringing and the queued line button flashes.
● Lift handset and dial outside line.
Attendant Clock Set
The attendant can set the Time/Date without entering
Admin. Programming.
● Press TRANS/PGM button.
● Dial # 1.
● Enter Date/Time. (YYMMDDHHmm)
If there is no need to change date or time, press * key.
● Press HOLD/SAVE button.
In GDK-16/20W,
● Press TRANS/PGM button.
● Dial # 1.
● Enter Date (YYMMDDHH) and press HOLD/SAVE
button.
● Enter Time (HHmm) and press HOLD/SAVE button.
If th
there iis no need
d tto change
h
d
date
t or ti
time, d
do nott di
diall
current date/time and press HOLD/SAVE button.
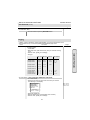
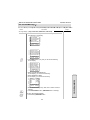
Flexible Buttons Programming
●
●
●
●
Press TRANS/PGM button.
Press a flexible button to be programmed.
See the below chart and dial the desired code.
Press HOLD/SAVE button.
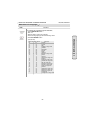
Direct Station Select
100~291 (GDK-186)
100~171 (GDK-100)
100~133 (GDK-34i)
100~115 (GDK-16)
100~133 (GDK-20W)
Call Park
601~619 (GDK-186)
601~610 (GDK-100)
601~605 (GDK-34i)
601~606 (GDK-16/20W)
Call Wait (Camp-on)
TRANS/PGM + 8 5
Station Speed Dial
SPEED + bin no.
(00~19 / 01~20:GDK-16/20W)
System Speed Dial
SPEED + bin no.
200~999 (GDK-186)
200~399 (GDK-100/34i)
21 99 (GDK
21~99
(GDK-16/20W)
16/20W)
All Call Page
4 9 (# 0 in GDK-16/20W)
Universal Night Answer 6 9
Last Number Redial
SPEED + *
Save Number Redial(*) SPEED + #
To erase a flexible button,
● Press TRANS/PGM button.
● Press the flexible button to be erased.
● Press HOLD/SAVE button.
Quick Ref. Guide
Quick Reference Guide for Digital Key Telephone
● DIGITAL KEY TELEPHONE
KD, KD/E, LKD SERIES
CONTENTS
Digital Key Telephone Family............................................................................................................……. 5
Button Arrangement for Digital Key Telephone Family ..................................................................... …. 7
3
System Featurres
System Features
Placing an Intercom Group Call..........................................................................................................……...24
Placing a CO Call on Hold ...................................................................................................................….… 24
Group Call Pick-up...............................................................................................................................….... 24
Conference ....................................................................................................................…………………... 25
Access Authorization Code...................................................................................................................... ... 26
Blocking Outside Calls .........................................................................................................................…… 27
Restoring Outside Calls .......................................................................................................................…... 27
Wake-up Call ..........................................................................................................................……………... 28
Using Dial By Name ............................................................................................................................……. 29
Programming Your Name into Display .................................................................................................…... 31
Pre-selected Message ..........................................................................................................................….. 31
User Custom Message Programming ...................................................................................................…... 32
Background Music...................................................................................................…………………………. 33
DISA (Direct Inward System Access) ..................................................................................................……. 33
Voice Announcement ...............................................................................................….………………………34
CO Message Wait ………………………………………………………………………………………..…………… 37
LCD Language Change ...................................................................................................………………….. 38
Alarm Reset ...................................................................................................…………………………………38
Two-way Recording ……………………………………………………………………………………………………38
Auto Call Distribution (ACD) Operation …………………………………………………………...…………………39
Intercom Featurres
Intercom Features
Changing Intercom Answer Mode ........................................................................................................…... 15
Placing an Intercom Call ........................................................................................................................….. 15
Answering an Intercom Call .................................................................................................................….. 16
Placing an Intercom on Hold
Hold...................................................................................................….………….. 16
Changing Differential Ring ..................................................................................................................…... 16
Voice Over...............................................................................................................…………………………. 17
Answering a Call Wait with Voice Over ..................................................................................................….. 17
Answering a Queue Request .................................................................................................................….. 17
Directed Call Pick-up..............................................................................................................................…...18
Call Wait (Camp-on) .............................................................................................................................…... 18
Mute ...................................................................................................................................................…….18
Call Back...............................................................................................................................................…... 19
Message Waiting....................................................................................................................……………….19
Do Not Disturb............................................................................................................……………………….. 19
Call Forward .....................................................................................................................…………………. 20
Paging ........................................................................................................…………………………………... 21
Flash .......................................................................................................................………………………….22
Speakerphone .........................................................................................................................……………. 23
Speaker Volume Control.................................................................................................……………………. 23
Ring Volume Control .............................................................................................................................….. 23
CO Line Fe
eatures
CO Line Features
Placing an Outside Call .................................................................................................................…………. 9
Answering an Outside Call................................................................................................…………………... 9
Call Transfer .................................................................................................................……………………… 9
Last Number Redial..................................................................................................................…………….. 10
Save Number Redial................................................................................................................…………….. 10
Dial Memo.....................................................................................................................…………………….. 10
Auto Call Number Redial......................................................................................................................……. 11
Queuing................................................................................................................…….......………………….11
Executive/Secretary Transfer ..........................................................................................................…........ 11
Step Call .......................................................................................................................................………… 11
Speed Dial Numbers ............................................................................................................................…...12
Storing Dial By Name ...........................................................................................................................…... 13
Call Park ..............................................................................................................................................…... 13
Universal Night Answer........................................................................................................……………….. 14
● DIGITAL KEY TELEPHONE
KD, KD/E, LKD SERIES
CONTENTS
Flexible Button Programming .............................................................................................................……. 42
Attendant Operation
Wake-up Call.....................................................................................................................…………………. 44
System Greetings.............................................................................................................................….…... 45
Attendant Clock Set ...........................................................................................…………………………….. 46
Changing Time/Date Format ..............................................................................................................…….. 46
To Set Current Time 1 Hour Early/Late …………………………………………………………………………….. 47
System Speed Dial..............................................................................................................................….... 47
Attendant Intrusion ................................................................................................................…... ………… 48
Day/On-demand/Night Mode Service (Manual/Automatic) ......................................................................…. 48
To Print out Accumulated SMDR Records...........................................................................………………… 49
To Erase SMDR Record.......................................................................................................................…… 50
Dial By Name …………………………………………………………………………………………………………. 51
Customized Message.........................................................................................................................…….. 51
CO Outgoing Disable................................................................................................................…... ………. 52
Temporary COS Change..................................................................................................................………. 52
y
53
Traffic Analysis......................................................................................……………………………………….
Erasing Station Message .......................................................................................................................….. 54
Attendant LCD Language ....................................................................................................................……. 55
Intercom Box BGM Selection by Attendant ..........................................................................................…… 55
Overriding a Key Telephone in Do Not Disturb ......................................................................................……55
Attendant DSS Operation ......................................................................................………………………….. 56
Atttendant Operation
Hotel Operation
Introduction.....................................................................................................................……………………. 57
Register Hotel Name.........................................................................................................................….…... 57
Check-In...................................................................................................................………………………... 57
Check-In /Change a Guest's Room Status.....................................................………………………………... 58
Register & Change a Guest Name (Room Status Type 1).....................................................………………. 58
Class of Service (Room Status Type 2).....................................................…………………………………… 59
Guest Alarm Call (Room Status Type 3).....................................................………………………………….. 59
Intercom Enable/Disable (Room Status Type 4).....................................................………………………….. 59
Room to Room Call Group (Room Status Type 5).....................................................……………………….. 60
Authorization Code (Room Status Type 6)........................................................................................………. 60
Pre-paid Call Charge (Room Status Type 7)...........................................………………………………………. 60
Call Charge Rate (Room Status Type 8)..............................................................................................….... 61
Baby Listening ..........................................................................................……………………………………. 61
Check-Out ......................................................................……………………………………………………….. 61
Room Charge Display & Printing .................................................................................…………………….. 62
Printing a Guest's Room Status ........................................................................…………………………….. 62
Intercom Cal Enable/Disable ...................................................................................................................….62
One-Time CO Call Enable ......................................................................................…………………………. 63
Change LCD Display Language .....................................................................................…………………… 63
Bath Alarm .....................................................................................……………………………………………. 64
Maid Status …………………………………………………………………………………………………………… 64
Register Bar & Mini-Bar Charge …………….……………………………………………………………………… 65
Room to Room Call Group…………………………………………………………..………………………………. 65
Room Rate Assign……………………………………………………………………………………………………. 65
Fee for Part Time……………………………………………………………………………………………………… 66
Auto Internal Speed Directory ………………………………………………………………………………………. 66
Multiple Front Desk …………………………………………………………………………………………………... 67
New Cabina Call ……………………………………………………………………………………………………… 67
Brief SMDR Print ……………………………………………………………………………………………………… 67
Hotel Op
peration
La
arge LCD
Large LCD Keyset Features
LCD Brightness Control ......................................................................................................................……. 41
Door Open ...................................................................................................…………………………………. 41
Calendar Display...................................................................................................…………………………… 41
Index (Alphabetical Order) .....................................................................................…………………………. 68
4
● DIGITAL KEY TELEPHONE
KD, KD/E, LKD SERIES
Digital Key Telephone Family
Large Digital Key Telephone (You cannot use Large LCD keyset with GDK
GDK-16/20W
16/20W system
system.))
●
KD-33LD
●
KD/E-36LD
●
KD-24N
KD Series
●
KD-36D
KD-36D : LCD Display, 24 Flexible Buttons
KD 36N : No LCD Display,
KD-36N
Displa 24 Flexible
Fle ible Buttons
B ttons
KD-24D : LCD Display, 12 Flexible Buttons
KD-24N : No LCD Display, 24 Flexible Buttons
KD/E Series
●
KD/E-36EXE
●
KD/E-24ENH
KD/E-36EXE : LCD Display, 24 Flexible Buttons
KD/E-36ENH : No LCD Display, 24 Flexible Buttons
KD/E-24EXE : LCD Display, 12 Flexible Buttons
KD/E-24ENH : No LCD Display, 24 Flexible Buttons
KD/E-8 BTN : No LCD Display, 8 Flexible Buttons
5
●
KD/E-8BTN
● DIGITAL KEY TELEPHONE
KD, KD/E, LKD SERIES
Digital Key Telephone Family
LKD Series (You cannot use LKD
LKD-30LD
30LD with GDK-16/20W
GDK 16/20W system
system.))
●
LKD-2N/S
●
LKD-8D/S
●
LKD-30LD
LKD-2N/S: No LCD Display, 2 Flexible Buttons
LKD-8D/S: LCD Display, 8 Flexible Buttons
LKD-30D: LCD Display, 30 Flexible Buttons (Dual LED with Flex. BTN 01~24 & Single LED with 25~30)
LKD-30LD: Large LCD Display, 30 Flexible Buttons (Dual LED with Flex. BTN 01~24 & Single LED with 25~30)
LKD-DSS: 48 Flexible Buttons
※ The LKD series keysets can be normally operated in the following S/W version or later.
GDK-34i: GS40P-1.2A // GDK-100: GS00P-3.2A // GDK-186: GS86P-5.1A
GDK-34i: GS40P-1.1Cd // GDK-100: GS00P-3.1Df // GDK-186: GS86P-4.0Ee
KE/C, KD/C Series (CTI is not available with GDK-16/20W system.)
KE/C, KD/C Series keysets have normal functions as KD, KD/E keysets and CTI (Computer
Telephony Integration) function to connect PC (RS-232C Interface Function). Connecting CTI
Module, the KE/C, KD/C keyset operates to transmit/receive data to communicate with PC.
Installation Guide for Connection CTI Module to KE/C, KD/C keyset
1. Connect KE/C,, KD/C keyset
y
to KTU port
p of CTI module with 6-pin
p line cord.
2. Connect KSU to KSU port of CTI module with 4-pin line cord.
3. Connect the serial port of PC to the serial port of CTI module with 9-pin RS-232C cable.
6
● DIGITAL KEY TELEPHONE
KD, KD/E, LKD SERIES
Button Arrangement for Digital Key Telephone Family
Large Digital Key Telephone (You cannot use Large LCD keyset with GDK
GDK-16/20W
16/20W system
system.))
●
KD-33LD
●
KD/E-36LD
KD Series
●
KD-36D
●
KD-36N
●
7
KD-24D
●
KD-24N
● DIGITAL KEY TELEPHONE
KD, KD/E, LKD SERIES
Button Arrangement for Digital Key Telephone Family
KD/E Series
●
KD/E-36EXE
●
KD/E-24ENH
●
KD/E-8BTN
LKD Series
●
LKD-8D/S
●
In LKD-8D/S, 2N/S, REDIAL key has the function of FLASH in older system software versions, ie GDK16 S/W version 1 and GDK-186/100/34i versions 5.4/3.4/1.4 and below.
●
8
LKD-30D
● DIGITAL KEY TELEPHONE / USER’S GUIDE
KD, KD/E, LKD Series
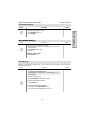
Placing an Outside Call
Button
Procedures
●
●
●
9, 8 +
186 : 01 ~ 48
100 : 01 ~ 24
34i : 01 ~ 09
16/20W : 1 ~ 4
Or, 88 +
186 : 01 ~ 96
100 : 01 ~ 48
34i : 01 ~ 34
16 : 1 ~ 6
20W: 1 ~ 8
Answering an Outside Call
Button
Procedures
●
●
Range
Lift handset or press MON/SPEAKER button to use
speakerphone.
P
Press
flashing
fl hi CO liline b
button
tt or lloop kkey.
(If your phone is programmed with Preferred Line Answer, you
may answer just by lifting handset.)
Call Transfer
B tton
Button
Range
Proced res
Procedures
To transfer an outside call to the other extension,
● Press TRANS/PGM button. (The outside call is put on hold.)
● Dial station number or appropriate DSS button.
● You can make a screened or unscreened transfer.
Screened
Transfer
When the called extension answers, notice the call transfer and
hang up to complete call transfer.
Unscreened
Transfer
While the station you called rings, hang up to complete call
transfer.
186 : 100 ~ 291
100 : 100 ~ 235
34i : 100 ~ 177
16 : 100 ~ 115
20W: 100 ~ 133
To answer screened transfer,
● When a station rings according to Intercom Answer Mode
selection, answer the intercom call.
● The transferring party hangs up, the call will be connected.
Note : 1) The feature which is marked (*), is not available in GDK-16/20W.
2) The button description in this manual is based on LKD series keyset.
9
CO Line Fe
eatures
●
Lift handset or press MON/SPEAKER button.
Press outside line button, pool button or dial CO line access
code.
Dial desired party.
When called party answers, lift handset or use speakerphone.
Range
● DIGITAL KEY TELEPHONE / USER’S GUIDE
KD, KD/E, LKD Series
Last Number Redial
Button
Procedures
Range
Save Number Redial (*)
Button
Procedures
Range
If you want to save a number you dialed,
● After dialing the number of an outside party, keep handset
off-hook state.
● Press SPEED button twice.
● Hang up.
T dial
To
di l a saved
d number,
b
●
Press SPEED + #.
Dial Memo (*)
While on an outside line or intercom call, you may enter and save a number in the save number
redial bin for future use
use.
Button
Procedures
●
Press the programmed DIAL MEMO button.
To program [DIAL MEMO] button,
[TRANS/PGM] + flexible button + [TRANS/PGM] + 8 0 +
[HOLD/SAVE]
●
Dial the desired number.
Press DIAL MEMO button again
g
to save.
●
To dial the dial memo number,
●
Press SPEED + #.
To check the dial memo number,
●
●
In idle state, press DIAL MEMO button.
The saved number is displayed on the LCD.
10
Range
CO Line Fe
eatures
The last dialed number on an outside line is saved.
To redial the last dialed number,
● Press REDIAL button. Or,
● Press SPEED + *.
● DIGITAL KEY TELEPHONE / USER’S GUIDE
KD, KD/E, LKD Series
Auto Call Number Redial (*)
When the called party is busy or does not answer the call,
call the system can automatically redial
the number by pre-programmed time interval.
Button
Procedures
●
●
●
CO Line Fe
eatures
●
Range
Press REDIAL button.
Hang up.
A busy or no answer number will be redialed automatically after
pre-programmed time interval while MUTE button is lighting.
When called party answers, lift handset to talk.
Queuing (*)
When a CO line is busy, you can request a call back when the CO line is available. As soon as it
becomes idle, you can be the first extension to get the CO line.
Button
Procedures
●
●
●
●
Range
Lift handset or press MON/SPEAKER button.
Press busy outside line button or specific line group button.
Pressing CALLBK button, your CALLBK button is lighting and
confirmation tone is heard.
Hang up or press MON/SPEAKER button.
To answer a queue request,
● When the busy CO line or specific line group returns to idle,
you hear ring and the queued line button is flashing.
flashing
● Lift handset and dial a desired phone number.
Executive/Secretary Transfer (*)
Button
Procedures
●
●
When the Executive Station is busy or DND (Do Not Disturb),
all calls will go to the Secretary Station.
The Secretary Station may signal the Executive Station that is
in DND by using Call Wait feature. (Press * key or dial the last
digit of the number of Executive station or press the DSS
button to operate Call Wait feature.)
11
Range
● DIGITAL KEY TELEPHONE / USER’S GUIDE
KD, KD/E, LKD Series
Step Call (*)
Wh an extension
When
t
i iis b
busy, you can make
k a callll tto a diff
differentt station
t ti b
by di
dialing
li only
l th
the llastt di
digit
it
of new station number.
Button
Procedures
●
●
CO Line Fe
eatures
●
Range
Dialing an extension number, and the station is busy.
After hearing ICM busy tone, dial the last digit of the next
extension number in the same 10’s group.
(ex. If station “112” is busy, dial digit “4” to call station “114”.)
It can be used for CO line call by pressing SPEED button +
last digit
digit.
Speed Dial Numbers (Station Basis)
Each extension can program up to 20 individual speed dial numbers in the station. The numbers
are entered and stored by the user and it can be recalled at any time.
Button
Procedures
Range
To store station speed numbers
numbers,
●
●
●
●
●
●
●
●
●
●
●
●
●
●
Press TRANS/PGM button.
Press SPEED button.
Dial speed number bin.
Dial the phone numbers to be stored.
Press HOLD/SAVE button.
Enter name for Dial by Name. (optional)
Or,
Press TRANS/PGM button.
Press SPEED button.
Dial speed number bin.
Press desired outside line or specific line group button.
Dial the phone number to be stored.
Press HOLD/SAVE button.
Enter name for Dial by Name. (optional)
Press HOLD/SAVE button.
Station Speed bin
186/100/34i :
00~19
16/20W: 01~20
GDK-16/20W:
Dial by Name is
not available.
GDK-16/20W:
Line group button
is not available.
To use station speed numbers,
●
●
●
Lift handset or press MON/SPEAKER button.
Press SPEED button.
Dial speed number bin.
To use system speed numbers,
●
●
●
Lift handset or press MON/SPEAKER button.
Press SPEED button.
Dial speed number bin.
T erase station
To
t ti speed
d numbers,
b
●
●
●
●
Press TRANS/PGM button.
Press SPEED button.
Dial speed number bin to be erased.
Press HOLD/SAVE button.
12
System Speed bin
186 : 200~999
100 : 200~399
34i : 200~399
16/20W: 21~99
● DIGITAL KEY TELEPHONE / USER’S GUIDE
KD, KD/E, LKD Series
Storing Dial by Name
Users for digital display phone can enter the called party’s
party s name so they can dial by name instead
of dialing the phone number.
Button
Procedures
●
●
●
●
●
CO Line Fe
eatures
●
Range
Press TRANS/PGM button.
Press SPEED button and speed number bin.
Dial the desired phone number.
Press HOLD/SAVE button.
Enter the name up to 16 letters using the code below;
Q - 11
Z - 12
. - 13
1 - 10
A - 21
B - 22
C - 23
2 - 20
D - 31
E - 32
F - 33
3 - 30
G - 41
H - 42
I - 43
4 - 40
J - 51
K - 52
L - 53
5 - 50
M - 61
N - 62
O - 63
6 - 60
P - 71
R - 72
S - 73
Q - 7*
7 - 70
T - 81
U - 82
V - 83
8 - 80
W - 91
X - 92
Y - 93
Z - 9#
9 - 90
*1 - Blank
*2 - :
*3 - ,
0-00
#
Press HOLD/SAVE button.
In GDK-16,
● Pressing [▼] key while entering name, the last character will be
erased
erased.
● While entering a name, you may press ‘4,5,6’ or ‘7,8,9’ as a
second digit instead of ‘1,2,3’.
(Ex. To enter ‘J”, you may press ‘5 1’, ‘5 4’ or ‘5 7’.)
Call Park
A call can be parked in a parking location and the call will be retrieved by dialing the location
number. Also, the call can be picked up by other extension with making a page announcement
to inform parking location.
Button
Procedures
While connected to an outside call,
● Press TRANS/PGM button.
● Dial parking location.
13
Range
186 : 601~619
100 : 601~610
34i : 601~605
16/20W : 601~606
● DIGITAL KEY TELEPHONE / USER’S GUIDE
KD, KD/E, LKD Series
Call Park (Cont’d)
A call can be parked in a parking location and the call will be retrieved by dialing the location
number. Also, the call can be picked up by other extension with making a page announcement
to inform parking location.
Button
Procedures
While connected to an outside call,
● Press TRANS/PGM button.
● Dial parking location.
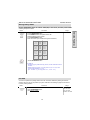
● Press PAGE down(▼) key, and you will see the following
on the display.
■
■
■
■
■
▣
●
Range
186 : 601~619
100 : 601~610
34i : 601~605
16/20W: 601~606
CALL PARK (01-19) ■
GROUP PICKUP
■
DIR PICKUP (STA#) ■
■
■
STA 102 (T)
NOV 02 01:40pm
▲
▼
Select CALL PARK.
To retrieve a p
parked call,
●
●
Lift handset or press MON/SPEAKER button.
Dial parking location.
Universal Night Answer
When CO lines are programmed for UNA and the system is placed into night mode, users can
answer incoming CO line calls employing dial code regardless of pick-up group..
Button
Procedures
●
●
●
Lift handset or press MON/SPEAKER button.
Press flashing CO line button. If a CO line button is not
assigned, dial 6 9.
You will be connected to ringing outside line.
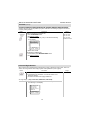
Or using display, (Only in KD-33LD, KD/E-36LD, LKD-30LD)
●
Press the 4th menu key from main menu and you will see
the following on the display.
■
■
■
■
■
▣
INT PAGE (01-20)
INT ALL CALL
EXT ALL CALL
INT/EXT ALL CALL
MEET ME
STA 102 (T)
NOV 02 01:40pm
■
■
■
■
■
▲
▼
14
Range
● DIGITAL KEY TELEPHONE / USER’S GUIDE
KD, KD/E, LKD Series
Universal Night Answer (Cont’d)
Button
Procedures
●
Press PAGE down(▼) key twice, and you will see the
following on the display.
■
■
■
■
■
ACC CO-GR (01-48)
ACC 1 CO (01-96)
UNIV NITE ANSWER
TIE ROUTE (01-30)
ALARM RESET
■
■
■
■
■
▣
STA 102 (T)
NOV 02 01:40pm
▲
▼
CO Line Fe
eatures
●
Range
Select UNIV ANSWER key.
If an outside line is assigned for UNA and the attendant
station is placed into night service mode, you will be
connected to ringing outside line.
Changing Intercom Answer Mode
Button
Procedures
●
●
●
●
Range
Press TRANS/PGM button.
Dial 4 9.
Dial 1 for Handsfree, 2 for Tone ring, or 3 for Privacy announce.
Press HOLD/SAVE button.
Placing an Intercom Call
Button
Procedures
●
●
Dial intercom number or press programmed DSS button.
You will hear,,
- Ring back tone in TN (Tone) mode. Wait for called station
to answer the ringing.
- 3 bursts of tone in HF(Handsfree) or PV(Privacy) mode.
Begin your announcement after the tone.
15
Range
● DIGITAL KEY TELEPHONE / USER’S GUIDE
KD, KD/E, LKD Series
Answering an Intercom Call
Button
Procedures
●
Range
g
With your intercom answer mode setting,
- in TN mode, intercom ring is heard. Lift handset to talk.
- in PV mode, 3 bursts of tone and one-way announcement is
heard. Lift handset to talk.
- in HF mode, 3 bursts of tone and announcement is heard.
Reply with handsfree mode or lift handset for privacy.
Placing an Intercom on Hold (*)
Button
Procedures
●
●
If your phone has ICM button, you may put an intercom call on
hold by pressing HOLD/SAVE button.
Or, while on an intercom call, press ICM button.
The ICM button flashes and intercom dial tone will be heard.
To retrieve intercom call on hold,
●
Press the flashing ICM button and lift handset.
Changing
g g Differential Ring
g
Button
Procedures
●
●
●
●
Press TRANS/PGM button.
Dial 5 0 .
Select the ring type by dialing 1~4.
Press HOLD/SAVE button.
Or using display, (Only in KD-33LD, KD/E-36LD, LKD-30LD)
●
●
Press the 5th menu key from main menu to select PROGRAM.
and you’ll see the following on the display.
■
■
■
■
■
ATD PROGRAM
STATIONPROGRAM
LCD BRIGHTNESS
RING VOLUME
SPEAKER VOLUME
■
■
■
■
■
▣
STA 102 (T)
NOV 02 01:40pm
▲
▼
Select STATION PROGRAM.
On the display, you will see the following.
16
Range
Intercom Featurres
●
Range
● DIGITAL KEY TELEPHONE / USER’S GUIDE
KD, KD/E, LKD Series
Changing Differential Ring
Button
Procedures
■
■
■
■
■
▣
●
▣
●
STA 102 (T)
NOV 02 01:40pm
▲
▼
S>DIFFER RING
LGE/GS86P-5.5Ca
STA 102 (T)
NOV 02 01:40pm
■
■
■
■
■
▲
▼
Select DIFFER RING key.
Select the ring type (1~4) by pressing dial button 1~4
1~4.
Press HOLD/SAVE button.
Voice Over (*)
This feature provides voice announcement to a busy station without interrupting the existing
conversation. The announcement is received over the existing
g conversation so that only
y the
busy station hears both incoming parties.
Button
Procedures
●
●
●
Range
When a busy keyset engaged in an internal or external call is
called through camp-on by a caller, HOLD/SAVE button of
busy keyset is flashing.
After tone, the busy keyset can be connected to both parties.
Press HOLD/SAVE button in the busy keyset to converse with
new call.
Press HOLD/SAVE button again to alternate the call.
call
Answering a Call Wait with Voice Over
Button
●
●
●
Procedures
Range
You hear camp-on tone and HOLD/SAVE button is flashing.
Press HOLD/SAVE button to talk with the second caller.
The first caller is placed on hold.
You will be connected to the first caller when the second caller
hangs up.
GDK-16/20W:
The previous
internal call will
ill
be disconnected.
The previous
external call will
be on hold.
17
Intercom Featurres
●
■
■
■
■
■
Press PAGE down(▼) key twice.
On the display,
display you will see the following
following.
■
■
■
■
■
●
S>WAKE-UP SET
S>WAKE-UP ERASE
S>REG PASSWORD
S>CHG PASSWORD
S>INTERCOM ONLY
Range
g
● DIGITAL KEY TELEPHONE / USER’S GUIDE
KD, KD/E, LKD Series
Directed Call Pick-up (*)
B tt
Button
P
Procedures
d
●
●
●
●
You hear intercom or transferred outside line ring at a station.
Lift handset or press MON/SPEAKER button.
Dial 7 and the ringing station number.
You will be connected to the calling party.
R
Range
186 : 100~291
100 : 100~235
34i : 100~177
Or using display, (Only in KD-33LD, KD/E-36LD, LKD-30LD)
●
●
●
Press the 4th menu key from the main menu.
Select DIR
DIR.PICKUP
PICKUP (STA#) and dial the ringing station number
number.
You will be connected to calling party automatically.
186 : 100~291
100 : 100~235
34i : 100~177
Call Wait (Camp-on)
If you dial a busy station, you may alert it of your call.
Procedures
●
●
●
Range
After receiving intercom busy tone, dial “*” or last digit of called
station number, or press DSS button.
Camp-on tone is heard in called station.
When called party answers, talk or hang up to transfer the call.
Mute
It provides privacy during speakerphone or handset operation by disabling the microphone.
Button
Procedures
●
●
Press MUTE button to activate.
Press MUTE button again to deactivate.
18
Range
Intercom Featurres
Button
● DIGITAL KEY TELEPHONE / USER’S GUIDE
KD, KD/E, LKD Series
Call Back
If you dial a station that is busy
busy, you can leave a callback indication
indication.
Button
Procedures
●
●
●
●
Range
After receiving intercom busy tone, press CALLBK button.
Hang up.
When the busy station hangs up, you will be signaled.
Answer the signal by lifting handset or by pressing
MON/SPEAKER button, the station you called will be signaled.
Message Waiting
When the called extension does not answer the call, you can leave a message wait to the station.
Button
Procedures
●
●
If a called party does not answer, press CALLBK button.
Hang
g up.
p
At that time, the LED of CALLBK button in the called station is
flashing.
Intercom Featurres
●
Range
On LKD-2N/S, 8D/S,
●
If a called party does not answer, press TRANS/PGM button
and dial 5 6 .
To answer a message waiting indication,
●
●
Press flashing CALLBK button.
Station that left message will be signaled with tone ring.
On LKD-2N/S, 8D/S,
●
Dial 5 7 .
Do Not Disturb
Button
Procedures
If your phone has been programmed to have Do Not Disturb,
● Press DND/FWD button while on-hook or your phone is ringing.
● The LED is lighting and your phone is in DND.
To remove Do Not Disturb,
●
●
Press DND/FWD button while on-hook.
The LED is extinguished and DND at your phone is removed.
On LKD-2N/S, 8D/S,
●
Dial 5 3 instead of pressing DND/FWD button (Toggle setting).
19
Range
● DIGITAL KEY TELEPHONE / USER’S GUIDE
KD, KD/E, LKD Series
Call Forward
A call can be forwarded to the other station or group depending on the call forward type
type.
It should be programmed in Admin. Programming to use some of the Call Forward types.
Button
Procedures
Range
Lift handset or press MON/SPEAKER button.
(The MON/SPEAKER button is lighting.)
● Press DND/FWD button.
● Press the call forward type;
●
0 - Follow me (not available in GDK-16)
1 - Unconditional
y calls
2 - Busy
3 - No answer calls
4 - Busy / no answer calls
5 - Station off-net
6 - Incoming outside line to off-net (system attendant only)
7 - DVU forward for no answer-1 (forwarded after 4sec)
8 - DVU forward for no answer-2 (forwarded after predefined time)
9 - DVU forward for busy
●
●
- In case Follow-me, it should be programmed from the station
that you will be forwarded to i.e. if your extension is 102 and you
are forwarding to 104, then you will need to go to 104 to
program the feature. Also, this feature requires authorization
code and requires system programming.
- In case Station Off-net, the number you are forwarding to
should be saved as a speed dial number first. (Please see the
Page 12 to save a Speed Dial Number.)
- In case Incoming outside line to Off-net, this feature requires
system programming.
- In GDK-16/20W,
• only 1 DVIB Forward is available.
(DND/FWD + dial 7; the forwarding time can be programmed
with Admin Programming.)
• Attendant may set “Forward to DVIB” by pressing DND/FWD
+ dial 7: When normal CO ring is received, the call may be
routed to DVIB and the calling party can leave a message at
Attendant.
Attendant
To cancel call forward,
●
●
●
Lift handset or press MON/SPEAKER button.
Press DND/FWD button and dial #.
Hang up.
- To cancel Incoming Outside line to Off-net (at system attendant),
Press MON + DND/FWD + CO line code (CO group /
CO line no. / CO BTN) + #
- To program {CALL FORWARD} button at a flexible button,
Press TRANS/PGM + flexible button + TRANS/PGM + 5 4
+ 7 (for No Answer DVU Forward after 4sec), 8 (for No Answer
Forward after DVU FWD Answer timer), or 9 (for Busy DVU
Forward) -- HOLD/SAVE
20
INT. Group
186 : 620~649
100 : 620~634
34i : 620~627
16/20W : 61~64
Intercom Featurres
●
Dial station number or press DSS button or intercom group.
Confirmation tone is heard and DND/FWD button is flashing
on forwarded station.
Hang up.
Sta. No.
186 : 100~291
100 : 100~235
34i : 100~177
16 : 100~115
20W: 100~133
● DIGITAL KEY TELEPHONE / USER’S GUIDE
KD, KD/E, LKD Series
Call Forward (Cont’d)
Button
Procedures
Range
On LKD-2N/S, 8D/S,
●
Dial 5 4 instead of pressing DND/FWD button.
Paging
ag g
A station, which is allowed to access page facilities, can connect and transmit voice
announcement to any or all of the system external/internal page zones.
Button
Range
Procedures
GDK-186 GDK-100
All Call
Internal Zone 1
Internal Zone 2
:
Internal Zone 5
:
Internal Zone 15
:
Internal Zone 20
Internal All Call
External Zone 1
External Zone 2
External All Call
4 9
401
402
:
405
415
:
420
4 3
4 6
4 7
4 8
GDK-34i
GDK-16/20W
4 9
401
402
:
405
:
415
4 9
401
402
:
405
# 0
# 1
# 2
N.A.
4
4
4
4
4
4
3
6
# 4
N.A
4
8
# 3
3
6
7
8
Intercom Featurres
To make a page,
● Lift handset.
● Dial page zone. (See below chart.) And you will hear warning
tone.
● After the tone,
tone speak your message.
message
● Hang up.
Or using display, (Only in KD-33LD, KD/E-36LD, LKD-30LD)
F internal
For
i t
l zone,
●
Press the 4th menu key from main menu and you will see
the following on the display.
■
■
■
■
■
▣
●
●
●
INT PAGE (01-20)
INT ALL CALL
EXT ALL CALL
INT/EXT ALL CALL
MEET ME
STA 102 (T)
NOV 02 01:40pm
186 : 01~20
100 : 01~15
34i : 01~05
■
■
■
■
■
▲
▼
Select INT PAGE key.
Dial the desired zone. (Confirmation tone is heard.)
After the tone, speak your message.
21
● DIGITAL KEY TELEPHONE / USER’S GUIDE
KD, KD/E, LKD Series
Paging (Cont’d)
Button
Procedures
Range
For internal all call/external all call/all call,
●
Press the 4th menu key from main menu and you will see
the following on the display.
■
■
■
■
■
▣
INT PAGE (01-20)
INT ALL CALL
EXT ALL CALL
INT/EXT ALL CALL
MEET ME
STA 102 (T)
NOV 02 01:40pm
■
■
■
■
■
186 : 01~20
100 : 01~15
34i : 01~05
▲
▼
●
Select the desired page key.
●
You will hear warning tone.
After the tone, speak your message.
(INT ALL CALL/EXT ALL CALL/INT/EXT ALL CALL)
●
To answer paging,
●
Go to the nearest key telephone.
Lift handset and dial 4 4 (GDK-16/20W:
(GDK 16/20W: # 6) or HOLD/SAVE
button, and you will be connected to the paging party.
Or using display, (Only in KD-33LD, KD/E-36LD, LKD-30LD)
●
Press the 4th menu key from main menu and you will see
the following on the display.
■
■
■
■
■
▣
●
INT PAGE (01-20)
INT ALL CALL
EXT ALL CALL
INT/EXT ALL CALL
MEET ME
STA 102 (T)
NOV 02 01:40pm
■
■
■
■
■
186 : 01~20
100 : 01~15
34i : 01~05
▲
▼
Select MEET ME and you will be connected to paging party.
Flash
Disconnects outside line and reseizes dial tone. It can be used to send a timed break recall when
the system is connected with a PBX.
Button
Procedures
●
While connected to an outside line, press FLASH button.
Note: In LKD-2/8 BTN keyset, FLASH button is replaced by
REDIAL button in X.5 version or later. To assign FLASH
button in a flex. Key, press TRANS + 9 4.
22
Range
Intercom Featurres
●
● DIGITAL KEY TELEPHONE / USER’S GUIDE
KD, KD/E, LKD Series
Speakerphone
Pressing an outside line button
button, a speed button
button, a station button or dialing a station number will
automatically activate the speakerphone. (LKD-2N/S has no microphone and doesn’t function
as handsfree unit.)
Button
Procedures
Range
To activate speakerphone,
● Press MON/SPEAKER button.
● Dial outside line number or intercom number to talk.
Speaker Volume Control
Button
Procedures
●
Range
In speakerphone mode, press VOLUME (▲/▼) button to
control the speakerphone volume..
●
●
●
Press the 5th menu key from main menu to select PROGRAM.
Select SPEAKER VOLUME.
Press VOLUME (▲/▼) button to control speaker volume.
Ring Volume Control
Button
Range
Procedures
●
When bell rings, press VOLUME (▲/▼) button to control
ring volume.
Or using display, (Only in KD-33LD, KD/E-36LD, LKD-30LD)
●
●
●
Press the 5th menu key from main menu to select PROGRAM.
Select RING VOLUME
VOLUME.
Press VOLUME (▲/▼) button to control ring volume.
23
Range
Intercom Featurres
Or using display, (Only in KD-33LD, KD/E-36LD, LKD-30LD)
● DIGITAL KEY TELEPHONE / USER’S GUIDE
KD, KD/E, LKD Series
Placing an Intercom Group Call
Range
Procedures
Button
To make an intercom group call,
●
●
INT. Group No.
186 : 620 ~ 649
100 : 620 ~ 634
34i : 620 ~ 627
16/20W: 61~64
Lift handset or press MON/SPEAKER button.
Dial the intercom group number.
Placing a CO Call on Hold
Button
Range
Procedures
●
Press HOLD/SAVE button.
- Once for system hold
- Twice for exclusive hold
Reverse if hold preference is programmed to system hold.
●
Press HOLD/SAVE button (in GDK-16/20W).
CO call will be put on hold according to the Hold Preference.
To retrieve the call,
●
Lift handset and press flashing outside line button.
Group Call Pick-up
Button
Range
Procedures
You should be in the same pick-up group as ringing phone.
● You hear an unattended phone ringing.
● Lift handset or press MON/SPEAKER button.
● Dial 6 6 .
Or using display, (Only in KD-33LD, KD/E-36LD, LKD-30LD)
●
Press the 4th menu key from the main menu.
▣
●
●
INTERCOM CALL
STATION SPD DIAL
SYSTEM SPD DIAL
FEATURE
PROGRAM
■
■
■
■
■
▶
▲
STA 102 (T)
NOV 02 01:40pm ▼
■
■
■
■
■
▣
INT PAGE (01-20)
INT ALL CALL
EXT ALL CALL
INT/EXT ALL CALL
MEET ME
■
■
■
■
■
▲
STA 102 (T)
NOV 02 01:40pm ▼
Pressing PAGE down(▼) key, you will see the following.
■
■
■
■
■
CALL PARK (01-19) ■
GROUP PICKUP
■
DIR PICKUP (STA#) ■
■
■
▣
▲
STA 102 (T)
NOV 02 01:40pm ▼
Select the GROUP PICKUP. You will be connected to the
calling party automatically.
24
System Featurres
■
■
■
■
■
● DIGITAL KEY TELEPHONE / USER’S GUIDE
KD, KD/E, LKD Series
Conference
Button
Procedures
To establish a conference,
●
●
●
●
●
Call desired party. (internal or outside)
Press CONF button. (CONF button is lighting and the called
party is put on exclusive hold.)
Call the next party.
Press CONF button twice. (once if adding additional parties)
Conference is established.
Range
GDK-16/20W:
At most 3 parties
can be active in
a conference.
To add another party in the conference,
(not available in GDK-16/20W)
●
●
●
Press CONF button.
Call the next party.
Press CONF button twice.
To exit a conference (unsupervised),
●
Press CONF button in the supervisor station and hang up.
Other parties are still connected.
Re-entering a conference,
●
●
Lift handset or press MON/SPEAKER button.
Press CONF button.
To drop an outside party,
(not available in GDK-16/20W)
(You should be active in the conference.)
● Press outside line of party you wish to drop.
● Hang up or press MON/SPEAKER button.
To terminate the conference,
●
Hang up or, press CONF button if unsupervised.
On LKD-2N/S, 8D/S,
●
Conference feature can be accomplished by programming
a flexible key as CONF button (TRANS + 91).
System Featurres
25
● DIGITAL KEY TELEPHONE / USER’S GUIDE
KD, KD/E, LKD Series
Access Authorization Code (*)
To prevent unauthorized outside calling,
calling DISA access or Trunk access on your station by others
others,
the system provides a means to lock/unlock a station by access authorization code.
Button
Range
Procedures
To register access authorization code,
●
●
●
●
Press TRANS/PGM button and dial 4 4. (MON/SPEAKER
button is lighting.)
Dial your own 5 digits access authorization code.
Press HOLD/SAVE button.
Confirmation tone is heard
heard.
Or using display, (Only in KD-33LD, KD/E-36LD, LKD-30LD)
●
Press the 5th menu key from the main menu.
■
■
■
■
■
▣
●
●
●
INTERCOM CALL
STATION SPD DIAL
SYSTEM SPD DIAL
FEATURE
PROGRAM
■
■
■
■
■
▶
▲
STA 102 (T)
NOV 02 01:40pm ▼
■
■
■
■
■
ATD PROGRAM
STATION PROGRAM
LCD BRIGHTNESS
RING VOLUME
SPEAKER VOLUME
■
■
■
■
■
▣
STA 102 (T)
NOV 02 01:40pm
▲
▼
Select the STATION PROGRAM and you will see the following.
■
■
■
■
■
S>WAKE-UP SET
S>WAKE-UP ERASE
S>REG PASSWORD
S>CHG PASSWORD
S>INTERCOM ONLY
■
■
■
■
■
▣
STA 102 (T)
NOV 02 01:40pm
▲
▼
Select the REG PASSWORD and enter the 5 digits access
authorization code.
Press HOLD/SAVE button.
To change access authorization code,
●
●
●
●
Or using display, (Only in KD-33LD, KD/E-36LD, LKD-30LD)
●
●
●
●
●
Press the 5th menu key from the main menu.
Select the STATION PROGRAM.
Select the CHANGE PASSWORD and enter your current
access authorization code.
Enter your new 5 digits access authorization code.
Press HOLD/SAVE button.
26
System Featurres
●
Press TRANS/PGM button and dial 4 5.
Dial your current access authorization code. You will hear
confirmation tone.
Dial your new 5 digits access authorization code.
Press HOLD/SAVE button.
You will hear confirmation tone.
● DIGITAL KEY TELEPHONE / USER’S GUIDE
KD, KD/E, LKD Series
Blocking Outside Calls (*)
Note : An access authorization code should be registered
registered.
Button
Procedures
●
●
●
Range
Press TRANS/PGM button and dial 4 6. (MON/SPEAKER
button is lighting.)
Press HOLD/SAVE button. (Confirmation tone is heard.)
MUTE button will flash until restored to normal.
Or using display, (Only in KD-33LD, KD/E-36LD, LKD-30LD)
●
●
●
●
●
Press the 5th menu key from the main menu
menu.
Press HOLD/SAVE button. (Confirmation tone is heard.)
MUTE button will flash until restored to normal.
Select the STATION PROGRAM and you will see the following.
■
■
■
■
■
S>WAKE-UP SET
S>WAKE-UP ERASE
S>REG PASSWORD
S>CHG PASSWORD
S>INTERCOM ONLY
■
■
■
■
■
▣
STA 102 (T)
NOV 02 01:40pm
▲
▼
Select INTERCOM ONLY.
Restoring Outside Calls (*)
Button
Procedures
●
●
●
R
Range
Press TRANS/PGM button and dial 4 7.
Dial your current access authorization code.
(Confirmation tone is heard.)
MUTE button will be extinguished.
Or using display, (Only in KD-33LD, KD/E-36LD, LKD-30LD)
●
●
●
●
●
●
■
■
■
■
■
S>RESTORE COS
S>MSG PROGRAM
S>ICM ANS MODE
S>MUSIC CHANNEL
S>PRESELECT MSG
■
■
■
■
■
▣
STA 102 (T)
NOV 02 01:40pm
▲
▼
Select RESTORE COS key.
Enter your current access authorization code.
Press HOLD/SAVE button.
27
System Featurres
●
Press the 5th menu key from the main menu.
Press STATION PROGRAM key.
key
Press PAGE down(▼) key.
On the display, you will see the following.
● DIGITAL KEY TELEPHONE / USER’S GUIDE
KD, KD/E, LKD Series
Wake-up Call
The system automatically sends ring signal to a station which registers a wake
wake-up
up time
time. There are
two kinds of wake-up call, one is effective for one-day, the other is effective until canceled.
Button
Procedures
Range
To register wake-up time,
●
●
●
Press TRANS/PGM button.
Dial 4 1 and 4-digit wake-up time (HHMM) in 24-hour mode.
(HH = 00~23, MM = 00~59)
Press HOLD/SAVE button for “one-day” or dial # and
HOLD/SAVE button for “until canceled”.
(Confirmation tone is heard.)
Or using display, (Only in KD-33LD, KD/E-36LD, LKD-30LD)
●
●
●
●
●
Press the 5th menu key from the main menu.
■
■
■
■
■
ATD PROGRAM
STATION PROGRAM
LCD BRIGHTNESS
RING VOLUME
SPEAKER VOLUME
■
■
■
■
■
▣
STA 102 (T)
NOV 02 01:40pm
▲
▼
Select the STATION PROGRAM and you will see the following.
■
■
■
■
■
S>WAKE-UP SET
S>WAKE-UP ERASE
S>REG PASSWORD
S>CHG PASSWORD
S>INTERCOM ONLY
■
■
■
■
■
▣
STA 102 (T)
NOV 02 01
01:40pm
40
▲
▼
Select WAKE-UP SET key.
Enter 4-digit wake-up time (HHMM) in 24-hour mode.
(HH = 00~23, MM = 00~59)
Press HOLD/SAVE button for “one-day” or dial # and
HOLD/SAVE button for “until canceled”.
(Confirmation tone is heard.)
To cancel wake-up call,
●
Press TRANS/PGM button and dial 4 2.
Press HOLD/SAVE button. (Confirmation tone is heard.)
Or using display, (Only in KD-33LD, KD/E-36LD, LKD-30LD)
●
●
●
●
Press the 5th menu key from the main menu.
Select STATION PROGRAM key.
Select WAKE-UP ERASE key.
Press HOLD/SAVE button. (Confirmation tone is heard.)
28
System Featurres
●
● DIGITAL KEY TELEPHONE / USER’S GUIDE
KD, KD/E, LKD Series
Using Dial By Name
Each station and speed dial number can be assigned to a name
name. When names are programmed
programmed,
you may select a speed dial number by the stored name.
Button
Procedures
●
●
Range
Press SPEED button twice.
On the display, you will see the following.
DIAL BY NAME
ICM : 1 U_SPD : 2 S_SPD : 3
●
●
Select desired type.
1 : Intercom
2 : User (Station Speed Dial)
3 : System (System Speed Dial)
Confirmation tone is heard and you will see the following.
1 : XXXX XXXX XXXXXX
2 : YYYY YYYY YYYYYY
●
●
●
●
●
Press the VOLUME button to see the next two names.
You may enter characters using the code in “Storing Dial by
Name”. The LCD will display the first two names which match
your input.
To select the name in line 1, press HOLD/SAVE button.
To select the name in line 2, dial 2 and press HOLD/SAVE
button.
The call is placed automatically.
In GDK-16/20W,
●
●
Press SPEED button twice.
On the display, you will see the following.
DIAL BY NAME
ICM : 1 U_SPD : 2 S_SPD : 3
●
●
Select desired type.
1 : Intercom
2 : User (Station Speed Dial)
3 : System (System Speed Dial)
C fi
Confirmation
ti ttone iis h
heard
d and
d you will
ill see th
the ffollowing.
ll i
●
●
●
●
Pressing VOLUME button, the cursor will be moved to the next
name. When the cursor points a name or a dial number to call,
press HOLD/SAVE button. Then, the stored number is dialed.
You may enter characters using the code in “Storing Dial by
Name”. The LCD will display the first two names which match
your input.
input (You may delete the last letter of your input by
pressing CALLBK button.)
You can see the matched phone number by pressing FLASH
button while the name is displayed (toggle).
The call is placed automatically.
29
System Featurres
1 : XXXX XXXX XXXXXX
2 : YYYY YYYY YYYYYY
● DIGITAL KEY TELEPHONE / USER’S GUIDE
KD, KD/E, LKD Series
Using Dial By Name (in KD-33LD, KD/E-36LD, LKD-30LD)
Button
(Cont'd)
Procedures
Range
Or using display, (Only in KD-33LD, KD/E-36LD, LKD-30LD)
Intercom Call
(Intercom name should be programmed by attendant.)
● Press the 1st menu key from the main menu.
If it is programmed, you will see the following on the display.
■
■
■
■
■
▣
●
■
■
■
■
■
STA 102 (T)
NOV 02 01:40pm
▲
▼
Select the key according to the first letter of the desired party’s
name. (Ex. Selecting the first letter with HI, you will see the
sorted subscriber’s name as follows.)
■
■
■
■
■
▣
●
LMN
OPQ
RST
UVW
XYZ
AB
CD
EFG
HI
JK
■
■
■
■
■
HONG H
H.S.
S
JANG W.H.
KIM Y.J.
LEE M.S.
LEE S.H.
STA 102 (T)
NOV 02 01:40pm
▲
▼
Press PAGE(▲/▼) key until you find the desired name.
■
■
■
■
■
▣
■
■
■
■
■
LEE Y
Y.U.
U
STA 102 (T)
NOV 02 01:40pm
▲
▼
Station Speed Dial
●
Press the 2nd menu key from the main menu.
g on the display.
p y
You will see the following
▣
●
LMN
OPQ
RST
UVW
XYZ
■
■
■
■
■
STA 102 (T)
NOV 02 01:40pm
▲
▼
AB
CD
EFG
HI
JK
Follow the procedure as described in Intercom Call.
System Speed Dial
●
●
Press the 3rd menu key from the main menu.
Follow the procedure as described in Station Speed Dial.
30
System Featurres
■
■
■
■
■
● DIGITAL KEY TELEPHONE / USER’S GUIDE
KD, KD/E, LKD Series
Programming Your Name into Display
You can program your name and
Y
d people
l using
i di
display
l phones
h
will
ill see your name iinstead
t d off your
station number.
Button
Procedures
●
●
●
●
●
●
Range
Press TRANS/PGM button.
Press SPEED button and dial 0 0.
Press SPEED button.
Enter your name. (up to 7 letters using the code in “Storing Dial
by name.)
P
Press
HOLD/SAVE button.
b tt
In GDK-16/20W, pressing [▼] key while entering station name,
the last character will be erased.
Pre-selected Message (*)
Button
Procedures
●
●
●
Press TRANS/PGM button and dial 7 7.
Dial the number of desired message. Date, Time or Station
Number if required.
Press HOLD/SAVE button. (DND/FWD button is flashing.)
0 1 LUNCH, RETURN HH:MM
0 2 ON VACATION / RETURN AT MM:DD
0 3 OUT OF OFFICE / RETURN TIME (HH:MM)
0 4 OUT OF OFFICE / RETURN AT MM:DD
0 5 OUT OF OFFICE / RETURN UNKNOWN
0 6 CALL : XX.... (Telephone no: max.17 digits)
0 7 IN OFFICE/STA XXXX
0 8 IN A MEETING/RETURN TIME (HH:MM)
0 9 AT HOME
1 0 AT BRANCH OFFICE
# to cancel
1 1 ~ 2 0 are used for customized messages which are
programmed by attendant. (See “Creating Customized Message”)
31
Range
● DIGITAL KEY TELEPHONE / USER’S GUIDE
KD, KD/E, LKD Series
Pre-selected Message (*)
Y can select
You
l t a pre-assigned
i
d message tto b
be di
displayed
l
d on th
the LCD off the
th phone
h
calling
lli th
the station.
t ti
Button
Procedures
Range
Or using display, (Only in KD-33LD, KD/E-36LD, LKD-30LD)
●
●
●
●
●
Press the 5th menu key from main menu and you will see
the following on the display.
■
■
■
■
■
ATD PROGRAM
STATION PROGRAM
LCD BRIGHTNESS
RING VOLUME
SPEAKER VOLUME
■
■
■
■
■
▣
STA 102 (T)
NOV 02 01:40pm
▲
▼
■
■
■
■
■
S>WAKE-UP SET
S>WAKE-UP ERASE
S>REG PASSWORD
S>CHG PASSWORD
S>INTERCOM ONLY
■
■
■
■
■
▣
STA 102 (T)
NOV 02 01:40pm
▲
▼
Press PAGE down(▼) key and you will see the following
on the display.
■
■
■
■
■
S>RESTORE COS
S>MSG PROGRAM
S>ICM INS MODE
S>MUSIC CHANNEL
S>PRESELECT MSG
■
■
■
■
■
▣
STA 102 (T)
NOV 02 01:40pm
▲
▼
Select STATION PROGRAM key.
On the display, you will see the following.
Select PRESELECT MSG.
On the display, you will see the following.
▣
●
●
LUNCH
VACATION
OUT
OUT
OUT
(TIME)
(DATE)
(TIME)
(DATE)
( ? )
STA 102 (T)
NOV 02 01:40pm
■
■
■
■
■
▲
▼
Select desired message key, date, time or station number, if
required.
Press HOLD/SAVE button. (DND/FWD button is flashing.)
To turn off message display,
●
Press flashing DND/FWD button.
32
System Featurres
■
■
■
■
■
● DIGITAL KEY TELEPHONE / USER’S GUIDE
KD, KD/E, LKD Series
User Custom Message Programming (*)
Y may program a custom
You
t
message 00 to
t be
b displayed
di l
d on the
th LCD off the
th phone
h
calling
lli your
station.
Button
Procedures
●
●
●
Range
Press TRANS/PGM button and dial 4 8 at the station.
(Confirmation tone is heard.)
Enter the message. (up to 24 letters using the code in “Storing
Dial by Name”)
Press HOLD/SAVE button.
Background Music
A station can receive audio, generally music from an internal or external source while idle.
Button
Procedures
●
●
●
●
●
Press TRANS/PGM button.
button
Dial 7 3 .
Internal BGM is heard.
Pressing TRANS/PGM + 7 3, the selected music is changed by
turns. (Channel 0: BGM is not heard.)
The default setting is assigned by PGM 41-BTN 1.
Range
186 : 0
0~9
9
100 : 0~9
34i : 0~9
16/20w : 1~3
DISA (Direct Inward System Access)
Outside caller can access a CO line which is programmed as DISA line.
Button
Procedures
●
●
Range
Dial the CO access code after hearing dial tone or voice guide
from DVU.
Or, dial the CO access code after dialing the programmed
authorization code (when needed) for outgoing call.
System Featurres
33
● DIGITAL KEY TELEPHONE / USER’S GUIDE
KD, KD/E, LKD Series
Voice Announcement
This feature provides the station with an audible system prompt
prompt, you can record a greeting that
will be played to the caller when the call is not answered within the predefined time.
Button
Procedures
Range
Time Prompt;
● Dial 6 7 1.
● You will hear the time prompt, “Time is XX : XX PM.”
Date Prompt;
● Dial 6 7 2.
● You will hear the date prompt, “Date is December, 20th.”
Station N
Number
mber Prompt
Prompt;
● Dial 6 7 3.
● You will hear the station number prompt, “This is station XXXX.”
Record your greeting;
● Dial 6 7 4 (for No Answer FWD) or 6 7 # (for Busy FWD).
● To stop recording, press MON/SPEAKER or HOLD/SAVE button.
(MON/SPEAKER button: erased automatically after 48 hours,
HOLD/SAVE button: remained until canceled)
● After recording your greeting message, a caller will hear your
greeting message when you do not answer the call within a
predefined time (PGM 43-BTN 24).
Delete your greeting;
● Dial 6 7 5 (for No Answer FWD) or 6 7*(for Busy FWD).
Playback your greeting;
● Dial 6 7 6 (for No Answer FWD) or 6 7 0 (for Busy FWD).
(You will hear the recorded greeting message.)
Station status prompt;
● Dial 6 7 7. (You will hear below list (a-h). c-g items will be
omitted if not active.)
a) Station number XXXX
c) Listed message X
e) Do not disturb
g) Forwarded to speed bin XXX
i) COS X
b) Intercom Answer mode
d) Wake-up time XXXX AM or PM
f) Forwarded to station XXXX
h) Locked (temporary COS change)
34
System Featurres
Record paging message;
● Dial 6 7 8.
● Lift handset to record your paging message.
● Press HOLD/SAVE button after recording.
Confirm paging message;
● Dial 6 7 9.
● The paging message is heard.
Activate Call Forward to DVU;
● Lift handset or press MON/SPEAKER button.
● Press DND/FWD button.
● Dial 7, 8, or 9. (Select DVU forward type for no answer or busy).
● Go on-hook.
Deactivate Call Forward to DVU;
● Lift handset or press MON/SPEAKER button.
● Press DND/FWD button.
● Dial #.
● Go on-hook.
● DIGITAL KEY TELEPHONE / USER’S GUIDE
KD, KD/E, LKD Series
Voice Announcement (Cont’d)
Button
Procedures
Range
Listen to the recorded message,
● Press the flashing CALLBK button.
● The recorded message is heard with the time and date.
● Pressing HOLD/SAVE button, the current message is saved
and the next message is heard.
● Pressing CALLBK button, the recorded message is heard from
the first message saved.
● Pressing CONF button, the current message is deleted.
※ The recorded caller’s message will not be erased without pressing CONF
button. When the system power is off or system is reset, it will be erased.
※ The max. user recording time is 250sec. (Default: 20sec: it can be
programmable with admin programming - PGM 44-BTN 16)
On LKD-2N/S, 8D/S,
●
●
●
●
●
●
●
If a DVU message is left, the MSG lamp is flashing.
Dial 5 7 or programmed CALLBK button to listen to the
recorded message.
Th recorded
The
d d message is
i heard
h d and
d then
th th
the message iis
automatically deleted when you hang up.
Pressing HOLD/SAVE button while a message is played, saves
the message and the next message is heard.
Pressing programmed CALLBK button, the recorded message
is heard from the first message saved.
If you don’t press HOLD/SAVE button, the current message is
deleted.
If you program a flex. button as a CONF button, the message
will be saved and you should press the programmed CONF
button to delete the message (only in GDK-16).
DVU station status;
● Press
P
th
the 4th kkey ffrom the
th main
i menu.
● Press PAGE down (▼) key 4 times.
● Select DVU STA STATUS.
You will hear below lists (a - I).
35
System Featurres
Or using display, (Only in KD-33LD, KD/E-36LD, LKD-30LD)
Time Prompt;
● Dial 6 7 1.
● You will hear the time prompt, “Time is XX : XX PM.”
Date Prompt;
● Dial 6 7 2.
● You
Y will
ill h
hear th
the d
date
t prompt,
t “D
“Date
t iis D
December,
b 20th
20th.””
Station Number Prompt;
● Dial 6 7 3.
● You will hear the station number prompt, “This is station XXXX.”
Record paging message;
● Dial 6 7 8.
● Lift handset to record your paging message.
● Press HOLD/SAVE button after recording.
● DIGITAL KEY TELEPHONE / USER’S GUIDE
KD, KD/E, LKD Series
Voice Announcement
Button
Procedures
Range
a) Station number XXXX
b) Ring assignment
c) Listed message X
d) Wake-up time XXXX AM or PM
e) Do Not disturb
f) Forwarded to station XXXX
g) Forwarded to speed bin XXX
h) Locked (temporary COS change)
i) COS X
Record your greeting;
● Press the 4th key from the main menu.
● Press PAGE down(▼) key 3 times.
● Select DVU RECORD key.
● Lift handset to record your greeting message.
● Press HOLD/SAVE button.
Delete your recording;
● Press the 4th key from the main menu.
● Press PAGE down(
down(▼)) key 3 times.
● Select DVU DELETE key.
Playback your greeting;
Press the 4th key from the main menu.
● Press PAGE down(▼) key 3 times.
● Select DVU PLAY key.
●
Paging your greeting;
Lift handset and dial the desired page zone.
● After hearing confirmation tone
tone, your recorded paging message
is sent to the page zone automatically.
●
In GDK-16/20W,
Record your greeting;
● Lift handset or press MON/SPEAKER button.
● Press DND/FWD button.
● Dial 7 #.
Activate Call Forward to DVU;
● Lift handset or press MON/SPEAKER button.
● Press DND/FWD button.
● Dial 7 .
● Go on-hook.
Deactivate Call Forward to DVU;
● Lift handset or press MON/SPEAKER button.
● Press DND/FWD button.
● Dial #.
● Go on-hook.
36
System Featurres
Delete your greeting;
● Lift handset or press MON/SPEAKER button.
● Press DND/FWD button.
● Dial 7 *.
● DIGITAL KEY TELEPHONE / USER’S GUIDE
KD, KD/E, LKD Series
Voice Announcement (in GDK-16/20W)
Button
Procedures
g
Range
To listen to the recorded message,
● Press the flashing CALLBK button.
● The recorded message is heard with the time and date.
● Pressing HOLD/SAVE button, the current message is saved
and the next message is heard.
● Pressing CALLBK button, the recorded message is heard from
the first.
● Pressing CONF button, the current message is deleted.
* The operation
p
of 2/8 BTN keyset
y
is the same with other GDK
systems. (Refer to p.34)
※ The max. user recording time is about 250sec. (Default: 20sec: it can be
programmable with admin programming - Main Menu 6-1-24)
CO Message Wait
When a call is received with DISA/DID, the Calling Line Identification (CLI) of the incoming call is
displayed on the LCD of the station
station. If the DISA/DID external party hangs up the call before
answered, the CLI will be stored in the CO message wait queue in the called party.
Button
Procedures
Range
To retrieve CLI Message,
Press CALLBK button.
● The stored message will be shown on the LCD.
●
To delete the current CLI message and see the next one,
Press CONF button.
●
To make a callback,
● Press HOLD/SAVE button.
● The stored number is dialed as speed dialing.
To see the next/previous CLI message,
Press VOLUME button.
●
37
System Featurres
To delete all CLI messages, (Not available in GDK-16/20W)
● Press SPEED button twice.
● If DVU message is stored with CLI message
message, the CLI message
will not be deleted by pressing SPEED button.
● DIGITAL KEY TELEPHONE / USER’S GUIDE
KD, KD/E, LKD Series
LCD Language Change (*)
Button
Procedures
●
●
●
Range
Press TRANS/PGM button and dial 5 1 .
The language in LCD is changed into default value.
If pressing TRANS/PGM + 5 1 , the language in the LCD is
changed to the nation’s language.
Alarm Reset
Button
Procedures
Range
To terminate alarm signal while idle state,
● Dial 6 5.
● Confirmation tone is heard and the alarm signal is terminated
at all assigned stations.
Or using display, (Only in KD-33LD, KD/E-36LD, LKD-30LD)
●
●
●
●
Press the 4th menu key from main menu to select FEATURE.
Press PAGE down(▼) key twice.
On the display, you will see the following.
■
■
■
■
■
ACC CO-GR(01-48)
ACC 1 CO(01-96)
UNIV NITE ANSWER
TIE ROUTE (01-30)
ALARM RESET
■
■
■
■
■
▣
STA 102 ((T))
NOV 02 01:40pm
▲
▼
Select ALARM RESET key.
Ring is stopped.
Two-way Recording (Only in GDK-16/20W)
Button
Procedures
To record the conversation,
● Press the programmed {RECORD} button.
To program the {RECORD} button,
[TRANS/PGM] + Flex. BTN + [TRANS/PGM] + # 4 +
[HOLD/SAVE]
To finish the recording,
● Press the programmed {RECORD} button again. Or, replace
the handset.
38
Range
System Featurres
While a CO line call, you can record the conversation and it will be saved in its own mailbox.
● DIGITAL KEY TELEPHONE / USER’S GUIDE
KD, KD/E, LKD Series
Automatic Call Distribution (ACD) Operation (*)
A separate or common supervisor can be assigned in a UCD group
group, and the assigned supervisor
can monitor and change the status of UCD group.
Button
Procedures
Range
The ACD status key can be programmed onto a Supervisor
station, the Supervisor must be a digital display telephone.
(The Supervisor can be assigned by PGM 48-BTN 13)
To program {ACD} button at the supervisor station,
[TRANS/PGM] + flexible button + [TRANS/PGM] + 8 * +
[HOLD/SAVE]
To use the ACD Status key to monitor agents,
Dial the agent station to be monitored, or press the DSS key
for the agent.
● On hearing busy tone, press the ACD key.
● Three busts if tone will be heard by the agent, and the caller
will now be monitoring the agent’s conversation.
● At this p
point, yyour MUTE button will be alight,
g yyour p
phone will
be muted, so that the agent and caller will not be able to hear
anything from your telephone.
It is not possible to disable this mute during monitoring.
●
●
The three busts of tone can be disabled with programming.
(PGM 21-BTN 2)
To use the ACD Status key for group statistics,
(With the Supervisor’s phone on-hook,)
● Press
P
th
the ACD St
Status
t key.
k
● You will see the following display;
ACD STATUS (GGG)
STAT: 1 DB: 2 DUTY: 3 PRT: #
Where GGG is the group number. If the phone is the Supervisor
for more than one group, you can use the Volume key to arrow
up or down through the groups.
39
System Featurres
For statistics, dial 1.
The bottom line will show the group statistics. There are a number
of these available, to scroll through them, you can press the down
arrow on the Volume key.
The statistics available are;
TOTAL CALLS x
This shows the total calls presented to the group.
AVE CALL TIME xx:xx
This is the average conversation time for calls within the group,
shown in minutes and seconds
seconds.
AVE RING TIME xx:xx
This is the average ringing time for calls presented to the group,
before they are answered.
● DIGITAL KEY TELEPHONE / USER’S GUIDE
KD, KD/E, LKD Series
Automatic Call Distribution (ACD) Operation (Cont’d) (*)
Button
Procedures
Range
BUSY x TIME xx:xx
This gives a count of how many times all agents have been busy
and how long they were all busy for.
CALLS IN QUEUE x
This shows how many calls are queuing within the group at the
present time. This will not increment if left on the display.
AVE xx:xx LONG xx:xx
This shows the average and longest ringing times for calls, before
they are answered in the group.
UNANSWERED CALLS x
This shows the number of calls that have not been answered in
the group. (the caller has hung up)
●
If you wish to print the statistics you can take the PRT option
from the display above. Pressing # key, the details will be
printed from the serial port on the system.
System Featurres
40
● DIGITAL KEY TELEPHONE / USER’S GUIDE
KD, KD/E, LKD Series
Large LCD Features
La
arge LCD
Th following
The
f ll i
features
f t
are operated
t d only
l KD-33LD,
KD 33LD KD/E-36LD
KD/E 36LD and
d LKD
LKD-30LD.
30LD
(Large LCD Digital Keyset)
LCD Brightness Control (*)
Button
Procedures
●
●
●
Range
Press the 5th menu key from main menu.
Select LCD BRIGHTNESS.
Press VOLUME (▲/▼) button to control the brightness.
Door Open
Button
Procedures
●
●
Press the 4th menu key from main menu to select FEATURE.
Press PAGE down(▼) key 3 times.
times
On the display, you will see the following.
■
■
■
■
■
▣
●
●
Range
■
■
■
■
■
DOOR OPEN (1-4)
DVU RECORD
DVU DELETE
DVU STA STATUS
DVU PLAY
STA 102 (T)
NOV 02 01:40pm
▲
▼
Select DOOR OPEN(1-4) key.
Select the door open type by pressing dial button 1~4.
Calendar Display
Button
Procedures
●
Press MENU key to display Calendar.
On the display, you will see calendar as follows;
■
■
■
■
■
▣
●
●
MAR 2000
S M T W T F S
1
2 3
5 6 7 8 9 10
12 13 14 15 16 17
19 20 21 22 23 24
26 27 28 29 30 31
4
11
18
25
STA 102 (T)
SEP 02 01:40pm
■
■
■
■
■
▲
▼
While the calendar is displayed, the main menu key and other
menu keys will not work.
To display the main menu instead of calendar, press
MENU key.
41
Range
● DIGITAL KEY TELEPHONE / USER’S GUIDE
KD, KD/E, LKD Series
Flexible Button Programming
B tt
Button
Range
P
Procedures
d
To program flexible buttons,
●
●
●
●
Press TRANS/PGM button.
Press a flexible button to program.
See the below table and enter the desired code.
Press HOLD/SAVE button.
To erase a flexible button,
●
●
●
Press TRANS/PGM button.
Press the flexible button to be erased.
Press HOLD/SAVE button.
Code for Flexible Button Programming
Direct Station Select
station number
System speed dial
186 : 100~291
100 : 100~235
34i : 100~177
16 : 100~115
20W: 100~133
Call Park
186 : 200~999
200 999
100 : 200~399
34i : 200~399
16/20W :21~99
parking location
186 : 601~619
100 : 601~610
34i : 601~605
16/20W: 601~606
Hunt Group
SPEED + bin no.
internal hunt group
186 : 620~649
100 : 620~634
34i : 620~627
16/20W : 61~64
Group Call Pick-up
66
Dial Memo
TRANS/PGM + 8 0
Call Wait (Camp-on)
TRANS/PGM + 8 5
Wake-up
To register (continued) TRANS/PGM + 4 1
To cancel
TRANS/PGM + 4 2
P i
Paging
R
Refer
f tto p. 21
Access Authorization code
Blocking outside call
TRANS/PGM + 4 6
Restoring outside call TRANS/PGM + 4 7
Pre-selected Message TRANS/PGM + 7 7
Background Music
TRANS/PGM + 7 3
LCD Display Change
TRANS/PGM + 5 1
Intercom Hold
TRANS/PGM + 8 3
Universal Night Answer 6 9
Loop button
TRANS/PGM + 8 4
Speed Dial
Station speed dial
SPEED + bin no
186/100/34i: 00~19
16/20W: 01~20
42
Intercom Answer Mode
Stop Watch Event Timer
Alarm Reset
Station DVU Access
Account Code
Camp-on
Outside Line Access
Group access
Group #1
Group #2
:
TRANS/PGM + 4 9
TRANS/PGM + 8 9
65
67
TRANS/PGM + 8 1
TRANS/PGM + 8 5
Group #48
Individual Line Access
848
8 8 + line no.
9
8 0 1 186: Group#01~48
8 0 2 100: Group#01~24
:
34i: Group#01~09
16/20W :Group#01~04
186 : 01~96
100 : 01~48
34i : 01
01~34
34
16/20W :01~06
Button Assignment for LKD-2/8 button
REDIAL button
SPEED button
CONF button
CALLBK button
DND button
FLASH button
MUTE button
MON button
TRANS + 8 8
TRANS + 9 0
TRANS + 9 1
TRANS + 9 2
TRANS + 9 3
TRANS + 9 4 (*)
TRANS + 9 5
TRANS + 9 6 (*)
● DIGITAL KEY TELEPHONE / USER’S GUIDE
KD, KD/E, LKD Series
Information
. You cannot use Large LCD digital keyset in GDK
GDK-16/20W.
16/20W
. Programming flexible buttons for the following features are not supported in GDK-16/20W
(marked (*)).
- Dial Memo
- Access Authorization Code
- Pre-selected Message
- LCD Display Change
- Stop Watch Event Timer
- Account Code
43
● DIGITAL KEY TELEPHONE / ATTENDANT OPERATION
KD, KD/E, LKD Series
Wake-up Call
Button
Procedures
To register wake-up call,
●
●
●
●
Or using display, (Only in KD-33LD, KD/E-36LD, LKD-30LD)
●
●
Press the 5th menu key from the main menu to select PROGRAM.
On the display, you'll see the following.
■
■
■
■
■
ATD PROGRAM
STATION PROGRAM
LCD BRIGHTNESS
RING VOLUME
SPEAKER VOLUME
■
■
■
■
■
▣
STA 102 (T)
NOV 02 01:40pm
▲
▼
Select the ATD PROGRAM. On the display, you'll see the following.
■
■
■
■
■
▣
●
●
●
●
A>WAKE-UP SET
A>WAKE-UP ERASE
A>PASSWORD ERASE
A>CHG DATE MODE
A>CHG TIME MODE
STA 102 (T)
NOV 02 01:40pm
■
■
■
■
■
▲
▼
Select the WAKE-UP SET key.
Enter the station range(XXX-YYY) to receive wake-up call.
Enter 4-digit wake-up time (HHmm) in 24-hour mode.
Press HOLD/SAVE button for one-day, or dial # and HOLD/SAVE button for
until canceled.
To cancel wake-up
wake up call,
call
●
●
●
●
Press TRANS/PGM button.
Dial 4 2. (Confirmation tone is heard and MON/SPEAKER button is lighting.)
Dial the station range to be canceled.
Press HOLD/SAVE button. (MON/SPEAKER button will be extinguished.)
Or using display, (Only in KD-33LD, KD/E-36LD, LKD-30LD)
●
●
●
●
●
Press the 5th menu key from the main menu.
Select the ATD PROGRAM.
Select the WAKE-UP ERASE key.
Enter the station range to be canceled (XXX~YYY).
Press HOLD/SAVE button.
44
Atttendant Operation
●
Press TRANS/PGM button.
Dial 4 1.
Dial the station range (6 digits). In case of one station, dial the station
number twice.
After hearing confirmation tone, enter 4-digit wake-up time (HHmm) with
24-hour mode. (HH= 00~23, mm= 00~59)
Press HOLD/SAVE button for one-day, or dial # and HOLD/SAVE button for
until canceled.
canceled
● DIGITAL KEY TELEPHONE / ATTENDANT OPERATION
KD, KD/E, LKD Series
System Greetings
It provides announcements for Hunt service (UCD/Circular/Terminal) or DISA and only the
system attendant can record this message.
Button
Procedures
●
●
●
1~9 : for Hunt or company information with DISA
10 : for Invalid message
11 : for Time-out message
12 : for Try again message
13 : for Transfer to attendant message
14 : for Leave message
15 : for Record message
16 : for Enter authorization message
17 : for MOH message
18 : for Busy message
20 : for STA off-net announcement message
●
●
●
Press # (to record with DKTU) button or * (to record with external MOH)
button after hearing the message.
Record your greeting and hang up to finish the recording.
To delete, press DND/FWD button while the message is played.
In GDK-16,
●
Press TRANS/PGM button.
Dial # 4.
Select the announcement type.
(1: System Greeting,
Greeting 2: System Prompt)
Dial the announcement number.
Dial the source number. (1: external MOH, 2: DKTU)
Dial # to start recording.
Press HOLD/SAVE button.
●
You have 6 System Greetings and 9 Prompts;
●
●
●
●
●
●
System Greetings (Announcement Type 1)
1 : Day Time System Greeting
2 : Night Time System Greeting
3 : Circular & Terminal Hunt Group Greeting
4 : 1st UCD Group Announcement
5 : 2nd UCD Group Announcement
6 : DVIB MOH
7 : SLT Message Wait Indication Announcement
8 : Station Off-net Call Forward Announcement
System Prompts (Announcement Type 2)
1 : Timeout Prompt
2 : Retry Prompt
3 : Busy Prompt
4 : DND Prompt
5 : Invalid Prompt
6 : No Answer Prompt
7 : Transfer to Attendant Prompt
8 : Authorization Code Prompt
9 : Record Start Prompt
●
To delete announcement, dial the announcement number and #.
45
Atttendant Operation
●
Press TRANS/PGM button.
Dial # 4.
For DVU, dial 0 1 for announcement 1, dial 0 2 for announcement 2, or 0 3
for announcement 3. (Announcement 3 is played back when the called party
is busy.)
For EDVU, you have 31 (01~31) system greetings;
● DIGITAL KEY TELEPHONE / ATTENDANT OPERATION
KD, KD/E, LKD Series
Attendant Clock Set
This feature allows the attendant to set the Time/Date without entering Admin Programming.
Programming
Button
Procedure
●
●
●
In GDK-16,
●
●
●
●
Press TRANS/PGM button.
Dial # 1.
Enter Date as MMDDYY (6 digits) and press HOLD/SAVE button.
Enter Time as military format (4 digits) and press HOLD/SAVE button.
If there is no need to change date or time, press HOLD/SAVE button to go to
the next step.
Changing Time/Date Format
Button
Procedure
To change the date format on the LCD,
●
●
●
Press TRANS/PGM button.
Dial * 5.
The format toggles between DDMMYY and MMDDYY.
(YY : year, MM : month, DD : date)
Or using display, (Only in KD-33LD, KD/E-36LD, LKD-30LD)
●
●
●
Press the 5th menu key from the main menu to select PROGRAM.
Select the ATD PROGRAM key.
Press PAGE down (▼) key once. On the display, you'll see the following.
■
■
■
■
■
▣
●
●
A>WAKE-UP SET
A>WAKE UP ERASE
A>WAKE-UP
A>PASSWORD ERASE
A>CHG DATE MODE
A>CHG TIME MODE
STA 102 (T)
NOV 02 01:40pm
■
■
■
■
■
▲
▼
Select the CHG DATE MODE key.
The format toggles between DDMMYY and MMDDYY.
(YY : year, MM : month, DD : date)
T change
To
h
the
th titime fformatt on th
the LCD
LCD,
●
●
●
Press TRANS/PGM button.
Dial * 6.
The format toggles between 12-hour mode and 24-hour mode.
46
Atttendant Operation
●
Press TRANS/PGM button.
Dial # 1.
Enter Date + Time. Enter as YYMMDDHHmm.
(YY= Year 00~99, MM= Month 01~12, DD= Date 01~31, HH= Hour 00~23,
mm= minute 00~59)
If there is no need to change date or time, press * key.
((YYMMDD + * or * + HHmm))
Press HOLD/SAVE button.
● DIGITAL KEY TELEPHONE / ATTENDANT OPERATION
KD, KD/E, LKD Series
Changing Time/Date Format (Cont’d)
Button
Procedure
Or using display, (Only in KD-33LD, KD/E-36LD, LKD-30LD)
●
●
●
Press the 5th menu key from the main menu to select PROGRAM.
Select the ATD PROGRAM key.
Select the CHG TIME MODE key.
The format toggles between 12 and 24-hour mode.
Button
Procedure
To set the current time 1 hour early,
●
●
Press TRANS/PGM button.
Dial * 1.
To set the current time 1 hour late,
●
●
Press TRANS/PGM button.
Dial * 2.
System
y
Speed
p
Dial
A group of speed dial numbers can be stored within the system for access by allowed stations.
These numbers provide speedy access to often used outgoing CO dialing numbers.
Button
Procedure
To store system speed numbers,
●
●
●
●
●
●
●
●
●
●
●
Press TRANS/PGM button.
Dial SPEED button.
GDK-186 : 200~999
Dial speed number bin.
100 : 200~399
Dial the phone numbers to be stored.
34i : 200~399
Dial HOLD/SAVE button.
16/20W : 21~99
Or,
Press TRANS/PGM button.
Dial SPEED button.
Dial speed number bin.
Press desired outside line button.
Dial the phone numbers to be stored.
Dial HOLD/SAVE button.
To use system speed numbers,
●
●
Press SPEED button.
Dial speed number bin.
47
Atttendant Operation
To Set Current Time 1 Hour Early/Late (Only in GDK-16/20W)
● DIGITAL KEY TELEPHONE / ATTENDANT OPERATION
KD, KD/E, LKD Series
Attendant Intrusion
Attendant may intrude into any station which is in conversation with a CO line.
line
Button
Procedure
To assign a flexible key as the Intrusion button (Not available in GDK-16/20W),
●
●
●
●
To activate attendant intrusion (GDK-186/100/34i),
●
●
Press DSS button corresponding to the busy station you wish to call.
(Busy tone is heard.)
Press ATD INTRUSION button.
(Intrusion warning tone is heard in the busy station, then a 3-way
conference is set up.)
To activate attendant intrusion (GDK-16/20W),
●
●
Press CO button you wish to converse.
(If intrusion is allowed by Admin program, then 3 way conversation is set
up. If intrusion is not allowed, busy tone will be heard.)
System Base Program (Main Menu 5) - System Attribute (Sub Menu 1)
- Privacy (Terminal Menu 2)
Day/On-demand/Night Mode Service (Manual/Automatic)
The attendant station can be placed into night service mode allowing ring assignments and
answering privileges to station not having the privileges in the day mode. Or, can be placed
into on-demand service mode allowing ring assignments and answering privileges to station not
having the privileges in the night mode.
(In GDK-16, only Day/Night mode change is available by pressing DND button at attendant station.)
Button
Procedures
To activate/deactivate Day/Night/On-demand mode manually,
●
●
●
●
Press DND/FWD button
P
b tt att attendant
tt d t station.
t ti
Then, DND/FWD button is flashing. (The system is placed into On-demand
mode.)
If pressing the DND button once more, then the system is placed into Night
service mode.
On-demand mode is not activated automatically.
To change Day/Night mode automatically,
●
●
●
●
Press TRANS/PGM button.
Dial # 9
9.
Enter DAY TIME + NIGHT TIME, or DAY TIME + * or * + NIGHT TIME .
(Enter as HHmm (HH= hour 00~23, mm= minute 00~59))
Press HOLD/SAVE button.
48
Atttendant Operation
●
Press TRANS/PGM button.
Press the desired flex. key to be registered.
Press TRANS/PGM button.
Dial 8 6.
Press HOLD/SAVE button.
● DIGITAL KEY TELEPHONE / ATTENDANT OPERATION
KD, KD/E, LKD Series
To Print out Accumulated SMDR Records (*)
Station Message Detail Recording (SMDR) can provide details on both incoming and outgoing
calls.
Button
Procedures
For station basis,
●
●
●
Or using display, (Only in KD-33LD, KD/E-36LD, LKD-30LD)
●
Press the 4th menu key from the main menu to select FEATURE.
On the display, you will see the following.
■
■
■
■
■
▣
●
●
●
●
INT PAGE (01-20)
INT ALL CALL
EXT ALL CALL
INT/EXT ALL CALL
MEET ME
STA 102 (T)
NOV 02 01:40pm
■
■
■
■
■
▲
▼
Press PAGE down key(▼) 4 times. On the display, you will see the following.
■
■
■
■
■
STA PRT SMDR
ACT GRD PRT SMDR
STA DEL SMDR
ACT GRP DEL SMR
DISP CALL CHARGE
■
■
■
■
■
▣
STA 102 (T)
NOV 02 01:40pm
▲
▼
Select STA PRT SMDR key.
Enter the desired station range to be printed.
Press HOLD/SAVE button.
For account group basis,
●
●
●
Dial * 1.
Enter the desired account group to be printed. GDK-186 : 01~99
100 : 01~24
P
Press
HOLD/SAVE button.
b tt
34i : 01~24
(Accumulated SMDR records will be printed out
through the printer connected to KSU.)
Or using display, (Only in KD-33LD, KD/E-36LD, LKD-30LD)
●
●
●
●
●
Press the 4th menu key from the main menu to select FEATURE.
Press PAGE down key(▼) 4 times.
Select ACT GRP PRT SMDR key.
GDK-186 : 01~99
Enter the account g
group
p to be p
printed.
100 : 01~24
Press HOLD/SAVE button.
34i : 01~24
49
Atttendant Operation
Dial * 0.
Enter the desired station range.
Press HOLD/SAVE button.
Accumulated SMDR records will be printed out through the printer
connected
co
ected to KSU.
SU
● DIGITAL KEY TELEPHONE / ATTENDANT OPERATION
To Erase SMDR Records
KD, KD/E, LKD Series
(*)
B tton
Button
P
Procedure
d
For station basis,
●
●
●
Dial * 2.
Enter the desired station range.
(SMDR records will be erased for all stations in the range.)
Press HOLD/SAVE button.
●
●
●
●
●
Press the 4th menu key from the main menu to select FEATURE
FEATURE.
Press PAGE down key(▼) 4 times.
Select STA DEL SMDR key.
Enter the station range to be erased.
Press HOLD/SAVE button.
For call account group,
●
●
●
Dial * 3.
Enter the desired account group.
((SMDR records will be erased for all stations in the range.)
g )
Press HOLD/SAVE button.
Or using display, (Only in KD-33LD, KD/E-36LD , LKD-30LD)
●
●
●
●
●
Press the 4th menu key from the main menu to select FEATURE.
Press PAGE down key(▼) 4 times.
Select ACT GRP DEL SMDR key.
Enter the account group to be erased.
Press HOLD/SAVE button.
To display call charge,
●
●
●
Dial * 4.
Enter the station number.
Press HOLD/SAVE button.
Or using display, (Only in KD-33LD, KD/E-36LD, LKD-30LD)
●
●
●
●
●
Press the 4th menu key from the main menu to select FEATURE.
Press PAGE down key(▼) 4 times.
Select DISP CALL CHARGE key.
y
Enter the desired station number.
Press HOLD/SAVE button.
50
Atttendant Operation
Or using display, (Only in KD-33LD, KD/E-36LD , LKD-30LD)
● DIGITAL KEY TELEPHONE / ATTENDANT OPERATION
KD, KD/E, LKD Series
Dial by Name (for ICM) (*)
Button
Procedure
●
●
●
Q - 11
Z - 12
. - 13
1 - 10
A - 21
B - 22
C - 23
2 - 20
D - 31
E - 32
F - 33
3 - 30
G - 41
H - 42
I - 43
4 - 40
J - 51
K - 52
L - 53
5 - 50
M - 61
N - 62
O - 63
6 - 60
P - 71
R - 72
S - 73
Q - 7*
7 - 70
T - 81
U - 82
V - 83
8 - 80
W - 91
X - 92
Y - 93
Z - 9#
9 - 90
*1 - Blank
*2 - :
*3 - ,
0-00
#
Press HOLD/SAVE button.
Or using display, (Only in KD-33LD, KD/E-36LD, LKD-30LD)
●
●
●
Press the 5th menu key from the main menu to select PROGRAM.
Select the ATD PROGRAM key.
Press PAGE down key (▼) 3 times. On the display, you'll see the following.
■
■
■
■
■
▣
●
●
A>USER DIAL NAME
A>AUTO DAY-NIGHT
STA 102 (T)
NOV 02 01:40pm
■
■
■
■
■
▲
▼
Dial the station number and enter the name using the code.
Press HOLD/SAVE button.
Customized Message (*)
Button
Procedure
●
●
●
●
●
Press TRANS/PGM button.
Dial * 7.
Dial the number of the desired message. (11~20)
Enter the desired message using the code in Dial by Name.
Press HOLD/SAVE button.
51
Atttendant Operation
●
Press TRANS/PGM button.
Dial # 8.
Dial the station number and enter the name using the code shown below.
● DIGITAL KEY TELEPHONE / ATTENDANT OPERATION
CO Outgoing Disable
KD, KD/E, LKD Series
(*)
Button
Procedure
To disable outgoing calls a CO line,
●
●
●
●
●
Press TRANS/PGM button.
Dial * 8.
Press the desired outside line button. (Confirmation tone is heard.)
After hearing confirmation tone, selected outside line button is disabled.
Repeat the process to enable the CO line.
●
●
●
●
●
Press the 5th menu key from the main menu to select PROGRAM.
Select the ATD PROGRAM key.
Press PAGE down key(▼) once. On the display, you'll see the following.
■
■
■
■
■
A>DISABLE CO OUT
A>STA MSG ERASE
A>SET ICMBOX MSC
A>CLOCK SET
A>INTERCOM ONLY
■
■
■
■
■
▣
STA 102 (T)
NOV 02 01:40pm
▲
▼
Select the DISABLE CO OUT key.
Press the desired outside line button. (Confirmation tone is heard.)
T
Temporary
COS Change
Ch
(*)
A station user can change the class of service to lower class temporarily to prevent unauthorized
use of the station by others.
Button
Procedures
To activate temporary COS change,
●
●
●
●
Press TRANS/PGM button.
Dial # 2.
Enter the station range
range.
Press HOLD/SAVE button.
To remove temporary COS change,
●
●
●
●
Press TRANS/PGM button.
Dial # 3.
Enter the station range.
Press HOLD/SAVE button.
52
Atttendant Operation
Or using display,
display (Only in KD-33LD,
KD-33LD KD/E-36LD,
KD/E-36LD LKD-30LD)
● DIGITAL KEY TELEPHONE / ATTENDANT OPERATION
Traffic Analysis
KD, KD/E, LKD Series
(*)
Button
Procedure
To start the traffic analysis at system attendant,
●
●
●
Press TRANS/PGM button.
Dial # 7 1.
Press HOLD/SAVE button.
To stop the traffic analysis at system attendant
attendant,
●
●
●
Press TRANS/PGM button.
Dial # 7 2.
Press HOLD/SAVE button.
To print the result of traffic analysis at system attendant,
●
●
●
Press TRANS/PGM button.
Dial # 7 3.
Press HOLD/SAVE button.
To abort printing at system attendant
attendant,
●
●
●
Press TRANS/PGM button.
Dial # 7 4.
Press HOLD/SAVE button.
Erasing Station Message (*)
The attendant can cancel the features, DND CALL FORWARD and preselected message
activating at other station.
Button
Procedure
●
●
●
●
Press TRANS/PGM button.
Dial * 9.
Dial the desired station range to be canceled.
Press HOLD/SAVE button.
53
Atttendant Operation
Th system
The
t
will
ill monitor
it th
the system
t
and
d record
d various
i
ttraffic
ffi d
data
t which
hi h can b
be printed
i t d upon
request. The information can be used to determine whether the circuits installed in the system
are adequate.
When enabled, it will continue to monitor the traffic until disabled. The traffic data is collected and
sent to the RS232C port upon request. The collected traffic data contains two types of traffic data.
The first type is peg counts which give an actual count of the number of times a particular
operation has occurred. Peg counts are given in absolute values from 00000 to 99999. The
second type of data is usage times which give the average percent occupancy of a device, i.e.,
stations, CO lines, DTMF receivers, etc. Usage times are given in seconds from 00000 to
99999 Counts and times are cumulative from the time the monitoring is activated
99999.
activated, and are reset
by initiating the start up procedure again.
● DIGITAL KEY TELEPHONE / ATTENDANT OPERATION
KD, KD/E, LKD Series
Attendant LCD Language (*)
B tt
Button
P
Procedure
d
To change the LCD language at attendant,
●
●
●
●
●
Press TRANS/PGM button.
Dial 5 1.
Dial the station range to be changed.
Select the language type with the following codes.
Press HOLD/SAVE button.
GDK-186 GDK-100/34i
00
01
02
03
04
05
06
07
08
09
10
..
..
13
12
14
15
16
17
18
20
9
21
11
22
..
00
01
02
03
04
05
06
07
08
09
10
11
12
13
14
15
16
17
18
19
20
21
22
23
24
25
Language
English
Korean
Italy
English for Large LCD
Swedish
Norwegian
Finnish
Dutch
Spanish
Korean for Large LCD
Danish
German
German for Large LCD
Estonia
Estonia for Large LCD
Swedish for Large LCD
Italy for Large LCD
Norway for Large LCD
Finnish for Large LCD
Dutch for Large LCD
Russian
Spanish for Large LCD
Russian for Large LCD
Danish for Large LCD
Portuguese
Portuguese for Large LCD
54
Atttendant Operation
Type (00~25)
● DIGITAL KEY TELEPHONE / ATTENDANT OPERATION
KD, KD/E, LKD Series
Intercom Box BGM Selection by Attendant (*)
Th attendant
The
tt d t can select
l t the
th music
i channel
h
l source to
t an ICM b
box.
Button
Procedure
To set ICM box music,
●
●
●
●
Press TRANS/PGM button.
Dial * 0.
Dial the music channel (0~9).
Press HOLD/SAVE button.
●
●
Press the 5th menu key from the main menu to select PROGRAM.
Select the ATD PROGRAM key. On the display, you will see the following.
■
■
■
■
■
▣
●
●
●
●
A>WAKE-UP SET
A>WAKE-UP ERASE
A>PASSWORD ERASE
A>CHG DATE MODE
A>CHG TIME MODE
STA 102 (T)
NOV 02 01:40pm
■
■
■
■
■
▲
▼
Press PAGE down key (▼) once.
You'll see the following.
■
■
■
■
■
A>DISABLE CO OUT
A>STA MSG ERASE
A>SET ICMBOX MSC
A>CLOCK SET
A>INTERCOM ONLY
■
■
■
■
■
▣
STA 102 (T)
NOV 02 01:40pm
▲
▼
Select the SET ICMBOX MSC.
Press the Music type;
0 : No music
1~9 : Music from channel 1~9
Press HOLD/SAVE button.
Overriding a Key Telephone in Do Not Disturb (in GDK-16/20W)
Button
Procedure
●
●
Press DSS button of the station to be overridden. (DND tone or busy tone is
heard.)
Dial * to override the station in DND or in busy.
55
Atttendant Operation
Or using display, (Only in KD-33LD, KD/E-36LD, LKD-30LD)
● DIGITAL KEY TELEPHONE / ATTENDANT OPERATION
KD, KD/E, LKD Series
Attendant DSS Operation /Placing an Intercom Call from the DSS
Button
Procedures
●
●
●
Lift handset or press MON/SPEAKER button.
Press the desired DSS station button.
Hang up or press RELEASE button to terminate the call.
(RELEASE button is not available in GDK-16/20W.)
Button
Procedure
●
●
●
●
Lift handset or press MON/SPEAKER button.
Press PAGE button.
Speak in normal voice tone to announce message.
Hang up or press RELEASE button.
(RELEASE button is not available in GDK-16/20W.)
Transferring an Outside Line to Another Station
Button
Procedure
●
●
●
While connecting an outside line, press the desired DSS station button.
You can wait to announce the transfer or,
Hang up or press RELEASE button.
(RELEASE button is not available in GDK-16/20W
GDK-16/20W.))
Intercom Group Call (*)
Button
Procedure
●
●
●
Lift handset or press MON/SPEAKER button.
Press the programmed INTERCOM GROUP CALL button.
button
The call is connected to an idle station in the group.
Overriding a Key Telephone in Do Not Disturb (*)
Button
Procedure
●
●
Press DSS button of the station to be overridden. (DND tone or busy tone is
heard.)
Press programmed OVERRIDE button.
56
Atttendant Operation
Making a Page