1
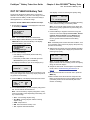
ODYSSEY® Battery Heavy Duty
Diagnostic Tester
User Guide
IMPORTANT NOTICES
SAFETY
All DANGER, WARNING, IMPORTANT messages and Notes must be followed for your safety. These safety
messages are in the following formats:
DANGER: Means you may risk possible loss of life
WARNING: Means you may risk possible bodily harm
IMPORTANT: Means you risk damage to the vehicle or the tool
Notes: are added to provide clarity and helpful tips
These safety messages cover situations of which the manufacturer of the ODYSSEY® Heavy Duty Battery
Diagnostic Tester is aware. The manufacturer cannot know, evaluate and advise you as to all of the possible
hazards. You must be certain that any conditions or service procedures encountered do not jeopardize your
personal safety.
COPYRIGHT
No part of this manual may be reproduced, stored in a retrieval system or transmitted, in any form or by any
means, electronic, mechanical, photocopying, recording, or otherwise, without the prior written permission
of EnerSys®.
DISCLAIMER
All information, illustrations and specifications contained in this technical instruction manual are based on the
latest information available at the time of publication. The right is reserved to make changes at any time without
obligation to notify any person or organization of such revisions or changes. Further, EnerSys® shall not be liable
for errors contained herein or for incidental or consequential damages (including lost profits) in connection with
the furnishing, performance or use of this material.
© 2008 EnerSys. All rights reserved.
ODYSSEY® BATTERY HEAVY DUTY
HANDHELD BATTERY &
ELECTRICAL SYSTEM TESTER
USER GUIDE
Contents
Chapter 1: General Information . . . . . . . . . . . . . . . . . . . . . . . . . . 1
Component Identification . . . . . . . . . . . . . . . . . . . . . . . . . . . . . . . . . . . . . . . . 1
PortAlyzer™ Heavy Duty Tester . . . . . . . . . . . . . . . . . . . . . . . . . . . . . . . . 1
Test Lead with Battery Clamps . . . . . . . . . . . . . . . . . . . . . . . . . . . . . . . . . 1
Chapter 2: ODYSSEY® Battery Tests . . . . . . . . . . . . . . . . . . . . . . 3
Pretest Steps. . . . . . . . . . . . . . . . . . . . . . . . . . . . . . . . . . . . . . . . . . . . . . . . . . 3
EnerSys® Batteries and Functions . . . . . . . . . . . . . . . . . . . . . . . . . . . . . . . . . 3
Chapter 3: Non-ODYSSEY® Battery Tests . . . . . . . . . . . . . . . . . . 5
Pretest Steps. . . . . . . . . . . . . . . . . . . . . . . . . . . . . . . . . . . . . . . . . . . . . . . . . . 5
Other Batteries and Functions (non-ODYSSEY® batteries) . . . . . . . . . . . . . . 6
IN VEHICLE Battery and Electrical System Test (non-ODYSSEY® batteries) 6
OUT OF VEHICLE Battery Test . . . . . . . . . . . . . . . . . . . . . . . . . . . . . . . . . . . 9
QUICK TEST (Battery) . . . . . . . . . . . . . . . . . . . . . . . . . . . . . . . . . . . . . . . . . 10
Understanding Test Results . . . . . . . . . . . . . . . . . . . . . . . . . . . . . . . . . . . . . 11
Battery Test Results . . . . . . . . . . . . . . . . . . . . . . . . . . . . . . . . . . . . . . . . 11
System Test Results . . . . . . . . . . . . . . . . . . . . . . . . . . . . . . . . . . . . . . . . 11
Chapter 4: More Functions Menu . . . . . . . . . . . . . . . . . . . . . . . . 13
VIEW LAST TEST Results . . . . . . . . . . . . . . . . . . . . . . . . . . . . . . . . . . . . . . 13
SOFTWARE UPDATE. . . . . . . . . . . . . . . . . . . . . . . . . . . . . . . . . . . . . . . . . . 14
UNIT VERSION. . . . . . . . . . . . . . . . . . . . . . . . . . . . . . . . . . . . . . . . . . . . . . . 14
TEST COUNTERS . . . . . . . . . . . . . . . . . . . . . . . . . . . . . . . . . . . . . . . . . . . . 14
STORED TESTS. . . . . . . . . . . . . . . . . . . . . . . . . . . . . . . . . . . . . . . . . . . . . . 15
MANUAL CRANK DATA . . . . . . . . . . . . . . . . . . . . . . . . . . . . . . . . . . . . . . . . 15
ACC LOAD TEST . . . . . . . . . . . . . . . . . . . . . . . . . . . . . . . . . . . . . . . . . . . . . 16
PortAlyzer™ Battery Tester User Guide
Safety Precautions
Safety Precautions
DANGER:
• When an engine is operating, keep the service area WELL VENTILATED or attach a building
exhaust removal system to the engine exhaust system. Engines produce carbon monoxide,
an odorless, poisonous gas that causes slower reaction time and can lead to serious injury
or death.
WARNING:
• Wear an American National Standards Institute (ANSI) approved eye shield when testing or
repairing vehicles. Objects propelled by whirling engine components or pressurized liquids
escaping may cause personal injury.
• Set the parking brake and block the wheels before testing or repairing a vehicle. It is especially
important to block the wheels on front-wheel drive vehicles because the parking brake does
not hold the drive wheels.
• Do not drive the vehicle and operate the tester at the same time. Any distractions may
cause an accident. Have one person operate the tester as another person drives the vehicle.
• Maintain adequate clearance around moving components or belts during testing. Moving
components and belts can catch loose clothing, body parts or test equipment and cause
serious damage or personal injury.
• Automotive batteries contain sulfuric acid and produce explosive gases that can result in serious
injury. Stand back from the battery during testing. To prevent ignition of gases, keep lighted
cigarettes, sparks, flames and other ignition sources away from the battery at all times.
• Do not test a frozen battery, as it may explode. Allow the battery to warm up before testing.
• Do not spray liquids on the tester. Liquids may enter the tester and cause permanent damage
to the electrical components. Flammable liquids may cause an explosion.
• Do not use the test leads if the insulation is damaged or if metal is exposed.
• Do not remove the test leads while a test is running.
• Do not touch the test leads, tips or the circuit being tested.
• Refer to the service manual for the vehicle being serviced and adhere to all diagnostic
procedures and precautions.
IMPORTANT:
To prevent damage to the vehicle computer when disconnecting battery cables:
• Turn the ignition and all accessories and loads off. Close the vehicle doors and trunk lid.
• Remove the negative battery cable first, then remove the positive cable.
i
This page is intentionally blank
PortAlyzer™ Battery Tester User Guide
Chapter 1: General Information
1
Component Identification
1: General Information
The PortAlyzer™ Heavy Duty Battery Tester is a portable,
hand-held tool that tests the condition of 12 volt batteries as
well as 12 or 24 volt battery packs.
1
The PortAlyzer Heavy Duty Battery Tester tests thin plate
pure lead absorbed glass mat (AGM) batteries within the 50
to 4000 Cold Cranking Amp (CCA), Cranking Amp (CA), Amp
Hours (A-HR), Japanese Industrial Standard (JIS) or
German-Duetche Industry Norm (DIN) capacity ratings.
Component Identification
2
4
3
The PortAlyzer Heavy Duty Battery Tester includes the
following system components:
•
•
•
•
Carrying Case
User Guide
PortAlyzer Heavy Duty Battery Tester
Test Lead with Battery Clamps
Figure 1.2: PortAlyzer™ Heavy Duty Battery Tester
The front and back of the PortAlyzer Heavy Duty Battery
Tester have the following components:
PortAlyzer™ Heavy Duty Battery Tester
1
2
3
Item 1 Digital Display - displays four lines.
Item 2 Keypad - has the following keys:
• MENU - returns to the main menu screen.
• Up and Down Arrows - scrolls up and down
on a screen or within a data field for making
selections on the screen.
4
• GO - executes a screen command and advances
to the next screen or step in a procedure.
• OFF - turns the PortAlyzer Heavy Duty
Battery Tester off when it is not connected to
a battery.
Figure 1.1: PortAlyzer™ Heavy Duty Battery Tester, Top View
The top of the PortAlyzer Heavy Duty Battery Tester has the
following components:
Item 1 RJ45 Port - connects a personal computer (PC)
for updating the internal software.
• ON - turns the PortAlyzer Heavy Duty
Battery Tester on when it is not connected to
a battery. (When properly connected to a
battery, the tester turns on automatically.)
Item 2 Test Lead Port - connects the battery clamp test lead.
Item 3 Security Cable Connector - attaches a security
cable for protecting against theft, loss or dropping.
Item 3 Infrared Lights - not used.
Item 4 Battery Compartment - holds one 9 volt battery.
Item 4 Red and Black Jacks - not used.
Test Lead with Battery Clamps
2
1
3
Figure 1.3: Test Lead with Battery Clamps
Item 1 Connector - connect to the top of the PortAlyzer
Heavy Duty Battery Tester.
Item 2 Black Clamp - connect to the battery negative
terminal.
Item 3 Red Clamp - connect to the battery positive terminal.
2
This page is intentionally blank
PortAlyzer™ Battery Tester User Guide
Chapter 2: ODYSSEY® Battery Tests
Overview
2: ODYSSEY® Battery Tests
Overview
The PortAlyzer™ Heavy Duty Battery Tester reports the
battery condition of EnerSys® 12 or 24 volt batteries.
Pretest Steps
To prepare for testing, follow these steps:
1 Check the following:
• WARNING: When connecting and disconnecting
from the positive terminal, be careful of battery hold
downs. Major arcing will occur if your positive
clamp simultaneously contacts both the positive
terminal and battery hold down.
• If the battery being tested is frozen, let it warm up
before testing.
• Make sure that the terminals of the battery being
tested are clean and dry; clean with a wire brush if
necessary.
• If the battery being tested was recently charged or used
(is in a vehicle that had the engine running), let the
battery stabilize 3 minutes before testing. Otherwise,
let the battery stabilize 1 minute before testing.
• If testing a battery installed in a vehicle, make sure
the contact between the battery terminals and
cables is not oxidized or loose, which causes
cranking and charging problems and may falsify
the test results.
• If testing a battery installed in a vehicle, turn off all
sources that may drain current from the battery.
For example, turn the vehicle’s ignition key and all
accessories and other loads off, close the doors
and trunk and disconnect the under-hood light.
2 Install a 9 volt battery in the battery tester’s battery
compartment. To open the compartment slide the cover
toward the bottom of the battery tester.
Note: Replace the internal 9 volt battery if the PortAlyzer
Battery Tester does not power up with its own battery or when
connected to the battery to be tested.
Note: Replace the internal 9 volt battery if the PortAlyzer
Battery Tester returns to the Main Menu screen during a test.
3 Connect the test lead (the one with the battery clamps)
to the test lead port on the top of the tester. Finger-tighten
the connector’s screws.
4 Attach the test lead’s clamps to the battery’s terminals:
red to positive (+); black to negative (-).
Note: The battery tester turns on automatically when
properly connected to the battery. If it does not turn on, check
the connections. Both clamps must make a solid contact
with the terminals.
5 Begin test setup, select battery specifications entry by
ENERSYS® BRAND (ODYSSEY BATTERIES) or NONENERSYS (OTHER BATS AND FUNCT).
EnerSys® Batteries and
Functions
1 Press the Up and Down Arrow keys to select the Battery
Brand, press the GO key.
SELECT BRAND:
ODYSSEY
GO
TROLLING THUNDER
OTHER BATS AND FUNCT
Å
2 Select the Battery Model / Part Number, press the GO
key.
ODYSSEY
PC310
PC535
PC545
Å GO
3 Select the Battery Test, press the GO key.
BATTERY TEST
BATTERY PACK TEST
QUICK CCA TEST
Å GO
• If BATTERY TEST, follow the on-screen
instructions.
• If BATTERY PACK TEST, select the pack
configuration (2x12-12V, 3x12-12V, 4x12-12V,
2X12-24V, 4X12-24V). Press the GO key and
follow the on-screen instructions.
• If QUICK CCA TEST, follow the on-screen
instructions.
4 For further test instructions,
• If testing IN VEHICLE, go to “IN VEHICLE Battery
and Electrical System Test (non-ODYSSEY®
batteries)” on page 6,
• If testing OUT OF VEHICLE, go to “OUT OF
VEHICLE Battery Test” on page 9,
• If testing with QUICK TEST,go to “QUICK TEST
(Battery)” on page 10 .
3
4
This page is intentionally blank
PortAlyzer™ Battery Tester User Guide
Chapter 3: Non-ODYSSEY® Battery Tests
Overview
3: Non-ODYSSEY® Battery Tests
Overview
Pretest Steps
The PortAlyzer™ Heavy Duty Battery Tester reports the
battery condition of ODYSSEY® and non-ODYSSEY 6 / 12 /
24 volt batteries and the vehicle starting / charging system.
The test results include the battery condition, the vehicle’s
charging and starting system and diodes.
To prepare for testing, follow these steps:
IN VEHICLE: tests ODYSSEY 12 volt batteries or a nonODYSSEY 6, 12 or 24 volt system that is installed in a vehicle.
The non-ODYSSEY test determines the battery conditions
and then lets you continue with a test of the vehicle’s
starting/charging system. The test results include the battery
condition and the condition of the vehicle’s charging system,
starting system and diodes. For instructions, refer to page 6.
OUT OF VEHICLE: tests a ODYSSEY 12 volt battery or a
non-ODYSSEY 6 or 12 volt battery. This test determines the
battery condition and displays the results (good, bad, etc.)
along with the battery’s open circuit voltage (OCV). For
instructions, refer to page 9.
QUICK TEST: determines the condition of a ODYSSEY 12
volt battery or a non-ODYSSEY 6, 12 or 24 volt battery or
battery pack. The Quick Test displays the Open Circuit
Voltage (OCV), Cold Cranking Amps (CCA), Cranking Amps
(CA), Ampere Hours (A-HR), and German-Duetche Industry
Norm (DIN) as applicable. For instructions, refer to page 10.
More Functions: has the following options:
• View Last Test - displays the results of the last test
performed.
• Set Time / Date - lets you set a date and time for printing
on test results.
• Software Update - updates the software when properly
connected to a PC.
• Unit Version - displays information about the software,
such as name, version number, etc.
• Test Counters - displays the number of tests done with the
tester and lets you reset the counters to zero.
• Stored Tests - stores the results for up to 13 tests for you
to review later.
• Manual Crank Data - displays live amps, maximum amps,
live volts and minimum volts during engine cranking.
• Acc. Load Test - checks the capacity of the alternator at
idle with accessory loads applied.
For instructions, refer to page 13.
1 Check the following:
• WARNING: When connecting and disconnecting
from the positive terminal, be careful of battery hold
downs. Major arcing will occur if your positive
clamp simultaneously contacts both the positive
terminal and battery hold down.
• If the battery being tested is frozen, let it warm up
before testing.
• Make sure that the terminals of the battery being
tested are clean and dry; clean with a wire brush if
necessary.
• If the battery being tested was recently charged or used
(is in a vehicle that had the engine running), let the
battery stabilize 3 minutes before testing. Otherwise,
let the battery stabilize 1 minute before testing.
• If testing a battery installed in a vehicle, make sure
the contact between the battery terminals and
cables is not oxidized or loose, which causes
cranking and charging problems and may falsify
the test results.
• If testing a battery installed in a vehicle, turn off all
sources that may drain current from the battery.
For example, turn the vehicle’s ignition key and all
accessories and other loads off, close the doors
and trunk, and disconnect the under-hood light.
2 Install a 9 volt battery in the battery tester’s battery
compartment. (To open the compartment, slide the cover
toward the bottom of the tester.)
Note: Replace the internal 9 volt battery if the PortAlyzer
Battery Tester does not power up with it’s own battery or when
connected to the battery to be tested.
Note: Replace the internal 9 volt battery if the PortAlyzer
Battery Tester returns to the Main Menu screen during a test.
3 Connect the test lead (the one with the battery clamps)
to the test lead port on the top of the tester. Finger-tighten
the connector’s screws.
4 Attach the test lead’s clamps to the battery’s terminals:
red to positive (+); black to negative (-).
Note: The battery tester turns on automatically when
properly connected to the battery. If it does not turn on, check
the connections. Both clamps must make a solid contact with
the terminals.
5
6
PortAlyzer™ Battery Tester User Guide
Other Batteries and Functions (non-ODYSSEY® batteries)
Other Batteries and Functions
(non-ODYSSEY® batteries)
Batteries that are not an ODYSSEY® battery must have the
specifications entered manually.
IN VEHICLE Battery and Electrical
System Test (non-ODYSSEY®
batteries)
To enter the battery specifications manually, follow these
steps:
The IN VEHICLE test is a 35 second test to determine the
condition of the battery and the vehicle’s starting (cranking)
system, diodes and charging system.
1 Press the Up or Down Arrow keys to select OTHER
BAT&FUNCTS. Press the GO key, the main menu will
appear for battery test selection.
To do the IN VEHICLE test, follow these steps:
SELECT BRAND:
ODYSSEY
TROLLING THUNDER
OTHER BATS AND FUNCT
IN VEHICLE
OUT OF VEHICLE
QUICK TEST
More Functions
GO
GO
2 Continue with the appropriate test steps (in the next
three sections) for testing IN VEHICLE, OUT OF VEHICLE
and QUICK TEST.
1 Do the steps in “Overview”. This displays the main menu
on the tester.
IN VEHICLE
OUT OF VEHICLE
QUICK TEST
More Functions
GO
Warning: When connecting and disconnecting from the
positive terminal, be very careful of battery hold downs.
Major arcing will occur if your positive clamp
simultaneously contacts both the positive terminal and
battery hold down.
Note: The word GO indicates the selected item.
2 Use the Up and Down Arrow keys to select IN VEHICLE
and then press the GO key. This displays the Select
Charging System screen.
Select Charging Sys:
12 Volts
6 Volts
24 Volts
GO
3 Use the Up and Down Arrow keys to select the correct
charging system, then press the GO key. This displays a
question about the status of the battery.
Known Good Battery?:
YES
NO
4 Determine the status of the battery, if known:
• If the battery is known to be good, press the Up
Arrow key. This will skip the remaining questions
about the battery(s) and take you immediately to
the start of the actual test. Go to step 14.
• If the status of the battery is not known, press the
Down Arrow key. This displays the Number/Type
of Battery screen.
NUMBER/TYPE OF BATT
1X12VOLT BATT
GO
2X12VOLT BATTS
3X12VOLT BATTS
Note: The possible selections continue beyond the first
screen. Use the Down Arrow key to view all of the possible
selections.
PortAlyzer™ Battery Tester User Guide
Chapter 3: Non-ODYSSEY® Battery Tests
®
IN VEHICLE Battery and Electrical System Test (non-ODYSSEY batteries)
5 Use the Down Arrow key to select the correct number(s)
and type(s) of batteries, then press the GO key. This
displays the Select Battery Type screen.
Select Battery Type
CONVENTIONAL
AGM/GELL
Change Batt. Type
GO
6 Do one of the following:
• If the battery is conventional (flooded lead acid),
press the GO key.
• If the battery is AGM or GELL, press the Down
Arrow key, then press the GO key.
7 Press the GO key. This displays the Select Units screen.
SELECT UNITS
CCA
GO
CA/MCA
Change
A-HR
DIN
JIS
8 Use the Down Arrow key to select a capacity rating for the
test. The GO indicates the selected line.
Note: This is the battery’s capacity rating that is usually
found on the battery’s label. Depending on the battery, use
any of the following:
• CCA - Cold Cranking Ampere rating
• CA / MCA - Cranking Ampere / Marine Cranking
Ampere rating
• A-HR - Ampere Hours
• DIN - German-Duetche Industry Norm
• JIS - Japanese Industrial Standard
9 After selecting a capacity rating, press the GO key.
This displays a screen for entering the capacity rating.
Enter Rated CCA For
One Batt.
700
GO
To Change Value
Note: If the battery pack you are testing is mismatched,
disassemble the pack and test each battery individually.
10Use the Up and Down Arrow keys and adjust the rating
until it matches the rating on the battery’s label.
Note: Do not use the rating reported by the Quick Test
because it is typically higher than the printed rating for
a newer battery.
11 Press the GO key. This displays the battery’s Open Circuit
Voltage (OCV).
PRESS GO
12.57V
12Press GO. The battery pack test is performed. If the pack
is good, go to step 13.
Note: If the battery pack is determined to be low, the screen
pictured below will be displayed and the battery tester will
begin the Quick Idle test. Follow the on-screen prompts to
complete the Quick Idle test.
START THE ENGINE
RUN AT IDLE SPEED
GO = CONTINUE
= NO START
Note: If the engine does not start, press the Up Arrow key.
The battery tester will proceed to the individual battery tests.
13Wait for the screen to display “Is this an AIR-START
vehicle?”
IS THIS AN AIR-START
VEHICLE?
YES
NO
14If you are testing an air-start vehicle, press the Up Arrow
key for “Yes”. If it is not an air-start vehicle, press the Down
Arrow key for “No”. The “start engine” screen is displayed.
START VEHICLE AND
TURN OFF LOADS
AC,R-DEFOG,ETC ‘GO’
IF NO START
‘MENU’
15Start the vehicle’s engine and then press the GO key. This
starts the test and displays the series of screens shown on
the next page.
Note: If the engine does not start, press the MENU key.
This displays the battery test results as described in step
17 on page 8. Charge the battery(s) or use a booster
battery to provide power.
7
8
PortAlyzer™ Battery Tester User Guide
IN VEHICLE Battery and Electrical System Test (non-ODYSSEY® batteries)
INCREASE IN RPM
WILL BE REQUIRED
PRESS GO
RUN ENGINE ABOVE
1500 RPM NOW AND
MAINTAIN FOR 15
SECONDS
MAINTAIN SPEED
VOLTS = 14.70v
WITH ENGINE IDLING
TURN ON ALL OF THE
ELECTRICAL ACC/LOADS
PRESS GO
TEST COMPLETE
TURN ENGINE OFF
18The second screen of test results displays charging
system test results, which includes loaded and open-circuit
(no load) voltages, and the test results for the charging
system. Press the Down Arrow key to display the next
screen, or the Up Arrow to review the previous screen(s).
Note: Possible charging system results are GOOD or
CHARGING SYSTEM NEEDS REPAIR.
DIODES
MORE
OCV 12.57
TESTED CCA 1122
BATTERY GOOD
MORE
GO - Print
Note: The test results appear on several screens.
They may include special messages, readings, or condition
results. To view each screen, use the Down Arrow key. The
following steps are examples from a good battery and
system. For test result descriptions, refer to “Understanding
Test Results” on page 11.
17If the battery and system test is good, the first screen of
test results displays the battery test results (shown above).
These include battery condition, Open-circuit Voltage
(OCV), and actual Cold Cranking Ampere rating (CCA).
Press the Down Arrow key to display the next screen.
Note: Other possible results for the first screen include NO
START CONDITION, CHARGING VOLTS TOO LOW,
BAT. GOOD/ LOW CHARGE, BAT. BAD, and BAT.
CHARGE AND RETEST.
CHG.LOAD V=13.73
CHG.NO LOAD V=13.74
CHG. VOLTS GOOD
MORE
BACK
GO-Print
BACK
GO-Print
19The third screen of test results displays the condition of the
diodes. Press the Down Arrow key to display the next
screen, or the Up Arrow to review the previous screen(s).
Note: Possible diode results are GOOD, BAD or NA.
ACC.LOAD V=14.21
ACC. LOAD VOLTS GOOD
MORE
16Follow the instructions given on the screens to hold the
engine RPM above 1500 for 15 seconds and then turn the
engine off. The test results display immediately.
GOOD
BACK
GO-Print
20The fourth screen of test results displays the loaded
system test results. Press the Down Arrow key to display
the next screen, or the Up Arrow to review the previous
screen(s).
Note: Possible Acc. Load results are GOOD or LOW.
CRANKING V=10.84
GOOD
BACK
GO-Print
21The final screen of test results displays the cranking
voltage (voltage during starting) and condition. You can
use the Up Arrow to review the previous screen(s), print
the test results or return to the main menu using the
following steps.
Note: Possible cranking voltage results are GOOD or LOW.
22To end the test and return to the main menu, press the
MENU key.
23Select another test or disconnect the clamps from the
battery.
24Press the OFF key to turn the battery tester off. (The
battery tester turns off automatically after a few minutes of
inactivity.)
PortAlyzer™ Battery Tester User Guide
Chapter 3: Non-ODYSSEY® Battery Tests
OUT OF VEHICLE Battery Test
OUT OF VEHICLE Battery Test
The OUT OF VEHICLE test takes about 13 seconds to
determine if the battery is good, has a low charge or is bad.
The test shows the battery condition even if the battery is
discharged down to 1 volt state of charge.
To do the OUT OF VEHICLE test, follow these steps:
1 Do the steps in “Overview”. This displays the main menu
on the battery tester.
IN VEHICLE
OUT OF VEHICLE
QUICK TEST
More Functions
GO
Note: The word GO indicates the selected item.
2 Use the Up and Down Arrow keys to select OUT OF
VEHICLE and then press the GO key. This displays
the Choose Battery Type screen.
Select Battery Type
CONVENTIONAL
AGM/GELL
Change Batt. Type
GO
3 Do one of the following:
• If the battery is conventional (flooded lead acid),
press the GO key.
• If the battery is AGM, GELL or OPTIMA, press the
Down Arrow key, then press the GO key.
This displays the battery’s open circuit voltage (OCV).
PRESS ’GO’
12.60v
Note: If the battery tester senses abnormal conditions, such
as very low voltage, other screens may display. Respond to
any questions as necessary.
4 Press the GO key. This displays the Select Units screen.
SELECT UNITS
CCA
GO
CA/MCA
Change
A-HR
DIN
JIS
5 Use the Down Arrow key to select a capacity rating for the
test. The GO indicate the selected line.
Note: This is the battery’s capacity rating that is usually
found on the battery’s label. Depending on the battery, use
any of the following:
• CCA - Cold Cranking Ampere rating
• CA / MCA - Cranking Ampere / Marine Cranking
Ampere rating
• A-HR - Ampere Hours
• DIN - German-Duetche Industry norm
• JIS - Japanese Industrial Standard
This displays a screen for entering the capacity rating.
Enter Rated CCA For
One Batt.
700
GO
To Change Value
6 Use the Up and Down Arrow keys and adjust the rating
until it matches the rating on the battery’s label.
Note: Do not use the rating reported by the Quick Test
because it is typically higher than the printed rating for a
newer battery.
7 Press the GO key to begin the load and recovery part
of the test. The screen displays First Load On, Second
Load On, Recovery Period and then Working as it
applies two medium loads to the battery followed by
recovery periods and then determines the battery
condition.
Note: If the battery tester senses abnormal conditions, such
as a cold battery, other screens may display. Respond to any
questions as necessary.
8 When the test is complete, the screen displays the battery
condition, the Open Circuit Voltage (OCV) and the Cold
Cranking Amps (CCA).
BAT. GOOD
OCV. 12.5
CCA
709
Print Results = GO
Note: For some capacity ratings, the A-HR reading
appears instead of the CCA reading. For the JIS capacity
rating, the JIS code displays.
9 Analyze the test results. For descriptions of possible test
results, refer to “Understanding Test Results” on
page 11.
10To end the test and return to the main menu, press the
MENU key.
11 Select another test or disconnect the clamps from the
battery. Press the OFF key to turn the battery tester off.
(The battery tester turns off automatically after a few
minutes of inactivity.)
9
10
PortAlyzer™ Battery Tester User Guide
QUICK TEST (Battery)
QUICK TEST (Battery)
The QUICK TEST is a 1 second test to determine the battery
voltage and actual Cold Cranking Amperes (CCA), Cranking
Ampere rating (CA), Ampere Hours (A-HR), and GermanDeutche Industry Norm (DIN) if applicable.
To do the QUICK TEST, follow these steps:
1 Do the steps in “Overview”. This displays the main menu
on the battery tester.
IN VEHICLE
OUT OF VEHICLE
QUICK TEST
More Functions
GO
Warning: When connecting and disconnecting from the
positive terminal, be very careful of battery hold downs.
Major arcing will occur if your positive clamp
simultaneously contacts both the positive terminal and
battery hold down.
Note: The word GO indicates the selected item.
2 Use the Up and Down Arrow keys to select QUICK TEST
and then press the GO key. This displays
the Select Battery Type screen.
Select Battery Type
CONVENTIONAL
AGM/GELL
Change Batt. Type
GO
3 Do one of the following:
• If the battery is conventional (flooded lead acid),
press the GO key.
• If the battery is AGM or GELL, press the Down
Arrow key, then press the GO key.
This displays the battery’s open circuit voltage (OCV).
PRESS ’GO’
12.60v
4 Press the GO key. This displays the Select Charging
System screen.
SELECT CCA TYPE
12 V CCA
6 V CCA
24 V CCA
GO
5 Use the Down Arrow key to select the charging system
type for the test. The GO indicates the selected line.
6 Press the GO key to begin the test. The screen displays
Working as determines the battery’s capacity.
Note: If the battery tester senses abnormal conditions, such
as a cold battery, other screens may display. Respond to any
questions as necessary.
7 When the test is complete, the screen displays the open
Circuit Voltage (OCV) and the Cold Cranking Amps (CCA).
OCV
12.54
↓ CCA 650
8 Repeatedly press the Down Arrow key to change the
second line to Cranking Amps (CA), then Ampere Hours
(AHR), German-Deutche Industry Norm (DIN), then back
to Cold Cranking Amps (CCA).
9 To end the test and return to the main menu, press the
MENU key.
10Select another test or disconnect the clamps from the
battery.
11 Press the OFF key to turn the battery tester off. (The
battery tester turns off automatically after a few minutes of
inactivity.)
PortAlyzer™ Battery Tester User Guide
Chapter 3: Non-ODYSSEY® Battery Tests
Understanding Test Results
Understanding Test Results
System Test Results
This section includes descriptions for test results and tips for
solving problems.
CHARGE BATTERY AND RETEST SYSTEM: indicates the
battery either has a low charge or is almost fully discharged
and must be charged before the battery tester will run any
tests.
Battery Test Results
BAT. GOOD: the battery is in good condition and can hold a
charge. This also indicates that the charging system,
cranking system and diode test will be unaffected by the
battery condition.
BAT. GOOD / LOW CHARGE: the battery is in good condition
but needs charging. (The battery charge is above 15% but not
close to the full nominal capacity.)
BAT. CHARGE & RETEST: the battery is almost fully
discharged and the battery condition cannot be determined
reliably. (The battery charge is below 15% of the nominal
capacity). Charge the battery and repeat the test.
BAT. BAD: the battery is in bad condition and would most
likely not hold enough of a charge for reliable vehicle starting.
Replace the battery.
Note: A bad battery can mask other charging system
problems that will be caught when tested with a good battery.
For example, a bad battery could make the diodes look bad.
SERVICE BATTERIES AS REQUIRED AND RETEST
SYSTEM: indicates battery is bad and must be replaced
before the battery tester will run any tests.
DIODES GOOD: indicates the rectifier diodes are good.
DIODES BAD: indicates the diode pack or alternator needs
replacing.
Note: To prevent an erroneous diode test, the battery tester
does not test diodes unless the battery condition is good.
CHARGING SYSTEM GOOD: indicates the charging system
is in good condition.
CHARGING VOLTS TOO LOW/HIGH CHARGING SYSTEM
NEEDS REPAIR: indicates the charging system voltages are
too low/high. The charging system is faulty. If the no load
voltage is too low, the battery test result may be GOOD/LOW
CHARGE.
CRANKING GOOD: indicates the starting system is in good
condition.
NO START CONDITION: indicates the battery is bad or
needs recharging. This result may also appear if the battery
is too small for the vehicle, if the starter motor is defective or
if the cranking resistance is excessive. Make sure the battery
size is correct and there are no starter or engine problems.
11
12
This page is intentionally blank
PortAlyzer™ Battery Tester User Guide
Chapter 4: More Functions Menu
VIEW LAST TEST Results
4: More Functions Menu
This chapter includes the following sections:
•
•
•
•
•
•
•
View Last Test
Software Update
VIEW LAST TEST Results
The More Functions, VIEW LAST TEST function displays the
test results of the last test performed.
Unit Version
Test Counters
To view the last test results, follow these steps:
Stored Tests
1 If necessary, press the ON key to turn the tester on and
display the main menu. (If the tester is already on, press
the MENU key to display the main menu.)
Manual Crank Data
Accessory Load Test
IN VEHICLE
OUT OF VEHICLE
QUICK TEST
More Functions
GO
Note: The word GO indicates the selected item.
2 Use the Down Arrow key to select More Functions, then
press the GO key.
VIEW LAST TEST
SET TIME/DATE
SOFTWARE UPDATE
GO
3 Use the Up and Down Arrow keys to select VIEW LAST
TEST and then press the GO key. This displays the test
results.
BAT. GOOD
OCV. 12.5
CCA
709
Print Results = GO
4 If necessary, use the Down Arrow key to scroll through the
test results.
5 To return to the main menu, press the MENU key.
6 Select another test or disconnect the clamps from the
battery (if connected).
7 Press the OFF key to turn the tester off. (The tester turns
off automatically after a few minutes of inactivity.)
Note: Because the battery tester shuts off automatically
after a few minutes, it may be helpful to connect the battery
tester to a battery before performing the steps in this chapter. (To do this, refer to “VIEW LAST TEST Results” on
page 13.)
13
14
PortAlyzer™ Battery Tester User Guide
SOFTWARE UPDATE
SOFTWARE UPDATE
TEST COUNTERS
The Software Update function allows for software updates.
Instructions will be provided as updates become available.
The Test Counters function displays the number of System
Tests, Battery Tests and Quick Tests that have been done with
the tester and lets you reset the counters to zero.
UNIT VERSION
The Unit Version function displays information about the
software, such as name, version number, etc.
To display the version information, follow these steps:
1 Press the ON key to turn the battery tester on. This displays
the main menu.
IN VEHICLE
OUT OF VEHICLE
QUICK TEST
More Functions
1 Press the ON key to turn the battery tester on. This displays
the main menu.
IN VEHICLE
OUT OF VEHICLE
QUICK TEST
More Functions
GO
Note: The word GO indicates the selected item.
GO
Note: The word GO indicates the selected item.
2 Repeatedly press the Down Arrow key until More
Functions is selected. Then press the GO key. This
displays the More Functions menu.
UNIT VERSION
VIEW LAST TEST
SET TIME/DATE
SOFTWARE UPDATE
To display and reset the test counters, follow these
steps:
GO
3 Use the Down Arrow key to select UNIT VERSION
and then press the GO key. This displays the version
information.
PORTALYZER HEAVY V#.###
Program PN-#######
release date
Press GO to continue
4 Press the GO key to return to the More Functions menu.
5 Press the MENU key to return to the main menu.
2 Repeatedly press the Down Arrow key until More
Functions is selected. Then press the GO key. This
displays the More Functions menu.
TEST COUNTERS
VIEW LAST TEST
SET TIME/DATE
SOFTWARE UPDATE
GO
3 Use the Down Arrow key to select TEST COUNTERS and
then press the GO key. This displays the test counts.
System Tests
Battery Tests
Quick Tests
Press ↓ to clear
###
###
###
4 To reset all the counters to zeros (000), press the Down
Arrow key.
5 When finished, press the MENU key twice to return to the
main menu.
PortAlyzer™ Battery Tester User Guide
Chapter 4: More Functions Menu
STORED TESTS
STORED TESTS
MANUAL CRANK DATA
The Stored Tests function stores up to 13 tests and lets you
review them later.
The Manual Crank Data function displays data acquired
during engine cranking.
To view stored test results, follow these steps:
To view Manual Crank Data, follow these steps:
1 Press the ON key to turn the battery tester on. This displays
the main menu.
1 Press the ON key to turn the battery tester on. This displays
the main menu.
IN VEHICLE
OUT OF VEHICLE
QUICK TEST
More Functions
GO
Note: The word GO indicates the selected item.
2 Use the Down Arrow key to select More Functions, then
press the GO key. This displays the More Functions menu.
VIEW LAST TEST
SET TIME/DATE
SOFTWARE UPDATE
GO
3 Repeatedly press the Down Arrow key until STORED
TESTS shows on the screen and is selected. Then press
the GO key. This displays the Stored Tests screen.
STORED TESTS
View Stored Tests↑
Clear Stored Tests↓
Press MENU to exit
4 Do one of the following:
• To view a stored test, press the Up Arrow key.
This displays the View Stored Tests screen.
View Stored Tests
Number of tests: ##
View test: ## ↑↓ GO
Dated: ##/##/## ##:##
This screen shows the number of stored tests, the
number of the currently selected test and the date and
time of the currently selected test. Use the Up (or Down)
Arrow key to select the test number to view and then
press the GO key. This displays the results for the
selected test.
Note: If the results have more than one screen,
use the Down Arrow key to scroll to the next
screen(s). Optionally, press the GO key to print the
test results. When finished, press the MENU key to
return to the main menu.
• To clear the stored tests, press the Down Arrow
key. This displays the Clear Stored Tests screen.
Clear Stored Tests
Press ↑ to clear ALL
stored tests or MENU
to exit.
5 To clear all the stored tests, press the Up Arrow key.
The message, “ALL TESTS CLEARED” appears on
the screen. Use the MENU key to return to previous
screens.
IN VEHICLE
OUT OF VEHICLE
QUICK TEST
More Functions
GO
Note: The word GO indicates the selected item.
2 Use the Down Arrow key to select More Functions, then
press the GO key. This displays the More Functions menu.
VIEW LAST TEST
SET TIME/DATE
SOFTWARE UPDATE
GO
3 Repeatedly press the Down Arrow key until MANUAL
CRANK DATA shows on the screen and is selected. Then
press the GO key. This displays the first Manual Crank data
screen.
TURN OFF ALL LOADS:
LIGHTS, RADIOS, A/C,
ETC.
Press GO
4 Follow the on-screen instructions and turn off all loads
(lights, radios, A/C, etc.), then press the GO key. This
displays the manual crank data..
13.7V
CRANK 9.8V
0.07A
CRANK 0.07A
Clear Crank Data ↑
5 The manual crank data includes fixed readings for
maximum amps and minimum volts (the readings on the
right) and live amps and live volts (displayed on the left).
Use the Up Arrow key to clear the crank data.
6 Press the MENU key twice to return to the main menu.
15
16
PortAlyzer™ Battery Tester User Guide
ACC LOAD TEST
ACC LOAD TEST
The ACC Load Test function checks the output of the
alternator at idle and checks the effect of adding all
accessories and electrical loads.
To perform the ACC Load Test, follow these steps:
1 Press the ON key to turn the battery tester on. This displays
the main menu.
IN VEHICLE
OUT OF VEHICLE
QUICK TEST
More Functions
GO
Note: The word GO indicates the selected item.
2 Use the Down Arrow key to select More Functions, then
press the GO key. This displays the More Functions menu.
ACC LOAD TEST
VIEW LAST TEST
SET TIME/DATE
SOFTWARE UPDATE
GO
3 Repeatedly press the Down Arrow key until ACC LOAD
TEST shows on the screen and is selected. Then press the
GO key. This displays the first ACC Load Test screen.
START THE ENGINE AND
LET IT IDLE FOR 20
SECONDS
PRESS GO
4 Follow the on-screen instructions to start the engine and
let it idle for 20 seconds, then press the GO key. This
displays the next instruction in the ACC Load Test.
WITH ENGINE IDLING,
TURN ON ALL OF THE
ELECTRICAL ACC/LOADS
PRESS GO
5 Follow the on-screen instructions to turn on all of the
electrical/accessory loads, then press the GO key.
This performs the test.
TEST COMPLETE!
TURN OFF ALL OF THE
ELECTRICAL ACC/LOADS
AND TURN OFF ENGINE
6 Follow the on-screen instructions to turn off all of the
electrical/accessory loads and turn off the engine.
This displays the test results.
ACC. LOAD V=13.709
ACC. LOAD VOLTS OK
GO=Print
Note: Possible ACC Load Test results are OK and LOW.
7 To end the test and return to the main menu, press the
MENU key twice.
8 Select another test or disconnect the clamps from the
battery. Press the OFF key to turn the battery tester off.
(The battery tester turns off automatically after a few
minutes of inactivity.)
Limited Warranty
THIS LIMITED WARRANTY IS EXPRESSLY LIMITED TO ORIGINAL RETAIL BUYERS OF
NEW ELECTRONIC DIAGNOSTIC TOOLS (“UNITS”).
• ODYSSEY® Battery PortAlyzer™ Units are warranted against defects in materials and workmanship for three
years (36 months) from date of delivery.
• Cables and Accessories are warranted against defects in materials and workmanship for one year
(12 months) from date of delivery.
This Limited Warranty does not cover and is void for any Unit that has been abused, altered, used for a purpose
other than that for which it was intended or used in a manner inconsistent with instructions regarding use. The
sole and exclusive remedy for any Unit found to be defective is repair or replacement, at the option of EnerSys®.
In no event shall EnerSys be liable for any direct, indirect, special, incidental or consequential damages (including
lost profit) whether based on warranty, contract, tort or any other legal theory. The existence of a defect shall be
determined by EnerSys in accordance with procedures established by EnerSys. No one is authorized to make
any statement or representation altering the terms of this Limited Warranty.
DISCLAIMER
THE ABOVE LIMITED WARRANTY IS IN LIEU OF ANY OTHER WARRANTY, EXPRESS OR IMPLIED AND
ALL OTHER WARRANTIES, INCLUDING, BUT NOT LIMITED TO THE WARRANTY OF MERCHANTABILITY
OR FITNESS FOR A PARTICULAR PURPOSE.
SOFTWARE
Unit software is proprietary, confidential information protected under copyright law. Users have no right in or title
to Unit software other than a limited right of use revocable by SPX®. Unit software may not be transferred or
disclosed without the written consent of SPX. Unit software may not be copied except in ordinary backup
procedures.
ORDER INFORMATION
Replacement and optional parts can be ordered directly from your EnerSys authorized tool supplier.
Your order should include the following information:
• quantity
• part number
• item description
Technical Service
If you have any questions on the operation of the Unit, please call (800) 964-2837.
Repair Service
When sending a Unit for repair, please include the following information:
• company name
• contact name
• telephone number
• description of the problem
• proof-of-purchase for warranty repairs
• preferred method of payment for non-warranty repairs
For non-warranty repairs, payment can be made with VISA®, MasterCard® or with approved credit terms.
To receive a credit application, please fax your request to the Credit Department at 800-962-8734.
Send the Unit to:
PortAlyzerTM ODYSSEY® Battery Heavy Duty Diagnostic Tester
617 N. Ridgeview Drive
Warrensburg, MO 64093
© 2008 EnerSys. All rights reserved.
Trademarks and logos are the property of EnerSys and its affiliates
except SPX®, VISA ®, and MasterCard®, which are not the property
of EnerSys.
Publication No: US-ODY-PRT-OM-001 • July 2008
Subject to revisions without prior notice. E.&O.E.