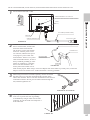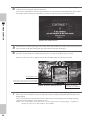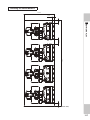
1
420-7180UK
1ST PRINTING APR. 2009
OWNER'S MANUAL
SEGA AMUSEMENTS U.S.A., INC.
800 ARTHUR AVENUE, ELK GROVE VILLAGE, IL 60007-5215
Phone: 888-877-2669 Facsimile: 847-427-1065
WEB: WWW.SAU.SEGA.COM
© SEGA
All manufacturers, cars, names, brands and associated imagery featured in this game are trademarks and/or
copyrighted materials of their respective owners. All rights reserved.
IMPORTANT
• Before using this product, read this manual carefully to understand the
contents herein stated.
• After reading this manual, be sure to keep it near the product or in a
convenient place for easy reference when necessary.
BEFORE USING THE PRODUCT, BE SURE TO READ THE FOLLOWING:
To maintain safety:
To ensure the safe operation of this product, be sure to read the following before usage.
The following instructions are intended for the users, operators and the personnel in charge of
the operation of the product. After carefully reading and sufficiently understanding the warning
displays and cautions, handle the product appropriately. Be sure to keep this manual close to the
product or in a convenient place for future reference.
Herein, explanations which require special attention are enclosed with dual lines. Depending on
the potentially hazardous degrees, the terms of DANGER, WARNING, CAUTION, etc. are used.
Be sure to understand the contents of the displays before reading the text.
Indicates that mishandling the
product by disregarding this
pictograph will cause severe
injury or death.
Indicates that mishandling the
product by disregarding this
warning will cause a potentially
hazardous situation which can
result in death or serious injury.
Indicates that mishandling
the product by disregarding
this caution will cause a slight
hazardous situation which can
result in personal injury and/or
material damage.
For the safe usage of the product, the following pictographs are used:
Indicates "HANDLE WITH CARE." In order to protect the human body and equipment,
this display is attached to places where the Owner's Manual, Serviceman Manual and/or
Service Manual should be referred to.
Indicates a "Protective Earth Terminal." Before operating the equipment, be sure to
connect it to the Ground.
(The step may be omitted for products in which a power cord with earth is used.)
• Perform work in accordance with the instructions herein stated.
Instructions for work are explained by paying attention to the aspect of accident prevention.
Failing to perform work as per the instructions can cause accidents. In the case where only
those who have technical expertise should perform the work to avoid hazardous situation, the
instructions herein state that the site maintenance personnel should perform such work.
• Be sure to turn off the power before working on the machine.
To prevent an electric shock, be sure to turn off the power before carrying out any work that
requires direct contact with the interior of the product. If the work is to be performed in the
power-on status, the Instruction Manual herein always states to that effect.
• Be sure to ground the Earth Terminal.
(This is not required in the case where a power cord with earth is used.)
This product is equipped with the Earth Terminal. When installing the product, connect the
Earth Terminal to the "accurately grounded indoor earth terminal" by using an earth wire.
Unless the product is grounded appropriately, the user can be subject to an electric shock.
After performing repair, etc. for the control equipment, ensure that the Earth Wire is firmly
connected to the control equipment.
• Ensure that the Power Supply used is equipped with an Earth Leakage Breaker.
This product does not incorporate the Earth Leakage Breaker. Using a power supply which is
not equipped with the Earth Leakage Breaker can cause a fire when earth leakage occurs.
• Be sure to use fuses which meet the specified rating.
(Only for the machines which use fuses.)
Using fuses exceeding the specified rating can cause a fire and an electric shock.
• Specification changes (removal of equipment, conversion and addition) not
designated by SEGA are not allowed.
The parts of the product include warning labels for safety, covers for personal protection, etc.
It is very hazardous to operate the product by removing parts and/or modifying the circuits.
Should doors, lids and protective parts be damaged or lost, refrain from operating the product,
and contact where the product was purchased from or the office herein stated.
SEGA shall not be held responsible for any accidents, compensation for damage to a third
party, resulting from the specifications not designated by SEGA.
• Ensure that the product meets the requirements of appropriate Electrical
Specifications.
Before installing the product, check for Electrical Specifications. SEGA products have
a nameplate on which Electrical Specifications are described. Ensure that the product is
compatible with the power supply voltage and frequency requirements of the location. Using
any Electrical Specifications different from the designated Specifications can cause a fire and
an electric shock.
• Install and operate the product in places where appropriate lighting is available,
allowing warning labels to be clearly read.
To ensure safety for the customers, labels and printed instructions describing potentially
hazardous situations are applied to places where accidents can be caused. Ensure that where
the product is operated has sufficient lighting allowing the warnings to be read. If any label
is peeled off, apply it again immediately. Please place an order with where the product was
purchased from or the office herein stated.
• When handling the monitor, be very careful.
(Applies only to the product with a monitor.)
Some of the monitor (TV) parts are subject to high tension voltage. Even after turning off the
power, some portions are still subject to high tension voltage sometimes. Monitor repair and
replacement should be performed only by those technical personnel who have knowledge of
electricity and technical expertise.
• Be sure to adjust the monitor/projector properly.
(Applies only to the product with a monitor/projector.)
Do not operate the product leaving on-screen flickering or blurring as it is. Using the product
with the monitor/projector not properly adjusted may cause dizziness or a headache to an
operator, a player, or the customers.
• When transporting or reselling this product, be sure to attach this manual to
the product.
In the case where commercially available monitors and printers are used in this product,
only the contents relating to this product are explained herein. Some commercially available
equipment has functions and reactions not stated in this manual. Read this manual together
with the specific Instruction Manual of such equipment.
*Descriptions herein contained may be subject to improvement changes without notice.
*The contents described herein are fully prepared with due care. However, should any question
arise or errors be found, please contact SEGA.
INSPECTIONS IMMEDIATELY AFTER TRANSPORTING THE PRODUCT TO THE LOCATION
Normally, at the time of shipment, SEGA products are in a status allowing for usage immediately
after transporting to the location. Nevertheless, an irregular situation may occur during
transportation. Before turning on the power, check the following points to ensure that the product
has been transported in a satisfactory status.
Are there any dented portions or defects (cuts, etc.) on the external surfaces of the cabinet?
Are Casters and Adjusters damaged?
Do the power supply voltage and frequency requirements meet with those of the location?
Are all wiring connectors correctly and securely connected? Unless connected in the correct
way, connector connections can not be made accurately. Do not insert connectors forcibly.
Do power cords have cuts and dents?
Do the fuses used meet specified ratings? Is the Circuit Protector in an energized status?
Are all accessories available?
Can all Doors and Lids be opened with the Accessory Keys? Can Doors and Lids be firmly
closed?
TABLE OF CONTENTS
BEFORE USING THE PRODUCT, BE SURE TO READ THE FOLLOWING:
INTRODUCTION....................................................................................................iv
11 HANDLING PRECAUTIONS..........................................................................1
2 2 PRECAUTIONS REGARDING INSTALLATION LOCATION..............................................4
2-1
2-2
LIMITATIONS OF USAGE............................................................................................5
OPERATION AREA......................................................................................................6
TABLE OF CONTENTS
TABLE OF CONTENTS...........................................................................................i
3 PRECAUTIONS REGARDING PRODUCT OPERATION........................................... 7
3-1
3-2
BEFORE OPERATION.................................................................................................7
DURING OPERATION (PAYING ATTENTION TO CUSTOMERS)..............................9
4 PART DESCRIPTION...................................................................................11
5 ACCESORIES..............................................................................................12
636 ASSEMBLY AND INSTALLATION...............................................................13
6-1
6-2
6-3
6-4
6-5
6-6
6-7
ATTACHING THE BILLBOARD.................................................................................16
ATTACHING THE REAR CABINET...........................................................................18
FASTENING THE PRODUCT TO THE INSTALLATION LOCATION........................20
ATTACHING THE COIN CHUTE TOWER..................................................................22
INSTALLING THE MAT..............................................................................................27
CONNECTION OF POWER AND GROUND WIRE...................................................28
CHECKING THE ASSEMBLY....................................................................................30
47 PRECAUTIONS WHEN MOVING THE MACHINE......................................33
48 GAME DESCRIPTION..................................................................................35
8-1
8-2
8-3
8-4
HOW TO PLAY...........................................................................................................35
STORY MODE............................................................................................................36
VERSUS MODE.........................................................................................................39
HINTS FOR PLAYING THE GAME............................................................................41
9-1
9-2
9-3
SWITCH UNIT AND COIN METER............................................................................44
SYSTEM TEST MODE...............................................................................................45
GAME TEST MODE...................................................................................................47
49 EXPLANATION OF TEST AND DATA DISPLAY.........................................42
E0-0902
420-7180-01
TABLE OF CONTENTS
9-4
9-3-1 GAME TEST MODE......................................................................................47
9-3-2 INPUT TEST..................................................................................................48
9-3-3 OUTPUT TEST..............................................................................................50
9-3-4 GAME ASSIGNMENTS.................................................................................53
9-3-5 INPUT ADJUSTMENT...................................................................................55
9-3-6 NETWORK SETTING....................................................................................56
9-3-7 BOOKKEEPING............................................................................................58
9-3-8 BACKUP DATA CLEAR................................................................................62
ERROR MESSAGES..................................................................................................63
1110HANDLE.......................................................................................................66
10-1 FRONT BRAKE VOLUME..........................................................................................66
10-1-1 Adjusting the Volume..................................................................................66
10-1-2 Replacing the Volume.................................................................................68
10-1-3 GREASING....................................................................................................70
10-2 ACCELERATOR VOLUME........................................................................................71
10-2-1 Adjusting the Volume..................................................................................71
10-2-2 Replacing the Volume.................................................................................73
10-2-3 GREASING....................................................................................................75
10-3 HANDLE VOLUME.....................................................................................................76
10-3-1 Adjusting the Volume..................................................................................76
10-3-2 Replacing the Volume.................................................................................78
10-3-3 GREASING....................................................................................................83
1411MOTORCYCLE MECHANISM.....................................................................84
11-1 ROLL (LEAN) VOLUME.............................................................................................84
11-1-1 Adjusting the Volume..................................................................................84
11-1-2 Replacing the Volume.................................................................................86
11-1-3 GREASING....................................................................................................89
11-2 REPLACING THE SIDE GUIDE PLATES..................................................................90
11-3 REPLACING THE VIBRATION UNIT HARNESS......................................................92
1412COIN SELECTOR........................................................................................96
12-1 CLEANING THE COIN SELECTOR...........................................................................96
12-2 ADJUSTMENTS TO PRICE OF PLAY.......................................................................98
12-3 CREDIT BOARD DIP SWITCH SETTINGS...............................................................99
1413DLP PROJECTOR......................................................................................104
13-1 CLEANING THE SCREEN.......................................................................................105
4114REPLACING THE FLUORESCENT AND HALOGEN LAMPS.......................................106
14-1 REPLACING THE FLUORESCENT LAMP..............................................................106
ii
1415PERIODIC INSPECTION............................................................................108
1616TROUBLESHOOTING...............................................................................110
16-1 TROUBLESHOOTING TABLE.................................................................................110
17-1 CLEANING THE LINDBERGH BOARD...................................................................114
17-2 COMPOSITION OF GAME BOARD.........................................................................115
1818NETWORK PLAY.......................................................................................116
18-1 INSTALLATION PRECAUTIONS.............................................................................116
TABLE OF CONTENTS
1717GAME BOARD (LINDBERGH RED EX)....................................................113
1919DESIGN RELATED PARTS........................................................................118
2020PARTS LIST...............................................................................................119
2121WIRE COLOR CODE TABLE....................................................................155
2222WIRING DIAGRAM....................................................................................156
SEGA AMUSEMENTS OFFICES
iii
INTRODUCTION
This manual is intended to provide detailed descriptions together with all the necessary information covering the
general operation of electronic assemblies, electro-mechanicals, servicing control, spare parts, etc. for the product,
“HARLEY-DAVIDSON® KING OF THE ROAD.”
INTRODUCTION
This manual is intended for the owners, personnel and managers in charge of operation of the product.
Operate the product after carefully reading and sufficiently understanding the instructions.
In the unlikely event that the product does not function correctly, DO NOT allow anyone other than a technician
to touch the internal system. Turn off the power to the machine, making sure to unplug the electrical cord from the
outlet, and contact the office listed below or the point-of-purchase for this product.
Use of this product is unlikely to cause physical injuries or damage to property. However, points that require special
attention are indicated by bold text, the word "IMPORTANT" and the symbol below.
Indicates important information that, if ignored, may result in the mishandling of the
product and cause faulty operation or damage to the product.
SPECIFICATIONS
iv
Installation space
60 ” (width) x 95 ” (depth)
1,522 mm [Width] x 2,410 mm [Depth]
Height
95 ”
2,400 mm
Weight
862 lbs
391 kg
Power, maximum current
2.65A
Single phase AC220V, 50Hz Area
2.5A
Single phase AC230V, 50Hz Area
Definition of 'Site Maintenance Personnel or Other Qualified Individuals'
Parts replacement, maintenance inspections and troubleshooting should be carried out by site maintenance personnel
or other qualified professionals. This manual includes directions for potentially dangerous procedures which should
only be carried out by professionals with the appropriate specialized knowledge.
INTRODUCTION
Procedures not described in this manual or marked as 'to be carried out by site
maintenance personnel or other qualified professionals' should not be carried out by
personnel without the necessary skill or technology. Work carried out by unqualified
persons may cause serious accidents, including electrocution.
The site maintenance personnel or other qualified professionals mentioned in this manual are defined as follows:
Site maintenance personnel:
Individuals with experience in maintaining amusement equipment, vending machines, etc., working under the
supervision of the owner/operator of this product to maintain machines within amusement facilities or similar
premises by carrying out everyday procedures such as assembly, maintenance inspections, and replacement of units/
expendable parts.
Activities to be carried out by site maintenance personnel:
Amusement equipment/vending machine assembly, maintenance inspection and replacement of units/expendable
parts.
Other qualified professionals:
Persons employed by amusement equipment manufacturers, or involved in design, production, testing or
maintenance of amusement equipment. The individual should have either graduated from technical school or hold
similar qualifications in electrical/electronics/mechanical engineering.
Activities to be carried out by other qualified professionals:
Amusement equipment/vending machine assembly, repair/adjustment of electrical/electronic/mechanical parts.
1 HANDLING PRECAUTIONS
When installing or inspecting the machine, be very careful of the following points and pay attention to ensure that
the player can enjoy the game safely.
Non-compliance with the following points or inappropriate handling running counter to the cautionary matters
herein stated can cause personal injury or damage to the machine.
1
• To avoid an electric shock or short circuit, do not plug in or unplug quickly.
• To avoid an electric shock, do not plug in or unplug with a wet hand.
• Do not expose power cords or ground wires on the surface, (floor, passage, etc.). If
exposed, the power cords and ground wires are susceptible to damage. Damaged
cords and wires can cause an electric shock or short circuit.
• To avoid causing a fire or an electric shock, do not put things on or damage the power
cords.
HANDLING PRECAUTIONS
• When working with the product, be sure to turn the power off. Working with the
power on may cause an electric shock or short circuit.
• When, or after installing the product, do not unnecessarily pull the power cord. If
damaged, the power cord can cause a fire or an electric shock.
• In case the power cable is damaged, ask for a replacement through where the product
was purchased from or the office herein stated. Using the cord as is damaged can
cause fire, an electric shock or leakage.
• Be sure to perform grounding appropriately. Inappropriate grounding can cause an
electric shock.
• Be sure to use fuses meeting the specified rating. Using fuses exceeding the specified
rating can cause a fire or an electric shock.
• Be sure that connections such as IC BD are made properly. Insufficient insertion can
cause an electric shock.
• Specification changes, removal of equipment, conversion and/or addition, not
designated by SEGA are not permitted.
- Failure to observe this may cause a fire or an electric shock. Non-compliance with
this instruction can have a bad influence upon physical conditions of the players or
the onlookers, or result in injury during play.
- SEGA shall not be held responsible for damage, compensation for damage to a third
party, caused by specification changes not designated by SEGA.
• If work or parts replacement not indicated in this manual is carried out, an accident
may occur. If it is necessary to carry out work not indicated in this manual, be sure to
have it done by the office indicated in this manual or by the point of purchase. Also,
please inquire regarding details of the work involved.
• Be sure to perform periodic maintenance inspections herein stated.
• For the IC board circuit inspections, only the logic tester is allowed. The use of a
multiple-purpose tester is not permitted, so be careful in this regard.
1
HANDLING PRECAUTIONS
• Static electricity from your body may damage some electronics devices on the IC
board. Before handling the IC board, touch a grounded metallic surface so that the
static electricity can be discharged.
• This product uses a DLP projector. DLP projector screens scratch easily, so be careful
when cleaning the screen. See Chapter 13 ( “DLP Projectors” ) for details.
• Some parts are not designed and manufactured specifically for this game machine.
The manufacturers may discontinue, or change the specifications of such generalpurpose parts. If this is the case, SEGA cannot repair or replace a failed game machine
whether or not a warranty period has expired.
CONCERNING THE STICKER DISPLAY
This SEGA product has stickers attached describing the product manufacture No. (Serial No.) and Electrical
Specifications. It also has a Sticker describing where to contact for repair and for purchasing parts.
When inquiring about or asking for repairs, mention the Serial No. and Name of Machine indicated on the Sticker.
The Serial Number indicates the product register. Identical machines could have different parts depending on the
date of production. Also, improvements and modifications might have been made after the publication of this
manual. In order to ensure you order the correct parts, mention the Serial No. when contacting the applicable places.
CONCERNING WARNING DISPLAYS
This SEGA product has warning displays on stickers, labels and/or printed instructions adhered/attached to or
incorporated in the places where a potentially hazardous situation could arise. The warning displays are intended
for accident prevention for customers and for avoiding hazardous situations relating to maintenance and servicing
work. Some portions of the cabinet contain high voltage and may cause accidents if touched. When performing
maintenance, be very careful of the warning displays. It is especially important that any complex repair and
replacement work not mentioned herein should be performed by those technical personnel who have
knowledge of electricity and technical expertise.
In order to prevent accidents, caution any customer ignoring the warnings to cease and desist immediately.
555-30-104
1
HANDLING PRECAUTIONS
440-WS0354-EG
HLT-3019-01
440-WS0275-EG
HLT-3018-01
440-CS0355-EG
3
2 PRECAUTIONS REGARDING INSTALLATION LOCATION
2
PRECAUTIONS REGARDING INSTALLATION LOCATION
This product is an indoor game machine. Do not install it outside. Even indoors, avoid
installing in places mentioned below so as not to cause a fire, electric shock, injury and/or
malfunction.
- Places subject to rain or water leakage, or places subject to high humidity in the
proximity of an indoor swimming pool and/or shower, etc.
- Places subject to direct sunlight, or places subject to high temperatures in the
proximity of heating units, etc.
- Places filled with inflammable gas or vicinity of highly inflammable/volatile chemicals
or hazardous matter.
- Dusty places.
- Sloped surfaces.
- Places subject to any type of violent impact.
- Vicinity of anti-disaster facilities such as fire exits and fire extinguishers.
- Areas where the temperature exceeds the applicable temperature (ambient
temperature) range of 5 to 30 degrees centigrade.
2-1 LIMITATIONS OF USAGE
• This product requires a breaker and earth mechanism as part of the location facilities.
Using the product without these can cause a fire and electric shock.
• Be sure to use an independent power supply equipped with an earth leakage breaker.
Using a power supply without an earth leakage breaker can cause an outbreak of fire if
a power surge occurs.
• Putting many loads on one electrical outlet can cause generation of heat and a fire
resulting from overload.
• Ensure that the indoor wiring for the power supply is rated at 15 A or higher (AC single
phase 100 V ~ 120 V area), and 7 A or higher (AC 220 V ~ 240 V area). Non-compliance
with the Electrical Specifications can cause a fire and electric shock.
• When using an extension cord, ensure that the cord is rated at 15 A or higher (AC 100
V ~ 120 V area) and 7 A or higher (AC 220 V ~ 240 V area). Using a cord rated lower
than the specified rating can cause a fire and electric shock.
Electricity Consumption:
2
PRECAUTIONS REGARDING INSTALLATION LOCATION
• Be sure to check the Electrical Specifications. Ensure that this product is compatible
with the location's power supply, voltage, and frequency requirements. A plate
describing Electrical Specifications is attached to the product. Noncompliance with the
Electrical Specifications can cause a fire and electric shock.
MAX. 2.65 A (AC 220 V, 50 Hz)
MAX. 2.5 A (AC 230 V, 50 Hz)
2-2 OPERATION AREA
• For safe operation, use and operate this product in an area measuring at least 2,000
mm in width and 2,600 mm in depth.
• SEGA shall not be held responsible for damage, compensation for damage to a third
party, resulting from the failure to observe this instruction.
• The ceiling where this product is installed must be at least 2,400 mm high. If the ceiling
is too low, the heat emitted from the product may cause it to catch on fire.
For transporting the machine into the location's building, the minimum necessary
dimensions of the opening (of doors, etc.) are 900 mm (W) and 1,400 mm (H)
2600
150
1522
250
2000
PRECAUTIONS REGARDING INSTALLATION LOCATION
• Be sure to provide sufficient space specified in this manual. Do not allow objects to
block the ventilation ports. It can cause generation of heat and a fire.
250
2
2400
2410
340
2-2 FIG. 01
(Unit: mm)
3 PRECAUTIONS REGARDING PRODUCT OPERATION
The motorcycle mechanism on this product tilts to the left and right during game play.
To avoid injury and trouble, be sure to pay attention to the behavior of visitors and players.
3-1 BEFORE OPERATION
3
• To ensure maximum safety for the players and the customers, ensure that where the
product is operated has sufficient lighting to allow any warnings to be read. Operation
under insufficient lighting can cause bodily contact with each other, hitting accident,
and/or trouble between customers.
• Be sure to perform appropriate adjustment of the monitor (projector). For operation of
this machine, do not leave monitor's flickering or deviation as is. Failure to observe this
can have a bad influence upon the players' or the customers' physical conditions.
• It is suggested to ensure a space allowing the players who feel sick while playing the
game to take a rest.
• Check if all of the adjusters are in contact with the surface. If they are not, the Cabinet
can move and cause an accident.
PRECAUTIONS REGARDING PRODUCT OPERATION
In order to avoid accidents, check the following before starting the operation:
Ensure that all of the adjusters are in contact with the floor.
• Check the side guide plates on the back
of the motorcycle mechanism to make
sure they are undamaged and intact. If
the guide plates are faulty, it could lead
to an accident such as the customer
getting his or her fingers caught in
between the parts.
MOTORCYCLE MECHANISM
SIDE GUIDE PLATE (both sides)
• Do not put any heavy item on this product. Placing any heavy item on the product can
cause a falling down accident or parts damage.
• Do not climb on the product. Climbing on the product can cause falling down
accidents. To check the top portion of the product, use a step ladder.
3
• To avoid electric shock, check to see if door & cover parts are damaged or omitted.
PRECAUTIONS REGARDING PRODUCT OPERATION
• To avoid electric shock, short circuit and/or parts damage, do not put the following
items on or in the periphery of the product.
Flower vases, flowerpots, cups, water tanks, cosmetics, and receptacles/
containers/vessels containing chemicals and water.
• Check the surrounding area before turning on the power. The product will perform
the initializing operation automatically after the power is turned on. If there are people
near it, they could be struck or knocked over when the seat moves to the left and right.
• For safety reasons, perform a test run, and be sure to inspect the safety mechanism
before making the game available for play. The product is equipped with a safety
mechanism as the seat will vibrate (move to the left and right). Be very careful when
inspecting the safety mechanism to ensure it works properly.
- Is the seat loose?
- Are the side guide plates undamaged and intact?
• Inspect the seat to make sure it moves properly. Abnormal movement of the seat
could lead to accidents, so do not make the game available for play until the problem
is resolved.
- Does the seat move in the direction it is steered?
- Does the seat move smoothly?
- Is there significant rattling?
- Are there any unusual noises when the seat moves?
- Does the seat vibrate in an unusual manner when it moves?
- Does the seat stop in a level position when the game ends?
• Stop operations immediately if the moving mechanism ever malfunctions. Turn off
the power, unplug the power plug from the outlet, and contact the party listed in this
manual or the point of purchase for this product. Continued use despite a malfunction
could result in major accidents such as electrocution, short circuits, fire, or a fall.
• If the moving mechanism requires maintenance, contact the party listed in this
manual or the point of purchase for this product. If maintenance work is performed
by someone other than a qualified technician, an accident involving the person
performing the maintenance work or persons playing the game may occur.
• This appliance is not intended for use by persons including children with reduced
physical, sensory or mental capabilities or lack of experience and knowledge, unless
they have been given supervision or instruction concerning use of the appliance by
person(s) responsible for satefy.
To avoid injury, be sure to provide sufficient space by considering the potentially
crowded situation at the installation location. The motorcycle mechanism on this product
tilts to the left and the right according to the player’ s steering. Insufficient installation
space can cause making bodily contact with each other, hitting accidents, and/or trouble
between customers.
To avoid injury and trouble, be sure to pay attention to the behavior of visitors and players
• For safety reasons, do not allow any of the following people to play the game.
- Those who need assistance such as the use of an apparatus when walking.
- Those who have high blood pressure or a heart problem.
- Those who have experienced muscle convulsion or loss of consciousness when
playing video games, etc.
- Those who have neck or spinal cord problems.
- Those who are intoxicated or under the influence of drugs.
- Pregnant women.
- Persons susceptible to motion sickness.
- Persons who disregard the product's warning displays.
PRECAUTIONS REGARDING PRODUCT OPERATION
3-2 DURING OPERATION (PAYING ATTENTION TO CUSTOMERS)
3
- Persons under 140 cm in height.
- Persons over 150 kg in weight.
- Those who cannot grasp the Control Unit securely because of immobility in fingers,
hands or arms.
• For safety reasons,
persons under 140 cm in
height cannot play this
game.
140cm
• Instruct players that only 1 person should get on the motorcycle at a time. The product
is made for a single rider. If two or more people get on at the same time, they could fall
off.
• Instruct those wearing high-heeled shoes that they should not play the game due to
the high risk of having an accident during play.
• Instruct players to straddle the seat when playing the game. The motorcycle
mechanism tilts during play, so the player could fall off if both legs are on one side.
3
PRECAUTIONS REGARDING PRODUCT OPERATION
• Even players who have never been adversely affected by light stimulus might
experience dizziness or headache depending on their physical condition when playing
the game. Small children are especially likely to experience these symptoms. Caution
guardians of small children to keep watch on their children during play.
• Instruct those who feel sick during play to have a medical examination.
• To avoid injury from falls and electric shocks due to spilled drinks, instruct the player
not to place heavy items or drinks on the product.
• To avoid electric shocks and short circuits, do not allow customers to put hands and
fingers or extraneous matter in the openings of the product or small openings in or
around the doors.
• To avoid falls and resulting injury, immediately stop the customer from leaning against
or climbing on the product, etc.
• To avoid electric shock and short circuit, do not allow customers to unplug the power
plug without a justifiable reason.
• Covers have been placed over parts on this product that the player could have their
fingers or hands caught between, but this does not eliminate the danger to small
children. Caution small children not to get close to the product while it is being played.
• Caution players not to take their feet off the footrests during play. If the player takes his
or her feet off the footrests carelessly during play, their feet could get caught between
or on parts, resulting in broken bones, sprains, or other injuries.
• Do not engage in actions that could result in accidents or trouble such as playing with
bags or scarves draped around the neck or while holding drinks.
• Caution those other than the player that they should not go near the cabinet. Doing so
could result in collision with the player or the motorcycle mechanism.
• Instruct players to grip the handles tightly during play to prevent accidents. Caution
those that engage in risky behavior such as holding on with just one hand.
• Immediately stop such violent acts as hitting and kicking the product. Such violent
acts can cause parts damage or cause the cabinet to fall over, resulting in injury.
• The maximum weight for players is 150 kg. Prohibit those who weigh more than 150
kg from playing as it could result in abnormal operation or damage to the parts.
10
4 PART DESCRIPTION
BILLBOARD
MASK
DLP PROJECTOR
SPEAKER UNIT L
4
HANDLE
MOTORCYCLE MECHANISM
PART DESCRIPTION
FRONT PANEL CENTER
SPEAKER UNIT R
REAR CABINET
DLP CABINET
COIN CHUTE TOWER
COIN CHUTE DOOR
AC UNIT
CASH BOX DOOR
4 FIG. 01
4 Table 01 Major Dimensions and Weights for Reference When Moving the Product
ITEMS
Width x Depth x Height
Weight
Rear cabinet (without Coin Chute Tower)
35’ x 59’ x 51’
890 mm x 1,493 mm x 1,280 mm
314lbs
142 kg
DLP cabinet
54’ x 24’ x 74’
1,360mm x 610mm x 1,870mm
480lbs
218kg
Billboard
51’ x 21’ x 13’
1,270mm x 520mm x 320mm
40lbs
19kg
11
5 ACCESORIES
Confirm that the accessories listed in the table below are present when setting up the product. The parts listed as
“Spare” in the “Use etc.” column are expendable parts, and have therefore been included as spare parts.
5 TABLE 01 ACCESORIES
5
ACCESORIES
DESCRIPTION:
Part No. (Qty.):
Note:
Figures:
OWNER’S MANUAL
555-30-300(1)
This manual
Parts not labeled with part numbers are as yet unregistered
or cannot be registered. Be sure to handle all parts
with care, as some parts are not available for purchase
separately.
DVD SOFT KIT (1)
CUSHION SPONGE
601-11137 (1) Protective material
DVD (1)
DISK CASE
253-5507 (1)
HEXAGON BOLT (2), black
M6 x 20, w/spring washer, large flat washer used
GUIDE
12
6 ASSEMBLY AND INSTALLATION
• Perform assembly work by following the procedure herein stated. Failure to comply
with the instructions can cause electric shock.
• Perform assembling as per this manual. Since this is a complex machine, incorrect
assembling can cause an electric shock, machine damage and/or improper functioning
as per specified performance.
• When assembling, be sure to use plural persons. Depending on the assembly work,
there are some cases in which working by one person alone can cause personal injury
or parts damage.
6
ASSEMBLY AND INSTALLATION
• This work should be carried out by the site maintenance personnel or other qualified
professionals. Work performed by non-technical personnel can cause a severe accident
such as electric shock. Failing to comply with this instruction can cause a severe
accident such as electric shock to the player during operation. If no one with proper
technological expertise is available, request service from the office indicated in this
document or the point of purchase so as to ensure safety.
• Adhere strictly to all of the work procedures stipulated in this document. If two or
more workers are working at the same time, exercise special caution. If sequences are
carried out erroneously, accidents can result. There might also be cases in which the
assembly cannot be completed.
• Pay special attention to the surroundings when a multiple number of workers are
working at the same time. There is always the danger that a worker might be injured.
In assembly and installation of this product, there are procedures in which a stepladder
is used and procedures in which heavy objects are attached. Carelessness in doing
work could lead to grave injuries and even fatalities.
• Ensure that connectors are accurately connected. Incomplete connections can cause
electric shock.
• Be careful not to damage the wires. Damaged wires may cause electric shock or short
circuit or present a risk of fire.
• Do not leave power cable or earth lines exposed over passageways. Exposure could
lead to damage, electric shock or short circuit. Wherever wiring has been laid out on a
floor surface, use a wiring protection cover. (Wiring diameter: Power cable, approx. ø8,
Network cable, approx. ø5.)
• When inserting or removing a connector, always hold it by its main part. If you hold
it by anything else while doing so, the connections between wire and connector
terminal fixtures could be damaged; and there could be a short circuit or fire. There
could also be poor connectivity.
• Make sure that all the adjusters are resting on the floor. The cabinet may move and
cause an accident if the adjusters are not laid out properly.
13
• Whenever any fasteners (e.g. screws, nuts) have been lost, always use replacement
fasteners with proper dimensions as specified in this manual. If fasteners of any other
dimensions are used, it could cause damage and/or separation of parts that result in
secondary accidents.
6
ASSEMBLY AND INSTALLATION
• Exercise proper caution when using a step ladder to perform work. Falling or tipping
over could result in a major accident. Also, if the ceiling is low, you could bump your
head.
• To perform work safely and securely, be sure to prepare a step which is in a secure and
stable condition. Performing work without using the step can cause accidents such as
falling down.
• When attaching or removing doors be careful that your hand or finger does not get
caught in anything.
• Support and hold parts in place securely and fasten them with screws and/or bolts.
Use two workers, one to support the part and another to fasten it in place. If a part is
not supported securely, it might fall down, resulting in an accident.
• Wear appropriate work clothing so that work can be performed safely. Use gloves and
safety shoes to prevent accidents or injuries.
• When installing a wire protection cover over a floor, use a material shaped so that
no one passing by will stumble over it. Using a material that could be stumbled over
might lead to an accidental fall.
• Be careful in handling plastic parts. Be sure not to tighten screws or nuts too tightly.
If such parts are exposed to excessive loads or impact, they might become damaged,
resulting in fragments or cracks that could cause accidental injury.
• When installing 2 cabinets side by side, leave enough room so that the players will
not collide with each other or other customers. If the cabinets are too close together,
it could cause collisions. If the player were to fall off, it could result in a serious injury
such as the player hitting his or her head on the other machine. It could also provoke
unnecessary conflict between customers.
Be very careful when handling the DLP projector screen. The screen is easily damaged but
cannot be repaired. If damaged the entire screen must be replaced.
14
The installation and assembly work for this product is performed according to the following procedures:
Attaching the Billboard
Attaching the Rear Cabinet
Fastening the Product to the Installation Location
Attaching the Coin Chute Tower
Installing the Mat
Connecting Power and Ground Wire
Checking the Assembly
6
ASSEMBLY AND INSTALLATION
6-1
6-2
6-3
6-4
6-5
6-6
6-7
Tools necessary for work
- MASTER KEYS
- Phillips screwdrivers (for M4, M5 screws)
- Hexagonal screwdrivers (for M4 bolts and nuts)
- Socket wrenches (for M6, M8 bolts, nuts)
- Spanner with measuring distance of 24 mm to opposite side (for adjusters)
Length to
opposite side
- Step/Stepladder
15
6-1 ATTACHING THE BILLBOARD
1
.
Locate and remove the 16 fixings which as attached to the top of the DLP Cabinet
6
ASSEMBLY AND INSTALLATION
2
.
Using a minimum of 2 persons and a step ladder, carefully place the Assy Billboard on top of the DLP cabinet and secure in the 8 location using the fixings previously removed.
ASSY BILLBOARD (Marquee)
3
.
Fit PIPES L and R into the sides of the Billboard Box and secure the pipes to the top of the DLP cabinet again using the fixing previously removed.
16
4
.
Make all connections good from within the Billboard Box (3 connections in total)
6
ASSEMBLY AND INSTALLATION
5
.
Remove the 4 fixings and washers from the front of the Billboard Box and fit the Marquee in its location. Fix into place using the fixings previously removed.
17
6-2 ATTACHING THE REAR CABINET
1
Connect the 5 connectors on the ASSY tube to the DLP base.
Connect connectors.
SM10P, SM18P, YL9P, YL21P, VL4P
6
ASSEMBLY AND INSTALLATION
ASSY TUBE
6-5 FIG. 01
2
ASSY TUBE
6-5 FIG. 02
Fasten the ASSY tube in place with 6 truss screws. Be careful
not to pinch any wires.
ASSY TUBE
TRUSS SCREW (6), black
M4 x 8
6-5 FIG. 03
3
Put the rear cabinet in place.
REAR CABINET
18
6-5 FIG. 04
4
Connect the 5 connectors to the rear cabinet. Be careful not to pinch any wires.
6
ASSEMBLY AND INSTALLATION
Connect connectors.
SM10P, SM18P, YL9P, YL21P, VL4P
6-5 FIG. 05
5
Fasten the ASSY tube in place with 4 truss screws.
TRUSS SCREW (4), black
M4 x 8
6-5 FIG. 06
19
6-3 FASTENING THE PRODUCT TO THE INSTALLATION LOCATION
Make sure that all the adjusters contact the floor. Otherwise the cabinet could move,
causing an accident.
6
ASSEMBLY AND INSTALLATION
This product has 9 casters and 11 adjusters. After determining the installation location, have the adjusters contact the
floor directly, and adjust them so the machine will remain in a level position keeping a space of about 5 mm between
the floor and the casters.
NOTE: Put the adjusters on the coin chute tower on the floor after following the instructions in“ 6-7 Attaching the
Coin Chute Tower.”
CASTER (9)
ADJUSTER (11)
340mm
COIN CHUTE TOWER
6-6 FIG. 01
1
2
3
20
Move the product to the installation site. Secure a 150 mm space between the back wall and the back of the
cabinet for ventilation.
Leave 340 mm of space between the front and rear cabinets.
Bring the adjusters into direct contact with the floor. Use a wrench to align the height of the adjusters until
the cabinet is perfectly level.
4
After setting, turn adjuster nuts upwards to tighten them and secure adjuster heights.
ADJUSTER
CASTER
Tighten nut upwards.
About 5 mm
6-6 FIG. 02
Views are reduced to 1/100.
Use them for reference in installation site layout.
6
ASSEMBLY AND INSTALLATION
ADJUSTER
6-6 FIG. 03
21
6-4 ATTACHING THE COIN CHUTE TOWER
1
Slide the Joint Tower up to the fixing point on the CYCLE Base. Fix into location using the 2x
M8x30 Hex Bolts supplied. Once secure, connect the Link harness to the Main harness on the
Cycle side.
NUT (2)
M8, large flat & spring washers used
6
ASSEMBLY AND INSTALLATION
TOWER JOINT
2
6-7 FIG. 01
Attach and fasten the JOIN LID into place using 4x M8 Hex Bolts, 2x Imperial Internal Hex Bolts
and 2x Truss head fixings (supplied).
HEXAGON BOLT (2), black
TRUSS SCREW (2), black
M8 x 20, w/spring washer,
large flat washer used
6-7 FIG. 02
JOINT LID
6-7 FIG. 03
22
6-7 FIG. 04
3
Hold the coin chute tower up with at least 1 other person and attach it after connecting 1
connector. Be careful not to pinch any wires.
Connect connector.
COIN CHUTE TOWER
SM18P
6
4
ASSEMBLY AND INSTALLATION
6-7 FIG. 05
Secure the coin chute tower to the base using the 4x security bolts supplied. (Inside front and
Rear of coin chute tower.)
Security Bolt x 4 (Black)
23
5
Secure the Joint Plate to the side of the coin chute tower using the fixings supplied.
6
ASSEMBLY AND INSTALLATION
6-7 FIG. 08
6
Finally adjust the Leg Leveller so that the coin chute tower is level to the CYCLE frame once it has
been installed.
6-7 FIG. 09
24
6-5 INSTALLING THE MAT
1
Lay the mat down.
6
6-8 FIG. 01
2
Fasten 2 guides to the right side of the rear
cabinet with 2 hexagon bolts in the front and
back.
ASSEMBLY AND INSTALLATION
MAT
HEXAGON BOLT (2), black
M6 x 20, w/spring washer, large flat washer used
GUIDE
6-8 FIG. 02 Right side of rear cabinet (rear)
3
Refer to Step 2 and fasten 2 guides to the left side of the rear cabinet with 2 hexagon bolts in the front and
back.
25
6-6 CONNECTION OF POWER AND GROUND WIRE
• Use the power supply equipped with an earth leakage breaker. Use of power supply
without such a breaker could result in fire if there is a current leakage.
6
ASSEMBLY AND INSTALLATION
• Have available a securely grounded indoor ground terminal. Without proper
grounding, customers could be electrocuted and product operations might not always
be stable.
• Do not expose the power cord or ground wire. If these are exposed, customers could
stumble over them, for instance, and easily damage them. Additionally, if these lines
are damaged, there could be a risk of electrical shock or short circuit. Set these lines at
locations where they will not interfere with customer traffic, or attach covers to them.
• After laying out the power cord on the floor, be sure to always protect it. If the power
cord is left exposed, it can easily be damaged, resulting in electrical shock.
• When using the product’ s AC unit ground terminal, use ground wire with a
circular terminal as shown in the illustration, and establish ground securely. Avoid
Terminal width 12 mm
indiscriminant grounding operations such as use of
Hole diameter 6.4 mm
wire with only its sheath peeled off.
If grounding has been established with the ground wire inside the power cord, do not
perform grounding with the AC unit ground terminal. Conversely, if the AC unit ground
terminal has been used for grounding, do not establish ground with the ground wire in
the power cord. Otherwise there could be faulty or erroneous operations.
26
The AC Unit has Main SW, Circuit Protector, Earth Terminal and the Inlet which connects the Power Cord.
1
Ensure that the Main SW is OFF.
EARTH TERMINAL <For Taiwan>
Connect with the indoor earth terminal.
INLET
6
AC CABLE (POWER CORD)
MAIN SW
To the AC outlet
CIRCUIT PROTECTOR
6-10 FIG. 01
2
3
Connect one end of the earth wire to
Always connect the ground wire.
the AC earth terminal, and the other
end to the indoor earth terminal.
The accessory power cord contains
POWER PLUG
earth wire. Connect power cord to
AC unit inlet, and then insert power
cord plug into “power outlet with
GROUND WIRE
earth terminal”. If there is no “power
outlet with earth terminal”, be sure to
always establish grounding by some
means; for example, by connecting
ADAPTER
the AC unit earth terminal to the
6-10 FIG. 02
earth system with an earth wire set
aside for that purpose. When using a conversion adapter sold on the market to provide power, connect the
adaptor’s earth wire terminal to an “earth terminal that is securely grounded”.
ASSEMBLY AND INSTALLATION
Main SW OFF.
When using an earth wire set aside separately, connect one end of
the earth wire to AC unit earth terminal and the opposite end to
indoor earth terminal. The AC unit earth terminal uses a bolt and nut
combination. Remove the nut, pass the earth terminal through the
bolt, and then tighten the nut.
6-10 FIG. 03 <For Taiwan>
4
Lay out power cord indoors. Attach power
cord cover to protect the cord. If grounding
is established by using an earth wire set aside
separately, lay out this earth wire and protect it
at the same time.
6-10 FIG. 04
27
6-7 CHECKING THE ASSEMBLY
Refer to Chapter 9 “Explanation of Test and Data Display” and enter Test Mode.
Use Test Mode to check whether or not the product has been assembled correctly and whether or not everything is
normal with the LINDBERGH RED EX, connected boards, and input/output devices.
(1) MONITOR TEST
6
ASSEMBLY AND INSTALLATION
A screen for testing the monitor is displayed when MONITOR TEST is selected on the System Test Menu Screen in
System Test Mode. The monitor is adjusted before it is shipped from the factory, but look at the test screen to see if
further adjustment is necessary. If further adjustment is necessary, refer to Chapter 13 and adjust the monitor.
MONITOR TEST 1/ 2 1
32
MONITOR TEST 2/ 2
PRESS TEST TO NEXT
PRESS TEST TO EXIT
6-12 FIG. 01
6-12 FIG. 02
(2) SPEAKER TEST
A screen for testing the speakers is displayed when SPEAKER TEST (PCI) is selected on the System Test Menu
Screen in System Test Mode. A sound test can be performed by turning the RIGHT SPEAKER or LEFT SPEAKER
“ON” and “OFF.”
SPEAKER TEST(*******)
RIGHT SPEAKER OFF
LEFT SPEAKER OFF
REAR RIGHT SPEAKER OFF
REAR LEFT SPEAKER OFF
CENTER SPEAKER OFF
WOOFER SPEAKER OFF
−>EXIT
SELECT WITH SERVICE AND PRESS TEST
6-12 FIG. 03
28
(3) INPUT TEST
A screen for testing the switches is displayed when INPUT TEST is selected on the GAME TEST MODE Screen in
Game Test Mode.
Refer to “9-3-2 INPUT TEST” and check to make sure it works correctly.
INPUT TEST
START
SHIFT UP
SHIFT DOWN
VIEW CHANGE
MUSIC SELECT
ACCEL
BRAKE
HANDLE
LEAN
SERVICE
TEST
6
OFF
OFF
OFF
OFF
OFF
**H
**H
**H
**H
OFF
OFF
PRESS TEST AND SERVICE TO EXIT
6-12 FIG. 04 INPUT TEST SCREEN
ASSEMBLY AND INSTALLATION
(4) OUTPUT TEST
A screen for testing the lamp and wire connections is displayed when OUTPUT TEST is selected on the GAME
TEST MODE Screen in Game Test Mode. Refer to “9-3-3 OUTPUT TEST” and check to make sure the lamps light
up properly and that the motorcycle mechanism is working correctly.
OUTPUT TEST
START LAMP
LEFT LEADER LAMP RIGHT LEADER LAMP FOOT LAMP TAIL LAMP OFF
OFF
OFF
OFF
OFF
LEAN ENABLE LEAN LEFT LEAN RIGHT LEAN CENTER OFF
OFF
OFF
OFF
VIBRATION ENABLE VIBRATION OFF
OFF
->EXIT
SELECT WITH SERVICE AND PRESS TEST
6-12 FIG. 05 OUTPUT TEST SCREEN
29
(5) INPUT ADJUSTMENT
A screen for adjusting the controller is displayed when INPUT ADJUSTMENT is selected on the GAME TEST
MODE Screen in Game Test Mode. Before making the game available for play, always test the game and check to
make sure no adjustments are necessary and that it is functioning correctly. (See 9-3-5.)
INPUT ADJUSTMENT
6
ASSEMBLY AND INSTALLATION
30
HANDLE
ACCEL
BRAKE
DEFAULT SETTING
MIN NOW MAX
[**H] [**H] [**H]
c
Left [ 0 ] Right
[**H] [**H] [**H]
Min [0 ] Max
[**H] [**H] [**H]
Min [0 ] Max
EXIT : MEMORIZE
->EXIT : CANCEL
SELECT WITH SERVICE AND PRESS TEST
6-12 FIG. 06 INPUT ADJUSTMENT SCREEN
7 PRECAUTIONS WHEN MOVING THE MACHINE
• When moving the machine, be sure to pull out the plug from the power supply.
Moving the machine with the plug still inserted can cause the power cord to be
damaged, resulting in a fire and/or electric shock.
• When lifting the cabinet, be sure to hold the handles and the bottom part. Lifting the
cabinet by holding other portions may damage parts and installation portions due to
the empty weight of the cabinet, and may cause personal injury.
• When moving the DLP projector, do not push it from the rear side. Push it from
sideways. Pushing the DLP projector from the rear side can have the DLP projector fall
down, causing personal injury, etc. In case the floor has slanted surfaces or step-like
differences, be sure to move the machine by 2 or more persons.
PRECAUTIONS WHEN MOVING THE MACHINE
• When moving the machine on the floor, retract the adjusters, and ensure that the
casters make contact with the floor. Pay careful attention so that the casters do not run
over power cords and earth wires. Damaging the power cords can cause an electric
shock and/or short circuit.
7
Do not hold or press the plastic parts when moving the machine. Failure to observe this
instruction may break the parts, and eventually the broken pieces may cause a personal
injury.
• Disassemble the product into the individual units before moving it. If the product is
tilted or the cabinet is set on an uneven surface in an assembled state, the joints could
break.
• Do not allow ropes to come in contact with the surface of the machine directly or they
may scratch it. Put some kind of protective material under the rope where it will touch
the machine.
31
7
PRECAUTIONS WHEN MOVING THE MACHINE
7 FIG. 01
Remove the mat and DVD DRIVE when moving the product and separate the rear cabinet. (See Chapter 6.)
If there is a difference in floor level of 1 cm or more, add a ramp or separate the coin chute tower as well.
Do not push the product holding the shaded areas.
7 FIG. 02
The product can be moved with the coin chute tower attached, but do not pull or push on it in order to move the
cabinet.
32
8 GAME DESCRIPTION
8-1 HOW TO PLAY
1
2
3
Once you press the START button when the START button is flashing, the game will begin.
The modes that can be played after the game starts differ depending on whether or not it has been configured
for network play. (See Chapter 18 “Network Play.”)
8
GAME DESCRIPTION
When you insert coins, they will be counted in the credit display at the bottom of the screen. When you
insert enough coins for a game, the message at the bottom will change from “INSERT COIN (S)” to “PRESS
START BUTTON,” and the START button will flash.
Up to 24 credits can be counted at once. Coins inserted after 24 credits are recorded will not be counted or
returned. However, the number of coins inserted will be counted in the data display and the coin meter.
NOTE: The credit and coin settings can be configured under COIN ASSIGNMENTS in System Test Mode.
(See 9-2.)
- Not configured for network play: Single-player Story Mode (see 8-2) only.
- Configured for network play:
Select between Single-player Story Mode and Multiple-player Versus
Mode (see 8-3).
HANDLE
SHIFT UP BUTTON
BRAKE
SHIFT DOWN BUTTON
START BUTTON
GAS (ACCEL)
MOTORCYCLE MECHANISM
VIEW CHANGE BUTTON
MUSIC SELECT BUTTON
8-1 FIG. 01 Button Positions
33
8-2 STORY MODE
8
GAME DESCRIPTION
In story mode, you play against distinctive rivals that appear during the rounds. If you cross the finish line before
your rival within the allotted time, you will be able to proceed to the next round. If you are unable to cross the finish
line first or within the allotted time, you can proceed to the next round by continuing. In the final round, you will
compete against the “Reigning King,” the ultimate rival. If you beat him, you will become the new “Reigning King”
and your name will be displayed during the advertisements.
NOTE: If the game is not configured for network play, Story Mode will begin after the game starts.
If the game is configured for network play and there are no entries from the other cabinets, you will be able
to play in Story Mode after the game starts.
1
You will be taken to the Motorcycle Selection Screen.
Select 1 motorcycle from the many available. Each motorcycle has its own features, so select one that suits
you.
The selected motorcycle is displayed here.
The performance characteristics of
the selected motorcycle are displayed here.
Select a motorcycle
from the many available
by moving the handles
to the left or right.
8-2 FIG. 01 Motorcycle Selection Screen
2
Twist the accelerator to
confirm your selection.
After selecting your motorcycle, you will be taken to the Music Selection Screen.
Select 1 song from the many available. The selected song will be played during the game to enliven the
mood. The song can also be changed during the game by pressing the Music Select Button.
The selected song is displayed here.
Select a song from the many available by
moving the handles to the left or right.
8-2 FIG. 02 Music Selection Screen
34
Twist the accelerator to
confirm your selection.
3
After selecting music, several cut scenes will follow and you will be taken to the Game Play Screen.
In Story Mode, you will be able to proceed to the next round if you overtake your rival and cross the finish
line first.
Remaining time of the Round
Player’s motorcycle
Player’s current location
8
GAME DESCRIPTION
Player and rival’s positions
Speedometer
8-2 FIG. 03 Game Screen
Acceleration gauge
The player can perform the following operations during the game:
How to Operate the Motorcycle
Twist the accelerator:
The motorcycle will speed up in proportion to how far the accelerator on the right side of the handle is twisted.
Twist the accelerator twice rapidly:
If the acceleration gauge has filled and the accelerator is twisted twice rapidly, the motorcycle’s accelerating power
will increase in proportion to how full the gauge is, and it will speed up. Also, if the acceleration gauge is completely
full when the accelerator is twisted twice rapidly, the motorcycle’s accelerating power will increase even more than
normal and can be used for an extended period of time. Additionally, the acceleration gauge will fill up as items are
collected.
Tilt the handle:
The motorcycle will turn in the direction the handles are tilted.
Pull the brake lever:
The motorcycle will slow down in proportion to how hard the brake lever on the right side of the handle is pulled.
Push the up/down shift buttons:
If the shift buttons on the left side of the handle are pressed, the motorcycle will switch from automatic to manual,
and the gears can be shifted up and down by pressing the up and down shift buttons, respectively. If the buttons are
not pressed for a certain period of time, it will automatically switch to automatic.
How to Perform Other Operations
MUSIC SELECT BUTTON:
The current song can be changed by pressing the Music Select Button. Press it to select another song from the many
available.
VIEW CHANGE BUTTON:
Switch between 3 different views.
35
4
If you were unable to cross the finish line within the allotted time or could not overtake your rival, the
Continue Screen will appear after the round ends.
If you wish to CONTINUE, insert the required number of coins and press the START button again. If there
are enough credits remaining to CONTINUE, you can join again by pressing the START button.
8
GAME DESCRIPTION
8-2 FIG. 04 Continue Screen
5
6
If you choose to continue, game play will resume on the next round after you select a motorcycle and music.
If you continue on the final round, game play will resume on the final round again.
If you proceed to the next round, you will be taken to the Course Selection Screen to select the next course.
If you are on either the first or the final round, however, you will not be able to select a course.
Select the course you wish to compete in from the 2 available and proceed to the next round.
The selected course
Select the course you wish to compete in
by moving the handles to the left or right.
8-2 FIG. 05 Course Selection Screen
7
36
Twist the accelerator
to confirm your selection.
In each round, you will compete with a distinctive rival. If you beat the “Reigning King,” the rival in the
final round, you will be able to enter your name and it will be displayed during the advertisements as the
Reigning King.
Also, if your total points after the final round are within the top 20 among the previous Reigning Kings,
your name will be displayed in the rankings as well.
NOTE: The“ Current King” is the player most recently registered as a“ Reigning King,” regardless of
whether the game was in Story Mode or Versus Mode.
8-3 VERSUS MODE
Versus Mode is played with multiple players over several rounds and points are received according to ranking. The
player with the most points at the end of the final round becomes the new “Reigning King” and can have his or her
name displayed during the advertisements.
8
GAME DESCRIPTION
NOTE: If network play is configured, the game will wait for other players to join after starting and will accept
entries from the other cabinets. However, when games are already in progress on the other cabinets or at
other times when entries cannot be accepted, the game will automatically proceed to Story Mode without
waiting.
8-3 FIG. 01 Entry Waiting Screen
1
2
3
4
If other players join on the Entry Waiting Screen, Versus Mode will begin.
If no other players join within the allotted time, the game will automatically proceed to Story Mode.
You will be taken to the Motorcycle Selection Screen.
Select 1 motorcycle from the many available. Each motorcycle has its own features, so select one that suits
you.
After selecting your motorcycle, you will be taken to the Music Selection Screen.
Select 1 song from the many available. The selected song will be played during the game to enliven the
mood. The song can also be changed during the game by pressing the Music Select Button.
After selecting music, you will be taken to the Course Selection Screen.
Select the course you wish to compete in from the 2 available. In Versus Mode, course confirmation is
decided by the most votes. If 2 courses have the same number of votes, then the course with the lowest
difficulty rating will be chosen.
The selected course
Select the course you wish to
compete in by moving the handles
to the left or right.
8-3 FIG. 02 Course Selection Screen
Twist the accelerator to
make your tentative selection.
37
5
After selecting the course, several cut scenes will follow and you will be taken to the Game Play Screen.
In Versus Mode, the players compete 1 round at a time, and the winner is determined by who has the most
points after the final round.
Remaining time of the Round
Player’s motorcycle
Player’s current location
8
GAME DESCRIPTION
Player and rival’s positions
Speedometer
8-3 FIG. 03 Game Screen
6
7
Acceleration gauge
See Step 3 under “8-2 Story Mode” for details on the operations available during game play.
In Versus Mode, you will be taken to the Continue Screen after the round ends.
If you wish to CONTINUE, insert the required number of coins and press the START button again. If there
are enough credits remaining to CONTINUE, you can join again by pressing the START button.
NOTE: In Game Test Mode, the settings can be changed so that the player coming in 1st can proceed to the
next round. (See 9-3-4.)
8-3 FIG. 04 Continue Screen
8
9
38
When a game is continued and other players have joined, game play will resume on the next round after the
players have selected their motorcycles and music. If no other players have joined, the game will proceed to
Story Mode.
Points are received according to ranking. The player with the most points at the end of the final round will
be able to enter his or her name on the Name Entry Screen, and have it displayed during the advertisements
as the “Reigning King.”
NOTE: The“ Current King” is the player most recently registered as a“ Reigning King,” regardless of
whether the game was in Story Mode or Versus Mode.
8-4 HINTS FOR PLAYING THE GAME
• Find a motorcycle that matches your playing style.
Each motorcycle has its own unique features. There are fast types, cornering types, strong types, balance types,
and others. Assess the features of the motorcycles, find the one that matches your playing style, and learn how to
ride it proficiently.
• Find your best course.
The courses have various shapes and gimmicks. Find the best and worst courses for your motorcycle and select
the ones that match your playing style.
• Slow down early when approaching sharp curves.
There are some curves in the courses that cannot be cornered at top speed. Try to slow down before the curves
and corner them smoothly, rather than running into obstacles and losing time. This is the key to playing better.
• Fill your acceleration gauge by collecting items.
There are several items along the courses that will fill your acceleration gauge. Collect as many as you can so
that you will have Super Acceleration ready to use whenever you need it.
8
GAME DESCRIPTION
• Use Super Acceleration effectively.
Super Acceleration can be used for as long as your acceleration gauge is filled. Assess the shape of the course
you are on and think about the best time to use it. For example, it would be effective to use it on long straight
aways when your gauge is sufficiently filled.
Items
Acceleration gauge increases by 1.
Acceleration gauge increases to the MAX.
8-4 FIG. 01
8-4 FIG. 02
Acceleration gauge increases by 5.
8-4 FIG. 03
39
9 EXPLANATION OF TEST AND DATA DISPLAY
9
Do not touch any parts that are not specified in these directions. Touching unspecified
locations may lead to electric shock or cause short circuits.
EXPLANATION OF TEST AND DATA DISPLAY
• Be careful that a finger or hand does not get caught when opening/closing the coin
chute door.
• When you enter Test Mode, the locks on the handles and motorcycle mechanism will
release. If you press the TEST Button while leaning on the motorcycle mechanism
which tilts, you could fall off. The locks will be activated again when you exit Test
Mode.
• When you enter the Test Mode, fractional coin and bonus adder data is erased.
• Adjust the sound to the optimum volume, taking into consideration the environmental
requirements of the installation location.
• Removing the coin meter circuitry renders the game inoperable.
• If multiple game machines are connected for network play and you enter Test Mode
on one of them, all the others will produce an error. Therefore, do not use Test Mode if
people are playing on the other game machines.
This product uses a LINDBERGH RED EX game board and a DVD DRIVE. In the system, a different game can be
played by putting a different DVD ROM in the DVD DRIVE.
For this reason, the product’s Test Mode consists of two modes: a System Test Mode for systems in which coin
settings, for instance, are made for products that use the same system, and a Game Test Mode for setting of difficulty
level, etc., and for input/output test of operational units used exclusively with this product.
Perform tests and data checks periodically by manipulating the TEST Button and SERVICE Button in the cabinet.
Follow the instructions in this chapter to conduct checks when the game machine is first installed, when money is
being collected, or when the game machine does not operate properly.
40
Shown below are the tests and screens to be used for different problems.
NOTE:“ S/M” in the table denotes LINDBERGH RED EX Service Manual, which is provided with the product.
ITEMS
Game machine installation
Control problem
Monitor problem
IC board problem
Date check
REFERENCE SECTIONS
1. Investigate each input device on the Input Test
Screen.
6-12, 9-3-2
2. Investigate each output device on the Output
Test Screen.
6-12, 9-3-3
3. Adjust the controllers on the Input Adjustment
Screen.
9-3-5
1. Check settings.
9-3-4
2. Test each input device on the Input Test Screen.
9-3-2
3. Test each output device on the Output Test
Screen.
9-3-3
1. Investigate each input device on the Input Test
Screen.
9-3-2
2. Adjust or replace each input device.
9-3-5, Chapters 10 & 11
On the Monitor Adjustment Check Screen,
check to be sure the monitor has been adjusted
properly.
Chapter 13,
“S/M” Chapter 4
1. Information Display Screen.
“S/M” Chapter 4
2. Speaker Test.
“S/M” Chapter 4
Check data on game play times, histograms, etc.,
and adjust the level of difficulty.
9
EXPLANATION OF TEST AND DATA DISPLAY
Periodic maintenance
DESCRIPTION
9-3-4, 9-3-8
41
9-1 SWITCH UNIT AND COIN METER
In Test Mode, the switch unit in the coin chute door is operated.
Use the master key, unlock and open the coin chute door. Inside is a switch unit.
TEST BUTTON
SERVICE BUTTON
9
EXPLANATION OF TEST AND DATA DISPLAY
42
9-1 FIG. 01
Unlock
9-1 FIG. 02
SOUND VOLUME KNOB
TEST Button
Establishes Test Mode. Becomes the button to confirm selections in Test Mode.
SERVICE Button
Makes it possible to enter credits for service without increasing the coin meter. Becomes the
button to select items in Test Mode.
Sound Volume Knob
This is the volume knob for speakers at the left and right of the front panel. Turn the knob
to the right to increase speaker volume.
9-2 SYSTEM TEST MODE
• The details of changes to Test Mode settings are saved when you exit from Test Mode
by selecting EXIT from the system Test Mode menu. Be careful because if the power is
turned off before that point, changes to the settings will be lost.
In the System Test Mode, the main activities include checking LINDBERGH RED EX information and actions and
the setting of coin/credit. Also, a screen appears for checking screen adjustments. For details, see the LINDBERGH
RED EX Service Manual, which is provided with the product.
Use the following settings with this product.
If the settings are not as specified, error messages might appear and operations might not be normal.
COIN ASSIGNMENTS
COIN CHUTE TYPE
SERVICE TYPE
COMMON
COMMON
NETWORK SETTING
MAIN NETWORK
DHCP
DISABLE
9
EXPLANATION OF TEST AND DATA DISPLAY
• Read the LINDBERGH RED EX Service Manual that comes with the product for details
on the System Test Mode. However, you should perform the settings for this product
according to the manual you are reading.
NOTE: Settings other than DHCP do not need to be configured.
43
Replacing the Denomination Sheet
If the COIN ASSIGNMENTS settings were changed in System Test Mode, replace the denomination sheet.
9
EXPLANATION OF TEST AND DATA DISPLAY
1
2
Turn the power off.
Remove the 4 hexagon socket screws and take the instruction plate off.
HEXAGON SOCKET SCREW (4)
INSTRUCTION PLATE
M4 x 12, spring & design washer used
9-2 FIG. 01
3
9-2FIG. 02
Swap and affix the denomination sheets.
DENOMINATION SHEET (Sample)
5 FIG. 03
44
9-3 GAME TEST MODE
When the TEST Button is pressed, the System Test Menu Screen (SYSTEM TEST MENU) appears. Use the
SERVICE Button to move the cursor to the desired test item. Select GAME TEST MODE and press the TEST
Button to display the Game Test Mode Screen.
9
9-3-1 GAME TEST MODE
GAME TEST MODE
INPUT TEST
OUTPUT TEST
GAME ASSIGNMENTS
INPUT ADJUSTMENT
NETWORK SETTING
BOOKKEEPING
BACKUP DATA CLEAR
->EXIT
SELECT WITH SERVICE AND PRESS TEST
EXPLANATION OF TEST AND DATA DISPLAY
To change settings in the Game Test Mode, simply making changes on the setting screen
will not be effective. Complete the Test Mode in normal fashion.
9-3-1 FIG. 01 GAME TEST MODE Screen
Operating Instructions
- Use the SERVICE Button to move the cursor to the desired test item.
- Press the TEST Button to select the test item.
- On the GAME TEST MODE screen, select EXIT and press the TEST Button. The SYSTEM TEST MENU
screen reappears.
Explanation of Each Item
INPUT TEST
Tests each input device used for game.
OUTPUT TEST
Tests each output device used for game.
GAME ASSIGNMENTS
Adjusts all game settings.
INPUT ADJUSTMENT
Adjusts the Controller.
NETWORK SETTING
Adjusts all network settings.
BOOKKEEPING
Displays all recorded game data.
BACKUP DATA CLEAR
Erases all types of game records.
45
9-3-2 INPUT TEST
Select INPUT TEST to display the following screen and check the status of input devices.
This test should be used periodically to check that each input device is functioning correctly.
Select INPUT TEST on the GAME TEST MODE Screen and press the TEST Button. A screen will be displayed
asking whether or not to initialize the cabinet.
9
EXPLANATION OF TEST AND DATA DISPLAY
NOTE: If the LEAN option is set to OFF on the GAME ASSIGNMENTS Screen, the INPUT TEST Screen will
appear without displaying the Initialize Screen. (See 9-3-4.)
INPUT TEST
PRESS SERVICE : INITIALIZE
PRESS TEST
: EXIT
9-3-2 FIG. 01 Initialize Screen
NOTE: The following caution message will be displayed while the cabinet is being initialized:
The seat is being initialized.
For your own safety, please do not touch the seat.
Operating Instructions
Press the SERVICE Button to start initializing the cabinet. When initialization is complete, it will proceed to the
INPUT TEST Screen.
Press the TEST Button to return to the GAME TEST MODE Screen.
NOTE: With this game, if the motor or other parts malfunction during the initialization process, the initialization
process will be terminated and it will return to the INPUT TEST Screen. If that happens, an error message
will be displayed at the bottom of the screen according to the particular problem.
The error message will be displayed not only during the initialization process, but also when there is a
problem during the INPUT TEST. Refer to“ 9-4 Error Messages” to address the problem.
INPUT TEST
START
SHIFT UP
SHIFT DOWN
VIEW CHANGE
MUSIC SELECT
ACCEL
BRAKE
HANDLE
LEAN
SERVICE
TEST
Error7301
OFF
OFF
OFF
OFF
OFF
**H
**H
**H
**H
OFF
OFF
PRESS TEST AND SERVICE TO EXIT
46
9-3-2 FIG. 02 INPUT TEST Screen (When an error is displayed)
INPUT TEST
START
SHIFT UP
SHIFT DOWN
VIEW CHANGE
MUSIC SELECT
ACCEL
BRAKE
HANDLE
LEAN
SERVICE
TEST
OFF
OFF
OFF
OFF
OFF
**H
**H
**H
**H
OFF
OFF
9
PRESS TEST AND SERVICE TO EXIT
9-3-2 FIG. 03 INPUT TEST Screen
Operating Instructions
When the buttons are pressed, the message should switch from OFF to ON or the numbers should change.
Explanation of Each Item
START
SHIFT UP
SHIFT DOWN
VIEW CHANGE
MUSIC SELECT
ACCEL
BRAKE
HANDLE
LEAN
SERVICE
TEST
START button
SHIFT UP button on left side of HANDLE
SHIFT DOWN button on left side of HANDLE
VIEW CHANGE button
MUSIC SELECT button
Numbers will change when the ACCELERATOR is twisted.
Numbers will change when the BRAKE is pulled.
Numbers will change when the HANDLE is tilted to the left or right.
Numbers will change when the MOTORCYCLE MECHANISM is tilted to the left or
right.
NOTE: If the LEAN option on the GAME ASSIGNMENTS Screen is set to OFF, it will
be grayed out and the test will not be available. (See 9-3-4.)
SERVICE Button
TEST Button
EXPLANATION OF TEST AND DATA DISPLAY
HANDLE
SHIFT UP BUTTON
BRAKE
SHIFT DOWN BUTTON
START BUTTON
ACCEL (GAS)
MOTORCYCLE MECHANISM
VIEW CHANGE BUTTON
MUSIC SELECT BUTTON
9-3-2 FIG. 04
Press the SERVICE and TEST Buttons simultaneously to return to the GAME TEST MODE screen.
47
9-3-3 OUTPUT TEST
Perform the output tests for the functions used in the game.
Use this screen periodically to check and make sure the output devices are working properly.
Select OUTPUT TEST on the GAME TEST MODE Screen and press the TEST Button. A screen will be displayed
asking whether or not to initialize the cabinet.
9
EXPLANATION OF TEST AND DATA DISPLAY
NOTE: If the LEAN option is set to OFF
on the GAME ASSIGNMENTS
Screen, the INPU TEST Screen
will appear without displaying
the Initialize Screen. (See 9-3-4.)
OUTPUT TEST
PRESS SERVICE : INITIALIZE
PRESS TEST
: EXIT
9-3-3 FIG. 01 INITIALIZE Screen
NOTE: The following caution message will be displayed while the cabinet is being initialized:
The seat is being initialized.
For your own safety, please do not touch the seat.
Operating Instructions
Press the SERVICE Button to start initializing the cabinet. When initialization is complete, it will proceed to the
OUTPUT TEST Screen.
Press the TEST Button to return to the GAME TEST MODE Screen.
NOTE: With this game, if the motor or other parts malfunction during the initialization process, the initialization
process will be terminated and it will return to the OUPUT TEST Screen. If that happens, an error message
will be displayed at the bottom of the screen according to the particular problem.
The error message will be displayed not only during the initialization process, but also when there is a
problem during the OUTPUT TEST. Refer to“ 9-4 Error Messages” to address the problem.
OUTPUT TEST
START LAMP
LEFT LEADER LAMP RIGHT LEADER LAMP FOOT LAMP TAIL LAMP OFF
OFF
OFF
OFF
OFF
LEAN ENABLE LEAN LEFT LEAN RIGHT LEAN CENTER OFF
OFF
OFF
OFF
VIBRATION ENABLE VIBRATION OFF
OFF
->EXIT
Error7302
SELECT WITH SERVICE AND PRESS TEST
9-3-3FIG. 02 OUTPUT TEST Screen (When an error is displayed)
48
OUTPUT TEST
START LAMP
LEFT LEADER LAMP RIGHT LEADER LAMP FOOT LAMP TAIL LAMP OFF
OFF
OFF
OFF
OFF
LEAN ENABLE LEAN LEFT LEAN RIGHT LEAN CENTER OFF
OFF
OFF
OFF
VIBRATION ENABLE VIBRATION OFF
OFF
->EXIT
SELECT WITH SERVICE AND PRESS TEST
9-3-3 FIG. 03 OUTPUT TEST Screen
Explanation of Each Item
START LAMP
Select START LAMP and press the TEST Button to change it to ON. The Start
Button on the cabinet will light up. Press the TEST Button again to change it to
OFF.
LEFT LEADER LAMP
Select LEFT LEADER LAMP and press the TEST Button to change it to ON.
The upper left lamp on the DLP projector will light up. Press the TEST Button
again to change it to OFF.
RIGHT LEADER LAMP
Select RIGHT LEADER LAMP and press the TEST Button to change it to ON.
The upper right lamp on the DLP projector will light up. Press the TEST Button
again to change it to OFF.
FOOT LAMP
Select FOOT LAMP and press the TEST Button to change it to ON. The lamps
on the left and right steps on the cabinet will light up. Press the TEST Button
again to change it to OFF.
TAIL LAMP
Select TAIL LAMP and press the TEST Button to change it to ON. The lamp on
the back of the cabinet will light up. Press the TEST Button again to change it to
OFF.
LEAN ENABLE
Select LEAN ENABLE and press the TEST Button to change it to ON. The lock
on the motorcycle mechanism will be released. Press the TEST Button again to
change it to OFF.
The lock on the motorcycle mechanism will be activated. Also, when the LEAN
ENABLE option is set to OFF, selecting LEAN LEFT, LEAN RIGHT, or LEAN
CENTER and pressing the TEST Button will change it to ON.
LEAN LEFT
Select LEAN LEFT and press the TEST Button to change it to ON. The
motorcycle mechanism will tilt to the left. If the TEST Button is pressed again
or the LEAN ENABLE, LEAN RIGHT, or LEAN CENTER options are set to
ON and the motorcycle mechanism finishes tilting to the left, it will change to
OFF.
LEAN RIGHT
Select LEAN RIGHT and press the TEST Button to change it to ON. The
motorcycle mechanism will tilt to the right. If the TEST Button is pressed again
or the LEAN ENABLE, LEAN LEFT, or LEAN CENTER options are set to ON
and the motorcycle mechanism finishes tilting to the right, it will change to OFF.
9
EXPLANATION OF TEST AND DATA DISPLAY
49
9
EXPLANATION OF TEST AND DATA DISPLAY
LEAN CENTER
Select LEAN CENTER and press the TEST Button to change it to ON. The
motorcycle mechanism will return to its upright position. If the TEST Button is
pressed again or the LEAN ENABLE, LEAN LEFT, or LEAN RIGHT options
are set to ON and the motorcycle mechanism finishes returning to its upright
position, it will change to OFF.
VIBRATION ENABLE
Select VIBRATION ENABLE and press the TEST Button to change it to ON.
The motorcycle mechanism’s motor lock will be released. Press the TEST
Button again to change it to OFF. The motor lock will be activated.
VIBRATION
Select VIBRATION and press the TEST Button to change the setting to a
number between 1 and 15. Each number corresponds to the level of motor
vibration. The higher the number, the stronger the vibration. Press the TEST
Button again to change it to OFF. Also, if you select VIBRATION and press the
TEST Button when the VIBRATION ENABLE option is set to OFF, the number
will be displayed and the VIBRATION ENABLE option will change to ON at
the same time.
NOTE: If the LEAN option on the GAME ASSIGNMENTS Screen is set to OFF, the LEAN ENABLE, LEAN LEFT,
LEAN RIGHT, and LEAN CENTER options will be grayed out and the test will not be available. (See 9-3-4.)
If the VIBRATION option on the GAME ASSIGNMENTS Screen is set to OFF, the VIBRATION ENABLE
and VIBRATION options will be grayed out and the test will not be available. (See 9-3-4.)
RIGHT LEADER LAMP
LEFT LEADER LAMP
START LAMP
TAIL LAMP
FOOT LAMP
9-3-3 FIG. 04
Move the cursor to EXIT and press the TEST Button to return to the GAME TEST MODE screen.
50
9-3-4 GAME ASSIGNMENTS
Changes to settings are not enabled until Game Test Mode is exited. After changing
settings, be sure to exit Game Test Mode.
GAME ASSIGNMENTS
CABINET TYPE
LEAN
VIBRATION
ADVERTISE SOUND
ADVERTISE VIBRATION
DELUXE
ON
ON
ON
ON
GAME DIFFICULTY
STORY MODE
VERSUS MODE
VERSUS MODE 1st CONTINUE
DRESS CODE
SPEED DISPLAY
NORMAL
NORMAL
OFF
LOW
KM
->EXIT
SELECT WITH SERVICE AND PRESS TEST
9-3-4 FIG. 01 GAME ASSIGNMENTS Screen
EXPLANATION OF TEST AND DATA DISPLAY
Configure the game settings.
9
Explanation of Each Item
CABINET TYPE
Set the cabinet type DELUXE or STANDARD.
NOTE: Set the DELUXE in this game machine.
LEAN
If the cabinet lean option is set to ON, it will move. If it is set to OFF, it will
not move.
NOTE: If CABINET TYPE is not set to DELUXE, it will be grayed out and
will not be available.
VIBRATION
If the cabinet motor vibration option is set to ON, it will vibrate. If it is set to
OFF, it will not vibrate.
NOTE: If CABINET TYPE is not set to DELUXE, it will be grayed out and
will not be available.
ADVERTISE SOUND
Set the sound for the advertisements. There are five levels: ON → 3/4 → 1/2
→ 1/4 →OFF. The volume gets lower the closer it gets to OFF.
ADVERTISE VIBRATION
Set the motor vibration during advertisements. If it is set to ON, it will
vibrate during the advertisements. If it is set to OFF, it will not vibrate. If
VIBRATION is set to OFF, this option will be grayed out and will not be
available.
GAME DIFFICULTY >
STORY MODE
Select from 5 levels of difficulty for Story Mode: VERY EASY → EASY →
NORMAL → HARD → VERY HARD. The level of difficulty increases the
closer it gets to VERY HARD.
GAME DIFFICULTY >
VERSUS MODE
Select from 5 levels of difficulty for Versus Mode: VERY EASY → EASY
→ NORMAL→ HARD → VERY HARD. The level of difficulty increases
the closer it gets to VERY HARD.
51
9
VERSUS MODE 1st
CONTINUE
Set whether or not to allow the player coming in 1st to proceed to the next
round in Versus Mode. If the option is set to OFF, all players’ game will end
on that round (Continue Screen will be displayed).
DRESS CODE
Set the amount of clothing that the female characters in the game wear to
LOW or HIGH. The clothing is normal at the LOW setting, and at HIGH it
will cover more skin.
SPEED DISPLAY
Set the speedometer to display speed in KM (kirometers per hour; km/h) or
MILE (miles per hour; MPH). (Default setting: KM)
EXPLANATION OF TEST AND DATA DISPLAY
NOTE: If STAND ALONE or SUB is selected for the MODE option on the NETWORK SETTING Screen, the options
that cannot be selected under GAME ASSIGNMENTS will be grayed out and will not be available.
GAME ASSIGNMENTS
CABINET TYPE
LEAN
VIBRATION
ADVERTISE SOUND
ADVERTISE VIBRATION
DELUXE
ON
ON
ON
ON
GAME DIFFICULTY
STORY MODE
VERSUS MODE
VERSUS MODE 1st CONTINUE
DRESS CODE
SPEED DISPLAY
NORMAL
NORMAL
ON
LOW
KM
->EXIT
SELECT WITH SERVICE AND PRESS TEST
9-3-4 FIG. 02 GAME ASSIGNMENTS Screen (SUB)
Move the cursor to EXIT and press the TEST Button to return to the GAME TEST MODE screen.
52
9-3-5 INPUT ADJUSTMENT
Adjust the controllers used in the game:
INPUT ADJUSTMENT
HANDLE
ACCEL
BRAKE
DEFAULT SETTING
MIN NOW MAX
[**H] [**H] [**H]
c
Left [ 0 ] Right
[**H] [**H] [**H]
Min [0 ] Max
[**H] [**H] [**H]
Min [0 ] Max
EXIT : MEMORIZE
->EXIT : CANCEL
SELECT WITH SERVICE AND PRESS TEST
9
EXPLANATION OF TEST AND DATA DISPLAY
When adjusting the HANDLE, ACCELERATOR, and BRAKE settings, it is not necessary to
tilt the HANDLE, twist the ACCELERATOR, or pull the BRAKE all the way to their limits. If
excessive force is applied, it could end up breaking them or causing problems during the
game so be careful.
9-3-5 FIG. 01 INPUT ADJUSTMENT
Explanation of Each Item
HANDLE
This option sets the left-right offset for the handle. Tilt the handle all the way to the
left and right and return it to the center position.
NOTE: “c” indicates the center position set for the handle.
ACCEL
This option sets the offset for when the accelerator is twisted. Twist the accelerator
all the way and return it to the starting position.
BRAKE
This option sets the offset for when the brake lever is pulled. Pull the brake lever all
the way and return it to the starting position.
DEFAULT SETTING
This option returns the settings to the default values.
Select “EXIT: MEMORIZE” and press the TEST Button to save the settings and return to the GAME TEST MODE
Screen.
Select “EXIT: CANCEL” and press the TEST Button to return to the GAME TEST MODE Screen without saving
the settings.
53
9-3-6 NETWORK SETTING
Configure the network settings for the cabinets.
NETWORK SETTING
9
CABINET ID
EXPLANATION OF TEST AND DATA DISPLAY
MODE
TOTAL NUMBER
54
1
STAND ALONE
4
-> EXIT
SELECT WITH SERVICE AND PRESS TEST
9-3-6 FIG. 01 NETWORK SETTING Screen
Explanation of Each Item
CABINET ID
Assign a number between 1 and 4 to the cabinets, and set the numbers to be identified
during communication. If network play will be used, set a different number on each
cabinet in the network. It is recommended that you assign the numbers in numerical
order from left to right (facing the machines) in order to match them with the results
displayed during versus play.
NOTE: With this game, if the same number is assigned as the CABINET ID for
different cabinets in the network, it will give an error when proceeding to
the Game Screen and“ Error6803” will be displayed on the screen. If that
happens, press the TEST Button again and go to SYSTEM TEST MENU →
GAME TESTMODE → NETWORK SETTING to change the CABINET IDs to
different numbers.
MODE
Set the MODE of the cabinet. Choose from STAND ALONE, MAIN, and SUB.
STAND ALONE is a setting for when network play will not be used. MAIN is for
network play and should be assigned to one of the cabinets. SUB is also for network
play and should be assigned to all other cabinets other than the one set as the MAIN
cabinet.
NOTES:
- With this game, if more than one cabinet in the network is set to MAIN, it will give
an error when proceeding to the Game Screen and “Error6802” will be displayed
on the screen. If that happens, press the TEST Button again and go to SYSTEM
TEST MENU → GAME TEST MODE → NETWORK SETTING to change the
MODE settings so that only one cabinet is set to MAIN.
- With this game, if all the cabinets in the network are set to SUB, it will give an
error when proceeding to the Game Screen and “Error6804” will be displayed on
the screen. If that happens, press the TEST Button again and go to SYSTEM TEST
MENU → GAME TEST MODE → NETWORK SETTING to change the MODE
settings so that one of the cabinets is set to MAIN.
TOTAL NUMBER
Move the cursor to EXIT and press the TEST Button to return to the GAME TEST MODE screen.
9
EXPLANATION OF TEST AND DATA DISPLAY
If the MODE of the cabinet is set to MAIN, set the number of cabinets in the network
under TOTAL NUMBER. The number should be equal to the total number of cabinets
set to MAIN and SUB. If the MODE of the cabinet is set to something other than
MAIN, the TOTAL NUMBER option will be grayed out and will not be available.
NOTE: With this game, if the TOTAL NUMBER setting does not match the total
number of cabinets in the network set to MAIN and SUB, it will give an
error when proceeding to the Game Screen and“ Error6804,"“ Error6006,”
“ Error6008,” or“ Error6009” will be displayed on the screen. If that happens,
press the TEST Button again and go to SYSTEM TEST MENU → GAME TEST
MODE → NETWORK SETTING to change the TOTAL NUMBER setting to the
total number of cabinets that have been set to MAIN and SUB.
55
9-3-7 BOOKKEEPING
The game records can be viewed here.
9
BOOKKEEPING PAGE 1/7
EXPLANATION OF TEST AND DATA DISPLAY
COIN 1
COIN 2
COIN 3
COIN 4
TOTAL COINS
0
0
0
0
0
COIN CREDITS
SERVICE CREDITS
TOTAL CREDITS
0
0
0
PRESS TEST TO CONTINUE
9-3-7 FIG. 01 BOOKKEEPING PAGE 1/7 Screen
Explanation of Each Item
COIN 1
Number of coins inserted in coin chute 1.
COIN 2
Number of coins inserted in coin chute 2.
COIN 3
Number of coins inserted in coin chute 3.
COIN 4
Number of coins inserted in coin chute 4.
TOTAL COINS
Total number of coins inserted in all coin chutes.
COIN CREDITS
Number of credits for coins inserted.
SERVICE CREDITS
Number of credits entered with the SERVICE Button.
TOTAL CREDITS
Total number of all credits.
Press the TEST Button to proceed to the
BOOKKEEPING PAGE 2/7 Screen.
BOOKKEEPING PAGE 2/7
NUMBER OF GAMES
FIRST PLAY
CONTINUE PLAY
TOTAL TIME
PLAY TIME
AVERAGE PLAY TIME
LONGEST PLAY TIME
SHORTEST PLAY TIME
0
0
0
0000D 00H 00M 00S
0000D 00H 00M 00S
00M 00S
00M 00S
00M 00S
PRESS TEST TO CONTINUE
9-3-7 FIG. 02 BOOKKEEPING PAGE 2/7 Screen
Explanation of Each Item
56
NUMBER OF GAMES
Total number of games played.
FIRST PLAY
Total number of first plays.
CONTINUE PLAY
Total number of continue plays.
TOTAL TIME
The total operation time
PLAY TIME
Amount of time game has been played.
AVERAGE PLAY TIME
Average length of a single game.
LONGEST PLAY TIME
Longest single game.
SHORTEST PLAY TIME
Shortest single game.
Press the TEST Button to proceed to the BOOKKEEPING PAGE 3/7 Screen.
BOOKKEEPING PAGE 3/7
GAME HISTOGRAM
0M 00S
0M 30S
1M 00S
1M 30S
2M 00S
2M 30S
3M 00S
3M 30S
4M 00S
4M 30S
5M 00S
5M 30S
6M 00S
6M 30S
7M 00S
7M 30S
8M 00S
8M 30S
9M 00S
9M 30S
OVER
~ 0M 29S
~ 0M 59S
~ 1M 29S
~ 1M 59S
~ 2M 29S
~ 2M 59S
~ 3M 29S
~ 3M 59S
~ 4M 29S
~ 4M 59S
~ 5M 29S
~ 5M 59S
~ 6M 29S
~ 6M 59S
~ 7M 29S
~ 7M 59S
~ 8M 29S
~ 8M 59S
~ 9M 29S
~ 9M 59S
10M00S0
0
0
0
0
0
0
0
0
0
0
0
0
0
0
0
0
0
0
0
0
PRESS TEST TO CONTINUE
9-3-7 FIG. 03 BOOKKEEPING PAGE 3/7 Screen
This is a list of the total play times in each mode.
This displays play times on a scale from 0M00S to 9M59S based on 30-second intervals.
All play times 10 minutes or over are included in the item OVER 10M00S.
Press the TEST Button to proceed to the
BOOKKEEPING PAGE 4/7 Screen.
9
EXPLANATION OF TEST AND DATA DISPLAY
BOOKKEEPING PAGE 4/7
STORY MODE
NUMBER OF GAMES
FIRST PLAY
CONTINUE PLAY
TOTAL TIME
PLAY TIME
AVERAGE PLAY TIME
LONGEST PLAY TIME
SHORTEST PLAY TIME
0
0
0
0000D 00H 00M 00S
0000D 00H 00M 00S
00M 00S
00M 00S
00M 00S
PRESS TEST TO CONTINUE
9-3-7 FIG. 04 BOOKKEEPING PAGE 4/7 Screen
Explanation of Each Item
NUMBER OF GAMES
Total number of games played in Story Mode.
FIRST PLAY
Total number of first plays in Story Mode.
CONTINUE PLAY
Total number of continue plays in Story Mode.
TOTAL TIME
The total operation time
PLAY TIME
Amount of time game has been played in Story Mode.
AVERAGE PLAY TIME
Average length of a single game in Story Mode.
LONGEST PLAY TIME
Longest single game in Story Mode.
SHORTEST PLAY TIME
Shortest single game in Story Mode.
57
Press the TEST Button to proceed to the BOOKKEEPING PAGE 5/7 Screen.
BOOKKEEPING PAGE 5/7
STORY MODE
GAME HISTOGRAM
9
EXPLANATION OF TEST AND DATA DISPLAY
0M 00S
0M 30S
1M 00S
1M 30S
2M 00S
2M 30S
3M 00S
3M 30S
4M 00S
4M 30S
5M 00S
5M 30S
6M 00S
6M 30S
7M 00S
7M 30S
8M 00S
8M 30S
9M 00S
9M 30S
OVER
~ 0M 29S
~ 0M 59S
~ 1M 29S
~ 1M 59S
~ 2M 29S
~ 2M 59S
~ 3M 29S
~ 3M 59S
~ 4M 29S
~ 4M 59S
~ 5M 29S
~ 5M 59S
~ 6M 29S
~ 6M 59S
~ 7M 29S
~ 7M 59S
~ 8M 29S
~ 8M 59S
~ 9M 29S
~ 9M 59S
10M00S0
PRESS TEST TO CONTINUE
9-3-7 FIG. 05 BOOKKEEPING PAGE 5/7 Screen
This is a list of the total play times in Story Mode.
This displays play times on a scale from 0M00S to 9M59S based on 30-second intervals.
All play times 10 minutes or over are included in the item OVER 10M00S.
58
0
0
0
0
0
0
0
0
0
0
0
0
0
0
0
0
0
0
0
0
Press the TEST Button to proceed to the BOOKKEEPING PAGE 6/7 Screen.
BOOKKEEPING PAGE 6/7
VERSUS MODE
NUMBER OF GAMES
FIRST PLAY
CONTINUE PLAY
TOTAL TIME
PLAY TIME
AVERAGE PLAY TIME
LONGEST PLAY TIME
SHORTEST PLAY TIME
0
0
0
0000D 00H 00M 00S
0000D 00H 00M 00S
00M 00S
00M 00S
00M 00S
9-3-7 FIG. 06 BOOKKEEPING PAGE 6/7 Screen
Explanation of Each Item
NUMBER OF GAMES
Total number of games played in Versus Mode.
FIRST PLAY
Total number of first plays in Versus Mode.
CONTINUE PLAY
Total number of continue plays in Versus Mode.
TOTAL TIME
The total operation time
PLAY TIME
Amount of time game has been played in Versus Mode.
AVERAGE PLAY TIME
Average length of a single game in Versus Mode.
LONGEST PLAY TIME
Longest single game in Versus Mode.
SHORTEST PLAY TIME
Shortest single game in Versus Mode.
Press the TEST Button to proceed to the
BOOKKEEPING PAGE 7/7 Screen.
EXPLANATION OF TEST AND DATA DISPLAY
PRESS TEST TO CONTINUE
9
BOOKKEEPING PAGE 7/7
VERSUS MODE
GAME HISTOGRAM
0M 00S
0M 30S
1M 00S
1M 30S
2M 00S
2M 30S
3M 00S
3M 30S
4M 00S
4M 30S
5M 00S
5M 30S
6M 00S
6M 30S
7M 00S
7M 30S
8M 00S
8M 30S
9M 00S
9M 30S
OVER
~ 0M 29S
~ 0M 59S
~ 1M 29S
~ 1M 59S
~ 2M 29S
~ 2M 59S
~ 3M 29S
~ 3M 59S
~ 4M 29S
~ 4M 59S
~ 5M 29S
~ 5M 59S
~ 6M 29S
~ 6M 59S
~ 7M 29S
~ 7M 59S
~ 8M 29S
~ 8M 59S
~ 9M 29S
~ 9M 59S
10M00S0
0
0
0
0
0
0
0
0
0
0
0
0
0
0
0
0
0
0
0
0
PRESS TEST TO EXIT
9-3-7 FIG. 07 BOOKKEEPING PAGE 7/7 Screen
This is a list of the total play times in Versus Mode.
This displays play times on a scale from 0M00S to 9M59S based on 30-second intervals.
All play times 10 minutes or over are included in the item OVER 10M00S.
Press the TEST Button to return to the GAME TEST MODE Screen.
59
9-3-8 BACKUP DATA CLEAR
This deletes the various game data (ranking data, BOOKKEEPING data from GAME TEST MODE, and remaining
credits).
BACKUP DATA CLEAR
9
EXPLANATION OF TEST AND DATA DISPLAY
60
YES(CLEAR)
->NO (CANCEL)
SELECT WITH SERVICE AND PRESS TEST
9-3-8 FIG. 01
Explanation of Each Item
YES (CLEAR)
All game records are cleared. After clearing, “COMPLETED” is displayed and press the
TEST Button to return to the GAME TEST MODE screen.
NO (CANCEL)
Move the cursor and press the TEST Button to return to the GAME TEST MODE screen
without clearing the data.
9-4 ERROR MESSAGES
• In the event that problems arise beyond those covered in this manual, or if the
procedures listed in this document do not solve the problem, do not attempt to solve
the problem with careless measures. Immediately turn off the product’ s power and
contact the office listed in this manual or the point of purchase. Improper procedures
can result in unforeseen accidents.
If an error number or message not listed below is displayed, stop use of the machine and
send the LINDBERGH RED EX in for repairs.
9
EXPLANATION OF TEST AND DATA DISPLAY
• Should an error message appear, have the facility’ s maintenance or technical staff
deal with the issue. Work by those without the necessary specialized knowledge
and technical expertise can result in electric shocks, short circuits, and fires. If such
maintenance or technical staff is not available, or if the problem is with the ride
mechanisms, immediately turn off the product’ s power and contact the office listed
in this manual or the point of purchase.
This product displays the following messages when it detects an error. Read the error description and follow
the steps indicated. Refer to the LINDBERGH Service Manual for details on error messages displayed with the
LINDBERGH logo.
NETWORK MESSAGES
DISPLAY
Error6003
Network PacketSize.
CAUSE
The size of the packets transmitted was abnormal during communication.
COUNTERMEASURES
Check to make sure the network cable has been inserted all the way.
DISPLAY
Error6004
Network PacketKind.
CAUSE
The kind of packets transmitted during communication was abnormal.
COUNTERMEASURES
Check to make sure the network cable has been inserted all the way.
DISPLAY
Error6005
Network TimeOut.
CAUSE
Communication was interrupted for a certain length of time due to a problem
between the cabinets, the network line being pulled out, etc.
COUNTERMEASURES
Check to make sure the cabinets are on and the network cable has been inserted
all the way.
61
9
EXPLANATION OF TEST AND DATA DISPLAY
62
DISPLAY
Error6006
Network SendError.
CAUSE
Sending failed for some reason.
COUNTERMEASURES
Check to make sure the network cable has been inserted all the way.
DISPLAY
Error6007
Network SendTryOut.
CAUSE
Sending failed repeatedly for some reason.
COUNTERMEASURES
Check to make sure the network cable has been inserted all the way.
DISPLAY
Error6008
Network RecvError.
CAUSE
An unknown error occurred while receiving data.
COUNTERMEASURES
Check to make sure the network cable has been inserted all the way.
DISPLAY
Error6009
Network RecvDisconnect.
CAUSE
The connection was broken while data was being received.
COUNTERMEASURES
Check to make sure the cabinets are on and available for play.
DISPLAY
Error6802
Network Setting Many Main.
CAUSE
Multiple cabinets in the network were set to MAIN.
COUNTERMEASURES
Under the LINDBERGH RED EX settings, go to SYSTEM TEST MENU→
GAME TEST MODE→NETWORK SETTING and change the MODE setting.
DISPLAY
Error6803
Network Setting Same Cabinet ID.
CAUSE
Multiple cabinets in the network were assigned the same ID.
(CABINET ID is set under NETWORK SETTING→CABINET ID in GAME
TEST MODE.)
COUNTERMEASURES
Under the LINDBERGH RED EX settings, go to SYSTEM TEST MENU→
GAME TEST MODE→NETWORK SETTING and change the CABINET ID
setting.
DISPLAY
Error6804
Network Setting Error.
CAUSE
There was a problem sending data during communication due to incorrect
settings or some other reason.
COUNTERMEASURES
Under the LINDBERGH RED EX settings, go to SYSTEM TEST MENU→
GAME TEST MODE→NETWORKSETTING and check to make sure all the
settings are correct.
MOTOR-RELATED ERRORS
Error7301
Serial AlarmEncoder.
CAUSE
The encoder alarm went off.
COUNTERMEASURES
Check the servo driver motor wiring and then reboot the cabinet.
DISPLAY
Error7302
Serial AlarmOvercurrent.
CAUSE
The overcurrent alarm went off.
COUNTERMEASURES
Turn off the cabinet for a brief period of time and then turn it back on.
DISPLAY
Error7303
Serial AlarmOverheat.
CAUSE
The overheat/overload alarm went off.
COUNTERMEASURES
Turn off the cabinet for a brief period of time and then turn it back on.
DISPLAY
Error7304
Serial DataError.
CAUSE
Communication data was corrupt.
COUNTERMEASURES
Check the wire to the LINDBERGH RED EX COM1 port.
DISPLAY
Error7702
Serial TimeOut.
CAUSE
There was no response from the serial motor driver or it is not connected.
COUNTERMEASURES
Check the wire to the LINDBERGH RED EX COM1 port.
DISPLAY
Error7703
Serial Initial.
CAUSE
The software could not be reset during the initialization process.
COUNTERMEASURES
Reboot the cabinet.
DISPLAY
Error7704
Serial ZeroSearch.
CAUSE
The cabinet is not moving due to a home-position search error.
COUNTERMEASURES
Check to make sure the cabinet is not stuck for some reason.
DISPLAY
Error7705
Serial CenterSearch.
CAUSE
The cabinet is not moving due to a center search error.
COUNTERMEASURES
Check to make sure the cabinet is not stuck for some reason.
Check to make sure the movement lock has not come off.
Check to make sure there is nothing around the cabinet obstructing its
movement.
DISPLAY
Error7801
Roll Volume
CAUSE
The wrong value came back from the roll volume.
COUNTERMEASURES
Check to make sure there is nothing wrong with the roll volume wiring.
9
EXPLANATION OF TEST AND DATA DISPLAY
DISPLAY
63
10 HANDLE
10
HANDLE
• In order to prevent electric shock and short circuit hazards, be sure to turn the power
off before performing work. However, the unit must be switched on when using test
mode. Do not touch any part of the unit except those areas indicated.
• Be careful not to damage the wires. Damaged wires may cause electric shock or short
circuit.
• Exercise due caution in performing soldering work. If soldering iron is handled
carelessly, there could be fires or burns.
• Be sure to perform volume's move value setting in the INPUT ASSIGNMENTS in the
Game Test Mode after replacing or adjusting the Volume. Failure to do so could
prevent the game from operating properly.
10-1 FRONT BRAKE VOLUME
A tamperproof screw wrench (for M4) is required for the following procedure.
10-1-1 Adjusting the Volume
1
2
Turn the power off.
Remove the 4 tamperproof screws and take the VR cover off.
TAMPERPROOF SCREW (4), black
M4 x 8
10-1-1 FIG. 01
64
VR COVER
10-1-1 FIG. 02
3
Loosen the 2 screws, move the VR bracket, and adjust the angle and way the gears fit together. The brake
lever should be released, and the D-cut surface of the volume rotating shaft should be in the position shown
in the figure when doing so.
SCREW (4)
M4 x 8, w/flat & spring washers
VR BRACKET
10
HANDLE
10-1-1 FIG. 03
10-1-1 FIG. 04
D-CUT SURFACE
10-1-1 FIG. 05
4
5
6
7
8
After performing the adjustment, use the 2 screws to fully tighten the VR bracket on.
Operate the brake lever and check to make sure the gears rotate smoothly.
Refer to Step 2 and attach the VR cover.
Turn on the power and be careful not to touch the motorcycle mechanism when doing so. The motorcycle
mechanism initialization operation will be performed automatically after the power is turned on.
Set the volume value on the INPUT ADJUSTMENT Screen in Game Test Mode. The recommended value
for the front brake volume is “30H±8H” with the brake lever released. Check to make sure the value
increases when the brake lever is pulled. (See “9-3-5 INPUT ADJUSTMENT.”)
65
10-1-2 Replacing the Volume
A replacement volume (220-5753) and 3 heat-shrinkable tubes (310-5029-F20) are required.
The following tools and soldering equipment will be used:
10
HANDLE
- Tamperproof screw wrench (for M4)
- Nipper
- Cutter
- Wire stripper
- Soldering iron
- Industrial dryer
1
2
3
Turn the power off.
Refer to Step 2 under “10-1-1 Adjusting the Volume” and remove the VR cover.
Remove the 2 screws fastening the VR bracket in place and take the volume off including the VR bracket.
SCREW (2)
M4 x 8, w/flat & spring washers
10-1-2 FIG. 01
4
VOLUME
10-1-2 FIG. 02
Remove the 2 hexagon socket screws and pull the gear off the volume shaft.
HEXAGON SOCKET SCREW (2)
M3×6
GEAR
10-1-2 FIG. 03
66
5
6
Remove the nut fastening the VR bracket in place and take the volume off the VR bracket. (See 10-1-2 FIG.
03.)
The wires connected to the volume will proceed to be used. Use a tool such as nippers or a cutter to remove
the old heat-shrinkable tubes from the places where the wires are connected.
10
HANDLE
HEAT-SHRINKABLE TUBE
10-1-2 FIG. 04
7
Use a soldering iron to melt the solder and separate the wires from the old volume. Be careful when using
the soldering iron.
SOLDERING IRON
10-1-2 FIG. 05
8
9
10
11
12
13
If the exposed conductive wire at the end is less than 5 mm, use a tool such as a wire stripper or cutter to cut
the coating back.
Pass the wires through the 3 heat-shrinkable tubes.
Solder the wires to the terminals on the new volume. Check the wiring diagram and be careful not to mix up
the wires.
Cover the soldered parts with the heat-shrinkable tubes and apply heat with an industrial dryer until the
heat-shrinkable tubes tightly cover the soldered parts.
Refer to Steps 3-5 and work in reverse order to attach the volume.
Refer to “10-1-1 Adjusting the Volume” and adjust the volume.
67
10-1-3 GREASING
10
• Be sure to use the designated grease. Using undesignated grease can cause parts
damage.
HANDLE
• Do not apply grease to locations other than as specified. Doing so may create a risk of
operational problems and deterioration of parts.
• The designated periods for greasing serve only as a guide. Whenever there are squeaks
or other anomalies, apply grease at designated locations.
Use spray grease once every three months to grease up the gear mesh portion of the constituent parts.
Use "Grease Mate" (part number 090-0066) for the spray grease.
Refer to Steps 1 and 2 under “10-1-1 Adjusting the Volume” and remove the VR cover. Apply grease between the
gears that turn the volume shaft.
10-1-3 FIG. 01
68
GEAR MESH PORTION
10-1-3 FIG. 02
GEAR MESH PORTION
10-2 ACCELERATOR VOLUME
10-2-1 Adjusting the Volume
A tamperproof screw wrench (for M4) is required for the following procedure.
Turn the power off.
10
HANDLE
1
2
Remove the 4 tamperproof screws and take the VR cover off.
TAMPERPROOF SCREW (4), black
M4 x 8
10-2-1 FIG. 01
3
10-2-1 FIG. 02
VR COVER
Loosen the screw, move the VR bracket, and adjust the angle and way the gears fit together. The accelerator
should be released, and the D-cut surface of the volume rotating shaft should be in the position shown in the
figure when doing so.
SCREW (1)
M4 x 8, w/flat & spring washers
10-2-1 FIG. 03
VR BRACKET
10-2-1 FIG. 04
69
D-CUT SURFACE
10
HANDLE
10-2-1 FIG. 05
4
5
6
7
8
70
After performing the adjustment, use the screw to fully tighten the VR bracket on.
Operate the accelerator and check to make sure the gears rotate smoothly.
Refer to Step 2 and attach the VR cover.
Turn on the power and be careful not to touch the motorcycle mechanism when doing so. The motorcycle
mechanism initialization operation will be performed automatically after the power is turned on.
Set the volume value on the INPUT ADJUSTMENT Screen in Game Test Mode. The recommended
value for the accelerator volume is “30H±8H” with the accelerator released. Check to make sure the value
increases when the accelerator is twisted. (See “9-3-5 INPUT ADJUSTMENT.”)
10-2-2 Replacing the Volume
A replacement volume (220-5753) and 3 heat-shrinkable tubes (310-5029-F20) are required.
The following tools and soldering equipment will be used:
- Tamperproof screw wrench (for M4)
- Nipper
- Cutter
- Wire stripper
- Soldering iron
- Industrial dryer
HANDLE
1
2
3
10
Turn the power off.
Refer to Step 2 under “10-2-1 Adjusting the Volume” and remove the VR cover.
Remove the screw and take the volume off.
SCREW (1)
M4 x 8, w/flat & spring washers
10-2-2 FIG. 01
4
VOLUME
10-2-2 FIG. 02
Remove the 2 hexagon socket screws and pull the gear off the volume shaft.
HEXAGON SOCKET SCREW (2)
M3×6
GEAR
10-2-2 FIG. 03
5
Remove the nut fastening the VR bracket in place and take the volume off the VR bracket. (See 10-2-2 FIG.
03.)
71
6
The wires connected to the volume will proceed to be used. Use a tool such as nippers or a cutter to remove
the old heat-shrinkable tubes from the places where the wires are connected.
HEAT-SHRINKABLE TUBE
10
HANDLE
10-2-2 FIG. 04
7
Use a soldering iron to melt the solder and separate the wires from the old volume. Be careful when using
the soldering iron.
SOLDERING IRON
10-2-2 FIG. 05
8
9
10
11
12
13
72
If the exposed conductive wire at the end is less than 5 mm, use a tool such as a wire stripper or cutter to cut
the coating back.
Pass the wires through the 3 heat-shrinkable tubes.
Solder the wires to the terminals on the new volume. Check the wiring diagram and be careful not to mix up
the wires.
Cover the soldered parts with the heat-shrinkable tubes and apply heat with an industrial dryer until the
heat-shrinkable tubes tightly cover the soldered parts.
Refer to Steps 3-5 and work in reverse order to attach the volume.
Refer to “10-2-1 Adjusting the Volume” and adjust the volume.
10-2-3 GREASING
• Be sure to use the designated grease. Using undesignated grease can cause parts
damage.
• The designated periods for greasing serve only as a guide. Whenever there are squeaks
or other anomalies, apply grease at designated locations.
10
HANDLE
• Do not apply grease to locations other than as specified. Doing so may create a risk of
operational problems and deterioration of parts.
Use spray grease once every three months to grease up the gear mesh portion of the constituent parts.
Use "Grease Mate" (part number 090-0066) for the spray grease.
Refer to Steps 1 and 2 under “10-2-1 Adjusting the Volume” and remove the VR cover. Apply grease between the
gears that turn the volume shaft.
GEAR MESH PORTION
10-2-3 FIG. 01
73
10-3 HANDLE VOLUME
10-3-1 Adjusting the Volume
10
HANDLE
1
2
Turn the power off.
Remove the 4 screws and take Handle Front Cover Lid B off.
SCREW (4), black
M4 x 8, w/flat & spring washers
10-3-1 FIG. 01
3
HANDLE FRONT COVER LID B
10-3-1 FIG. 02
Loosen the 2 screws, move the VR bracket, and adjust the angle and way the gears fit together. The handle
should be in the center position, and the D-cut surface of the volume rotating shaft should be in the position
shown in the figure when doing so.
SCREW (2)
M4 x 12, w/flat & spring washers
10-3-1 FIG. 03
VR BRACKET
D-CUT SURFACE
74
10-3-1 FIG. 04
Operate the handle and check to make sure the gears rotate smoothly.
Refer to Step 2 and attach Handle Front Cover Lid B.
Turn on the power and be careful not to touch the motorcycle mechanism when doing so. The motorcycle
mechanism initialization operation will be performed automatically after the power is turned on.
Set the volume value on the INPUT ADJUSTMENT Screen in Game Test Mode. The recommended value
for the handle volume is “30H±8H” with the handle in the center position. Check to make sure the value
decreases when the handle is turned to the left and increases when it is turned to the right. (See “9-3-5
INPUT ADJUSTMENT.”)
10
HANDLE
4
5
6
7
8
After performing the adjustment, use the 2 screws to fully tighten the VR bracket on.
75
10-3-2 Replacing the Volume
A replacement volume (220-5753) and 3 heat-shrinkable tubes (310-5029-F20) are required.
The following tools and soldering equipment will be used:
10
HANDLE
- Tamperproof screw wrench (for M4)
- Nipper
- Cutter
- Wire stripper
- Soldering iron
- Industrial dryer
1
2
Turn the power off.
Remove the 2 screws and take the handle front tube bracket off. Be careful not to damage the wires when
doing so.
HANDLE FRONT TUBE BRACKET
SCREW (2), black
M4 x 8, w/flat & spring washers
10-3-2 FIG. 01
3
Detach the 3 connectors.
Detach connectors.
SM3P (white), SM3P (black), SM6P
10-3-2 FIG. 02
76
4
Lay out a sheet of protective fabric and set the handle front tube bracket on top of it.
10
PROTECTIVE FABRIC
HANDLE
HANDLE FRONT TUBE BRACKET
10-3-2 FIG. 03
5
Remove the 4 tamperproof screws.
TAMPERPROOF SCREW (4), chrome
M4 x 8
10-3-2 FIG. 04
6
Remove the 4 tamperproof screws and take Handle Front Cover Lid A off.
TAMPERPROOF SCREW (4), black
M4 x 8
10-3-2 FIG. 05
HANDLE FRONT COVER LID A
10-3-2 FIG. 06
77
7
Remove the 6 screws and take the handle front cover off. Be careful not to damage the wires when doing so.
SCREW (2), black
SCREW (4), black
M4 x 10, w/flat & spring washers,
large flat washer used
M4 x 10, w/flat & spring washers,
large flat washer used
10
HANDLE
10-3-2 FIG. 07
10-3-2 FIG. 08
HANDLE FRONT COVER
10-3-2 FIG. 09
8
Remove the 2 screws and take the volume off.
SCREW (2)
M4 x 12, w/flat & spring washers
10-3-2 FIG. 10
78
VOLUME
10-3-2 FIG. 11
9
Remove the 2 hexagon socket screws and pull the gear off the volume shaft.
GEAR
HEXAGON SOCKET SCREW (2)
M3 x 8
10
10
11
Remove the nut fastening the VR bracket in place and take the volume off the VR bracket. (See 10-3-2 FIG.
03.)
HANDLE
10-3-2 FIG. 12
The wires connected to the volume will proceed to be used. Use a tool such as nippers or a cutter to remove
the old heat-shrinkable tubes from the places where the wires are connected.
HEAT-SHRINKABLE TUBE
10-3-2 FIG. 13
12
Use a soldering iron to melt the solder and separate the wires from the old volume. Be very careful when
using the soldering iron.
SOLDERING IRON
10-3-2 FIG. 14
13
14
If the exposed conductive wire at the end is less than 5 mm, use a tool such as a wire stripper or cutter to cut
the coating back.
Pass the wires through the 3 heat-shrinkable tubes.
79
10
HANDLE
80
15
16
17
18
Solder the wires to the terminals on the new volume. Check the wiring diagram and be careful not to mix up
the wires.
Cover the soldered parts with the heat-shrinkable tubes and apply heat with an industrial dryer until the
heat-shrinkable tubes tightly cover the soldered parts.
Refer to Steps 2-10 and work in reverse order to attach the volume, handle front tube bracket, Handle Front
Cover Lid A, and handle front cover.
Refer to “10-3-1 Adjusting the Volume” and adjust the volume.
10-3-3 GREASING
• Be sure to use the designated grease. Using undesignated grease can cause parts
damage.
• The designated periods for greasing serve only as a guide. Whenever there are squeaks
or other anomalies, apply grease at designated locations.
10
HANDLE
• Do not apply grease to locations other than as specified. Doing so may create a risk of
operational problems and deterioration of parts.
Use spray grease once every three months to grease up the gear mesh portion of the constituent parts.
Use "Grease Mate" (part number 090-0066) for the spray grease.
Refer to Steps 1 and 2 under “10-3-1 Adjusting the Volume” and remove Handle Front Cover Lid B.
Apply grease between the gears that turn the volume shaft.
GEAR MESH PORTION
10-3-3 FIG. 01
81
11 MOTORCYCLE MECHANISM
11
MOTORCYCLE MECHANISM
• Always disengage the power before beginning work. Otherwise there could be an
electric shock or short circuit. Note that when using TEST mode there will be electricity
running through the machine. Do not touch any parts that are not specified in these
directions.
• Be careful not to damage the wires. Damaged wires may cause electric shock or short
circuit or present a fire risk.
• Be very careful when soldering. Handling a soldering iron carelessly may result in a fire
or a burn.
11-1 ROLL (LEAN) VOLUME
11-1-1 Adjusting the Volume
1
2
Turn the power off.
Remove the 6 truss screws and take the front shaft cover off.
TRUSS SCREW (6), black
FRONT SHAFT COVER
M4 x 8, large flat washer used
11-1-1 FIG. 01
82
11-1-1 FIG. 02
3
Loosen the 2 screws, move the VR bracket, and adjust the angle and way the gears fit together. The
motorcycle mechanism should be in the center position, and the D-cut surface of the volume rotating shaft
should be in the position shown in the figure when doing so.
SCREW (2)
VR BRACKET
M4 x 8, w/flat & spring washers
11
11-1-1 FIG. 04
MOTORCYCLE MECHANISM
11-1-1 FIG. 03
D-CUT SURFACE
11-1-1 FIG. 05
4
5
6
7
8
After performing the adjustment, use the 2 screws to fully tighten the VR bracket on.
Refer to Step 2 and attach the front shaft cover.
Operate the motorcycle mechanism and check to make sure the gears rotate smoothly.
Turn on the power and be careful not to touch the motorcycle mechanism when doing so. The motorcycle
mechanism initialization operation will be performed automatically after the power is turned on.
Set the volume value on the INPUT ADJUSTMENT Screen in Game Test Mode. The recommended value
for the roll volume is “80H±8H” with the motorcycle mechanism in the center position. Check to make sure
the value decreases when the motorcycle mechanism is tilted to the right and increases when it is tilted to
the left. (See “9-3-2 INPUT TEST.”)
83
11-1-2 Replacing the Volume
A replacement volume (220-5753) and 3 heat-shrinkable tubes (310-5029-F20) are required.
The following tools and soldering equipment will be used:
11
MOTORCYCLE MECHANISM
- Tamperproof screw wrench (for M4)
- Nipper
- Cutter
- Wire stripper
- Soldering iron
- Industrial dryer
1
2
3
Turn the power off.
Refer to “11-1-1 Adjusting the Volume” and remove the front shaft cover.
Undo the cord clamp.
11-1-2 FIG. 01
Undo cord clamp.
(1)
4
Remove the 2 screws and take the volume off. Be careful not to drop or lose the screws when doing so.
SCREW (2)
VOLUME
M4 x 8, w/flat & spring washers
11-1-2 FIG. 02
84
11-1-2 FIG. 03
5
Remove the 2 hexagon socket screws and pull the gear off the volume shaft.
HEXAGON SOCKET SCREW (2)
M3 x 6
11
GEAR
6
7
Remove the nut fastening the VR bracket in place and take the volume off the VR bracket. (See 11-1-2 FIG.
04.)
The wires connected to the volume will proceed to be used. Use a tool such as nippers or a cutter to remove
the old heat-shrinkable tubes from the places where the wires are connected.
MOTORCYCLE MECHANISM
11-1-2 FIG. 04
HEAT-SHRINKABLE TUBE
11-1-2 FIG. 05
8
Use a soldering iron to melt the solder and separate the wires from the old volume. Be very careful when
using the soldering iron.
SOLDERING IRON
11-1-2 FIG. 06
85
11
MOTORCYCLE MECHANISM
86
9
10
11
12
13
14
If the exposed conductive wire at the end is less than 5 mm, use a tool such as a wire stripper or cutter to cut
the coating back.
Pass the wires through the 3 heat-shrinkable tubes.
Solder the wires to the terminals on the new volume. Check the wiring diagram and be careful not to mix up
the wires.
Cover the soldered parts with the heat-shrinkable tubes and apply heat with an industrial dryer until the
heat-shrinkable tubes tightly cover the soldered parts.
Refer to Steps 3-6 and work in reverse order to attach the volume.
Refer to “11-1-1 Adjusting the Volume” and check the volume.
11-1-3 GREASING
• Be sure to use the designated grease. Using undesignated grease can cause parts
damage.
• The designated periods for greasing serve only as a guide. Whenever there are squeaks
or other anomalies, apply grease at designated locations.
Use spray grease once every three months to grease up the gear mesh portion of the constituent parts.
Use "Grease Mate" (part number 090-0066) for the spray grease.
Refer to Steps 1 and 2 under “11-1-1 Adjusting the Volume” and remove the front shaft cover. Apply grease between
the gears that turn the volume shaft.
GEAR MESH PORTION
11
MOTORCYCLE MECHANISM
• Do not apply grease to locations other than as specified. Doing so may create a risk of
operational problems and deterioration of parts.
11-1-3 FIG. 01
87
11-2 REPLACING THE SIDE GUIDE PLATES
The side guide plates are important parts which prevent accidents. Always inspect them before the doors open every
day to make sure they are not damaged and have not come off. If the game is played despite the side guide plates
being damaged or having come off, it could result in an accident such as the customer getting his or her fingers
caught.
11
The following work requires a hexagon wrench with a WAF of 2.5 mm.
MOTORCYCLE MECHANISM
1
2
Turn the power off.
Remove the 2 hexagon socket screws and take the side guide plate off.
HEXAGON SOCKET SCREW (2)
M4 x 12, large flat & spring washers used
11-2 FIG. 01
3
11-2 FIG. 02
Affix STICKER W PINCH HLT ENG to the new side guide plate as shown in the figure.
SIDE GUIDE PLATE
HLT-3024
STICKER W PINCH HLT ENG
440-WS0353XEG
11-2 FIG. 03
88
SIDE GUIDE PLATE
4
Use the 2 hexagon socket screws to loosely attach the new side guide plate.
11
M4 x 12, large flat & spring washers used
11-2 FIG. 04
5
Adjust the side guide plate so that the clearance between it and the seat is about 1 mm, and fully tighten the
2 hexagon socket screws.
Ap
pr
MOTORCYCLE MECHANISM
HEXAGON SOCKET SCREW (2)
ox
.1
m
m
11-2 FIG. 05
6
Refer to Steps 1-5 and replace the plate on the other side following the same procedure.
89
11-3 REPLACING THE VIBRATION UNIT HARNESS
If the motorcycle mechanism does not vibrate, replace the vibration unit harness. If that does not fix it, replace the
vibration unit itself.
The following work requires nippers and a hexagon wrench with a WAF of 2.5 mm.
11
MOTORCYCLE MECHANISM
1
2
Turn the power off.
Remove the 6 hexagon socket screws and take the switch plate off. Be careful not to damage the wires when
doing so.
HEXAGON SOCKET SCREW (6)
SWITCH PLATE
M4 x 12, spring and design washers used
11-3 FIG. 01
3
11-3 FIG. 02
Detach the connector and remove the switch plate.
Detach connector.
YL8P
11-3 FIG. 03
90
4
Take Tank Center off.
11
11-3 FIG. 04
5
Remove the 4 screws and take Tank L off.
SCREW (4), black
M4×12, w/spring washer, large flat washer used
11-3 FIG. 05
6
7
TANK L
MOTORCYCLE MECHANISM
TANK CENTER
11-3 FIG. 06
Refer to Step 5 and take Tank R off.
Using the nippers, cut the cable tie. Be careful not to damage the wires when doing so.
CABLE TIE
11-3 FIG. 07
91
NOTE: When attaching it, use 2 cable ties that have been joined together to fasten the core and wires together. Cut
the extra part of the cable tie off. Be careful not to damage the wires when doing so.
11
MOTORCYCLE MECHANISM
11-3 FIG. 08
11-3 FIG. 09
EXTRA PART OF CABLE TIE
11-3 FIG. 10
8
Undo the 3 cord clamps.
Undo cord clamps.
(3)
11-3 FIG. 11
92
CABLE TIE
9
Detach the connector.
11
YL2P
11-3 FIG. 12
10
Remove the 4 hexagon bolts and take the vibration unit off.
11-3 FIG. 13
HEXAGON BOLT (4)
M6×16, w/flat & spring washers
MOTORCYCLE MECHANISM
Detach connectors.
11-3 FIG. 14
VIBRATION UNIT
11-3 FIG. 15
93
11
12
Set the vibration unit on a level surface.
Undo the clamps and open the core.
CLAMP
11
MOTORCYCLE MECHANISM
11-3 FIG. 16
13
Use the nippers to cut the cable tie, and take the core out. Be careful not to damage the wires when doing so.
When attaching it, wrap the wires around the core 2.5 times and fasten them to it using a cable tie.
VIBRATION UNIT
CABLE TIE
11-3 FIG. 17
14
HLT-3250
11-3 FIG. 18
Undo the 2 cord clamps.
Undo cord clamps.
(2)
11-3 FIG. 19
94
CORE
15
Detach the connector and replace the vibration unit harness.
VIBRATION UNIT HARNESS
HLT-60054
11
Detach connectors.
YL2P
MOTORCYCLE MECHANISM
11-3 FIG. 20
95
COICOIN
12
HANDLING
Handling the Coin Jam
12
If the coin is not rejected when the REJECT button is pressed, open the coin chute door and open the
selector gate. After removing the jammed coin, put a normal coin in and check to see that the selector
correctly functions.
COIN SELECTOR
12-1 CLEANING THE COIN SELECTOR
● Remove and clean smears by using a soft cloth dipped in water or diluted chemical
detergent and then squeezed dry.
●
Never apply machine oil, etc. to the Coin Selector.
● After cleaning the Coin Selector, insert a regular coin in the normal working status
and ensure that the selector correctly functions.
The Coin Selector should be cleaned once every 3 months.
When cleaning, follow the procedure below:
1
2
3
Turn the power for the machine OFF. Open the coin chute door.
Remove the Coin Selector from the coin chute door.
Open the gate and dust off by using a soft brush (made
of wool, etc.).
GATE
FIG. 12 a
96
12-1 CLEANING THE COIN SELECTOR
4
Remove and clean smears by using a soft cloth dipped in water or diluted chemical detergent
and then squeezed dry.
5
Remove the CRADLE.
When removing the retaining ring (E ring), be
very careful so as not to bend the rotary shaft.
12
COIN SELECTOR
CRADLE
FIG. 12b
6
Remove stain from the rotary shaft and shaft receiving portions by wiping off with a soft cloth,
etc.
7
After wiping off as per previous step, further apply a dry cloth, etc. to cause the Coin Selector to
dry completely.
Coin Insertion Test
Once every month, when performing the Coin SW Test,
simultaneously check the following:
Does the Coin Meter count satisfactorily?
Does the coin drop into the cashbox correctly?
Is the coin rejected when inserted while keeping the
REJECT Button pressed down?
Insert a coin while keeping
the REJECT Button
pressed down and
FIG. 12 c
97
12-2 ADJUSTING THE PRICE OF PLAY
This product comes equipped with a Money Controls SR3 Coin Acceptor. To adjust the price
of play ALL credit setting are adjusted via the EXCEL CREDIT BOARD.
12
IMPORTANT!
COIN SELECTOR
The CREDIT SETTINGS within the SYSTEM TEST MODE must be set to 1 coin 1 credit to allow
the CREDIT BOARD to function correctly.
The EXCEL CREDIT board houses 2 DIL Switches. These allow the operator to select the price
of play, type of coin acceptor and region.
EXCEL Credit Board
SERVICE BUTTON
DIL SW3 - (REGIONAL SETINGS)
STATUS LED
CN3
CH1
I/O CONNECTOR (TO HOST)
DIL SW 1 (CREDIT SETTINGS)
CN5
CH2
98
DIL SW3 (Regional Settings)
Adjust these switches to specify the type of Coin
Acceptor used and currency. Default = SW1 & SW2
ON - SR3 in parallel made, Sterling.
SERVICE BUTTON
Provides a service credit when pressed.
Status LED
Flashes when functioning.
O/I Connector
Inputs and Outputs to and from host.
CN5
To secondary SR3 Coin Acceptor.
CH2
To secondary Coin Acceptor (Mars, NRI, ect.)
DIL SW1 (credit settings)
Adjust to required price of pay.
CH1
To primary Coin Acceptor (Mars, Nri, ect.)
CN3
To primary SR3 Coin Acceptor.
DLP PROJECTOR
• Set SW 3 on the VTS /Excel board as shown in the table above corresponding to the country required. • For Germany (DM), France (Fr) & Switzerland (SFr), use the appropriate existing setting shown above (from another country) that
matches the coin ratios programmed into your coin mech. • Set SW 1 according to the option settings found in the relevant Price of Play Settings Table on the following pages. Note: These switch settings are under constant review and may change due to world currency updates. REGIONAL AND ACCEPTOR SETTINGS (SW3)
13
99
STERLING PRICE OF PLAY SETTINGS (SW1)
13
DLP PROJECTOR
100
EURO PRICE OF PLAY SETTINGS (SW1)
13
DLP PROJECTOR
101
12-3 SR3 OPTIONS - TEACH AND RUN PROGRAMMING
SELECTING STERLING / EURO OPTION
13
The SR3 coin acceptor (supplied) is programmed to accept UK Sterling and the Euro. Factory setting is
for the UK Sterling. If the configuration needs to change to the Euro, then please follow the instructions
below for changing over to the Euro and visa versa.
DLP PROJECTOR
BANK SELECT
This function allows you to enable both or individual select banks of coins via switches 7 and 8 on the 8
way DIL switch.
This enables the selection of 2 different currencies, one in each bank, or 12 coins/tokens in both banks
from the same country.
To enable/disable the banks set the switches as show below.
Both Banks ON (enabled) - Sterling and Euro’s
Bank 1 ON (enabled) and Bank 2 OFF (disabled) - Sterling ONLY
Bank 1 OFF (disabled) and Bank 2 ON (enabled) - Euro’s ONLY
Please remove power from the SR3 before changing the status on the DIP SW.
102
12-3 SR3 OPTIONS - TEACH AND RUN PROGRAMMING
TEACH AND RUN PROGRAMMING (SR3)
If the machine is positioned in location where only tokens are used, then the SR3 Coin Acceptor can be
programmed to accept and credit special coins/tokens.
Table 1: Teach & Run Programming Bank 1.
Coin Number
1
2
3
4
5
6
SW1
off
off
off
off
off
off
SW2
off
off
off
ON
ON
ON
SW3
off
ON
ON
off
off
ON
SW4
ON
off
ON
off
ON
off
SW5
ON
ON
ON
ON
ON
ON
SW6
off
off
off
off
off
off
SW4
ON
off
ON
off
ON
off
SW5
ON
ON
ON
ON
ON
ON
SW6
off
off
off
off
off
off
DLP PROJECTOR
Please follow the instructions below to enable and program the TEACH & RUN facility.
13
Bank 2
Table 2: Teach & Run Programming Bank 2
Coin Number
7
8
9
10
11
12
SW1
off
ON
ON
ON
ON
ON
SW2
ON
off
off
off
off
ON
SW3
ON
off
off
ON
ON
off
Teach and Run EXAMPLE. (To teach coin channel 12 for £1)
Switch off the power to the SR3 and set the Program DIL switches to:-
MSB
SW1
ON
SW2
SW3
ON
OFF
LSB
SW4
OFF
TOTAL
SW5
SW6
12
ON
OFF
Switch on the power to the SR3.
Press the reject lever within 20 seconds. The LED will turn RED.
Start entering £1 coins until the LED flashes GREEN, typically after 8 to 10 insertions.
NOTE: If the LED turns GREEN after the 1st coin, then the Teach & Run is DISABLED.
Press the reject lever and the LED will turn GREEN. The coin channel has now been
programmed.
SET ALL SWITCHES TO THE OFF POSITION.
103
13 DLP PROJECTOR
13
The DLP projector is adjusted prior to leaving the factory. Avoid any unnecessary
adjustment. Failure to observe this can have a bad influence upon the players' or the
customers' physical conditions.
DLP PROJECTOR
• If the adjustment method in this manual does not resolve the problem contact the
office listed in this manual or your supplier.
• “Snow” on the screen/changes in brightness for a short period are due to the high
pressure mercury lamp in the projector. This is not a defect and does not need repairs.
• The life of the high pressure mercury lamp is the average number of hours 50% of
lamps last for. Therefore a life of 8,000 hours does not mean that the lamp cannot last
beyond 8,000 hours.
• There is no way of knowing when the lamp is going to cease to function. Once it
ceases to function, the DLP projector will be unable to display anything and the
product cannot be used. Have a spare lamp ready at all times.
• Do not stick tape, stickers or anything else onto the screen. Any kind of adhesive may
damage the surface of the screen.
The projector remembers adjustments.
If there is any distortion, etc. that requires adjustment on the TEST screen, use the remote control.
The average life of the projector’s high pressure mercury lamp is approximately 8,000 hours (50 % survival).
However this may change depending on circumstances.
The lamp will not last forever. If the screen is dark or continually disappears the lamp must be changed immediately.
After changing the projector lamp you must reset the timer setting.
104
13-1 CLEANING THE SCREEN
Since the Projector screen is susceptible to damage, pay careful attention to its handling.
Do not clean the screen with volatile chemicals, solvents or alkaline/acidic cleaners.
DLP PROJECTOR
Clean the screen surface once a week.
Dip a soft cloth in water 40 degrees centigrade or below, wring it out firmly, and use it to gently wipe the screen.
If there are stains that can’t be removed with warm water, use a neutral detergent diluted to 2-3%.
Refrain from using other chemicals, solvents, bleaches and cleaners because they may affect the screen.
Also do not use chemically-treated cloths.
The screen is easily damaged, so avoid scratching it with hard objects or striking it with a duster or other objects.
If the stains are serious, contact the office detailed in this manual or the point-of-purchase for this product.
13
13-1 FIG. 01
105
14 REPLACING THE FLUORESCENT AND HALOGEN LAMPS
14
• When working with the product, be sure to turn the power off. Working with the
power on may cause an electric shock or short circuit.
REPLACING THE FLUORESCENT AND HALOGEN LAMPS
• There is danger that hot lamps can cause burns. Exercise due caution when replacing
lamps.
• Use lamps of the specified ratings. Using lamps with different ratings may cause fires
or damage.
• Such things as deteriorated insulation in lighting fixtures can cause a short circuit
and/or smoke. Make sure there are no abnormalities. For example, check if you can
smell anything burning, if any sockets have been discolored and if the lamp has to be
replaced frequently.
• To perform work safely and securely, be sure to prepare a step which is in a secure and
stable condition. Performing work without using the step can cause violent falling
down accidents.
• Be careful when handling the plastic made parts. Failure to observe this may cause
injury due to damage or fragments resulting from damage.
14-1 REPLACING THE FLUORESCENT LAMP
1
106
Remove the 4 marquee screws. and take marquee off..
2
Carefully Replace Fluorescent lamp..
14
REPLACING THE FLUORESCENT AND HALOGEN LAMPS
107
15 PERIODIC INSPECTION
15
• Be sure to check once a year to see whether power cords are damaged, the plug is
securely inserted, dust has accumulated between the socket outlet and the power
plug, etc. Using the product with accumulated dust can cause fire and electric shock.
PERIODIC INSPECTION
• Periodically, around once a year, get in touch with the office herein stated or the
distributor, etc. where the product was purchased from, regarding internal cleaning.
Using the product with accumulated dust in the interior can cause a fire or accident.
Note that professional cleaning will require a fee.
• There is the danger of accidents involving electrical shorts circuits or fire caused by
factors such as the deterioration of insulation in electrical and electronic equipment
over time. Check that there are no abnormalities such as odors from burning.
• Do not use a water jet (high pressure washing device) or hose to clean this product.
It was not designed to be cleaned by a water jet. Water could get inside and cause
electrocution or short circuits. The product could also be damaged in such a way that
it is difficult to repair.
NOTE: The Sservice Manual referenced in the table is the separate“ LINDBERGH RED EX Service Manual.”
ITEMS
CABINET
HANDLE
MOTORCYCLE
MECHANISM
VIBRATION UNIT
COIN CHUTE TOWER
DLP PROJECTOR
LINDBERGH RED EX
BILLBOARD
SPEAKER UNIT
POWER CABLE
CABINET INTERIOR
CABINET SURFACES
108
DESCRIPTION
Confirm that adjusters contact floor
Inspect volume
Inspect gear meshing
Apply grease
Inspect volume
Inspect gear meshing
Apply grease
Inspect side guide plates
Inspect screws for looseness
Coin switch inspection
Coin insertion test
Cleaning
Inspect door cushions
Screen cleaning
Check screen adjustment
Memory test
Settings check
Cleaning
Inspect lighting fixtures (fluorescent
lamp)
Inspect lighting fixtures (halogen
lamp)
Inspection, Cleaning
Cleaning
Cleaning
PERIOD
REFERENCE
Daily
Monthly
Every 3 months
Every 3 months
Monthly
Every 3 months
Every 3 months
Daily
Monthly
Monthly
Monthly
Monthly
Monthly
Weekly
Monthly or when moving
Monthly
Monthly
Every 3 months
As appropriate
2
10
10
10
11-1-1
11-1-1
11-1-3
11-2
11-3
12-1
12-3
12-1
See next page
13-1
13
Service Manual, 4
Service Manual, 4
17-2
14-1
As appropriate
14-2
1 year
1 year
As appropriate
6-10
As above
See next page
Cleaning the Cabinet Surfaces
When the cabinet surfaces become dirty, remove stains with a soft cloth soaked in water or diluted (with water)
chemical detergent and then wrung dry. To avoid damaging the finish, do not use such solvents as thinner, benzene,
etc. (other than ethyl alcohol) or abrasives (bleaching agent and chemical dust-cloth).
Replacing the Door Cushions
If the coin chute or cash box doors produce a loud vibrating noise, replace the door cushions.
1
2
Turn the power off.
15
PERIODIC INSPECTION
Some general-purpose household, kitchen, and furniture cleaning products may contain strong solvents that degrade
plastic parts, coatings, and print. Before using any cleaning product, read the product's cautionary notes carefully
and test the product first on a small area that is not highly visible.
Unlock the coin chute door with the master key and open it. Unlock the cash box
door with the key and open it.
Unlock
Unlock
15 FIG. 01
3
Replace the door cushions with the ones supplied.
DOOR CUSHION
HLT-0306
DOOR CUSHION
HLT-0306
15 FIG. 02
109
16 TROUBLESHOOTING
16-1 TROUBLESHOOTING TABLE
16
TROUBLESHOOTING
• The work described below should be carried out by the site maintenance personnel or
other qualified professional. Work carried out by personnel without the necessary skill
or technology can cause accident.
• If no improvements can be noted even after the following measures have been taken,
disengage the power and contact the point of purchase or the office indicated in these
instructions. If the power is left on while there is an abnormality, a fire, electric shock or
other serious accident can occur.
• When working with the product, be sure to turn the power off. Working with the
power on may cause an electric shock or short circuit.
• Be careful not to damage the wires. Damaged wires may cause an electric shock, short
circuit or present a risk of fire.
• Once the reason that the breaker or circuit protector activated has been removed,
restore the breaker or circuit protector to its original condition. If the product is used
while the reason for activation has not yet been removed, heat and/or fire could be
generated.
If a problem occurs, first inspect the connection of any wiring connectors.
NOTE: The Service Manual referenced in the table is the separate“ LINDBERGH RED EX Service Manual.”
16-1 TABLE 01
PROBLEMS
With main switch
ON, no activation.
110
CAUSE
COUNTERMEASURES
Power is not supplied.
Securely insert the power plug into the
plug socket.
Power supply/voltage is not correct.
Make sure that power supply/voltage is
correct.
The circuit protector functioned due to the
momentary overload.
After eliminating the cause of overload,
reinstate the AC unit’s circuit protector.
<See below>
Billboard's
fluorescent lamp does
not light up.
Connector is not properly connected.
Firmly connect the connector between
cabinet and billboard.
Fluorescent lamp or glow lamp has
expired.
Replace the fluorescent lamp and/or glow
lamp. <See 14-1>
There is sound and
the fluorescent lamp
is on, but the monitor
is completely black.
Video signal connector or monitor power
connector is not properly connected.
Check to make sure the connector between
the monitor and game board is properly
connected.
Characteristic of DLP projector.
Depending on the model, it may take
approx. 2 minutes for the video signal to
come through after turning the power on.
Problem with monitor.
Contact the point of purchase for this
product.
PROBLEM
No sound.
CAUSE
COUNTERMEASURE
Adjust the sound on the switch unit.
<See 9-1>
Connector is not properly connected.
Check the connectors going to the game
board, amps, speakers, and volume.
Problem with board, amps, or speakers.
Check by performing the speaker test.
<See Service Manual, 4>
Video signal connector is not properly
connected.
Check to make sure the video signal
connector is properly connected and
fastened in place.
Faulty screen adjustment.
Perform appropriate adjustments.
<See chapter 13>
Monitor screen
shakes or shrinks.
Power supply/voltage is not correct.
Power is not sufficient.
Make sure that power supply/voltage is
correct.
Switch or volume
input does not work.
Connector is not properly connected.
Check the connection of the connector
between the I/O board and the cabinet.
The color on the DLP
projector screen is
incorrect.
Check the connection of the connector
between the I/O board and the game board.
16
TROUBLESHOOTING
Volume is not properly adjusted.
Check the power to the I/O board.
Handle, accelerator,
or brakes do not work
as intended.
Motorcycle
mechanism does not
move as intended.
Faulty volume setting.
Configure the setting in Test Mode.
<See 9-3-5>
Faulty volume attachment or gear meshing.
Make adjustments and check them in Test
Mode. <See chapter 10>
Connector is not properly connected.
Check the connection of the handle,
accelerator, and brake connectors.
Volume is broken.
Replace the volume. <See chapter 10>
Faulty initialization operation.
Turn the power on again and make sure the
initialization operation finishes properly.
Faulty volume attachment or gear meshing.
Make adjustments and check them in Test
Mode. <See 11-1-1>
Volume is broken.
Replace the volume. <See 11-1-2>
Wire is broken or disconnected.
Check wires around moving parts for poor
contact.
When replacing wires, fasten them down
where they will not come in contact with
moving parts.
Motorcycle
mechanism does not
move.
Faulty initialization operation.
Make sure the initialization operation
finishes properly.
Setting is not correct.
Check the LEAN setting on the GAME
ASSIGNMENTS Screen. <See 9-3-4>
Connector is not properly connected.
Check the connection of the connectors
between the game board and the servo
driver, and between the servo driver and
the servomotor.
Servomotor’s thermal element was
triggered.
Rise in internal temperature triggered
element. Once it cools down, it will
automatically recover.
Servo driver’s fuse blew due to momentary
overload.
Contact the point of purchase for this
product.
111
PROBLEM
Network play does
not work.
CAUSE
COUNTERMEASURE
Network play settings are not correct.
Configure the settings correctly.
<See 9-3-6 and 19-3>
Network cable has come loose.
Connect the network cable properly.
<See 19-2>
Network cable cannot be properly
connected.
Connect the network cable properly.
<See 19-2>
Network cable is broken.
Replace the network cable.
Contact the point of purchase for this
product.
Halogen lamp does
not turn on.
Halogen lamp has expired.
Replace the halogen lamp. <See 14-2>
Fuse is blown.
Replace the fuse. <See 16-2>
No vibration.
Setting is not correct.
Check the VIBRATION setting on the
GAME ASSIGNMENTS Screen.
<See 9-3-4>
Connector is not properly connected.
Check the connection of the connector
between the motor control board and the
motor.
Motor has expired.
Replace the vibration unit. <See 11-3>
Connector is not properly connected.
Check the connection of the connector.
16
TROUBLESHOOTING
Leader lamp, foot
lamp, or tail lamp
does not turn on.
CIRCUIT PROTECTOR
Functions due to the activation of bimetal. To restore the function, wait for approximately 1 minute or longer until
the bimetal cools off. (Press the button.)
CIRCUIT PROTECTOR
16-1 FIG. 01
112
17 GAME BOARD (LINDBERGH RED EX)
• The work described below should be carried out by the site maintenance personnel or
other qualified professional. Work carried out by personnel without the necessary skill
or technology can cause accident.
• Be careful not to damage the wires. Damaged wires may cause electric shock or short
circuit or present a fire risk.
• Do not use this product with connectors other than those that were connected and
used with the LINDBERGH RED EX at the time of shipping. Do not carelessly connect
wires to connectors that were not used at the time of shipping, as this may cause
overheating, smoke or fire damage.
• When connecting the connectors, be sure to attach them correctly. There is only one
correct way in which they must be connected. Attempting to connect them incorrectly
may cause damage to the pins on the connectors, and cause electric shock, short
circuit or fire.
GAME BOARD (LINDBERGH RED EX)
• In order to prevent electric shock and short circuit hazards, be sure to turn power off
before performing work.
17
In this product, setting changes are made during the Test Mode. The LINDBERG RED EX
need not be operated. Use the LINDBERGH RED EX, etc. as is with the same setting made
at the time of shipment so as not to cause electric shock and malfunctioning.
Static electricity from your body may damage some electronics devices on the IC board.
Before handling the IC board, touch a grounded metallic surface so that the static
electricity can be discharged.
113
17-1 CLEANING THE LINDBERGH BOARD
17
Be sure to clean game boards once in 3 months. Dust accumulating in game boards may
not function properly.
GAME BOARD (LINDBERGH RED EX)
Once every 3 months remove the LINDBERGH RED EX from the cabinet and use a vacuum cleaner to clean around
the LINDBERGH RED EX’s air vents and installation area.
1
2
Refer to 17-1, and remove the LINDBERGH RED EX from the cabinet.
Clean around the air vent of LINDBERGH boards with a vacuum cleaner.
AIR VENT
AIR VENT
AIR VENT
17-2 FIG. 01
AIR VENT
17-2 FIG. 02
3
4
114
AIR VENT
Clean around installment parts of LINDBERGH RED EX in the cabinet with a vacuum cleaner. Be sure not
to damage wirings and boards. Electronic devices on boards may damage by static electricity, and be sure
not to vacuum electronic devices by a vacuum cleaner.
Reinstall the LINDBERGH RED EX you removed by the reverse method.
17-2 COMPOSITION OF GAME BOARD
• With the key chip inserted into it, this LINDBERGH RED EX serves as a special-purpose
LINDBERGH RED EX for the product.
ASSY CASE LBJ L 1GB HLT EXP (845-0014D-02)
GAME BOARD (LINDBERGH RED EX)
• Use with the dip switches (DIP SW) on the board at the prescribed settings. If settings
do not match the product, an error message will be displayed. In some cases, the game
cannot be started.
17
BOARD NUMBER STICKER
DIP SW
KEY CHIP
17-3 FIG. 01
DIP SW Settings
Use this product with the DIP SW settings shown in the figure below.
17-3 FIG. 02
115
18 NETWORK PLAY
With this product, up to 4 machines can be connected with network (LAN) cables for network play.
18-1 INSTALLATION PRECAUTIONS
18
NETWORK PLAY
• The work described below should be carried out by the site maintenance personnel or
other qualified professional. Work carried out by personnel without the necessary skill
or technology can cause accident.
• Before starting to work, ensure that the Power SW is OFF. Failure to observe this can
cause electric shock or short circuit.
• Use care so as not to damage wirings. Damaged wiring can cause electric shock or
short circuit.
• Do not touch undesignated places. Touching places not designated can cause electric
shock or short circuit.
• Multiple game machines will be connected for network play, so be sure to provide
sufficient power according to the number of machines. Make sure that each game
machine is supplied with the current listed in this manual. If the machines are used
with different electrical specifications, it could result in fires or electrocution.
• The distance between the game machines is limited by the length of the
communication cables used, but place them as far apart as possible. If the machines
are too close together, it could result in a serious injury such as the player hitting
his or her head on the other machine if he or she falls off. The distance between the
machines shown in this manual is for when the optional equipment has been installed.
• Do not perform work on inclined surfaces, surfaces with different levels, or grooves.
Doing so could result in a serious injury such as the worker tripping and falling. It will
also prevent the work from being performed properly.
• To perform work safely, be sure to secure the space corresponding to number of
machines to be linked. Failure to observe this can cause accident.
• If the network cables are laid out in the aisles, select a cable cover that is shaped so as
not trip the customers. Otherwise customers may trip and fall.
• To prevent accidents and acts of vandalism, cover the network cables with the
strongest cover possible.
Supply the appropriate power to each of the 4 game machines. Each one should be supplied with around 15 A of
power.
116
Installing the Game Machine
2,600
150
250
18
NETWORK PLAY
500
8,000
250
18-1 FIG. 01
(Unit: mm)
117
19 DESIGN RELATED PARTS
19
DESIGN RELATED PARTS
118
20 PARTS LIST
1 BILLBOARD UNIT
20
PARTS LIST
2 DLP UNIT
119
3 COIN TOWER UNIT
20
PARTS LIST
4 AC UNIT
120
5 CPU UNIT
20
PARTS LIST
6 POWER SUPPLY UNIT
121
7 ELEC UNIT
20
PARTS LIST
122
17
1
203
2
16
1
2
1
4
1
20
8
3
1
42
1
224
4
205
1
206
2
19
1
22
1
216
4
218
4
the edge lines around the affixing surface.
2. Affix (33) and (34) evenly with respect to
the correct positions as shown in the figure.
218
6
27
1
1
1
217
6
221
4
25
1
29
1
207
4
6
1
SEE A
13
1
12
1
202
6
32
1
26
1
44
1
243
38
1
36
1
30
1
36
2
35
2
223
2
226
6
±1
206
4
216
6
43
204
1
Detailed diagram of inside of covers
4.4 ±0.5
1. Affix stickers without instructions in
NOTES:
203
7
225
3
201
4
202
4
213
10
14
1
101
1
214
10
7
1
207
2
215
2
201
6
202
6
31
1
±0.5
2
±1
43
5
1
±3
43
1
EA
40
1
SE
41
1
754
216
4
21
1
±3
220
4
28
1
1
210
2
9
1
Adjustment dimensions
218
6
210
2
10
1
218
4
23
1
8
1
24
2
24
4
208
2
208
4
203
2
39
1
37
1
212
10
208
4
222
4
43
2
211
10
225
3
203
7
15
1
11
1
213
10
20
8
18
1
209
2
33
1
34
1
209
4
PARTS LIST
207
2
209
4
214
10
215
2
8 ASSY REAR CABINET (HLT-3000)
(D-1/3)
20
123
8 ASSY REAR CABINET (HLT-3000)
20
PARTS LIST
124
ITEM NO.
PART NO.
DESCRIPTION
1
2
3
4
5
6
7
8
9
10
11
12
13
14
15
16
17
18
19
20
21
22
23
24
25
26
27
28
29
30
31
32
33
34
35
36
37
39
40
41
42
43
44
HLT-3100
HLT-3200
HLT-3250
HLT-2000
HLT-2100
HLT-3300
HLT-3320
HLT-3350
HLT-3400
HLT-3420
HLT-3500
HLT-3001
HLT-3002
123-050520-2R
HLT-3003
HLT-3004
HLT-3005
HLT-3006X
HLT-3007X
250-5715-05
HLT-3008
HLT-3009
HLT-3010
250-5715-04
HLT-3011
HLT-3012X
HLT-3013
HLT-3014
HLT-3015
HLT-3016
123-050540-R
HLT-3017X
HLT-3018-01
HLT-3019-01
HLT-3020
440-CS0245-EG
421-11416
HLT-3021
HLT-3022
HLT-3023
HLD-3034
HLT-3024X
HLT-3027
ASSY RIDE BASE
MOTOR UNIT
VIBRATION UNIT
ASSY CENTERING MECHA
ASSY HANDLE DLX
ASSY WOOFER
ASSY ROLL VOLUME
ASSY SW PLATE
ASSY STEP L
ASSY STEP R
ASSY REAR FENDER
BIKE SEAT
SEAT BRKT
KEY 5x5x20 2R
ENGINE COVER LID L
ENGINE COVER LID R
ENGINE COVER BRKT R
ENGINE COVER L
ENGINE COVER R
SPCL WASHER M5 HLT
TANK L
TANK R
TANK CENTER
SPCL WASHER M4 HLT
FRONT SHAFT COVER
HANDLE FRONT COVER
HANDLE MAIN SHAFT COLLAR
HANDLE FRONT COVER LID A
HANDLE FRONT COVER TOP
HANDLE FRONT COVER LID B
KEY 5x5x40 R
HANDLE MOUNT PLATE
STICKER REAR BASE L ENG
STICKER REAR BASE R ENG
STICKER FRONT FORK
STICKER C GEAR S ENG
STICKER CAUTION FORK
ENGINE COVER BRKT L
HANDLE COVER SASH
HANDLE COVER SASH SPONGE
HANDLE WSHR
SEAT SIDE GUIDE PLATE
SEAT SPACER PLATE
101
102
103
111-1164
280-5275-SR10
601-0460
COUPLING NES70W-N12CXN14C-TK
CORD CLAMP SR10
PLASTIC TIE BELT 100M/M
(D-2/3)
NOTE
8 ASSY REAR CABINET (HLT-3000)
ITEM NO.
201
202
203
204
205
206
207
208
209
210
211
212
213
214
215
216
217
218
220
221
222
223
224
225
226
PART NO.
DESCRIPTION
030-000816-S
060-F00800
000-P00510-W
030-001020-S
028-A00408-P
000-P00408-WB
000-P00408-W
FAS-290042
060-S00400
000-T00408-0C
FAS-290030
068-652016-0B
FAS-290037
060-S00500
068-552016-0C
000-P00412-WB
000-T00408-0B
068-441616-0B
008-T00408-0B
008-T00408-0C
068-441616-0C
FAS-290071
030-000616-W
000-T00510-0B
030-000825-S
HEX BLT W/S M8x16
FLT WSHR M8
M SCR PH W/FS M5x10
HEX BLT W/S M10x20
SET SCR HEX SKT CUP P M4x8
M SCR PH W/FS BLK M4x8
M SCR PH W/FS M4x8
HEX SKT LH CAP SCR STN M4x12
SPR WSHR M4
M SCR TH CRM M4x8
HEX SKT SCR BH BLK M6x16
FLT WSHR BLK 6.5-20x1.6
HEX SKT LH CAP SCR STN M5x20
SPR WSHR M5
FLT WSHR CRM 5.5-20x1.6
M SCR PH W/FS BLK M4x12
M SCR TH BLK M4x8
FLT WSHR BLK 4.4-16x1.6
TMP PRF SCR TH BLK M4x8
TMP PRF SCR TH CRM M4x8
FLT WSHR CRM 4.4-16x1.6
HEX SKT ELH CAP SCR STN M4x10
HEX BLT W/FS M6x16
M SCR TH BLK M5x10
HEX BLT W/S M8x25
NOTE
20
PARTS LIST
(D-3/3)
125
5
1
206
2
9
1
7
4
126
205
4
201
6
2
207
12
204
4
3
1
2
1
201
4
(M14):122N . m (1240 kgf . cm)
Fastening Torque:
101
2
13
1
207
2
210
1
1
1
203
4
206
6
202
4
EARTH
211
1
212
1
(Details of part "A")
10
2
11
2
12
2
210
4
20
207
4
8
4
PARTS LIST
208
8
211
4
"A"
212
4
9 ASSY RIDE BASE (HLT-3100)
(D-1/2)
9 ASSY RIDE BASE (HLT-3100)
ITEM NO.
PART NO.
DESCRIPTION
1
2
3
5
6
7
8
9
10
11
12
13
HLT-3101
HLT-3150
HLT-3103Y
HLT-3105
HLT-3106
HLT-3107
HLT-3108
HLT-3109
HLT-3110
HLT-3111X
HLT-3112
HLT-3113
ASSY SUBCABI REAR
ASSY RIDE MECHA
STOPPER SHAFT
GEAR 110 HLT
STEP LID
STEP LED HOLDER
STEP SPONGE
BASE LID
RUBBER BRKT
RIDE STOPPER RUBBER
RIDE STOPPER URETHANE
FENDER HOLDER
101
102
103
104
390-6967
280-6676
280-5277
280-5275-SR10
LED PIPE 300MM BLUE
CORD CLAMP TL-25A TKK
CORD CLAMP 18
CORD CLAMP SR10
201
202
203
204
205
206
207
208
210
211
212
FAS-200005
060-S01400
060-F01400
030-000816-S
060-F00800
000-P00408-W
000-T00408-0B
000-P00308-W
050-H00400
060-S00400
060-F00400
HEX SKT H CAP SCR B 0Z M14x40
SPR WSHR M14
FLT WSHR M14
HEX BLT W/S M8x16
FLT WSHR M8
M SCR PH W/FS M4x8
M SCR TH BLK M4x8
M SCR PH W/FS M3x8
HEX NUT M4
SPR WSHR M4
FLT WSHR M4
301
HLT-60028
WH REAR CABINET01
NOTE
20
PARTS LIST
(D-2/2)
127
10 ASSY SUBCABI REAR (HLT-3101)
1
1
20
PARTS LIST
203
4
128
102
4
ITEM NO.
PART NO.
DESCRIPTION
1
HLT-3102
REAR BASE
101
102
601-6056-01
601-5882
CASTER 50 PH
LEG ADJUSTER (TAKIGEN C-280-2)
201
202
203
030-000616-S
060-F00600
050-H01600-3
HEX BLT W/S M6x16
FLT WSHR M6
HEX NUT TYPE3 M16
101
4
201
16
202
16
NOTE
5
1
6
1
206
1
205
1
4
1
10
1
102
1
3
1
210
4
211
4
2
1
201
2
207
4
203
4
208
4
202
2
207 (M14):122 N . m(1240 Kgf . cm)
Fastening Torque:
209
4
204
2
205
4
1
1
101
2
212
1
7
1
EARTH
213
1
214
1
8
1
PARTS LIST
9
1
205
1
206
1
11 ASSY RIDE MECHA (HLT-3150)
(D-1/2)
20
129
11 ASSY RIDE MECHA (HLT-3150)
20
PARTS LIST
130
ITEM NO.
PART NO.
DESCRIPTION
1
2
3
4
5
6
7
8
9
10
HLT-3151X
HLT-3152X
HLT-3153
HLT-3154
HLT-3155
TTR-3205
HLT-3156
HLT-3157
HLT-3114
HLT-3158
RIDE MECHA
TANK CENTER FRAME
FRONT SHAFT
FRONT SHAFT SPACER
PILLOW BLOCK FRONT
FLT 14.5-36x3.2
PILLOW BLOCK REAR
FLT WSHR 14.5-55x3.2
SHAFT MASK
FRONT SHAFT SPACER LONG
101
102
103
104
105
106
107
108
110
100-5552
350-5934
280-6676
280-5277
280-5275-SR10
310-5027-2203
310-5027-1903
601-5526-120
601-0460
BEARING 30 NTN UCFE206 W/HOLE
REDUCER CNV-5097 DR-175 200W
CORD CLAMP TL-25A TKK
CORD CLAMP 18
CORD CLAMP SR10
INSL SLIT TUBE ID 22
INSL SLIT TUBE ID 19
BUSH 1.6T
PLASTIC TIE BELT 100 M/M
201
202
203
204
205
206
207
208
209
210
211
212
213
214
215
030-000612-S
060-F00600
000-P00510-W
028-A00608-P
060-S01400
050-H01400
FAS-200005
060-F01400
020-001030-0Z
060-S01000
060-F01000
000-P00408
060-S00400
060-F00400
000-F00312
HEX BLT W/S M6x12
FLT WSHR M6
M SCR PH W/FS M5x10
SET SCR HEX SKT CUP P M6x8
SPR WSHR M14
HEX NUT M14
HEX SKT H CAP SCR B 0Z M14x40
FLT WSHR M14
HEX SKT CAP SCR BLK OZ M10x30
SPR WSHR M10
FLT WSHR M10
M SCR PH M4x8
SPR WSHR M4
FLT WSHR M4
MSCR FH M3x12
301
302
303
304
305
HLT-60029X
HLT-60030
HLT-60031
HLT-60032
HLT-60047
WH RIDE MECHA01
WH RIDE MECHA02
WH RIDE MECHA03
WH RIDE MECHA04
WH E RIDE MECHA
(D-2/2)
NOTE
12 MOTOR UNIT (HLT-3200)
1
1
3
1
102
1
(D-1/2)
205
3
206
3
2
1
101
1
20
PARTS LIST
201
2
4
1
5
2
6
2
202
2
203
4
204
4
Fastening Torque:
203
(M8):12.5 N . m(127.5 kgf . cm)
204
(M5): 3.1 N . m(31.6 kgf . cm)
131
12 MOTOR UNIT (HLT-3200)
20
PARTS LIST
132
ITEM NO.
PART NO.
DESCRIPTION
1
2
3
4
5
6
HLT-3201X
ORA-2507
SPG-2453
HLT-3202
253-5592
253-5593
MOTOR BRKT
MOTOR SHAFT COLLAR
KEY 4x4x40
MOTOR JOINT BUSH
MOTOR INSULATOR A
MOTOR INSULATOR B
101
102
103
104
105
106
107
108
350-5805-01
601-11311
211-5409
211-5410
481-5511
481-5568
601-0460
209-0023-91
280-5275-SR10
SERVO MOTOR W/FG Y21C-5010S
BRAKE BXH-08-10 24V
AMP S. S.PRESSOR CONN 172006-1
CONTACT 170284-1
DIODE 1S1887A(TOSHIBA)
DIODE 1N4004RLG AXIAL ONSEMI
PLASTIC TIE BELT 100 M/M
CONN CLOSED END
CORD CLAMP SR10
201
202
203
204
205
206
028-A00408-P
012-P00412
030-000835-S
068-852216
020-000530-0Z
060-S00500
SET SCR HEX SKT CUP P M4x8
TAP SCR #2 PH 4x12
HEX BLT W/S M8x35
FLT WSHR 8.5-22 x1.6
HEX SKT H CAP SCR BLK OZ M5x30
SPR WSHR M5
301
HLT-60039
WH MOTOR UNIT
(D-2/2)
NOTE
A
107.1
±0.2
5
1
1
4
10
1
2
14
6
1
205
4
3
204
201
4
206
5
5
1
3
1
1
205
208
12
101
3
207
2
1
2
1
A
2
2
13
1
2
8
9
202
1
1
202
15
SECTION A-A
1
1
4
10
102
PARTS LIST
107
2
103
1
2
103.0[mm]
Span length:
11
10[mm]
Belt width:
202
0.34[g/cm^2]
Belt unit mass:
1
8.5N or less
Belt tension:
The requirements for (102) are as follows:
7
205
2
2
3
207
210
209
13 VIBRATION UNIT (HLT-3250)
(D-1/2)
20
133
13 VIBRATION UNIT (HLT-3250)
20
PARTS LIST
134
ITEM NO.
PART NO.
DESCRIPTION
1
2
3
4
5
6
7
8
9
10
11
12
13
14
15
HLT-3251
HLT-3252X
HLT-3253X
HLT-3254X
HLT-3255X
HLT-3256X
HLT-3257
HLT-3258
HLT-3259
SPG-2504
SPG-2505
123-040414-2R
123-050515-2R
HLT-3260
HLT-3261X
VIB FIELD
VIB BASE
VIB CENTER BRKT
VIB MOTOR BRKT
VIB COVER
VIB BEARING HOLD CASE
VIB BEARING HOLD LID
VIB BEARING SHAFT
VIB BALLAST
PULLEY 20 S5M
PULLEY 60 S5M
KEY 4x4x14 2R
KEY 5x5x15 2R
VIB SPONGE
VIB FIELD BED
101
102
103
105
106
107
108
109
110
111
350-5937
350-5902
100-5112
209-0023-91
601-0460
100-5445-21
270-5117
280-5275-SR10
280-6676
280-5277
MOTOR DMN37KB WITH BUSH
TIMING BELT S5M425
BEARING 17 (NSK 6003ZZ)
CONN CLOSED END
PLASTIC TIE BELT 100 M/M
OILES BEARING 80W-21
FERRITE CORE TDK ZCAT3035-1330
CORD CLAMP SR10
CORD CLAMP TL-25A TKK
CORD CLAMP 18
201
202
204
205
207
208
209
210
000-P00510-W
028-A00408-P
050-U00600
FAS-300053
060-F00600
000-P00306-W
000-F00310
050-U00300
M SCR PH W/FS M5x10
SET SCR HEX SKT CUP P M4x8
U NUT M6
HEX BLT W/FS M6x12
FLT WSHR M6
M SCR PH W/FS M3x6
M SCR FH M3x10
U NUT M3
301
302
HLT-60040
HLT-60054
WH VIBRATION UNIT
WH VIBRATION UNIT EXT
(D-2/2)
NOTE
18
1
15
1
206
2
208
1
209
2
3
1
11
2
14
1
203
2
204
2
205
2
12
2
8
1
10
2
207
1
202
4
203
4
16
1
13
1
17
1
102
1
5
1
9
1
206
2
209
2
202
4
210
2
201
2
4
2
7
2
2
2
SECTION A-A
NOTES:
1. Screw components must be coated with thread sealant.
2. Apply grease to the gear components adequately.
203
4
Direction of VOLUME D-Cut.
A
A
PARTS LIST
1
1
101
2
14 ASSY CENTERING MECHA (HLT-2000)
(D-1/2)
20
135
14 ASSY CENTERING MECHA (HLT-2000)
20
PARTS LIST
136
ITEM NO.
PART NO.
DESCRIPTION
1
2
3
4
5
7
8
9
10
11
12
13
14
15
16
17
18
HLT-2001X
HLT-2002
HLT-2003Y
HLT-2004
HLT-2005Y
HLT-2007Y
HLT-2008X
HLT-2009
HLT-2010
HLT-2011
HLT-2012
HLT-2013
HLD-2105
HLD-2116X
123-050515-2R
601-7945
601-10003
HANDLE MAIN SHAFT
HANDLE CENTERING RUBBER
HANDLE CENTERING BRKT A
HANDLE CENTERING SPACER A
HANDLE CENTERING BRKT B
HANDLE CENTERING SPRING DLX
HANDLE MECHA BASE
HANDLE MECHA COVER
HANDLE STOPPER BRKT
HANDLE STOPPER SHAFT
HANDLE STOPPER RUBBER
HANDLE VR BRKT
GEAR HOLDER
GEAR PLATE
KEY 5x5x15 2R
GEAR 20
GEAR 80
101
102
103
104
100-5266
220-5753
310-5029-F20
280-5277
BEARING FAI25 (6005ZZ)
VOL CONT B-5K OHM (TOCOS)
SUMITUBE F F 20MM
CORD CLAMP 18
201
202
203
204
205
206
207
208
209
210
000-P00508-W
030-000816-S
060-F00800
050-H00800
060-S00800
000-P00412-W
030-001020-S
060-F01000
028-A00308-P
060-F00600
M SCR PH W/FS M5x8
HEX BLT W/S M8x16
FLT WSHR M8
HEX NUT M8
SPR WSHR M8
M SCR PH W/FS M4x12
HEX BLT W/S M10x20
FLT WSHR M10
SET SCR HEX SKT CUP P M3x8
FLT WSHR M6
301
HLT-60034
WH HANDLE UNIT
(D-2/2)
NOTE
15 ASSY HANDLE DLX (HLT-2100)
3
1
101
2
9
1
205
2
210
2
102
3
8
1
209
2
10
1
206
1
207
1
208
1
1
1
201
1
7
1
6
2
202
4
203
4
204
4
5
1
4
1
20
PARTS LIST
EARTH
2
1
NOTES:
1. Screw components must be coated with thread sealant.
2. Attach (7) using an adhesive (Konishi Bond G17).
3. Cut the ends of (101) and (102) after tightening them to prevent them from becoming loose.
ITEM NO.
PART NO.
DESCRIPTION
1
2
3
4
5
6
7
8
9
10
HLT-2500
HLT-2600
HLT-2700
HLT-2101X
HLD-3035
HLT-2102X
HLT-2103
HLT-2104
HLT-2105X
HLT-2106
ASSY BRAKE MECHA
ASSY THROTTLE
ASSY SHIFT SWITCH
HANDLE BAR DLX
HANDLE MOUNT
HANDLE HOLDER
GRIP L
HANDLE FRONT TUBE PLATE
WIRE STAY
HANDLE FRONT TUBE BRKT
101
102
601-6788
601-11017
PLASTIC TIE BELT BLACK 4.8x188
PLASTIC TIE BELT BLACK 100MM
201
202
203
204
205
206
207
208
209
210
008-T00408-0B
020-000620-0Z
060-S00600
060-F00600
050-F00300
050-H00400
060-S00400
060-F00400
000-P00408-WB
060-F00300-0B
TMP PRF SCR TH BLK M4x8
HEX SKT H CAP SCR BLK 0Z M6x20
SPR WSHR M6
FLT WSHR M6
FLG NUT M3
HEX NUT M4
SPR WSHR M4
FLT WSHR M4
M SCR PH W/FS BLK M4x8
FLT WSHR BLK M3
NOTE
137
138
102
3
16
1
101
1
7
1
5
1
205
2
206
1
Greasing
13
1
9
1
208
1
4
1
10
1
EARTH
209
1
6
2
12
1
SECTION C-C
210
1
SECTION B-B
8
1
SECTION A-A
204
2
203
1
14
1
207
2
1
1
2
1
201
2
202
2
Loosely tighten
B
B
3
1
C
NOTES:
1. Screw components must be coated with thread sealant.
(Other than screws used to fasten (8), (15).)
2. Apply grease to all gear parts and sliding parts.
203
4
A
203
4
20
C
15
1
PARTS LIST
11
1
A
16 ASSY BRAKE MECHA (HLT-2500)
(D-1/2)
16 ASSY BRAKE MECHA (HLT-2500)
ITEM NO.
PART NO.
DESCRIPTION
1
2
3
4
5
6
7
8
9
10
11
12
13
14
15
16
HLD-2501
HLD-2502
HLD-2503X
HLD-2504
HLD-2505
HLD-2506
HLT-2502
HLD-2508
HLD-2509
WRD-2551
280-6619
HLD-2512
HLD-2514
601-7944
HLD-2513
HLT-2504
BRAKE MASTER CASE
MASTER CASE HOLDER
MASTER CASE COVER
BRAKE GEAR
IDOL GEAR
PIVOT SHAFT
BRAKE VR BRKT
LEVER STOPPER
IDOL GEAR SHAFT
MASTER PISTON
RUBBER FOOT T 3G
BRAKE LEVER
RETURN SPRING
GEAR 15
VR COVER
PROTECT TUBE
101
102
220-5753
310-5029-F20
VOL CONT B-5K OHM (TOCOS)
SUMITUBE F F 20MM
201
202
203
204
205
206
207
208
209
210
030-000625-SB
060-F00600-0B
008-T00408-0B
FAS-500015
000-P00408-W
050-C00400-3B
028-A00306-P
000-P00408
060-S00400
060-F00400
HEX BLT W/S BLK M6x25
FLT WSHR BLK M6
TMP PRF SCR TH BLK M4x8
CAP NUT BLK M6
M SCR PH W/FS M4x8
CAP NUT TYPE3 BLK M4
SET SCR HEX SKT CUP P M3x6
M SCR PH M4x8
SPR WSHR M4
FLT WSHR M4
301
HLT-60035
WH BRAKE MECHA
NOTE
20
PARTS LIST
(D-2/2)
139
140
203
4
5
1
SECTION B-B
A
A
3
1
16
1
202
2
Greasing
6
1
4
1
9
1
8
1
14
1
SECTION C-C
1
1
11
1
102
3
101
1
15
1
12
1
205
1
207
2
SECTION A-A
7
1
3. Apply grease to all gear parts.
2. Attach (11) using an adhesive (Konishi Bond G17).
1. Screw components must be coated with thread sealant.
NOTES:
204
1
Loosely tighten
201
2
13
1
B
C
C
B
2
1
20
204
1
206
2
204
4
PARTS LIST
10
1
17 ASSY THROTTLE (HLT-2600)
(D-1/2)
17 ASSY THROTTLE (HLT-2600)
ITEM NO.
PART NO.
DESCRIPTION
1
2
3
4
5
6
7
8
9
10
11
12
13
14
15
16
HLD-2601
HLD-2602
HLD-2603
HLD-2604
HLD-2605
HLD-2606
HLD-2607X
HLD-2608
HLD-2609
HLD-2610
HLT-2605
HLD-2612
HLD-2613X
HLD-2614
601-7944
HLT-2504
THROTTLE CASE LOWER
THROTTLE CASE UPPER
INNER GRIP
ACCEL GEAR
BASE PLATE
ACCEL GEAR SHAFT
ACCEL VR BRKT
SPRING HOOK
RETURN SPRING
VR COVER
GRIP R
SLIDE PLATE
SPRING STOPPER
GEAR SPRING
GEAR 15
PROTECT TUBE
101
102
220-5753
310-5029-F20
VOL CONT B-5K OHM (TOCOS)
SUMITUBE F F 20MM
201
202
203
204
205
206
207
030-000625-SB
060-F00600-0B
000-F00408
008-T00408-0B
000-P00408-W
012-P00306
028-A00306-P
HEX BLT W/S BLK M6x25
FLT WSHR BLK M6
M SCR FH M4x8
TMP PRF SCR TH BLK M4x8
M SCR PH W/FS M4x8
TAP SCR #2 PH 3x6
SET SCR HEX SKT CUP P M3x6
301
HLT-60036
WH THROTTLE
NOTE
20
PARTS LIST
(D-2/2)
141
142
5
2
10
1
Detail of (1) side
4
2
6
1
202
4
(2) side
201
3
Loosely tighten
11
1
2
1
8
1
7
1
101
1
101
1
203
1
203
1
Detail of (2) side
202
2
202
2
20
(1) side
3
1
PARTS LIST
1
1
9
1
202
2
18 ASSY SHIFT SWITCH (HLT-2700)
(D-1/2)
18 ASSY SHIFT SWITCH (HLT-2700)
ITEM NO.
PART NO.
DESCRIPTION
1
2
3
4
5
6
7
8
9
10
11
HLT-2701
HLT-2702
HLT-2703
HLT-2704X
HLT-2705
HLT-2706
HLT-2707
HLT-2708
HLT-2709X
HLT-2710
HLT-6001
SHIFT BASE A
SHIFT BASE B
SHIFT SHAFT
SHIFT SPRING
SHIFT SW
SHIFT SHAFT BRKT
SHIFT SENSOR BRKT A
SHIFT SENSOR BRKT B
SHIFT TUBE BRKT
STICKER SHIFT
ASSY WIRE TUBE SHIFT
101
370-5297
PHOTO INTERRUPTER GP1A75EJ000F
201
202
203
000-P00408-W
000-P00308-W
000-P00308
M SCR PH W/FS M4x8
M SCR PH W/FS M3x8
M SCR PH M3x8
NOTE
20
PARTS LIST
(D-2/2)
143
19 ASSY WIRE TUBE SHIFT (HLT-6001)
1
20
U
PARTS LIST
1
2
3
4
5
6
RE
BL
BK
RE
OR
BK
1
2
3
AMP CT3P
1
2
3
D
WH(SM)
CAP
AMP CT3P
NOTE 1: Insert a pin into the SM6P housing after passing it through the protective tube.
NOTE 2: Wires of the same color are interchangeable.
144
ITEM NO.
PART NO.
DESCRIPTION
1
HLT-2701
PROTECT TUBE
301
HLT-60037X
WH SHIFT SW
NOTE
20 ASSY WOOFER (HLT-3300)
1
1
201
2
2
1
ITEM NO.
PART NO.
DESCRIPTION
1
2
HLT-3301
HLT-3302
WOOFER BRKT L
WOOFER BRKT R
101
130-5218-01
SUB WOOFER 4OHM 40W YL
201
012-T00412
TAP SCR #2 TH 4x12
101
1
20
PARTS LIST
201
2
NOTE
145
21 ASSY ROLL VOLUME (HLT-3320)
1
1
20
PARTS LIST
146
101
1
102
3
2
1
201
2
ITEM NO.
PART NO.
DESCRIPTION
1
2
HLT-3321
601-7944
ROLL VOLUME BRKT
GEAR 15
101
102
220-5753
310-5029-F20
VOL CONT B-5K OHM (TOCOS)
SUMITUBE F F 20MM
201
028-A00306-P
SET SCR HEX SKT CUP P M3x6
301
HLT-60033
WH ROLL VOLUME
NOTE
22 ASSY SW PLATE (HLT-3350)
1
1
2
1
20
PARTS LIST
101
1
103
1
102
1
NOTE: Align (2) with the center of the relief hole when affixing it.
ITEM NO.
PART NO.
DESCRIPTION
1
2
HLT-3351
HLT-3352
TANK CENTER SW PLATE
STICKER CENTER SW
101
102
103
104
509-6222
509-6223
509-6224
601-0460
SW OBSA-60UM START HLT
SW OBSA-30UM MUSIC HLT
SW OBSA-30UM VIEW CHANGE HLT
PLASTIC TIE BELT 100 M/M
301
HLT-60038
WH SW PLATE
NOTE
147
23 ASSY STEP L (HLT-3400)
20
PARTS LIST
1
1
A
2
1
148
4
1
201
4
202
4
3
1
A
ITEM NO.
PART NO.
DESCRIPTION
1
2
3
4
HLT-3401
HLT-3402
HLT-3403
HLT-3404
STEP L
STEP ACRYL PLATE
STEP MAT
STEP BASE
201
202
050-U00400
060-F00400
U NUT M4
FLT WSHR M4
SECTION A-A
NOTE
201
8
202
8
24 ASSY STEP R (HLT-3420)
1
1
4
1
A
201
8
202
8
20
PARTS LIST
2
1
201
4
202
4
3
1
A
ITEM NO.
PART NO.
DESCRIPTION
1
2
3
4
HLT-3421
HLT-3402
HLT-3403
HLT-3404
STEP R
STEP ACRYL PLATE
STEP MAT
STEP BASE
201
202
050-U00400
060-F00400
U NUT M4
FLT WSHR M4
SECTION A-A
NOTE
149
5
150
±0.5
201
4
12
1
6
2
204
4
205
4
A
A
13
(Opposite side: )
1
7
4
202
3
206
2
208
6
2
1
11
1
9
1
207
2
203
3
10
1
201
2
1
1
201
6
SECTION A-A
8
1
5
1
20
±0.5
5
PARTS LIST
4
1
201
4
3
1
25 ASSY REAR FENDER (HLT-3500)
(D-1/2)
25 ASSY REAR FENDER (HLT-3500)
ITEM NO.
PART NO.
DESCRIPTION
1
2
3
4
5
6
7
8
9
10
11
12
13
HLT-3520
HLT-3530
HLT-3501
HLT-3502
HLT-3503
HLT-3504
250-5715-04
HLT-3505
HLT-3506
HLT-3507
HLT-3508
HLT-3509
HLT-3510
ASSY TAIL LAMP
ASSY NUMBER PLATE
FENDER BASE
REAR FENDER
NUMBER PLATE BASE
FENDER SIDE PLATE
SPCL WASHER M4 HLT
TIRE HOLDER
TIRE
TAIL LAMP COVER
TAIL LAMP OUTER COVER
STICKER TIRE SIDE L
STICKER TIRE SIDE R
101
280-5275-SR10
CORD CLAMP SR10
201
202
203
204
205
206
207
208
000-P00410-W
008-T00410-0B
068-441616-0B
FAS-290042
060-S00400
008-T00416-0C
068-441616-0C
000-P00612-W
M SCR PH W/FS M4x10
TMP PRF SCR TH BLK M4x10
FLT WSHR BLK 4.4-16x1.6
HEX SKT LH CAP SCR STN M4x12
SPR WSHR M4
TMP PRF SCR TH CRM M4x16
FLT WSHR CRM 4.4-16x1.6
M SCR PH W/FS M6x12
301
HLT-60042
WH REAR FENDER
NOTE
20
PARTS LIST
(D-2/2)
151
26 ASSY TAIL LAMP (HLT-3520)
101
1
20
PARTS LIST
152
201
2
ITEM NO.
PART NO.
DESCRIPTION
1
HLT-3521
TAIL LAMP CASE
101
102
838-14590
280-5275-SR10
LED BD RED 4EA
CORD CLAMP SR10
201
000-P00308-W
M SCR PH W/FS M3x8
301
HLT-60043
WH TAIL LAMP
1
1
NOTE
27 ASSY NUMBER PLATE (HLT-3530)
4
1
3
1
202
4
201
4
2
1
1
1
20
PARTS LIST
NOTE: Affix (4) to (2) from the inside.
ITEM NO.
PART NO.
DESCRIPTION
1
2
3
4
HLT-3531
HLT-3532
HLT-3533-P0
440-WS0354-EG
NUMBER PLATE HOLDER
NUMBER PLATE COVER
NUMBER PLATE P0
STICKER W TANDEM HLT ENG
201
202
031-000410-0B
050-C00400-3B
CRG BLT BLK M4x10
CAP NUT TYPE3 BLK M4
NOTE
153
28 ASSY TUBE (HLT-0400)
1
1
201
1
202
1
203
1
2
1
201
1
202
1
20
PARTS LIST
EARTH
102
1
154
EARTH
103
1
101
4
ITEM NO.
PART NO.
DESCRIPTION
1
2
HLT-0401
HLT-0402
TUBE LID F
TUBE LID R
101
102
103
310-5286-36
310-5285-360050
310-5285-360043
CONN 36
FLEX TUBE 36-0050CM
FLEX TUBE 36-0043CM
201
202
203
050-H00400
060-S00400
060-F00400
HEX NUT M4
SPR WSHR M4
FLT WSHR M4
301
302
303
304
305
306
HLT-60021
HLT-60022
HLT-60023
HLT-60024
HLT-60025
HLT-60046
WH JOINT01
WH JOINT02
WH JOINT03
WH JOINT04
WH JOINT05
WH E JOINT
NOTE
203
1
21 WIRE COLOR CODE TABLE
MEMO
The DC power wire color for this product is different from previous SEGA titles. Working
from the previous wire colors will create a high risk of fire.
The color codes for the wires used in the diagrams in the following chapter are as follows.
A
B
C
D
E
PINK
SKY BLUE
BROWN
PURPLE
LIGHT GREEN
Wires other than those of any of the above 5 single colors will be displayed by 2 alphanumeric characters.
1
2
3
4
5
7
8
9
RED
BLUE
YELLOW
GREEN
WHITE
ORANGE
BLACK
GRAY
If the right-hand side numeral of the code is 0, then the wire will be of a single color shown by the left-hand side
numeral (see the above).
Note 1:
If the right-hand side numeral is not 0, that particular wire has a spiral color code. The left-hand side
character shows the base color and the right-hand side one, the spiral color.
<Example> 51………WHITE/RED
RED
WHITE
Note 2:
The character following the wire color code indicates the size of the wire.
U: AWG16
K: AWG18
L: AWG20
None: AWG22
155
22 WIRING DIAGRAM
22
WIRING DIAGRAM
156
WIRING DIAGRAM
22
WIRING DIAGRAM
157
SEGA AMUSEMENTS OFFICES
SEGA AMUSEMENTS U.S.A., INC.
800 Arthur Avenue, Elk Grove Village, IL 60007-5215, U.S.A.
Telephone: +1-847-364-9787
Toll free:
+1-888-877-2669
Facsimile: +1-847-427-1065
SEGA AMUSEMENTS EUROPE, LTD.
42, Barwell Business Park, Leatherhead Road, Chessington, Surrey, KT9 2NY United Kingdom
Telephone: +44 (0) 208 391 8090
Facsimile: +44 (0) 208 391 8099
e-mail: [email protected]
http://www.sega-amusements.co.uk
SEGA CORPORATION
Nissay Aroma Building, 5-37-1, Kamata, Ohta-ku, Tokyo 144-8721, Japan
Telephone: +81-3-5480-6548
Facsimile: +81-3-5480-6584
1ST PRINTING
2009.MAR
- SEGA TOTAL SOLUTIONS 42 Barwell Business Park
Leatherhead Road,
Chessington,
Surrey,
KT9 2NY
United Kingdom
Tel: +44 (0) 208 391 8060
Fax: +44 (0) 208 391 8096
Exclusive Suppliers of SEGA Spares
To Heathrow Airport