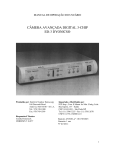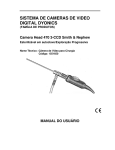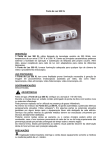
1
Operations/Service Manual
Smith & Nephew
640 Image
Management System
Smart Media
MMC & SD
Memo ry
Comp actFla
sh
Stick
Glossary of Symbols
Ethernet
Power On
Ethernet Port
Power Off
Microphone Input
Main Menu
Audio Output
Capture or Still Capture
Tally Light Output
Save Menu
Serial Port
Keyboard
Aux Video Input
Date of Manufacture
Headphone Input
UL Classification
Variability
Bidirectional Port
Eject
Non-ionizing Electromagnetic Radiation
Caution: See Instructions for Use
Parallel Port
Electrical Shock Hazard
Universal Serial Bus (USB) Port
Type B Equipment
Y/C Input
Fuse Rating
Still Freeze
Still Capture Loop Thru
Video Capture
Y/C Output
RGB Input
RGB Output
Video Graphics Array (VGA)
Disconnect Before Shipping
Smith & Nephew 640 Image Management System Operations/Service Manual 1061407 Rev. F
1
Table of Contents
Glossary of Symbols . . . . . . . . . . . . . . .1
Recording Video . . . . . . . . . . . . . . . . .24
Environmental Protection . . . . . . . . . . . . .43
Preface . . . . . . . . . . . . . . . . . . . . . . . . . .3
Reviewing Images and Video Clips . . .24
Service Philosophy . . . . . . . . . . . . . . . . .43
Indications for Use . . . . . . . . . . . . . . . .3
Adding Text Notes . . . . . . . . . . . . . . . .25
Troubleshooting . . . . . . . . . . . . . . . . .44
Contraindications . . . . . . . . . . . . . . . . .3
Save and Reports . . . . . . . . . . . . . . . . . .26
Ordering Information . . . . . . . . . . . . . .45
Product Description . . . . . . . . . . . . . . .3
Saving Procedures . . . . . . . . . . . . .26–27
Warnings and Precautions
Warnings . . . . . . . . . . . . . . . . . . . . . . . . . .4
Saving to Multiple CDs . . . . . . . . . . . .27
Frequently Asked Questions
(FAQS) . . . . . . . . . . . . . . . . . . . . . .46–47
Generating a Report/Printing . . . . . . .28
Warranty . . . . . . . . . . . . . . . .Back Cover
Precautions . . . . . . . . . . . . . . . . . . . . . .4–5
Auto Print . . . . . . . . . . . . . . . . . . . . . . .28
Introduction . . . . . . . . . . . . . . . . . . . . . .5
System Administration . . . . . . . . . . .29–30
Service Replacement
Program . . . . . . . . . . . . . . . . .Back Cover
HERMES-READY System Information . .5
Integration Broker Introduction . . . . . .30-31
System Components
Unpacking the Components . . . . . . . . . . .5
DORAWEB Related . . . . . . . . . . . . . . . .31
Component List . . . . . . . . . . . . . . . . . . . . .5
PACS Related . . . . . . . . . . . . . . . . . . . .31
…
HIS Related . . . . . . . . . . . . . . . . . . . . . .31
Front Panel . . . . . . . . . . . . . . . . . . . . . . . . .6
IMS Folder and Sub Folders . . . . . . . . .31
Rear Panel . . . . . . . . . . . . . . . . . . . . . . .7–8
DORAWEB System Integration . . . . . . . . .32
Keyboard . . . . . . . . . . . . . . . . . . . . . . . . . .9
Overview . . . . . . . . . . . . . . . . . . . . . . .32
Touchpad . . . . . . . . . . . . . . . . . . . . . . . . . .9
Configuring DORAWEB System
Integration . . . . . . . . . . . . . . . . . . . . . .32
System Installation
Overview . . . . . . . . . . . . . . . . . . . . . . . . . .10
Recommended System Configuration . . .11
Configuring the DICOM Send Utility . .33
Step A: Attaching Cables . . . . . . . . . . . . .12
Configuring the 640 Image
Management System . . . . . . . . . .34–35
Cable Configuration . . . . . . . . . . . . . . . . .13
Cleaning the Hard Disk . . . . . . . . . . . .36
Step B: Attaching HERMES Digital O.R.
Control Center . . . . . . . . . . . . . . . . . . .14
Advanced Topics . . . . . . . . . . . . . . . . . . .37
®
Step C: Attaching the
Windows ®-Compatible Printer . . . . . . .14
System Operation
Overview . . . . . . . . . . . . . . . . . . . . . . . . . .15
Network Connection . . . . . . . . . . . . . .15
Auto Login . . . . . . . . . . . . . . . . . . . . . .15
System Tools Login . . . . . . . . . . . . . . . .15
Notes on the DVD Drive
and Media . . . . . . . . . . . . . . . . . . . . . .37
Notes on the Multi-card
Drive and Media . . . . . . . . . . . . . . . . .37
Notes on the 640 Image
Management System . . . . . . . . . . . . . .37
Folders and Files on the 640
Image Management System . . . . . . . .37
Login Type . . . . . . . . . . . . . . . . . . . . . . .15
System Specifications . . . . . . . . . . . . .38
Basic Operation . . . . . . . . . . . . . . . . . . . .15
Guidance and Manufacturer’s
Declaration – Electromagnetic
Immunity . . . . . . . . . . . . . . . . . . . .39-40
Turning Power On . . . . . . . . . . . . . . . . .15
Using the 640 Image Management
System Screens . . . . . . . . . . . . . . .16–17
Using the Pointing Devices and
Function Keys . . . . . . . . . . . . . . . . .17–18
Using the Touchpad . . . . . . . . . . . . . . .18
Shutting the System Down . . . . . . . . .18
Guidance and Manufacturer’s
Declaration – Electromagnetic
Emissions . . . . . . . . . . . . . . . . . . . . . . .41
Guidance for Separation Distances . .42
Maintenance/Service
System and Keyboard:
Patients and Procedures . . . . . . . . . . . . .19
Cleaning the System . . . . . . . . . . . . . .43
Procedure States . . . . . . . . . . . . . . . . .20
Protecting the Keyboard . . . . . . . . . . .43
Adding a New Procedure . . . . . . . . . .20
Moving the 640 Image Management
System . . . . . . . . . . . . . . . . . . . . . . . . .43
Changing a Current Procedure . . . . . .21
Deleting a Procedure . . . . . . . . . . . . . .21
Images . . . . . . . . . . . . . . . . . . . . . . . . . .22
Setting Video Options . . . . . . . . . .22–23
Capturing Images . . . . . . . . . . . . . . . .23
Figures
1. Front Panel. . . . . . . . . . . . . . . . . . . . . . 6
2. Rear Panel . . . . . . . . . . . . . . . . . . . . . . 7
3. System Keyboard . . . . . . . . . . . . . . . . 9
4. Touchpad . . . . . . . . . . . . . . . . . . . . . . . 9
5. IEC 60601-1-1 System Configuration. . 11
6. USB Connection . . . . . . . . . . . . . . . . . 12
7. Cable Configuration . . . . . . . . . . . . . . 13
8. 640 System Login Dialog Box . . . . . . 15
9. 640 System Screen . . . . . . . . . . . . . . 16
10. Add New Procedure Box. . . . . . . . . . 20
11. Change Current Procedure Box . . . . . 21
12. Video Settings Dialog Box. . . . . . . . . 22
13. Note Dialog Box . . . . . . . . . . . . . . . . 25
14. Save Dialog Box. . . . . . . . . . . . . . . . . 26
15. Report Dialog Box . . . . . . . . . . . . . . . 28
16. System Tools Dialog Box. . . . . . . . . . 29
17. Integration Folder. . . . . . . . . . . . . . . . 30
18. DORAWEB System Dialog Box . . . . . 32
19. DICOM Send Utility Dialog Box . . . . . 33
20. DICOM Send Configuration
Dialog Box . . . . . . . . . . . . . . . . . . . . . 33
21. System Configuration Dialog Box Policies . . . . . . . . . . . . . . . . . . . . . . . 34
22. System Configuration Dialog Box Data Systems and Devices . . . . . . . . 35
23. Disk Maintenance Dialog Box. . . . . . 36
Tables
1.
Guidance and Manufacturer’s
Declaration - Electromagnetic
Immunity . . . . . . . . . . . . . . . . . . . 39–40
2. Guidance and Manufacturer’s
Declaration - Electromagnetic
Emissions . . . . . . . . . . . . . . . . . . . . . . 41
3. Guidance for Separation Distances . 42
Data Storage Media:
Caring For Removable Disks and CD
Media . . . . . . . . . . . . . . . . . . . . . . . . . .43
Preventative Maintenance:
Recommended Annual Performance
Checks . . . . . . . . . . . . . . . . . . . . . . . . .43
Electrical Interference . . . . . . . . . . . . . . .43
2
Smith & Nephew 640 Image Management System Operations/Service Manual 1061407 Rev. F
Preface/Indications for Use/Contraindications/
Product Description
Preface
This manual contains general information, together
with setup, operation, and maintenance instructions,
for the Smith & Nephew 640 Image Management
System. It is essential that all materials in this manual
be read and understood before any attempt is made
to operate or maintain the system.
Indications for Use
To capture intraoperative still and motion images.
Contraindications
None known.
Product Description
The 640 Image Management System is designed to
be used to capture intraoperative still and motion
images using the camera system, front panel,
keyboard, or using optional voice-activated or touch
panel control via the HERMES Digital O.R. Control
Center. Images are then stored as standard image file
formats on transportable media, or exported to an
Ethernet network for long-term archival, retrieval, or
printing using third-party image application software
or the Smith & Nephew DORAWEB™ Surgical
Documentation System.
Smith & Nephew 640 Image Management System Operations/Service Manual 1061407 Rev. F
3
Warnings and Precautions
To ensure maximum performance, safe operation, and full warranty protection of the Smith & Nephew 640 Image
Management System, please read and follow these warnings and cautions.
Precautions
Warnings
• To reduce the risk of electric shock, do not
remove the unit's cover or back panel. Refer
servicing to qualified service personnel.
• DANGER: Risk of explosion if used in the
presence of flammable anesthetics.
• If a power strip is used, ensure that it is not
placed on the floor.
• Prior to initiating system installation ensure
that there is no electrical power to any of the
system components.
• If this unit is configured as part of a system,
the entire system should be tested for
compliance with IEC 60601-1-1.
• If the leakage current of the configured system
exceeds the limits of IEC 60601-1-1, install an
appropriately rated UL 60601-1/IEC 60601-1
approved isolation transformer and retest the
system.
• The use of accessory equipment not complying
with the equivalent safety requirements of this
equipment may lead to a reduced level of
safety of the resulting system. Consideration
relating to the choice shall include:
Use of the accessory in the patient vicinity.
Evidence that the safety certification of the
accessory has been performed in accordance
with UL 60601-1/IEC 60601-1/IEC 60601-1-1
and/or CAN/CSA C22.2 No. 601.1.
• Check leakage currents when interconnecting
this unit with other equipment.
• Do not operate at line voltages other than
those stipulated on the back of the unit.
• Prior to cleaning the system turn off all power
to the system and disconnect it from the
power source.
U.S. Federal law restricts this device to sale by or
on the order of a physician.
• This 640 Image Management System does not
ship with virus scanning software installed. Before
operation, it is important to install virus scanning
software on the 640 Image Management System
if the 640 Image Management System is to be
networked or if the user will use non-blank or
reusable recording media such as flash media
or compact discs.
• The 640 Image Management System complies to
IEC 60601-1-2, however, the user must be aware
that this does not necessarily ensure protection of
the unit against interference from other devices.
• Electrical safety testing should be performed by a
biomedical engineer or other qualified person.
• This equipment is designed and tested to
minimize interference with other electrical
equipment. However, if interference occurs with
other equipment it may be corrected by one or
more of the following measures:
Reorient or relocate this equipment, the other
equipment, or both.
Increase the separation between the pieces
of equipment.
Connect the pieces of equipment into different
outlets or circuits.
Consult a biomedical engineer.
• Handle unit with care. If the unit is dropped
or damaged in any way, it must be returned
immediately to Smith & Nephew for service.
• Maintenance: At least annually, the electrical
safety conditions should be checked to ensure
compliance with IEC 60601-1.
• Do not unplug the system power cable or interrupt
the power source at any time while data is being
acquired. Images and video clips may be lost.
• Do not allow water or other fluids to enter the
multi-card reader or CD/DVD drives on the front
panel.
4
Smith & Nephew 640 Image Management System Operations/Service Manual 1061407 Rev. F
Precautions/Introduction/HERMES-Ready™ System Information/
System Components
• The CD/DVD drive unit should only be used with
blank CD-R and/or CD-RW 650 MB or 700 MB
disk media and blank DVD-R and/or DVD-RW
4.7 GB disk media.
• Do not unplug the system power cable or interrupt
the power source at any time while the data is
being written to the CD/DVD-R/CD/DVD-RW
media. Doing so will render the CD/DVD-R/
CD/DVD-RW disk unusable.
• This equipment contains electronic printed circuit
assemblies. At the end of the useful life of the
equipment it should be disposed of in accordance
with any applicable national or institutional related
policy relating to obsolete electronic equipment.
Introduction
The Smith & Nephew 640 Image Management
System enables the acquisition, review, export,
and printing of still images and video clips. A
basic patient record containing patient demographic
information and notes is also created directly on the
system. The patient record and all still images and
video clips can be stored on flash media, 650 MB or
700 MB CD media, 4.7 GB DVD media or exported to
an Ethernet network. Exported data can be viewed
using standard third-party software or the Smith &
Nephew DORAWEB™ Surgical Documentation System.
To obtain a copy of the Release Notes and “bug
fixes” for Version 2.0, please contact your authorized
Smith & Nephew Representative.
HERMES-Ready… System
Information
The 640 Image Management System is configured
to be connected to the HERMES Digital O.R. Control
Center via the HERMES port, which uses RS-232
serial communications protocol. When connected,
the system functions may be accessed by direct
voice commands or by manual use of a touch screen
control.
Center Operating and Maintenance Manual for the
proper setup, use, and troubleshooting of the device.
System Components
Unpacking the Components
Carefully unpack and inspect all of the components
shipped with the 640 Image Management System.
Compare components received with those shown
below.
Component List
You should have received the following:
Quantity Description
1
1
1
1
1
1
2
1
1
3
1
1
1
1
640 Image Management System
Keyboard (Installed)
650 MB or 700 MB CD-R
Compact Disk
4.7 GB DVD-R
Touchpad (Installed)
Power Cord, Hospital-Grade
Service Stickers
Cable, Y/C (S-Video), 6 ft, M to M
Cable, RGBS, 6 ft, M to M
Cable, 3.5 mm Mini-Plug
Cable, Mini-Plug/RCA Phono Plug
VGA Termination Plug
Tally Light Cable
Software Agreements
Windows ® License
If any parts are missing or damaged, please contact
your authorized Smith & Nephew sales
representative.
Save the carton and packing materials in the event
a component needs to be returned for repair.
For information about ordering additional supplies,
refer to the “Ordering Information” section.
It is recommended that the physician and support
personnel are thoroughly familiar with the setup and
operation of the HERMES Digital O.R. Control Center.
Please refer to the HERMES Digital O.R. Control
Smith & Nephew 640 Image Management System Operations/Service Manual 1061407 Rev. F
5
System Components
Front Panel
Figure 1. Smith & Nephew 640 Image Management System Front Panel
Power Switch: Activates power to the unit.
Multi-card Reader: Accepts the following media
types: Smart Media, Compact Flash, SD/MMC or
Memory Stick. LED flashes when media is inserted
and recognized. Storage capacity varies
depending on user preference and market
availability.
CD/DVD Drive: Accepts 650 MB or 700 MB
CD-R/RW or 4.7 GB DVD-R/RW media. Includes
a Headphone input (not used with this system),
Volume control (not used with this system), and
Eject button. The Eject button is used to open and
close the CD/DVD-RW tray.
AUX VIDEO INPUT: Accepts
any composite video signal
from an external source such
as a C-Arm or ultrasound
device.
MAIN MENU Button:
Displays 640 System screen
of the user interface on the
surgical display.
CAPTURE Button: Acquires
still image shown on the
screen.
SAVE MENU Button:
Displays the Procedure
Save dialog box of the
user interface on the
surgical display.
LED Display: Lights flash
to indicate activity.
AUX Button: Switches
between AUX and camera
input signals.
6
Smith & Nephew 640 Image Management System Operations/Service Manual 1061407 Rev. F
System Components
Rear Panel
Figure 2. Smith & Nephew 640 Image Management System Rear Panel
Safety and Regulatory Labels
Y/C Input: From camera
system's Y/C output.
Hospital Grade AC Input Receptacle
Y/C Output: Y/C output to
additional video components.
Removable Fuse Block
Fan:
Cools the system.
Keyboard Input: System
keyboard.
Keyboard
RGB Input: From
camera system's
RGB/SYNC output.
RGB Output:
RGB/SYNC signal
to additional video
components.
Bidirectional Port: Serial communication
connection to HERMES ® Digital O.R. Control
Center.
Ethernet: Ethernet network connection.
Smith & Nephew 640 Image Management System Operations/Service Manual 1061407 Rev. F
Still Capture: Accepts input
activated by camera head
button or optional footswitch.
Still Capture Loop Thru:
The Still Capture input port
is simultaneously routed as
an output signal to this port.
The Loop Thru port can be
connected to a video printer
so both the system and the
video printer can be operated
from the same camera head
button or the optional footswitch
control.
7
System Components
Rear Panel
Still Freeze: Accepts input
activated by camera head
button or optional footswitch
instructing system to freeze
presently displayed video
image. A second press
returns display to live video.
Video Capture: Accepts input
activated by camera head button
or optional footswitch instructing
system to start video acquisition.
A second press stops
acquisition.
Microphone: Audio input
from line level audio source.
Audio Out: Outputs line level
audio signal when playing back
captured video.
Tally Light: Outputs signal
instructing Tally Light to turn on
during video acquisition. Used
only with compatible surgical
displays.
8
Serial Port: Touch panel input
port.
Universal Serial Bus (USB) Port:
Bidirectional input/output port
for use with USB peripherals
such as printer and pointing
devices (touchpad, mouse, etc.)
Parallel Port: Bidirectional
parallel communication port
for use with local printers.
Video Graphics Array (VGA):
Outputs video graphics array
signal for use with optional
computer monitor/touch panel.
Disconnect Before Shipping:
Disconnect the keyboard and
touchpad cables and wrap
them securely with the Velcro ®
fastener before shipping the
system.
Smith & Nephew 640 Image Management System Operations/Service Manual 1061407 Rev. F
System Components
Keyboard
Display Mode
Figure 3. Smith & Nephew 640 Image Management System Keyboard
The keyboard and touchpad are located in the
bottom drawer of the 640 Image Management
System. The keyboard and cable are secured in
the drawer with a Velcro ® fastener. To minimize
drawer obstruction, rewrap the cable securely
with the Velcro fastener when storing.
General Keyboard Functions
Left and Right Arrows =
Move cursor on the selected
highlighted line entry.
Left
Button
Right
Button
Figure 4. Touchpad
Up and Down Arrows =
Move cursor between fields.
For information regarding function keys, refer to
the “Using the Pointing Devices and Function
Keys” section.
Smith & Nephew 640 Image Management System Operations/Service Manual 1061407 Rev. F
9
System Installation
Overview
The following pages summarize the steps required to
install and configure the Smith & Nephew 640 Image
Management System.
Each 640 Image Management System configuration
may vary depending on the camera system and
components used. Figure 5 indicates a system
configuration that complies with IEC 60601-1-1
requirements. Figure 7 indicates one example of
component configuration and interconnection.
Important: Prior to initiating system installation all
the Warnings and Cautions (reference Page 4) must
be thoroughly read and understood.
Caution: This 640 Image Management System does
not ship with virus scanning software installed.
Before operation, it is important to install virus
scanning software on the 640 Image Management
System if the 640 Image Management System is to
be networked or if the user will use non-blank or
reusable recording media such as compact discs,
DVDs or removable flash media.
10
Smith & Nephew 640 Image Management System Operations/Service Manual 1061407 Rev. F
System Installation
Recommended System Configuration
IEC 60601-1-1 Compliant
System Configuration
Figure 5 indicates a system configuration that complies with IEC 60601-11 requirements.
Warning: If this unit is configured as part of a system,
the entire system should be tested for compliance with
IEC 60601-1-1.
•
If the leakage current of the configured system exceeds
the limits of IEC 60601-1-1, install an appropriately rated
•
UL 2601-1/IEC 60601-1 approved isolation transformer and retest
the system.
The use of accessory equipment not complying with the equivalent
safety requirements of this equipment may lead to a reduced level
of safety of the resulting system. Consideration relating to the
choice shall include:
– Use of the accessory in the patient vicinity.
– Evidence that the safety certification of the accessory
has been performed in accordance with the appropriate
UL 2601-1/IEC 60601-1 and/or IEC 60601-1-1.
IEC 60601-1/UL 60601-1
MEDICAL GRADE ISOLATION TRANSFORMER
COLOR VIDEO MONITOR
WITH A VA RATING ≥ 1000
Toroid ISB-100W
Sony PVM-20M2MDU
REF 7206091
Note: Isolation Transformer required for
220/240 VAC setup only
or
DYONICS™ Vision 818
REF 7209067
AC Input
AC Input
AC Output
Wall Receptacle
COLOR VIDEO PRINTER
Sony UP-51MD
REF 7207801
or
MEDICAL GRADE POWER STRIP
Sony UP-51MDU
REF 7207812
SUITABLE FOR EXPECTED LOAD
SL Waber XULMC6-023
AC Input
AC Output
AC Input
SMITH & NEPHEW CAMERA CONTROL UNIT
DYONICS™ ED-3 Camera Control Unit
NTSC REF 7206063/PAL REF 7206065
LIQUID CRYSTAL DISPLAY TOUCH PANEL
or
Smith & Nephew 15" REF 7210344
National 15" 90M0312
Smith & Nephew 19" REF 7210345
National 19" 90M0225
DYONICS™ Vision 325Z Camera Control Unit
NTSC REF 7207445/PAL REF 7207446
or
AC Input
DYONICS™ HD 900 Camera Control Unit
NTSC REF 7206080/PAL REF 7207395
or
DYONICS™ Vision 325Z DV Camera Control Unit
NTSC REF 7209070
AC Input
SMITH & NEPHEW LIGHT SOURCE
DYONICS™ 300XL Xenon Light Source
REF 7206084
or
TriVex™ System 300XL Xenon Light Source
REF 7207449
AC Input
SMITH & NEPHEW 640 IMAGE
MANAGEMENT SYSTEM
REF 7210233
AC Input
HERMES® DIGITAL O.R. CONTROL CENTER
REF 7209756
Figure 5. IEC 60601-1-1 Compliant System Configuration
Smith & Nephew 640 Image Management System Operations/Service Manual 1061407 Rev. F
AC Input
11
System Installation
Step A: Attaching Cables
Use the following instructions to attach the system
to a Smith & Nephew camera (or similar device) and
other devices.
One standard configuration is presented in Figure 7.
This configuration enables still images and video
clips to be acquired using two camera head buttons.
Other configurations can be used.
1.
Connect RGB/SYNC and Y/C Output on
the back of the camera control unit to the
RGB/SYNC and Y/C Input on the rear of the
640 Image Management System.
Note: The 640 Image Management System can
capture still images from RGB/SYNC, Y/C, or
composite video input and it can only capture
video clips from Y/C or composite video input.
2. Connect two mini-plug cables from the SW1/SW2
or Blue/Gray Output on the back of the camera
control unit to the Still Capture and Video Capture
input ports on the back of the system. (The
optional footswitch can be used in lieu of the
camera head buttons.)
3. To print to a color video printer when a digital still
image is acquired, connect the video printer to
the Still Capture Loop Thru port using the third
mini-plug cable. Connect the RGB/SYNC and Y/C
outputs on the 640 Image Management System
to the RGB/SYNC and Y/C inputs on the printer.
Connect the RGB/SYNC and Y/C outputs on the
printer to the RGB/SYNC and Y/C inputs on the
monitor.
4. Connect the multi-pin, circular connector
attached to the keyboard, to the Keyboard
port on the back of the system.
5. Connect the touchpad to the bottom USB
port (port #2).
12
Figure 6. USB Connection
6. (Optional) Connect the Tally Light cable from the
Tally Light output on the system to the Remote 1
input on the back of the surgical display. This will
enable the Tally Light to illuminate while digital
video clips are being acquired.
7. Connect a network cable (optional) to the
Ethernet port using a standard RJ45 Cat 5
Ethernet cable.
Caution: This 640 Image Management System
does not ship with virus scanning software
installed. Before operation, it is important to
install virus scanning software on the 640
Image Management System if the 640 Image
Management System is to be networked or if the
user will use non-blank or reusable recording
media such as flash media, DVDs or compact
discs.
8. Connect the power cord to the rear of the
system.
Smith & Nephew 640 Image Management System Operations/Service Manual 1061407 Rev. F
System Installation
Cable Configuration
Figure 7. Standard Cable Configuration for Still Image and Video Clip Acquisition
Smith & Nephew 640 Image Management System Operations/Service Manual 1061407 Rev. F
13
System Installation
Step B: Attaching HERMES ® Digital
O.R. Control Center
Refer to Figure 7 and the HERMES Digital O.R. Control
Center Operating and Maintenance Manual for
operation and configuration of the HERMES Control
Center with the 640 Image Management System.
Step C: Attaching the Windows ®Compatible Printer
You can install and configure a standard Windowscompatible printer with the 640 Image Management
System in three different ways:
• Connected locally to the USB port.
• Connected locally to the LPT parallel port.
• Connected as a network printer.
Configure the printer via the System Tools dialog box.
14
Smith & Nephew 640 Image Management System Operations/Service Manual 1061407 Rev. F
System Operation
Overview
Network Connection
The Smith & Nephew 640 Image Management
System may be configured as part of a system
connected to an Ethernet network allowing exported
data to be viewed using Smith & Nephew’s
DORAWEB™ Surgical Documentation System, your
institution’s Picture Archiving Communication System
(PACS), or standard third party image viewing tools.
If your system is to be configured as part of a
network you should review System Administration
section, DORAWEB System, Integration Broker
Introduction, and System Configuration.
If your installation is not configured as part of a
network you should disregard all references to
DORAWEB or PACS or Integration Broker functionality
in the following section.
Auto Login
The 640 Image Management System comes from the
factory configured to Auto Login when the system is
powered up. If required the system may be
configured to require a System Login (Figure 8) at
power up, review System Administration section
System Configuration on page 28 and Configuring
the 640 Image Management System on page 32.
System Tools Login
The Smith & Nephew 640 Image Management
System will always require an Administrator Login
(Figure 8) to access the System Tools dialog box,
review System Administration on page 28.
Login Type
The login type may be configured as “Simple”
requiring only a password to be entered in the Login
Boxes (User Name and Domain lines will be grayed
out [Figure 8]) or as “Windows” requiring all three
lines of information.
The 640 Image Management System comes from the
factory with the Login Type set as “Simple” and the
simple password as “SNE640”.
Caution: If the Windows ® Login is required the system
administrator must confirm that the appropriate
accounts and policies are set up using standard
Windows System Tools. See Release notes for details
on restrictions to using Windows 2000 Login Type.
Basic Operation
Turning Power On
To turn on the power:
1.
Press the POWER switch on the front panel
to ON.
Initialization begins and the surgical display
displays the “Please Stand By” message.
2. After initialization is complete, the 640 System
screen displays either on the surgical display or
on the computer monitor/touch panel, if one is
installed and configured on your system.
Figure 8. 640 System Login Dialog Box
The system administrator can also configure the
640 System Login to verify multiple user accounts.
Smith & Nephew 640 Image Management System Operations/Service Manual 1061407 Rev. F
15
System Operation
Using the 640 Image Management
System Screens
The left side of the 640 System screen contains:
•
•
•
•
Procedure Information describing the current
procedure by the patient’s full name, Medical
Record Number (MRN), date of birth, sex,
surgeon’s name, and procedure type.
Buttons provide access to additional dialog
screens for Patient Information, Note Creation,
Save Functions, Report Print, and Close
Procedure Functions.
Note: The Close Procedure button should be
used with caution. This operation will close the
current procedure. Once closed, features such
as image capture will not be functional.
Display Mode controls the output to the Surgical
Display. Live Video mode displays the live video
signal from the Camera Control Unit (CCU) on the
surgical display.
Main Menu Mode displays the 640 Image
Management System Screen on the
surgical display.
•
•
•
•
•
•
Capture Controls are provided to preview and
capture still video images and to capture and
play back video clips.
The Disk Usage Progress Bar display the amount
of space used by the currently stored images. It
may be configured to display the usage of a
CD/DVD or flash media. It may also be
configured to display the usage of the system’s
Hard Disk. Each increment on the bar is equal to
5% of total disk space.
The progress bar will come configured to indicate
CD/DVD usage. To reconfigure the bar refer to
the “Configuring the 640 Image Management
System” section.
The System Tools button provides the system
administrator password protected access to a
System Tools dialog for system configuration.
Refer to the “System Administration” section.
The Video Settings button provides the user
access to Video Input Option, Capture File
Option, and Surgical Display Option settings.
Refer to the “Setting Video Options” section.
The Shut Down button initiates a controlled
system shut down. Refer to the “Shutting the
System Down” section.
Figure 9. 640 System Screen
16
Smith & Nephew 640 Image Management System Operations/Service Manual 1061407 Rev. F
System Operation
•
•
•
•
•
•
At the top of the right side of the 640 System
Main Screen is the Review Box. The last image
captured will automatically be displayed in the
Review Box.
Below the review box is the Thumbnail Display
Box where all available images and video clips for
the current procedure are listed. Still images are
displayed as thumbnails (small versions), video
clips are indicated by the
icon. They are listed
in time order, with the newest at the end of the
list, and are each labeled with a capture time
stamp in the form “HHMMSS” where “HH” is the
hour, “MM” is the minute, and “SS” is the
second. The file extension (the characters after
the period) indicates the file type: BITMAP (.bmp),
JPEG (.jpg), or MPEG (.mpg).
The name of the captured still image or video clip
is editable by placing the cursor on the name,
left-clicking the touch pad pointing device once,
pausing and clicking again. The name may then
be changed. The file extension; however, should
not be changed.
Any previously captured still images may be
displayed in the review box by clicking on it’s
thumbnail to select and display it. A video clip
may be reviewed by clicking on the
icon and
pressing the Playback button. Refer to the
“Reviewing Images and Video Clips” section.
The Print button allows the user to print the
currently selected still image. All the images
available for the current procedure may be
printed in one report by accessing the Report
dialog. Refer to the “Generating a Report”
section.
The Delete button allows individual or multiple
selected images and video clips to be deleted by
the user. For additional information regarding
deleting multiple images refer to the “Cleaning
the Hard Disk” section.
Using the Pointing Devices
and Function Keys
There are two ways to navigate or move through the
system screens:
•
Click a button using your touchpad pointing
device. Refer to the “Using the Touchpad”
section. If the system has been configured with
the optional VGA touch panel, buttons may be
activated by touching them directly on the
screen.
•
Press the equivalent function key for a button –
for example, press <F12> instead of clicking the
Save button.
Note: The instructions in this manual describe using
the first technique, clicking buttons, but you can use
the navigation technique that you find most
convenient.
All of the function keys are defined as follows:
<ESC> Toggle Video Mode (equivalent to the
Display Mode: Live Video/Main Menu
button on the 640 System screen).
<F1>
Reserved for future use.
<F2>
Display the 640 System screen with the
most recently captured image on the surgical
monitor (equivalent to the Display Mode:
Main Menu button on the 640 System
screen).
<F3>
Preview captured image (equivalent to the
Preview button on the 640 System screen).
<F4>
Capture the still image currently displayed
on the video monitor (equivalent to the
Capture
button on the 640
System screen).
<F5>
Start or stop recording a video clip
(equivalent to the Record
and
Stop
buttons on the 640 System
screen).
Turn on the screen display of image
sequence numbers (equivalent to the
On-Screen Display: On radio button
in the Video Settings dialog box).
<F6>
<F7>
Turn off the screen display of image
sequence numbers (equivalent to the
On-Screen Display: Off radio button
in the Video Settings dialog box).
<F8>
Set the video input to RGB (equivalent to the
Input: RGB radio button in the Video
Settings dialog box).
<F9>
Set the video input to S-Video (equivalent to
the Input: S-Video radio button in the Video
Settings dialog box).
<F10> Equivalent to the OK button.
Smith & Nephew 640 Image Management System Operations/Service Manual 1061407 Rev. F
17
System Operation
<F11>
Play the most recently recorded video clip
(equivalent to the Playback
and
Stop
buttons on the 640 System
screen).
<F12> Open the Save Dialog (equivalent to the
Save button on the 640 System screen).
In addition, you can use the up and down arrow keys
and the left and right arrow keys to move through the
text fields and lists in the dialog boxes, making each
successive one active. The Enter button may also be
used to move through the text fields.
Using the Touchpad
The touchpad is an easy way to control your
computer screen. Simply glide your finger over the
surface of the touchpad to move the cursor on the
screen.
Shutting the System Down
To shut down the Smith & Nephew 640 Image
Management System:
1.
On the 640 System screen, click Shut Down. A
dialog box will first appear to confirm or cancel
shutdown.
2. If you confirm shutdown and a procedure is
current, you are prompted to close the
procedure. If you decide to not close the
procedure, the procedure will remain current
when the system is started up again.
3. Important: Wait for the system to prompt the
operator that it is now safe to turn off the system.
4. Turn the POWER switch on the front panel of the
640 Image Management System to OFF.
To click a button on the screen, glide your finger to
move the screen cursor over the desired button and
then gently tap your finger. You can also use the
buttons on the bottom of the touchpad to left- or
right-click. To double-click, click the left button twice
or click the right button once.
To scroll, place your finger down on the right
edge of the touchpad and glide up or down.
Note: The touchpad responds best to a very
light, crisp tap of the finger.
18
Smith & Nephew 640 Image Management System Operations/Service Manual 1061407 Rev. F
System Operation
Patients and Procedures
The following describes the information stored in the
system about each procedure:
Last Name:
The patient’s last name (a maximum
of 26 characters for the entire name).
First Name:
The patient’s first name (a maximum
of 26 characters for the entire name).
M. Initial:
The patient’s middle initial
(one character maximum).
DOB:
The patient’s date of birth
(mm/dd/yyyy).
Sex:
The patient’s sex (F or M).
MRN:
The patient’s Medical Record
Number (a maximum of 26
characters).
Surgeon:
The surgeon’s name (a maximum
of 26 characters).
Procedure:
Indicates Type of procedure being
performed. May be input manually
or selected from the Procedure Type
pull down list that will be available if
the Smith & Nephew 640 Image
Management System is networked
as part of a DORAWEB™ Surgical
Documentation System, PACS or a
Hospital Information System (HIS).
Procedure ID:
Visible only when Show Procedure
ID is checked.
For non-DORAWEB™ users the MRN field is a required
field.
Note: Users who do not use the DORAWEB System
may skip the following.
For DORAWEB users the following fields are required
fields:
Last Name
First Name
MRN
Surgeon
Procedure
In earlier versions of the 640 System software this
information was available to the 640 System via the
Update List function in the Patient module. Users can
continue to use this option; however, they can also
enter patient information in the 640 System and then
transfer the information to the DORAWEB System
when the procedure is completed. The DORAWEB
software requires the above five fields to process the
information, therefore, they are required fields in the
640 software for DORAWEB users. Users who intend
to enter patient information for DORAWEB in the 640
System for the first time are required to check the
DORAWEB/Network check box in the Save module
(Figure 14). This action will put an * next to all the
required fields.
The default screen does not show the Procedure ID.
Users who want to enter a Procedure ID manually can
do so. First, the user must click on Data Systems
and Devices in “System Configuration”. The Show
Procedure ID box needs to be checked (Figure 22).
On the Main Menu there will now be an additional
field called Procedure ID.
Smith & Nephew 640 Image Management System Operations/Service Manual 1061407 Rev. F
19
System Operation
Procedure States
Each procedure will be in one of three states at any
given time:
•
Queued – The procedure has been scheduled
and appears in the Procedure List, but does not
yet have any acquired images or video clips.
• Current – There is only one current procedure the procedure that is currently being displayed
on the 640 System screen.
• In Process – The procedure has at least one
acquired image or video clip.
When you create a new procedure, it begins in the
queued state and displays in the Procedure List.
When a procedure is selected from the list it is
marked as “Current” and remains current until a new
procedure is selected from the list. The original
procedure is then marked “In Process” and remains
available through the Save and Report functions.
Refer to the “Save and Reports” section.
Adding a New Procedure
To add a new procedure:
1.
2. If using DORAWEB/PACS/HIS, click Update List.
The system will acquire the most recent schedule
of procedures from these systems. Users who
want to transfer procedure information to the
DORAWEB System after "first" entering it at the
640 System must have the DORAWEB/Network
check box selected in the Save module. This
action will cause the procedure information to
show up with five required fields, making it
compatible to transfer to the DORAWEB System
later.
3. Select the first entry. The Procedure Information
fields display the blank data fields.
4. Click on a field and enter information. Use
the ‰ and the ¬ arrows or the enter button, on
the keyboard or the touchpad to move from field
to field.
5. To enter the Procedure Type, select a procedure
type from the drop-down list or click within the
Procedure field’s text area and then type in the
new information.
6. Click Save to save the new information or click
Cancel to not add the new procedure.
7. Click OK to close the dialog box.
On the 640 System screen, click Patient. The
Patient dialog box displays. In the Procedure
List, the first entry is labeled <Add new
procedure> (Figure 10). If you are not using
DORAWEB/PACS/HIS, proceed to Step 3.
Figure 10. Add New Procedure Box
20
Smith & Nephew 640 Image Management System Operations/Service Manual 1061407 Rev. F
System Operation
Changing a Procedure
When a procedure is current or in process (at least
one image or video clip has been acquired) stored
information regarding the procedure cannot be
changed.
To change the stored information for a queued or
current procedure (not allowed for procedure in
process):
1.
2.
3.
4.
5.
On the 640 System screen, click Patient. The
Patient dialog box displays. If you are not using
DORAWEB™/PACS/HIS, proceed to Step 3.
If using DORAWEB/PACS/HIS, click Update List.
The system will acquire the most recent schedule
of procedures from these systems.
In the Procedure List, click the entry for the
patient whose procedure you want to change. If
there is more than one procedure scheduled for
this patient, there will be multiple entries in the
list. The Procedure Information fields display the
stored data.
Click Edit to change the data.
To change the type of Procedure, select a
different procedure type from the Procedure
Type drop-down list or click within the
Procedure field’s text area and then type in the
new information. To change any of the other
fields, click within the field’s text area and then
type in the new information.
6. Click Save to save the new information or click
Cancel to leave the stored data unchanged.
7. Click OK to close the dialog box.
Deleting a Procedure
To delete a procedure:
1.
2.
3.
4.
5.
On the 640 System screen, click Patient. The
Patient dialog box displays. If you are not using
DORAWEB/PACS/HIS, proceed to Step 3.
If you are using DORAWEB/PACS/HIS, click
Update List. The system acquires the most
recent schedule of procedures from the
DORAWEB System.
In the Procedure List, click the entry for the
patient whose procedure you want to delete.
If there is more than one procedure scheduled
for this patient there will be multiple entries in
the list.
The Procedure Information fields display the
stored data.
Click Delete to delete the procedure.
Note: Once you delete a procedure, it can be
recovered by reloading the procedure list via the
DORAWEB/PACS/HIS Systems using the Update
List button.
Click OK to close the dialog box.
Figure 11. Change Current Procedure Box
Smith & Nephew 640 Image Management System Operations/Service Manual 1061407 Rev. F
21
System Operation
Images
•
Setting Video Options
To set the video options:
1.
On the 640 System screen, click Video Settings.
The Video Settings dialog box displays, with
areas for video options, capture file options, and
surgical display options.
2. Set the type of video input. You can choose one
type of input from RGB, S-Video, and Auxiliary.
If any of these types are not available on your
installation, they are grayed out so you cannot
select them.
Note: Video clips can only be recorded using the
S-Video or composite video (front panel) input
channel.
3. By default all still images are captured in Bitmap
(.bmp) format. Bitmap files are uncompressed
files that are approximately 1 MB in size.
You can set additional image capture file options:
•
If DICOM is enabled and selected on the 640
System screen you will also capture images in
a DICOM-compatible (.dcm) format.
•
•
If JPEG is enabled and selected on the 640
System screen you will also capture images
in JPEG (.jpg) format. You can set the quality
to Standard (higher compression of 20:1,
with an average file size of 50 KB) or High (lower
compression of 10.5:1, with an average file size of
85 KB).
Note: The DORAWEB™ System imports Bitmap,
JPEG, and DICOM still images and video clips.
When capturing images for export to the
DORAWEB System, JPEG is the recommended
format to allow image annotation.
For video clips select MPEG1 or MPEG2 (.mpg)
format. MPEG1 generates half the video
resolution with smaller file sizes. MPEG2
generates full video resolution with larger file
sizes.
To help ensure that all information acquired for
a given patient fits onto the target medium
(including flash and CD), set the maximum
MPEG File size to 100 MB, 200 MB, or 600 MB.
This will automatically break long video clips into
smaller, more manageable file sizes. You can
capture data up to a maximum of 2 GB total per
procedure, which is stored on the 640 internal
hard disk.
Figure 12. Video Settings Dialog Box
22
Smith & Nephew 640 Image Management System Operations/Service Manual 1061407 Rev. F
System Operation
•
The Smith & Nephew proprietary Motion
Correction Filter for analog video can be turned
on or off. The filter reduces blurring artifacts in
acquired images. This is a post-processing filter
that runs for approximately three seconds per
image.
Note: When acquiring images from devices such
as C-arms or ultrasound units, the recommended
setting is off.
4. Set the surgical display options:
• Turn the On-Screen Display of image
sequence numbers on, off, or set to
momentary (three second display).
• Turn the display of captured images off or
set to momentary (the live video is replaced
by the captured image for three seconds).
• Set the playback of video clips on the surgical
display to Yes or No.
5. Click OK to save the video settings and close
the dialog box.
Capturing Images
In Live Video Mode images from the camera control
unit are displayed on the surgical display. If the onscreen display is turned to on or momentary, the
sequence number in the lower left corner of the
screen indicates the number of still images and video
clips that have been acquired. The letters in the lower
left corner of the screen indicate the video input
(RGB, Y/C or AUX).
Still images are initially configured in Bitmap format.
To capture images in JPEG and/or DICOM format,
click the associated checkboxes on the 640 System
screen.
To capture images for the current procedure:
1.
If you want to first freeze the live video, click the
Preview button on the 640 System screen. Note
that this is not necessary. Click Capture and
Close or Cancel to return to live video.
2. On the 640 System screen, click Capture
. The image currently displayed on
the surgical display is acquired. During image
acquisition, the video image will freeze
momentarily and the CAPTURE light on the front
panel will illuminate indicating that the still image
was acquired successfully. After the capture, the
image will display in the review area on the 640
System screen and will have its thumbnail added
to the end of the list, identified by the capture
time stamp.
Note: The CAPTURE button will be grayed out if
there is no current procedure or if the system
does not detect a video input signal.
Note: You can also acquire images using the
CAPTURE button on the 640 Image Management
System’s front panel, the optional footswitch
connected to the Still Capture input port on the
rear panel, or the camera head buttons if they are
configured appropriately. For more information, refer
to the “System Components” section.
Note: The 640 System may occasionally miss a
camera button click when the camera button (or foot
pedal) is pushed in rapid succession and the 640
System is performing a large number of tasks
simultaneously (i.e., multi-tasking). These tasks
include video recording, momentary display of
captured image, motion correction filtering, and
auto printing. Under these circumstances, a
camera button click may not register in the 640
software. Image capture responsivity can be
improved by reducing the number of background
tasks that are concurrently performed and increasing
the time between image captures.
To confirm a successful image capture, the user may
also enable the on-screen display (OSD) option found
in the Video Setting dialog. With this option activated,
an image counter will appear in the lower left-hand
corner of the surgical display and will increment when
an image or video is successfully captured.
To acquire still images and print them simultaneously
on a video printer, connect the camera head button
or the optional footswitch to the Still Capture Loop
Thru input port on the 640 Image Management
System’s rear panel and acquire the image as
described above.
Still images are saved on the internal hard disk in
order to minimize the chance of data loss if power is
interrupted. To save images to other media, refer to
the “Save and Reports” section.
Caution: Do not unplug the system power cable or
interrupt the power source at any time while data is
being acquired. Images and video clips may be lost.
Smith & Nephew 640 Image Management System Operations/Service Manual 1061407 Rev. F
23
System Operation
Recording Video
Reviewing Images and Video Clips
Video clips are recorded in MPEG1 or MPEG2 format
depending on the video options settings. Refer to the
“Setting Video Options” section for more information.
To view the most recently acquired still image:
To record a video clip for the current procedure:
1.
On the 640 System screen, click Record
. During recording, the Stop button will
turn red indicating that recording is in progress.
In addition, the CAPTURE light on the front panel
will illuminate and the Tally Light on the surgical
display will also illuminate if the Tally Light cable
is connected.
Note: The Record button will be grayed out if
there is no current procedure or if the system
does not detect a video input signal.
Note: If a video clip becomes as large as the
maximum MPEG size set on the video settings
dialog box, the system stops recording the video
clip and begins a new one.
2. To stop the recording, on the 640 System screen
click Stop
.
If the on-screen display is turned to on or
momentary, the total number of acquired video clips
and still images is displayed in the lower left corner
of the screen. After the recording, the video clip will
be listed as an MPEG icon at the end of the list,
identified by the capture time stamp.
Note: You can also record video clips using the
optional footswitch or the camera head buttons
if they are configured appropriately. For more
information, refer to the “System Components”
section.
1.
On the 640 System screen, click the Main Menu
button. The last still image captured displays in
the review area on the 640 System screen.
2. To return to live video, click the Live Video
button.
To play the most recently recorded video clip:
1.
On the 640 System screen, click Playback
. The video clip will play on the full
screen of the 640 System display and the
surgical display if selected. It plays to the end
unless you press any key on the keyboard.
To view any acquired still image or video clip:
1.
2.
3.
4.
5.
On the lower right side of the 640 System
screen, locate the thumbnail of the desired still
image or the MPEG icon of the desired video clip.
To view the desired still image in the review area,
click it.
To play a desired video clip, click on its’ icon. On
the 640 System screen, click Playback
.
The video clip will play on the full screen of the
640 System display and the surgical display if
selected. It plays to the end unless you press any
key on the keyboard.
To print the displayed image, click Print.
To delete the displayed image or video clip from
the procedure, click Delete.
Note: Once you delete an image or video clip, it
cannot be recovered.
Video clips are saved on the internal hard disk in
order to minimize the chance of data loss if power is
interrupted. To save video clips to other media, refer
to the “Save and Reports” section.
Caution: Do not unplug the system power cable or
interrupt the power source at any time while data is
being acquired. Images and video clips may be lost.
If a microphone is connected to the 640 rear panel
microphone audio input, audio can be recorded on
to the MPEG file while video recording is enabled.
24
Smith & Nephew 640 Image Management System Operations/Service Manual 1061407 Rev. F
System Operation
Adding Text Notes
You can add text notes to the current procedure at
any time.
To add text notes for the current procedure:
1.
On the 640 System screen, click Note. The Note
dialog box displays.
2. Type your free-format text into the text box.
3. If you want to delete all of your text, click Clear to
clear the text box and begin again.
4. Click OK to save the note or click Cancel to not
save the note. In both cases, the dialog box
closes.
Figure 13. Note Dialog Box
Smith & Nephew 640 Image Management System Operations/Service Manual 1061407 Rev. F
25
System Operation
Save and Reports
Saving Procedures
You can save the current procedure or all procedures
by copying the procedure data to the flash or
CD/DVD removable media. At the same time you can
also transfer the procedure data to the DORAWEB™
System and/or your installation’s PACS or HIS.
Note: The Save does not automatically delete the
procedure data from the 640 Image Management
System.
Note: Before saving procedure data to the
DORAWEB/PACS/HIS System, make sure that your
system administrator has configured the DORAWEB/
PACS/HIS System integration. For more information,
refer to Integration Broker and the “IMS folder and
sub-folders”, and “Configuring DORAWEB System/
Integration” section.
To save the current selected, or all procedures:
1.
On the 640 System screen, click Save. The Save
dialog box displays.
2. Choose one, two, three, or four destinations for
the procedure or procedures from among Media,
the DORAWEB/Network System, your
installation’s PACS or HIS system. If you select
media, you have a choice between the CD/DVD
and the flash media. If any of these destinations
except CD/DVD is not currently available, it will
be grayed out so you cannot select it.
Note: When saving to CD/DVD, the drive must
contain an empty CD/DVD-R or CD/DVD-RW
disk. If one is not present, the system reminds
you to insert one in the drive after it has
attempted to initialize the disk.
Note: When saving to flash media, the
information can be appended to previously
existing procedure information provided there is
enough storage capacity available on the media.
If there is not enough storage capacity, the
Zip/Flash radio button will be grayed out. It will
also be grayed out if the appropriate flash media
is not present.
3. Choose one, two, or three types of data to be
included for each procedure. You can choose
among Pictures (images), Notes, and Video
Clips.
Figure 14. Save Dialog Box
26
Smith & Nephew 640 Image Management System Operations/Service Manual 1061407 Rev. F
System Operation
4. Choose Current procedure, All procedures,
(including current and in process procedures), or
Selected procedures. When Selected is chosen
the checkboxes for the appropriate procedures
should be checked to indicate which procedures
are being saved. Total Archive Size indicates the
size, in megabytes, of the procedure(s) being
saved.
5. Click Start Save. The progress bar indicates
how much of the save has been completed
in 5% increments.
To delete files, refer to the “Cleaning the Hard
Disk” section.
For more information about folders and files,
refer to the “Folders and Files on the 640 Image
Management” section.
When saving to a network folder location you can
save all data providing you have sufficient
network folder memory.
For more information regarding CD/DVD and flash
media, refer to the “Advanced Topics” section.
Saving to Multiple CDs
The 640 software supports saving to multiple
CD/DVDs. If a Save operation requires more data
than a single CD can store, the software will allow the
recording to continue on multiple CDs.
When one CD's data has been stored the drive will
be ejected and the user will be prompted to insert a
new C. A new CD should be inserted and the OK
button should be pressed to continue. The software
will then continue writing to the subsequent CD until
all data is written.
Note: If the total data to be saved is less than
600 MB it is recommended that it be saved to a CD.
Smith & Nephew 640 Image Management System Operations/Service Manual 1061407 Rev. F
27
System Operation
Generating a Report/Printing
To generate a report for the current, selected, or all
procedures:
1.
2.
3.
4.
5.
On the 640 System screen, click Report. The
Report dialog box displays.
Choose one or two types of data to be included
in the report. You can choose among Pictures
(images) and Notes. If you selected Notes, they
will print on a separate page once the pictures
have printed.
Choose Current procedure, All procedures
(including current and in-process procedures, or
Selected procedures). When Selected is chosen
the checkboxes for the appropriate procedures
should be checked to indicate which reports are
to be generated.
Choose an image layout for the report:
• 1x1 – one image per page (the default)
• 1x2 – two rows of one image per page
(two images per page)
• 2x3 – three rows of two images per page
(six images per page)
• 3x5 – five rows of three images per page
(fifteen images per page)
To print the report, click Print. If the print button
is grayed out, the printer is not available for
printing (e.g., turned off or disconnected).
6. The Cancel Printing button allows the user to
cancel printing in process. This button is
activated only after the Print button has been
depressed and printing is in process.
7. Print Copies list bar allows the user to select the
number of copies to print.
8. Click OK to close the Report dialog box.
Auto Print
The Auto Print function checkbox selection tells the
640 System if the user wants to print a page of
images in the selected layout immediately after
enough images have been captured to fill a page.
As an example, if the 2x3 format is selected and the
Auto Print checkbox is checked, the 640 System will
print out a single page of images when six images
have been captured. It will print another single page
when six more images have been captured. The
Print button will be disabled when Auto Print is
checked. It can be enabled by unchecking Auto
Print.
In the Report dialog, the Procedure Selected and All
radio button selections will be grayed out when the
Auto Print checkbox is checked, since these
procedure buttons are not relevant for auto printing;
if the auto print box is unchecked then all three
Procedure radio buttons are activated.
Figure 15. Report Dialog Box
28
Smith & Nephew 640 Image Management System Operations/Service Manual 1061407 Rev. F
System Operation
System Administration
As the system administrator, you can configure the
640 Image Management System for your particular
installation via the System Tools dialog box. Display
the dialog box by clicking System Tools on the 640
System screen and enter password “SNE640” which
may be changed by the system administrator (refer to
Figure 8). Access to the System Tools option should
be limited to users proficient in Windows 2000
Operating System configuration and authorized to
network computer systems.
System administration includes the following
Windows configuration tasks:
•
System Management Tools – displays the
Windows Computer Management dialog box so
that you can manage the user accounts and disk
drives.
•
•
•
•
Network Connections – displays the Windows
Network and Dial-up Connections dialog box so
that you can manage your network connections.
International – displays the Windows Regional
Options dialog box so that you can set regional
options including numbers, currency, time, and
date. To change the language used by the 640
System, select from the list of languages in the
Menus and Dialogs drop-down list box and
restart the system.
Date and Time – displays the Windows
Date/Time Properties dialog box so that
you can set the date and time as necessary.
Printers – displays the Windows Printer dialog
box so that you can configure and manage the
local and network printers.
Figure 16. System Tools Dialog Box
Smith & Nephew 640 Image Management System Operations/Service Manual 1061407 Rev. F
29
System Operation
The following system administration tasks are specific
to the 640 Image Management System:
•
•
•
•
DORAWEB™/PACS/HIS System – enables you to
configure the connection with the DORAWEB
and PACS/HIS System. Refer to the “Configuring
DORAWEB System Integration” section.
System Configuration – displays the 640 System
configuration for editing. Refer to the “Configuring
the 640 Image Management System” section.
Disk Maintenance – enables you to remove files
from the hard disk to increase storage space.
Refer to the “Cleaning the Hard Disk” section.
About 640 System – to display the version
number of the 640 Image Management System,
click the About 640 System button. This will
display the current system version and
associated software version numbers. To close
the About 640 System dialog, simply click OK.
Integration Broker Introduction
All users who do not use DORAWEB, PACS or HIS to
interface to the 640 System may skip this section.
The Integration Broker is the software component
responsible for communication between the Smith &
Nephew 640 Image Management System, the Smith
& Nephew DORAWEB Surgical Documentation
System, PACS and HIS. The Integration Broker can
be installed on a DORAWEB server or on a hospital
server. An integration folder with the share name IMS
is automatically created on this shared drive during
the installation. The following sub-folders are also
automatically created:
DORA
PACS
HIS
In addition to the IMS folder, there are also the PACS
and HIS folders. These folders are mapped to the
PACS or HIS system that is being used and may
reside on a different server. The Integration Broker
therefore transfers information between different
folders on shared drives. Figure 17 shows how the
Integration Broker software handles the transfer of
information across different systems.
Figure 17. Integration Folder
30
Smith & Nephew 640 Image Management System Operations/Service Manual 1061407 Rev. F
System Operation
The Integration Broker performs the following
functions:
DORAWEB™ Related
•
•
•
•
Once daily at a configured time, transfers all the
patient demographics for the day's scheduled
procedures from DORAWEB to the IMS\DORA
folder. These procedures will be listed in the
Procedure List in the 640 Image Management
System. In addition, the previous day’s data is
deleted from this folder.
Once daily, transfers the current Procedure List
from DORAWEB to the IMS\DORA folder.
In addition, transfers new patient demographics
(from DORAWEB) for a procedure to be performed
that day, but after the export described above, to
the IMS\DORA folder. These procedures are
appended to the end of the Procedure List on the
640 Image Management System.
Transfers saved still images (.bmp or .jpg or
.dcm), video clips (.mpeg), and Note (.txt) files
(originating from the 640 Image Management
System) from the IMS\DORA folder into the
DORAWEB System.
PACS Related
•
•
Transfers saved DICOM images (originating from
the 640 Image Management System) from the
IMS\PACS folder into the PACS folder.
Once daily at a configured time, transfers all
DICOM images associated with the day's
scheduled procedures from the PACS folder to
the IMS\PACS folder. The procedure related text
information will then be extracted from these
images and will be placed in the IMS\PACS
folder. These procedures will be listed in the
Procedure List in the 640 Image Management
System. In addition, the previous day’s images
will be deleted from this folder.
IMS Folder and Sub Folders
When saving procedure information from the 640
System, the PACS or DORAWEB/Network options can
be selected. Depending on those selections,
procedure information is either stored in the
IMS/DORAWEB or IMS/PACS folders. The information
in these folders is structured as a set of procedure
directories, one for each procedure. Each directory is
named by the last name of the patient followed by
the medical record number (MRN). For example, a
procedure directory may be named “Smith123456”.
Each procedure directory contains an image
subdirectory named by the procedure name followed
by the date and time (MMDDYYYYHHMMSS) and the
640 System location. For example, an image
subdirectory may be named “10212003120510”
“ArthroplastyRoom1”.
The image subdirectory may contain these
types of image/video files:
•
•
•
•
•
MPEG 1 or MPEG 2 (.mpg) video files
Note (.txt) files
JPEG (.jpg) image files
DICOM (.dcm) image files
Bitmap (.bmp) image files
Each procedure has an associated text (.txt) file
in the image subdirectory with the name of the last
captured image. The text file contains the patient
demographics for the associated patient and the
notes entered during the procedure. It will also have
an associated Text (.txt) file named “alldone.txt”.
Note: The DORAweb Surgical Documentation System
operates with still images, JPEG (.jpg), Bitmap (.bmp),
MPEG (.MPG), DICOM (.dcm), and Note (.txt) files.
DICOM (.dcm) images can also be saved separately
to your institution’s PACS.
HIS Related
•
Once daily at a configured time, transfers HL7
text messages relating to the procedures from
the HIS folder to the IMS\HIS folder. These
procedures will be listed in the Procedure List in
the 640 Image Management System. In addition,
the previous day’s images will be deleted from
this folder.
Smith & Nephew 640 Image Management System Operations/Service Manual 1061407 Rev. F
31
System Operation
DORAWEB™ System Integration
Configuring DORAWEB System Integration
Overview
The Smith & Nephew 640 Image Management
System needs to be configured with User Name,
Password and Share Directory.
At the time of DORAWEB Surgical Documentation
System installation the system administrator setup
a server on the local network and created a share
directory to receive procedure files from the Smith &
Nephew 640 Image Management System. A user
name and password were also established at that
time to allow the Smith & Nephew 640 Image
Management System to be recognized by the server.
Note: In order to setup the Smith & Nephew 640
Image Management System on the network you will
need to know the User Name, Password, Server
Name, and Share Name established by the system
administrator.
Refer to DORAWEB Installation Guide, REF 1061336,
under Software Installation reference “Config”.
An example for User Name is “dora640”
In the case of DORAWEB, these values will have
to be configured based on the configuration of
the DORAWEB Surgical Documentation System
established by the system administrator.
To integrate the 640 Image Management System with
the DORAWEB and/or PACS/HIS System:
1.
2.
3.
4.
An example for Password is “Dora!640”
An example for Share Directory is
“\\DORAWEBServer\IMS\”
5.
In the System Tools dialog box, click DORAWEB/
PACS/HIS System.
The DORAWEB/PACS/HIS System dialog box
displays.
Enter user name and password in the provided
fields.
Enter the share directory information.
Click Test Connection to connect to the
appropriate Server. If the connection succeeds,
the system displays “Connection Test Pass.” If
the connection is unsuccessful, the system
displays “Connection Test Fail"; check your
network connections.
Click OK to save the information and close the
dialog box.
Figure 18. DORAWEB System Dialog Box
32
Smith & Nephew 640 Image Management System Operations/Service Manual 1061407 Rev. F
System Operation
Configuring the DICOM Send Utility
Note: Users not currently using DICOM Send may
skip this section.
The Integration Broker will replace the DICOM Send
Utility to transfer DICOM images to PACS. It is being
retained to allow existing users of this utility to
transition over at a time of their choosing.
The DICOM Send Utility enables you to send
stored DICOM images to your Picture Archiving
Communication System (PACS). You must configure
the utility with information about your particular
PACS installation.
To configure the DICOM Send Utility:
1.
In the System Tools dialog box, click DICOM
Send Utility. The DICOM Send Utility dialog
box displays.
3. Enter the local name of the 640 Image
Management System in the Local AE Title
field, typically “smith&nephew 640.”
4. Enter the full path name of the Directory
containing the image files that are to be
copied to the PACS. Select the option to
scan subdirectories.
5. Specify the Remote IP Address, Remote Port
Number, and Remote AE Title (the registered
name) of the PACS.
6. Click OK to save the information and close the
dialog box.
7. On the DICOM Send Utility dialog box, click Echo
to start a communications test with the PACS.
8. If the test is successful, a dialog box will display.
Click OK to close the box.
9. Click Quit to end the configuration and close the
dialog box.
10. Stop and restart 640 service in order for changes
to take effect. See Windows 2000 administrator
documentation for information on starting and
stopping Windows services.
Figure 19. DICOM Send Utility Dialog Box
2. Click Settings. The DICOM Send Configuration
dialog box displays.
Figure 20. DICOM Send Configuration Dialog Box
Smith & Nephew 640 Image Management System Operations/Service Manual 1061407 Rev. F
33
System Operation
Configuring the 640 Image
Management System
The Policies tab contains three settings groups to
control system behavior.
The System Configuration dialog screen provides
control over many options of the 640 system that
allow the user to customize it to best fit his/her
needs. Changes made in this dialog take effect
after the user presses OK and restarts the system.
In the System Identification group, set the customer
name to the name of the medical institution you want
to appear on the 640 System reports; set the system
name to something that will uniquely identify which
640 System produced a report or set of images. In
Figure 21. System Configuration Dialog Box - Policies
the Startup and Login Options group, there are three
choices that control access to the 640 System. The
VGA Monitor setting is used to control the
appearance of the 640 System control display on the
surgical monitor at startup. Yes means the main
menu will not be presented on the surgical display at
startup, only on the VGA display. No means main
menu will be presented on surgical display at startup.
The Startup Login option is used to control the
appearance of a logon dialog when the system is
powered on. If users are required to logon before
using the 640 System then choose Yes; if not choose
No. The Login Type setting is used to select between
the Windows authentication, which requires system
accounts to be created for each user, and Simple,
34
which requires only a password to use the system.
The password can be set and confirmed in the same
dialog but only applies to the Simple method of login.
The Prompt to Show Disk Maintenance after Save
gives the user the opportunity to delete the
procedure from the system after save. Yes means
show a prompt to go to Disk Maintenance utility. No
means do not prompt and do not allow user to delete
the procedure unless the user enters through System
Tools.
The Video Standard setting is either NTSC or PAL.
Typically NTSC is chosen for North America and
Japan while PAL is the broadcast video standard for
Europe.
Smith & Nephew 640 Image Management System Operations/Service Manual 1061407 Rev. F
System Operation
Figure 22. System Configuration Dialog Box - Data Systems and Devices
The Data Systems and Devices tab contains three
settings groups to select 640 System interface
options.
The HERMES ® selection activates or deactivates
the HERMES message exchange interface for
voice commands from a HERMES controller.
The Network group provides selections to activate
PACS, HIS and/or the DORAWEB System interfaces.
Networking must be configured and enabled for
communications with these systems to exchange
data with the 640 System. Both the DICOM Send
Utility and DORAWEB have their own utilities available
through System Tools to provide connection details.
The Network share drive letter should not be
changed unless the drive letter is already reserved
for another share directory on your network.
The Storage Device Mapping group gives three
choices for what media to monitor on the main
menu while acquiring procedure data.
In order for your changes to take effect you must shut
the system down and restart it. Refer to the “Shutting
the System Down” and “Turning the Power On”
sections.
Smith & Nephew 640 Image Management System Operations/Service Manual 1061407 Rev. F
35
System Operation
Cleaning the Hard Disk
All procedure files except the current procedure are
stored on the system hard disk. If you do not delete
them after they have been saved or uploaded to a
network share the hard disk will eventually become
full.
To clean the hard disk:
1.
Confirm that all procedures have been properly
saved to external media or uploaded.
2. In the System Tools dialog box, click Disk
Maintenance. The Disk Maintenance dialog
box displays the folder structure of the disk.
3. To delete a particular procedure and all its files,
click the Selected procedure radio button and
select the procedure from list. Click Delete
Procedure(s) under Procedure(s).
OR
To delete a set of files from a particular
procedure, select the procedure from Procedure
list. Select the files from those listed under
Procedure Files. Click Delete Files.
OR
To delete all procedures, select All procedures
radio button. Click Delete Procedure(s).
4. Click OK to close the dialog box.
Figure 23. Disk Maintenance Dialog Box
36
Smith & Nephew 640 Image Management System Operations/Service Manual 1061407 Rev. F
System Operation
Advanced Topics
Notes on the DVD Drive and Media
•
•
•
Only use 650 MB or 700 MB data CDs or 4.7 GB
DVDs. Music CDs are not compatible.
The DVD tray will open on completion of the write
process. Remove the disk from the tray and then
press the Eject button or gently push in the tray
to close.
Data is written to the CD/DVD in the ISO 9660
Standard CD-RW format.
Notes on the Multi-card Drive
and Media
•
•
The multi-card drive is operating correctly when
the green activity light blinks for a few seconds
after the media is inserted. If there is no blinking,
remove the media and then reinsert it.
Never remove the flash media when the green
activity light is blinking. Removing the media
during a write or read process could corrupt
data.
Notes on the 640 Image
Management System
•
•
•
Avoid placing the 640 Image Management
System against item(s) that could block or impair
the cooling vents on the sides or the cooling fan
located on the back of the unit.
Avoid placing items in excess of 40 pounds
directly on top of the 640 Image Management
System.
Save at the end of each surgical case to avoid
running into time delays. The time required for
data transfer depends on the number of images
acquired.
Folders and Files on the 640 Image
Management System
Image files are stored on the hard disk and saved
to flash media or CD/DVD in a folder named
“SNE640data”. Below this folder there is a folder
for each patient named using the patient’s last
name followed by the patient’s MRN (for example,
“Smith123456”). This folder contains a folder for
each of the patient’s procedures, named using
the procedure name followed by the machine name
of the particular 640 Image Management System
(for example, “ArthroplastyOR1”). If there are multiple
procedures for a patient that would generate
duplicate folder names, the folder names are
appended with a sequential counter.
Within the procedure folder, individual image files
are named using a capture time stamp of the form
“HHMMSS” where “HH” is the hour, “MM” is the
minute, and “SS” is the second. Each image file has
the file extension “.bmp” for Bitmap images, “.jpg” for
JPEG images, or “.dcm” for DICOM images. Video
clips are also named using the time stamp but have
an “.mpg” file extension. If notes have been created
for the procedure, the text is stored in a file named
“notes.txt”.
Smith & Nephew 640 Image Management System Operations/Service Manual 1061407 Rev. F
37
System Specifications
Video Inputs
RGBS – BNC connector x 4: RGB = .7Vp-p/
SYNC = .3 to 4Vp-p, 75 ohms terminated.
S-Video (Y/C) – 4-pin mini-DIN x 1: Y = 1Vp-p/
C = NTSC/EIA standards (286mVp-p for NTSC,
300mV for PAL), 75 ohms terminated.
AUX VIDEO INPUT (Front Panel) – BNC
connector x 1: 1Vp-p, Composite B/W
Video. 75 ohms terminated.
Video Formats – NTSC and PAL.
All Video Inputs are diode protected for
over-voltage conditions.
Video Outputs
RGBS – BNC connector x 4: RGB = .7Vp-p/
SYNC = .3 to 4Vp-p, 75 ohms terminated.
S-Video (Y/C) – 4-pin mini-DIN x1: Y = 1Vp-p/
C = NTSC/EIA standards (.3Vp-p), 75 ohms
terminated.
Video Formats – NTSC and PAL.
All Video Outputs are diode protected for
over-voltage conditions.
Keyboard Input
Mini PS/2 Keyboard.
Front Panel Inputs
Four buttons – AUX VIDEO INPUT, MAIN MENU,
CAPTURE, and SAVE MENU.
One AUX VIDEO INPUT BNC.
Rear Panel Inputs
4 X 3.5 mm mini-jacks – STILL CAPTURE, STILL
FREEZE, STILL CAPTURE LOOP THRU, and VIDEO
CAPTURE.
MIC In – 1000 mV RMS @ 10K ohm Impedance
(typical).
Audio Out – 1000 mV RMS @ 4.7K ohm Impedance
(minimum).
Tally Light – Interface for Sony PVM Medical Grade
Series Monitors with Remote Port ONLY.
Rear Panel Ports
Bidirectional Port: RS-232 Communication Port with
USB Type B receptacle. (Not a USB protocolsupported connection. Connect to HERMES ®
Digital O.R. Control Center only.)
Parallel Port: Bidirectional input/output port with
female DB-25 receptacle.
Universal Serial Bus (USB) Ports: Two USB ports with
USB Type A receptacle, software compatible with
NS16C550.
38
Serial Port: UART port with male DB-9 receptacle
configured as COM 2.
Video Graphics Array (VGA) Port: 16-pin female VGA
port.
Ethernet Port: Auto-select 10Base-T/100Base-TX.
Storage Drives
Multi-card Drive, IDE Interface. (Supports read/write
of flash media of different sizes.) Storage capacity is
as per user preference and market availability.
CD-R, 650 MB or 700 MB, DVD-R, 4.7 GB. (Writes
data in standard ISO 9660 CD-R format only.
Supports CD-R, CD-RW, DVD-R, and DVD-RW media.)
Processor 700 MHz Intel P111 Processor.
Operating System Windows 2000.
Hard Drive
60 GB drive with Ultra DMA data transfer.
Still Image File Format
24-bit RGB bitmap (.bmp) file.
24-bit JPEG (.jpg) file.
24-bit DICOM (.dcm) file.
Still Image Resolution
NTSC – 640 x 480 @ 24-bit color depth.
PAL – 640 x 480 @ 24-bit color depth.
Still Image Color Resolution
16.77 million True Color.
Still Image Aspect Ratio 4:3.
Motion Video File Format
MPEG1 and MPEG2 (.mpg) file.
Motion Video Resolution
MPEG1 = 352 x 240 – NTSC, 352 x 288 – PAL.
MPEG2 = 704 x 480 – NTSC, 704 x 576 – PAL.
Display Output
NTSC – Real Time RGBS and S-Video outputs.
PAL – Real Time RGBS and S-Video outputs.
Power Requirements
Input Voltage 100–120/200–230 VAC,
50/60 Hz @ 150 VA.
Leakage Current <70 µA.
Dimensions
(L x W x H) 18.00 x 17.00 x 6.64 inches
(45.72 x 43.18 x 16.87 cm).
Weight
21 lbs.
Classification
CISPR 11 Class A.
Smith & Nephew 640 Image Management System Operations/Service Manual 1061407 Rev. F
Guidance and Manufacturer’s Declaration – Electromagnetic Immunity
Table 1. Guidance and Manufacturer's Declaration – Electromagnetic Immunity
The Smith & Nephew 640 Image Management System (REF 7210233) is intended for use in the electromagnetic
environment specified below. The customer or the user of the 640 Image Management System should assure that
it is used in such an environment.
Immunity Test
IEC 60601
Test Level
Compliance
Level
Electromagnetic Environment - Guidance
Portable and mobile RF communications equipment should be used
no closer to any part of the 640 System, including cables, than the
recommended separation distance calculated from the equation
applicable to the frequency of the transmitter.
Recommended separation distance
d = 1.2√ p
Conducted RF
IEC 61000-4-6
Radiated RF
IEC 61000-4-3
3 Vrms
150 KHz
to 80 MHz
1 Vrms
3 Vrms
80 MHz
to 2.5 GHz
3 V/m
d = 1.2√ p
d = 2.3√ p
80 MHz to 800 MHz
800 MHz to 2.5 GHz
Where p is the maximum output power rating of the transmitter in
watts (W) according to the transmitter manufacturer and d is the
recommended separation distance in meters (m).
Field strength from fixed RF transmitters, as determined by an
electromagnetic site survey,a should be less than the compliance
level in each frequency range.b
Interference may occur in the vicinity of equipment marked with the
following symbol:
Note 1: At 80 MHz and 800 MHz, the higher frequency range applies.
Note 2: These guidelines may not apply in all situations. Electromagnetic propagation is affected by absorption
and reflection from structures, objects, and people.
a
Field strengths from fixed transmitters, such as base stations for radio, (cellular/cordless) telephones, land mobile
radios, amateur radios, AM and FM radio broadcasts, and TV broadcasts cannot be predicted theoretically with
accuracy. To assess the electromagnetic environment due to fixed RF transmitters, an electromagnetic site survey
should be considered. If the measured field strength in the location in which the 640 Image Management System is
used exceeds the applicable RF compliance level above, the 640 Image Management System should be observed to
verify normal operation. If abnormal performance is observed, additional measures may be necessary, such as
reorienting or relocating the 640 Image Management System.
b
Over the frequency range 150 KHz to 80 MHz, field strengths should be less than 3 V/m.
Smith & Nephew 640 Image Management System Operations/Service Manual 1061407 Rev. F
39
Guidance and Manufacturer’s Declaration – Electromagnetic Immunity
Table 1: Guidance and Manufacturer's Declaration – Electromagnetic Immunity (continued)
The Smith & Nephew 640 Image Management System (REF 7210233) is intended for use in the electromagnetic
environment specified below. The customer or the user of the 640 Image Management System should assure
that it is used in such an environment.
IEC 60601
Immunity Test Test Level
Compliance
Level
Electrostatic
+/- 6kV contact
(ESD)
discharge
+/- 8kV air
IEC 61000-4-2
+/- 6kV contact Floors should be wood, concrete or ceramic tiles. If floors are
covered with synthetic material, the relative humidity should be
+/- 8kV air
at least 30%.
Electrical fast +/- 2kV for
transient/burst power supply
IEC 61000-4-4 lines
+/- 1kV for input/
output lines
+/- 2kV for
Mains power quality should be that of a typical commercial or
power supply
hospital environment.
lines
+/- 1kV for input
/output lines
Surge
+/- 1kV
IEC 61000-4-5 differential mode
+/- 2kV
common mode
+/- .5kV input/
output
+/- 1kV
Mains power quality should be that of a typical commercial or
differential mode hospital environment.
+/- 2kV
common mode
+/- .5kV input/
output
Voltage dips,
short
interruptions
and voltage
variations on
power supply
input lines
IEC 61000-4-11
>95% Reduction
for 10ms
60% Reduction
for 100ms
30% Reduction
for 500ms
>95% Reduction
for 5s
Mains power quality should be that of a typical commercial
or hospital environment. If the user of the 640 Image
Management System requires continued operation during
power mains interruptions, it is recommended that the 640
Image Management System be powered from an uninterruptible
power supply or a battery.
3A/m
The power frequency magnetic field should be at levels
characteristic of a typical location in a typical commercial
or hospital environment.
>95% Reduction
for 10ms
60% Reduction
for 100ms
30% Reduction
for 500ms
>95% Reduction
for 5s
Power
3A/m
frequency
(50/60 Hz)
magnetic field
IEC 61000-4-8
40
Electromagnetic Environment - Guidance
Smith & Nephew 640 Image Management System Operations/Service Manual 1061407 Rev. F
Guidance and Manufacturer’s Declaration – Electromagnetic Emissions
Table 2: Guidance and Manufacturer's Declaration – Electromagnetic Emissions
The Smith & Nephew 640 Image Management System (REF 7210233) is intended for use in the electromagnetic
environment specified below. The customer or the user of the 640 Image Management System should assure
that it is used in such an environment.
Emissions Test
Test Level
Electromagnetic Environment - Guidance
Radiated emissions
CISPR 11
Class A
The 640 Image Management System uses RF energy only for
its internal function. Therefore, its RF emissions are very low
and are not likely to cause any interference in nearby electronic
equipment.
Conducted emissions
CISPR 11
Class A
The 640 Image Management System is suitable for use in all
establishments other than domestic and those directly connected
to the public low-voltage power supply network that supplies
buildings used for domestic purposes.
Harmonic
IEC 61000-3-2
Complies
Voltage fluctuations and
flicker emissions
IEC 61000-3-3
Complies
Smith & Nephew 640 Image Management System Operations/Service Manual 1061407 Rev. F
41
Guidance for Separation Distances
Table 3: Recommended separation distances between portable and mobile RF communications equipment and
the Smith & Nephew 640 Image Management System
The Smith & Nephew 640 Image Management System (REF 7210233) is intended for use in an electromagnetic
environment in which radiated RF disturbances are controlled. The customer or user of the 640 Image Management
System can help prevent electromagnetic interference by maintaining a minimum distance between portable and mobile
RF communications equipment (transmitters) and the 640 Image Management System as recommended below, according
to the maximum output power of the communications equipment.
Rated Maximum
Output Power
of Transmitter W
Separation distance according to frequency of transmitter M
150 KHz to 80 MHz
d = 1.2√ p
0.01
0.1
1
10
100
0.12
0.38
1.2
3.8
12
80 MHz to 800 MHz
d = 1.2√ p
0.12
0.38
1.2
3.8
12
800 MHz to 2.5 GHz
d = 2.3√ p
0.23
0.73
2.3
7.3
23
For transmitters rated at a maximum output power not listed above, the recommended separation distance d in meters (m) can
be estimated using the equation applicable to the frequency of the transmitter, where p is the maximum output power rating of
the transmitter in watts (w) according to the transmitter manufacturer.
Note 1: At 80 MHz and 800 MHz, the separation distance for the higher frequency range applies.
Note 2: These guidelines may not apply in all situations. Electromagnetic propagation is affected by absorption
and reflection from structures, objects, and people.
42
Smith & Nephew 640 Image Management System Operations/Service Manual 1061407 Rev. F
Maintenance/Service
Maintenance
Smith & Nephew 640 Image Management
System and Keyboard
Cleaning the System
Warning: Prior to cleaning the system, turn off
Do not drop flash or CD/DVD media onto hard
surfaces as this can result in disk damage and
data loss.
Keep flash and CD/DVD media clean and dry by
always storing them in their cases.
Avoid storing at temperatures greater than 120° F.
all power to the system and disconnect it from
the power source.
Do not allow water or other fluids to enter the multicard reader or CD/DVD drives on the front panel.
The exterior of the 640 Image Management System
may be cleaned with a mild detergent on a damp (not
wet), lint-free cloth. Do not use abrasives, alcohol, or
other solvents.
Preventative Maintenance
Do not allow moisture to enter the inside of the unit,
or damage to the internal components may result.
Do not open the unit or remove the cover.
Protecting the Keyboard
Liquid can permanently damage the keyboard. Use
the keyboard in such a position that it is protected
from spills.
If liquid is spilled on the keyboard, disconnect it
immediately from the back of the system, and turn
the keyboard upside down to allow the liquid to drain
out. The keyboard should be allowed to dry for at
least eight hours before plugging it in and using it
again.
If the keyboard is not responding, make sure
the connector is properly aligned and securely
connected to the back of the system. Refer to
Rear Panel illustration for connector location.
Moving the 640 Image Management System
Always turn off power to the system before moving
it. Even though the system is on a movable cart, it
should be turned off before relocating it. The
sensitive disk drive heads are less vulnerable to
jarring or damage if the system is turned off before
being moved. Do not drop or jar the system as
damage to components and loss of data may result.
Recommended Annual Performance Checks
Smith & Nephew recommends that dielectric
strength, earth leakage current, and protective earth
testing be performed annually to assure continued
compliance with applicable safety requirements.
These tests should be conducted in accordance
with specifications UL 60601-1/IEC 60601-1.
Caution: Electrical safety testing should be performed
by a biomedical engineer or other qualified person.
Electrical Interference
Caution: This equipment is designed and tested
to minimize interference with other electrical
equipment. However, if interference occurs with other
equipment it may be corrected by one or more of the
following measures:
Reorient or relocate this equipment, the other
equipment, or both.
Increase the separation between the pieces
of equipment.
Connect the pieces of equipment into different
outlets or circuits.
Consult a biomedical engineer.
Environmental Protection
Caution: This equipment contains electronic printed
circuit assemblies. At the end of the useful life of the
equipment it should be disposed of in accordance
with any applicable national or institutional related
policy relating to obsolete electronic equipment.
Data Storage Media
Service
Caring for Removable Disks
and CD/DVD Media
Service Philosophy
Flash and CD/DVD media are used to record and
store images and data created while using the 640
Image Management System.
The 640 Image Management System is not fieldserviceable. When service is required, return the
unit to Smith & Nephew, or an authorized Smith &
Nephew Service Center.
Smith & Nephew 640 Image Management System Operations/Service Manual 1061407 Rev. F
43
Troubleshooting
Refer to the table below for information on problem solving for the Smith & Nephew 640 Image Management
System. Additionally, review the “Frequently Asked Questions” section for frequently asked questions regarding
proper use of the system.
Symptom
Cause
What To Do
No video image
Video cables loose or disconnected. Check video cable connections.
Video source turned OFF.
Turn video source power ON.
Monitor turned OFF.
Turn monitor power ON.
Video out of sync (for example,
partial rolling images)
Monitor sync setting incorrect.
Set monitor sync to EXT (external).
Keyboard does not respond to
typing
Keyboard cable loose or
disconnected.
Check keyboard cable connection
on rear of unit.
Screen displays “A SYSTEM ERROR An internal system error has
HAS OCCURRED” “PLEASE CALL
occurred and the system cannot
CUSTOMER SUPPORT”
continue to operate normally. A code
number may be shown on the
screen.
Try resetting the system by
powering down and then back on
again. If condition persists, call
Customer Support with error code
number which displays on the
screen.
Refer to the “Saving Procedures”
section to save the procedures
before removing the procedure
records from the system.
Screen displays “SYSTEM DATA
DISK FULL”
You have reached the maximum
allowable hard disk storage.
Camera control buttons or the
optional footswitch not working
Camera SW1/SW2 or the optional
footswitch cables loose or
disconnected.
Can’t establish contact with
the network
• Network not physically connected Verify that all network information is
to the system.
valid and try logging-on again. If the
problem persists, contact your IT/IS
• Network information not valid.
administrator.
• Network busy or down.
Printer cannot be configured
for the system
• Local printer not installed.
Printer configured but
not printing
The printer has not been configured Configure printer as the default
as the default printer.
printer.
44
• No network printer available.
Check SW1/SW2 or the optional
footswitch cable connections.
Install a local printer or contact your
IT/IS administrator.
Smith & Nephew 640 Image Management System Operations/Service Manual 1061407 Rev. F
Ordering Information
Smith & Nephew 640 Image
Management System
REF
7210235
Description
Smith & Nephew 640 Image
Management System—ENGLISH
On-Screen Display, Operations Manual,
U.S. Power Cord
7210237
Smith & Nephew 640 Image
Management System—Multi-Language
On-Screen Display, Operations Manual,
Continental Power Cord
7210239
Smith & Nephew 640 Image
Management System—ENGLISH
On-Screen Display, Operations Manual,
U.K. Power Cord
Accessories
7207447
Iomega® 250 MB Zip… disk
7207448
Iomega 100 MB Zip disk
7209338
650 MB or 700 MB CD-R media
7210534
DVD-R media
81013395
Integration Broker Software CD
7209339
Single-pedal footswitch
7209340
Dual-pedal footswitch
7210344
15" LCD touch panel
7210345
19" LCD touch panel
Smith & Nephew 640 Image Management System Operations/Service Manual 1061407 Rev. F
45
Frequently Asked Questions (FAQs)
Flash and CD/DVD Media
Internal Memory vs. Writing to Disk
How many video clips/still images can be
acquired per patient case?
There is a 2.0 GB limit per procedure. Video clips are
acquired and exported in either an MPEG1 or MPEG2
format. Both file names end with .mpg suffix. MPEG2
files provide better image quality but are larger in
size. To help ensure that all information acquired for
a given patient fits into manageable chunks, the
system enables you to set the maximum video clip
size in minutes to 100 MB (approximately 4 minutes),
200 MB (approximately 8 minutes), 600 MB
(approximately 24 minutes). If the video clip becomes
as large as the maximum size, the system stops
recording the video clip and begins a new one. You
can record clips until the procedure limit is reached.
Why can’t the unit store the images to flash media
or CD/DVD media as they are acquired and
eliminate the wait time after the case is
completed?
The system allows the user to record to multiple CDs
and DVDs, e.g., if the 600 MB limit has been reached
on a CD the system will prompt the user to insert a
second CD and recording will continue when the
new CD is inserted. Recording limit for flash media
depends on the memory capacity of the flash media.
How many bitmap images will a 128 MB flash
media hold? How about the 256 MB flash media?
Each bitmap image uses approximately 900 KB
of memory storage. The number of images that can
be stored depends on the flash media.
A 256 MB flash card will hold 284 images.
If you enter patient information before inserting
the flash media, does the patient information get
lost when you put the flash media into the drive?
No. The 640 Image Management System can actually
be used without flash media inserted. The flash
media is ONLY needed when transferring images
from the internal memory to the flash media.
46
•
•
•
Data is written to CD/DVD in a batch format,
not in a real-time continuous method.
Data is most likely to be lost when being written
to disk or CD/DVD media. The writing speed is
much slower than the speed of the system's
internal memory.
In the event of a power loss, the wait time is a
trade-off between having a reliable way of
storing the images (in the system) vs. saving the
images as they are acquired then losing several
on a disk. The current method is the most
reliable, considering there is likely only one
opportunity to acquire a desired image.
Power Loss
Will data be lost if you lose power after images
have been acquired to the internal hard disk
but before they get written to flash media?
No. The internal hard disk saves images during the
acquisition process and is only cleared by the disk
maintenance function.
Can you lose images if a power glitch or
accidental power plug pull occurs while
writing to flash media, CD/DVD, or to the network?
No. Since the image transfer was not complete due
to the loss of power, the system's image buffering
design assures that the images ARE NOT LOST. Smith
& Nephew understands these problems and has
tried to greatly reduce the chances of ever losing
images due to accidental power loss.
Smith & Nephew 640 Image Management System Operations/Service Manual 1061407 Rev. F
Frequently Asked Questions (FAQs)
Multiple Patients without Saving
to Disk
What if you do not save the image data after a
surgical case and you want to enter another
patient's information?
Go to the 640 System screen, click Patient and
enter the new patient information for the next case.
The previous patient information has already been
acquired and stored by a unique filing system in the
internal memory. When a save is performed, ALL
image data from each case will be transferred to the
flash, CD, DVD or to the network.
Bitmap Images
What is a bitmap image format, and is the
image compressed?
In bitmap format, an image file is made up of all the
individual picture elements—called pixels—which
are “mapped” into a grid in their actual positions
and colors. Pixels can represent many colors–over
16.77 million true color pixels are possible with the
640 Image Management System. The image file is
not compressed, so the image artifacts that
sometimes plague compressed image files
will not occur.
Perceived image quality is also greatly influenced by
color depth. Because we use a 24-bit color pixel bit
depth we can acquire images in what is called “True
Color.” If a system uses less than a 24-bit format it
loses color and brightness information in the
acquired images. The full color and brightness areas
of the image would then be replaced with black or
white “dots” or pixels, which would basically be
missing picture information.
The type of VGA computer display or VGA video
projector used to view the final images also makes a
substantial difference in perceived image quality. As
just mentioned, a system needs to start with a high
picture bit depth.
Again, 24-bit picture bit depth is considered True
Color. If a VGA computer display or VGA video
projector cannot “display” all 24-bit possible color
combinations for Red, Green and Blue (over 16.77
million possible colors) then the image information
on the display is replaced with color and brightness
levels that are not the same as what was originally
acquired. If the system displays less color bit depth
than the format in which the image information was
acquired, it is losing picture information.
System Resolution
What is the 640 Image Management System’s
image resolution? My colleague perceives the
image quality somewhat differently than I do.
What are some of the image quality concepts that
I need to know in order to understand differences
in image quality perception?
The 640 Image Management System’s image
resolution—the grid of pixels making up the image—
is 640 x 480 pixels (horizontal x vertical). This is the
maximum pixel resolution due to the source of the
signal—in this case, an analog video camera, e.g.,
the system cannot obtain (acquire) more resolution
than what is provided by NTSC video.
Smith & Nephew 640 Image Management System Operations/Service Manual 1061407 Rev. F
47
Warranty
Smith & Nephew products are guaranteed to be free
from defects in material and workmanship for the
warranty period for a particular product, beginning
from date of invoice. Refer to the current Smith &
Nephew Product Catalog or contact Smith & Nephew
Customer Service for specific warranty information.
Smith & Nephew
York Science Park
Heslington, York YO10 5DF
United Kingdom
This limited warranty is restricted to repair or
replacement by Smith & Nephew, at its option,
of any product found to be defective during the
warranty period. Damage inflicted to a product
by the user that causes it to be unsuitable for
refurbishment may result in additional charges,
regardless of warranty status. All warranties apply
to the original buyer only. In no event shall Smith &
Nephew be liable for any anticipated profits,
consequential damages or loss of time incurred by
the buyer with the purchase or use of any product.
NO OTHER WARRANTY, EXPRESSED OR IMPLIED, IS
GIVEN.
Service Replacement Program
Smith & Nephew offers a 24-hour Service
Replacement Program for its products to minimize
downtime in your operating room. Our goal is to ship
you a service replacement unit within 24 hours**
of your call (during normal business hours). For a
Return Authorization (RA) number or for additional
information on this program, call Customer Service at
1-800-343-5717 in the U.S., or contact your authorized
representative.
**24-hour shipment is not offered in all countries.
™Trademarks of Smith & Nephew. Certain marks registered U.S. Patent & Trademark Office.
All other trademarks acknowledged.
Endoscopy
Smith & Nephew, Inc.
Andover, MA 01810
USA
www.smith-nephew.com
978 749 1000
978 749 1108 Fax
800 343 5717 U.S. Customer Service
©2003, 2004 Smith & Nephew, Inc.
All Rights Reserved.
Printed in USA
09/04 1061407 Rev. F