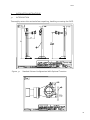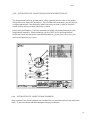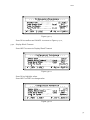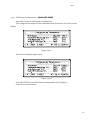
1
Rev.2 INSTALLATION AND SERVICE MANUAL “triton” FLOOR MOUNT TUBE SUPPORT (FMTS) MODEL NO: 09-000 Manual Number: 02-FMTS Revision: 2 Date: Sept., 2010 DURABLERELIABLEPRECISIONCRAFTED Please have available the following information when requesting technical assistance: Model name and number Serial number Date and place of purchase The original dra- of this document is written in English. CoRE labs 3720 S. Lipan Street Englewood, CO 80110 T. (303) 761-0131 F. (303) 948-8913 1 WEB: www.corelabshome.com EMail: [email protected] Rev.2 TRANSPORTATION DAMAGES All packages should be closely examined at the time of delivery. If damage is apparent, have a notification of “bad order” placed by the delivering driver on all copies of the freight or express bill. If damage is of a concealed nature, notify the transportation agent as soon as possible to make an “inspection report of damage” but, in any event, not later than 3 days a-er delivery. A transportation company usually will not pay a claim for concealed damage if an inspection is not requested within this 3-day period. If the shipment was handled by a moving van service, uncrated, call immediately when any damage is found. Do not attempt to call any local agent. At this time, be ready to describe the type of damage, type of equipment, serial number and, if possible, the job number. The above paragraph is in regard to equipment requiring installation only, and does not apply to supply items. The F.O.B. point for these item is as shown in your quotation. 1. 1.1 1.2 1.3 1.4 1.4.1 1.4.2 1.5 1.6 GENERAL INFORMATION Introduction Description Code Compliance Compatible Components X-ray Tubes Collimators Options Interference 2. 2.1 2.2 2.3 2.3.1 2.3.1.1 2.3.1.2 2.3.1.3 2.3.1.4 2.3.1.5 2.3.1.6 2.4 2.5 2.5.1 2.5.2 2.5.3 2.5.4 2.6 2.7 2.7.1 2.7.1.1 2.7.1.2 2.8 OPERATION Safe operation Overview Controls Push Buttons Transverse Lock Release Up/Down (SID) Lock Release Tube Rotate Lock Release Transverse/Longitudinal Centering Locks Release Long Lock Release 3-Way Lock Release Center Squeeze Handle Display SID to Table Display SID to Wall Bucky Display Tube Rotation Angle Display Display Backlight Control Service Mode Electronic Control Assemblies Display Board Assembly Basic Display Board Features Connectors Interconnect Board Assembly 2 3. 3.1 3.2 3.3 3.3.1 3.3.2 3.3.3 3.3.4 3.3.5 3.4 3.5 3.6 3.7 3.8 3.8.1 3.8.2 3.8.3 3.8.4 3.8.5 3.8.6 3.8.7 3.8.8 3.8.9 3.9 Rev.2 INSTALLATION INSTRUCTIONS Introduction Equipment Size and Weight Electrical Requirements Input Power Source Requirements Equipment Grounding Electrical Leakage Required Maintenance Electrical Wiring and Troughing Tools, Equipment and Materials Unpacking and Handling. Selecting Equipment Locations Blank Unit installation Floor Track Installation Transverse Bridge Installation Telescope Carriage Installation. X-ray Tube and Collimator Installation Control Handle Installation X-ray Tube and Telescope Adjustment Cable Installation Installation of Longitudinal Potentiometer Installation of Longitudinal Bumpers Blank 4.0 4.1 4.2 5.0 5.1 5.1.1 5.1.2 5.1.3 5.2 5.3 5.3.1 5.3.2 5.3.3 5.3.4 5.3.5 5.3.6 5.3.7 5.3.8 GENERAL MAINTENANCE Operational Check-up Operational Check-up List SERVICE MODE AND CALIBRATION PROCEDURE Overview General Scope Accessing Service Mode Service Mode Function Calibration Mode Roll Pot Calibration Vertical Pot Calibration Longitudinal Pot Calibration Transverse Pot Calibration Table Pot Calibration Roll Tilt Sensor Calibration Vertical 40 in SID Center [Table] Calibration Horizontal 36 in SID Center [Wall] Calibration 3 5.4 5.4.1 5.4.2 5.4.3 5.4.4 5.4.5 5.4.6 5.4.7 5.4.8 5.4.9 5.4.10 5.4.11 5.4.12 5.4.13 5.5 5.6 5.7 CONFIGURATION MODE Display Units Configuration Display Blank Timeout Configuration Table Bucky Offset Configuration Table Pot Enable Configuration Fixed Table Height Configuration Wall Bucky Type Configuration Wall Bucky Pot Tracking Aux State Relay Mode Roll Detent Configuration Trans Centering Tolerance Configuration Longitudinal Centering Tolerance Configuration Vertical SID Centering Tolerance Configuration Display Reverse Video Configuration Utility Mode Warranty General Safety Overview ----- READ BEFORE INSTALLING 1. GENERAL INFORMATION 1.1 INTRODUCTION Rev.2 This manual provides information necessary for operation, installation and adjustment/ calibration of the Floor Mount Tube Support, product number 09-000. Throughout this manual, the Floor Mount Tube Support will be referred to as the “FMTS”. 1.2 DESCRIPTION The Floor Mount Tube Support is of the heavy duty manually operated, fully counterbalanced, floor mounted type, designed to accommodate the compatible components listed in this section. The vertical column consists of a freestanding column, enclosing a counterweight designed to balance the associated weight of the supported X-ray tube and collimator. The X-ray tube is easily positioned at any selected point within its total travel range. The column provides vertical movement of approximately 64 inches. The X-ray tube rotates a full 360-degree (+/-180 degree) about the vertical tube axis with manual detent/stops at each 90-degree position. Tube rotation about its horizontal axis is also 360 degree (+/- 180 degree) with mechanical indexing at each 90-degree position. This movement is possible only with using Tube Rotate Lock Release; see Figure 2.1. 4 1.3 Rev.2 PRODUCT REGISTRATIONS IEC 60601-2-32 (1994), EN 60601-1, EN 60601-1-2, EN 60601-2-32, IEC 601-2-32:1994, CSA C22.2 No. 601.IM90. This is Class 1 Equipment – Grounded Equipment. This equipment is classified as a Ordinary EQUIPMENT with respect to ingress of liquids. This equipment is not suitable for use in the presence of a FLAMMABLE ANESTHETIC MIXTURE WITH AIR or WITH OXYGEN OR NITROUS OXIDE. 1.4 COMPATIBLE COMPONENTS The following equipment is compatible with the FMTS: 1.4.1 X-RAY TUBES All X-ray tubes in the following series, which have a 180-degree cable termination to the output port, are considered compatible to the tube mounting platform or mounting rings. VARIAN DIAMOND / SAPPHIRE SERIES DUNLEE PX 1300 / PX 1400 SERIES 1.4.2 COLLIMATORS Machlett Collimator “C” 150 kVp Automatic Collimating System. Eureka Linear or MC Series Collimare CM Series Other Vendor’s tubes and collimators may be compatible as listed in their respective documentation. In case of using other (bigger) X-ray tubes or collimators with the triton FMTS, we recommend to consider some restrictions in movement and/or some necessary adjustment. 5 1.5 Rev.2 OPTIONS - Extended Floor Tracks - X-ray tube mounting ring arrangement. (trunnion) 1.6 POTENTIAL ELECTROMAGNETIC OR OTHER INTERFERENCE This equipment generates, uses and can radiate radio frequency energy and, if not installed and used in accordance with the instructions, it may cause harmful interference with radio communications. However, there is no guarantee that interference will not occur in a particular installation. If this equipment does cause harmful interference to radio or television reception, which can be determined by turning the unit off and on, the user is encouraged to try to correct the interference by one or more of the following measures: • Reorient or relocate the receiving antenna. • Increase the separation between the equipment and receiver. • Connect the equipment to an outlet on a circuit different from that to which the receiver is connected. • Consult the dealer or an experience radio/TV technician for help. 2. OPERATION 2.1 SAFE OPERATION Careless or improper use of X-ray equipment can be extremely dangerous. It is imperative that this equipment be operated and serviced only by trained personnel familiar with the proper use of OTS and the safety precautions required to prevent excessive exposure to primary and secondary radiation. Although the FMTS includes protective design features for limitation both the direct (primary) X-ray beam and the secondary radiation produced by this beam, design factors alone cannot prevent human carelessness, negligence or lack of knowledge. This machine is sold with the understanding that the user assumes sole responsibility for radiation safety. The manufacturer or its agents and representative do not accept any responsibility for: a) Injury or danger to any person from X-ray exposure. b) Overexposure due to poor operating techniques or procedures. c) Any problem or hazard resulting from improper servicing or failure to maintain equipment as specified in this manual. d) Equipment, which has been modified or tampered with in any way. 6 Rev.2 WARNING! When power is disconnected from the unit the transverse & longitudinal locks are released allowing free rolling motion of the tube assembly. The unit must be level to ameliorate free motion at this time. 2.2 OVERVIEW The operator control panel for “triton” FMTS provides handles to allow the tube support to be moved, momentary push buttons to release the electric locks and a LCD display showing SID and tube longitudinal, transverse and angular positioning status. 2.3 CONTROLS These operator controls are provided: Center horizontal “Squeeze” handle with 1-momentary trigger switch, 3-momentary pushbuttons near le- handle, 3-momentary pushbuttons near right handle, “Detent Control” “Squeeze Handle” Figure: 2.1 Control Handle with operation switches 7 Rev.2 2.3.1 PUSHBUTTONS There are 6 momentary pushbuttons, 3 on each side, comfortably reachable with the thumb while holding either the le- or right handle. The le! side pushbutton functions are: Top: Transverse Lock Release Middle: Up/Down (SID) Lock Release Lower: Tube Rotate lock Release The right side pushbutton functions are: Top: Transverse/Long Centering Lock Release (Detent Control) Middle: Long Lock Release Lower: 3-way Lock Release 2.3.1.1 Transverse Lock Release While this button is pressed, the transverse locks are released. This allows the OTS to be manually moved only in the lateral (transverse direction). 2.3.1.2 Up/Down (SID) Lock Release While this button is pressed, the up and down counterweighted motion lock is released, allowing the tube to be manually moved up and down to adjust the SID (Source to Image Distance). 2.3.1.3 Tube Rotate Lock Release While this button is pressed, the tube rotation lock is released, allowing the tube to be manually rotated, +/- 180-degree. There are mechanical detents every 90-degrees. 8 2.3.1.4 Rev.2 Transverse/Long Centering Locks Release (Detents) While this button is pressed, the transverse, vertical and longitudinal locks are released, (unless the unit is positioned at each respective detent position). When the unit is panned through a detent position, the locks will automatically come on, holding that axis at the calibrated detent position. 2.3.1.5 Long Lock Release While this button is pressed, the longitudinal locks are released. This allows the tube support to be manually moved only in the long direction. 2.3.1.6 3-Way Lock Release - “ALL LOCKS” (EXCEPT TUBE ROTATION) While this button is pressed, all three Longitudinal, Transverse and Vertical locks are released, allowing the tube to be manually moved in all three directions. When each axis is at its detent position, no motion in that axis is allowed. To release either axes from this centered position, one of the other lock release buttons can be used. For example the 3-way float switch overrides these center detents. Likewise the transverse and long lock release buttons will release respective axis from the center detent. The centering lock release logic depends somewhat on the current SID mode: Vertical SID mode or Horizontal SID mode, as follows: In the vertical SID mode, the X-ray tube is rotated to the 0-degree detent (collimator down). In this mode, a transverse center position is normally defined to be at the center of the table. There is no longitudinal lock position in this mode, since the film cassette is not fixed (this transverse center position is defined during system calibration. It corresponds to the position where the X-ray tube is exactly centered over the tabletop). 9 Rev.2 In the horizontal SID mode, the tube is rotated to the 90-degree position and an alternate set of centering positions are defined for operation with the wall Bucky. These locations are calibrated to properly align the tube for these horizontal operations. There are four horizontal SID lock positions, which are typically calibrated to represent the standard SID positions of 36”, 40”, 44” and 72”, although they can be calibrated for any position. TYPICAL INSTALLATIONS WILL ONLY HAVE 40” & 72” Detents Calibrated (and the others will be calibrated outside the normal travel range so as to not interfere with the commonly used 40 & 72). The locks will be engaged when any of these positions are found. With the tube rotated to this position, the normal over tabletop center position is ignored. If the tube is rotated to any other position other than the 0-degree or 90degree detents, then the centering locks are not used. 2.4 CENTER HANDLE - “SQUEEZE HANDLE” The center handle trigger switch is momentary and when engaged it will release all locks except the tube rotate lock. This allows the entire tube support to be easily panned around and up/down movement made by one hand. This has the exact effect as the 3-way button described above. 10 2.5 Rev.2 DISPLAY Mounted on control handle is a LCD Display, which is used to show the current X-ray tube positions. In normal operation, there is several display modes depend on the orientation of the tube rotation: a) Tube is at 0-degrees (not rotated) and table height is known,– Shows SID values to table, (distance from focal spot to table Bucky and to tabletop). This is the standard configuration. b) Tube is at 0-degrees, but table height is not known - Shows tube rotation angle (0). This is a non-standard configuration. c) Tube is at +/- 90-degree detent – Shows SID to wall Bucky, (distance to wall Bucky) In this mode the display graphics are rotated to keep text horizontal. d) Tube is at any other angle – Shows tube rotation angle, in 1-degree increments. In this mode the only angle of tube is displayed. For the installation professional, the display is also used in the service modes to display various menus and prompts for calibrations. 2.5.1 SID to TABLE DISPLAY When the X-ray tube is not rotated (<3 degrees), and the table height is known, then two values are simultaneously displayed: a) Distance from focal spot to table Bucky (Cassette Face -- FFD) b) Distance from focal spot to table top Figure 2.5.1 Vertical SID Mode Display 11 Rev.2 A service selectable option allows these two values to be displayed in inches or centimeters. In the inch mode, values are displayed to nearest 1/10 of inch. In centimeter mode, values are displayed to the nearest centimeter. Hysteresis is added to ensure that the display values do not “flicker”. The display is organized into three text “lines”: a) The display shows the letters “SID” with fairly large text, centered on the top line of the display. b) Below that on the second (middle) line, the two numeric values are shown, again with large text. The le- side shows the distance to the Bucky and the right side shows the distance to the tabletop. Immediately to the right of each numeric value the units will be shown in smaller size “in” or “cm”. c) The tabletop. Immediately to the right of each numeric value the units are shown in smaller text size “in” or “cm”. d) The bottom line shows the words “Bucky” and “Table Top” directly under the numeric readouts. These indicate the film orientation. Graphic “pictorial” symbols are shown immediately to the right of the “Bucky” and “TableTop” words to represent the SID mode as shown on Figure 2.5.1. 2.5.2 SID to WALL BUCKY DISPLAY The display will also show the SID distance to a wall Bucky. In this mode, the tube is rotated to the 90-deg detent and the unit displays the distance from the focal spot to the Bucky or image plane. The Bucky can be on the right side or le- side, as setup in the service mode. In this mode the display is “rotated” to read right side up and will show only the SID to Bucky value. Figure 2.5.2 Wall Bucky SID Mode Display This symbolizes film or image plane distance to the Cassette inside the Bucky or imager. 12 Rev.2 2.5.3 TUBE ROTATION ANGLE DISPLAY When the tube is rotated more than 3 degrees away from the 0-degree or 90-degree detents or when the rotation lock release button is pressed, then the rotation angle is shown in place of the SID values. In this mode the SID value are not valid, so they are not needed. The current rotation angle is displayed to the nearest whole degree value, with hysteresis added to ensure that the display does not “flicker”. The tube can be rotated from -180 degrees to +180 degrees. As the tube is rotated, the display rotates with it, therefore it is desirable to have the display text be automatically adjusted to read “right side up”. There are two display orientations for the angle display mode: a) Normal: -90 deg. to +90 deg. b) Inverted: -180 deg. to –91 deg. and +91 deg. to +180 deg. Hysteresis is used to avoid the display flickering back and forth between these modes. Figure: 2.5.3 Tube Angle Mode Display 2.5.4 DISPLAY BACKLIGHT CONTROL The LCD uses a CCFL (Cold Cathode Fluorescent*) tube for backlighting to achieve the brightest display. To ensure maximum life of the backlight bulb, the so-ware will automatically turn off the backlight when the system bas been idling for an extended period. The backlight can be reenabled with any operator activity including pressing any button. 2.6 SERVICE MODE The system can be placed into the service mode either by pressing the service pushbutton switch, which is located inside the covers or by pressing an exact sequence of normal user pushbuttons. *Some units use a modern LCD alternative 13 Rev.2 To active the service mode with the normal user controls, an exact “magic” sequence must be followed. This sequence is such that it is highly unlikely that a normal user would activate the sequence. See Section 5.1.3. Once in the Service menu, the display will prompt for all necessary services and calibration menu functions including, but not limited to: a) b) c) d) e) Roll /Vert. /Long. /Trans. /Table Pot calibration Long. /Trans. /Vert. 40” SID position over table calibration Long/Trans. position calibration for wall Bucky Horizontal SID calibration (36”, 40”, 48” and 72”) Table top to film plane offset Service Menu and Calibration Procedure are explained in later chapters. 2.7 ELECTRONIC CONTROL ASSEMBLIES The OTS electronics are comprised of two separate control assemblies: a) Display Board Assembly (Handle Board) b) Interconnect Board Assembly (Top Board or Communications Board) The following is a block diagram of the OTS electronics assemblies: 14 Figure: 2.7 Rev.2 Block Diagram - OTS Control Assemblies *Some Units drive brakes not from the interconnect board but rather the brakes are driven from the power supply board. Schematics of both are contained herein. 15 Rev.2 2.7.1 DISPLAY BOARD ASSEMBLY Figure: 2.7.1 Block Diagram-Display Board The Display Board Assembly is located inside the control handle, immediately behind the LCD display. It contains the main CPU and electronics for the OTS control. 2.7.1.1 BASIC DISPLAY BOARD FEATURES + Main Control Electronics for FMTS + Siemens C515 microprocessor (8051 family) + Flash EPROM memory, field upgradeable + LCD display power and interface logic + 10 pushbutton switch inputs + 1 service switch (on board) + 5 pot inputs (10-bit ADC) + CAN bus communications with system + Brake control signals (so-ware controlled) 1 on board power supplied brake drive (tube rotation brake) 3 off board brake control circuits (Vert, Long, Trans - power from Top board) + DC/DC converter for +24V to +5V logic + TDK CXA series backlight inverter module + Zentek EPN001 5V to –24V converter module for LCD bias supply + Optrex DMF-50316 240x64 dot LCD module with CCFL backlight* + AD202 “SmartLevel” tilt sensor (not shown) *Some units use a modern LCD alternative 16 Rev.2 2.7.1.2 CONNECTORS Eight (8) connectors are located on the Display Board Assembly: a) I/O to overhead interconnect board, 26-pin 2x13 header b) Le- side pushbuttons, 6-pin header c) Right side pushbuttons, 6-pin header d) Rotation Pot/Brake, 5-pin header e) LCD data I/F, 20-pin 2x10 header socket f) LCD CCFL backlight, 4-pin JST g) Front panel “flex switch” 5-pin header (AUTO -- present only for OTS motorized versions) 2.8 INTERCONNECT BOARD ASSEMBLY The Interconnect Board Assembly is located overhead in the FMTS system. It contains the power supplies, the external interconnections and the transverse, longitudinal and vertical brake drivers (power for the tube rotation lock is supplied by the display board). Since the space inside the handle control is very limited, all system interconnections are handled on this board located overhead where space is ample. In general this board provides mostly I/O connectors, brake drive circuits and power supplies. No logic functions are handled by this board. The functions provided by the interconnect board are: a) 24VDC power supply, powered from externally supplied 90-264VAC. b) Three main brake drive circuits (Vertical, Longitudinal and Transverse). A 4th Spare is also provide for. Controlled by signals from the CPU module, these circuits are really just simple power switches. c) Terminal strip connector for brake connections. d) Terminal strip for 5 pots, signals are routed to CPU module below. e) CAN Input/Output connectors (each 15-pin D). f) +10V isolated CAN supply. g) Uses 3.81mm pitch EURO style screw style terminal strip connectors: Phoenix style MC, MCVW and MCVR family (or similar). h) 26-pin header I/O connects to display board via 12-1/2 pair cable. i) SID status relay outputs. *Later Units drive brakes not from the interconnect board but rather the brakes are driven from the power supply board. Schematics of both are contained herein. 17 3. INSTALLATION INSTRUCTIONS 3.1 INTRODUCTION Rev.2 Thoroughly review this section before unpacking, handling or moving the FMTS. Figure 3.1. Standard Column Configuration With Optional Trunnion 18 Rev.2 Please Note: Optional trunnion mounts will move the tube further away from the floor track. The following drawing are provided to familiarize yourself with the construction and makeup of the triton FMTS. Familiarization of the components will greatly speed your installation time. Installation of this FMTS requires a skilled x-ray installation professional familiar with Floor Mount Tube Stands similar to this model from CoRE labs. Proper room layout is required. Such room layout is typically provided by an X-Ray Architect. If you don’t have architect plans for your installation location, please call CoRE labs for instructions on how to begin and complete your installation -- 303-761-0131. Fig.3.3-1 Side View of Column Base with Covers attached. 19 Rev.2 Fig.3.3-1 Top View of Column and Column Base, with covers removed, showing mechanical components and electrical components. Fig.3.3-2 Side view of Transverse arm showing routing of cable conduit. Additional space is provided within #16 for routing of HV Cables. Top leview shows large eyelet (used for HV Cable Management). 20 Rev.2 Fig.3.3-3 More views of transverse arm showing cable management as well as platform leveling screws (kidneys behind tube). Fig.3.3-4 Transverse arm with Transverse Lock Assy (adjustment screws). 21 Rev.2 Fig.3.3-5 Main Floor Base Platform Showing Location of Longitudinal Brake Strip (which is to be located at the back of the room). This assembly has twin aluminum extrusions which are the assembling structure of the platform. The front extrusion, contains a geared rubber timing belt (used for longitudinal SID tracking). This platform must be secured to the floor with Tapcon or similar concrete anchors of at least 1/4-20 in size. A level floor is a must so that this platform is also level (a level foundation upon which to build a level traveling FMTS... 22 Rev.2 3.2 EQUIPMENT SIZE AND WEIGHT Product literature “flyers” show the physical dimensions of the FMTS. (Weights shown do not include the X-ray tube, collimator, high-tension cables. All dimensions and weights are approximate and subject to change without notice. 3.3.1 INPUT POWER SOURCE REQUIREMENTS The FMTS requires a nominal line voltage of 115/220 VAC, single phase, at 50/60 Hz. Power should be connected to the FMTS by three No. 18 gauge (minimum) common wires, and controlled by a front operated, 15 ampere main switch with an enclosed circuit breaker. The FMTS should be connected to an auxiliary power source in the room, separate from the X-ray generator power. 3.3.2 EQUIPMENT GROUNDING Proper equipment grounding minimizes the possibility of electrical shock hazard to personnel located in the room by establishing the same ground potential condition between equipment in the room. To maintain all equipment within the same room at an equal potential, all exit ground terminals should be connected to a single ground point. Measurement of electrical leakage should be referenced to the physical location of the point. The main grounding point is provided on a Euro Strip inside the Communication Board Enclosure). The following recommendations concerning grounding of the apparatus should be observed: a) One ground conductor should be run from each piece of equipment or group of equipment to the single reference ground point to avoid electrical ground loops. b) Where applicable, the size of the ground wire must adhere to the requirement of the National Electrical Code. c) Use of a fully insulated ground conductor must be standard. d) Size of the ground conductor should be increased according to the length of the conductor run. e) Terminating connections of ground conductors must be sufficiently low impedance so the ground conductor is not affected. The following National Fire Protection Association documents of current issue should be reviewed. a) NFPA Document No. 56A-Standard for Use Inhalation Anesthetics b) NFPA Document No. 70-National Electric Code c) NFPA Document No.- 76A - Essential Electrical Systems for Hospitals 23 d) NFPA Document No. 76B - Safe Use of Electricity in Hospitals 3.3.3 Rev.2 ELECTRICAL LEAKAGE Electrical leakage measurements should be made between the installed equipment and the reference ground point, between equipment in the group, and between the equipment ground and any other equipment in the same room. Only responsible for the electrical leakage equipment between installed equipment and between these equipment and the reference point. During electrical leakage measurements make certain that electrical interference originating from the power line or other outside sources does not produce erroneous result. An oscilloscope survey of the electrical leakage is suggested to assure correct leakage measurements. 3.3.4 REQUIRED MAINTENANCE A-er the X-ray is free from hazardous leakage potentials, the using facility is responsible for maintaining a safe environment. This maintenance includes the following: a) b) c) d) Keep ground conductors free of damage and assure that ground conductors are not removed. Maintain low impedance terminations on ground conductors. Maintain equipment so that any internal faults that may occur are immediately corrected. Notify the local factory representative whenever changes are made to the electrical distribution circuits for installed equipment. e) Periodically inspect all ground conductors to insure that they are still properly connected and free from damage, dirt or corrosion, and notify the local representative if problems exist. f) Review any technical documentation on the equipment and the specific grounding requirements of each device. 3.3.5 ELECTRICAL WIRING AND TROUGHING Certain electrical wiring and troughing requirements must be met before equipment installation. The electrical contractor will supply and install all junction boxes and main switches, conduits, wire, troughing, etc., and the installation must conform to all applicable local codes. Standard type wire must be used throughout the installation and all wiring must be tagged at both ends. Six-foot wire tails are the minimum required. Ceiling fixtures in the X-ray room must be flush-mounted so as to interface with the OTS. Conduits of approximate size should be installed to route wiring from the junction box to associated equipment in the room. Conduit runs are required between the junction box and X-ray control, the X-ray table, and the wall Bucky or wall mounted cassette holder. The high tension cable trough and the electrical junction box should be installed adjacent to one other. If possible, installation of the high-tension cable trough should be inside the wall. This will help to prevent damage to high-tension cables, which may result from heat, cold, condensation or seepage from the outside. 24 3.4 Rev.2 TOOLS, EQUIPMENT AND MATERIALS The following are recommended for proper execution of FMTS and X-ray room equipment: a) Li-ing device such as a appliance dolley and pallet jack, suitable to facilitate transportation of your FMTS components from the “dock” to your instal room. b) Level, minimum length of 5 feet c) Normal complete of hand tools d) Shims, if necessary to level the main floor platform to ensure a level track. e) Alcohol to clean the high-tension cable ends and tube-head and high-tension transformer sockets. f) Dow Corning, DC4 Vapor Proofing Compound, silicon insulating grease or equivalent for packing X-ray tube head high-tension cable terminals (typically supplied with new x-ray tubes). g) Syringe-minimum capacity 25cc (for above). h) Plum bob i) “C” Clamp j) Loctite -- Blue and Red k) Square l) Special film cassette (11x14 cassette with scribed centerlines). 3.5 UNPACKING AND HANDLING When the unit is received, carefully inspect the shipping container for damage, which have occurred during shipment. If there is any evidence of damage, call the carrier’s representative immediately so that the equipment is unpacked under the supervision of the representative. NOTE X-ray tubes should always be inspected immediately upon receipt from the carrier. DO NOT warehouse X-ray tubes without immediate inspection and, if possible, thorough testing. Extreme care must be used whenever X-ray tubes or high-tension cables and handled. They are extremely delicate. A li-ing device suitable for supporting the FMTS components should be available for transporting to installation site. Move all components as close as possible to the work site to avoid excessive movement a-er unpacking. Be very careful to handle all of the material furnished to avoid unnecessary damage. Hint! Your units are carefully packed and double-inventoried to be sure you receive all components. Be sure to not accidentally discard components during unpacking. 25 3.6 Rev.2 SELECTING EQUIPMENT LOCATION The relationship between X-ray table and the FMTS should allow complete longitudinal and transverse coverage of the X-ray table. Additionally, this relationship should allow the FMTS to be parked and not interfere with the X-ray table in vertical position or with X-ray tube normal to the tabletop. A minimum source-image receptor distance (SID) of 36 inches must be obtained between the FMTS X-ray tube and the upright table Bucky. The high-tension transformer (generator) should be positioned in an out-of-the-way location. In general, the high-tension transformer should be located so that the cable lengths from the transformer to the X-ray tube are as short as possible. A wall-mounted cassette holder mounted to the wall in a common position, with the centerline of the cassette holder being on the same centerline as the X-ray table. Such a placement of a wall stand would require a large enough room to allow for “in-line” placement (and still have enough room for longer SID wall stand shots). All information provided is for reference only and room layout questions should be directed to your room layout planner (architect) prior to mounting / installing equipment. 3.8 UNIT INSTALLATION 3.8.1 Floor Track Installation Proper placement in the room and parallelism of the floor track is essential for smooth operation of the FMTS. A level floor is also essential for smooth motion. INSTALLATION HARDWARE Each install location requires varying types of hardware to secure the floor track securely to the floor. This is a freestanding design and it must be secured to the floor in a robust fashion to prevent tipping. Failure to properly secure this track could lead to product tippage and cause injury or death. Mechanical engineers must be consulted to select the proper hardware to secure this track to your existing instal location floor. The floor track has multiple holes from which to secure it to the floor by the aforementioned hardware. All hole locations should be anchored (don’t skip any holes). A-er securing the floor track to your floor, install the main upright column onto the floor track. This can be “tipped” in from the front or rolled onto the tracks from the side, in the event you have room to perform the latter. Immediately secure the main column to the floor track by installing both sweeper/keeper assemblies (which lock the column under the floor track extrusions. You will need to source: Floor Anchoring Hardware per above description Possible Unistrut hangar for Cable Drapes (Optional) 26 Rev.2 3.8.4 X-RAY TUBE AND COLLIMATOR INSTALLATION CAUTION: INSTALLATION OF X-RAY TUBE REQUIRES TWO PERSONS 1. 2. 3. 4. 5. 6. 7. Pull the X-ray tube head down to comfortable working height and secure height by installing a piece of scrap wood into the recess on the column above the transverse arm. Tape around the column so that this scrap wood will not fall out. If this scrap wood falls out, the transverse arm may rapidly fly up and cause severe injury or death. Place the X-ray tube on the platform (or trunnion). Place the Swivel Mounting Ring and any spacers required beneath the platform, and install the four screw provided with collimator through the ring and into the tube (this procedure will vary if you have trunnions as the handle bracket and collimator are assembled in a different fashion). Tighten securely. Use of Loctite ™ #242 is recommended. Spacer quantity/ count/thickness varies on tube/collimator pair selection. See documentation of your purchased tube/collimator for this “F-FS” distance (Flange to Focal Spot). Turn the platform with X-ray tube upside down so that the Swivel Mounting Ring will faces up. (you to overcome have the force of the Fail-Safe Tube Rotation Lock by turning hard on the control handle if your unit is not under power. You may also provide a 24VDC external power source to release this the lock to ease in “pre-power” rotation. As little as 12VDC will release this lock. Carefully place the collimator upside down on the mounting ring. Secure the screw in the Swivel Ring Collar (or 4 tab floating head type). Check if collimator is turning freely. Turn the assembly back so that the collimator is facing down. 3.8.5 CONTROL HANDLE INSTALLATION 1. 2. Install the Control Handle/Handle Bracket in to the platform. It is extremely helpful to attach the three system cables (ground, communication{ribbon} & tube rotation lock) prior to mounting the control handle as they can be difficult to attach otherwise. Be sure to actuate the slide locks on the communication and tube rotation cables a-er seating them onto their respective connections on the back of the control handle. Failure to engage these slide locks will lead to an intermittent system error a-er some usage by your customer). Install Tube Cover on platform with HV cables and other cables within the cable bushing. 27 hieS ub T l na tio Op Rev.2 Ad e lat rP e t ap 3.8.6 X-RAY TUBE AND COLUMN ADJUSTMENT A-er installing X-ray tube and collimator, check the verticality of column and adjust accordingly. 1 If your column is not level. You may install shims between the steel base plate and the steel weldment structure. Be sure to retighten the four 3/8-16 bolts securely. Never remove these bolts completely as the unit could fall over and cause severe injury or death. 2 Check level of bottom face of collimator and adjust accordingly with four bolts behind tube (kidneys). Never remove these bolts completely as the tube head could fall off and cause severe injury or death. 3 For leveling in transverse plane, loose four screws on both sides of platform (parallel arms) and adjust collimator level by turning two vertical bolts on platform. 4 Reinstall Cover-Platform side (obsolete on later models). 28 Rev.2 3.8.7 CABLE INSTALLATION The following cabling needs to be attached... 1. 2. 3. 4. Connect the Rotational Brake Cable to socket on backside of Control Handle (see Figure: 3.7 ) -- engage slide lock. Connect HV cables and stator cord to the X-ray tube according to X-ray tube manual. Connect control cable to the collimator. Connect 25 position communications (ribbon) control cable to Control Handle (socket is on backside of control handle) -- engage slide lock. Figure: 3.7 ROTATIONAL BRAKE CABLE (FMTS & OTS) 29 Rev.2 3.8.8 INSTALLATION OF LONGITUDINAL POTENTIOMETER PULLEY The longitudinal tracking system uses a pulley (geared) which rides on the under side of the front base track extrusion. On this base track extrusion, you will notice a rubber geared belt. Mechanically install the pulley so that it rides on this belt. Install tension spring to keep the pulley in place. Later, during calibration, it will be necessary to install the potentiometer for this longitudinal assembly. When installing, set the FMTS at it’s mid longitudinal travel and install the pot which you should preset at 5 turns (this is a 10 turn pot and it’s mid position is 5 turns). 3.8.9 INSTALLATION OF LONGITUDINAL BUMPERS. Most systems have these bumpers pre-installed for you onto the ends of the main base track. If you have removed these bumpers during installation 30 4. Rev.2 GENERAL MAINTENANCE Maintenance should be performed on the FMTS to avoid any operational problem and assure long-lasting and safe use. Close cooperation of operator and maintenance technician is essential to discover of any degraded performance during use and periodic inspection. The operator and maintenance technician must be aware of and identify correctly any problems before catastrophic failure occurs. The operator should carefully observe the normal operation of the unit. If there is any abnormal operation such as noise, stiffness, grinding etc., the maintenance technician must be notified immediately. FMTS should be cleaned frequently. Use cloth slightly moistened in warm, soapy water to clean all surfaces. Wipe with a cloth slightly moistened in clean water. Do not use cleaners or solvent of any kind as they may remove markings and could damage the finish and plastic covers. When cleaning the collimator and x-ray tube follow the manufacturers instruction and manuals. The periodic inspection should cover the following: inspect the counterweight support cables every 6 months.*** inspect the mounting clips (ferrules) of cables every 6 months*** clean surface of wear-strip (blue temper) and bearings if necessary inspect magnetic holding pucks and brake strip Inspect and verify operation of both Fail-Safe Brakes (vertical and tube rotation)*** 4.1 OPERATIONAL CHECK-UP The operational check-up is recommended to keep a record of the operational performance and to early discover any future problems or failure. Make a copy of this procedure, record the results of check-up and store copy with FMTS documentation. ***Critical 31 4.2 OPERATIONAL “CHECK-UP” LIST Pass/Fail 1. Ensure that system power is OFF 2. Verify that FMTS unit moves freely in transversal and longitudinal 3. Verify that FMTS unit is vertically balanced properly (not dri-ing). 4. Turn the system ON. 5. Press the tube rotation lock release button and verify that the tube directions and axial rotation (detents). Rev.2 7. Verify that the transverse lock release works properly. 8. Verify that the longitudinal lock release works properly. 9. Verify that the up/down lock release works properly and rotates freely in full range ± 180-degree. 6. Verify that the rotation mechanically detents at 0, +90, -90 and 180-degree positions. tube is not dri-ing up or down. 10. Verify that the central handle lock release switch works properly. 11. Verify that the 3-way lock release works properly. 12. Verify that the transverse/long centering lock release works properly. 32 Rev.2 CALIBRATION PROCEDURE 5.1 Overview 5.1.1 General This document outlines the Service and Calibration Mode of “halo” Overhead Tube Support or “triton” floor mount tube stands. 5.1.2 Scope This procedure applies to the firmware, which is resident on the OTS/FMTS display control board. Assy: 151-91-030-2 OTS/FMS Display CPU This covers access to Service Menu and Calibration Procedure both from OTS/FMTS Control Handle and laptop computer. 5.1.3 Accessing Service Mode. The Service Menu and Calibration Procedure is accessible from OTS Control Handle using “magic” sequence of pressing operation switches. The “magic” sequence is shown on the Figure 5.1. Figure: 5.1 33 Rev.2 Intentionally Blank 34 Rev.2 5.3 Calibration Menu In this Menu the following parameters can be calibrated for further display in Operation Mode: To access to the Service Menu press the operation switches in “magic” sequence 1, 2, 3, 4 (this same again), 5, and 6. (Proceed slowly and precisely) 5.2 Service Menu Function From Service Mode we have access to following operations: Calibration Configuration Utility Exit Figure 5.2 Service Menu Display - Wall Bucky Pot - calibrates optional wall Bucky height Vertical Pot - calibrates tube vertical position to the floor, Long Pot - calibrates longitudinal position of tube, Transverse Pot - calibrates lateral position of tube, Table Pot - calibrates height of tabletop to the floor, Tilt Roll Sensor - calibrates smart-level tilt angle sensor Vert 40” SID Center [Table] - calibrates vertical 40” SID to the Table, and table centering (transverse) at the same time. Horz 36”, 40”, 48” or 72” SID Center - calibrates longitudinal SID (36”, 40”, 48” or 72”) to the Wall Bucky (as well as transverse detent position). CoRE labs wall stands provide a third, vertical calibration as well. 5.3.1 Bucky Pot Calibration *** At the bottom of display there are displayed functions related to the operation switches shown on Figure 5.1. The “PREV” – operating switch moves highlight cursor to previous position or decreases the numbers in digital data. The “NEXT” – operating switch moves highlight cursor to next position or increases the numbers in digital data. The “OK” – operating switch accepts the entered data. The “CANCEL” – operating switch cancels present operation and returns to previous menu. ***IT IS RECOMMENDED TO MAKE SOME PRACTICE WITH COORDINATION OF OPERATION SWITCHES FUNCTIONS TO ACHIEVE EXPECTED RESPONSE ON DISPLAY PANEL. FAILURE TO PRACTICE WILL RESULT IN LONGER TIME BEING SPENT DURING FINAL CALIBRATION. 35 With display as in Figure 5.2 press OK and display will look as follows: Rev.2 Figure 5.3.1.1 Press OK to go to Pot Calibration Mode – Wall Bucky Pot. Press PREV or NEXT to go “High Cal Pos. Figure 5.3.1.2 (The digits with adc on display are for so-ware programming only and will be neglected in following descriptions) Press OK to highlight value of High Cal Pos. Move Wall Bucky to its highest position from the floor. Measure the distance from the center crosshairs of the Bucky to the floor. Set the measured value by pressing PREV or NEXT. Press OK for confirmation. 36 Rev.2 Figure 5.3.1.3 The display will prompt you if you are sure to execute calibration in this position. Figure 5.3.1.4 Press OK for confirmation. Move Wall Bucky to lowest position from the floor. Measure the distance from the floor to the center crosshairs of the Bucky. PREV or NEXT to move cursor to Low Cal Pos. Figure 5.3.1.5 Press OK to highlight value of Low Cal Pos. as on Figure 5.3.1.6 Figure 5.3.1.6 37 Rev.2 Set the measured value by pressing PREV or NEXT. Press OK for confirmation. Figure 5.3.1.7 Press OK to execute. Press CANCEL to return to the calibrate selection menu. 5.3.2 Vertical Pot Calibration -- Tip! Place the tube crane/stand just off of a corner of the table below so that vertical calibration of the vertical pot is performed to the floor near a corner of the table. This same floor spot near the corner of the table frame should be used to measuring/calibrating the table height/table pot calibration (this will contain floor unlevelness variable during calibration). Making a mark “X” on this spot on the floor is advisable. Press NEXT to highlight Vertical Pot, Figure 5.3.2.1 Press OK for Pot Calibration Mode-Vertical Pot. By pressing 3-Way Lock Release, Figure 2.1, li- the Tube Head to the highest position. Measure the distance to the floor from the focal spot (marked on the ends of the tube) to the floor. Hint! Do not use the collimator tape. Use a good rigid tape measure which is at least 16’ long -- a Stanley FatMax works best. Use the same tape measure throughout all axes calibration for consistency. 38 Rev.2 Figure 5.3.2.2 Press PREV or NEXT to highlight High Cal Position Press OK to highlight “High Cal Pos:” value. Figure 5.3.2.3 Enter the distance from the Focal Spot to the floor “X” by pressing PREV or NEXT. Figure 5.3.2.4 Press OK to confirm. You will be prompted whether you are sure to proceed with calibration. 39 Rev.2 Figure 5.3.2.5 Press OK for confirmation. Press PREV or NEXT to proceed with calibration of Low Tube Position. Figure 5.3.2.6 Move the tube to its lowest position and measure distance to the floor with the same tape measure. Hint! Be sure the tube crane/stand has not moved transversely or longitudinally during this vertical move to low cal position. For example, if the tube moves somewhere else in the room, floor un-levelness can introduce a variable which will affect calibration accuracy. Press OK to highlight the value of Low Cal Pos. Figure 5.3.2.7 40 Rev.2 By pressing PREV or NEXT set the measured value. Press OK for confirmation. Figure 5.3.2.8 Press OK for confirmation. Press CANCEL then NEXT to display as on Figure 5.3.3.1 Figure 5.3.3.1 Press OK to enter Long Pot Calibration. 5.3.3 Longitudinal Pot Calibration -- Hint! Use the same tape measure as before. Rotate the tube head so that it points to your wall Bucky (+90 or -90 Degrees). Figure 5.3.3.2 41 Rev.2 Press PREV or NEXT to go to High Cal Pos. digit value. Figure 5.3.3.3 By pressing “3-Way Lock Release” or “Center Handle Squeeze Switch” move the unit to most distant position from Wall Bucky, Measure distance from the focus spot on the cap of the tube (scribed line or dimple) to the Wall Bucky (face of a cassette or detector within the wall Bucky stand “FFD”). Press OK to Highlight High Cal figure in the display. By pressing NEXT/PREV enter the measured value and press OK. Figure 5.3.3.3 Press OK for confirmation and then press NEXT to go to Low Cal Pos. Hint! This same OKNEXT confirmation sequence (execute cal flashing) is used throughout calibration steps for all axes. Proceed as above in closest to the Wall Bucky pos.. A-er entering low cal “closest” figure, press OK twice to confirm, and CANCEL to return to the calibrate selection menu. 5.3.4 Transverse Pot Calibration -- OTS only. Press NEXT to go to Service Menu-Transverse Pot. 42 Rev.2 Figure 5.3.4.1 Proceed the same way as you just performed in longitudinal, but in transverse direction and calibrate high and low positions. Hint! When measuring for transverse calibration, make a pencil mark on the back wall and originate your measurements (high & low) from this same origin point marked on the wall. The destination measurement point is anywhere on back of the tube crane (we suggest you use the lowermost point of the telescope (on the vacuum hose bracket where it bolts to the main pivot arm). When doing this transverse pot calibration, be sure not to move the unit vertically or longitudinally during the move from the low cal (back of the room) to the high cal position (front of the room). Low cal position should be tube crane as far back of the room as possible (to bridge bumper stops) and high cal position should be all the way to the front of the room (to the other bridge bumper stops -- or as far as your cable drapes will allow). A-er calibrating the transverse pot, press cancel to access the table pot calibration. 5.3.5 Table Pot Calibration With display as in Figure 5.3.1.1 press NEXT to go to Service Menu-Table Pot, This procedure apply only to the elevating table equipped with table elevation sensor potentiometer, (“ATLAS” Elevating Table). Figure 5.3.5.1 Hint! When installing the table pot into the spring tension assembly, we suggest the following method for ease/speed/correct installation. This pot is a 10 turn pot. Set this pot at 5 turns (mid position). Drive the table all the way down. Take a measurement from the table upper shroud (skirt) to the floor. Drive the table all the way up, take a measurement to the floor. Find the difference between these numbers, to calculate the mid-heightposition of the table. Drive the table to its mid-height -position, SWITCH THE TABLE POWER OFF, then install the Pot. A!er installing the Pot into its position, and tighten the set screw. Be sure to remove your allen wrench a!er tightening the set screw for if you drive the table with the wrench installed, your pot assembly will be damaged. If you set screw is not visible/accessible at mid position, install the pot, hold sideways flexion on the pot, switch the table on, being very mindful of the dangers of a moving scissor, gently bump the table pedal to drive the table UP, while holding the flexion action on the pot, until the set screw is visible. Turn the table back off, fully tighten the now accessible set screw. 43 Rev.2 Sample 35” skirt height, less 24” skirt height (at low position) is 11” different. Eleven inches, divided by 2, is 5.5 inches. 35” minus 5.5” is 29.5” Mid-Height-Table Position for installation of table pot preset at 5 turns. Press OK to go to POT CALIBRATION-Table Pot. Figure 5.3.5.2 Move tabletop all the way up. Measure the distance from the tabletop to the floor. Hint! This is the exact same spot on the floor where the vertical calibration (high & low) measurements were taken from. Press OK to highlight digit value of high cal position. By pressing PREV or NEXT set the measured value in this field. Figure 5.3.5.3 Press OK for confirmation. Figure 5.3.5.4 44 Rev.2 Press OK to execute. Press CANCEL to go to low cal table position and OK to highlight Low Cal Pos value. Move tabletop all the way down. Measure the distance from tabletop to the floor (same exact spot again). By pressing PREV or NEXT set value of Low Cal Pos. Figure 5.3.5.5 Press OK, twice for confirmation/execute and CANCEL to return to the calibrate selection menu. 5.3.6 Tilt Sensor Calibration - SKIP if your sensor is behaving properly upon receipt. Press NEXT to go to Service Menu-Roll Tilt Sensor as on Figure 5.3.6.1. Figure 5.3.6.1 45 Rev.2 Press OK to go to Roll Tilt Sensor Calibration. Figure 5.3.6.2 The displayed value of X and Y are for so!ware programming only and are not matter of our consideration at this point. These are the feedback figures from the electronics on the PCB. Figure 5.3.6.3 With this display turn the tube right 90 deg so the collimator will be facing to wall Bucky located on right side (counterclockwise). Hint! during this roll tilt sensor calibration, be sure the tube is exactly in its detent position and also is exactly level (EYEBALL IS BEST -BACK AWAY AND LOOK BEFORE EXECUTING EACH VALUE). See section 3.8.6 and drawing # 02-005. Press OK to confirm this position as “-90 deg” Figure 5.3.6.4 Press OK for execution. 46 Rev.2 Press NEXT to go to calibration in position “0 deg”. Figure 5.3.6.5 Press OK to highlight digit value. Figure 5.3.6.6 Turn tube back clockwise so that the collimator is facing down for “0 deg”. Press OK for confirmation. Figure 5.3.6.7 Press OK twice to execute this zero degree setting. 47 Rev.2 Press NEXT to go to “+90 deg “ position (clockwise to +90 degrees as if the collimator would face a wall stand on the le- side of the room). Once in this +90 degree position, proceed as above to execute calibration. Figure 5.3.6.8 Press NEXT so that the display is as on Figure 5.3.6.9 and press OK to highlight the 180 degree digit value. Figure 5.3.6.9 Turn the tube further clockwise, 180 deg so the collimator will face towards the ceiling and proceed as above. Hint! A!er executing this fourth roll tilt sensor calibration, return the collimator to the zero position (straight down). Eyeball levelness, and note figure at the top of the display “current:”. If this figure is not zero (or very close to zero), it may be necessary to toggle the cursor up to the top of this display screen to the current position. Executing a calibration on this current position value will zero it out and further perfect your roll-tilt sensor calibration. Press cancel to return to the service menu...... 48 Rev.2 5.3.7 Vertical 40 in SID and Center of the Table Calibration. With display as in Figure 5.3.1.1 press NEXT to go to Service Menu-Vert 40” SID Center [Table]. Figure 5.3.7.1 Press OK to go to Center Position Cal. Figure 5.3.7.2 Move the tube up to the 40” distance from the table (Depending on local regulations, this may be 40” from the tabletop or 40” from the cassette face (FFD). Switch the collimators light on and move the center of the light cross to desired position on the table (usually TRANSVERSE center -- center of actual cassette as seen with tabletop, Ion chamber and grid removed). 49 Rev.2 Figure 5.3.7.3 Be sure you are now 40” vertically for your SID and also centered transversely on the cassette)........ Press OK to execute calibration for this position. Press Cancel to return to the service menu. A-er this operation, the unit will stop on preset position when moving transverse and vertically. There will be two signs of vertical and transverse set points on display when the SID will be in calibrated position. These signs (symbols) are shown in the figure 5.3.7.4 below. Figure 5.3.7.4 5.3.8 Horizontal 36” SID Center to the Wall Bucky Calibration If the Bucky pot tracking has been enabled in the configuration menu, then all four of following screens will show an additional value “Vertical Offset”. When calibrating the center positions, the collimator light field should be used to align the tube with the Bucky film center. When the calibration is done the difference between the Bucky height and the tube height will be recorded and displayed in this field. Press NEXT to go to Service Menu-36” SID Center [Wall] Press OK to enter the 36” Horiz SID section. 50 Rev.2 Turn the Tube (clockwise or counterclockwise) so that it points to your Wall Bucky direction. Figure 5.3.8.1 Figure 5.3.8.2 Switch the collimators light on and move the Tube, so the center of the light cross will mach with the center (transverse) of the Wall Bucky and an SID of 36 inches from the cassette face (FFD). CoRE labs Wall Stands also require that the collimators light field is at the same height as the wall stand (be sure to have the tube at exactly 90 degrees when executing). Press OK twice to execute Calibration for this position. Figure 5.3.8.3 Press Cancel to return to the service menu. 51 Rev.2 A-er this operation, the unit will stop on preset position when moving transverse and longitudinal with the center of collimator cross light in center of wall Bucky and with SID of 36 in (plus vertically with CoRE labs Wall Stands). There will be two signs of longitudinal and transverse set points on display when the SID will be in calibrated position. Figure 5.3.8.4 Proceed with calibration of next 40, 48 and 72 inches position the same way as just performed with the 36” calibration. Hint! For 48”, most users will want to calibrate this at actual 100” SID/FFD (out of range) so that it doesn’t fall between the commonly used detents at 40” & 72”. You may also want to do the same for 36”. Press CANCEL to return to the service menu... 5.4 Configuration Mode In this Mode the following parameters can be configured and set for future operation: Display Units (in or cm) Display Blank Timeout (minutes) Table Bucky Offset -- fixed variable that user must enter value Table Pot Enable -- enabled for CoRE labs ET configs (atlas) Fixed Table Height -- enabled for non-ET configs Wall Bucky Type -- most users will need to select at least one (le! or right) Wall Bucky Pot Tracking -- enabled with CoRE labs vertical Pot Wall Bucky Stand Aux State Relay Mode [VSID 40] -- advanced users Roll Detent -- advanced users Trans Centering Tolerance -- advanced users Longitudinal Centering Tolerance -- advanced users Vertical SID Centering Tolerance -- advanced users Display Reverse Video -- advanced users -- obsolete on later models 52 Rev.2 In Service Menu Display, Figure 2.0 press NEXT to go to Config Mode, 5.4.1 Display Units Configuration Press OK to go to Configuration Parameters Mode, Figure 5.4.1.1 Figure 5.4.1.2 Press OK to highlight Units box, Figure 5.4.1.3 Press NEXT or PREV to move to another Units (inch or cm), 53 Rev.2 Figure 5.4.1.4 Press OK to confirm and CANCEL to return to Figure 5.4.1.2, 5.4.2 Display Blank Timeout Press NEXT to move to Display Blank Timeout Figure 5.4.2.1 Press OK to highlight value. Press NEXT or PREV to change value. Figure 5.4.2.2 54 Rev.2 5.4.3 Table Bucky Offset Configuration -- Take a physical measurement from the top surface of the tabletop to the top surface of the cassette within the table (use a straight edge) and enter this value here in millimeters. This is the figure that the user display will show a different value on the display for SID distance to table top and table Bucky (while in vertical mode). Figure 5.4.3.1 Press NEXT to highlight Table Bucky Offset, By pressing NEXT/PREV set the proper for your Bucky offset, Figure 5.4.3.1 Press OK for confirmation, Press CANCEL to return to configuration selection menu. *** Some config parameters may be present in your tube crane display but are not discussed herein... 5.4.4 Table Pot Enable Configuration -- enabled for CoRE labs ET configs (atlas) Press NEXT to go to Table Pot Enable 55 Rev.2 Figure 5.4.4.1 Press OK to highlight the field, Press NEXT to Enable/Disable Table Pot according to used table (atlas users will want this enabled. Figure 5.4.4.2 Figure 5.4.4.3 Press OK to confirm and CANCEL to return to Figure 5.4.1.2 5.4.5 Fixed Table Height Configuration (non-ET configs) Enter height here in millimeters the actual measured, installed height of a non-elevating-table. It may be necessary to install a pair of 1K ohm resistors in the communications board (TB2) to simulate a feedback for the SID to display properly with these non-ET configs. A 1K ohm resistor should be installed in TB2, between position 1&2 and also between position 2&3. Press NEXT to go to Fixed Table Ht, Figure 5.4.5.1 56 Rev.2 Measure your tabletop height from the floor, Press OK to highlight digital value, Press NEXT/PREV to set measured height. Figure 5.4.5.2 Press OK to confirm and CANCEL to return to Figure 5.4.1.2 5.4.6 Wall Bucky Type Configuration -- (le! or right) -- usually one or the other must be selected in rooms with a wall stand. Press NEXT to go to Wall Bucky Type, Figure 5.4.6.1 Press OK to highlight wall Bucky type, Figure 5.4.6.2 57 Rev.2 Press NEXT to select Bucky type: on the Right or Le- side of the room, Figure 5.4.6.3 Press OK to confirm, 5.4.7 Wall Bucky Pot Tracking. This configuration is used with Wall Bucky equipped with potentiometer for vertical movement tracing. Figure 5.4.7.1 In this display the Wall Bucky Pot Tracking can be configures by choosing Enabled or Disabled position. 58 Rev.2 5.4.8 Auxiliary State Relay Mode of 40 in Vertical SID for the Table - ADVANCED USERS Press NEXT to go to Aux State Relay Mode Configuration Figure 5.4.8.1 Press OK to highlight selection window. Figure 5.4.8.2 Press NEXT to select VSID 40 ON or OFF. Figure 5.4.8.3 59 Rev.2 5.4.9 Roll Detent Configuration - ADVANCED USERS Press NEXT to go to Roll Detent Configuration This configures the angle of tube head above that the display will flip to Angle display. Figure 5.4.9.1 Press OK to highlight digital value, Figure 5.4.9.2 Press NEXT/PREV to set Roll Detent Configuration value (Deg/10), Press OK for confirmation. 60 Rev.2 5.4.10 Transverse Centering Tolerance Configuration - ADVANCED USERS This is the detent “window” width. Press NEXT to go to Trans. Centering Tol. Configuration, Figure 5.4.10.1 Press OK to move cursor to digits, Figure 5.4.10.2 Press NEXT to set Transverse Centering Tolerance value, Press OK to confirm. 61 Rev.2 5.4.11 Longitudinal Centering Tolerance Configuration - ADVANCED USERS This is the detent “window” width. Press NEXT to highlight Long Centering Tol, Figure 5.4.11.1 Press OK to move cursor to digital value, Figure 5.4.11.2 By pressing NEXT/PREV set the Longitudinal Centering Tolerance value, Press OK to confirm. 62 Rev.2 5.4.12 Vertical SID Centering Tolerance Calibration - ADVANCED USERS This is the detent “window” width. Press to go to Vert SID Centering Tol. Figure 5.4.12.1 Press OK to highlight digit value. By pressing NEXT or PREV set the tolerance value. Figure 5.4.12.2 Press OK for confirmation. 63 Rev.2 5.4.13 Display Reverse Video Configuration -- Obsolete on late models. Press NEXT to highlight Display Reverse Video, Figure 5.4.13.1 Press OK to move cursor right, Figure 5.4.13.2 By pressing NEXT/PREV select preferable background of display, Figure 5.4.13.3 Press OK to confirm. 64 5.5 Rev.2 Utility Mode - ADVANCED USERS In this Mode the So-ware Version and EEPROM can be verified. Press NEXT to open Utility-Service Mode display, Figure 5.5.1.1 Press OK to highlight So-ware Version, Figure 5.5.1.2 Press NEXT to highlight Load EEPROM Default. CAUTION -- THIS IS TOTAL RESET Figure 5.5.1.3 Press Cancel (3X) to return to Operation Mode Display. 65 Rev.2 5.6 Warranty CoRE labs warrants that all products to be provided hereunder shall comply with SELLER’s specification and shall be free from defects in material and workmanship under normal use and service for a period of 1 year from shipment to BUYER. If any products supplied by CoRE labs fail to conform to SELLER’s specification, CoRE labs shall, as its sole and exclusive liability hereunder, repair or replace such products and /or its components if they are returned to CoRE labs facility, Englewood, Colorado, within the warranty period as expressed above and how it relates to the particular product involved. CoRE labs shall not be liable for any incident or consequential damages. These warranties are made upon the express condition that: 1. CoRE labs is given prompt written notice upon discovery by BUYER of such non-conformity, with a detailed explanation of the alleged deficiencies; 2. Such products and/or components are returned to CoRE labs at the expense of BUYER; 3. The product and/or components have not been altered, modified or changed in any manner by anyone other than CoRE labs or BUYER’s qualified factory or service personnel as authorized by CoRE labs. 4. Repairs to the products and/or components have not been made by anyone other than CoRE labs or at CoRE labs’ authorized service facility or BUYER’s qualified service personnel as authorized by CoRE labs. 5. CoRE labs agrees to repair or replace such products within a reasonable time and will return the repaired or replaced product at CoRE labs expense. THIS WARRANTY EXCLUDES ALL OTHER WARRANTIES, WHETHER EXPRESSED OR IMPLIED, ORAL OR WRITTEN, INCLUDING WITHOUT LIMITATION ANY WARRANTY FOR MERCHANTABILITY AND/OR FITNESS FOR A PARTICULAR PURPOSE. NO TERM, CONDITION, UNDERSTANDING OR AGREEMENT PURPORTING TO MODIFY THE TERMS OF THIS WARRANTY SHALL HAVE ANY LEGAL EFFECT UNLESS MADE IN WRITING AND SIGNED BY AN AUTHORIZED OFFICER OF CORE LABS AND THE BUYER. IF BUYER HAS MADE DIFFERENT WARRANTY TERMS THAN SHOWN ABOVE, BE SURE TO HAVE A CORE LABS REPRESENTATIVE OFFER SUCH WARRANTY IN WRITING, SIGNED BY AN OFFICER OF CORE LABS. FAILURE TO MAKE PAYMENT BY END USER AND OR INSTALLING DEALER, VOIDS ANY AND ALL WARRANTY. 5.7 Safety Overview The CoRE labs triton is an Floor Mount Tube Support (FMTS). Personnel operating and maintaining the FMTS should receive training and be familiar with all aspects of operation and maintenance. To ensure safety, read the Safety Information section carefully before installing the system and observe all Warnings, Cautions, Importants’, and Notes located throughout the manual. General The following are general safety precautions: • Do not attempt any repairs if the equipment fails to operate correctly. Immediately call a person qualified and authorized to repair the equipment. • Observe all warnings and cautions, stated or implied, in the procedures. • Follow all safety labels on the equipment. Electrical/Mechanical Only a qualified CoRE labs authorized Service Provider should replace electrical and mechanical components. 66 Rev.2 Mechanical The following are mechanical safety precautions: • Keep fingers, hands, and tools clear of moving parts. • Unless specifically instructed, do not operate the equipment with covers or access panels removed. • Route cables properly to eliminate hazards from tripping. Safety Warnings and Cautions This manual uses many types of messages to emphasize information or potential risks to personnel or equipment. NOTE: Notes provide additional information, such as expanded explanations, hints, or reminders. IMPORTANTS: Importants highlights critical policy information that affects how you use this manual and this product. Cautions point out procedures that you must follow precisely to avoid damage to the system or any of its components, loss of data, or corruption of files in so-ware applications. Warnings identify procedures that you must follow precisely to avoid injury to your- self or others. ! Only qualified personnel may operate the FMTS System. Operation of the equipment by persons who have not been trained or who are unfamiliar with the functions and controls of the FMTS System may cause serious injury to the patient, serious injury to the operator, or equipment damage. The FMTS System includes no user serviceable parts. For service assistance, contact CoRE labs. This device must be maintained according to the directions in the Operator’s Manual. Failure to maintain this equipment as directed may result in injury, equipment malfunction, or unacceptable images. Some of the ceiling components weigh up to 1000 lbs (454 kg). Use more than one installer and a suitable li-ing device for these components. The FMTS and associated cables must not be operated in the presence of condensation. The FMTS System is not suitable for operation in the presence of a flammable anesthetic mixture with air, oxygen, or nitrous oxide. Safety Information Using the Equipment CAUTION ! The equipment is fragile and must be handled with care. Cleaning Cautions WARNING Do not operate the equipment when cleaning the equipment. Do not spray cleaning solution directly onto the equipment. Moisten a cloth with warm water/mild soapl solution for use on plastics and enameled metal. Apply to patient contact areas a-er each contact, or follow your hospital’s approved disinfecting procedure. Read and follow instructions in the Material Safety Data (MSDS). Do not immerse the equipment in liquid. Do not autoclave the equipment. 67 Rev.2 Applicable IEC Symbols Protective earth (ground). Identifies any terminal, which is intended for connection of an external protective conductor to protect against electrical shock in case of a fault. This symbol on the equipment means that the accompanying operating instructions should be consulted to assure safe operation. Dangerous voltage. Indicates an avoidable dangerous high voltage hazard. Function Earth (ground) Terminal. Terminal directly connected to a point of a UL measuring supply or control circuit or to a screening part that is intended to be earthen for functional purposes. Alternating Current. Indicates equipment that is suitable for alternating current only. N Connection point for the neutral conductor on PERMANENTLY INSTALLED EQUIPMENT 68 Rev.2 SUPPLEMENT SECTION..... Photos of control handle cables and installation points. 69 Optional Detent Ring Shown with Square TubeShi- Plate, Tube Flange, and Parralel Arms Rev.2 OTS AND FMTS Platform 70 Rev.2 71 AMVECO # AA-28040C GREEN RED BLUE BROWN BLACK WHITE ORANGE T1 TOROID GREEN ORANGE RED BLACK 1 2 3 4 5 6 7 8 9 P1 1 2 3 4 5 6 7 8 9 10 J3 J5 P4 CONNECTOR 110VAC CONNECTOR 220VAC 4 TRANSVERSE BRAKES PLUG LINE TO J3 FOR LINE, PLUG LINE TO J5 FOR LINE. J12 J2 P2 P2 OTS POWER SUPPLY M1518 J13 P12 P3 J11 J14 J3 J15 1 9 2 10 3 11 4 12 5 13 6 14 7 15 8 P14 P11 1 2 1 2 3 4 VERTICAL BRAKE RED CLUTCH BLK 4 3 2 1 4 3 2 1 P15 1 9 2 10 3 11 4 12 5 13 6 14 7 15 8 6 5 4 3 2 1 P6 P2 1 2 J6 J3 TB5 + ROTATION BRAKE TOP LIMIT S2 CAN-OUT S1 BUTOM LIMIT TB1 3 4 3 2 1 1 2 3 4 5 6 7 8 9 P2A P2 1 2 3 4 5 S3 S2 S1 J1 J2 P11 TB11 ROTATION SW. VERTICAL SW. TRANS. SW. P1B P1C AUXILLIARY 1 2 3 4 5 6 7 8 9 P2B J5 OTS CONN.BOARD #151-91-031 TB4 1 2 3 4 TO MOTOR DRIVE (OPTIONAL)J4 P16 P17 ROTATIONAL BRAKE RED WHT 3 R2 120 2 TB6 TB7 TB5 1 2 3 4 1 2 3 4 3 4 CAN BUSS TERMINATOR TB3 J3 TB2 S4 S6 S9 S8 S11 J7 J5 1 2 J1 J8 J6 A + Date: Size C Title B TO LCD BACKLIGHT P6 J12 LONGITUDE BRAKES (SET #1) P1 POT_REF VERT_POT_H VERT_POT_L POT_RTN POT_REF LN_POT_H 3 POT_RTN P1A DISPLAY OTS CPU # 151-151-030 J9 P9 AUTO/MANUAL FLEXSTRIP SWITCHES HANDLE ASSEMBLY P3 J3 TO LCD DISPLAY 2 P12 1 2 3 4 P13 1 2 3 4 1 2 3 4 1 P7 1K VERTICAL POT LONGITUDE BRAKES (SET #2) J7 POT_REF VERT_POT_H 1 2 3 4 5 6 7 8 9 1K P6A 1 of 1 Rev 0 R232 SERIAL INTERFACE CONNECTOR TRANSVERSE POT Sheet 1 2 3 1K LONGITUDE POT VERT_POT_L POT_RTN POT_REF LN_POT_H 3 POT_RTN POT_REF TRNSV_POT_H TRANSV_POT_L S5 1 P6 POT_RTN HANDLE SW. S10 S7 P4 J4 OTS WIRING 02-00001 Wednesday, December 19, 2007 Document Number J6 DETENT SW. S12 LONG. SW. MASTER SW. TO TABLE 1 2 3 4 J14 P14 1 2 3 4 J13 1 2 3 4 1 2 P3/5 P2 J10 P13 4 1 2 1 2 1 2 1 2 5 P4 M1 ENCODER 1 2 3 4 POT_REF TRNSV_POT_H TRANSV_POT_L POT_RTN 1 2 3 4 POT_REF TBL_POT_H 3 POT_RTN 1 2 3 4 POT_REF BKY_POT_H 3 POT_RTN 110/220VAC LINE TO TERMINATED HOST ON BOARD PROGRAMING CONNECTORS J6 P1 RS232 INTERFACE MOTOR 1 2 VER_SID40_A VER_SID40_B 24VAC TO COLLIMATOR J5 4V OTS MOTOR AMP. 212-100 20 V J4 30 V 0V D C B A 100 V 0V 1 2 1 2 3 4 5 6 7V 0V 5 6 5 4 3 2 1 60VDC 17 V 0V 20 V 0V 8 15 7 14 6 13 5 12 4 11 3 10 2 9 1 6 5 4 3 2 1 10 9 8 7 6 5 4 3 2 1 GND +24V 60VDCRTN 10 9 8 7 6 5 4 3 2 1 0V 100 V 0V 1 2 3 +5V -15V +15V 1 2 9 8 7 6 5 4 3 2 1 1 2 0V 5 9 4 8 3 7 2 6 1 Rev.2 D C B A OTS AND FMTS 72 - U6 U15 74ACT04 74HC00 TYPE GND PIN 7 7 +5V PIN 14 14 PIN C B WDS SWT SWT 01/30/03 PROJECT: IROM Change D1 from 24V, SMBJ24A to 30V, SMBJ30A C2 08/01/02 Change C35 (6D3) from 47uF, 16V to 10uF, 35V. C1 SWT 03/27/02 SEE NOTE 7. C SWT SWT SHEET 3 ADD R92, L1, C41. CHANGE C39, C40 FROM02/06/2001 100nF AND R67 FROM 1.0M. Appr. B1 Date 01/26/2000 12/12/2000 SEE NOTE 6 Description INITIAL RELEASE A B Rev A REVISIONS 4 1 E D 7. Changes for revision C: Incorporate B1 changes as follows: Add C41, L1, R92 (3D4). Change C39, C40 from 100nF to 470nF and change R67 from 1.0M to 2.0M (3D4). Also add MT9, MT10, MT11 and E1 (2C1). Change R36 from 1.0uF to 0.47uF. Make note 5 not applicable - was an obsolete reference to connection of analog and digital ground at sheet 5, zone D2. 6. B REVISION CHANGES: Correct reversed inputs to U9A, U10A, U11A (Sh 3). Change U9, U10, U11 from TLC272. Pin Y1-1 was connected to GND (Sh 5). Delete U14-1 connection to +5V (Sh 5). Disconnect Q2A from J7-3, connect J7-3 to +5V, delete R67 (Sh 6). At J1-20,21 substitute signals SCL, SDA; add interface networks R88, D38, R89, D39 (Sh 3). Connect SCL, SDA at U12-77,78 (Sh 5). Change all references "Latitude" to "Transverse", "Elevation" to "Vertical", "Rotation" to "Roll". Change all signals LAT_POT to TRNSV_POT, EL_POT to VERT_POT, ROT_POT to ROLL_POT. Negative input to TBL_POT channel was independent and connected to J1-20; now shared with TRNSV_POT channel. Was: R69 47K, R71 2.7K, R73 10K (Sh 6). Add J9 and interface networks for signals SW_FLXx (SH 4) and route them into U13 (Sh 5). Add U18, U19, C38-C40, R67 (Sh 3). U6F was spare. Wire ROLL_X, ROLL_Y, ROLL_Y/ into U12, and rewire affected signals (Sh 5). Change PadsID of Y1 from SMT-04 to SMT-SG615. Change signal from LN_POT- to BKY_POT+. Add R90, R91. Change signal ROLL_POT to BKY/ROLL_POT. Delete D16 and R36 to R40. 1. ALL RESISTORS ARE SURFACE-MOUNT CHIP TYPES, STYLE 1206, TOLERANCE 5%, RATED 1/8 WATT. VALUES ARE IN OHMS, KILOHMS (K) OR MEGOHMS (M). 2. ALL CAPACITORS ARE SURFACE-MOUNT CERAMIC CHIP TYPES, STYLE 1206, TOLERANCE 10%, RATED 50V. VALUES ARE IN MICROFARADS (uF), NANOFARADS (nF) OR PICOFARADS (pF). 3. RELATED DRAWINGS: ASSEMBLY: 151-91-030 (with CAN) 151-91-033 (No CAN) PCB: 151-93-030 4. USED ON PROJECT: IROM 5 NA Document Number A 18:15:36 151-51-030 Schematic, OTS Display CPU Thursday, January 30, 2003 C Rev C2 Sheet 1 of 6 1 Size Title 2615 Manhattan Beach Blvd. Redondo Beach, CA 90278 (310) 643-0040 FAX: (310) 643-0041 [email protected] Data Spectrum, Inc. S:\PROJ2\51IROM-ARCHIVE\30OTSDISP\PCB-C\151S030C2.DSN 2 NOTES: (UNLESS OTHERWISE SPECIFIED) R78 R91 U18 (Implicit connections only) Table 2, IC Power & Ground Connections REF B 2 D12, D16, D20 TP23 - TP27 NOT FITTED C 3 C41 D39 E1 F2 J9 L1 MT11 Q5 R92 RP3 SW3 TP39 U19 Y1 UNUSED Table 1. Reference Designators LAST USED D 3 4 E Rev.2 73 1 2 3 (Sht 5) CAN_RX_LED/ (Sht 5) CAN_TX_LED/ (Sht 5) LED3/ (Sht 5) LED4/ SMT SMT GND TP39 E MA198 D39 MA198 D38 +5V 2 2 CN-HD2X13-BXRT +24V GND +24V GND GND CAN_PWR CAN_GND CAN_H CAN_L DIAGNOSTIC LEDS GND GND SMT TP13 TP12 (Sht 5) SP_BRK/ (Sht 5) TRNSV_BRK/ (Sht 5) LN_BRK/ (Sht 5) VERT_BRK/ (Sht 3) POT_REF (Sht 5) SDA (Sht 5) SCL J1 1 2 3 4 5 6 7 8 9 10 11 12 13 14 15 16 17 18 19 20 21 22 23 24 25 26 3 3 TO OVERHEAD CONTROL UNIT 1 1 5 1 R89 33 +5V R88 33 VERT_POT+ VERT_POTLN_POT+ BKY_POT+ TRNSV_POT+ TRNSV_POTTBL_POT+ SDA_I SCL_I VERT_BRK LN_BRK TRNSV_BRK SP_BRK POT_REF R16 (Sht 5) CAN_TXDC 2 U6C 74ACT04M 6 U6A 74ACT04M 9 3 4 C3 100nF 1 U1 MIC5205-5.0BM5 Vin Vout 5 TH 1% R8 10.0K -15V +24V +24V 1% R22 68.1K 1% R20 56.2K 1% R14 47.5K POWER VOLTAGE MONITORING +5V D1 30V SMBJ30A CANH TH TP7 CANL TH 4 CAN_GND Byp (SOT23-5) En GND + C2 + 10uF 16V TANT SMT +5V R15 10.0K 1% R11 47.5K 1% POWER VOLTAGE FOR CAN INTERFACE CIRCUITRY 3 2 TP6 C1 + 10uF 16V TANT SMT Isolated CAN Power Planes CAN_GND TP3 D MOUNTING HOLES =4.13V @ 5.0V MA198 1 C SOIC08-15 CANL CANH 3 PWR-PT78-H OUT 78HT205 6 7 U4 + VREF RXD TXD 2 PAD R21 33.2K 1% SEN-15V TP14 MT9 MT10 MT11 FIDUCIAL FIDUCIAL FIDUCIAL ALIGNMENT TARGETS D5 =4.17V @ 24V PAD SEN+24V TP11 PAD SEN+5V TP10 C6 100uF 6.3V TANT SMT 5 4 1 PCA82C250 RS 8 24V TO 5V DC-DC CONVERTER IN U5 D4 LL4148 +5V C5 10uF 35V TANT SMT 1 CAN I-O DATA ADAPTER TH CAN_+5V CAN_PWR TP2 TH CAN_PWR D2 5.6V 1N5339B R5 47K R1 470 +5V 3 SW1 R6 470 +24V 6 R3 390 CAN_+5V R2 470 3 DIP08 U3 HCPL2601 2 B R13 10.0K 1% C7 100nF +5V 4 3 2 1 C8 100nF SOIC08 PFI GND VCC M/R U7 +5V 5 6 7 8 C TH PF/ (Sht 5,6) RESET/ (Sht 5,6) SW_RST/ (Sht 5) VERT_POT+ (Sht 3) VERT_POT- (Sht 3) LN_POT+ (Sht 3) BKY_POT+ (Sht 3) TRNSV_POT+ (Sht 3) TRNSV_POT- (Sht 3) TBL_POT+ (Sht 3) CAN_RXDC (Sht 5) A Rev C2 Sheet 2 of 6 SENSE+5V (Sht 5) SENSE+24V (Sht 5) SENSE-15V (Sht 5) A 151-51-030 CAN_RX TP4 Document Number R10 4.7K +5V R7 4.7K +5V C4 100nF +5V R4 390 Thursday, January 30, 2003 Size 6 RESET/ TRIP: 10.9V R12 681K 1% PFO N.C. RST RST MAX708 RESET SUPERVISOR Isolated CAN Power Planes R9 78.7K 1% SPST, MOMENTARY 2 +5V +5V +24V D3 +5V SMT, RED +5V TH TP9 RESET 1 7 +24V TH TP8 DIP08 U2 HCPL2601 2 B CAN BUS ISOLATION Isolated CAN Power Planes 8 C 7 TP1 BRAKE DRIVERS D 1 2 3 4 MT1 MT2 MT3 MT4 MT5 MT6 MT7 MT8 PAD 0.250 PAD 0.250 PAD 0.250 PAD 0.250 PAD 0.250 PAD 0.250 PAD 0.250 PAD 0.250 DRILL 0.120 DRILL 0.120 DRILL 0.120 DRILL 0.120 DRILL 0.188 DRILL 0.188 DRILL 0.188 DRILL 0.188 U6D 74ACT04M 8 U6B 74ACT04M 470 D6 CAN_RX SMT, RED TH CAN_TX 470 D7 CAN_TX R17 SMT, RED GND 4 TP5 470 R18 D8 LED3 SMT, RED GND 5 4 Isolated CAN Power Planes 470 R19 D9 LED4 SMT, RED GND 2 3 VDD VSS 2 8 5 E 3 47K RP1A 5 5 1 Rev.2 74 1 2 3 4 BKY_POT+ E (Sht 2) TBL_POT+ (Sht 2) TRNSV_POT+ (Sht 2) TRNSV_POT- (Sht 2) LN_POT+ (Sht 2) VERT_POT+ (Sht 2) VERT_POT- (Sht 2) (Sht 5) ROLL_BRK/ C39 470nF 25V R92 100 L1 R67 2.0M 2 7 6 1 FERRITE D R90 33 VDD ROLL ANGLE SENSOR COM XOUT YOUT LCC8(E-8) T2 XFLT YFLT C41 470nF 25V 2 2 2 2 ADXL202E STEST U18 INSTALL R90 OR R91, BUT NOT BOTH C40 470nF 25V C38 100nF +5V +5V D D21 D19 D18 D17 3 5 4 8 D15 D14 D13 1 MA198 1 MA198 1 MA198 1 MA198 2 2 2 10 +5V +5V +5V +5V 2 3 1 MA198 NC1 NC2 T2 XFLT YFLT +5V +5V +5V R30 8 4 7 10 9 R49 R48 R41 R40 R33 R32 390 6 + - + - 3 2 + - 1 R39 1 C15 C 100K 1% 100nF C12 100nF R34 100K 1% U10A U11A R47 1 C20 100K 1% 100nF C17 100nF R42 100K 1% C21 100nF R50 100K 1% TLC2272C SOIC08-15 +5V 100nF 3 2 U9A 100K 1% TLC2272C SOIC08-15 +5V 100nF 3 2 C10 R31 1 100K 1% 100K 1% R44 R45 100K 1% R37 Q1 2N6388 100K 1% 3 2 R27 5.1K R36 D11 SMT, RED ROLL BRAKE 100nF 9 SPARE 10 TLC2272C SOIC08-15 +5V F2 U6F 74ACT04M 12 0.75A, SMD POLYSWITCH 7 ILQ2 13 U8D 8 R29 1.0K POTENTIOMETER BUFFERS 100K 1% 12 11 +24V R28 1.0K +24V 100nF ILQ2 C19 C14 100K 1% 100K 1% 100K 1% 100K 1% C9 U8C 5 100K 1% ROLL BRAKE DRIVER NC3 COM1 COM2 XOUT YOUT SOIC14-30 1 MA198 C ADXL202Q VTP VDD1 13 STEST VDD2 14 U19 1 MA198 1 6 5 12 11 U6E 74ACT04M R91 NO-FIT 11 INSTALL U18 OR U19, BUT NOT BOTH 3 3 3 3 3 3 3 8 4 8 4 8 4 TH 5 6 5 6 5 6 + + + U10B R43 7 C16 100K 1% 7 C18 100nF R46 100K 1% U11B B 100nF C13 100nF R38 100K 1% TLC2272C SOIC08-15 +5V - 7 100nF 100K 1% TLC2272C SOIC08-15 +5V - U9B R35 C11 TLC2272C SOIC08-15 +5V - F1 B 0.30A, SMD POLYSWITCH R_BRAKE TP15 1N4002 D10 +5V 8 4 8 4 8 E R26 R24 16 C ROLL BRAKE ROLL POT +24VBRK_OK/ (Sht 5) A 151-51-030 TBL_POT (Sht 5) TRNSV_POT (Sht 5) LN_POT (Sht 5) VERT_POT (Sht 5) Rev C2 Sheet 3 of 6 BKY/ROLL_POT (Sht 5) (FOR REFERENCE ONLY) Document Number ROLL BRK CN-HDKK05-RT 1 2 3 4 5 R25 47K +5V POTREF_OK/ (Sht 5) POT_REF (Sht 2) Thursday, January 30, 2003 Size 13 3 J2 14 U8B 4 ILQ2 15 2 ILQ2 U8A 1 5.1K 470 R23 47K +5V ROLL_Y/ (Sht 5) ROLL_X (Sht 5) ROLL_Y (Sht 5) A 1 2 3 4 4 Rev.2 75 1 2 3 A C D E FLEXSTRIP SWITCHES (FOR REFERENCE ONLY) B E RIGHT SIDE SWITCHES (FOR REFERENCE ONLY) LEFT SIDE SWITCHES (FOR REFERENCE ONLY) FLEX SWITCHES CN-HD1X06-RT 1 2 3 4 5 6 J9 CN-HDKK06-RT 1 2 3 4 5 6 J4 CN-HDKK06-RT 1 2 3 4 5 6 J3 D D R60 R59 R58 R57 R56 R55 R54 R53 R52 R51 100 +5V 100 +5V 100 +5V 100 +5V 100 +5V 100 +5V 100 +5V 100 +5V 100 +5V 100 +5V MA198 1 MA198 1 MA198 1 MA198 1 MA198 1 MA198 1 MA198 1 MA198 1 MA198 1 MA198 1 3 3 3 3 3 3 3 3 3 +5V D31 D30 D29 D28 D27 D26 D25 D24 D23 D22 R85 100 +5V R84 100 +5V R83 100 +5V R82 100 +5V R81 100 3 4 E 2 2 2 2 2 2 2 2 2 2 1 1 1 1 1 D33 D34 3 D35 3 D36 3 D37 3 3 2 MA198 2 MA198 2 MA198 2 MA198 2 MA198 C C SW_FLX1 SW_FLX2 SW_FLX5 SW_FLX4 SW_FLX3 SW10 SW9 SW8 SW7 SW6 SW5 SW4 SW3 SW2 SW1 B B C Document Number A 151-51-030 Rev C2 Sheet 4 of 6 1 2 3 4 Thursday, January 30, 2003 Size SW_FLX[1:5] (Sht 5) PANEL SWITCH CONDITIONING SW[1:10] (Sht 5) A Rev.2 76 1 2 3 1 21 1 2 3 4 40 SW2 SW3 41 2 +5V (Sht 3) POTREF_OK/ (Sht 3) +24VBRK_OK/ (Sht 3) ROLL_X (Sht 3) ROLL_Y (Sht 3) ROLL_Y/ (Sht 3) BKY/ROLL_POT (Sht 3) VERT_POT (Sht 3) LN_POT (Sht 3) TRNSV_POT (Sht 3) TBL_POT (Sht 2) SENSE-15V (Sht 2) SENSE+5V (Sht 2) SENSE+24V E (Sht 2,6) RESET/ (Sht 2) SW_RST/ (Sht 2,6) PF/ (Sht 2) CAN_TXDC (Sht 2) CAN_RXDC CTS 206-4 (T-HOLE) 8 7 6 5 SERVICE MODE SPST, MOMENTARY 20 16 1 17 RESET/ +5V TQFP64 PSD813F1 47K 5 RP1B 3 4 PQFP80 47K 5 RP1C 4 33 48 +5V 32 49 2 1 4 8.00MHZ 3 SP_BRK/ FS INV/ ROLL_BRK/ SDA SCL PAD PAD SDA TP34 TP33 SCL XT-SG615 GND OE VCC VO Y1 PAD ROLL_POT TP16 64 47K 10 RP1D 6 PAD VERT_POT/ TP17 C515C 5 2 47K RP1F 60 47K 10 RP1E 7 PAD LN_POT TP18 PAD TRNSV_POT TP19 PAD TBL_POT TP20 61 ROLL_Y ROLL_Y/ SP_BRK/ DSPRST/ INV/ FS ROLL_X XTAL_OUT D DSPRST/ CAN_RX_LED/ CAN_TX_LED/ LED3/ LED4/ SW_RST/ 47K 8 R63 1.0K RP1G 10 RESET/ C28 100nF 23 75 69 4 3 72 73 74 76 77 78 79 80 67 66 65 64 63 62 61 60 1 31 30 29 28 27 26 25 24 37 36 R65 47K CAN_RX_LED/ CAN_TX_LED/ LED3/ LED4/ SDA SCL CAN_TXDC CAN_RXDC POTREF_OK/ +24VBRK_OK/ ROLL_BRK/ SVSW/ DSW1/ DSW2/ DSW3/ DSW4/ +5V 33 32 68 BKY/ROLL_POT 12 VERT_POT 11 LN_POT 10 TRNSV_POT 9 TBL_POT 8 SENSE-15V 7 SENSE+5V 6 SENSE+24V 5 C24 100nF +5V P7.0/INT7 PE/SWD HWPD VAGND VAREF P4.0/ADST P4.1/SCLK P4.2/SRI P4.3/STO P4.4/SLS P4.5/INT8 P4.6/TXDC P4.7/RXDC P5.0 P5.1 P5.2 P5.3 P5.4 P5.5 P5.6 P5.7 RESET P1.0/INT3/CC0 P1.1/INT4/CC1 P1.2/INT5/CC2 P1.3/INT6/CC3 P1.4/INT2 P1.5/T2EX P1.6/CLKOUT P1.7/T2 XTAL1(OUT) XTAL2(IN) P6.0/AIN0 P6.1/AIN1 P6.2/AIN2 P6.3/AIN3 P6.4/AIN4 P6.5/AIN5 P6.6/AIN6 P6.7/AIN7 VCC1 VCCE1 VCCE2 (PQFP80) NC1 NC2 VSSEXT VSSCLK VSS1 VSSW1 VSSE2 CPUR P3.0/RXD P3.1/TXD P3.2/INT0 P3.3/INT1 P3.4/T0 P3.5/T1 P3.6/WR P3.7/RD EA P2.0/A8 P2.1/A9 P2.2/A10 P2.3/A11 P2.4/A12 P2.5/A13 P2.6/A14 P2.7/A15 PSEN ALE P0.0/AD0 P0.1/AD1 P0.2/AD2 P0.3/AD3 P0.4/AD4 P0.5/AD5 P0.6/AD6 P0.7/AD7 VCCEXT VCCCLK U12 C515C MICROPROCESSOR 2 71 51 13 34 35 70 46 15 16 17 18 19 20 21 22 49 38 39 40 41 42 43 44 45 47 48 52 53 54 55 56 57 58 59 50 14 MICROCONTROLLER RX TX BL_EN/ VEE_EN/ VERT_BRK/ LN_BRK/ WR/ RD/ A8 A9 A10 A11 A12 A13 A14 A15 PSEN/ ALE AD0 AD1 AD2 AD3 AD4 AD5 AD6 AD7 C25 100nF +5V PAD C LCD_VEE_EN/ TP28 80 PAD PSEN/ TP22 PAD ALE TP21 +5V 5 3 4 1 BL_EN/ VEE_EN/ GND5 GND6 PB0 PB1 PB2 PB3 PB4 PB5 PB6 PB7 NC4 NC5 NC6 NC7 NC1 NC2 NC3 PA0 PA1 PA2 PA3 PA4 PA5 PA6 PA7 GND3 GND4 GND V+ V- VCC 7 B 8 9 10 14 13 15 2 6 16 MAX232ACPE JT-TMS/PC0 JT-TCK/PC1 VSTBY/PC2 JT-TSTAT/PC3 JT-TERR/PC4 JT-TDI/PC5 JT-TDO/PC6 PC7 (SOIC16) C2- C1C2+ C1+ U14 CNTL0/WR CNTL1/RD RESET PD2/CS2/CSIN PD1/CS1/CLKIN ADIO8 ADIO9 ADIO10 ADIO11 ADIO12 ADIO13 ADIO14 ADIO15 CNTL2/PSEN PD0/CS0/ALE ADIO0 ADIO1 ADIO2 ADIO3 ADIO4 ADIO5 ADIO6 ADIO7 11 100nF C29 100nF C26 48 52 50 1 2 40 41 42 43 44 45 46 47 51 3 29 30 32 33 34 35 36 37 GND1 GND2 VCC3 VCC4 U13 PSD813F1 MICROPROC PERIPHERAL VCC1 VCC2 12 WR/ RD/ RESET/ TRNSV_BRK/ AD0 AD1 AD2 AD3 AD4 AD5 AD6 AD7 10 11 8 9 RX XTAL_OUT 100nF C22 B MPU PERIPHERAL TX RESET/ PAD RD/ TP35 PAD WR/ TP32 TX 1 PAD LCD_BL_EN/ TP29 C PAD TP30 +5V 15 14 13 12 7 6 5 4 55 56 62 61 60 59 58 57 54 53 31 49 63 64 16 17 18 28 27 26 23 22 21 20 19 24 25 38 39 C30 100nF C27 100nF R64 47K TMS TCK SW_FLX2 TSTAT SW_FLX1 TDI TDO SW_FLX3 SW9 SW10 SW_FLX4 SW_FLX5 DSP_WR/ DSP_RD/ DSP_CE/ DSP_C/D/ SW1 SW2 SW3 SW4 SW5 SW6 SW7 SW8 RX_L TX_L +5V R61 10K +5V 100nF C23 +5V +5V 5 (Sht 4) SW[1:10] D PAD RX TP31 SW[1:10] 10 R86 10K R87 10K RP2 10K C Document Number SW_RST/ +5V A JEN/ TRST/ GND CNTL TDI TSTAT +5V RST/ TMS GND TCK GND TDO TERR/ C2 Sheet 5 of 6 Rev FS (Sht 6) INV/ (Sht 6) ROLL_BRK/ (Sht 3) LN_BRK/ (Sht 2) TRNSV_BRK/ (Sht 2) VERT_BRK/ (Sht 2) SP_BRK/ (Sht 2) SDA (Sht 2) SCL (Sht 2) DSPRST/ (Sht 6) CAN_RX_LED/ (Sht 2) CAN_TX_LED/ (Sht 2) LED3/ (Sht 2) LED4/ (Sht 2) BL_EN/ (Sht 6) VEE_EN/ (Sht 6) RS232 Serial Interface CN-HD1X03-BXRT 1 2 3 J6 CN-HD2X07 1 2 3 4 5 6 7 8 9 10 11 12 13 14 J5 JTAG PROGRAMMING PORT FOR MCU PERIPHERAL DSP_WR/ (Sht 6) DSP_RD/ (Sht 6) DSP_CE/ (Sht 6) DSP_C/D/ (Sht 6) AD[0:7] (Sht 6) 151-51-030 SW_RST/ SW_FLX3 SW_FLX2 SW_FLX1 SW_FLX[1:5] A 1 2 3 4 Thursday, January 30, 2003 Size RP3 10K R62 10K 1 2 3 4 6 7 8 9 5 (Sht 4) SW_FLX[1:5] 10 10 1 2 3 4 6 7 8 9 E 47K RP1H ON 9 Rev.2 77 1 2 3 4 R78 NO-FIT (Sht 5) BL_EN/ E (Sht 5) AD[0:7] (Sht 5) FS (Sht 5) INV/ (Sht 5) DSPRST/ (Sht 2,5) RESET/ (Sht 5) DSP_WR/ (Sht 5) DSP_RD/ (Sht 5) DSP_CE/ (Sht 5) DSP_C/D/ ADJUSTING HOLE FOR POT R79 PAD 0.150 DRILL 0.060 E1 1 3 R79 100K 2 CCW ADJUST R79 FOR PROPER DISPLAY CONTRAST AT ROOM TEMPERATURE. (Sht 2,5) PF/ (Sht 5) VEE_EN/ R70 47K +5V R66 10K 1 SPARE Q2A Si9953DY 2 + 10 9 8 6 10 11 NC ADJ IN IN U16 74HC00 SOIC14-15 8 13 12 OUT OUT EPN001 R74 3 R80 10K +5V 74HC00 SOIC14-15 U15D 1 2 6 11 C36 0.47uF 50V TH -15V 4.7K 100nF C32 Q2B Si9953DY OFF OFF ON 0 1 1 74HC00 SOIC14-15 U15B VEE STATE PF/ XENTEK 5 4 X 1 0 VEE_EN/ TH TP36 PWR-EPN001 +5V 3 U15C C34 47uF 16V TANT 74HC00 SOIC14-15 U15A 2 1 8 7 GND 4 +5V GND 5 D D 6 5 + LCD_RST/ C35 10uF 35V TANT TH -15V TP38 2 1 R77 47K R68 Q5 MMBT4401 TDK VOL VO2H VO1H CXA-L10A PWR-CXA-L10 IN- IN+ U17 5 4 3 VEE BIAS GENERATOR AND SWITCH LL4148 4.7K LCD BACKLIGHT VOLTAGE GENERATOR C37 10uF 25V TANT SMT D32 R75 Q4 MMBT4403 R72 4.7K +5V +5V T 15K@25C R73 33K R71 20K R69 56K C C33 100nF 6 C R76 47K Q3 MMBT4403 TH VEESW TP37 VEESW DSP_WR/ DSP_RD/ DSP_CE/ DSP_C/D/ B B C31 10uF +5V C OPTREX DMF-50316 LCD Document Number A 151-51-030 LCD BACKLIGHT CN-VH04-RT 1 2 3 4 J8 LCD CN-HD2X10S-S 1 2 3 4 5 6 7 8 9 10 11 12 13 14 15 16 17 18 19 20 J7 A Rev C2 Sheet 6 of 6 1 2 3 4 Thursday, January 30, 2003 Size LCD_RST/ AD0 AD1 AD2 AD3 AD4 AD5 AD6 AD7 FS INV/ 6.3V TANT + E + 4 Rev.2 78 PCF8574 TYPE 8 GND PIN 16 +5V PIN PIN 1 C B PROJECT: IROM SEE NOTE 5. B Description Date 12/12/2000 03/29/2000 nnn SWT Appr. 4 D Data S pectrum, Inc. C Document Number A 18:20:13 91 151-51-031 Rev B Sheet 1 of 4 Schematic, OTS Overhead Controls Monday, January 08, 2001 Size Title 2615 Manhattan Beach Blvd. Redondo Beach, CA 90278 (310) 643-0040 FAX: (310) 643-0041 [email protected] S:\PROJ\51IROM\31OVHD\PCB-B\151S031B.DSN 1 E 1. ALL RESISTORS ARE SURFACE-MOUNT CHIP TYPES, STYLE 1206, RATED 1/8 WATT. VALUES ARE IN OHMS, KILOHMS (K) OR MEGOHMS (M). 2. ALL CAPACITORS ARE SURFACE-MOUNT CERAMIC CHIP TYPES, STYLE 1206, RATED 50V. VALUES ARE IN MICROFARADS (uF), NANOFARADS (nF) OR PICOFARADS (pF). 3. RELATED DRAWINGS: ASSEMBLY: 151-91-031 PCB: 151-93-031 4. USED ON PROJECT: IROM 5. Changes for Revision B: Add Sh 4 containing SID Status circuitry. Axes renamed, LAT to TRSVS, EL to VERT. Fuse F3 was 1.1A. Sh2 add note and box regarding CAN-based components. Delete Cosel Power Supply, J2, etc. U9 was DIP16. Reorder "P" connections to U9. Add rating note for AQV210s. Signal names at TB4,5,6 were "HORZ_SID36_HI", etc. NOTES: (UNLESS OTHERWISE SPECIFIED) U10 REF (EXPLICIT CONNECTIONS NOT LISTED) POWER, GROUND CONNECTIONS INITIAL RELEASE A Rev A REVISIONS 2 JB1, JB2 NOT FITTED B 2 UNUSED C 3 C6 D30 F3 J6 JB2 MT4 Q4 R35 TB11 TP14 U11 LAST USED REFERENCE DESIGNATORS D 3 4 E Rev.2 79 J5 1 2 3 4 5 6 7 8 J1 1 2 3 4 5 6 7 8 9 10 11 12 13 14 15 16 17 18 19 20 21 22 23 24 25 26 MT1 PAD 0.250 DRILL 0.120 CAN_L_A CAN_GND CAN_H_A CAN_PWR E MT2 PAD 0.250 DRILL 0.120 +24V MT3 PAD 0.250 DRILL 0.120 CAN_H_A CAN_L_A CAN_H_B CAN_L_B CAN_PWR CAN_GND VERT_BRK LN_BRK TRNSV_BRK SP_BRK POT_REF POT_RTN VERT_POT_H VERT_POT_L LN_POT_H BKY_POT_H TRNSV_POT_H TRNSV_POT_L TBL_POT_H SDA SCL CAN_L_A CAN_GND CAN_H_A CAN_PWR +24V MOUNTING HOLES CN-HD2X13-BX [...] TO OTS DISPLAY CPU CN-MFJR08 AUXILLIARY (Sht 3) VERT_POT_H (Sht 3) VERT_POT_L (Sht 3) LN_POT_H (Sht 3) BKY_POT_H (Sht 3) TRNSV_POT_H (Sht 3) TRNSV_POT_L (Sht 3) TBL_POT_H 1 2 3 4 5 6 7 8 CN-MFJR08 TO MOTOR DRIVE J4 +24V MT4 PAD 0.250 DRILL 0.120 D D 24VDC INPUT CN-MFJR06 1 2 3 4 5 6 J6 SMT C +24V + GND R1 2.7K TP4 D4 1.5KE30A 30V 1500W TH +24V TP1 D6 SMT, RED 3.75A, RXE POLYSWITCH F1 C C1 10uF 35V TANT SMT +24V (24V) DCIN+ U1 +24V COSEL ZUS62412 MBR745 TO220AC D8 6 DCOUTCS2 (12V) DCOUT+ 4 3 +24V-TK 2 2 GND-TK CN-HD1X02 JB2 CN-HD1X02 JB1 D1 1N4002 C2 100uF 35V ELECT TH B INSTALL 22AWG WIRE JUMPERS 1 1 + PARTS TO BE INSTALLED FOR CAN-BASED VERSIONS ONLY 2 DCINCS1 PWR-ZUS6 5 1 B 1N4002 D3 TH CAN GND TP3 1N4002 D2 C Document Number SDA (Sht 4) SCL (Sht 4) J2 J3 A R2 1.0K CAN-OUT CN-D15P-RT 15 14 13 12 11 10 9 CAN-IN CN-D15P-RT 15 14 13 12 11 10 9 91 151-51-031 8 7 6 5 4 3 2 1 8 7 6 5 4 3 2 1 CAN PWR D7 SMT, RED CAN PWR TH TP2 Monday, January 08, 2001 Size CAN_H_B CAN_L_B CAN_PWR CAN_GND XRAY XCOM PREP XCOM +24VTK +24VTK +24VTK GNDTK GNDTK GNDTK CAN_H_A CAN_L_A CAN_PWR CAN_GND XRAY XCOM PREP XCOM +24VTK +24VTK +24VTK GNDTK GNDTK GNDTK D5 12V,500W SA12A CAN_PWR VERT_BRK (Sht 3) LN_BRK (Sht 3) TRNSV_BRK (Sht 3) SP_BRK (Sht 3) POT_REF (Sht 3) POT_RTN (Sht 3) CAN_GND 0.50A, SMD POLYSW F2 A Rev B Sheet 2 of 4 1 2 3 4 1 2 3 4 E Rev.2 80 1 2 3 4 E SHOWN FOR REFERENCE ONLY R12 390 R10 390 R9 390 R8 390 + C3 10uF 35V TANT SMT D13 LL4148 D14 LL4148 3 VERT_POT_L 4 POT_RTN - 4 POT_RTN 3 TRNSV_POT_L 2 TRNSV_POT_H 1 POT_REF - D 4 POT_RTN TB15-04 3 L 1 POT_REF 2 BKY_POT_H TB1 H + 4 POT_RTN TB15-04 3 L 1 POT_REF 2 TBL_POT_H TB2 TB15-04 TB3 H + - L H + 4 POT_RTN TB15-04 3 2 LN_POT_H H L 1 POT_REF + TB6 TB15-04 2 VERT_POT_H L 1 POT_REF D16 LL4148 H + TB7 D15 LL4148 D 16 14 13 11 12 10 9 2 4 3 5 6 8 7 TH BKY POT TP14 TH TBL POT TP13 TH TRANSV POT TP12 LN POT TH TP11 TH VERT POT TP10 POTENTIOMETER INTERFACE 15 ILQ2 1 U2 R3 2.2K +24V R4 2.2K R5 2.2K R6 2.2K C 1 1 1 1 BRAKE DRIVERS C 3 2 3 2 3 2 3 2 Q4 2N6388 Q3 2N6388 Q2 2N6388 Q1 2N6388 F3 R14 2.7K R13 2.7K R11 2.7K SP BRK D20 SMT, RED D19 1N4002 TRNSV BRK D18 SMT, RED D17 1N4002 LN BRK D12 SMT, RED D11 1N4002 VERT BRK D10 SMT, RED D9 1N4002 2.5A, SMD POLYSW R7 2.7K +24V TH TH SP_BRK TP9 TH TRNSV_BRK TP8 TH LN_BRK TP7 TH VERT_BRK TP6 BRK PWR TP5 B B 4 3 2 1 4 3 2 1 TB15-04 TB4 TB15-04 TB5 C Document Number A 91 151-51-031 Monday, January 08, 2001 Size BKY_POT_H (Sht 2) TBL_POT_H (Sht 2) TRNSV_POT_L (Sht 2) TRNSV_POT_H (Sht 2) LN_POT_H (Sht 2) VERT_POT_L (Sht 2) VERT_POT_H (Sht 2) SHOWN FOR REFERENCE ONLY SPARE BRAKE TRANSVERSE BRAKE LONGITUDE BRAKE VERTICAL BRAKE A Rev B Sheet 3 of 4 1 2 3 4 1.0K WALL BUCKY POTENTIOMETER 1.0K TABLE POTENTIOMETER 1.0K TRANSVERSE POTENTIOMETER 1.0K LONGITUDE POTENTIOMETER 1.0K VERTICAL POTENTIOMETER (Sht 2) POT_RTN (Sht 2) POT_REF (Sht 2) SP_BRK (Sht 2) TRNSV_BRK (Sht 2) LN_BRK (Sht 2) VERT_BRK E Rev.2 81 1 2 (Sht 2) SDA (Sht 2) SCL E D29 LL4148 D27 LL4148 +5V D30 LL4148 D28 LL4148 +5V 1.0W R22 51 1 VIN U7 SDA SCL 3 R35 33 R34 33 R32 10K +5V 2 7805 VOUT GND R31 10K +5V C4 + 1.0uF 35V TANT TO220 SMT 3 +5V D 14 15 3 2 1 INT P7 P6 P5 P4 P3 P2 P1 P0 13 12 11 10 9 7 6 5 4 PCF8574T SOIC16-30 SCL SDA A2 A1 A0 U10 C6 100nF +5V C5 + 1.0uF 35V TANT SMT SPR_IN_1 SPR_IN_2 SPARE_SID VERT_SID40 HORZ_SID72 HORZ_SID48 HORZ_SID40 HORZ_SID36 +5V 1.0K 2 1.0K C R24 +24V 1 HZ S36 D21 SMT, RED 1.0K R25 3 HZ S40 D22 SMT, RED 1.0K R26 TO-220 C HZ S48 D23 SMT, RED 1.0K R27 D24 SMT, RED D HZ S72 R28 1.0K R29 D25 SMT, RED 4 E VT S40 D26 SMT, RED +5V SPR_IN_2 SPR_IN_1 SPARE_SID R33 470 VERT_SID40 R30 470 HORZ_SID72 R23 470 HORZ_SID48 R21 470 HORZ_SID40 R20 470 HORZ_SID36 8 7 10 9 AQV210 AQV210 AQV210 AQV210 AQV210 DIP06 4 5 6 B AQV210 RATING: 100 mA, 350v PEAK AC/DC 35 OHMS MAX 3 2 1 4 U11 5 6 3 DIP06 U9 2 1 4 3 DIP06 5 6 2 1 4 U8 5 3 6 2 DIP06 U6 4 3 1 5 6 2 DIP06 U5 4 1 5 6 3 DIP06 AQV210 6 12 U4 5 11 DIP16 3 13 2 4 1 14 16 ILQ2 15 U3 R17 2.2K +24V 2 1 R16 2.2K +5V R19 470 R15 2.2K +5V B SPARE VERT SID 40 HORZ SID 72 HORZ SID 48 HORZ SID 40 HORZ SID 36 SPARE INPUT 2 SPARE INPUT 1 B Sheet 4 of 4 Rev To Semi-Auto Collimator -- ie Linear II A 91 151-51-031 TB15-04 TB11 TB15-04 TB10 TB15-04 TB9 TB15-04 TB8 Document Number 4 3 2 1 4 3 2 1 4 3 2 1 4 3 2 1 1 2 3 4 Monday, January 08, 2001 C SPARE_SID_B SPARE_SID_A VERT_SID40_B VERT_SID40_A HORZ_SID72_B HORZ_SID72_A HORZ_SID48_B HORZ_SID48_A HORZ_SID40_B HORZ_SID40_A HORZ_SID36_B HORZ_SID36_A SPARE_IN2 SPARE_IN1 Size R18 2.2K +24V A Rev.2 82 SPARE Rev.2 83 Rev.2 Supplimental: 84 Rev.2 85