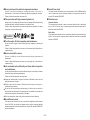
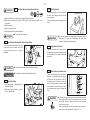
1
5-Reel Gang Rough Mowers Owner's Operating Manual Read this manual and the owner's manual before using the machine! MOWER R Ver.1.1 R −1− Contents Introduction...........................................................................................3 1.Training.............................................................................................4 2.Preparation.......................................................................................4 3.Precautions during operation............................................................5 4.Maintenance and storage.................................................................6 To use the Baroness mower safely......................................................6 Warnings for Safety..............................................................................6 Be sure to observe for safe operation..................................................7 1. Warning 2. Warning General precautions............................................................7 Caution Before operating the machine................................7 Caution Inspection and maintenance before Warning 3. Danger and after operating the machine.......................................................8 4. Warning When transporting the machine..........................................9 5. Warning Caution When moving and taking the machine on or off a field.........................................................................................10 6. Warning 7. Danger When operating the machine............................................10 Warning Caution After operating the machine and storage.... 11 Names of various sections, Warning label and operation label attaching position.......................................................................13 Warning label and operation label description....................................14 Features of LM285.............................................................................15 Specifications.....................................................................................15 Handling instructions..........................................................................16 1. Inspection before use...............................................................16 Caution Cleaning of the radiator, oil cooler and radiator cover.....16 1-1 Caution Inspection of the radiator and coolant level.....................16 1-2 1-3 Inspection and refilling of engine oil...............................................17 Caution 1-4 1-5 1-6 1-7 1-8 1-9 Inspection and refilling of the hydraulic oil.....................................17 Cleaning of the air filter..................................................................17 Inspection of the engine and its surroundings...............................18 Inspection of the tires.....................................................................18 Danger Inspection of brake..........................................................18 Danger Replenish the fuel...........................................................18 2. Fastening of each portion.......................................................................19 3. Operation method of each part...............................................................19 3-1 3-2 3-3 3-4 3-5 3-6 3-7 3-8 3-9 3-10 3-11 3-12 3-13 3-14 3-15 3-16 3-17 3-18 About the mechanical operation......................................19 Caution Before starting engine.......................................19 Warning Caution Starting and stopping the engine....................................20 Safety device.................................................................................20 Danger Cautions on fuel handling................................................20 Caution Cautions when leaving the machine...............................21 Caution Operation method at the time of travelling........21 Warning Stop travelling................................................................................21 Caution Parking brake..................................................................21 Adjustment of seat.........................................................................21 Caution Reel unit up or down lever..............................................21 Caution Reel rotation lever...........................................................22 Caution Reel reverse rotation stopper..........................................22 Warning Headlight switch..............................................................22 Throttle lever..................................................................................22 Caution Reel rotation/stop shift lever............................................22 Mower lock lever............................................................................23 Caution Stop valve.......................................................................23 4. Measuring instrument.............................................................................23 4-1 4-2 4-3 4-4 4-5 4-6 Caution Instruments of operation panel......................................................23 Tachometer & hour meter..............................................................23 Water temperature gauge..............................................................23 Danger Fuel gauge......................................................................23 Charge lamp..................................................................................24 Glow lamp......................................................................................24 4-7 Oil pressure lamp (Engine oil pressure lamp)................................24 5. Mowing operation...................................................................................24 5-1 Cutting height adjustment (roller type)...........................................24 5-2 Cutting height adjustment (wheel type).........................................25 Danger Caution Blade adjustment..............................................25 5-3 Danger Caution Mowing work.....................................................26 5-4 Caution Safety precautions on sloping ground.............................26 5-5 5-6 For safety operation.......................................................................26 Warning About the clothes for safety operation.............................26 5-7 6. Maintenance of the main unit..................................................................27 Caution Change of engine oil.......................................................27 6-1 Caution Change of hydraulic oil....................................................27 6-2 6-3 Inspection of oil leak .....................................................................27 6-4 Greasing each part........................................................................27 Grease up positions.................................................................................28 6-5 Replacement of fuses....................................................................29 Danger Inspection of battery........................................................29 6-6 Caution Opening and closing the engine hood (R, L)...................30 6-7 Caution Opening and closing the seat undercover.......................30 6-8 Danger Adjustment of brake........................................................31 6-9 6-10 Caution NTN uniform joint............................................................31 7. Maintenance of the mower unit...............................................................31 Danger Caution Back lapping......................................................31 7-1 8. Cautions for maintenance.......................................................................32 Caution Cautions for maintenance...............................................32 8-1 Warning Prevention of the damage caused by high-pressure oil....32 8-2 8-3 Maintenance schedule...................................................................32 8-4 Specifications for periodic maintenance........................................33 9. Adjustment of the other functions...........................................................33 Caution Adjustment of the neutral position of piston pump..........33 9-1 Caution Traction when the machine is unable to travel................33 9-2 10.Long-term storage..................................................................................34 11.Disposal..................................................................................................34 −2− −3− California Proposition 65 WARNING The engine exhaust from this product contains chemicals known to the State of California to cause cancer, birth defects or other reproductive harm. Introduction Thank you for purchasing the Baroness LM285, compact and light weight 5-unit reel mower. This operator’s manual describes the correct methods for handling, adjusting, and checking the machine for those who do the mowing operation of a golf course. Be sure to read this manual and make sure that you understand its contents thoroughly before using the machine. Our machines have been tested and inspected thoroughly before shipment from the factory. However, whether the machine can display its original performance depends on the handling method, as well as daily checks, adjustments, and lubrication before and after operation. Keep the machine well maintained to expect safe operation and excellent performance for an extended period of time. Note ●● Gradual changes may be made to the machine. When making enquiries about the machine, be sure to specify both the model type and serial number. ●● The information described in this manual may change without prior notice. Caution • • • About operation ●● The warning labels that are attached to the machine and used in this manual contain information to maintain safety. Please read the operating procedures and safety precautions carefully and only operate the machine after you have understood them completely. ●● The warning labels and their descriptions should be preserved in their entirety. If they are lost or damaged, please replace them immediately with new ones. ●● Do not, under any circumstances, remove the warning labels that are attached to the machine. Introduction Read this manual carefully to thoroughly understand the proper operating and maintenance methods of your mower, and to avoid causing injury to yourself and to others. The operator is responsible for operating this machine properly and safely. Never perform maintenance and repair which are not explained in this manual. If a maintenance and repair is required, an engineer who has technical knowledge and understood the service manual enough should do the work. For questions concerning maintenance or genuine parts, please contact your local Baroness dealer. When making inquiries about your mower, please specify the mower's model number and serial number. Safety This machine meets CEN standard EN 836:1997 (by affixing the specified label) for ride-on lawn mowers at the time of production. Improper use or maintenance can result in injury or death. To prevent an accident, be sure to follow the safety precautions described below and always pay attention to the warning symbols. The warning symbols are displayed as CAUTION, WARNING, or DANGER, and all symbols describe important safety precautions. Failure to thoroughly follow these safety precautions can cause an accident resulting in injury or death. Safety management The following instructions are taken from CEN standard EN 836:1997, ISO standard 5395:1990 and ANSI B71.4-2004. Intended uses Use the mower for the purpose it is intended for, that is cutting grass on lawns. Any other use could be dangerous or damage the equipment. 111Training 222Preparation ■■ Read the Operator's manual and other training material carefully. Be familiar with the controls and safety indications and learn how to stop the mower in an emergency. ■■ If the operator cannot understand the manual, it is the owner's responsibility to thoroughly explain the contents of this Operator's manual. ■■ Never allow children to operate or service the mower. Never allow adults that are unfamiliar with the instructions to operate or service the mower. Follow the age limit specified by your country or local government. ■■ Never operate the machine while people, especially children, or pets are nearby. ■■ Keep in mind that the owner, operator, or mechanic is responsible for preventing accidents, and accidents can be abolished with the cooperation of all. ■■ Never carry passengers other than the operator. ■■ All operators and mechanics should receive proper training. The owner is responsible for training the operators and the following must be thoroughly understood.: ●● The basic safety precautions for operating ride-on mowers ●● It gets difficult to control the mower by applying the brake when it begins to slide on a slope. The main reasons it is impossible to control the mower on a slope are: •• Insufficient tire grip •• Driving too fast •• Inadequate braking •• Using a model inadequate for the job •• Lack of awareness of the ground conditions (bumpy, icy, muddy) ■■ Use clothing and equipment that are suitable for the job. Wear a helmet, safety glasses, and ear protectors. Long hair, loose clothing, or jewelry can get tangled in moving parts. Do not operate the mower when barefoot or wearing sandals. ■■ Thoroughly check that the area where the mower is to be used is free of objects that can be thrown by the mower such as rocks, toys, and wire before starting. ■■ Do not operate the mower under the influence of alcohol or drugs. ■■ Warning : Fuel is highly flammable. Take the following precautions: ●● Store fuel in containers specifically designed for this purpose. ●● Refuel outdoors only and do not smoke while refueling. ●● Refuel before mowing. Do not remove the fuel tank cap when the engine is running or when the engine is hot. ●● If fuel is spilled, do not start the engine. Move the machine away from the area where the fuel was spilled and avoid creating any source of ignition until the spilled fuel has completely dissipated. ●● Close the fuel tank and fuel container cap securely. ■■ Replace muffler when it is broken. ■■ Repair any sensors that are malfunctioning before operating the mower. ■■ Check that the seat switch and safety switch, and the safety guards and covers are installed correctly and that they function properly. Repair these parts if there is a malfunction before operating the mower. −4− −5− 333Precautions during operation ■■ Do not start the engine in a closed space since there is a danger of carbon monoxide poisoning. ■■ Operate the mower during the day or in an area with sufficient lighting. ■■ Before starting the engine, disengage all equipment, place the gearshift into neutral, and set the parking brake. Sit on the seat and start the engine. ■■ Remember that there is no such thing as a safe slope. Operating on grassy slopes requires particular care. To avoid overturning: ●● Do not stop or start suddenly on any slope. ●● Reduce speed when travelling and making sharp turns on slopes. ●● Always stay alert for bumps, hollows, and other hidden obstacles. ●● Never mow across the surface of the slope unless the mower is designed to do so. ●● If noted in the manuals, use a counterbalance or wheel balance. ■■ Never neglect the warnings for hidden hollows or obstacles. ■■ Watch out for other traffic when crossing or near a road. ■■ Stop the rotation of the reel cutter when operating on surfaces other than grass. ■■ When using attachments, never direct the discharge at bystanders. Never allow anyone near the mower while it is operating. ■■ Do not operate the mower with damaged guards or with guards not installed properly. ■■ Do not remove the interlock device, and be sure to use it when it is adjusted properly. ■■ Do not change the engine governor setting or operate the engine at high engine speeds. Otherwise, an accident resulting in injury or death, or a malfunction can occur. ■■ Before leaving the operator's position: ●● Move the mower to a level surface. ●● Disconnect the power take-off (PTO) and lower the attachments. ●● Place the gearshift into neutral and set the parking brake. ●● Reduce the engine speed. ●● Stop the engine and remove the key. Note After operating with a heavy load, let the engine idle for 5 minutes before turning the engine off. ■■ Disengage the drive to each attachment except when mowing. ■■ Stop the engine, disengage the drive to each attachment, and remove the key under the following conditions: ●● Before refueling ●● Before removing the grass catcher ●● Before adjusting the cutting height (except when the adjustment can be made from the operator's seat) ●● Before removing blockages ●● Before checking, cleaning, or servicing the mower ●● After striking a foreign object or an abnormal vibration occurs on the mower ■■ When turning the engine off, close the throttle, and close the fuel valve if your model is equipped with one. ■■ Keep hands and feet away from the cutting units. ■■ Before backing up, look down and behind you to check that the path is clear and you can back up safely. Have someone guide you if it is difficult to check the area behind you. ■■ Reduce speed when turning or crossing roads or sidewalks, and proceed by taking extreme caution with your surroundings. Also, be sure to stop the rotation of the reel cutter. ■■ Take care when loading or unloading the mower onto a trailer or truck. ■■ Use care when approaching blind corners, shrubs, trees, or other objects that may obscure your vision. 444Maintenance and storage To use the Baroness mower safely ■■ Park the machine on the flat ground. ■■ Never let indisciplined person fit out the machine. ■■ Check that all nuts, bolts, and screws are properly tightened to ensure that the mower is always working under safe conditions. ■■ To prevent a fire, keep the engine, muffler, and battery areas free of excessive grease, grass, leaves, and dust. ■■ Check the grass catcher frequently for preventing wear or damage. ■■ Keep all parts of the mower in good working condition and all fasteners and hydraulic fittings tightened. ■■ If the fuel tank needs to be cleaned, clean it outdoors. ■■ Take care not to pinch your fingers etc. while making adjustments to the mower. ■■ For mowers equipped with multiple reel cutters, take care as rotating one reel cutter can cause other reel cutters to rotate. ■■ Before servicing or adjusting the mower, stop the mower, stop the cutting units, set the parking brake, turn the engine off, and remove the key (for gasoline engines, disconnect the spark plug lead). Be sure to check that each part has completely stopped operating before servicing or adjusting the mower. ■■ When necessary, use a jack to securely support the mower. ■■ Take care when removing equipment, the spring or oil pressure that have applied to it could be suddenly free. ■■ When servicing the mower, disconnect the battery lead. To disconnect the battery, disconnect the negative battery cable first, then the positive battery cable. To connect the battery, connect the positive battery cable first. ■■ When checking the reel cutters, wear gloves or wrap the reel cutters in thick cloth to avoid injury. ■■ Keep hands and feet away from moving parts. If possible, avoid making any adjustments while the engine is running. ■■ Charge the battery in a well ventilated area, away from sparks and flames. Unplug the battery charger before connecting or disconnecting it to the battery. Also, wear protective clothing and use insulated tools. ■■ Be sure to empty the fuel tank, and keep apart from the fire origin, when storaging the machine indoors where using spark or naked flame. ■■ Check the engine cool down enough, when storaging the machine in the shutted place. ■■ Lower the mowing unit when storaging the machine. In case to store the machine with raising the outermost #4 and #5 mowers, be sure to latch them. The following precautions should always be followed to operate the Baroness mower safely. Warnings for Safety Warning symbols have been attached to this machine to ensure that you can operate it safely. The warning symbols indicate items which are particularly important for your safety. It is important to always follow the warnings and operate the machine with safety. Warning symbols Danger • • • This symbol indicates that serious injury or death will occur if the warning is ignored. Warning • • • This symbol indicates that serious injury or death could occur if the warning is ignored. Caution • • • T his symbol indicates that an injury or damage to property may occur if the caution is ignored. to the · · · Refer operator's manual. symbol · · · Danger (Danger-flammables) symbol · · · Danger (Flying objects) ··· −6− Danger symbol (Cutting of hand or foot) Danger symbol symbol · · · Caution (Hot surface) · · · of hand or foot Danger symbol catching symbol · · · Caution (Entanglement) symbol · · · Warning safty clothes symbol · · · Caution (Pinch) · · · (Cutting of finger) Warning symbol · · · (High-pressure oil) symbol · · · Caution (Pinch) Caution symbol · · · (V-belt/rotating parts) symbol · · · Warning (Overturn, fall) Fuel · · · (No.2 Diesel fuel only) Warning symbol · · · (Caution-exhaust gas) · · · Grease −7− Be sure to observe for safe operation. ●● The precautions that are described here are the important contents concerning safety. Be sure to follow these safety precautions. ●● Failure to follow these precautions can cause injury or death, or accidents or damage to the machine. ** The information described in this manual may vary from the actual machine purchased. 111General precautions Warning ■■Do not operate the machine under the following conditions! ●● If you cannot concentrate while operating the machine due to fatigue or illness, or if you are under the influence of medication ●● After drinking alcohol ●● If pregnant ●● If less than 18 years old or untrained person ** Failure to observe these precautions can cause an unexpected accident. ■■Wear suitable clothes when operating the machine. Do not wear a towel around your head or waist, or a scarf around your neck. Wear safety glasses, a helmet, and slip resistant shoes. Use protective gear suitable for the working conditions and do not wear loosefitting clothes. ** Failure to observe this precaution may cause you to get caught in the machine or to slip and fall. ■■When lending the machine to others Thoroughly explain the operating procedures and instruct them to read the "Operator's manual" before use. ** Failure to follow this precaution can cause an accident, resulting in severe injury or death, or damage to the machine. 222Before operating the machine Warning ■■Do not carry passengers. The riding capacity of this machine is one person. Do not carry passengers. ** Failure to follow this precaution can cause an unexpected accident. ■■When starting the engine, be sure to be seated in the operator's seat and check your surroundings for safety. When starting the engine, be sure to be seated in the operator's seat, check the position of the seat, and check your surroundings for safety. ** Failure to follow this precaution can cause an unexpected accident. ■■Do not drive or operate the machine or work at night. Do not drive or operate the machine or work at night or in poor visible condition. ** Failure to follow this precaution can cause an unexpected accident. ■■Warm the engine up when it is cold. When the engine is cold, be sure to warm it up. ** Failure to follow this precaution may not allow the machine to sufficiently demonstrate its performance capability. Caution ■■Take precaution with a hot muffler/exhaust pipe. Do not touch the muffler/exhaust pipe while operating the machine or just after the engine is turned off since it will be hot. ** Failure to follow this precaution can cause burns. ■■Do not modify the machine. Do not modify the machine. ** Failure to follow this precaution can cause an accident or injury, or the machine to malfunction. ■■Inspection and maintenance Be sure to perform checks and maintenance before and after operating the machine. ** Failure to follow this precaution can cause an accident or injury, or the machine to malfunction. ■■Performing the periodic checks and maintenance ■■Close the fuel cap and clean up any spilt fuel. Perform the periodic checks and maintenance every year, and maintain each part. Be sure to change the power steering hose every two years and to check the electrical wires every year. ** Failure to follow this precaution can cause an accident or the machine to malfunction due to improper maintenance. After refueling, be sure to securely close the fuel cap and thoroughly clean up any spilt fuel. ** Failure to follow this precaution can cause a fire. ■■Fire is strictly prohibited when checking the battery Fire is strictly prohibited when checking or charging the battery. ** Failure to follow this precaution can cause the battery to ignite and explode, which can cause burns. Caution ■■Do not let electrolyte get on your skin. ■■Caution of reel mower Do not let electrolyte get on your skin or on your clothes. If it gets on your skin or clothes, immediately wash the affected area with water. ** Failure to follow this precaution can cause burns or damage to your clothes. ●● Do not insert hand, foot or other things to the rotating part, where dangerous, during operation or maintenance. ●● Remove obstacles such as rocks before using machine, they cause the damage of reel cutter and bed knife, and fry apart to invite an accident. In case the obstacles get caught in the reel cutter, switch the engine off, and remove it after stopping the driving unit completely. ●● Protective cover and belt cover prevent the risk of operator, when they damaged, replace them and settled in the proper position. ■■Install and remove the battery by following the correct procedure. To install the battery, connect the positive (+) battery cable first. To remove the battery, disconnect the negative (-) battery cable first. ** Failure to follow this precaution can cause a short circuit, which can cause burns and a fire. 333Inspection and maintenance before and after operating the machine Warning ■■Do not allow the electrolyte to go below the "LOWER" level mark. Check the electrolyte between the "UPPER" and "LOWER" level marks and that it is not below the "LOWER" level marks. ** This comment is just for the battery equipped originally. In case the replacement battery is maintenance-free, you do not need to check the level of electrolyte. ** Failure to follow this precaution can cause the pole connector in the container to be exposed from the electrolyte if it is below the "LOWER" level mark, which can cause sparks when starting the engine, and the gas in the container to ignite, causing an explosion. Danger ■■Add oil and refuel when the engine is cold. Do not add oil or refuel when the engine is operating or if the engine is hot. ** Failure to follow this precaution can cause the fuel to ignite and cause a fire. ■■Fire is strictly prohibited when refueling Do not smoke or use open flames when refueling. ** Failure to follow this precaution can cause the fuel to ignite and cause a fire. ■■Take precaution with high-pressure oil. Always check if the hydraulic fittings and hoses are loose or damaged. When disconnecting the fittings and hoses, release the pressure in the hydraulic circuit. ** Failure to follow this precaution can cause the high-pressure oil to break through your skin and cause an injury. ■■Take precaution with fuel leaks. Be sure to check the fuel pipe and see if it is damaged and fuel leaks. ** Failure to follow this precaution can cause fuel to ignite and cause a fire. −8− −9− Caution ■■Be sure to check the electrical parts and wires. Check if the electrical wires are touching other parts, if the covering is damaged, or if the connector is loose every day before operating the machine. ** Failure to follow this precaution can cause a short cut and a fire. ■■Do not fill the tires with air over the specified maximum air pressure. When filling the tires with air, do not fill the tires over the specified maximum air pressure. ** Failure to follow this precaution can cause the tires to explode and cause an injury. ■■Take sufficient precaution with exhaust gas. Do not start the engine in an enclosed area. Start the engine outdoors with sufficient air circulation. If you have to start the engine indoors, make sure there is sufficient ventilation. ** Failure to follow this precaution can cause you to be poisoned by the exhaust gas, which can result in death. ■■Be sure to check the parking brake lever. Check that the brake operation is not faulty and that the parking brake lever is not remarkably loose nor does it have remarkable play. ** Failure to follow this precaution can cause an accident. ■■Remove debris from the muffler and engine. Check that there is no grass, debris, or fuel around the muffler and engine or on the brakes every day before operating the machine. ** Failure to follow this precaution can cause a fire. ■■Turn the engine off while inspection and maintenance. Be sure to turn the engine off while inspection, servicing, repairing, or cleaning the machine. ** Failure to follow this precaution can cause you to be pinned under the machine or a personal injury. ■■Let overheated parts sufficiently cool down before inspection and maintenance. Let the parts that overheat such as the muffler and engine to sufficiently cool down before inspection and maintenance. ** Failure to follow this precaution can cause burns. ■■Perform inspect and maintenance on a flat and stable place. Perform inspect and maintenance on a flat and stable place with no traffic risk, using tire chocks, on which the machine will not overturn or move. ** Failure to follow this precaution can cause the machine to overturn and cause an unexpected accident. ■■Be sure to install the covers. Be sure to install any covers that were removed while inspection and maintenance. ** Failure to follow this precaution can cause you to get caught up in the machine or a personal injury. ■■Correctly use the proper tools for the job. Properly manage and correctly use the proper tools necessary for inspection and maintenance. ** Failure to follow this precaution can cause an accident due to improper maintenance. 444When transporting the machine Warning ■■Do not operate quick start and stop on a running board. Take sufficient precaution when operating on slopes or running boards. ** Failure to follow this precaution can cause an accident such as fall or overturn. ■■Use a running board with sufficient strength, length, and width. When loading or unloading the machine onto a truck, be sure to turn the engine of the truck off on a flat surface that is safe from traffic, set the parking brake to avoid moving, and chock the wheels. The running board should be non-skid and bear sufficient strength, length, and width. ** Failure to follow these precautions can cause an accident such as fall or overturn. ■■When the machine is loading / unloading on the truck. When the machine is loading onto a truck, it move forward, when the machine is unloading, it move backward. ** Failure to follow this precaution can cause you to loose your balance and cause an accident such as causing the machine to fall or overturn. ■■Securely fasten the machine to the truck with a rope. When loading the machine onto a truck and moving it, set the parking brake and fasten the machine to the truck with a rope that has sufficient strength. ** Failure to follow this precaution can cause the machine to fall from the deck of the truck and cause an accident. 555When moving and taking the machine on or off a field ■■When operating at high speeds do not operate the brake pedal suddenly. ** Failure to follow this precaution can cause the machine to overturn or fall. 666When operating the machine Warning ■■Do not operate the machine on public roads. Warning This machine is not authorized as a special motorized vehicle. Do not operate it on public roads. ** Failure to follow this precaution is subject to punishment for violating the traffic laws. ■■Do not substitute weight for people or cargo. Do not load people or cargo as a substitute for weight. ** Failure to follow this precaution can cause an injury. ■■Check your surroundings for safety and slowly accelerate. ■■Wear protective gear. Start the engine after checking your surroundings for safety. Accelerate slowly, do not start quickly. ** Failure to follow this precaution can cause a personal injury. Be sure to wear safety glasses, a helmet, and slip resistant shoes. ** Failure to follow this precaution can cause an injury. ■■Take precaution with the shoulder of the road when moving. ■■Do not go or place your feet under the operating machine. ■■Do not start, stop, or turn suddenly, or operate at excessive speeds. ■■Before operating, remove obstacles in the field such as rocks, etc. Do not go or place your feet under the operating machine. ** Failure to follow this precaution can cause a personal injury when the operating machine is lowered. On roads with ditches or on roads where both sides are inclined, take sufficient precaution with the shoulder of the road. ** Failure to follow the precaution can cause the machine to fall. ** Failure to follow this precaution can cause an accident or injury, or the machine to malfunction. Start and stop slowly. When turning, sufficiently reduce your speed. Also, sufficiently reduce your speed when operating on slopes, bumpy roads, or curves. ** Failure to follow this precaution can cause the machine to overturn or fall, causing damage to the machine. ■■Do not start, stop, or turn suddenly, or operate at excessive speeds. Start and stop slowly. When turning, sufficiently reduce your speed. ** Failure to follow this precaution can cause the machine to overturn or fall, causing damage to the machine. ■■Use a running board to cross ditches. When entering a field, crossing ditches, or traveling over a soft area, be sure to use a running board. Use non-skid running board bearing sufficient strength, length, and width. ** Failure to follow this precaution can cause the machine to have an accident by slipping or overturning. ■■Operate or work on a slope with extreme care. The balance of the machine worsens on slopes and bumps. Be sure to decrease your speed sufficiently and operate and work slowly. ** Failure to follow this precaution can cause the machine to overturn or fall, causing damage to the machine. Caution ■■Be sure to turn the engine off when inspecting the mower. When a malfunction of the reel cutter occurs such as jamming the grass or rocks, be sure to turn the engine off to inspect and make adjustments. ** Failure to follow this precaution can cause you to get caught up in the machine. ■■Set the parking brake while warming the engine up. ** Failure to follow this precaution can cause the machine to move spontaneously and cause an accident. −10− −11− ■■Keep away from children. Keep away from children and do not operate the machine near them. ** Failure to follow this precaution can cause a personal injury. ■■Inspect and perform maintenance immediately if unusual vibration occurs. If unusual vibration occurs, stop the engine immediately, then inspect the cause and repair it if necessary. ** Failure to follow this precaution can cause an accident or injury, or the machine to malfunction. ■■Keep bystanders away from grass discharge area. Grass, dust, sand and rocks will fly out. In addition, be sure to install the reel cover. ** Failure to follow this precaution can cause a personal injury. ■■Do not look aside. Do not operate or travel with no hands. ** Failure to follow this precaution can cause a personal injury or material damage. ■■When leave from the machine, stay machine at level place and stop engine. Stay the machine at flat and stable place, then turn the engine off, set the parking brake, chock the wheel, lower the mower unit, and remove key from ignition switch. ** Failure to follow this precaution can cause the machine to move spontaneously and cause an accident. ■■Do not carry passengers. The riding capacity of this machine is one person. Do not carry passengers. ** Failure to follow this precaution can cause an unexpected accident. 777After operating the machine and storage Danger ■■Add oil and refuel when the engine is cold. Do not add oil or refuel when the engine is operating or if the engine is hot. ** Failure to follow this precaution can cause the fuel to ignite and cause a fire. ■■Do not open the radiator cap when the radiator is hot. When the radiator has overheated, do not open the radiator cap. ** Failure to follow this precaution can cause scalding water to shoot out and cause burns. ■■Cover the machine with a sheet after it has sufficiently cooled down. If covering the machine with a sheet, cover it after the muffler and engine have sufficiently cooled down. ** Failure to follow this precaution can cause a fire. ■■Install and remove the battery by following the correct procedure. To install the battery, connect the positive (+) battery cable first. To remove the battery, disconnect the negative (-) battery cable first. ** Failure to follow this precaution can cause a short circuit, which can cause burns and a fire. ■■Precautions for operating on slopes When operating on a slope, the ground will not be even and there may be bumps and rocks, which can cause the machine to incline suddenly. Therefore, never operate the machine on a slope of 15 degrees or more, or in areas in which there is danger of it overturning or slipping. ** Remove holes, rocks, or tree roots (and other illegally thrown objects) and check that these items do not exist before operating the machine on a slope. ** When operating the machine on a slope, work along the contour line and make turns where the grade of the slope is low. ■■Remove the battery and pull out the key when long trem storage Remove the battery and pull out the key when not using the machine and keep in storage for a long time. ** Failure to follow this precaution can cause fatal accident. Warning ■■Perform inspection and maintenance on a flat and stable place. Set lower the mower unit and perform inspection and maintenance on a flat and stable place on which the machine will not overturn or move. ** Failure to follow this precaution can cause the machine to overturn and cause an unexpected accident. ■■Remove debris from the muffler and engine. Check that there is no grass, debris, or fuel around the muffler and engine and on the brakes every day before operating the machine. ** Failure to follow this precaution can cause the fuel to ignite and cause a fire. ■■Be sure to inspect the electrical components and wires. ■■Sound Power Level ■■Take precaution with high pressure hydraulic oil. ■■Vibration Level Inspect if the electrical cables are touching other parts, if the cover is disconnected, or if the connector is loose every day before operating the machine. ** Failure to follow this precaution can cause a fire. This machine was confirmed to have a sound power level of 98 dBA/lpw as the result of measuring identical machines based on the procedure specified in directive EC standard 2000/14/EC. Hand-arm vibration This machine was confirmed to have a maximum vibration level on hands and 2 arms of 3.81m/s as the result of measuring identical machines based on the procedure specified in ISO5349. Always check if the fittings and hoses are loose or damaged. When disconnecting the joints and hoses, release the pressure in the hydraulic circuit. ** Failure to follow this precaution can cause the high-pressure hydraulic oil to break through your skin and cause an injury. Whole Body This machine was confirmed to have a maximum vibration level on whole body of 2 0.99m/s as the result of measuring identical machines based on the procedure specified in ISO2631. Caution ■■Turn the engine off while inspecting and maintenance. Be sure to turn the engine off while checking, servicing, repairing, or cleaning the machine. ** Failure to follow this precaution can cause you to be pinned under the machine or a personal injury. ■■Be sure to install the covers. Be sure to install any covers that were removed during inspection and maintenance. ** Failure to follow this precaution can cause you to get caught up in the machine or a personal injury. ■■Let overheated parts sufficiently cool down before inspection and maintenance. Let the parts that overheat such as the muffler and engine to sufficiently cool down before checking or performing maintenance. ** Failure to follow this precaution can cause burns. ●● Inspect the rotation speed of engine at the dealer of Baroness to make sure the safety and accuracy of engine. ●● Please consult with the dealer of Baroness, when the large scale repair or maintenance get necessary. ●● Be sure to use the genuine parts and accessory, in order to use the machine in safe and with best performance. Pay attention that it is possible not to warrant the products when using part and accessory of third party. ●● Don't use the machine, when modify it without previous notice to Baroness. ■■Sound Pressure Level This machine was confirmed to have a continuous weightened sound pressure level of 84 dB (A), at a position of operators as the result of measuring identical machines based on the procedure specified in directive EC standard 2006/42/EC and its amendments. −12− −13− Names of various sections, Warning label and operation label attaching position Manual box (behind the seat) 5 Fuel tank Seat Angle gauge Throttle lever Battery Hood Muffler 4 Travel pedal Brake pedal 1 #4 mower #1 mower #2 mower #3 mower Parking brake lever Serial number plate Specification label *1. Serial number plate *2. Specification label MADE IN JAPAN * Please refer to the following page for the details of the Warning label and operation label of 1 - 5. The label of 2 and 3 is pasted on each reel cover. model serial No. #5 mower Warning label and operation label description Attach the warning labels and operation labels in the locations that are close to dangerous parts and in which the labels can be easily seen. If a label is damaged or peels off, attach a new label to the machine. Danger : Flying objects While the blade is rotating, keep away from the machine. A bystander needs to have a safety distance from the machine. High-pressure oil symbol Read the owner's manual. 20 Fuel filler port Warning Warning Danger Danger Danger : Read the owner's manual. : Leave the machine after setting the parking brake, turning the engine off, and removing the ignition key. : Flying objects - Excluding the operator, keep a safe distance away from the machine. : Cutting hands or feet - Use extreme caution near moving parts. : Overturning - Do not operate the machine on a slop of 20 degrees or more. When going down a slope, fasten the seat belt, lower the mower and travel at a low speed. Danger Low sulfur or ultra low sulfur diesel fuel only. : Cutting hands or feet If you do not stop the rotation of the mower and the engine is not turned off, there is a risk that you will get injured. −14− −15− Features of LM285 ●● The permanent four-wheel drive of the total hydraulic is adopted. ●● Compared with other driving 5-deck mowers, this machine is lightweight, and gentle to grass since the low-pressure wide tires are adopted. ●● The vertical axis was adopted as the towing point, and the swing of mowers is reduced. ●● The following operations are available using the mower lock lever (manually operated). •• The up-and-down operation time of the #4 and #5 mowers can be shortened if the mower lock lever is lowered. It is suitable at the time of travelling in operation. •• When storing the machine with the #4 and #5 mowers raised, set the mower lock lever so that it would not fall. •• By setting the mower lock lever on #4 and #5 mowers, 3-deck mowing or rightand-left 4-deck mowing etc. can be done with suitable cutting width according to the situation. Specifications Baroness LM285 Engine Engine rotation speed Fuel consumption at 3,000rpm Drive system Speed KubotaD1105-T (Diesel Turbo) /24.5kW (33.3ps) Number of cylinders 3 Total displacement 1,123cc 1,400~3,000rpm 255g/kW.h (188g/ps.h) Four-wheel drive 9mph (Reverse 5.3mph) 26 inch (660.4mm) /unit Reel diameter 6.42 in. 5.7.9 blades Cutting width 68.1 inch (1,729mm) /3units 89.5 inch (2,273mm) /4units 111 inch (2,815mm) /5units Cutting height Total weight Total Length Wheelbase Total width Total height Cutting height 0.39~2.36 in. 2703 lbs. (Move) 1989 lbs. (Work) Wheel: 108.66 in. Roller: 104.33 in. 53.82 in. When travelling: 92.13 in. When working: 119.29 in. 72.05 in. Wheel: 0.43~2.68 in. Roller: 0.39~2.36 in. Front wheel 24x13.00-12 4P Wheel size Rear wheel 23x8.5-12 4P Rough front wheel 23x10.50-12 4P Rough rear wheel 23x8.50-12 4P 1-2 Inspection of the radiator and coolant level Handling instructions Caution 111Inspection before use Caution ●● Please be sure to check the following sections before putting the engine into operation. ••Check that the coolant level of the reserve tank is between "FULL" and "LOW." ••When the coolant is below the line of "LOW", add the coolant to the cap part of the reserve tank to the line of "FULL" line. When there is no coolant in the reserve tank, fill the cap part of the radiator to the top. ••Do not open the radiator cap in normal inspection. ••When the coolant level decreases, supply clean water only. ••Please drain the cooling water before winter or mix with long life coolant. ••Perform the drainage by the drain plug on the left side of the machine. 1-1 Cleaning of the radiator, oil cooler and radiator cover Be sure to clean when dust has adhered to the radiator, oil cooler, and radiator cover. When operating in high dust areas more frequent cleaning is suggested. Radiat o r Oil cooler Ra diat or c ov er Caution ●● Perform the inspection when the engine is cold. The radiator cap is the pressure type. If the radiator cap is removed when the engine is at high temperature, the steam blows off and it may cause burns. After the water temperature and the pressure falls, apply a thick cloth etc. to the cap. Slowly turn the radiator cap counter-clockwise, then loosen and remove. ●● If proper cleaning is not maintained, the engine will overheat or seize to run. Moreover this can cause damage to the hydraulic equipment. Radiator cap Radiator Reserve tank Standard long life coolant (LLC) consistency and the freezing point Freezing point Up to 14 °F Up to 5 °F Up to -4 °F Up to -13 °F LLC consistency (volume %) 20% 30% 35% 40% ** The radiator coolant capacity of this machine is about 6L. (including the reserve tank) −16− −17− 1-3 Inspection and refilling of engine oil 1-4 Inspection and refilling of the hydraulic oil Put the engine on a level surface, and check the oil level with the dipstick. The proper oil level is between the upper and lower limit when the dipstick is fully inserted. If the oil level is low, add engine oil, and if the oil is dirty, change the oil. Perform the oil level inspection after the engine is cooled for 10 to 20 minutes or more. Please keep in mind adding too much oil can cause engine failure. Perform refilling of the engine oil from the oil filler. It takes some time for the added engine oil to fall in the oil pan. Inspect the oil level again in 10 to 20 minutes after adding the engine oil. ** Never mix different kinds of engine oil. ** Use engine oil higher than the API service classification CF class, and SAE viscosity suited to the application environment (temperature). ** T h e e n g i n e o i l t a n k c a p a c i t y i s approximately 3.1L. Level the engine and raise the mower unit. Always check whether the hydraulic oil level is at the center of oil level gauge. If the level is low, remove the tank cap and supply oil. When refilling the hydraulic oil, use ShellTellus 46 or an equivalent type. ** Do not mix hydraulic oil of different kinds by any means. ** The tank capacity is approximately 24L. Dipstick Dipstick Upper limit Oil level gauge Oil tank Front mower unit arm (R) Lower limit Tank cap Oil filler cap 1-5 Cleaning of the air filter If the air filter element is dirty, it can cause the engine to malfunction. When the air filter is dirty, clean it by carefully tapping the element or blowing air from the inside so that the element does not damage. Air cleaner Clip Air cleaner cap Clip Filter 1-6 Inspection of the engine and its surroundings 1-9 Replenish the fuel Please refer to "Operating and instruction manual" for handling of the engine. 111 Check all the parts of the fuel system for cracks or leaks, and replace with new parts if necessary. 222 When grass, leaf, etc. have jammed to the inside of the muffler and exhaust pipe or the surroundings, blow out with air. Park the machine on the level surface. Replenish the fuel (diesel) immediately, when the fuel gauge approaches E (empty). If you supply the fuel too much, it is possible the fuel to brim over the cap, during operating or driving machine at the slope. So supply the fuel until the center (red mark) of the fuel gauge. ** Use the Low sulfur or ultra low sulfur diesel fuel only. ** The capacity of fuel tank is approximately 38 Liters. 1-7 Inspection of the tires Inspect tire pressure, cracks, damage, and unusual wear. Front wheel Rear wheel Tire pressure 2 120kPa (1.2kgf/cm ) 2 150kPa (1.5kgf/cm ) Danger 1-8 Inspection of brake 111 Parking brake If the parking brake wire is extended, adjust the wire tension by the adjuster bolts on the both ends of the wire. Never overfill the tank, lest the fuel run out of the tank during operation and it should cause the fire. Never fill gasoline (Petrol) into the tank. Adjust bolts Adjust Parking brake 222 Brake pedal If the wire for the brake pedal is extended, adjust the wire tension by the adjuster bolts on the both ends of the wire. Adjust the wire tension so that the strength of the brake on either side becomes the same. Danger Brake wire ●● If the brake wire is cut, it's very dangerous since the brake will lose its effect. Inspect the brake system before operation, if there is a crack or damage, repair it immediately. −18− E 14 12 34 F FUEL Fuel Gauge Fuel Tank −19− 222Fastening of each portion Many parts are fastened by bolts. Bolts and nuts may become loosened some time after initial operation. Be sure to tighten them by the specified torque. Appropriate tightening torque (kgf·cm) Nominal diameter Normal bolt Hardness classification 4.8 Heat-treated bolt Hardness classification 10.9 M6 7~9 (71.38~91.77) 14~18 (142.76~183.55) M8 14~19 (142.76~193.74) 28~38 (285.52~387.49) M10 29~38 (295.71~387.49) 58~76 (591.43~774.97) M12 52~67 (530.24~683.20) 104~134 (1,060.49~1,366.40) M14 70~94 (713.79~958.52) 140~188 (1,427.58~1,917.04) M16 88~112 (897.34~1,142.06) 210~260 (2,141.37~2,651.22) M18 116~144 (1,182.85~1,468.37) 280~340 (2,855.16~3,466.98) M20 147~183 (1,498.96~1,866.05) 370~450 (3,772.89~4,588.65) 333Operation method of each part Caution 3-1 About the mechanical operation Check whether the operation state of each part is good. Check that the brake disc, tires, steering, and mower do not have abnormalities before operating the engine. Operate the engine at a speed that can carry out an emergency stop. Locate and remove all debris, in the operating area before using equipment. Warning 3-2 Before starting engine ●● Inspect the area where the equipment will be used. ●● Inspect whether there are no damages and the covers/ guards are securely fastened in place. ●● Never operate the engine without proper ventilation. ●●Preparation before starting up Side brake lever 111 Apply the parking brake lever. 222 Shift the reel up or down lever and the reel rotation lever into the neutral position. 333 Shift the throttle lever to the middle position. Shift pedal Reel rotation lever Throttle lever Caution Steering wheel Reel up or down lever ●● Do not put a leg on the shift pedal at the time of starting the engine. ●● Do not touch rotating parts, such as the fan belt and pulley, during the engine operation. 3-3 Starting and stopping the engine ●●Stopping procedure 111 Turn the reel rotation lever to the "OFF" positon. 222 Apply the parking brake. 333 Return the throttle lever to the "LOW" position. 444 The engine will stop, when the ignition key is turned to the "STOP" position. ●●Starting procedure 111 Sit on the seat. 222 Pull up the parking brake lever, and apply parking brake. 333 Shift the reel rotation lever into the "STOP" position. 444 Pull the throttle lever slightly upward. 555 When the ignition key is turned to the "GLOW" position, the glow lamp will turn on. 666 Fully turn the ignition key clockwise promptly after the glow lamp turns off, the starter will operate and the engine will start. Release it as soon as engine starts. 777 Ensure that the charge lamp and the engine oil pressure lamp turn off. If they do not turn off, stop the engine, perform inspection and repair. Caution Glow 3-4 Safety device This machine is equipped with a Safety device starting/stopping of the engine as an interlock system. START ●● Safety device on this machine prevents the engine from starting unless; aaaOperator is seated. bbbParking brake is engaged. cccThe reel rotation lever is in "STOP" position. dddThe travel pedal is in the neutral position. Glow lamp ࠴ࡖࠫ ●● The interlock system will stop the engine if the operator leaves the seat without engaging the parking brake. ●● Applying the parking brake with the engine running, the operator may then leave the seat. At this time if the travel pedal is stepped on the engine will stop. ●● If the reel rotation lever is shifted to the lapping polishing after the operator has left from the seat while the engine is running, the reel will reverse-rotate, but if it is shifted to the forward rotation of mowing, the engine will stop. ࠨࡕࠬ࠲࠻ ࠛࡦࠫࡦᴤ Danger ●● Do not step on the travel pedal. It is very dangerous if the machine moves. ●● Do not touch the V-Belt, the Pulley, etc. during the engine rotation. 3-5 Cautions on fuel handling ●● It is highly flammable. Do not smoke when handling fuel. ●● Never fill the fuel tank indoors, while engine is running, or if the engine is hot. ●● In order to prevent the fire, always keep the engine clean and be sure to remove deposition of grass, grease, and oil. ●● Clean spilled fuel immediately. ●● Operation of the starter is a maximum of 15 seconds. If the engine still does not start, to prevent battery wastage, wait 30 to 60 seconds before trying to restart the engine. −20− −21− Caution 3-6 Cautions when leaving the machine 111 Stop the machine in level place and engage the parking brake. 222 Make the reel rotation lever into the "OFF" position, and lower the mower unit to the ground. 333 Stop the engine. 444 Remove the ignition key. 555 Park the machine using wheel stoppers. Caution 3-9 Parking brake The parking brake is on the left side of the seat. Fully engage the lever at the time of parking. Push the button when disengaging the lever. ●● Do not park on the slopes. Caution 3-7 Operation method at the time of travelling If the travel pedal is pressed in front, the machine will move forward, and if the pedal is pressed in back, it will go backward. Travel pedal Caution ●● Press the travel pedal slowly for a safe operation. Warning ●● Travelling on public roads is forbidden by law. 3-8 Stop travelling 111 If the travel pedal is disengaged, the machine will stop. 222 When not stopping at step 1), step on the foot brake pedal. Brake pedal Parking brake lever ●● Be sure to operate after disengaging the parking brake completely. If it has not disengaged, the brake and hydraulic equipment will be damaged. 3-10 Adjustment of seat The lever is located in the lower front of the seat. When the lever is pushed to the left, the seat can be moved forward and backward. Lever 3-11 Reel unit up or down lever The levers are located on the right side of the seat. The 2nd lever from the front is for #5 mower, the 3rd lever is for #1, #2, #3 mowers and the 4th lever is for #4 mower. To lower mower or mowers, push desired lever or levers away from body, to raise mowers pull lever in towards the body. Caution #5 #1,2,3 #4 Up Down ●● If a hand is hung on the grip and the mower unit is raised while using LM285, there is a possibility that a hand may be pinched. When you raise the mower unit, do not hang your hand on the grip. When operating the reel unit up or down lever, be sure the stop valve is in the open position. (Refer to 3 -17) 3-12 Reel rotation lever The reel rotation lever is located in the forefront on the right-hand side of the seat. If the lever is pushed outwards, the reel will rotate in the mowing direction, and if pushed to inwards, the reel will rotate in the back lapping rotation. Caution 3-14 Headlight switch When the switch is in the "UP" position, the headlight will light up, to turn the light off flip the switch to the "DOWN" position. Reel rotation lever Back lapping rotation Mowing rotation ●● Use the reel rotation lever just before mowing or lapping polishing operation. Be sure to use the neutral position at all times other than mowing or lapping polish operation. ●● Be sure to check that people are not in the surrounding area of the machine before operating the reel unit up or down levers or the reel rotation levers. Headlight switch Warning 3-15 Throttle lever If the throttle lever is pushed to the back, the engine speed will become high (HIGH), and engine speed will become low if it is pushed to the front (LOW). ** F a c t o r y s e t t i n g o f t h e m a x i m u m engine rpm is 3,000 rpm. 3-13 Reel reverse rotation stopper This stopper is for preventing reverse rotation of the reels during mowing operation. Except for back lapping, loosen the stopper's knob, slide it to the lever's side, and tighten the knob. When back lapping Reel reverse rotation stopper When mowing Caution ●● The headlight is an auxiliary light. Do not travel or operate when the visibility is not good or during the night. Throttle lever HIGH LOW 3-16 Reel rotation/stop shift lever ●● Be sure to check if the knob is tightened before mowing operation. The reel rotation/stop shift lever is attached to the reel motor on the mower. This shift lever is used for mowing or lapping, and to perform 3-deck mowing and 4-deck mowing by using the mower lock lever (refer to 3-17 ). Only the shift lever of the mower you want to use is (rotation)" side, and made into the " other mowers' shift lever is made into the (stop)" side. " Caution −22− Reel rotation/stop shift lever Stop Rotation ●● Before moving the reel rotation/stop shift lever, be sure that the reel rotation lever is in the stop position. −23− 3-17 Mower lock lever 4-2 Tachometer & hour meter Indicates the engine speed and total operating hour. Carry out the periodic inspection and maintenance, and repair based on the operating hour. When you store the machine hang the mower lock lever when the mower unit #4 and #5 are raised. Mower lock lever Hour meter 3-18 Stop valve 4-3 Water temperature gauge The fall prevention stop valve is used when mower is raised. The stop valve is located below the seat on the lower right of the seat. When the water temperature gauge rises near "H" during operation, it is overheating. Stop the engine and carry out the maintenance and repair, after making the engine no-load and operating for 5 minutes in idling. Stop Open Caution Stop valve ●● Turn the valve into the stop position when you stop the engine with the mower raised. ●● If the water temperature rises above 105°C, the warning alarm will sound. 4-4 Fuel gauge 444Measuring instrument Indicates current fuel level. If the fuel gauge approaches E (Empty), supply fuel (diesel) immediately. The capacity of the fuel tank is approximately 38 Liters. 4-1 Instruments of operation panel aaaTachometer & hour meter bbbWater temperature gauge cccFuel level gauge dddPilot lamp Left: Charge lamp Center:Glow lamp Right: Oil pressure lamp (Engine oil pressure lamp) eeeAngle gauge 50 b a 40 30 20 10 0 0 10 20 3 40 e 50 c d E 14 12 FUEL Danger ●● Never fill gasoline (Petrol) into the tank. ●● Never allow fuel to run out of the tank. ●● Never overfill the tank. 34 F 555Mowing operation 4-5 Charge lamp The lamp turns on when the ignition switch is in the "ON" position. After the engine starts, the light will turn off if the mower charges normal. When the lamp is turned on during operation, stop the engine immediately and inspect, do maintenance and repair. Charge lamp 5-1 Cutting height adjustment (roller type) ࠴ࡖࠫ Adjust the cutting height according to the mowing condition. As shown in the following figure, four heights of settings are possible for the front roller. ࠨࡕࠬ࠲࠻ ࠛࡦࠫࡦᴤ (10~22mm) 4-6 Glow lamp Refer to 3-3 " Starting and stopping the engine". (28~40mm) (38~60mm) Glow lamp ࠴ࡖࠫ ࠨࡕࠬ࠲࠻ ࠛࡦࠫࡦᴤ Attach the front roller to the position of the cutting height which is suitable for the job. Loosen the cutting height adjusting nut and adjust the rear roller according to the cutting height gauge, then tighten the cutting height adjusting nut securely. 4-7 Oil pressure lamp (Engine oil pressure lamp) The lamp turns on when the ignition switch is in the "ON" position. After the engine starts, the light will turn off when the oil begins to circulate and pressurizes normally. If the lamp remains on during operation, stop the engine immediately and carry out the maintenance and repair. (20~30mm) Engine oil pressure lamp ࠴ࡖࠫ Reel cutter Cutting height adjusting nut ࠨࡕࠬ࠲࠻ ࠛࡦࠫࡦᴤ Rear roller Front Cutting height gauge Cutting height −24− Bed knife −25− 5-2 Cutting height adjustment (wheel type) 5-3 Blade adjustment Adjust the cutting height according to the mowing condition. As shown in the following figure, five heights of settings are possible for the front roller. (11~25mm) (19~33mm) (26~40mm) (33~47mm) (40~68mm) Attach the wheel to the position of the cutting height which is suitable for the job. Loosen the cutting height adjusting nut and adjust the rear roller according to the cutting height gauge, then tighten the cutting height adjusting nut securely. Reel cutter Cutting height adjusting nut Wheel Cutting height gauge Rear roller Cutting height Refer to the 3-16 Reel rotation/stop shift lever section. Caution 111 Shift the reel rotation/stop shift lever of the reel motor into the " (stop)" position. 222 When adjusting engagement of the reel cutter and bed knife, contact the whole blade surface evenly using the cutter adjusting nut, and adjust so that a newspaper (two sheets) can be cut. If the cutter adjusting nut is loosened, the gap between the bedknife and reel lessens. If the cutter adjusting nut is tightened the gap becomes bigger. 333 Carry out a lapping polishing if a newspaper still cannot be cut. 444 If the reel cutter is worn out and its diameter becomes small, the tension of the spring will become weak. Loosen the pipe with the cutter adjustment screw, and adjust the tension of the spring. Danger Bed knife ●● When checking the blade, stop the engine on a level surface, and perform the adjustment after engaging the parking brake. Cutter adjusting nut Spring Pipe with the cutter adjustment screw ●● Both the reel cutter and bed knife are cutting tools. Utmost attention must be paid when you are handling them. ●● When you try cutting a newspaper, be careful of fingers when turning the reel cutter. 5-4 Mowing work 5-5 Safety precautions on sloping ground 111 Switch reel reverse rotation stopper to "FOR MOWING" (Refer to 3-13 ) 222 Pull up the throttle lever and set engine speed to MAX (3,000rpm). (Refer to 3-15 ) 333 Unlock the mower lock lever. (Refer to 3-17 ) 444 Switch the mower unit up or down lever to the "DOWN" position, and lower the mower unit. (Refer to 3-11 ) 555 Set the reel rotation lever to the "FORWARD" side, and rotate the reel. (Refer to 3-12 ) 666 Step on the forward pedal and start the work. ** When raising or lowering of mower unit, the reel also rotates or stops. Danger ●● Quick start/hard braking Do not perform quick operations. It is dangerous, and also hydraulic equipment may be damaged or it may become a cause of oil leakage. Caution ●● Perform a mowing job slowly on a coarse working surface. Although mowing speed is made slow, the engine rpm should be constant. ●● Be sure to work by the speed which is best suited for the working condition. ●● The reel rotation is carrying out "ON" or "OFF" by detecting the position of the mower unit. Keep in mind that reel rotation may not stop if operation of the mower unit up or down lever is stopped before the mower unit has gone up. Caution ●● When you work by a sloping ground, be sure to keep in mind the following: the ground is not flat, there are unevenness, look out for stones, branches etc. and the machine's angle of gradient may become large suddenly. Therefore, the degree of application allowable angle is to 20 degrees. Do not operate the machine by any means in places where there is danger of a fall or a slip. In a sloping ground, remove rocks, tree roots (other disposal objects) etc. before operation, and start working with care after checking safety precautions. In a sloping ground, operate according to a level contour line, and perform a turn in the place where an angle of gradient is small. Since there is a danger of rolling, never operate on a steep slope of 20 degrees or more. 5-6 For safety operation Lawnmower is a machine made to rotate the reel cutter (sharp cutting tool), and changes conditions variously according to the working place, obstruction, and state of lawn. The owner must perform periodic maintenance and repair of the machine, practice operation of the machine, and keep safe work in mind. Moreover, operate the machine safely and correctly not to harm to others. 5-7 About the clothes for safety operation Warning −26− ●● For a safety, put on the orderly clothes which are not caught in the machine and put on a safe instrument, glasses, shoes, a helmet, gloves, etc. suitable for operation. Especially long clothing, such as an apron or a towel, has the possibility that it may be dragged in or caught, and is dangerous. −27− 666Maintenance of the main unit Caution 6-1 Change of engine oil Refer to the engine's instruction manual for handling of the engine. 111 Change the oil after the first 50 hours of operation, and change it for every 100 hours of operation from there on. 222 Remove drain plug on the oil pan. If this is done while the engine is warm, the oil can be drained completely. Cartridge filter is equipped at the back side of left front tyre. Cartridge filter Drain plug Caution ●● The hydraulic oil's temperature is very hot, immediately after operation. Change only after waiting for a while to prevent from being burned, when removing the drain plug. ** Do not overfill ●● Use the engine oil higher than the API service classification CF class. ●● The engine oil's temperature is very hot immediately after the operation. Change it after waiting for a while to prevent being burned, when removing the drain plug. 6-2 Change of hydraulic oil 111 First change the hydraulic oil after the first 100-hour of operation, and Right mower unit change it in the shorter period between the one year and 500-hours operation from the next. 222 Always replace the hydraulic filter when changing oil. Hydraulic oil tank 333 Remove the drain plug on the bottom Drain plug of the hydraulic oil tank, and drain the hydraulic oil. 444 Drain and replace the hydraulic oil if you notice the presence of water or foam in the oil (emulsifying), or contamination (lack of transparency). 555 Use Shell Tellus 46 or equivalent products for the hydraulic oil. ** The capacity of the hydraulic oil tank is approximately 24Liters. 6-3 Inspection of oil leak All of the fittings for the hydraulic hoses, pumps, cylinders etc. may loosen after 50 hours of operation. The fittings should be securely fastened. 6-4 Greasing each part Carry out the greasing up to the following grease nipples every 50 hours. 1 2 3 4 5 6 Front roller 10 places 7 Pivot 3 places Rear roller 10 places 8 Piston pump 2 places Reel housing 5 places 9 Unload lever joint fitting 2 places Mower arm joint fitting 5 places 10 Pedal joint fitting 1 place Lift arm joint fitting 5 places 11 Pedal (under) joint fitting 1 place Idle lever joint fitting 1 place 12 Brake lever shaft 2 places * Refer to the following page for the grease up points of each part. Grease up positions 9 2 4 3 1 2 5 12 7 10 8 −28− 11 6 12 −29− 6-5 Replacement of fuses 6-6 Inspection of battery Fuses are in the left-hand side rear engine hood. 111 Fuse box. The spare fuse and the replacement tool are attached in the fuse box. Replace with the fuses of the requirement rated capacity. The fuses are mini-fuse for automobiles. 222 Fusible link The fuse rated capacity of the fusible link is 50A. J K L M A B C D E F G H I J K L M N 5A EDCB A I HGF Refer to the Battery's instruction manual. Fuse box Check the electrolyte level between "UPPER LEVEL" (maximum level line) and "LOWER LEVEL" (minimum level line). When the electrolyte level falls to below half between "UPPER LEVEL" and "LOWER LEVEL", add the refining water to "UPPER LEVEL" immediately. LOWER LEVEL N Proximity sensor, reel rotation stop solenoid Charge lamp, hydraulic oil warning lamp, water temperature gauge buzzer, hour meter, tachometer, fuel gauge Fuel pump Glow lamp Glow lamp timer Starter relay Engine stop solenoid Alternator (1G) Glow lamp timer Spare fuse Fuse replacement tool UPPER LEVEL Danger ●● Do not drink electrolyte and avoid contact with skin, eyes or clothing. Wear protective glasses and protective clothes. ●● When charging the battery, battery generates explosive hydrogen gas as battery electrolytes contains sulfuric acid which is a deadly poison and can cause severe burns. ●● Never smoke near the battery and keep sparks and flames away from it. ●● When removing battery, remove the negative (-) cable first, and positive (+) cable last. Install the battery; assemble the positive (+) cable first and negative (-) cable last. ●● When you connect the battery cables, connect the positive and negative side correctly. When you mistake, the battery and the electrical equipment may be damaged. (The redcolor cable is the positive side.) ●● If a dry cloth is used to clean the battery, static electricity may occur causing the possibility of fire or explosion. 6-7 Opening and closing the engine hood (R, L) 6-8 Opening and closing the seat undercover Detach the rubber catch and pull up the engine hood. Hook the engine-hood support on the carrier of the housing inner side; check that the engine hood does not close. Set the seat to the frontmost position when opening. Extract two M8 screws behind the seat and lift the seat. Lock the seat by fixing the seat support to the seat bottom cover securely. Carrier Enginehood 2 M8 screws Engine-hood support Rubber catch When you close, detach the engine-hood support from the carrier, lower slowly, and fit the rubber catch. Seat Seat support Rubber catch Seat support Engine-hood Caution Caution ●● When you close the engine hood, be careful not to pinch your hand. ●● Do not open the engine hood when strong wind is present. −30− ●● When you close the undercover, be careful not to pinch your hand. −31− 777Maintenance of the mower unit 6-9 Adjustment of brake 111 Parking brake If the parking brake wire is extended, stretch the wire using the adjuster bolts located on the both ends of the wire. Adjust bolts 7-1 Back lapping Danger Parking brake 222 Brake pedal If the foot brake wire is extended, stretch the wire using the adjuster bolts located on the both ends of the wire. Be sure to adjust so that the effectiveness of the brake on either side is equal. Danger Brake wire Caution ●● If the brake wire is cut, the brake system loses its effect and it is very dangerous. Before starting up the engine inspect the brake condition, if any cracks or damage is seen, repair immediately. 6-10 NTN uniform joint When grease leakage occurs in the joint attachment or the boot band attachment, exchange a boot or an O ring, etc. Do not re-use a boot band, always use a new one. Engine Hydraulic pump Boot band Boot Caution Refer to the section of 3-16 Reel rotation/stop shift lever. Adjust ●● Avoid mixing used grease for NTN uniform joints and other grease. ●● The mower unit goes up and down even when the reel rotation is set as reverse rotation (lapping side). Therefore, do not raise or lower the mower unit when the reel rotation has been set as reverse rotation (lapping side). ●● When you try cutting a newspaper, be sure to protect your hand with a glove etc. However, when you turn the reel cutter, be careful not to catch glove etc. in the reel cutter. ●● Apply the parking brake and place chocks at the wheels. ●● Do not carry out in two-person operation. 111 Check width of the reel cutter, with a newspaper and specify the parts Reel reverse rotation stopper which cuts well and the parts which When back does not cut. Reel rotation Reverse lapping lever 222 Swich reel reverse rotation stopper to rotation "FOR BACKLAPPING". 333 Start the engine and keep the engine rpm in low speed. When 444 Shift the reel rotation lever to the mowing REVERSE position and reverserotate the reel cutter. 555 Apply some abrasive soap to the part which cuts newspaper well with a brush. (Never apply abrasive soap to the part which does not cut well.) Abrasive soap should be mixed with lapping powder (#150 - #200) and oil at a ratio of 1:3-4. 666 Rotate the reel for a while, when there is no longer contact sound, stop rotation, and stop the engine. 777 Check width of the reel cutter, with a newspaper and find the parts which does not cut well. 888 After the above setting is repeated, the reel cutter and bed knife will come to contact uniformly. 999 Finally, apply abrasive soap all over the reel cutter, and perform finish lapping. 1111Stop the engine and wash out abrasive soap finely with steam etc. 888Cautions for maintenance Caution 8-3 Maintenance schedule u Use the required tools suitable for the purpose of the maintenance. Maintenance 8-1 Cautions for maintenance Initial 50 hours, thereafter every 100 hours Initial 50 hours, thereafter every 100 hours Cleaning of radiator, oil cooler and radiator cover Before use P16 Inspection of coolant Before use P16 Before use P17 Every 200 hours P17 Inspection of fan belt Before use Owner's manual for engine Inspection of battery electrolyte Every 6 months P28 Replacement of fuel filter Every 500 hours Owner's manual for engine Inspection of tires Before use P18 Inspection of hydraulic oil Before use P17 Change of engine oil Replacement of oil filter Engine ●● Use correct/appropriate parts in good condition. ●● Repair or replace worn or damaged parts immediately. ●● Do not modify any mechanical equipments/parts. Use Baroness genuine equipments or parts for safety. ●● Clean up grass and debris, oil/grease or fuel spillage. ●● Make sure to disconnect the negative (-) battery cable before maintaining the electric circuit. ●● When you maintain with the machine raised, carry out the safe support securely. Inspection and cleaning of air filter Replacement of air filter element Replacement of hydraulic oil revention of the damage caused by high8-2 P pressure oil Replacement of oil filter Main body Warning ●● When high pressure oil is injected to the skin, get seriously injured. ●● Eliminate the pressure before removing the high-pressure line hose coupling. ●● Check visible hose, fittings before operating the machine. ●● Use the paper or cardboard for the test of oil leak. If hydraulic oil is injected into the skin, be sure to have medical treatment by doctor within 2 to 3 hours. Before use Initial 100 hours, thereafter every 500 hours Initial 100 hours, thereafter every 500 hours P17, P26 P27 Inspection of brake Before use P18 Oil leakage of each part Before use P17 Inspection of slack or damage on each part Before use P18 Inspection of reel cutter Before use P25 Every 50 hours P27 Before use P3 Grease up Remove adhesion of cutting grass, etc. Inspection of backlash and play in bearing of front roller. −32− Remarks P17, Owner's manual for engine P26, Owner's manual for engine Owner's manual for engine Inspection of engine oil ●● Read this manual carefully and have full knowledge of the maintenance procedure. ●● Stay the machine on a flat, clean and dried place. ●● Never lubricate or maintenance where the engine is run. ●● Keep hands, feet away from drive/moving part if engine is run. ●● Set lower the mower unit to the ground, engage parking brake, stop the engine and remove key from ignition switch. Maintenance period Every 100 hours −33− 8-4 Specifications for periodic maintenance u Specifications for periodic maintenance Engine oil capacity Approximately 3.1 L Coolant capacity Total capacity 6 L Tire pressure (standard tire) Front tire 120 kPa 2 (1.2kgf/cm ) Rear tire 150 kPa 2 (1.5kgf/cm ) Approximately 38 L Approximately 24 L Fuel tank capacity Oil tank capacity u Wear parts lists for the engine, hydraulic system Parts name Oil filter element Air filter element Fan belt Fuel filter cartridge Battery Oil filter cartridge u Parts list for wires Parts name Throttle wire Brake wire 1410 Brake wire 1020 Brake wire 1250 Higher than the API service classification CF class Including 1 L in reserve tank Diesel JIS2 type Use the Shell Tellus 46 equivalent 999Adjustment of the other functions 9-1 Adjustment of the neutral position of piston pump Caution ●● Stop the engine, if the engine is still running. Apply the parking brake and place chocks at the wheels. 111 Jack up the machine and put on a stable stand, and float the front and rear wheels. 222 Raise the seat upwards. 333 Start the engine. 444 When the front wheel rotates in the forward direction, loosen the locknut and turn in the direction that reduces the length of the neutral adjustment rod. When rotating in the backward direction, turn in the direction that extends the length of the neutral adjustment rod. Find the position at which the front wheel stops and tighten the locknut. Caution Neutral adjustment rod Locknut Neutral adjustment rod Locknut 9-2 Traction when the machine is unable to travel. ●● Unloading valve When the machine is unable to travel due to engine trouble etc., towing or handpushed move is possible in the following procedure. The unloading valve is installed on the frame below the seat, and below the back frame. It is used, when it becomes unable to travel and needs towing. If both of unloading valves are opened, oil hydraulics will be unloaded and it will become easy to carry out towing. The unloading valve below the seat can be reached by opening the seat stand. Caution 1111 Long-term storage Please refer to the Engine/Battery operation manuals for details. Park the machine on a flat and stable surface, then turn the engine off and set the parking brake, lower the mower unit, and remove key from ignition switch. Unloading valve Seat 111 Clean grass and debris from mower unit, drives, muffler, radiator and engine. Clean up oil, grease or fuel spillage. 222 Inspect and replace the engine oil and filter element. 333 Refill oil and apply lubricant/grease to each lubrication part. 444 Drain the fuel in the fuel tank. Do this outdoors. 555 Set the air pressure in the tires slightly higher than normal, place the machine on a board to avoid humidity. 666 Inspect that all bolts, nuts and screws are tightened. If any are worn or damaged replace them. 777 Repair or replace damaged parts and paint peelings. Store where it is dry and free from rain. 888 Remove the battery from the machine. If you keep the battery installed in the machine, disconnect the grounding side (negative side). Unloading valve ●● When you tow, drive carefully at a low speed. ●● When you put the engine into operation next time, be sure to start after returning the unloading valve. ●● How to open the unloading valve 111 The hexagonal nut is attached to the unloading valve. 222 To open the unloading valve, loosen the hexagonal nut, then loosen the needle valve at the center. 1111 Disposal Tighten Dispose in accordance with the local law. (Example: waste oil, rubber goods, antifreeze, battery, wiring, etc.) Loosen Needle valve Hexagonal nut Caution ●● When towing is completed, tighten the needle valve completely. −34− R Kyoeisha USA, Inc. 1301 Rand Street, Suite D · Petaluma,CA 94954 Phone: 707.283.0610 · Fax:707.283.0613 Web: www.baroness.us Head Office 1-26, Miyuki-cho, Toyokawa, Aichi-Pref, 442-8530 Japan. Phone: +81.533.84.1221 Fax: +81.533.84.1220 LM285---UM--USZ/10G-00-SPEC