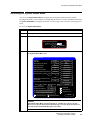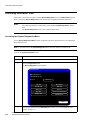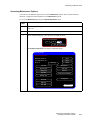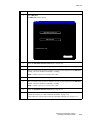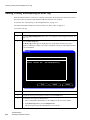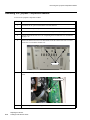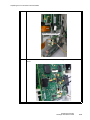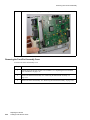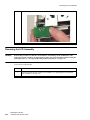
1
Service Guide SureSigns VS4 Vital Signs Monitor Release A.04 English Part Number 4535 643 03951 Printed in USA June 2012 First Edition *453564303951* SureSigns VS4 Vital Signs Monitor SERVICE GUIDE Release A.04 English Notice Proprietary Information This document contains proprietary information, which is protected by copyright. Copyright Copyright © 2012 Koninklijke Philips Electronics N.V. All Rights Reserved Trademark Acknowledgements SureSigns is a registered trademark of Koninklijke Philips Electronics N.V. Other product names may be trademarks of their respective owners. Manufacturer Philips Medical Systems 3000 Minuteman Road Andover, MA 01810-1085 (978) 687-1501 Document Number 453564303951 Warranty Disclaimer The information contained in this document is subject to change without notice. Philips Medical Systems makes no warranty of any kind with regard to this material, including, but not limited to, the implied warranties or merchantability and fitness for a particular purpose. Philips Medical Systems shall not be liable for errors contained herein or for incidental or consequential damages in connection with the furnishing, performance, or use of this material. Printing History New editions of this document incorporate all material updated since the previous edition. Update packages may be issued between editions and contain replacement and additional pages to be merged by a revision date at the bottom of the page. Pages that are rearranged due to changes on a previous page are not considered revised. The documentation printing date and part number indicate its current edition. The printing date changes when a new edition is printed. (Minor corrections and updates that are incorporated at reprint do not cause the date to change.) The document part number changes when extensive technical changes are incorporated. First Edition . . . . . . . . . . . . . . . . . . . . . . . . . . . . . . . . . . . . . . . . . . . . . . . . . . . . . . . . . June 2012 ii SureSigns VS4 Service Guide Conventions This section describes the conventions used in this guide. Text Formatting The following typographical conventions are used in this guide. Typeface Usage Example Bold System keys Press the Main Screen key. Special bold User interface text Open the System Menu. Italic Variables, document titles • <product name>-<hardware configuration>-<software version>.cfg • SureSigns VM Series Instructions for Use Decimal Points Because the SureSigns monitor uses a period (.) to indicate a decimal point in decimal numbers (for example, 10.0), all decimal numbers in this guide use a period as a decimal point. Commas are not used as decimal points. Notes, Cautions, and Warnings The guide uses the following conventions for Notes, Cautions, and Warnings. Note — A Note calls attention to an important point in the text. Caution A Caution calls attention to a condition or possible situation that could damage or destroy the product or the user’s work. Warning A Warning calls attention to a condition or possible situation that could cause injury to the user and/or patient. SureSigns VS4 Service Guide iii Explanation of Symbols The following symbols appear on the monitor and its packaging. Symbol Description Symbol Description Alarm Silence key NBP key NBP Interval key Main Screen key Print key On/Standby key CE marking Serial number 0123 Rx only Prescription Use Only (US Federal Law) Batch code 40°C -20°C Catalog number Electrostatic sensitive device handling Fragile, handle with care Temperature limitation 40°C -20°C Keep dry 1014 hPA Keep upright Atmospheric pressure limitation 90% 90% Humidity limitation 15% 708 hPA 15% SpO2 connector iv SureSigns VS4 Service Guide ICES-001 Canadian ISM requirement Caution, consult accompanying documents Temperature connector Battery charging LED AC Power LED Symbol 100-240V ~ 50/60Hz 120VA T1.6A 250V Description Symbol Description NBP connector USB port Nurse call connector Option number Input power and fuse rating Ethernet port EUFP Equipotential grounding post (Environmentally friendly use period - China) FCC ID Defibrillator Proof Type CF applied part CSA mark Ingress protection to vertically falling water drops Compliance with WEEE standard FCC label for radio IC ID Industry Canada label for radio CE marking and identifier for radio RF Interference Date of manufacture Date of first calibration Use by Eject key Probe cover installed Scan key ° Probe cover not installed Single Use Timer key No Latex C/°F key SureSigns VS4 Service Guide v Symbol Description Symbol Description Choking Hazard DEHP-free Consult instructions for use Keep out of sun Non-Sterile Manufacturer’s Name and Address Regulatory and Safety Specifications Declaration 0123 The SureSigns VS4 monitor is a Class IIb device and complies with the requirements of the Council Directive 93/42/EEC of 14 June 1993 concerning medical devices and carries CE-marking accordingly. The radio device used in the SureSigns VS4 vital signs monitors are in compliance with the essential requirements and other relevant provisions of Directive 1999/5/EC (Radio Equipment and Telecommunications Terminal Equipment Directive). Authorized EU Representative Philips Medizin Systeme Böblingen GmbH Hewlett-Packard Str. 2 71034 Böblingen Germany Rx Only Caution vi United States Federal Law restricts this device to sale by or on the order of a physician. SureSigns VS4 Service Guide Safety Standards Parameter Specification EN/IEC 60601-1, EN/IEC 60601-1-2, EN/IEC 60601-1-1 (as applicable), EN/IEC 60601-2-30, EN/IEC 60601-2-49, ISO 9919, EN12470-5:2003 (E), ASTM E1965-98 Protection Class Class I, internally powered equipment, per IEC 60601-1 Degree of Protection Type CF defibrillator-proof: per IEC 60601-1 Mode of Operation Continuous Protection Against Hazards of Ignition of Flammable Anaesthetic Mixtures Equipment is not suitable for use in the presence of a flammable anaesthetic mixture with air or oxygen or nitrous oxide, per IEC 60601-1 SureSigns VS4 Service Guide vii viii SureSigns VS4 Service Guide Contents 1 Overview Intended Audience.....................................................................................................................................................1-1 Navigation Controls ..................................................................................................................................................1-1 SureSigns VS4 Documentation .................................................................................................................................1-1 2 Performing Routine Maintenance Recommended Frequency .........................................................................................................................................2-1 Routine Safety and Operational Checks....................................................................................................................2-1 Cleaning and Disinfecting the Monitor .....................................................................................................................2-1 Maintaining the Battery.............................................................................................................................................2-2 About the Battery ............................................................................................................................2-2 Viewing Battery Information ..........................................................................................................2-2 Reconditioning the Battery .............................................................................................................2-4 Replacing the Battery......................................................................................................................2-4 Battery Messages and Alarms.........................................................................................................2-5 Technical Alarms ..................................................................................................................2-5 Error Codes............................................................................................................................2-5 3 Performance Verification Testing Overview ...................................................................................................................................................................3-1 Testing and Inspection Guidelines ............................................................................................................................3-1 Recommended Frequency .........................................................................................................................................3-2 Required Test Equipment..........................................................................................................................................3-3 Test Recording ..........................................................................................................................................................3-3 Accessing the System Menu......................................................................................................................................3-4 Accessing the System Admin Menu .........................................................................................................................3-5 System Admin Menu Options.........................................................................................................3-6 Enabling Demo Mode .....................................................................................................................3-6 Upgrading the Software.............................................................................................................................................3-7 Performing Verification Tests .................................................................................................................................3-10 Accessing the System Diagnostics Menu .....................................................................................3-10 Accessing Maintenance Options...................................................................................................3-11 Visual Test...............................................................................................................................................................3-12 Power-On Self Test .................................................................................................................................................3-12 Alarms Test .............................................................................................................................................................3-13 SpO2 Test ................................................................................................................................................................3-13 NBP Test .................................................................................................................................................................3-14 NBP Accuracy ..............................................................................................................................3-14 NBP Calibration Procedure...........................................................................................................3-16 Pneumatic Leakage Test ...............................................................................................................3-17 Predictive Temperature Test ...................................................................................................................................3-18 Tympanic Temperature Test ...................................................................................................................................3-18 Contents-1 SureSigns VS4 Service Guide Safety Tests............................................................................................................................................................. 3-19 Enclosure Leakage........................................................................................................................ 3-19 Expected Test Results ......................................................................................................... 3-19 Expected Test Results ......................................................................................................... 3-20 Ground Integrity ........................................................................................................................... 3-20 Expected Test Results ......................................................................................................... 3-20 Patient Leakage Current With Mains Voltage.............................................................................. 3-21 Expected Test Results ......................................................................................................... 3-21 Nurse Call Relay Test ............................................................................................................................................. 3-21 Calibrating the Touch Screen.................................................................................................................................. 3-22 4 Troubleshooting When You Cannot Correct a Problem............................................................................................ 4-1 Viewing System Information.................................................................................................................................... 4-1 Diagnosing a Problem............................................................................................................................................... 4-1 Start-up and Power Sequences.................................................................................................................................. 4-2 Troubleshooting Tables ............................................................................................................................................ 4-3 Power Problems ............................................................................................................................. 4-4 Display Problems ........................................................................................................................... 4-4 Alarm Problems ............................................................................................................................. 4-5 NBP Problems ................................................................................................................................ 4-6 Temperature Measurement Problems............................................................................................. 4-7 SpO2 Measurement Problems......................................................................................................... 4-8 Navigation Wheel, Touch Screen, and Key Problems ................................................................... 4-9 Recorder Problems ......................................................................................................................... 4-9 Nurse Call Problems..................................................................................................................... 4-10 USB Hub Problems ...................................................................................................................... 4-10 Error Codes ............................................................................................................................................................. 4-11 Running System Diagnostics .................................................................................................................................. 4-29 Running the Self Test.............................................................................................................................................. 4-29 Testing the Recorder ............................................................................................................................................... 4-31 Testing the Navigation Wheel and Keys ................................................................................................................ 4-32 Testing the Display ................................................................................................................................................. 4-33 Testing the Speaker................................................................................................................................................. 4-33 Testing the Battery LED ......................................................................................................................................... 4-34 Viewing and Resetting Tracked Parameters ........................................................................................................... 4-34 Resetting Parameters .................................................................................................................... 4-35 Viewing, Printing, and Exporting the Error Log .................................................................................................... 4-36 Clearing Patient Data .............................................................................................................................................. 4-37 5 Repairing the Monitor Disassembling the Monitor ....................................................................................................................................... 5-1 Tools Required for Service ....................................................................................................................................... 5-2 Shutting Down the Monitor ...................................................................................................................................... 5-2 Removing the Battery ............................................................................................................................................... 5-3 Reinstalling the Battery .................................................................................................................. 5-4 Removing a Fuse....................................................................................................................................................... 5-5 Removing the Predictive Temperature Module and Probe Cover Holder ................................................................ 5-6 Reinstalling the Predictive Temperature Module........................................................................... 5-8 Removing the Tympanic Temperature Module...................................................................................................... 5-10 Contents-2 SureSigns VS4 Service Guide Separating the Front and Rear Case Assemblies .................................................................................................... 5-12 Reassembling the Front and Rear Cases ...................................................................................... 5-16 Removing the Faceplate or Recorder ..................................................................................................................... 5-16 Removing the Main Board Assembly..................................................................................................................... 5-18 Removing the Main Board Assembly .......................................................................................... 5-18 Reinstalling the Main Board Assembly ....................................................................................... 5-22 Removing the Fan and Speaker .............................................................................................................................. 5-22 Replacing the Handle O-Ring................................................................................................................................. 5-24 Removing the Front End Assembly........................................................................................................................ 5-24 Removing the Front End Assembly Cover .................................................................................. 5-26 Removing the SpO2 Board ..................................................................................................................................... 5-28 Removing the Power Supply .................................................................................................................................. 5-30 Removing the Main Board...................................................................................................................................... 5-31 Resetting the Serial Number ................................................................................................................................... 5-34 Setting the System Configuration........................................................................................................................... 5-35 Removing the NBP Module.................................................................................................................................... 5-36 Removing the NBP Filter............................................................................................................. 5-38 Removing the AC Power Connector ...................................................................................................................... 5-39 Removing the Communications (LAN) Board....................................................................................................... 5-41 Removing the Battery Connector Board................................................................................................................. 5-42 Removing the LCD Assembly................................................................................................................................ 5-44 Removing the Navigation Wheel Assembly Board................................................................................................ 5-47 Removing the Touch Screen Board ........................................................................................................................ 5-50 Removing the Wireless Module ............................................................................................................................. 5-50 Removing the Antenna ........................................................................................................................................... 5-52 6 Replacement Parts and Assembly Drawings Spare Parts ................................................................................................................................................................ 6-1 Assembly Drawings.................................................................................................................................................. 6-3 Power Cords.............................................................................................................................................................. 6-6 A Theory of Operation Block Diagram Components.................................................................................................................................... A-1 Block Diagram .............................................................................................................................. A-2 Main Board.................................................................................................................................... A-3 Front End Board ............................................................................................................................ A-3 Communications (LAN) Board ..................................................................................................... A-4 Nurse Call Contacts ............................................................................................................. A-4 Front Panel Assembly ................................................................................................................... A-4 Speaker .......................................................................................................................................... A-5 Navigation Wheel.......................................................................................................................... A-5 Power Supply Module................................................................................................................... A-5 Power Management ............................................................................................................. A-5 Recorder ........................................................................................................................................ A-6 NBP Assembly and Circuitry........................................................................................................ A-6 SpO2 Processing ............................................................................................................................ A-7 Predictive Temperature Module.................................................................................................... A-7 Predictive Measurements..................................................................................................... A-7 Monitored Measurements .................................................................................................... A-7 Tympanic Temperature Module.................................................................................................... A-8 Wireless Module ........................................................................................................................... A-8 Contents-3 SureSigns VS4 Service Guide B Electromagnetic Compatibility Instructions for Use ....................................................................................................................... B-1 Reducing Electromagnetic Interference ........................................................................................ B-1 Restrictions for Use ....................................................................................................................... B-2 Emissions and Immunity ............................................................................................................... B-2 Guidance and Manufacturer’s Declaration.................................................................................... B-2 Recommended Separation Distances ............................................................................................ B-5 Index Contents-4 SureSigns VS4 Service Guide 1 Overview Intended Audience This guide is for biomedical engineers or technicians responsible for troubleshooting, repairing, and maintaining Philips patient monitoring systems. Navigation Controls The following table describes how to use the navigation controls on the SureSigns® VS4 monitor: Action Description Select Touch a button, menu, or list item on the touch screen to select it. Press Press a front panel key or press the wheel. Enter data using the numeric keypad and keyboard Touch the item to display the numeric keypad or the keyboard. Touch the values, and then touch OK to close the keypad or keyboard. Select or clear check boxes Touch a check box to select or clear it. Scroll Touch the list and drag your finger to scroll up and down. Touch the Up or Down arrows to display the next or previous page in the list. (You can also use the wheel to scroll and select items in the list.) A scroll bar to the right of the list indicates the current location in the list. Touch an item to select it. SureSigns VS4 Documentation SureSigns VS4 documentation includes: • SureSigns VS4 Installation and Configuration Guide: Provides instructions for unpacking, installing, and connecting all hardware. Includes initial testing and configuration procedures. Also includes instructions for returning the monitor. • SureSigns VS4 Instructions for Use: Provides information for day to day operation of the monitor. Also includes safety information, monitor specifications, and a list of compatible accessories. • SureSigns VS4 Quick Card: Provides brief descriptions of commonly used functions. • SureSigns VS4 Service Guide: Provides instructions for repairing and testing the monitor. Includes assembly diagrams, spare parts lists and troubleshooting information. • SureSigns VS4 Data Export Guide: Provides detailed information about the HL7 data export feature, including HL7 message syntax and procedures for exporting HL7 data from the monitor. Overview SureSigns VS4 Service Guide 1-1 SureSigns VS4 Documentation 1-2 • SureSigns VS4 Network Configuration Guide: Provides instructions for configuring your monitor to connect to a network using a wired LAN connection, a wireless LAN connection, or an RS-232 serial adapter. • SureSigns VS4 QuickCapture Configuration Guide: Provides instructions for configuring the QuickCapture feature on the monitor. Includes information about defining the set of observations and assessments, creating a file to import that information into the monitor, and mapping the exported data to an EHR. • SureSigns VS4 QuickAlerts Configuration Guide: Provides instructions for planning and configuring the QuickAlerts feature on the SureSigns VS4 monitor. Includes information about defining the set of alert messages, creating a file to import that information into the monitor, and mapping the exported data to an EHR. Overview SureSigns VS4 Service Guide 2 Performing Routine Maintenance Recommended Frequency Perform the maintenance procedures at the recommended frequency shown in the following table. Caution The frequency recommendations in the following table do not supersede local requirements. Always perform locally required testing in addition to the testing in this chapter. Maintenance Procedure Frequency Routine Safety and Operational Checks • Visual Inspection of exterior for damage Before use. • Inspection of labels for legibility Before use. Cleaning and Disinfecting According to your institution’s policy or between each patient. For complete cleaning instructions, see the SureSigns VS4 Instructions for Use. Maintaining the Battery • Charging As needed. • Reconditioning When the Max Error is 10% or greater. Routine Safety and Operational Checks Philips recommends that you regularly: • Visually inspect the monitor exterior for damage. • Inspect the monitor labels for legibility. If the labels on the rear case are not legible, you must replace the rear case. If the serial number label is not legible, you must return the monitor for label replacement. For detailed information, see “Visual Test” on page 3-12. Philips recommends that you perform certain test and verification checks at least once a year and after each repair. For complete information about performing verification testing and checks, see Chapter 3, “Performance Verification Testing.” Cleaning and Disinfecting the Monitor To clean or disinfect your monitor, use only cleaning agents approved by Philips. For complete cleaning instructions, see the SureSigns VS4 Instructions for Use. Performing Routine Maintenance SureSigns VS4 Service Guide 2-1 Maintaining the Battery Maintaining the Battery About the Battery The rechargeable lithium ion battery used in the monitor is a smart battery with built-in circuitry that communicates battery status information to the monitor. Battery power lasts a minimum of four hours of continuous monitoring with no printing and one NBP measurement every 15 minutes. Observe these guidelines: • If a battery shows damage or signs of leakage, replace it immediately. • Never use a faulty battery in the monitor. • Never dispose of the battery in a normal waste container. • Never leave a battery inside the monitor if it is not used for a long period of time. • Never store a battery that is more than 50% charged. Note — For information about the battery status indicators, see the SureSigns VS4 Instructions for Use. Viewing Battery Information As a battery ages, its capacity decreases and the battery status indicator becomes increasingly less accurate, relative to the total number of charges and discharges. Select the Battery Info button to display information about the battery. 2-2 Performing Routine Maintenance SureSigns VS4 Service Guide Maintaining the Battery To view information about the battery: Step 1 Open the System Diagnostics Menu. See “Accessing the System Diagnostics Menu” on page 3-10. 2 Select the Battery Info button. The Battery Info window opens. Battery Info Parameter Manufacturer Chemistry Serial Number: Manufact. Date Cycle Count Max Error Relative Charge Absolute Charge Battery Name Voltage Current Temperature Full Capacity Design Capacity Value EONEMOLI LION #17403 06/27/12 95 100% 86% 79% E013R 12503 (mV) 664 (mA) 299.50 (K) 26.50(C) 7261 (mAH) 7200 (mAH) Recondition Return Note — You must reseat the battery if the following message appears: No data from battery. Please see your Service Guide. For detailed information, see “Removing the Battery” on page 5-3. 3 To view the entire list of results, select the list to activate scrolling. The Battery Info window provides detailed information about battery capacity and charging status, including: • Cycle Count: The number of full charge and discharge cycles calculated by the battery. • Max Error: The expected margin of error in the state of the charge calculation. The Max Error value is the difference between the Relative Charge value and the Absolute Charge value. • Relative Charge: The predicted remaining battery capacity, expressed as a percentage of Full Capacity. The value in the Relative Charge field decreases as the battery ages. The Battery Status icon is a graphic representation of the Relative Charge. • Absolute Charge: The predicted remaining battery capacity, expressed as a percentage of Design Capacity. • Full Capacity: The predicted capacity of the battery when it is fully charged. The value in the Full Capacity field decreases as the battery ages. The difference between the value in the Full Capacity field and the value in the Design Capacity field is an indication of battery condition. • Design Capacity: The capacity of a new battery. Performing Routine Maintenance SureSigns VS4 Service Guide 2-3 Maintaining the Battery Reconditioning the battery reduces the Max Error value, and in turn, increases the accuracy of the Relative Charge. When the monitor is in suspend mode, the Battery service required message appears if the following conditions are met: • The max error value exceeds 8%. • The Full Capacity value is one half of the Design Capacity value. Recondition the battery to clear the message. For information about the battery reconditioning procedure, see “Reconditioning the Battery” on page 2-4. Reconditioning the Battery Reconditioning the battery reduces the Max Error value, and in turn, increases the accuracy of the Relative Charge. Philips recommends that you condition the battery by fully discharging and recharging it when the Max Error is 10% or greater. Step 1 Open the Battery Info window. See “Viewing Battery Information” on page 2-2. 2 Disconnect the monitor from the power source. 3 Select Recondition. The Relative Charge percentage will decrease to 0%. 4 When the monitor shuts down, connect the monitor to the power source and allow the battery to recharge to 100%. 5 Repeat step 1 through step 4. Note — If the battery does not recharge after four reconditioning cycles, replace it. Replacing the Battery Replace the battery if the following conditions occur: • After reconditioning, if the monitor operates for less than one hour on a fully charged battery before the low battery alarm occurs. • After reconditioning, if the Max Error does not exceed 2%. • If the battery does not recharge to full capacity after four reconditioning cycles. For information about replacing the battery, see “Removing the Battery” on page 5-3. Warning 2-4 Dispose of used batteries in an environmentally responsible manner. Do not dispose of the battery in normal waste containers. Consult your hospital administrator to find out about local arrangements. Performing Routine Maintenance SureSigns VS4 Service Guide Maintaining the Battery Battery Messages and Alarms The condition of the battery is reported by technical alarms and error codes. Technical Alarms The following battery technical alarms appear in the message area: • Low Batt — Remaining battery power is less than 30%. • Extreme Low Batt — Remaining battery power is less than 21%. Error Codes An error code (for example, 257 System Error, indicating Battery charger power failure) appears in the Error Log. To view the Error Log, see “Viewing, Printing, and Exporting the Error Log” on page 4-36. For a complete list of error codes and actions to take, see Chapter 4, “Troubleshooting.” Performing Routine Maintenance SureSigns VS4 Service Guide 2-5 Maintaining the Battery 2-6 Performing Routine Maintenance SureSigns VS4 Service Guide 3 Performance Verification Testing Overview This chapter includes the following information: • Testing and inspection guidelines • Recommended frequency of performance tests • Test procedures following monitor repair or during routine maintenance • NBP calibration procedure If the monitor fails any test, it must be repaired before it is returned to use. Note — The procedures in this chapter assume knowledge of basic monitor operation. For details about using the monitor, see the SureSigns VS4 Instructions for Use. Testing and Inspection Guidelines The following table lists the tests that Philips requires that you complete after performing monitor repairs or upgrading the software. For information about routine maintenance procedures, see Chapter 2, “Performing Routine Maintenance.” For information about repair procedures, see Chapter 5, “Repairing the Monitor.” After Complete These Tests Upgrading the software • Power-on self test • Verify that your system settings are preserved Opening the monitor for any reason • Power-on self test • Alarms test • Pneumatic leakage test • All safety tests Replacing any internal parts (except NBP parts, SpO2 board) • Power-on self test • Pneumatic leakage test • All safety tests Replacing the NBP module or parts • Power-on self test • NBP test • Pneumatic leakage test • All safety tests Performance Verification Testing SureSigns VS4 Service Guide 3-1 Recommended Frequency After Complete These Tests Replacing the SpO2 board • Power-on self test • SpO2 • Pneumatic leakage test • All safety tests Replacing the temperature module • Power-on self test • Alarms test • Pneumatic leakage test • All safety tests • Temperature test Replacing the LCD • Power-on self test • Alarms test • Pneumatic leakage test • All safety tests • Touch Screen Calibration Recommended Frequency Perform the test procedures at the recommended frequency outlined in the following table. Caution The frequency recommendations in the following table do not supersede local requirements. Always perform locally required testing in addition to the testing outlined in the table. Suggested Testing Frequency Preventive Maintenance NBP calibration Once every two years. Battery reconditioning When the Max Error is 10% or greater. Tympanic temperature calibration1 Once a year. Performance • Predictive temperature accuracy • NBP accuracy test Once every two years, or if you suspect the measurement is incorrect. • SpO2 • Nurse call relay2 3-2 Performance Verification Testing SureSigns VS4 Service Guide Once every two years. Required Test Equipment Safety In accordance with IEC 60601-1 Once a year or after repairs where the monitor has been opened (front and back separated) or the monitor has been damaged by impact. • Enclosure leakage current • Ground integrity • Patient leakage current 1. Requires a Covidien calibration module. For more information, see “Tympanic Temperature Test” on page 3-18. 2. When used as part of facility protocols. Required Test Equipment The following table lists the additional test equipment that you need to perform each of the tests in this chapter. Many of these tests also use the standard accessories that are shipped with the monitor. To Perform This Test You Need This Test Equipment “Visual Test” on page 3-12 None “Power-On Self Test” on page 3-12 None “Alarms Test” on page 3-13 NBP cuff and hose “SpO2 Test” on page 3-13 Adult SpO2 transducer “NBP Test” on page 3-14 • A reference manometer (including hand pump and valve) with an accuracy 0.2% • An expansion chamber (volume 250 ml ± 10%) • Appropriate tubing “Predictive Temperature Test” on page 3-18 “Safety Tests” on page 3-19 “Nurse Call Relay Test” on page 3-21 • SureSigns temperature probe • SureSigns Temperature Calibration Key (part number 4535 640 33691) A multimeter • A patient simulator • An ohmmeter • A phono connector Test Recording Authorized Philips personnel report test results back to Philips to add to the product development database. Hospital personnel, however, do not need to report results. The following table describes what to record on the service record after you complete the tests in this chapter. Performance Verification Testing SureSigns VS4 Service Guide 3-3 Accessing the System Menu Note — P = pass, F = fail, X = measured value as defined in tests in this chapter. Test What to record Visual V:P or V:F Power-On PO:P or PO:F NBP NBP:P/X1/X2/X3 or NBP:F/X1/X2/X3 Safety S(1): P/X1/X2 or S(1):F/X1/X2 S(2): P/X1 or S(2): F/X1 S(3): P/X1 or S(3): F/X1 Accessing the System Menu Use the System Menu to configure the monitor, view system information, shut down the monitor, and access the System Admin Menu. For more information about using the System Menu to configure the monitor, see the SureSigns VS4 Instructions for Use or the SureSigns VS4 Installation and Configuration Guide. To access the System Menu: • Select the System button. The System Menu appears. System Menu 25.0 mm/s Save Patient Records Waveform Print: 20 seconds System Admin Date Format: mm/dd/yyyy Shutdown Display Time: Yes Lock Touch Screen Default Patient Type: Adult Recorder Speed: Monitor Name: USL0000001 Serial Number: USL0000001 Hardware ID: 5 - 00 - A6 Software Version: A.04.52 LAN MAC Address: 00-09-FB-10-4B-3C LAN IP Address: 0.0.0.0 WLAN MAC Address: 00-17-23-A1-84-B2 WLAN IP Address: 0.0.0.0 Language: English Configuration: VS4 SpO2 Temp-T NBP-P Recorder Main Screen 3-4 Performance Verification Testing SureSigns VS4 Service Guide Accessing the System Admin Menu Accessing the System Admin Menu You can use the System Admin Menu to configure password-protected functions of the monitor, including Demo Mode, system diagnostics, and upgrading the software. For more information about using the System Admin Menu to configure the monitor, see the SureSigns VS4 Installation and Configuration Guide. To access the System Admin Menu: Step 1 In the System Menu, select the System Admin button. 2 In the window that appears, enter the Administrator password, 2-1-5, as shown: Please enter the password: 2 1 5 Cancel OK 3 Select OK. The System Admin Menu opens. System Admin Menu Language: English Alarm Tone: Philips Minimum Alarm Tone Volume: Diagnostics LAN Wireless 3 Alarm Pause Duration: 120 seconds Data Export Default NBP Interval: Off Default Continuous SpO2: On Export Settings 2 minutes Import Settings 0 Patient ID Settings Default Save SpO2 to Patient Record: SpO2 Alarm Delay: High/Low: 0 Upgrade Software Desat: QuickCapture Minimum Nurse Call Alarm Priority: Low QuickAlerts Auto Suspend: Off QuickCheck Default Initial NBP Inflation Pressure: Adult: 160 Pediatric: Align Interval to Clock: Auto Save Patient Record: 140 Date/Time Settings Neonate: 100 Certificate No Demo Mode 1 minute Allow Audio Off Save Current Alarm Settings as Default Large Battery Icon Restore Factory Default Alarm Settings Latch Physiological Allow Alarm Disable Return Caution The System Admin Menu remains unlocked for 1 minute after you close it. This allows you to open the menu again without having to re-enter the password. Do not leave the monitor unattended during the unlock time. Performance Verification Testing SureSigns VS4 Service Guide 3-5 Accessing the System Admin Menu System Admin Menu Options The following table describes the System Admin Menu options that are explained in this guide. All other options on the menu are explained in the SureSigns VS4 Installation and Configuration Guide and the SureSigns VS4 Network Configuration Guide. Option Description Demo Mode Demo Mode allows the monitor to be demonstrated without actually monitoring parameters. For more information, see “Enabling Demo Mode” on page 3-6. Diagnostics Opens the System Diagnostics menu. Monitoring is suspended while this menu is open. Note — This button is unavailable when the monitor is running in Demo mode. For more information, see “Performing Verification Tests” on page 3-10. Upgrade Software Opens the Upgrade Software menu. For more information, see “Upgrading the Software” on page 3-7. Enabling Demo Mode Warning Do not connect a patient to a monitor running in Demo mode. Values represented in Demo mode do not represent measurements from a patient connected to the monitor, and may lead to incorrect diagnoses. Demo mode is used for demonstrating the monitor without monitoring parameters. Demo mode simulates all patient parameters and generates alarms when alarm settings are exceeded. By default, the check box is cleared. Caution Entering Demo mode clears the patient data. Note — You cannot access the System Diagnostics menu when the monitor is in Demo mode. To put the monitor in Demo mode: Step 3-6 1 Open the System Admin Menu. See “Accessing the System Admin Menu” on page 3-5. 2 Select the Demo Mode check box. 3 Select the Return button. Performance Verification Testing SureSigns VS4 Service Guide Upgrading the Software Step 4 Select Yes. The monitor enters Demo mode and clears all patient data. ** DEMO ** appears on the screen as shown. 5 To exit Demo mode, press the On/Standby key to turn off the monitor. The monitor clears all simulated patient data. Upgrading the Software Use the following procedure to upgrade the system software with a USB flash drive. When you upgrade the software, the monitor saves all of the system settings, including the System Admin Menu settings, the Error log, and the patient list. Note — Philips recommends using a SanDisk® or Kingston® USB flash drive for software upgrades. Performance Verification Testing SureSigns VS4 Service Guide 3-7 Upgrading the Software Caution Before you upgrade the software, you can back up the system settings by exporting the current configuration settings or by recording them on the worksheets provided in the SureSigns VS4 Installation and Configuration Guide. For more information, see the SureSigns VS4 Installation and Configuration Guide. Do not downgrade the software to an earlier version, because it may cause hardware incompatibility and loss of system settings and patient records. The current software version is displayed on the start-up screen and the System Information window. For more information, see “Viewing System Information” on page 4-1. When you upgrade the software: • Charge the battery before upgrading the software. • Never perform a software upgrade with the monitor connected to a patient. • Disconnect any USB peripherals. • Do not upgrade software through a USB hub. • If the USB port has a clamp in place, you may need to remove the clamp to ensure that the USB flash drive can be inserted completely into the USB port. After the upgrade starts: • Do not unplug the monitor. • Do not remove the USB flash drive. • Do not press any keys. If the upgrade is inadvertently interrupted and the main board data is lost, replace the main board. For more information, see “Removing the Main Board” on page 5-31. To perform a software upgrade: Step 1 Connect the monitor to AC power and turn on the monitor. Note — Your monitor must be connected to AC power and have a fully charged battery before upgrading the software. 2 Insert the USB flash drive with the software upgrade into the USB port on the back of the monitor. Note — The software upgrade folder must be located in the top directory of the USB flash drive. 3 3-8 Open the System Admin Menu. See “Accessing the System Admin Menu” on page 3-5. Performance Verification Testing SureSigns VS4 Service Guide Upgrading the Software Step 4 Select the Upgrade Software button. The monitor searches for a valid software image on the USB flash drive, and then displays the software image information in the Upgrade Software window. Upgrade Software Current Version: A.04.24 New Version: A.04.25 Upgrade WARNING: Battery should be charged before upgrading software. Do no unplug the monitor, remove the USB flash drive, or press any keys after the upgrade process begins. Any user interaction during the upgrade may cause the upgrade to fail and adversely affect monitor performance. Return If the monitor cannot find a valid software image, the screen returns to the System Admin Menu. 5 Select the Upgrade Software button to start the upgrade. The Upgrade in Progress indicator increments while the upgrade is in progress. When the upgrade is complete, the Checking Memory CRC and Upgrade Successful messages appear. After the software upgrade, the monitor automatically shuts down and restarts. 6 Remove the USB flash drive. 7 Before placing the monitor back in service, perform the following: • Power-on self test. See “Power-On Self Test” on page 3-12. • Verify that your system settings are as expected. Performance Verification Testing SureSigns VS4 Service Guide 3-9 Performing Verification Tests Performing Verification Tests Some of the verification tests require using the System Diagnostics menu or the Maintenance options. When you open the System Diagnostics menu, monitoring is suspended and measurements stop. Notes • The Charging LED does not show battery status while the System Diagnostics menu is open. • The System Diagnostics menu is not available in Demo mode. Accessing the System Diagnostics Menu Use the System Diagnostics Menu to track component usage hours and perform the system diagnostic and verification tests. Note — You cannot access the System Diagnostics menu when the monitor is in Demo mode. To access the System Diagnostics menu: Step 1 Open the System Admin Menu. See “Accessing the System Admin Menu” on page 3-5. 2 Select the Diagnostics button. The System Diagnostics menu appears. System Diagnostics Monitoring Suspended NBP Cycle Count: 44 LCD Usage Hours: 23.1 Errors: 0 Error Log Self Test Display Test Recorder Test Audio Test Battery Info LED Test Keys Test Touch Screen Calibration Network Test Maintenance >> Return 3 3-10 To access the options under the Maintenance >> button, see “Accessing Maintenance Options” on page 3-11. Performance Verification Testing SureSigns VS4 Service Guide Performing Verification Tests Accessing Maintenance Options You must enter an additional password to access the Maintenance options. Only trained biomedical engineers or support personnel should access the Maintenance options. To access the Maintenance options in the System Diagnostics menu: Step 1 Open the System Diagnostics menu. See “Accessing the System Diagnostics Menu” on page 3-10. 2 Select the Maintenance >> button. 3 In the window that appears, enter the password, 1-2-9, as shown: Please enter the password: 1 2 OK 9 Cancel The System Diagnostics menu displays additional options. System Diagnostics Monitoring Suspended NBP Cycle Count: 44 Reset LCD Usage Hours: 23.1 Reset Errors: 0 Error Log Reset Self Test Display Test Recorder Test Audio Test Battery Info LED Test Keys Test Touch Screen Calibration Network Test Reset S/N Configuration NBP Test Clear Data Return Performance Verification Testing SureSigns VS4 Service Guide 3-11 Visual Test Visual Test To perform the visual test: Step 1 Inspect the system for obvious signs of damage; for example, cracks, cuts, or breakage. 2 Check all external cables and accessories for damage; for example, cuts, kinks, wrong connections. 3 Ensure that all markings and labeling are legible. If the labels on the rear case are not legible, replace the rear case. If the serial number label is not legible, contact the Philips Customer Care Center or your local Philips representative to return the monitor for label replacement. 4 Check for any obstructions to mechanical parts. The expected test result is that the system has no obvious signs of damage or obstruction. Note — Philips employees record this value as V:P or V:F. Power-On Self Test To perform the power-on self test: Step 1 Connect the monitor to an AC power source. 2 Press the On/Standby key to power up the monitor. 3 Make sure that the monitor powers up successfully as described in the following sequence: • The screen displays color bars for about five seconds. • The LCD turns off for three seconds, and the charging LED lights. • The Philips screen appears for one second, and a startup tone sounds. • The main screen appears. The expected result is that the monitor starts up and displays the main screen. For detailed information about the start-up and power sequences, see “Start-up and Power Sequences” on page 4-2. If the LEDs do not function as expected, see “Power Problems” on page 4-4. If the display does not function as expected, see “Power Problems” on page 4-4 or “Display Problems” on page 4-6. If you do not hear a startup tone, or the monitor displays the Speaker Malfunc error message, see “Error Codes” on page 4-11. Note — Philips employees record this value as PO:P or PO:F. 3-12 Performance Verification Testing SureSigns VS4 Service Guide Alarms Test Alarms Test The following test allows you to verify that the visual and audio alarms are working. To perform this test, you need an NBP cuff and hose. To test the alarms: Step 1 With the monitor turned on, make sure that all alarms are enabled (the monitor is not in Audio Pause or Audio Off mode). 2 Make sure the NBP alarm is enabled (the crossed bell icon does not appear in the NBP numeric pane). 3 Connect the NBP hose to the NBP input connector, but do not place the cuff on your arm. 4 Press the NBP key on the front panel. 5 Wait for the NBP module to cycle and check that an NBP error message appears and an alarm tone sounds. 6 If you do not get the results in step 5, see “NBP Problems” on page 4-6. SpO2 Test The following procedure tests the performance of the SpO2 measurement and alarm. To perform this test, you need an adult SpO2 sensor. To perform the SpO2 test: Step Caution 1 Connect an adult SpO2 sensor to the SpO2 connector on the monitor. Ensure that the red LED in the sensor is lit. 2 Connect the other end of the sensor to your finger. 3 Verify that the SpO2 value displayed on the monitor is between 95% and 100%. If it is not, try the test again with a patient simulator. 4 If you still do not get the results in step 3, see “SpO2 Measurement Problems” on page 4-8. A functional tester cannot be used to assess the accuracy of a pulse oximeter monitor. However, if there is independent demonstration that a particular calibration curve is accurate for the combination of a pulse oximeter monitor and a pulse oximeter sensor, then a functional tester can measure the contribution of a monitor to the total error of a monitor/sensor system. The functional tester can then measure how accurately a particular pulse oximeter monitor is reproducing that calibration curve. Performance Verification Testing SureSigns VS4 Service Guide 3-13 NBP Test NBP Test These tests check the performance of the non-invasive blood pressure measurement: • NBP accuracy • NBP calibration procedure (if required) • NBP pneumatic leakage To perform these tests, you need: • A reference manometer (includes hand pump and valve), accuracy 0.2% of reading • An expansion chamber (volume 250 ml 10%) • Appropriate tubing NBP Accuracy To test the NBP accuracy: Step 1 Connect the manometer and the pump with tubing to the NBP connector on the monitor. 2 Connect the tubing to the expansion chamber (250 ml cylinder). SureSigns VM Patient Monitor Expansion chamber 3 3-14 Manometer Monitor Open the Maintenance options in the System Diagnostics menu. See “Accessing Maintenance Options” on page 3-11. Performance Verification Testing SureSigns VS4 Service Guide NBP Test Step 4 Select NBP Test. The NBP Test window appears. NBP Test Pressure (mmHg): Start Static Pressure Test NBP Calibration Firmware version: 0.33 Return 5 Select the Start Static Pressure Test button to start the test. 6 Squeeze the manometer pump and apply a pressure of 280 mmHg. 7 Wait 10 seconds for the pressure to stabilize. Note the pressure displayed in the NBP Test window. The value should be 280 mmHg 3 mmHg. Note — Philips employees record this value as X1. 8 Squeeze the manometer pump to apply a pressure of 150 mmHg to the monitor. 9 Wait 10 seconds for the pressure to stabilize. Note the pressure displayed in the NBP Test window. The value should be 150 mmHg 3 mmHg. Note — Philips employees record this value as X2. 10 Select the Stop Static Pressure Test button to stop the test. 11 If the difference between the manometer and displayed values is greater than 3 mmHg, calibrate the monitor (see “NBP Calibration Procedure” on page 3-16). If the results are as expected, proceed to the “Pneumatic Leakage Test” on page 3-17. Performance Verification Testing SureSigns VS4 Service Guide 3-15 NBP Test NBP Calibration Procedure To calibrate the NBP module: Step 1 In the NBP Test window, Select NBP Calibration. Note — To stop the calibration process at any time, select Stop. The NBP Calibration menu appears. NBP Calibration Set Pressure Value: 220.0 Start CAL P1 Stop Return Note — If you are using a manual manometer, close the valve before continuing. 2 Select the Start button to begin calibration. The monitor inflates the expansion chamber and displays the message, Starting NBP Calibration... 3 Wait until the message, Ready for calibration at first pressure point..., appears. 4 Select the Set Pressure Value field, and then select the value to match that displayed on the manometer. 5 Select CAL Point to save the calibration point. 6 Wait until the message, NBP calibration successful, appears. If the test fails for any reason, select the Stop button to stop the test. 3-16 7 Select the Return button to exit the test. 8 To verify the calibration, check the accuracy of the NBP. See “NBP Accuracy” on page 3-14. Performance Verification Testing SureSigns VS4 Service Guide NBP Test Step 9 If you do not get the expected results after several tries, see Chapter 4, “Troubleshooting.” Pneumatic Leakage Test To check the pneumatic system and valve: Step 1 In the NBP Test window, select the Start Static Pressure Test button. 2 Squeeze the manometer pump to apply a pressure of 280 mmHg. 3 Wait 10 seconds for the pressure to stabilize. Note the pressure value in the NBP Test window. Note — Philips employees record this value as P1. 4 Wait 60 seconds for the pressure to stabilize. Note the pressure value in the NBP Test window. Note — Philips employees record this value as P2. 5 Calculate and document the leakage test value. The leakage test value should be less than or equal to 6 mmHg. Note — Philips employees record this value as X3 (where X3 = P1 - P2). 6 Select the Stop Static Pressure Test to stop the process. 7 If the leakage test value exceeds 6 mmHg, check the test setup cuff and tubing, and then test again. If the test still fails, check the pneumatic tubing inside the monitor. 8 If you cannot eliminate the leak, see Chapter 4, “Troubleshooting.” Performance Verification Testing SureSigns VS4 Service Guide 3-17 Predictive Temperature Test Predictive Temperature Test The following procedure uses a fixed temperature value to check the performance of the temperature measurement on the monitor. To perform this test, you need: • A SureSigns temperature probe • A SureSigns Temperature Calibration Key (part # 4535 640 33691) To test the performance of the temperature measurement: Step 1 Connect the temperature probe to the monitor. 2 Open the Temperature Menu and select Monitored mode. 3 Remove the temperature probe and the probe well and disconnect the temperature probe connector from the monitor. Note — A temperature probe error may occur and an alarm may sound. 4 Connect the SureSigns temperature calibration key to the temperature module. 5 Replace the temperature probe and the probe well. Note — If a temperature probe error was generated, the alarm stops. 6 Remove the temperature probe from the probe well. 7 Wait for the monitor to display the static temperature value. 8 Check that the displayed temperature reads 36.3 ± 0.1°C (97.3 ± 0.2°F). 9 If the value is not within tolerance, see “Temperature Measurement Problems” on page 4-7. Tympanic Temperature Test To verify the performance of the tympanic temperature module, you must do one of the following: • Send the monitor to Philips for calibration. Contact the Philips Customer Care Center or your local Philips representative • Purchase a Covidien calibration device, part number 303079. See the Covidien web site for ordering information (www.covidien.com). Note — The battery compartment in the tympanic temperature probe is not functional. 3-18 Performance Verification Testing SureSigns VS4 Service Guide Safety Tests Safety Tests Use the following safety test procedures to verify safe service of the monitor. The setups and the acceptable ranges of values used for these tests are derived from local and international standards, but may not be equivalent. These tests are not a substitute for local safety testing where it is required for an installation or a service event. If you use the Metron Safety tester, perform the tests in accordance with your local regulations. For example, in Europe, use IEC 60601-1/IEC 60601-1-1 and in the United States, use UL 60601-1. The Metron Report should print results with the names listed below, together with other data. Note — Safety tests meet the standards of, and are performed in accordance with IEC 60601-1, Clause 19 (EN60601-1). The SureSigns VS4 vital signs monitors have been classified as Class I equipment. To perform these tests, you need a multimeter. The monitor safety tests include: • Enclosure leakage • Ground integrity • Patient leakage current with mains voltage Enclosure Leakage S(1) Part 1: Enclosure Leakage Current - NC (normal condition) Medical Electrical Equipment Medical electrical system Instrument under test Signal parts in- and/or output L (N) (**) Signal parts in- and/or output Other Instrument S2 S1 Applied part N (L) S4 (*) MD PE (*) Not present in Class 2. (**) Can be multiple different connections to different equipment at same time. Expected Test Results Normal condition maximum leakage current x1 100A. This measures leakage current of exposed metal parts of Instrument under Test (IUT) and between parts of the system within the patient environment; normal and reversed polarity using S2. Safety test according IEC 60601-1 / UL 60601-1. S(1) Part 2: Enclosure Leakage Current - Single Fault (open earth) Performance Verification Testing SureSigns VS4 Service Guide 3-19 Safety Tests M eMedical d ic a l e Electrical le c tr ic a lEquipment s y s te m In s tr u m e n t u n d e r te s t S ig n a l p a rts in - a n d /o r o u tp u t (**) L (N ) S ig n a l p a rts in - a n d /o r o u tp u t O th e r In s tr u m e n t S2 S1 A p p lie d p a r t N (L ) S4 PE MD (**) C a n b e m u ltip le d iffe re n t c o n n e c tio n s to d iffe re n t e q u ip m e n t a t s a m e tim e . Expected Test Results Single Fault maximum leakage current x2 500A (IEC 60601-1). 300A (UL 60601-1) This measures leakage current of exposed metal parts of Instrument under Test (IUT) with Protective Earth (PE) open circuit (S4 = open) and between parts of the system within the patient environment; normal and reversed polarity using S2. Ground Integrity S(2) Protective Earth Continuity Instrument under test L (N) N (L) Ri Applied part PE Ohm 6V 50 Hz (*) Insulating pad 25 A or 1.5 Ir (*) If equipotential connection present : measure also with yellow/green E.P. conductor connected. Expected Test Results With mains cable, maximum impedance x 100 mOhms (IEC 60601-1 and UL 60601-1). This measures impedance of Protective Earth (PE) terminal to all exposed metal parts of Instrument under Test (IUT), which are for safety reasons connected to the Protective Earth (PE). Test current 25 Amp applied for 5 to 10 seconds. 3-20 Performance Verification Testing SureSigns VS4 Service Guide Nurse Call Relay Test Patient Leakage Current With Mains Voltage S(3) Patient Leakage current - Single Fault Condition (S.F.C.) mains on applied part (*) Not present in Class 2 Instrument under test L (N) S2 S1 Applied part N (L) S4 PE (*) MD Signal part in- and/or output Insulating pad S5 L (N) S6 R N (L) Expected Test Results Maximum leakage current, x 50A @ 250V (IEC60601-1 and UL 60601-1). Measures patient leakage current from applied part to earth caused by external main voltage on applied part with switch S5 open and closed. Each polarity combination possible is tested using S2 and S6. This test is applicable for every measurement input. Nurse Call Relay Test If your facility uses the nurse call function on the monitor, perform the following procedure to test the nurse call alarm output relay. The nurse call alarm output is a phone jack connector that is capable of both normally closed and normally open relay operation. The nurse call connector jack has three contacts that connect with those on a phono connector as shown in the following illustration. Tip Sleeve Ring • Tip — Relay normally open, closed for alarm • Ring — Relay normally closed, open for alarm • Sleeve — Common Performance Verification Testing SureSigns VS4 Service Guide 3-21 Calibrating the Touch Screen To perform this test, you need: • A patient simulator • An ohmmeter • A phono connector To perform the nurse call relay test: Step 1 Plug the phono connector into the Nurse Call connector on the back of the monitor. 2 Use the ohmmeter and patient simulator to verify relay operation as follows: 3 Condition Phone Jack Connector Tip (Relay Normally Open) Phone Jack Connector Ring (Relay Normally Closed) Alarm Closed Open No alarm Open Closed If the nurse call function does not work as expected, see Chapter 4, “Troubleshooting.” Calibrating the Touch Screen When you replace the LCD, you must calibrate the touch screen after reassembly. To calibrate the touch screen: Step 1 Open the System Diagnostics menu. See “Accessing the System Diagnostics Menu” on page 3-10. 2 Touch the Touch Screen Calibration button. Notes: • You cannot enter the calibration mode with the navigation wheel, you must touch the Touch Screen Calibration button. • You cannot exit the test until it is completed. 3 Touch the Touch Screen Calibration button again. The calibration screen appears 4 Touch and hold the center of the target cross hair that appears until the target moves to another position. Caution Do not use a sharp object that could scratch the screen. 3-22 Performance Verification Testing SureSigns VS4 Service Guide Calibrating the Touch Screen 5 Repeat step 4 until the calibration is complete and the following message appears: New calibration settings have been measured. Press the navigation wheel to accept the new settings. 6 Press the wheel to save the calibration settings. 7 Touch the screen anywhere to end the test. Performance Verification Testing SureSigns VS4 Service Guide 3-23 Calibrating the Touch Screen 3-24 Performance Verification Testing SureSigns VS4 Service Guide 4 Troubleshooting Use the information in this chapter to diagnose and correct monitor problems. This chapter describes how to troubleshoot a monitor that is not operating correctly. Chapter 5, “Repairing the Monitor,” describes how to perform the recommended repairs. You can repair the monitor in either of two ways: • Bench repair, where you return the monitor to a Philips authorized service center for repair. • Spare parts, where you order replacement parts and you repair the monitor. The tools required to repair the monitor are listed in “Tools Required for Service” on page 5-2. If you open the case for a repair, you then must perform specific tests after reassembly. For detailed information about these tests, see Chapter 3, “Performance Verification Testing.” The Philips Parts Center stocks board level assemblies and mechanical parts. Chapter 6, “Replacement Parts and Assembly Drawings,” lists these parts and assemblies. Service notes announce the availability of additional spare parts. When You Cannot Correct a Problem The information in this chapter is intended to help you resolve most problems that may occur with your monitor. If you still cannot isolate a problem after using the information in this chapter, call the Philips Customer Care Center or your local representative. Viewing System Information Before you troubleshoot the monitor, identify important information about the monitor, such as the hardware version and the software version, which are displayed in the System Menu. To view the System Menu: • Select the System button. The System Menu appears. Diagnosing a Problem Before you begin to troubleshoot a problem or open the monitor for repair, check the following basics: 1. Is the power switch turned on? 2. Is the battery adequately charged? 3. Is the AC power cord connected to the monitor and plugged into a functional AC outlet? 4. Is the monitor's display functioning? 5. Are the LEDs on the front of the monitor lit as you expect? Note — It may take several seconds for the AC Power LED to light or turn off after the AC power cord has been connected or disconnected. Troubleshooting SureSigns VS4 Service Guide 4-1 Start-up and Power Sequences If the monitor is not receiving power: 1. Check “Start-up and Power Sequences” on page 4-2, and then follow the troubleshooting steps in “Power Problems” on page 4-4. 2. If the monitor has no — or an incorrect — display, follow the troubleshooting steps in “Display Problems” on page 4-4. When the monitor has power and a functioning display, use the information in this chapter to diagnose other monitor problems. Start-up and Power Sequences The following table describes the start-up and power on phases of the monitor and its components. If the monitor does not behave as described in the following table, see “Display Problems” on page 4-4. For the monitor to start correctly, it must be powered correctly and the +3.3V system board supply voltage must be working properly as indicated by the lit LEDs on the front panel. User Action Expected Result Plug the AC power cord or insert the battery (or both) into an unpowered monitor. The screen displays the color bar for about five seconds. Press the On/Standby key. The Philips splash screen appears and a tone sounds. The LCD is off and the Charging LED lights (when the battery is available). The Date/Time Menu appears for a new time setting. After you acknowledge the Date/Time Menu, the main screen appears. Press the On/Standby key of the monitor (with AC and/or battery) that is off. The screen displays the color bar for about five seconds. The LCD is off and the Charging LED lights (when the battery is available). The Philips splash screen appears in one second and a tone sounds. The main screen appears. Software reset (system or user). The screen displays the color bar for about five seconds. The LCD turns off and the Charging LED lights (when the battery is available). The Philips splash screen appears in one second and a tone sounds. The main screen appears. Plug AC power cord into a monitor that is off (battery only). Press the On/Standby key. The screen displays the color bar for about five seconds. The LCD is off and the Charging LED lights (when the battery is available). The Philips splash screen appears and a tone sounds. The New Patient Menu displays for new patient settings. After the New Patient Menu is acknowledged, the main screen appears. 4-2 Troubleshooting SureSigns VS4 Service Guide Troubleshooting Tables User Action Expected Result Press the On/Standby key when the monitor is in Standby mode (AC and/or battery). A tone sounds. The New Patient Menu displays the new patient setting. Press the On/Standby key when the monitor is on (AC and/or battery). The Philips splash screen appears and the LCD turns off. Select Shutdown in the System Menu. The Philips splash screen appears and a tone sounds. The LCD turns off. After the New Patient Menu is acknowledged, the main screen appears. Troubleshooting Tables Use the following tables to diagnose and fix monitor problems. The tables describe a monitor problem by symptom, list a possible cause, and suggest actions. Check the first possible cause listed, and then perform the associated action to repair the problem. Perform all actions in the order that they appear in a table. Monitor problems are categorized as follows: • Power • Display • Alarms • Measurements, including: – NBP – Temperature – SpO2 • Navigation wheel, touch screen, and keys • Recorder • Nurse Call • USB hub If using the following troubleshooting tables does not solve the problem, see “Running System Diagnostics” on page 4-29. Troubleshooting SureSigns VS4 Service Guide 4-3 Troubleshooting Tables Power Problems Symptom Possible Cause Action The monitor turns on with battery power, but does not with AC power. The power cord is unplugged. Ensure that the AC power cord is plugged into an outlet. The power cord is broken. Replace the AC power cord. The fuse is blown. Replace the fuse. See “Removing a Fuse” on page 5-5. The power supply cable malfunctioned. Replace the DC In cable. See “Removing the Power Supply” on page 5-30. The power supply malfunctioned. Check output voltage on power supply. If you do not measure 15 V, replace the power supply. See “Removing the Power Supply” on page 5-30. The AC power connector malfunctioned. Replace the AC connector. See “Removing the AC Power Connector” on page 5-39. The monitor keypad is worn. Replace the front panel. See “Removing the LCD Assembly” on page 5-44. The main board malfunctioned. Replace the main board. See “Removing the Main Board” on page 5-31. The battery is not charged. Charge the battery. For more information, see “Maintaining the Battery” on page 2-2. The battery or connector is loose. Reseat both the battery and battery cable. The battery does not have a connection to the main board. Replace the battery board. See “Removing the Battery Connector Board” on page 5-42. The main board malfunctioned. Replace the main board. See “Removing the Main Board” on page 5-31. The monitor does not turn on with either AC or battery power. The LCD, cables, battery, power supply, or main board malfunctioned. Follow the steps in the power troubleshooting flowchart on the following page. Only one of the Charging LED colors is displayed. The membrane switch assembly malfunctioned. Replace the front panel. See “Separating the Front and Rear Case Assemblies” on page 5-12. The following message is displayed: Battery service The Max Error value exceeds 8%. Recondition the battery. See “Reconditioning the Battery” on page 2-4. required The Full Capacity value is one half of the Design Capacity value. The monitor turns on with AC power, but does not with battery power. Display Problems Symptom Possible Cause Action The power is on, but the monitor screen is blank. The monitor is in Standby mode. Press the On/Standby key to end Standby mode. The connection with the backlight LCD is faulty. Ensure that there is a proper connection between the cable, LCD, and main board. The main board malfunctioned. Replace the main board. See “Removing the Main Board” on page 5-31. 4-4 Troubleshooting SureSigns VS4 Service Guide Troubleshooting Tables Symptom Possible Cause Action The monitor displays random or distorted graphics with a white background. The LCD signal cable is not attached correctly. Open the monitor and reseat the LCD signal cable. See “Removing the LCD Assembly” on page 5-44. The LCD malfunctioned. Replace the LCD. See “Removing the LCD Assembly” on page 5-44. The main board malfunctioned. Replace the main board. See “Removing the Main Board” on page 5-31. The main board malfunctioned. Replace the main board. See “Removing the Main Board” on page 5-31. The monitor turns on and the opening screen and/or color bar starts, but then freezes. Alarm Problems Symptom Possible Cause Action A flashing red and white box with the message AUDIO FAILED appears on the screen. The speaker malfunctioned. Clear the error message by performing the speaker test or clearing the error log. See “Testing the Speaker” on page 4-33 or “Clearing Patient Data” on page 4-37. The connection to the speaker is a faulty. Ensure that the connection to the speaker is correct. Clear the error message by performing the speaker test or clearing the error log. See “Testing the Speaker” on page 4-33 or “Clearing Patient Data” on page 4-37. Audible alarms do not sound. The Auto Set Alarm Limits button is unavailable. The speaker is faulty. Replace the speaker. See “Removing the Fan and Speaker” on page 5-22. The monitor is in Audio Pause mode or Audio Off mode. Confirm audio alarms are enabled. The connection to the speaker is faulty. Ensure that the connection to the speaker is correct. The speaker malfunctioned. Replace the speaker. See “Removing the Fan and Speaker” on page 5-22. The main board malfunctioned. Replace the main board. See “Removing the Main Board” on page 5-31. Auto Set Alarm Limits function is only available when the monitor is in NBP Interval mode or Continuous SpO2 mode. Ensure that the monitor is in NBP Interval mode or Continuous SpO2 mode. See the SureSigns VS4 Instructions for Use. Troubleshooting SureSigns VS4 Service Guide 4-5 Troubleshooting Tables NBP Problems Symptom Possible Cause Action The NBP cuff does not inflate. The air tube or cuff is bent or twisted. Straighten the tube or cuff. Air leak in the air tube or cuff. Replace the cuff and ensure that there is no air leakage in the tube. The NBP module malfunctioned. Replace the NBP pump module. See “Removing the NBP Module” on page 5-36. The NBP pump filter is blocked. Replace the NBP pump filter. See “Removing the NBP Filter” on page 5-38. The main board malfunctioned. Replace the main board. See “Removing the Main Board” on page 5-31. Wrong cuff size, or incorrect cuff placement. Use proper cuff size, ensure proper cuff placement. Initial pressure setting is incorrect. Specify the correct initial pressure. For more information, see the SureSigns VS4 Installation and Configuration Guide. The air tube is bent or twisted or there is air leakage in the air tube or cuff. Ensure that the tube is straight and not kinked. Replace the cuff and ensure that there is no air leakage in tube. External problem. Ensure that all external blood pressure reading requirements are met and that the patient is not moving excessively. For more information about measuring NBP, see the SureSigns VS4 Instructions for Use. The NBP pump filter is blocked. Replace the NBP pump filter. See “Removing the NBP Filter” on page 5-38. NBP module error. Replace the pump module or main board. See “Removing the NBP Module” on page 5-36 or “Removing the Main Board” on page 5-31. NBP measurements are not displayed. 4-6 Troubleshooting SureSigns VS4 Service Guide Troubleshooting Tables Symptom Possible Cause Action NBP measurements are unreliable. Wrong cuff size, or incorrect cuff placement. Use proper cuff size and ensure proper cuff placement. Initial pressure setting is incorrect. Specify the correct initial pressure. For more information, see the SureSigns VS4 Installation and Configuration Guide. External problem. Ensure that all external blood pressure reading requirements are met and that the patient is not moving excessively. For more information about measuring NBP, see the SureSigns VS4 Instructions for Use. The NBP module needs to be calibrated. Recalibrate the NBP module see “NBP Calibration Procedure” on page 3-16. The cuff is too tight. Ensure the cuff is fastened correctly. The initial inflation pressure setting is incorrect. Specify the correct initial inflation pressure. See the SureSigns VS4 Installation and Configuration Guide. The NBP initial pressure too high. Temperature Measurement Problems Symptom Possible Cause Action Temperature measurements are not displayed. The probe is disconnected from the monitor. Ensure that the temperature probe is connected and seated in the probe well. The probe is misplaced. Ensure that the probe is properly placed in the measurement site. The predictive temperature is over range. Ensure that the predictive temperature reading is in the range of 15° – 45°C (59°F – 113°F). See “Predictive Temperature Test” on page 3-18. The probe malfunctioned. Replace the probe. Front end malfunction. Replace the front end board. See “Removing the Front End Assembly” on page 5-24. The temperature module malfunctioned. Replace the temperature module. See “Removing the Predictive Temperature Module and Probe Cover Holder” on page 5-6 or “Removing the Tympanic Temperature Module” on page 5-10. The main board malfunctioned. Replace the main board. See “Removing the Main Board” on page 5-31. Troubleshooting SureSigns VS4 Service Guide 4-7 Troubleshooting Tables Symptom Possible Cause Action Temperature measurements are unreliable. The probe malfunctioned. Replace the temperature probe. The module is not calibrated. Calibrate the temperature module. See “Predictive Temperature Test” on page 3-18 or “Tympanic Temperature Test” on page 3-18. The front end malfunctioned. Replace the front end board. See “Removing the Front End Assembly” on page 5-24. The temperature module malfunctioned. Replace the temperature module. See “Removing the Predictive Temperature Module and Probe Cover Holder” on page 5-6 or “Removing the Tympanic Temperature Module” on page 5-10. Tympanic temperature reading is unusually high. The probe cover is faulty or incorrectly attached. Verify the tip of the probe cover is not torn and that the probe is inserted into the cover completely. Tympanic temperature reading is unusually low. The probe, probe cover, or ear canal is obstructed. Ensure the probe, probe cover, or ear canal are free of obstructions. Symptom Possible Cause Action SpO2 measurements are not displayed. The SpO2 module is in the learning phase. Wait until the module finishes the learning phase. The SpO2 sensor malfunctioned. Replace the SpO2 sensor. The SpO2 board has a faulty connection to the front end board. Ensure that all connectors to the front end board are seated correctly. The SpO2 board malfunctioned. Replace the SpO2 board. See “Removing the SpO2 Board” on page 5-28. The main board malfunctioned. Replace the main board. See “Removing the Main Board” on page 5-31. External problem. For example, excessive patient movement. Ensure that all external SpO2 reading requirements are met and that the patient is not moving excessively. For more information about taking SpO2 readings, see the SureSigns VS4 Instructions for Use. Perfusion is low. Reset the SpO2 function. See “SpO2 Test” on page 3-13. SpO2 Measurement Problems SpO2 measurements are unreliable. 4-8 Troubleshooting SureSigns VS4 Service Guide Troubleshooting Tables Navigation Wheel, Touch Screen, and Key Problems Symptom Possible Cause Action The monitor does not respond to the navigation wheel or front panel keys. The main board has a faulty connection. Ensure that all connectors to the main board are seated correctly. The front panel keypad or navigation wheel is broken. Replace the membrane switch or navigation wheel. See “Removing the LCD Assembly” on page 5-44 or “Removing the Navigation Wheel Assembly Board” on page 5-47. The main board malfunctioned. Replace the main board. See “Removing the Main Board” on page 5-31. The membrane switch assembly malfunctioned. Replace the front panel. See “Removing the LCD Assembly” on page 5-44. Pressing a key does not access the expected function. For example, pressing the Print key initiates an NBP measurement. The membrane switch assembly malfunctioned. Replace the front panel. See “Removing the LCD Assembly” on page 5-44. A key is collapsed, or doesn’t click when pressed. The membrane switch assembly malfunctioned. Replace the front panel. See “Removing the LCD Assembly” on page 5-44. The monitor does not respond to the touch screen. The touch screen is locked. On the System Menu, select the Unlock Touch Screen button. See “Accessing the System Menu” on page 3-4. The touch screen is not configured. In the Configuration menu, select the Touch Screen button. For more information, see the “Setting the System Configuration” on page 5-35. The touch screen is not calibrated. Calibrate the touch screen. See “Calibrating the Touch Screen” on page 3-22. The touch screen malfunctioned. Replace the touch screen. See “Removing the LCD Assembly” on page 5-44. Recorder Problems Symptom Possible Cause Action The recorder paper is jamming. The paper is not installed correctly. Remove paper and reinstall correctly. The wrong type of paper is installed. Use only the recommend recorder paper. The recorder has a mechanical problem. Replace the recorder module. See “Removing the Faceplate or Recorder” on page 5-16. Troubleshooting SureSigns VS4 Service Guide 4-9 Troubleshooting Tables Symptom Possible Cause Action The recorder does not print. The recorder is out of paper. Install a new roll of paper. The recorder door is open. Open the recorder door, and then close it again. The system does not recognize the recorder. Check the recorder’s physical connections. See “Removing the Faceplate or Recorder” on page 5-16. The recorder module malfunctioned. Replace the recorder module. See “Removing the Faceplate or Recorder” on page 5-16. The main board malfunctioned. Replace the main board. See “Removing the Main Board” on page 5-31. Symptom Possible Cause Action The nurse call function does not signal alarm conditions. Minimum Nurse Call Alarm Priority Specify an appropriate Minimum Nurse Call Alarm Priority for your facility. For more information, see the SureSigns VS4 Installation and Configuration Guide. Nurse Call Problems is set too high. Alarms have been silenced. Press the Alarm Silence key to end the Audio Off mode or Audio Pause mode. The phono connector is loose or broken. Check the physical connection to the nurse call connector. The communications board malfunctioned. Replace the Communications (LAN) Board. See “Removing the Communications (LAN) Board” on page 5-41. The main board malfunctioned. Replace the main board. See “Removing the Main Board” on page 5-31. USB Hub Problems Symptom Possible Cause Action The USB hub does not work. The USB hub is disconnected from the monitor. Ensure that all USB plugs are firmly connected into their ports. The hub’s USB ports are blocked by dust or dirt. Clean the USB hub. See the Instructions for Use that came with the USB hub for cleaning instructions. The USB hub is broken. Replace the USB hub. The LAN (I/O Communications) board is broken or not properly connected. Confirm that the LAN (I/O Communications) board is properly connected to the main board. Replace the main board. See “Removing the Communications (LAN) Board” on page 5-41. 4-10 Troubleshooting SureSigns VS4 Service Guide Error Codes Error Codes When the monitor detects an error condition (depending on the type of error), an error message appears on the screen or an error code is written to the Error Log. An error code is an indication that the monitor detected an error in operation and service may be required. An error code is a hexidecimal number that indicates the nature of the error. If an error occurs during monitoring, an audible alarm also sounds. Press the Alarm Silence key to end the audible alarm. The following table lists the error codes that correspond to monitor malfunctions and actions to take when the error occurs. These errors are written to the Error Log. To print the Error Log, see “Viewing, Printing, and Exporting the Error Log” on page 4-36. Code Description Possible Cause Action 257 System Error Battery charger power failure. Replace the battery. See “Removing the Battery” on page 5-3. If the problem persists, replace the main board. See “Removing the Main Board” on page 5-31. If the problem persists, replace the AC power module. See “Removing the AC Power Connector” on page 5-39. 261 System Error Battery is overcharged. Run the monitor without AC power. If the problem persists, replace the battery. See “Removing the Battery” on page 5-3. If the problem persists, replace the main board. See “Removing the Main Board” on page 5-31. 264 temp System Error value Battery is over temperature. Shut down (see “Shutting Down the Monitor” on page 5-2) and restart the monitor. If the problem persists, replace the battery. See “Removing the Battery” on page 5-3. If the problem persists, replace the main board. See “Removing the Main Board” on page 5-31. 817 FPGA FIFO Overrun NBP software error. Informational message. No action required. 818 (2) NBP Equip Malfunc (2) NBP power-on self test failed because the A/D converter is inoperative, or the pressure transducer offset is too large. Replace the NBP module. See “Removing the NBP Module” on page 5-36. If the problem persists, replace the main board. See “Removing the Main Board” on page 5-31. Troubleshooting SureSigns VS4 Service Guide 4-11 Error Codes Code Description Possible Cause Action 818 (15) NBP Equip Malfunc (15) NBP abnormal, unrecoverable system errors with internal firmware. Replace the main board. See “Removing the Main Board” on page 5-31. 818 (25) NBP Equip Malfunc (25) NBP hardware malfunctioned because there is no data. Replace the NBP module. See “Removing the NBP Module” on page 5-36. Task overrun. Shut down (see “Shutting Down the Monitor” on page 5-2) and restart the monitor. 818 (101) NBP Equip Malfunc (101) If the problem persists, replace the main board. See “Removing the Main Board” on page 5-31. If the problem persists, replace the main board. See “Removing the Main Board” on page 5-31. 818 (102) NBP Equip Malfunc (102) Interrupt stack overwritten. Shut down (see “Shutting Down the Monitor” on page 5-2) and restart the monitor. If the problem persists, replace the main board. See “Removing the Main Board” on page 5-31. 818 (103) NBP Equip Malfunc (103) User stack overwritten. Shut down (see “Shutting Down the Monitor” on page 5-2) and restart the monitor. If the problem persists, replace the main board. See “Removing the Main Board” on page 5-31. 818 (104) NBP Equip Malfunc (104) Data validity check failed. Shut down (see “Shutting Down the Monitor” on page 5-2) and restart the monitor. If the problem persists, replace the main board. See “Removing the Main Board” on page 5-31. 818 (106) NBP Equip Malfunc (106) Unable to write init flag data to non-volatile memory. Shut down (see “Shutting Down the Monitor” on page 5-2) and restart the monitor. If the problem persists, replace the main board. See “Removing the Main Board” on page 5-31. 818 (107) NBP Equip Malfunc (107) Unable to verify init flag data written to non-volatile memory. Shut down (see “Shutting Down the Monitor” on page 5-2) and restart the monitor. If the problem persists, replace the main board. See “Removing the Main Board” on page 5-31. 4-12 Troubleshooting SureSigns VS4 Service Guide Error Codes Code Description Possible Cause Action 818 (109) NBP Equip Malfunc (109) Unable to write NBP configuration data to non-volatile memory. Shut down (see “Shutting Down the Monitor” on page 5-2) and restart the monitor. If the problem persists, replace the main board. See “Removing the Main Board” on page 5-31. 818 (110) NBP Equip Malfunc (110) Unable to write NBP configuration data to non-volatile memory. Shut down (see “Shutting Down the Monitor” on page 5-2) and restart the monitor. If the problem persists, replace the main board. See “Removing the Main Board” on page 5-31. 818 (111) NBP Equip Malfunc (111) Calibration data checksum error. Shut down (see “Shutting Down the Monitor” on page 5-2) and restart the monitor. If the problem persists, replace the main board. See “Removing the Main Board” on page 5-31. 818 (112) NBP Equip Malfunc (112) Unable to write calibration data to non-volatile memory. Shut down (see “Shutting Down the Monitor” on page 5-2) and restart the monitor. If the problem persists, replace the main board. See “Removing the Main Board” on page 5-31. 818 (113) NBP Equip Malfunc (113) Unable to verify calibration data written to non-volatile memory. Shut down (see “Shutting Down the Monitor” on page 5-2) and restart the monitor. If the problem persists, replace the main board. See “Removing the Main Board” on page 5-31. 818 (114) NBP Equip Malfunc (114) Error log checksum error. Shut down (see “Shutting Down the Monitor” on page 5-2) and restart the monitor. If the problem persists, replace the main board. See “Removing the Main Board” on page 5-31. 818 (115) NBP Equip Malfunc (115) Unable to write error log to non-volatile memory. Shut down (see “Shutting Down the Monitor” on page 5-2) and restart the monitor. If the problem persists, replace the main board. See “Removing the Main Board” on page 5-31. Troubleshooting SureSigns VS4 Service Guide 4-13 Error Codes Code Description Possible Cause Action 818 (116) NBP Equip Malfunc (116) Unable to verify error log data written to non-volatile memory. Shut down (see “Shutting Down the Monitor” on page 5-2) and restart the monitor. If the problem persists, replace the main board. See “Removing the Main Board” on page 5-31. 818 (117) NBP Equip Malfunc (117) Inflation cycle count and runtime data checksum error. Shut down (see “Shutting Down the Monitor” on page 5-2) and restart the monitor. If the problem persists, replace the main board. See “Removing the Main Board” on page 5-31. 818 (118) 818 (119) 818 (120) 818 (121) NBP Equip Malfunc (118) NBP Equip Malfunc (119) NBP Equip Malfunc (120) NBP Equip Malfunc (121) Unable to write inflation cycle count and runtime data to non-volatile memory. Shut down (see “Shutting Down the Monitor” on page 5-2) and restart the monitor. Unable to verify inflation cycle count and runtime data written to non-volatile memory. Shut down (see “Shutting Down the Monitor” on page 5-2) and restart the monitor. A new message will be sent to the host although the previous message is not finished. Shut down (see “Shutting Down the Monitor” on page 5-2) and restart the monitor. Pressure value from second pressure sensor not available. Shut down (see “Shutting Down the Monitor” on page 5-2) and restart the monitor. If the problem persists, replace the main board. See “Removing the Main Board” on page 5-31. If the problem persists, replace the main board. See “Removing the Main Board” on page 5-31. If the problem persists, replace the main board. See “Removing the Main Board” on page 5-31. If the problem persists, replace the main board. See “Removing the Main Board” on page 5-31. 818 (122) NBP Equip Malfunc (122) The 5-volt supply voltage value is too high or low. Shut down (see “Shutting Down the Monitor” on page 5-2) and restart the monitor. If the problem persists, replace the main board. See “Removing the Main Board” on page 5-31. 4-14 Troubleshooting SureSigns VS4 Service Guide Error Codes Code Description Possible Cause Action 818 (123) NBP Equip Malfunc (123) Error from the 5-volt regulator. Shut down (see “Shutting Down the Monitor” on page 5-2) and restart the monitor. If the problem persists, replace the main board. See “Removing the Main Board” on page 5-31. 818 (124) NBP Equip Malfunc (124) The 12-volt supply voltage value is too high or low. Shut down (see “Shutting Down the Monitor” on page 5-2) and restart the monitor. If the problem persists, replace the main board. See “Removing the Main Board” on page 5-31. 818 (128) NBP Equip Malfunc (128) Offset of pressure sensor 1 is out of range. Shut down (see “Shutting Down the Monitor” on page 5-2) and restart the monitor. If the problem persists, replace the main board. See “Removing the Main Board” on page 5-31. 818 (129) NBP Equip Malfunc (129) Offset of pressure sensor 2 is out of range. Shut down (see “Shutting Down the Monitor” on page 5-2) and restart the monitor. If the problem persists, replace the main board. See “Removing the Main Board” on page 5-31. 818 (130) NBP Equip Malfunc (130) Response of pressure sensor 2 to test signal is out of range. Shut down (see “Shutting Down the Monitor” on page 5-2) and restart the monitor. If the problem persists, replace the main board. See “Removing the Main Board” on page 5-31. 818 (131) NBP Equip Malfunc (131) The difference between the two pressure channels is too large. Shut down (see “Shutting Down the Monitor” on page 5-2) and restart the monitor. If the problem persists, replace the main board. See “Removing the Main Board” on page 5-31. 818 (132) NBP Equip Malfunc (132) One of the two valves was activated for too long. Shut down (see “Shutting Down the Monitor” on page 5-2) and restart the monitor. If the problem persists, replace the NBP module. See “Removing the NBP Module” on page 5-36. Troubleshooting SureSigns VS4 Service Guide 4-15 Error Codes Code Description Possible Cause Action 818 (133) NBP Equip Malfunc (133) CRC mismatch in calibration data. Shut down (see “Shutting Down the Monitor” on page 5-2) and restart the monitor. If the problem persists, replace the main board. See “Removing the Main Board” on page 5-31. 818 (134) NBP Equip Malfunc (134) CRC mismatch in error log data. Shut down (see “Shutting Down the Monitor” on page 5-2) and restart the monitor. If the problem persists, replace the main board. See “Removing the Main Board” on page 5-31. 818 (135) NBP Equip Malfunc (135) CRC mismatch in inflation cycle count and runtime data. Shut down (see “Shutting Down the Monitor” on page 5-2) and restart the monitor. If the problem persists, replace the main board. See “Removing the Main Board” on page 5-31. 818 (136) NBP Equip Malfunc (136) The pneumatic safety switch malfunctioned. Shut down (see “Shutting Down the Monitor” on page 5-2) and restart the monitor. If the problem persists, replace the main board. See “Removing the Main Board” on page 5-31. If the problem persists, replace the NBP module. See “Removing the NBP Module” on page 5-36. 818 (137) NBP Equip Malfunc (137) Valve 2 is defective or blocked. Shut down (see “Shutting Down the Monitor” on page 5-2) and restart the monitor. If the problem persists, replace the NBP module. See “Removing the NBP Module” on page 5-36. If the problem persists, replace the main board. See “Removing the Main Board” on page 5-31. 818 (141) NBP Equip Malfunc (141) Inflation time for selected patient type exceeded. Verify that the appropriate cuff size is being used for the selected patient type. If the problem persists, shut down (see “Shutting Down the Monitor” on page 5-2) and restart the monitor. 4-16 Troubleshooting SureSigns VS4 Service Guide Error Codes Code Description Possible Cause Action 818 (199) NBP Equip Malfunc (199) No data from NBP block. Shut down (see “Shutting Down the Monitor” on page 5-2) and restart the monitor. If the problem persists, replace the main board. See “Removing the Main Board” on page 5-31. 819 NBP Equip Malfunc - Not Calibrated NBP not calibrated. Shut down (see “Shutting Down the Monitor” on page 5-2) and restart the monitor. If the problem persists, recalibrate the NBP module. See “NBP Test” on page 3-14. 819 (127) NBP Equip Malfunc (127) NBP module is not calibrated. Contact the Customer Care Center. 820 (138) NBP Hose Blocked (138) Problem in pneumatic system. Verify that all internal NBP hoses are connected. If the problem persists, shut down (see “Shutting Down the Monitor” on page 5-2) and restart the monitor. If the problem persists, replace the NBP module. See “Removing the NBP Module” on page 5-36. If the problem persists, replace the main board. See “Removing the Main Board” on page 5-31. 821 (139) NBP Air Leak (139) Air leak or valve defect. Verify that all internal NBP hoses are connected. If the problem persists, shut down (see “Shutting Down the Monitor” on page 5-2) and restart the monitor. If the problem persists, replace the NBP module. See “Removing the NBP Module” on page 5-36. If the problem persists, replace the main board. See “Removing the Main Board” on page 5-31. 833 (1) SpO2 Equip Malfunc (1) SpO2 ROM checksum error. Replace the SpO2 board. See “Removing the SpO2 Board” on page 5-28. 833 (2) SpO2 Equip Malfunc (2) SpO2 RAM test error. Replace the SpO2 board. See “Removing the SpO2 Board” on page 5-28. 833 (4) SpO2 Equip Malfunc (4) SpO2 analog signal path self test failed. Replace the SpO2 board. See “Removing the SpO2 Board” on page 5-28. Troubleshooting SureSigns VS4 Service Guide 4-17 Error Codes Code Description Possible Cause Action 833 (6) SpO2 Equip Malfunc (6) SpO2 self test timeout. Reseat the SpO2 board. If the problem persists, replace the SpO2 board. See “Removing the SpO2 Board” on page 5-28. 833 (8) SpO2 Equip Malfunc (8) SpO2 internal DSP communication error. Replace the SpO2 board. See “Removing the SpO2 Board” on page 5-28. 833 (10) SpO2 Equip Malfunc (10) SpO2 host communication error. Replace the SpO2 board. See “Removing the SpO2 Board” on page 5-28. If the problem persists, replace the front end assembly. See “Removing the Front End Assembly” on page 5-24. If the problem persists, replace the main board. See “Removing the Main Board” on page 5-31. 833 (20) SpO2 Equip Malfunc (20) SpO2 hardware defect. Replace the SpO2 board. See “Removing the SpO2 Board” on page 5-28. 833 (40) SpO2 Equip Malfunc (40) SpO2 non-volatile memory corrupted. Replace the SpO2 board. See “Removing the SpO2 Board” on page 5-28. 834 SpO2 Sensor Malfunc Malfunction of the SpO2 sensor or sensor cable. Check the SpO2 sensor and extension cable. If the problem persists, check the cable between the front end board and SpO2 board. Reseat it if necessary. If the problem persists, replace the SpO2 board. See “Removing the SpO2 Board” on page 5-28. If the problem persists, replace the front end assembly. See “Removing the Front End Assembly” on page 5-24. 835 FPGA FIFO Overrun SpO2 software error. Informational message. No action required. 836 SpO2 Communication Error SpO2 communication error. Informational message. No action required. If the message continues, replace the SpO2 board. See “Removing the SpO2 Board” on page 5-28. 4-18 Troubleshooting SureSigns VS4 Service Guide Error Codes Code Description Possible Cause Action 837 SpO2 Error. The front end will now reset itself. No data from SpO2. Allow the monitor to reset. Replace the SpO2 board. See “Removing the SpO2 Board” on page 5-28. If the problem persists, replace the front end assembly. See “Removing the Front End Assembly” on page 5-24. If the problem persists, replace the main board. See “Removing the Main Board” on page 5-31. 865 FPGA FIFO Overrun Temperature software error. Informational message. No action required. 866 (21) Temp Probe Error (21) The probe is operating in temperature conditions above 43.3°C (112°F). Probe tip is defective: heater too close to thermistor. Replace the probe. Excessive heater energy. Heater not working or it could have taken too long to predict. Repeat the measurement. Thermistor pulled away from the tip or heater broken. Repeat the measurement. Probe not responsive. Probe not characterized/calibrated. Repeat the measurement. Probe not characterized/calibrated. Repeat the measurement. Measurement below allowable temperature values and far below the low ambient limits. Verify conditions at 50°F. If conditions are valid and problem persists, replace the temperature probe. Measurement above allowable temperature values and far above the high ambient and/or patient limits. Verify conditions at 50°F. If conditions are valid and problem persists, replace the temperature probe. 866 (22) 866 (32) 866 (33) 866 (34) 866 (45) 866 (46) Temp Probe Error (22) Temp Probe Error (32) Temp Probe Error (33) Temp Probe Error (34) Temp Probe Error (45) Temp Probe Error (46) If the problem persists, replace the temperature module. See “Removing the Predictive Temperature Module and Probe Cover Holder” on page 5-6. If the problem persists, replace the probe. If the problem persists, replace the probe. If the problem persists, replace the probe. If the problem persists, replace the probe. If the problem persists, replace the temperature module. See “Removing the Predictive Temperature Module and Probe Cover Holder” on page 5-6. If the problems, replace the temperature module. See “Removing the Predictive Temperature Module and Probe Cover Holder” on page 5-6. Troubleshooting SureSigns VS4 Service Guide 4-19 Error Codes Code Description Possible Cause Action 866 (52) Temp Probe Error (52) Probe not characterized/calibrated. Replace the probe. Probe well missing or not installed properly. Reseat or replace the well. Error reading the probe's EEPROM. Shut down (see “Shutting Down the Monitor” on page 5-2) and restart the monitor. 866 (63) 866 (70) Temp Probe Error (63) Temp Probe Error (70) If the problem persists, replace the temperature module. See “Removing the Predictive Temperature Module and Probe Cover Holder” on page 5-6. If the problem persists, replace the temperature module. See “Removing the Predictive Temperature Module and Probe Cover Holder” on page 5-6. If the problem persists, replace the temperature probe. 866 (75) 866 (78) Temp Probe Error (75) Temp Module Malfunc (78) Error reading the probe's EEPROM correctly or the probe was not factory tested. Shut down (see “Shutting Down the Monitor” on page 5-2) and restart the monitor. The Probe’s non-volatile error detection mechanism detected an error. Shut down (see “Shutting Down the Monitor” on page 5-2) and restart the monitor. If the problem persists, replace the temperature probe. If the problem persists, replace the front end assembly and the temperature module. See “Removing the Front End Assembly” on page 5-24 and “Removing the Predictive Temperature Module and Probe Cover Holder” on page 5-6. 866 (79) 4-20 Temp Module Malfunc (79) Troubleshooting SureSigns VS4 Service Guide The module’s non-volatile error log memory error detection mechanism detected an error. Shut down (see “Shutting Down the Monitor” on page 5-2) and restart the monitor. If the problem persists, replace the front end assembly and the temperature module. See “Removing the Front End Assembly” on page 5-24 and “Removing the Predictive Temperature Module and Probe Cover Holder” on page 5-6. Error Codes Code Description Possible Cause Action 866 (80) Temp Probe Error (80) Software is trying to turn off the probe heater, but the heater feedback signals that it is still on. Shut down (see “Shutting Down the Monitor” on page 5-2) and restart the monitor. If the problem persists, replace the temperature probe. If the problem persists, replace the temperature module. See “Removing the Predictive Temperature Module and Probe Cover Holder” on page 5-6. 866 (81) Temp Probe Error (81) Software is trying to turn on the probe heater, but the heater feedback signal says it is still off. Shut down (see “Shutting Down the Monitor” on page 5-2) and restart the monitor. If the problem persists, replace the temperature probe. If the problem persists, replace the temperature module. See “Removing the Predictive Temperature Module and Probe Cover Holder” on page 5-6. 867 (24) Temp Module Malfunc (24) Ambient temperature is too high. Check that the fan is running. Check all venting slots of the temperature module. Check the thermal shield plate in the module. Verify that the ambient temperature does not exceed operating specifications. If the problem persists, replace the temperature probe. 867 (25) Temp Module Malfunc (25) Ambient temperature too low. Verify that the ambient temperature does not exceed operating specifications. If the problem persists, replace the temperature probe. 867 (27) Temp Module Malfunc (27) Battery or power supply voltage exceeds maximum value. Replace the front end assembly. See “Removing the Front End Assembly” on page 5-24. 867 (28) Temp Module Malfunc (28) Battery or power supply voltage below minimum value. Replace the front end assembly. See “Removing the Front End Assembly” on page 5-24. 867 (47) Temp Module Malfunc (47) Internal calibration resistor (RCAL) on the board is damaged. Shut down (see “Shutting Down the Monitor” on page 5-2) and restart the monitor. If the problem persists, replace the temperature module. See “Removing the Predictive Temperature Module and Probe Cover Holder” on page 5-6. Troubleshooting SureSigns VS4 Service Guide 4-21 Error Codes Code Description Possible Cause Action 867 (48) Temp Module Malfunc (48) Internal calibration resistor (RCAL) is damaged. Shut down (see “Shutting Down the Monitor” on page 5-2) and restart the monitor. If the problem persists, replace the temperature module. See “Removing the Predictive Temperature Module and Probe Cover Holder” on page 5-6. 867 (49) Temp Module Malfunc (49) Internal circuit validation resistor (PTB) is damaged. Shut down (see “Shutting Down the Monitor” on page 5-2) and restart the monitor. If the problem persists, replace the temperature module. See “Removing the Predictive Temperature Module and Probe Cover Holder” on page 5-6. 867 (50) Temp Module Malfunc (50) Internal circuit validation resistor (PTB) is damaged. Shut down (see “Shutting Down the Monitor” on page 5-2) and restart the monitor. If the problem persists, replace the temperature module. See “Removing the Predictive Temperature Module and Probe Cover Holder” on page 5-6. 867 (51) Temp Module Malfunc (51) A/D measurement timed out and did not finish in the allowed time slot. Shut down (see “Shutting Down the Monitor” on page 5-2) and restart the monitor. If the problem persists, replace the temperature module. See “Removing the Predictive Temperature Module and Probe Cover Holder” on page 5-6. 867 (59) Temp Module Malfunc (59) Battery or power supply voltage below maximum value. Replace the front end assembly. See “Removing the Front End Assembly” on page 5-24. 867 (60) Temp Module Malfunc (60) Battery or power supply voltage exceeds minimum value. Replace the front end assembly. See “Removing the Front End Assembly” on page 5-24. 867 (61) Temp Module Malfunc (61) Reference voltage circuit under voltage or unstable. Shut down (see “Shutting Down the Monitor” on page 5-2) and restart the monitor. If the problem persists, replace the temperature module. See “Removing the Predictive Temperature Module and Probe Cover Holder” on page 5-6. 867 (62) 4-22 Temp Module Malfunc (62) Troubleshooting SureSigns VS4 Service Guide The module is not calibrated. Replace the temperature module. See “Removing the Predictive Temperature Module and Probe Cover Holder” on page 5-6. Error Codes Code Description Possible Cause Action 867 (65) Temp Module Malfunc (65) Error saving to the module’s EEPROM. Shut down (see “Shutting Down the Monitor” on page 5-2) and restart the monitor. If the problem persists, replace the temperature module. See “Removing the Predictive Temperature Module and Probe Cover Holder” on page 5-6. If the problem persists, replace the front end assembly. See “Removing the Front End Assembly” on page 5-24. 867 (66) Temp Module Malfunc (66) The module’s non-volatile calibration memory error detection mechanism detected an error. Shut down (see “Shutting Down the Monitor” on page 5-2) and restart the monitor. If the problem persists, replace the temperature module. See “Removing the Predictive Temperature Module and Probe Cover Holder” on page 5-6. If the problem persists, replace the front end assembly. See “Removing the Front End Assembly” on page 5-24. 867 (67) Temp Module Malfunc (67) Error reading/writing to the module’s EEPROM. Shut down (see “Shutting Down the Monitor” on page 5-2) and restart the monitor. If the problem persists, replace the temperature module. See “Removing the Predictive Temperature Module and Probe Cover Holder” on page 5-6. If the problem persists, replace the front end assembly. See “Removing the Front End Assembly” on page 5-24. 867 (68) Temp Module Malfunc (68) Error reading/writing to the module’s EEPROM. Shut down (see “Shutting Down the Monitor” on page 5-2) and restart the monitor. If the problem persists, replace the temperature module. See “Removing the Predictive Temperature Module and Probe Cover Holder” on page 5-6. If the problem persists, replace the front end assembly. See “Removing the Front End Assembly” on page 5-24. Troubleshooting SureSigns VS4 Service Guide 4-23 Error Codes Code Description Possible Cause Action 867 (69) Temp Module Malfunc (69) Error reading/writing to the module’s EEPROM. Shut down (see “Shutting Down the Monitor” on page 5-2) and restart the monitor. If the problem persists, replace the temperature module. See “Removing the Predictive Temperature Module and Probe Cover Holder” on page 5-6. If the problem persists, replace the front end assembly. See “Removing the Front End Assembly” on page 5-24. 867 (74) 867 (82) Temp Module Malfunc (74) Temp Module Malfunc (82) Internal error. Module is trying to initialize the EEPROM if it detects that it has not been initialized before. Shut down (see “Shutting Down the Monitor” on page 5-2) and restart the monitor. Signal HTR_Q is on and signal HTRC is off, but still have voltage. Shut down (see “Shutting Down the Monitor” on page 5-2) and restart the monitor. If the problem persists, replace the temperature module. See “Removing the Predictive Temperature Module and Probe Cover Holder” on page 5-6. If the problem persists, replace the temperature module. See “Removing the Predictive Temperature Module and Probe Cover Holder” on page 5-6. 867 (83) 867 (84) Temp Module Malfunc (83) Temp Module Malfunc (84) Signal HTR_Q is tri-stated with signal HTRC enabled, and has heater power. Shut down (see “Shutting Down the Monitor” on page 5-2) and restart the monitor. Signal Q&C is turned on and the heater voltage is not high enough. Shut down (see “Shutting Down the Monitor” on page 5-2) and restart the monitor. If the problem persists, replace the temperature module. See “Removing the Predictive Temperature Module and Probe Cover Holder” on page 5-6. If the problem persists, replace the temperature module. See “Removing the Predictive Temperature Module and Probe Cover Holder” on page 5-6. 867 (85) Temp Module Malfunc (85) Heater hardware fail-safe should have turned off, but did not. Shut down (see “Shutting Down the Monitor” on page 5-2) and restart the monitor. If the problem persists, replace the temperature module. See “Removing the Predictive Temperature Module and Probe Cover Holder” on page 5-6. 4-24 Troubleshooting SureSigns VS4 Service Guide Error Codes Code Description Possible Cause Action 867 (101) Temp Module Malfunc (101) Tympanic temperature module checksum error. Replace the tympanic temperature module. See “Removing the Tympanic Temperature Module” on page 5-10. 867 (102) Temp Module Malfunc (102) Tympanic temperature module calibration error. Send the module for calibration. See “Tympanic Temperature Test” on page 3-18. Replace the tympanic temperature module. See “Removing the Tympanic Temperature Module” on page 5-10. 867 (103) Temp Module Malfunc (103) The ambient temperature is below the minimum operating temperature limit. Place the monitor in an environment with a temperature between 16°C and 33°C (60.8°F and 91.4°F). 867 (104) Temp Module Malfunc (104) The ambient temperature is above the maximum operating temperature limit. Place the monitor in an environment with a temperature between 16°C and 33°C (60.8°F and 91.4°F). 868 Temp Error. The front end will now reset itself. No data from temperature. Allow the monitor to reset. Check the temperature module and front end board connection cable. If the problem persists, replace the temperature module. See “Removing the Predictive Temperature Module and Probe Cover Holder” on page 5-6. 881 Speaker Malfunc (881) The speaker failed. To clear the message, perform the speaker test or clear the error log. See “Testing the Speaker” on page 4-33 or “Clearing Patient Data” on page 4-37. If the problem persists, replace the speaker. See “Removing the Fan and Speaker” on page 5-22. 882 Wireless Malfunc The wireless module malfunctioned. Replace the wireless module. See “Removing the Wireless Module” on page 5-50. 883 Touch Screen Malfunc The touch screen malfunctioned. Replace the LCD. See “Removing the LCD Assembly” on page 5-44. 1025 System Error (1025) Could not load ResourceDLL.dll. Shut down (see “Shutting Down the Monitor” on page 5-2) and restart the monitor. If the problem persists, replace the main board. See “Removing the Main Board” on page 5-31. Troubleshooting SureSigns VS4 Service Guide 4-25 Error Codes Code Description Possible Cause Action 1026 System Error (1026) Could not load data from flash. Shut down (see “Shutting Down the Monitor” on page 5-2) and restart the monitor. If the problem persists, replace the main board. See “Removing the Main Board” on page 5-31. 1027 System Error (1027) Could not start the front end. Shut down (see “Shutting Down the Monitor” on page 5-2) and restart the monitor. If the problem persists, replace the front end assembly. See “Removing the Front End Assembly” on page 5-24. If the problem persists, replace the main board. See “Removing the Main Board” on page 5-31. 1028 System Error (1028) Could not stop the front end. Shut down (see “Shutting Down the Monitor” on page 5-2) and restart the monitor. If the problem persists, replace the front end assembly. See “Removing the Front End Assembly” on page 5-24. If the problem persists, replace the main board. See “Removing the Main Board Assembly” on page 5-18. 1029 System Error (1029) Could not allocate enough memory. Shut down (see “Shutting Down the Monitor” on page 5-2) and restart the monitor. If the problem persists, replace the main board. See “Removing the Main Board” on page 5-31. 1030 System Error (1030) An error occurred when the system shut down front end devices. Shut down (see “Shutting Down the Monitor” on page 5-2) and restart the monitor. If the problem persists, replace the main board. See “Removing the Main Board” on page 5-31. 1031 System Error (1031) The monitoring and watchdog thread could not initialize. Shut down (see “Shutting Down the Monitor” on page 5-2) and restart the monitor. If the problem persists, replace the main board. See “Removing the Main Board” on page 5-31. 4-26 Troubleshooting SureSigns VS4 Service Guide Error Codes Code Description Possible Cause Action 1032 System Error Could not open audio files. Shut down (see “Shutting Down the Monitor” on page 5-2) and restart the monitor. If the problem persists, replace the main board. See “Removing the Main Board” on page 5-31. 1033 System Error Unspecified error. Shut down (see “Shutting Down the Monitor” on page 5-2) and restart the monitor. If the problem persists, replace the main board. See “Removing the Main Board” on page 5-31. 1034 System Error Failed to load product info. Shut down (see “Shutting Down the Monitor” on page 5-2) and restart the monitor. If the problem persists, replace the main board. See “Removing the Main Board” on page 5-31. 1035 System Error Cannot initialize the front-end manager. Shut down (see “Shutting Down the Monitor” on page 5-2) and restart the monitor. If the problem persists, replace the main board. See “Removing the Main Board” on page 5-31. 1036 System Error Failed to start work thread. Shut down (see “Shutting Down the Monitor” on page 5-2) and restart the monitor. If the problem persists, replace the main board. See “Removing the Main Board” on page 5-31. 1037 System Error Cannot start polling thread. Shut down (see “Shutting Down the Monitor” on page 5-2) and restart the monitor. If the problem persists, replace the main board. See “Removing the Main Board” on page 5-31. 1039 System Error Cannot get front-end version. Shut down (see “Shutting Down the Monitor” on page 5-2) and restart the monitor. If the problem persists, replace the front end assembly. See “Removing the Front End Assembly” on page 5-24. If the problem persists, replace the main board. See “Removing the Main Board” on page 5-31. Troubleshooting SureSigns VS4 Service Guide 4-27 Error Codes Code Description Possible Cause Action 1042 System Error Failed to start up network driver. Shut down (see “Shutting Down the Monitor” on page 5-2) and restart the monitor. If the problem persists, replace the main board. See “Removing the Main Board” on page 5-31. 1043 System Error Work thread timed out. Shut down (see “Shutting Down the Monitor” on page 5-2) and restart the monitor. If the problem persists, replace the main board. See “Removing the Main Board” on page 5-31. 1044 System Error Front end software error. Shut down (see “Shutting Down the Monitor” on page 5-2) and restart the monitor. If the problem persists, replace the main board. See “Removing the Main Board” on page 5-31. 1045 System Error Printing software error. Shut down (see “Shutting Down the Monitor” on page 5-2) and restart the monitor. If the problem persists, replace the main board. See “Removing the Main Board” on page 5-31. 1047 System Error Monitoring software error. Shut down (see “Shutting Down the Monitor” on page 5-2) and restart the monitor. If the problem persists, replace the main board. See “Removing the Main Board” on page 5-31. 1048 System Error An exception was detected in the alarming software. Shut down (see “Shutting Down the Monitor” on page 5-2) and restart the monitor. If the problem persists, replace the main board. See “Removing the Main Board” on page 5-31. 1050 System Error Failed to stop work thread. Shut down (see “Shutting Down the Monitor” on page 5-2) and restart the monitor. If the problem persists, replace the main board. See “Removing the Main Board” on page 5-31. 4-28 Troubleshooting SureSigns VS4 Service Guide Running System Diagnostics Code Description Possible Cause Action 1051 System Error Cannot initialize NBP. Shut down (see “Shutting Down the Monitor” on page 5-2) and restart the monitor. If the problem persists, replace the main board. See “Removing the Main Board” on page 5-31. 1052 System Error Memory error. Shut down (see “Shutting Down the Monitor” on page 5-2) and restart the monitor. If the problem persists, replace the main board. See “Removing the Main Board” on page 5-31. 1053 System Error Loss of monitoring. Informational message. No action required. Running System Diagnostics If you cannot identify a problem by using the troubleshooting tables beginning on page 4-3 or the Error Code table on page 4-11, run the diagnostic tests. To access the system diagnostic and verification tests, open the System Diagnostics menu. For more information, see “Performing Verification Tests” on page 3-10. Note — You must enter another password to access the Maintenance options. Only trained biomedical engineers or support persons should access the Maintenance options. Running the Self Test Running the Self Test performs the resident self test, which includes a complete memory test and a front end test on all available modules, such as SpO2, NBP, or Predictive Temperature. If the test cannot detect a specific module or if an error occurs, then that test fails. Note — When the monitor is powered up from Standby mode, the monitor performs the front end tests in addition to the start-up sequence. When the monitor is powered up from Deep Sleep mode, the monitor performs the complete memory and front end tests. Troubleshooting SureSigns VS4 Service Guide 4-29 Running the Self Test To run the self test: Step 1 Access the System Diagnostics menu. See “Accessing the System Diagnostics Menu” on page 3-10. 2 Select the Self Test button. The status of the self test is displayed. While the test is running, In Progress is displayed. If a module is not installed or configured, Not Supported is displayed as the Result. If a test fails, Failed (in red text) is displayed as the Result. Self Test Test Item Result Memory SpO2 NBP Predictive Temp Tympanic Temp Passed Passed Failed Not Supported No Self Test Return 3 When all tests are complete, select the Return button. Detected errors are written to the error log with detailed error information and error codes. 4-30 Troubleshooting SureSigns VS4 Service Guide Testing the Recorder Testing the Recorder To test the optional recorder: Step 1 In the System Diagnostics menu, select the Recorder Test button to start the test. The recorder prints a test pattern similar to the following illustration: 2 Use the pattern to identify the recorder problem, such as a faulty print head or motor. Troubleshooting SureSigns VS4 Service Guide 4-31 Testing the Navigation Wheel and Keys Testing the Navigation Wheel and Keys The Keys/Rotary Wheel Test tests the functions of the navigation (rotary) wheel and the keys on the front panel. If you do not get the expected results, see “Display Problems” on page 4-4. To run the keys/rotary wheel test: Step 1 In the System Diagnostics menu, select the Keys Test button. The Keys/Rotary Wheel Test window appears. Each fixed key on the monitor (except On/Standby) is represented by a button in the right side of the window. Keys/Rotary Wheel Test 2 Press a fixed key on the front of the monitor to test it. If the key is working properly, the corresponding icon in the test window lights with a grey border for five seconds. Repeat for each key on the front of the monitor. 3 To test the navigation wheel, turn the wheel clockwise or counterclockwise. If the wheel is working properly, the wheel icon on the screen draws red dots in the direction that you turn the wheel. 4 4-32 To end the test, press the wheel. Troubleshooting SureSigns VS4 Service Guide Testing the Display Testing the Display To test the display: Step 1 In the System Diagnostics menu, select the Display Test button to start the test. The display test draws a sequence of patterns on the monitor screen. Each pattern displays for five seconds. When the last pattern is drawn, the sequence starts again from the first pattern. The following describes the test patterns displayed: 2 Pattern Description of Screen Vertical Bars Alternating black and white vertical bars, starting with white. This description is displayed in red text across the top of the screen. Vertical Bars (inverse) Alternating black and white vertical bars, starting with black. This description is displayed in red text across the top of the screen. Solid White The screen background is white. White is displayed in black text that moves across the screen. Solid Red The screen background is red. Red is displayed in black text that moves across the screen. Solid Green The screen background is green. Green is displayed in black text that moves across the screen. Solid Blue The screen background is blue. Blue is displayed in black text that moves across the screen. To exit the test, press or rotate the wheel. Testing the Speaker The audio test plays a sample sound at each of the decibel levels. To perform the speaker test: Step 1 In the System Diagnostics menu, select the Audio Test button to start the test. A window appears confirming that the monitor is entering the audio test and displays the text: Listen for three short tones. 2 Verify three short tones at different decibel levels. When the test completes, the window closes. Troubleshooting SureSigns VS4 Service Guide 4-33 Testing the Battery LED Testing the Battery LED To test the battery LED: • In the System Diagnostics menu, turn the wheel to highlight the LED Test button, and then press the wheel to select the test. A window opens and displays the expected LED behavior during the test. If the Charging LED is functioning as expected, the following sequence occurs: – Lights in yellow for five seconds – Lights in green for five seconds – Flashes in yellow for five seconds – Flashes in green for five seconds The AC Power LED remains green during the test. If you do not get the expected results, see “Power Problems” on page 4-4. Viewing and Resetting Tracked Parameters The monitor tracks the usage of some parameters and displays them on the System Diagnostics menu. This can be helpful in diagnosing problems with the monitor. The monitor tracks the following parameters: 4-34 Parameter Description NBP Cycle Count The number of NBP measurements taken by the monitor. LCD Usage Hours The number of hours that the LCD screen has been on. Errors The number of errors recorded by the monitor. For more information about tracked errors, see “Viewing, Printing, and Exporting the Error Log” on page 4-36. Troubleshooting SureSigns VS4 Service Guide Viewing and Resetting Tracked Parameters Resetting Parameters Caution You must always reset a tracked parameter after replacing the associated part. To reset a tracked parameter: Step 1 Open the Maintenance options of the System Diagnostics menu. See “Accessing Maintenance Options” on page 3-11. When Maintenance options are available, a Reset button appears next to each tracked parameter. 2 Select the Reset button to the right of the parameter to reset. A confirmation window appears before the parameter is cleared. 3 In the confirmation window, select Yes to reset the parameter to 0. 4 Repeat step 2 and step 3 to reset any other parameter. 5 Select the Return button. The System Admin Menu appears. 6 Select the Return button. The System Menu appears. 7 Select the Shutdown button. A confirmation window asks if you want to shut down the system. 8 In the confirmation window, select Yes. The monitor shuts down. Troubleshooting SureSigns VS4 Service Guide 4-35 Viewing, Printing, and Exporting the Error Log Viewing, Printing, and Exporting the Error Log When the monitor detects a system error, it displays a message in the message area and saves the error to the error log.The log includes a timestamp that indicates when the error occurred. To clear the error count and log, see “Resetting Parameters” on page 4-35. For detailed information about errors and error codes, see “Error Codes” on page 4-11. To view the error log: Step 1 Access the System Diagnostics menu. See “Accessing the System Diagnostics Menu” on page 3-10. 1 Select the Error Log button. The Error Log window appears, displaying a list of log entries. Each error log entry includes a timestamp, a unique error code, a description of the error, and an optional block of error information. Error Log Date Time 12/07/12 12/15/12 06:12:44 13:22:04 Code 866 833 Description Temp Probe Error (63) SpO2 Equip Malfunc (2) Print Export 2 To view the entire list of errors, select the list to activate scrolling. 3 To print the error log to the optional recorder, select the Print button. 4 To export the error log to a USB flash drive: Return • Insert a compatible USB flash drive in the USB port on the rear of the monitor. • In the Error Log window, select the Export button. The error log is saved to the USB flash drive as an .xls file. 4-36 Troubleshooting SureSigns VS4 Service Guide Clearing Patient Data Clearing Patient Data The Clear Data option clears all patient data in memory. It does not clear calibration and hardware configuration data. Whenever you return a monitor for service, you should clear patient data first. To clear all patient data: Step 1 Open the Maintenance options of the System Diagnostics menu. See “Accessing Maintenance Options” on page 3-11. 2 Select the Clear Data button. A confirmation window appears. 3 In the confirmation window, select the Yes button. The monitor clears the patient data and error log, and then restarts. Troubleshooting SureSigns VS4 Service Guide 4-37 Clearing Patient Data 4-38 Troubleshooting SureSigns VS4 Service Guide 5 Repairing the Monitor Disassembling the Monitor This chapter contains the procedures for disassembling the monitor to replace defective assemblies or components. The monitor has three main assemblies: • Rear case • Main board • Front case Rear case assembly Main board assembly Front case assembly The monitor can be further disassembled into all major components, including: • Printed circuit boards (boards) • Battery • Cables • LCD • Measurement modules For more information about replaceable parts, see Chapter 6, “Replacement Parts and Assembly Drawings.” Repairing the Monitor SureSigns VS4 Service Guide 5-1 Tools Required for Service Warning Before you open or disassemble the monitor, disconnect the AC power from the monitor and remove the battery. After any monitor repair, you must perform the recommended Performance and Safety tests before you put the monitor into operation. Failure to perform these tests can result in erroneous monitor readings. For more information about performing safety and performance tests, see Chapter 3, “Performance Verification Testing.” Caution Observe ESD (electrostatic discharge) precautions when working inside the monitor. Tools Required for Service The following tools and additional test equipment are required to disassemble, repair, and re-assemble the monitor. • #1, #2 Phillips screwdrivers • Torx T10, T20 screwdrivers • Small and medium flathead screwdrivers • 10 mm, 12 mm wrenches • Needle nose pliers • Plastic cable zip ties • Wire-cutters • ESD mat and wrist strap Shutting Down the Monitor Perform a hard shutdown whenever you need to power down the monitor for repair. Performing a hard shutdown ensures that all patient and system data is saved in memory. To perform a hard shutdown: Step 1 Open the System Menu. See “Accessing the System Menu” on page 3-4. 2 Select the Shutdown button. 3 In the confirmation window that appears, select the Yes button. The monitor shuts down. 5-2 Repairing the Monitor SureSigns VS4 Service Guide Removing the Battery Removing the Battery Caution Before removing the battery, perform a monitor hard shutdown. To remove the battery: Step 1 Shut down the monitor. See “Shutting Down the Monitor” on page 5-2. 2 Disconnect the AC power cord from the rear of the monitor. 3 Tip the monitor and insert a flathead screwdriver into the slot in the bottom of the case under the battery cover. Slot Caution Do not try to remove the battery cover by inserting the screwdriver into the vents in the cover. This can damage the battery case cover. 4 Slightly twist the screwdriver to pop the battery cover off of the case. Repairing the Monitor SureSigns VS4 Service Guide 5-3 Removing the Battery 5 Press down on the battery retaining clips, and pull the battery out of the monitor by the ribbon. Ribbon Clips Reinstalling the Battery To reinstall the battery: Step 5-4 1 Orient the battery so that the contacts and ribbon are on the right. 2 Insert the battery into the empty battery compartment and push it in until the battery snaps into place behind the metal retaining clips. Repairing the Monitor SureSigns VS4 Service Guide Removing a Fuse 3 Replace the battery cover by inserting it into the battery opening with the two tabs facing up. 4 Snap the battery cover into place by pressing it firmly against the monitor case. Removing a Fuse To remove a fuse in the AC power connector: Step 1 Disconnect the AC power cord from the rear of the monitor. 2 Remove the battery from the monitor (see “Removing the Battery” on page 5-3). 3 Use needle nose pliers to lift the fuse holder away from AC power connector. 4 Replace the fuse(s), and then push the fuse holder back into the power connector until it snaps into place. Repairing the Monitor SureSigns VS4 Service Guide 5-5 Removing the Predictive Temperature Module and Probe Cover Holder Removing the Predictive Temperature Module and Probe Cover Holder To remove the predictive temperature module and probe cover holder: Step 1 Disconnect the AC power cord from the rear of the monitor. 2 Disconnect the temperature probe. 3 Remove the battery from the monitor (see “Removing the Battery” on page 5-3). 4 Remove the Torx T10 screw and washer from the probe cover holder and remove the holder from the case. Screw 5-6 Repairing the Monitor SureSigns VS4 Service Guide Removing the Predictive Temperature Module and Probe Cover Holder 5 Remove three Torx T10 screws and washers from the bottom of the rear cover and remove the cover from the monitor case. Screws 6 Disconnect the temperature module cable from the connector on the front end assembly board. Connector Repairing the Monitor SureSigns VS4 Service Guide 5-7 Removing the Predictive Temperature Module and Probe Cover Holder 7 Remove the two Torx T10 screws and washers from the temperature module. Screws 8 Gently pull the temperature module and temperature module cable away from the monitor. Reinstalling the Predictive Temperature Module To reinstall the temperature module: Step 1 Use isopropyl alcohol to clean the surface where the adhesive strip will be applied. Ensure that the surfaces are clean and free of any adhesive residue. Dry the surface thoroughly. Clean here 2 5-8 Place a new adhesive strip on the temperature module. Repairing the Monitor SureSigns VS4 Service Guide Removing the Predictive Temperature Module and Probe Cover Holder 3 Feed the temperature module cable through the top vent slot on the side of the monitor and over the top of the front end board. Note — You may need to open the front and rear case assemblies to reattach the temperature module cable. See “Separating the Front and Rear Case Assemblies” on page 5-12. Adhesive foam tape 4 Reattach the temperature module cable to the front end board. Be sure the gold leads of the temperature module cable are facing toward the back of the monitor. 5 Remove the paper backing from the adhesive tape on the temperature module. 6 Align the screw holes of the temperature module with the screw holes on the monitor. 7 Secure the temperature module to the monitor with two Torx T10 screws. 8 Place the monitor on its side and then place a 10 lb to 15 lb-weight on the module and leave it in place for 15 minutes to ensure a strong bond. Caution This step is crucial to ensure a secure bond. It takes 24 hours to attain full bonding. 9 Caution Reattach the rear cover and temperature probe cover holder to the monitor. After you replace the temperature module, complete all necessary performance tests. For more information, see “Testing and Inspection Guidelines” on page 3-1. Repairing the Monitor SureSigns VS4 Service Guide 5-9 Removing the Tympanic Temperature Module Removing the Tympanic Temperature Module To remove the tympanic temperature module: Step 1 Disconnect the AC power cord from the rear of the monitor. 2 Disconnect the temperature probe. 3 Remove the battery from the monitor (see “Removing the Battery” on page 5-3). 4 Separate the front and rear cases. See “Separating the Front and Rear Case Assemblies” on page 5-12. 5 Remove the three Torx T10 screws and washers from the bottom of the rear cover and remove the cover from the monitor case. Screws 6 Disconnect the temperature module cable from connector on the front end assembly board. Connector 7 5-10 Remove the plastic labels covering the three screw holes. Repairing the Monitor SureSigns VS4 Service Guide Removing the Tympanic Temperature Module 8 Remove the three Torx T10 screws and washers from the temperature module. Screws 9 Gently pull the temperature module cable out of the monitor and remove the temperature module from the monitor. Cable Repairing the Monitor SureSigns VS4 Service Guide 5-11 Separating the Front and Rear Case Assemblies Separating the Front and Rear Case Assemblies To install internal replacement parts, you must first separate the front and rear case assemblies. To separate the front and rear case assemblies: Warning The metal edges on the inside of the front case assembly are sharp. Use extreme caution when handling the separated monitor assemblies. Step 1 Disconnect the AC power cable from the back of the monitor. 2 Disconnect all external cables from the monitor. 3 Remove the battery from the monitor (see “Removing the Battery” on page 5-3). 4 Remove the USB hub (if attached) from the rear cover. 5 Remove the two Torx T20 screws from the top of the rear case. Top screws Caution Cables run between the front and rear case assemblies. 5-12 Repairing the Monitor SureSigns VS4 Service Guide Separating the Front and Rear Case Assemblies 6 Remove the two Torx T20 screws from the bottom of the rear case. Bottom screws 7 Separate the front and rear case assemblies by pulling the lower edge of the front case assembly and slowly lifting it up over the handle. Repairing the Monitor SureSigns VS4 Service Guide 5-13 Separating the Front and Rear Case Assemblies 8 Carefully disconnect the ribbon cable and the navigation wheel assembly board cable from the main board. Navigation wheel assembly cable Ribbon cable 5-14 Repairing the Monitor SureSigns VS4 Service Guide Separating the Front and Rear Case Assemblies 9 Disconnect the cable from the touch screen board. Touch screen board cable 10 Rotate the monitor and disconnect the two cables from the opposite side of the main board. Cables Repairing the Monitor SureSigns VS4 Service Guide 5-15 Removing the Faceplate or Recorder Reassembling the Front and Rear Cases To reassemble the front and rear cases: Step 1 Connect all cables. 2 Line up the tab on the front assembly case with the handle on the rear case, and then slip the front assembly case over the handle. 3 Snap the two assembly cases together and install the four screws. 4 Power up the monitor. If the monitor starts properly, perform the required performance tests (see “Testing and Inspection Guidelines” on page 3-1). Removing the Faceplate or Recorder To remove the faceplate or optional recorder: Step 1 Shut down the monitor. See “Shutting Down the Monitor” on page 5-2. 2 Go to the step appropriate for your monitor: For monitors without the optional recorder, go to step 3. For monitors with an optional recorder, go to step 5. 3 5-16 Remove the plastic labels covering the two Torx T10 screws holding the faceplate to the monitor case. Repairing the Monitor SureSigns VS4 Service Guide Removing the Faceplate or Recorder 4 Remove the two screws, and lift the faceplate off. Screws 5 Open the recorder door on the rear case assembly and remove the paper roll. 6 Loosen (do not remove) the two Torx T10 screws holding the recorder to the monitor case. Screws Repairing the Monitor SureSigns VS4 Service Guide 5-17 Removing the Main Board Assembly 7 Place your thumbs on either side of the recorder case and pull it straight out of the assembly and away from the recorder connector on the main board. Caution When you reassemble the recorder or faceplate, do not overtighten the screws. Removing the Main Board Assembly This section describes how to remove the main board assembly from the rear case and how to reinstall it. Removing the Main Board Assembly To remove the main board assembly from the rear case: Step 5-18 1 Separate the front and rear case assemblies. See “Separating the Front and Rear Case Assemblies” on page 5-12. 2 Remove the faceplate or recorder. See “Removing the Faceplate or Recorder” on page 5-16. Repairing the Monitor SureSigns VS4 Service Guide Removing the Main Board Assembly 3 Disconnect the fan and speaker cables from the connectors on the main board. Speaker Connector 4 Fan Connector Remove three Torx T10 screws and washers from the bottom of the rear cover and remove the cover from the monitor case. Screws Repairing the Monitor SureSigns VS4 Service Guide 5-19 Removing the Main Board Assembly 5 For monitors with the optional temperature module, disconnect the temperature cable connector from the front end assembly board. Connector 6 Remove the four Torx T10 screws and washers on the bottom of the rear case assembly. Screws 5-20 Repairing the Monitor SureSigns VS4 Service Guide Removing the Main Board Assembly 7 Remove the two Torx T10 screws and washers from the main board assembly. Main board screws 8 Pull the main board assembly out of the rear case. Repairing the Monitor SureSigns VS4 Service Guide 5-21 Removing the Fan and Speaker Reinstalling the Main Board Assembly To reinstall the main board assembly: Step 1 Slide the main board assembly into the rear case (guiding the power cord retaining clip through the rear cover). Retaining clip 2 Push the assembly until it snaps into place in the case. 3 Replace the four Torx T10 screws and washers on the bottom of the rear case to ensure that the main board assembly fits correctly in the case. Removing the Fan and Speaker To remove the fan and speaker: Step 5-22 1 Separate the front and rear case assemblies. See “Separating the Front and Rear Case Assemblies” on page 5-12. 2 Remove the main board assembly. See “Removing the Main Board Assembly” on page 5-18. Repairing the Monitor SureSigns VS4 Service Guide Removing the Fan and Speaker 3 Pull the cables through the zip tie. Zip tie Screw Fan assembly 4 Remove the Torx T10 screw and washer holding the fan assembly in place. 5 Slide the fan assembly and then the speaker out of the rear case. Repairing the Monitor SureSigns VS4 Service Guide 5-23 Replacing the Handle O-Ring Replacing the Handle O-Ring Caution Do not try to remove the handle from the rear case. It is part of the rear case and not a replacement part. To replace the handle O-ring: Step 1 Separate the front and rear case assemblies. See “Separating the Front and Rear Case Assemblies” on page 5-12. 2 Gently pull the O-ring from the inside of the handle. If the O-ring is damaged or torn, remove all pieces from the channel in the handle. O-ring 3 Insert a new O-ring in the handle and press it into place along the channel in the handle. Removing the Front End Assembly To remove the plastic patient connector panel from the front end assembly or SpO2 board, you must remove the front end assembly from the main board assembly. To remove the front end assembly: Step 5-24 1 Separate the front and rear monitor case assemblies. See “Separating the Front and Rear Case Assemblies” on page 5-12. 2 Remove the main board assembly. See “Removing the Main Board Assembly” on page 5-18. Repairing the Monitor SureSigns VS4 Service Guide Removing the Front End Assembly 3 Turn the main board assembly around and disconnect the tubing from the NBP manifold. Tubing 4 Remove the two Torx T10 screws and washers holding the front end assembly to the frame. Screws Repairing the Monitor SureSigns VS4 Service Guide 5-25 Removing the Front End Assembly 5 Pull the front end assembly away from the 40-pin connector on the side of the main board. Removing the Front End Assembly Cover To remove the front end assembly cover: Step 5-26 1 Separate the front and rear monitor case assemblies. See “Separating the Front and Rear Case Assemblies” on page 5-12. 2 Remove the main board assembly. See “Removing the Main Board Assembly” on page 5-18. 3 Remove the front end assembly. See “Removing the Front End Assembly” on page 5-24. Repairing the Monitor SureSigns VS4 Service Guide Removing the Front End Assembly 4 Remove the two Torx T10 screws holding the plastic cover to the front end assembly board. 5 Remove the front end assembly cover by inserting a small flathead screwdriver into the two slots at the bottom of the cover and pushing the tabs. Slots Repairing the Monitor SureSigns VS4 Service Guide 5-27 Removing the SpO2 Board 6 To reattach the cover, line up the slots in the cover with the tabs on the assembly and snap the cover into place by pressing it onto the assembly. Tabs Removing the SpO2 Board To remove the SpO2 board: Step 5-28 1 Separate the front and rear monitor case assemblies. See “Separating the Front and Rear Case Assemblies” on page 5-12. 2 Remove the main board assembly. See “Removing the Main Board Assembly” on page 5-18. 3 Remove the front end assembly. See “Removing the Front End Assembly” on page 5-24. 4 Remove the front end assembly cover. See “Removing the Front End Assembly Cover” on page 5-26. Repairing the Monitor SureSigns VS4 Service Guide Removing the SpO2 Board 5 Remove the two plastic Phillips screws on the front end assembly. Screws 6 Remove the two connectors and separate the SpO2 board from the front end assembly board. Connectors Repairing the Monitor SureSigns VS4 Service Guide 5-29 Removing the Power Supply Removing the Power Supply To remove the power supply: Step 1 Separate the front and rear monitor case assemblies. See “Separating the Front and Rear Case Assemblies” on page 5-12. 2 Remove the main board assembly. See “Removing the Main Board Assembly” on page 5-18. 3 Disconnect the 2-pin and 6-pin power supply connectors from the back of the main board assembly. Connectors Caution When you reconnect the power supply, connect the white 6-pin connector cable to the power supply and the black connector on the end of the cable to the main board. If you reverse the connectors, the monitor will not power up. 5-30 Repairing the Monitor SureSigns VS4 Service Guide Removing the Main Board 4 Remove the three Torx T10 screws and washers, use pliers to release the plastic stand-off pin, and then remove the power supply from the assembly. Screws Plastic stand-off pin Removing the Main Board Caution Before you replace the main board, export the current configuration settings. For more information, see the “Export Settings” section of the SureSigns VS4 Installation and Configuration Guide. After you replace the main board, you must reset the monitor serial number and reconfigure the system. For information about resetting the serial number, see “Resetting the Serial Number” on page 5-34. For information about configuring the system, see “Setting the System Configuration” on page 5-35. To remove the main board: Step 1 Separate the front and rear monitor case assemblies. See “Separating the Front and Rear Case Assemblies” on page 5-12. 2 Remove the main board assembly. See “Removing the Main Board Assembly” on page 5-18. Repairing the Monitor SureSigns VS4 Service Guide 5-31 Removing the Main Board 3 Remove the front end assembly. See “Removing the Front End Assembly” on page 5-24. 4 Remove the five T10 screws from the main board. Screws 5-32 Repairing the Monitor SureSigns VS4 Service Guide Screws Removing the Main Board 5 Disconnect the NBP tubing from the main board. NBP Tubing 6 Disconnect the four cables from the connectors on the main board. Cables 7 Remove the board from the assembly. Repairing the Monitor SureSigns VS4 Service Guide 5-33 Resetting the Serial Number Resetting the Serial Number When you replace the main board, you must reset the serial number. The serial number appears in a label (marked ) on the back of the monitor. To reset the serial number: Step 1 Open the Maintenance options of the System Diagnostics menu. See “Accessing Maintenance Options” on page 3-11. 2 Select the Reset S/N button. The Reset Serial Number menu appears. Reset Serial Number Serial Number: US93619750 Apply 3 Cancel Select the Serial Number field. A keyboard appears. 4 Enter the serial number. Use the Back button to backspace, the Cancel button to close the keyboard without saving, or the OK button to save the changes. 5 Select the Apply button. A confirmation window displays the message: System will restart now. 6 In the confirmation window, select the OK button. The monitor restarts. 5-34 Repairing the Monitor SureSigns VS4 Service Guide Setting the System Configuration Setting the System Configuration When the monitor performs a self test, it first checks its system configuration. If you replace the main board, you must reprogram the system configuration. Caution The system configuration settings must match the hardware installed on the monitor. Incorrect settings may result in system malfunction alarm messages and the monitor may not start. If this happens, correct the system configuration settings. To reset the system configuration: Step 1 In the System Diagnostics menu, select the Configuration button, and then press the wheel. The Configuration menu appears: Configuration Configuration: SpO222 Predictive Temp Tympanic Temp Touch Screen Wireless Apply 2 Select each option installed in the monitor. 3 Select the Apply button. Cancel A confirmation window displays the message: System will restart now. 4 In the confirmation window, select the OK button. The monitor restarts. Repairing the Monitor SureSigns VS4 Service Guide 5-35 Removing the NBP Module Removing the NBP Module Caution After replacing the NBP module, you must reset the NBP cycle count and run the NBP tests. For more information about resetting the NBP cycle count, see “Viewing and Resetting Tracked Parameters” on page 4-34. For information about running the NBP test, see “NBP Test” on page 3-14. To remove the NBP module: Step 1 Separate the front and rear monitor case assemblies. See “Separating the Front and Rear Case Assemblies” on page 5-12. 2 Remove the main board assembly. See “Removing the Main Board Assembly” on page 5-18. 3 Remove the front end assembly. See “Removing the Front End Assembly” on page 5-24. 4 Remove two Torx T10 screws and washers from the metal bracket holding the NBP module assembly to the bottom of the main board. Screws 5-36 Repairing the Monitor SureSigns VS4 Service Guide Removing the NBP Module 5 Lift the NBP module and gently pull it free from the pressure sensor tube connectors on the main board. 6 Disconnect the 6-pin connector from the main board and remove the NBP module. Connector Repairing the Monitor SureSigns VS4 Service Guide 5-37 Removing the NBP Module Removing the NBP Filter To remove the NBP filter: Step 1 Separate the front and rear monitor case assemblies. See “Separating the Front and Rear Case Assemblies” on page 5-12. 2 Remove the main board assembly. See “Removing the Main Board Assembly” on page 5-18. 3 Remove the front end assembly. See “Removing the Front End Assembly” on page 5-24. 4 Remove the NBP module. See “Removing the NBP Module” on page 5-36. 5 Use wire-cutters to cut the plastic zip tie securing the filter to the module, and disconnect the filter from the NBP filter tube. Plastic zip tie NBP filter tube Caution When you reassemble the NBP filter, secure it to the NBP module with a new plastic zip tie. 5-38 Repairing the Monitor SureSigns VS4 Service Guide Removing the AC Power Connector Removing the AC Power Connector To remove the AC power connector: Step 1 Separate the front and rear monitor case assemblies. See “Separating the Front and Rear Case Assemblies” on page 5-12. 2 Remove the main board assembly. See “Removing the Main Board Assembly” on page 5-18. 3 Squeeze the power cord retaining clip and remove it from the bolts. AC-In cable Retaining clip 4 Disconnect the AC-In cable from the main board assembly. Repairing the Monitor SureSigns VS4 Service Guide 5-39 Removing the AC Power Connector 5 Remove the two AC power connector screws. Grounding cable Equipotential grounding post AC power connector screws 5-40 6 Use a 10 mm wrench to remove the washer from the equipotential grounding post and disconnect the cable from the lug. 7 Slide the AC power connector out of the mounting bracket. Repairing the Monitor SureSigns VS4 Service Guide Removing the Communications (LAN) Board Removing the Communications (LAN) Board To remove the communications board: Step 1 Separate the front and rear monitor case assemblies. See “Separating the Front and Rear Case Assemblies” on page 5-12. 2 Remove the main board assembly. See “Removing the Main Board Assembly” on page 5-18. 3 Remove the two Torx T10 screws and washers holding the communications board to the main board assembly. Screws Repairing the Monitor SureSigns VS4 Service Guide 5-41 Removing the Battery Connector Board 4 Pull the LAN board away from the 26-pin connector on the main board and remove it. Removing the Battery Connector Board To remove the battery connector board: Step 5-42 1 Separate the front and rear monitor case assemblies. See “Separating the Front and Rear Case Assemblies” on page 5-12. 2 Remove the main board assembly. See “Removing the Main Board Assembly” on page 5-18. Repairing the Monitor SureSigns VS4 Service Guide Removing the Battery Connector Board 3 Disconnect the battery board connector from the main board on the main board assembly. AC power connector Battery board connector 4 Remove the two Torx T10 screws and washers holding the battery connector board. Screws Repairing the Monitor SureSigns VS4 Service Guide 5-43 Removing the LCD Assembly 5 Lift the board out of the slot in the metal frame and remove it. Removing the LCD Assembly Caution Perform this procedure in a dust-free environment to avoid damage to the LCD display. After replacing the LCD, you must reset the LCD usage hours. For more information about resetting the LCD usage hours, see “Viewing and Resetting Tracked Parameters” on page 4-34. To remove the LCD assembly: Step 1 5-44 Separate the front and rear monitor case assemblies. See “Separating the Front and Rear Case Assemblies” on page 5-12. Repairing the Monitor SureSigns VS4 Service Guide Removing the LCD Assembly 2 Remove the six Torx T10 screws that hold the LCD assembly and frame in place. Screws 3 Disconnect the wireless board ribbon cable from the wireless board. Ribbon Cable 4 Disconnect the touch screen board ribbon cable. Ribbon Cable Repairing the Monitor SureSigns VS4 Service Guide 5-45 Removing the LCD Assembly 5 Gently peel the adhesive strip from the LCD frame and lift the wireless board ribbon cable away from the LCD frame to expose the grounding screw. Adhesive strip Grounding screw Note — Save the adhesive strip to use when you reassemble the front panel. 6 Remove the grounding screw with a Phillips screwdriver. 7 Gently peel the membrane switch ribbon cable from the foam adhesive and lift the LCD assembly out of the front case. Ribbon Cable Adhesive 5-46 Repairing the Monitor SureSigns VS4 Service Guide Removing the Navigation Wheel Assembly Board 8 Remove the four Phillips screws from the LCD frame. Screws Screws 9 Remove the LCD from the LCD frame. Removing the Navigation Wheel Assembly Board To remove the navigation wheel assembly board: Step 1 Separate the front and rear monitor case assemblies. See “Separating the Front and Rear Case Assemblies” on page 5-12. 2 Remove the LCD assembly. See “Removing the LCD Assembly” on page 5-44. Repairing the Monitor SureSigns VS4 Service Guide 5-47 Removing the Navigation Wheel Assembly Board 3 Pull the wheel off of the stem. 4 Remove the locking nut and washer. Locking nut and washer 5-48 Repairing the Monitor SureSigns VS4 Service Guide Removing the Navigation Wheel Assembly Board 5 Remove the Torx T10 self-tapping screw. Screw 6 Press the stem while lifting off the wheel assembly. Note — When you reattach the wheel, line up the flat side of the wheel to the flat side of the wheel stem. Repairing the Monitor SureSigns VS4 Service Guide 5-49 Removing the Touch Screen Board Removing the Touch Screen Board To remove the touch screen board: Step 1 Separate the front and rear case assemblies. See “Separating the Front and Rear Case Assemblies” on page 5-12. 2 Disconnect the touch screen board ribbon cable. Screws Ribbon Cable 3 Remove the two Phillips screws from the board, and then remove the board from the LCD frame. Removing the Wireless Module To replace the wireless module: Step 1 5-50 Separate the front and rear case assemblies. See “Separating the Front and Rear Case Assemblies” on page 5-12. Repairing the Monitor SureSigns VS4 Service Guide Removing the Wireless Module 2 Pull the antenna cable upward to disconnect it from the wireless board. Antenna cable Navigation wheel board Screw Wireless board cable 3 Disconnect the wireless board cable from the navigation wheel board. 4 Remove the Phillips screw from the wireless board and remove the board from the LCD frame. Repairing the Monitor SureSigns VS4 Service Guide 5-51 Removing the Antenna Removing the Antenna To replace the antenna: Step 1 Separate the front and rear case assemblies. See “Separating the Front and Rear Case Assemblies” on page 5-12. 2 Disconnect the antenna cable from the wireless board. Antenna cable 3 With a 12 mm wrench, remove the washer and locking nut from the antenna and then remove the antenna from the front panel. Washer and nut 5-52 Repairing the Monitor SureSigns VS4 Service Guide 6 Replacement Parts and Assembly Drawings Spare Parts The following table lists the SureSigns VS4 monitor spare parts and their Philips part numbers. See Figure 6-1 through Figure 6-3 for the item numbers that correspond to each spare part in the list. Note — For clarity, some screws and connector lines do not appear in the drawings. Description Part Number Figure Item Number 2D Barcode Scanner 4535 640 51331 6-2 32 Antenna 4535 642 70421 6-1 37 Battery (Lithium Ion) 9898 031 44631 6-2 24 Battery connector board 4535 640 20271 6-2 12 Cable – DC in 4535 640 20291 6-2 18 Cable – LCD 4535 643 57381 6-1 5 Cable – LCD signal-in 4535 640 53881 6-1 4 Cable – Navigation wheel board 4535 640 31241 6-1 8 Cable — Touchscreen interface 4535 643 57811 Not shown Cable – Wireless board to navigation wheel board 4535 643 57401 6-1 39 Cover without recorder 4535 642 09251 6-2 31 Fan assembly 4535 640 24591 6-2 36 Front end assembly (NBP and SpO2) 4535 640 41441 6-2 16 Front panel with touchscreen 4535 643 57411 6-1 1 Front panel with touchscreen (English labels) 4535 643 57461 Not shown LAN (I/O Communications) Board 4535 640 41481 6-2 13 LCD assembly 4535 643 57421 6-1 2 LCD frame 4535 643 57491 6-1 3 LCD touchscreen controller board 4535 643 57801 6-1 6 Main board 4535 643 57371 6-2 15 Main frame 4535 640 24621 6-2 30 Navigation wheel board with wireless interface 4535 643 57391 6-1 9 NBP filter replacement 4535 640 41171 6-2 20 NBP pump/valve assembly with filter 4535 642 08081 6-2 19 Replacement Parts and Assembly Drawings SureSigns VS4 Service Guide 6-1 Spare Parts 6-2 Description Part Number Figure Item Number Power input module (AC) 4535 640 51201 6-2 29 Power supply module 4535 640 20471 6-2 14 Rear case with handle 4535 643 57431 6-2 26 Rear Cover 4535 642 09241 6-2 25 Recorder assembly 4535 640 95691 6-2 27 RS-232 serial adapter (includes USB hub, insulator sheath, and USB clamp) 9898 031 59601 Not shown Small parts kit: 4535 640 31481 • Battery compartment cover 6-2 23 • Bed rail hook clip Not shown • D-Spring Not shown • Fuses, 1600 mA/250V (2) Not shown • Ground strip 6-1 • Ground strip (for 10-inch screen) Not shown • M3 x 0.5 8mm screws (6) Not shown • M4 x 0.7 12mm screws (6) Not shown • M4 x 0.7 16mm screws (2) Not shown • Navigation wheel 6-1 11 • O-ring, handle 6-2 34 • Power cord retainer 6-2 28 • Rubber feet (4) Not shown • USB clamp Not shown 7 Speaker 4535 642 08091 6-3 35 SpO2 board 4535 640 20531 6-2 17 Temperature module, predictive and probe cover holder 4535 641 04821 6-2 21 Temperature module, tympanic 4535 643 57791 6-2 33 Temperature probe cover holder, predictive, 4535 641 24601 6-2 22 Temperature probe, predictive, retainer clip 4535 640 82891 Not shown USB Hub 4535 640 39661 Not shown Wireless board 4535 642 70101 6-1 Wireless upgrade kit 9898 031 81201 Not shown Replacement Parts and Assembly Drawings SureSigns VS4 Service Guide 38 Assembly Drawings Assembly Drawings See “Spare Parts” on page 6-1 for the part numbers referenced in the following figures. 1 2 3 38 4 39 37 7 6 8 9 11 Figure 6-1 Front Case Assembly Replacement Parts and Assembly Drawings SureSigns VS4 Service Guide 6-3 Assembly Drawings 13 32 31 14 15 12 30 27 29 28 26 19 20 18 16 17 25 24 33 23 21 22 Figure 6-2 Rear Case Assembly 6-4 Replacement Parts and Assembly Drawings SureSigns VS4 Service Guide Assembly Drawings 34 35 36 Figure 6-3 Rear Case Assembly, Top View Replacement Parts and Assembly Drawings SureSigns VS4 Service Guide 6-5 Power Cords Power Cords The following table lists the available power cords and their part numbers. Description Part Number Power cord (903), 2.4 m 8120-5429 Taiwan, US, Canada, Latin America, Singapore, Caribbean, Laos Power cord (902), 2 m 8120-1689 Portugal, Korea, Russia, South America, Indonesia, West Indies, Libya Power cord (906), 2 m 8120-2104 Switzerland Power cord (917), 2 m 8120-4211 India, South Africa Power cord (901), 2 m 8120-4475 Australia Power cord (919), 2m 8120-5182 Israel Power cord (900), 2 m 8120-1351 United Kingdom, Singapore, Hong Kong Power cord (920), 2 m 8120-6869 Europe Power cord (921), 4.5 m 8120-6980 Argentina Power cord (912), 2 m Greenland 6-6 Replacement Parts and Assembly Drawings SureSigns VS4 Service Guide 8120-2956 A Theory of Operation This section contains a system overview of the SureSigns VS4 vital signs monitor, including a high-level block diagram. The block diagram shows major components of the monitor, including the power supply, isolated front end, NBP control, SpO2 processing, and microcontroller. The SureSigns VS4 is a vital signs monitor for use on adult, pediatric, and neonatal patients. The functions performed by the system include: • Non-invasive blood pressure • Blood oxygen saturation • Temperature In addition to monitoring and displaying the status of physiological parameters, the monitor performs various microprocessor-programmed analytical functions, including: • Creating both visual and audible alarm signals when settings are violated • Creating and displaying warning messages when conditions are detected that would degrade or prevent valid measurements • Creating and displaying tabular data • Providing input to an optional recorder for printout of current or tabular data The SureSigns VS4 vital signs monitor operates from either an AC power source or battery power. The monitor charges the battery when powered by an AC line. Block Diagram Components The SureSigns VS4 vital signs monitor contains several major blocks, including: • Front end assembly • Main board • Communications board • Front panel assembly The monitor also contains several additional modules. Note — Shaded items in the diagram indicate parts that are field replaceable. For more information, see Chapter 6, “Replacement Parts and Assembly Drawings.” Theory of Operation SureSigns VS4 Service Guide A-1 Block Diagram Components Block Diagram Communications Board Note — Shaded items are replaceable. Fan Speaker LAN USB hub USB Front Panel Assembly SDRAM Navigation Wheel Board Flash Memory LAN Power Management Regulator, Battery Charger Recorder Power Supply Module Patient Isolation NBP Assembly A-2 Theory of Operation SureSigns VS4 Service Guide Battery Connector Board NBP Temperature Module LCD AC Power Connector and Fuses Battery Monitor Keypad Front Panel NBP Nurse Call Microprocessor Front End Interface SpO2 Front End Assembly Patient Connectors Main Board Block Diagram Components Main Board The main board contains these components: • Intel X_Scale microprocessor – 32 Mb flash memory – 64 Mb SDRAM • LAN controller – 10/100T • Power management control – Voltage regulator – Smart battery charger that monitors status of battery • USB – 1.1 compliant • LCD drivers • Front end interface circuitry • Fan control • LVDS buffer for LCD interface • Power distribution and monitoring • VGA DAC • Audio • NBP pump control circuitry • Connectors – DC input (wire to AC/DC module) – Speaker – LCD – Touch screen – Control board – B2B: patient daughter board – B2B: VGA daughter board – B2B: I/O daughter board – B2B: recorder board Front End Board The Front End Board contains circuitry for the following functional inputs: Analog circuitry: • SpO2 • Temperature Isolation circuitry: • Power transformers • Opto-isolator to provide patient isolation from the monitor Theory of Operation SureSigns VS4 Service Guide A-3 Block Diagram Components In addition, the Front End Board contains a patient connector block that is soldered onto the board. The patient connector block contains B2B connector(s) to the main board. The patient connector block circuitry sends low-level analog measurement signals that are converted to DC, and then fed (serially) to the main board for analysis. For example: A/D conversion Analog signal SpO2 A/D Opto-isolator conversion Serial digital data Main Board Communications (LAN) Board The communications (LAN) board contains these components: • USB connector and its EMC/ESD parts • LAN connector and isolation transformer • Nurse Call (alarm contact) connector and relay • B2B connector to main board Nurse Call Contacts The nurse call alarm contacts are available through a 3.5 mm miniature insulated phone jack on the back of the monitor. The alarm contacts close (open) for any alarm condition detected by the monitor. The alarm contacts are the three switching signals associated with a single pole, double throw relay: • Normally open contact (NO) • Common contact • Normally closed contact (NC) Contact Rating: NO = 1A @ < 25 VAC Common contact = 1A @ < 60 VDC Isolation of 1.5 KV Front Panel Assembly The front panel assembly contains these elements: • A-4 LCD – 8.4-inch SVGA – 800 x 600 DPI Theory of Operation SureSigns VS4 Service Guide Block Diagram Components • Touch screen – 5-wire resistive technology – 4096 x 4096 touch point density • Touch screen controller board • Monitor keypad • Navigation wheel Speaker The speaker is driven by an amplifier and Audio CODEC that interfaces to the microprocessor. The speaker provides the monitor’s audio during alarm conditions. The microprocessor outputs different audio tones specified by different alarm priorities and conditions. Navigation Wheel The navigation wheel is a rotating, push-switch wheel. The associated wheel circuitry generates a pulse when pressed and generates a digitally encoded pair of quadrature signals whose relative magnitudes and polarities represent the angular position of the wheel. These outputs are connected to the microprocessor where they are interpreted as required for the functions involved. Successive angular positions determine the direction of wheel rotation. In addition to the functions performed in conjunction with the keypad, the wheel operates in conjunction with the display to select menus and lists of parameter variables. Power Supply Module The monitor contains a medical grade power supply module and circuitry that converts AC lines (100 V – 240 V) to DC (15 V). The power consumption is 75 VA. Power Management The power management module contains: • Li+ battery – 11.1 V – 7200 mAH • Smart battery charger • DC/DC converter The power management circuitry charges a Li-Ion battery through a smart battery charger. Both the battery and the AC/DC power module can power the system through several DC/DC converters that provide various voltage outputs required by various chips. Isolated transformers provide the power to the front ends floating area. Theory of Operation SureSigns VS4 Service Guide A-5 Block Diagram Components Recorder The recorder contains the following elements: • Digital thermal head array assembly • Printing width – 48 mm on 58 mm paper – Resolution: Time axis = 16 dots/mm at the speed of 25 mm/sec, 8 dots/mm at 50 mm/sec Voltage axis = 8 dots/mm • Motor (paper drive) and driver circuitry • Paper out/door open detector • Selectable print speed: 6.25, 12.5, 25, 50 mm/s Print head control logic is implemented on the main board. The microprocessor sends data to the recorder via a local bus. NBP Assembly and Circuitry The NBP assembly and circuitry contain the following elements: • Pump • Valves (2-valve system of dump and safety valve) • Manifold • Filter • Pressure measurement and control circuitry Pressure data is converted to digital format and conveyed to the processor. The NBP pump uses an oscillometric method that employs stepwise pressure deflation. The measurement software eliminates most ambient noise and motion interference. Applications are neonatal, pediatric and adult patients. The blood pressure range is: Systolic, 30 mmHg – 270 mmHg and Diastolic, 10 mmHg – 245 mmHg. The accuracy is ± 5 mmHg, with a standard deviation no greater than 8 mmHg. NBP processing uses an oscillometric technique to provide needed measurements at selected intervals. This technique uses an inflatable sphygmomanometer cuff similar to those used by clinicians in routine measurements. At the default inflation pressure, a motorized pump inflates the cuff to approximately 160 mmHg (adult mode) initially, at which point the pressure effectively stops the flow of blood. Then, under monitor control, the pressure in the cuff is gradually reduced, while a pressure transducer detects the pressure and transmits the parameter signal to the NBP input circuitry. As the pressure is reduced, blood flows in the previously occluded artery, and changes the measurements made by the transducer. The point at which oscillation increases sharply is defined as systolic pressure. As the cuff continues to deflate, the oscillation amplitude increases to a maximum, and then decreases. The peak oscillation amplitude is defined as the mean arterial pressure. The point at which the system detects a rapid decrease in oscillation is defined as the diastolic pressure. A-6 Theory of Operation SureSigns VS4 Service Guide Block Diagram Components SpO2 Processing The SpO2 module measures oxygen saturation in the blood using an optical spectrophotometry technique. It is based on the differences in the absorption of red and Infrared light by oxygenated and deoxygenated Hemoglobin. A pulse oximeter passes red and infrared light into an arteriolar bed and measures changes in light absorption during the pulsatile cycle. The light sources are red and infrared light emitting diodes (LEDs). A photo diode provides detection. To identify the oxygen saturation of arterial hemoglobin, the monitor uses the pulsatile nature of arterial flow. During systole, a new pulse of arterial blood enters the vacuolar bed, and both blood volume and light absorption increase. During diastole, blood volume and light absorption reach their lowest point. The measurement is based on the difference between maximum and minimum absorption, focusing on the pulsatile arterial blood. In addition to the oximetry function, the measurement can also provide the heart rate. Predictive Temperature Module The predictive temperature module is a fully integrated microprocessor-based thermistor thermometer that takes oral, axillary, and rectal temperatures for all patient populations. The monitor provides two types of temperature measurement: • Predictive • Monitored Predictive Measurements In Predictive mode, the monitor measures the patient’s temperature for approximately 4 seconds for oral measurements and approximately 16 seconds for axillary and rectal measurements. The monitor then displays the final measurement. If the monitor cannot get a reading after 1 minute, it automatically switches to Monitored mode. Monitored Measurements In Monitored mode, the monitor measures the patient’s temperature continuously and displays the temperature in the numeric pane as long as the probe is in contact with the patient. Use Monitored mode only when a situation prevents accurate predictive measurement. Note — Temperature measurements taken in Monitored mode are not saved to a patient record. Theory of Operation SureSigns VS4 Service Guide A-7 Block Diagram Components Tympanic Temperature Module The tympanic temperature module is an infrared ear canal thermometer with measurement site equivalence modes including oral, core, and rectal equivalent temperatures for all patient populations. The tapered probe tip is designed for proper ear canal alignment. In ear (EAR) mode, the absolute temperature measurement without adjustment is displayed. In other modes, the tympanic measurement is adjusted to compensate for the average difference in temperature at each of the measurement sites. The following table shows the calculations used to adjust the displayed temperature: Mode Calculation Oral (ORL) Ear mode measurement + 0.60°C Core (CORE) Ear mode measurement + 1.04°C Rectal (REC) Ear mode measurement + 1.16°C Wireless Module The wireless module includes a radio board and an antenna. The module provides wireless connectivity for the monitor. The radio board interfaces with the main board through a 20-pin connector. The antenna interfaces with the radio board through a MMCX (micro-miniature coaxial) connector. The module supports all 802.11a, 802.11b, and 802.11g data rates and automatically adjusts data rates and operational modes based on various environmental factors. A-8 Theory of Operation SureSigns VS4 Service Guide B Electromagnetic Compatibility This appendix lists the tests and compliance levels that make the SureSigns VS4 vital signs monitor suitable for use in the specified electromagnetic environment according to IEC 60601-1-2:2001. Instructions for Use Medical electrical equipment can either generate or receive electromagnetic interference. This product has been evaluated for electromagnetic compatibility (EMC) with the appropriate accessories according to IEC 60601-1-2, the international standard for EMC for medical electrical equipment. This IEC standard has been adopted in the European Union as the European Norm, EN 60601-1-2. Radio frequency (RF) interference from nearby transmitting devices can degrade performance of the product. Electromagnetic compatibility with surrounding devices should be assessed prior to using the product. Fixed, portable, and mobile radio frequency communications equipment can also affect the performance of medical equipment. See your service provider for assistance with the minimum recommended separation distance between RF communications equipment and the product. The cables, sensors/transducers, and other accessories for which compliance is claimed are listed in the beginning of this guide. Warning • Use of accessories, transducers, and cables other than those specified may result in increased emissions and/or decreased immunity of the SureSigns VS4 vital signs monitor. • The SureSigns VS4 vital signs monitor should not be used adjacent to or stacked with other equipment. If adjacent or stacked use is necessary, the monitor should be observed to verify normal operation in the configuration in which it is used. Reducing Electromagnetic Interference The SureSigns VS4 vital signs monitor and associated accessories can be susceptible to interference from other RF energy sources and continuous, repetitive, power line bursts. Examples of other sources of RF interference are other medical electrical devices, cellular products, information technology equipment, and radio/television transmission. If interference is encountered, as demonstrated by dramatic variations in physiological parameter measurement values, attempt to locate the source. Assess the following: • Is the interference due to misplaced or poorly applied electrodes or sensors? If so, re-apply electrodes and sensors correctly according to directions in the product’s Instructions for Use. • Is the interference intermittent or constant? • Does the interference occur only in certain locations? • Does the interference occur only when in close proximity to certain medical electrical equipment? • Do parameter measurement values change dramatically when the AC line cord is unplugged? Once the source is located, attempt to attenuate the interference by distancing the product from the source as much as possible. If assistance is needed, contact your local Philips representative. Electromagnetic Compatibility SureSigns VS4 Service Guide B-1 Restrictions for Use Artifact on physiological parameters caused by electromagnetic interference should be evaluated by a physician or physician authorized personnel to determine if it will negatively impact patient diagnosis or treatment. Emissions and Immunity The SureSigns VS4 vital signs monitor is designed and evaluated to comply with the emissions and immunity requirements of international and national EMC standards. See Table B-1 through Table B-4 for detailed information regarding declaration and guidance. The EMC standards state that manufacturers of patient-coupled equipment must specify immunity levels for their systems. See Table B-2 and Table B-3 for this detailed immunity information. See Table B-4 for recommended minimum separation distances between portable and mobile communications equipment and the product. Immunity is defined in the standard as the ability of a system to perform without degradation in the presence of an electromagnetic disturbance. Degradation in system performance is a qualitative assessment which can be subjective. Caution should, therefore, be taken in comparing immunity levels of different devices. The criteria used for degradation is not specified by the standard and can vary with the manufacturer. Guidance and Manufacturer’s Declaration The SureSigns VS4 vital signs monitor is intended for use in the electromagnetic environment specified in the following tables. The customer or the user of the product should assure that it is used in such an environment. Table B-1 Electromagnetic Emissions Emissions Test RF emissions Compliance Group 1 CISPR 11 RF emissions Electromagnetic Environment Guidance The SureSigns VS4 vital signs monitor uses RF energy only for its internal function. Therefore, its RF emissions are very low and not likely to cause any interference in nearby electronic equipment. Class B CISPR 11 Harmonic emissions Class A IEC 61000-3-2 Voltage fluctuations/flicker emissions IEC 61000-3-3 B-2 Electromagnetic Compatibility SureSigns VS4 Service Guide Complies The SureSigns VS4 vital signs monitor is suitable for use in all establishments, including domestic establishments and those directly connected to the public low-voltage power supply network that supplies buildings used for domestic purposes. Table B-2 Electromagnetic Immunity (ESD, EFT, Surge, Dips and Magnetic Field) Compliance Level Electromagnetic Environment Guidance + 6 kV contact + 6 kV contact + 8 kV air + 8 kV air Floors should be wood, concrete, or ceramic tile. If floors are covered with synthetic material, the relative humidity should be at least 30%. Electrical fast transient/burst + 1 kV differential mode + 1 kV IEC 61000-4-4 +2 kV common mode Surge + 1 kV differential mode Immunity Test Electrostatic discharge (ESD) IEC 60601 Test Level IEC 61000-4-2 IEC 61000-4-5 +1 kV + 1 kV + 2 kV + 2 kV common mode Voltage dips, short interruptions, and voltage variations on power supply input lines IEC 61000-4-11 < 5% UT (> 95% dip in UT) for 0,5 cycle < 5% UT 40% UT (60% dip in UT) for 5 cycles 40% UT 70% UT (30% dip in UT) for 25 cycles In the event of reduced performance, it may be necessary to operate the patient monitor from a filtered power connection or battery powered (no electrical connection to the AC mains while monitoring.) Mains power quality should be that of a typical commercial and/or hospital environment. 70% UT < 5% UT (> 95% dip in UT) for 5 sec < 5% UT Power frequency (50/60 Hz) Magnetic field IEC 61000-4-8 3 A/m 3 A/m Power frequency magnetic fields should be at levels characteristic of a typical location in a typical commercial or hospital environment. Note — UT is the AC mains voltage prior to application of the test level. Electromagnetic Compatibility SureSigns VS4 Service Guide B-3 Table B-3 Electromagnetic Immunity (RF Radiated and Conducted) Immunity Test IEC 60601 Test Level Compliance Level Electromagnetic Environment Guidance Portable and mobile RF communications equipment should be used no closer to any part of the SureSigns VS4 vital signs monitor, including cables, than the recommended separation distance calculated from the equation applicable to the frequency of the transmitter. Recommended Separation Distance Conducted RF 3 Vrms IEC 61000-4-6 0.15 MHz to 80 MHz 3 Vrms 3.5 d = ------3 P ; 0.150 MHz to 80 MHz Outside ISM bands Radiated RF 3 V/m IEC 61000-4-3 80 MHz to 2500 MHz 3 V/m 3.5 d = ------3 7 d = --3 P ; 80 MHz to 800 MHz P ; 800 MHz to 2500 MHz where P is the maximum output power rating of the transmitter in watts (W) according to the transmitter manufacturer and d is the recommended separation distance in meters (m). Field strengths from fixed RF transmitters, as determined by an electromagnetic site survey,1 should be less than the compliance level in each frequency range.2 Interference may occur in the vicinity of equipment marked with the following symbol: B-4 Electromagnetic Compatibility SureSigns VS4 Service Guide Table B-3 Electromagnetic Immunity (RF Radiated and Conducted) Immunity Test IEC 60601 Test Level Compliance Level Electromagnetic Environment Guidance 1 Field strengths from fixed transmitters, such as base stations for radio (cellular/cordless) telephones and land mobile radios, amateur radio, AM and FM radio broadcast and TV broadcast cannot be predicted theoretically with accuracy. To assess the electromagnetic environment due to fixed RF transmitters, an electromagnetic site survey should be considered. If the measured field strength in the location in which the SureSigns VS3 vital signs monitor is used exceeds the applicable RF compliance level above, the SureSigns VS3 vital signs monitor should be observed to verify normal operation. If abnormal performance is observed, additional measures are necessary, such as re-orienting or relocating the SureSigns VS3 vital signs monitor. 2 Over the frequency range 150 kHz to 80 MHz, field strengths should be less than 3 V/m. Recommended Separation Distances The SureSigns VS4 vital signs monitor is intended for use in an electromagnetic environment in which radiated RF disturbances are controlled. The customer or the user of the product can help prevent electromagnetic interference by maintaining a minimum distance between portable and mobile RF communications equipment (transmitters) and the product as recommended below, according to the maximum output power of the communications equipment. Table B-4 Recommended Separation Distances Between Portable and Mobile RF Communication Equipment and the SureSigns VS3 vital signs monitor Frequency of Transmitter Equation 150 kHz to 80 MHz 3.5 d = ------3 P 80 to 800 MHz 3.5 d = ------3 P 800 MHz to 2.5 GHz 7 d = --3 P Rated Maximum Output Power of Transmitter (Watts) Separation Distance (d) Separation Distance (d) Separation Distance (d) (meters) (meters) (meters) 0.01 0.12 0.12 0.23 0.1 0.37 0.37 0.74 1 1.17 1.17 2.33 10 3.69 3.69 7.38 100 11.67 11.67 23.33 For transmitters rated at a maximum output power not listed above, the separation distance d can be estimated, in meters, using the equation in the corresponding column, where P is the maximum output power rating of the transmitter in watts according to the transmitter’s manufacturer. These guidelines may not apply in all situations. Electromagnetic propagation is affected by absorption and reflection from structures, objects and people. Electromagnetic Compatibility SureSigns VS4 Service Guide B-5 B-6 Electromagnetic Compatibility SureSigns VS4 Service Guide Index A D Absolute Charge, 2–3 AC power connector, removing, 5–39 AC power, troubleshooting, 4–4 alarms testing, 3–13 troubleshooting problems, 4–5 alarms, technical, battery, 2–5 antenna, removing, 5–52 assembly diagrams, 6–3 audio testing, 4–33 data, patient, clearing, 4–37 deleting patient data, 4–37 demo mode, 3–6 Design Capacity, 2–3 diagnosing problems, 4–1 diagnostics audio testing, 4–33 component usage, tracking, 4–34 display testing, 4–33 error log, viewing, printing, exporting, 4–36 keys test, 4–32 LED testing, 4–34 recorder testing, 4–31 self test, 4–29 serial number, resetting, 5–34 diagnostics mode, entering, 3–10 disinfecting procedures, 2–1 display testing, 4–33 troubleshooting problems, 4–4 documents, related, 1–1 B battery description, 2–2 disposing of, 2–4 guidelines, 2–2 installing, 5–4 maintenance, 2–2 messages and alarms, 2–5 reconditioning, 2–4 replacing, 2–4, 5–3 viewing information about, 2–2 battery connector board, removing, 5–42 battery information, viewing, 2–2 block diagram, theory of operation, A–1 C cables, power, 6–6 calibration NBP, 3–16 touch screen, 3–22 tympanic temperature module, 3–18 case, opening, 5–12 check boxes, selecting and clearing, 1–1 checks, safety and operational, 2–1 cleaning instructions, 2–1 codes, error, 4–11 communications board, removing, 5–41 component usage resetting, 4–35 tracking, 4–34 configuration, system, setting, 5–35 controls, navigation, 1–1 cords, power, 6–6 Cycle Count, 2–3 E electromagnetic compatibility, B–1 electromagnetic interference emissions and immunity, B–2 manufacturer declaration, B–2 reducing, B–1 restrictions for use, B–2 separation distances, recommended, B–5 error codes battery, 2–5 description, 4–11 list, 4–11 printing log, 4–11 error log, viewing, exporting, printing, 4–36 F faceplate, removing, 5–16 fan/speaker assembly, removing, 5–22 frequency maintenance, 2–1 performance tests, 3–2 front and rear case, separating, 5–12 front end assembly cover, removing, 5–26 assembly, removing, 5–24 board, theory of operation, A–3 Index-1 SureSigns VS4 Service Guide front panel assembly, theory of operation, A–4 troubleshooting, 4–9 Full Capacity, 2–3 fuse, removing, 5–5 G guidelines battery, 2–2 testing and inspection, 3–1 H handle O-ring, removing, 5–24 hard shutdown, performing, 5–2 hub, usb, troubleshooting, 4–10 I information battery, 2–2 system, 4–1 K keys test, running, 4–32 keys, troubleshooting, 4–9 L LAN (communications board), removing, 5–41 LCD removing, 5–44 troubleshooting problems, 4–4 usage hours, 4–34 LEDs, testing, 4–34 log, error, printing, 4–11 M main board assembly, removing, 5–18 theory of operation, A–3 maintenance battery, 2–2 recommended frequency, 2–1 routine, 2–1 maintenance options, accessing, 3–11 Max Error, 2–3 memory, clearing, 4–37 monitored temperature, theory of operation, A–7 Index-2 SureSigns VS4 Service Guide N navigation controls, 1–1 navigation wheel assembly, removing, 5–47 removing, 5–47 test, 4–32 theory of operation, A–5 troubleshooting, 4–9 NBP accuracy performance verification test, 3–14 assembly, theory of operation, A–6 filter, removing, 5–38 module, removing, 5–36 performance verification test, 3–14 troubleshooting, 4–6 nurse call contacts, theory of operation, A–4 relay verification test, 3–21 troubleshooting, 4–10 O opening monitor, 5–12 operational checks, 2–1 O-ring, replacing, 5–24 P patient data, clearing all, 4–37 performance tests overview, 3–1 recommended frequency, 3–2 pneumatic leakage verification test, 3–17 power and start up sequences, 4–2 power cables, 6–6 power connector, removing, 5–39 power problems, troubleshooting, 4–4 power supply removing, 5–30 theory of operation, A–5 power-on self test, 3–12 predictive temperature test, 3–18, 3–19 theory of operation, A–7 printer, see recorder probe cover holder, temperature, removing, 5–6 R recorder installing, 5–16 removing, 5–16 testing, 4–31 theory of operation, A–6 troubleshooting, 4–9, 4–10 recording test results, 3–3 related documents, 1–1 Relative Charge, 2–3 repairing monitors AC power connector, removing, 5–39 antenna, removing, 5–52 battery connector board, removing, 5–42 communications (LAN) board, 5–41 disassembly, 5–1 faceplate, removing, 5–16 fan/speaker assembly, removing, 5–22 front end assembly cover, removing, 5–26 front end assembly, removing, 5–24 handle O-ring, removing, 5–24 installing battery, 5–4 LCD, removing, 5–44 navigation wheel assembly, 5–47 NBP filter, removing, 5–38 NBP module, removing, 5–36 power connector fuse, 5–5 power supply, removing, 5–30 reconditioning the battery, 2–4 recorder, installing, 5–16 recorder, removing, 5–16 replacing battery, 5–3 separating front and rear case, 5–12 SpO2 board, removing, 5–28 tools required, 5–2 touch screen board, removing, 5–50 wireless module, removing, 5–50 replacement parts, 6–1 replacing battery, guidelines, 2–4 routine checks, 2–1 S safety and operational checks, 2–1 safety, verification test, 3–19 selecting and clearing check boxes, 1–1 self test, running, 4–29 serial number, resetting, 5–34 shutdown, hard, performing, 5–2 software upgrade, performing, 3–7 spare parts, 6–1 speaker testing, 4–33 theory of operation, A–5 SpO2 board, removing, 5–28 measurements, troubleshooting, 4–8 processing, theory of operation, A–7 verification test, 3–13 start up and power sequences, 4–2 SureSigns monitor, overview, 1–1 system admin menu accessing, 3–5 options, 3–6 system configuration, setting, 5–35 system diagnostics menu, 3–11 system information, viewing, 4–1 system overview, theory of operation, A–1 T technical alarms, battery, 2–5 temperature measurement problems, troubleshooting, 4–7 predictive module, removing, 5–6 theory of operation, A–7 tympanic module, removing, 5–10 verification test, 3–19 verification, predictive test, 3–18 test equipment, required, 3–3 testing and inspection guidelines, 3–1 tests performance, 3–1 performance, recommended frequency, 3–2 recording results, 3–3 verification, performing, 3–10 theory of operation block diagram, A–1 front end board, A–3 front panel assembly, A–4 main board, A–3 monitored temperature, A–7 navigation wheel, A–5 NBP assembly, A–6 nurse call contacts, A–4 power supply, A–5 predictive temperature, A–7 recorder, A–6 speaker, A–5 SpO2 processing, A–7 system overview, A–1 temperature, A–7 tools, required for repairs, 5–2 Index-3 SureSigns VS4 Service Guide touch screen board, removing, 5–50 calibration, 3–22 theory of operation, A–5 troubleshooting problems, 4–9 troubleshooting AC power, 4–4 diagnosing problems, 4–1 front panel, 4–9 navigation wheel, 4–9 NBP, 4–6 nurse call, 4–10 overview, 4–1 recorder, 4–9, 4–10 SpO2 measurements, 4–8 temperature measurement problems, 4–7 touch screen, 4–9 tympanic temperature module calibration, 3–18 performance test, 3–18 removing, 5–10 theory of operation, A–8 U upgrade, software, performing, 3–7 USB hub, troubleshooting, 4–10 V verification tests, 3–1 alarms, 3–13 NBP, 3–14 NBP accuracy, 3–14 NBP calibration, 3–16 nurse call relay, 3–21 performing, 3–10 pneumatic leakage, 3–17 power-on self test, 3–12 predictive temperature, 3–18 safety, 3–19 SpO2, 3–13 temperature, 3–19 visual, 3–12 viewing battery information, 2–2 system information, 4–1 visual verification test, 3–12 W wheel, see navigation wheel, 5–47 wireless module removing, 5–50 theory of operation, A–8 Index-4 SureSigns VS4 Service Guide