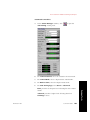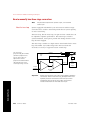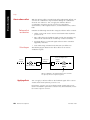
1
FlexTest™ SE User Information and Software Reference 100-077-223 C λ Copyright information Trademark information © 2002 MTS Systems Corporation. All rights reserved. MTS, Temposonics, and TestWare are registered trademarks of MTS Systems Corporation. FlexTest, MPT, MultiPurpose TestWare, Station Builder, Station Manager, and TestStar are trademarks of MTS Systems Corporation. Adobe is a registered trademark of Adobe Systems Inc. Acrobat is a trademark of Adobe Systems Inc. PowerPC is a registered trademark of International Business Machines Corporation Microsoft and Windows are registered trademarks of Microsoft Corporation. Software verification and validation MTS software is developed using established quality practices in accordance with the requirements detailed in the ISO 9001 standards. Because MTS authored software is delivered in binary format, it is not user accessible. This software will not change over time. Many releases are written to be backwards compatible, creating another form of verification. The status and validity of MTS' operating software is also checked during system verification and routine calibration of MTS hardware. These controlled calibration processes compare the final test results after statistical analysis against the predicted response of the calibration standards. With these established methods, MTS assures its customers that MTS products meet MTS' exacting quality standards when initially installed and will continue to perform as intended over time. Publication information Manual Part Number Publication Date 100-077-223 A September 2002 100-077-223 B October 2002 100-077-223 C November 2002 Contents Contents Contents Preface 5 Conventions 6 Technical Support 8 Chapter 1 Introduction 13 Basic Description 14 Front Panel Controls Controller Files Specifications 17 29 32 Chapter 2 Basic Description PC-Supervised Controllers 35 36 Using the Interfaces 37 PC-Supervised Controller Files 43 Locating PC-Supervised Documentation Chapter 3 46 Common Tasks 47 How to Power Up the Controller 49 How to Use the Front Panel Controls 51 How To Warm Up Station Hydraulics 59 How to Set Servovalve Polarity 63 How to Balance the Servovalve 68 How to Adjust Dither 72 How to Perform a Shunt Calibration 79 How to Manually Tune the Control Loop 82 How to Perform Advanced Tuning Techniques FlexTest™ SE 101 Contents 3 Contents Contents Chapter 4 FG 120 Setup 132 Status 178 Scope 181 Meters 187 Tuning 194 Config 207 Limits Log Menus Descriptions 119 238 240 Appendix A Maintenance 243 Appendix B Menu Summaries 245 Appendix C Boot Options 247 Index 249 4 Contents FlexTest™ SE Preface Safety first! Before you attempt to use your MTS equipment in your test system, read and understand the Safety manual. Like an automobile, your test system is very useful—but if misused, it is capable of deadly force. You should not be afraid of your test system, but you should always maintain a healthy respect for it. Improper installation, operation, or maintenance of MTS equipment in your test system can result in hazardous conditions that can cause severe personal injury or death, and damage to your equipment and specimen. Again, read and understand the Safety manual before you continue. It is very important that you remain aware of hazards that apply to your test system. Other MTS manuals In addition to this manual, you may receive additional MTS manuals in paper or electronic form. If you have purchased a test system, it may include an MTS System Documentation CD. This CD contains an electronic copy of all of the MTS manuals that pertain to your test system, including controller manuals, hydraulic and mechanical component manuals, assembly drawings and parts lists, and operation and preventive maintenance manuals. Contents Conventions 6 Technical Support 8 Preface 5 Conventions Conventions The following paragraphs describe some of the conventions that are used in your MTS manuals. Hazard conventions Hazard notices are embedded in this manual and contain safety information that is specific to the task to be performed. Hazard notices immediately precede the step or procedure that may lead to an associated hazard. Read all hazard notices carefully and follow the directions that are given. Three different levels of hazard notices may appear in your manuals. Following are examples of all three levels. Note Danger notices DANGER For general safety information, see the Safety manual included with your system. Danger notices indicate the presence of a hazard which will cause severe personal injury, death, or substantial property damage if the danger is ignored. For example: High intensity light and dangerous radiation are emitted by class 3B lasers. Viewing a class 3b laser directly or viewing it using optical instruments will cause immediate and severe injury. Avoid eye or skin exposure to the laser beam. Ensure that all power to the laser is off before attempting any maintenance, service, or adjustment procedure. Warning notices WARNING Warning notices indicate the presence of a hazard which can cause severe personal injury, death, or substantial property damage if the warning is ignored. For example: Hazardous fumes can accumulate in the test chamber as a result of testing. Breathing hazardous fumes can cause nausea, fainting, or death. Ensure the chamber is properly ventilated before you open the chamber door or put your head or hands into the chamber. To do this, ensure the temperature controller is off and allow sufficient time for the ventilation system to completely exchange the atmosphere within the chamber. 6 Preface Conventions Caution notices CAUTION Caution notices indicate the presence of a hazard which will or can cause minor personal injury, cause minor equipment damage, or endanger test integrity if the caution is ignored. For example: This specimen can develop sharp edges as a result of testing. Handling the specimen with unprotected hands can result in cuts and slivers. Always wear protective gloves when you handle the specimen. Other conventions Notes Other conventions used in your manuals are described below: Notes provide additional information about operating your system or highlight easily overlooked items. For example: Note Special terms Illustrations Electronic manual conventions Hypertext links Resources that are put back on the hardware lists show up at the end of the list. The first occurrence of special terms is shown in italics. Illustrations appear in this manual to clarify text. It is important for you to be aware that these illustrations are examples only and do not necessarily represent your actual system configuration, test application, or software. This manual is available as an electronic document in the Portable Document File (PDF) format. It can be viewed on any computer that has Adobe Acrobat Reader installed. The electronic document has many hypertext links displayed in a blue font. All blue words in the body text, along with all contents entries and index page numbers are hypertext links. When you click a hypertext link, the application jumps to the corresponding topic. Preface 7 Technical Support Technical Support Start with your manuals The manuals supplied by MTS provide most of the information you will need to use and maintain your equipment. If your equipment includes MTS software, you should look for README files for additional product information. If you cannot find answers to your technical questions from these sources, you can use the internet, telephone, or fax to contact MTS for assistance. You can also fill out the Problem Submittal Form that is available on the MTS web site and in the back of many MTS manuals that are distributed in paper form. Technical support numbers MTS web site www.mts.com E-mail: Telephone Fax Before you contact MTS Know your site number and system number 8 Preface MTS provides a full range of support services after your system is installed. If you have any questions about a system or product, contact MTS in one of the following ways. The MTS web site gives you access to our technical support staff by means of a Problem Submittal Form and a Technical Support link. • Problem Submittal Form: www.mts.com > Contact MTS > Problem Submittal Form • Technical Support: www.mts.com > Contact MTS > Technical Support [email protected] HELPLine 800-328-2255 Weekdays 7:00 A.M. to 6:00 P.M., Central Time 952-937-4515 Please include an MTS contact name if possible. MTS can help you more efficiently if you have the following information available when you contact us for support. The site number contains your company number and identifies your equipment type (material testing, simulation, and so forth). The number is usually written on a label on your MTS equipment before the system leaves MTS. If you do not have or do not know your MTS site number, contact your MTS sales engineer. Technical Support Example site number: 571167 When you have more than one MTS system, the system number identifies which system you are calling about. You can find your job number in the papers sent to you when you ordered your system. Example system number: US1.42460 Know information from prior technical assistance Identify the problem Know relevant computer information If you have contacted MTS about this problem before, we can recall your file. You will need to tell us the: • MTS notification number • Name of the person who helped you Describe the problem you are experiencing and know the answers to the following questions. • How long has the problem been occurring? • Can you reproduce the problem? • Were any hardware or software changes made to the system before the problem started? • What are the model and serial numbers of the suspect equipment? If you are experiencing a computer problem, have the following information available. • Manufacturer’s name and model number • Operating software type and service patch information. Examples: – Windows XP Service Pack 1 (SP1) – Windows 2000 Service Pack 3 (SP3) – Windows NT 4.0 Service Pack 7 (SP7) • Amount of system memory. Example: 640 MB of RAM. • Amount of free space on the hard drive in which the application resides. Example: 11.2 GB free space, or 72% free space. • Current status of hard-drive fragmentation. Example: 3% total fragmentation. Preface 9 Technical Support Know relevant software information For MTS software application problems, have the following information available. • The software application’s name, version number, build number, and if available, software patch number. This information is displayed briefly when you launch the application, and can typically be found in the “About” selection in the “Help” menu. Example: Station Manager, Version 3.3A, Build 1190, Patch 4 If you contact MTS by phone Identify system type Be prepared to troubleshoot 10 Preface • The same information for other MTS software included with your system • Names of other non-MTS applications that are running on your computer, such as screen savers, keyboard enhancers, print spoolers, and so forth Your call will be registered by a HELPLine agent if you are calling within the United States or Canada. Before connecting you with a technical support specialist, your agent will ask you for your site number, name, company, company address, and the phone number where you can normally be reached. To assist your HELPLine agent with connecting you to the most qualified technical support specialist available, identify your system as one of the following types: • Electromechanical materials test system • Hydromechanical materials test system • Vehicles test system • Vehicles component test system • Aero test system Prepare yourself for troubleshooting while on the phone. • Call from a telephone close to the system so that you can try implementing suggestions made over the phone. • Have the original operating and application software media available. • If you are not familiar with all aspects of the equipment operation, have an experienced user nearby to assist you. Technical Support Write down relevant information Prepare yourself in case we need to call you back. • Remember to ask for the notification number. • Record the name of the person who helped you. • Write down any specific instructions to be followed, such as data recording or performance monitoring. After you call MTS logs and tracks all calls to ensure that you receive assistance and that action is taken regarding your problem or request. If you have questions about the status of your problem or have additional information to report, please contact MTS again. Problem Submittal Form in MTS manuals In addition to the Problem Submittal Form on the MTS web site, there is also a paper version of this form (postage paid) in the back of many MTS manuals. Use this form to forward problems you are experiencing with your MTS equipment, whether it be software, hardware, manuals, or service. This form includes check boxes that allow you to select when you expect us to respond to your input. We guarantee a timely response—your feedback is important to us. Preface 11 Technical Support 12 Preface Chapter 1 Introduction This chapter provides a basic description of the FlexTest™ SE Controller; a detailed description on front panel controls and indicators; information about navigation, data entry, and types of Controller files; and specifications. Contents Basic Description 14 Standard features 14 Optional features 15 Front Panel Controls 17 Emergency Stop 18 Monitor 1 & 2 connectors Display screen 18 Menu buttons 21 Navigate buttons 18 25 Dial, and Increment/Decrement buttons 26 A/B Recall buttons Numeric keypad 27 28 Interlock controls 28 Controller Files Specifications FlexTest ™ SE 26 Program controls Power controls Introduction Help (?) button 26 28 29 32 Introduction 13 Basic Description Basic Description Introduction The FlexTest™ Controller is a VME-based, fully-digital PIDF Controller equipped with a multi-color display panel. MTS FlexTest™ SE Controller (shown with optional carrying handle) Standard features Standard features include on-board meters with large numeric display, full-range digital universal conditioners, front panel monitor connectors, dedicated menu buttons for direct access to grouped functions, and instant recall of panel displays. Basic capabilities include station configuration editing, the creation of up to four parameter sets per configuration, auto-zeroing, control mode switching with hydraulics on, and adaptive control. The Controller provides fully self-contained, single-channel control, and can be linked to other Controllers for multi-channel testing. It supports cyclic and monotonic programming without data acquisition. 14 Introduction FlexTest ™ SE Basic Description Optional features The following options are available for the Controller: FlexTest™ Controller Options (part 1 of 2) DESCRIPTION PC-Supervision Personal Computer equipped with a high-speed Ethernet connection (PC to Controller) and MTS Model 793 software, including Model 793.01 System Software with Basic TestWare®, and Model 793.10 MultiPurpose TestWare®. For more information, see “PC-Supervised Controllers” on page 35. Model 793.51 Scope Full featured on-board oscilloscope that allows you to view time and X-Y plots, optimize the display with auto-scaling, and pan trace history. Model 793.52 Advanced FG Enhancement to the standard FG menu that includes sine sweeps and block-cyclic programming. Model 793.53 Auto-Tuning Enhancement to the standard Tuning menu that allows you to quickly tune your Controller without having to make individual PIDF control adjustments. Model 793.08 PVP Compensator Compensator that optimizes command by altering command phase to correct for phase lag, and increasing the command amplitude to correct for amplitude rolloff. Additional Model 493.40 I/O Carrier Additional I/O carrier can be accommodated in special models. Support for the additional I/O carrier must be configured in the factory when the Controller is manufactured. Note This is not an add-on option. For more information, contact MTS. Model 493.15 3-Stage Valve Driver Heavy-duty valve driver required to support three-stage servovalves (MTS Series 256 and 257 Servovalves). Additional Model 493.25 Digital Universal Conditioner (DUC) Sensor conditioning electronics that can accommodate both AC and DC-coupled sensors. Model 493.47 Encoder Sensor conditioning electronics that can accommodate encoder-type sensors (incremental and Temposonics® III SSI). Model 493.45 A/D Electronics that convert up to six channels of analog signals to digital signals for use by the Controller. Model 493.46 D/A Electronics that convert up to six channels of digital signals from the Controller to analog signals for use by external devices. FlexTest ™ SE Introduction 15 Introduction ITEM Basic Description FlexTest™ Controller Options (part 2 of 2) DESCRIPTION Cables for interconnecting multiple Controllers Cables required to interconnect multiple Controllers via the Box In and Box Out rear panel connectors. Rack-Mounting Kit Hardware necessary for mounting the Controller in a standard-size electronics rack. Carrying-Handle Kit Handle and hardware required to fasten the handle to the Controller. Introduction ITEM 16 Introduction FlexTest ™ SE Front Panel Controls Front Panel Controls Control placement Increment/ Decrement Emergency Stop Back Recall Dial Interlock controls Numeric keypad Help Power control For information about menus and controls when using the Controller with PC-supervision, see “PC-Supervised Controllers” on page 35. Due to space limitations, some of the labels on the face of the Controller, as well as text displayed in some of the Controller’s menus and prompts, contain abbreviated names of the items they represent. ABABBREVIATION ACTUAL NAME CLC Channel Limited Channel control mode Config Configuration, as in the station’s configuration file FG Function Generator HPU Hydraulic Power Unit HSM Hydraulic Service Manifold or actuator manifold PIDF P—Proportional gain; I—Integral gain; D— Derivative gain; F—Feed-forward gain PVC Peak/Valley Compensation PVP Peak/Valley Phase compensation Introduction 17 Introduction FlexTest ™ SE Down Menu item buttons Note Abbreviations Program controls Up Display Screen Monitor Connectors Previous/ Next Front Panel Controls Emergency Stop The Emergency Stop button is a mechanically latching button that commands the hydraulic pressure to turn off, removes the program signal, and lights the Interlock indicator. When pressed, you cannot apply hydraulic pressure again until you return the button to its inactive position by turning it clockwise until it unlatches. Press the Reset button to extinguish the Interlock indicator. Emergency Stop Monitor 1 & 2 connectors The Monitor 1 and Monitor 2 BNC connectors allow easy connection to external monitor devices. You can use the menus to select the signal for each connector. Monitor 1 Monitor 2 Refer to the Setup menu on page 132 for information about assigning station signals to these connectors. Introduction Display screen The display screen, or screen for short, displays various types of Controller information, including information panels, menus, and messages. Information panels 18 Introduction The Controller can display the following types of information panels: • Scope • Meters • Status • Log FlexTest ™ SE Front Panel Controls Default panel positions By default, the Meters, Status, and Log panels are displayed on the screen. (If the optional Scope is purchased, it is displayed in front of the Log.) Each panel is associated with a Menu button. You can change the position of each panel on the screen as desired (refer to “How to change numbers” on page 53). Log Meters Status Default positions of the Log, Meters, and Status panels on standard Controllers. Introduction Scope (optional) When the Scope is displayed the Log is behind the Scope. To display the Log, press the Log Menu button. Default positions of the Scope, Meters, and Status panels on Controllers equipped with the optional Scope. FlexTest ™ SE Introduction 19 Front Panel Controls Panel views When you shutdown or reboot, the Controller saves the information displayed on the screen, or panel view, present at the time of the operation. The panel view includes the position of the panels on the screen and the associated user settings in each panel. Note A panel view does not include menu images or the focus status of menu items, as is the case with the Recall buttons; see “A/B Recall buttons” on page 26. The Controller also saves the current panel view when you press the <<Save Panels>> button in the Status menu, and restores that panel view when you press <<Restore Panels>>. So at any given time, the Controller can store two different panel views for later recall. Introduction The panel view saved when you shutdown or reboot is automatically restored when you power up the Controller during the next session. Once in the next session, the panel view saved when you pressed <<Save Panels>> in the previous session can be restored by pressing the <<Restore Panels>>. 20 Introduction FlexTest ™ SE Front Panel Controls Menu buttons Each menu button pertains to an activity you perform with the Controller, or to a general function, as described below: Note The FG, Setup, Tuning, and Limits menus are not available for Controllers in the automated mode. For more information, see “PCSupervised Controllers” on page 35. Note For menu displays that pertain to stand-alone Controllers, refer to Appendix B, “Menu Summaries”. Menu Function (part 1 of 2) MENU DESCRIPTION FG The FG menu defines program command. You can select from monotonic, cyclic, and external command program types. With the Advanced FG option, Sweep and Block cyclic programs types are also available. For a description of FG menu controls, see page 120. Setup The Setup menu assigns attributes to the parameter set associated with the loaded configuration, and manages parameter sets. A parameter set defines the operational characteristics of the resources in the configuration, such as calibration, tuning, and limit settings. For a description of Setup menu controls, see page 132. The Status panel displays general information about what is currently loaded in the Controller, including the parameter set (an attribute of the configuration file), the user access state, the active application, the current running time, and if available, counter information. The Status menu displays many frequently used Controller features, such as: Access levels, control mode, and Set Point and Span. For a description of the Status panel and Status menu controls, see page 178. Scope (optional) The Scope panel is like an external oscilloscope, used to view analog displays of signals being processed by the Controller. The Scope menu selects the signals you wish to view on the Scope panel, and customizes the Scope panel. For a description of the Scope panel and Scope menu controls, see page 181. FlexTest ™ SE Introduction 21 Introduction Status Front Panel Controls Menu Function (part 2 of 2) MENU DESCRIPTION Meters The Meters panel is like an external meter, used to view numerical displays of the signals being processed by the Controller. You can choose to display a timed meter, a Peak/Valley meter, a mean/amplitude meter, or a running max/min meter. The Meters menu selects the signals you wish to view on the Meters panel, and customizes the Meters panel. For a description of the Meters panel and Meter menu controls, see page 187. Tuning The Tuning menu adjusts the stability and response of the servo-control loop. For a description of Tuning menu controls, see page 194. Config The Config menu creates and modifies configuration files, modifies hardware settings, and performs other tasks, such as entering license keys, setting regional and local preferences, and setting the time and date. For a description of Config menu controls, see page 207. Limits The Limits table (pressing the Limits button displays a special kind of menu that looks like a table) displays limit and error values and associated actions for station signals. Pressing the Limits button alternates display of limit and error tables, which displays the limit setting, status, and action for all associated input signals in the station. Introduction For detailed information, see “Limits” on page 238. Log The Log panel displays log entries, which record station and test events as they occur, including file events, resource mismatches, hydraulic status changes, station state changes, and detector activity. Use the Log menu to assign display attributes to log entries, screen whether or not messages are written to the log based on severity level, clear log entries, and position the Log panel on the screen. For detailed information, see “Limits” on page 238. 22 Introduction FlexTest ™ SE Front Panel Controls FG, Setup, Tuning, and Config When you press the FG, Setup, Tuning, or Config buttons, the Controller displays the associated menu on the screen. ΦΓ Σετυπ If you press the FG Menu button… Στατυσ Σχοπε …the Function Generator menu appears on the screen. Μετερσ Τυνινγ Χονφιγ Λιµιτσ Λογ Μενυ Status, Scope, Meters, and Log When you press the Status, Scope, Meters, and Log buttons once, the Controller brings focus to their associated information panels on the screen. When you press any of these buttons again, the Controller displays the associated menu on the screen (subsequent presses alternately dismiss and bring focus to the menu). Introduction Pressing the Meters button once brings focus to the Meters panel on the screen… FlexTest ™ SE …pressing the Meters button again brings focus to the Meters menu. Introduction 23 Front Panel Controls Limits When you press the Limits button once, the Controller displays a table of signal limit values and actions; when you press the Limits button again, the Controller displays a table of signal error values and actions (pressing the button a third time dismisses the table). The information in these tables is identical to the Limits information in the Setup menu. …the next time you press the Limits button, a table of signal error information is displayed. Introduction Pressing the Limits button does not display a menu, it displays a table. The first time you press the Limits button, a table of signal limit information is displayed… 24 Introduction FlexTest ™ SE Front Panel Controls Navigate buttons The Navigate buttons include Menu Item buttons, Up and Down buttons, the Back Button, and the Previous and Next buttons. You use the Navigate buttons to select menus, bring focus to specific menu items, select from lists in menu items, and scroll within logs and tables. Note You can also perform some navigation functions with the Dial and Increment/Decrement buttons. Up button. In a menu, the Up button scrolls up through menu items; in a panel, it scrolls up through the panel. The Back button goes back to the previous layer in nested menus. When in the root layer of a menu, pressing the Back button removes the menu from the screen; in a panel, it removes focus. Previous and Next buttons. When in a submenu that contains related submenus, pressing these buttons scrolls through the submenus. In the Log, pressing these buttons scrolls through the log entries horizontally. In the Limits (and Linearization) table, pressing these buttons scrolls through the table values horizontally. Ναϖιγατε Down button. In a menu, the Down button scrolls down through menu items; in a panel, it scrolls down through the panel. FlexTest ™ SE Introduction 25 Introduction Menu Item buttons bring focus to the menu items directly across from them. If the menu item contains a list, additional presses scroll through the list. Front Panel Controls Dial, and Increment/Decrement buttons Dial The Dial is a high-resolution rotary input device that is especially useful for making small adjustments in numerical values. You can also use it to select from lists, enter text, and scroll through file names. Increment Decrement Note To change the unit of resolution used by the Increment/Decrement buttons, or the range available to the Dial, see page 54. Εναβλεδ Enable button and indicator. The enabled state will automatically turn off after 30 seconds of inactivity. Dial. Press the Enable button to use the Dial (Enabled indicator must be lit). The Dial is velocity sensitive, so fast rotations change values at a proportionally higher velocity than slow rotations. Introduction Increment/Decrement buttons The Increment/Decrement buttons change numerical values by one point of resolution. You can also use them to select from lists. Help (?) button ? The Help button displays information about the currently selected item. Pressing it a second time returns to the original display. A/B Recall buttons Α The A/B Recall buttons store a bookmark to a selected menu or panel in the current panel view. Β Ρεχαλλ A bookmark includes the menu image and the focus status of the menu items. When you press the same recall button later in the current or subsequent session, the bookmark is recalled. For more information, see “How to change text” on page 52. 26 Introduction FlexTest ™ SE Front Panel Controls Numeric keypad 7 8 9 An item may require a numeric value. In this case, use the numeric buttons or the Dial to enter the number. 4 5 6 • 0 through 9: Types numerals on the screen. 1 2 3 • +/-: Changes the sign of the value being entered. +/− 0 . • . (decimal point): Types a decimal point. • enter: Commits the displayed entry. • backspace: If you make a mistake, use the backspace arrow to erase the last digit you have typed. • cancel: If you change your mind about an entry you have typed, press cancel to erase your entire entry. The original entry reappears. εντερ χανχελ Introduction FlexTest ™ SE Introduction 27 Front Panel Controls Program controls Ρεωινδ Ηολδ Ρυν Στοπ Προγραµ Program controls allow you to control the current application (typically the FG or Tuning FG). • Run: Applies the program signal to the system and lights the Run indicator. • Hold: Holds the program signal at the current level and lights the Hold indicator. • Stop: Removes the program signal from the system and lights the Stop indicator. • Rewind: Resets counter information when running or resuming programs. Interlock controls Ηψδραυλιχ Ιντερλοχκ Προγραµ Ιντερλοχκ ρεσετ The Hydraulic Interlock and Program Interlock indicators light to indicate that an interlock has occurred. They will extinguish only after you eliminate the interlock condition and press the reset function button. Introduction Both types of interlocks stop the test, and a hydraulic interlock also turns off the hydraulic power supply. The Controller records the cause of the interlock in a log entry. Pressing and holding the reset button temporarily overrides the interlock state. Power controls Οφφ Λοω Ηιγη Λοω Ηιγη ΗΠΥ Οφφ The Power controls control the hydraulic power unit (HPU) and the hydraulic service manifold (HSM). In practice, the functions of these buttons depend upon the hydraulic configuration in software (see page 232). The following are typical functions: ΗΣΜ Ποωερ 28 Introduction • High: Turns on high hydraulic pressure. • Low: Turns on low hydraulic pressure. • Off: Turns off hydraulic pressure. FlexTest ™ SE Controller Files Controller Files Your FlexTest™ SE Controller uses the following types of files and attribute sets, all of which reside in the Controller’s flash disk memory, to maintain control and perform tests: Hardware interface files (.hwi) • Hardware Interface files (.hwi) • Configuration files (.cfg) • Station Parameter sets • Panel View sets The hardware interface file (extension.hwi) is an inventory of the conditioners, valve drivers, and other physical resources that are available to the Controller for creating configuration files. MTS creates the hardware interface for you at the factory. The Controller’s Config menu has an Edit Hardware control that lets you change attributes of the resources listed in the hardware interface file. For instance, you can change the excitation of one of the universal conditioner’s from DC to AC to accommodate a sensor that requires AC excitation. Configuration files (.cfg) The configuration file (extension.cfg) defines how the resources listed in the hardware interface file are allocated. For instance, you can allocate a valve driver resource and a sensor resource for a control channel. When complete, a configuration file allocates all of the station resources needed for a specific test station, including valve drivers, conditioners, analog inputs and outputs, digital inputs and outputs, and readouts. You can store up to four configuration files in the Controller. The Controller’s Config menu has an Edit Configuration control that lets you change the allocation of resources in configuration files. For more information about editing configuration files, see page 215. FlexTest ™ SE Introduction 29 Introduction For more information about editing hardware interface files, see page 229. Controller Files Parameter sets A parameter set is a set of attributes attached to a configuration file. Though not a separate file, you can create up to four different parameter sets for a configuration file. A parameter set defines the operational characteristics of the resources in the configuration. For instance, you can define the PIDF tuning settings for a specific conditioner/sensor pair. When complete, a parameter set contains all of the settings needed by a configuration to run a test, such as calibration, tuning, limit, and compensator settings. A parameter set adapts the way your station resources operate to suit your test requirements. The Controller’s Setup menu lets you define and edit parameter sets, which are saved with the configuration file. Panel view sets A panel view set is another set of attributes attached to the configuration file. Introduction You can create up to two panel view sets for a configuration file—one with default panel settings, and another with saved panel settings. Each panel view set is independent of each other, and includes: Default Panel Settings • The position of the menus on the screen • Associated user settings in each panel • Up to two bookmarks (created with the Recall A/B buttons), each of which captures menu images and the focus status of menu items Default panel settings are saved when you press the <<Save Def. Pnls.>> button. The Controller also automatically saves default panel settings whenever you shut down or reboot; and whenever you run a test after making changes to the FG Type, Cyclic Preset Count, Block Cyclic Control Mode, or Block Cyclic Count (FG menu controls). 30 Introduction FlexTest ™ SE Controller Files The Controller automatically restores default panel settings whenever you load or reboot the Controller. Default Panel Settings TO CREATE: TO RESTORE: BENEFITS/COMMENTS • Press <<Save Def. Pnls.>> • Load Controller • Press <<Shut Down>> • Reboot Controller This feature may be a benefit when performing unsupervised, longduration tests. • Press <<Reboot>> • Press Program Run after making changes to: – FG Type – Cyclic Preset Count – Block Cyclic Control Mode – Block Cyclic Count Saved Panel Settings Pressing <<Save Def. Pnls.>> before beginning a test ensures that when rebooting after an uncontrolled shutdown or power failure, the Controller will recover the settings present while the test was in progress. The Controller creates a panel view set independent of the default panel view set when you press <<Save Panels>> in the Status menu. The Controller restores this panel view set only when you press the <<Restore Settings>> control (in the Status menu). Introduction Saved Panel Settings TO CREATE: TO RESTORE: BENEFITS/COMMENTS • • This feature allows you to save alternate panel settings that are independent of default panel settings. Press <<Save Panels>> Press <<Restore Panels>> Also, the saved panel set can be recovered any time in any subsequent session by pressing the <<Restore Panels>> button. (In contrast, default panel settings are recovered only when you load or reboot the Controller.) FlexTest ™ SE Introduction 31 Specifications Specifications MTS FlexTest™ SE Specifications PARAMETER SPECIFICATION Physical Height 13 cm (5.2 in) Width 43 cm (17 in) Depth 43 cm (17 in) Weight 8.6 kg (19 lbs) in stand-alone configuration Rack-mount Compatibility (see “Rack mounting requirements” on page 33) Standard 48 cm (19 in) chassis Environmental Ambient temperature 5°C (41°F) to 40°C (104°F) Relative humidity 10% to 85%, non-condensing Altitude For use at altitudes up to 2000 m (6500 ft.) Introduction Power Input Power Factor Corrected universal input Input voltage* 100 to 240 V AC (startup) Input frequency 47 to 63 Hz Input surge < 50 A Operating power (V AC) 4-2 A < 360 W Insulation over voltage Category II Pollution degree 2 * The specification shown conforms to the CE Low Voltage Directive requirements. The specification allows for 10% of the values stated. The actual voltage in which the 493.02 chassis can operate is 90 to 264 V AC. 32 Introduction FlexTest ™ SE Specifications Rack mounting requirements The Controller can be mounted in an equipment rack. When doing so allow a minimum of 2 in. (5.1 cm) on either side of the Controller for air flow. There are no spacing requirements for the top or bottom of the Controller. If the equipment rack is equipped with doors, allow adequate clearance for the front and rear of the Controller. The rear of the Controller requires a minimum clearance of 6 in. (15.24 cm) to accommodate cables. Introduction FlexTest ™ SE Introduction 33 Introduction Specifications 34 Introduction FlexTest ™ SE Chapter 2 PC-Supervised Controllers Contents This chapter describes the PC-supervision option for the FlexTest™ SE Controller. With this option, the Controller includes a PC equipped with Model 793.00 System Software. Basic Description 36 Using the Interfaces 37 Controller interface functions in the automated mode About Exclusive Control PC-Supervised Controller Files 37 39 43 About passwords and PC-supervised controllers 44 About selecting applications for PC-supervised controllers About panel settings for PC-supervised Controllers About sensor files in PC-supervised Controllers Locating PC-Supervised Documentation 45 45 46 PC-Supervised Controllers 35 PC-Supervised Controllers FlexTest ™ SE 44 Basic Description Basic Description In the PC-supervised mode, the Controller is connected to a PC equipped with MTS Series 793 software, which expands capabilities to include: • Custom programming and data acquisition with MTS Basic TestWare™ • State-of-the-art test design with MTS MultiPurpose TestWare™ • Playout and acquisition of time history files • Inter-operability with MTS RPC® software for the development, iteration, and analysis of time history data It also allows you to leverage the ability of the PC to generate test reports and network test data. m PC-Supervised Controllers FlexTest SE Controller with PC-Supervision Using Station Manager with PC-Supervised Controllers 36 When you use the Controller with PC-supervision, you run the Station Manager program in tandem to the Controller. The Station Manager is included with the Model 793.00 System Software suite that comes with PC-supervised Controllers. The Station Manager provides another interface with which you can perform test activities. PC-Supervised Controllers FlexTest ™ SE Using the Interfaces Using the Interfaces When you use the Controller with PC-supervision, you boot the Controller in the automated mode. While in the automated mode, several of the Controller’s menus are disabled, as described in the table below. To compensate for the disabled Controller menus, you use the Station Manager’s interface, which replaces the functionality of the disabled Controller menus. You run the Station Manager program on the PC whenever using the Controller in the PC-supervised mode. Controller interface functions in the automated mode The table that follows describes how the various Controller menus are affected while the Controller is in the automated mode. Controller interface in the automated mode (part 1 of 3) MENU/CONTROL FUNCTION FG menu Disabled. To create simple program command, use Station Manager’s Function Generator, which has similar capabilities to the FG menu of the Controller when used in the stand-alone mode. If exclusive control (see page 39) is assigned to the Controller and the Function Generator is not selected as the current application, you can select the Function Generator by selecting “Station Manager” in the Application list of the Status menu. Setup menu Disabled. Use the Station Manager interface to perform setup activities. Status panel Controller counters are disabled. The Application control displays the current application selected to provide program control. To select a different application, use the Application control in the Status menu. FlexTest ™ SE PC-Supervised Controllers 37 PC-Supervised Controllers To use counters, select an application that uses counters, such as Basic TestWare (Test Counters) or MPT (Sequence Counters and Channel Counters) and view counter information on the application panel of Station Manager. Using the Interfaces Controller interface in the automated mode (part 2 of 3) MENU/CONTROL FUNCTION Status menu Fully functional. The Application control lists the applications available (from Station Manager) which can provide program command for the Controller. Typical applications that are available include Station Manager (function generator), Basic TestWare, and MPT (MultiPurpose TestWare). • The Station Manager selection chooses the Station Manager’s on-board function generator. The function generator allows you to create simple program command without data acquisition. The function generator is suitable for simple programs and exercising the actuator prior to testing. This selection is similar to the FlexTest SE’s FG menu. • The Basic TestWare application allows you to create more complex program command with basic data acquisition. • The MPT application allows you to create very complex program command with sophisticated data acquisition options. Scope panel and menu Fully functional. Meters panel and menu Fully functional. Tuning panel and menu Disabled. To change tuning parameters of the current configuration file, use the Station Manager’s tuning controls (Display > Station Setup > Tuning). Config menu Fully Functional. PC-Supervised Controllers Changes to the Access Level and Panel Placement controls respond immediately in the current session. Changes to all other Config menu controls take effect only after the Controller is rebooted. Limits menu Disabled. To set and view limit and error detectors, use Station Manager’s Detector controls (Display > Station Setup > Detectors). 38 PC-Supervised Controllers FlexTest ™ SE Using the Interfaces Controller interface in the automated mode (part 3 of 3) MENU/CONTROL FUNCTION Log panel and menu Fully functional. Program Controls See “Effects of Exclusive Control on Program and Power Controls” on page 41. Hydraulic Power Controls Interlock Reset Controls Emergency Stop Control About Exclusive Control When used in the PC-supervised mode, you use the Controller in tandem with Station Manager, which provides an additional interface with which you can perform test activities. For safety reasons, you cannot control (apply hydraulic power and manually position the actuator) your station from both interfaces at the same time. To prevent this, each interface is equipped with a control labeled Exclusive Control. You assign exclusive control to one interface or the other, giving that interface exclusive control of the station, and disabling control in the other. In general, you perform all setup operations including calibration, tuning, zeroing, setting errors and limits, and all program command definition with Station Manager, regardless of the interface you assign exclusive control. These functions are disabled on the Controller interface when the Controller is booted in the automated mode. For other activities, such as applying hydraulic power, manually positioning the actuator (Span and Setpoint), and starting the test, you may assign exclusive control to which ever device you wish. FlexTest ™ SE PC-Supervised Controllers 39 PC-Supervised Controllers Some controls, which are included in both interfaces, are always functional regardless of which interface has exclusive control. These are Emergency Stop, HPU Off, HSM Off, interlock Reset, and Program Stop, and Program Hold (for Basic TestWare and MPT only; the Function Generator does not have the Program Hold function). Using the Interfaces Location of Exclusive Control in the Station Manager In Station Manager, the Exclusive Control feature is located below the Station Controls panel, as shown: Exclusive Control in the Station Manager program’s interface. Location of Exclusive Control on the Controller On the Controller, the Exclusive Control feature is located on the Status panel and Status menu, as shown: Exclusive Control in the Controller’s Status panel. Exclusive Control in the Controller’s Status menu. Switching between interfaces To perform some activities, you may have to switch from one interface to another. PC-Supervised Controllers For instance, suppose you have assigned exclusive control to the Controller, and use it to apply hydraulic pressure to the station and position the actuator with the Dial to install the specimen. In this case, to zero out the tare weight of the specimen, you would have to switch to the Station Manager interface (where zero controls are always active) and perform zeroing there. In general, if you assign exclusive control to Station Manager you will switch between interfaces less often than if you assign exclusive control to the Controller. 40 PC-Supervised Controllers FlexTest ™ SE Using the Interfaces How exclusive control affects the interface The table below describes how assigning exclusive control to either interface affects the controls on both interfaces. Effects of Exclusive Control on Program and Power Controls (part 1 of 2) MENU/CONTROL FUNCTION Program Control buttons When exclusive control is assigned to the Controller: • Run, Stop, and Hold (if available) are functional on the Controller. • Rewind is disabled on the Controller. • Run is disabled on Station Manager. When exclusive control is assigned to Station Manager: • Run, Hold (if available), and Stop are functional on Station Manager. • Run and Rewind are disabled on the Controller. When exclusive control is assigned to either interface: • PC-Supervised Controllers 41 PC-Supervised Controllers FlexTest ™ SE Hold (for Basic TestWare and MPT) and Stop are functional on both interfaces. Using the Interfaces Effects of Exclusive Control on Program and Power Controls (part 2 of 2) MENU/CONTROL FUNCTION Hydraulic Power and Interlock Reset buttons When exclusive control is assigned to the Controller: • HPU Off, Low, and High are functional on the Controller. • If available, HSM Off, Low, and High are functional on the Controller. • HPU Low and High are disabled on Station Manager. If available, HSM Low, and High are disabled on Station Manager. When exclusive control is assigned to Station Manager: • HPU Off, Low, and High are functional on Station Manager. • If available, All Off, HSM Off, Low, and High are functional on Station Manager. • HPU Low, and High are disabled on the Controller. If available, HSM Low, and High are disabled on the Controller. When exclusive control is assigned to either interface: • PC-Supervised Controllers Emergency Stop 42 HPU Off, HSM Off (if available), All Off (if available), and Reset (program and hydraulic interlock) are functional on both interfaces. Always functional on both interfaces. PC-Supervised Controllers FlexTest ™ SE PC-Supervised Controller Files PC-Supervised Controller Files When used in the automated mode, the FlexTest™ SE Controller and MTS Series 793 Software use the following files and attribute sets, in their specified locations, to generate program command, maintain control, and perform tests: Panel View-Set files • Hardware Interface files (.hwi)—Stored in the PC (see page 29). • Configuration files (.cfg)—Stored in the PC (see page 29). • Parameter sets—Stored in the PC (see page 30). • Sensor Calibration files (.scf)—Stored in the PC (see the Model 793.00 System Software manual). • Panel View-Set files (.cfv)—Stored in the Controller (see below). • Test files (.tst)—Created with Basic TestWare, and stored in the PC. For information about Test files, see the Model 793.00 System Software manual (see the Model 793.00 System Software manual). • Procedure files (.000)—Created with MultiPurpose TestWare, and stored in the PC (see the Model 793.10 MultiPurpose TestWare manual). When a Controller operates in the automated mode, panel settings are saved in a separate view-set file. View-set files have the same name as the associated configuration file, but have a “.cfv” extension instead of a “.cfg” extension. View-set files are stored in the flash-disk memory of the Controller. When you use the save or restore panel controls in the Status menu, the view-set file updates the associated configuration file, which is stored in the PC. PC-Supervised Controllers 43 PC-Supervised Controllers FlexTest ™ SE PC-Supervised Controller Files About passwords and PC-supervised controllers The user level passwords for the Controller and Station Manager are independent of each other. Because of this, it’s likely that you will need to know both sets of passwords when using the Controller in the PC-supervised mode. For instance, if you assign exclusive control to the Controller, you are still required to perform setup activities with the Station Manager. Some of the setup activities, such as shifting electrical zero, tuning, and calibration, require entering Station Manager passwords to gain access to higher user levels. Keep both sets of passwords handy when using your PC-supervised Controller. About selecting applications for PC-supervised controllers While you can assign exclusive control to either the Controller or Station Manager, the term “exclusive control” refers to the interface that controls the station (the interface with which you can manually control hydraulics and position the actuator), not the interface that generates program command. When used with PC-supervision, the Controller cannot generate program command (the FG menu is disabled). Regardless of whether exclusive control is assigned to the Controller or Station Manager, when you select program command, you select from various Series 793 applications on the PC. PC-Supervised Controllers When you assign exclusive control to the Controller, you choose the desired Series 793 application from the Controller’s Status menu (Status > Application). The selections are typically Station Manager (which is actually the Station Manager’s on-board function generator), Basic TestWare, and MPT. When you assign exclusive control to Station Manager, you choose the desired Series 793 application from the Station Manager interface. 44 PC-Supervised Controllers FlexTest ™ SE PC-Supervised Controller Files About panel settings for PC-supervised Controllers Panel settings consist of the position of the menus on the screen and the associated user settings in each panel, including up to two bookmarks you create with the Recall A/B buttons. When a Controller operates in the stand-alone mode, panel settings are saved in a panel view set, which is not a file in itself, but a set of attributes attached to the configuration file, both which reside in the Controller’s flash-disk memory. When a Controller operates in the automated mode, panel settings are saved in a separate view-set file. View-set files have the same name as the associated configuration file, but have a “.cfv” extension instead of a “.cfg” extension. View-set files are stored in the flash-disk memory of the Controller. When you use the save or restore panel controls in the Status menu, the view-set file updates the associated configuration file, which is stored in the PC. About sensor files in PC-supervised Controllers A sensor files stores calibration data that pertains to a sensorconditioner pair, and has an “.scf” extension. You create sensor files with Station Manager when calibrating your system, and sensor files are stored with the associated configuration file. When you boot the Controller in the automation mode and use it with PC-supervision, it can open configuration files that include sensor files. When you boot the Controller in the stand-alone mode, you cannot open configuration files that include sensor files. If you attempt to open a configuration file that includes sensor files, the Controller will display an error message. PC-Supervised Controllers 45 PC-Supervised Controllers FlexTest ™ SE Locating PC-Supervised Documentation Locating PC-Supervised Documentation The following table describes where to find documentation for specific activities related to using your Controller in the PC-supervised mode. ACTIVITY WHERE TO FIND DOCUMENTATION Powering Up See “PC-supervised power up” on page 49 in this manual. Using Program Command Applications For MultiPurpose TestWare, see the Model 793.10 MultiPurpose TestWare manual that accompanies your system. This manual also describes how to set up Sequence Counters and Channel Counters. Using Counters For Basic TestWare and the Station Manager’s function generator, see the Model 793.00 System Software manual that accompanies your system. This manual also describes how to set up Test Counters. Using Manual Control (specimen installation) When you assign Exclusive Control to the Controller, see this manual. Using Compensators When you assign Exclusive Control to Station Manager, see the System Software manual that accompanies your system. Using Auto Zero See the Station Manager manual that accompanies your system. When booted in the automated mode, the Controller cannot apply a software offset or adjust electrical zero regardless of its Exclusive Control status. PC-Supervised Controllers Moving Files between the Controller and the PC 46 See “Appendix C: Service Tools” in the FlexTest SE Service manual. PC-Supervised Controllers FlexTest ™ SE Chapter 3 Common Tasks This chapter describes how to perform common tasks, such as powering up the Controller, warming up hydraulics, and tuning the servoloop. For each task, instructions are provided for stand-alone and PC-supervised Controllers. If you are using a PC-supervised Controller, read “PC-Supervised Controllers” on page 35 before beginning. Also, for more information about specific menus and controls, refer to Chapter 4, “Menus Descriptions”. Contents How to Power Up the Controller Stand-alone power up 49 49 PC-supervised power up Master/slave power up 49 50 How to Use the Front Panel Controls How to change panel positions How to change text 51 51 52 How to change numbers 53 How to change the range and display resolution of controls How to select files and items from lists How to use bookmarks 57 58 How To Warm Up Station Hydraulics How to Set Servovalve Polarity 63 How to Balance the Servovalve 68 How to Adjust Dither 54 59 72 How to Perform a Shunt Calibration 79 Common Tasks FlexTest ™ SE Common Tasks 47 How to Manually Tune the Control Loop About tuning programs 82 86 Monitoring tuning waveforms 87 How to manually tune the displacement control mode How to manually tune the force control mode How to Perform Advanced Tuning Techniques How to auto-tune 88 94 101 101 How to manually tune three-stage servovalves 116 Common Tasks How to use error to tune I Gain 108 48 Common Tasks FlexTest ™ SE How to Power Up the Controller How to Power Up the Controller Stand-alone power up Apply power to the Controller with the I/O button on the Controller’s rear panel, and allow the software to fully boot. The boot process typically requires a few minutes, during which the Controller loads the default configuration file, associated parameter set, and any saved panel views. While booting, the screen displays various messages, including the MTS logo. When the boot process is complete, the screen typically displays the Scope (or Log), Status, and Meters panels. PC-supervised power up For PC-supervised systems complete the following power up procedure: 1. Ensure that the network cable (PN 519968-xx) is connected from the PC to the Controller. 2. Ensure that the PC is on, preferably with the Desktop displayed. 3. Apply power to the Controller with the I/O button on the Controller’s rear panel. 4. Allow the software to boot. When the initial boot process is complete, the Controller will display the message: Waiting for System Load... If Waiting for System Load... does not appear, but the Scope, Status, and Meters panels are displayed, you must set the Controller to boot in Automation mode. Select the Automation mode with this path: Config > Local Settings > Networking > Boot Location > Automation Next, if desired, save your settings (<<Save Settings>>), then reboot the Controller. Common Tasks 5. Launch System Manager from your PC desktop. FlexTest ™ SE Common Tasks 49 How to Power Up the Controller 6. Allow System Manager to load. The message: Waiting for a station to connect to... is displayed on the Controller when System Manager loading is complete. 7. Select the desired Configuration file (and if available, the desired Parameter set) from the displayed list, and wait for the station to load. 8. Select Exclusive Control for either the System Manager or the Controller. To select the System Manager for Exclusive Control click the Exclusive Control checkbox on the Station Controls panel. To select the Controller for exclusive control, use the following path: Status < Exclusive Control > Enabled. Master/slave power up If you have more than one Controller connected to each other, apply power to the master first, allowing the software to fully boot. Then apply power to the slave Controllers in sequence, beginning with the slave Controller connected to the master Controller. To remove power from the chain, reverse the order of operations, beginning with the end-of-run slave. Master/slave connection information You connect Controllers to each other via the J51 Box In and J52 Box Out connectors on the 493.42 System I/O module in the Controller’s rear panel. The master Controller will have an open Box In connector, and a cable attached to the Box Out connector. A middle-run slave Controller will have cables attached to both the Box In and Box Out connectors. The end-of-run slave will have a cable attached to the Box In connector, and a jumper plug attached to its Box Out connector. For more information, see the FlexTest™ SE Service manual. Interlock function If you have more than one Controller connected to each other, power must be applied to all of the Controllers for proper operation. If power is not applied to any one of the Controllers, you will not be able to clear an interlock condition in any of the Controllers. Common Tasks Power up sequence 50 Common Tasks FlexTest ™ SE How to Use the Front Panel Controls How to Use the Front Panel Controls How to change panel positions Changing the position of an individual panel You can change the position of any panel on the screen. To do this for a specific panel, press the Menu button associated with the panel and change the setting of the Placement control. For instance, to change the position of the Log from the lower half of the screen to the upper half: 1. Press the Log button twice to display the Log menu. 2. Press the Menu Item button next to the Placement control to bring focus to it. 3. Press the Menu Item button additional times to select Bottom. Changing the position of all the panels You can also change the positions of all the panels on the screen with one control, as follows: 1. Press the Config button to display the Config menu. 2. Press the Menu Item button next to the Panel Placement control to display its submenu, which lists all the panels and position settings. 3. Change each position as desired. Common Tasks FlexTest ™ SE Common Tasks 51 How to Use the Front Panel Controls How to change text Some tasks, such as entering license keys and parameter set names, require that you enter text. To do this: 1. Press the Menu Item button next to the field in which you wish to enter text, to select it. 2. Press the Dial’s Enable button (this will highlight the text field). 3. Slowly rotate the Dial until the desired letter is displayed. 4. Press the Increment button (to the upper left of the Dial) to enter the desired letter or number. 5. Repeat steps 3 and 4 as required. 6. Press enter. Controls used to enter and edit text EFFECT ON TEXT Dial Scrolls through characters. Backspace Deletes one character to the left. Increment Shifts the text entry cursor one position to the right. Decrement Shifts the text entry cursor one position to the left. cancel Reverts to the saved text string. Menu Item button Once the text entry field is highlighted, pressing the Menu Item button next the field toggles the character display from lowercase to uppercase (for instance, a to A). Common Tasks CONTROL 52 Common Tasks FlexTest ™ SE How to Use the Front Panel Controls How to change numbers Note Using the Dial To adjust the resolution and range of the controls, see page 54. 1. Press the Menu Item button next to the desired menu item to bring focus to it. 2. Press the Enable button to enable the Dial (The Enabled indicator lights). 3. While observing the value in the menu item, rotate the Dial to adjust the value. Using the Increment/ Decrement buttons 1. Press the Menu Item button next to the desired menu item to bring focus to it. 2. Press the Increment/Decrement buttons to change the value. Each button press changes the value by one point of resolution (to adjust the resolution and range of the adjustment, see page 54). Using numeric keypad 1. Press the Menu Item button next to the desired menu item to bring focus to it. 2. Enter the desired number with the numeric keypad. 3. Press enter. Note If you are making adjustments (such as gain) while the hydraulics are on, MTS recommends using the Dial, rather than the numeric buttons. Using the numeric buttons can cause a slight bump in the actuator movement, due to the sudden change in value. For a smoother transition, use the Dial. Common Tasks FlexTest ™ SE Common Tasks 53 How to Use the Front Panel Controls How to change the range and display resolution of controls Various controls, such as Setpoint, Manual Offset, Limits, and so on, have parameters which can be changed for purposes of display, including range, resolution, number or digits, and dimension. To adjust these parameters you must access the control’s Display Parameters menu by pressing and holding the Menu Item button next to the control. For instance, to change the display parameters for the Setpoint control: 1. Press the Status button twice to display the Status menu. 2. Press and hold the Menu Item button next to Setpoint to bring focus to it. 3. Note the Setpoint value. 4. Press and hold the Menu Item button next to Setpoint to display the Display Parameters menu. See the figure below for an explanation of each control in the menu. For more information, see “More about the Display Parameters menu” on page 55. Common Tasks 5. Change the values as desired. 54 Common Tasks FlexTest ™ SE How to Use the Front Panel Controls Minimum and Maximum. These values determine the control’s range of adjustment. Resolution. Defines the smallest unit with which you may adjustments to the control. Formatting. Determines the number of digits used to display the range and control values. Display Unit. Defines the dimension in which the control value is displayed. Press and hold the Menu Item button next to the Setpoint control to display the Display Parameters menu. More about the Display Parameters menu The Formatting number defines the number of digits displayed to express the Minimum and Maximum range values.* For instance, if the Setpoint control’s maximum range value is 10, and you enter a formatting number of 3, the maximum range is displayed as 10.0 (Once the formatting number is applied to the range values, the number of digits displayed to the right of the decimal point in the range values is maintained in the control value display, regardless of the total number of digits displayed. For instance, suppose you enter a Formatting number of 4, which results in the Maximum and Minimum ranges values being displayed as 10.00 and -10.00, respectively. In this case, if the actual Setpoint value is 1.5, it will be displayed as 1.50 (even though the formatting number is 4). Common Tasks FlexTest ™ SE Common Tasks 55 How to Use the Front Panel Controls The Resolution value defines the smallest value with which you can make adjustments to the control. To continue the previous example, if the Setpoint value displayed is 1.50 and you enter a resolution value of 0.01, then pressing the Increment button once would result in a Setpoint display of 1.51. If you had entered a resolution value of 0.001 instead of 0.01, then pressing the Increment button once would result in a Setpoint display of 1.50, because even though the value was increased by one point of resolution, the displayed value will not reflect that increase until pressed ten times. Common Tasks * Unless the Formatting number is less than the number of digits required to express the whole numbers in those values. For instance, if the maximum range is 100 and you enter a formatting number of 1, the maximum range is still displayed as 100. 56 Common Tasks FlexTest ™ SE How to Use the Front Panel Controls How to select files and items from lists Many menu items contain a list of selections, and some menu items serve as file viewers, allowing you to browse file names. In both cases, you can scroll through the available items with the Dial, Increment/ Decrement, and Menu Item buttons, as follows: Using the Dial 1. Press the Menu Item button next to the desired menu item to bring focus to it. 2. Press the Enable button to enable the Dial (The Enabled indicator lights). 3. While observing the menu item, rotate the Dial to scroll through the list as desired. Using the Increment/ Decrement buttons 1. Press the Menu Item button next to the desired menu item to bring focus to it. 2. Press the Increment/Decrement buttons to scroll through the list as desired. Using the Menu Item buttons 1. Press the Menu Item button next to the desired menu item to bring focus to it. 2. Press the Menu Item button additional times to scroll through the list as desired. Common Tasks FlexTest ™ SE Common Tasks 57 How to Use the Front Panel Controls How to use bookmarks You can use the Recall A/B buttons to save specific panel views, or bookmarks, for recall later in the current or subsequent sessions. For instance, suppose you need to make frequent adjustments of the Trace 1 Settings of the oscilloscope. By pressing and holding the Recall A button while the Trace 1 Settings menu has focus, you create a shortcut to it for future use, making it easier to access than if you used the normal navigation path. When you press and hold a recall button, a confirmation message appears on the screen which lists the items in the snapshot, as shown below. When you press and hold a recall button, the Controller displays a view definition message. Common Tasks The A and B buttons operate independently, allowing you to create two shortcuts to desired panel snapshots. 58 Common Tasks FlexTest ™ SE How To Warm Up Station Hydraulics How To Warm Up Station Hydraulics It is good practice to warm up station hydraulics before testing by exercising the actuator without a specimen installed for at least 30 minutes. Warm up procedures for both stand alone and automated systems are provided here. Stand-Alone Controllers 1. Press the Tuning button, then select Manual. 2. For Control Mode, select displacement. 3. Press FG, and enter the following settings in the FG menu. CONTROL SETTING Wave Shape Sine Frequency 0.1 Hz Setpoint 0 Amplitude 80% of full-scale actuator displacement 4. Press the Back button to return to the Tuning < Manual> menu. 5. On the front panel, press reset to clear interlocks. 6. Apply station power. 7. On the front panel, press Run to start the function generator. Common Tasks FlexTest ™ SE Common Tasks 59 How To Warm Up Station Hydraulics 8. Observe the actuator’s response. If necessary, correct P Gain during warm up. A. If necessary, select the Tuning access level. Path: Status > Access Level > Tuning B. Adjust P Gain if required. Path: Tuning > Manual > P Gain If the actuator responds in a sluggish manner, increase the P Gain setting. If you hear a unusual or unexpected sound, decrease the P Gain. 9. After 30 minutes, click Stop on the controller front panel to stop the command. Note 1. In the Station Manager navigation pane, click the Function Generator icon to display the Function Generator panel. Common Tasks Automated Controllers Procedures for “Automated Controllers” assumes the FlexTest SE Controller is equipped with the PC-Supervision option, and that Exclusive Control is assigned to Station Manager. For more information about Station Manager, see the Model 793.00 System Software manual that accompanies your system. 60 Common Tasks FlexTest ™ SE How To Warm Up Station Hydraulics 2. Enter the following settings in the Function Generator panel CONTROL SETTING Control Channel The control channel associated with the valve you are adjusting. Control Mode Displacement Adaptive Compensator None Target Setpoint 0 Amplitude 80% of the full-scale actuator displacement Frequency 0.1 Hz Wave Shape Sine 3. In the Station Manager window’s Station Controls panel: A. Click Reset to clear interlocks. B. Apply station power. C. Click Program Run to start the function generator. 4. If necessary, correct P Gain during warm up. A. On the Station Manager window’s Display menu, select Station Setup. Common Tasks FlexTest ™ SE Common Tasks 61 How To Warm Up Station Hydraulics B. Click the Channel Tuning icon to open the Tuning panel, and then click the Adjustments tab. C. If the actuator does not move very well, increase the P Gain setting on the Adjustments tab. D. If you hear a unusual or unexpected sound, decrease the P Gain setting on the Adjustments tab. 5. After 30 minutes, click Stop on the Station Controls panel (under Function Generator) to stop the command. Common Tasks 6. Turn off hydraulic pressure. 62 Common Tasks FlexTest ™ SE How to Set Servovalve Polarity How to Set Servovalve Polarity Servovalve polarity refers to the direction the servovalve moves the actuator in response to a positive command. It can be set to normal or invert. By definition, a servovalve with a normal polarity extends the actuator in response to a positive command. Likewise, a servovalve with an inverted polarity retracts the actuator in response to a positive actuator command. Before you can set servovalve polarity, you must determine if the current servovalve polarity follows the normal convention. The procedures that follows determines servovalve polarity by having you observe actuator movement while applying a positive Setpoint command to the actuator. Procedures for both stand alone and automated systems are described. Stand-Alone Controllers 1. Get things ready. A. Ensure the actuator can be fully extended without contacting anything. You may need to remove any obstructions. B. Press the Status button twice to display the Status menu, and for Control Mode, select displacement. C. For Access Level, select Tuning. 2. If necessary, enter an initial tuning value for P Gain (first time only). The actuator can not move unless an adequate P Gain value is applied. If you already have an adequate P Gain setting for the displacement control mode, skip this step. Path: Tuning > Manual > P Gain. In P Gain, enter 1. No other tuning controls need to be set. For three-stage servovalves, the initial maximum P Gain setting is 0.8, so enter an initial value 0.5. 3. Set the polarity of the servovalve to Normal. Path: Setup > Output > Polarity: Normal FlexTest ™ SE Common Tasks 63 Common Tasks Note How to Set Servovalve Polarity 4. If necessary, clear hydraulic interlocks. If the Hydraulic Interlock indicator is lit, determine the cause, correct it, and then press reset. If an interlock indicator lights again, you will need to determine the cause and correct it before proceeding. 5. Apply hydraulic power. 6. Check the movement of the actuator to determine servovalve polarity. A. Enable the front panel Dial. B. Press the Status button twice to display the Status menu, and select Setpoint. While observing the actuator, use the Dial to slowly apply a positive Setpoint command to the actuator. • If the actuator extends when a positive command is applied, the servovalve polarity is correct. • If the actuator retracts when a positive command is applied (and the polarity setting is Normal), some electrical element that affects the servovalve (such as conditioner polarity or cable orientation) has been reversed and should be remedied. • If the actuator begins in full retraction and applying a positive Setpoint does not extend it, zero the command, remove hydraulic pressure, and change the servovalve polarity. Then retry this test. If it still does not move, return to Step 2 and increase the gain setting. • If the actuator begins in full extension and applying a negative Setpoint does not retract it, zero the Setpoint command, remove hydraulic pressure, and change the servovalve polarity. Then retry this test. If it still does not move, return to Step 2 and increase the gain setting. • If the actuator does not move at all, return to Step 2 and increase the gain setting. Common Tasks 7. Set servovalve polarity to achieve desired actuator movement. 64 Common Tasks FlexTest ™ SE How to Set Servovalve Polarity Note Automated Controllers Procedures for “Automated Controllers” assumes the FlexTest SE Controller is equipped with the PC-Supervision option, and that Exclusive Control is assigned to Station Manager. For more information about Station Manager, see the Model 793.00 System Software manual that accompanies your system. 1. Get things ready. This step establishes the required conditions for the remaining steps. A. You need displacement control mode. If you have not created this type of a control mode, create it now. B. Ensure that the actuator can be fully extended without contacting anything. You may need to remove any obstructions. C. On the Station Manager Toolbar, select Tuning in the User Level access box. 2. Enter an initial tuning value (first time only). The actuator can not move unless an adequate gain tuning value is set. If you already have a gain setting for the displacement control mode, skip this step. A. On the Station Manager Display menu, select Station Setup, B. Ensure that the correct displacement control channel is selected in the navigation panel. C. Click the Channel Tuning icon to open the Tuning panel. D. In the P Gain box, type 1. No other tuning controls need to be set. Note For three-stage servovalves, the initial maximum P Gain setting is 0.8, so enter an initial value 0.5. 3. Select the polarity of the servovalve signal. Ensure that the correct displacement control channel is selected in the navigation panel. B. Click the Channel Drive icon to open the Channel Drive panel, and then click the Valve tab. C. Set the valve polarity. If you do not know which polarity to use for your servovalve, click Normal (default). Common Tasks 65 Common Tasks FlexTest ™ SE A. How to Set Servovalve Polarity 4. On the Station Controls panel perform the following setup. A. Click the Manual Command button to open the Manual Command window. B. In the Channel selection box, select the desired control channel. C. In the Control Mode selection box, ensure that displacement control mode is selected. D. Click on the Enable Manual Command check box to enable manual command. E. On the Station Controls panel, ensure that the Master Span is set for 100%. F. If the Interlock indicator is lit, determine the cause, correct it, and then click Reset. G. If it lights again, you will need to determine the cause of the interlock and correct it before proceeding. H. In the power selection box, click the Power Low button, and then Power High for the appropriate hydraulic service manifold (HSM). 5. Check the movement of the actuator. Perform this step to verify that the actuator moves as you want. A. The following conditions assume you want a positive command to retract the actuator. Common Tasks Note On the Manual Command window, increase the Manual Cmd adjustment for a positive command. 66 Common Tasks FlexTest ™ SE How to Set Servovalve Polarity Actuator fully retracted or extended B. Actuator not fully retracted or extended C. If the actuator is fully retracted and applying a negative Manual Cmd does not extend it, zero the command, remove hydraulic pressure, and change the servovalve polarity. Then retry this test. If it still does not move, return to Step 2 and increase the gain setting. • If the actuator is fully extended and applying a positive Manual Cmd does not retract it, zero the command, remove hydraulic pressure, and change the servovalve polarity. Then retry this test. If it still does not move, return to Step 2 and increase the gain setting. • If the actuator does not move at all, return to Step 2 and increase the gain setting. • If the actuator retracts, the servovalve polarity is correct. • If the actuator extends, the servovalve polarity must be reversed. Check the Polarity setting (on the Valve tab of the Drive panel) and change it (from Normal to Inverted or vice versa). Check the movement of the actuator. Adjust the Manual Cmd slider to extend the actuator, and then adjust the Manual Cmd slider to retract the actuator. 6. Disable manual command. A. On the Station Controls Toolbar, click the Manual Command button to open the Manual Command window. B. Click on the Enable Manual Command check box to disable manual command. Common Tasks FlexTest ™ SE Common Tasks 67 How to Balance the Servovalve How to Balance the Servovalve The act of balancing the servovalve adjusts the electrical input to the servovalve so that the feedback and command signals are equal. The Controller’s valve balance control electrically compensates for minor electrical and mechanical imbalances in the servoloop. Procedures for both stand alone and automated systems are described. Stand-Alone Controllers 1. Select the Calibration access level. Path: Config > Access Level > Calibration 2. Remove any specimen. 3. Apply hydraulic pressure. WARNING Enabling the front panel Dial for Setpoint control allows you to manually position actuators. A moving actuator can injure anyone in its path. Always clear the actuator area before manually adjusting actuator position. 4. Select the displacement control mode. Path: Status > Control Mode > displacement 5. Position the actuator at or near its midstroke position. Path: Status > Setpoint A. Enable the Dial. B. Use the Dial to adjust the Setpoint to position the actuator. 6. Record and zero displacement I Gain. Common Tasks Path: Tuning > Manual > I Gain 68 Common Tasks A. Write down the current displacement I Gain. B. Zero the I Gain. FlexTest ™ SE How to Balance the Servovalve 7. Setup a meter to view displacement error. A. Select Meters. B. Select an existing meter, such as Meter 1, or select <<Add Meters>> to create a new meter, and select it. C. For Meter Type, select Timed. D. For Signal, select Ch Error. 8. Zero displacement error with the Valve Balance control. Path: Setup > Output > Valve Balance A. Enable the Dial. B. While observing Ch Error on the Meters panel, adjust the Valve Balance control by rotating the Dial until Ch Error is zero. 9. Return displacement I Gain to its original setting. Path: Tuning > Manual > I Gain Note Automated Controllers Procedures for “Automated Controllers” assumes the FlexTest SE Controller is equipped with the PC-Supervision option, and that Exclusive Control is assigned to Station Manager. For more information about Station Manager, see the Model 793.00 System Software manual that accompanies your system. 1. In the Station Manager window’s toolbar, select an access level of Calibration. 2. Remove any specimen. 3. Apply hydraulic pressure. WARNING Selecting the Enable Manual Command allows you to manually position actuators. A moving actuator can injure anyone in its path. FlexTest ™ SE Common Tasks 69 Common Tasks Always clear the actuator area before selecting Enable Manual Command. How to Balance the Servovalve 4. In the Station Controls panel’s toolbar, click . In the Manual Command window: A. Select the Channel whose valve balance needs checking. B. For the Control Mode, select a displacement control mode. C. Select Enable Manual Command. D. Use the Manual Cmd to position the actuator at or near its midstroke position. 5. In the Station Manager window’s Display menu, select Station Setup. 6. In the Station Setup window navigation pane’s Channels, select the channel whose valve balance needs checking. 7. In the Station Setup window, click . In the Tuning panel, click the Adjustments tab. In this tab: Write down the current I Gain. B. Zero the I Gain. Common Tasks A. 70 Common Tasks FlexTest ™ SE How to Balance the Servovalve 8. Set up a meter to view displacement error. A. Select the Meters icon on the Station Manager tool bar. B. Select the Meter 1 - Setup button. C. For Meter Type, select Timed. D. In Signal Selection, select the channel whose valve balance needs checking. For Signal, select Displacement Absolute Error. 9. Zero the displacement error with the Valve Balance control. A. In the Station Setup window, click . Three-stage valves: In the Drive panel, click the Valve tab. B. While observing Displacement Absolute Error on the Meters panel, adjust the Valve Balance control until Displacement Absolute Error is zero. 10. In the Station Setup window, click . In the Tuning panel, click the Adjustments tab. In this tab, return I Gain to its original setting. Common Tasks FlexTest ™ SE Common Tasks 71 How to Adjust Dither How to Adjust Dither Dither is a small, high frequency sine wave applied to a servovalve’s spool to improve the valve’s response to low amplitude signals by reducing sticking. Dither (exaggerated) Test Waveform The following are signs of an improper dither adjustment: • Dither amplitude is too low—While running a sinusoidal test on a properly tuned system, you notice that the waveform distorts at its maximum and minimum points. This will normally be more apparent during a test that has either a low frequency or a low amplitude test waveform. • Dither amplitude is too high—You hear unusual sounds, such as hammering, squealing, or pounding coming from the test system. There are two methods for checking and adjusting dither. Method 1 uses an oscilloscope. Method 2 uses your hearing. Procedures for both stand alone and automated FT SE systems are described. Stand-Alone Controllers Method 1: 1. Select an access level of Tuning. Path: Config > Access Level > Tuning Common Tasks 2. Remove any specimen. 72 Common Tasks FlexTest ™ SE How to Adjust Dither 3. Select FG from the front panel, and create a program as follows:. CONTROL SETTING Type Cyclic Wave Shape Ramp Control Mode displacement Target Setpoint 0 mm Amplitude 5 mm Frequency 0.001 Hz Compensator None 4. Select Scope and set up scope parameters to display the channel’s command and feedback signals. WARNING Applying station hydraulic pressure can put actuators in motion. A moving actuator can injure anyone in its path. Always clear the actuator area before applying hydraulic pressure. 5. Apply station hydraulic power. 6. Press Run to start the displacement command. 7. Use the Scope to observe the feedback signal. If the feedback signal shows a smooth ramp, you do not need to adjust the dither amplitude. If the feedback signal shows a jagged ramp—caused by the actuator sticking before moving—continue on to the next step to adjust the dither amplitude. Common Tasks FlexTest ™ SE Common Tasks 73 How to Adjust Dither 8. Increase Dither Amplitude until the feedback is smooth. Path: Setup > Output > Dither Amplitude If you hear an unusual sound coming from the servovalve, the dither amplitude is set too high. Method 2: 1. Select an access level of Tuning. Path: Config > Access Level > Tuning 2. Remove any specimen. 3. Apply station hydraulic power. 4. Increase Dither Amplitude until you can hear the dither and then decrease Dither Amplitude until the noise goes away. Path: Setup > Output > Dither Amplitude Note Automated Controllers Procedures for “Automated Controllers” assumes the FlexTest SE Controller is equipped with the PC-Supervision option, and that Exclusive Control is assigned to Station Manager. For more information about Station Manager, see the Model 793.00 System Software manual that accompanies your system. Method 1: 1. In the Station Manager window’s toolbar, select an access level of Tuning. 2. Remove any specimen. . Common Tasks 3. In the Station Manager window’s navigation pane, click 74 Common Tasks FlexTest ™ SE How to Adjust Dither 4. In the Function Generator panel, set up a tuning program. These are typical Function Generator settings: A. For Channel, select a channel whose dither needs checking. B. For Control Mode, select a displacement mode. C. For Target Setpoint, select 0 mm. D. For Amplitude, select 5 mm. E. For Frequency, select 0.001 Hz. F. For Wave Shape, select Ramp. G. For Compensator, select None. Common Tasks FlexTest ™ SE Common Tasks 75 How to Adjust Dither 5. Set up the Station Manager window’s Scope to display the channel’s command and feedback signals. WARNING A. In the Station Manager window’s toolbar, click . B. Set up the Scope window to display the channel’s command and feedback signals. The following shows a typical setup. Applying station hydraulic pressure can put actuators in motion. A moving actuator can injure anyone in its path. Always clear the actuator area before applying hydraulic pressure. 6. Apply station hydraulic power. 7. In the Station Manager window’s Station Controls panel, click Common Tasks to start the displacement command. 76 Common Tasks FlexTest ™ SE How to Adjust Dither 8. Use the scope to observe the feedback signal. If the feedback signal shows a smooth ramp, you do not need to adjust the dither amplitude. If the feedback signal shows a jagged ramp—caused by the actuator sticking before moving—continue on to the next step to adjust the dither amplitude. 9. In the Station Manager window’s Display menu, select Station Setup. 10. In the Station Setup window navigation pane’s Channels, locate and select the channel whose servovalve dither you want to adjust. 11. In the Station Setup window, click . Three-stage valves: In the Drive panel, click the Valve tab. Increase Dither Amplitude until the feedback is smooth. If you hear an unusual sound coming from the servovalve, the dither amplitude is set too high. Common Tasks FlexTest ™ SE Common Tasks 77 How to Adjust Dither Method 2: 1. In the Station Manager window’s toolbar, select an access level of Tuning. 2. Remove any specimen. 3. Apply station hydraulic power. 4. In the Station Manager window’s Display menu, select Station Setup. 5. In the Station Setup window navigation pane’s Channels, locate and select the channel whose servovalve dither you want to adjust. 6. In the Station Setup window, click . Three-stage valves: In the Drive panel, click the Valve tab. Increase Dither Amplitude until you can hear the dither and then decrease Dither Amplitude until the noise goes away. Dither Frequency Adjustment In addition to Dither Amplitude, Flex Test SE Controllers have a Dither Frequency control. Common Tasks The default dither frequency is 528 Hz, which is effective for most applications, and should not require adjustment. However, if the dither frequency begins to resonate with test frequencies, adjustment may be necessary. 78 Common Tasks FlexTest ™ SE How to Perform a Shunt Calibration How to Perform a Shunt Calibration Shunt calibration is a method of verifying the calibration accuracy of your system’s DC sensor/conditioner pairs. For a given sensor/ conditioner pair, it does this by shunting a precision resistor across one arm of the sensor’s Wheatstone bridge. The resulting imbalance provides a reference value, which is provided in the calibration sheet that accompanies the sensor. The Controller’s shunt calibration controls allow you to periodically check this reference value. Significant variations between current and reference values may occur if the excitation voltage has drifted, or the sensor has been damaged or has changed if some other way. Shunt calibration procedures for both stand alone and automated FT SE systems are described here. Stand-Alone Controllers 1. Select a control mode to which shunt calibration applies. Path: Setup > force > Calibration. 2. Locate the shunt calibration controls toward the bottom of the calibration menu. 3. Apply the shunt by setting the Shunt State (+) control to On. 4. Compare the output of the selected feedback as displayed on the Meter panel to the Shunt Reference Value. You may find it necessary to recalibrate the sensor/conditioner pair if the two values differ by more than your standards permit (for example, > 20 mV). 5. To make the output of the current feedback the new Shunt Reference Value: Attain the calibration access level. Path: Status > Access Level: Calibration. B. Return to the force calibration menu. Path: Setup > force > Calibration. C. Press << Update >>. 6. Remove the shunt by setting the Shunt State (+) control to Off. Note FlexTest ™ SE Leaving the calibration menu automatically removes the shunt. Common Tasks 79 Common Tasks A. How to Perform a Shunt Calibration Note Automated Controllers Procedures for “Automated Controllers” assumes the FlexTest SE Controller is equipped with the PC-Supervision option, and that Exclusive Control is assigned to Station Manager. For more information about Station Manager, see the Model 793.00 System Software manual that accompanies your system. 1. In the Station Manager window’s toolbar, select an access level of Calibration. 2. In the Station Manager window’s Display menu, select Station Setup. 3. Apply a shunt calibration. To apply a shunt calibration to a control mode: A. In the Station Setup window’s navigation pane Channels, locate and select the control mode needing a shunt calibration. B. In the Station Setup window, click . To apply a shunt calibration to an auxiliary input: Common Tasks In the navigation pane’s Auxiliary Inputs, click the input signal needing shunt calibration. 80 Common Tasks FlexTest ™ SE How to Perform a Shunt Calibration 4. In the Inputs panel, click the Shunt tab. 5. In the Shunt tab, perform the calibration. A. As required, select the Current Range needing calibration. B. In Select Shunt Type, select either (+) Shunt or (-) Shunt. (FlexTest IIm systems only) C. For the Shunt Reference Value units, select mV. D. Click E. to apply the shunt. Compare the Current Shunt Value to the Shunt Reference Value. Recalibrate the sensor/conditioner pair if the values differ by more than 20 mV. F. G. Click Note FlexTest ™ SE to remove the shunt. Leaving the Shunt tab or choosing another item in the navigation panel will automatically remove the shunt. Common Tasks 81 Common Tasks To make the Current Shunt Value the new Shunt Reference Value, click Update. How to Manually Tune the Control Loop How to Manually Tune the Control Loop About manual tuning When you tune the control loop manually, you make individual adjustments to the PIDF controls to optimize the stability and response of the control loop. Error Proper tuning reduces error and phase lag. Time Lag (phase shift) Program Command Feedback (higher Proportional gain) Feedback (lower Proportional gain) Inaccurate tuning increases the error and phase lag between the program command and the sensor feedback. Large error reduces control accuracy and repeatability, and keeps the full program command from being applied to the specimen. Optimal system operation may require a level of detuning to accommodate specimen changes during a test. • A highly tuned system provides the greatest level of response, but this places the system near the point of oscillation or instability. • As a specimen changes characteristics during testing, the response of the system also changes. This can cause unstable operation. • You may need to retune the system response when the characteristics of the specimen change during a test. • For the greatest control accuracy, use a control compensator. Common Tasks • 82 Common Tasks FlexTest ™ SE How to Manually Tune the Control Loop If you’ve never tuned before What if you adjust something wrong? Saving tuning parameters If you are unfamiliar with the tuning controls, review the following guidelines. Before you start tuning your system manually you should: • If your Controller is equipped with the optional auto-tuning feature, auto-tune your system before manually tune it. • Define upper and lower limits for the displacement and force sensors before you start tuning. • Tune the displacement control mode first since no specimen is needed. • Note the value of the tuning control before adjusting it so you can return it to that value if necessary. • Make small initial tuning adjustments. If the waveform does not appear to change, increase the adjustments. If you make an inappropriate adjustment, the system will go unstable or shut down. An unstable system produces humming or screeching sound. A system shutdown displays an error. • If an adjustment causes the system to go unstable, quickly readjust the control until the noise stops. If you cannot eliminate the sound, shut down the system by pressing the Emergency Stop button. • If an adjustment causes the system to shut down, readjust the control to the level where the system was last stable. Then reset the system and continue tuning. The tuning values are saved as part of the parameter set. The parameter set can save one set of tuning values for each control mode. Common Tasks FlexTest ™ SE Common Tasks 83 How to Manually Tune the Control Loop Tuning is needed whenever any of the following events occurs: • A gross change in the compliance or size of the test specimen. For example, you were testing steel and change to rubber. • The servohydraulic configuration has changed. For example, a servovalve is replaced or changed to a different capacity. • The system is sluggish (slow to react or not reaching the desired peaks). However, this is not always a tuning problem; it could be insufficient velocity capability such as a low-capacity servovalve. • If a control channel or sensor is recalibrated. • The system is unstable (indicated by a humming or screeching sound). • When you observe poorly controlled accuracy. • When you create a new control mode, or, if the sensor for a control mode is changed. • The end levels or frequencies are significantly different from those observed earlier in the test. For example, you notice that the specimen characteristics change during the test (this could also mean the specimen is failing). Common Tasks Recognizing when tuning is necessary 84 Common Tasks FlexTest ™ SE How to Manually Tune the Control Loop Tasks related to manual tuning The following are tasks that should be completed before you tune. It is not necessary to perform every task each time you tune. The condition of your system dictates which of the following tasks you must perform. For example, a new system or a system freshly recalibrated requires all of the following to be completed. If you are performing periodic or fine-tuning, review the following and determine which tasks you need to complete. • Balance the servovalve. The electrical valve balance adjustment compensates for minor mechanical imbalance—it is an intermediate adjustment. Refer to “How to Balance the Servovalve” on page 68. • Calibrate each sensor used for a control mode or data acquisition. Perform the appropriate calibration procedure. Refer to the FlexTest™ SE Service manual. • If your sensor calibration schedule does not require calibration at this time, perform a shunt calibration check to determine if your DC sensor/DC conditioner is within tolerance. Refer to “How to Perform a Shunt Calibration” on page 79. • If you have a three-stage (Series 256 or 257) servovalve, tune the inner loop (gain and rate) before tuning the outer loop. The rules for inner loop tuning are similar to those of the outer loop. Refer to “How to Perform a Shunt Calibration” on page 79. • If your Controller is equipped with the optional auto-tuning feature, it is best to run auto-tuning first. Auto-tuning establishes reasonable tuning levels that will be adequate for most control modes. If the results from auto-tuning are not satisfactory, you should manually tune each control mode. Refer to “How to Perform Advanced Tuning Techniques” on page 101. Common Tasks FlexTest ™ SE Common Tasks 85 How to Manually Tune the Control Loop About tuning programs The Tuning menu includes a built-in function generator provided specifically for creating tuning programs (Tuning > Manual > FG). The purpose of a tuning program is to produce a command that reflects the most demanding system response expected from a test. Initial tuning is best done with a waveform that has abrupt changes. This excites the system at frequencies likely to be unstable with excessive gain. Square and ramp waveforms are preferred. Final tuning can be done with the actual program command for the test. A typical tuning program is a low-amplitude (5% to 10% of full-scale), low-frequency (1 Hz to 2 Hz) square waveform. This section describes how the amplitude, frequency, and waveform type of a tuning program can be selected to reflect the capabilities of the testing system or the testing requirements. Command waveforms A tuning program produces a cyclic program command to exercise the system while you make the initial tuning adjustments. A square wave is best because it demands the maximum response of the servo hydraulic system, but it may not be suitable for all systems. The following describe the different waveform characteristics: Square/Tapered Square A square waveform requires the servovalve to open and close rapidly. It is the most demanding waveform because it requires the maximum response from the servoloop system. It also places a large acceleration on the test system and specimen. Common Tasks Tapered square waves taper from 0% to 100% amplitude at the beginning of execution, and from 100% to 0% at the end of execution. 86 Common Tasks • A square waveform is most useful for tuning displacement. • A square waveform has an infinite velocity command. • Do not use a square waveform when tuning a control mode that uses an extensometer. The large accelerations can cause the extensometer to move or fall off the specimen, which can cause the system to go unstable. FlexTest ™ SE How to Manually Tune the Control Loop Ramp/Tapered Ramp A ramp waveform (also called a triangle waveform) requires the actuator to move at a constant rate. This requires the servovalve to move quickly between two discrete openings. Cycling a ramp waveform produces a triangle waveform. Tapered ramp waves taper from 0% to 100% amplitude at the beginning of execution, and from 100% to 0% at the end of execution. Sine/Tapered Sine • A ramp waveform is useful for all levels of tuning. • Use a ramp waveform if a square waveform creates excessive velocities or acceleration for the type of specimen being tested. A sine waveform (also called sinusoidal or haversine) requires the servovalve to move at a variety of rates. Tapered sine waves taper from 0% to 100% amplitude at the beginning of execution, and from 100% to 0% at the end of execution. Monitoring tuning waveforms On standard Controllers, whenever you select the manual tuning menu (Tuning > Manual), the Controller also displays a panel on which you can monitor tuning waveforms, referred to as the Tuning Panel. The Tuning Panel automatically scales and displays command (tuning program) and feedback waveforms to facilitate tuning. What to monitor The accuracy of the waveform represents how well it reaches the amplitude of the command or how repeatable the end levels are. The peaks and valleys of triangle and sine waveforms should be consistent. Use the area of the square wave after the ringing settles to monitor the end levels. These are the areas of interest on these waveforms You do not need to monitor the entire waveform. Instead, zoom in on the area of interest. Common Tasks FlexTest ™ SE Common Tasks 87 How to Manually Tune the Control Loop How to manually tune the displacement control mode A displacement control mode uses the feedback signal from an LVDT (linear variable differential transformer). You do not need a specimen to tune a displacement control mode. When to tune • The fixtures attached to the actuator have changed (such as grips). The main tuning factor is a change in the mass attached to the actuator. • Any time hydraulic system potential has changed, such as after servovalve, hose, or pump replacement. • You want to fine tune the control mode. • The sensor range has changed. • You feel system response should be improved or reduced. Be sure the following conditions are present before you begin tuning the displacement control mode: • Hydraulic pressure is off. • The specimen is not installed. Common Tasks Prerequisites A displacement control mode typically needs to be tuned only when recalibrated. However, you may want to retune the displacement control mode if: 88 Common Tasks FlexTest ™ SE How to Manually Tune the Control Loop Procedure This basic displacement tuning procedure should work for most applications—consider it a guideline. You should be familiar with the background information presented in this chapter so you can modify the following procedure for your specific system. Note Procedures for “Automated Controllers” assumes the FlexTest SE Controller is equipped with the PC-Supervision option, and that Exclusive Control is assigned to Station Manager. For more information about Station Manager, see the Model 793.00 System Software manual that accompanies your system. 1. Select the following settings in the tuning function generator. Stand-Alone Controllers: Tuning > Manual > FG Automated Controllers: Click CONTROL SETTING Wave Shape Square Frequency 1 Hz Target Setpoint 0 mm Amplitude 10% of full scale on Station Manager. 2. Set up the Scope. Note You can use an oscilloscope instead of the software scope if you want. To do that you must define a Readout channel to connect the oscilloscope. Stand-Alone Controllers: Select Scope and set up scope parameters to display the displacement feedback signal. Automated Controllers: On the Display menu select Scope. B. Select the displacement signal for display. C. Set the Trace Time to 5 seconds. Common Tasks A. D. Ensure Auto-Scale is on (the default position is ON). FlexTest ™ SE Common Tasks 89 How to Manually Tune the Control Loop Note WARNING To improve your view of the waveform, click the Rescale button to maximize the waveform on the display. Do not place any part of your body in the path of a moving actuator. A crush zone exists between the actuator and any equipment in the path of its movement. Immediate and unexpected actuator response is possible when you apply hydraulic pressure to your system. Stay clear of the actuators when applying hydraulic pressure. 3. If necessary, turn on hydraulic pressure. Stand-Alone Controllers: A. Note B. In the Power section, press Low and then High for the HPU. If an HPU is not listed, start the HPU at the pump. The HPU can be configured for “first on”. If this is the case, start the appropriate HSM. If an HSM is present, click Low and then High for the HSM. Automated Controllers: A. In the power selection box, click (Low) and then (High) for the HPU. If an HPU is not listed, start the HPU at the pump. Note B. The HPU can be configured for “first on”. If this is the case, start the appropriate HSM. If an HSM is present, click (Low) and then (High) for the appropriate HSM. 4. Ensure that the displacement control mode is selected. Stand-Alone Controllers: Press the Back button (or select Tuning > Manual > Control Mode). Common Tasks Automated Controllers: On the Manual Command window, ensure that displacement is selected for Control Mode. 5. Install a dummy specimen. Stand-Alone Controllers: A. 90 Common Tasks Enable the Dial. FlexTest ™ SE How to Manually Tune the Control Loop B. Adjust the Dial to position the actuator during specimen installation. Automated Controllers: A. On the Manual Command window. Click Enable Manual Command. B. Adjust the Manual Command window slider to position the actuator during specimen installation. 6. Check system interlocks Stand-Alone Controllers: If the Hydraulic Interlock or Program Interlock indicator is lit, determine the cause, correct it, and then click Reset. If either interlock indicator lights again, you will need to determine the cause of the interlock and correct it before proceeding. Automated Controllers: If the Interlock indicator is lit, click Reset. If the indicator lights again, you must determine the cause and correct it before proceeding. 7. Open the Tuning submenu or panel. Stand-Alone Controllers: Path: Tuning > Manual Automated Controllers: A. Click to display the Tuning panel. B. In the Tuning panel, click the Adjustments tab. C. Select the Show References check box. Note FlexTest ™ SE The Reference settings are saved with the parameter set. Common Tasks 91 Common Tasks Notice the Reference column on the right side of the window. This column shows the current set of tuning parameters. Use the buttons to update reference settings with new values or replace the current values with the last set that worked properly. How to Manually Tune the Control Loop 8. Adjust the P Gain and D Gain tuning controls. Overshoot A. Start the tuning function generator. B. Select Continuous Sweep on the internal or external scope. C. Increase the P Gain adjustment until you see a little overshoot and a little ringing. D. Increase the D Gain adjustment to reduce the overshoot and ringing. Ringing E. Repeat C and D until you achieve a optimum waveform. High The middle waveform is a optimum waveform. In some cases the optimum waveform will have no overshoot or ringing, and the waveform will look more like a square waveform with rounded corners. Rate (D) Low High For actual testing, if your system goes unstable it will sound unstable—that is, it will emit an annoying high-pitched sound that is quite different from the usual tuning sound (“ka-chunk, kachunk”). If your system begins to go unstable, quickly readjust the control that caused the instability to return the control to its previous setting. Common Tasks Unstable sounds Gain (P) 92 Common Tasks FlexTest ™ SE How to Manually Tune the Control Loop 9. Adjust the I Gain tuning control. Set up a peak/valley meter to monitor the peaks and valleys of the sensor signal. The peaks and valleys should be balanced. Before adjusting reset (I Gain), be sure the feedback signal is repeatable (that is, the same peaks and valleys are achieved). For example, assume the test command is centered on zero and the meter displays +3 mm and -5 mm. You want to adjust the reset (I Gain) control to achieve ±4 mm. If the command is not centered on zero, monitor the difference between peaks and valleys of the sensor feedback to the upper and lower levels of the test command. Any difference should be the same. Note You can also use the optional Scope or an external oscilloscope to adjust I Gain by monitoring the Error signal. For more information, see “How to use error to tune I Gain” on page 116. 10. Save your tuning settings. Stand-Alone Controllers: Setup > Open/Save Parameters > <<Save>> Automated Controllers: On the Station Manger File menu, select Save Parameters As. You can either select an existing parameter set or enter the name of a new parameter set to save. About saving elements of a parameter set It is important that you save your parameter set as you complete the various parts that make up a parameter set. Throughout this manual you will be performing discrete procedures while building a single parameter set. • If you have already established your default parameter set for the current station and you are creating a new parameter set for a specific test, save the parameters with a different name. • Different tests and/or specimens may require different parameter sets. Common Tasks FlexTest ™ SE Common Tasks 93 How to Manually Tune the Control Loop How to manually tune the force control mode To complete this task, you will make sure the force tuning values established in your station parameter set are appropriate for the test you are about to run. To do this, you will: • Create and apply a simple tuning program. • Evaluate the current force tuning values by comparing command and feedback signals. Once established, displacement tuning values are unlikely to require adjustment; in contrast, optimal force tuning values are a function of your specimen’s compliance and often change over time, or even from test-to-test. You should also tune force whenever you make any change to the force train (such as changing fixtures). Note Prerequisites Procedures for “Automated Controllers” assumes the FlexTest SE Controller is equipped with the PC-Supervision option, and that Exclusive Control is assigned to Station Manager. For more information about Station Manager, see the Model 793.00 System Software manual that accompanies your system. Be sure the following conditions are present before you begin tuning the force control mode: Stand-Alone Controller and Automated Controllers: • Hydraulic pressure is off. • The specimen is not installed Automated Controllers Only: You have created a station configuration file. • You have created a station parameter set. Common Tasks • 94 Common Tasks FlexTest ™ SE How to Manually Tune the Control Loop Procedure The following is a step-by-step tuning procedure for a force control mode. It is a basic procedure that should work for most applications. However, you should consider it a guideline. The background information presented in this chapter should help you modify the following procedure for your specific system. 1. Select the following settings in the tuning function generator. Stand-Alone Controllers: Tuning > Manual > FG Automated Controllers: Click CONTROL SETTING Wave Shape Square Frequency 1 Hz Target Setpoint 0N Amplitude 10% of full scale on Station Manager 2. Set up the Scope. Note You can use an oscilloscope instead of the software scope if you want. To do that you must define a Readout channel to connect the oscilloscope. Stand-Alone Controllers: Select Scope and set up scope parameters to display the force feedback signal. Automated Controllers: A. On the Display menu select Scope. B. Select the Force Absolute Error signal for display. C. Set the Trace Time to 2 seconds. Note FlexTest ™ SE To improve your view of the waveform, click the Rescale button to maximize the waveform on the display. Common Tasks 95 Common Tasks D. Ensure Auto-Scale is on (the default position is ON). How to Manually Tune the Control Loop WARNING Do not place any part of your body in the path of a moving actuator. A crush zone exists between the actuator and any equipment in the path of its movement. Immediate and unexpected actuator response is possible when you apply hydraulic pressure to your system. Stay clear of the actuators when applying hydraulic pressure. 3. Turn on hydraulic pressure. Stand-Alone Controllers: A. Note B. In the Power section, press Low and then High for the HPU. If an HPU is not listed, start the HPU at the pump. The HPU can be configured for “first on”. If this is the case, start the appropriate HSM. If an HSM is present, click Low and then High for the HSM. Automated Controllers: A. In the power selection box, click (Low) and then (High) for the HPU. If an HPU is not listed, start the HPU at the pump. Note B. The HPU can be configured for “first on”. If this is the case, start the appropriate HSM. If an HSM is present, click (Low) and then (High) for the appropriate HSM. 4. Ensure that the displacement control mode is selected. Stand-Alone Controllers: Press the Back button (or select Tuning > Manual > Control Mode). Common Tasks Automated Controllers: On the Manual Command window, ensure that displacement is selected for Control Mode. 96 Common Tasks FlexTest ™ SE How to Manually Tune the Control Loop 5. Install a dummy specimen. Stand-Alone Controllers: A. Enable the Dial. B. Adjust the Dial to position the actuator during specimen installation. Automated Controllers: A. On the Manual Command window. Click Enable Manual Command. B. Adjust the Manual Command window slider to position the actuator during specimen installation. 6. Switch to the force control mode. 7. Check system interlocks. Stand-Alone Controllers: If the Hydraulic Interlock or Program Interlock indicator is lit, determine the cause, correct it, and then click Reset. If either interlock indicator lights again, you will need to determine the cause of the interlock and correct it before proceeding. Automated Controllers: If the Interlock indicator is lit, click Reset. If the indicator lights again, you must determine the cause and correct it before proceeding. Common Tasks FlexTest ™ SE Common Tasks 97 How to Manually Tune the Control Loop 8. Open the Tuning submenu or panel. Stand-Alone Controllers: Tuning > Manual Automated Controllers: A. Click to display the Tuning panel. B. In the Tuning panel, click the Adjustments tab. C. Select the Show References check box. Notice the Reference column on the right side of the window. This column shows the current set of tuning parameters. Use the buttons to update reference settings with new values or replace the current values with the last set that worked properly. The Reference settings are saved with the parameter set. Common Tasks Note 98 Common Tasks FlexTest ™ SE How to Manually Tune the Control Loop 9. Adjust the P Gain and D Gain tuning controls. Stand-Alone and Automated Controllers: Overshoot A. Start the function generator. B. On the Scope menu, select Continuous for Sweep Mode. C. On the Manual Tuning submenu, increase the P Gain adjustment until you see a little overshoot and a little ringing. D. Slowly increase the D Gain adjustment to reduce the overshoot and ringing. Small adjustments of D can have large effects on the system. Ringing E. Repeat C and D until you achieve a optimum waveform. High The middle waveform is the optimum waveform. In some cases the waveform will have no overshoot or ringing. Rate (D) Low Unstable sounds Gain (P) High For actual testing, if your system goes unstable it will sound unstable— that is, it will emit an annoying high-pitched sound (accompanied by high-frequency actuator movement) that is quite different from the usual tuning sound (“ka-chunk,ka-chunk”). If your system begins to go unstable, quickly readjust the control that caused the instability. Common Tasks FlexTest ™ SE Common Tasks 99 How to Manually Tune the Control Loop 10. Adjust the I Gain tuning control. Stand-Alone and Automated Controllers: Set up a peak/valley meter to monitor the peaks and valleys of the sensor signal. The peaks and valleys should be balanced. Before adjusting reset (I Gain), be sure the feedback signal is repeatable (that is, the same peaks and valleys are achieved). If the command is not centered on zero, monitor the difference between peaks and valleys of the sensor feedback to the upper and lower levels of the test command. Any difference should be the same. Note You can also use the optional Scope or an external oscilloscope to adjust I Gain by monitoring the Error signal. For more information, see “How to use error to tune I Gain” on page 116. 11. Save your tuning settings. Stand-Alone Controllers: Setup > Open/Save Parameters > <<Save>> Automated Controllers: On the Station Manager File menu, select Save Parameters As. You can either select an existing parameter set or enter the name of a new parameter set to save. It is important that you save your parameter set as you complete the various parts that make up a parameter set. Throughout this manual you will be performing discrete procedures while building a single parameter set. • If you have already established your default parameter set for the current station and you are creating a new parameter set for a specific test, save the parameters with a different name. • Different tests and/or specimens may require different parameter sets. Common Tasks About saving elements of a parameter set 100 Common Tasks FlexTest ™ SE How to Perform Advanced Tuning Techniques How to Perform Advanced Tuning Techniques The following techniques require product features that are optional for the FlexTest™ Controller. To obtain these features, contact your local MTS Sales Representative (or refer to “Technical Support” on page 11). How to auto-tune Note This procedure requires the optional Auto-Tuning feature. When you run auto-tuning, the Controller disregards your current PIDF gain settings and applies the minimum required drive signal to ramp the feedback to 80% of the auto-tuning limits. It then measures the relationship between the feedback velocity and the valve opening signal and then derives the minimum PIDF gains required to track the command. It’s good practice to auto-tune the displacement control mode first, then install a dummy specimen and auto-tune the force control mode. Note Auto-tuning the displacement control mode Procedures for “Automated Controllers” assumes the FlexTest SE Controller is equipped with the PC-Supervision option, and that Exclusive Control is assigned to Station Manager. For more information about Station Manager, see the Model 793.00 System Software manual that accompanies your system. 1. Select an access level of Tuning. Stand-Alone Controllers: Status > Access Level > Tuning Automated Controllers: In the Station Manager window’s toolbar, select an access level of Tuning. 2. Remove the specimen. 3. Set and enable the displacement feedback signal’s limits (typically just outside the signal’s full-scale range). Stand-Alone Controllers: Setup > displacement > Limits FlexTest ™ SE Common Tasks Common Tasks Automated Controllers: In the Station Setup window’s navigation pane, click Detectors and then Limits. 101 How to Perform Advanced Tuning Techniques 4. Set up auto-tuning parameters. Stand-Alone Controllers: A. Select Tuning > Auto-Tuning. B. For Control Mode, select displacement. C. For Mode to Tune, select displacement. D. For Actuator Type, select the type you have. The actuator is typically equipped with a label that identifies whether or not it is hydrostatic. Note E. If you receive a “Feedback is not responding to drive signal” message during tuning, select Hydrostatic. This setting allows more and faster valve movements, which results in more actuator movement. For Upper Limit and Lower Limit, set the upper and lower limits for actuator travel during auto-tuning. Common Tasks Auto-tuning exercises the actuator within 80% of these limits. 102 Common Tasks FlexTest ™ SE How to Perform Advanced Tuning Techniques Automated Controllers: A. In the Station Manager window, click to open the Auto-Tuning control panel. B. For Control Channel, select the channel to be auto-tuned. C. For Control Mode, select a displacement control mode. D. For Mode to Tune, select the displacement mode. E. For Auto-Tuning Type, select Basic or Advanced. Advanced provides a higher level of tuning based on Tracking% values. FlexTest ™ SE Common Tasks 103 Common Tasks Basic provides an adequate level of tuning for most control modes. How to Perform Advanced Tuning Techniques F. For Actuator Type, select Normal or Hydrostatic. For most cases select Normal. If you receive a “Feedback is not responding to drive signal” message during tuning, select Hydrostatic. This setting allows more and faster valve movements, which results in more actuator movement. G. For Upper Limit and Lower Limit, set the upper and lower limits for actuator travel during auto-tuning. Basic auto-tuning exercises within 80% of these limits. Advanced auto-tuning function exercises within 20% of these limits. If the limits are exceeded, the auto-tuner will quit and trip an interlock. H. For Advanced auto-tuning—Set the Tracking% value. The 50% default setting is appropriate for most systems. I. For Advanced auto-tuning—Set the Sweep Freq. Common Tasks The Sweep Freq sets the upper frequency limit of the sine sweep. The 20 Hz default setting is a good starting point. 104 Common Tasks FlexTest ™ SE How to Perform Advanced Tuning Techniques WARNING Pressing the Run button will put the actuator in motion. A moving actuator can injure anyone in its path Always clear the actuator area before pressing the Run button. 5. Press Run to start auto-tuning, and if desired, accept tuning values. While auto-tuning is in progress, the Controller displays: “Auto Tuning in Progress...To terminate auto-tuning before completion, press <Stop>.” When auto-tuning is complete, the Controller displays: “Auto Tuning for this mode has completed successfully.” Also, when auto-tuning is complete, the results are displayed showing Current tuning values and Reference values. Press Accept to apply the Reference values. 6. Save the auto-tuning values. Path: Setup > Open/Save Parameters > <<Save>> You may save auto-tuning values to an existing parameter set or to a new parameter set. Common Tasks FlexTest ™ SE Common Tasks 105 How to Perform Advanced Tuning Techniques Auto-tuning the force control mode 1. Install a dummy specimen. 2. Set and enable the force feedback signal’s limits (typically just outside the signal’s full-scale range). Path: Setup > Force > Limits 3. Set up auto-tuning parameters: WARNING A. Select Tuning > Auto-Tuning. B. For Control Mode, select displacement. C. For Mode to Tune, select force. Pressing the Run button will put the actuator in motion. A moving actuator can injure anyone in its path. Always clear the actuator area before pressing the Run button. 4. Press Run to start auto-tuning. The Controller displays the following: Common Tasks Press <<OK>> if you have tuned the channel’s displacement mode and installed a specimen. 106 Common Tasks FlexTest ™ SE How to Perform Advanced Tuning Techniques Then the Controller starts auto-tuning and displays the following: “Auto Tuning in Progress...To terminate auto-tuning before completion, press <Stop>.” When auto-tuning is complete, the Controller displays: “Auto Tuning for this mode has completed successfully.” Also, when auto-tuning is complete, the results are displayed showing Current tuning values and Reference values. Press Accept to apply the Reference values. 5. Save the auto-tuning values. Path: Setup > Open/Save Parameters > <<Save>> You may save auto-tuning values to an existing parameter set or to a new parameter set. Common Tasks FlexTest ™ SE Common Tasks 107 How to Perform Advanced Tuning Techniques How to manually tune three-stage servovalves Note About the inner loop This procedure requires the optional Scope, or an external oscilloscope. Systems equipped with Model 493.15 Valve Drivers and three-stage servovalves have an inner control loop inside the test system’s primary, or outer control loop. The inner loop, like the outer loop, has gain and rate controls that can be adjusted to optimize performance. The inner-loop is tuned at system installation, and requires periodic fine tuning when the outerloop becomes sluggish. The inner loop is similar to a displacement control mode for the outerloop. The Model 493.15 Three-Stage Valve Driver includes the electronics necessary to support the inner control loop. The innerloop (proportional) gain and rate (derivative) adjustments are the same types of adjustments as the proportional and derivative gain adjustments of the outerloop tuning controls. Feedback Outer Loop Inner Loop HSM Control Signal Hydraulic Power Supply Program Command Always tune the inner loop without the hydraulics applied to the actuator. Perform the inner loop gain adjustments with hydraulic pressure removed from the main spool while maintaining pressure at the pilot stage. This prevents interaction between the inner and outer loops. Common Tasks Important 493.15 Valve Driver 108 Common Tasks FlexTest ™ SE How to Perform Advanced Tuning Techniques Prerequisites Procedure • The hydraulic fluid and the servovalve should be at operating temperature. See “How To Warm Up Station Hydraulics” on page 59. • Command compensators should be turned off. • The specimen should be removed. 1. Remove hydraulic pressure from the main spool. A. Remove hydraulic pressure. B. Disconnect the HSM control cable, at the back of the FT SE Controller chassis, from connector J28. Disconnecting this cable disables pressure to the main spool, but leaves pressure applied to the pilot stage of the servovalve. 2. Apply hydraulic pressure. Note Procedures for “Automated Controllers” assumes the FlexTest SE Controller is equipped with the PC-Supervision option, and that Exclusive Control is assigned to Station Manager. For more information about Station Manager, see the Model 793.00 System Software manual that accompanies your system. 3. Select an access level of Tuning. Stand-Alone Controllers: Config > Access Level > Tuning Automated Controllers: In the Station Manager window’s toolbar, select an access level of Tuning. 4. Set the following valve drive conditioner parameters: Stand-Alone Controllers: Setup > Output > Conditioner Automated Controllers: In the Station Setup window, click to display the Drive panel. In the Drive panel, click the Conditioner tab. Set Excitation to 10V. B. Set Phase to between 10 and 30 deg. C. Set Offset to 0 V. Common Tasks A. D. Set the Gain to 10. E. FlexTest ™ SE Set the Polarity to Normal. Common Tasks 109 How to Perform Advanced Tuning Techniques 5. Configure a Meter to monitor the spool position signal. Stand-Alone Controllers: Path: Meters > Meter 1 A. For Meter Type, select Timed. B. For Signal, select Spool Position. C. For Display Mode and Display Units, select Volts. D. Set a Display Resolution. Automated Controllers: A. On the Station Manager window’s toolbar, select Create Meters on the Meters icon pull-down menu. B. Select Create Meters again to display a second Meters window. C. In the Meters window, click the Meter Setup button. Use the Meter Setup window to define the meter D. For Meter Type, select Timed. E. For Signal Selection, select the desired Channel name and Spool Position for Signal type. F. For Display Mode, select Volts. G. Set a Display Resolution. 6. Produce a Spool Position output signal of -10 V DC with the spool driven into the end cap. Stand-Alone Controllers: Reverse the Conditioner > Polarity setting to drive the inner loop spool into one of the end caps. B. Adjust Conditioner > Gain until the Meter reads approximately -8 V DC. Common Tasks A. 110 Common Tasks FlexTest ™ SE How to Perform Advanced Tuning Techniques C. Adjust Conditioner > Phase until the Meter displays maximum voltage. The phase adjustment matches the phase of the inner loop LVDT feedback with the 10 kHz demodulator reference signal. This adjustment provides a maximum output for the maximum LVDT spool position offset. Note This adjustment must be set for the initial calibration, servovalve replacement, cable replacement, or valve driver replacement. Once the phase is correctly set, readjustment is not necessary during routine calibration. D. Readjust Conditioner > Gain until the Meter reads -10 V DC. E. Return Conditioner > Polarity to its original setting. Automated Controllers: In the Drive panel Conditioner tab: A. Reverse the Polarity setting to drive the inner loop spool into one of the end caps. B. Adjust Gain until the meter reads approximately -8 V DC. C. Adjust Phase until the meter displays maximum voltage. The phase adjustment matches the phase of the inner loop LVDT feedback with the 10 kHz demodulator reference signal. This adjustment provides a maximum output for the maximum LVDT spool position offset. Note This adjustment must be set for the initial calibration, servovalve replacement, cable replacement, or valve driver replacement. Once the phase is correctly set, readjustment is not necessary during routine calibration. D. Readjust Gain until the meter reads -10 V DC. E. Return Polarity to its original setting. Common Tasks FlexTest ™ SE Common Tasks 111 How to Perform Advanced Tuning Techniques 7. Produce a Spool Position output signal of +10 V DC with the spool driven into the opposite end cap. Stand-Alone Controllers: A. Reverse the Conditioner > Polarity setting to drive the inner loop spool into the other end cap. B. Check the Meter. It should read +10 V DC (±0.5 V DC). If the voltage is correct, proceed to the next step in this procedure. If the voltage is off by more than 0.5 V, you may need to mechanically center the pilot spool. Refer to “Zero the Spool Position Signal” in your Controller Service manual for a detailed procedure. Complete this procedure, then recheck spool position voltages at each endcap before you resume inner loop tuning. C. Return Conditioner > Polarity to its original setting. Automated Controllers: In the Drive panel, click the Valve tab. In the Valve tab, produce a Spool Position output signal of +10 V DC with the spool driven into the opposite end cap. A. Reverse the Polarity setting to drive the inner loop spool into the other end cap. B. Check the meter. It should read +10 V DC (±0.5 V DC). If the voltage is correct, proceed to the next step in this procedure. Common Tasks If the voltage is off by more than 0.5 V, you may need to mechanically center the pilot spool. Refer to “Zero the Spool Position Signal” in your Controller Service manual for a detailed procedure. Complete this procedure, then recheck spool position voltages at each endcap before you resume inner loop tuning. C. 112 Common Tasks Return Polarity to its original setting. FlexTest ™ SE How to Perform Advanced Tuning Techniques 8. Monitor the spool position signal with a scope. Stand-Alone Controllers: Press Scope to monitor the spool position signal. Automated Controllers: A. In the Station Manager window’s toolbar, click once to display a single Scope window. B. In the Scope window’s toolbar, click to open the Setup for Scope window. 9. Open the function generator application. Stand-Alone Controllers: Select FG and select the following settings to set up a tuning program. Automated Controllers: In the Station Manager window’s navigation pane, click . CONTROL SETTING Type Cyclic Wave Shape Square Control Mode displacement Target Setpoint 0 mm Amplitude 50% of full scale Frequency 1 Hz Compensator None Common Tasks FlexTest ™ SE Common Tasks 113 How to Perform Advanced Tuning Techniques 10. Start the function generator Stand-Alone Controllers: Press Run to start the displacement command. Automated Controllers: In the Station Controls panel, click to start the Function Generator. 11. Observe the spool position signal on the Scope. If the Spool Position signal is too small to be properly displayed on the Scope window during tuning, increase the Function Generator panel’s Amplitude. If the Amplitude setting does not amplify the spool signal as expected, increase the P Gain. Stand-Alone Controllers: Tuning > P Gain Automated Controllers: A. In Station Setup window’s navigation pane click In the Inputs panel, click the Adjustment tab. C. In the Adjustment tab, increase the P Gain. Common Tasks B. . 114 Common Tasks FlexTest ™ SE How to Perform Advanced Tuning Techniques 12. Tune the inner loop. Stand-Alone Controllers: Setup > Output > Inner Loop Automated Controllers: In the Station Setup window’s Drive panel, click the Inner Loop tab. For optimal system response, tune the inner loop to be relatively less responsive and more stable than a typical outer loop. A. For Rate Input Selection, select Spool Position. B. Increase Inner Loop Gain until you see a little overshoot on the oscilloscope. Overshoot Ringing C. Slightly increase the Inner Loop Rate to eliminate this overshoot. When properly tuned, the waveform should be a square wave with rounded corners, having no overshoot. Too Low Correct Too High Common Tasks FlexTest ™ SE Common Tasks 115 How to Perform Advanced Tuning Techniques How to use error to tune I Gain Note This procedure requires the optional Scope, or an external oscilloscope. This procedure pertains to manually tuning the I Gain control using the Error signal. To perform this procedure for the displacement control mode, follow the procedure beginning on page 88, then use it as an alternate method to “Adjust the I Gain tuning control.” on page 93. To perform this procedure for the force control mode, follow the procedure beginning on page 94, then use it as an alternate method to “Adjust the I Gain tuning control.” on page 100. Setting up the Scope Set up the Scope to view Command and Error, and select a Trace Time of 5 seconds. Also, ensure Auto-Scale is on (it is on by default). Note Using a square wave To improve your view of the waveform, click the Rescale button to maximize the waveform on the display. Apply the tuning program with a square wave, and monitor the amplitude of the settled portion of the error signal. The settled portion of the error signal should be the same level for both segments, if not, adjust I Gain as required. Adjust I Gain Common Tasks Ideal Waveform 116 Common Tasks FlexTest ™ SE How to Perform Advanced Tuning Techniques Using a ramp Apply the tuning program with a ramp, and monitor the amplitude of the settled portion of the error signal. The settled portion of the error signal should be balanced, if not, adjust I Gain as required. Zero Upset recovery method Balance difference around zero Monitor the error signal, then disrupt the system by changing the command by adjusting the Setpoint control with the Dial. When you do this, the error should return to zero within 5–10 seconds. If not, increase the reset (I Gain) setting and repeat the procedure until the error zeros itself within a reasonable time period. Common Tasks FlexTest ™ SE Common Tasks 117 Common Tasks How to Perform Advanced Tuning Techniques 118 Common Tasks FlexTest ™ SE Menus Descriptions Chapter 4 Menus Descriptions This chapter describes the controls accessed from the front-panel menu buttons in detail. Contents Note Appendix B, “Menu Summaries” contains fold-out displays of each menu. Note When the controller is booted in the automated mode and used with PC-supervision, access to menus and controls changes. For more information, see “PC-Supervised Controllers” on page 35. FG 120 Setup 132 Status 178 Scope 181 Meters Tuning 194 Config 207 Limits 238 Log FlexTest ™ SE 187 240 Menus Descriptions 119 Menus Descriptions FG FG Note Menu This menu is available only when you boot the Controller in the Stand-Alone or Stand-Alone with Networking mode (Config > Local Settings > Networking > Boot Location). When booted in the Automated mode and used with PC-supervision, this menu is disabled. Use Station Manager to create program command. Use the FG menu to define program command. To begin, select a program type. Each program type has a unique set of parameters, which is reflected on the FG menu. Access Level: Operator. FG Type Monotonic Cyclic External Command Block Cyclic Sweep FG Types TYPE DESCRIPTION Monotonic The function generator ramps the command signal to the specified amplitude at the specified rate. Cyclic The function generator cycles the command signal at the specified amplitude and frequency. External command The Controller accepts program generation from an external source. Block cyclic The function generator plays out predefined blocks of cyclic commands. Sweep The function generator sweeps the command signal between specified frequency limits. 120 Menus Descriptions FlexTest ™ SE FG Menus Descriptions FG Menu ! Monotonic Use the Monotonic selection to define a ramp program. Monotonic Control Mode Rate Type Test Time End Level Type End Level Compensator Monotonic Menu ITEM DESCRIPTION Control Mode Specifies the control mode for the ramp. Rate Type Defines the command ramp in terms of Time or Rate. The ramp starts at the current actuator position and ends at the specified end level. The time/rate value can be changed while a test is running, but the end level type cannot. Test Time/Rate End Level Type End Level value Specifies whether the ramp is defined in terms of Time or Rate. When Time is selected, Test Time allows you to enter the ramp time. The longest test time permitted is 120 minutes (7200 seconds). When Rate is selected, Test Rate allows you to enter the ramp rate. Specifies the end level of the command as Absolute or Relative. The End Level value depends on the end level Type selection (Absolute or Relative). Absolute values are relative to zero. Relative values are relative to the current output. The end level value can be changed while a test is running, but the end level type can not. Compensator Specifies the compensator used by the Function Generator. The Compensators that may be available include Null Pacing, Peak Valley Control (PVC), and Peak Valley Phase (PVP). See “About Null Pacing and compensators” on page 161. FlexTest ™ SE Menus Descriptions 121 Menus Descriptions FG FG Menu!Cyclic Use the Cyclic selection to define a cyclic program. Cyclic Wave Shape Control Mode Target Setpoint Amplitude Frequency Compensator Preset Count Current Count Total Count Cyclic Menu (part 1 of 2) ITEM DESCRIPTION Wave Shape Specifies the program signal’s wave shape as Square, Ramp, Sine, Square Tapered, Ramp Tapered, or Sine Tapered. Tapered shapes will ramp from zero to amplitude when starting, and from amplitude to zero when stopping or holding. See “About Wave Shapes” on page 130. Control Mode Specifies the control mode used when the Function Generator starts. Typical selections are force and displacement. Target Setpoint Specifies the setpoint, or mean level, at which the program signal’s amplitude centers on. Amplitude Specifies the program signal’s amplitude. The specified amplitude applies equally to both sides of the Target Setpoint. Frequency Specifies the program signal’s frequency, or cycles per second. The maximum frequency may not exceed 20% of the Controller’s update rate. Compensator Specifies the compensator used by the Function Generator. The Compensators that may be available include Null Pacing, Peak Valley Control (PVC), and Peak Valley Phase (PVP). See “About Null Pacing and compensators” on page 161. Preset Count Specifies the number of cycles (or segments) the function generator will play out. You cannot enter half cycles or an odd number of segments. 122 Menus Descriptions FlexTest ™ SE FG ITEM Current Count DESCRIPTION Displays the number of cycles (or segments) that have played out. When this counter reaches the Preset Count value, the function generator stops. When the Current Count value and Preset Count value are equal, the Current Count value will automatically reset the next time Run is pressed. To manually reset this value, press the Rewind button or enter 0. Total Count FlexTest ™ SE Specifies the total number of cycles that have been played out since the last time the Rewind button was pressed. Menus Descriptions 123 Menus Descriptions Cyclic Menu (part 2 of 2) Menus Descriptions FG FG Menu!External Command Note This menu will be available only if an analog input signal is assigned as an external command. For more information, see page 218. Use the External Command selection to assign program attributes to a command signal that is generated externally, and delivered to the Controller as an analog input. Before the Controller can accept the external command, you must assign an analog input resource to the control channel when you define the configuration (Config > Edit Configuration > Anlg In; see page 218). External Command Control Mode Target Setpoint Soft Start/Stop Compensator External Command Menu ITEM DESCRIPTION Control Mode Specifies the control mode of the external command. The control modes available will be compatible with the dimension selected for the analog input resource used for receiving external command, allocated when the configuration was created. Target Setpoint Specifies the setpoint, or mean level, at which the dynamic portion of the external command begins and operates around. Soft Start/Stop Enable: Causes the external command to taper from zero to 100% over two seconds while starting, and from 100% to zero over two seconds when stopping. Disable: Uses 100% of the external command to be applied and removed when starting and stopping. Note Compensator You cannot vary the taper times of soft start and stop ramps created with the Controller. However, when operating in the automated mode, the Controller will accept customized taper times created by other applications. Specifies the compensator used by the Function Generator. The Compensators that may be available include PVC and PVP. 124 Menus Descriptions FlexTest ™ SE FG Note Block Cyclic and Sweep programming capabilities are included in the optional Advanced FG feature for the FlexTest™ SE Controller. To obtain this feature, contact your local MTS Sales Representative (or refer to “Technical Support” on page 11). Use the Block cyclic selection to create repeating blocks of program command. Block Cyclic Passes Level Type Block 1! Block 2! Block 3! Block 4! Block (n) Wave Shape Control Mode Mean/End Level 1 Amplitude/End Level 2 Frequency Compensator Count Block Cyclic Menu ITEM DESCRIPTION Passes Specifies the number of times in which all of the blocks will play out in series. To repeat continuously, enter 0. Level Type Specifies whether the cyclic program in a particular block is defined in terms of amplitude and mean, or in terms of end level values. Block (n) Specifies the cyclic program that will play out from a particular block. See “Block (n) Menu” on page 126. FlexTest ™ SE Menus Descriptions 125 Menus Descriptions FG Menu!Block Cyclic Menus Descriptions FG Block (n) Menu ITEM DESCRIPTION Wave Shape Specifies the program signal’s wave shape as Square, Ramp, Sine, Square Tapered, Ramp Tapered, or Sine Tapered. Tapered shapes will ramp from zero to amplitude when starting, and from amplitude to zero when stopping or holding. See “About Wave Shapes” on page 130. Control mode Specifies the control mode used when the Function Generator starts. Typical selections are force and displacement. End Level Type Absolute: The program is relative to zero. Relative: The program is relative to the starting command value (the value when the block begins). Mean/End Level 1 Mean: Specifies the mean value around which the block’s cyclic program centers. End Level 1: Specifies one of the end levels of the block’s cyclic program. Amplitude/End Level 2 Amplitude: Specifies the ± amplitude that operates around the specified mean of the block’s cyclic program. End Level 2: Specifies the remaining end level of the block’s cyclic program. Frequency Sets the frequency of the block’s cyclic program. Compensator Specifies the compensator used by the Function Generator. The Compensators that may be available include Null Pacing, PVC, and PVP. See “About Null Pacing and compensators” on page 161. Count Specifies the number of segments or cycles the current block will repeat before the next block is played out. To skip the current block, enter 0. 126 Menus Descriptions FlexTest ™ SE FG Note Block Cyclic and Sweep programming capabilities are included in the optional Advanced FG feature for the FlexTest™ SE Controller. To obtain this feature, contact your local MTS Sales Representative (or refer to “Technical Support” on page 11). Use the Sweep selection to define a sweep program. Sweep Sweep Settings ! Target Setpoint Amplitude Frequency <<Sweep Up>> <<Sweep Dwell>> <<Sweep Down>> WARNING Sweep Settings Control Mode Wave Shape Compensator Sweep Type Sweep Mode Sweep Rate Lower Frequency Upper Frequency Changes in Function Generator values made with hydraulic pressure on can result in unexpected actuator movement. Unexpected actuator movement can injure personnel and damage equipment. Always clear the actuator area before changing values. Sweep Menu (part 1 of 2) ITEM DESCRIPTION Sweep Settings Defines the sweep parameters. See the "Sweep Settings Menu" table below. Target Setpoint Specifies the setpoint, or mean level, at which the program signal’s amplitude centers on. Amplitude (±) Specifies the program signal’s amplitude. The specified amplitude applies equally to both sides of the Target Setpoint. Frequency Specifies the program signal’s frequency, or cycles per second. The maximum frequency may not exceed 20% of the Controller’s update rate. FlexTest ™ SE Menus Descriptions 127 Menus Descriptions FG Menu!Sweep Menus Descriptions FG Sweep Menu (part 2 of 2) ITEM DESCRIPTION <<Sweep Up>> Note When a sweep is in progress, the Controller highlights the Sweep Up, Sweep Dwell, and Sweep Down buttons according to the current sweep state. If the sweep transitions occur faster than four times per second, the highlighting may not be accurate. Starts an upward sweep toward the upper frequency limit. <<Sweep Dwell>> Holds the sweep at its current frequency. <<Sweep Down>> Starts a downward sweep toward the lower frequency limit. Sweep Settings Menu (part 1 of 2) ITEM DESCRIPTION Control Mode Specifies the control mode used when the Function Generator starts. Typical selections are force and displacement. Wave Shape Specifies the program signal’s wave shape as Square, Ramp, Sine, Square Tapered, Ramp Tapered, or Sine Tapered. Tapered shapes will ramp from zero to amplitude when starting, and from amplitude to zero when stopping or holding. See “About Wave Shapes” on page 130. Compensator Specifies the compensator used by the Function Generator. The Compensators that may be available include Null Pacing, Peak Valley Control (PVC), and Peak Valley Phase (PVP). See “About Null Pacing and compensators” on page 161. Sweep Type Defines the sweep type: Linear: Steps the sweep linearly by the Sweep Rate between the Upper and Lower Frequency. Logarithmic: Steps the sweep logarithmically by the Sweep Rate between Upper and Lower Frequency. 128 Menus Descriptions FlexTest ™ SE FG ITEM Sweep Mode DESCRIPTION Specifies the duration of the sweep. Single: Sweeps the frequency until it reaches a frequency limit and then dwells at that limit. Continuous: Sweeps the frequency continuously between frequency limits until stopped. Sweep Rate Sets the frequency sweep rate. Lower Frequency Sets the sweep command’s lower frequency limit. Upper Frequency Sets the sweep command’s upper frequency limit. FlexTest ™ SE Menus Descriptions 129 Menus Descriptions Sweep Settings Menu (part 2 of 2) Menus Descriptions FG About Wave Shapes Square The Function Generator provides the following wave shapes. 4.0000 2.0000 0.0000 0.3000 0.9000 1.5000 2.1000 2.7000 3.3000 Time (sec) Ramp 4.0000 2.0000 0.0000 0.3000 0.9000 1.5000 2.1000 2.7000 3.3000 Time (sec) Sine 4.0000 2.0000 0.0000 0.3000 0.9000 1.5000 2.1000 2.7000 3.3000 Time (sec) 130 Menus Descriptions FlexTest ™ SE FG Tapered square waves taper from 0% to 100% amplitude when starting, and from 100% to 0% when stopping or holding. 4.0000 2.0000 0.0000 2.0000 4.0000 Time (sec) Ramp tapered Tapered triangle waves taper from 0% to 100% amplitude when starting, and from 100% to 0% when stopping or holding. 4.0000 2.0000 0.0000 2.0000 4.0000 Time (sec) Sine tapered Sine waves taper from 0% to 100% amplitude when starting, and from 100% to 0% when stopping or holding. 4.0000 2.0000 0.0000 2.0000 4.0000 Time (sec) FlexTest ™ SE Menus Descriptions 131 Menus Descriptions Square tapered Menus Descriptions Setup Setup Note Overview This menu is available only when you boot the Controller in the Stand-Alone mode (Config > Local Settings > Networking). Use the Setup menu to assign attributes to the parameter set associated with the loaded configuration, and to manage parameter sets. A parameter set defines the operational characteristics of the resources in the configuration, such as calibration, tuning, and limit settings. You can save up to four parameter sets in the Controller. Access Level: See submenus. Typical Setup Menu. For a more complete listing, see Appendix B, “Menu Summaries”. Setup Open/Save Parms ! Output ! Sensor ! Dual Mode Sensor! Monitor (n) ! Aux Input 1 ! Analog Out ! Stabilization ! Digital Input (n) ! Digital Output (n) ! Open/Save Parms Select existing name Enter new name <<Open>> <<Save>> <<Delete>> Output (single valve) Polarity Valve Balance Dither Amplitude Dither Frequency Sensor Calibration ! Offset/Zero ! Limits ! Error Detectors ! Tuning ! Null Pacing ! PVC ! PVP ! Monitor (n) Readout Signal Polarity Gain Offset Aux Input (n) Calibration ! Offset/Zero ! Limits ! Stabilization Calibration ! Offset/Zero ! Limits ! Digital Input (n) State Trigger Action Digital Output (n) State Dual-Mode Sensor Error Detectors ! Null Pacing ! PVC ! PVP ! Dual-compensation ! 132 Menus Descriptions FlexTest ™ SE Setup Use this menu to create, load, save, and delete parameter sets. Select an existing or new parameter set with the Select Existing Name or Enter New Name controls, then choose the desired operation with the appropriate trigger (<< >>) control. Note: After entering a new name for an existing parameter set, be sure to press the Enter button on the face of the Controller. Access Level: Operator. Open/Save Parameters Select existing name Enter new name <<Open>> <<Save>> <<Delete>> File Menu ITEM DESCRIPTION Select Existing Name Allows you select an existing parameter set by entering its name. Enter New Name Allows you to enter a new name for the current parameter set. <<Open>> Allows you to select an existing parameter set by means of a browser. <<Save>> Allows you to save the current parameter set. <<Delete>> Deletes the specified parameter set. FlexTest ™ SE Menus Descriptions 133 Menus Descriptions Setup Menu!Open/Save Parameters Menus Descriptions Setup Setup Menu!Output Overview Use this menu to assign attributes to the drive signal (analog output), which is typically used to drive a servovalve. The controls and menus vary according to the type of valve driver with which your Controller is equipped. Both two-stage and three-stage valve driver menus are shown. For information about how perform servovalve adjustments, see “How to Set Servovalve Polarity” on page 63, and “How to Balance the Servovalve” on page 68, “How to Adjust Dither” on page 72, and “How to Perform Advanced Tuning Techniques” on page 101. Access Level: Tuning. Output (Single Valve Driver) Polarity Valve Balance Dither Amplitude Dither Frequency Output (Dual Valve Driver) Polarity Valve Balance1 Valve Balance 2 Dither Amplitude Dither Frequency Output (3-Stage Valve Driver) Polarity Valve Balance Dither Amplitude Dither Frequency Inner Loop ! Conditioner ! Service Port Output Inner Loop Inner Loop Gain Inner Loop Rate Rate Input Selection Conditioner Excitation Phase Offset Gain Polarity 134 Menus Descriptions FlexTest ™ SE Setup ITEM DESCRIPTION Polarity Sets the polarity of the valve drive signal, which determines whether the actuator extends or retracts in response to positive command. The Polarity cannot be changed when station pressure is on. Valve Balance Applies a voltage that compensates for minor mechanical imbalances in the servovalve. When adjusted properly, the actuator will not move when the valve driver output is zero. A second Valve Balance displays if you have dual valves. Dither Amplitude/ Frequency Adjusts the amplitude and frequency of dither. Dither is a small, high-frequency sinewave applied to the servovalve spool to keep it in motion and prevent it from sticking. Dither adjustment is probably needed if you note that a lowfrequency, low-amplitude test waveform is distorted at its maximum and minimum points. A guideline for dither adjustment is to increase amplitude until you can hear its effect on the servovalve, and then back off the adjustment until it is not audible. For dual valve configurations, adjusts dither in both valves simultaneously. Inner Loop For three-stage valve drivers, displays the Inner Loop submenu. See “Inner Loop Menu for Three-Stage Valve Drivers” on page 136. Conditioner For three-stage valve drivers, displays the Conditioner submenu. See “Conditioner Menu for Three-Stage Valve Drivers” on page 136. Service Port Output For three-stage valve drivers, displays the Service Port Output submenu. See “Conditioner Menu for Service Port Output Signals” on page 137. FlexTest ™ SE Menus Descriptions 135 Menus Descriptions Output Menu Menus Descriptions Setup Inner Loop Menu for Three-Stage Valve Drivers ITEM DESCRIPTION Inner Loop Gain Sets the inner loop’s proportional gain, which affects the inner loop response of the pilot valve. Inner Loop Rate Sets the inner loop’s derivative gain, which affects the servovalve’s stability at higher inner loop gain settings. Rate Input Selection Spool Position: Sets the feedback from the servovalve’s spool as the rate input. Most systems use this setting. Inner Loop Error: Sets the inner loop error as the rate input. This is the difference between spool position feedback and spool position command. Conditioner Menu for Three-Stage Valve Drivers ITEM DESCRIPTION Excitation Sets the amount of AC excitation that the conditioner applies to the servovalve’s inner spool. Phase Sets the phase for the demodulation circuitry that receives the sensor’s output. The sensor’s output rides on the conditioner’s excitation signal, which is an AC signal. An optimal phase shift yields the maximum DC output from the conditioner. Offset Sets the offset applied by the conditioner to the sensor’s output signal. Gain Sets the amount of gain applied by the conditioner to the sensor’s output signal. Gain values affect tuning settings and the noise sensitivity of the valve command. Polarity Sets the polarity of the spool output or inner loop output signal to Normal or Invert. Polarity cannot be changed when the station pressure is on. 136 Menus Descriptions FlexTest ™ SE Setup SIGNAL DESCRIPTION Valve Current The final output to the servovalve. The voltage represents the current output [10 V (DC) = 50 mA; standard]. Demod Filter Output The analog output of the demodulator prior to gain. Innerloop Command The input signal to the 3-Stage Valve Driver (the test program command). Spool Position The Conditioner Out signal summed with the Spool Zero signal. Spool Offset Signal that is summed with spool position to remove any DC offset. ±10 V represents ±4 V of zero summing. Preamp Output The raw AC input from the spool LVDT. Conditioner Out The conditioned feedback signal from the servovalve LVDT. Voltage Reference (5V) Internal board reference test only. Monitoring inner-loop signals Only the Spool Position signal is available to the Controller on-board Scope and Meters. To read any of the other inner-loop signals: 1. Connect a service calibration cable package (MTS part number 100-026-213) to connector J3 Service on the I/O carrier module. 2. Connect a DVM or oscilloscope to the appropriate BNC Output Channel on the service cable, depending on which slot the valve driver occupies in the I/O Carrier module. 3. Select: Setup > Output > Service Port Output. 4. From Service Port Output, select one of signals described in the Service Port Output Signals list. FlexTest ™ SE Menus Descriptions 137 Menus Descriptions Conditioner Menu for Service Port Output Signals Menus Descriptions Setup Setup Menu !PIDF Control Mode This selection (with labels such as “Displacement,” “Force,” or “Strain”) is a PIDF control mode, which is the typical control mode used for testing. With the associated menu, you can: • Adjust the calibration settings of the control mode’s sensor/ conditioner pair, to ensure measured and actual variables are the same • Adjust the software zero for convenience, and the electrical zero to compensate for changes in sensor’s calibrated output • Set up limits (error detectors and limit detectors) and actions to minimize the risk of equipment damage and to manage test events • Adjust PIDF and compensator tuning values to optimize system performance To create a PIDF control mode, you must allocate an input resource to receive sensor feedback. For more information, see page 218. Access Level: See submenus. control mode Calibration ! Offset/Zero ! Limits ! Error Detectors ! Tuning ! Null Pacing ! PVC ! PVP ! Setup Menu !PIDF Control Mode!Calibration Use the items on the Calibration menu to set the calibration values for the sensor (and conditioner) associated with the selected control mode. Each sensor requires calibration to ensure that its output accurately represents the condition it senses. The controls and menus vary according to the type of calibration you choose. Enter initial calibration values from the calibration sheets that accompany your system when you receive it, and recalibrate each sensor/conditioner pair as required. 138 Menus Descriptions FlexTest ™ SE Setup Access Level: Calibration. Calibration control mode Calibration ! Calibration Minimum Maximum Display Unit Polarity Resolution (encoder, Temposonic sensors only) Cal Type: Cal Types Cal Type: Gain/Linear Pre-amp Post-amp Total Gain Data Range From Data Range To << Reset >> Linearization Data ! Excitation Phase (AC only) <<Auto Zero>> Fine Zero Shunt Display (DC only) Shunt Ref (+) (DC only) <<Update>> (DC only) Shunt State (+) (DC only) FlexTest ™ SE Cal Type: Gain/Delta K Pre-amp Post-amp Gain Total Gain Delta K Cal Type: mv/v Pos Tension Neg. Compression Pos. Tension Excitation Balance Option (DC only) <<Auto Zero>> Cal Type: mv/v Pos Compress Neg. Tension Pos. Compression Excitation Balance Option (DC only) <<Auto Zero>> Excitation Balance Option (DC only) <<Auto Zero>> Fine Zero Shunt Display (DC only) Shunt Ref (+) (DC only) <<Update>> (DC only) Shunt State (+) (DC only) Fine Zero Shunt Display (DC only) Shunt Ref (+) (DC only) <<Update>> (DC only) Shunt State (+) (DC only) Fine Zero Shunt Display (DC only) Shunt Ref (+) (DC only) <<Update>> (DC only) Shunt State (+) (DC only) Menus Descriptions 139 Menus Descriptions For information about how to perform calibrations, see the FlexTest™ SE Service manual. Menus Descriptions Setup Calibration Menu (part 1 of 2) ITEM DESCRIPTION Minimum/Maximum Sets the sensor’s fullscale minimum and maximum values in engineering units, which determines the range of the sensor. Display Unit Selects the engineering units in which the sensor signal is displayed. The selected display unit will be used as the default display unit for the Scope and Meters. Polarity Sets the polarity of the feedback signal to change how the actuator responds to commands. Normal: A positive command can extend or retract the actuator, depending on system conventions. Invert: Reverses the actuator’s normal response. Resolution Sets the resolution of the sensor feedback signal. (Encoder, Temposonics only) For encoder resolution, the resolution value is supplied in the encoder documentation. For Temposonics III, refer to the product literature. For Temposonics II resolution, use the following formula to determine the resolution value: 1 Recirculations = −−−−−−−−−−−−−−−−−−−−−−−−−−−−−−−−−−−−−−−−−−−−−−−−−−−−−−−−−−−−−−−−−−−−−−−−−−−−−−−−−−−−−−−−−−−−−−−−−−−− Gradient × Frequency × Recirculations Gradient = Unique value supplied with the Temposonics sensor documentation. Gradient refers to the propagation speed of the wave in the waveguide. Frequency = Speed of the internal clock (typically 8 MHz). 140 Menus Descriptions FlexTest ™ SE Setup ITEM DESCRIPTION Recirculations = Unique value supplied with the Temposonics sensor documentation. Recirculation is the number of times the position of the magnet is checked before it is reported. You may have to adjust the recirculation numbers on the control dials in the sensor head to comply with the number supplied. Cal Type Sets the type of calibration used for the feedback signal. The calibration types displayed depend on the conditioner type selected: FlexTest ™ SE • Gain/Linearization: Select to use linearization data for calibration of sensors with full-range conditioners. This type of calibration allows use of the Advanced Sensor Data window to precisely edit range data points. See “Cal Type: Gain/Linearization” on page 142. • Gain/Delta-K: Select to use delta K for calibration of sensors. Allows you to specify the amount of delta K applied to the sensor’s output signal. Equally negative and positive inputs cause asymmetry in the sensor’s output signal. Delta K compensates for this asymmetry. See “Cal Type: Gain/Delta K” on page 144. • mv/v Pos Tension: Select when a sensor has been calibrated so that a positive output represents actuator retraction (tension). See “Cal Type: mv/v Pos Tension” on page 145. • mv/v Pos Comp: Select when a sensor has been calibrated so that a positive output represents actuator extension (compression). See “Cal Type: mv/v Pos Compression” on page 147. Menus Descriptions 141 Menus Descriptions Calibration Menu (part 2 of 2) Menus Descriptions Setup Cal Type: Gain/Linearization (part 1 of 2) ITEM DESCRIPTION Pre-amp/ Applies coarse gain to the pre-amp element of the conditioner’s gain function. Post-amp Applies fine gain to the post-amp element of the conditioner’s gain function. Total Gain Displays the total gain applied. This value is a function of Pre-Amp and Post-Amp values. Entering a total gain value here causes the Controller to enter the Pre-amp and Post-amp values required to achieve this value. Data Range From/To Sets the operating range over which the linearization values apply. Range is expressed as a percentage of the transducer’s fullscale value. << Reset >> Resets the conditioner and standard values to an perfectly linear, uncompensated state. Linearization Data Displays the Linearization Data table in which you can manually enter sensor calibration data. The table has three columns: • The left column contains incremental range values that span the full range of the selected sensor • The middle column, labeled Standard, contains the actual force or displacement values applied to the sensor during the calibration process • The right column, labeled Conditioner, contains the conditioner’s output in response to the applied Standard values The Controller uses the difference between the Standard and Conditioner values at each range increment to compensate for sensor non-linearity. Excitation Sets the excitation voltage applied to the sensor, which is usually specified by the sensor manufacturer. AC sensors typically require 10 V AC excitation, and DC sensors typical require 10 V DC excitation. 142 Menus Descriptions FlexTest ™ SE Setup Menus Descriptions Cal Type: Gain/Linearization (part 2 of 2) ITEM DESCRIPTION Phase (AC only) Adjusts the phase, or lag, of the sensor signal in relation to the excitation signal. Optimal phase adjustments produce the maximum output signal from the sensor. Phase values are typically between 30º - 45º. Balance Option/Coarse Zero (DC only) The conditioner may be configured so that this control behaves like a Coarse Zero, or a Bridge Balance (Balance Option). Course Zero: Performs fine (high-resolution) changes to conditioner’s zero reference. Bridge Balance: Typically used with strain gages, this control applies a bridge balance to offset any resistance imbalance in the sensor that would saturate the conditioner output at the strain gage’s null position. <<Auto Zero>> Zeroes the sensor signal and makes the current output the new zero reference. Fine Zero Applies a fine-zero (high-resolution) offset to the sensor’s output signal. Shunt Display Shunt Reference (+) <<Update>> Shunt State (+) See “Shunt Calibration” on page 148. FlexTest ™ SE Menus Descriptions 143 Menus Descriptions Setup Cal Type: Gain/Delta K (part 1 of 2) ITEM DESCRIPTION Pre-amp Applies coarse gain to the pre-amp element of the conditioner’s gain function. Post-amp Applies fine gain to the post-amp element of the conditioner’s gain function. Total Gain Displays the total gain applied. This value is a function of Pre-Amp and Post-Amp values. Entering a total gain value here causes the Controller to enter the Pre-Amp and Post-Amp values required to achieve this value. Delta K Applies Delta K to the sensor’s output signal. Delta K is a gain control affecting only the positive side of the sensor’s output, which is necessary because of inherent asymmetry in the output. Delta K compensates for this asymmetry. Excitation Sets the excitation voltage applied to the sensor, which is usually specified by the sensor manufacturer. AC sensors typically require 10 V AC excitation, and DC sensors typically require 10 V DC excitation. Phase (AC only) Adjusts the phase of the feedback signal based on the excitation signal. Optimal phase adjustments produce the maximum output signal from the sensor. Phase values are usually between 30º - 45º. Balance Option (DC only) The conditioner may be configured so that this control behaves like a Coarse Zero, or a Bridge Balance (Balance Option). Course Zero: Applies a coarse-zero (low-resolution) offset to the sensor’s output signal. Bridge Balance: Typically used with strain gages, this control applies a bridge balance to offset any resistance imbalance in the sensor that would saturate the conditioner output at the strain gage’s null position. <<Auto Zero>> 144 Menus Descriptions Zeroes the sensor signal and makes the current output the new zero reference. FlexTest ™ SE Setup Menus Descriptions Cal Type: Gain/Delta K (part 2 of 2) ITEM DESCRIPTION Fine Zero Applies a fine-zero (high-resolution) offset to the sensor’s output signal. Shunt Display Shunt Reference (+) <<Update>> Shunt State (+) See “Shunt Calibration” on page 148. Cal Type: mv/v Pos Tension (part 1 of 2) ITEM DESCRIPTION Neg. Compression Sets the gain relationship between the negative output of the sensor (in millivolts), to the associated amplified voltage in the conditioner (in volts), that causes the actuator to move in a compressive direction. This value is typically supplied with the calibration information that accompanies the system. Pos. Tension Sets the gain relationship between the positive output of the sensor (in millivolts), to the associated amplified voltage in the conditioner (in volts), that causes the actuator to move in a tensile direction. This value is typically supplied with the calibration information that accompanies the system. Excitation Sets the excitation voltage applied to the sensor, which is usually specified by the sensor manufacturer. AC sensors typically require 10 V AC excitation, and DC sensors typically require 10 V DC excitation. Phase (AC only) Adjusts the phase of the feedback signal based on the excitation signal. Optimal phase adjustments produce the maximum output signal from the sensor. Phase values are usually between 30º - 45º. Balance Option (DC only) The conditioner may be configured so that this control behaves like a Coarse Zero, or a Bridge Balance (Balance Option). Course Zero: Applies a coarse-zero (low-resolution) offset to the sensor’s output signal. Bridge Balance: Typically used with strain gages, this control applies a bridge balance to offset any resistance imbalance in the sensor that would saturate the conditioner output at the strain gage’s null position. FlexTest ™ SE Menus Descriptions 145 Menus Descriptions Setup Cal Type: mv/v Pos Tension (part 2 of 2) ITEM DESCRIPTION <<Auto Zero>> Zeroes the sensor signal and makes the current output the new zero reference. Fine Zero Applies a fine-zero (high-resolution) offset to the sensor’s output signal. Shunt Display Shunt Reference (+) <<Update>> Shunt State (+) See “Shunt Calibration” on page 148. 146 Menus Descriptions FlexTest ™ SE Setup ITEM DESCRIPTION Neg. Tension Sets the gain relationship between the negative output of the sensor (in millivolts), to the associated amplified voltage in the conditioner (in volts). This value is typically supplied with the calibration information that accompanies the system. Pos. Compression Sets the gain relationship between the positive output of the sensor (in millivolts), to the associated amplified voltage in the conditioner (in volts), that causes the actuator to move in a compressive direction. This value is typically supplied with the calibration information that accompanies the system. Excitation Sets the excitation voltage applied to the sensor, which is usually specified by the sensor manufacturer. AC sensors typically require 10 V AC excitation, and DC sensors typically require 10 V DC excitation. Phase (AC only) Adjusts the phase of the feedback signal based on the excitation signal. Optimal phase adjustments produce the maximum output signal from the sensor. Phase values are usually between 30º - 45º. Balance Option (DC only) The conditioner may be configured so that this control behaves like a Coarse Zero, or a Bridge Balance (Balance Option). Course Zero: Applies a coarse-zero (low-resolution) offset to the sensor’s output signal. Bridge Balance: Typically used with strain gages, this control applies a bridge balance to offset any resistance imbalance in the sensor that would saturate the conditioner output at the strain gage’s null position. <<Auto Zero>> Zeroes the sensor signal and makes the current output the new zero reference. Fine Zero Performs high resolution changes to conditioner’s zero reference. Shunt Display Shunt Reference (+) <<Update>> Shunt State (+) See “Shunt Calibration” on page 148. FlexTest ™ SE Menus Descriptions 147 Menus Descriptions Cal Type: mv/v Pos Compression Menus Descriptions Setup Shunt Calibration Shunt calibration is a method of verifying the calibration accuracy of dc sensor/conditioner pairs by shunting a precision resistor across one arm of the sensor’s Wheatstone bridge. The resulting imbalance provides a reference value, which is provided in the calibration sheet that accompanies the sensor. To perform a shunt calibration, see “How to Perform a Shunt Calibration” on page 79. Access level: Tuning. Shunt Calibration Controls ITEM DESCRIPTION Shunt Display Selects whether the shunt values are displayed in engineering units or volts. Shunt Reference (+) Displays the saved shunt reference value in engineering units. Initially, you enter this value from the calibration sheet that accompanies the sensor. When performing a shunt calibration, you compare the shunt value displayed on the meters (using the same units) to the value stored here. To update the shunt reference value, enter the values as desired. <<Update>> Makes the current shunt value the new Shunt Reference value. Shunt State (+) On: Shunts voltage across the Controller’s shunt resistor and displays the results in engineering units on the meter panel. Off: Removes voltage from the shunt resistor. 148 Menus Descriptions FlexTest ™ SE Setup PIDF Control Mode Offset/Zero With this menu you can apply a software offset to the conditioner’s output, changing its apparent zero reference. You can also adjust the conditioner’s electrical zero, changing its actual zero reference. Access Level: See individual controls. Offset/Zero <<Auto Offset>> Manual Offset <<Auto Zero>> Electrical Zero Electrical Zero Lock Offset/Zero ITEM DESCRIPTION <<Auto Offset>> Automatically zeroes the conditioner’s output to the current value by applying a software offset. Access Level: Operator. Manual Offset Permits manual application of a software offset to the conditioner’s output. Access Level: Operator. <<Auto Zero>> Automatically zeroes the conditioner’s output to the current value by adjusting the conditioner’s electrical zero. Access Level: Operator. Note Electrical Zero The Auto Zero and Electrical Zero controls are not available for the active control mode when hydraulic pressure is on. Permits manual adjustment of the conditioner’s electrical zero. Access Level: Operator. Electrical Zero Lock Lock: Disables the Auto Zero and Electrical Zero controls, preventing changes to the conditioner’s electrical zero. Unlock: Enables the Auto Zero and Electrical Zero controls, allowing changes to the conditioner’s electrical zero. Access Level: Calibration. FlexTest ™ SE Menus Descriptions 149 Menus Descriptions Setup Menu Menus Descriptions Setup About software offset With the software offset controls (Auto Offset and Manual Offset), you can zero the conditioner’s output without shifting the conditioner’s electrical zero reference. You can apply the software offset to accommodate specimen size, forces from test components, extensometers, cable length/resistance, environmental factors, and so forth. Software offset considerations Consider the following items before using the software offset controls: Offset diagram • Offset can be used on the current control mode when hydraulic pressure is on. • Since offset alters the feedback signal used by the Controller, any offset will be included in the closed-loop control calculations. • Applying offset to a saturated signal will not remove interlocks tripped by saturation. • Your usable range is limited in the direction you offset zero. The following figure illustrates the effect offset has on sensor/ conditioner signals. Controller/Application Conditioner Sensor Voltage Gain Electrical Zero Conditioner Voltage A/D Digital Signal Offset Offset is applied to the digital signal in the software. You specify offset in engineering units. Applying offsets You can apply a software offset to the feedback signal of the current control mode while hydraulic pressure is on. For instance, suppose you are in displacement control and you use manual command to position the actuator away from midstroke, where the sensor output is not zero. 150 Menus Descriptions FlexTest ™ SE Setup Menus Descriptions Using Auto Offset To automatically offset the feedback signal: 1. In the Setup menu, select Displacement. 2. In the Displacement menu, select Offset/Zero. 3. In the Offset/Zero menu click <<Auto Offset>>. The output will zero the conditioner’s current output at the current actuator position. Note Since your range is centered around the sensor’s calibrated electrical zero, offset limits the usable range in the direction you shift it. For example, if you are in a ±1-cm range, offsetting the signal +0.5 cm results in +0.5 cm of control range on the positive side, and –1.5 cm on the negative side. Using Manual Offset If the desired amount of offset is known, enter the value manually with the Manual Offset control. About electrical zero With the electrical zero controls, you can shift the sensor’s electrical zero reference. Displacement sensors and corresponding conditioners are typically calibrated so the conditioner’s feedback is zero volts at the middle of the actuator’s operating range. This position is known as the conditioner’s electrical zero. In some situations, you may want to shift the conditioner’s electrical zero. Electrical zero considerations WARNING Consider the following items before adjusting the electrical zero: • Electrical zero adjustments can be made on the current feedback when hydraulics are active. Actuator movement is possible when adjust electrical zero. Keep personnel and test equipment clear of the actuator’s path when adjusting electrical zero. FlexTest ™ SE • The shifted electrical zero position is not a calibrated zero position. • Your usable range is still limited by the sensor’s capacity. Menus Descriptions 151 Menus Descriptions Setup Electrical zero diagram The figure below illustrates the effect electrical offset has on sensor conditioner signals. Controller/Application Conditioner Sensor Voltage Gain Electrical Zero Conditioner Voltage A/D Digital Signal Offset Electrical zero adjustments are applied in the conditioner. You specify electrical zero adjustments in voltage. Applying electrical zero 152 Menus Descriptions You can adjust the electrical zero for the active control mode when hydraulics are on. FlexTest ™ SE Setup The following steps position the actuator in the new electrical zero location: 1. Apply hydraulics. 2. Select a displacement control mode and enable the Dial. 3. Adjust the Dial to move the actuator to the desired zero position. 4. Switch to a different control mode (be sure to leave manual command enabled). The following steps shift’s the selected conditioner’s electrical zero: 1. In the Setup menu, select Displacement. 2. In the Displacement menu, select Offset/Zero. 3. If necessary, in the Offset/Zero menu, set the Electrical Zero Lock control to Unlock. 4. In the Offset/Zero menu, click <<Auto Zero>>. Using Electrical Zero FlexTest ™ SE If you want to shift the conditioner’s electrical zero manually, use the Electrical Zero control. Menus Descriptions 153 Menus Descriptions Using Auto Zero Menus Descriptions Setup Setup Menu !PIDF Control Mode ! Limits Limits Use Limits to set the feedback signal’s limit values and specify the Controller’s response if these limits are exceeded You can use limits to: • Minimize the risk of injury to yourself and damage to the specimen and test equipment while installing the specimen. • Indicate when sensor levels that you define are detected. • Stop the test automatically when defined sensor levels are detected. Access Level: Operator. control mode Calibration ! Offset/Zero ! Limits ! 154 Menus Descriptions Limits Lower Limit Lower Action Upper Limit Upper Action FlexTest ™ SE Setup Menus Descriptions Limits Menu ITEM DESCRIPTION Lower Limit Sets the lower limit that the feedback signal must cross to trigger the Lower Action. The adjustment range equals 130% of the selected range’s full scale. Actions Adjusts the Controller’s response when a Limit trips. Note All actions except Disabled write a message to the log. Disabled: No action occurs. This setting disables the Limit indicator. Indicate: This setting turns the Limit indicator white. Station Power Off: Clamps the servovalve, turns off pressure at the hydraulic service manifold (HSM), and stops any program. Interlock: Turns off pressure at both the HSM and hydraulic power unit (HPU), and stops any program command. Program Interlock: Stops any program command, but does not turn off station hydraulic pressure. Program Stop: Stops any program command. Produces the same action as clicking the Program Stop button on the Station Controls panel. Program Hold: Holds all program command. Produces the same action as clicking the Hold button on the Program panel. Upper Limit Sets the upper limit that the feedback signal must cross to trigger the Upper Action. The adjustment range equals 130% of the selected range’s full scale. FlexTest ™ SE Menus Descriptions 155 Menus Descriptions Setup Signal limits The upper limit defines the most positive or least negative level for the limit detector. The lower limit defines the least positive or most negative level of the limit detector. The difference between the upper and lower limits represents the normal operating range of the sensor. When set correctly, a sensor output beyond this range represents a change in the test that deserves attention. Limits can also protect your equipment if a specimen breaks. If the sensor output exceeds either limit, the Controller performs the action that you assign with the limit action fields. If the sensor output exceeds a limit, and if the selected action is Hydraulics Off, the test stops and hydraulic pressure is turned off. upper limit detected upper limit = 1.1 cm 1 cm 0 cm -1 cm Setting limits specimen breaks lower limit = -1.1 cm Set the limits to establish a normal operating range for the sensor during a test, and then select an action you want performed if a limit is detected. For example, suppose you are testing a specimen using a displacement control mode. Also assume the LVDT has a displacement of 5 mm and you design the test to operate over the range of ±2 mm. Setting the limits for either the displacement signal at -2.1 mm and +2.1 mm should protect your system from damage. Unknown limits If you do not know what the limit setting should be for a test, you will need to run the test and monitor the sensor signal. Set up a Peak/ Valley or a max./min. meter to determine the maximum and minimum sensor values. While running the test, note the upper and lower values. Valid limits can be more than the upper value and less than the lower value. Note It is good practice to establish limits for at least one input signal to prevent damage to the test equipment if the servo control loop is broken (for example, if a cable becomes unplugged or the specimen breaks). The best input signal for this purpose is from the LVDT sensor. 156 Menus Descriptions FlexTest ™ SE Setup Error Detectors Use Error Detectors to set control mode error values and specify the Controller’s response if these limits are exceeded. You can use error detectors to warn you when the specimen is beginning to fail and to trigger an action to record data and/or halt the test. Access Level: Operator. control mode Calibration ! Offset/Zero ! Limits ! Error Detectors ! Error Detectors Inner Limit Inner Action Outer Limit Outer Action Error Detectors Menu ITEM DESCRIPTION Inner Limit Displays the error signal’s inner limit. A detector action can occur if the signal exceeds this limit. New values can be entered in the display boxes. Indicator colors show each detector’s status. Inner Action/Outer Action Outer Limit FlexTest ™ SE See “Actions” on page 155. Displays the error signal’s outer limit. A detector action can occur if the signal exceeds this limit. Menus Descriptions 157 Menus Descriptions Setup Menu !PIDF Control Mode ! Error Detectors Menus Descriptions Setup How error detectors work The error detector monitors the difference between the test command and a feedback signal. The amount of error indicates how closely the system tracks the test command. As a specimen changes (approaching failure), the amount of error will likely increase. The purpose of an error detector is to warn you that a specimen is beginning to fail, and/or to shut down the test before the specimen breaks (which can cause equipment damage). • If an error exceeds the level you set, the digital Controller performs the action you choose (disable, indicate, hydraulics off, interlock, program interlock). • An effective error detector requires the servo loop to be properly tuned. • For static or low-frequency tests, the error detector is typically set to a low level. • At high frequencies, the error detector is used to detect loss of closed-loop control. Set the error detector to a high level. • Use the minimum error to indicate an approaching failure. • Use the maximum error to perform an appropriate action. Error Error Error Error Feedback Feedback Test TestCommand Command Test Command Test Command At lower frequencies the error level is usually small. The feedback tracks the command more closely. 158 Menus Descriptions Feedback Feedback At higher frequencies the error level is large. The phase lag of the feedback creates a larger error. FlexTest ™ SE Setup Use this selection to adjust the individual PIDF controls of the selected control mode to optimize stability and accurate response to commands. The controls in this menu are identical to the controls accessed by pressing the Tuning button on front panel—they are in both places for the sake of convenience. For detailed information about tuning controls, see “Tuning” on page 194. For information about how to tune a PIDF control mode, see “How to auto-tune” on page 101, and “How to Manually Tune the Control Loop” on page 82. Access Level: Tuning. control mode Calibration ! Offset/Zero ! Limits ! Error Detectors ! Tuning ! FlexTest ™ SE Tuning P Gain I Gain D Gain F Gain S Gain FL Filter Filter Type Frequency Bandwidth Stabilization Filter ! Stabilization Filter Filter Type Filter Min. Filter Max. Menus Descriptions 159 Menus Descriptions Setup Menu !PIDF Control Mode ! Tuning Menus Descriptions Setup Setup Menu !PIDF Control Mode ! Null Pacing Null Pacing Use this selection to define the null compensation parameters that can be applied to the command signal. • Static null pacing holds the command at a steady state until the feedback reaches its target peak if the error becomes too large. • Dynamic null pacing slows the command frequency to allow the feedback more time to track the command if the error becomes too large. See “About Null Pacing and compensators” on page 161 for more about this compensation method. Access Level: Tuning. control mode Calibration ! Offset/Zero ! Limits ! Error Detectors ! Tuning ! Null Pacing ! Null Pacing SNP Error Tolerance SNP Timeout SNP Timeout Action DNP Error Tolerance DNP TImeout DNP Timeout Action WARNING Changing compensation values with hydraulic pressure on can result in unexpected actuator movement. A moving actuator can injure anyone in its path. Always clear the actuator area before changing values. 160 Menus Descriptions FlexTest ™ SE Setup ITEM DESCRIPTION SNP Error Tolerance Sets the maximum error, as a percentage of the command signal, allowed before Static Null Pacing holds the command. SNP Timeout Sets the time allowed for feedback to come within tolerance. SNP Timeout Action Sets the test station’s action when the Timeout is exceeded. See “Actions” on page 155. DNP Error Tolerance Sets the maximum error, as a percentage of the command signal, allowed before Dynamic Null Pacing slows the command. DNP Timeout Sets the time allowed for feedback to come within tolerance. DNP Timeout Action See “Actions” on page 155. About Null Pacing and compensators Null Pacing, PVC and PVP (see page 163) are compensators. Compensators monitor sensor feedback to ensure the command is applied completely to the specimen. For PVC and PVP, if the feedback is not reaching the commanded level, the compensator boosts the command to ensure the proper result. For example, suppose while programming a sine wave for a ±10 cm displacement, the LVDT feedback only achieves ±9 cm. A Peak Valley Control compensator will monitor the feedback and automatically boost the initial command to ensure that the LVDT feedback reaches the commanded ±10 cm. You can view the compensated command with the Controller’s Scope and Meters. Each type of compensator uses a different technique to achieve the commanded levels. Certain compensators work more effectively than others for specific applications. Types of Null Pacing FlexTest ™ SE There are two types of null pacing: • Static null pacing • Dynamic null pacing Menus Descriptions 161 Menus Descriptions Null Pacing Menu Menus Descriptions Setup How static null pacing works Amplitude If the error is too large, static null pacing holds the command at its segment boundaries, allowing the sensor feedback more time to reach its target peak. As the error comes within the user-specified Error Tolerance, static null pacing resumes the command. Amplitude SNP starts at end of Segment #1 SNP starts Tolerance Command SNP ends Command Error Feedback Feedback Time Segment #1 SNP Hold Time Segment #1 SNP Hold Segment #2 Static Null Pacing (SNP) How dynamic null pacing works If the error is too large, dynamic null pacing reduces the command frequency allowing the sensor feedback more time to track the command. The frequency decreases until either of the following occurs: 162 Menus Descriptions • The error comes within the user-specified Error Tolerance, at which time the command frequency starts increasing towards the command frequency. • The frequency decreases to the minimum frequency value (20% of the original frequency). The command is then held at this frequency as long as the error remains out of tolerance. This condition is also known as low cycle. FlexTest ™ SE Setup PVC Use this selection to define Peak Valley Control (PVC) compensation parameters. See “About PVC” on page 165 for more information. PVP Note PVC/PVP Peak Valley Phase compensation (PVP) an optional feature for the FlexTest™ SE Controller. To obtain this feature, contact your local MTS Sales Representative (or refer to “Technical Support” on page 11). Use this selection to define Peak Valley Phase (PVP) compensation parameters. See “About PVP” on page 166 for more information. Access Level: Tuning. control mode Calibration ! Offset/Zero ! Limits ! Error Detectors ! Tuning ! Null Pacing ! PVC ! PVC/PVP PVP ! Convergence Rate Sensitivity Adaptation State <<Reset>> FlexTest ™ SE Menus Descriptions 163 Menus Descriptions Setup Menu !PIDF Control Mode! PVC/PVP Menus Descriptions Setup PVC/PVP Menu ITEM DESCRIPTION Convergence Rate Sets how quickly compensation values are applied to converge the feedback and command signals. Larger values cause faster adaptation, but values that are too large result in instability and failure of the adaptation process. Sensitivity Determines how much the feedback signal must change, as a percentage of its peak-to-peak value, before a peak or valley is detected. This filters out noise and minimizes invalid peak or valley detection. Adaptation State Hold: Continues to use current values but stops adapting new values. Resume: Adapts and continuously updates compensation values. <<Reset>> WARNING Clears acquired compensation values and restarts the adaptation process. Pressing Reset with compensation applied may produce a spike in the feedback. Clicking Reset with hydraulic pressure on can result in unexpected actuator movement. A moving actuator can injure anyone in its path. Always clear the actuator area before clicking reset. 164 Menus Descriptions FlexTest ™ SE Setup Peak Valley Control (PVC) compensation monitors cyclic command feedback for any amplitude roll-off or mean-level divergence. PVC performs the following: • Increases the command amplitude if it detects amplitude roll-off in the feedback signal. • Adjusts the mean command level if it detects mean-level divergence in the feedback signal. Note For best results when using PVC, set the I Gain as low as possible on the control mode being compensated. 5 4 3 2 1 Mean Level Error cm 0 -1 Initial Feedback -2 -3 Test Command Amplitude Error -4 -5 FlexTest ™ SE Menus Descriptions 165 Menus Descriptions About PVC Menus Descriptions Setup About PVP Peak Valley Phase (PVP) compensation improves the amplitude and phase tracking of the command and sensor feedback. PVP performs the following: • Alters the command phase to correct for phase lag. • Increases the command amplitude to correct for amplitude roll-off. • Adjusts the mean command level if it detects mean-level divergence in the feedback signal. Basically, the PVP is a phase compensator cascading into a peak/valley compensator. The peak/valley algorithm is identical to the one used by PVC. PVP Compensator Segment Generator 166 Menus Descriptions Phase Compensator Peak Valley Compensator Actuator PIDF FlexTest ™ SE Setup This selection is a Channel-Limited-Channel (CLC) control mode, which uses one input channel to control the servo loop (Active P gain) while using a second input channel (Limiting P gain) to restrict the active channel. The CLC control mode is the typically used for specimen installation. With the associated menu, you can: • Set up error detector settings and actions to minimize the risk of equipment damage and to manage test events • Adjust Active and Limiting P gain (and associated limits) and compensator tuning values to optimize system performance • Note: Compensators are typically not used for CLC control modes. To create a CLC control mode, you must define at least two PIDF control modes, and enable the CLC control on the valve driver resource. For more information, see page 217. Access Level: See submenus. CLC Error Detectors ! Tuning ! Null Pacing ! PVC ! PVP ! CLC Control Mode ITEM DESCRIPTION Error Detectors, Null Pacing, PVC/PVP See “Error Detectors” on page 157, “Null Pacing” on page 160, and “PVC/ PVP” on page 163. Tuning See “Tuning controls for a CLC control mode” on page 204. FlexTest ™ SE Menus Descriptions 167 Menus Descriptions Setup Menu !CLC Control Mode Menus Descriptions Setup Setup Menu!Dual Compensation Mode This selection is a dual-compensation control mode, which uses two control modes that operate simultaneously: A compensator control mode, and a base control mode. The compensator control mode uses secondary feedback from a sensor not typically suitable for PIDF control to provide command compensation, and has two tuning controls, Conversion Gain and Integration Gain. The base control mode receives primary feedback from a sensor that is suitable to maintain PIDF control. The naming convention is: Compensator control mode/Base control mode. With the associated menu, you can: • Set up error detector settings and actions to minimize the risk of equipment damage and to manage test events • Adjust Conversion and Integration gain to optimize system performance To create a dual-compensation mode, you must allocate an input resource to an existing control mode. For more information, see page 220. Access Level: See submenus. Note The sample menu shows a Analog In/Load dual-compensation mode, but dual compensation mode can be created from any two input resources. Analog In\Force Error Detectors! Null Pacing! PVC! PVP! Dual Compensation! 168 Menus Descriptions FlexTest ™ SE Setup ITEM DESCRIPTION Error Detectors, Null Pacing, PVC/PVP See “Error Detectors” on page 157, “Null Pacing” on page 160, and “PVC/ PVP” on page 163. Dual Compensation Conversion Gain: The Conversion Gain controls how the command from the function generator, which has a different dimension than the command required by the PIDF Controller, is converted to command for the PIDF Controller. Integrator Gain: The Integrator Gain improves static accuracy when the command is paused or stopped. Dual-compensation example Observe the Force/Displacement dual-compensation control mode in the example below. Programming and compensation are based on force feedback, while the PIDF Controller uses displacement feedback to maintain closed-loop control. Compensated Command (in Disp.) Conversion Gain Command (in Force) Compensator + Disp. Full Scale ---------------------------------------Force Full Scale PIDF Integrator Integrator Gain Primary Feedback to PIDF (Displacement) Secondary Feedback to Compensator (Force) Dual-compensation control modes compensate based on one feedback signal, but maintain closed-loop control with a second (usually less noisy) feedback signal. FlexTest ™ SE Menus Descriptions 169 Menus Descriptions Dual-Compensation Control Mode Menus Descriptions Setup Conversion Gain The conversion gain controls how the “force” command from the function generator is converted to a “displacement” command for the PIDF Controller. The output of the compensator is a force signal which is multiplied by the following equation to create the displacement signal used to program the inner PIDF Controller: Φυλλ Σχαλε ∆ισπλαχµεντ Χονϖερσιον Γαιν ςαλυε × ∃ −−−−−−−−−−−−−−−−−−−−−−−−−−−−−−−−−−−−−−−−−−−−−−−−−−−−−−−− ∀ # Φυλλ Σχαλε Φορχε ! The value you should enter for Conversion Gain depends on the specimen stiffness. Integrator Gain The Integrator Gain acts the same as the I Gain of the PIDF Controller. Its purpose is to improve the static accuracy when the command is paused or stopped. Since the Peak Valley Control (PVC) compensator also corrects the mean, the Integrator Gain is disabled when the test is running and this compensator is active. Calculating conversion gain The following methods can be used to calculate the proper Conversion Gain setting (assume we are using a Force/Displacement dualcompensation control mode): Method 1 1. Using the function generator, excite the specimen in displacement control using a small amplitude sine wave. 2. Configure two Peak/Valley meters, one to measure the force feedback and the other to measure the displacement feedback. 3. Calculate specimen stiffness (K) as: ( Force Peak Force Valley ) K = −−−−−−−−−−−−−−−−−−−−−−−−−−−−−−−−−−−−−−−−−−−−−−−−−−−−−−−−−−−−−−−−−−−−−−−−−−−−−−−−−−−−−−−−−−−−−−−−−−−−−−−−−−−−−−−− − ( Displacement Peak Displacement Valley ) 4. Calculate the Conversion Gain value as: 1 Full Scale Force Conversion Gain = ∃ ----∀ × ∃ ----------------------------------------------------------------∀ # K! # Full Scale Displacement! Note For a more conservative estimate, use 80% of the calculated Conversion Gain value. When using asymmetrical full-scale values, enter the difference between the values. 170 Menus Descriptions FlexTest ™ SE Setup FlexTest ™ SE 1. Select the Force/Displacement dual-compensation mode, and enable the desired compensator on the function generator. 2. Set the Conversion Gain to a minimum level. 3. Using the function generator, excite the specimen in displacement control using a small amplitude sine wave. 4. Monitor the force feedback with the scope or peak/valley meter and gradually increase the Conversion Gain until the force feedback is between 80–100% of the commanded value. Menus Descriptions 171 Menus Descriptions Method 2 Menus Descriptions Setup Setup Menu! Monitor (n) Use this selection to assign attributes to station signals for optimal display by external readout devices, such as oscilloscopes or meters. To create a readout channel, you must allocate a readout channel resource in the configuration file. For more information, see page 224. Access Level: Operator. Readout (n) Readout Polarity Gain Offset Readout Menu ITEM DESCRIPTION Readout Signal Selects the signal you wish to make available for monitoring. The signals are available on the selected Monitor 1 or 2 BNC connector on the front panel of the Controller. For information of the list of available station signals, see “Station signals” on page 191. Gain Sets the amplification applied to the readout signal. The default is 1, which means that the full scale of the selected signal is scaled to 10 V. Polarity Allows you to invert the readout signal. Offset Adjusts the zero reference point of the readout signal. The default setting is 0, which references the signal to 0 volts. The offset is applied to the converted value in volts. 172 Menus Descriptions FlexTest ™ SE Setup Use this selection to assign attributes to the stabilization input. A stabilization input is an input resource that is integrated into the Controller’s composite command to act as a stabilizing factor. To create a stabilization resource, you must allocate an input resource in the configuration file. For more information, see page 218. Access Level: See submenus. Stabilization Calibration! Offset/Zero! Limits! Stabilization Menu ITEM DESCRIPTION Calibration See page 138. Offset/Zero See page 149. Limits See page 154. FlexTest ™ SE Menus Descriptions 173 Menus Descriptions Setup Menu !Stabilization Menus Descriptions Setup Setup Menu! Digital Input (n) Use this selection to define each digital input’s Trigger and resulting Action. A digital input is a signal received by the Controller from another device. You can set the Controller to recognize a specific change in state of the digital input, or trigger, and to perform a specific action when the trigger occurs. Access Level: Operator. Note Channel Low and Channel High trigger modes do not support the following Actions: Indicate, Program Stop, and Program Hold. Digital Input (n) State Trigger Action Digital Input Menu (part 1 of 2) ITEM DESCRIPTION State True: The digital input is high. False: The digital input is low. Trigger Defines the change in state of the digital input signal needed to trigger an Action. High/Low: Triggers when the input goes from a high state to a low state. Low/High: Triggers when the input goes from a low state to a high state. Either: Triggers when the input either goes from a low state to a high state or from a high state to a low state. Channel Low: Triggers when the channel goes low and remains triggered as long as the channel stays low. Channel High: Triggers when the channel goes high and remains triggered as long as the channel stays high. None: Disables the Action. 174 Menus Descriptions FlexTest ™ SE Setup Menus Descriptions Digital Input Menu (part 2 of 2) ITEM DESCRIPTION Action Sets a trigger response: Note FlexTest ™ SE All Actions except Disabled write a message to the Log. • Disabled: No action occurs. • Indicate: Writes a message to the Log. • Station Power Off: Clamps the servovalve, turns off pressure at the hydraulic service manifold (HSM), and stops any program. • Interlock: Turns off pressure at both the HSM and hydraulic power supply (HPS), and stops any program command. • Program Interlock: Stops any program command, but does not turn off station hydraulic pressure. • Program Stop: Stops any program command. Produces the same action as clicking the Stop button on the Program panel. • Program Hold: Places a hold on any program command. Produces the same action as clicking the Hold button on the Program panel. Menus Descriptions 175 Menus Descriptions Setup Setup Menu! Digital Output (n) Use this selection to define when the Controller transmits digital output signals, and to define the polarity of digital output signals. A digital output is a signal transmitted by the Controller to another device. You can set the Controller to recognize specific station events, including the reception of specific digital signals, which result in the transmission of digital output signals. Access Level: Operator. Digital Output (n) Assignment Polarity State Digital Output Menu (part 1 of 2) ITEM DESCRIPTION Assignment Defines the change in the state of station events that must occur before the Controller sets the state of the digital output high (or, if polarity is reversed, low). Interlock: Sets the digital output high when any interlock occurs. Run/Stop: Sets the digital output high when the program is started or stopped (This may be caused by the operator pressing the Run and Stop buttons, or by the reception of a digital input). Hold: Sets the digital output high when the program goes into a hold state (This may be caused by the operator pressing the Hold buttons, or by a digital input). Program Interlock: Sets the digital output high when a program interlock occurs. This may be caused by a limit or error detector, or by a digital input. Dig In (n): Sets the digital output high when the Controller receives a specific digital input signal. 176 Menus Descriptions FlexTest ™ SE Setup Menus Descriptions Digital Output Menu (part 2 of 2) ITEM DESCRIPTION Polarity Sets the polarity of the selected Digital Output when assigned. Normal: Active High. Invert: Active Low. State Displays the current state of the selected Digital Output. If the Digital Output is not assigned, and not in use by another application (such as MultiPurpose TestWare), you can change its state. True: The digital output is high. False: The digital output is low. FlexTest ™ SE Menus Descriptions 177 Menus Descriptions Status Status Panel The Status panel displays general information about what is currently loaded into the Controller, including the parameter set (an attribute of the configuration file), the user access state, the active application, the current running time, and if available, counter information. Sample Status Panel (Stand-alone Controller) Menu Use this menu for ready access to many frequently used Controller features, such as: • Changing access levels • Selecting a control mode and controlling application • Adjusting Set Point and Span • Shutting Down • Rebooting Access level: Operator. Status Access Level Application! Control Mode! Setpoint Span <<Shut Down>> <<Reboot>> <<Save Def. Pnls.>> <<Save Panels>> <<Restore Panels>> Placement 178 Menus Descriptions FlexTest ™ SE Status ITEM DESCRIPTION Access Level This control determines your ability to access and change tuning, calibration, and configuration settings. (This control also exists in the Config menu). To access many of the controls in the Config menu, you must be at the Configuration access level. Required access level: Operator or higher. Note Operator After making higher level changes, it is a good idea to always return to the Operator level. This is the default user level. This level does not need a password and has the fewest privileges. Tuning Enter this level to make tuning adjustments. Calibration Enter this level to modify calibration parameters. Configuration Enter this level to make changes to various controls in the Config menu, including all the controls in the Edit Configuration and Edit Hardware submenus. Exclusive Control This is an optional feature available for PC-supervised Controllers. This control, in conjunction with the Exclusive Control on the interface of the Station Manager program, determine whether the Controller or the Station Manager program performs closed-loop control of the system. For more information, see “PC-Supervised Controllers” on page 35. Application Selects the controlling application, that is, the application that generates program command and responds to the Controller’s Program controls (Rewind, Run, Hold, and Stop). Function Generator: The FG controls provide program command. Tuning: The Tuning controls provide program command. Control Mode Sets the control mode when using the Dial for manual control. Setpoint Specifies the offset from zero. Setpoint is the static portion of the program command, that is, the base from which the program command’s amplitude content centers on. FlexTest ™ SE Menus Descriptions 179 Menus Descriptions Status Menu (part 1 of 2) Menus Descriptions Status Status Menu (part 2 of 2) ITEM DESCRIPTION Span Changes the amplitude (span) of the program command. <<Shut down>> Saves panel changes to the configuration file automatically, prompts you to save parameter set changes if any have been made, then closes all applications and prompts you to remove power from the Controller. <<Reboot>> Saves panel changes to the configuration file automatically, prompts you to save parameter set changes if any have been made, then closes all applications and restarts the Controller. <<Save Def. Pnls.>> Default panel settings are the settings of the FG, Scope, Meters, and Log menus, and the Recall buttons. Default panel settings are stored in the configuration file in an attribute set. Pressing <<Save Def. Pnls.>> saves the default panel settings. The Controller also automatically saves default panel settings when you: • Shut down • Reboot • Run a test (press Program Run) after changing the FG Type, Cyclic Preset Count, Block Cyclic Control Mode, or Block Cyclic Count Pressing <<Save Def. Pnls.>> allows you to update the default panel settings at any time, without shutting down or rebooting, or changing function generator parameters. Default panel settings are automatically restored when you load or reboot the Controller. <<Save Panels>> Pressing <<Save Panels>> saves the current panel settings in an attribute set in the configuration file that is independent of default panel settings. Saved panel settings, like default panel settings, are the settings of the FG, Scope, Meters, and Log menus, and the Recall buttons, stored in the configuration file. Saved panel settings are restored only when you press the <<Restore Panels>> in the current or subsequent sessions. <<Restore Panels>> Restores the panel settings that are saved with the <<Save Panels>> control. Placement Moves the Status panel around the display. 180 Menus Descriptions FlexTest ™ SE Scope Note Panel The Scope is an optional feature for the FlexTest™ SE Controller. To obtain this feature, contact your local MTS Sales Representative (or refer to “Technical Support” on page 11). The Scope provides an analog display of digital signals being processed by the Controller. The scope has two formats, one for Time and another for X-Y. Use the scope to: • Display up to two channels simultaneously (Time) • Plot one channel versus another channel (X-Y). Sample Scope Display Menu Use the Scope menu to select the signals you wish to view, and to customize the Scope panel. Access level: Operator. Scope Control Sweep Mode Plot Mode Trace Time Trace 1 Settings! Trace 2 Settings! Auto-Scale! Placement FlexTest ™ SE Menus Descriptions 181 Menus Descriptions Scope Menus Descriptions Scope Scope Menu (part 1 of 2) ITEMITEM DESCRIDESCRIPTIONPTION Control Starts and stops the signal trace. Sweep Mode Determines how the Scope’s signal trace sweeps across the display. Continuous: Starts the Scope with a continuous trace sweep. The scope continues to run until you stop the signal trace. The Scope starts a continuous sweep as soon as it is opened. Single-sweep: Starts the Scope with a single trace sweep. When the trace fills the display, the Scope stops. To acquire another sweep press the <Enter> button. Program: Starts the Scope with a continuous trace sweep when the test program starts. The trace stops when the test program stops. Plot Mode Sets the type of plot the Scope will display. Time: Plots up to two signals against time. X/Y: Plot two signals against each other. Trace Time Sets the length of time for a trace to cross the Scope display. You can select a maximum Trace Time of up to 100 seconds and a minimum of 0.01 seconds (the default is 2.0 seconds). Trace 1/2 Settings ! Displays the options available for the currently selected trace. Signal Selects the signal you want to monitor. For more information, see “Station signals” on page 191. Units/Div Sets the distance between the grid lines on the display. Offset Changes the zero reference (mid-point between minimum and maximum) of the signal from the center of the display. Display Mode Sets the display in terms of engineering units or volts. Display Unit If the Display Mode is set to engineering units, this control specifies the type of engineering units desired. Otherwise, the display units are shown as volts. Display Resolution Sets the number of digits the Scope displays. Auto-Scale ! 182 Menus Descriptions Displays the options available for scaling trace signals for optimal display. FlexTest ™ SE Scope ITEMITEM DESCRIDESCRIPTIONPTION Auto-Scale Turns auto-scaling on or off. By default, auto-scaling is turned on. When auto-scaling is on, the maximum value for the y-axis will be determined from the data, so that the entire trace is visible. Autoscaling increases the maximum value as needed, but never decreases the maximum. If you enter a value for the maximum value, auto-scaling will turn off, and manual scaling will be in effect. <<Rescale>> When in the time plot mode, this control adjusts the units/division to improve the waveform display. For instance, to make an off-scale waveform fit the display, it increases the units/division. To maximize a compressed waveform, it decreases the units/division. While Autoscale continually adjusts the spacing to keep the waveform visible, Rescale makes a single adjustment affecting the values currently displayed. Same Scale Locks the scaling of the displayed signals together. If the scale is changed on one (by Auto-scaling or by manual adjustment), the scaling for the other signal is adjusted similarly. Auto-Scale Mode Specifies whether the Auto-scale control affects sensitivity and offset, or just sensitivity. Sens(itivity) & Offset--allows the Auto-scale (and Rescale) controls to change both the Y-axis units/division and the offset. Sensitivity--allows the Auto-scale (and Rescale) controls to change only the Y-axis units/division. Placement FlexTest ™ SE Moves the Scope panel around the display. Menus Descriptions 183 Menus Descriptions Scope Menu (part 2 of 2) Menus Descriptions Scope Scaling traces If the display is off-scale or too compressed, you can click <<Rescale>> to quickly adjust the units/division and offset. This scales the scope display to the minimum and maximum values of the data being collected. <<Rescale>> can be clicked whether Auto Scale is enabled or not. Once the waveform is scaled to fit, enable Auto Scale to continue adjusting the units/division and offset automatically. Note These controls affect the display, not the waveform. When you select a signal the scope scaling defaults to 100% of the signal range. To change the scaling for the selected trace, enter the desired values in the Units/Div and Offset controls in the individual Trace Settings menus. Signal prior to auto scaling peaks are off-scale Signal after auto scaling grid is scaled (peaks fit) 184 Menus Descriptions FlexTest ™ SE Scope The Offset control in the Trace Settings menu defines the grid’s midpoints. Applying an Offset shifts where zero is on the display. For example, suppose your scope is set up so that the upper scale is 8 mm, the lower scale is -8 mm, and Offset is set to 0 mm. Changing the Offset to 1.0 mm shifts the upper range to 9 mm and the lower range to -7 mm. Changing the Offset also shifts the signal trace down on the display grid to reflect the new zero position. No Offset Zero reference at midpoint 1.0 mm Offset 1.0 mm now at midpoint Zero reference shifts down X-Y plot mode The X-Y plot mode displays one signal on the horizontal axis, and another signal on the vertical axis. Using the X-Y plot mode to plot load versus displacement displays a Lissajou figure, as shown to the right. Lissajou figures are useful for displaying feedback hysteresis. FlexTest ™ SE Menus Descriptions 185 Menus Descriptions Offsetting traces Menus Descriptions Scope Panning traces The scope temporarily records the trace up to 10 times the time of the time-base of the trace. To review trace history (look back in time), simply stop the trace, press the Scope menu button to bring focus to (highlight) the scope, then enable the Dial and rotate it counter-clockwise. Figure B Figure A 1. To view trace history, stop the trace (Scope > Control > Stop) and bring focus to the scope… 3. …and the trace history will appear. Εναβλεδ 2. Enable then rotate the Dial counter-clockwise… Time markers in the pan display When panning traces, time markers will be present at the lower lefthand and lower right-hand corners of the display. The right-hand number will be at or near zero when the trace is stopped (zero is last point acquired). The numbers becomes increasing negative the further you pan into trace history. In Figure A (above), the trace was stopped while the waveform was in progress. In Figure B (which is same waveform), the beginning of the waveform occurred approximately 7.5 seconds before the trace was stopped. 186 Menus Descriptions FlexTest ™ SE Meters Panel Use the Meters panel to monitor station signals. You can choose to display a timed meter, a Peak/Valley meter, a mean/amplitude meter, or a running max/min meter. Sample Meter Display Overview Use the Meters menu to select the signals you wish to view, and to customize the Meters panel. Access level: Operator. Meters <<Add Meter>> <<Reset Meters>> Control Meter 1! Meter 2! Meter 3! Meter 4! Placement Font Size Note FlexTest ™ SE If the Meter is monitoring a command signal that has multiple control modes, it will display the dimension and units of the current mode. Menus Descriptions 187 Menus Descriptions Meters Menus Descriptions Meters Meter Menu (part 1 of 3) ITEMITEM DESCRIDESCRIPTIONPTION <<Add Meter>> Adds a new meter to the bottom of the meter panel. The maximum number of meters is 16. <<Reset Meters>> Clears all active meters so new values can be acquired. Control Run: Starts displaying data on all meters. Stop: Stops updating the meters. Program Control: Starts displaying data on all meters when the test program starts. The meters stop updating when the test program stops. Meter (n) ! 188 Menus Descriptions Displays the options available for the currently selected meter. FlexTest ™ SE Meters Menus Descriptions Meter Menu (part 2 of 3) ITEMITEM DESCRIDESCRIPTIONPTION Meter Type Timed Meter: The timed meter displays signal values at user-defined intervals. Data Points Time Increments Peak/Valley Meter: The Peak/Valley meter displays the highest peak value and the lowest valley value for each cycle monitored. Peaks Valleys Mean/Amplitude Meter: The mean/amplitude meter displays the midpoint value and the difference between the peak and valley values for each cycle monitored. Running Max/Min Meter: The running max/min meter displays the highest and lowest values attained while the meter is running. Amplitude Mean True Max 1st Max Not Max 1st Min 2nd Min True Min FlexTest ™ SE Menus Descriptions 189 Menus Descriptions Meters Meter Menu (part 3 of 3) ITEMITEM DESCRIDESCRIPTIONPTION Signal Selects the signal the meter will monitor. Note Time and Segment Count signals are not available for Peak/ Valley, Mean/Amplitude, and Max/Min meters If auxiliary input channels have been defined for the station, auxiliary input signals will also be available. If the conditioner gain of the selected signal is set to zero, the Meters will not be able to monitor the signal. Display Mode Selects engineering units or volts. If Volts is selected, you can use the list box to select mV or V. Display Unit If the Display Mode is set to engineering units, this control specifies the type of engineering units desired. Otherwise, the display units are shown as volts. Display Resolution Sets the number of digits used to display the meter output (from one to ten). Sensitivity Specifies the amount the signal must change before the data signal is updated (Peak/Valley and Mean/Amplitude meters only). <<Add Meter After>> Adds a new meter below the currently selected meter. This control is disabled if 16 meters already exist. <<Delete Meter>> Deletes the current meter. This control is disabled if there is only one meter. <<Shift Meter Up>> Moves the selected meter up one row in the meter panel, where Meter 1 is at the top of the display. <<Shift Meter Down>> Moves the selected meter down one row in the meter panel, where Meter 16 (if created) is at the bottom of the display. Placement Moves the meter panel around the display. Font Size Toggles the size of the meter font display between small or large fonts. Small font is the default. 190 Menus Descriptions FlexTest ™ SE Meters The following table lists station signals that are typically available to the on-board Scope and Meters. These signals may also be available to the front panel Monitor 1 and 2 connectors—provided they have been configured as readout channels. When operating the Controller in the automated mode, the following signals are also available to the MultiPurpose TestWare and Basic TestWare data acquisition processes, with the exception of Command and Compensated Command Note Time, Hourly Rollover Time, Running Time, and Segment Count are not available for the Scope, Peak/Valley, Mean/Amplitude, or Max/ Min meters. Station Signals (part 1 of 2) ITEMITEM DESCRIDESCRIPTIONPTION Time Displays the time reference signal derived from the internal clock that increments continually. This signal exists to support data acquisition by test applications. It is not practical to monitor the Time signal. Hourly Rollover Time Displays the time reference signal derived from the internal clock that resets every hour. Like the Time signal, this signal exists to support data acquisition by test applications, and is not practical to monitor the Hourly Rollover Time. Running Time Displays the accumulated time in which the test program is running. The Rewind control resets this value, the Stop and Hold controls do not. Pressing Run after pressing Stop or Hold causes this value to resume incrementing. Output Displays the signal that goes into the valve driver in volts. Sensor signals Displays various types of sensor feedback signals in engineering units. Force and Displacement are typically sensor signals. Segment Count Displays the number of segments played out so far in the selected channel. When monitoring signals with a meter, this signal is only available for Timed meters. Command Displays the command signal in engineering units. This signal can be internally generated by the Controller or externally generated by an analog input. FlexTest ™ SE Menus Descriptions 191 Menus Descriptions Station signals Menus Descriptions Meters Station Signals (part 2 of 2) ITEMITEM DESCRIDESCRIPTIONPTION Compensated Command Displays the command signal after going through a compensator (i.e., Adaptive Compensator) in engineering units. This does not apply to null pacing. If null pacing is used, this signal is the same as the command signal. Error Displays the control mode error signal in engineering units. This signal shows the difference between the Channel Name Command and the Channel Name Control Mode Name signals. Active Feedback Displays the sensor feedback of the active control mode. Absolute Error Displays the absolute value of the Error signal in engineering units. Absolute means negative becomes positive and positive remains positive. This signal is always positive. Anlg In Displays the signal present at the Controller’ analog input connector (Anlg In). Monitor 1/2 Displays the signals currently selected by Controller’s monitor connectors (Monitor 1/2). Anlg Out Displays the signal present at the Controller’s analog output connector (Anlg Out). 192 Menus Descriptions FlexTest ™ SE Meters Command Menus Descriptions Signal diagram This diagram shows where various station signals you can monitor with the Scope and Meters are derived. Compensated Command Output Valve Driver Signals from Other Modes of this Channel PIDF Controller F Command Compensator Test Command I P • Null Pacing • Peak/Valley • APC • AIC • ALC - - Output Scalar FLF D S Mode Switch D/A Valve Driver Signal (convert control signal to counts ) Closed Loop Absolute Error Generator (Dela P/Load Cell Feedback) Input Signal Conditioning Stabilization Feedback Signal Inner/Outer Error Detector (LVDT Feedback) Input Signal Conditioning Absolute Error FlexTest ™ SE Error Sensor Signal Active Feedback Signal Stabilization Menus Descriptions 193 Menus Descriptions Tuning Tuning Note Overview This menu is available only when you boot the Controller in the Stand-Alone mode (Config > Local Settings > Networking > Boot Location). When booted in the Automated mode and used with PCsupervision, this menu is disabled. Use Station Manager to tune your system. Use the Tuning menu to adjust the stability and response of the servocontrol loop. Proper tuning ensures that the servo loop responds accurately to the command and improves the performance of your test system. You can tune PIDF and CLC control modes manually from the Manual submenu, and PIDF control modes automatically from the Auto submenu. For information about how to tune a PIDF control mode, see “How to auto-tune” on page 101, and “How to Manually Tune the Control Loop” on page 82. Access level: Tuning. Tuning Manual! Auto! Tuning! Manual This menu contains controls that can be manually adjusted when tuning PIDF and CLC control modes. The controls available depend on the control mode selected (for instance, PIDF control modes have different tuning controls than CLC control modes). 194 Menus Descriptions FlexTest ™ SE Tuning The following menu applies to PIDF control modes (with typical labels such as “Force,” “Displacement,” or “Strain.”) For information about tuning a CLC control mode, see “Tuning controls for a CLC control mode” on page 204. Manual Base Control Mode FG! P Gain I Gain F Gain FL Filter Filter Type Frequency Bandwidth Stabilization Filter! Manual PIDF Tuning Controls (part 1 of 3) ITEM DESCRIPTION Control Mode Selects the control mode to tune. A Proportional, Integral, Derivative, Feed Forward (PIDF) control mode uses one input channel, such as force or displacement, to control the servo loop. For detailed information about individual PIDF controls, see “About PIDF tuning controls” on page 198. FG Displays the various Tuning FG controls you use to create simple command waveforms required for manual tuning. P Gain Proportional (P) gain is used for all tuning situations. It introduces a control factor that is proportional to the error signal. Proportional gain increases system response by boosting the effect of the error signal on the servovalve. I Gain Integral (I) gain introduces an integral of the error signal that gradually, over time, boosts the low-frequency response of the servovalve command. Integral gain improves mean level response during dynamic operation, and corrects feedback droop caused by the spring characteristic of the servovalve in static and very low-frequency test programs. FlexTest ™ SE Menus Descriptions 195 Menus Descriptions Tuning controls for a PIDF control mode Menus Descriptions Tuning Manual PIDF Tuning Controls (part 2 of 3) ITEM DESCRIPTION D Gain Derivative (D) gain is used with dynamic test programs. It anticipates the rate of change of the feedback and slows the system response at high rates of change. Derivative gain reduces ringing, and provides stability and reduces noise at higher proportional gain settings. F Gain Feed forward (F) gain is like derivative gain except that it anticipates how much valve opening is needed to reach the required response and augments the valve command—like compensating for phase lag. Feed forward gain is needed when testing a soft specimen in force control, and helps the servo-control loop react quickly to abrupt changes in command. S Gain Stabilization (S) gain allows a second signal to be integrated into the control mode as a stabilizing factor. The S Gain enhances stability for systems that move large masses at high speeds. Note This feature is available only if the control mode being tuned includes a stabilization input. FL Filter Forward Loop (FL) filter adjustments compensate for noise in the servo loop–which usually comes from sensor feedback. FL filter adjustments establish a frequency bandwidth for the servo loop command signal. Filter Type Some systems experience mechanical resonances that limit the amount of gain you can use before the system becomes unstable. A filter may be used in the forward path of the Controller to reduce the system response at the resonance frequency. This makes it possible to increase the Controller gain (while maintaining system stability). Two types of filters are available: Frequency • A lowpass filter attenuates signals above a specified frequency. • A bandstop filter attenuates signals in a specified band around a specified frequency. For low pass filters, enter a frequency above which the filter will attenuate. For bandstop filters, enter a frequency to define the center of the attenuation band. 196 Menus Descriptions FlexTest ™ SE Tuning ITEM DESCRIPTION Bandwidth For bandstop filters, enter a frequency that defines the frequency range of the attenuation band. The center of the attenuation band is the value entered for the ‘Frequency’ control. For example, if you set ‘Frequency’ to 300 Hz, and ‘Bandwidth’ to 50 Hz, the filter will attenuate frequencies from 275 Hz to 325 Hz. Stabilization Filter Defines the characteristics of the stabilization filter, which works with the S Gain to integrate a second signal into the control mode as a stabilizing factor. Note Filter Type This feature is available only if the control mode being tuned includes a stabilization input. Filter Type: 1 Hz High-Pass or Band-Pass. 1 Hz High-Pass: Attenuates signals below 1 Hz. This is the default selection. Band-Pass: Attenuates signals outside of the band defined by the ‘Filter Min’ and ‘Filter Max’ controls. For example, if you set the lower frequency to 10 Hz and the upper to 200 Hz, you create a 190 Hz band in which signals can pass without attenuation. Filter Min For band-pass filters only, sets the minimum frequency of the band. Filter Max For band-pass filters only, sets the maximum frequency of the band. FlexTest ™ SE Menus Descriptions 197 Menus Descriptions Manual PIDF Tuning Controls (part 3 of 3) Menus Descriptions Tuning About PIDF tuning controls Tuning affects how the servoloop responds to the error between a command and its resulting feedback. The goal of tuning is to get the error to be as low as possible at all times. Over tuning the servoloop causes instability as the Controller overcompensates for the error. Under tuning the servoloop causes the system response to be sluggish. You can monitor the error on the scope (it allows you to view the command and sensor signals in real time). As you monitor the signals, you can continually adjust the tuning controls to optimize the Controller response to the error. Proportional Gain (P Gain) Proportional gain (P Gain) increases the effect of the error signal on the servovalve to improve system response. Proportional gain is used in all tuning situations. The following figures show the tuning command in grey and the feedback in black P Gain Too Low Integral Gain (I Gain) Optimum P Gain P Gain Too High • As P Gain increases, the error decreases and the feedback signal tracks the command signal more closely. • Higher P Gain increases the speed of the system response. • Too high a P Gain can cause the system to become unstable. • Too low a P Gain can cause the system to become sluggish. Integral gain (I Gain) introduces “an integral of the error signal” that gradually, over time, boosts the low-frequency response of the servovalve command. I Gain increases system response during static or low-frequency operation and maintains the mean level during high-frequency operation. It can offset a DC or steady-state error, such as that caused by valve imbalance. 198 Menus Descriptions FlexTest ™ SE Tuning Overshoot Droop I Gain Too Low FlexTest ™ SE Optimum I Gain I Gain Too High Hunting Excessive I Gain • I Gain improves the mean level response during dynamic operations. • I Gain corrects the feedback droop caused by servovalve spring characteristics during static and very low-frequency tests. • I Gain minimizes the amount of time that the system needs to recover from transitions or transients. • For best performance, set I Gain as low as possible when using compensation methods that provide mean correction. These methods include Peak Valley Phase (PVP) and Peak Valley Control compensation (PVC). • Higher I Gain settings increase system response. • Excessive I Gain can cause a slow oscillation or hunting. • Readings in the Max/Min Meter window can be useful when adjusting I Gain. Menus Descriptions 199 Menus Descriptions The following ramp and hold waveforms illustrate different levels of reset. The I Gain determines how much time it takes to improve the mean level accuracy. Menus Descriptions Tuning Derivative Gain (D Gain) Derivative gain (D Gain) is used with dynamic test programs. It introduces a derivative of the feedback signal. This means that it anticipates the feedback signal’s rate of change and slows the system’s response at high rates of change. Overshoot Ringing Needs D Gain 200 Menus Descriptions Optimum D Gain Too Much D Gain Excessive D Gain • D Gain reduces ringing. • D Gain provides stability and reduces noise at higher P Gain settings. • D Gain tends to amplify noise from sensors. • D Gain tends to decrease system response when set too high. • Too much D Gain can create instability at high frequencies. • Excessive D Gain may cause a ringing or screeching sound. • Too little D Gain can make a rumbling sound. The correct amount of D Gain results in the system running quietly. • Series 256 and 257 Servovalves require D Gain on both inner and outer control loops. FlexTest ™ SE Tuning Feed forward (F Gain) introduces a derivative of the command signal. It anticipates how large a valve opening is needed to reach the required response and adds that to the valve command—like compensating for phase lag. Adjusting F Gain causes the command signal to start sooner. This causes the feedback signal to track the original command signal more closely. Original Command Command with F Gain Stabilization gain (S) Original Feedback • F Gain does not compensate for normal changes during testing, such as temperature changes, and servovalve droop. • F Gain can be used to minimize phase lag. • F Gain should be used like D Gain. However, F Gain applies to the test command signal while D Gain applies to the feedback signal. • F Gain gain helps the servocontrol loop react quickly to an abrupt change in the command signal. • F Gain is needed when testing a soft specimen in force control. Stabilization gain allows a second signal to be integrated into the control mode as a stabilizing factor. The S Gain enhances stability for systems that move large masses at high speeds. The input to the stabilization gain is usually a dynamic input signal such as: • ∆P (differential pressure) • Acceleration Note This control will be available only if a stabilization resource was added when the station configuration file was created. Most systems do not need stabilization gain. FlexTest ™ SE Menus Descriptions 201 Menus Descriptions Feed Forward Gain (F Gain) Menus Descriptions Tuning Delta P (∆P) stabilization Delta P is a differential pressure sensor that measures the difference in pressure at each end of the actuator. It compensates for hydraulic compliance (compressed hydraulic fluid acts like a spring). Delta P improves displacement control of heavy mass loaded systems. Delta P is typically used on systems with large hydraulic fluid flow rates. This adjustment is usually needed when the natural frequency of the actuator is less than the 90° phase lag frequency of the servovalve. The servovalve 90° phase lag frequency can be found in the servovalve product literature. The natural frequency can be approximated with the following formula: CA Actuator Frequency = -----------WV Where: C = constant for English (2500) or metric units (1060) A = actuator piston area expressed as in2 (cm2) W= any directly coupled mass including the actuator piston mass expressed in lbs (kg) V = hydraulic fluid volume contained inside the actuator and manifold expressed as in3 (cm3) • If the system response deteriorates when adding delta P, then change the polarity of the signal. • Check all amplitudes for overshoot. Do not allow more than 10% overshoot (preferably none) at any amplitude of a square wave response. Delta P will not compensate for additional compliance from swivels, linkages, test tables, etc. Acceleration stabilization Test systems with specimens affected by acceleration resonances can use a mass accelerometer signal for stabilization. Acceleration stabilization dampens the resonances (vibrations) affecting the specimen. Typical systems that benefit from acceleration stabilization include: • Load units that operate at high frequencies with massive grips • Test systems that employ swivels, linkages, test tables etc. Sensor feedback is provided by an accelerometer attached to (or near) the specimen. The Controller converts this feedback into a stabilization signal which is combined with the composite command signal (postPIDF correction). The “stabilized” command signal is then sent to the valve driver. Note Acceleration stabilization works to minimize compliances from swivels, linkages, test tables, etc. 202 Menus Descriptions FlexTest ™ SE Tuning Forward loop filter (FL Filter) adjustments compensate for noise in the servoloop, which usually comes from sensor feedback. FL Filter adjustments establish a frequency bandwidth for the servoloop command signal. Needs FL Filter FlexTest ™ SE D Gain Amplifies Noise FL Filter Removes Most Noise • By default, the FL Filter is set to one-half the system rate. • The minimum FL Filter setting is 0.01. • Ensure the FL Filter is set higher than any frequency in the test program. • Systems with moving load cells or heavy grips can produce a noisy force signal. • If you observe a noisy sensor feedback signal, reduce the FL Filter setting to about 100, provided your test does not reach 100 Hz. If additional adjustment is needed, reduce the setting in five to ten Hz increments. Menus Descriptions 203 Menus Descriptions Forward Loop Filter (FL Filter) Menus Descriptions Tuning Tuning controls for a CLC control mode The following menu applies to CLC control modes. Note The CLC control mode uses the first two control modes you create in the configuration file. The first control mode you create becomes the master channel (typically displacement). The second control mode you create is the limiting channel (typically force). A quick way of determining the type of control modes used for the master and limiting channels is to view the Setup menu. The first control mode listed after Output is the master channel, the next control mode is the limiting channel. The following menu applies to CLC control mode. Manual Control Mode FG! Active P Limiting P Lower Limit Upper LImit Manual CLC Tuning Menu ITEM DESCRIPTION Control Mode The Channel Limited Channel (CLC) control mode requires two sensor feedbacks, or input channels. CLC uses the first input channel (master channel) to control the servo loop while using the second input channel (limiting channel) to restrict the master channel. The master channel has an Active P Gain control, and the limiting channel has a Limiting P Gain control. A CLC control mode typically uses displacement as the master channel and force as the limiting channel. FG See “FG” on page 195. Active P Gain Adjusts the amount of proportional gain for the active control mode. Limiting P Gain Adjusts the amount of proportional gain for the limiting control mode. Lower Limit/Upper Limit Defines an operating range for the limiting control channel. The limiting channel ensures the command does not exceed the upper or lower limits. Select limit values based on the modulus of the specimen. 204 Menus Descriptions FlexTest ™ SE Tuning CLC example A CLC control mode uses one input channel to control the servo loop (Active P gain) while using a second input channel (Limiting P gain) to restrict the active channel. Suppose you have a ±3 cm displacement sensor (LVDT), an 11 kN force sensor, and phasing that produces tension with a positive command. A typical CLC control mode uses displacement as the master channel and force as the limiting channel. The upper limit is set to 1 kN and the lower limit is set to -2 kN. The specimen is installed in one of the grips. As you position the actuator manually with the Dial, the specimen moves towards the other grip (compression) in displacement control. When the specimen starts to contact the grip, the force increases. When force reaches -2 kN and you continue to adjust the control, nothing happens. The displacement value that caused the force limit is maintained and will not increase. After the specimen is gripped and you adjust the Dial for tension, the lower limit value ensures the tension does not go beyond 1 kN. Guidelines for tuning a CLC mode Command the CLC control mode with the Dial. A typical CLC control mode uses displacement as the active channel and force as the limiting channel. Note The easiest way to tune a CLC mode is to begin by assigning the proportional gain (P) values from any tuned PIDF control mode (of the same signal type) to the Active P gain and Limiting P gain values. The following procedure is a tuning guideline assuming the Active feedback is displacement and the Limiting channel is force. FlexTest ™ SE 1. Adjust the Active P control for adequate actuator response when adjusting the Dial. 2. Monitor the force output and adjust the limiting channel control to minimize any delay to stop actuator movement when it reaches the specified limit. Menus Descriptions 205 Menus Descriptions How CLC works Menus Descriptions Tuning Tuning! Auto Note Auto-Tuning is an optional feature for the FlexTest™ SE Controller. To obtain this feature, contact your local MTS Sales Representative (or refer to “Technical Support” on page 11). The auto-tuning feature automatically calculates tuning values for PIDF control modes. To do this, the auto-tuner disregards your current PIDF gain settings and applies the minimum required drive signal to ramp the feedback to 80% of the auto-tuning limits. It then measures the relationship between the feedback velocity and the valve opening, and derives the minimum PIDF gains required to track the command. Auto-tuning provides a modest level of tuning for PIDF control modes. Auto Control Mode Mode to Tune Actuator Type Lower Limit Upper Limit <<Accept>> Auto-Tuning Menu ITEM DESCRIPTION Control Mode Selects the active control mode that is maintained while auto-tuning takes place. Mode to Tune Selects the control mode to auto-tune. Auto-tuning is available only for PIDF control modes. Actuator Type Normal: Uses tuning algorithms for non-hydrostatic actuators. Hydrostatic: Uses tuning algorithms for hydrostatic actuators. Lower Limit/Upper Limit Sets the limits in which the actuator moves during auto-tuning. <<Accept>> Transfers Reference PIDF values to Current PIDF values. 206 Menus Descriptions If the actuator exceeds these limits during auto-tuning, the Controller will trip an interlock and auto-tuning will cease. FlexTest ™ SE Config Menus Descriptions Config Overview Use this menu to create and modify configuration files, modify hardware settings, and to perform a variety of other tasks, such as: • Entering license keys for Controller options • Setting regional and local settings • Changing network settings • Setting the time and date for the Controller • Selecting screen positions for the various panel displays. Access level: See submenus. Config Access Level Panel Placement! Local Settings! Edit Configuration! Edit Hardware! Set Date/Time! Service Tools! <<Shut down>> <<Reboot>> Access Level (part 1 of 2) ITEM DESCRIPTION Access Level This control determines your ability to access and change tuning, calibration, and configuration settings. This control also exists in the Status menu—it is repeated on the Config menu for convenience. To access many of the controls in the Config menu, you must be at the Configuration access level. Required access level: Operator or higher. Note Operator After making higher level changes, it is a good idea to always return to the Operator level. This is the default user level. This level does not need a password and has the fewest privileges. FlexTest ™ SE Menus Descriptions 207 Menus Descriptions Config Access Level (part 2 of 2) ITEM DESCRIPTION Tuning Enter this level to make tuning adjustments. Calibration Enter this level to modify calibration parameters. Configuration Enter this level to make changes to various controls in the Config menu, including all the controls in the Edit Configuration and Edit Hardware submenus. <<Shut down>> Saves panel changes to the configuration file automatically, prompts you to save parameter set changes if any have been made, then closes all applications and removes power from the Controller. <<Reboot>> Saves panel changes to the configuration file automatically, prompts you to save parameter set changes if any have been made, then closes all applications and starts them up again. Config Menu! Panel Placement Use this selection to specify the position of all of the panel displays (Log, Status, Scope, and Meters) on the Controller screen. Note You can also set the position of each panel display in its equivalent menu. For instance, you can also set the position of the Log panel display in Log > Placement. Access level: Operator. Panel Placement Log: Top Status: Bottom-right Scope: Top Meters: Bottom-left Selections are Top, Right, Bottom, Left, Top Left, Top Right, Bottom Right, Bottom Left. 208 Menus Descriptions FlexTest ™ SE Config Use this menu to specify settings that are specific to the Controller, and independent of the currently selected hardware interface (.hwi) and configuration file (.cfg). For instance, when you select passwords for access levels, they apply to any configuration file you load in the Controller. When making changes, you must save (Local Settings > Save Settings) and reboot the Controller before the changes will take effect. Access level: See submenus and individual controls. Local Settings HWI File Config File Regional settings! Passwords! Networking! License Keys! <<Save Settings>> <<Discard Changes>> Local Settings Menu ITEM DESCRIPTION HWI File, Config File Specifies the hardware interface file (.hwi) or configuration file (.cfg) that is loaded when the Controller boots in the standalone mode. When the Controller boots in the automated mode, this field does not apply. Access level: Configuration. FlexTest ™ SE Menus Descriptions 209 Menus Descriptions Config Menu! Local Settings Menus Descriptions Config Config Menu! Local Settings! Regional Settings Use this selection to change elements of the configuration file that pertain to localization. For instance, you can select how the Controller displays the date, and the units with which the Controller displays force measurements. Access level: Operator. Regional settings Language Decimal separator Unit Assignment Set Date Format Time Format Regional Settings Menu (part 1 of 2) ITEM DESCRIPTION Language English is the standard language installed on the Controller and displayed on the interface. If available, select other languages as desired. Decimal Separator Specifies the decimal symbol used in numbers. Select Period (.) or Comma (,). Appearance using Period (.): 34678288.00 Appearance using Comma (,): 34678288,00 210 Menus Descriptions FlexTest ™ SE Config ITEM DESCRIPTION Unit Assignment Set Specifies the unit assignment set used by the Controller to display measurements of all types. For instance, SISET - SI defines a set of units that contains customary international (metric) units. It provides force, and force-related units, in kN. The following unit assignment sets are available: CGSSET - Centimeters, Grams, Seconds: Defines a set of units that is based upon centimeters, grams, and seconds. ENGSET - U.S. Engineering Units: Defines a set of units that contains customary U.S. engineering units. It provides force, and force-related units, in kip. ENGSETSM - U.S. Engineering Units (small)—Defines a set of units that contains customary U.S. engineering units. It provides force, and force-related units, in lbf. SISET - SI (Systeme International d’Unites)—Defines a set of units that contains customary international (metric) units. It provides force, and force-related units, in kN. SISETSM - SI (Systeme International d’Unites) - small—Defines a set of units that contains customary international (metric) units. It provides force, and force-related units, in N. SYSDEF - System Units Definition—Contains a copy of the units that are used in the hardware and software to represent test values of interest. Date Format Selects the format in which the date stamp is displayed on the message log. Select M/D/Y, D/M/Y, or D.M.Y. Appearance examples: M/D/Y, 4/24/2002; D/M/Y, 24/4/2002; D.M.Y., 24.4.2002. Time Format Selects the format in which the time stamp is displayed on the message log. Select 12-hour or 24-hour. Appearance examples: 12-hour, 6:31:23 AM; 24-hour, 18:21:23. FlexTest ™ SE Menus Descriptions 211 Menus Descriptions Regional Settings Menu (part 2 of 2) Menus Descriptions Config Config Menu! Local Settings! Passwords Use this selection to change passwords for tuning, calibration, and configuration access levels. By default, passwords are not assigned and you will not be prompted for password validation when changing from one access level to another. To set passwords, use the numeric buttons and enter numbers as desired. Access level: Operator. Passwords Tuning Calibration Configuration 212 Menus Descriptions FlexTest ™ SE Config Use this selection to define networking options, such as Controller identification and boot location. Networking is necessary for servicing the Controller, and for operating the Controller in the automated mode. Access level: See individual controls. Networking Controller ID Controller Name Boot Location Networking Menu ITEM DESCRIPTION Controller ID Specifies the Controller’s network identification number. Important This setting must be 0 in order for the Controller to operate properly with MTS service tools. Access level: Configuration. Controller Name Specifies the Controller’s name. By default, this value will be the serial number of the Model 493.42 System I/O board in the Controller. You can change this name as desired. Access level: Configuration. Boot Location Standalone: Use to operate the Controller in the standalone mode (ensure no network cables are attached to the Controller). Standalone with Networking: Use to operate the Controller in the standalone mode when a network cable is attached to the Controller for purposes of file transfers, etc. Service: Use to perform service activities typically involving file transfers between the PC and the Controller. Automation: Use to operate the Controller with a PC equipped with MTS Series 793 software. Access level: Operator. FlexTest ™ SE Menus Descriptions 213 Menus Descriptions Config Menu! Local Settings! Networking Menus Descriptions Config Config Menu! Local Settings! License Keys Use this selection to add and remove optional Controller features. To add (enable) a feature, you must enter a license key provided by MTS. A license key is an alphanumeric password that enables an optional product. Note The 793.54 Automation feature does not require a license key. To remove a feature, use the backspace button to clear the license key, save (Config > Local Settings > <<Save Settings>>), then reboot. The optional resource will still be displayed in menu (without the license key), but the feature will be removed from the Controller. Access level: Operator. License Keys 793.51 Scope 793.52 Advanced FG 793.53 Auto-Tuning 793.08 PVP Compensator The following options are available for the Controller. 214 Menus Descriptions • 793.51 Scope: The Scope option is a full featured on-board oscilloscope that allows you to view time and X-Y plots, optimize the display with auto-scaling, and pan trace history. By default, the Controller includes a simplified scope designed to assist with tuning. • 793.52 Adv FG: The Advanced Function Generator (Adv FG) option includes features advanced programming features such as Sweeps and Block-Cyclic waveforms. • 793.53 Auto-Tuning: The Auto-Tuning option allows you to quickly tune your Controller to new specimens or changing specimen characteristics without having to make individual PIDF control adjustments. • 793.08 PVP Compensator: The Peak Valley Phase (PVP) compensator option optimizes command by altering command phase to correct for phase lag, and increasing the command amplitude to correct for amplitude rolloff. FlexTest ™ SE Config Use this menu to edit configuration files (.cfg) by adding or removing resources listed in the Controller’s hardware interface (.hwi) file. For instance, suppose you want to add a readout channel for use by an external meter. With the Edit Config menu you could add a readout channel to your Controller by enabling a Monitor resource, and you can name it “Meter,” or whatever you wish. You can modify any configuration file, including the file that is currently running. If you are modifying the currently running configuration file, you must save your changes (Edit Configuration > <<Save>>) and reboot before the changes take effect. Note The FlexTest SE Controller can store up to four station configuration files on-board. Store additional station configuration files on a PC and download as required. Access level: Configuration. Edit Configuration Configuration File (Ex.cfg) ! 493.15 VD S2-J7 (Ch 1)! Anlg In (Stabilization) ! 493.25 S2-J4 (Disp) ! 493.25 S2-J5 (Force) ! Monitor 1 ! Monitor 2 ! Anlg Out ! Dig In 1 (D/I 1) ! Dig In 2 (D/I 2) ! Dig In 3 (D/I 3) ! Dig Out 1 (D/O 1) ! Dig Out 2 (D/O 2) ! Dig Out 3 (D/O 3) ! The resources you allocate to create station configuration files include valve drivers, conditioners, analog inputs and outputs, digital inputs and outputs, readouts, and so forth. You also configure control modes, feedback signals, and readout signals that will be available during your test. FlexTest ™ SE Menus Descriptions 215 Menus Descriptions Config Menu!Edit Config Menus Descriptions Config Config Menu!Edit Config!Configuration File This selection allows you to select, open, save, and delete configuration files. Configuration File Select existing name Enter new name <<New>> <<Load>> <<Save>> <<Delete>> Configuration File Menu ITEM DESCRIPTION Selecting existing name Selects the name of existing configuration (.cfg) files saved to the Controller. The number of configuration files that can be saved is limited to four. Enter new name Allows you to save the file as another name (similar to a “Save As” function). Use the Dial to add or change letters in the new name. <<New>> Creates a new configuration file. To create the new configuration file, the Controller initializes all the hardware resources in the current d hwi file. <<Load>> Loads the selected configuration file. <<Save>> Saves the selected configuration file. If the selected configuration file includes user-defined attributes referred to as a “parameter set,” you will be prompted whether you want to save the configuration file with or without the parameter set. <<Delete>> Deletes the selected configuration file. 216 Menus Descriptions FlexTest ™ SE Config The Model 493.15 SV S2-J7 resource is a two-stage valve driver (threestage valve drivers are also available) listed in the Controller’s HWI file. The valve driver is an electronic module that controls a servovalve in a control channel. 493.15 VD S2-J7 Display Name Enabled Include CLC Power 493.15 VD S2-J7 Menu ITEM DESCRIPTION Display Name Allows you to customize the default resource name for display purposes. For instance, the internal name of the valve driver resource is “493.15 VD S2-J7”; you can assign a display name that is meaningful to your test system, such as “10 kN.” Enabled True: Enables the resource in the current configuration file. False: Disables the resource in the current configuration file. Include CLC Enables a special control mode designed for specimen installation and removal. It uses one feedback to control the actuator (master channel), and another feedback to limit the range of the active control mode (limiting channel). To create a CLC control mode, you must assign at least two analog input resources as PIDF control modes. The first PIDF control mode defined becomes the master channel, and the second defined becomes the limiting channel. True: Enables channel-limited-channel (CLC) control on the enabled resource. False: Disables CLC control on the enabled resource. Power None: Allows operation of the Controller without a hydraulic service manifold (HSM) selection. HSM (n): Requires the Controller to be cabled to the specified HSM. FlexTest ™ SE Menus Descriptions 217 Menus Descriptions Config Menu!Edit Config!493.15 SV S(n)-J(n) Menus Descriptions Config Config Menu!Edit Config!Anlg In, 493.25 S(n)-J(n), 493.47 S(n)-J(n) The analog input resource consists of a BNC-type connector located to the rear of the Controller (Anlg In) with associated scaling electronics. It is used to receive analog signals preconditioned by an external source, or to receive external command input. The Model 493.25 resource (Controllers are typically equipped with two) consists of a D-type connector (displacement is typically J4, force is typically J5) and an associated conditioner module in the Controller chassis. It is typically used in conjunction with LVDTs (linear variable displacement transformers) and load cells to condition displacement and force sensor feedback, though it can be used to with a variety of other sensors as well. The Model 493.47 resource (optional) consists of a D-type connector (typically J6) and an associated conditioner module in the Controller chassis. It is typically used with an encoder. An encoder is a sensor which measures displacement by counting pulses transmitted to it from a device in the actuator. Note For more information about hardware resources, see “Resource naming conventions” on page 226 For purposes of creating station configurations, analog inputs, Model 493.25 conditioners, and Model 493.47 encoders are considered input resources which may be used to: • Support a control mode • Provide auxiliary (outside of the control loop) feedback • Receive external command • Augment existing control mode feedback with stabilization feedback The menu that follows shows how the type selected for the each resource affects the menu. Note how the “Type” selection affects the menu items. 218 Menus Descriptions FlexTest ™ SE Config Menus Descriptions Access level: Configuration. Anlg In, 493.25, 493.47 Display Name Enabled Type: Control Mode Dimension Display Unit Channel <<Add Dual Comp>> Type: Aux. Input Dimension Display Unit Type: External Command Dimension Display Unit Channel Type: Stabilization Fdbk Dimension Display Unit Mode Anlg In, 493.25, 493.47 Menus (part 1 of 3) ITEM DESCRIPTION Display Name Allows you to customize the default resource name for display purposes. Enabled True: Enables the resource in the current configuration file. False: Disables the resource in the current configuration file. Type: Control Mode Allocates the selected input resource for the control channel. Specifically, the feedback from the input resource (a 493.25 conditioner, 493.47 encoder, or an analog input that receives externally conditioned feedback) is summed with a command source to drive a servovalve, which applies the command to the specimen. Dimension Selects the appropriate dimension for the sensor associated with the selected input resource. Display Unit Selects your preference in units for the selected dimension. Channel Selects the valve driver allocated to the control channel. FlexTest ™ SE Menus Descriptions 219 Menus Descriptions Config Anlg In, 493.25, 493.47 Menus (part 2 of 3) ITEM DESCRIPTION <<Add Dual Comp>> Creates a Dual Comp (n) menu item. Use the Dual Comp menu to add a sensor input to the selected control mode for purposes of command compensation. This creates a dual-compensation control mode, in which the compensator uses a sensor input with a different dimension than the sensor input used by the Controller to maintain PIDF control. See “Types of control modes” and “More about dual-compensation” on page 223. Display Name: Allows you to edit the default name. The default naming convention for a dual-compensation control mode is compensator feedback signal name/control mode name. Signal: Selects the resource whose feedback signal will be used by the compensator. Type: Sets the type of control the compensator provides. You can select Amplitude Control Only, or Mean and Amplitude Control. <<Delete>>: Deletes the current instance of the Dual Comp (n) submenu. Type: Aux Input Dimension Selects the appropriate dimension for the sensor associated with the selected resource. Display Unit Selects your preference in units for the selected dimension. Type: External Command 220 Configures the input resource to receive sensor feedback not used for PIDF control. When the Controller is used in the stand-alone mode, auxiliary input signals can be monitored. When the Controller is used in the automated mode, they can also be used for data acquisition. Configures the input resource to receive command from an external source in place of the command from the Controller. The analog input resource is the input resource typically used to receive external command. Dimension Selects the appropriate dimension for the sensor associated with the selected resource. Display Unit Selects your preference in units for the selected dimension. Channel Specifies the compensator used by the function generator. Menus Descriptions FlexTest ™ SE Config ITEM DESCRIPTION Type: Stabilization Fdbk Configures the input resource as a stabilization signal for the control mode specified in the Control Mode field. This integrates the feedback into the composite command, and helps to stabilize closed-loop control. It is used primarily in high-mass systems equipped with Delta P (differential pressure) sensors, and in highspeed systems equipped with accelerometers. Delta P sensors typically use DC conditioners. Accelerometers are typically conditioned externally, and are cabled to the console through one of the analog input resources. Dimension Selects the appropriate dimension for the sensor associated with the selected resource. Display Unit Selects your preference in units for the selected dimension. Control Mode Specifies the control mode to which the stabilization feedback applies. About control modes FlexTest ™ SE Control modes use a program command and sensor feedback to control a servovalve. You use control modes to apply your command in a specific dimension (such as displacement, force, strain, acceleration, and so forth). You must define at least one control mode for each control channel. Menus Descriptions 221 Menus Descriptions Anlg In, 493.25, 493.47 Menus (part 3 of 3) Menus Descriptions Config Types of control modes 222 Menus Descriptions The Controller employs three types of control modes: PIDF, CLC, and dual-compensation. You define the control mode type in the Config menu. • PIDF control modes are the normal control modes used for testing. Proportional, integral, derivative, and feed forward gain adjustments are available to tune the servo loop response. • CLC (channel limited channel) control modes require two sensor feedbacks and are typically used for specimen installation and removal. Using a CLC control mode, you apply the program in the dimension of the “master channel” (usually displacement), but the signal is restricted by the limits you define for the second “limiting channel” (usually force). • Dual-compensation control modes are typically used to program channels that use a dimension whose feedback is too noisy to provide adequate control. Dual-compensation control modes require two feedback signals. The first is used by the compensator to provide command compensation. The second is used by the PIDF Controller to close the loop. FlexTest ™ SE Config Dual-compensation control modes are configurations in which the compensator uses a feedback signal with a different dimension than the feedback signal used by the Controller. This is also known as “mixed-mode” compensation. Suppose you want to program an actuator in the strain control mode, but the strain feedback is too noisy to provide adequate control. You can create a dual-compensation control mode that compensates the command signal based on strain feedback, while the PIDF Controller uses displacement feedback to close the loop. Function Generator Strain Compensator Displacement PIDF Controller Displacement Strain Dual-compensation Control Mode: Strain/Displacement Controller receives displacement feedback for PIDF control Compensator receives strain feedback and strain-based programming For a dual-compensation control mode, the feedback signals available to the compensator are the auxiliary input signals and feedback signals already assigned to the channel. The default naming convention for a dual-compensation control mode is compensator feedback name/ control mode name. About external command You can configure the Controller to accept commands from an external device while the Controller performs all other closed-loop control functions. The Controller can only accept programs that contain a single control mode. The Controller cannot accept programs that contain mode switches. FlexTest ™ SE Menus Descriptions 223 Menus Descriptions More about dualcompensation Menus Descriptions Config Config Menu Edit Config Digital Output (n) Monitor (n), Anlg Out, Digital Input (n), Use the Monitor (n), Anlg Out, Digital Input (n), and Digital Output (n) selections to assign attributes to these resources. The monitor (Monitor (n)) resources correspond to the two BNC-type connectors (Monitor 1 and Monitor 2) on the front panel of the Controller. When enabled, analog station signals are available on these connectors for external readout devices such as a meter, oscilloscope, or x-y recorder. The analog output (Anlg Out) resource corresponds to a single BNCtype connector (Analog Out) to the rear of the Controller. Analog output signals can be used to command an external valve driver or Controller. The digital input (Digital Input (n)) resource corresponds to a D-type connector (J54) to the rear of the Controller, which can receive digital signals from external devices. When the Controller is used in the automated mode with the MultiPurpose TestWare application, a digital input can signal your Controller that an external event has occurred. 224 Menus Descriptions FlexTest ™ SE Config Access level: Configuration. Monitor/Anlg Out/Dig In/Dig Out Display Name Enabled Mon (n), Anlg Out, Digital Input (n), Digital Output (n) Menus ITEM DESCRIPTION Display Name Sets the display name of the resource. Enter as desired. Enabled Enables or disables the resource in the current configuration. FlexTest ™ SE Menus Descriptions 225 Menus Descriptions The digital output (Digital Output (n)) resource corresponds to a Dtype connector (J55) to the rear of the Controller, which can issue digital signals to external devices. When the Controller is used in the automated mode with the MultiPurpose TestWare application, a digital output can signal an external device that an event has occurred in your test. Menus Descriptions Config Config Menu!Edit Hardware Use this menu to modify hardware settings by changing resource attributes in the hardware interface (.hwi) file. For instance, with the Edit Hardware menu you can change the sensor excitation of Model 493.25 conditioners from DC, which is used by force sensors such as load cells, to AC, which is used by displacement sensors, such as LVDTs. When you make changes to the controls in this menu, you are literally editing the equivalent portion of the associated.hwi file. If you change the conditioner mode with this control and save your changes, you would see the same change if you opened up and examined the associated.hwi file. You can modify any hardware interface file (.hwi), including the file that is currently running. If you are modifying the currently running hardware interface file, you must save your changes (Edit Hardware > <<Save>>) and reboot before the changes take effect. Access level: Configuration. Edit Hardware HWI File (ftse.hwi) ! 493.25 S2-J4! 493.25 S2-J5 ! 493.14 VD S2-J7 ! Power Options! System Options ! About the hwi file The hardware resources available to the Controller are defined by the hardware interface file (ftse.hwi). The Controller reads this file to determine what VMEbus modules are available to your system, where the modules are located, and which rear-panel connectors are associated with them. Resource naming conventions The hardware resource name contains information regarding the resource type, slot location, and connector number. For example, consider the following resource name: 493.25 S2-J4 The resource named 493.25 S2-J4 refers to a conditioner module located in slot 2 of the chassis, at connector J4. 226 Menus Descriptions FlexTest ™ SE Config VMEbus compatible modules are installed in chassis slots according to the following guidelines. • The processor module is installed in slot 1 • The I/O carrier module is installed in slot 2. • An optional I/O carrier module may be installed in slot 3 • The System I/O module is installed in slots 4 and 5. Slot Position 5 4 3 2 1 ΡΥΝ 6ΤΣ ΒΦΛ ΑΒΤ ΤΨΠΕ Ε ΠΧ−ΜΙΠ ΤΨΠΕ Ε ΠΧ−ΜΙΠ ΡΣΤ ∆ΕΒΥΓ ΠΧΙ ΜΕΖΖΑΝΝΕ ΧΑΡ∆ VMEbus Modules (part 1 of 2) SLOT MODULE NAME FUNCTION Slot 1 PowerPC® Provides PIDF processing for the Controller and management of the other plug-in modules in the standalone configuration. Provides an interface between the Controller and an external computer in the automated configuration. Slot 2 Model 493. 40 I/O Carrier Supports up to four daughter boards that can be used for sensor conditioning, driving a servovalve, and in the automated configuration, providing A/D and/or D/A channels. FlexTest ™ SE Menus Descriptions 227 Menus Descriptions VMEbus modules Menus Descriptions Config VMEbus Modules (part 2 of 2) SLOT MODULE NAME FUNCTION Slot 3 Blank in standard configurations. May be used for optional Model 493.40 I/O Carrier Provides support for additional sensor conditioning, and in the automated configuration, additional A/D and/or D/A channels. Slots 4, 5 Model 493.42 System I/O Provides box-in and box-out connections for daisy chaining multiple Controllers, analog and digital I/O, EStop, and HSM and HPU control. 228 Menus Descriptions FlexTest ™ SE Config Use this selection to select, open, save, and delete hardware interface (.hwi) files. Access level: Configuration. HWI File Select existing name Enter new name <<Load>> <<Save>> <<Delete>> HWI File Menu ITEM DESCRIPTION Select existing name Selects the name of existing hardware interface (.hwi) files saved to the Controller. If you select a new file, the Controller will create a new hardware interface file. Enter new name Allows you to change the name of an existing file and save it as another name (similar to a “Save As” function). Use the Dial to add or change letters in the new name. <<Load>> Loads the selected hardware interface file. <<Save>> Saves the selected hardware interface file. <<Delete>> Deletes the selected hardware interface file. FlexTest ™ SE Menus Descriptions 229 Menus Descriptions Config Menu!Edit Hardware!HWI File Menus Descriptions Config Config Menu!Edit Hardware!493.25 S(n)-J(n) Use this selection to change the type of excitation provided by the Controller’s conditioners. Access level: Configuration. 493.25 Mode AC 493.25 S(n)-(n) Menu ITEM DESCRIPTION Mode AC: Typically used for displacement sensors, such as Linear Variable Displacement Transformers (LVDTs). DC: Typically used for force sensors, such as load cells. Config Menu!Edit Hardware!493.47 S(n)-J(n) Use this selection to match the type of encoder supplied with your test system to the types supported by Model 493.47 encoders. Access level: Configuration. 493.47 Mode Incremental 493.47 S(n)-(n) Menu ITEM DESCRIPTION Mode Select the type of encoder supplied with your test system from the following: 230 Menus Descriptions • Teledyne • Incremental • Tempo III (24 Bit) • Tempo III (25 Bit) FlexTest ™ SE Config Use this selection to set the Model 493.14 valve driver to support a single or dual servovalves. Note Model 493.15 three-stage valve driver resources do not have editable attributes and are not displayed in the Edit Hardware menu. Access level: Configuration. 493.14 Mode Single 493.14 VD S(n)-J7 Menu ITEM DESCRIPTION Mode Sets the type of servovalve support provided by the valve driver. Single: Supports a single servovalve configuration. Dual: Supports a dual servovalve configuration. FlexTest ™ SE Menus Descriptions 231 Menus Descriptions Config Menu!Edit Hardware!493.14 VD S(n)-J7 Menus Descriptions Config Config Menu!Edit Hardware!Power Options Use this selection to choose appropriate hydraulic power unit (HPU) and hydraulic service manifold (HSM) options for your Controller. Access level: Configuration. Power Options Power Type HSM Type HPU/HSM Solenoid Power Options ITEM DESCRIPTION Power Type HPU Only: This selection applies to systems connected directly to the hydraulic power unit. HPU/HSM: This selection applies to systems equipped with both a hydraulic power unit (HPU) and a hydraulic service manifold (HSM). HSM Only: This selection applies to systems equipped with a hydraulic service manifold that is connected to house power. Auto. HPU/HSM: This selection applies to systems equipped with multiple hydraulic service manifolds (HSMs) that share a single hydraulic power unit (HPU), and operate in a first-on, last-off manner. Slave HSM: This selection applies to systems equipped with multiple hydraulic service manifolds (HSMs) configured in a master/slave configuration, connected to house power. HSM Type On/Off Solenoid: This selection is appropriate if your hydraulic service manifold is equipped with an on/off type solenoid. Solenoid: This selection is appropriate if your hydraulic service manifold is equipped with an off/low/high type solenoid. Proportional: This selection is appropriate if your hydraulic service manifold is equipped with an proportional-type solenoid. 232 Menus Descriptions FlexTest ™ SE Config The Power Type control in this menu and the Power control in the valve driver menu (Config > Edit Configuration > 493.14 VD S2-J7) determine the functionality of the HPU and HSM controls and indicators on front panel of the Controller, as shown in the following: HWI FILE POWER TYPE SELECTION CFG FILE POWER SELECTION HPU INDICATOR & HSM INDICATOR & BUTTON FUNCTION BUTTON FUNCTION HPU Only HPU On Off None Off Off HSM1 N/A N/A HSM On On2 None On Off HSM On On3 None On Off HSM On On None On Off HSM Off Off HPU/HSM HSM Only Auto HPU/ HSM Slave HSM 1 This selection is available, but invalid. 2 HPU must be on before HSM can be turned on. 3 HSM can be turned on before HPU is turned on. Note FlexTest ™ SE For more information about hydraulic interconnection, see the FlexTest SE Service manual. Menus Descriptions 233 Menus Descriptions Front panel hydraulic controls and indicators Menus Descriptions Config Config Menu!Edit Hardware!System Options If desired, use this selection to enable the velocity limiter option, a safety feature designed for CE compliance. Access level: Configuration. System Options Velocity Limiter (CE) System Options ITEM DESCRIPTION Velocity Limiter (CE) Enables or disables the velocity limiter feature. When enabled, the velocity limiter feature restricts the rate of actuator movement to 10 mm/ sec when actuator positioning is performed with the Dial, as is typical during specimen installation. 234 Menus Descriptions FlexTest ™ SE Config Use this selection to set the Controller’s date and time, according to the format selected in Config Menu > Local Settings > Regional Settings. See "Date Format" and “Time Format” on page 211. Access level: Operator. Set Date/Time Month Day Year Hour Minute Second <<Set>> Set Date/Time Menu ITEM Date: Time: DESCRIPTION Month Selects the month of the year. Day Selects the day of the month. Year Selects the year. Hour Selects the hour of the day (24 hour format). Minute Selects the minute of the hour (0 - 59). Second Selects the second of the minute (0 -59). <<Set>> Sets the date entries in the Controller’s memory. Config Menu!Service Tools This menu contains tools to assist MTS service personnel with updating, troubleshooting, and calibrating the Controller. Access level: Operator. Service Tools Automated Calibration Service ! View Files ! FlexTest ™ SE Menus Descriptions 235 Menus Descriptions Config Menu!Set Date/Time Menus Descriptions Config Config Menu!Service Tools!Automated Calibration Service This selection is for MTS service personnel to assist with calibrating the Controller with MTS proprietary software tools. Access level: Operator. Automated Calibration Service Activate Serial Port ! Control Mode ! Automated Calibration Service Menu ITEM DESCRIPTION Activate Serial Port Enables the Controller’s serial port to communicate with a PC equipped with MTS service tools. Control Mode When the serial port is enabled, allows MTS service personnel to switch control modes to facilitate automated calibration. 236 Menus Descriptions FlexTest ™ SE Config This selection is for MTS service personnel to view the content of system files used by the Controller, including hardware interface files (.hwi), unit definition files (.udf), unit assignment sets (.uas), and configuration files (.cfg). Access level: Operator. View Files ftse.hwi ! sysunit.udf ! siset.uas ! ftse3.cfg ! View File Example FlexTest ™ SE Menus Descriptions 237 Menus Descriptions Config Menu!Service Tools!View Files Menus Descriptions Limits Limits Note Overview This menu is available only when you boot the Controller in the Stand-Alone mode (Config > Local Settings > Networking > Boot Location). When booted in the Automated mode and used with PCsupervision, this menu is disabled. Use Station Manager to set limit and error parameters. The Limits button toggles between two types of limit summary panels, Limits and Errors. Each panel displays the limit setting, status, and action for all associated input signals in the station. Detector color key: • Grey appears when the limit is Disabled • White appears when the limit is set to Indicate and has not tripped • Green appears when the limit is set to Interlock, Program Interlock, Program Stop, or Program Hold and has not tripped • Red appears when the limit is set to Interlock, Program Interlock, Program Stop, or Program Hold and has tripped You can edit limit settings in summary panels. To edit a setting, select the setting row by pressing the navigate button next to the row, then use the < > (previous/next) buttons to select the setting field. When the desired field has focus, use the navigate button to toggle through the selections. You can also edit limit settings for individual input signals at Settings > input signal > Limits. Changes made there are reflected in the limit summary panels, and visa-versa. Access level: Operator. Note 238 Menus Descriptions For more information, see “Limits” on page 154. FlexTest ™ SE Limits Menus Descriptions Limit Parameter Limits summary panel Input Signal Indicator Action Errors summary panel FlexTest ™ SE Menus Descriptions 239 Menus Descriptions Log Log Panel The Log panel displays log entries, which record station and test events as they occur, including file events, resource mismatches, hydraulic status changes, station state changes, and detector activity. Log panel Time Stamp Menu Severity Level Source Message Use the Log menu to assign display attributes to log entries, determine if messages are written to the log based on severity level, clear log entries, and position the Log panel on the screen. Access level: Operator. Log Show Time Stamp Show Source Show Severity Minimum Severity <<Clear Log>> Placement 240 Menus Descriptions FlexTest ™ SE Log ITEM DESCRIPTION Show Time Stamp Determines if and how the time stamp is displayed in log entries. For information on the format of the time and date in timestamp entries, see "Date Format" and “Time Format” on page 211. Show Source Determines whether or not log entries display their source. For stand-alone operation, two internal Controller components may write messages to the log: FlexTest SE and Stmgr. For automated operation, additional applications such as Station Manager (also Stmgr), MultiPurpose TestWare (MPT), and Basic TestWare (BTW) may also write messages to the log. Show Severity Determines whether or not log entries display their severity level. Minimum Severity Sets the severity level that must be reached before the Controller writes a message to the Log. The Controller writes messages to the log according to the following minimum severity levels: • Diagnostic: Writes Diagnostic, Information, Warning, Error, and Fatal Error messages. • Information: Writes Information, Warning, Error, and Fatal Error messages; does not write Diagnostic messages. • Warning: Writes Warning, Error, and Fatal Error messages; does not write Diagnostic and Information messages. • Error: Writes Error and Fatal Error messages; does not write Diagnostic, Information, and Warning messages. • Fatal Error: Writes only Fatal Error messages; does not write Diagnostic, Information, Warning, and Error messages. <<Clear Log>> Clears all messages from the Log. Placement Moves the Log around the screen. FlexTest ™ SE Menus Descriptions 241 Menus Descriptions Log Menu Menus Descriptions Log 242 Menus Descriptions FlexTest ™ SE Appendix A Maintenance This section describes how to maintain the Model 493.02 Chassis. Cleaning the chassis Air Filter removal and installation Remove any dust from the chassis or front panel with a damp cloth. The Controller is equipped with an air filter, which can be accessed from the rear of the chassis. Clean or replace the filter as required. To remove the filter, pull the filter handle straight out from the chassis. Filter orientation is important. Ensure you re-install the filter in the proper orientation. Clean the air filter with soapy water, and then rinse well and dry it completely before reinstalling. ΡΥΝ 6ΤΣ ΒΦΛ ΑΒΤ ΤΨΠΕ Ε ΠΧ−ΜΙΠ ΡΣΤ ΤΨΠΕ Ε ΠΧ−ΜΙΠ ∆ΕΒΥΓ Air Filter. Ensure the element is oriented as shown, so that the "Air Flow" arrow points to the right (while you are facing the rear of the chassis). FlexTest™ SE Maintenance 243 Maintenance Note Maintenance 244 Maintenance FlexTest™ SE Appendix B Menu Summaries This appendix contains fold-out summaries of FlexTest™ SE menus for ready reference. Note When used with PC-supervision, access to menus and controls is restricted. For more information, see “PC-Supervised Controllers” on page 35. Menu Summaries FlexTest ™ SE Menu Summaries 245 Menu Summaries 246 Menu Summaries FlexTest ™ SE FlexTest™ SE Controller Menus (1 of 3) Function Generator (FG) (Stand-alone mode) FG Menu FG Type: Sweep FG Type: Sweep FG Type: Monotonic FG Type: Cyclic Type: External Comma Monotonic Cyclic External Command Block Cyclic Sweep Settings6 Target Setpoint Amplitude Frequency <<Sweep Up>> <<Sweep Dwell>> <<Sweep Down>> 6Sweep Settings Control mode Wave Shape Compensator Sweep Type Sweep Mode Sweep Rate Lower Frequency Upper Frequency Control mode Rate Type Test Time End Level Type End Level Compensator Wave Shape Control mode Target Setpoint Amplitude Frequency Compensator Preset count Current count Total count Control mode Target Setpoint Soft Start/Stop Compensator FlexTest™ SE Controller Menus (2 of 3) Setup (Stand-alone mode) Setup Menu 6CLC Open/Save Parameters6 Output6 6Open/Save Parameters Select existing name 6Displacement or Force Calibration66 66Calibration Displacement6 Force6 CLC6 Force/Displacement6 Enter new name <<Open>>, <<Save>>, <<Delete>> 6Output (Single/Dual Valves) Polarity Offset/Zero66 Limits66 Error Detectors66 Tuning66 Minimum Maximum Display Unit Polarity Readout (n)6 Stabilization6 Digital Input (n)6 Digital Output (n)6 Valve Balance 1 Valve Balance 2 (Dual Only) Dither Amplitude Dither Frequency 6Output (3-Stage Valve) Null Pacing66 PVC66 APC66 PVP66 Resolution ref (H) Cal Type: Gain/Linearization Gain/Delta-K mv/v Pos Tension mv/v Pos Comp Cal Type: Gain/Linearization Pre-amp Post-amp Gain Data Range From: Data Range To: << Reset >> Linearization Data6ref (G) Excitation (peak, AC only) Cal Type: Gain Pre-amp Post-amp Gain Delta K Excitation (pea Balance option Phase << Auto Zero > Fine Zero Rate Input Selection Balance option Shunt Display r 66Conditioner Phase Shunt Ref (+) Excitation << Auto Zero >> << Update >> Phase Offset Fine Zero Shunt Display ref (E) Shunt State (+) Gain Shunt Ref (+) Polarity << Update >> Polarity Valve Balance Dither Amplitude Dither Frequency Inner Loop66 Conditioner66 Service Port Output 66Inner Loop Inner Loop Gain Inner Loop Rate Shunt State (+) 6CLC Error Detectors66ref (B) Tuning66 Null Pacing66ref (C) 6Force/Displacement Error Detectors66ref (B) Null Pacing66ref (C) PVC66ref (D) 6Readout (n) Readout Signal Polarity Gain PVC66ref (D) PVP66ref (D) Offset PVP66ref (D) Dual compensation 66 6Stabilization Calibration66 Offset/Zero66 Limits66ref (A) 66Calibration 66Offset/ Minimum <<Auto Offse Manual Offse 66Tuning 66Dual Compensation Maximum Active P Gain Limiting P Gain Conversion Gain Integrator Gain (DC only) Display Unit Polarity Gain FlexTest™ SE Controller Menus (3 of 3) Status, Scope, Meters, Tuning, Config, Limits, and Log (StandStatus Menu Scope Menu Meters Menu Tuning Menu Access Level Application Control Sweep Mode <<Add Meter>> <<Reset Meter>> Manual 6 Auto 6 Control Mode Setpoint Span <<Shutdown>> <<Reboot>> <<Save Def. Pnls.>> <<Save Panels>> <<Restore Panels>> Plot Mode Trace Time Trace 1 Settings 6 Trace 2 Settings 6 Auto-Scale 6 Placement 6Trace (n) Settings Signal Control Meter (n) 6 Placement Font Size 6Meter (n) Meter Type Signal Display Mode Placement 6Manual Control Mode FG 66 P, I, D, F, Gains S Gain ref (F) FL Filter Filter Type ref (F) Frequency ref (F) Units/Div Display Unit Bandwidth ref (F) Offset Display Mode Display Unit Display Resolution Sensitivity (P/V and M/A only) <<Add Meter After>> Stabilization Filter 66 66FG Wave Shape Display Resolution <<Delete Meter>> Frequency 6Auto-Scale Auto-Scale <<Rescale>> Same Scale <<Shift Meter Up>> <<Shift Meter Down>> Setpoint Amplitude 66Stabilization Filter ref (F) Filter Type Auto-Scale Mode 6Auto Control Mode Mode to Tune Actuator Type Lower Limit Upper Limit <<Accept>> Filter Min Filter Max Config Menu Access Level Panel placement6 Local Settings6 Edit Configuration6 Edit Hardware6 Set Date6 Set Date/Time6 Service Tools6 << Shut down >> << Reboot >> 6Panel placement Log, Status, Scope, Meters 6Local Settings HWI File Config File Regional settings66 Passwords66 Networking66 License Keys66 <<Save settings>> <<Discard changes>> 66Regional Settings Language Decimal separator 6Edit Configuration Configuration File66 493.14 S2-J766 Anlg In66 493.25 S2-J(n)66 493.25 S2-J(n)66 Mon (n)66 Anlg Out66 Digital Input (n)66 Digital Output (n)66 66Configuration File Select existing name Enter new name <<New>> 66493.25 S2-J (n) Display name Enabled Type Dimension Display Unit Channel << Add Dual Comp >> 66Mon (n),/Anlg Out/ Dig Input (n)/Dig Output (n) Display name Enabled 6Edit Hardware HWI file66 493.25 DC-Slot 166 493.25 AC-Slot 266 493.14 2SVD-Slot 466 Power Options66 System Options66 66HWI file Select existing na Enter new name << Load >> << Save >> << Delete >> 66493.25 S2-J Unit Assignment Set <<Load>> Mode Date Format Time Format 66Passwords Tuning, Calibration, Configuration 66Networking Controller ID <<Save>> <<Delete>> 66493.14 VD S2-J7 Display name Enabled Include CLC 66493.14 VD S Mode 66Power Opti Power Type HSM Type 66System Opt Controller Name Power Boot location 66Licence Keys 793.51 Scope, 793.52 Advd. FG, 793.53 Auto Tuning, 793.08 PVP 66Anlg In Display name, Enabled, Type Dimension, Display Unit Velocity Limiter (C 6Set Date/Time Month, Day, Year, Hour, <<Set>> Appendix C Boot Options By pressing specific buttons during the boot process, you can prevent the Controller from loading default files, as follows: PRESS THIS BUTTON Note TO PREVENT LOADING THIS FILE 1 Configuration file (as a result, only the Config menu will be available). 2 The parameter set and panel view associated with the configuration file (the configuration does load). 3 The panel view associated with the configuration file (the configuration and parameter set does load). Timing is important. You must press the selected button immediately after the MTS logo appears on the screen, and hold the button down until the boot process is complete. Boot Options FlexTest ™ SE Boot Options 247 Boot Options 248 Boot Options FlexTest ™ SE Index Index Symbols C .cfg file 29 .hwi file 29 carrying-handle kit 16 changing the position of panels 51 CLC 17 defining the control modes 204 example 205 using the controls 205 compensation Null Pacing about 161 Peak/Valley Compensation (PVC) about 165 Conditioner menu for three-stage valve drivers 136 conditioners electrical zero 151 offset 150 Config 17 Config menu 22 configuration file 29 configuration file (.cfg) 29 connectors, BNC 18 control modes dual compensation modes 223 types of 221 Controller files 29 creating parameter sets 30 Current Count 123 Numerics 493.15 3-Stage Valve Driver 15 493.25 Digital Universal Conditioner (DUC) 15 493.40 I/O Carrier 15 493.45 A/D 15 493.46 D/A 15 493.47 Encoder 15 793 software 36 793.01 System Software 15 793.08 PVP Compensator 15 793.10 MultiPurpose TestWare 15 793.51 Scope 15 793.52 Advanced FG 15 793.53 Auto-Tuning 15 A A/B Recall buttons 26 abbreviations 17 acceleration stabilization 202 accelerometers, stabilizing with 221 additional model 493.40 I/O Carrier 15 air filter, installing 243 Amplitude (±) 127 auto-tuning how to 101 B Back button 25 basic capabilities 14 Basic TestWare 36 Block (n) of a block-cyclic program 125 BNC connectors (front panel) 18 FlexTest™ SE D default panel positions 19 delta P sensor 202 Derivative gain 200 Dial 17, 26 Dial, and Increment/Decrement buttons 26 differential pressure, using delta P sensors 202 displacement tuning prerequisites 88 procedure 89 when to tune 88 display resolution 54 display screen 18 dither about 72 Dither Amplitude/Frequency 135 documentation for PC-Supervised activities 46 Down button 25 Index 249 Index dual-compensation control mode 223 conversion gain 169 integrator gain 169 E I electrical zero (conditioner) 151 Emergency Stop 17, 18 enabling Exclusive Control in Station Manager 43 Exclusive Control control 179 External Command 124 F Feed Forward gain 201 FG menu 21, 120 force tuning prerequisites 94 procedure 95 forward loop filter, about 203 Frequency 127 front panel controls 17 G gain Derivative 200 Feed Forward 201 Integral gain, about 198 Proportional, about 198 stabilization (S gain) 201 H hardware interface file 226 hardware interface file (.hwi) 29 Help (?) button 26 how to change numbers 53 how to change panel positions 51 how to change text 52 how to change the display resolution of controls 54 how to change the range of controls 54 how to power up the controller 49 how to select files and items from lists 57 how to use error to tune I Gain 116 how To warm up station hydraulics 59 HPU 17 HSM 17 250 hwi file (*.hwi). See hardware interface file Hydraulic Interlock 28 hydraulics warm-up 59, 79 Index Increment/Decrement buttons 26 information panels 18 information, on-screen 26 Inner Loop 135 Inner Loop Menu for Three-Stage Valve Drivers 136 Inner Loop Rate 136 inner loop, tuning three stage valves 108 Integral gain, about 198 Interlock controls 17, 28 interlock, defined 28 L Level Type (of a block-cyclic program) 125 Limits description 24 Limits table 22 Locating 46 locating documentation for PC-Supervised activities 46 location of Exclusive Control in the Station Manager 40 location of Exclusive Control on the Controller 40 Log menu 22 Log panel 22 M Master/slave power up 50 max/min meters 189, 194 mean/amplitude meters 189, 194 Menu buttons 21 Menu Item button 25 meters mean/amplitude 189, 194 peak/valley 194 running max/min 189, 194 Meters menu 22 Meters panel 22 Model 493.15 3-Stage Valve Driver 15 Model 493.25 Digital Universal Conditioner (DUC 15 Model 493.45 A/D 15 Model 493.46 D/A 15 Model 493.47 Encoder 15 Model 793.08 PVP Compensator 15 FlexTest™ SE N Navigate buttons 25 Next button 25 Null Pacing compensation about 161 Numeric keypad 27 PVC 17, 165 PVP 17, 166 Index Model 793.53 Auto-Tuning 15 Monitor 1&2 BNC connectors 18 Monitor Connectors 17 monitoring signals 18 monitoring waveforms 87 areas of interest 87 MTS Series 793 software 36 MultiPurpose TestWare 36 R rack mounting requirements 33 rack-mounting kit 16 Ramp tapered wave shape 131 Ramp wave shape 130 Rate Input Selection 136 Recall buttons 26 reset button 28 Rewind 28 RPC® software 36 S O offset (conditioner) 150 Open/Save Parameters 133 optional features 15 P panel settings for PC-supervised Controllers 45 panel view sets 30 panel views 20 parameter set 30 parameter sets 30 Passes (in a block cyclic program) 125 passwords and PC-supervised controllers 44 PC-supervised power up 49 PC-supervision 35 Peak Valley Control (PVC) compensation 165 Peak Valley Phase (PVP) compensation 166 Peak/Valley Compensation (PVC) about 165 peak/valley meters 194 PIDF 17 Polarity 135 Power controls 28 prerequisites creating a parameter set 30 Preset Count 122 pressure (differential) 202 Previous button 25 Previous/Next 17 Program controls 28 Program Interlock 28 Proportional gain, about 198 FlexTest™ SE S gain. See stabilization gain save station parameter set 93, 100 tuning parameters 83 scope plot options 185 signals (time base scaling) 186 Scope menu 21 Scope panel 21 selecting applications for PC-supervised controllers 44 sensor files in PC-supervised Controllers 45 Service Port Output 135 Service Port Output Signals 137 servovalve polarity check 64, 67 setting polarity 63 Setup menu 21 signal diagram 193 signal limits setting limit detector 156 signal monitoring 18 Sine tapered wave shape 131 Sine wave shape 130 specifications 32 specimens changing 82 Square tapered wave shape 131 Square wave shape 130 stabilization gain 201 with acceleration 202 with differential pressure sensor 202 Stand-alone power up 49 standard features 13, 14 Index 251 Index station parameter set creating 30 overview 30 Status menu 21 Sweep Settings (of a sweep program) 127 switching Exclusive Control between interfaces 40 system hydraulics, warm-up 59, 79 T tapered wave shapes 131 Target Setpoint 122, 127 Total Count 123 tuning auto-tuning 101 compensation 82 creating a program 86 Derivative gain, about 200 displacement 88 dither about 72 Feed Forward gain, about 201 force control modes 94 forward loop filter, about 203 guidelines 83 inner loop 108 Integral gain, about 198 monitoring waveforms 87 prerequisites 85 Proportional gain, about 198 specimens changing 82 three stage valves 108 valve balance 68 waveforms 86 when to tune 84 Tuning menu 22 W warm-up procedure 59, 79 Wave shapes ramp 130 ramp tapered 131 sine 130 sine tapered 131 square 130 square tapered 131 waveforms 86, 87 areas of interest 87 monitoring 87 Z zero offset conditioner zero 150 shift conditioner electrical zero 151 U Up button 25 Upset recovery method 117 V Valve Balance 135 valve balance, adjusting 68 valves polarity check 64, 67 252 Index FlexTest™ SE