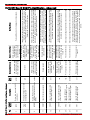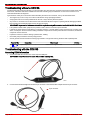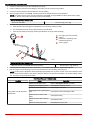
1
Diagnostics and Troubleshooting
Fuel System
Section 3B - Diagnostics and Troubleshooting
Table of Contents
Fuel System Specifications................................................3B-2
Wire Color Code Abbreviations..........................................3B-3
30/40 EFI Gen III ECM Pin Identification...........................3B-3
30/40 EFI Gen III ECM Pin Identification ‑ Advanced........3B-6
Troubleshooting without a CDS G3 ................................3B-10
Troubleshooting with the CDS G3...................................3B-10
Accessing ECM Information.....................................3B-10
Engine Information Displayed by CDS G3................3B-11
Faults........................................................................3B-11
Freeze Frame Buffer CDS G3 Display Information. .3B-12
Default Sensor Information.......................................3B-14
Data Count to Voltage Table....................................3B-14
Data Stream..............................................................3B-15
Fault Conditions........................................................3B-19
Basic Diagnostic Outline...........................................3B-20
30/40 EFI Fault Information......................................3B-21
CDS G3 Text ‑ Guardian Cause...............................3B-24
90-883064R03 NOVEMBER 2010
Fuel System.....................................................................3B-24
Pressure Regulator Test (Electric Fuel Pump).........3B-24
Anti‑Siphon Valves...................................................3B-25
Mechanical Fuel Pump Test (Vacuum).....................3B-25
Mechanical Fuel Pump Test (Pressure)...................3B-27
Fuel Pump Pressure Troubleshooting......................3B-28
Guardian Protection System............................................3B-28
Overheat Temperature Parameters.................................3B-29
30/40 EFI FourStroke...............................................3B-29
Gen III EFI System Troubleshooting Guide.....................3B-30
Component Resistance Tests..........................................3B-33
Engine Coolant Temperature (ECT) Sensor and
Manifold Air Temperature (MAT) Sensor..............3B-33
Fuel Injector..............................................................3B-34
Main Power Relay.....................................................3B-34
Manifold Absolute Pressure (MAP) Sensor..............3B-34
Crankshaft Position Sensor (CPS)...........................3B-35
Page 3B-1
3
B
Diagnostics and Troubleshooting
Fuel System Specifications
Fuel System Specifications
Mechanical water‑cooled (plunger/
diaphragm)
Fuel lift pump type
Fuel pump pressure (maximum)
20–41 kPa (3–6 psi)
Plunger stroke
5.9 mm (0.232 in.)
Fuel tank capacity
Accessory
Fuel injection system
Sequential
Fuel injector resistance
10–13.5 ohms
Pressure
Electric fuel pump
Mechanical fuel pump
290–303 kPa (42–44 psi)
Engine running ‑ after five minutes
295 kPa (43 psi)
Minimum pressure at 1000 RPM with pinched fuel
outlet line
20.7 kPa (3 psi)
Minimum vacuum at 1000 RPM with fuel inlet line
pinched
102 mm Hg (4 in. Hg)
Vapor separator float height ‑ float needle seated
36.5–39.5 mm (1.437–1.555 in.)
Idle RPM (neutral) warm
750 ± 25 RPM
Idle RPM (forward gear) warm
750 ± 25 RPM
Lubricant, Sealant, Adhesives
Tube Ref No.
25
Description
Liquid Neoprene
Where Used
Part No.
Grounds and ring terminals
92- 25711 3
Special Tools
CDS G3 Diagnostic Interface Tool With
Harness
8M0046124
Provides diagnostic support for the Computer Diagnostic System.
41993
CDS G3 Termination Harness
84‑8M0045065
43351
Fuel Pressure Gauge Kit
Contains termination resistors to allow communication when G3 is connected to
the engine's diagnostic connector.
91‑881833A03
Tests the fuel pump pressure; can be used to relieve fuel pressure.
2807
Page 3B-2
90-883064R03 NOVEMBER 2010
Diagnostics and Troubleshooting
Dual Fuel/Air Pressure Gauge Kit
91‑881834A 1
Tests fuel and air pressure; the dual gauges allow the viewing of both pressures
simultaneously.
5822
DMT 2004 Digital Multimeter
91‑892647A01
Measures RPM on spark ignition (SI) engines, ohms, amperes, AC and DC
voltages; records maximums and minimums simultaneously, and accurately reads
in high RFI environments.
H z TEMP
mA
A
V Hz
mV
IG
OFF
IP
TEMP
A
mA
COM
V
Hz
4516
Wire Color Code Abbreviations
Wire Color Abbreviations
BLK
Black
BLU
Blue
BRN
Brown
GRY
Gray
GRN
Green
ORN or ORG
Orange
PNK
Pink
PPL or PUR
Purple
RED
Red
TAN
Tan
WHT
White
YEL
Yellow
LT or LIT
Light
DK or DRK
Dark
30/40 EFI Gen III ECM Pin Identification
Pin
Gen III ECM
Color Code
1
Empty
Empty
2
Empty
Empty
3
Idle air control (IAC) valve driver
wht/orn
4
Analog tach signal out or tach link configuration1.
5
Empty
Empty
6
Empty
Empty
7
Empty
Empty
8
Main power relay (MPR) driver (pin that controls MPR)
yel/ppl
9
Empty
Empty
10
Empty
Empty
11
Oil pressure signal
12
Empty
13
CPS signal (–)
wht
14
Crankshaft position sensor (CPS) signal (+)
red
15
Empty
Empty
16
Empty
Empty
17
Empty
Empty
18
Empty
Empty
gry
lt blu
Empty
1. May be switchable with the CDS G3.
90-883064R03 NOVEMBER 2010
Page 3B-3
Diagnostics and Troubleshooting
Pin
Gen III ECM
Color Code
19
Empty
20
Intake air temperature (IAT) signal
21
Engine coolant temperature (ECT) signal
tan/blk
22
Manifold absolute pressure (MAP) signal
yel
23
CAN 1 (+) signal for SmartCraft gauges and CDS G3 tool
wht
24
CAN 1 (–) signal for SmartCraft gauges and CDS G3 tool
dk blu
25
Empty
Empty
26
Empty
Empty
27
Empty
Empty
28
Not for service
dk blu/wht
29
Not for service
wht/lt blu
30
Empty
Empty
31
Empty
Empty
32
EST coil #1 driver (controls smart coil)
33
EST coil #2 driver
grn/red
34
Sensor power (power 1) 5 V (+) from ECM to sensors
ppl/yel
35
Empty
Empty
36
Empty
Empty
37
Empty
Empty
38
Empty
Empty
39
Empty
Empty
40
Empty
Empty
41
Emergency stop (through 14 pin main engine harness)
blk/yel
42
Sensor ground (5 V [–]), sometimes called filtered ground
blk/orn
43
Empty
Empty
44
Empty
Empty
45
Empty
Empty
46
Empty
Empty
47
Empty
Empty
48
Empty
Empty
49
Fuel injector #1 driver (controls negative side of injector)
pnk/brn
50
Fuel injector #2 driver (controls negative side of injector)
pnk/red
51
Empty
Empty
52
Wake up (key switch +)
53
Throttle position sensor (TPS) signal
54
Empty
Empty
55
Empty
Empty
56
Empty
Empty
57
Driver power (12 V [+]) (from MPR into the ECM)
red/blu
58
Driver power (12 V [+]) (from MPR into the ECM)
red/blu
59
Empty
Empty
60
Empty
Empty
61
Empty
Empty
Page 3B-4
Empty
tan
grn
ppl
lt blu/wht
90-883064R03 NOVEMBER 2010
Diagnostics and Troubleshooting
Pin
Gen III ECM
Color Code
62
Empty
63
Warning horn driver (controls negative side of horn)
64
Empty
Empty
65
Fuel injector #3 driver (controls negative side of injector)
pnk/orn
66
EST coil #3 driver
grn/orn
67
Battery positive (+) to ECM
red/ppl
68
Ground (to engine block/negative battery terminal)
blk
69
Fuel pump driver (controls fuel pump negative side)
red/blk
70
Ground (to engine block/negative battery terminal)
blk
90-883064R03 NOVEMBER 2010
Empty
tan/lt blu
Page 3B-5
wht/orn
gry
yel/ppl
lt blu
wht
red
tan
tan/blk
yel
Driver ‑ Idle air control (IAC)
valve driver
Analog tach signal out or tach
link configuration1.
Driver ‑ Main power relay
(MPR) driver (pin that controls
MPR)
Input ‑ Oil pressure signal
Input ‑ Manifold absolute
pressure (MAP) signal
MPRD
SWG1
CNK VR Input ‑ Crankshaft position
+
sensor (CPS) signal (+)
Input ‑ Engine coolant
temperature (ECT) signal
Tach_
Link
CNK VR Input ‑ Crankshaft position
–
sensor (CPS) signal (–)
Input ‑ Manifold air
temperature (MAT) signal
LSO2
AN2
AN3
AN1
4
8
11
13
14
20
21
22
3
Color
Code
Description
Cryptic
Name
Pin
30/40 EFI Gen III ECM Pin Identification ‑ Advanced
Page 3B-6
If SmartCraft products are used, you must "enable" the
"Set Tach Link" function. If a conventional 3 wire
tachometer (power, ground, and signal), then you must
"Disable" the "Set Tach Link" function.
Use "Set Tach Link"
active test in G3 to
configure this output. By
default, function is
disabled.
Pins 13 and 14 are
companions and are
isolated from other
circuits.
Pin 34 (sensor power)
and 42 (sensor ground)
Pin 42 (sensor ground)
Three wire pressure
sensor.
Two wire thermistor.
Signal is highest when reading barometric pressure.
Signal is lowest when throttle is closed. Verify MAP
readings change with throttle movement. MAP sensors
can stick at a single value. This will cause the engine to
run poorly except at the exact speed the MAP reading is
correct.
Sensor signal voltage is high when cold and low when hot.
Sensor signal voltage is high when cold and low when hot.
As the flywheel rotates, the timing vanes pass by the
sensor and produce an AC voltage signal the ECM uses
to determine crankshaft position and speed.
Circuit is isolated from
ground. Voltage only
flows between sensor
and ECM through pins
13 and 14.
Pins 13 and 14 are
companions and are
isolated from other
circuits.
Two wire thermistor.
As the flywheel rotates, the timing vanes pass by the
sensor and produce an AC voltage signal the ECM uses
to determine crankshaft position and speed.
Circuit is isolated from
ground. Voltage only
flows between sensor
and ECM through pins
13 and 14.
Engine ground
Pin 42 (sensor ground)
Switch provides ground through engine block. Switch
open = good pressure. Switch closed = no pressure.
When open, the circuit (lt blue) will read 5 V (or close to 5
V). When closed, the circuit will read 0 V (or close to 0 V).
One wire pressure
sensor switch.
Relay control coil is
connected to battery
volts on one end and
ECM pin 8 on the other.
ECM pin 8 controls the
ground for the relay's A relay that clicks may not be working correctly. The relay
control coil. When
must provide a closed circuit (low resistance) between
grounded, the relay
relay pins 30 and 87A when turned on, and an open circuit
turns on. When opened,
(high resistance) when turned off.
the relay turns off.
Pulse width percent is displayed on data stream.
ECM grounds pin 3
using pulse width
modulation (PWM) to
control the IAC valve
opening.
IAC positive terminal
receives battery volts
from main power relay.
Ground
Service Notes
Service Information
Companion Circuits
Diagnostics and Troubleshooting
30/40 EFI Gen III ECM Pin Identification ‑ Advanced
90-883064R03 NOVEMBER 2010
90-883064R03 NOVEMBER 2010
ppl/yel
blk/yel
Driver ‑ EST coil #2 driver
Sensor power (power 1) from
ECM to sensors
(5 V +)
Input ‑ Emergency stop
(through 10 pin CAN
connector)
Sprk_
IGBT1
Sprk_
IGBT2
32
33
34
41
Sensor ground 5 V (–),
sometimes call filtered ground
grn/red
Driver ‑ EST coil #1 driver
CAN1L
24
42
dk blu
Communication ‑ SmartCraft
CAN P Low (–)
blk/on
grn
wht
CAN1H
Communication ‑ SmartCraft
CAN P High (+)
23
Color
Code
Description
Cryptic
Name
Pin
Requires CAN terminator resistors to communicate. No
resistors = no communication.
Data highway for ECM,
G3 tool, and SmartCraft
devices. Opening or
shorting either circuit
(pin 23 or pin 24) will
result in no
communication
between devices.
Since primary current flows through the ECM, it is critical
ECM grounds pin 32 to
the ECM is grounded. Verify the black leads coming from
charge the #1 ignition
pins 68 and 70 are connected to ground. The hardware
coil and opens this pin to
must be clean and tight. High resistance grounds will
discharge the coil.
cause premature ECM failure.
Since primary current flows through the ECM, it is critical
ECM grounds pin 33 to
the ECM is grounded. Verify the black leads coming from
charge the #1 ignition
pins 68 and 70 are connected to ground. The hardware
coil and opens this pin to
must be clean and tight. High resistance grounds will
discharge the coil.
cause premature ECM failure.
Pin 23 and pin 24 are
companions on an
isolated communication
circuit
Pin 23 and pin 24 are
companions on an
isolated communication
circuit
Coil positive terminal
receives battery volts
from main power relay.
Coil negative (green)
circuit is connected to
ECM.
Coil positive terminal
receives battery volts
from main power relay.
Coil negative (green)
circuit is connected to
ECM.
Pin 34 (sensor power)
Pin 42 (sensor ground)
Pin 42 (sensor ground)
Requires CAN terminator resistors to communicate. No
resistors = no communication.
Data highway for ECM,
G3 tool, and SmartCraft
devices. Opening or
shorting either circuit
(pin 23 or pin 24) will
result in no
communication
between devices.
Dedicated 5 V ground
circuit for all 2 and 3 wire
sensors.
Circuit must be open to
run. When shorted to
ground, ECM will not
allow the engine to run.
If open, engine will not start. All sensors will be skewed
high or low.
When open, the black/yellow circuit will read
approximately 8 V. When closed, the circuit is
approximately 1 V.
5 V to all 2 and 3 wire
sensors. Pin 42
If sensor power voltage is higher or lower than normal, all
provides a ground for all
2 and 3 wire sensors signals will be skewed higher or
sensors using this
lower than normal. Sensor power should always be at or
circuit. Sensor power
near 5 V.
voltage displayed on
data stream.
Service Notes
Service Information
Companion Circuits
Diagnostics and Troubleshooting
1. May be switchable with the CDS G3.
Page 3B-7
Page 3B-8
EST coil #3 driver
Voltage input ‑ Battery (+)
66
67
63
red/ppl
grn/orn
pnk/orn
Driver ‑ Warning horn (controls
Battery volts from ignition
tan/lt blu
negative side of horn)
switch
58
65
red/blu
Driver power ‑ from MPR into
the ECM (12 V +)
Driver ‑ Fuel injector #3 driver
(controls negative side of
injector)
12 V from main power
A relay with burned contacts between pin 30 and pin 87A
relay circuit. Voltage
can cause low voltage to the driver power. This voltage is
only present when MPR
displayed on the data stream.
is active.
Pin 57 and pin 58 are
spliced together in the
engine harness.
red/blu
57
ECM grounds pin 65 to
fire the #3 fuel injector.
When opened, the fuel
injector closes.
The length of time the injector is open is called pulse width.
Pulse width information is displayed on the data stream.
ECM grounds this pin to
activate the warning
The warning horn status is displayed on the data stream.
horn.
ECM ground
Constant 12 V + when
battery is connected.
Large terminal with a heavy gauge wire.
Coil positive terminal
Primary current flows through the ECM and it is critical the
ECM grounds pin 66 to
receives battery volts
ECM is grounded. The black leads coming from pins 68
charge the #3 ignition
from main power relay.
and 70 are connected to ground. The hardware must be
coil and opens this pin to
Coil negative (grn) circuit
clean and tight. High resistance grounds will cause
discharge the coil.
is connected to the ECM.
premature ECM failure.
Fuel injector positive
terminal receives battery
volts from main power
relay. Injector negative
(pnk/orn) is connected to
the ECM.
12 V from main power
A relay with burned contacts between pin 30 and pin 87A
relay circuit. Voltage
can cause low voltage to the driver power. This voltage is
only present when MPR
displayed on the data stream.
is active.
Pin 57 and pin 58 are
spliced together in the
engine harness.
Driver power ‑ from MPR into
the ECM (12 V +)
TPS signal voltage will be lowest when throttle is closed
and highest when throttle is open.
Three wire position
sensor.
Key switch voltage is displayed on the data stream.
The length of time the injector is open is called pulse width.
Pulse width information is displayed on the data stream.
Pin 34 (sensor power)
and pin 42 (sensor
ground)
ECM grounds pin 59 to
fire the #2 fuel injector.
When opened, the fuel
injector closes.
Fuel injector positive
terminal receives battery
volts from main power
relay. Injector negative
(pink/red) is connected to
the ECM.
The length of time the injector is open is called pulse width.
Pulse width information is displayed on the data stream.
Input ‑ Throttle position sensor
lt blu/wht
(TPS) signal
53
ECM grounds pin 49 to
fire the #1 fuel injector.
When opened, the fuel
injector closes.
Fuel injector positive
terminal receives battery
volts from main power
relay circuit. Injector
negative (pink/brown) is
controlled by the ECM.
Service Notes
12 V from key switch to
turn the ECM on.
52
Service Information
Companion Circuits
ECM ground
Voltage input ‑ Wake up (key
switch +)
50
ppl
pnk/red
Fuel injector #2 driver
(controls negative side of
injector)
Color
Code
pnk/brn
Description
49
Cryptic
Name
Fuel injector #1 driver
(controls negative side of
injector)
Pin
Diagnostics and Troubleshooting
90-883064R03 NOVEMBER 2010
Driver ‑ High pressure electric
fuel pump
Ground (to engine block/
negative battery terminal)
69
70
Description
Ground (to engine block/
negative battery terminal)
Cryptic
Name
68
Pin
blk
red/blk
blk
Color
Code
ECM ground circuit.
Service Information
Pins 68 and 70 are both
ECM ground
ECM ground circuit.
Fuel pump positive
Fuel pump current draw
terminal receives battery
(measured within the
volts from main power ECM) can be viewed on
relay. Fuel pump
the data stream. The
negative terminal
fuel pump runs when the
connects to ECM pin 69.
ECM grounds pin 69.
Pin 68 and 70 are both
ECM ground.
Companion Circuits
Large terminal with a heavy gauge wire.
Large terminal with a heavy gauge wire.
Large terminal with a heavy gauge wire.
Service Notes
Diagnostics and Troubleshooting
90-883064R03 NOVEMBER 2010
Page 3B-9
Diagnostics and Troubleshooting
Troubleshooting without a CDS G3
Troubleshooting without the CDS G3 tool is not recommended. The CDS G3 tool is required to access the necessary faults, data,
active tests, and historic data that is available from the ECM. Checking only the resistance on some of the sensors is not a
recommended method for diagnosis.
Typical failures usually do not involve the ECM. Most likely at fault are the connectors, set‑up, and mechanical wear.
•
The engine may not run or may not run above idle with the wrong spark plugs installed.
•
Swap ignition coils to see if the problem follows the coil or stays with the particular cylinder.
•
Any sensor or connection can be disconnected and reconnected while the engine is operating without damaging the ECM.
Disconnecting the crankshaft position sensor will stop the engine.
IMPORTANT: Any sensor that is disconnected while the engine is running will be recorded as a fault in the ECM Fault Hours.
•
If all cylinders exhibit similar symptoms, the problem is with a sensor or harness input to the ECM.
•
If problem is speed related or intermittent, it is probably connector or contact related. Inspect connectors for corrosion, loose
wires, or loose pins. Secure connector seating. If dielectric compound was used to protect the wire connections, the dielectric
compound must be removed.
•
Inspect the harness for obvious damage: pinched wires, chaffing.
•
Check fuel pump connections and fuel pump pressure.
•
Secure grounds and all connections involving ring terminals. Coat grounds and ring terminals with Liquid Neoprene.
Tube Ref No.
25
Description
Liquid Neoprene
Where Used
Part No.
Grounds and ring terminals
92- 25711 3
Troubleshooting with the CDS G3
Accessing ECM Information
1.
Connect the USB cable end into one of the computer USB ports.
IMPORTANT: Always connect to the same USB port when acquiring data.
43969
2.
Connect the SmartCraft Diagnostic Interface 9 pin connector to the CAN P/CAN H adapter harness 9 pin connector.
a - 9 pin connector
a
43970
Page 3B-10
90-883064R03 NOVEMBER 2010
Diagnostics and Troubleshooting
3.
Remove the CAN P termination resistor from the engine harness.
4.
Connect the CAN P/CAN H adapter harness to the CAN P/CAN H termination harness (84‑8M0045065)
5.
Connect the CAN P/CAN H termination harness to the CAN P engine harness SmartCraft diagnostic port.
IMPORTANT: The G3 CAN P/CAN H termination harness (84‑8M0045065) contains the correct termination resistor for the
CDS G3 SmartCraft Diagnostic Interface to communicate with the ECM.
6.
Key‑up the engine.
7.
Open the G3 software program.
NOTE: The following lights on the G3 interface should be lit:
•
Pwr
•
Bus I
•
Bus II (disregard any activity on these engines)
a - SmartCraft diagnostic port
b - ECM
a
b
43426
The ECM is designed that if a sensor fails, the ECM will compensate so the engine continues to run efficiently as possible. However,
the air/fuel mixture will not be as accurate without all of the sensors providing input. Under most conditions, a sensor failure results
in an air/fuel mixture that is richer than normal. Because of this, disconnecting a sensor for troubleshooting purposes will produce
noticeably different effects on the running quality, depending on which sensor is disconnected.
The CDS G3 system was developed specifically to help technicians diagnose and repair Mercury Marine engines and systems.
The CDS G3 will monitor sensors and ECM data values including the status of switches.
CDS G3 Diagnostic Interface Tool With
Harness
CDS G3 Termination Harness
8M0046124
84‑8M0045065
Engine Information Displayed by CDS G3
The Module Data screen will display the following information for each module it finds on the CAN Bus.
•
Status (online or offline)
•
Electronic Address (city ID)
•
CAN bus on P or H
•
Calibration ID
•
Informational Messages
Faults
A Fault indicates the ECU has either sensed the circuit in question has reported a sensor value outside of its acceptable parameters
or a sensor value has gone outside its normal range. For example:
A circuit with an open or short would give a fault that is "CUT HI" or "CUT LO." This indicates the sensor has failed with an open
or short circuit, or one of the leads between the sensor and the PCM/ECM is open or shorted.
A sensor showing a reading outside of its normal range, but not shorted or open, would give a fault identifying an abnormal
operating condition, such as "ECT Coolant Overheat," which indicates the ECT circuit is operating correctly, and the engine is
overheating.
•
Fault codes can be displayed active or historic.
90-883064R03 NOVEMBER 2010
Page 3B-11
Diagnostics and Troubleshooting
•
An active fault is a fault that is present right now. It is occurring at this instant. Active faults affect how the engine is running
right now. Active faults will activate the Guardian program, which will reduce engine power based on the severity of the
problem. Refer to Guardian Protection System.
•
An occurred fault is a fault that was active during this key switch cycle, but is not active now. Occurred faults do not affect
how the engine is running. They are valuable for diagnosing intermittent faults (faults that come and go, but do not stay active
permanently). Without the intermittent/historic fault, we would not know that a problem occurred in the past.
•
The View Fault displays active and inactive faults, the code number, description, and the source of the faults. When the status
column shows "YES," they are active. When the status shows "NO," they are inactive/historic, which also means intermittent
(a fault that comes and goes, but does not stay active permanently).
Freeze Frame Buffer CDS G3 Display Information
Freeze Frames are captures of selected data stream items at the time a fault occurs. A Buffer can be created for each fault that
is enabled on a particular calibration. When a fault becomes active, the ECM will store the data items in the first buffer using the
values the instant the fault became active.
Buffer Data Item
Service Description
Service Information
FF_FaultIndex
Lists the fault name
Refer to the fault listing for more fault
information
FF_Occurance_Cnt_Data
Lists the number of times the fault has
occurred. This count starts at 0, where 0=1,
1=2, 3=2 and so on.
The number of times the fault has occurred
is important. Low number of occurrences
could be someone tampering with the
system. One or two occurrences over a long
time are not cause for concern. A single
occurrence 30 minutes ago needs to be
checked out. High numbers can indicate an
intermittent problem. Look for loose and
corroded connections. Check both battery
cable connections at the battery and engine.
Check for corrosion on connectors and
terminal studs.
FF_ActualGear_Data
Lists the gear position at the time of the fault.
Not applicable on this engine. No sensor
(switch) installed. Will always read "In_gear."
FF_APC_Data
Lists the air per cylinder per cycle calculation
at the time of the fault.
Compare to previously saved data.
FF_Baro_Data
The barometric reading is a reference
pressure reading that relates to the altitude
the ECM was at when the fault was stored.
Lists the barometric pressure reading taken
Higher than normal readings will cause the
at the start of the run cycle during which this
engine to be richer than normal. Lower than
fault occurred. The barometric reading is
normal readings will cause the opposite.
taken once per run cycle, when the key is
Barometric pressures will change with the
turned on.
weather. The barometric sensor displays
absolute pressure, which means it is a raw
reading that has not been compensated.
FF_BaseSparkAdv_Data
FF_BattVolt_Data
Page 3B-12
Lists the spark advance at the time of the
fault.
Spark advance is ignition timing and is listed
in degrees before top dead center (BTDC).
Negative numbers indicate degrees after top
dead center.
Lists the battery voltage at the time of the
fault .
Battery voltage anywhere on the engine
should always be within one volt of the
voltage at the battery terminals. The battery
should not drop below 11.0V during normal
operation, except while starting the engine.
Low voltages at the ECM can indicate
problems with loose or corroded
connections, excessive accessory loads,
defective charging system and/or battery.
The voltage that determines this fault is
measured at Pin 67 (and/or pin 52).
90-883064R03 NOVEMBER 2010
Diagnostics and Troubleshooting
Buffer Data Item
FF_ECT_Data
FF_EngineState_Data
FF_EngRunTime_Data
FF_FaultIndex_Data
Service Description
Service Information
Lists the engine temperature at the time of
the fault.
Temperatures below normal operating
temperature are usually the result of debris
holding the thermostat open. A cold‑running
engine will run rich and can eventually dilute
the engine oil with gasoline. EFI engines
must reach an operating temperature to run
properly.
Displays the engine operating mode at the
time of the fault.
Possible engine states are: dead, stall,
crank, run, and unknown. This helps you
understand the operating mode the engine
was in at the time of the fault. Normal values
are stall, crank, or run.
Lists the total engine run time when the fault
occurred. For example, if the buffer data is
11.8 hours and total engine run time is 13.2
hours, the fault occurred 1.4 engine run hours
ago. Recent faults deserve more attention
than faults from long ago.
A fault that stored a couple of times a long
time ago and occurred again is usually
something to not spend time on. In these
cases, record the buffer data on the work
order in case it shows up again, then clear
the fault buffer. Old buffers are relevant
when the customer complaint is about
something that happened a long time ago.
Review the buffer data and inspect the
relevant circuit and components.
Fault number ‑ a specific number tied to a
specific fault name.
Currently CDS G3 displays the fault number
in freeze frame buffers, but does not display
the fault number in active/inactive faults.
FF_GuardianLatchedPwrLim_
Data
Guardian will reduce available power the
most for severe problems: low oil pressure
Lists the available power at the time the fault
and engine overheat. Mild problems (sensor
occurred.
circuit high) will result in a small reduction in
available power.
FF_IAT_Data
Intake air temperature data is used to
calibrate the air/fuel mixture. It cannot cause
Lists the intake (manifold) air temperature at
drastic changes to the air/fuel mixture. Do
the time the fault occurred.
not blame major engine issues on this
sensor.
FF_IdleAir_Data
The IAC valve will open on deceleration to
prevent stalling. Low numbers, or even 0 at
Lists the IAC valve position at the time of the
idle, indicate air leaks into the intake
fault.
manifold. Higher than normal numbers can
indicate tampering with the throttle body.
FF_MAP_Data
FF_OilPress_Data
FF_RPM_Data
90-883064R03 NOVEMBER 2010
Lists the manifold absolute pressure at the
time of the fault.
Similar to Baro, the MAP sensor modify the
fuel curve richer or leaner. The MAP reading
will change with throttle, RPM and load
changes. Higher than normal MAP readings
cause rich mixtures. Lower than normal
reading cause lean mixtures.
The oil pressure switch opens at a
predefined pressure. If the switch is closed
Lists the oil pressure status at the time of
(shorted to ground), then oil pressure is not
fault. 0.0 kPa indicates the oil pressure switch
high enough for safe engine operation. If the
was closed. 87.0 kPa indicates the oil
switch is open (no continuity to ground), then
pressure switch was open.
oil pressure is high enough for safe engine
operation.
Lists the engine RPM at the time the fault
occurred.
No additional information.
Page 3B-13
Diagnostics and Troubleshooting
Buffer Data Item
FF_RunFPC_Data
Service Description
Service Information
Lists the fuel per cylinder per cycle value at
the time the fault occurred.
Indication of fuel flow through injectors.
Higher numbers indicate richer mixtures,
lower numbers indicate lean mixtures.
Lists the water pressure inside the engine
block.
Not applicable on this engine. No sensor
installed. Will always read 0.0 kPa,
regardless of the actual water pump
pressure.
FF_SeaPumpPress_Data
FF_SysVolt_Data
System voltage starts at the battery and
flows to the MPR and fuses. When the MPR
is turned on, battery voltage flows from the
Lists the system voltage at the time the fault
MPR and into the ECM on pins 57 and 58.
occurred.
System voltage is used to control actuators:
IAC valve, fuel injectors, fuel pumps, and
ignition coils.
FF_TPS_Data
TPS data can be used to determine operator
demand. TPS and MAP data mirror each
Lists the throttle position at the time the fault
other in most operating conditions. High TPS
occurred.
= high MAP. Low TPS = low MAP. This is
only true when the engine is running.
FF_XDRPa_Data
Ideally, this reads 4.98–5.02V. 4.90–5.10V is
the maximum acceptable range. When it is
unacceptable, it is usually pulled down by a
Lists the sensor power voltage at the time the
shorted sensor or sensor harness. If it is too
fault occurred. This value should be 5V.
high, it has shorted to battery voltage.
Sensors cannot display accurate data when
sensor power is unacceptable.
Default Sensor Information
Default sensor values are preprogrammed amounts used by the PCM to calculate fuel and ignition values when the sensor in
question has exceeded its preprogrammed diagnostic limits. Default sensor values are typically used when the sensor has a circuit
high or circuit low fault. For example, all 2 wire sensors operate the same. When you unplug the sensor, a circuit high fault occurs
and when you short the two wires together, a circuit low fault occurs.
Most temperature sensors default to 0 °C (32 °F). This can be verified by unplugging the sensor in question and watching the data
stream value with the CDS.
Most pressure sensors default to a preprogrammed number also. The MAP sensor is an exception. A failed MAP sensor will
display a value that is near the actual value, but diagnosed with displayed fault codes. Refer to Fault Information.
Data Count to Voltage Table
Some data on the CDS G3 screen is presented as analog to digital conversion (ADC) counts. ADC is a method of changing the
sensor signal into display information for diagnosis. In diagnosing circuits that use data counts it is helpful to convert the counts
into volts to allow the use of a multimeter on that circuit.
The display range for data counts is 0–1023. Zero counts equal zero volts and 1023 counts equal 5 V.
Page 3B-14
90-883064R03 NOVEMBER 2010
Diagnostics and Troubleshooting
ECM70 Series Controller
Digital to Analog Voltage Conversion (ADC Counts)
0 Counts = 0 Volts, 1023 Counts = 5.0 Volts
Counts from Service Tool Data Stream
DC Voltage
0
0
10
0.049
20
0.098
102
0.498
205
1.001
410
2.002
615
3.003
819
4.00
900
4.395
950
4.639
1000
4.883
1023
5.000
Data stream value x 0.0048828 = equivalent DC voltage.
Data Stream
Description
from G3
Significance
Service Information
ActiveFaultMarquee
N/A
Continuously scrolls through all active
faults approximately one per second.
Displays dashes when there are no
faults.
Convenient to see if active faults are
present without switching to the fault
page.
ActiveFaultPwrLim
Available
power due to
active faults
Displays how much available power
remains after all active faults have
reduced it from 100%.
Most technicians use the data item
"GuardianLatchedPwrLim" to determine
the total amount of power available to the
operator.
APC
Air per Cylinder
per Cycle
(APC)
Similar to FPC. A calculation of air
passing through the cylinders.
Compare to previously recorded values.
Data Item Name
Barometric
Pressure
A technician should understand what the
typical Baro value is at his location.
Compensate your shop value for
Displays the current barometric
extremely high or low barometric
pressure. Baro on an EFI engine is
pressures due to extreme weather
absolute, often called raw. Raw data
conditions. When Baro readings are
must be used to calculate fuel delivery
incorrect and higher than actual (due to
at different altitudes. Baro data
determines the fuel delivery at start up. sensor or circuit problems) the engine will
run rich. When incorrect and lower than
actual, the engine will run lean.
BaseIdleRPM
Default Idle
RPM
This is the idle RPM the ECM wants the
engine to idle at when at operating
temperature and running normal.
This may not be the actual idle speed the
ECM is trying to achieve. Use the data
item IdleCtrlSetpointRPM for the actual
idle speed the ECM is trying to achieve
when the engine is running.
CurrentEngineLocation
N/A
Displays the current engine location
programmed into the ECM.
Use the G3 tool to change the engine
location; STBD Outer (default), PORT
Outer, STBD Inner or PORT Inner.
BARO
90-883064R03 NOVEMBER 2010
Page 3B-15
Diagnostics and Troubleshooting
Data Item Name
Description
from G3
Significance
Service Information
DemandLinear
Operator
Demand
(from TPS
sensor)
How much power is requested from the
engine.
Important when working with the
Guardian program.
DRVP
If voltage is low and battery voltage is
Shows if the ECM is receiving the
correct (at battery terminals), test the
voltage it needs to control all of the
main power relay and engine fuses.
Battery Voltage
actuators. The voltage should be within Check battery cables for loose, corroded,
from Main
0.5V of actual battery voltage. The
or high resistance connections. Verify
Power Relay
ECM measures this voltage at pins 57
ECM grounds to the negative battery
cable. Test the red/blue between the
and 58.
ECM, the MPR, and fuse block.
ECT
Temperature of the Engine Coolant.
EFI engines will not run correctly
unless they reach operating
The cooling system uses raw water to cool
temperature. Running too cold will
Engine Coolant
the engine. Debris in the cooling system
cause rich mixtures (like a stuck
Temperature
can hold the thermostat open causing the
choke). The engine will idle very poorly
(ECT)
engine to run cold.
until the problem is resolved. Always
verify proper ECT temperature when
diagnosing an engine.
ECUP
If this voltage is more than 1 V below
actual battery voltage, check the circuit to
Battery Voltage Voltage from the ignition switch to pin
the helm, key switch and back to engine
from Ignition 52 on ECM. This voltage tells the ECM
for high resistance, loose connections,
Switch
to wake up and turn itself on.
corrosion, or other causes for voltage
drop.
EngineState
ESTOP
ESTOP_ADC
FPC_Total
Page 3B-16
N/A
Emergency
Stop (ESTOP)
Displays the current operating mode of
the engine: Dead, Stall, Crank, Run,
Unknown. Typical modes are Stall,
Crank, or Run.
More critical when used in the freeze
frame buffer. Displayed to allow
familiarization with the data.
ESTOP starts at ECM pin 41. Black/
Tells whether the emergency stop
yellow circuit goes to the 14 pin main
program is active. 0=no, 1=yes. When harness connector and any lanyard safety
ESTOP circuit black/yellow is shorted
switches on the engine or at the helm.
to ground, the engine stops and will not Defective lanyard and ignition switches
start.
can cause high‑speed misfires when they
intermittently short this circuit to ground.
If counts are higher than 150 when
Displays the ESTOP circuit
ESTOP is on, or lower than 850 when
analog‑to‑digital conversion in "ADC"
ESTOP is off, the black/yellow ESTOP
counts. Counts range between 0 (low)
circuit has a problem. Check the ignition
and 1023 (high). ESTOP is off when
and lanyard switches for excessive
EStop Circuit in counts are high and on when counts
resistance, corrosion, or damage. Check
Counts
are low. The ESTOP circuit should
the black/yellow circuit between the ECM
never indicate near the middle of the
and the ignition switch for shorts to ground
ADC range. Counts above 100 or
or any other circuit that could provide a
below 900 are an indication of trouble
ground path. On remote control boats,
in the ESTOP circuit.
check the ESTOP circuit to the helm.
Fuel per
Cylinder per
Cycle (FPC)
A calculation of fuel flow through the
injectors. Useful when compared to
known good values. Large numbers ‑
rich fuel mixtures, smaller numbers ‑
lean mixtures.
This legacy item is used through many
generations of engines. New ECMs are
switching to pulse width as a
measurement of fuel flow through the
injector.
90-883064R03 NOVEMBER 2010
Diagnostics and Troubleshooting
Data Item Name
Description
from G3
FuelPumpCurrent
N/A
FuelRate
N/A
GuardianCause
N/A
Significance
Service Information
Excessive current can result from shorted
Fuel pump current flowing through
armature windings or excessive internal
ECM. Allows a technician to monitor
friction within the pump. Current draw
the condition of the fuel pump over
below normal can result from high
time. Current draw changes can be an
resistance in the armature or fuel pump
early indication of electrical,
circuits, aerated fuel, fuel vapor, or pump
mechanical, or fuel supply problems.
cavitation from wear or damage.
Fuel consumption listed by an
individual cylinder. Displayed where
each cylinder value is shown.
Displays one of the following: None, Volts,
ECT, Oil Pressure, or Active Fault.
Example: If GuardianLatchedPwrLim
(available power) is 65%, None is
Lists four possible choices of Guardian.
displayed until the operator exceeds 65%
Helps determine the component or
demand. A demand 65% or greater,
system that is activating Guardian.
Guardian limits engine output to 65%
Similar to "Guardian due to:" on original
power and will display Volts, ECT Oil
CDS tool.
Pressure, or Active Fault. The engine will
run normal below 65% and the data will
display None.
Available
Power
Maximum Power allowed by the
Guardian System at any given time.
When 100%, the engine can produce
full power without any Guardian
restrictions.
Guardian will reduce available power
significantly for severe problems: low oil
pressure and engine overheat. Mild
problems (sensor circuit high) will result in
a small reduction in available power.
GuardianState
N/A
Displays whether Guardian is active or
inactive. Guardian will only display
active when operator demand exceeds
GuardianLatchedPwrLim (available
power).
Guardian limits engine power when
problems are detected. It reduces power
by adjusting fuel injection and ignition
timing. It can stop cylinders from firing
when necessary.
HornOutputState
Warning Horn
Status:
1=On, 0=Off
Displays when the ECM expects the
horn to be audible.
Horn should be audible whenever the
data value is 1.
IAT
Intake Air
Temperature
(IAT)
Intake air temp data is used to calibrate
Displays the temperature of the air in
the air‑fuel mixture. It cannot cause
the intake manifold. Intake air temp and
drastic changes to the air/fuel mixture.
manifold air temp are terms that are
Major engine issues are not related to this
often used interchangeably.
sensor.
IAT Sensor in
Counts
Counts can be related and converted to
voltage. Sensor circuits are 0–5 volt
circuits. 0 counts = 0 V and 1023 counts
= 5 V. The data is proportional. Counts
can be multiplied by 0.0048828 to convert
it to volts. Do not round the multiplier, it will
not produce accurate results. Converting
the counts allows you to measure the
voltage in the circuit when checking for
circuit problems, such as shorts, opens,
and high resistance.
GuardianLatchedPwrLim
IAT_ADC
IdleAir
Displays the IAT sensor value in
analog‑to‑digital conversion (ADC)
counts. Counts range between 0 (low)
and 1023 (high). Very low readings (0–
10) indicate a circuit low fault. Very high
readings (1015–1023) indicate a circuit
high fault.
Displays the pulse width modulation
PWM is a measurement of the time a
Idle Air Control (PWM) signal sent from the IAC driver. signal is on or off. 0% indicates the valve
(IAC) Valve
Signals range from 0% (valve closed), is off (closed). 100% indicates the valve is
proportionally to 100% (valve open).
open.
IdleControlState
90-883064R03 NOVEMBER 2010
N/A
Displays one of the six possible modes
of idle control operation that is active.
Possible modes are: Crank, Flare_Inc,
Idle_Entry, Base_Idle_no_offset,
Base_idle_with_offset, and off_idle
Page 3B-17
Diagnostics and Troubleshooting
Data Item Name
Description
from G3
Significance
This is the idle speed the ECM wants
Helps diagnose idle problems. If desired
to achieve. Idle speed is ECM
idle speed is higher than base idle,
controlled when the TPS is closed,
something is causing the ECM to raise the
typically a range between 0–5%. When
idle speed. The most common reason for
the ECM considers the throttle open,
elevated idle speed is a cold engine or a
the ECM does not control engine idle
throttle‑body not returning to its idle stop.
speed.
IdleCtrlSetpointRPM
Desired Idle
RPM
InjEPWOffset
N/A
The time required for the injector to
react to the electric signal. Displayed
where each cylinder's value is shown.
InjMPW
N/A
Time the injector should be
mechanically open. Adding the MPW to
the EPW equals the total time the
electrical signal is on. Displayed where
each cylinder's value is shown.
LoadPercent
Calculated
Engine Load
A calculation of the engine work load.
The data is not relevant unless the
engine is running.
MAF
Calculated
Engine Air
Flow
Calculated mass air flow (MAF).
MAP
MAP_ADC
MAPIsDefaulted
OccurredFaultMarquee
Page 3B-18
Manifold
Absolute
Pressure
(MAP)
Service Information
Longer MPW values result in more fuel
injected: rich mixture. Shorter MPW
values results in less fuel: lean mixture.
When determining if the MAP sensor is
delivering accurate data, do not compare
Displays the intake manifold pressure. a standard vacuum gauge reading to the
MAP sensor. Vacuum gauges are
MAP data must follow throttle, RPM
referenced against the current
and load changes. MAP readings have
atmospheric pressure (about 14.7 psi),
a large effect on air/fuel ratios.
while a MAP sensor is referenced against
a nearly perfect vacuum.
Counts can be related and converted to
voltage. Sensor circuits are 0–5 V circuits.
0 counts = 0 V and 1023 counts = 5 V. The
Displays the MAP sensor value in
data is proportional. Counts can be
analog‑to‑digital conversion (ADC)
counts. Counts range between 0 (low) multiplied by 0.0048828 to convert it to
MAP Sensor in
and 1023 (high). Very low readings (0– volts. Do not round the multiplier, it will not
Counts
10) normally indicate a circuit low fault. produce accurate results. Converting the
counts allows you to measure the voltage
Very high readings (1015–1023)
in the circuit when checking for circuit
normally indicate a circuit high fault.
problems, such as shorts, opens, and
high resistance.
MAP Data
Status:
Live=0,
Default=1
If MAP status is the default, then the
engine is not using the MAP sensor
data to run. This is usually because of
a MAP circuit high or circuit low fault.
N/A
Displays all faults that have occurred in
this key cycle. Continuously scrolls
through all faults one per second. If a
fault is present here, but not in the
ActiveFaultMarquee, then the fault is
not active. Displays dashes when there
are no faults.
If the fault is present in this list and in
ActiveFaultMarquee, then the fault is
active. The dedicated fault page is the
best place to view inactive faults.
90-883064R03 NOVEMBER 2010
Diagnostics and Troubleshooting
Description
from G3
Significance
Service Information
N/A
Oil pressure is normal or low. The
sensor is a pressure switch that is
either open or closed to engine ground.
When the engine is off, the switch is
closed, when oil pressure is present,
the switch is open.
The ECM monitors the voltage at pin 11.
If the switch is closed, or the sensor lead
is shorted to ground, the voltage at pin 11
will be near 0 (low). If the switch is open,
or the sensor lead is open, the voltage at
pin 11 will be near 5V (high) and the oil
pressure is good.
PctMaxPower
Engine Power
Output
Displays the percent of maximum
power the engine is producing. The
lower the number, the less horsepower
produced. The higher the number, the
more power produced.
RPM
Engine Speed
How fast the engine's crankshaft is
rotating in revolutions per minute.
SparkAdvAverage
N/A
Ignition timing in degrees before top
dead center (BTDC).
Timing that is after top dead center
(ATDC) will appear as negative values.
TotalEngRunTime
Total Engine
Operating
Hours
The total time the engine has been
running.
Total engine run time cannot be erased or
cleared.
TotalFuel
Calculated
Total Fuel
Consumption
An estimate of the total fuel consumed
during this run event.
Data Item Name
OilPressSw
TPS1
TPS1_ADC
XDRPa
Throttle
Position
Sensor
Throttle plate position in percent. When
moving the throttle slowly from idle to
The TPS reads low numbers when the
wide‑open throttle, the data must
throttle plate is closed and high numbers
increase steadily with the throttle
when the throttle plate is opened. The
movement. If the data freezes, dips or TPS and MAP sensor mirror each other.
is erratic, the TPS sensor is suspect.
TPS Sensor in
Counts
Displays the TPS sensor value in
analog‑to‑digital conversion counts.
Counts range between 0 (low) and
1023 (high). Counts can be converted
The ECM reads the TPS signal at pin 53.
to voltage. 0 counts = 0 V. 1023 counts
= 5 V. Values in between can be
calculated by multiplying the ADC
value by 0.0048828.
Power 1 ‑
Sensor Power
(5 vdc)
Normal reading: 4.98–5.02 V. 4.90–5.10 V
5.0 vdc power for operating all sensors. is the maximum acceptable range. When
When this voltage is incorrect, all
the voltage is too low, it is usually caused
sensor data can be out of calibration. by the sensor or sensor harness short. If
Whenever you have multiple sensor
the voltage is high, it has shorted to
faults, verify this voltage is correct.
battery voltage. Sensor power comes
from ECM pin 34.
Fault Conditions
Most faults can be detected without the engine running, or key on, engine off. However, some faults require the presence of engine
RPM, and cannot be detected key on, engine off. Examples of this type of fault are EST (cylinders 1–3) shorted circuit or fuel
injector faults.
Some faults are only detected in the key on, engine off mode. An example of this type of fault would be EST (cylinders 1–3) open
circuit.
In addition, some faults are programmed to ignore certain engine speeds. For example, a low block pressure sensor fault (sea
pump pressure on a MerCruiser) is typically not enabled until enough RPM has been achieved to develop a reasonable amount
of water pressure. Therefore, this fault will not be set at idle.
90-883064R03 NOVEMBER 2010
Page 3B-19
Diagnostics and Troubleshooting
Basic Diagnostic Outline
G3 Diagnostics
1.
Verify the customer complaint. Try to duplicate the symptom.
2.
Connect the G3 system and read all fault information.
3.
Diagnose the active faults.
4.
Diagnose Inactive Faults next.
5.
Clear faults as they are diagnosed and test the engine to see if any faults return.
•
•
•
•
Document all the fault information.
Use the Data Stream and Active Tests to assist with the diagnostics of the faults.
Use Freeze Frame Buffer data to assist with diagnostics of these faults.
Faults rarely indicate a defective ECM. Assume the ECM is working correctly until complete and thorough
troubleshooting procedures prove that it is defective.
6.
Again diagnose faults that have reoccurred.
7.
When all faults have been diagnosed and do not reoccur, check to see if the original customer complaint still exists.
8.
If customer complaint still exists, repeat the diagnosis of the symptom.
9.
9. Perform the Visual/Physical Inspection. It process will help diagnose symptoms that do not produce faults.
Faults
1.
2.
If the fault is a CUT HI or CUT LO, refer to the appropriate wiring diagram and check each of the leads between the suspect
sensor and the PCM/ECM for open and short circuits. The short circuit does not have to be to ground, it could be to any other
wire in the harness. If all of the leads test good, then the sensor should be replaced.
a.
When troubleshooting Active Faults (faults displayed under the "Fault Status" screen), the circuit in question is an active
failure. Look for an open circuit or short circuit in the two or three wires involved with the sensor in question. The sensor
itself has actually failed or the connections at the ECU have failed.
b.
When troubleshooting intermittent faults (faults displayed under the "Fault History" screen), the circuit in question is not
an active failure at the moment. You are looking for an intermittent connection or an intermittent short circuit that is not
present currently. Check the circuits for opens and shorts and wiggle the wires and connectors during all tests in an
attempt to locate the poor connection. Carefully look for subtle problems, such as corroded connections and internal
wiring harness splices; and for connectors with a loose fit between the male and female pins.
NOTE: An excellent way to find an intermittent problem is to use the data monitor function in the CDS G3 tool. While
observing the data from the suspect circuit, wiggle the wires and connectors while the key is on or while the engine is
running. When you locate the bad connection the data reading will fluctuate.
If the fault is an abnormal operating condition, repair the system as needed. For example, if the engine coolant temperature
is too hot, check the water pickups for obstructions or replace the water pump impeller as needed.
Active Test Table
The CDS G3 can send commands to the ECM to perform special functions. These functions called Active Tests are useful for
verifying proper function of various actuators and systems, in addition to diagnosing problems with engine performance. The
following table lists the active tests available.
CDS G3 Active Tests
Additional Information
Set engine location
Change the electronic address stored in the ECM. Used in preparing the engine for delivery.
Set tachometer link
Set the tachometer output to operate a SmartCraft AGI or other SmartCraft gauges. Used in preparing
the engine for delivery or adding new accessories to the boat.
Cylinder misfire
Drop cylinders on a running engine to compare power output of each cylinder. Assists with diagnosing
a poorly running engine or an engine with low power.
Fuel pump output
Operate the fuel pump to verify function, current draw, and assist in diagnosis of the fuel pump.
IAC output
Operate the IAC valve to verify function and assist in diagnosis of idle control problems.
Horn output
Operate the warning horn to verify function and assist in diagnosis of horn malfunctions.
Visual/Physical Inspection
1.
Verify that the battery is fully charged and is of sufficient capacity for the engine being tested. If necessary, substitute a known
good battery.
Page 3B-20
90-883064R03 NOVEMBER 2010
Diagnostics and Troubleshooting
2.
Check the battery cable connections. Ensure they are clean and tight. If present, discard wing nuts and replace with corrosion
resistant hex nuts. Ensure the cable connections are tight at the starter solenoid and the ground stud. Verify the ground stud
is not loose in the engine block, even if the nut is tight.
3.
If there is any doubt about the mechanical condition of the engine, perform a cylinder leak‑down test.
4.
Ensure the safety lanyard is correctly installed and that the customer understands the correct starting procedure.
5.
Unplug and inspect the main harness (14 pin) connector between the engine and boat harnesses. If there is any doubt about
the boat harness, substitute a shop harness and key switch assembly and rerun the boat. If the problem disappears, the
problem is in the boat harness, not the engine harness. A test harness is available from Mercury Parts and Accessories as
part number.
6.
Check for adequate fuel pressure at the fuel rail (test port at the VST).
7.
If there is no fuel pressure, check that the fuel pump is actually operating. The pump must run for at least two seconds each
time the key is turned to the on position. If the fuel pump and the warning horn are not operating as the key is turned on, verify
the ECM is powering up.
8.
The low‑pressure supply pump is a mechanical pump on this engine. The pump is driven by a lobe on a camshaft. It must
maintain the fuel level in the VST for the high‑pressure electric pump.
9.
The rail fuel pressure does not vary with engine speed and/or load. The regulator vent line is not connected to manifold
vacuum. Fuel pressure should be stable from idle to full throttle.
10. If fuel pressure drops at higher speed and higher engine loads, check the boat’s fuel system for restrictions with an accurate
vacuum gauge and clear hose at the water separating fuel filter’s inlet. As the engine is run from idle to wide‑open throttle
and back to idle, the clear hose must not show any air bubbles and the vacuum gauge must not read higher than 2 in. hg.
11. If the supply system tests OK, but the fuel pressure is low at high speeds and loads, replace any fuel filters and test. If rail
pressure remains low, the electric fuel pump is suspected as defective.
12. Check any and all vacuum lines for splits, kinks, and proper connections.
13. Check for any air leaks in the induction system, such as throttle body and intake manifold gaskets. If the normal IAC percentage
for the engine is known, then any air leak will result in a lower IAC percent than normal. IAC should read 30–50%.
14. Unplug and inspect the ECM connector. Ensure there are no ECM pins bent over and that all of the correct pins are present.
Refer to the service manual charts for the pins used and not used. Look for signs of tampering, corrosion, damage to the pin
locking mechanisms, melted insulation, and any other evidence of shorts or other damage.
15. Unplug and inspect as many of the sensors and actuators as you can reasonably access. Look for signs of tampering,
corrosion, damage to the pin locking mechanisms, melted insulation, and any other evidence of shorts or other damage.
Based on the results of this inspection, further inspection of the harness may be necessary. There are many internal splices
in the harness that may be damaged or defective. If there is damage on the external connections, you will have to inspect
several of the internal splices to verify that the damage is not also present at these locations.
30/40 EFI Fault Information
NOTE: Not all faults may be enabled on any specific engine. Each calibration can have its own fault setup.
Fault Text
MAF_too_High
Type
Sticky
Description
Service Information
Circuit information
The PCM estimates the amount of
air flowing throughout the engine. If
Mass air flow is too high. Check for
this exceeds predefined limits, the
proper ECM calibration number
Not applicable
fault it active. Usually the result of
and/or modified components.
the wrong calibration or engine
modifications.
The voltage entering the ECM at
pins 57 and 58 is too low. This is
usually caused by a defective
alternator, excessive accessory
load, or high resistance in the MPR,
the fuse and/or the entire circuit.
The fault sets when the voltage is
approximately 11 V or lower.
Driver (system)
Voltage too Low
Non_
Sticky
Driver (system) voltage too low.
ESTOP_Active
Non_
Sticky
Emergency stop circuit is
Check lanyard stop switch. Check
activated. The engine will not start
ESTOP circuit for short to ground.
as long as it is on.
90-883064R03 NOVEMBER 2010
Pins 57 and 58 (driver
power)
Pins 68 and 70 (ECM
ground)
Pin 41 (ESTOP)
Pin 42 (sensor ground)
Page 3B-21
Diagnostics and Troubleshooting
Fault Text
Type
Description
Service Information
Circuit information
EncoderFault
CrankCamtrigger
Non_
Sticky
Crankshaft position sensor signal
is erratic. This engine does not
use a camshaft sensor.
Check sensor for proper mounting.
Check white and red circuits for
intermittent shorts and opens.
Check for damage to the flywheel
encoder ring.
Pins 13 and 14 (crankshaft
position sensor)
FuelPumpCurrent
High
Non_
Sticky
Most likely a defective pump (short).
Fuel pump is drawing too much
Check for 12 V pump positive circuit
current. The pump could be
shorted to the fuel pump driver
locked up or its windings shorted.
circuit (pin 71), red/black circuit.
Battery + to fuel pump
Pin 69 (fuel pump driver)
Pins 68 and 70 (ECM
ground)
FuelPumpCurrent
Low
Non_
Sticky
Fuel pump is not drawing enough
current. The impeller may not be
turning with the pump or there may
be excessive resistance in the
pump armature and pump circuits.
Battery + to fuel pump
Pin 69 (fuel pump driver)
Pins 68 and 70 (ECM
ground)
XDRPaInputHigh
Non_
Sticky
Check sensor power circuit for short
Pin 34 (sensor power)
Sensor power 1 ‑ voltage too high to battery voltage or other higher
Pin 42 (sensor ground)
voltage source.
Possible defective pump (open
circuit). Check wiring for low or no
12 V to the fuel pump or high
resistance on the fuel pump driver
circuit (pin 71), red/black circuit.
Sensor power 1 ‑ voltage too low
Check for shorted sensor by
unplugging one sensor at a time
while watching sensor power on
data stream. When voltage goes
up, you have located the problem
sensor.
Pin 34 (sensor power)
Pin 42 (sensor ground)
MAP circuit high
Check sensor and circuits for open
sensor ground, short between
sensor power and sensor signal,
and short between sensor signal
and other voltage source.
Pin 22 (MAP signal)
Pin 34 (sensor power)
Pin 42 (sensor ground)
MAP circuit low
Check sensor and circuits for open
Pin 22 (MAP signal)
sensor power, open sensor signal,
Pin 34 (sensor power)
or short between sensor signal and
Pin 42 (sensor ground)
sensor ground.
DRVPInputHigh
Non_
Sticky
Driver (system) voltage too high
The voltage entering the ECM is too
high (usually above 16 volts). This
can be caused by a defective
voltage regulator, can also be
caused by a circuit with higher
voltage shorting to this circuit.
Pins 57 and 58 (driver
power)
Pins 68 and 70 (ECM
ground)
Guardian_
OilPressure
Non_
Sticky
Oil pressure is too low, Guardian
enabled
Check oil level. Check oil pressure
with a mechanical gauge.
Pin 11 (sensor signal)
Pin 68 and 70 (ECM
ground)
Guardian_
Overheat
Non_
Sticky
Engine coolant is too hot,
Guardian enabled
Check cooling system for possible
malfunction.
Pin 21 (ECT signal)
Pin 42 (sensor ground)
OilPress_Low
Non_
Sticky
Oil pressure is too low
Check oil level. Check oil pressure
with a mechanical gauge.
Pin 11 (sensor signal)
Pin 68 and 70 (ECM
ground)
BaroRange
Non_
Sticky
Baro Value out of expected range
Pin 22 (MAP signal)
Baro pressure is absolute pressure.
Pin 34 (sensor power)
It is not compensated for altitude.
Pin 42 (sensor ground)
ECT_Overtemp
Non_
Sticky
Engine coolant temperature too
hot
Check cooling system for possible
malfunction.
Pin 21 (ECT signal)
Pin 42 (sensor ground)
EST1_OutputFault
Non_
Sticky
EST 1 primary circuit open or
shorted
Check ignition coil primary circuit for
opens and shorts. Check circuit
between ignition coil and ECM for
opens and shorts.
Battery + to ignition coil
Pin 32 (EST 1)
Pin 68 and 70 (ECM
ground)
XDRPaInputLow
MAPInputHigh
MAPInputLow
Page 3B-22
Non_
Sticky
Sticky
Sticky
90-883064R03 NOVEMBER 2010
Diagnostics and Troubleshooting
Fault Text
Type
Description
Service Information
Circuit information
EST2_OutputFault
Non_
Sticky
EST 2 primary circuit open or
shorted
Check ignition coil primary circuit for
opens and shorts. Check circuit
between ignition coil and ECM for
opens and shorts.
Battery + to ignition coil
Pin 33 (EST 2)
Pin 68 and 70 (ECM
ground)
EST3_OutputFault
Non_
Sticky
EST 3 primary circuit open or
shorted
Check ignition coil primary circuit for
opens and shorts. Check circuit
between ignition coil and ECM for
opens and shorts.
Battery + to ignition coil
Pin 66 (EST 3)
Pins 68 and 70 (ECM
ground)
Guardian_Active_
Fault
Non_
Sticky
Guardian is active due to an active
Check fault listing.
fault
Not applicable
Pin 52 (key switch)
Pins 57 and 58 (driver
Check for low or high voltage on pin power)
52, 57, 58, and 67.
Pin 67 (battery)
Pins 68 and 70 (ECM
ground)
Guardian_Voltage
Non_
Sticky
Battery voltage problem,
Guardian enabled
INJ1_OutputFault
Non_
Sticky
Check injector and circuit between
Injector 1 circuit is open or shorted ECM and injector for opens and
shorts.
Battery + (to fuel injector)
Pin 49 (injector 1 driver)
Pins 68 and 70 (ECM
ground)
INJ2_OutputFault
Non_
Sticky
Check injector and circuit between
Injector 2 circuit is open or shorted ECM and injector for opens and
shorts.
Battery + (to fuel injector)
Pin 50 (injector 2 driver)
Pins 68 and 70 (ECM
ground)
INJ3_OutputFault
Non_
Sticky
Check injector and circuit between
Injector 3 circuit is open or shorted ECM and injector for opens and
shorts.
Battery + (to fuel injector)
Pin 65 (injector 3 Driver)
Pins 68 and 70 (ECM
ground)
LIAC_OutputFault
Non_
Sticky
Idle air control valve is open or
shorted
Check IAC valve and circuit
between ECM and IAC valve for
opens and shorts.
Battery + (to IAC valve)
Pin 3 (IAC Driver)
Pins 68 and 70 (ECM
ground)
MAP and TPS are not reading as
expected.
For any given MAP signal, the TPS
is not reading as expected. Check
MAP and TPS circuits for high
resistance. Check if MAP and TPS
data appear correct.
Pin 22 (MAP signal)
Pin 53 (TPS signal)
Pin 34 (sensor power)
Pin 42 (sensor ground)
TPS circuit high
Check sensor and circuits for open
sensor ground, short between
sensor power and sensor signal,
and short between sensor signal
and other voltage source.
Pin 53 (TPS signal)
Pin 34 (sensor power)
Pin 42 (sensor ground)
TPS circuit low
Check sensor and circuits for open
Pin 53 (TPS signal)
sensor power, open sensor signal,
Pin 34 (sensor power)
or short between sensor signal and
Pin 42 (sensor ground)
sensor ground.
Pin 53 (TPS signal)
Pin 34 (sensor power)
Pin 42 (sensor ground)
Pin 21 (ECT signal)
Pin 42 (sensor ground)
MAPR_
TPS1Rationality
Non_
Sticky
TPS1_RangeHigh
Non_
Sticky
TSP1_RangeLow
Non_
Sticky
TPS_AdaptMech
Non_
Sticky
TPS cannot adapt
Check linkage for anything
preventing throttle from fully
closing. Throttle must be closed
when engine is started.
ECTInputHigh
Non_
Sticky
ECT circuit high
Check for open sensor, open
sensor signal, or open sensor
ground circuit.
ECTInputLow
Non_
Sticky
ECT circuit low
Check for shorted sensor or sensor Pin 21 (ECT signal)
signal circuit shorted to ground.
Pin 42 (sensor ground)
90-883064R03 NOVEMBER 2010
Page 3B-23
Diagnostics and Troubleshooting
Fault Text
Type
Description
Service Information
Circuit information
Guardian_
Overspeed
Non_
Sticky
Engine overspeed, Guardian
enabled
Check for proper propeller pitch,
damaged propeller, or other causes
Not applicable
of ventilation. Possible slipping
propeller hub.
IATInputHigh
Non_
Sticky
IAT circuit high
Check for open sensor, open
sensor signal, or open sensor
ground circuit.
IATInputLow
Non_
Sticky
IAT circuit low
Check for shorted sensor or sensor Pin 20 (IAT Signal)
signal circuit shorted to ground.
Pin 42 (sensor ground)
RxDoc2_SOH
Non_
Sticky
CAN COMM fault ‑ type 2
Check for proper CAN P
termination. Check CAN P circuits
for opens and shorts.
Pin 23 and 24 (CAN
circuits)
HORN_Output
Fault
Non_
Sticky
Warning horn problem ‑ check
circuit
Check horn and tan/blue circuit for
open and short circuits. Check horn
for battery voltage at purple lead
when key is on.
Battery + (to horn)
Pin 63 (horn driver)
Pins 68 and 70 (ECM
ground)
Pin 20 (IAT signal)
Pin 42 (sensor ground)
"Non‑Sticky" indicates the fault will go inactive as soon as the problem is corrected.
"Sticky" indicates the fault will remain active until the problem is corrected and the key switch is cycled. Cycle key often when
diagnosing faults.
CDS G3 Text ‑ Guardian Cause
CDS G3 Text for Data Stream item "Guardian Cause"
Text
None
Probable Cause
Guardian is not currently active. No faults or operator demand is less than
GuardianLatchedPwrLim.
ECT (engine coolant temperature)
ECT is hot. Diagnose the cooling system.
Hot
Volts
Battery voltage is too low or high. Diagnose the charging system.
Active Fault
A circuit high or circuit low sensor failure has occurred. Check fault status.
Oil Pressure
4‑stroke mechanical oil pump pressure is low.
Fuel System
Pressure Regulator Test (Electric Fuel Pump)
1.
Install the fuel pressure gauge onto the Schrader valve located on the VST.
Page 3B-24
90-883064R03 NOVEMBER 2010
Diagnostics and Troubleshooting
2.
Start the engine. The fuel pressure should be within specification.
a
c
d
b
e
31027
abcde-
Schrader valve
To Schrader valve
Fuel pressure gauge
Pressure relief button
Drain hose
Fuel Pump Pressure
At all speeds
290–303 kPa (42–44 psi)
Fuel Pressure Gauge Kit
91‑881833A03
Dual Fuel/Air Pressure Gauge Kit
91‑881834A 1
Anti‑Siphon Valves
While anti‑siphon valves may be helpful from a safety standpoint, they clog with debris, they may be too small, or they may have
too heavy a spring. The pressure drop across these valves can, and often does, create operational problems and/or powerhead
damage by restricting fuel to the fuel lift pump and, subsequently, the high‑pressure fuel pump. Some symptoms of restricted
(lean) fuel flow, which could be caused by use of an anti‑siphon valve, are:
•
Severe fuel rail pressure fluctuation
•
Loss of fuel pump pressure
•
High speed surging
•
Outboard cuts out or hesitates upon acceleration
•
Outboard runs rough
•
Outboard quits and cannot be restarted
•
Outboard will not start
•
Vapor lock
Since any type of anti‑siphon device must be located between the outboard fuel inlet and fuel tank outlet, a simple method of
checking if such a device (or bad fuel) is a problem source, is to operate the outboard with a separate fuel supply which is known
to be good, such as a remote fuel tank.
If, after using a separate fuel supply, it is found that the anti‑siphon valve is the cause of the problem, there are two solutions to
the problem; either 1) replace the anti‑siphon valve with one that has a lighter spring tension, or 2) replace it with a
solenoid‑operated fuel shut off valve.
Mechanical Fuel Pump Test (Vacuum)
Fuel system vacuum can be checked by using a short piece of extra fuel hose, vacuum gauge, and a T‑fitting.
1.
2.
Conduct the test with water to the engine cooling system using one of the following methods:
a.
In a test tank
b.
With the boat/outboard lower unit in water
Disconnect the fuel hose from the inlet fitting of the mechanical fuel pump.
90-883064R03 NOVEMBER 2010
Page 3B-25
Diagnostics and Troubleshooting
3.
Connect an extra fuel hose onto the outlet fitting of the pump.
4.
Install a T‑fitting into the extra hose making the connection as close to the pump as possible.
5.
Connect a vacuum gauge and the fuel inlet hose onto the T‑fitting.
6.
Start the engine and run at 1000 RPM, normal fuel system vacuum (lift) should be to specifications.
NOTE: The system vacuum test is normally performed at 1000 RPM. As engine RPM is increased, there will be a slight
increase in vacuum; this increase should not exceed normal readings.
Mechanical Fuel Pump Vacuum (Lift)
Vacuum at 1000 RPM
7.
25–50 mm Hg (1–2 in. Hg)
To isolate the mechanical fuel pump from the rest of the fuel system:
a.
Pinch off/restrict the fuel supply hose between the vacuum gauge and the fuel tank.
b.
The mechanical fuel pump vacuum (lift) should be to specifications.
c.
If the vacuum reading for the pump is below specifications, the pump needs rebuilding.
a - Fuel supply hose from fuel tank
b - T‑fitting
c - Extra hose to inlet fitting of the
mechanical fuel pump
d - Vacuum gauge
d
a
c
b
28177
Mechanical Fuel Pump Vacuum (Lift)
Minimum vacuum at 1000 RPM with fuel line pinched
102 mm Hg (4 in. Hg) minimum
8.
If the fuel pressure reading is not within specifications, refer to Fuel Pump Pressure Troubleshooting table.
9.
Stop the engine, remove the gauge, and reconnect the fuel line to the inlet fitting of the fuel pump.
NOTE: The fuel pump is designed to lift fuel (vertically) approximately 152 cm (60 in.) if there are no other restrictions in the
system using a fuel hose that is 8 mm (5/16 in.) minimum diameter. As restrictions are added, such as filters, fittings, valves,
etc., the amount of fuel pump lift decreases.
Fuel Pump (Vacuum) Troubleshooting
Condition
Fuel system vacuum (lift) above
specification
Page 3B-26
Cause
Correction
Restricted anti‑siphon valve
Refer to Anti-Siphon Valves, preceding
Plugged fuel tank pickup screen
Clean/replace fuel pickup screen
Pinched/collapsed fuel hose
Inspect/replace fuel hoses
Dirty/plugged water separating fuel
Clean/replace water separating fuel filter
filter
Restriction in fuel line thru‑hull
fitting
Clean/replace fitting
Restriction in fuel tank switching
valve
Clean/replace valve
Restriction within primer bulb
Rebuild/replace primer bulb
90-883064R03 NOVEMBER 2010
Diagnostics and Troubleshooting
Fuel Pump (Vacuum) Troubleshooting
Condition
Cause
Correction
Low fuel level in fuel tank
Fill tank with fuel
Hole/cut in pickup tube of fuel tank Replace fuel pickup tube
Loose fuel line connection
Check/tighten all connections
Hole/cut in fuel line
Inspect/replace fuel hoses
Loose fuel pump screws
Torque screws to specification
Fuel pump gaskets worn or leaking Rebuild/replace fuel pump
Fuel system vacuum (lift) below
specification
Fuel pump check valves/seals
leaking
Rebuild/replace fuel pump
Leaky fuel pump diaphragm
Rebuild/replace fuel pump
Worn/broken fuel pump springs
Rebuild/replace fuel pump
Leaky fuel pump seals
Rebuild/replace fuel pump
Fuel filter bowl loose
Tighten fuel filter bowl
Fuel filter gasket cut/worn
Replace gasket
Fuel vaporization
Check for plugged fuel pump water‑cooling circuit
Mechanical Fuel Pump Test (Pressure)
Fuel system pressure troubleshooting can be performed by using a piece of clear fuel hose 10 cm (4 in.) long, a pressure gauge,
and a T‑fitting.
1.
Conduct the test with water to the engine cooling system using one of the following methods:
•
In a test tank
•
With the boat/outboard lower unit in water
2.
Disconnect the fuel hose from the outlet fitting of the mechanical fuel pump.
3.
Connect the clear fuel hose onto the outlet fitting of the pump.
4.
Install the T‑fitting onto the clear fuel hose.
5.
Connect the pressure gauge and fuel outlet hose (to VST) onto the T‑fitting.
6.
Start the engine and run at 1000 RPM, normal fuel system pressure should be to specifications.
Normal Mechanical Fuel System Pressure
Pressure at 1000 RPM
7.
13.8 kPa (2 psi)
To isolate the mechanical fuel pump from the rest of the fuel system:
a.
Pinch off/restrict the fuel hose between the T‑fitting and the VST.
b.
The mechanical fuel pump pressure should be to specifications.
c.
If pressure reading for the pump is below specifications, the pump needs rebuilding.
8.
If the fuel pressure reading is below specifications, refer to Fuel Pump Pressure Troubleshooting table.
9.
Stop the engine, remove the gauge, and clear hoses. Reconnect the fuel line to the outlet fitting of the fuel pump.
a - Fuel hose (to VST)
b - Clear hose (from mechanical fuel pump outlet
to T‑fitting)
a
b
28182
90-883064R03 NOVEMBER 2010
Page 3B-27
Diagnostics and Troubleshooting
Mechanical Fuel Pump Pressure
Pressure at 1000 RPM with pinched fuel line
20.7 kPa (3 psi)
Fuel Pressure Gauge Kit
91‑881833A03
Dual Fuel/Air Pressure Gauge Kit
91‑881834A 1
Fuel Pump Pressure Troubleshooting
Mechanical Fuel Pump (Pressure) Troubleshooting
Condition
Cause
Correction
Restricted anti‑siphon valve
Refer to Anti-Siphon Valves, preceding
Low fuel level in fuel tank1.
Fill tank with fuel
Plugged fuel tank pickup screen
Clean/replace fuel pickup screen
Hole/cut in pickup tube of fuel
tank1.
Replace fuel pickup tube
Loose fuel line connection1.
Check/tighten all connections
Hole/cut in fuel line1.
Inspect/replace fuel hoses
Fuel line primer bulb check valves
not opening
Replace fuel line primer bulb
Fuel hose/line internal diameter too
Use 8 mm (5/16 in.) fuel hose
small
Fuel system pressure below
specification
Restriction in fuel line thru‑hull
fitting
Clean/replace fitting
Restriction in fuel tank switching
valve
Clean/replace valve
Restriction within primer bulb
Rebuild/replace primer bulb
Pinched/collapsed fuel hose
Inspect/replace fuel hoses
Dirty/plugged water separating fuel
Clean/replace water separating fuel filter
filter
Fuel filter bowl loose1.
Tighten fuel filter bowl
Fuel filter gasket cut/worn1.
Replace gasket
Loose fuel pump screws1.
Tighten screws to specification
Fuel pump gaskets worn or
leaking1.
Rebuild/replace fuel pump
Fuel pump check valves/seals
leaking
Rebuild/replace fuel pump
Leaky fuel pump diaphragm1.
Rebuild/replace fuel pump
Worn/broken fuel pump springs
Rebuild/replace fuel pump
Leaky fuel pump seals
Rebuild/replace fuel pump
Fuel vaporization
Check for plugged fuel pump water‑cooling circuit
Guardian Protection System
The Guardian Protection System monitors critical engine functions and will reduce engine power accordingly in an attempt to keep
the engine running within safe operating parameters.
1. Air bubbles may also be visible as fuel passes through the clear fuel (test) hose installed between the mechanical fuel pump outlet fitting and the
VST.
Page 3B-28
90-883064R03 NOVEMBER 2010
Diagnostics and Troubleshooting
IMPORTANT: The Guardian Protection System cannot guarantee that powerhead damage will not occur when adverse operating
conditions are encountered. The Guardian Protection System is designed to 1) warn the boat operator that the engine is operating
under adverse conditions and 2) reduce power by limiting maximum RPM in an attempt to avoid or reduce the possibility of engine
damage. The boat operator is ultimately responsible for proper engine operation.
Warning Horn/Guardian System Operation
Sound
One beep on key up
Condition
Description
Normal
System test.
Six beeps on key up,
Failure detected with MAP, IAT, TPS, or
or during a running
Flash Check Sum (ECM)
failure
Engine should run well, however, service will be required.
Failure detected with:
Three beeps every
four minutes
•
Battery voltage
•
EST ‑ Open detected at key up. Short
detected with engine running.
•
Engine will start hard, run rough, and/or stall. Utilizing the
neutral
fast idle feature may assist starting. Service is
Fuel injector ‑ Detected while cranking/
required.
running
•
Coolant sensor ‑ ECT
•
IAC
Failure detected with:
Intermittent beeps
Continuous beep
•
Fuel pump ‑ May start momentarily
•
Main Power Relay (MPR) ‑ No start
•
ECM reference voltage to MAP/TPS ‑
Starts but stalls under load
Engine may or may not start. If engine starts, it easily stalls.
Service is required.
Engine overheat
Engine Guardian Protection System is activated. Power
limit will vary with level of overheat. Stop engine and check
water intake for obstruction. Advancing throttle above idle
may provide additional cooling.
Low oil pressure
Guardian Protection System is activated. Engine power is
limited to 10% of maximum. Stop engine and check oil
level. Add oil if necessary.
Battery voltage less than 10 V or more than Engine Guardian Protection System is activated. Engine
16 V
power is limited to 75% of maximum.
Coolant sensor failure ‑ ECT
Engine Guardian Protection System is activated. Engine
power is limited to 50% of maximum. Engine overheat
protection is compromised.
Engine speed limiter
Exceeding 6200 RPM cuts spark/injection on cylinders #2
and #3 to reduce engine speed. Exceeding 6350 RPM cuts
spark/injection on all cylinders to reduce engine speed.
Overheat Temperature Parameters
30/40 EFI FourStroke
When troubleshooting these models of engines, questions often arise as to what the actual engine overheat parameters are for
Guardian. Please see the table below as a reference point for this information:
Engine Temperature
Percent of Available Power (GuardianLatchedPwrLim)
Below 77 °C (170 °F)
100%
77–79 °C (170–174 °F)
60%
79–82 °C (174–180 °F)
40%
85–87 °C (185–189 °F)
30%
Above 87 °C (189 °F)
20%
90-883064R03 NOVEMBER 2010
Page 3B-29
Diagnostics and Troubleshooting
NOTE: These models of engines are able to run at idle speed with temperatures up to 90 °C (194 °F) before any Guardian or
horn is activated.
Keep in mind that the operator must attempt to operate the engine above the available power limit to activate the Guardian system.
If the engine is operating at one of the above temperatures, but below the available power limit, no reduction in speed or warning
horn will be noticed.
GuardianLatchedPwrLim = available power.
IMPORTANT: One of the many causes of an overheat condition can be a damaged or plugged thermostat. If the engine has a
thermostat that allows the engine to reach temperatures between 71–77 °C (160–170 °F) the Guardian system may activate due
to engine load as part of the calibration not covered in the above chart. In these scenarios the fault will be recorded as a RPM
Limit fault.
Gen III EFI System Troubleshooting Guide
Condition
Cause/First
Warning Mode
Check
Lanyard stop switch is in
the "OFF" position
None
Set lanyard stop switch to "RUN."
Weak battery or bad
starter motor. Battery
voltage drops below 8
volts while cranking
(ECM cuts out below 6
volts) (fuel pump
requires 8 volts)
Blown fuse
Engine cranks, but will
not start
Main power relay
Three beeps every Check condition of battery/starter solenoid terminals and
four minutes for low
cables. Charge/replace battery. Inspect condition of
battery voltage
starter motor.
None
Replace fuse (located in the port fuse holder). Inspect
engine wiring harness and electrical components.
Fuse #2 ‑ Fuel injectors/IAC/fuel pump
Fuse #3 ‑ Main power relay/accessory
Fuse #4 ‑ Ignition coils
Intermittent beeps
Listen for relay to click when key switch is turned to "ON"
81–99 ohms
Between pin 8 (yel/ppl) of the ECM connector and (red/
blu) wire of fuse #3 (fuse removed)
‑ or ‑
Between pin #85 and pin #86 of relay
‑ or ‑
Test suppression diode. Refer to Section 2B Suppression Diode Tests.
None
Crankshaft position
sensor (CPS)
Page 3B-30
NOTE: No RPM
reading at
tachometer
300–350 ohms
Between pin 29 (red) and pin 13 (wht) of the ECM
connector.
‑ or‑
Between pin #1 (red) and pin #2 (wht) of CPS connector.
Electric fuel pump
Intermittent beeps
Listen for pump. Fuel pump should run two seconds after
key switch is turned to "RUN" position.
32–41 ohms
Between pin 69 (blk/blu) and pin 57 or 58 (red/blu)
‑ or ‑
Between pins of fuel pump connector.
Flywheel misaligned
None
Remove flywheel and inspect flywheel key/keyway.
Engine coolant
temperature (ECT)
sensor
Three beeps every
four minutes
See ECT sensor resistance chart.
Advancing the remote control fast idle feature or
advancing the tiller handle throttle grip halfway may assist
starting.
90-883064R03 NOVEMBER 2010
Diagnostics and Troubleshooting
Condition
Cause/First
Warning Mode
Check
Remote control to
engine wiring harness
connection is poor
None
Clean and inspect male and female connections.
Air in fuel system/lines
None
Crank and start engine several times.
Manifold absolute
pressure (MAP) sensor
Six beeps at key up
or failure
See MAP sensor resistance chart.
Throttle position sensor
(TPS)
Six beeps at key up
or failure
Typical TPI range with CDS:
Idle 0.39–1.0 volts, WOT 3.66–4.80 volts.
Idle air control (IAC)
Three beeps every
four minutes
20–24 ohms
Between pin 3 (wht/org) and pin 57 or 58 (red/blu) of the
ECM connector.
‑ or ‑
Between pin A and pin B of IAC.
ECM reference voltage
to MAP/TPS
Intermittent beeps
5 V between ppl/yel pin of MAP sensor wiring harness
connector and engine ground (key switch to "RUN").
Fuel pressure at VST
fitting
None
See fuel pressure test.
Flywheel misaligned
None
Remove flywheel and inspect flywheel key and keyway.
Engine coolant
temperature (ECT)
sensor
Three beeps every
four minutes
See ECT sensor resistance chart.
Fuel injector
Three beeps every
four minutes
10.0–13.5 ohms
Between fuel injector pin #1 and pin #2.
‑ or ‑
Between (removed) fuse #2 (red/blu) wire and the ECM
connector:
Pin 49 (pnk/brn) fuel injector #1
Pin 50 (pnk/red) fuel injector #2
Pin 65 (pnk/org) fuel injector #3
Ignition coil (EST)1.
Three beeps every
four minutes
See ignition coil resistance chart ‑ Section 2A - Ignition.
Fuel pressure at VST
fitting
None
See fuel pressure test.
Fuel filter plugged
None
Replace fuel filter.
Improper spark plugs
None
Use recommended resistor spark plugs.
Loose grounds
None
Check all ground connections.
Flywheel timing tooth
pattern
None
Check tooth pattern for partially missing or damaged
teeth.
Fouled spark plug
None
Replace spark plug.
Engine cranks, starts,
and stalls
Engine idles
fast after warm‑up
(900–1100 RPM)
Poor off idle or WOT
running quality
1. The ECM will only monitor the EST connection to the ignition coil, use resistance tests and /or spark gap test to confirm an ignition coil failure.
90-883064R03 NOVEMBER 2010
Page 3B-31
Diagnostics and Troubleshooting
Condition
Cause/First
Warning Mode
Check
Crankshaft position
sensor
None
300–350 ohms
Between pin 14 (red) and pin 13 (wht) of the ECM
connector.
‑ or ‑
Between pin #1 (red) and pin #2 (wht) of CPS connector.
Manifold absolute
pressure (MAP) sensor
Six beeps at key up
or failure
See MAP sensor resistance chart.
Throttle position sensor
(TPS)
Six beeps at key up
or failure
Typical TPI range with CDS:
Idle 0.39–1.0 volts, WOT 3.66–4.80 volts.
Engine coolant
temperature (ECT)
sensor
Three beeps every
four minutes
See ECT sensor resistance chart.
Manifold air temperature Six beeps at key up
(MAT) sensor
or failure
See MAT sensor resistance chart.
Fuel injector
Three beeps every
four minutes.
10.0–13.5 ohms
Between fuel injector pin #1 and pin #2.
‑ or ‑
Between (removed) fuse #2 (red/blu) wire and the ECM
connector.
Pin 49 (pnk/brn) fuel injector #1
Pin 50 (pnk/red) fuel injector #2
Pin 65 (pnk/org) fuel injector #3
Ignition coil (EST)1.
Three beeps every
four minutes
See ignition coil resistance chart ‑ Section 2A - Ignition.
Idle air control (IAC)
Three beeps every
four minutes
20–24 ohms
Between pin 3 (wht/org) and pins 57 or 58 (red/blu) of the
ECM connector.
‑ or ‑
Between pin A and pin B of IAC.
Fuel pressure at VST
fitting
None
See fuel pressure test.
Loose grounds
None
Check all ground connections.
Fouled spark plug
None
Replace spark plug.
Fuel pressure regulator
None
42–44 psi (290–303 kPa) at VST fitting.
Engine coolant
temperature (ECT)
sensor
Three beeps every
four minutes
See ECT sensor resistance chart.
Thermostat stuck open
None
Remove and inspect thermostat ‑ Section 4A - Cylinder
Head.
Continuous horn
above 10% power
setting
Check engine oil level and add oil as needed.
Remove oil pressure switch and install oil pressure
gauge, (warm engine) oil pressure should be:
Above 2.9 psi (20.0 kPa) at idle
30–40 psi (207–278 kPa) at 3000 RPM.
See Oil Pressure Switch Test in Section 4B - Cylinder
Block/Crankcase.
Check for short between pin 11 (lt blu) of the ECM
connector and open connector of oil pressure switch.
Poor idle quality
Engine runs rich
Speed reduction
Engine RPM limited to
2000
Page 3B-32
Low oil pressure or
grounded oil pressure
switch lead
90-883064R03 NOVEMBER 2010
Diagnostics and Troubleshooting
Condition
Cause/First
Speed reduction
Engine RPM limited
Warning Mode
Check
Engine overheat
Continuous
Engine Guardian System is activated. Power limit will vary
with level of overheat. Stop engine and check water intake
for obstruction.
Advancing throttle above idle may provide additional
cooling.
Battery voltage
Less than 10 V or
more than 16 V
Continuous horn
above 75% power
setting
Engine Guardian System is activated. Engine power is
limited to 75% of maximum.
Engine coolant
temperature (ECT)
sensor failure
Continuous horn
above 50% power
setting
Engine Guardian System is activated. Engine power is
limited to 50% of maximum. Engine overheat protection
is compromised.
IMPORTANT: In all instances check wiring harness integrity (especially ground connections) in boat and on engine.
Component Resistance Tests
Engine Coolant Temperature (ECT) Sensor and Manifold Air Temperature (MAT) Sensor
The ECT and MAT sensors are thermistors (a resistor that changes value based on temperature). Low temperature produces a
high resistance. High temperature causes low resistance.
1. Place the temperature sensor in a container filled with water.
2. Place a thermometer in the water and slowly heat the water.
3. Measure the resistance when the specified temperature is reached. If the reading is out of specification, replace the sensor.
a
a - Temperature sensor
28198
DMT 2004 Digital Multimeter
91‑892647A01
Approximate Temperature‑to‑Resistance Values
°F
°C
ohms
210
100
680
160
70
1,752
104
40
5,327
70
20
12,493
41
5
25,396
32
0
32,654
23
‑5
42,324
‑4
‑20
97,060
‑40
‑40
336,000
90-883064R03 NOVEMBER 2010
Page 3B-33
Diagnostics and Troubleshooting
Fuel Injector
a
b
28204
a - Pin A
b - Pin B
DMT 2004 Digital Multimeter
91‑892647A01
Meter Test Leads
Red
Black
Pin A
Pin B
Meter Scale
Reading (Ω)
Ω
10.0–13.5
Main Power Relay
85
86
28205
DMT 2004 Digital Multimeter
91‑892647A01
Meter Test Leads
Red
Black
Terminal 85
Terminal 86
Meter Scale
Reading (Ω)
Ω
81–91
Manifold Absolute Pressure (MAP) Sensor
c
b
a
28206
a - Pin A (blk/org)
b - Pin B (yel)
c - Pin C (pur/yel)
Page 3B-34
90-883064R03 NOVEMBER 2010
Diagnostics and Troubleshooting
DMT 2004 Digital Multimeter
91‑892647A01
Meter Test Leads
Meter Scale
Reading (Ω)
Pin B
Ω
95–105 k
Pin A
Pin C
Ω
3.9–4.3 k
Pin B
Pin C
Ω
95–105 k
Red
Black
Pin A
Crankshaft Position Sensor (CPS)
28207
Meter Test Leads
Red
Black
Red
White
DMT 2004 Digital Multimeter
90-883064R03 NOVEMBER 2010
Meter Scale
Reading (Ω)
Ω
300–350
91‑892647A01
Page 3B-35
Diagnostics and Troubleshooting
Notes:
Page 3B-36
90-883064R03 NOVEMBER 2010