1
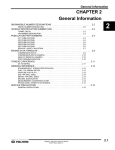
Published for Polaris Dealers, Distributors, and Service Staff
Vol. 10, No. 8
August, 2002
Polaris Model Year 2002 500/600 VES Snowmobiles Overheating
Much has been learned about the cooling system of the 2002 models that utilize the “small block” 500/600 VES engine.
Polaris would like to thank the many dealers who have assisted us this past season in identifying solutions to these cooling issues.
Due to the overwhelming concern that customers will have overheating issues on their Model Year 2002 500/600 VES
EDGE Snowmobile, Polaris has decided to extend the warranty coverage regarding cooling on all 2002 model 500/600
VES EDGE snowmobiles with or without M-10 suspensions. The following breaks down the steps in detail that MUST
be performed. The most important fact that we want to convey is that there is not “just one fix” for these overheating issues.
These steps need to take place to overcome the overheating scenario. If all of these steps are taken and they are done thoroughly and completely, these snowmobiles should run correctly the whole winter with adequate snow conditions. Marginal snow conditions may still cause overheating issues.
The cooling warranty coverage on these units will expire on April 30, 2003 to accommodate the 2002-- 2003 riding season. Dealers may perform SAF-02-03 on any 500/600 VES EDGE model with or without M-10 suspensions. Again,
this offer expires April 30, 2003.
Dealers may perform SAF-- 02-- 04 (EDGE Cooler Kit, Small Block PN 2202143 Installation) on any 2002 500/600 VES
model with M-10 suspensions only under warranty. SAF-- 02-- 03 MUST be performed prior to installing the cooler kit
outlined in SAF-- 02-- 04. You will need warranty authorization from a Polaris Technical Service Representative to perform SAF-02-04 regardless. This offer also expires on April 30, 2003.
-- --The following is for 2002 500 / 600 EDGE models with or without M-- 10 Suspensions-- -(Also Reference Service Alert SAF--02--03)
These steps MUST be performed on every 500 / 600 EDGE with M-10 suspensions
prior to installing cooling kit PN 2202143.
The integrity of the cooling system will be compromised if it doesn’t hold pressure. If it
does not hold the recommended pressure when warmed up the snowmobile will overheat.
Step #1. Inspect the coolant surge bottle to see if the sealing
surface between the cap and bottle or the threads of the
bottle is distorted or damaged. If the coolant bottle is severely
distorted due to heat, replace the bottle with new coolant bottle
PN 2520314. Inspect the threads on the coolant bottle thoroughly.
If the pressure cap has been installed and turned too far, the sealing surface has been damaged and the surge bottle WILL NOT
hold pressure (see photo at right). If the threads of the surge
bottle are damaged, replace the bottle.
Damage from turning cap
too far onto bottle.
New Coolant Bottle: PN 2520314
Snow Team Tips Printed in USA
1
E 2002 Polaris Sales Inc.
August, 2002
Step #2. Verify that the coolant system will hold at least 12 psi of pressure. If the coolant surge bottle is not
distorted, and the sealing surface looks fine, pressure test the coolant system. If the cap cannot hold at least 12
psi of pressure, the system will overheat very quickly. The coolant may boil in an otherwise normal operating
temperature range disrupting thermistor readings to the CDI box. Test the cooling system as outlined below.
HOW TO PRESSURE TEST COOLANT BOTTLES (12 psi)
1. With the pressure cap firmly in place, remove the over flow tube (1/4” O.D.) from the neck of the coolant bottle and
insert the Mighty Vact hose in its place.
2. Set the Mighty Vact to apply pressure with the selector lever, and pump the gauge to the specified lbs. for the
pressure cap you are testing. The gauge should indicate full pressure and then slowly release the pressure after specified pressure is reached. If the bottle will not hold 12 psi replace the coolant bottle.
Over Flow Tube
Gauge
Mighty Vac Tube
Cap Pressure Specification
Step #3. Bleed the system correctly and completely. This is the most important step in this whole cooling
system process. We cannot stress enough the importance of proper cooling system bleeding. The system
should be bled of any trapped air using the following procedure:
Allow the system to cool completely. Fill the reservoir with coolant to the
maximum indicated mark and install the pressure cap.
Apply parking brake and run the engine at specified idle RPM until the thermostat opens (approximately 5 to 8 minutes). NOTE: It is important that
the thermostat stays open! When the thermostat opens it will draw in cold
coolant from the heat exchangers and the cold coolant may close the thermostat again. Make sure the thermostat opens and stays open! Once the
thermostat is open tip the snowmobile slightly on its right side. Cycle the
RPM from idle to enough RPM (4000) to get coolant to flow but not enough
RPM to engage the clutch. This allows air to bleed from the rear crossover
tube (as shown in photos at right). Then tilt the machine slightly on its left
side so that the coolant bottle is the highest point in the cooling system.
Cycle the RPM from idle to enough RPM (4000) to get coolant to flow but
not enough RPM to engage the clutch. It is important to get enough coolant flow to purge the air from the front close-off cooler and observe this
air reaching the bottle.
Place the snowmobile in its normal position and loosen the bleed screw at
the top of the water outlet manifold until trapped air has been purged. Tighten
the bleed screw. Turn off the machine and release parking brake. Allow
the system to cool completely. Re-check the coolant level after the cap
has been removed and add coolant to fill line if necessary. Our testing has
shown that after the machine has cooled down, 3 ounces or more of coolant may have to be added. This procedure should take approximately 15
minutes.
You may have to perform this operation more than one time! The
photos at right depict air in the rear crossover tube underneath the seat.
The top photo shows air remaining after one warm-up cycle. The bottom
photo shows almost no air remaining after the second warm-up cycle.
(Note: The clear tube shown in the photos has been installed for photography purposes only.)
Snow Team Tips Printed in USA
2
After 1 warm up / bleeding cycle
Residual Air After Bleeding System
After 2 warm up / bleeding cycles
IMPORTANT!: ALL LIQUID
COOLED SNOWMOBILES MUST BE
BLED DURING DEALER SET-UP!
E 2002 Polaris Sales Inc.
August, 2002
Step #4. Check the TPS specification and make sure it is between 3.9 and 4.0 volts at wide open
throttle. Use TPS tool PN 2201519 (Order from SPX Tool Company). Follow the procedure for testing the TPS
in the appropriate Polaris Service Manual. The TPS tool MUST be used to set the TPS correctly and accurately.
Step #5. Make sure track tension is set to specification. Track tension specifications are: 3/8--1/2”, 16” ahead
of rear idler shaft with 10 lb. weight for EDGE suspensions. 3/4--1”, 16” ahead of rear idler shaft free hanging for
M-10 suspensions.
NOTE: Testing has shown that 1” track tension is desirable on M-10 models for reduced initial hyfax wear.
Step #6. Install new longer snow flap PN 5433521-1106. This longer snow flap keeps snow in the tunnel longer enhancing cooling and helps to obtain and maintain the clearance required for adequate snow retention inside
the tunnel.
IMPORTANT: The possibility exists that the new snow flap
(PN 5433521--1106) may become damaged when operating
unit in reverse or when backing unit off of a trailer. Use caution to ensure snow flap does not curl under the tunnel when
backing the snowmobile. For units with reverse you can
use snow flap support PN 5812229 with 5 longer rivets
PN 7621418.
New Snow Flap
PN 5433521-1106
Step #7. After the new snow flap has been installed, adjust the suspension ride-in for the customer.
This procedure is outlined on the decal located on the underside of the hood, any 2002 Snowmobile Owners
Manual or Performance Service Manual PN 9917367. Our testing has shown that the clearance between the
ground and the bottom edge of the snow flap should be maximum of 3 inches (76.2 mm) with the rider on the
sled and in full gear. Have the customer sit on the sled and adjust the suspension until there are 3 inches
(76.2 mm) or less of clearance between the ground and the bottom of the snow flap. If you are unable to
reach a maximum of 3 inches (76.2 mm) of clearance, install lighter weight springs. NOTE: If the rider is a
light person and the suspension is set too stiff there could be an overheat issue because the suspension will
not collapse enough for snow to reach the rear strip coolers. If this occurs, replace the original rear suspension torsion springs (coil over spring for M-10 models) with optional lighter springs.
Optional Lighter Rear Torsion Springs, EDGE
7041629-067 L.H. .359/77
7041630-067 R.H .359/77
3” (76.2 mm)
Optional Lighter Rear Coil Over Spring, M-10
7042010-216 135/240 variable
Obtain a ride-in setting of 3” (76.2 mm) maximum from the
bottom edge of the snow flap to the ground with the rider on
the sled in full gear.
Step #8. Liquid cooled snowmobiles require adequate amounts of snow for cooling. Hard snow, windswept
snow, icy snow, hard packed trails, or marginal overall snow may be inadequate for proper cooling. With the advent
of long-travel suspensions, it is more difficult for adequate amounts of snow to reach the cooling extrusions to remove
the heat generated by these engines and components. We have found that most customer complaints were directly
related to customers driving below 30 MPH on tight trails with minimal and/or hard packed snow or ice. Inspect the
hi-fax for excessive wear, which may be an indication of snow and cooling conditions. If the hi--fax are worn, it
may be due to inadequate snow conditions. Adequate cooling snow is a MUST for proper cooling!
Snow Team Tips Printed in USA
3
E 2002 Polaris Sales Inc.
August, 2002
Step #9. Keep idle periods to a minimum. We strongly recommend that your customers DO NOT leave their
snowmobiles idle while they are not riding it. Without any snow reaching the cooling exchangers, there is nothing
to reduce operating temperatures. People have reported that the snowmobile has overheated after the customer
has stopped on the trail to read a map, etc. and left his snowmobile idle. This idle period may be long enough for
the sled to go into its overheat “fail-safe” mode. Rule of thumb: If you stop, turn the machine off! Also, remind
your customers that if they do let the snowmobile idle too long, and it starts to go into “fail safe” mode, to aggressively press the throttle so that more coolant starts to flow immediately. Too many times people panic when their
snowmobile starts to stutter because they are afraid something is wrong. Generating immediate engine RPM will
allow coolant to flow allowing the snowmobile to come out of its fail safe condition.
Step #10. If the TEMP light comes on but the engine is not overheating, inspect the thermistor. The
thermistor should read 192+/-- 30 ohms at 212_ F (100_ C) in a water bath. Once you verify that step #1 and
step #2 are not causing any issues, inspecting the thermistor should be the third step. The temperature thermistor is easy to get to, and removing it and testing it is easy if you have the right equipment. Another option is to
have a known good thermistor on hand and replace the one in question with the known good one. Take the machine for a test ride trying to duplicate the riding situation that the customer has been telling you about. If the
engine still shows signs of overheating, continue to the next step. If the snowmobile shows no signs of overheating, replace the temperature thermistor.
Warranty Information: After performing all of the above steps, reference SAF--02--03 for warranty claim information. SAF--02--03 is located and can be printed from the Service Bulletin section of the Dealer Website.
Warranty Claim Preparation: File individual claims for each authorization number received.
Step #11. For 500 / 600 VES models with M-10 suspensions only.
-- -- --The following is for 2002 500 / 600 EDGE with M--10 Suspension models only-- - (Also Reference Service Alert SAF--02--04)
The possibility exists that after performing the steps listed previously, some units with
M-10 suspensions may still exhibit overheating issues in certain riding conditions. If you
find that the overheating issue still persists, install kit PN 2202143 per SAF--02--04. You
may only install this kit after SAF--02-- 03 has been performed and a warranty claim has
been submitted. You will need authorization from Polaris to install this kit to verify that
SAF--02--03 has been performed on the unit. Please perform all items thoroughly and
completely. Read and understand the kit instructions completely before attempting the
procedure.
Parts Required
Qty. Part Description
Part No.
1
2202143
Cooler Kit, EDGE
Warranty Information: After installing Cooler Kit PN 2202143, reference SAF--02--04 for warranty claim
information. Authorization will be required from the Polaris Technical Service Department. SAF--02--04
is located and can be printed from the Service Bulletin section of the Dealer Website.
Warranty Claim Preparation: File individual claims for each authorization number received.
Cooling Kit
PN 2202143
Snow Team Tips Printed in USA
4
E 2002 Polaris Sales Inc.
August, 2002
SUMMARY
MODELS AFFECTED:
2002 500 XC SP EDGE
2002 500 XC SP with M-10
2002 600 XC SP EDGE
2002 600 XC SP with M-10
2002 600 Classic
WHAT IS TO BE PERFORMED ON NON-M-10 Models: Perform the 10 step procedure (in order) outlined in this
Team Tip for all models listed above that exhibit overheating problems. File a warranty claim under the guidelines of Service Alert Number SAF-- 02-- 03.
WHAT IS TO BE PERFORMED ON MODELS WITH M-10 SUSPENSIONS: Perform the 10 step procedure (in order) outlined in this Team Tip for all models listed above that exhibit overheating problems. File a warranty claim under
the guidelines of Service Alert Number SAF-- 02-- 03. If the snowmobile still overheats after performing SAF-- 02-- 03, obtain
warranty authorization and install cooler kit PN 2202143. File a claim under the guidelines of Service Alert Number
SAF-- 02-- 04.
WILL I NEED WARRANTY AUTHORIZATION? You will NOT need warranty authorization to perform the 10 step
procedure (SAF-- 02-- 03). You WILL need warranty authorization to perform SAF-- 02-- 04 on models with M-10 suspensions AFTER you have performed SAF-- 02-- 03 on that snowmobile and overheating problems still exist.
WHERE DO I FIND SAF-- 02-- 02 AND SAF-- 02-- 04? Both of these Service Alerts are located on the Dealer Website,
www.polarisdealers.com under “Service & Warranty”, “Service Bulletins”.
DO THESE SERVICE ALERTS EXPIRE? Yes, both Service Alerts expire April 30, 2003.
SUMMARY OF PROCEDURE STEPS:
Step #1. Inspect the coolant surge bottle to see if the sealing surface between the cap and bottle or the
threads of the bottle is distorted or damaged.
Step #2. Verify that the coolant system will hold at least 12 psi of pressure.
Step #3. Bleed the system correctly and completely.
Step #4. Check the TPS specification and make sure it is between 3.9 and 4.0 volts at wide open throttle.
Step #5. Make sure track tension is set to specification.
Step #6. Install a new longer snow flap PN 5433521-1106 and 5 rivets PN 7621472.
Step #7. Adjust the suspension ride-in for the customer.
Step #8. Liquid cooled snowmobiles require adequate amounts of snow for cooling.
Step #9. Keep idle periods to a minimum.
Step #10. If the TEMP light comes on but the engine is not overheating, inspect the thermistor.
Step #11. For 500 / 600 VES models with M-10 suspensions only. Install Cooler Kit PN 2202143.
Year 2000
Model
Inspect/Replace Coolant Surge
Tank
Verify cooling system
holds 12 psi
pressure
Bleed
Cooling
System
Verify TPS
spec.
Adjust
Track
Tension
Adjust
Ride-in
Install
longer snow
flap
Inspect
thermistor
Install
Cooler Kit
500 XC SP
Edge
Yes
Yes
Yes
Yes
Yes
Yes
Yes, if
necessary
Yes
No
500 XC SP
w/M-10
Yes
Yes
Yes
Yes
Yes
Yes
Yes, if
necessary
Yes
Yes*
600 XC SP
Edge
Yes
Yes
Yes
Yes
Yes
Yes
Yes, if
necessary
Yes
No
600 XC SP
w/M-10
Yes
Yes
Yes
Yes
Yes
Yes
Yes, if
necessary
Yes
Yes*
600 Classic
Yes
Yes
Yes
Yes
Yes
Yes
Yes, if
necessary
Yes
Yes*
*Install cooler kit only if necessary. Prior authorization required.
Snow Team Tips Printed in USA
5
E 2002 Polaris Sales Inc.
August, 2002