1
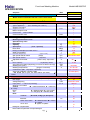
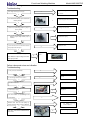
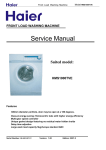
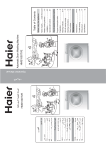
)URQW /RDG :DVKLQJ 0DFKLQH 0RGHO+0679( )5217/2$':$6+,1*0$&+,1( 6HUYLFH0DQXDO 6XLWHGPRGHO +0679( )HDWXUHV PPGLDPHWHUSRUWKROHGRRUPD\EHRSHQDWDGHJUHHV &ODVV$HQHUJ\VDYLQJ+RPRFHQWULFWXEVZLWKKLJKHUHQHUJ\HIILFLHQF\ 0XOWLJHDUVSHHGFRQWUROOHU 8QLTXHJDVNHWGHVLJQIHDWXULQJQRUHVLGXDOZDWHUKLGGHQLQVLGH 'HOD\WLPHDGMXVWLYH /DUJHZDVKORDGFDSDFLW\NJ(XURSHVWDQGDUG $&& 6HULDO 1XPEHU 6 0 + 0 6 7 9 ( 9HUVLRQ (GLWLRQ )URQW /RDG :DVKLQJ 0DFKLQH 0RGHO+0679( &RQWHQWV 3URGXFWFRGHLOOXPLQDWLRQDQGVHULHV LQWURGXFWLRQ )HDWXUHV 6SHFLILFDWLRQ 6DIHW\ ,QVWDOODWLRQ 1HWGLPHQVLRQ 1DPHVRIWKHSDUWV 2SHUDWLRQDOIXQFWLRQV 3URJUDPGHVFULSWLRQWDEOH (UURUGLVSOD\DQGWURXEOHVKRRWLQJ :LULQJFLUFXLW 1RWH 3DJH Front Load Washing Machine Model:HMS1000TVE PRODUCT CODE ILLUMINATION AND SERIES INTRODUCTION Model code rule description Model identification˖ HMS 1000 T V E A B C D E A˖Serial code B˖Max spin speed C˖Temprature adjustive D˖Spin speed adjustive E˖Computer control Examples˖ HMS1000TVE It represents HMS series appearanceˈwith big windowǃ180eopening windowǃ 1000rpm spin speed.Spin speed is adjustive from 0 to 1000rpmˈtemprature is also adjustive. it’s controlled by computer. Page 2 Front Load Washing Machine Model:HMS1000TVE FEATURES ƽ300mm diameter porthole, door may be open at a 180 degrees. Facilitate view of wash process, facilitate unloading and easy to use with large port. ƽMulti-gear speed controller According to different costumingˈyou can slect corresponding spin speedˈfrom 0 to 1000 rpm. ƽUnique gasket design featuring no residual water hidden inside. By the unique gasketˈwashing machine can left no residual water hidden between outer drum and board. ƽDelay time adjustive. According to different costumingˈyou can slect delay timeˈfrom 0.5h to 24h. Page 3 )URQW /RDG :DVKLQJ 0DFKLQH 0RGHO+0679( 63(&,),&$7,21 3URSRVDO )URQW ORDG ZDVKLQJ PDFKLQHV %UDQG SRVLWLRQ FHQWHU XSSHU IUDPH RI GRRU FKURPHG VWLFNHU 0RGHO QXPEHU VHULJUDSK\ ULJKW WRS FRUQHU FRQWURO SDQHO 2Q ZKLWH VLOYHU 2Q VLOYHU EODFN RU GDUN JUH\ 3URGXFW LGHQWLILFDWLRQ 'HVFULSWLRQ RI DSSOLDQFH 7\SH RI DSSOLDQFH )6 VWDQGLQJ %, EXLOWLQ 6XSSOLHU RZQ EUDQG 6XSSOLHU EDU FRGH 0DUHV FRPSXWHU FRGH &RPPHUFLDO %UDQG 0RGHO &RPPHUFLDO EDU FRGH .H\)HDWXUHV (QHUJ\ HIILFLHQF\ FODVV :DVKLQJ SHUIRUPDQFH FODVV 6SLQ HIILFLHQF\ FODVV 3URJUDPV &DSDFLW\ 6SLQ VSHHG PD[ RSWLRQDO 1RLVH OHYHO (QHUJ\ FRQVXPSWLRQ SHU ZDVK FLUFOH :DWHU FRQVXPSWLRQ 5HVLGXDO GDPSQHVV VSLQ UHVXOW 6SLQ VSHHG VHOHFWRU VZLWFK VWHSV 6SLQ VSHHG YDULDWRU VWHSOHVV $GMXVWDEOH WKHUPRVWDW ZDWHU WHPS DGMXVW IURP WR 'UXP FDSDFLW\ GU\ ODXQGU\ ZDWHU $XWR ZDWHU OHYHO DGMXVW GHSHQGLQJ RQ YROXPH RI ILOOHG LQ ODXQGU\ :DVKLQJ WLPH PD[ :DVKLQJ WHPSHUDWXUHV SURJUDPFRQWUROOHG &HUWLILFDWLRQ V &( ,62 ,62 $SSURYDOV 9'(*6 7h9*6 ,04 (1 & F\FOH IXOO ORDG ZLWKRXW SUHZDVK &2/' %DVLFV GDWD 8QLW GLPHQVLRQV + [ : [ ' 1HW ZHLJKW 9ROWDJHIUHTXHQF\ ,QSXW SRZHU PDLQ IXVH LQWHQVLW\ :RUN WRS UHPRYDEOH &RQWURO 0 HOHFWURPHFKDQLFDO ( HOHFWURQLF ) IX]]\ 'UXP 6 VWDLQOHVV VWHHO = ]LQF FRDWHG 7XE 3 3RO\SURS 6 VWDLQOHVV VWHHO 'RRU DHVWKHWLF 5 URXQG < ELJ H\H 4 VTXDUH 'LDPHWHU 2XWHU GRRU IUDPH ,QQHU GRRU ($1 ($1 Q NJ USP G%$ N:K O USP USP 'HWHUJHQW FRPSDUWPHQWV 5HPRYDEOH FRPSDUWPHQW IRU OLTXLG GHWHUJHQW NJ O $:/ PLQ & $ & & 7%& &( ,62 7h9*6 5KO FP NJ 9+] :$ ;; [ [ 9a+] ( 6 3 5 PHWDO 3 * Q 3DJH :DVKLQJ PDFKLQH )6 +DLHU 7%& & FP 6 VWDLQOHVV VWHHO 0 3 SODVWLF * JODVV 3 SODVWLF 1HZ 6HQVRU +0679( Front Load Washing Machine 4. 5. Model:HMS1000TVE Delay timer (from - to) Self cleaning suds pump Water inlet hose cold water / hot water Water drain hose / -support Adjustable feet Safety systems Auto door lock Motor overheating protection h n° ADL MOP No heating without water NHW Auto water cool-down (before drain 80°C boiled water) Water return protection Acqua Stop kit Child protection Programs 1) Strong action /cotton cycles 2) Normal action / synthetics 3) Delicate action / wooll cycles Pre-wash / wash Quick wash / super quick wash Rinse / soften Delicate / hand wash Wool / cashmere Soak / spin Drain Easy ironing Optional function keys (additional program settings) ON/OFF button Half load Fussy Spin exclusion Spin speed selection High water level No Soak Rinse stop Delicate Cold wash Delay Timer Extra Rinse Load Select Easy Ironning Temperature selection 5kg wash Prewash AWC WRP Remark : "ƽ" signify the washing machine has this function "- " signify the washing machine does not have this function Page ˑ 0.5-24 ƽ 4 ƽ ƽ ƽ ƽ - n° n° n° ƽ ƽ ƽ ƽ ƽ ƽ ƽƽ ƽƽ ƽ /ƽ ƽ rpm ƽ ƽ ƽ ƽ ƽ ⧏ ⧏ ⧏ ƽ ⧏ ƽ Front Load Washing Machine Model:HMS1000TVE Matters Needing Attention ƽ6DIHW\ .A separate earthed socket is required for the power supply. The washing machine must be positioned so that the plug is accessible. 2. Hold the plug and not the electric cable when unplugging the washing machine. 3.Fuses in the power circuit should be rated for 15A. 4. Do not touch or use the washing machine barefooted or when the hands or feet are wet. If the supply cord is damaged, it must be replaced by the manufacturer, its service agent or similarly qualified persons in order to avoid a hazard. 5.Do not use flammable detergent or dry clean 6. The door of the washing machine will become hot during the heating process. Avoid contact with the ing agent; do not use flammable spray in close vicinity to the washing machine; do not door during the heating process. For safety, keep children away from the washing machine. remove or insert the plug in the presence of flammable gas. .HHSFKLOGUHQDZD\IURPWKHSDFNLQJPDWHULDOVDIWHUXQSDFNHG Page 6 Front Load Washing Machine Model:HMS1000TVE Matters Needing Attention .The washing machine should not be install- 9.The carpet must not obstruct the ventilation ed outdoors or in a damp place. In the openings in the base of the washing machine. event of water leakage or splashes allow the machine to dry naturally. 10.Keep away from heat sources and direct sun- 11.During installation, ensure that the electric light to prevent plastic and rubber components cable is not trapped by the washing machine and avoid damage to the electric cable. from aging. ƽDuringUse 1. Before use, check the joints of the filling hose, the Keep the door slightly open when the washing machine is not in use to prevent formation of tap and the drainage hose for possible problems odors; do not cover the washing machine with from water pressure fluctuations. If joints are loose plastic cover so that inside dampness cannot be kept in. or there is leakage, turn off the tap and repair. Do not use the washing machine until the hoses are properly fixed. Page 7 Front Load Washing Machine Model:HMS1000TVE Matters Needing Attention 3. Do not place heavy, heating source or wet 4. Do not hot wash foam rubber or sponge-like materials. articles on the top of the washing machine. 5. Before washing, do up zippers, buttons and clothes straps and put small articles, such as not open the detergent distribution drawer 6. Do during the wash cycle.. socks, laces or bras, into a washing bag or a pillow. Steel wires in bras will pop out during washing; never wash bras containing steel wires. 7.Thedoorisfittedwithaself-lock deviceandwillnotopenuntil 2~3 minutesafterthewashingmachine stops.Donotforce thedooropen.Do notopenthedoorifwaterlevelcan reach theporthole. Page 8 8.After each wash program, turn off the tap to prevent leakage; and unplug the washing machine and wipe clean the lower part of the porthole. Front Load Washing Machine Model:HMS1000TVE Installation ƽ 5HPRYHDOOWKHSDFNLQJPDWHULDOVLQFOXGLQJWKHIRDPEDVH WRSUHYHQWYLEUDWLRQGXULQJXVHDVVKRZQLQ)LJ 8SRQRSHQLQJRIWKHSDFNDJHZDWHUGURSVPD\EHVHHQRQWKH SODVWLFEDJDQGWKHSRUWKROH7KLVLVQRUPDOSKHQRPHQRQ UHVXOWLQJIURPZDWHUWHVWLQWKHIDFWRU\ Fig.1 ƽ Check attachments and materials with reference to the following 4XW\ 1DPH 2SHUDWLRQ 4XDOLW\ FHUWLILFDWH PDQXDO 0RGHO +0679( :DWHU 'UDLQDJH 3ODVWLF KRVH KROGHU SOXJV ƽDismantle the packing bolts as shown in Fig. 2. The packing bolts are designed for clamping anti-vibration components inside of the washing machine during the transportation process. Beforeuse: 1. Remove the back plate; 2. Remove the three packing bolts on the back plate and take out the rubber hose; 3. Replace the back plate; 4. Fill the holes left by the packing bolts with plastic plugs. (Attention: The packing bolts and rubber hose should be kept in a safe place for later use) Fig. ƽ Adjusting the washing machine There are adjustable feet under the bottom of the washing machine. Before use, the washing machine should be adjusted, as shown in Fig. 3, so that it is level. Fig Page 9 Front Load Washing Machine Model:HMS1000TVE Installation Joining the Inlet Hose to the Washing Machine 1. Connect the nut on the inlet hose to the connector on the water valve. :DWHULQOHWKRVHRXW 7LJKWHQWKHQXWWRVHFXUHWKHKRVH Connect of water inlet valve 'UDLQDJH+RVH Use the drainage holder to keep the end of the drainage hose retained and to prevent the outflow FP fix it to the drainage hose clip at the back of the washing machine. FP The height of the drainage outlet must be 80-100cm. To prevent the drainage hose from dropping off, of water. It is recommended that drainage hose extensions not be used; if an extension is needed, please consult a serviceman. The additional hose should be no more than 250cm (overextended hoses could lead to siphonage). Note: The drainage hose should not be submerged in water and should be securely fixed and leak-free.The appliance is to be connected to the waster mains using new hose-sets and that old hose-sets should not be reused. Connecting to the Power Supply Before connecting to the power supply, check: The socket is adequate for the maximum power of the washing machine (For safety, fuses in the power circuit should be rated for no less than 15A). The voltage should meet the requirement. The power outlet should be capable of accepting the washing machine plug. The washing machine must be earthed before use. Supplementary earth cable should not be necessary if the socket is connected to the earth Supplementary earth cable shoulde be installed on the upper back of the washing machine andconnected to an earth if the power supply socket has no earth connection Page 10 )URQW /RDG :DVKLQJ 0DFKLQH 0RGHO+0679( 1HW 'LPHQVLRQ KHLJKW PP ZLGWK PP GHSWK PP 3DJH Front Load Washing Machine Model:HMS1000TVE Name of the parts Detergent dispenser Top Cover Button Program selector Door handle Porthole Bottom plaque Page 12 Front Load Washing Machine Model:HMS1000TVE Opertional Functions HMS1000TVE Pre-wash Cotton Synthetic Wool Cashmere Silk Delay Temperature Spin Start/Pause Quick Wash Rinse Spin Drain Power 2Q 2 II $˖Wash programming knob By turning the knob clockwise/counterclockwise, the required program can be selected. There are 11 programs available. After a program is selected, the corresponding light will go on. (Refer to Guide to Operational Program Selection). %Power Switch Press this button to switch on the washing machine. Press it again to switch it off. &Start / Pause Button When the washing machine is connected to the power socket and a program is selected, washing operation will start. Lightly touch this button during a wash cycle, operation will stop and the digits on the screen start blinking. Touch it again to resume operation. To cancel a wash program during a wash cycle, touch this button, when the digits on the screen start blinking, press the Power switch, the program will be cancelled. D: Spinning Speed Setting Button Touch this button lightly to select the desired speed. When a speed is set, it will be displayed on the screen. Note: Different water temperatures and spinning speeds can be set for different laundries. Refer to the operation instructions on pages 11 and 14. Wash using the default settings if there is no special requirement. E: Washing temperature button Touch this button lightly, the washing temperature will be displayed on the screen. Select a temperature according to the type of laundry. Page 13 Front Load Washing Machine Model:HMS1000TVE Functions F: Delay Button Touch this button lightly, the washing machine will start operation after a period of time and the corresponding indicator will go on. The range is 0.5-24 hours; each touch of this button increases a half hour. After the button is set, press the Start/Pause button to start countdown of the set time (the time is displayed on the screen until the program ends). E+F Key Combination Press these two keys simultaneously, the sign "LOCK" and the remaining washing time are displayed on the LED alternately. Now all the function keys except the Power switch can be locked. Press the key combination again to cancel this function. G: Detergent distribution drawer Open the drawer, three compartments can be seen: Compartment 1: Pre-wash detergent Compartment 2: Normal - Quick wash detergent Compartment 3: Softener, conditioning agent, perfume, etc. H: DisplayPress Such information as remaining wash time, temperature and speed setting and error messages will be shown. Note: After power is switched on, the display will go on and the remaining wash time decreases. As the water pressure and temperature may differ, the remaining time may be adjusted accordingly. When the laundry is not balanced during spinning, the time may be automatically prolonged. These are normal phenomena. Page 14 Front Load Washing Machine Page 15 Model:HMS1000TVE Front Load Washing Machine Model:HMS1000TVE HMS1000TVE Error Display and Troubleshooting Error message:Door is not properly shut 20s after program is started. Troubleshooting: Pushing the door to Check Whether Door is properly shut or not N Shut the door properly. Y Cut off the power and then turn on again. Check the voltage between brown wire and blue wire of door lock, is it between AC 220-240V? 220-240v Y Door lock is broken connected properly. N Connect the wire properly Check if the wire connecting door lock and PCB is loose Y 220-240v N Replace PCB Check the voltage between brown wire and blue wire of PCB, is it between AC 220-240V? N Error message:Drainage error, water not emptied within 4 min. Troubleshooting: Cut off power and water Check if water is emptied Y level pressure switch wire connection, measure the resistance of 1 and 3 pin, is it infinite? If not, it is water level pressure switch failure and replace it. If it is, then repair and check PCB and wire as followed. N Check if drain pump acts by touching pump position Y Check if drain pump or drain pipe is jammed, and open the filter and clean N Cut off the power and choose spin program to start, then check the import voltage of drain pump, is it between AC 220-240V? Y N Cut off power and pull out water level pressure switch wire connection. Set spin program to start. Check the export voltage to drain pump, is it between AC 220-240V? and need replacing, then make sure wire is Y The wire between PCB and drain pump is not connected properly. Replace the wire. N Replace PCB Page 16 Replace drain pump )URQW /RDG :DVKLQJ 0DFKLQH 0RGHO+0679( (UURU PHVVDJH7HPSHUDWXUH VHQVRU LV QRW SURSHUO\ FRQQHFWHG RU GDPDJHG GLVSOD\ DW WKH HQG RI D SURJUDP 7URXEOHVKRRWLQJ &XW RII SRZHU DQG PHDVXUH WKH UHVLVWDQFH 1 17& H[LVW RSHQ FLUFXLW 5HSODFH LW RI WHPSHUDWXUH VHQVRU E\ PXOWLPHWHU LV LW EHWZHHQ N ȍ " < &RQQHFW 17& ZHOO &KHFN LI 17& LV FRQQHFWHG SURSHUO\ 1 < &KHFN WKH ZULHV RI 17& DUH WKH\ FRQQHFWHG ZHOO 1 &RQQHFW DOO ZLUHV ZHOO < 'LVFRQQHFW WKH ZKLWH ZLUH DQG EODFN ZLUH IURP 3&% DQG PHDVXUH LI WKH UHVLVWDQFH EHWZHHQ ZKLWH ZLUH DQG EODFN ZLUH RI 3&% LV LW LQILQLWH" 5HSODFH ZLUH < 1 5HSODFH 3&% (UURU PHVVDJH7KH KHDWHU PD\ EH EURNHQ 7URXEOHVKRRWLQJ &XW RII SRZHU FKHFN WKH UHVLVWDQFH RI WZR SLQV RI KHDWHU HOHPHQW E\ PXOWLPHWHU LV LW EHWZHHQ " 1 < 7KH FRQWURO ZLUH PD\ EH EURNHQ RWKHUZLVH 3&% PXVW EH EURNHQ 3OHDVH UHSODFH WKH EURNHQ RQH 3DJH +HDWHU HOHPHQW PXVW EH EURNHQ SOHDVH UHSODFH LW Front Load Washing Machine Model:HMS1000TVE Error message:The required water level is not reached within 8 min Troubleshooting: Check if water is leaking from washer bottom. inlet pipe. drain pipe or other pipe connection Y Readjust or replace the broken parts N Check if tap is closed or water pressure is too Y Open the tap or wait for normal water pressure to use low (usual between0.2 -1 MPa) N Clean inlet valve Check if inlet valve is jammed Y N Observe if the height of drain pipe not reach 80 Draw out the dispenser and check if water is entering Y cm. If water level pressures switch and N the hose is leaking gas Turn on power, and set pre-wash mode, then start. Check the import voltage of electromagnetic valve by multimeter , is it between AC 220-240V? 220-240V Electromagnetic valve must be broken, please replace Y it. N The wire connected PCB and inlet valve is not Check if export voltage from PCB to Y electromagnetic valve, is it between AC 220-240V? N Replace PCB Page 18 properly. Please reconnect it or replace it. Front Load Washing 0DFKLQH 0RGHO+0679( Error message. Motor overheat protection or is damaged. Troubleshooting: Cut off power and check if motor wires Reconnect well N are connected well Y Put the motor in normal temperature about Measure if resistance of motor winding by multimeter, is it as followed? 1-2:5 ; N 3-5:5 ; 7-8:5 Y ten minutes, and then test again. If the resistance is natural, it is caused by overheated protection. Then check and deal with overload, abnormal voltage. If not, please replace motor Pull out the wire connection of motor Then check if circuit is open by multimeter Y Repair wires Page 19 Front Load Washing Machine Model:HMS1000TVE Error message. Water level exceeds protective value. Troubleshooting: Clean water switch hose and air Y Check if water switch hose and air collector collector are jammed N Pull out water switch inserts and turn on power, then set wash mode. While water is entering at the position of 1/4 glass window, check the resistance between ķ and ĸ, is it 0? Check the resistance between ķand Ĺ, is it infinite? Replace water pressure switch Y N Replace inlet valve Without power ,connect inlet pipe to inlet Y vavle,then open the tap and observe if water is entering in dispenser N Without starting but electrifying, measure the 220-240V Replace Y import voltage of inlet valve, is it between AC 220-240V? Page 20 PCB Front Load Washing Machine Model:HMS1000TVE HMS1000TVE Examination & Troubleshooting Failure:Display nothing Troubleshooting: Repair power supply N Measure the power supply ,is it exists 220V-240V AC voltage Y Press the power switch N Is power switch on? Y Press power switch and check the voltage between two pins of power switch. Is there 220-240V AC voltage? Make sure power supply cable assembly is 220-240V N connected well and then replace power switch. Y Cut off power and check if plugs are connected N Insert the plug well and test N Replace PCB well by pulling the plug of PCB. Y Check if power plug exists 220V-240V AC voltage at the import pin Failure:no water inletting Troubleshooting: Is the tap shut off or the water pressure Open tap or wait for normal water pressure Y too low? N Check if water is leaking from washer connection, especially between inlet pipe Y Reconnect inlet pipe. and tap. to make sure of no bends. N Y Check if filter of electromagnetic valve is Clean filter jammed N Choose pre-wash program and start ˈ Check if there is 220-240V at import pin of electromagnetic valve 220-240V Replace electromagnetic valve Y N Reconnect the wire Is there open circuit Y between electromagnetic valve N 220-240V Choose pre-wash program and start ˈ N then check if there is 220-240V at export pin of electromagnetic valve Page 21 Replace PCB Front Load Washing 0DFKLQH 0RGHO+0679( Failure:no draining Troubleshooting: Adjust the height of drain pipe to Y Is the height of drain pipe too high? 80-100 cm N Turn filter anticlockwiseˈopen and check if Y filter is jammed Clean and tighten filter clockwise. N Arrange hose and clean Check if hose connecting cylinder to pump is Y bent or jammed N Turn on power and choose spin program to start. Measure if import voltage of drain pump is 220-240V Y Replace drain pump N Replace the wire. Cut off and check if the connection between Y drain pump and PCB is open N Replace Turn on and choose spin program to start. Measure if export voltage of PCB to N PCB drain pump is 2209 Failure :abnormal noise and vibration Troubleshooting: Is the pack screws dismantled? N Dismantle the screws Y Clean Is there foreign material in the washer? Y N Adjust adjustable feet Is washer in balance? Y Is belt loose or worn? Y Replace it N Are the screws of counterweight and motor loose? Fasten them Y N Remove belt and turn belt pulley by Dismantle triangle and check the bearing .If it is broken, replace it. hand, and then check if there is different N Turn on power and set spin program, then startˈcheck if there is different noise from motor Y Page 22 Replace motor Front Load Washing Machine Model:HMS1000TVE Failure:water leaking Troubleshooting: Check if water is leaking from the inlet pipe Y Readjust it. or the tap N Is drain pipe broken˛ Replace drain pipe Y N Remove clothes Check if there is foreign material nipped between cushion of sight window and sight window Y N Check if all tubes and tie-in is leaking water, including the connecting of tube and valve, dispenser, tube and dispenser ,outer cylinder-cushion of sight window-hose and outer cylinder, drain pump and gas valve Y Reassemble or repair N Replace Y Is cushion of sight window broken? cushion of window N Y Is water leaking from outer cylinder? Page 23 Replace outer cylinder sight Front Load Washing Machine Model:HMS1000TVE Wiring Circuit 1 2 2 1 JA2 J8 JA3 JA4 J6 J5 Page 24 2 1 J2 2 1 1 2 3 4 5 6 2 1 JA7 JA8 JA1 J4 JA6 L JA5 3 2 1 )URQW /RDG :DVKLQJ 0DFKLQH 0RGHO+0679( )F YOU WANT TO STOP THE PROGRAM SETTING!T FIRST YOU SHOULD PRESS THE BUTTON OF STARTPAUSE ONLY ONE TIME4 HEN TURN OFF POWER )F YOU WANT TO START THE PROGRAM SETTING AGAINYOU SHOULD TURN ON THE POWER AGAINSO IT IS OK 3 WITCH ON THE POWE 7HEN THE DOOR SWITCH IS CLOSED FOR TEN SECONDS WILL BE DISPLAYED 7HEN THE MAIN WASH VALVE ALLOWS WATER TO LET IN FOR SECONDS WILL BE DISPLAYED 7HEN THE PREWASH VALVE ALLOWS WATER TO LET IN FOR SECONDS WILL BE DISPLAYED 7HEN THE HOT WATER VALVE ALLOWS WATER TO LET IN FOR SECONDS WILL BE DISPLAYED 7HEN THE MAIN WASH VALVE THE PREWASH VALVE AND AND ALSO THE HOT WATER VALVE ALLOW WATER TO LET IN FOR SECONDS AT THE SAME TIME WILL BE DISPLAYED 7HEN THE MOTOR RUNS FOR TEN SECONDS WITH THE SPIN SPEED RPM WILL BE DISPLAYED 7HEN THE MOTOR RUNS FOR SECONDS WITH THE SPIN SPEED RPM WILL BE DISPLAYED 7HEN THE MAIN WASH AND PREWASH ALLOW THE WATER TO GO IN MEANWHILE UNTIL THE MAXIM WATER LEVEL WILL BE DISPLAYED 7HEN THE WATER FILLS THE TUB FULLY IT WILL STOP FOR TEN SECONDS AND AT THIS TIME WILL BE DISPLAYED 7HEN THE MOTOR RUNS CLOCKWISE FOR SECONDS WITH RPM THE WASHING MACHINE WILL STOP FOR SECONDS AND AT THIS TIME WILL BE DISPLAYED 7HEN THE WASHING MACHINE HEATS WATER FOR SECONDS WILL BE DISPLAYED 7HEN THE WASHING MACHINE DRAINS FOR SECONDS WILL BE DISPLAYED 7HEN A PROGRAM CYCLE IS FINISHED % .$ WILL BE DISPLAYED 3DJH