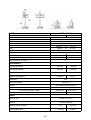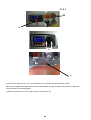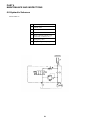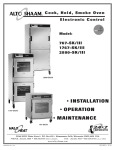
1
OPERATING AND MAINTENANCE MANUAL
AEUP IAWP 9.6/15
English Version
ANSI Specification
Rev 06.10
IMPORTANT
The user/operator should not accept operating responsibility until the Manual has been read
and fully understood as well as having operated the lift under supervision of an experienced
and qualified operator. The operator/user must not accept operating responsibility until he/
she understands their responsibilities set forth in the ANSI Manual of Responsibilities
provided with this lift.
Only trained and authorized personnel shall be permitted to operate this machine.
This manual and its attachments should be considered integrant part of this machine and
should remain with the machine all the time.
As the manufacturer has no direct control over utilization and application of this machine,
proper safety practice are responsibility of the user and operating personnel.
WARNING
ANY MODIFICATION ON THIS MACHINE WITHOUT THE EXPRESS WRITTEN CONSENT OF
THE MANUFACTURER IS PROHIBITED. A MODIFICATION MAY COMPROMIZE THE SAFETY
OF THE MACHINE, SUBJECTING OPERATOR TO SERIUS INJURY OR DEATH.
This machine is manufactured in Italy by:
BRAVIISOL Divisione Meccanica S.r.l.
S.S. 16 Adriatica km. 314,600
60022 Castelfidardo (AN)
Tel. +39.071.7819090 Fax +39.071.7819355
www.braviisol.com
If there is a question on application and/or operation, contact th Manufacturer.
This machine complies with ANSI Standard A92.6 2006
2
TABLE OF CONTENT
PAGE
INTRODUCTORY INFORMATION AND PRODUCT SPECIFICATION
Delivery Note
AEUP IAWP 9.6/15 Maintenance
Machine Identification
Purpose and Product Design
General Delivery Notes
Machine Specifications
SAFETY
Safety Symbols
General Safety Rules and Precautions
Safety Precaution
Safety Features
Safety and Control Decal Location
OPERATION
Loading/Unloading Procedures
Operator Controls
Platform Controls
Base Controls
Operation
Extending the Roll-Out Extension Deck
Driving Operations
Lifting/Lowering Operations
SHUT OFF PHASE
Temporary Shutdown
Daily Shutdown
Prolonged Shutdown
Emergency Shutdown
Emergency Lowering
Manual Emergency Handling
CLEANING AND DISPOSAL
Cleaning
Disposal
MAINTENANCE AND INSPECTIONS
Preface and General Maintenance Tips
Standard Safety Basket Position
Hydraulic Oil Refill
Checking of Battery Terminals
Battery Water Checking
Function Tests
Prestart Inspection
Frequent Inspection
Annual Inspection
Inspection Check List Forms
Troubleshooting and Error Codes
Hydraulic Schemes
Electric Diagrams
WARRANTY
3
4
4
5
5
5
7
8
12
12
13
14
18
20
21
21
26
26
28
29
31
31
31
32
32
32
32
32
33
33
34
34
34
35
35
35
36
36
37
38
40
41
41
42
44
51
53
55
PART 1
INTRODUCTORY INFORMATION AND MACHINE SPECIFICATIONS
1.1
DELIVERY NOTE
The AEUP IAWP 9.6/15 (LUI MINI S.I./LUI S.I.460) Platform has been manufactured in compliance with the ANSI
Standards A92.6 .
Therefore, they are not dangerous to the operator if used according to the instructions in this manual and along
with the training supplied by the manufacturer's technician, provided that the safety devices are always kept
effective.
This page testifies:
•
•
•
that the safety devices were effective when the machine was received
that the present manual was delivered with the machine
that the operator accepts responsibility for following the manual step by step
The manufacturer informs that any modification, tampering or any operation carried out contrary to those
stated in this manual, its specifications or other documents which could jeopardize safety will annul both the
warranty and the original ANSI compliance.
ANY MODIFICATION ON THIS MACHINE WITHOUT THE EXPRESS WRITTEN CONSENT OF THE
MANUFACTURER IS PROHIBITED.
The manufacturer hopes that you take advantage of all of the functions of AEUP IAWP 9.6/15 (LUI MINI S.I./LUI
S.I.460) Platform.
Remember, however, that all of the technical data refer to the standard machine (see part 3) and that the
drawings and any other documents delivered together with the machine are property of the manufacturer who
reserves all rights and reminds that they may not be made available to third parties without his written approval.
.
Therefore, even partial reproduction of the text and illustrations is strictly prohibited.
The original was delivered to the owner together with all the other documents of
this platform.
Machine:
Series : AEUP IAWP 9.6 (LUI MINI S.I.)
Serial Number
Company Name:
Date
4
Signature
PART 1
INTRODUCTORY INFORMATION AND MACHINE SPECIFICATIONS
1.2
AEUP IAWP 9.6/15 (LUI MINI S.I./LUI S.I.460) MOBILE
PLATFORM MAINTENANCE
The following instructions must be complied with to ensure the correct operation of the mobile platform:
•
Make sure that the battery water level is above the inner plates and splash guard by at least 0.19 inch
(5 mm).
•
Fully re-charge the batteries after their daily use.
•
Fully re-charge the batteries before a long shutdown of the platform and at least once
every 15 days.
•
Carry out all the ordinary maintenance activities (SECTION 8).
Follow all the recommendations and instructions contained in this manual for the safe use of the platform.
The manufacturer shall not be responsible for damages caused by improper use.
1.3
MACHINE IDENTIFICATION AND MANUAL NUMBER
1.3.1
Whenever contacting the manufacturer or its service centers regarding AEUP IAWP 9.6/15 (LUI MINI
S.I./LUI S.I.460) Platform, always cite the type and serial number, that can be read on the identification
plate on the column of the machine.
1.4 PURPOSE AND PRODUCT DESCRIPTION
The AEUP IAWP 9.6/15 (LUI MINI S.I./ LUI S.I.460) is an aerial work platform designed for compact
size, ease of operation and operator safety. The purpose of this machine is to position personnel and
their necessary tools and material.
Safety is our number one priority. The AEUP IAWP 9.6/15 eliminates the need for scaffolding, scissor
lifts and normal push-around units. No more ladders, no outriggers, no hassles. One man can easily do a
job safely, quickly and efficiently.
Its unique design creates usage in very confined areas. Small elevators, narrow hallways, closets, aisle
ways, mezzanines and cramped office space are just a few of its many applications.
5
Machine:AEUP
IAWP 15 (LUI S.I.460)
Series :
Serial Number
Company Name:
Date
6
Signature
PART 1
INTRODUCTORY INFORMATION AND MACHINE SPECIFICATIONS
1.5
GENERAL
DELIVERY NOTES
1
2
3
OPERATING AND MAINTENANCE MANUAL
AEUP IAWP 9.6/15
English Version
ANSI Specification
DESCRIPTION
POSITION
Complete machine
1
Loading/Unloading Device (optional, only for IAWP 9.6)
2
User manual
3
Platforms original Documents:
- Warranty
- Delivery Note
- Test Sheet
- TÜV Certificate
4
The machine, its parts and/or accessories may be shipped in a container or
packed in crates (optional). Upon receipt, always check for the following:
1 - The machine is not damaged.
2 - The delivery complies with the order specifications (see delivery note or packing
list).
3 - The machine and its accessories are not damaged.
In case of damages or missing parts, immediately contact the Manufacturer, his local
representatives, the forwarder or the insurance company, supplying detailed information and/or photos.
Spare parts and accessories may sometimes be shipped in separate containers.
7
PART 1
INTRODUCTORY INFORMATION AND MACHINE SPECIFICATIONS
1.6
MACHINE SPECIFICATIONS
8
PART 1
INTRODUCTORY INFORMATION AND MACHINE SPECIFICATIONS
Direct Drive Electric Motors
Watt 500; Volt24; Nm 0.8; F.F. 1; RPM 3600;
Ah18,5; IP 54; DUTY S2
Gearbox
MRIV 40 U03A; PW 1400 min-1: 0,27 Kw; Speed:
i=70; Ø 11 - 140
Pump
2000W; 24V; 105 Ah; 2100 RPM; Nm 9.09; IP 20;
F.F. 1
Wheel Blocking Electromagnets
28,8W; 24V; IP 40
Rear Drive Wheels
External Bearing: RIZ25
Internal Bearing: UCFC 205
One Hand proportional controller
Controls
Solid Rubber, Non Marking
Tires
Hydraulic Oil
Roloil LI 22 / HIV
Grease
White, no- drying grease LBT2
Filter
90 micron
Oil Pressure
18 - 23 bar
Noise
Less than 70 dB(A)
NOTE:
SERVICING CAN ONLY BE CARRIED OUT ON LEVEL
FLOORING IN CLOSED ENVIRONMENTS.
9
MODEL
AEUP IAWP 15
Metric
4600mm
340mm
6600mm
A
B
C
US
15 ft
1 ft 3 in
21 ft 7,8 in
Platform Width
740mm
D
2 ft 2 in
Platform Length w/decks ext
Width
2376mm
760mm
E
F
7 ft 10 in
2 ft 5 in
Length Stowed
1659mm
G
Height Stowed
1850mm
H
MEASUREMENTS
Platform Height
Entry Step
Working Height
5 ft 5.36 in
6 ft
Platform Capacity w/decks ext
280 Kg
617 lbs
Ground Clearance
65mm
2.56 in
Rated number of occupants
2
PERFORMANCE
Drive Speed Stowed
3,2 Km/h
1.98 mph
Drive Speed Elevated
0.6 Km/h
0.35 mph
Inside Turning Radius
ZERO
Outside Turning Radius
1345mm
Gradeability
3 ft 2 in
35%
Raise/Lower Speed
26/15 sec
Controls
One Hand proportional control
Tires
Solid Rubber, No Marking
Front Wheel: diameter / width
250/80 mm
9.84/ 3.14 in
Rear Wheel: diameter / width
350/105 mm
13.77/ 4.13 in
POWER
Power Source
110/220 V ca, 24Vcc
Batteries
N 04, 6V 240Ah 5h
Hydraulic System Capacity
12 lt
Weight (without load)
1250 Kg
10
3.17 gal
2755lbs
Direct Drive Electric Motors
Watt 1200; Volt24; Nm 3.2; F.F. 1; RPM 3600;
Amp65; IP 20; DUTY S2
Gearbox
MRIV 63 U03A; PW 1400 min-1: 0,74 Kw; Speed:
i=63.6;
Pump
2000W; 24V; 150 Ah; 2250 RPM; Nm 8; IP 54;
Wheel Blocking Electromagnets
18W; 24V; IP 40
Rear Drive Wheels
UCFC 206 bearing
One Hand proportional controller
Controls
Solid Rubber, Non Marking
Tires
Hydraulic Oil
SYNTHEST HP32 BIO OIL
Grease
White, no- drying grease LBT2
Filter
Internal filter 90 micron
Oil Pressure
65 bar
Noise
Less than 70 dB(A)
NOTE:
SERVICING CAN ONLY BE CARRIED OUT ON LEVEL
FLOORING IN CLOSED ENVIRONMENTS.
11
PART 2
SAFETY
2.1 SAFETY SYMBOLS
This section of the Manual contains important information of the safe use of the
machine. Failure to read, understand and strictly follow all safety rules, warnings
and instructions will unnecessarily expose you and others to dangerous situations. For your safety and the safety of the persons around you, you must operate your machine as instructed in this Manual.
YOU, THE OPERATOR, ARE THE SINGLE MOST IMPORTANT FACTOR FOR
SAFETY WHEN USING ANY PIECE OF EQUIPMENT. LEARN TO OPERATE THIS
MACHINE IN A SAFE MANNER.
DECAL LEGEND:
BRAVIISOL PRODUCT USE THE FOLLOWING SYMBOLS AND COLOR CODING
AND SIGNAL WORDS TO IDENTIFY THE FOLLOWING:
SAFETY ALERT SYMBOL
This symbol is used to alert personnel to potential personal injury hazards. Strictly obey all safety messages that follow this symbol to avoid possibile serious injury or death.
DANGER— White font on a red Background
It indicates the presence of an imminent hazardous situation which, if not avoided, will result in death or
serious injury.
WARNING—Black letters on a orange background
It indicates the presence of a potentially hazarous situation which, if not avoided, could result in death or
serious injury.
CAUTION—Black Letters on a yellow background
It indicates the presence of a potentially hazardous situation which, if not avoided, may cause minor or
moderate injury or damage to the equipment.
NOTICE—White letters on a green or background
It indicates maintenance or operation information.
12
PART 2
2.2 GENERAL SAFETY RULES AND PRECAUTIONS
BRAVIISOL D.M. s.r.l. designed self—propelled lift AEUP
Series IAWP
LUI S.I.
9.6/15
to be(LUI
safeMINI
andS.I/LUI
reliable.
S.I.
They
are intended
460)
to be safe
toand
position
reliable.
personnel,
They arealong
intended
with to
their
position
necessary
personnel,
tools and
along
materials
with their
to necesoverheadtools
sary
workand
locations.
materials to overhead work locations.
The owner/user/operator of the machine must not accept responsibility for the operation of
the machine unless properly trained.
ANSI 92.6—2006 standards identify requirements of all parties who may be involved with selfpropelled elevating work platforms. The A92.6—2006 Manual of Responsibilities is considered a part of this machine and can be found in the manual compartment, located at the platform control station.
To ensure safe use of the machine, pre-start, frequent and annual inspections must be carried
out as specified in Section 6.7 of the ANSI A92.6—2006 Standard, at the designated intervals,
as prescribed by the same Standard, in accordance with BRAVIISOL recommendations set
forth in the Attachment to the User Manual and the Service Manual.
13
SAFETY PRECAUTIONS
DANGER
Failure to obey the instructions and safety rules in this manual will result in death
or serious injury.
While reading through this maintenance and user manual you will find some symbols which have a specific
meaning.
2.1 CONVENTIONAL SYMBOLS AND THEIR DEFINITION
2.1.1
CAUTION!
DANGER OF ELECTROCUTION
Warns the staff in charge that by not carrying out
the operation described according to the safety precautions that apply they run the risk of an electric shock.
2.1.2
DANGER!
Warns the staff in charge of any potential physical damage incurred if the operation described is not carried
out according to the safety precautions that apply.
2.1.3
NOTE
Draws the attention of the staff in charge to some relevant or important information.
2.1.4
WARNING
Draws the attention of the staff in charge to some procedures that could cause light personal injuries
or damage to the machine if not respected.
2.1.5
OPERATOR OR MACHINE DRIVER
Refers to qualified staff, i.e. staff having specific skills, inasmuch as the operations are entirely manual
and will therefore require all of the driver’s attention
to ensure the best quality results.
It is therefore strictly forbidden to the operator to carry out any operation that would
otherwise be the responsibility of the maintenance technician.
2.1.6
MAINTENANCE TECHNICIAN
Qualified technician who can operate the machine under normal conditions of use and carry out all adjustment, maintenance and repair interventions needed on mechanical parts.
However this person is not qualified to carry out interventions on live electrical plants.
2.1.7
ELECTRICAL TECHNICIAN OR SKILLED PERSON
(See EN 60204 paragraph 3.55)
Qualified technician who can drive the machine under normal conditions of use and carry out all electrical
adjustment, maintenance and repair interventions. This person can work on live electrical cabinets and
boxes.
2.1.8
PERSONAL PROTECTION
When one of the symbols appearing next to the description is found, the operator must absolutely
be equipped with safety wear because of the implicit hazard.
2.1.9
EXTRAORDINARY MAINTENANCE OPERATIONS
The maintenance operations marked with this symbol must be carried out by the manufacturer.
Completely discharge the pressure before carrying out any intervention on the oil system.
14
PART 2
SAFETY
2.2
Before installing the machine, always check that the floor is levelled and strong enough to bear its weight (see section 1 Technical Specifications).
WARNING
The machine model IAWP 9.6 (LUI MINI S.I.) or IAWP 15 (LUI S.I.460) can only be operated in closed environments with good lighting conditions on flat, uniform floors.
2.3
WARNING – DANGER OF ELECTRICAL SHOCK
Maintenance and interventions on the electrical board can only be carried out by a qualified electrician, who will
anyhow bring the machine to the “Zero” Power condition. Do not open or tamper with the electrical board
2.4
The operators in charge of handling the machine and its equipment must always wear protective gloves, safety
shoes, a helmet and safety belt.
2.5
For information on operating once the machine has been unpacked, see section 4 Transport and Handling.
Lift the machine (after completely lowering it) at max. 11.8 inch (30 cm) from the floor (except for obstacles) and
move it very slowly. Never lift the machine with the column in operating position (including very small movements).
Never use external means to move the machine and never handle the machine in a way different from the ones
described in this manual . For emergencies the platform has been provided with a lifting device for the manual
handling of the platform.
2.6
“0” POWER CONDITION. DISCONNECTION FROM POWER SOURCES.
Before carrying out any cleaning, maintenance or lubrication operation, always bring the machine to “zero” power
condition, that is:
- Completely lowered basket or basket fixed with the basket blocking bar.
- Keyswitch Q2 removed from the control panel and under the responsibility of the Production Manager.
- Stop Emergency button pressed.
2.7
In case of any problem during operation, whether during the production cycle or not, immediately press the STOP/
EMERGENCY button.
The STOP/EMERGENCY button will immediately stop all the moving elements of the machine.
Never use the safety devices of the platform to stop the machine during standard operation.
MOREOVER
Read SECTION 7 “EMERGENCY” for additional information on all the methods to stop the
platform.
2.8
If the machine cannot be brought to “ZERO” power condition during extraordinary maintenance operations, a sign
on the machine must be placed to indicate work in progress.
2.9
Never rest or sit on the machine for any reason during the production cycle, the emergency status or the ZERO
power condition.
Operators must be alert and physically fit. Do not operate the machine under the effect of alcohol or drugs that
may affect sight, hearing, alertness and reactions.
2.10
Operation and maintenance must be only carried out by Electrical or Mechanical Maintenance Operators who
have been trained on how to use the machine at the Manufacturer’s premises or in his authorized Distribution Centres. Operators must also be informed on the safety regulations and the contents of this manual.
2.11
The keys used to operate the machine and the keys used to access internal areas must always remain under the
exclusive responsibility of the Manager in charge of the department where the machine is installed.
2.12
Never tamper with or voluntarily damage safety diagrams or stops. Never remove or hide warning labels.
IN CASE OF DAMAGE THAT PREVENTS READING IMMEDIATELY REPLACE LABELS.
Before operating the machine check all the labels to be in the correct position and perfectly visible and readable.
Check Safety and Control Decal Location List in Section 6 of this Manual.
15
PART 2
SAFETY
2.13
Operation, cleaning and maintenance must be carried out by one operator only and NEVER BY
SEVERAL PERSONS, except as otherwise indicated. Operators must always wear work clothes.
Moreover the operator:
- must wear work overalls with tight cuffs
- must tie back long hair
- must avoid any loose and/or torn objects and/or clothes (like necklaces, watches, rings, bracelets,
scarves, ties, etc.)
2.14
Never carry out makeshift repairs in order to start working.
2.15
Never tamper with or disconnect the safety micro switches or the other safety devices for any
reason. Never create by-pass connections or use them for purposes other than the ones for which
they have been installed.
2.16
WARNING – FALL protection notice
The guardrail system around the perimeter of the platform is the fall protection system for self propelled elevating platforms, as per the American National Standards Institute ANSI/SIA A92.6
Standard. It is prohibited to use this machine with any portion or all of the guardrails removed.
Lanyard anchorage points on this type of equipment are not required to conform to the applicable
ANSI/SIA Standard and EC Regulation.
THE IMPROPER USE OF FALL ARREST SYSTEMS MAY CAUSE MACHINE TO TIP RESULTING IN SERIOUS INJURY OR DEATH.
However, if anchorage points for lanyard attachments are required by site authorities or other regulations, the anchorage points on this machine are recommended to be used for working positioning
restraint of personnel only. Lanyard lengths are to be determined by operator/owner to restrict the
operator to the confines within the guardrail System.
2.17
The correct position of the operator during the utilization of the platform is in front of the control
panel.
When in this position, the operator can see the platform working area and ask any people standing in a 6.56 ft area (2 meters area) to move away, as necessary.
Never lean out of the platform rail.
2.18
The operator must restore all safety devices back and close all protection covers after any cleaning, setting and maintenance operation.
2.19
Once maintenance or repair operations have been completed, before starting the machine, do the
pre-operation inspection before going on to the function test. Then check that all tools, cloths or
other materials have been removed from the compartments with moving parts or from the areas in
the proximity of moving mechanisms.
2.20
WARNING: DANGER OF FALL
Make sure that occupants, equipment and material on the platform do not exceed the limits for
which the platform is certified and / or pre-set (see technical features, SECTION 1).
LOADING AND UNLOADING OPERATIONS ARE PROHIBITED WITH RAISED PLATFORM.
IT IS ABSOLUTELY FORBIDDEN TO LOAD GOODS ON THE BASKET FROM AN UPPER
POSITION.
2.21
After you have completed your work, NEVER leave the platform with potential danger
sources and bring it to zero energy status.
2.22
WARNING – DANGER OF POLLUTION
All the parts to be disposed of as a result of maintenance activities or at the end of the working
life of the equipment must not be left in the surrounding environment, but disposed of by authorized bodies. However, before disposing of the platform, drain the oil, remove the batteries, anchor the moving parts and handle it as described in the relevant sections of this manual.
2.23
The first assembly must be carried out by the Manufacturer. No interventions can be carried out
independently.
16
2.17
PART 2
SAFETY
2.
2.24
Do not use outriggers to stabilize the machine, since they may cause instability, dangers of falls, crush or
cut.
2.25
The operator must constantly carry out the daily maintenance operations and inspections as indicated in
section 6 of this Operating Manual.
2.26
The operation, maintenance cleaning, setting and handling of the machine must be exclusively carried out
by highly qualified and trained personnel informed on the safety instructions contained in this manual.
2.27
The area comprised within 6.56 ft (2 meters) around the machine is to be considered as dangerous. The
operator must make sure that no individuals, animals or objects remain or enter in such area at low or
high level (i.e. rods, columns or other aerial obstacles).
2.28
WARNING – ELECTROCUTION HAZARD
THIS MACHINE IS NOT ELECTRICALLY INSULATED!
DO NOT OPERATE MACHINE NEAR POWER LINES. THE PLATFORM AND ENCLOSURES
ARE NOT ELECTRICALLY INSULATED.
You must maintain a safe distance of at least 10 feet/3mt from electrical power line and apparatus carrying over 300 volts up to 50000 volts in accordance with applicable government
regulations .
One foot additional clearance is required for every additional 30,000 volts
Death or serious injury will result from contact with or inadequate clearance from any electrically charged conductor.
2.29
Never Fasten fall protection lanyard to an adjacent structure while on the platform.
2.30
Make sure that the platform entry is properly closed and secure before operating the machine from the platform.
2.31
WARNING – DANGER OF OVERTURN
The operator must look in the movement direction, both up and down, during all forward or backward
movements (see section 3 Operation). The operator must also make sure that the floor is clean and free
of holes, depressions, inclinations, individuals or objects.
2.32
WARNING – DANGER OF CRUSH
The operator must make sure that no individuals are exposed when the machine moves upwards or
downwards.
2.33
WARNING – DANGER OF FALL
Do not use ladders, decks, scaffoldings or similar items to extend your reach while on the platform.
2.34
The added platform load MUST NOT exceed the max. rated workload (see section 1, Technical features). The load must not stick out of the basket and must be as balanced as possible on the basket.
Frequent stops of the platform during operation indicate that the load is getting close to the maximum load
level. In this case, the load must be reduced.
2.35
DO NOT REPLACE ITEMS CRITICAL TO MACHINE STABILITY WITH ITEMS OF DIFFERENT
WEIGHT OR SPECIFICATION. Total Battery weight: 92.5 lbs - 42 Kg (IAWP 9.6 each battery
46.3 / 21 Kg) 264 lbs - 120Kg (IAWP 15 each battery 66 lbs/30Kg) Only use original spare parts to
replace worn and/or broken parts.
2.36
WARNING
DO NOT USE THIS MACHINE AS A CRANE.
17
PART 2
SAFETY
2.3 SAFETY FEATURES
2
1
8
4
3
7
5
1
6
9
10
10
POS.
SAFETY FEATURES
1
Emergency Stop Button
2
Basket slide stop devices
3
Shock absorber
4
Flashing Light
5
Tilt sensor device
6
Manual emergency descent
7
Basket Blocking Bar
8
Lifting Device for Emergency Manual Handling
9
10
Tie Down and Lifting Points
Pothole protection system
11
Overload system
18
1
7
5
1
4
6
9
10
11
2
19
PART 2
SAFETY
2.4 SAFETY and CONTROL DECAL LOCATIONS
1-2-3 -12-15-17
4-5-6-7-19
2
9 - 10
13
11
14
16
8
2
NUMBER
1
2
3
DESCRIPTION
Prescription for a safe use of the platform WARNING
Rated Workload, Side Load, Rated number of occupants
Warning not to replace component critical to stability + total battery weight
4
15
DANGER – Machine not electrically insulated –
Prescription of distances from power lines
WARNING – Check list before every use
Notice of the Inspections required
WARNING – not to replace component without written authorization of the Manufacturer
WARNING – Total Batteries weight
Speed Selector
Wheel Lock
Maintenance Lock
ANSI Compliance - Section 4
Manual Inside
WARNING: Batteries produce explosive gas. Charge Batteries in well ventilated
area. (..)
WARNING: entry gate closed and properly in place before operating the platform
16
Forklift point
17
DANGER tip-over hazard
5
6
7
8
9
10
11
12
13
14
20
PART 3
OPERATION
3.1.2b
3.1.
3.1.3b
PART 3
OPERATION
WARNING
DANGER OF CRUSH, COLLISION AND ABRASION
The operators in charge of operation must be informed on the safety instructions given in this manual.
Preliminary Unpacking Instruction
Inspect the machine for any possible damage during the transport; always perform a pre-delivery inspection before
using the machine. Confirm that all wheel lug nuts are tight. Repairs, if required, must be made prior to operating.
3.1
LOADING / UNLOADING PROCEDURES
Compliance with the following instructions will result in the correct performance of the operation.
3.1.1
For information on the machine weight see Section 1 ”Technical Specifications” or the serial number
plate, on the machine.
WARNING – DANGER OF CRUSH
Follow this procedure:
•
Make sure that nobody is standing near the machine before moving it.
•
Remove all objects that may interfere with movements.
•
Carefully read the instructions below.
3.1.2
NOTE
THE MACHINE CAN BE UNLOADED IN THREE DIFFERENT WAYS:
•
Using a Forklift OR
•
Using the Loading/Unloading device and an appropriate set of ramps OR
•
Releasing the brake and attaching the machine to a winch.
3.1.3
USING A FORKLIFT
Provide yourself with a suitable lifting device (such as a forklift truck) with appropriate capacity (see
section 1 Technical Specifications).
3.1.3a
Place the forks of the forklift truck under the machine base. Make sure that no hoses or cables are
interfering with the forks.
3.1.3b
Lift the machine from the loading platform very slowly for about 3.9 inches or 7.8 inches (10 or 20
cm).
3.1.3c
Lower the platform on the forks as soon as possible and move it to the usage area by keeping it in
this position.
3.1.3d
Place the machine on the floor and remove the forklift truck.
21
PART 3
OPERATION
3.1.4
USING LOADING/UNLOADING SLIDES( ONLY FOR IAWP 9.6)
The controls for the machine movements are exclusively given on board, but it can also be controlled from the
vehicle when moving the platform from a truck.
In order to do this, comply with the following instructions.
3.1.4a
Before any other operation, install the Loading/Unloading device, according to the following instructions:
- put the iron levers L into the holes F on both sides of the machine and make sure they are well hooked to
their place (See Picture Step 1)
- pull strongly the edges of the levers in order to obtain the rise of the front wheels from the ground. (See
picture Step 2- 3)
- Make sure the machine is stable.
- WARNING: DANGER OF CRUSH
Using the pommel, turn the little bars C towards the center of the platform to avoid dangerous unhooking of
the levers. (See picture STEP 4)
•
The Loading/Unloading Device is installed.
3.1.4b
Procure suitable loading slides authorized by the Manufacturer and capable of withstanding the platform weight
(no other types are authorized).
3.1.4c
Place the loading/unloading slides in their position and anchor them to the vehicle (by means of a bolt); if
possible connect them by means of spacers thus rendering the lowering stage safer and more stable.
3.1.4d
WARNING – GENERIC DANGER
The operator must ensure that:
- the machine is completely lowered
- no persons, animals or objects are located in the movement area
- the floor is levelled (free of holes) and clean
Moreover, the operator must pay special attention not to run over his feet with the platform.
22
PART 3
OPERATION
3.1.5
3.1.5
3.1.4e
Check that the Stop Emergency buttons are switched off. If not, switch them off.
3.1.4f
Turn the Keyswitch Q2 left, to select the Platform Control. Wait at least 5 seconds before moving the translation
handle.
3.1.4g
Press the Driving Selector (P2) and...
3.1.4h
… use the Movement Knob very carefully to move the platform towards the loading/unloading slides.
3.1.4i
Warning: Danger of Overturn
Go very slowly and check that the wheels are correctly positioned on the slides.
3.1.4l
After handling and / or unloading the platform from the slides, switch it off by pressing the Stop button and move
the ignition key, if any, to “OFF”.
3.1.4m
Remove the loading/unloading slides and the Loading/Unloading device and keep them for future transportation.
3.1.5
USING LOADING/UNLOADING SLIDES AND A WINCH
The unloading procedure using Loading/Unloading ramps in section 3.1.4 can also be performed by the help of a
winch, using the Emergency Lifting Wheel. This device is Optional. (Section 7.6).
Release the Emergency Lifting Wheel following instructions given in Section 7.6 of this Manual. Attach the machine
to a winch using the front Tie Down/Lift Point.
3.1.5.1
For the IAWP 15 (LUI S.I.460) see procedure hereunder:
23
3.1.5.1
Q2
a
b
c
A)Turn the key switch Q2 as 3.1.5.1( the a LED will be on indicating the ground station control )
B)Push both left/right arrows (b) at the same time till the basket and ground station LED will start to flash( the
electric brakes are now disengaged)
C)Attach the machine to a winch using the front Tie Down point (c)
24
PART 3
OPERATION
FIG. 3.2.3b
FIG. 3.2.2.
FIG. 3.2.3a
IAWP
9.6
3.2 LOADING THE MACHINE WITH THE CRANE
3.2.1.
Check that the Stop Emergency buttons are switched off. If not, switch them off. Remove the top control box and
lean it on the platform.
3.2.2
Insert the chains or ropes into the four holes in the chassis (Fig. 3.2.2)
3.2.3
Pass the edges of the chains or ropes into the basket, making them pass under the central rails of the basket (Fig.
3.2.3a) then hook them all together to the crane attachment (Fig. 3.2.3b).
3.2.4
Warning
Inspect the chains and ropes for any damage or anomaly before lifting it with the crane. Make sure they are
securely fixed to the crane attachment and that the lifting machinery can sustain the weight of the unit (see 1.6 of
this Manual).
IT IS STRICTLY FORBIDDEN TO STAY INSIDE OR IN THE NEARBY OF THE MACHINE WHEN THIS IS
LIFTED WITH THE CRANE!! You must maintain a safe distance of at least 10 feet/3mt from the machine
when this is being transported with the crane.
25
PART 3
OPERATION
3.2 OPERATOR CONTROLS
3.2.1 Platform Controls
Version A
P4
P3
P2
P5
P1
P3
Version B
P5
P1 control Module, if selected,
The Platform
completely override the ground control.
P2
P4
P6
Push-Button Station
The Lift Key P2 and Drive Key P3 are used to select which mode the vehicle is set to. Select Lift/Lower or
Drive mode at a touch of the relative button (P2 or P3).
Wheel Blocking Device
Switching the selector to the right will activate the wheel blocking device, thus enabling the driving of the vehicle only along a straight line, both backwards and forwards.
The LED lightened indicates that the wheel blocking device is activated. The LED off indicates that the device is deactivated, thus enabling the driving in every direction
Mode Key Lift/Lower
The LED lightened indicates that the Lifting/Lowering function is selected; when it is off it indicates that the
Lifting /Lowering function is not selected.
Mode Key Traction
The LED lightened indicates that the Driving function is selected; when it is off it indicate that the Driving
function is not selected.
.
Battery Gauge
It is a 10 segment illuminated display that gives the state of charge of the battery.
One LED illuminated equates to the minimum battery charge state, while ten LEDs indicates the maximum
charge state.
P1
P2
P3
P4
JOYSTICK Module
The joystick controls the driving of the vehicle as well as the platform ascent and descent.
The joystick enable lever on the front of the joystick is used to enable any joystick commands and must be
pressed at all times when the joystick is being operated.
When in traction mode, releasing the joystick will stop the vehicle. In lifting mode, releasing the joystick will
stop the platform from ascending or descending .
26
P5
PART 3
OPERATION
Platform Controls
P7
P6
Emergency Stop Button
If the system behaves in an unexpected fashion or there is an urgent need to stop all the motion on
the vehicle, this switch must be firmly pushed to cut the power off. If the button is deactivated, it will
not start the platform but will enable the entering of the tension.
P6
Speed Selector
Successive switching of the selector towards right will gradually increase the driving speed, within the
speed restrictions established by the Manufacturer.
Successive switching of the selector towards left will gradually decrease the driving speed.
The current speed selected is displayed in the
5 – LEDs Display P4 located beneath the Battery Gauge.
One LED illuminated equates to the minimum speed setting, while five LEDs indicates that the maximum speed setting has been selected.
DRIVING
FORWARD
Version A/B
LEFT
RIGHT
BACKWARD
LIFTING/LOWERING
Version A/B
UP
DOWN
27
P7
PART 3
OPERATION
3.2.1 Base Controls
Version A
Q2
Q1
Q3
Q4
Q5
Q6
Version B
Q5
Q1
Q2
Q4
Q3
Q6
Q7
Q8
When the Ground Control is selected, the Platform control is automatically excluded.
Display
This is the main display for the control system and shows useful information regarding the
status of the system as well as diagnostic information, should the system detect a problem
with the vehicle.
Three-positions Keyswitch
The keyswitch selects between OFF (Center), Ground Station Control (Right) and Platform
control (Left).
When the keyswitch is in the central position OFF, the key can be removed.
Emergency Stop Switch
If the system behaves in an unexpected fashion or there is an urgent need to stop all the motion on the vehicle, this switch must be firmly pushed to cut the power off.
Button for the sole use of the Manufacturer or trained and qualified technicians
Up arrow button
When the Three-positions Keyswitch selects the Ground Station Mode, this button can be
pressed to raise the platform.
Down arrow button
When the Three-positions Keyswitch selects the Ground Station Mode, this button can be
pressed to lower the platform.
Batteries Charger Indicator
Batteries Charger Socket
28
Q1
Q2
Q3
Q4
Q5
Q6
Q7
Q8
PART 3
OPERATION
3.3 OPERATION
Preface
NOTICE
•
Do always perform a prestart inspection and function test before use each day or at the
beginning of each shift. Repairs (if any) must be made prior to operating the machine as it
is critical to ensure safe operation of the machine.
•
Do always arrange for frequent inspection made by a qualified technician in case the machine has been in service for three (3) months or 150 hours – whichever comes first.
•
Do always arrange for annual inspection no later than thirteen (13) months from the date
of the prior annual inspection
•
The pre-operation, frequent and annual inspections shall be in accordance with
BRAVIISOL recommendations set forth in the Attachments to this Manual and in the Service Manual.
•
The user/operator should not accept operating responsibility until the Manual has been
read and fully understood as well as having operated the lift under supervision of an experienced and qualified operator.
•
Only trained and authorized personnel shall be permitted to operate this machine.
•
This manual and its attachments should be considered an integral part of this machine
and should remain with the machine all the time.
•
As the manufacturer has no direct control over utilization and application of this machine
proper safety practice are responsibility of the user and operating personnel.
29
PART 3
OPERATION
3.1
3.4
OPERATING INSTRUCTION
WARNING – GENERIC DANGER
Operation must be only carried out by qualified Operators who have been trained on how to use the machine.
Operators must also carefully read and understand the safety regulations in section 2 and the contents of this
manual before operating the machine.
The following steps must be performed before starting operation:
a – Check that the platform is positioned on a clean, firm, leveled floor with no holes and is capable of supporting
the machine.
b – Check that the operation area is free from aerial obstacles.
c – All service maneuvers must be carried out with the controls located on the Push-Button Station on board.
d – Remind the operator that the driving speed is automatically set to max. speed (approx.44 yards / minute) when
the platform is fully lowered. When the platform is lifted the driving speed is automatically kept within 10 yards/
minute.
e - Bring the machine to the “zero” power condition.
f - Place the load on the platform and make sure that:
•
the load is balanced
•
the maximum weight is not exceeded (including the weight of the operator)
•
NEVER let the load stick out of the platform sides for more than 7.87 inches (20cm)
WARNING – DANGER OF CRUSH
•
NEVER tie anything out of the platform
g - Before getting on the machine, check that:
•
The Keyswitch Q2 is on the Platform Control position
•
the Stop/Emergency buttons are deactivated
•
If required, wear the safety belt
h- Now get on the machine following the instructions below:
Danger: hands could be crushed or limbs severed
Platform entry is achieved using a step 15” off the ground and then through a single saloon style swing gate. Push
the swing gate to enter the platform and close it. Warning: during moving operations, position your body so
that your limbs do not interfere with the surrounding fixed parts.
If required, hook the safety belt up to the platform rail.
WARNING – GENERIC DANGER
The operator must make sure that:
•
no individuals, animals or objects are located in the machine area
•
the floor is clean and levelled (with no holes) and is capable of supporting the machine
•
no aerial obstacles are present which may prevent operation or cause damages
WARNING – DANGER OF COLLISION
During the driving, lifting and lowering operation the operator must make sure that no aerial
obstacles are present.
WARNING – DANGER OF FALL
Never climb on the platform rails. Never place ladders, boards or other objects on the rails to reach higher
working heights. Never lean or stick out of the platform rails.
i - Press the Stop Emergency button.
This button must be pressed every time the platform is stopped to perform any activities.
The operator must then :
•
Decide whether it is necessary to extend the basket.
•
Deactivate the Emergency Button.
•
Decide which mode he wants to select, whether lifting/lowering (3.3.3) or driving (3.3.2).
30
PART 3
OPERATION
3.3.1
3.3.1 Platform Deck Extension
1.
2.
3.
Pull the two black pommels downwards (They will exit from their place).
Push forwards the platform deck extension until a noise is heard. This noise indicates that the two pommels are back in their safety position.
Repeat the same procedure to extend the other side of the basket.
Platform deck extensions must be retracted while entering and exiting the platform
3.3.2 Driving Operations
DANGER
THE OPERATOR MUST BE AWARE OF THE ENVIRONMENT. DO NOT RAISE THE PLATFORM
IF THE MACHINE IS NOT ON A FIRM LEVEL SURFACE. SAFE OPERATIONS BEGIN WITH A
SAFETY CONSCIOUS EQUIPMENT OPERATOR. Check that the route of travel is clear of
persons, objects, animals, obstructions, debris, holes, drop offs and is capable of supporting the machine.
1.
Press the button P3 once, LED will illuminate, indicating that the Driving function is selected.
2.
Check that the Wheel Blocking Device is not activated.
3.
The joystick enable lever on the front of the joystick is used to enable any joystick commands and must be
pressed at all times when the joystick is being operated.
4.
Handle the joystick to control the driving and direction of the vehicle. Travel speed is proportional and is
controlled by the movement of the control handle. The further it is moved, the faster the speed will be.
With the basket in the lower position, speed can also be increased using the Speed selector on the side of
the top control box (version A ) . As soon as the basket will be lifted, speed will automatically turn to Safety
Slow Speed. (P7— Section 3.2.1)
5.
Release the joystick to stop the vehicle. Brake is automatic.
6.
Press the selector P1 to activate the wheel blocking device, thus enabling the translation of the vehicle
only along a straight line, both backwards and forwards. The LED will lighten to display that the Wheel
Blocking Device is turned on. Repeat the operation 3, 4, 5.
3.3.3 Lifting/Lowering Operations
1.
Press the button P2 once, LED will illuminate, indicating that the Lifting/Lowering function is selected.
2.
The joystick enable lever on the front of the joystick is used to enable any joystick commands and must be
pressed at all times when the joystick is being operated.
3.
Push the joystick Forward to lift the basket. Push the Joystick Backward to lower the basket. (See Picture
on Page 28)
4.
Release the joystick to stop the vehicle ascent or descent.
Note:
At the end of the working day, re-charge the batteries. During the charging stage the platform must be
brought at 0 Power conditions and must not be used. When the LEDs on the battery charger indicate the maximum charge, disconnect the power supply cable and switch the Keyswitch Q2 to the central OFF position. Press
the Stop Emergency Button. The maintenance manual of the battery charger Manufacturer must be refered to for
additional information on this operation.
31
PART 4
SHUT OFF PHASE
PART 4
SHUT OFF PHASES
4.1
TEMPORARY SHUTDOWN
For a temporary platform stop, release the control joystick P3 and the enable lever and all the movement-related
functions will automatically stop.
4.2
DAILY SHUTDOWN
To stop the machine at the end of the working day perform the following actions:
4.2.1
Move the platform indoor, to an area protected against any water leakage or condensate; the access to this area
must only be allowed to trustworthy staff (any potential external tampering condition must be eliminated thus guaranteeing the operators’ safety).
4.2.2
Recharge the batteries.
4.2.3
Make sure that the machine is in “zero” power condition, that is:
- the platform is completely lowered
- the Stop/Emergency Button is pressed
- the Keyswitch Q2 has been removed from the control panel and is under the responsibility of the Production
Manager
4.3
PROLONGED SHUTDOWN
For this type of shutdown, follow the procedure described for the daily stop and follow the instruction in this manual to perform the following operations:
•
Ordinary maintenance
•
Cleaning
•
Controls and inspections
•
Recharging the batteries AT LEAST once a week
4.4
EMERGENCY SHUTDOWN
4.4.1
In case the operator is compelled to push the Stop Emergency button, perform the following operation:
4.4.2
Inspect the machine to find out the cause of the emergency stop.
4.4.3
Choose:
A – whether it is necessary to bring the machine to the “zero” power condition
B – whether it is necessary to contact the technical assistance
C – whether it is possible to repair the damage
4.4.4.
If it is possible to eliminate the cause of the emergency stop, pull the Emergency stop button and start the platform following the instruction on Part 4 “Instruction of Use” of this Manual.
32
PART 4
SHUT OFF PHASE
4.5
EMERGENCY LOWERING
4.5.1
WARNING: CRUSHING HAZARD
When carrying out this activity the operator must make sure that no individuals, animals or objects are
located in a 6.56 ft area (2 meters area) and that no impediments are present above the cover (this is the
area that the basket needs during the lowering stage).
4.5.2
The emergency descent can be done in two different ways:
A - Using the emergency lever
B - Using the Down Keys Q6 on the ground control panel
A - Using the emergency lever
The emergency lever is situated as for paragraph 2.3 . Pull the lever and the basket will smoothly start coming
down. After emergency has finished, release the lever to restore standard operation conditions.
B - Using the Down Keys Q6 on the Control Panel
Select the Ground Station Mode turning the Keyswitch Q2 to the right . Press the Down Key Q6 to lower the basket.
4.5.3
Follow the procedure on Paragraph 4.4
Emergency Shutdown
4.5.3.
Follow the procedure for Emergency Stop (Section 4.4 )
4.6
Manual Emergency Handling
In case it is impossible to handle the platform as indicated in Part 3 Operation, it is possible to manually handle the
platform according to the following instructions (only for IAWP 9.6) :
4.6.1
WARNING: DANGER OF CRUSH
During the following operation the machine must be brought at Zero Power Condition. No individuals or
obstacles must be in the machine area.
4.6.4
4.6.2.
Extend the basket as described in Paragraph 4.14a
4.6.3
Remove the cover as described in Part 9 “Preface”
4.6.4
Insert the special Key into the Manual Handling Device
4.6.5
...and turn it until the device wheel exits and the rear driving wheels are raised from the ground.
4.6.6.
When the lifting procedure is finished
•
Remove the key from the device.
•
If necessary, the cover can be installed and the basket extensions retracted.
4.6.7
Now the operator can manually handle the platform pushing it around.
33
4.6.5
PART 5
CLEANING
The operator in charge of cleaning must be informed on the safety instructions contained at the beginning of this manual (section 2).
5.1.1.
The machine must be cleaned daily since it operates in the presence of dust. If necessary,
the area used by the operator to climb the machine can be cleaned more frequently.
5.1.2
Bring the machine to “ZERO” power condition before cleaning.
5.1.2
DISPOSAL
WARNING – DANGER OF POLLUTION
At the end of the machine lifecycle, contact an authorized disposal agency or the Manufacturer who will provide
you with instructions regarding this situation.
The segregated collection of the materials must be carried out according to the following procedure:
- Drain the hydraulic circuit completely.
- Drain the oil from the gearboxes located on the rear wheels.
- Remove the tires.
- Remove the rubber hoses.
- Remove the batteries.
- Block all mobile parts.
34
PART 6
MAINTENANCE AND INSPECTIONS
Maintenance operations must be carried out by qualified personnel who
•
Have been informed on the safety instructions contained at the beginning of this
manual (see section 2)
•
Is provided with all the required personal safety devices and use them upon necessity
•
Works on the machine at the Zero Power Condition
Repairs, modifications, extraordinary maintenance operations other than the ones indicated below
cannot be carried out without the prior written approval of the Manufacturer’s after-sales technical
service.
Based on the specific situation, the Manufacturer will give his written approval (together with all the
necessary instructions) or recommend the intervention of his own technical staff.
Such a cautious measure is necessary since incorrect or improper operations may cause functional
anomalies, machine damages and personal injuries.
The Manufacturer accepts no responsibility for the possible consequences of the aforementioned
operations.
Before resuming operation, check the entire system as indicated in the start procedures.
Failure to comply with these precautions may cause machine damages and personal injuries.
Before resuming operation, check the entire system as indicated in the start procedures. Failure to
comply with these precautions may cause machine damages and personal injuries.
After repairs are completed, the operator must perform a pre-operation inspection before
going on to the function tests.
6.1
Preface and GENERAL MAINTENANCE TIPS
Regular inspection and conscientious maintenance is the key to efficient economical operation of
your AEUP IAWP 9.6 (LUI MINI S.I.) / AEUP IAWP 15 (LUI S.I.460)
The manufacturer has worked hard to improve machine reliability and simplify ordinary maintenance
operations. Your equipment will perform satisfactorily with a minimum of service and repair.
Never perform any service or maintenance to the machine without having first performed the safety
procedure to lock the basket in the safe service position, using the safety bar.
ADDITIONAL PRECAUTIONS:
• Never leave hydraulic components or hoses open. They must be protected from every type of
contamination. Never open a hydraulic system where there are contaminants in the air.
6.2
Standard Safety Position with lifted basket
This operation must be performed only when maintenance activities are required. The operator must
use the ground control according to the following procedure:
6.2.1
Disable all the Emergency buttons.
6.2.2.
Select the Ground Station Mode turning the Keyswitch Q2 to the right.
6.2.3
Press the Up Key Q5 to lift the basket up to 4.92 ft (1,5 mt).
6.2.4
Remove the base cover (only for IAWP 9.6 ).
6.2.5.
Put one hand under the exit of the safety bar and at the same time pull the black pommel (inside the
Basket on the IAWP 15).
6.2.6.
Allow the safety bar to descend completely, accompanying it with the hand.
6.2.7
Press the Up or Down Keys Q5/Q6 to slowly move the basket until the edge of the safety bar touch
the chassis.
6.2.8.
Select the OFF Mode, turning the Keyswitch Q2 to the center and remove the key.
6.2.9
Press the Stop/Emergency Button and perform the required maintenance activity.
35
PART 6
MAINTENANCE
6.3.7
6.3.3
6.3
HYDRAULIC SYSTEM OIL REFILL
6.3.1
Occasionally and at least once a year check the hydraulic oil level through the port under the cover. The oil level must
be checked when the basket is fully lowered. If the oil level is not visible through the port, it is necessary to refill the
hydraulic system oil, according to the following procedure.
6.3.2
To add the oil, move the platform back to its standard maintenance position, as described in the paragraph 6.1.
6.3.3
Unscrew the oil cap. (See Picture 6.3.3.)
6.3.4
•
ONLY FOR IAWP 9.6 add mineral oil Roloil LI 22/HIV with a viscosity index of 22 (in case of very cold climate, i.e. under –20°C, mineral oil with a lower freezing point of approx. –45°, is recommended).
•
ONLY FOR IAWP 15 add SYNTHEST HP32 BIO OIL with a viscosity index of 32.
USE ONLY SYNTHEST HP32 BIO OIL. Different oils will damage the cylinder seals and the oil
biodegradability.
6.3.5
Verify the oil level through the port; if necessary, add more oil.
6.3.6
Fasten the cap.
6.3.7.
Warning: danger of pollution. Do not disperse the oil in the environment
6.3.8
The procedure is finished.
6.4
CHECKING OF BATTERY TERMINALS
6.4.1
The condition of the battery terminals must be checked every two months.
6.4.2
If the battery terminals are dirty or oxidized, perform the following actions.
6.4.3
Place the platform in a safe position as described on Paragraph 6.1 “Standard Safety Position with Lifted Basket”.
6.4.3.1
For IAWP 15 open the right hatch pulling the black pommel see fig.6.5.4.1and 6.5.4.2.
6.4.4
Disconnect the terminals and clean them with a wet cloth. If the oxide layer is thick, brush the surface layer away and
soak them in water for at least 30 minutes.
6.4.5
Dry them thoroughly.
6.4.6
Place them back paying attention to the position of the positive and negative poles. Then tighten them.
6.4.7
Apply a protection lubricant for contacts on the terminals (e.g. pharmaceutical Vaseline oil lubricant).
6.4.8
The inspection on the battery terminal is finished.
6.4.8
For IAWP 15 close the right hatch tray, pushing it until it is locked in place. See fig 6.5.4.1.
36
PART 6
MAINTENANCE
6.5.4
6.5.4.1
6.5.4.2
6.5
BATTERY WATER CHECKING
6.5.1
The battery water must be checked every 4 working days or before recharging the battery.
6.5.2
Check the water level by removing the cover.
6.5.3
The water level must always be at least 5 mm above the covers of the internal elements. Before starting the
recharging cycle, check the water level and add some demineralized water, if necessary.
6.5.4
Some water evaporates during the charging stage. Therefore check and restore the water level 30 minutes after
achieving the max. re-charge.
6.5.5.
Perform standard operations with the machine for 30 minutes and perform this procedure another time to achieve
the required water level.
6.5.6
The maintenance manual of the battery Manufacturer must be refered to for the correct maintenance of the
battery.
WARNING
LEAD-ACID BATTERIES GENERATE EXPLOSIVE GASES. KEEP SPARKS AND FLAME AWAY FROM
BATTERIES. DO NOT SMOKE WHILE CHARGING.
37
PART 6
MAINTENANCE AND INSPECTIONS
6.6
Function Tests
DANGER
ELECTROCUTION HAZARD!!!
THIS MACHINE IS NOT INSULATED
Maintain safe clearances from electrically charged conductors (power lines) and apparatus.
You must allow for machine sway (side to side movement) when elevated and electrical line
movement. This machine does not provide protection from contact with, or proximity to, an
electrically charged conductor.
WARNING
BEFORE OPERATING THE MACHINE BE SURE THE AREA ABOVE THE MACHINE IS
CLEAR OF OBSTRUCTIONS TO ALLOW FULL ELEVATION OF PLATFORM.
DO NOT OPERATE THE MACHINE IF THE FOLLOWING CHECKS REVEAL A DEFECT.
FUNCTION TESTS:
A) Ground Control Operation and Check
•
Turn key switch selector to GROUND CONTROL position.
•
Activate the Lift Switch on the ground control panel to elevate the platform to the end of
its movement. Releasing the button should stop elevation.
•
Activate the Lower Switch on the ground control panel to lower the platform to the end of
its movement. Releasing the button should stop descent.
•
Test the Emergency Stop function. While the platform is moving, press the Emergency
Stop Button; platform should stop immediately.
•
Test the Emergency descent lever; when the platform is elevated, pull the emergency
lever to mechanically lower the platform. Releasing the lever should stop the descent.
•
Check for proper operation and hydraulic leaks. Release the maintenance lock into position before inspecting any items under the platform.
•
Deploy the Maintenance Lock and lower the platform to stowed position before starting
the Platform controls check.
38
PART 6
MAINTENANCE AND INSPECTIONS
B) Platform control function test
•
Turn key switch selector to PLATFORM CONTROL position.
•
Enter the platform and close and secure the entry.
•
Press the Driving mode selector to select driving function. Test Left/Right , Forwards/
Backwards steering by moving the joystick, pressing the joystick enable lever.
Releasing the joystick enable lever or returning the joystick to central position should
stop driving.
•
•
Test the Emergency Stop function. While the platform is moving, press the Emergency
Stop Button; platform should stop immediately.
•
Press the Lift/Lower mode selector to select Lifting/Lowering functions. Test Lifting by
pressing the joystick knob up (away from the operator) and pressing the joystick enable
lever. Releasing joystick enable lever or returning the joystick to central position should
stop lifting. Test Lowering by pressing the joystick down (towards the operator) and
pressing the joystick enable lever. Releasing the joystick enable lever or returning the joystick to central position should stop lowering.
•
Test the Emergency Stop function. While the platform is lifting/lowering, press the Emergency Stop Button; the platform should stop immediately.
•
Check for proper operation and hydraulic leaks. Release the maintenance lock into position before inspecting any items under the platform.
39
PART 6
MAINTENANCE AND INSPECTIONS
6.7
Pre-start Inspection
WARNING
The user/operator should not accept operating responsibility until the Manual has
been read and fully understood as well as having operated the lift under supervision of an experienced and qualified operator.
Only trained and authorized personnel shall be permitted to operate this machine.
This manual and its attachments should be considered an integral part of this machine and should remain with the machine all the time.
As the manufacturer has no direct control over utilization and application of this
machine, proper safety practices are the responsibility of the user and operating
personnel.
It is the responsibility of the operator to perform a pre-start inspection and routine
maintenance.
The pre-start inspection is a visual inspection on the machine performed by the operator before every utilization of the machine. The intent of the pre-start inspection
is to check the machine for every malfunction or anomaly and also to determine if
a routine maintenance is required.
If damage or any unauthorized variation from factory delivered condition is discovered, the machine must immediately be tagged and removed from service.
Do always arrange for frequent inspection made by a qualified technician in case
the machine has been in service for three (3) months or 150 hours – whichever
comes first.
Do always arrange for annual inspection no later than thirteen (13) months from the
date of the prior annual inspection.
The pre-operation, frequent and annual inspections shall be in accordance with
BRAVIISOL recommendations set forth in the Attachments to this Manual and in
the Service Manual.
40
PART 6
MAINTENANCE AND INSPECTIONS
Pre-start Inspection
WARNING
BEFORE EVERY USE:
•
Be sure the Users Manual and the Responsibilities Manual is complete and legible, in the weather resistant container on board the platform.
•
Be sure the serial number plate and all decals are legible and in their place—Use the Safety and
Control Decal location list on Section 6 of this Manual.
•
Check the machine for any damage or unauthorized variation from factory delivered condition.
•
Inspect the guardrail system.
•
Check for battery fluid leaks and proper fluid level – add distilled water if necessary.
•
Check and test all the safety and personal protective devices.
•
Check Operating and Emergency controls for any malfunction.
•
Check all the hydraulic, electrical and mechanical components for damage, improperly installed or missing parts.
•
Inspect the tires and wheels for damage, cracks and cuts.
AT THE END OF EVERY USE:
•
Recharge the batteries connecting the battery charger with the required proper tension.
•
Check the level of water in the battery.
•
Make the clean up and the minimum maintenance required, set forth in the User Manual.
•
Completely lower the platform and withdraw the extensions.
6.8
FREQUENT INSPECTION
(See Section 6.10 Form A)
WARNING
THIS INSPECTION MUST BE COMPLETED EVERY 3 MONTHS OF SERVICE OR 150 HOURS, WHICHEVER OCCURS FIRST, OR IF A MACHINE HAS BEEN OUT OF SERVICE FOR GREATER THAN 3
MONTHS. FAILURE TO DO SO COULD RESULT IN DEATH OR SERIOUS INJURY.
• Owner or user is responsible for Frequent inspections.
• The inspection must be performed by a qualified technician, qualified as a mechanic, trained on the use
and maintenance of this specific make and model of aerial work platform.
• Always keep inspection records up-to-date.
• Record and report all discrepancies and anomalies to your supervisor.
6.9
ANNUAL INSPECTION
See Section 6.10 Form B)
WARNING
THIS INSPECTION MUST BE COMPLETED NO LATER THAN 13 MONTHS FROM THE DATE OF THE
PRIOR ANNUAL INSPECTION. FAILURE TO PERFORM THIS INSPECTION COULD RESULT IN DEATH
OR SERIOUS INJURY.
•
•
Owner or user is responsible for Annual Inspections.
The inspection must be performed by a qualified technician, qualified as a mechanic, trained on the use
•
•
and maintenance of this specific make and model of aerial work platform.
Always keep inspection records up-to-date.
Record and report all discrepancies and anomalies to your supervisor.
41
6.10
Inspection Check Lists - Form A
FREQUENT INSPECTION CHECK LIST
MODEL______________________
SERIAL NUMBER______________
YEAR OF CONSTRUCTION_________
INITIAL DESCRIPTION
______ 1. Perform all checks listed on Pre-start Inspection.
______ 2. Check the oil level and status; be sure that the oil has a clear
light color.
______ 3. Check the entire machine for signs of damage, broken welds,
loose bolts, improper or makeshift repairs.
______ 4. Check that all adjustable flow valves are locked.
______ 5. Check that the basket with a full load does not lower.
______ 6. Inspect the motor and motor brushes.
______ 7. Check the electrical components and wires for any damaged or
oxidized part.
DATE
________________
INSPECTED BY
________________
42
6.10
Inspection Check Lists - Form B
Date:
Serial Number:
Model:
Date of Last Inspection:
Date placed into Service
ANNUAL INSPECTION
CHECK LIST
Customer:
Address:
City/State/Zip Code:
Phone:
Contact Name:
Dealer:
Address:
City/State/Zip Code:
Phone:
Contact Name:
R= Regular I = Irregular Re= Repaired
DECALS
ELECTRICAL COMPONENTS
Quantity
Ground Module Functioning
Legibility
Connectors
Correct Position
Wires
Loading Capacity clearly
marked
Joystick Functioning
Spiral cable
PLATFORM RAILS
Entry Gate closes properly
Batteries Integrity
Weather Resistant container
for Manuals on board the machine
Batteries proper Functioning
Battery Charger Functioning
Manuals into the container
EMERGENCY STOP
Proper Weld— no signs of
corrosion or damage
Break all circuit
BASE
PLATFORM EXTENSION
Sliding smoothly and easy
Bolts tight
Teflon sliding wheels entire
and not damaged
Chassis Proper Weld— no
signs of corrosion or damage
Bolt and washers
Drive Shaft Fastened
Front Turning Wheels Secured
ELEVATING SYSTEM
Mast structure
Teflon sliding wheels entire
and not damaged
Lifting movement and speed
Bolt and washers
Noise while lifting/Lowering
Spiral cable passing through
the steel tube
SAFETY MAINTENANCE BAR
Functioning
Stability
43
PART 6
MAINTENANCE AND INSPECTIONS
6.11
Troubleshooting and Error Codes
At power-up and during operation the LCD display on the ground Control Module (version A) displays the current
machine operating status. The following information is communicated:
•
There is a Battery Charge Indicator (BCI), this is in the shape of a battery with 10 bars indicating a fully charged
battery.
•
Underneath the BCI is an hour meter display; this indicates the duration the system has been running.
•
In the top right corner of the display there is a function display; this could be indicating one or more of the
following: a left and right arrow with a forward slash through the middle – DRIVE Disabled; an up arrow with a
forward slash underneath – LIFT UP Disabled; a down arrow with a forward slash above – LIFT DOWN
Disabled; an up and down arrow with a slash through the middle – both LIFT UP and LIFT DOWN disabled; a
tortoise – Drive Speed Cut-Back Mode Engaged, a battery with a flash through it – Battery Charger Plugged In.
•
In the bottom right corner of the display there is a fault code indicator. This is displayed as a symbol of a spanner
and a two-digit code, which will be explained in further detail. When a fault code is indicated the LCD screen will
alternate between the text and symbol display modes.
The following is a description of some of the common error codes and corrective measures. Please contact your local
distributor or the Manufacturer if more detailed error code explanations are required.
For version A Ground Control Station :
Code 01 – Low Battery Voltage
•
Battery cable ends loose or corroded at battery posts.
•
Charger DC output wires from charger to batteries damaged or disconnected.
Code 02 – Left PHP Bar - UP
Obstruction under LEFT pothole bar.
Obstruction around the actuator assembly at the base of the mast.
•
•
Code 03 – Right PHP Bar - UP
Obstruction under RIGHT pothole bar.
Obstruction around the actuator assembly at the base of the mast.
•
•
Code 04 – Tilt Condition
If machine is on a tilt of more than1.5° in either or both the X or Y direction, this is normal operation.
(DRIVE and LIFT UP are disabled when tilt is detected). Check if Ground Control Module is mounted
securely to the mast support column. Check if Ground Control Module is mounted securely to the mast
support column.
•
Code 05 – Obstruction Sensor System
No Communication with Ground Control Module.
Is machine equipped with an Obstruction Sensor System?
Are the electrical harness connectors from the OSS Module through the Platform Junction Box to the
Ground Control Module tight and undamaged?
•
•
•
Code 07 – Left Drive Motor - Disconnected
Check left drive motor M1 connector at the Traction Control Module for secure and proper connection.
•
Code 08 – Right Drive Motor - Disconnected
Check right drive motor M2 connector at the Traction Control Module for secure and proper
connection.
•
Code 09 – Left Brake - Disconnected
Check left drive motor M1 connector at the Traction Control Module for secure and proper connection.
•
Code 10 – Right Brake - Disconnected
Check right drive motor M2 connector at the Traction Control Module for secure and proper
connection.
•
44
PART 6
MAINTENANCE AND INSPECTIONS
Code 11 – Left Drive motor – Short Circuit
•
Check wiring harness from (M1) connector on Traction Control Module to Left Drive Motor for
damage.
Code 12 – Right Motor – Short Circuit
•
Check wiring harness from (M2) connector on Traction Control Module to Left Drive Motor for
damage.
Code 13 – Pump Motor - Disconnected
•
Check the Positive (+)/Negative (-) cables from the Ground Control Module to the Pump Motor
studs for loose or corroded connections.
Code 15 – Lift Down Valve - Disconnected
•
Inspect wire terminals on the lift down valve at the base of the lift cylinder for tight and secure
connection.
Code 16 – Lift Down Valve – Short Circuit
•
Damaged wiring in the lift down valve wiring harness or a damaged lift down valve coil.
Code 17 – Ground Control Module – In Fold Back
•
Has machine been operating on a continuous grade or rough terrain for a long period of time?
Code 18 – Alarm – Short Circuit
•
Damaged wiring in the alarm wiring harness or a damaged alarm.
Code 19 – Alarm - Disconnected
•
Damaged wiring in the alarm wiring harness or a damaged alarm.
•
Activate a function to check if alarm beeps.
Code 20 – Beacon – Short Circuit
•
Damaged wiring in the beacon wiring harness or a damaged beacon unit.
Code 21 – Beacon - Disconnected
•
Is machine equipped with flashing amber beacon light?
Code 22 – Horn - Short Circuit
•
Damaged wiring in the horn wiring harness or a damaged horn unit.
Code 23 – Horn - Disconnected
•
Is machine equipped with a horn unit?
Code 24 – Auxiliary #1 Circuit – Short Circuit
•
Damaged wiring in the Auxiliary #1 Component wiring harness or a damaged Component.
Code 25 – Auxiliary #1 Circuit - Disconnected
•
Is machine equipped with a component on the Auxiliary #1 circuit?
Code 26 – Auxiliary #2 – Short Circuit
•
Damaged wiring in the Auxiliary #2 Component wiring harness or a damaged Component.
Code 27 – Auxiliary #2 – Disconnected
•
Is machine equipped with a component on the Auxiliary #2 circuit?
Code 30 – Traction Module – No Communication with Ground Control Module
•
Check if the communications cable connections, P5 connector on the Ground Control Module
and round plug on the Traction Control Module are seated properly in their sockets at each end.
•
Check the positive (+) (RED) and Negative (-) (BLACK) power cable connections from the
Ground Control Module to the Traction Control Module are tight and secure at both ends.
45
PART 6
MAINTENANCE AND INSPECTIONS
Code 31 – Platform Control Console – No Communication with Ground Control Module
•
Check the harness connection at the P4 connector on the Ground Control Module and the harness connection at the other end on the Platform Junction Box.
Code 32 – Pump Motor – Over Current
•
Platform overload condition.
•
Check for obstruction in the mast system.
•
Confirm that pump Positive (+) and Negative (-) connections are secure and undamaged.
•
Check for crushed or kinked hydraulic lines.
•
Check for Hydraulic leaks.
Codes (100 – 199) - Ground Control Module – Fault Condition
Confirm that all battery and harness connectors are secure and undamaged on Ground Control
Module.
•
Confirm that batteries have sufficient charge.
•
Confirm that the static ground strap attached under base frame is secure and undamaged.
•
Codes (200 - 299) – Platform Control Console – Fault Condition
Damage to Platform Control Console wiring harness.
Secure harness connections from Platform Control Console to Platform Junction Box to Ground
Control Module.
•
Confirm that the static ground strap attached under base frame is secure and undamaged.
•
•
Codes (300 – 399) - Traction Control Module – Fault Condition
Damage to Traction Control Module wiring harness
Confirm that the static ground strap attached under base frame is secure and undamaged.
•
•
46
For version B Ground Control Station :
At power-up and during operation the LCD display on the ground Control Module (version B) displays the current machine operating status. The following information is communicated:
Battery’s state of charge
The battery’s state of charge indication (number 1 in figure) is displayed on the left side of the unit; it is
shown by the notches. Each notch represents the 10% of the battery charge. As the battery becomes
discharged, the notches turn off progressively, one after the other, in proportion to the value of the residual battery charge. When the residual battery charge is ≤ 40% the notches displayed start to blink.
When BATTERY LOW alarm appears on the traction controller, the battery sysmbol wich is near the
notches also blinks.
Performance
The number wich appear in the rectangle displayed in the top right side of the unit (number 2 in figure)
shows the performance mode which is being used in the controller.
Performances can be scrolled pressing button ◄. When one performance is selected the related information will be sent via can-bus to traction and pump controllers that will manage this data. The standard functioning reduces platform performance passing from performance mode 4 to performance mode 1.
The real meaning in terms of parameters level of these performances, depends on software present on
pump and traction controllers:
•
4 corresponds to highest performance;
•
3 corresponds to medium performance;
•
2 corresponds to low performance;
•
1 corresponds to minimum performance.
47
Hour meter
The number displayed on the bottom right side of the unit (number 5 in figure) shows the Hours Worked.
The letter present over the hour meter (number 4 in figure) shows which hour meter is displayed:
•
K: the key hour meter is displayed;
•
S: the seat hour meter is displayed;
•
M: the machine hour meter is displayed; it increase if traction or pump control is working.
Accelerator
The accelerator level indication (number 6 in figure) is displayed on the central top side of the unit; it is
shown by eight notches. When the accelerator level is minimum only a notch is displayed, when the accelerator level is maximum all the eight notches are displayed. Each notch represents 1/8 of the difference between maximum and minimum accelerator level.
Speed
The number displayed under the accelerator notches on the center of the unit (number 7 in figure) shows
the platform speed. The unit can be km/h or mph depending on the SPEED UNIT parameter setting.
Wheel position and running direction
The notch displayed on the left of the hour meter (number 8 in figure) represents the wheel( only one of
the nine notch is displayed) and shows the steering angle ( it correspomds to the relative platform
direction if the platform is running). The arrow (number 9 in figure) shows the set platform running
direction. The arrow point is up when the platform is forward running; the arrow point is down when the
platform is reverse running. If the platform doesn’t run a dot is displayed instead of the arrow.
At the bottom of the display there are five LED symbols that show the following:
•
•
•
•
•
Battery status - the LED lights when the battery voltage is less than 40%
Wrench - the LED blinks when the platform is in alarm
Tilt– the LED lights when the platform reaches the tilting angle
Basket - the LED lights when the platform is set on control box command
Frame - the LED lights when the platform is set on ground station command
48
The following is a description of some of the common error codes and corrective measures, please contact your
local distributor or the Manufacturer if more detailed error code explanations are required:
TYPE
W=warning
A=allarm
W
CODE
BATTERY LOW
W
228
TILLER OPEN
W
W
247
249
DATA ACQUISITION
CHECK UP NEEDED
A
8
WATCHDOG
A
221
FLASH CHECKSUM
A
A
A
A
A
A
A
A
A
231
212
17
225
244
28
29
31
254
WATCHDOG#2
WRONG RAM
LOGIC FAILURE #3
CURRENT SENS. KO
PHASE KO
PUMP VMN LOW
PUMP VMN HIGH
VMN HIGH
AUX DRIV SHRT
A
A
251
246
WRONG BATTERY
AUX DRIV.OPEN
A
239
EVP2 NOT OK
A
W
240
241
EVP1 NOT OK
LIFT + LOWER
A
214
EVP1 COIL OPEN
A
W
215
52
EVP2 COIL OPEN
PUMP I=0 EVER
A
53
STBY I HIGH
A
A
A
W
252
19
18
217
WRONG ZERO
LOGIC FAILURE #1
LOGIC FAILURE #2
PUMP I NO ZERO
DESCRIPTION
Low level of battery voltage
The truck is in stby with tiller switch opened for more than
30s
Maximum current adjustment procedure is in progress
(NOTE: this procedure has to be done only by Braviisol test
department)
Maintenance time is reached
Watchdog circuit outputs becomes high due to an HW or SW
problem
The software is corrupted or the flash on the inverter is damaged.
Watchdog 2 circuit outputs becomes high due to an HW or
SW problem
Microcontroller RAM is corrupted
Failure in the high current HW protection circuit
The current sensor is damaged.
One of the motor phases is open
Pump motor output is too low with respect to pwm applied
Pump motor output is too high, with respect to pwm applied
Motor output voltage higher than expected
When the mos of EB is shorted
The battery voltage is too low or too high (< 0,8 Vbatt OR >
1,2 Vbatt)
Driver of EB coil is damaged (not able to close)
Evp2 driver is failed shorted (always ON) mismatch between
the valve set-point and its feedback
Evp driver is failed shorted (always ON) mismatch between
the valve set-point and its feedback
Double request, LIFT + LOWER
The Evp1 coil is not connected between Paux and NEVP1
output, and the parameter EVP TYPE in the set-option menu
is set Analog or Digital
The Evp2 coil is not connected between Paux and NEVP2
output, and the parameter EVP TYPE in the set-option menu
is set Analog or Digital
Pump current is always equal to 0
In stby condition (no current applied to the traction motor) the
current feedbacks are out of permitted stby range
The outputs of the amplifiers (used to measure the motor
voltage) are cheked this alarm occurs when voltage signals
>3V or <2V at the init
Overvoltage/Undervoltage condition has been detected
Motor voltage feedback circuits are damaged
PUMP current has unexpected value
49
A
A
W
197
60
250
VMN NOT OK
CAPACITOR CHARGE
THERMIC SENS. KO
W
62
TH. PROTECTION
W
A
W
65
206
218
MOTOR TEMPERAT.
TRUCK DISABLED
SENS MOT TEMP KO
A
A
248
222
NO CAN MSG.
SMARTDRIVER KO
W
A
W
A
224
69
13
30
WAITING FOR NODE
CURRENT SENS.KO
EEPROM KO
VMN LOW
A
74
DRIVER SHORTED
A
A
A
A
A
A
A
W
A
213
234
37
75
232
220
223
235
38
AUX BATT. SHORT.
DRV. SHOR. EV
CONTACTOR DRIVER
CONTACTOR DRIVER
CONT. DRV. EV
KEY OFF SHORTED
COIL SHOR. MC-EB
COIL SHOR. EV.
CONTACTOR OPEN
A
208
TILLER ERROR
W
W
W
78
79
242
VACC NOT OK
INCORRECT START
PUMP INC START
W
80
FORW + BACK
A
230
EMERGENCY
A
A
W
229
233
245
POS. EB. SHORTED
POWER MOS SHORT
PUMP VACC NOT OK
A
236
W
W
W
A
0
200
201
237
CURRENT GAIN
/* Allarme reload hm
from mdi */
KEY ON INC.ST. P
KEY ON INC.ST. T
ANALOG INPUT
W
A
A
219
195
196
DEAD MAN ABSENT
TILTED
OVERLOAD
Voltage on tractoin motor different from more 20% of imposed value
Power capacitors voltage does not increase
The output of the controller thermal sensor is out of range.
The controller has reached the thermal cutback temperature
85°C
Battery is <= 10% when the parameter BATTERY CHECK is
set >0
Battery charge input open, truck is disabled
temperature sensor for moter is KO
generic CAN message alarm. Traction didn't receive an expected CAN message form display or tiller card
Smart driver is open, not able to provide EB positive
A Canbus network node is in alarm condition. uC is waiting
for it to resolve its error condition.
Current measured in stand-by mode greater than expected
Error is detected in eeprom or in eeprom management
Motor output voltage lower than expected
Driver of LC coil is shorted, so it is not able to open the LC,
or LC coil is disconnected
When the positive of the AUX OUTPUT is driven by the tiller,
the positive is high and the tiller is released.
EV driver is shorted
Main contactor is closed when it should be open
LC contact is stuck
Valve contactor driver
Key-off signal is low at Key-on
Shortcircuit on LC or EB coil
Coil short on EV valve
The LC coil has been driven but LC does not close
Input mismatch between hard&soft switch input and tiller input
The acceleretor value is higher than the minimum value recorded, and the direction/enable switches are opened.
TRAC Incorrect starting sequence
PUMP Incorrect starting sequence
The travel demands are active in both directions at the same
time
The PAUX connector (A3) is not connected to the battery or
the voltage is different.
Output of built in Smart Driver, which supplies Eb coil positive, is high (= +batt) when the tiller switch is opened.
Short circuit on the power mosfets
Vacc for pump is high without enable switch
The Maximum current gain parameters are the default values, which means the maximum current adjustment procedure has not been carried out yet
At key-on is present a pump request. Release request.
At key-on is present a traction request. Release request.
Problem on the A/D conversion of uC
With the parameter "Positive EB" at level 2 in the "HW setting" menu and "Deadman" input open the alarm appears
Input A7 open. The tilt device is not in the safety range.
Input A31 combi or A4 on can tiller is open
50
PART 6
MAINTENANCE AND INSPECTIONS
6.8 Hydraulic Schemes
AEUP IAWP 9.6
1
Electric pump
2
Unlock valve
3
One way valve
4
Flow rate valve
5
Block solenoid (sealed, 2 way,
electrically controller, NC)
6
Emergency valve
7
Single-acting telescopic cylinder
51
AEUP IAWP 15
52
PART 6
MAINTENANCE AND INSPECTIONS
6.9 Electric Diagrams
AEUP IAWP 9.6
53
AEUP IAWP 15
54
LIMITED WARRANTY—Warranty Statement
IF THE WARRANTY IS NOT INCLUDED IN THE SALES CONTRACT, THE FOLLOWING GUIDELINES APPLY TO THE
MACHINE WARRANTY.
The Manufacturer BRAVIISOL SRL warrants that all new units of equipment manufactured and sold by it conform to the
Company latest specifications. Moreover, Mast and hydraulic cylinder carry a Special Warranty of 10 years. The manufacturer warrants its equipment to the original purchaser against defect in material and/or workmanship under normal
use and service for 5 years from date of registered sale or date the unit left the factory if not registered. Excluded from
such warranty is the battery(s) which carries 1 year warranty from described purchase date. Warranty claims within
such warranty period shall be limited to repair or replacement of the defective part in question. The manufacturer will
send, free of charge, any component recognized as having faulty design or defective construction. The labor to perform
the necessary repair or replacement and the travel expenses involved carry a warranty of 1 Year from described purchase date, based on the Manufacturer's then current flat rate.
Warranty claims are valid ONLY providing the defective part in question is shipped prepaid to the Manufacturer and is found
upon inspection by the Manufacturer to be defective in material and/or workmanship. Furthermore, warranty claims can be
accepted ONLY when all information specifically required by the Manufacturer (such as Serial Number) are provided.
The manufacturer reserves the right to replace, repair, exchange, or to provide a new, used or rebuilt component, assembly,
sub-assembly, or weldment based on its unquestionable judgment.
THIS WARRANTY POLICY DOES NOT COVER DAMAGES CAUSED BY:
1.
2.
3.
4.
Shipment
Misuse of unit, including operation beyond Factory established limits, loads and/or specifications.
Natural disasters (such as flood, fire, wind and lightning)
Failure to properly service and maintain the unit in accordance with the Company manuals or Factory Service Bulletins.
BRAVIISOL DOES NOT ACCEPT ANY RESPONSIBILITY FOR:
1.
2.
3.
4.
Any part requested for work that was tampered with.
Unauthorized alterations or modifications to the unit carried out without being agreed upon in writing in advance with the
manufacturer.
Labor on consumable items, such as tire, batteries
Any indirect incidental, consequential or special damage (including without limitation to loss and profits, loss of revenue, cost
of capital, cost of substitute equipment, downtime, examination fees, claims of third parties, and injury to person or property)
based upon any claim of breach of warranty, breach of contract, negligence, strict liability in tort, or any legal theory.
ELECTRICAL COMPONENTS ARE COVERED BY THE WARRANTY UNDER THE FOLLOWING CONDITIONS
The battery is properly connected for re-charge, according to the specifications of this manual and/or electrical drawing provided by the
Manufacturer.
PROCEDURE OF THE WORKS COVERED BY THE WARRANTY:
•
The manufacturer must be notified of all claims covered by the warranty within 48 hours of the anomaly, in writing or by fax
(not only verbally) and as detailed as possible.
•
Warranty claims should be forwarded to your nearest local distributor or directly to the Manufacturer:
ABSOLUTE E-Z UP LLC
295 Seven Farms Drive
Suite C - 193
Charleston, SC 29492
843-388-2556 office
843-388-2558 fax www.absolutee-zup.com
BRAVIISOL Divisione Meccanica S.r.l.
S.S. 16 Adriatica km. 314,600
60022 Castelfidardo (AN)
Tel.+39.071.7819090
Fax+39.071.7819355
[email protected]
•
•
The manufacturer will confirm, in writing or by fax, eventual acceptance of the covered intervention carried out by the
customer or will provide guidance of his own technicians for works to be performed.
•
Any defective material replaced by the customer (authorized by the manufacturer or ABSOLUTE E-Z UP LLC) must either
be held 120 days so that the manufacturer or ABSOLUTE E-Z UP LLC can question or verify defective material. If needed
defective parts will be sent back to ABSOLUTE E-Z UP LLC or the Manufacturer.
•
If required, please, take photographs of the defective part and of the area where the machine has been operated. This is
both to prevent unpleasant controversies and to improve the quality, warranty, and safety of our machines.
THIS WARRANTY STATEMENT IS EXCLUSIVE AND IN LIEU OF ALL OTHER WARRANTIES, EXPRESSED OR
IMPLIED. ALL SUCH OTHER WARRANTIES, INCLUDING IMPLIED WARRANTIES OF MERCHANTABILITY AND
OF FITNESS FOR A PARTICULAR PURPOSE, ARE HEREBY EXCLUDED. No employee, dealer, Sales Representative, or other person purporting to act on behalf of BRAVIISOL DM SRL is authorized to alter the terms of this
warranty, or in any manner assume on behalf of the Manufacturer any liability or obligation which exceeds
BRAVIISOL DM SRL obligations under this warranty.
55