1
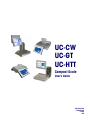
UC-CW
UC-GT
UC-HTT
Compact Scale
User’s Guide
ME-22007603
C16525600A
(10/06)
R04
©Mettler-Toledo, Inc. 2006
No part of this manual may be reproduced or transmitted in any form or by any means, electronic or
mechanical, including photocopying and recording, for any purpose without the express written
permission of Mettler-Toledo, Inc.
U.S. Government Restricted Rights: This documentation is furnished with Restricted Rights.
Attention: Retail Quality Manager - MTWR
If you have a problem with one of our products or publications, or just a
suggestion on how we can serve you better, please fill out this form and
send it to the address on the opposite side of this page (U.S. postage paid),
or fax it to us at (614) 438-4355. Your feedback will help us to improve
product performance, quality, and service.
Part / Product Name:
Part / Model Number:
Customer Feedback
Date:
Provided By:
Customer Name:
Address:
Phone Number:
Fax Number:
Your comments:
Do not write in space below. For METTLER TOLEDO use only. Response (if appropriate) and corrective action taken.
UC-CW UC-GT UC-HTT User's Guide
METTLER TOLEDO
Scales & Systems
1900 Polaris Parkway
Columbus, Ohio 43240
METTLER TOLEDO® is a registered trademark of Mettler-Toledo, Inc.
©2006 Mettler-Toledo, Inc.
Printed in USA
FOLD THIS FLAP FIRST
NO POSTAGE
NECESSARY IF
MAILED IN THE
UNITED STATES
BUSINESS REPLY MAIL
FIRST CLASS
PERMIT NO. 414
COLUMBUS, OH
POSTAGE WILL BE PAID BY ADDRESSEE
Mettler-Toledo, Inc.
Retail Quality Manager - MTWR
P.O. Box 1705
Columbus, OH 43216
USA
Please seal with tape.
Publication Revision
History
Part Number
Date
C16525600A
Rev 04
10/06
Revisions
Added UC-HTT; restructured manual
Disposal
In conformance with the European Directive 2002/96/EC on Waste Electrical and
Electronic Equipment (WEEE) this device may not be disposed of in domestic waste.
This also applies to countries outside the EU, per their specific requirements.
Please dispose of this product in accordance with local regulations at the collecting
point specified for electrical and electronic equipment.
If you have any questions, please contact the responsible authority or the distributor
from which you purchased this device.
Should this device be passed on to other parties (for private or professional use), the
content of this regulation must also be related.
Thank you for your contribution to environmental protection.
Declaration of Conformity
We,
Mettler-Toledo (Albstadt) GmbH Unter dem
Malesfelsen 34 D-72458 Albstadt, Germany
declare under our sole responsibility that the product
Retail Scale
type UC - CW
starting from serial number 2671796 to which this declaration relates, is in conformity with the
following directives and standards:
Directive
Standard
relating to electromagnetic compatibility 89/336/EWG;
amended by 92/31/EWG; 93/68/EWG
EN 61000-6-1
EN 61000-6-3
relating to electrical equipment to be used
within specified voltage limits 73/23/EWG;
amended by 93/68/EWG
EN 60950
relating to non automatic weighing instruments 90/384/EWG;
amended by 93/68/EWG
EN 45501
relating to electromagnetic compatibility (EMC)
- Part 3-2: Limits for harmonic current emissions
(equipment input current < 16 A per phase)
extension prA14 15.09.2000
EN 61000-3-2
Albstadt, June 2005
Peter Bürker, General Manager
Mettler-Toledo (Albstadt) GmbH
Dr. Andreas Rinn, Quality Manager
CONTENTS
Chapter 1.0
Introduction ................................................................................. 1-1
Overview .............................................................................................................................1-2
Customer Display .................................................................................................................1-2
Operator Touchscreen ...........................................................................................................1-2
Operator Touchscreen ...........................................................................................................1-3
Power Switch .......................................................................................................................1-3
Power Switch .......................................................................................................................1-4
Network Connection ..............................................................................................................1-4
Chapter 2.0
Loading Labels ............................................................................ 2-1
UC-CW Compact Printer ........................................................................................................2-1
UC-GT / UC-HTT Tower Printers...............................................................................................2-4
Chapter 3.0
Operating Instructions ................................................................... 3-1
Main Screen.........................................................................................................................3-1
PLU Edit Screen....................................................................................................................3-1
PLU Edit Screen....................................................................................................................3-2
Customer Display .................................................................................................................3-3
Basic Operation – Print Labels................................................................................................3-4
Printing Labels - Service Mode/By Weight ................................................................................. 3-6
Print Labels - Service Mode/By Count ....................................................................................... 3-6
Print Labels - Prepack Mode.................................................................................................... 3-6
PLU Pricing Modes ...............................................................................................................3-7
By-Weight PLU.....................................................................................................................3-7
By-Count PLU ......................................................................................................................3-7
Standard Pack PLU...............................................................................................................3-7
Temporary Overrides .............................................................................................................3-8
Operator ID and Password .....................................................................................................3-9
Memory Mode....................................................................................................................3-10
Country of Origin Labeling (COOL)........................................................................................3-12
Preconfigured COOL Statements ............................................................................................. 3-12
Custom COOL Statements...................................................................................................... 3-12
Custom COOL Statements...................................................................................................... 3-13
Forced COOL ....................................................................................................................... 3-13
COOL Pretext ....................................................................................................................... 3-14
Operations Menu ................................................................................................................3-15
Void Transactions ................................................................................................................ 3-15
Verify Labels ........................................................................................................................ 3-16
Launch User Application ....................................................................................................... 3-16
Self Service Mode ...............................................................................................................3-17
Using Self-Service Mode ............................................................................................ 3-18
Search in Self-Service Mode....................................................................................... 3-19
Search in Service Counter Mode ................................................................................. 3-20
Chapter 4
Setup.......................................................................................... 4-1
Printer and Label Setup .........................................................................................................4-2
Choose Store Logo ................................................................................................................. 4-2
Label Printer Setup ................................................................................................................. 4-3
Barcode Setup ....................................................................................................................... 4-5
Printer Adjustment .................................................................................................................. 4-6
Select Printer Model .................................................................................................... 4-8
Presets Setup .......................................................................................................................4-9
Preset Page Setup ................................................................................................................ 4-11
Add Page ................................................................................................................ 4-11
Adding Preset Pages “By Department”......................................................................... 4-14
Adding Pages using “Custom” ................................................................................... 4-15
Hide Menus Button ................................................................................................... 4-16
Edit Preset ........................................................................................................................... 4-17
Edit Preset ............................................................................................................... 4-17
Display Options........................................................................................................ 4-22
Finishing the Page.................................................................................................... 4-23
Quick Edits ........................................................................................................................4-24
Launch External Applications................................................................................................4-28
UC Editor............................................................................................................................. 4-28
UC SmartLabel ..................................................................................................................... 4-29
Chapter 5.0
Maintenance................................................................................ 5-1
Unit Cleaning .......................................................................................................................5-1
Printer Cleaning....................................................................................................................5-2
Chapter 1.0
Introduction
Thank you for purchasing a UC Scale. You have chosen the most capable scale instrument
available. Mettler Toledo designed the UC for your current and future requirements. The UC
can easily adapt to changing process and data requirements. This flexibility protects your
investment and helps you keep pace with rapidly changing production and customer
demands.
UC-CW
Counter
Scale
UC-HTT
Counter
Scale
UC-CW
Dead Deck
Version
UC-GT
Self Service
Version
Note: for additional information regarding the UC family of scales, please refer to one of the
following manuals:
•
•
•
UC Software Technical Manual
UC Service Manual
UC-CW, UC-GT or UC-HTT specific Parts Catalog
UC-CW/UC-GT/UC-HTT User Guide
1-1
Introduction
Overview
The METTLER TOLEDO® UC family of SmartTouch® scales offers very easy programming
with a user friendly interface and an open architecture system based on the Microsoft
Windows® operating system. All scales contain a built-in thermal label printer which is
designed for quick and easy roll changes. Also the UC family of scales provides both text
and graphical preset keys for easy PLU look-up.
Within the UC family, the UC-CW scale is a low profile counter scale which provides
unlimited connectivity. The UC-CW is also available in a dead deck configuration, which is
designed to connect to an external scale base and does not have the internal loadcell or
customer rear display.
The UC-GT and UC-HTT scales are tower versions of the same UC scale. The UC-GT scale is
designed for self-service applications and includes a large 12” color display. It has no rear
display. The UC-HTT offers the same large operator display as well as a 12” customer rear
display which permits easy readability and the highest impact in added value promotion,
merchandizing, and cross-selling to a consumer.
Customer Display
On the UC-CW counter scale and the UC-HTT tower scale the customer display screen can
show merchandising messages and graphics. The UC-HTT can display color images as
well as graphics. These images can be linked to the specific PLU entered into the scale.
Customer Display on a
UC-CW Counter Scale
Customer Display on a
UC-HTT Counter Scale
1-2
UC-CW/UC-GT/UC-HTT User Guide
Introduction
Operator Touchscreen
The Operator display is an easy-to-use Graphical Touchscreen combining an LCD display
and touch sensitive keyboard into one unit. It can display text-based preset keys or
Graphical image-based preset keys.
Main Screen
With Graphical Presets
Main Screen
With Text Presets
UC-CW/UC-GT/UC-HTT User Guide
1-3
Introduction
Power Switch
The power switch and power cord jack are located under the bottom near the left front of the
unit. Press the (-) on the switch to turn the scale power to ON. To turn the scale power off,
always exit any editing screens, than press the (o) on the switch to turn power OFF.
Always turn the power switch to off before cleaning the scale.
Power
Switch
Power Cord Jack
Located under the front of the unit
Network Connection
The UC family can connect to your Ethernet network using a cable or using a wireless
radio. If you use a wired network connection and experience connection problems, make
sure your Ethernet cable is connected and seated securely in the jack, located under the
touchscreen at the front of the scale.
If you are connected using a wireless radio, you will see a cover protruding from the left
side of the counter scale, or the right side of the tower scales, indicating a wireless radio is
installed.
RJ45
Ethernet Jack for
wired network
connections.
1-4
Cover for Wireless Radio Ethernet
network connection
(shown on a counter scale)
UC-CW/UC-GT/UC-HTT User Guide
Chapter 2.0
Loading Labels
UC-CW Compact Printer
A label loading diagram can be found on the inside of the printer door for quick reference.
Here are detail instructions for loading your labels in to the UC-CW Scale.
Note: when changing
a label roll, always
look for any buildup.
See Chapter 5 for
details in cleaning.
Open the
printer door by
pressing down
on the release
tab.
Pull the printer
out using the
green pull-tab
on the printer.
Unlock and
raise the
printhead by
pulling up on
the latch.
UC-CW/UC-GT/UC-HTT User Guide
2-1
Loading Labels
Note: A 3” label
width is usually
used in the
compact printer
for the UC-CW.
Install the label
roll on the
supply spool
and remove
about 6 inches
of labels from
the liner. Slide
the labels
under the
guides and
printhead as
shown in the
illustration.
Note: Do not use
excessive force to
pull out on the
green knob!
Pull the liner
back and route
it under the
bottom guide.
Gently pull out
on the green
knob on the
liner takeup (1)
and then slide
the liner into
slot in the roller
(2).
The knob does
not come out all
the way. Using
excessive force to
pull on the knob
can result in a
broken locking
mechanism.
1
2
2-2
Note: The green
knob does not
come all the
way out!
UC-CW/UC-GT/UC-HTT User Guide
Loading Labels
Note: Do not use
excessive force to
push the green
knob in to lock
the liner. Always
remove all spent
liner from the
takeup roller
before pushing
the knob back in.
Using excessive
force to push the
knob in can result
in broken locking
tabs on the green
knob.
2
1
Gently push in
on the green
knob to lock
the liner into
place, and then
turn the roller
clockwise to
take up some
of the slack in
the liner.
Press down on
the printhead
latch until it
locks down.
Shown is the
printer with
properly
installed
labels.
Push the
printer back in
and close the
door.
UC-CW/UC-GT/UC-HTT User Guide
2-3
Loading Labels
UC-GT / UC-HTT Tower Printers
Open the printer
door and refer to
the label threading
diagram backplate
on the printer for
reference in
loading labels.
Unlock and raise
the printhead by
pressing the green
release latch.
2-4
UC-CW/UC-GT/UC-HTT User Guide
Loading Labels
Note: A 2” label
width is normally
used in the tower
printer for the
UC-GT and UC-HTT.
For stripped
label operation,
install the label
roll on the
supply spool
and remove
about 6 inches
of labels from
the liner. Slide
the labels in
the guides as
shown.
Press down on
the printhead
latch until it
locks down.
UC-CW/UC-GT/UC-HTT User Guide
2-5
Loading Labels
For your notes
2-6
UC-CW/UC-GT/UC-HTT User Guide
Chapter 3.0
Operating Instructions
This chapter covers operating instructions and explains the various functions on the Main
Screen and PLU edit screens. In addition, pricing modes and overrides are explained.
Main Screen
Shown below is the main screen with the various parts of the screen identified.
Gross/Net
indicator. When
Net displays,
this indicates a
tare weight.
Current Department,
date, time, and
machine name.
Weight Display.
Touch to zero
the scale.
Price Look Up
(PLU) number
display.
ENTER accepts the
displayed value. If no
value is displayed, ejects
a blank label
Alert Message
Area. Displays
any alerts to
the operator.
BACKSPACE erases
the last entered digit
each time it is
pressed.
Used for Printer and
Database On-Line
indicators. Alerts the
operator to off-line
conditions.
Search – used to search
the Database for a PLU
using alpha-numeric input
by operator.
The Preset Keys are
used for one-touch call
up of PLU records or if
the key is linked to a
page, the new page
displays.
Preset Page Selector Buttons
select the preset page you wish to
use. The arrow left/right buttons
will display more page buttons.
The current page will be
highlighted. These buttons are
configured in Setup mode in
Presets Setup.
CLEAR - clears values
from the numeric entry
in PLU Number box.
Batch Mode – used to
print multiple labels
in one “batch”. When
scale is in Batch
Mode button text will
appear bold.
The Setup button is
used to enter the
application Setup
Mode. This button
is not shown in
Self Serve Mode.
UC-CW/UC-GT/UC-HTT User Guide
Memory is used to
store transactions
for used in printing
a receipt type label.
When scale is in
Memory Mode the
button text will
appear bold.
The Operations Button is
used to access the Verify
Labels and Void
Transactions functions.
This button is not shown
in Self Serve Mode.
3-1
Operating Instructions
PLU Edit Screen
Shown below is the Operator by-weight PLU edit screen. If the boxes are white, the values
can be changed for that transaction. If the box is not white, the value cannot be changed.
This is determined in Setup Mode.
This is the net
weight of the item
Touch to zero the
scale when the
platter is empty.
Displays the Tare
programmed into the
PLU record. Touch
this box to override
the tare (*).
The Unit Price is
programmed into the PLU
record. Touch to override
This is used to calculate
the Total Price. (*)
This value is the Total Price
of the item. If the item is
sold by weight, this is the
unit price multiplied by the
weight of the item. The Total
Price is never operator
accessible.
The Pack Date uses
the current date set in
the controller. This will
print on the label if it
is included in the
label format. (*)
The Shelf Life is
programmed into the PLU
record. This date is used
to show the date when
the item should not be
sold anymore. This date
will print on the label if it
is included in the label
format. (*)
Gross/Net
indicator. When
Net displays,
this indicates a
tare weight.
The Extra Text
number is
programmed into
the PLU record so
when the PLU is
called, the
associated Extra
Text is called. (*)
Touch the Extra
Text button to view
the text.
The Use By Date
programmed into the
PLU record. The item
should not be
consumed beyond
this date. This date
will print on the label
if it is included in the
label format. (*)
The Product Info
(or custom) key will
display here. Touch for
additional product
information.
Clear ends the
transaction and
returns the display
to the Main Screen.
Displays the current
Label Format (*)
When checked, enables Prepack
Mode. In this mode, the PLU will
stay on the screen until the Clear
button is pressed. When a new
item is placed on the scale, the
label will automatically print.
Displays the current
Accumulator. Dropdown
menu will appear when
multiple Accumulator
options are available.(*)
Prints the
item label.
Memory stores the
transaction in
memory until a totals
label is printed.
* = When allowed. See PLU Transaction Setup in Service Scale Setup.
3-2
UC-CW/UC-GT/UC-HTT User Guide
Operating Instructions
Customer Display
After a PLU is called up by the Operator, the screens below show the PLU data that is
displayed on the Customer screens.
Customer Display on UC-CW
(not available on Dead Deck)
Area reserved for PLU
Information on the UC-HTT
Customer Display
Customer Display on UC-HTT
(not available on UC-GT)
UC-CW/UC-GT/UC-HTT User Guide
3-3
Operating Instructions
Basic Operation – Print Labels
There are two ways to call up PLU records: Preset Buttons and Numeric Entry. Your
application could be set up for either text or graphical Presets. Below left is the Main Screen
set up for Text based Preset Buttons and below right is a graphical preset screen. You just
press the button to call the PLU.
Text Based Presets
Graphical Presets
These buttons select the preset page. PLUs can also be grouped into categories or
departments.
Category Buttons/Preset Tab bar
Shown below is the Numeric Keypad. You key in the PLU number, then press ENTER to call
the PLU.
Numeric Keypad
3-4
UC-CW/UC-GT/UC-HTT User Guide
Operating Instructions
If forced tare or count is turned on, you will see the following force data wizard screen next.
You can place the tray or wrapper on the platter and click “Platter Tare”, click “Clear Tare”
for none, or click “Enter Tare” using a keypad. Click “Done” when you are finished.
Force Data Wizard Screen
The PLU Edit Screen will display next. On this screen, you can change items like the ShelfLife or Use-By Date if the box is white. If the field is blue (not white) the value cannot be
changed. This is only temporary and the values will revert back to the original values when
you press the Clear button or when the screen returns to the Main Screen.
If a box is white,
the field can be
over-ridden.
PLU Edit Screen
UC-CW/UC-GT/UC-HTT User Guide
3-5
Operating Instructions
Printing Labels - Service Mode/By Weight
When you are ready, place the item on the scale and press the Print button to print a label.
After you take the label and remove the item from the platter, the scale will return to the
home screen.
Print Labels - Service Mode/By Count
Enter the PLU number for a by-count item and press the Print button to print a label. After
you take the label and remove the item from the platter, the scale will return to the home
screen.
Print Labels - Prepack Mode
Prepack Mode allows you to weigh multiple items of the same PLU. If you are in Prepack
Mode, the label will automatically print after placing the item on the platter. After the first
label prints, remove the first item from the platter and place the next item to weigh on the
platter. After you remove the label from the printer, the next label will print. Repeat this
procedure until you are finished. To exit this PLU, press the Clear button to return to the
home screen.
Print button
prints the label.
3-6
UC-CW/UC-GT/UC-HTT User Guide
Operating Instructions
PLU Pricing Modes
PLU is an abbreviation for Price Look Up. The PLU is a reference number assigned to
access a product's record that includes fields such as the description, price, tare, etc.
Different PLU's will have different pricing modes. Meat is normally sold "By Weight" by the
pound or kilogram. Many bakery products are sold "By Count". Other products may be sold
in a standard package that all weighs the same (or assumes all weight is the same or a
minimum value). The different pricing modes are described in the following sections.
By-Weight PLU
Examples of products sold by weight are meats, cheese, poultry, produce. By-Weight items
can be priced in three ways:
Priced "Per Pound" - Typically weighed items are priced per the pound.
The weight multiplied by the unit price equals the total price of the product
to the customer.
Priced "Per Fraction of a Pound" (fractional) - The item may also be priced by a
fraction of a pound (where legal and desired). Pricing per 1/4 pound and per
1/2 pound is available where it is legal for trade.
"Pounds for" price - The PLU may be sold with a pounds for price (rather than price per
pound). (2 pounds for $1.00).
By-Count PLU
Examples of items sold by the count are fruits and vegetables, cookies, donuts, rolls,
bread, etc. Example: 4 Apples for $0.69. The By-Count PLU allows
the operator to use the scale for a labeling operation. Pricing is
entered as a certain quantity of items for a set price.
Standard Pack PLU
Examples of items sold by Standard Pack include whole chickens, sheet cakes,
bread, etc. The Standard Pack PLU is similar to ByCount and also allows the operator to use the scale
for a labeling operation. The labels indicate the net
weight of the item and total price of the item.
UC-CW/UC-GT/UC-HTT User Guide
3-7
Operating Instructions
Temporary Overrides
If the displayed field box is white, you can perform a temporary override.
In the PLU screen below, the Tare, Unit Price, Shelf Life, Use by Date, Extra Text, Label
Format, and Accumulator boxes are white, indicating they can be changed. Note that this
is only a temporary override and the values will revert to the original the next time the PLU
is called.
Note: fields for the Pack Date and Total Price are not white and cannot be changed.
Touch the white field to bring up the various override windows.
Change Date Calendar
Extra Text Window
Price Override Keypad
3-8
UC-CW/UC-GT/UC-HTT User Guide
Operating Instructions
Operator ID and Password
Depending on how your system has been setup, you may need to enter both an Operator
ID and a Password in order to complete a transaction. By having this required, it adds
additional security, as well as reporting and tracking features, to be enabled.
If required, prior to printing or storing a transaction a screen will appear asking for your
Operator ID. Enter your Operator ID using the keypad. Hit Enter.
Then the Operator Password screen will appear. Enter your numeric password using the
keypad. Hit Enter.
The PLU transaction will then continue.
UC-CW/UC-GT/UC-HTT User Guide
3-9
Operating Instructions
Memory Mode
With the UC memory mode, you can store multiple transactions and print one label with the
totals for all of the items. To use memory mode, call up the PLU and from the PLU Edit
Screen (below), place the item on the platter, and then press the “Memory” button. The
screen will return automatically to the home screen for the next transaction.
Edit Screen Memory
Button places item into
the UC memory.
PLU Edit Screen
After completing all of the transactions, press the Memory button on the home screen.
Home Screen
Memory Button
calls all of the
transactions.
When in
Memory Mode,
this button will
display in bold
“Memory”.
3-10
UC-CW/UC-GT/UC-HTT User Guide
Operating Instructions
When the Memory button is pressed at the home screen, the contents of all the transactions
can be viewed, as shown below. From this screen you can continue with another
transaction by pressing the “Return” button, delete the entire order by pressing “Clear
Order”, delete one item by touching the PLU number box for the item and pressing the
“Delete Item” button, or print the label with all items tallied on it by pressing the “Print”
button.
View Memory Screen
UC-CW/UC-GT/UC-HTT User Guide
3-11
Operating Instructions
Country of Origin Labeling (COOL)
In software version 2.0 and above, the UC-CW scale supports Country of Origin Labeling
(COOL) in conjunction with the new Host CommandV2 only. COOL is supported through
specialized Extra Text Records and lists of extra text records that are downloaded to the
scale with the V2 Host Commands. The lists are then associated to the PLU record and the
application allows the user to choose a preconfigured COOL statement or, in some cases,
create custom COOL statements.
Preconfigured COOL Statements
Preconfigured COOL statements can be one of four types:
•
Default COOL preconfigured text.
•
Current Preconfigured COOL text.
•
Most recently used preconfigured text.
•
List of possible preconfigured text for that PLU.
Each is identified on the Preconfigured COOL Statement screen. The current text is the one
that is currently selected and would be used if proceeding with the transaction. The most
recently used text is the text statement that was last used to complete a transaction and
was printed on a label for that PLU.
If COOL is not forced on a PLU, meaning you are able to complete a transaction without
selecting a COOL statement to be printed on the label, a No COOL button is available. After
selecting the appropriate COOL statement, the user presses the Enter button to proceed. The
Cancel button will stop processing of the current transaction and return the user to the main
screen.
If the PLU selected has data that will allow the user to construct a custom COOL statement,
the Custom button is available.
Current COOL Text
Default COOL Text
Most Recently Used
COOL Text
List of possible
preconfigured text for
that PLU.
Note: the No COOL button
is used to proceed when
COOL is not forced.
3-12
UC-CW/UC-GT/UC-HTT User Guide
Operating Instructions
Custom COOL Statements
Custom COOL statements are constructed from keywords or production steps and country
names. If a PLU record has custom COOL production steps and country names associated
with it, a Custom button will appear at the bottom of the Preconfigured COOL Declaration
screen. If there is no preconfigured COOL text associated with the PLU, the user will be
immediately taken to the Custom COOL dialogs.
At this point, the user may select a production step followed by a country and continue in
that fashion until they are satisfied with the new custom COOL declaration. At that point, the
user touches the Done button. The Undo button will undo the last entry and you may
continue to undo until all countries and production steps are removed. The Clear button
will completely clear the custom declaration allowing a new declaration to be built.
Select a
country from
this list after
selecting a
production
step.
Select a production step
from this list
Clears all steps and
countries, allowing the
user too start over
Undoes the last country
or production step; it
can be repeated to
undo all additions
Forced COOL
There is a flag on the V2 PLU record that indicates that COOL is to be forced on that PLU.
There is also a scale setting within Service Scale Setup that enables forced COOL on the
scale. When both of these are set, the scale will not allow a transaction to complete without
a COOL statement selected for printing on the label.
UC-CW/UC-GT/UC-HTT User Guide
3-13
Operating Instructions
COOL Pretext
COOL Pre-Text is a single text record associated with the PLU in the PLU record. It is not
changeable and is always printed on the label. The most common use of it is to identify if
seafood is farm raised or caught in the wild.
Enable Forced COOL
check box. Together
with forced flag on
the PLU, forces
COOL information in
order to complete the
transaction
COOL Pre-text
indicator
Note that the No COOL
button is not available
when COOL is forced.
3-14
UC-CW/UC-GT/UC-HTT User Guide
Operating Instructions
Operations Menu
When you press the Operations button, the Operations screen will display. In this screen
you can perform the following functions.
Void Transactions
Use this feature to void previous transactions so your totals collection will remain accurate.
Highlight the transaction, then click the Void button.
A dialog screen will appear to verify
voiding the transaction. Click OK to confirm.
UC-CW/UC-GT/UC-HTT User Guide
3-15
Operating Instructions
Verify Labels
This function is used if you wish to print labels of all or selected PLUs. The information
printed on the label is determined by the Verify Label Format selected.
Launch User Application
This function is used to start custom programs that have been configured in your scale.
These will vary or may not be used at all in your location. Consult your system
administrator for further information.
3-16
UC-CW/UC-GT/UC-HTT User Guide
Operating Instructions
Self Service Mode
When the scale is in Self Service Mode, no overrides are possible by the user. This is ideal
for placement on the floor within a department for Customers to use.
In addition, the Operations button is disabled and removed and the Setup button can be
replaced with a different graphic. To return to the Operations menu touch the UC Graphic at
any time.
Self Service Mode screens are shown below. The self service screen may be configured
with or without the numeric keypad. If the Main Screen is configured without the keypad, it
can easily be accessed by touching the Keypad button in the top right.
Self Service Mode with Keypad
Self Service Mode without Keypad
The Keypad can also be centered or to the side of
the PLUs. To do so go to Unit Settings t Scale
Settings t Next and check Self Service Mode with
Centered Keypad and then the SAVE button. This
will center the keypad rather than have it on the
right.
If the primary database for the scale is off-line,
there is an indicator to store personnel to take
corrective action. When the primary database
is on-line, the background of the PLU number
field is white. When the primary database is
off-line, the background changes to yellow.
When yellow and off-line, the scale references
the secondary database in the scale and can
still be used.
UC-CW/UC-GT/UC-HTT User Guide
3-17
Operating Instructions
Using Self-Service Mode
The screens can be set up as category keys. Pressing one of the images, such as the
“Citrus” key as shown on the above example screen will open pages assigned under this
main key (see example screen below).
To call up a PLU and print a label, press the image of the item.
Note: If enabled, an
Alternative Language
button can be accessed for
multi-lingual locations.
This will call up the PLU screen for that item. The PLU screen will look different based on if
the item is by count, by weight or a pre-packed item. Also, if enabled, additional
information on the PLU may be displayed.
By – Count display with additional information
By – Pack display with no additional information
Place the item on the platter, and then press the PRINT button to print the label. After the
label prints, the screen will return to the Main screen.
3-18
UC-CW/UC-GT/UC-HTT User Guide
Operating Instructions
Search in Self-Service Mode
If an item isn’t found on the screen, press the “Search” button on the Main Screen. This will
call up the Search Screen.
By typing in the first few letters of the item, the UC will return a list of items.
Highlight the item by touching it with your finger to call that PLU and return to the PLU Edit
Screen or prompt for by-count.
UC-CW/UC-GT/UC-HTT User Guide
3-19
Operating Instructions
Search in Service Counter Mode
The Search Function is available in both Self-Service and Service Counter (normal) modes.
The process of Searching by name or partial name is the same as in Self-Service mode.
However in Service Counter mode you can change Departments via a dropdown menu.
Also in Service Counter mode the “Next” and “Previous” buttons are not available; instead
the returned search list is browsed via a scroll bar.
3-20
UC-CW/UC-GT/UC-HTT User Guide
Chapter 4
Setup
This Chapter covers the Setup screens commonly accessed by an Operator. These include:
Printer & Label Setup, Preset Setup, Quick Edits, and Launch External Application.
Additional Setup functions are available to the administrator of the scale. These are
discussed in the UC Software Technical Manual.
Setup is accessed by pressing the Setup button on the Main screen.
Note: if in Self Service Mode the Setup button may be hidden by a graphic, if so Setup can
be accessed by pressing the graphic.
The Setup screen is shown below. Touch the specific button to enter into the desired setup
topics. To return to the Main screen, press the Return button.
Note: Arrows
show the
functions
discussed in this
Chapter.
Note: Your particular unit may be configured differently than outlined in this chapter. A
password may be required to access setup and not all setup features may be available to
you.
UC-CW/UC-GT/UC-HTT User Guide
4-1
Setup
Printer and Label Setup
This screen is used to choose store logo, configure the printer, to set up the bar codes
printed by the printer, and delete custom label formats.
Choose Store Logo
Select a store logo that will be used on all labels printed on this unit.
4-2
UC-CW/UC-GT/UC-HTT User Guide
Setup
Label Printer Setup
From the Label Printer Setup screen you can do a variety of functions to help configure the
label.
Label Printer Setup.
Initial view - use the scroll
bar to view additional
formatting options.
Refresh and Save/Cancel Buttons
When the application starts, it loads the available label formats into an internal cache for
quick and easy retrieval. Pressing the Refresh button causes the application to update its
internal cache of the label formats that are available to the scale. So if new label formats or
changes to existing label formats have been loaded to the scale, they will only be available
after pressing the Refresh button.
After you have modified all of the label options, and hit the Refresh button, hit the SAVE
button to save the configuration and return to the Printer & Label Setup Main screen.
To exit without saving, hit the CANCEL button.
Current Label Stock
The length of the labels listed in Current Label Stock must match the length of the labels
that are loaded into the printer.
Standard sizes available include: 1.9”, 2.1”, 2.4”, 3.3”, 3.7”, 4.2”, 4.7”, 5.1”, and
Continuous (roll stock).
Run Total Label Format
Select the style of the label to use when printing totals labels.
UC-CW/UC-GT/UC-HTT User Guide
4-3
Setup
Stripped Delivery
This function enables or disables the take-up motor and label taken sensor. This box
should be checked when labels are taken stripped from the liner. The take-up motor will
wind up the used liner on the take-up spool and the label taken sensor will prevent another
label from printing when one remains in the printer. When this box is not checked, the takeup motor is disabled and the label taken sensor is ignored. Continuous stock should
always be run with this unchecked (disabled).
Eject Length
This is the position the label will stop at after printing. If the Eject Length is increased, the
label is ejected further outward from the printer. If the Eject Length is decreased, the label
moves inward towards the printer. (Default value: 10.0 mm) For example, if the labels are
falling off the liner, decrease the value; if labels stick too much to the liner, increase the
value.
Image Offset
The Image offset is used to adjust the vertical position of the image printed on the label. It
is measured in mm from the rear gap sensor to the printer's print head. On increasing the
image offset the image is moved up on the label and on decreasing the value the image
moves down on the label. (Default value: 0.0mm)
DESCRIPTION 1
DESCRIPTION 2
GRADE 1 TEXT
NET WT
1.11 lb
2
DESCRIPTION 1
DESCRIPTION 2
GRADE 1 TEXT
NET WT
**TOTAL
$2.21
$1.99/lb
00111 50221
1.11 lb
**TOTAL
$2.21
$1.99/lb
3
2
ADDRESS 1
ADDRESS 2
00111 50221
3
ADDRESS 1
ADDRESS 2
The printing is too low on the label to the
left. To raise the printing so it is centered
vertically on the label, increase the Image
Offset value.
The printing is too high on the label on
the left. To lower the printing so it is
centered vertically on the label, decrease
the Image Offset value.
DESCRIPTION 1
DESCRIPTION 2
GRADE 1 TEXT
NET WT
1.11 lb
2
**TOTAL
$2.21
$1.99/lb
00111 50221
The printing is properly centered vertically
on the label to the left. No adjustment is
necessary.
3
ADDRESS 1
ADDRESS 2
4-4
UC-CW/UC-GT/UC-HTT User Guide
Setup
NF Label Format
Select the label length that will be used for a NutriFact label. Default size is 1.9 inch.
By Weight Label Formats, By Count Label Formats,
Std Pack Label Formats, Prepack Formats, and
Process Products Format
Note: use the scroll
bar along the bottom
of the Label Printer
Setup screen to
access these
formatting options.
Select the default (0) format and alternate formats (1-7) to use for the Printer. This
corresponds to the label format field in the PLU record. Setup screen is shown below.
Touch the
format on
the right to
highlight,
and then
touch an
arrow button
to copy the
format to the
Assigned
Formats list.
Barcode Setup
Barcodes are configured according to your scanner requirements. See your store IT
department and the UC Software Technical Manual and UC Service Manual for additional
information.
UC-CW/UC-GT/UC-HTT User Guide
4-5
Setup
Printer Adjustment
The Printer Adjustment menu is used to set the printer density, select the print speed,
measure labels, calibrate the printer sensors, and to print a test label.
Note: Print Density and Print Speed should only be changed by a qualified technician.
Firmware Version is a system generated field.
Calibrate Gap Sensor
Calibrate Gap Sensor is used to calibrate the gap sensor with the label stock in use in the
printer.
Measure Label
Measure Label can be used to determine the length of the label stock in the printer.
Once the measurement test determines the length of the stock in the printer, the scale will
select the associated label stock and format assignments if you touch the SAVE button. If
you touch the CANCEL button the current setting will remain.
4-6
UC-CW/UC-GT/UC-HTT User Guide
Setup
Print Test
Print Test can be used to test print density and coverage of the label stock that is installed
in the printer.
Stage Label
When pushed, the Stage Label button will eject one blank label and set the next label into
position for printing. This is required when changing label rolls or when putting in a new
roll when the scale is out of labels.
When the scale is in Self-Service mode, this is the only way to stage a label without
changing back into service counter mode.
Calibrate Both Sensors
Calibrate Both Sensors is used to calibrate the label taken and gap sensor with the label
stock in use in the printer.
Before running this test, make sure labels are loaded properly with nothing blocking the
label taken sensor. If the label taken sensor is blocked, you will see the following error
message.
Remove the item blocking the sensor and retry the calibration.
UC-CW/UC-GT/UC-HTT User Guide
4-7
Setup
Select Printer Model
A related setting to Printer & Label Setup is selecting the proper Printer Model. You, or your
system administrator, may need to change the Printer model. Printer models can be
adjusted by going to Unit Setup t Scale Settings t Next Page t Select Printer Model.
There are two printer models in the UC scale; the Tower Printer (UC-GT, UC-HTT) and the
Compact Printer (UC-CW).
Currently, if a scale has a serrated tear bar, it is considered a Tower printer.
For the standard CW units, the printer model will default to Compact Printer.
For the UC-HTT and UC-GT models, the printer model defaults to Tower Printer.
4-8
UC-CW/UC-GT/UC-HTT User Guide
Setup
Presets Setup
Presets are used for one-touch call up of PLU records. Instead of entering the PLU number,
the preset keys are assigned for a specific PLU number and department. Then, when the
preset key is pressed, the PLU is automatically called up. There can be many pages of
presets and the PLUs can be called from any department. The pages are selected using the
Page Buttons at the bottom of the screen. You must first configure the pages, and then the
preset keys for that page can be configured.
The use of Presets are a desirable feature to reduce operator time to access a PLU and to
make training easier for a new operator. Presets are typically arranged in a hierarchy
method so the PLU can be located easily. For example to locate a “Tangerine”, an Operator
would push the “Produce” department button, then the “Fruit” category button. Within
“Fruit”, the Tangerine preset would be displayed.
There are two ways to display Presets: Graphical and Text. Graphical Presets have the
advantage of being easier for the Operator, and Customers when in Self-Service Mode, due
to uncertainty of product name and in an area where multiple languages are spoken.
UC-CW shown using
Graphical Preset Pages.
UC-CW shown using
Text Preset Pages.
UC-CW/UC-GT/UC-HTT User Guide
4-9
Setup
Below are Main Screens examples of Text and Graphical Preset Pages.
Example Screen with Text Based Preset Keys
Example Self Service Screen with Graphical Preset Keys
4-10
UC-CW/UC-GT/UC-HTT User Guide
Setup
Preset Page Setup
Press the “Setup” key on the main screen and then the “Presets Setup” key on the Setup
screen to display the Preset Setup screen. Shown below is the Preset Setup main screen.
There are three options which allow the Operator to set up the Keys (PLUs), Pages, and
select Display Options. These are covered in the following sections.
Note: You must first
configure the Pages,
and then the preset
Keys for that page can
be configured!
Add Page
To add new pages, press the Pages button (1) then press the Add Page (2) button.
1
2
UC-CW/UC-GT/UC-HTT User Guide
4-11
Setup
1
2
3
This will give you an initial screen that you can select the overall look of the Page.
Including the Page Format (1) and Page Layout (2).
If you wish the page to be accessed using a button on the bottom of the screen, select the
check box Show on Tab Bar? (3). If the page will be used as a link accessed by pressing
one of the preset keys, leave the box unchecked.
Page Format: select either “Text-based page” or “Graphical page”.
4-12
UC-CW/UC-GT/UC-HTT User Guide
Setup
Page layout: select the number and size of the preset keys on the page
(4 x 3, 4 x 4, or 4 x 6).
You can add pages automatically by selecting "By Department" for the "Page Type", or
manually using "Custom". If you select "By Department", pages of preset keys for all of the
PLUs in that department will be created. To program the preset keys manually, select
"Custom" from the drop down menu. Select either "By Department" or "Custom" from the
drop down list and press Next> to continue.
UC-CW/UC-GT/UC-HTT User Guide
4-13
Setup
Adding Preset Pages “By Department”
If you are adding pages by department, next select the department from the drop down list
and press Next> to continue. Then select the department pages you wish to create from the
drop down menu.
The number of pages that will be automatically created by using the PLUs from the selected
department will be shown.
Remember to press the
SAVE button to save
your new presets before
exiting the Preset Menu.
You can go back by pressing the <Back button, finish by pressing the Done button, or
cancel all by pressing Cancel.
Note: When you are all done programming presets, remember to press the Save button
before exiting Program Presets to save your settings.
4-14
UC-CW/UC-GT/UC-HTT User Guide
Setup
Adding Pages using “Custom”
First select “Custom” from the dropdown menu, then press Next>.
To edit the page name, press the Rename Page button.
Type in the new page name on the keyboard. The Enter key will move the cursor to the next
line when two or more lines of description are needed.
Press Apply to continue or Cancel to quit without saving changes.
UC-CW/UC-GT/UC-HTT User Guide
4-15
Setup
You may also add an Alternate name (1) for the page. This name will be used when the
Alternate Language button (2) is pressed. The exact same process as just outlined is used
to set or edit the alternate page name.
1
2
3
Your new page will be displayed and now can be edited.
Hide Menus Button
To preview a page, press the Hide Menus button (3) on the Main Preset page. This will
preview the complete page layout, without the programming function keys such as “Keys”
and “Pages” being displayed.
This will show the page as it will display on the normal operation screen.
Press the Show Menus button (4) to return to editing mode.
4
Note: while viewing the
screen in Setup Mode
without Menus, the phrase
“This unit is in setup mode”
will display along the
bottom of the screen. This
phrase does not appear on
the normal operation
screen.
4-16
UC-CW/UC-GT/UC-HTT User Guide
Setup
Edit Preset
Use Keys/Edit Preset to add or modify a preset key or to select a Page that will display as a
preset key for categorical presets including pages that do not show up on the tab bar. To
modify a button, (1) press the preset key you wish to edit, press the Keys button (2) to
display the drop down menu, then press the “Edit Preset” button (3).
1
2
3
Edit Preset
Press “Choose PLU” or “Choose Page” to select a PLU or to link to another page.
If you pressed the Choose PLU button, there are two methods to find PLU; List and Search.
UC-CW/UC-GT/UC-HTT User Guide
4-17
Setup
Choose PLU - List Method
Select the department where the PLU is located by touching the + button next to the
department. You can scroll through the list of PLU numbers. Select the PLU you wish to use
by touching it so it is highlighted, then press the Select key.
4-18
UC-CW/UC-GT/UC-HTT User Guide
Setup
Choose PLU - Search Method
When you touch the Search key, you can find a PLU by the PLU number or the Item
description.
For example, a search of the description “Man” returned the following results:
Highlight the PLU you wish to use, then press the Select key.
UC-CW/UC-GT/UC-HTT User Guide
4-19
Setup
Configure Preset Buttons
You can then modify the Preset Button description by pressing the Edit the Description key,
go back to select a different PLU by pressing <Back, or complete the procedure by pressing
Done.
You may also add or edit the Alternate Description. This description is displayed when the
alternate language button is pressed.
Text Based Page
Graphic Based Page
If you are editing a graphic based page, the second screen allows you to select the graphic
and edit the descriptions as shown below.
4-20
UC-CW/UC-GT/UC-HTT User Guide
Setup
The Service Application Software contains an extensive collection of images for produce,
bulk foods, and candy. To select an image to display on the preset key, press the “Choose
a Graphic” button.
Scroll through the graphic list using the scroll bars on the right, then touch the file to select
the graphic. A picture of the image will display whenever a file is highlighted, as shown
below. Touching “Top” will scroll to the top of the image list and touching “End” will scroll
to the bottom of the image list.
Click Done to confirm the selected image.
At this point, you can press “Edit the Description” to change the default description, Done to
quit or program another preset, Cancel to exit, or Back to select a different PLU.
You may also edit or add an alternate description by pressing “Edit Alternate Description”.
The alternate description is used when the alternate language button is pressed.
UC-CW/UC-GT/UC-HTT User Guide
4-21
Setup
Display Options
The Display Options button allows the following items to be configured.
Top Page
Top Page allows you to configure the page that displays first, every time you return to the
main screen. The selection includes the entire configured page and a feature called “Top
Sellers”.
Display Page
This feature selects whether to display either the Top Page each time the scale returns to the
home screen, or to display the “Last Used” page. If you select Top Page, configure the page
you wish displayed under the “Top Page” settings.
Auto Configure Settings
If you select Top Sellers, the UC will automatically configure the page for the PLUs that are
used the most. To set the frequency of the auto refresh of the page, refer to the Software
Technical Manual. To immediately create or refresh the Top Sellers page, press the
“Create/Refresh Page” key.
4-22
UC-CW/UC-GT/UC-HTT User Guide
Setup
Finishing the Page
When you are finished programming presets, remember to press the Save button to save
your work before exiting. To exit without saving any of the changes, press the Cancel
button.
UC-CW/UC-GT/UC-HTT User Guide
4-23
Setup
Quick Edits
The Quick Edits selection is used to change some of the more common numeric data in a
PLU record. The Quick Edit function changes the record in the scale database immediately.
Items that can be changed include the price, tare, shelf-life, and use-by date. An external
keyboard is not required to use Quick Edits. Quick Edits is not for adding new records or
deleting PLU’s. When selecting the Quick Edits function, you will first be asked to select the
department for the PLU data you wish to change.
Quick Edits is accessed by pressing the Setup button on the Main screen. The Setup screen
is shown below. To return to the Main screen, press the Return button.
Touch the Quick Edits button to enter the Quick Edits mode. This will give you the Quick
Edits Wizard.
.
4-24
UC-CW/UC-GT/UC-HTT User Guide
Setup
Select the department, and then click Next to display the Quick Edit main screen.
The main screen shows the current department. Enter a PLU number on the touchpad and
press the Enter key.
The PLU data will be retrieved from the scale database. To change any of the displayed
fields, touch the box that displays the data.
For instance, to change the Unit Price, touch the box displaying the Unit Price. You will
then be presented with a touchpad that can be used to change the price. Key in the new
price and press the Enter key. (Don’t forget to enter the decimal point).
UC-CW/UC-GT/UC-HTT User Guide
4-25
Setup
The PLU can also be converted to a Frequent Shopper price by touching the Frequent
Shopper Type and Price boxes.
4-26
UC-CW/UC-GT/UC-HTT User Guide
Setup
You can also change the Shelf Life or Use By dates by touching the appropriate boxes and
selecting a new date from the calendar. Touch the arrow keys at the top to change the
month. Touch the new date, and then press the OK key.
You can also enter the date numerically by touching the “Use Numerical Keypad” key.
UC-CW/UC-GT/UC-HTT User Guide
4-27
Setup
Launch External Applications
Use this function to access the UC Editor, UC Remote Setup, UC SmartLabel, the Report
Generator, and Touchscreen Calibrator; as well as any user loaded programs.
You may want to consult your system administrator or consult the UC Software Technical
Manual or UC Service Manual prior to accessing some external applications.
UC Editor
UC Editor is a separate application that is used to manage the scale item database. With
UC Editor, you can add, edit, or delete PLU records, Extra Text, Graphics, Nutritional
Information, Action Messages, and Grades. Use this editor to create and edit departments in
the scale database and manage department information, such as name, UPC, and store
address lines.
To edit PLU information, an
optional USB programming
keyboard is required.
4-28
Refer to the UC Software Technical Manual for details on UC Editor.
UC-CW/UC-GT/UC-HTT User Guide
Setup
UC SmartLabel
SmartLabel is used to format custom label formats.
Refer to the UC Software Technical Manual for details on SmartLabel.
UC-CW/UC-GT/UC-HTT User Guide
4-29
Setup
For your notes
4-30
UC-CW/UC-GT/UC-HTT User Guide
Chapter 5.0
Maintenance
Unit Cleaning
•
Disconnect power.
WARNING
DISCONNECT ALL POWER TO THIS UNIT BEFORE INSTALLING,
SERVICING, CLEANING, OR REMOVING THE FUSE. FAILURE TO DO
SO COULD RESULT IN BODILY HARM AND/OR PROPERTY DAMAGE.
DO NOT SPRAY OR WASH DOWN. HAZARD OF ELECTRICAL SHOCK
OR BURN.
•
Do not use solvents or commercial cleaners on the unit. They may harm the surfaces
or damage the touchscreen.
•
Do not spray directly on or at the unit
•
Touchscreen and Customer Displays - Only use a soft clean cloth dampened with mild
detergent and water to clean the Touchscreens and Customer display screen. Do not
scrape with sharp objects.
•
Covers and Platter – Clean using a soft clean cloth dampened with a mild cleaner or
detergent and water.
UC-CW/UC-GT/UC-HTT User Guide
5-1
Maintenance
Printer Cleaning
Clean the printhead anytime you notice the print quality has degraded. Slide the printer out,
lift the printhead, and cleaning the printhead where it contacts the labels on the bottom
using the cleaning pen or alcohol and a cotton swab to remove any label debris or glue.
UC-GT / UC-HTT Tower Printer
UC-CW Compact Printer
Compact Printer:
Lift the green latch
to release and
raise the printhead.
Tower Printer:
Unlock and release
the printhead by
pressing down on
the green latch.
WARNING! Do not use any metal or
sharp object to scrape the printhead.
This may cause serious damage.
Use the Cleaning Pen
to clean any glue or
debris from the black
stripe area of the
printhead. A cotton
swab and alcohol
may also be used in
place of the cleaning
pen.
Printer Roller
When doing regular maintenance, or when changing a label roll, check for any buildup on
the Printer Roller (located under the tear strip).
When the printer is pulled out and before the new label roll is installed, rotate the Roller by
pushing the Stage Label button (Setup t Printer/Label Setup t Printer Adjustment t
Stage Label). And then use the Cleaning Pen to get rid of excess buildup.
5-2
UC-CW/UC-GT/UC-HTT User Guide
Maintenance
If dirt and dust have gotten built up on the rubber portion of the Printer Roller, it also can be
cleaned with alcohol and a cotton swab. Again use the Stage Label button to rotate the
Roller, wipe the Roller with an alcohol-moistened cotton swab. Rotate the Roller again and
repeat the above procedure until the Roller is clean.
FOR SAFETY: Do NOT touch Rollers with your fingers while the Rollers are in motion.
UC-CW/UC-GT/UC-HTT User Guide
5-3
Maintenance
For your notes
5-4
UC-CW/UC-GT/UC-HTT User Guide
14001
Quality certification. Development,
production, and auditing in accordance with
ISO9001. Environmental management
system in accordance with ISO14001.
Worldwide service. Our dense service
network, among the best in the world,
ensures the maximum availability and
lifespan of your product.
Conformité Européene
This label is your guarantee that our
products conform to the latest guidelines.
On the Internet. You can find important
information about our products and
services, as well as our company, quickly
and easily at http://www.mt.com/support
1900 Polaris Parkway
Columbus, Ohio 43240
www.mt.com
®
METTLER TOLEDO is a registered trademark of Mettler-Toledo, Inc.
©2006 Mettler-Toledo, Inc.
Printed in USA