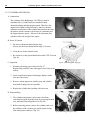
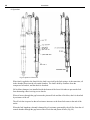
1
SERVICE MANUAL
Rockford Motors inc.
FORWARD
The ever increasing demand for larger, more sophisticated motorcycles is the reason Bridgestone developed the
350GTR – the most advanced motorcycle in the industry. The increasing knowledgeability of your customers
and complexity of their motorcycles make satisfactory maintenance service even more important.
This manual outlines the most efficient maintenance procedures. To give your customers the best possible
service, have a clean, well organized repair shop equipped with all the necessary special tools and keep this
manual always at hand for every service man’s use.
BRIDGESTONE TIRE CO., LTD
MOTORCYCLE SECTION
Table of Contents
1. TECHNICAL DATA . . . . . . . . . . . . . . . . . . . . . . . . . . . . . . . . . . . . . . . . . . . . . . . . . . . . . . . . . . . . . . . . . . . . . . 1
2. FRONT and SIDE VIEWS of BRIDGESTONE 350 GTR . . . . . . . . . . . . . . . . . . . . . . . . . . . . . . . . . . . . . . 3
3. Performance . . . . . . . . . . . . . . . . . . . . . . . . . . . . . . . . . . . . . . . . . . . . . . . . . . . . . . . . . . . . . . . . . . . . . . . . . . . . . 4
4. ENGINE . . . . . . . . . . . . . . . . . . . . . . . . . . . . . . . . . . . . . . . . . . . . . . . . . . . . . . . . . . . . . . . . . . . . . . . . . . . . . . . . . 6
Removing Engine . . . . . . . . . . . . . . . . . . . . . . . . . . . . . . . . . . . . . . . . . . . . . . . . . . . . . . . . . . . . . . . . . . . . . . . . . . . . . . . . . . . . . . . . 6
Notes of Caution . . . . . . . . . . . . . . . . . . . . . . . . . . . . . . . . . . . . . . . . . . . . . . . . . . . . . . . . . . . . . . . . . . . . . . . . . . . . . . . . . 6
Tools necessary . . . . . . . . . . . . . . . . . . . . . . . . . . . . . . . . . . . . . . . . . . . . . . . . . . . . . . . . . . . . . . . . . . . . . . . . . . . . . . . . . . 6
Removing the Engine . . . . . . . . . . . . . . . . . . . . . . . . . . . . . . . . . . . . . . . . . . . . . . . . . . . . . . . . . . . . . . . . . . . . . . . . . . . . . 6
Mounting Engine on Frame . . . . . . . . . . . . . . . . . . . . . . . . . . . . . . . . . . . . . . . . . . . . . . . . . . . . . . . . . . . . . . . . . . . . . . . . . . . . . . . . 8
Disassembling and Assembling Engine . . . . . . . . . . . . . . . . . . . . . . . . . . . . . . . . . . . . . . . . . . . . . . . . . . . . . . . . . . . . . . . . . . . . . . . 9
Special precautions . . . . . . . . . . . . . . . . . . . . . . . . . . . . . . . . . . . . . . . . . . . . . . . . . . . . . . . . . . . . . . . . . . . . . . . . . . . . . . . 9
Dismounting Engine . . . . . . . . . . . . . . . . . . . . . . . . . . . . . . . . . . . . . . . . . . . . . . . . . . . . . . . . . . . . . . . . . . . . . . . . . . . . . . 9
Component parts of crankcase . . . . . . . . . . . . . . . . . . . . . . . . . . . . . . . . . . . . . . . . . . . . . . . . . . . . . . . . . . . . . . . . . . . . . 13
Assembling Engine . . . . . . . . . . . . . . . . . . . . . . . . . . . . . . . . . . . . . . . . . . . . . . . . . . . . . . . . . . . . . . . . . . . . . . . . . . . . . . 14
CRANK SHAFT • PISTON • ROTARY VALVE . . . . . . . . . . . . . . . . . . . . . . . . . . . . . . . . . . . . . . . . . . . . . . . 17
CRANKSHAFT AND ROTARY DISC VALVES . . . . . . . . . . . . . . . . . . . . . . . . . . . . . . . . . . . . . . . . . . . . . . . . . . . . . . . . . . . . .
Construction . . . . . . . . . . . . . . . . . . . . . . . . . . . . . . . . . . . . . . . . . . . . . . . . . . . . . . . . . . . . . . . . . . . . . . . . . . . . . . . . . . .
Inspection . . . . . . . . . . . . . . . . . . . . . . . . . . . . . . . . . . . . . . . . . . . . . . . . . . . . . . . . . . . . . . . . . . . . . . . . . . . . . . . . . . . . . .
Lubrication of the crankshaft . . . . . . . . . . . . . . . . . . . . . . . . . . . . . . . . . . . . . . . . . . . . . . . . . . . . . . . . . . . . . . . . . . . . . .
Lubrication of transmission gears . . . . . . . . . . . . . . . . . . . . . . . . . . . . . . . . . . . . . . . . . . . . . . . . . . . . . . . . . . . . . . . . . .
CYLINDERS AND PISTONS . . . . . . . . . . . . . . . . . . . . . . . . . . . . . . . . . . . . . . . . . . . . . . . . . . . . . . . . . . . . . . . . . . . . . . . . . . . .
Construction . . . . . . . . . . . . . . . . . . . . . . . . . . . . . . . . . . . . . . . . . . . . . . . . . . . . . . . . . . . . . . . . . . . . . . . . . . . . . . . . . . .
Notes of Caution . . . . . . . . . . . . . . . . . . . . . . . . . . . . . . . . . . . . . . . . . . . . . . . . . . . . . . . . . . . . . . . . . . . . . . . . . . . . . . . .
Inspection . . . . . . . . . . . . . . . . . . . . . . . . . . . . . . . . . . . . . . . . . . . . . . . . . . . . . . . . . . . . . . . . . . . . . . . . . . . . . . . . . . . . . .
Disassembling . . . . . . . . . . . . . . . . . . . . . . . . . . . . . . . . . . . . . . . . . . . . . . . . . . . . . . . . . . . . . . . . . . . . . . . . . . . . . . . . . .
18
18
18
19
19
20
20
20
20
20
CLUTCH . . . . . . . . . . . . . . . . . . . . . . . . . . . . . . . . . . . . . . . . . . . . . . . . . . . . . . . . . . . . . . . . . . . . . . . . . . . . . . . . . 21
Construction . . . . . . . . . . . . . . . . . . . . . . . . . . . . . . . . . . . . . . . . . . . . . . . . . . . . . . . . . . . . . . . . . . . . . . . . . . . . . . . . . . . . . . . . . . .
Operation . . . . . . . . . . . . . . . . . . . . . . . . . . . . . . . . . . . . . . . . . . . . . . . . . . . . . . . . . . . . . . . . . . . . . . . . . . . . . . . . . . . . . . . . . . . . .
Clutch Adjustment . . . . . . . . . . . . . . . . . . . . . . . . . . . . . . . . . . . . . . . . . . . . . . . . . . . . . . . . . . . . . . . . . . . . . . . . . . . . . . . . . . . . . .
Disassembling Clutch . . . . . . . . . . . . . . . . . . . . . . . . . . . . . . . . . . . . . . . . . . . . . . . . . . . . . . . . . . . . . . . . . . . . . . . . . . . . . . . . . . .
Inspection . . . . . . . . . . . . . . . . . . . . . . . . . . . . . . . . . . . . . . . . . . . . . . . . . . . . . . . . . . . . . . . . . . . . . . . . . . . . . . . . . . . . . . . . . . . . .
22
22
23
23
24
TRANSMISSION . . . . . . . . . . . . . . . . . . . . . . . . . . . . . . . . . . . . . . . . . . . . . . . . . . . . . . . . . . . . . . . . . . . . . . . . . . 25
Construction . . . . . . . . . . . . . . . . . . . . . . . . . . . . . . . . . . . . . . . . . . . . . . . . . . . . . . . . . . . . . . . . . . . . . . . . . . . . . . . . . . . . . . . . . . .
Operation . . . . . . . . . . . . . . . . . . . . . . . . . . . . . . . . . . . . . . . . . . . . . . . . . . . . . . . . . . . . . . . . . . . . . . . . . . . . . . . . . . . . . . . . . . . . .
Component parts of gear change pedal & shift drum . . . . . . . . . . . . . . . . . . . . . . . . . . . . . . . . . . . . . . . . . . . . . . . . . . . . . . . . . . .
Gear shift mechanism . . . . . . . . . . . . . . . . . . . . . . . . . . . . . . . . . . . . . . . . . . . . . . . . . . . . . . . . . . . . . . . . . . . . . . . . . . . . . . . . . . . .
Gear operation and gear ratios . . . . . . . . . . . . . . . . . . . . . . . . . . . . . . . . . . . . . . . . . . . . . . . . . . . . . . . . . . . . . . . . . . . . . . . . . . . . .
Inspection . . . . . . . . . . . . . . . . . . . . . . . . . . . . . . . . . . . . . . . . . . . . . . . . . . . . . . . . . . . . . . . . . . . . . . . . . . . . . . . . . . . . . . . . . . . . .
26
26
27
28
31
33
KICK STARTER . . . . . . . . . . . . . . . . . . . . . . . . . . . . . . . . . . . . . . . . . . . . . . . . . . . . . . . . . . . . . . . . . . . . . . . . . . 34
Construction . . . . . . . . . . . . . . . . . . . . . . . . . . . . . . . . . . . . . . . . . . . . . . . . . . . . . . . . . . . . . . . . . . . . . . . . . . . . . . . . . . . . . . . . . . . 34
Operation . . . . . . . . . . . . . . . . . . . . . . . . . . . . . . . . . . . . . . . . . . . . . . . . . . . . . . . . . . . . . . . . . . . . . . . . . . . . . . . . . . . . . . . . . . . . . 35
Inspection . . . . . . . . . . . . . . . . . . . . . . . . . . . . . . . . . . . . . . . . . . . . . . . . . . . . . . . . . . . . . . . . . . . . . . . . . . . . . . . . . . . . . . . . . . . . . 35
CARBURETORS . . . . . . . . . . . . . . . . . . . . . . . . . . . . . . . . . . . . . . . . . . . . . . . . . . . . . . . . . . . . . . . . . . . . . . . . . . 37
Synchronizing Carburetors . . . . . . . . . . . . . . . . . . . . . . . . . . . . . . . . . . . . . . . . . . . . . . . . . . . . . . . . . . . . . . . . . . . . . . . . . . . . . . . 37
Indication of trouble at various engine speeds . . . . . . . . . . . . . . . . . . . . . . . . . . . . . . . . . . . . . . . . . . . . . . . . . . . . . . . . . . . . . . . . 37
Table of Contents
Idling Adjustment . . . . . . . . . . . . . . . . . . . . . . . . . . . . . . . . . . . . . . . . . . . . . . . . . . . . . . . . . . . . . . . . . . . . . . . . . . . . . . . . . . . . . . .
Medium Engine Speed Adjustment . . . . . . . . . . . . . . . . . . . . . . . . . . . . . . . . . . . . . . . . . . . . . . . . . . . . . . . . . . . . . . . . . . . . . . . . .
High Engine Speed Adjustment . . . . . . . . . . . . . . . . . . . . . . . . . . . . . . . . . . . . . . . . . . . . . . . . . . . . . . . . . . . . . . . . . . . . . . . . . . . .
Adjustment of Carburetor Float Level . . . . . . . . . . . . . . . . . . . . . . . . . . . . . . . . . . . . . . . . . . . . . . . . . . . . . . . . . . . . . . . . . . . . . .
Trouble Shooting of Gasoline Leaks from Carburetor . . . . . . . . . . . . . . . . . . . . . . . . . . . . . . . . . . . . . . . . . . . . . . . . . . . . . . . . .
37
38
38
39
39
OIL INJECTION SYSTEM . . . . . . . . . . . . . . . . . . . . . . . . . . . . . . . . . . . . . . . . . . . . . . . . . . . . . . . . . . . . . . . . . 40
Operation . . . . . . . . . . . . . . . . . . . . . . . . . . . . . . . . . . . . . . . . . . . . . . . . . . . . . . . . . . . . . . . . . . . . . . . . . . . . . . . . . . . . . . . . . . . . .
Oil Intake . . . . . . . . . . . . . . . . . . . . . . . . . . . . . . . . . . . . . . . . . . . . . . . . . . . . . . . . . . . . . . . . . . . . . . . . . . . . . . . . . . . . . . . . . . . . .
Oil Outlet . . . . . . . . . . . . . . . . . . . . . . . . . . . . . . . . . . . . . . . . . . . . . . . . . . . . . . . . . . . . . . . . . . . . . . . . . . . . . . . . . . . . . . . . . . . . .
Distribution of oil to both cylinders . . . . . . . . . . . . . . . . . . . . . . . . . . . . . . . . . . . . . . . . . . . . . . . . . . . . . . . . . . . . . . . . . . . . . . . .
Operation of worm wheel plunger in relation to the throttle grip . . . . . . . . . . . . . . . . . . . . . . . . . . . . . . . . . . . . . . . . . . . . . . . . .
Engine Idling at slow speed . . . . . . . . . . . . . . . . . . . . . . . . . . . . . . . . . . . . . . . . . . . . . . . . . . . . . . . . . . . . . . . . . . . . . . .
High Speed, wide open throttle . . . . . . . . . . . . . . . . . . . . . . . . . . . . . . . . . . . . . . . . . . . . . . . . . . . . . . . . . . . . . . . . . . . .
Adjustment of oil pump control wire . . . . . . . . . . . . . . . . . . . . . . . . . . . . . . . . . . . . . . . . . . . . . . . . . . . . . . . . . . . . . . . . . . . . . . .
Special Attention . . . . . . . . . . . . . . . . . . . . . . . . . . . . . . . . . . . . . . . . . . . . . . . . . . . . . . . . . . . . . . . . . . . . . . . . . . . . . . . . . . . . . . .
Meshing the plunger gear with the distributor gear . . . . . . . . . . . . . . . . . . . . . . . . . . . . . . . . . . . . . . . . . . . . . . . . . . . . . . . . . . . .
41
42
42
42
43
43
43
44
44
45
FRAME . . . . . . . . . . . . . . . . . . . . . . . . . . . . . . . . . . . . . . . . . . . . . . . . . . . . . . . . . . . . . . . . . . . . . . . . . . . . . . . . . . 46
Handlebar . . . . . . . . . . . . . . . . . . . . . . . . . . . . . . . . . . . . . . . . . . . . . . . . . . . . . . . . . . . . . . . . . . . . . . . . . . . . . . . . . . . . . . . . . . . . .
Removing Handlebar . . . . . . . . . . . . . . . . . . . . . . . . . . . . . . . . . . . . . . . . . . . . . . . . . . . . . . . . . . . . . . . . . . . . . . . . . . . .
Assembling . . . . . . . . . . . . . . . . . . . . . . . . . . . . . . . . . . . . . . . . . . . . . . . . . . . . . . . . . . . . . . . . . . . . . . . . . . . . . . . . . . . . . . . . . . . .
Inspection . . . . . . . . . . . . . . . . . . . . . . . . . . . . . . . . . . . . . . . . . . . . . . . . . . . . . . . . . . . . . . . . . . . . . . . . . . . . . . . . . . . . . . . . . . . . .
Front Fork . . . . . . . . . . . . . . . . . . . . . . . . . . . . . . . . . . . . . . . . . . . . . . . . . . . . . . . . . . . . . . . . . . . . . . . . . . . . . . . . . . . . . . . . . . . .
Operation . . . . . . . . . . . . . . . . . . . . . . . . . . . . . . . . . . . . . . . . . . . . . . . . . . . . . . . . . . . . . . . . . . . . . . . . . . . . . . . . . . . . . .
Disassembling . . . . . . . . . . . . . . . . . . . . . . . . . . . . . . . . . . . . . . . . . . . . . . . . . . . . . . . . . . . . . . . . . . . . . . . . . . . . . . . . . .
Assembling and Inspection . . . . . . . . . . . . . . . . . . . . . . . . . . . . . . . . . . . . . . . . . . . . . . . . . . . . . . . . . . . . . . . . . . . . . . . .
Removing the steering damper . . . . . . . . . . . . . . . . . . . . . . . . . . . . . . . . . . . . . . . . . . . . . . . . . . . . . . . . . . . . . . . . . . . . .
Rear suspension . . . . . . . . . . . . . . . . . . . . . . . . . . . . . . . . . . . . . . . . . . . . . . . . . . . . . . . . . . . . . . . . . . . . . . . . . . . . . . . . . . . . . . . .
Construction . . . . . . . . . . . . . . . . . . . . . . . . . . . . . . . . . . . . . . . . . . . . . . . . . . . . . . . . . . . . . . . . . . . . . . . . . . . . . . . . . . .
Operation . . . . . . . . . . . . . . . . . . . . . . . . . . . . . . . . . . . . . . . . . . . . . . . . . . . . . . . . . . . . . . . . . . . . . . . . . . . . . . . . . . . . . .
Adjustment of rear suspension . . . . . . . . . . . . . . . . . . . . . . . . . . . . . . . . . . . . . . . . . . . . . . . . . . . . . . . . . . . . . . . . . . . . .
Wheels . . . . . . . . . . . . . . . . . . . . . . . . . . . . . . . . . . . . . . . . . . . . . . . . . . . . . . . . . . . . . . . . . . . . . . . . . . . . . . . . . . . . . . . . . . . . . . .
Construction . . . . . . . . . . . . . . . . . . . . . . . . . . . . . . . . . . . . . . . . . . . . . . . . . . . . . . . . . . . . . . . . . . . . . . . . . . . . . . . . . . .
Checking of Tire Pressure and Balance . . . . . . . . . . . . . . . . . . . . . . . . . . . . . . . . . . . . . . . . . . . . . . . . . . . . . . . . . . . . . .
Front Wheel . . . . . . . . . . . . . . . . . . . . . . . . . . . . . . . . . . . . . . . . . . . . . . . . . . . . . . . . . . . . . . . . . . . . . . . . . . . . . . . . . . . .
Rear Wheel . . . . . . . . . . . . . . . . . . . . . . . . . . . . . . . . . . . . . . . . . . . . . . . . . . . . . . . . . . . . . . . . . . . . . . . . . . . . . . . . . . . .
47
47
47
47
48
49
50
50
50
51
51
51
52
53
53
53
54
55
ELECTRICAL EQUIPMENT . . . . . . . . . . . . . . . . . . . . . . . . . . . . . . . . . . . . . . . . . . . . . . . . . . . . . . . . . . . . . . . 57
A.C. Generator . . . . . . . . . . . . . . . . . . . . . . . . . . . . . . . . . . . . . . . . . . . . . . . . . . . . . . . . . . . . . . . . . . . . . . . . . . . . . . . . . . . . . . . . .
Description . . . . . . . . . . . . . . . . . . . . . . . . . . . . . . . . . . . . . . . . . . . . . . . . . . . . . . . . . . . . . . . . . . . . . . . . . . . . . . . . . . . .
Charging current . . . . . . . . . . . . . . . . . . . . . . . . . . . . . . . . . . . . . . . . . . . . . . . . . . . . . . . . . . . . . . . . . . . . . . . . . . . . . . . .
Voltage Regulator . . . . . . . . . . . . . . . . . . . . . . . . . . . . . . . . . . . . . . . . . . . . . . . . . . . . . . . . . . . . . . . . . . . . . . . . . . . . . . . . . . . . . .
Ignition system . . . . . . . . . . . . . . . . . . . . . . . . . . . . . . . . . . . . . . . . . . . . . . . . . . . . . . . . . . . . . . . . . . . . . . . . . . . . . . . . . . . . . . . . .
Contact Breakers . . . . . . . . . . . . . . . . . . . . . . . . . . . . . . . . . . . . . . . . . . . . . . . . . . . . . . . . . . . . . . . . . . . . . . . . . . . . . . . .
Adjusting the gap . . . . . . . . . . . . . . . . . . . . . . . . . . . . . . . . . . . . . . . . . . . . . . . . . . . . . . . . . . . . . . . . . . . . . . . . . . . . . . . .
Checking and Adjusting Ignition Timing . . . . . . . . . . . . . . . . . . . . . . . . . . . . . . . . . . . . . . . . . . . . . . . . . . . . . . . . . . . . .
Selenium Rectifier . . . . . . . . . . . . . . . . . . . . . . . . . . . . . . . . . . . . . . . . . . . . . . . . . . . . . . . . . . . . . . . . . . . . . . . . . . . . . . . . . . . . . .
Special Attention . . . . . . . . . . . . . . . . . . . . . . . . . . . . . . . . . . . . . . . . . . . . . . . . . . . . . . . . . . . . . . . . . . . . . . . . . . . . . . . .
Inspection . . . . . . . . . . . . . . . . . . . . . . . . . . . . . . . . . . . . . . . . . . . . . . . . . . . . . . . . . . . . . . . . . . . . . . . . . . . . . . . . . . . . . .
Condenser . . . . . . . . . . . . . . . . . . . . . . . . . . . . . . . . . . . . . . . . . . . . . . . . . . . . . . . . . . . . . . . . . . . . . . . . . . . . . . . . . . . . . . . . . . . . .
Inspection . . . . . . . . . . . . . . . . . . . . . . . . . . . . . . . . . . . . . . . . . . . . . . . . . . . . . . . . . . . . . . . . . . . . . . . . . . . . . . . . . . . . . .
Ignition coil . . . . . . . . . . . . . . . . . . . . . . . . . . . . . . . . . . . . . . . . . . . . . . . . . . . . . . . . . . . . . . . . . . . . . . . . . . . . . . . . . . . . . . . . . . .
inspection . . . . . . . . . . . . . . . . . . . . . . . . . . . . . . . . . . . . . . . . . . . . . . . . . . . . . . . . . . . . . . . . . . . . . . . . . . . . . . . . . . . . . .
Spark plug . . . . . . . . . . . . . . . . . . . . . . . . . . . . . . . . . . . . . . . . . . . . . . . . . . . . . . . . . . . . . . . . . . . . . . . . . . . . . . . . . . . . . . . . . . . . .
Description . . . . . . . . . . . . . . . . . . . . . . . . . . . . . . . . . . . . . . . . . . . . . . . . . . . . . . . . . . . . . . . . . . . . . . . . . . . . . . . . . . . .
Inspection and Adjustment . . . . . . . . . . . . . . . . . . . . . . . . . . . . . . . . . . . . . . . . . . . . . . . . . . . . . . . . . . . . . . . . . . . . . . . .
58
58
58
58
59
59
59
59
60
61
61
61
61
61
61
62
62
62
Table of Contents
Battery . . . . . . . . . . . . . . . . . . . . . . . . . . . . . . . . . . . . . . . . . . . . . . . . . . . . . . . . . . . . . . . . . . . . . . . . . . . . . . . . . . . . . . . . . . . . . . . .
Inspection of Specific Gravity . . . . . . . . . . . . . . . . . . . . . . . . . . . . . . . . . . . . . . . . . . . . . . . . . . . . . . . . . . . . . . . . . . . . .
Storage of dry charged battery . . . . . . . . . . . . . . . . . . . . . . . . . . . . . . . . . . . . . . . . . . . . . . . . . . . . . . . . . . . . . . . . . . . . .
Initial Charging Rate . . . . . . . . . . . . . . . . . . . . . . . . . . . . . . . . . . . . . . . . . . . . . . . . . . . . . . . . . . . . . . . . . . . . . . . . . . . . .
Lights . . . . . . . . . . . . . . . . . . . . . . . . . . . . . . . . . . . . . . . . . . . . . . . . . . . . . . . . . . . . . . . . . . . . . . . . . . . . . . . . . . . . . . . . . . . . . . . .
Head lamp • Tail lamp . . . . . . . . . . . . . . . . . . . . . . . . . . . . . . . . . . . . . . . . . . . . . . . . . . . . . . . . . . . . . . . . . . . . . . . . . . . .
Speedometer • Ignition Coil • Main Switch . . . . . . . . . . . . . . . . . . . . . . . . . . . . . . . . . . . . . . . . . . . . . . . . . . . . . . . . . . .
Bulbs . . . . . . . . . . . . . . . . . . . . . . . . . . . . . . . . . . . . . . . . . . . . . . . . . . . . . . . . . . . . . . . . . . . . . . . . . . . . . . . . . . . . . . . . .
Adjustment of head light beam . . . . . . . . . . . . . . . . . . . . . . . . . . . . . . . . . . . . . . . . . . . . . . . . . . . . . . . . . . . . . . . . . . . . .
Main Switch . . . . . . . . . . . . . . . . . . . . . . . . . . . . . . . . . . . . . . . . . . . . . . . . . . . . . . . . . . . . . . . . . . . . . . . . . . . . . . . . . . . . . . . . . . .
Horn . . . . . . . . . . . . . . . . . . . . . . . . . . . . . . . . . . . . . . . . . . . . . . . . . . . . . . . . . . . . . . . . . . . . . . . . . . . . . . . . . . . . . . . . . . . . . . . . .
63
63
64
64
65
65
66
67
67
68
68
TROUBLE SHOOTING . . . . . . . . . . . . . . . . . . . . . . . . . . . . . . . . . . . . . . . . . . . . . . . . . . . . . . . . . . . . . . . . . . . . 69
Engine is hard to start . . . . . . . . . . . . . . . . . . . . . . . . . . . . . . . . . . . . . . . . . . . . . . . . . . . . . . . . . . . . . . . . . . . . . . . . . . . . . . . . . . .
High engine revolution cannot be obtained . . . . . . . . . . . . . . . . . . . . . . . . . . . . . . . . . . . . . . . . . . . . . . . . . . . . . . . . . . . . . . . . . .
Unsatisfactory R.P.M. . . . . . . . . . . . . . . . . . . . . . . . . . . . . . . . . . . . . . . . . . . . . . . . . . . . . . . . . . . . . . . . . . . . . . . . . . . . . . . . . . . .
Irregular Revolutions . . . . . . . . . . . . . . . . . . . . . . . . . . . . . . . . . . . . . . . . . . . . . . . . . . . . . . . . . . . . . . . . . . . . . . . . . . . . . . . . . . . .
Unsatisfactory gear shifting . . . . . . . . . . . . . . . . . . . . . . . . . . . . . . . . . . . . . . . . . . . . . . . . . . . . . . . . . . . . . . . . . . . . . . . . . . . . . . .
Common Failures . . . . . . . . . . . . . . . . . . . . . . . . . . . . . . . . . . . . . . . . . . . . . . . . . . . . . . . . . . . . . . . . . . . . . . . . . . . . . . . . . . . . . .
Electrical failure . . . . . . . . . . . . . . . . . . . . . . . . . . . . . . . . . . . . . . . . . . . . . . . . . . . . . . . . . . . . . . . . . . . . . . . . . . . . . . . .
Failures in fuel system . . . . . . . . . . . . . . . . . . . . . . . . . . . . . . . . . . . . . . . . . . . . . . . . . . . . . . . . . . . . . . . . . . . . . . . . . . .
Mechanical failures . . . . . . . . . . . . . . . . . . . . . . . . . . . . . . . . . . . . . . . . . . . . . . . . . . . . . . . . . . . . . . . . . . . . . . . . . . . . . .
69
70
71
72
72
73
73
75
75
TOLERANCES AND FITS . . . . . . . . . . . . . . . . . . . . . . . . . . . . . . . . . . . . . . . . . . . . . . . . . . . . . . . . . . . . . . . . . . 76
Engine . . . . . . . . . . . . . . . . . . . . . . . . . . . . . . . . . . . . . . . . . . . . . . . . . . . . . . . . . . . . . . . . . . . . . . . . . . . . . . . . . . . . . . . . . . . . . . . .
Cylinder . . . . . . . . . . . . . . . . . . . . . . . . . . . . . . . . . . . . . . . . . . . . . . . . . . . . . . . . . . . . . . . . . . . . . . . . . . . . . . . . . . . . . . . . . . . . . .
Piston . . . . . . . . . . . . . . . . . . . . . . . . . . . . . . . . . . . . . . . . . . . . . . . . . . . . . . . . . . . . . . . . . . . . . . . . . . . . . . . . . . . . . . . . . . . . . . . .
Crankshaft & Rotary Disc Valve . . . . . . . . . . . . . . . . . . . . . . . . . . . . . . . . . . . . . . . . . . . . . . . . . . . . . . . . . . . . . . . . . . . . . . . . . . .
Clutch . . . . . . . . . . . . . . . . . . . . . . . . . . . . . . . . . . . . . . . . . . . . . . . . . . . . . . . . . . . . . . . . . . . . . . . . . . . . . . . . . . . . . . . . . . . . . . . .
Number of teeth . . . . . . . . . . . . . . . . . . . . . . . . . . . . . . . . . . . . . . . . . . . . . . . . . . . . . . . . . . . . . . . . . . . . . . . . . . . . . . . . . . . . . . . .
Fork guide . . . . . . . . . . . . . . . . . . . . . . . . . . . . . . . . . . . . . . . . . . . . . . . . . . . . . . . . . . . . . . . . . . . . . . . . . . . . . . . . . . . . . . . . . . . .
A.C. Generator & Ignition coil . . . . . . . . . . . . . . . . . . . . . . . . . . . . . . . . . . . . . . . . . . . . . . . . . . . . . . . . . . . . . . . . . . . . . . . . . . . .
Carburetor . . . . . . . . . . . . . . . . . . . . . . . . . . . . . . . . . . . . . . . . . . . . . . . . . . . . . . . . . . . . . . . . . . . . . . . . . . . . . . . . . . . . . . . . . . . .
Oil pump . . . . . . . . . . . . . . . . . . . . . . . . . . . . . . . . . . . . . . . . . . . . . . . . . . . . . . . . . . . . . . . . . . . . . . . . . . . . . . . . . . . . . . . . . . . . . .
Frame . . . . . . . . . . . . . . . . . . . . . . . . . . . . . . . . . . . . . . . . . . . . . . . . . . . . . . . . . . . . . . . . . . . . . . . . . . . . . . . . . . . . . . . . . . . . . . . .
Suspension . . . . . . . . . . . . . . . . . . . . . . . . . . . . . . . . . . . . . . . . . . . . . . . . . . . . . . . . . . . . . . . . . . . . . . . . . . . . . . . . . . . . . . . . . . . .
Lighting equipment . . . . . . . . . . . . . . . . . . . . . . . . . . . . . . . . . . . . . . . . . . . . . . . . . . . . . . . . . . . . . . . . . . . . . . . . . . . . . . . . . . . . .
Adjusting Torque . . . . . . . . . . . . . . . . . . . . . . . . . . . . . . . . . . . . . . . . . . . . . . . . . . . . . . . . . . . . . . . . . . . . . . . . . . . . . . . . . . . . . . .
76
76
76
76
78
78
79
79
79
80
80
80
80
81
WIRING DIAGRAM . . . . . . . . . . . . . . . . . . . . . . . . . . . . . . . . . . . . . . . . . . . . . . . . . . . . . . . . . . . . . . . . . . . . . . . 82
PERFORMANCE . . . . . . . . . . . . . . . . . . . . . . . . . . . . . . . . . . . . . . . . . . . . . . . . . . . . . . . . . . . . . . . . . . . . . . . . . . 83
Port Timing . . . . . . . . . . . . . . . . . . . . . . . . . . . . . . . . . . . . . . . . . . . . . . . . . . . . . . . . . . . . . . . . . . . . . . . . . . . . . . . . . . . . . . . . . . .
Port Dimensions . . . . . . . . . . . . . . . . . . . . . . . . . . . . . . . . . . . . . . . . . . . . . . . . . . . . . . . . . . . . . . . . . . . . . . . . . . . . . . . . . . . . . . . .
Port Time/Area . . . . . . . . . . . . . . . . . . . . . . . . . . . . . . . . . . . . . . . . . . . . . . . . . . . . . . . . . . . . . . . . . . . . . . . . . . . . . . . . . . . . . . . . .
Cylinder Exhaust . . . . . . . . . . . . . . . . . . . . . . . . . . . . . . . . . . . . . . . . . . . . . . . . . . . . . . . . . . . . . . . . . . . . . . . . . . . . . . . . . . . . . . .
Head Pipe . . . . . . . . . . . . . . . . . . . . . . . . . . . . . . . . . . . . . . . . . . . . . . . . . . . . . . . . . . . . . . . . . . . . . . . . . . . . . . . . . . . . . . . . . . . . .
Squish Band Clearance . . . . . . . . . . . . . . . . . . . . . . . . . . . . . . . . . . . . . . . . . . . . . . . . . . . . . . . . . . . . . . . . . . . . . . . . . . . . . . . . . .
Rotary Valve . . . . . . . . . . . . . . . . . . . . . . . . . . . . . . . . . . . . . . . . . . . . . . . . . . . . . . . . . . . . . . . . . . . . . . . . . . . . . . . . . . . . . . . . . . .
Ignition . . . . . . . . . . . . . . . . . . . . . . . . . . . . . . . . . . . . . . . . . . . . . . . . . . . . . . . . . . . . . . . . . . . . . . . . . . . . . . . . . . . . . . . . . . . . . . .
Expansion Chamber . . . . . . . . . . . . . . . . . . . . . . . . . . . . . . . . . . . . . . . . . . . . . . . . . . . . . . . . . . . . . . . . . . . . . . . . . . . . . . . . . . . . .
83
83
83
83
83
84
84
84
84
Technical Data
1. TECHNICAL DATA
* Engine
(1)
(2)
(3)
(4)
(5)
(6)
(7)
(8)
(9)
Type :
Piston Displacement :
Bore & Stroke :
Compression Ratio :
Max. Brake Horse Power
Max. Torque :
Air Intake System :
Starting System :
Charging System :
(10)
(11)
(12)
(13)
Ignition System:
Ignition Timing:
Spark Plug:
Carburetor:
(14) Engine Lubrication:
(15) Fuel:
(16) Transmission Oil:
2-stroke, Dual Cylinders
344.9cc (21.5 cu-inches)
61 mm × 59 mm (2.40 × 2.32 inches)
9.31:1
40 HP/7500 rpm
4.0 kg-m/7000 rpm
Rotary disc valve
Kick Starter
A. C. Generator
Contact breaker gap : 0.3 - 0.4 mm (0.012 - 0.016 inches)
Battery
(25+1-2) degrees before T.D.C.
N.G.K. B-8H, Electrode gap : 0.6 mm (0.024 inches)
Type AMAL VM 26 SC
Venturi: 26 mm
Main Jet No.: 130
Throttle Valve Cut Away:
2.0
Air Jet :
2.0
Adjustment of Needle Jet : 0.6
Pilot Jet:
22.5 Pilot Air Screw Position: 2 turns out
Needle Position: 3
2 cycle oil
Regular Gasoline
1.5 liter (2/5 US gal.) in transmission case
SAE No. 10W/30 in all seasons or
SAE No. 30 in summer and SAE No. 20 in winter
Performance
(1)
(2)
(3)
(4)
(5)
Max. Speed :
Climbing Ability :
Fuel Consumption :
Min. Turning Radius :
Acceleration :
(Standing Start 1/4 mile)
(Zero to 60 mph) :
( 6 ) Braking Distance :
100-110 mph
1 in 2
94 mpg/25 mph (40 km/litre at 40 km/h)
2.25 m (7.38 feet)
13.7 sec
5.2 sec
(Less than 12m at 50 km/h)
39 feet, at 30 mph
Frame and Suspension
(1) Frame:
(2) Front Suspension:
(3) Rear Suspension:
Pipe Frame, Cradle Type
Telescopic Fork with Hydraulic Damper
Swinging Arm with Hydraulic Damper
1
Technical Data
2
Transmission
( 1 ) Clutch :
( 2 ) Transmission :
( 3 ) Gear Ratio :
Dimensions and Weight
(1)
(2)
(3)
(4)
(5)
(6)
(7)
Overall Length :
Overall Width :
Overall Height:
Saddle Height :
Wheelbase:
Road Clearance :
Tire Size (Front) :
(Rear):
Tire Pressure
(Front) :
(Rear):
Caster :
Trail:
Banking Angle:
Net Weight:
Fuel Tank Capacity:
( 9 ) Battery :
Manual, Multiple discs, Dry type
Constant mesh 6-speeds
Primary (Helical Gear)
1:3.095
st
Gear Box:
1
1:2.46
2nd
1:1.647
rd
3
1:1.25
4th
1:1.00
th
5
1:0.852
th
6
1:0.759
Secondary (Chain) :
1:2.40
st
Total Gear Ratio :
1
1:18.27
2nd
1:12.23
rd
3
1:9.29
th
4
1:7.43
5th
1:6.33
th
6
1:5.64
Electrical Equipment
2,110 mm (83.1 inches)
825mm (32.5 inches)
1,115 mm (43.9 inches)
810mm (31.9 inches)
1,375 mm (54.1 inches)
145 mm (5.7 inches)
3.25-19 4 ply
3.25-19 4 ply
2.0kg/cm2 (28-30 lbs/in2)
2.2 kg/cm2 (30-32 lbs/in2 )
63°
105 mm (4.15 inches)
46°
165 kg (363 lbs)
15 litre (3-4/5 US gal.)
Including 3.2 litre (4/5 US gal.) reserve
2.5 litre (3/5 US gal.)
(1)
(2)
(3)
(4)
(5)
(6)
(7)
(8)
12V-35/30W
12V-7W
12V-23W
12V-3W
12V-3W
12V-3W
(8)
(9)
(10)
(11)
(12)
(13)
(14) Oil Tank Capacity :
Head Light :
Tail Light :
Stop Light :
Speedometer Lamp :
Tachometer Lamp :
Neutral Indicator Lamp :
5th Gear Indicator Lamp :
Headlight High Beam Lamp :
Front and Side Views of BS350GTR
12V-3W
12V-3W
12V-6AH
2. FRONT and SIDE VIEWS of
BRIDGESTONE 350 GTR
Dimensions in millimeters (inches)
3
4
3. Performance
Performance
Performance
5
Engine
6
4. ENGINE
4-1 Removing Engine
A. Notes of Caution:
1. Be careful not to damage the insulation of the various wires.
2. Be careful not to get oil on the clutch parts of the dry type racing clutch that is fitted to the 350
GTR.
B. Tools necessary for dismounting and mounting the engine:
1. Standard Tools:
1. Wrench
10 × 12mm
14 × 17mm
19 × 21mm
2. Screw driver r No. 3, No. 2
3. Screw driver s
4. Side cutting plier
5. Combination plier
6. T Type wrenches: 10, 12, 14, 23mm
2. Special Tools: (Fig. 1)
1.
2.
3.
4.
5.
6.
7.
Box wrench bar
28mm nut wrench
40mm ring nut wrench
Driven gear stopper
Clutch housing puller
Clutch housing stopper
Clutch hub stopper
Fig. 1 Special Tools
C. Removing the Engine:
1. Remove left side cover and dual seat.
2. Disconnect mainswitch wires and A.C. Generator
wires from the terminals. (Fig. 2)
Fig. 2 Disconnecting wires
3. Remove both exhaust pipes by pulling out the four
bolts. (Fig. 3)
4. Disconnect tachometer cable at the end of engine case,
then remove high-tension terminal plug caps from
spark plugs.
Fig. 3 Removing exhaust pipes
Engine
7
5. Disconnect oil tube C from union connector on oil
tank and plug the connector as shown in Fig. 4. Take
off the rubber cap of the tube valve on the tire and
plug it to the union connector.
6. Remove carburetor cover (R) by unscrewing the six
screws (one 6 × 40, one 6 × 30, three 60 × 20, one 6 ×
8) and take off rubber plug, then pull out carburetor.
Fig. 4 Disconnecting oil tube C
(Fig. 5)
7. Remove left carburetor following the same procedure
as for the right carburetor. Remove change pedal and
kick arm after taking off footrest (L).
9. Remove dust cover by unscrewing the three screws
and remove the crankcase cover by removing the six
screws (Fig. 6).
Fig. 5 Removing carburetor
10. Disconnect chain and lift the front section of chain
case by taking out the hexagonal bolt (6 × 48). (Fig. 7)
11. Take out four, engine mounting bolts: one 8 × 265, one
8 × 145, two 10 × 38 and then remove engine
mounting bracket L. (Fig. 8)
Fig. 6 Removing dust cover & crankcase cover
12. Remove six screws (5 × 25) of air cleaner cover and
lift engine from left side.
Fig. 7 Disconnecting chain
Fig. 8 Unscrewing engine mounting bolts
Engine
8
4-2 Mounting Engine on Frame
The engine should be installed in the reverse order of its
removal.
i Be careful of the following points:
1. Fit two (10 × 38) engine mounting bolts temporarily. (Fig. Fig. 9 Fitting engine mounting bolts
9)
2. See that the wires work correctly and especially match the
marks on the throttle valve and the projecting end of the
control lever of the oil pump. (Fig. 10, 11)
3. Connect electric wires securely.
Fig. 10 Adjusting throttle valve
4. The chain connector should be linked with the open end
pointing in the reverse direction of the moving chain.
(Fig. 12) Chain adjustment is correct when chain slack is
approximately 10mm (3/8") up or down when the rear
wheel is on the ground.
5. See that the transmission is filled with the proper amount
of oil (1.5 litre=2/5 US gal.) and check the oil level
through the peep hole only when the oil has settled in
Fig. 11 Adjusting oil pump
the transmission case. (Fig. 13)
6. After starting the engine, exhaust air bubbles in the oil
tubes A, B and C by manually opening the control lever
of the oil pump with the engine at idling speed. (Fig. 14)
7. Fit carburetor cover (R) after checking the oil pump.
Fig. 12 Link of chain connector
Fig. 14 Exhausting oil bubbles
Fig. 13 Checking oil level
Engine
9
4-3 Disassembling and Assembling Engine :
A. Special precautions.
1. When removing or installing the engine, use a wooden or plastic hammer and tap it lightly and
uniformly so as not to strain any parts.
2. When disassembling, take careful note of the position of the meshing gears and location of the
many washers, and lay the parts out in an orderly manner, so that they are not mislaid or
confused when assembling.
3. The parts should be carefully cleaned except the clutch parts.
i This machine is equipped with dry racing type clutch which must be kept free from oil to ensure
efficient action.
4. Bolt tightness of the clutch set bolt is 70 – 90kg/cm. (61 – 78 lbs-in)
B. Dismounting Engine
1.
Disconnect oil tubes from the connector instead of
disconnecting them from the check valves, to avoid air
leakage. (Fig. 15)
2. Pull out oil pump assembly by removing the two
pump screws, (Fig. 16)
3. Remove clutch springs and clutch facings and all
related parts by pulling out diagonally and evenly the
six hexagonal bolts of the clutch set plate. (Fig. 16)
Fig. 15 Position of check valves
4. Remove clutch hub nut (23mm) with clutch hub
stopper (special tool). (Fig. 17)
Fig. 16 Removing oil pump
Fig. 17 Removing clutch hub
Engine
10
5. Remove ring nut with the clutch-housing stopper and
the ring nut wrench (special tools) and then remove
clutch housing. (Fig.18,19)
6. Remove right crank case cover by unscrewing nine
screws of right crank case cover.
Fig. 18 Removing ring nut
7. Remove the left-hand threaded pinion gear nut with
the driven gear stopper and 28mm nut wrench (special
tool) and then remove the pinion gear. (Fig. 21) Then,
remove timing gear fitting bolt, timing gear, driven
gear and kick idler gear.
8. Remove over-run stopper plate by unscrewing the
screw (shown by the arrow A in Fig. 22). (Fig. 22)
To do this, shift into any gear by installing the change Fig. 19 Removing clutch housing
pedal. Then pull out the change shaft.
9. Remove guide plate and ratchet comp, by unscrewing
the two (6 × 12) screws (shown by the arrow B) of the
ratchet guide plate. (Fig. 22)
Fig. 20 Removing right crankcase cover
Fig. 21 Removing pinion gear (left-hand thread)
Fig. 22 Removing overrun stopper & guide plate
Engine
11
10. Remove rotary valve cover by unscrewing the six (6 ×
16) screws. (Fig. 23)
11. Remove rotary valve cover, drive sprocket and neutral
switch from the left side of engine. (Fig. 24)
12. Take off eight cylinder head nuts and remove cylinder
Fig. 23 Removing rotary valve cover
heads, gaskets and cylinders.
13. Remove piston-pin circlips and then piston pins,
pistons and needle hearings. (Fig. 25)
14. Remove screw (5 × 30) of AC Dynamo and hexagonal
nut of set band. Then, remove AC generator by pulling
it out in direction A. (Fig. 26)
Fig. 24 Removing drive sprocket & neutral sw.
15. Remove rotary disc valves.
16. Remove four hexagonal bolts, one 8 × 80, one 8 × 90,
and two 6 × 65 of upper crankcase. (Fig. 27)
Fig. 25 Removing piston pin circlips
Fig. 26 Removing AC generator
Fig. 27 Removing bolts of upper crankcase
Engine
12
17. Remove thirteen hexagonal bolts,one 8 × ll4, three 8 ×
90, two 8 × 62, five 6 × 62, one 8 × 100 and one 6 × 90
of lower crankcase. (Fig. 28)
18. Remove upper crank case cover. Fig. 29 shows the gear
box after taking off the upper cover.
19. Remove crankshaft comp, counter shaft, drive shaft
and kickshaft from lower case. Shift drum and forks
need not be removed from the case.
Fig. 28 Removing bolts of lower crankcase
The previous 19 steps are generally all that will be
necessary for most repairs. If it is necessary to remove
the shift drum or forks, proceed as follows:
a) To remove shift drum, take off guide bolt, drum
Fig. 29 Gear box
stopper, and guide stopper plate. Then pull out two
guide pins in the direction of right crank case cover.
(Fig. 30, 31, 32)
b) Take off split pin of fork guide, remove fork guide
pins and the shift drum.
Fig. 30 Removing guide bolt and drum stopper
Fig. 31 Removing guide stopper plates
Fig. 32 Removing guide shafts
Fig. 33 Crankcase fitting
Engine
13
C. Component parts of crankcase
Index No.
Part No.
Part Name
No. Req'd
1
2101-9000
Crank case assembly
1
2
3
4
5
6
2116-9000
2117-9000
2118-8000
2149-8000
0311-0610
Dynamo spacer
Dynamo set band
Dynamo set pin
Set band washer
Cross recd pan head screw
1
1
1
1
1
7
8
9
10
09021-104
09016-101
09016-114
09064-103
6 hexagon nut
6 × 40 Stud
8 × 156 Stud
8 fiber gasket
1
1
8
1
11
12
13
0111-0812
09056-102
2128-9000
Hexagon bolt A
4 × 8 A dowel
Oil baffle plate
1
1
1
14
15
16
0311-0510
09058-103
09065-102
Cross recd pan head screw
16 drain plug
16 aluminum gasket
3
1
1
17
18
09090-101
2122-9000
12 oil seal
Bearing retainer A
1
1
19
20
21
22
23
24
25
26
27
28
29
30
31
32
33
2123-9000
2125-9000
09056-105
09057-102
09511-113
09011-102
0113-0890
0113-0880
0113-0862
09011-106
0113-0662
0411-0818
0411-0613
09056-111
2137-9000
Bearing retainer B
Bearing retainer C
6 × 10 A dowel
8 × 12 × 14 B dowel
8×114 hexagon bolt
8×100 hexagon bolt
Hexagon bolt A
Hexagon bolt A
Hexagon bolt A
6×70 hexagon bolt
Hexagon bolt A
Plane washer A
Plane washer A
5 × 10 A dowel
8 rubber plug
2
1
3
2
1
1
4
1
2
1
7
9
8
2
1
34
2139-9000
8 plug
2
Engine
14
D. Assembling Engine
The engine should be assembled in the reverse order of disassembling.
1. Be careful to set gears and thrust washers correctly.
2. Be careful to insert knock pin and knock ring of bearings correctly.
3. Grease shafts and gears with heavy oil.
4. Caution: Be sure both crankcase halves are cleaned
properly and no old sealer is left on the mating
surfaces. Apply liquid sealer evenly and generously to
the mating surfaces of both crankcase halves. We
recommend a Goodyear product "Pliobond."
5. Hexagonal bolts of the cases should be fitted according
to Fig. 33.
Fig. 34 Setting over-run stopper
6. Set the over-run stopper as shown in Fig. 34, 35.
7. To fit kick shaft stopper, assemble upper and lower
crank case covers first and fit kick pedal temporarily to
the kick shaft by cranking the engine. (Fig. 36-1, 2, 3)
Fig. 35 Setting over-run stopper
Fig. 36-1 Fitting kick shaft stopper (1)
Fig. 36-2 Fitting kick shaft stopper (2)
Fig. 36-3 Fitting kick shaft stopper (3)
Engine
15
8. Fit kick ratchet and change ratchets as shown in Fig.
37.
Set the gears in neutral when fitting the ratchets.
9. Match the key position of rotary valve collar with the
mark on the rotary valve. (Fig. 38)
Fig. 37 Fitting kick ratchet & change ratchets
10. Set the timing marks on the timing gear, driven gear
and pinion gear as shown in Fig. 39.
11. Be careful in assembling clutch inner plates and clutch
outer plate as they are of different thicknesses. The
outer plate (3mm thick) should be installed first.
Effective Serial No.
After Serial No.
Up to 21 S 01021
21 S 01022
thickness
Q'ty thickness
Q'ty
Inner plate : 1.6 mm 6
1.6 mm
7
Outer plate : 3.0 mm 1
–
none
Fig. 38 Fitting rotary valve
12. Grease the top of the push rod when assembling.
13. Match the mark on the clutch hub with the 4mm hole
on the pressure plate when assembling clutch pressure
plate. (Fig. 40)
14. Mesh the oil pump gear with pinion gear by turning
the worm shaft outside of right crankcase. (Fig. 41 )
No timing is necessary.
Fig. 39 Setting the timing marks
Fig. 40 Matching the 4mm i hole
Fig. 41 Meshing oil pump gear
Engine
16
15. Be careful when fitting the oil tubes
Oil tube A
Oil tube B
Oil tube C
Color
Transparent
Transparent
Black
Length
Remarks
340 mm (13.4 inches) Left check valve
370 mm (14.6 inches) Right check valve
530 mm (20.9 inches) Oil tank
16. Adjust contact breaker point gap and ignition timing.
Contact breaker gap
0.3 – 0.4 mm (0. 012 – 0.016 inches)
Ignition timing
25°+1-2
Ignition timing should be checked carefully. (Refer to page 57)
Engine
17
CRANK SHAFT • PISTON • ROTARY VALVE
Index No.
Part No.
5
6
7
8
9
10
11
12
13
14
15
16
17
18
1301-9000
1321-9000
1325-9000
1331-9000
1337-9000
09066-120
09075-104
09090-117
09049-108
09049-109
1333-9000
09075-106
1341-9000
1305-9000
1381-9000
Part Name
Crank shaft complete
Crank pin
Needle bearing
Connecting rod
Labyrinth packing
59 O ring
Ball bearing
57 Oil seal
30 × 0.3 Shim
25 × 0.3 Shim
Needle bearing
Ball bearing
Piston
Piston ring set
Piston pin
No. Req'd
1
2
2
2
1
1
2
2
2
2
2
2
2
2
2
19
20
21
22
23
24
25
26
27
28
29
30
31
32
33
1382-9000
1385-9000
09045-103
09029-104
1412-9000
1413-9000
09056-102
09059-101
1430-9000
09090-118
1441-9000
1423-9000
09066-121
09066-122
0311-0616
Piston pin circlip
Drive pinion
20 external toothed
20 left thread nut
Rotary valve
Valve guide
4 × 8 A dowel
4 × 18 spring pin
Valve cover complete
32 Oil seal
Left valve cover
Left valve guide
125 O ring
33 O ring
Cross recd pan head
4
1
1
1
2
1
1
1
1
1
1
1
2
1
12
Crankshaft, pistons, cylinders and Rotary Disc Valves
18
5-1. CRANKSHAFT AND ROTARY DISC VALVES
A. Construction
Dual cylinders, dual carburetors and dual rotary disc valves are incorporated in the Bridgestone 350 GTR
engine.
Rotary disc valves are spline fitted at each end of the crankshaft of this parallel twin. (Fig. 42)
Fig. 42 Construction
B. Inspection
1. Measure crankshaft play with a dial gauge for tolerance and fit. (Fig. 43)
2. Inspect the crankshaft for wear and excess play where bearings are fitted.
If abnormal noise is produced or there is excessive play, replace the crankshaft.
3. If the connecting rod big end bearing is worn or damaged, replace the crankshaft assembly.
4. If a disc valve is damaged, replace it.
5. If an O ring is damaged or worn, replace it.
Fig. 43 Measuring crankshaft play
Crankshaft, pistons, cylinders and Rotary Disc Valves
19
C. Lubrication of the crankshaft
Crankshaft bearings are lubricated automatically and correctly with oil fed from the oil pump through oil
tubes B and C and the union bolt.
The oil, which lubricates bearings, is
sprayed to crank chamber after lubricating
the big end of the connecting rod or
passing in back of the rotary disc valves.
The oil sprayed from the crank shaft
lubricates the cylinder walls, the small end
of the crankshaft and the ball bearings of
the crankshaft. (Fig. 44)
D. Lubrication of transmission gears
Oil stored in the gear box lubricates gears as shown.
Caution:
1. When refilling with new transmission oil, take
off oil cock and fill with 1.5 litre (3/5 U.S. gal.)
SAE No. 20W/40 in all seasons or SAE No. 20
in winter.
2. Check the oil level through the peephole only
when the oil has settled in the transmission
case.
3. Change the oil periodically as follows.
1st oiling
after break-in
2nd oiling
every 2,000 miles
Crankshaft, pistons, cylinders and Rotary Disc Valves
20
5-2. CYLINDERS AND PISTONS
A. Construction
The cylinders of the Bridgestone 350 GTR are made of
aluminum alloy. Cylinder walls are honed after hard
chromium plating and then porous treated. Therefore, this
engine has excellent cooling efficiency, and since the heat
expansion coefficients of the cylinder and piston are the same,
the piston/cylinder clearance can be kept to a minimum and
the engine operates quietly. Moreover, the aluminum alloy
cylinders reduce the weight of the engine.
Fig. 46 Piston identification mark
B. Notes of Caution
1. Do not use chromium plated piston rings.
Always use the ferox treated piston rings. (Cast iron)
2. Keep the air cleaner element clean.
3. Be careful to set the piston identification mark "EX" forward.
(Fig. 46)
C. Inspection
Fig. 47 Measuring piston ring gaps
1. Measure piston ring gaps as shown in Fig. 47.
Replace rings with new ones when gaps exceed 1mm (0.04
inches).
2. Check cylinder head gasket for damage. Replace with a
new one if necessary.
3. Remove carbon deposit on cylinder ports and cylinder
head with cleaning solvent or gasoline.
4. Replace the cylinder base packing with a new one.
Fig. 48 Removing cylinder and piston
D. Disassembling
1. The cylinders and pistons can be removed without
removing the engine from the frame by removing the dual
seat, fuel tank, horn and ignition coil. (Fig. 48)
2. Before removing pistons, remove the cylinders and cover
the crankcase with a cloth to prevent the piston circlips
from entering the crankcase. (Fig. 49)
Fig. 49 Removing piston pin circlip
Clutch
PARTS LISTS AND SECTIONAL VIEWS OF THE 3 TYPES OF MODIFIED CLUTCHES ARE SHOWN BELOW.
FIELD MODIFICATION #l - USING SPECIAL OUTER PLATE (2216-9010)
(BEFORE SERIAL NO. 21S01022)
PART NO.
2211-9000
2213-9000
2214-9000
2215-9000
2216-9000
2218-9000
2219-9000
2221-9000
2216-9010
2195-9010
NAME
QTY
Pressure Plate
1
Spring Washer
6
Friction Plate
7
Inner Plate
6
Outer Plate
Not Used
Clutch Spring
6
Set Bolt
6
Clutch Hub
1
Special Outer Plate 1
Grommet
1
FIELD MODIFICATION #2 - USING
SPECIAL OUTER PLATE (2216-9010)
(AFTER SERIAL NO. 21S01022)
PART NO.
2211-9001
2214-9000
2215-9000
2218-9001
0113-0616
2221-9001
09040-112
2216-9010
2195-9010
NAME
QTY
Pressure Plate
1
Friction Plate
7
Inner Plate
6
Clutch Spring
6
Hex Bolt
6
Clutch Hub
1
Plain Washer
6
Special Outer Plate 1
Grommet
1
FACTORY MODIFICATION USING SPECIAL
OUTER PLATE (2216-9001)
(AFTER SERIAL NO. 21V04022)
PART NO.
2211-9001
2214-9000
2215-9000
2218-9001
2218-9002
2221-9002
09040-112
2216-9001
2195-9010
NAME
QTY
Pressure Plate
1
Friction Plate
7
Inner Plate
6
Clutch Spring
6
Hex Bolt
6
Clutch Hub
1
Plain Washer
6
Special Outer Plate 1
Grommet
1
21
Clutch
22
6. CLUTCH
A. Construction
The 350 GTR has racing type dry discs instead of conventional wet
discs to ensure quick and powerful action for better performance by
eliminating resistance of oil film.
Fig. 50 General view of clutch
B. Operation
1. Transmitting Engine Power
Engine power is transmitted through the drive pinion on the crankshaft and the driven gear. The
driven gear is fitted to the clutch housing and clutch friction plates are fitted inside the clutch housing
with teeth so that they turn together with the clutch housing and driven gear.
Clutch friction plates and inner plates are fitted alternately with the inner plates fitted to the clutch
hub with teeth.
The clutch hub, friction plates and inner plates all fit inside the clutch housing and are pressed
together tightly by the clutch springs. The clutch hub is spline fitted to the transmission countershaft,
which turns the transmission gears.
Effective Serial No. 21 S 01021
After No. 21 S 01022
Clutch Friction Plate . . . . . . . . . . . . . . . . 7 . . . . . . . . . . . . . . . . . . . . . . 7
Inner Plate . . . . . . . . . . . . . . . . . . . . . . . . 6 . . . . . . . . . . . . . . . . . . . . . . 7
Outer Plate . . . . . . . . . . . . . . . . . . . . . . . l . . . . . . . . . . . . . . . . . . . . . . . none
Clutch Spring . . . . . . . . . . . . . . . . . . . . . 6 . . . . . . . . . . . . . . . . . . . . . . 6
Spring tension . . . . . . . . . . . . . . . . . . . . . 100kg (220 lbs.) . . . . . . . . . . 100kg (220 lbs.)
2. Clutch Disengaged
When the clutch lever is pulled, the clutch wire turns the clutch release arm so that the adjusting
screw pushes the dowel (6×10), rod (6×236), and push rod and presses against the clutch pressure
plate.
The clutch springs are then compressed so that they do not hold the clutch friction plates against the
inner plates. As the friction plates and inner plates separate, the inner plates cease to turn so that
engine power is cut off from the clutch hub and transmission countershaft.
Clutch
23
C. Clutch Adjustment
1. Adjustment is easily carried out with the cable adjuster and
cable adjust screw. (Fig. 51, 52)
Fig. 51 Clutch cable adjuster
2. When satisfactory adjustment cannot be made in this way;
remove rubber cap from left crankcase cover, loosen
locknut, and adjust by holding the lock nut and turning
adjustment screw.
i The play of the lever is lessened by turning the screw right
and increased by turning left. (Fig. 53)
D. Disassembling Clutch
Fig. 52 Clutch cable adjust screw
1. Remove carburetor cover by unscrewing the six screws in
the right carburetor cover, one 60×40, one 60×30, three
6×20, and one 6×8 screws.
2. Remove clutch springs and clutch facings and related parts
by removing diagonally and evenly the hexagonal bolts of
the clutch set plate. (Fig. 54)
3. Remove clutch hub nut (23mm) with clutch hub stopper
(special tool) (Fig. 55)
Fig. 53 Clutch adjustment screw
Fig. 54 Unscrewing clutch hexagonal bolts
Fig. 55 Removing clutch hub
Clutch
24
6. CLUTCH
4. Remove the ring nut with the clutch housing stopper and
ring nut fitting tool (special tools), and then remove the
clutch housing. (Fig. 56, 57)
Fig. 56 Removing ring nut with clutch housing
stopper
E. Inspection
Fig. 57 Removing ring nut with ring nut fitting
tool
1. See if there is any damage such as serrations on the inner
plate, and worn or uneven plates.
2. Check for damaged, worn or uneven arms on friction
plates. (Fig. 58, 59)
3. Check release arm, release screw, release push screw dowel
and rod for wear. Replace where necessary.
Fig. 58 Checking friction plate
Fig. 59 Checking friction plate
Transmission
7. TRANSMISSION
(See page 34)
25
Transmission
26
A. Construction
The 350 GTR has a 6-speed, return-change transmission. (Fig. 60, 61)
Fig. 60 Foot shift lever
Fig. 61 Return change transmission
B. Operation
When the gear shift pedal is depressed, the shift drum is turned by the arm fixed on the gear change
shaft.
Three shifting forks are fitted to the shift drum and travel along three grooves on the drum when it turns.
The gear shifting forks move the gears on the countershaft and drive shaft.
The operating angle of the gear shift pedal is 12 degrees and the gear shift drum turns 51.5 degrees for
each gear change.
Transmission
27
C. Component parts of gear change pedal & shift drum
Index No.
Part Name
No. Req'd
18
Cross recd pan head screw
2
19
20
21
Drum stopper gasket
Shift fork
Fork guide
1
3
3
22
23
24
25
26
27
28
29
30
31
32
33
34
35
36
Split pin
Fork guide pin
Fork guide stopper
Cross recd pan head screw
Drum guide plate
Cross recd pan head screw
12 B snap ring
12 thrust washer
Cross flat head screw
Gear change pedal
Change pedal rubber
Hexagon bolt A
Spring washer
Drum shifter
Ratchet
3
2
2
2
1
2
1
1
1
1
1
1
1
1
2
1
Change arm complete
1
2
3
4
5
6
7
8
9
10
11
12
13
14
15
16
17
Ratchet spring
Change shaft return spring
Change shaft spring seat
Change arm stopper pin
Change shaft spacer
Shift drum complete
Gear shifter drum
Drum shifter shaft
Drum guide bolt
8 aluminum gasket
Stopper plate
Drum stopper arm
Drum stopper roller
Drum stopper boss
Drum stopper spring
4 × 8 A dowel
2
1
1
1
1
1
1
1
1
1
1
1
1
1
1
1
Transmission
28
37
Ratchet pole
2
Fig. 63 Operation of shift pedal pushed down
Fig. 62 Neutral gear position
D. Gear shift mechanism
Fig. 64 Shift pedal lifted up
Fig. 65-1 Stopper plate
C-l.
Neutral gear position. (Fig. 62)
C-2.
Operation of shift pedal pushed-down. (Fig. 63)
C-3.
Operation of shift pedal lifted-up. (Fig. 64)
C-4.
Operation of change arm stopper plate. (Fig.
65-1,2)
The 350 GTR is equipped with a change arm (over-run)
stopper mechanism that prevents improper or excessive
turning of the shift drum. This design makes it
impossible to miss gears when shifting.
Fig. 65-2 Operation of charge arm stopper plate
Transmission
29
Components part of gear box
Index No.
Part Name
No.
1
Driven gear
1
2
3
4
Clutch housing
22 oil seal
35 O ring
1
1
1
5
6
22 thrust washer
Needle bearing
1
2
7
8
9
10
40 ring nut
40 lock washer
Counter shaft
2nd gear A
1
1
1
1
11
12
13
14
15
16
17
3rd gear A
5th gear A
6th gear A
Counter shaft spacer
Needle bearing
20 thrust washer
3×15 Woodruff key
1
1
1
1
3
4
1
18
19
20
25 B snap ring
Ball bearing
Ball bearing
5
1
2
21
22
23
24
17 oil seal
17 thrust washer
22 thrust washer
Kick starter gear A
1
1
1
1
25
26
Drive shaft
1st gear B
1
1
27
28
29
30
31
32
33
34
35
36
2nd gear B
3rd gear B
4th gear B
5th gear B
6th gear B
25 thrust washer
Drive shaft bushing
2nd gear B bushing
25 oil seal
Kick starter gear B
1
1
1
1
1
4
1
1
1
1
37
38
39
40
41
42
20 B snap ring
20×0.3 Shim
Drive sprocket
Sprocket set plate
Hexagon bolt A
Needle bearing spacer
1
2-3
1
1
3
1
Transmission
30
E. Gear operation and gear ratios
1. Transmission Mechanism in Neutral Gear (Fig. 66)
2. Gear ratios
Number of teeth
Gears
"A" Gears (Countershaft)
"B" Gears (Driveshaft)
Transmission
Gear Ratio
1st gear (Low gear)
13
32
2.46
2nd gear
17
28
1.65
3rd gear
20
25
1.25
4th gear
23
23
1.00
5th gear
27
23
0.85
6th gear
29
22
0.76
3. Operation
The counter shaft and 1st gear A act as a unit. Second gear A and 4th gear A act as a unit and are
spline fitted on the countershaft, and slide both ways on the countershaft spline.
3rd gear A and 5th gear A turn freely on the countershaft.
6th gear A is locked with a woodruff key on the countershaft.
Transmission
31
1st gear B, 2nd gear B, 4th gear B and 6th gear B turn
freely on the driveshaft. 3rd gear B and 5th gear B
are spline fitted on the driveshaft.
1st gear:
Fig. 67 In 1 st gear position
With the gears on the countershaft remaining in position,
the 3rd gear B on the drive shaft slides to the right and the
drive dogs on this gear engage with 1st gear B.
! Engine power is transmitted in the following order: driven
gear -- clutch – counter-shaft – First gear A – First gear B
– 3rd gear B – driveshaft and drive sprocket. (Fig. 67)
2nd gear:
With the 2nd gear A remaining in position, the 3rd gear B
slides to the left and the drive dogs on this gear engage
with 2nd gear B.
! Engine power is transmitted in the following order: driven
gear – clutch – countershaft– 2nd gear A – 2nd gear B – 3rd
gear B – driveshaft and drive sprocket. (Fig. 68)
Fig. 68 In 2 nd gear position
3rd gear:
With the 3rd gear B on the drive shaft remaining in
position, the 2nd gear A slides to the right and the drive
dogs on this gear engage with drive dogs on 3rd gear A.
! Engine power is transmitted in the following order:
driven gear – clutch – countershaft – 2nd gear A – 3rd gear
A – 3rd gear B – driveshaft and drive sprocket. (Fig. 69)
4th gear:
Fig. 69 In 3 rd gear position
With the 4th gear A remaining in position, the 5th gear B
slides to the right and the drive dogs on this gear engage
with 4th gear B.
! Engine power is transmitted in the following order:
driven gear – clutch – countershaft – 4th gear A – 4th gear
B – 5th gear B – driveshaft and drive sprocket. (Fig. 70)
Fig. 70 In 4 th gear position
Transmission
32
5th gear:
With the 5th gear B remaining in position, 4th gear A
slides to the left and the drive dogs on this gear engage
with 5th gear A.
! Engine power is transmitted in the following order:
driven gear – clutch – countershaft – 4th gear A – 5th
gear A– 5th gear B – driveshaft and drive sprocket. (Fig.
71 )
6th gear:
Fig. 71 In 5 th gear position
With the 6th gear A remaining in position, 5th gear B
slides to the left and engages with the Drive dogs on 6th
gear B.
! Engine power is transmitted in the following order:
driven gear – clutch – countershaft – 6th gear A – 6th
gear B – 5th gear B – driveshaft and drive sprocket. (Fig.
72)
F. Inspection:
1. Check for worn or damaged gears, splines,
bearings and shafts.
Fig. 72 In 6 th gear position
2. Inspect shift fork and drum grooves.
3. Check for wear on the change arm, ratchet and drum shifter spring.
Kick Starter
33
8. KICK STARTER
Index No.
1
2
3
4
5
6
7
8
9
10
11
12
13
14
15
Component parts of kick starter
16
17
18
19
20
21
22
23
24
25
26
27
28
29
30
31
32
33
Part Name
Kick starter shaft
Kick gear C comp.
Ratchet
Ratchet spring
Ratchet pole
Kick starter ratchet stopper
Kick starter return spring
Return spring spacer
Kick starter shaft bushing
18 B snap ring
15 F snap ring
18 oil seal
15 thrust washer
18 thrust washer
Plain washer A
Kick starter arm ass'y.
Kick starter arm
Kick starter pedal rubber
Kick starter arm boss
Kick starter set spring
Ball
15 plain washer
15 wave washer
10 D snap ring
Kick starter shaft bolt
Tachometer gear B
Tachometer gear bushing
Tachometer bushing bolt
12 O ring
6 fiber gasket
8 thrust washer
Chain guide
Cross rec'd. round head screw
Spring washer
No. Req'd
1
1
1
1
1
1
1
1
2
1
1
1
2
1
1
1
1
1
1
1
2
1
1
1
1
1
1
1
1
1
1
1
2
2
A. Construction:
A primary kick starter system similar to other
Bridgestone models is used on the Bridgestone 350 GTR.
Since the kick starter does not operate through the
clutch, the engine can be started, even when the
transmission gears are engaged, by simply pulling in the
clutch lever. This very convenient system has earned a
good reputation because it eliminates the need for
finding neutral, thus allowing quick starting of the
engine. In conventional kick starters, the kick gear
engages with one of the transmission gears. But, with the
primary type kick starter, three kick starter gears are
installed independently in the transmission gear box.
(Fig. 73)
Fig. 73 Construction
Kick Starter
34
8. KICK STARTER
B. Operation:
B-l To start:
1. The kick shaft and ratchet arm turn counter-clockwise as shown
in Fig. 74. The pressure of the ratchet spring meshes the ratchet
with the kick gear. (Fig. 74)
2. When the kick starter is operated, the ratchet turns the kick gear.
3. Since the kick gear is always in mesh with the kick idle gear, the
Fig. 74 In kicking position
force created by turning the kick shaft is transmitted from the
kick starter gear B, kick starter gear A, driven gear and pinion
gear to the crankshaft, and starts the engine.
4. When the kick shaft is released, it is returned to its original position
by the return spring, the ratchet is released automatically from the
kick gear, and the kick gear rotates freely.
B-2 In cruising.
The Ratchet arm is turned counterclockwise by the kick return spring,
and ratchet and kick gear are held apart. (Fig. 75)
C. Inspection
Check for worn or damaged gears, kick return spring and ratchet.
Fig. 75 In cruising position
Carburetors
35
Component parts of carburetor
Index No.
1
2
3
4
5
6
7
8
9
10
11
12
13
14
15
16
Part Name
Carburetor assembly
Throttle valve
Jet needle
Needle clip
Spring seat
Throttle valve spring
Mixing chamber top
Mixing chamber cap
Cable adjuster
Adjuster lock: nut
Throttle stop rod
Throttle stop screw
Stop screw spring
Split pin
Pilot air screw
Air screw spring
140 main jet
No.
2
2
2
2
2
2
2
2
4
4
2
2
2
2
2
2
2
17
18
19
20
21
22
23
24
25
26
27
28
29
30
31
130 main jet
Needle jet
Pilot jet
Washer
Starter plunger
Plunger spring
Plunger cap
Float valve assy – before 21H
Float valve assy – after 21H
Valve seat gasket
Float
Float pin
Float chamber body
Float chamber gasket
Clamp screw
Hexagon nut A
Set screw
2
2
2
2
2
2
2
2
2
2
2
2
2
2
2
2
8
Carburetors
36
9. CARBURETORS
A. Synchronizing Carburetors
For best performance, the carburetor throttle valves should be
adjusted so they operate together. To adjust, open the throttle
slowly until the "O" mark on one of the throttle valves is at the
top of the air intake hole. While holding in this position, adjust
the throttle cable adjuster of the other carburetor so the mark
Fig. 76 Adjusting throttle valve
on its throttle valve is also at the top of the air intake hole.
Now close the throttle and check cable clearance. Each cable
must have at least 1/32" free cable before carburetor opens or readjustment will be necessary. (Fig. 76)
B. Indication of trouble at various engine speeds.
Mixture Too Rich
Mixture Too Lean
1. Engine speed fluctuates
1. Engine overheats
2. Engine dose not run smoothly when starter lever is used.
2. Engine runs smoothly when starter is used
3. Engine does not run smoothly after warming up
3. Engine does not run smoothly when engine is cool
4. Spark plugs are apt to foul
4. Spark plugs are apt to heat or burn
5. Engine runs smoothly when carburetor cover is removed
5. Engine runs smoothly when carburetor is choked
6. Exhaust fumes are white or grey
6. Exhaust fumes are light blue or colorless
C. Idling Adjustment (0-1/8 Throttle opening)
1. When the engine stops at engine idling speed, control the
engine speed with the throttle grip and turn the idle speed
adjuster on both carburetors until the engine runs
smoothly. (Fig. 77)
2. Turn the pilot air screws on the carburetors alternately.
Both screws must be turned an equal amount.
Set the screws at the point where the engine runs the most
Fig. 77 Idling adjustment
smoothly.
i When the pilot air screw is turned clockwise, the
gasoline/air mixture becomes richer and when it is turned
counterclockwise the mixture becomes leaner. Correct
adjustment is approximately 2 turns out. (Fig. 78)
Fig. 78 Pilot air screw adjustment
Carburetors
37
3. To set the pilot air screw, a fairly satisfactory method is to detach one spark plug, and set the air
screw on the carburetor of the other cylinder. Reverse the process for the other cylinder. If, when
both spark plugs are reconnected, the engine runs slightly faster than desired, a slight readjustment of
the throttle screw will put this right.
4. Trouble shooting.
Possible causes
Remedies
1) Pilot air hole or breather hole of pilot jet is
plugged.
Clean and blow these holes.
2) Loose pilot jet
Set pilot jet securely.
3) Starter plunger does not close when starter
lever is closed.
Adjust starter cable to set plunger completely closed.
4) Improper pilot air screw adjustment.
Adjust the air screw. Correct adjustment is 2 turns out.
D. Medium Engine Speed Adjustment (1/8 – 3/4 throttle opening)
1. The gasoline/air mixture can be adjusted by raising or lowering the jet needle at c – ¾ throttle
opening for medium engine speed. Therefore, adjust the jet needle within the range where
acceleration is not adversely affected.
2. Trouble shooting
Possible causes
Remedies
1) Clogged main jet or needle jet
Clean
2) Loose fitting of needle jet or main jet
Screw in securely
3) Worn needle jet
Replace it with a new one
4) Incorrect adjustment of needle jet position
Raise the jet needle when mixture is too lean and lower it
when mixture is too rich.
Standard jet needle position is in the third groove.
E. High Engine Speed Adjustment
1. The gasoline/air mixture can be adjusted by the main jet at 3/4 full throttle opening.
2. Trouble shooting
Possible causes
Remedies
1) Clogged needle jet hole
Clean
2) Loose fitting of needle jet or main jet
Screw in securely
3) Incorrect main jet size
Use a bigger main jet when mixture is too lean and a
small one when mixture is too rich.
Standard main jet is No. 130.
Caution : The main jet size should be decided according to the climate or temperature.
Carburetors
38
F. Adjustment of Carburetor Float Level
1. The float level affects the gas/air mixture ratio and should
be checked as follows:
i Gas/air mixture becomes rich at high floating level, and
lean at low level.
Fig. 79 Measuring float level
2. Adjustment
Dismount carburetor, remove float chamber and hold
mixing body upside down so the float arm is resting on the
float needle valve. Measure the float adjustment as shown.
(From gasket seat to top of float.) Correct float setting is
15/16" – 1". Adjustment is made by carefully bending the
float valve tab.
G. Trouble Shooting of Gasoline Leaks from Carburetor
Possible causes
Main causes of trouble
Remedies
Gas leaks from carburetor
Inadequate contact between
needle valve and valve seat
Replace needle valve and valve
seat with a new one.
Gas overflows at any time (even
cruising or stopping)
Punctured or deformed float.
Replace the float with a new one.
Gas leakage occasionally
1. Operation of float or needle
spring is not correct.
2. Clogged needle valve and valve
seat with dirt.
Adjust float or replace needle
valve with a new one.
Clean needle valve or valve seat.
Clean fuel cock bowl.
Oil Injection System
10. OIL INJECTION SYSTEM
Component parts of oil injection system
Index No.
1
2
3
4
5
6
7
8
9
10
11
12
13
14
15
16
17
Part Name
Oil pump assembly
Check valve assembly
Union connection C
8 Aluminum gasket
Worm shaft bush B
Pump gear B
Worm shaft
3 × 24 A dowel
External toothed washer
Hexagon nut C
Pump gasket
Oil tube A
Oil tube B
Oil tube grommet
Cross recd pan head screw
Wire bracket
Cross recd pan head screw
No. Req'd
1
2
2
4
1
1
1
1
1
1
1
1
1
1
2
1
2
39
Oil Injection System
40
On the 350 GTR, the oil injection mechanism, which eliminates the necessity of pre-mixing gasoline and oil,
injects lubricating oil directly to the crankshaft bearings and other parts. (Fig. 80)
Fig. 80 Oil injection system
A. Operation
The worm wheel of the oil pump is driven through the Crankshaft –> Driven Pinion –> Pump gear B.
The worm wheel, the boss of which is cam shaped, is
pushed in direction A by the plunger spring and contacts
the rod (c) as shown in (Fig. 81)
The worm wheel plunger slides both ways, following the
cam height.
Fig. 81 Operation
Oil Injection System
41
B. Oil Intake:
When the worm wheel contacts the rod at the highest point
of the cam, the volume of the pump chamber increases
and the pressure in the chamber decreases. The inlet port
opens and oil is sucked into the oil pump chamber. (Fig.
82-1,2,3)
Fig. 82-1 Oil intake
C. Oil Outlet:
Fig. 82-2 Rotation of distributor
Fig. 82-3
When the worm wheel plunger slides in the direction A
and contacts the rod at the lowest point of the cam, the
pump chamber volume decreases, therefore oil is forced
into the outlet port. (Fig. 83)
Fig. 83 Oil outlet
D. Distribution of oil to both cylinders
The rotation of the distributor shaft is one half that of
the worm wheel plunger. The distributor shaft has oil
passage holes as shown in Fig. 84. Therefore, oil flows
to each cylinder alternately. (Fig. 84-1,2)
Fig. 84-1 Oil distribution - left valve Fig. 84-2 Right
valve
Oil Injection System
42
E. Operation of worm wheel plunger in relation to the throttle grip:
l. Engine Idling at slow speed
When the throttle grip is in zero position (closed) the rod
contacts the control lever at its lowest position.
The worm wheel plunger slides to the right by spring
tension and the plunger contacts the adjust screw
before it contacts the rod. When the cam height is at the
lowest point, the plunger contacts the rod instead of the
adjust screw.
Fig. 85 Oil intake - zero throttle
The distance of the shaft of the plunger to the adjust
screw (D) is shortened to less than the height of the
worm wheel cam, thereby reducing the volume of oil.
(Fig. 85, 86)
2. High Speed, wide open throttle
When the throttle grip is wide open, the cam of the
control lever contacts the rod (c) at its highest point,
thereby shifting the rod (c) to the left so that the
distance of shift of the plunger is lengthened, and the
volume of oil is increased. (Fig. 87, 88)
Fig. 86 Oil outlet - zero throttle
Fig. 87 Oil intake - full throttle
Fig. 88 Oil outlet - full throttle
Oil Injection System
43
F. Adjustment of oil pump control wire
Open the throttle grip slightly, until the "O" mark of the
throttle valve matches the top center of the air intake of the
carburetor.
At the same time, the edge of the control lever of the oil pump
should meet the protecting end of the oil pump body. (Fig.
89-1, 89-2)
Fig. 89-1 Adjustment of oil pump wire
Caution:
Caution the customer not to touch the adjusting
screw because it is adjusted accurately at the factory.
The control lever is adjusted by turning the cable
adjuster.
Turning the cable adjuster to the left lifts the lever up
farther.
Fig. 89-2 Adjustment of oil pump
G. Special Attention:
1. Assemble the union connectors to the pump body as
shown on (Fig. 90)
2. Do not unscrew the union bolts to avoid bending the 6mm
aluminum gasket of the union bolts.
Fig. 90 Assembling the union connectors
3. To exhaust air bubbles between the oil tank and the oil
tube, disconnect the tube from the oil pump and let oil flow
freely. Then connect the tube to the pump and hold the
control lever wide open while running the engine at idle for
about one minute. (Fig. 91)
4. Be sure to use only check valve bolts to connect oil lines to
the crankcase.
Fig. 91 Exhausting air bubbles
Frame
44
H. Meshing the plunger gear with the distributor gear. (Fig. 92)
1. When the oil pump is disassembled, be careful to mesh the plunger
gear with the distributor gear. Because the distributor gear has three oil
passage holes, (Refer to Fig. 84 – one hole is for oil intake, the others
for lubrication of both cylinders) it is necessary to match the holes of
Fig. 92 Disassembled oil pump
the distributor with the plunger cam slot.
2. How to mesh both gears
1) Match the timing pin mark on the distributor gear with the
center of the plunger shaft hole. (Fig. 92)
2) Insert the plunger shaft by placing the end of the cam over
the center of the distributor gear. (Fig. 94)
Fig. 93 Insert the plunger shaft as shown
Fig. 94 Place the end of
the cam over the center of
the distributor.
Frame
45
11. FRAME
Component parts of frame and rear fender
Index No.
1
2
3
4
5
6
7
8
9
10
11
12
13
14
15
16
17
18
19
Part Name
Frame complete
Rear fender complete
Hexagon bolt A
Hexagon bolt A
Hexagon nut A
Plane washer A
Plane washer A
Spring washer
Rear fender clamp
Fender mounting rubber
Outer race
Inner race
Race cap
Race lock nut
Race adjuster
Ball
Oil tank pad
Pivot shaft
14 hexagon slotted nut
No. Req'd
1
1
4
3
4
6
3
2
1
1
2
2
1
1
1
38
1
1
1
20
21
22
23
24
25
26
27
28
29
30
31
32
33
34
35
36
37
38
39
15 plane washer
Split pin
Front tank cushion rubber
Rear tank cushion rubber
Tank mounting bolt
18 plane washer
Frame handle
Hexagon bolt A
Plane washer A
Cover pad
Tank cushion rubber
Number plate supporter
Supporter pad
Hexagon bolt
Engine cushion rubber A
Engine mounting bolt
Rear fender grommet
10 × 145 hexagon bolt
Hexagon nut A
Hexagon nut D
1
1
2
1
1
4
1
1
1
1
1
1
3
2
2
1
1
1
6
1
40
41
42
43
44
45
46
47
48
49
50
51
52
53
54
55
56
57
Left engine bracket
Right engine bracket
Engine cushion rubber B
Left engine hanger
Right engine hanger
10 plane washer
8 plane washer
Hexagon bolt A
Hexagon bolt A
Spring washer
Spring washer
Spring washer
10 × 38 hexagon bolt
Main switch bracket
Spacer A
Battery band
Battery pad
Battery seat
1
1
4
1
1
4
4
4
2
2
10
3
2
1
1
1
1
1
Frame
46
11-1 Handlebar
A. Removing Handlebar
1. Loosen clutch cable to the limit of the adjusting nut
and remove from clutch lever.
2. Remove the adjusting nut of the front brake and pull
the cable out of the brake lever.
3. Take off the 6 × 45 hexagonal nut of the starter lever
and remove the starter cable from the lever.
Fig. 95 Removing headlight rim
4. Unscrew the head light rim fitting screws at the bottom
of the rim, and disconnect the wiring harness
connections from the terminals. (Fig. 95)
5. Take off the four handle holder fitting bolts (8 × 36)
and remove the handlebar assembly from the front
fork.
B. Assembling:
Assembling is done in the reverse order of removing.
Fig. 96 Adjustment of brake lever
C. Inspection:
1. Adjust clutch and brake levers periodically.
Brake lever
Front brake lever should be adjusted to allow a play of
15-30mm (3/8" – l-l/8") before the brake acts. (Fig. 96)
Clutch lever
When properly adjusted, there will be approximately
15-20mm (3/8" – 3/4") free play in the clutch control
before the clutch disengages. (Fig. 97)
Fig. 97 Adjustment of clutch lever
2. Check for damaged or cracked wires in the grip holders, dimmer switch, and horn switch, and
replace if necessary.
Front Fork
47
11-2 Front Fork
Index No.
1
2
3
4
5
6
7
8
9
10
11
12
13
14
15
16
17
18
19
20
21
Part Name
Front fork assembly
Outer tube B
Outer tube A
8 × 26 hexagon bolt
4 × 7 cross pan head screw
Drain plug gasket
Outer tube nut
34 oil seal
40 O ring
Cushion slide metal
Inner tube A
Upper bridge bolt
9 O ring
Upper bridge washer
Front main cushion spring
Dust seal
Main spring seat
Front fork boot
Upper boot holder
Fork cover guide
Lower bridge
10 × 32 hexagon bolt
No. Req'd
1
1
1
1
2
2
2
2
2
2
2
2
2
2
2
2
2
2
2
2
1
2
22
23
24
25
26
27
28
29
30
31
32
33
34
35
36
37
38
39
40
41
42
Upper bridge
Handle holder
Hexagon bolt C
Plane washer B
Steering head nut
Steering head washer
Left fork cover
Right fork cover
Cable clip
Spring washer
Cross rec'd pan head screw
Steering damper knob
Damper knob guide
Damper lock spring
Steering damper spring
Damper spring guide
Friction plate
Damper facing
Damper guide plate
6×18 hexagon bolt
Split pin
1
2
4
4
1
1
1
1
1
1
1
1
1
1
1
1
1
1
1
2
1
Front Fork
48
A. Operation
Fig. 98 Operation of front fork
When load is applied to the front fork, the load is received by the fork springs. At the same time, oil
in the chamber flows into the oil control chamber. The load is held by resistance from the
compressed oil and air, and the shock is absorbed.
Oil lock bars (dampers) are installed inside the bottom of the lower fork tubes to prevent the fork
from bottoming when receiving severe shocks.
When oil moves through the gap between the piston oil hole and the oil lock bar, shock is absorbed
by resistance of the oil.
The oil lock bar is tapered so that oil resistance increases as the front fork comes to the end of the
stroke.
When the fork lengthens, rebound is damped by oil resistance generated by the oil flow from the oil
control chamber through the gap between the oil lock bar and piston oil hole. (Fig. 98)
Rear Suspension
49
B. Disassembling:
1. Put the cycle on the mainstand and place a supporting block under the engine before
disassembling the front fork and front wheel.
2. Take off the front fender by
loosening four hexagonal bolts
(8x12) and then turning the outer
tube of the fender.
3. The front fork is removed
separately by removing upper
bracket bolts and lower bracket
bolts.
Fig. 99 Assembling front fork
C. Assembling and Inspection
1. Assembling is done in the reverse order of removing.
2. Place the air holes on the rubber boot facing back to
prevent dust entering as shown in Fig. 99.
Fig. 100 Checking oil level
3. Fill each fork tube with 220cc of fork oil. (Do not use
hydraulic brake fluid) (Fig. 100) The oil level is checked
with an oil gauge: Correct level depths are 45mm (1.77
inches)
D. Removing the steering damper.
1. The steering damper is disassembled by taking off the split
pin at the bottom of the steering damper knob. Then
loosen the steering damper knob and remove the special
nut, friction plate, tension spring, and damper guide plate.
(Fig. 101)
Fig. 101 Component parts of steering damper
Rear Suspension
50
11-3 Rear suspension:
A. Construction:
The rear suspension of the 350 GTR is adjustable for land
or road conditions by changing the mounting position at
the top end of the shock absorber as shown in Fig. 102.
The vertical position is stiffer.
Fig. 102 Adjustment of rear suspension
B. Operation: (Fig. 103)
1. When depressed by shock or load:
When the unit receives shock or load, the spring is compressed and the damping oil chamber
becomes smaller. Oil enters the oil passage, pushes open the valve, and flows into the oil control
chamber. Oil flows through the oil hole on the inner tube into the gap between the inner tube and
the outer tube.
Shocks are absorbed by this spring action and oil flow.
Fig. 103 Rear suspension
Rear Suspension
51
2. Return stroke:
On the return stroke of the unit, the valve on the oil control chamber closes and the damping oil
flows out through the oil passage.
The oil overcomes strong resistance when it begins to flow in the gap between the inner tube and
the outer tube and flows slowly back into the damping oil chamber. Rebound is absorbed by this
oil flow resistance.
C. Adjustment of rear suspension
To adjust the rear suspension, remove the suspension
mounting bolts and reposition the rear suspension onto
the second set of mounting holes. On the left side, the rear
hole is also used for the frame handle. The spacer used
under the frame handle should be kept on the other bolt
when not used for the frame handle.
Wheels
52
11-4 Wheels:
A. Construction:
Tires:
Front: 3.25-19, 4ply
Rear: 3.25-19, 4ply
Drums:
Rear:
Front: 180mm
180mm
(7.09 inches)
(7.09 inches)
B. Checking of Tire Pressure and Balance
The 350 GTR has excellent acceleration and high speed performance, so correct tire pressure should
always be maintained. Make a thorough check weekly.
Recommended tire pressure:
Front tire 2.0kg/cm2 (28-30 psi)
Rear tire 2.2kg/cm2 (30-32 psi)
Balance:
1. Tire balance is very important to minimize vibration at
high speeds.
2 When replacing tires or repairing punctures, check
carefully the yellow spot on the side wall of the tire. The
tube valve stem should be lined up with this mark.
When this yellow mark is not recognizable, mark the
position of the tube valve on the tire before removing the
tire.
Fig. 105 Balance weights
3. Balance weights clamped to the spokes should be
attached to their original position. (Fig. 105)
4. To check the wheel balance, spin the wheel several times. A
balanced wheel will stop in any position. If the wheel regularly
stops in the same position, clamp a balancing weight to the top
spoke (the lightest part) in the stopped position. (Fig. 106)
Be sure to check the wear and air pressure of tires, bent or
deformed rims, looseness of spokes and wear of shafts or
bearings before balancing tire.
5. There are two balancing weights of 10 and 30 gram.
6. To fit the weights, tap them lightly onto the nipples by hand.
Fig. 106 Wheel balancing
Wheels
53
Front Wheel
Component parts of front wheel
Index No.
1
2
3
4
5
6
7
8
9
10
11
12
13
14
15
16
17
18
19
20
21
Part Name
Front brake drum
Front drum collar
Collar supporter
Ball bearing
22 oil seal
42 A snap ring
Front spoke assembly
Front wheel rim
Front wheel tire
Wheel tube
Tire flap
Wheel balancing weight A
Wheel balancing weight B
Front panel complete
48 oil seal
Brake shoe complete
Brake shoe spring
14 thrust washer
Speedometer gear
Front brake cam
Cam dust seal
No. Req'd
1
1
2
2
1
1
1
1
1
1
1
1
1
1
1
2
2
4
1
2
2
22
23
24
25
26
27
28
29
30
31
32
33
34
35
36
37
38
39
40
41
42
Brake arm A
Brake arm B
Rod end A
Rod end B
Brake arm rod
Front arm return spring
Brake arm pin
14 A snap ring
5 D snap ring
Hexagon bolt A
Hexagon nut A
Plane washer A
Hexagon nut C
Front torque link
Front link bolt
Internal toothed washer
Front wheel axle
Front axle collar
14 slotted hexagon nut
14 plane washer
Split pin
1
1
1
1
1
1
2
2
2
2
2
2
1
1
1
1
1
1
1
1
1
Wheels
54
Rear Wheel
Component parts of rear wheel
Index No.
Part Name
No. Req'd
1
Rear brake drum
1
2
3
Rear drum collar
Collar supporter B
1
1
4
5
6
7
8
Collar supporter B
Ball bearing
Ball bearing
28 oil seal
Rear wheel damper
1
1
1
1
6
9
10
11
12
13
14
15
16
17
18
Driven sprocket
10×35 hexagon bolt
Hexagon nut C
Spring washer
78 B snap ring
Front spoke assembly
Front wheel rim
Rear wheel tire
Wheel tube
Tire flap
1
6
6
6
1
1
1
1
1
1
19
20
21
22
Wheel balancing weight A
Wheel balancing weight B
Rear panel complete
Brake shoe complete
1
1
1
2
23
24
25
26
27
28
29
30
31
32
33
34
Brake shoe spring
14 thrust washer
Rear brake cam
Cam dust seal
Brake arm C
Rear arm return spring
14 A snap ring
Hexagon bolt A
Spring washer
Rear torque link
Rear link bolt
Latch clip
2
4
1
1
1
1
2
1
1
1
1
1
35
36
37
Hexagon nut A
Plane washer A
Spring washer
1
1
1
38
39
40
41
42
43
44
45
Rear wheel axle
Rear axle collar
Oil seal collar
14 slotted hexagon nut
14 plane washer
Split pin
Roller chain assembly
Chain joint complete
1
1
1
1
1
1
1
1
A.C. Generator • Voltage Regulator
55
12. ELECTRICAL EQUIPMENT
Dynamo and neutral switch
Index
Part Name
No.
1
2
A.C. dynamo assembly
Contact breaker cam
O ring
1
1
1
3
4
5
6
Contact breaker cover gasket
Contact breaker cover
Contact breaker base
Left contact breaker assy
1
1
1
1
7
8
Condenser
Right contact breaker assy
1
1
9
10
11
12
13
Pan head screw
Pan head screw
Pan head screw
Plane washer B
Spring washer
1
5
4
6
10
14
4 plane washer
1
15
16
17
Hexagon bolt A
Plane washer A
Timing gear
1
1
1
18
19
20
21
22
23
24
25
26
27
28
3×13 woodruff key
6 plane washer
External toothed washer
Hexagon bolt A
Neutral switch case
Neutral switch contact plate
Neutral switch gasket
Cross rec’d pan head screw
Cross rec’d pan head screw
Neutral switch wire grommet
Spark plug NGK B8HS
1
1
1
1
1
1
1
3
1
1
2
A.C. Generator • Voltage Regulator
56
12-1 A.C. Generator:
A. Description:
The generator fitted to the 350 GTR is a six-pole, magnetic, inner-rotor type A.C. dynamo. The
dynamo consists of a rotor into which magnets are cast and a stator with an iron core and wires
wound around the iron core. The timing gear is fitted on one end of the rotor and a cam which
operates the contact breakers is fitted at the other end.
A six-pole, permanent magnet is contained in the center of the rotor. Its rated output of 88 watts is
produced at an engine speed of 5000 r.p.m. and the peak output of 98 watts at 8000 r.p.m. The rated
output therefore is obtained at the following speeds. (m.p.h.)
B. Charging current:
The following table shows the engine speed which charges the battery.
Operation of Engine
lighting
0%
Day time
10%
0%
Upper beam
10%
0%
Lower beam
10%
rpm
1850
2550
2300
2850
2250
3200
Speed M.P.H. (K.M.H.)
4th gear
5th gear
19 (30)
22 (35)
26 (41)
30 (48)
23 (37)
27 (43)
29 (46)
34 (54)
23 (37)
27 (43)
32 (52)
38 (61)
6th
25
34
30
39
30
43
gear
(40)
(55)
(48)
(62)
(48)
(69)
12-2 Voltage Regulator
The 350 GTR is equipped with a voltage regulator. (Fig. 107)
The charging current generated by A.C. dynamo is regulated
by the voltage regulator and the regulated current is shown
below. (Fig. 108)
Fig. 107 Voltage regulator
Fig. 108-1 Daytime driving (no lights)
Fig. 108-2 Nighttime driving (upper beam)
Contact Breakers • Ignition Timing
57
12-3 Ignition system
A. Contact Breakers:
1. Description:
Two contact breakers are fitted on the A.C. dynamo. The A.C. dynamo is turned through the
pinion gear, the driven gear and a timing gear.
The timing gear turns one complete revolution when the crankshaft turns one full revolution. The
timing gear and point cam are fixed on the dynamo shaft and turn with it.
The engine of the 350 GTR is a two-stroke, twin cylinder engine so two explosions occur every
time the crankshaft makes one full revolution.
Because the speed of the A.C. dynamo is the same as the crankshaft, contact points must supply
two sparks for each revolution of the dynamo. Therefore, two sets of contact breakers are
installed.
One contact breaker opens every 180° (1/2 turn) of cam rotation and high voltage current is
induced in the ignition coil.
2. Maintenance:
Contact breaker points should be kept bright and smooth.
If point surfaces are rough or pitted, polish surfaces of both points with a point file. If point
surfaces are excessively rough or pitted, polish lightly and evenly on an oil stone until the
surfaces are smooth.
After polishing, wash the point surfaces with gasoline or thinner and wipe dry with a clean cloth.
B. Adjusting the gap :
Turn the engine over until the point cam is holding
the point at its widest position. Loosen the two
lock screws of the breaker and adjust the gap to 0.3
– 0.4mm (0.012 – 0.016 inches) with a thickness
gauge, by sliding breaker base slowly. (Fig. 109)
Repeat for other points.
Fig. 109 Contact breakers
C. Checking and Adjusting Ignition Timing
Checking
Remove the 8×12 hexagonal bolt on the front of the crank case and install timing bolt and pin. (Same
as 175)
Connect a continuity light to the points. Put the transmission in gear and rotate the rear wheel
forward. If the continuity light goes out when the timing button snaps into the hole in the crankshaft,
the ignition timing is correct.
Ignition Timing • Selenium Rectifier
58
Adjustment
Timing is adjusted by a point plate that moves both right
and left points at the same time. The point gap settings are
the same as on the Bridgestone 175 (.012-.016) but the
generator does not turn for adjusting the timing.
Use the same timing bolt and pin used on Bridgestone
175's to locate the firing mark. Turn the point plate until
the right point breaks at the timing mark. Check the left
points, which should also now be in time. If not, turn the
point plate approximately half the distance it is off of the
timing mark to balance both the left and right sides as
close as possible to the two timing marks.
To equalize for precision timing, open the gap slightly on
the retarded side to speed it up; close the gap slightly on
the advanced side to slow it down. Caution: After
adjustment, the point gaps must be within the .012 – .016
inch tolerances.
Note: B.T.D.C.
Piston distance
(m/m)
(inches)
23°
2.82
0.11
24°
3.07
0.12
Fig. 110 Checking ignition timing
Fig. 111 Finding ignition timing
25°
3.33
0.13
26°
3.60
0.14
12-4 Selenium Rectifier:
The selenium rectifier converts A.C. current generated by the generator into D.C. current and charges the
battery. (Fig. 112, 113)
Fig. 112 Key position 1
When â is positive cycle, ã changes into
negative cycle and vice versa.
Fig. 113 Key position 2
When â is positive cycle, ã or ä changes into
negative cycle.
ã is positive cycle, â or ä negative.
ä is positive cycle, â or ã negative.
Condenser • Ignition Coil
59
A. Special Attention:
Take care not to wet the rectifier when washing the motorcycle or run the engine without the rectifier
connected.
B. Inspection
1. Inspection is carried out easily by flowing 12-volt current in the reverse
direction as shown in Fig. 114.
If the bulb lights in the circuit, the rectifier is defective.
2. Insulation resistance should be more than 10Meg ohm with a 500V
tester.
Fig.114 Inspection of
rectifier
12-5 Condenser
A. Inspection
The capacity and insulation resistance of the condenser should
be checked with an electric tester, but it can also be checked
easily in the following manner.
Pass the current to the condenser by connecting the wire of the
battery, and then ground the condenser wire.
Fig. 115 Inspection of condenser
If there is a sharp spark between the wire and the ground, the
condenser is in good condition. (Fig. 115)
Condenser capacity 0.2 – 0.3 µF
Insulation resistance more than 5MS
12-6 Ignition coil inspection
The ignition coil requires no maintenance.
When testing the ignition coil, perform with an electro tester.
If the spark jumps 9mm or more, the coil is in good condition.
Checking
Sparking
Insulate resistance
Resistance of secondary coil
Standard figure
Over 9mm at 1500 rpm
500 MS
1 MS
Spark Plug
60
12-7 Spark plug
A. Description
The standard spark plug used is N.G.K. B-8H whose sectional
structure is shown in Fig. 116.
The spark gap should be 0.5 – 0.6mm (0.020 – 0.024 inches),
B. Inspection and Adjustment
Fig. 116 Spark plug
Check the spark plug every 3,000km (2,000 miles).
When the electrode becomes worn or coated with carbon, clean
or replace it.
A worn or dirty plug produces weak sparks or none and causes hard starting, low output, irregular
engine power, etc.
1. When too cold a plug is used.
Oil will foul the electrode or heavy carbon deposits will form.
Change to a "hotter" type plug. (Lower number)
2. When a correct plug is used.
The plug remains nearly white, or light brown (sometimes greyish) deposits form.
3. When too hot a plug is used.
Absence of deposits, bleached appearance of the insulator, and sometimes blisters indicate too
hot a plug is being used.
Change to a colder plug. (Higher number)
4. See chart below for plugs recommended.
BRAND
STANDARD
IF PLUG FOULS EASILY
(Slow Speed)
IF PLUG OVERHEATS EASILY
(High Speed)
NGK
B-8H
B-7H
B-9H
CHAMPION
L-58R
L-5
L-56T
BOSCH
W310T16
W240T
W340T16
LODGE
R47
3HN
R49
Battery
12-8
61
Battery
The capacity of the battery is 12V-6AH.
The battery should be checked periodically. Check the level of the electrolyte and the specific gravity.
Specific gravity of the solution should be 1.260-1.280 at 20° centigrade (68° F) when the battery is fully
charged.
A. Inspection of Specific Gravity
The condition of the battery can be determined by measuring the specific gravity of the electrolyte
solution. If the gravity is below 1.220, the battery should be charged without delay.
Specific gravity at 20° C (68° F)
(Solution Temperature)
Amount of charge
1.260
1.220
1.160
1.105
1.050
100%
75
50
25
None
Caution
Take care of the following points when checking the specific gravity.
1. Do not let the hydrometer float touch the side of wall.
2) Read the hydrometer at A (upper level of contact) instead of B (lower level) as shown in Fig. 117.
3) As specific gravity varies according to the temperature of the
solution, apply the following conversion table based on
standard 20° C (68° F) for the different temperatures.
Fig. 117 Hydrometer
Battery
62
Relation between specific gravity and temperature of solution.
0° C
30° F
1.218
1.223
1.228
1.233
1.238
1.244
1.249
1.254
1.259
1.264
1.269
1.274
1.276
1.284
1.289
1.294
5° C
42° F
1.215
1.220
1.225
1.230
1.235
1.241
1.246
1.251
1.256
1.261
1.266
1.271
1.276
1.281
1.286
1.290
10° C
50° F
1.212
1.217
1.222
1.227
1.232
1.237
1.242
1.247
1.252
1.257
1.262
1.267
1.272
1.277
1.282
1.287
15° C
59° F
1.208
1.213
1.218
1.223
1.228
1.234
1.239
1.244
1.249
1.254
1.259
1.264
1.269
1.274
1.279
1.284
20° C
68° F
1.205
1.210
1.215
1.220
1.225
1.230
1.235
1.240
1.245
1.250
1.255
1.260
1.265
1.270
1.275
1.280
25° C
77° F
1.202
1.207
1.212
1.217
1.222
1.226
1.231
1.236
1.241
1.246
1.251
1.256
1.261
1.266
1.270
1.276
30° C
86° F
1.198
1.203
1.208
1.213
1.218
1.223
1.228
1.233
1.238
1.243
1.248
1.253
1.258
1.263
1.268
1.273
35° C
95° F
1.195
1.200
1.205
1.210
1.215
1.219
1.224
1.229
1.234
1.239
1.244
1.249
1.254
1.259
1.264
1.269
40° C
104° F
1.191
1.196
1.202
1.206
1.211
1.216
1.221
1.226
1.231
1.236
1.240
1.245
1.250
1.255
1.260
1.265
45° C
113° F
1.188
1.193
1.198
1.203
1.208
1.212
1.217
1.222
1.227
1.232
1.237
1.242
1.247
1.252
1.257
1.261
B. Storage of dry charged battery.
Dry charged batteries, if stored in a relatively dry place, will remain in good condition for a
considerable period, but if the cells absorb moisture during storage, the negative plates will discharge
slowly and the charging rate will be longer as shown in the following table.
Storage period
Decreased Capacity
Capacity
Charging Rate
One Month
0%
100%
0.6Ampere × 10Hour
Three Month
15%
85%
0.6Ampere × 12Hour
Six Months
30%
70%
0.6Ampere × 14Hour
One Year
50%
50%
0.6Ampere × 20Hour
C. Initial Charging Rate
1) Fill the battery with sulfuric acid.
2) Wait from 2 to 12 hours after filling before charging.
When the level of electrolyte has dropped, add more electrolyte until the proper level is reached.
3) Charge at the proper rate as given below until all cells are gassing freely and cell voltage and
specific gravity stop rising and remain constant.
The total charging time will be 10 hours.
During charging, battery temperature should be kept below 45°C (113°F).
If the temperature exceeds 45°C., stop charging for a time until the temperature falls below 45°C.
Proper charging
Quick charging
0. 6 Ampere × 12 hour
3 Ampere × 1 hour
63
Head lamp • Tail lamp
12-9 Lights
A. Head lamp • Tail lamp
Index No.
Part Name
No. Req'd
1
Head lamp body
1
2
3
4
5
6
7
8
9
10
11
12
13
14
15
16
17
18
19
Head lamp grommet
Cross oval head screw
Head lamp assembly
Head lamp rim assy
Head lamp lens comp
Socket complete
Shield rubber
Head lamp bulb
Quick acting nut
Adjuster spring
Square nut
Adjuster screw
Holder screw
Socket set ring
Split pin
Neutral lamp assembly
Speedometer bulb
High beam lamp assy
1
2
1
1
1
1
1
1
2
1
1
1
2
1
2
1
2
1
20
21
23
24
25
26
27
28
29
30
31
32
33
34
34
35
36
37
Hexagon bolt A
Spring washer
Tail lamp assembly
Tail lamp lens
Tail lamp bulb
Tail lamp gasket
Cross oval head screw
Hexagon bolt A
Spring washer
Hexagon bolt A
Hexagon nut A
Spring washer
External toothed washer
Plane washer A
Wire harness
Wire harness
High beam wire
Body earth wire
Cover tube
2
2
1
1
1
1
2
3
3
3
3
2
2
8
1
1
1
1
1
Speedometer • Ignition Coil • Main Switch
64
B. Speedometer • Ignition Coil • Main Switch
Index No.
1
2
3
4
5
6
7
8
9
10
11
12
13
14
15
16
17
Part Name
Speedometer assembly
Speedometer bulb
Tachometer assembly
Left meter holder
Right meter holder
Speedometer washer
Speedometer set spring
Meter cushion rubber
Hexagon bolt A
Plane washer A
Horn assembly
Hexagon bolt A
Spring washer
Left ignition coil assy
Right ignition coil assy
Plug cap complete
Hexagon bolt A
No. Req'd
1
3
1
1
1
2
2
2
4
4
1
2
2
1
1
2
4
18
19
20
21
22
23
24
25
26
27
28
29
30
31
32
33
34
Spring washer
Main switch assy
Stop switch complete
Stop switch spring
Battery
Rectifier assembly
Pan head screw
Plane washer A
Plane washer A
Spring washer
Spring washer
Hexagon nut C
Regulator assembly
Hexagon bolt A
Spring washer
Fuse assembly
Fuse
4
1
1
1
1
1
5
5
2
5
1
1
1
2
2
1
2
Lights
65
C. Bulbs
Lamps
Wattage
Lamps
Wattage
Head lamp
12V-35/30W
5th Gear Indicator lamp
12V-3W
Speedometer lamp
12V-3W
Headlight Beam lamp
12V-3W
Tachometer lamp
12V-3W
Tail lamp
12V-7W
Neutral Indicator lamp
12V-3W
Stop lamp
12V-23W
D. Adjustment of head light beam
The headlight setting for high and low beams is important. This should be kept in proper adjustment.
For this purpose, a cross should be drawn on a light colored wall at the same height as the center of
headlamp.
The motorcycle should stand on its wheels about 33 feet (10 meters) from the wall, and be loaded by the
rider.
Switch on the high beam and set the headlamp so that the beam strikes the center of the cross.
Switch to the low beam; the upper edge of the illuminated area should be about 3.5 inches (9 cm) below
the cross: Adjust as required. (Fig. 118)
To adjust beam left and right, screw in or out the screw at the left side of the head light rim.
Fig. 118 Adjustment of headlight beam
Main Switch • Horn
66
12-10 Main Switch
The ignition switch is combined with the lighting and horn switches and divided into four positions and operated
as follows.
Combination Table
1
Battery Ignition
coil
O)))))O
Head
light
Tail
light
Horn
Stop 5th gear Neutral
light Indicator
O)))))O)))))O)))))O
High
beam
Parking
2
O)))))O)))))O)))))O)))))O)))))O)))))O)))))O)))))O)))))O
3
O))))))))))))))))))))))))))))))))))))))))))))))))))))))))O
Position of key
0
For parking
(Entire electric circuit is switched off)
Key can be pulled out
1
For daytime driving (Engine can be started
and horn, stop light, neutral lamp, 5th
gear indicator lamp are in circuit)
Key cannot be pulled out
2
For nighttime driving (Headlight, tail
light, stop light, neutral lamp, high beam
lamp, 5th gear indicator lamp, speedometer
lamp, horn are in circuit)
Key cannot be pulled out
3
For parking (Parking light is in circuit)
Key can be pulled out
12-11 Horn
Adjust horn volume by screwing the adjusting screw. (Fig. 119)
When horn does not work correctly, the trouble may be disconnected wires, damaged contact points or a
short circuited coil in the horn. Improper operation can also be caused by a defective horn switch, or a
defective horn.
Trouble shooting
13. TROUBLE SHOOTING:
13-1 Engine is hard to start.
67
68
13-2
Trouble shooting
High engine revolution cannot be obtained.
Insufficient power.
Trouble shooting
13-3. Unsatisfactory R.P.M.
69
Trouble shooting
70
13. TROUBLE SHOOTING
13-4 Irregular Revolutions (At medium and high speeds).
13-5
Unsatisfactory gear shifting.
Trouble shooting
71
13-6 Common Failures, Their Causes and Correction
One cylinder goes dead. This is generally due to electrical, fuel or mechanical failure.
A. Possible causes of electrical failure
1. Spark plug fouled or in poor condition.
2. Contact breaker points fouled or out of adjustment.
3. Bad condenser.
4. Weak ignition coil.
5. Ignition timing incorrect.
6. Cable disconnected between spark plug cap and high tension wire of ignition coil.
7. Damaged or short circuited wiring.
B. Possible causes of fuel failure.
1. Throttle valves not opening synchronously.
2. Clogged fuel line (fuel pipe, fuel cock bowl, tank cap, etc.)
3. Improperly adjusted air screw of carburetors.
4. Clogged jet holes of carburetors.
C. Possible causes of mechanical failure.
1. Worn cylinder, piston or piston rings.
2. Air leak around carburetor.
3. Cracked rotary disc valve.
A. Electrical failure
Possible causes
1. Spark plug fouled or in poor condition
2. Weak ignition coil
3. Incorrect contact breaker point gap
Breaker points dirty, oxidized or burned
4. Excessive contact firing or badly burned
contacts due to defective condenser
5. Checking ignition timing.
Remedies
Remove spark plug and ground it to the cylinder fin, and
crank engine, Spark must then flash. If spark plug is fouled,
replace it with the plug of the other cylinder and recheck.
Defective ignition should be checked carefully with an
electrotester. Before this test, remove spark plug, pull ignition
cable out of spark plug adapter, hold cable at a distance of
about 6 mm (0.236 inches) from the cylinder fin; If no sparks
flash between cable and fin, the failure may be due to other
causes including ignition coil.
Correct gap is 0.3–0.4 mm (0.012–0.016 inches).
Clean both points with a fine file.
Check capacity of condenser with tester, replace it
with new one when necessary.
Correct capacity: 0.25±0.3 µF (micro-Farad)
Insulation resistance : Over 5 MS (Meg-ohm)
The main cause of failure is incorrect ignition timing.
To adjust ignition timing, refer to page 57.
Trouble shooting
72
B. Failures in fuel system
* Engine does not run smoothly at low and middle speeds
Possible causes
Remedies
1. Clogged fuel line . . . . . . . . . . . . . . . . . . . . . . Check the fuel flow from fuel tank to carburetor.
2. Improperly adjusted pilot air screw . . . . . . . Correct adjustment is 2 turns out,
3. Throttle valves not opening synchronously
Adjust both slow adjuster screws and then open the
throttle grip slightly until the "O" mark of throttle valve
matches the upper line of ventilator.
4. Defective carburetor . . . . . . . . . . . . . . . . . . . Air-blast all passages and jets and reassemble parts
properly. Replace gasket with a new one.
* Engine does not run smoothly at high speeds.
1. Fuel tank air vent hole plugged . . . . . . . . . . Air blast the hole
2. Clogged main jet . . . . . . . . . . . . . . . . . . . . . . Air blast the hole
3. Loosely fitting carburetor to engine . . . . . . . Tighten
C. Mechanical failures
1. Insufficient compression . . . . . . . . . . . . . . . Check the compression
Standard : 8.5–9.5 kg/cm 2 (121-135 lbs/in2)
Permissible Limit : 6.3 kg/cm2 (90 lbs/in2)
2. Damaged rotary disc valve . . . . . . . . . . . . . . Replace
3. Worn crankshaft bearings . . . . . . . . . . . . . . Replace
4. Worn oil seals of crankcase . . . . . . . . . . . . . Replace
Tolerances and Fits
73
14. TOLERANCES AND FITS
A. Engine
1. Cylinder compression
2. Maximum speed
Standard
8.5–9.5 kg/cm2 (121-135 lbs/in2)
Over 160 km/h (100 mph)
Permissible Limit
6.3 kg/cm2 (90 lbs/in2)
61.005–61.025 mm
(2.4018–2. 4026 inches)
61.1 mm
(2.4055 inches)
B. Cylinder
1. Inside diameter
Measure at 4 points along the wall
2. Thickness of cylinder
head gasket
3. Nuts (Fitting torques)
0.95–1.05 mm
(0.037–0.041 inches)
250–300 kg/cm2
(217–260 lbs/in2)
C. Piston
1. Maximum diameter
at skirt
2. Maximum clearance
between piston & cylinder
3. Outside diameter of the
piston pin
4. Piston ring free gap
60.956–60.985 mm
60.85mm
(2.3959–2.3967 inches)
(2.3914 inches)
0.04–0.05 mm
0.15 mm
(0.0016–0.0019 inches)
(0.0059 inches)
(Select piston and cylinder to get above clearance when replacing with new one)
16.994–17.00 mm
16.90mm
(0.6678–0.6681 inches)
(0.6288 inches)
0.15–0.35 mm
1.0 mm
(0.0059–0.0138 inches)
(0.0393 inches)
D. Crankshaft & Rotary Disc Valve
1. Inside diameter of big end
of connecting rod
2. Inside diameter of small
end of connecting rod
3. Thrust side play of small
end of connecting rod
4. Thrust side play of big end
of connecting rod
5. Outside diameter of left
crankshaft (A)
30.008–30.017 mm
(1.1793–1.1797 inches)
21.00–21.013 mm
(0.8253–0.8258 inches)
0.l ~ 0.3 mm
(0.004 ~ 0.012 inches)
24.004–25.009 mm
(0.9434–0. 9829 inches)
30.057 mm
(1.1812 inches)
21.053 mm
(0.8274 inches)
4.2 mm
(0.1654 inches)
23.98 mm
(0.9424 inches)
Tolerances and Fits
74
Standard
Permissible Limit
6. Outside diameter of right
crankshaft (B)
21.99–22.005 mm
(0.8642–0.8648 inches)
21.97 mm
(0.8634 inches)
7. Up and down play of crankshaft
Less than 0.02 mm
(0.0008 inches)
3.95–4.00 mm
(0.1552–0.1572 inches)
0.15 mm
(0.0059 inch)
8. Thickness of rotary disc valve
E. Clutch
1. Type
2. Distortion of clutch friction plate
3. Thickness of friction plate
4. Width of teeth of friction plate
5. Distortion of inner plate
6. Distortion of outer plate
7. Free length of clutch spring
Multiple discs (seven facings), dry type
Less than 0.1 mm
(0.0039 inches)
2.95 – 3.00 mm
(0.1161– 0.1181 inches)
.581
Less than 0.2 mm
(0.0078 inches)
Less than 0.2 mm
(0.0078 inches)
30.3–30.9 mm
(1.1908–1.2144 inches)
29 mm
(1.1397 inches)
21
65
13
17
20
23
27
29
32
28
11. 3rd gear B
12. 4th gear B
13. 5th gear B
14. 6th gear B
15. Drive sprocket
16. Driven sprocket
17. Kick gear
18. Kick starter gear A
19. Kick starter gear B
20. Oil pump gear B
0.2 mm
(0.0078 inches)
F. Number of teeth
1. Drive pinion gear
2. Driven gear
3. 1st gear A
4. 2nd gear A
5. 3rd gear A
6. 4th gear A
7. 5th gear A
8. 6th gear A
9. 1st gear B
10. 2nd gear B
25
23
23
22
15
36
22
15
30
25
Tolerances and Fits
75
G. Fork guide
1. Thickness of fork guide
Standard
Permissible Limit
5.35–5.45 mm
(0.2103-0.2142 inches)
5.1 mm
(0.2004 inches)
Measuring thickness of fork guide
H. A.C. Generator & Ignition coil
1. Rated output of A.C.
Generator
62 Watt/2000 Engine rpm
88 Watt/5000 Engine rpm
98 Watt/8000 Engine rpm
2. Ignition timing
23–26° Before Top Dead Center (B.T.D.C.)
3. Contact breaker point gap
0.3–0.4 mm (0.012–0.016 inches)
4. Condenser capacity
0.22–0.28 micro Farad (:F)
5. Ignition coil
Type
Sparks
Insulation resistance
6. Spark plug
Type
Plug gap
HS 12B
Over 9 mm at 1,500 Engine rpm
Over than 500 Meg Ohm (MS)
B-8H or B-9H
0.5–0. 6 mm
(0.020–0.024 inches)
I. Carburetor
1. Type
MikuniVM26SC
2. Throttle valve cut away
2.0 mm
3. Main jet
No. 130
4. Jet needle
4D 3-2/5
5. Pilot jet
No. 22.5
6. Air screw turn-back
2
7. Float level
24±1.0mm(0.98–0.91 inches)
Tolerances and Fits
76
J. Oil pump
Standard
Permissible Limit
1. Min. plunger stroke
0.40–0.45 mm (0.016–0.018inches)
(60cc/h~68cc/h)
at 5000 Engine rpm
Plunger stroke is measured
with a dial gauge
2. Max. plunger stroke
3.6~3.73 mm (0.142–0.147 inches)
(600cc/h~626cc/h)
at 5000 Engine rpm
K. Frame
1. Caster
2. Trail
3. Fuel tank capacity
63
105 mm (4.13 inches)
15 litre (3-4/5 US. gal)
Including 3.2 litre (4/5 US. gal reserve)
2.5 litre (3/5 US. gal)
4.5mm (0.1772 inches)
179.6–179.9mm (7.07–7.08 inches)
180–180.2mm (7.09~7.095mm)
2 mm (0.079 inches)
177mm (6.97 inches)
181mm(7.13 inches)
1. Front fork
Stroke
Oil capacity
Oil surface
120mm (4.716 inches)
220cc (1/2 pint)
405mm (15.92 inches)
435mm (17.09 inches)
2. Rear suspension
Stroke
80 mm (3.14 inches)
4. Oil tank capacity
5. Brake lining thickness
6. Brake shoes thickness
7. Brake drum inside diameter
L. Suspension
M. Lighting equipment
1. Battery
Capacity
Acid capacity
Specific gravity
12V-6AH
390cc (4/5 pint)
1.280 at 20°C (68° F)
1.220
3. Selenium rectifier
Capacity
2.7Amp.
10mm Amp.
4. Head lamp
5. 5th gear indicator lamp
6. Speedometer lamp
7. Stop lamp
8. Tail lamp
9. Horn volume
10. Fuse
11. Speedometer error
12V–35/30W
12V–3W
12V–3W
12V–23W
12V–7W
95–115 phone
10 A
+10% – 0
2. Main switch
Insulation resistance over 1 MS
Tolerances and Fits
77
14. TOLERANCE AND FITS
N. Adjusting Torque
Size
Stud (8×50) Exhaust
Stud (6×40) Dynamo
Stud (8×156) Cylinder
5 mm Hexagon bolt A
6 mm Hexagon bolt A
8 mm Hexagon bolt A
6 mm Clutch set bolt
8 mm Drum guide bolt
8 mm Change arm stopper pin
6 mm Tachometer bushing bolt
5 mm Cross pan head screw
6 mm Cross pan head screw
6 mm Cross flat head screw
40mm Ring nut (clutch)
8 mm Cylinder head nut
20mm Left thread nut (Pinion gear)
8 mm Hexagon nut C (worm shaft)
16mm Hexagon nut (Counter shaft)
Spark plug
8 mm Check valve ass'y.
16mm Drain plug
17mm Hexagonal nut
10mm Hexagonal nut
Kg-cm
250–300
100–120
350–400
40 – 50
60 – 90
140–200
70 – 90
150–200
200–250
70 – 90
35 – 45
60 – 90
60 – 80
400–500
250–300
700–800
150–200
400–500
200–300
60 – 80
400–500
500–700
200–350
Lbs-inch
217–260
86 –104
304–345
35 – 43
52 – 78
122–174
61– 78
130–174
174–217
61– 78
30 – 39
52 – 78
52 – 69
347–434
217–260
608–694
130–174
347–434
174–260
52 – 69
347–434
434–610
174–304
78
15. WIRING DIAGRAM
Wiring Diagram
Performance Information
79
16. PERFORMANCE
16-1 Port Timing
Exhaust Open Period = 89° to 272°
Exhaust Open Duration = 183°
Boost Port Open Period = 115° to 250°
Boost Port Open Duration = 135°
Transfer Port Open Period = 120° to 245°
Transfer Port Open Duration = 125°
Rotary Valve Open Period = 242° to 62°
Rotary Valve Open Duration = 180°
Connecting Rod length = ~ 4-9/16"
Piston Crown Height = ~1.5"
16-2. Port Dimensions
Exhaust W = 1.4" H = 1.06"
Distance from top of cylinder = 1.3" to 2.36"
Mean Area = 150mm2
Transfer W = 1.12" H = 0.5"
Distance from top of cylinder = 1.88" to 2.4"
Mean Area = 56mm2 × 2
Boost
W = 1.08" H = 0.76"
Distance from top of cylinder = 1.82" to 2.58"
Mean Area = 64mm2
16-3. Port Time/Area
Exhaust = 3.4E-4 sec-cm2/cm 3
Transfer = 8.67E-5 sec-cm2/cm 3
Boost =
1.07E-4 sec-cm2/cm 3
16-4. Cylinder Exhaust Tract Length = 2.25" (center)
Actual size
16-5. Head Pipe Length = 12.75" (inside) 14.625" (center) 16.5" (outside)
Performance Information
80
16-6. Squish Band Clearance = 0.035"±0.005"
Squish band (not to scale)
Measure by setting four pieces of solder into grease, radially at each diagonal
edge of the piston, with the piston about a half inch before TDC. Bolt the head
into place, torqued properly, with the head gasket installed and rotate the
engine past TDC. Remove the head and measure the thickness of the solder,
noting where each piece came from. If the four pieces in a cylinder do not
measure the same thickness, it indicates the head is not properly centered on
the cylinder. Adjust the head gasket material thickness to
achieve the desired squish band clearance of
0.035"±0.005". Soft copper can be used for
material, with copper gasket sealer during
final assembly. If the thinnest material
available will not bring clearance below
0.040", then planing and lapping of the
head will be necessary. Milling may
also be required initially to achieve the
Milling head proper combustion chamber contour.
16-7. Rotary Valve
No modification of rotary valves is recommended. Stock intake
timing is optimal for street use. Cutting the disk will result in
increased blowback during all but very high rpm, causing reduced
cylinder charging and enrichening of the fuel/air mixture over
most of the normal operating range. This is due to part of the air
stream then actually entering the carburetor twice, drawing
extra fuel.
16-8. Ignition
Timing = (25° +0 -2) (23°±1 for racing)
Point gap = 0.012"
Spark plug = NGK B-8HV
Add a ground strap from the engine to the frame. This is typically a
braided non-insulated ribbon cable with lugs at each end.
Intake valve
16-8. Expansion Chamber
The chamber below will slip fit on the stock headpipe. The first segment (straight pipe) can be made long to start
with, then cut shorter to move the power peak higher in the rpm band until the desired point is reached. The length
below should cause power to roll off beyond redline, but is sensitive to actual exhaust port height. An adjustable
(slotted) mount is recommended to allow tailoring to riding preference. The internal stinger reduces noise levels
significantly, but for street use a canister-type
silencer is still recommended.
Expansion chamber