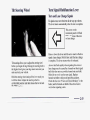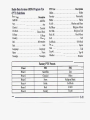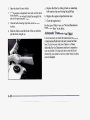
1
I 9 9 8
0 W N.E R ' S
M A N U A L
.
.
I o set theclock, press and hold.HR
4
ange. Releasethe button tis yoit--;
1
. - - I
b
L
P
:+-.
:ii
,.cc
-+\
The 1998 Cadillac Catera Owner’s Manual
1-1
Seats and Restraint Systems
This section tells you how to use your seats and safety belts properly. It also explains the air bag system.
2-1
Features and Controls
This section explainshow to start and operate your vehicle.
3-1
Comfort Controls and Audio Systems
This section tells you how to adjust the ventilation and comfort controls and how to operate your audio system.
4- 1
Your Driving and the Road
Here you’ll find helpful information and tips about the road and how
drive
tounder different conditions.
Problems on the Road
This section tells what to do if you have a problem while driving, such as a flat tire or overheated engine, etc.
5-1
6-1
Service and Appearance Care
Here the manual tellsyou how to keep your vehicle running properly and looking good.
7-1
Customer Assistance Information
This section tells you how to contact Cadillac for assistance and how to get service and owner publications.
It also gives you information on “Reporting Safety Defects” on page
7- 12.
8-1
Index
Here’s an alphabetical listing of almost every subject in this manual. You can to
usequickly
it
find
something you want to read.
f
Ir‘
GENERAL MOTORS, GM andthe GM Emblem,
CADILLAC andthe CADILLAC Emblem are
registered trademarksof General Motors Corporation.
This manual includesthe latest information at the time
it
was printed.We reserve the right to make changes in the
product after thattime without further notice. For
vehicles first sold inCanada, substitute the name
“General Motors of Canada Limited”for Cadillac Motor
Car Division wheneverit appears in this manual.
so it will be
Please keep this manual in your vehicle,
there if you ever need it whenyou’re on the road.If you
sell the vehicle, please leave this manual insoitthe new
owner can use it.
We support voluntary
technician certification.
LL
WE SUPPORT
VOLUNTARY TECHNICIAN
CERTIFICATION THROUGH
National Institutefor
AUTOMOTIVE
SERVICE
EXCELLENCE
For Canadian Owners Who Prefer
a
French Language Manual:
A m propriktaires canadiens: Vous pouvez vous
procurer un exemplaire de ce guide en franpis chez
votre concessionaireou au:
DGN Marketing Services Ltd.
1577 MeyersideDr.
Mississauga, OntarioL5T lB9
Litho in U.S.A.
Part No. 10407697 B First Edition
ii
@CopyrightGeneral Motors Corporation 1997
All Rights Reserved
1 9 9 8 E D I T I O N
Congratulations.
Cadillac has been designing and building luxurycars for 96 years.
With the Catera, you have selected the first Cadillac ever to
be engineered andmanufactured in Germany.
It is a uniqueexpression of Cadillac luxury with a sensibility to
European ride and handling. With proper care, your Catera will deliver
mile after mile of exciting, performance-oriented luxury driving.
Drive safely and enjoy.
Luxury truly can be fun.
THE CADDY THATZICS.m
THE CADDY THAT ZKXTM
iv
How to Use this Manual
Many people read their owner’s manualfrom beginning
to end when theyfirst receive their new vehicle.If you
do this, it will help you learn about the features and
controls for your vehicle. In this manual, you’llfind
that pictures and words work together to explain
things quickly.
Index
A good place to look for what you needis the Indexin
back of the manual. It’s an alphabetical
list of what’s in
the manual, andthe page number where you’ll find it.
Safety Warnings andSymbols
You will find a numberof safety cautions in this book.
We use a box and the word CAUTION
to tell you
about things that could hurt you if you were
to ignore
the warning.
These mean thereis something that could hurt
you or other people.
In the caution area, we tell you what the hazardThen
is.
we tell you what to
do to help avoid or reduce the
hazard. Please read these cautions.
If you don’t, you or
others couldbe hurt.
You will also find a circle
with a slash throughit in
this book. This safety
symbol means“Don’t,’’
“Don’t do this” or “Don’t
let this happen.”
Vehicle Damage Warnings
Also, in this bookyou will find these notices:
NOTICE:
These mean thereis something that could
damage your vehicle.
In the notice area,we tell you about something that can
damage your vehicle. Many times, this
damage would
not be covered by your warranty, andit could be costly.
But the notice willtell you what to do to help avoid the damage.
When you read other manuals, you might see CAUTION
and NOTICE warnings in different colors or in
different words.
You’ll also see warning labelson your vehicle. They use
the same words, CAUTION
or NOTICE.
Vehicle Symbols
These are some of the symbols you may findon your vehicle.
For example,
these symbols
are used on an
original battery:
CAUTION
POSSIBLE
INJURY
A
These symbols
are important
for you and
your passengers
whenever your
vehicle is
driven:
DOOR LOCK
UNLOCK
PROTECT
EYES BY
SHIELDING
CAUSTIC
BAlTERY
ACID COULD
CAUSE
BURNS
These symbols
have to do with
your lamps:
TURN
SIGNALS
These symbols
are on some of
your controls:
COOLANT
TEMP
ee
BAllERY
CHARGING
SYSTEM
WINDSHIELD
DEFROSTER
FASTEN
SEAT
BELTS
These symbols
are used on
warning and
indicator lights:
SPARK OR
FLAME
COULD
EXPLODE
BAllERY
WINDOW
DEFOGGER
POWER
WINDOW
ENGINE OIL
PRESSURE
,\I/,
FOG LAMPS
$0
VENTILATING
FAN
I-1
FUSE
LIGHTER
I
(0) b
HORN
BRAKE
COOLANT
AVOID
SPARKS OR
FLAMES
Here are some
other symbols
you may see:
ANTI-LOCK
BRAKES
a
SPEAKER
e,
(e)
FUEL
b
la
b% NOTES
,-h’-a*
Section 1 Seats and Restraint Systems
Here you’ll find information about the seats in your vehicle and how to use your safety belts properly.
You can also
learn about some things you should not do with air bagsand safety belts.
1-2
Seats and Seat Controls
SafetyBelts: They’re for Everyone
1- 13
1-18Here
are Questions Many People Ask About
Safety Belts -- and the Answers
1-19How
to Wear SafetyBelts Properly
1-19
Driver Position
1-26
SafetyBelt Use During Pregnancy
1-27
Right Front Passenger Position
1-27
1-36
1-40
1-43
1-53
1-56
1-56
1-57
Air BagSystems
Rear Seat Passengers
Children
Child Restraints
Larger Children
Safety BeltExtender
Checking Your Restraint Systems
Replacing Restraint System Parts After
a Crash
Seats andSeat Controls
This section tells you about the seats
-- how to adjust
them, and also about reclining front seatbacks,lumbar
adjustments, heated seats and head restraints.
Manual Front Passenger’s Seat
To tilt the front portionof the seat cushion up or down,
lift the seat lever located
on the sideof the seat cushion
closest to the door. Release the lever to lock the seat
into place.
This feature is available on vehicles with cloth seats
only. Lift the bar under the front passenger’s seat to
unlock it. Slide the seat to where you want
it and release
the bar. Try to move the seat with your body to be sure
the seatis locked into place.
Manual Lumbar Support
The lumbar control is
located on the sideof
each front seatback closest
to the door.The control
provides additional support
to your lower back and
works independently of
other seat controls.
10 raise the
seat cushion up or down, press one of
the rocker switch buttons located onthe side of the
passenger’s seatcushion closest to the door. The top
button raisesthe seat cushion and the bottom button
lowers the seat cushion.
Use manualor power seat controlsfirst to getthe
proper seating position.Then proceed with the
lumbar adjustment.
The upper andlower seatback canbe adjusted using the
small hand-wheel control. Turnthe control forward to
increase support andrearward to decrease support.
Keep in mind that as your seating position changes,
as
it may during long trips, so should the positionof the
lumbar support. Adjust the seat as needed.
This feature is available on all driver’s seats and only
on passenger’sseatswithleatherinteriors.
If a failureinthepowersupplysystemoccurs,thepower
The power seat controls are located on the side of the seats can be manually adjusted by inserting the crank
front
seat
cushions
closest
to the door.
handle
into the
slot
located
below
the
seat
cushion
(as
shown in the above illustration).Turn the crank handle
Lift up or push down on the front of the control to
to the right until you’ve reached your desired seating
adjust the front portion of the cushion up or down. position (note that manually moving the
seat requires
Move the rear of the control up or down to adjust the turning the crank handle many times).
rear
portion
of the
cushion.
The crank
handle is provided
the
tool
in
located
kit in
To adjust the seat height, lift up or push down on the the trunk (with the
center of the control.
To move the seat forwardor rearward, slide the
control in the desired direction.
jack).
Memory Seat and Mirrors (Option)
These buttons are located on the side
of the driver’s
seat closest tothe door. Seat andmirror positions may
be programmedfor two additional drivers by repeating
the above steps and pressing memory button
“2” or “3”
instead of memory button 1.
If your vehicle isin PARK (P), you can recall mirror
and seating positions by pressing and holding
one of
the three memory buttons.This will adjust the seat and
mirrors to where you
have previously programmed
them. Seat and mirror movement is immediately stopped
if the memory button is released or if a seat or mirror
control is moved.
Note thatthe exterior mirrorswill only adjust whenthe
ignition is turned on.
Adjust the driver’s seatto a comfortable position. Also
adjust the interior and exterior mirrors. Press memory
button “M’ and memorybutton “1” at the same time.
Also note thatif you try to adjust the driver’s memory
seat andit doesn’t move,try opening the driver’s door.
This will re-activate power tothe driver’s seat. (Power
to the driver’s seat “times out” after
30 seconds. Power
to the passenger’s seatis always present.)
1-5
Heated Front Seat (Option)
‘1
The controls are located
next to the radio on the
center console. Press this
button to turn onthe heating
element in the seat.The
seatback and cushion are
warmed until they match
your body temperature.
Reclining Front Seatbacks
This feature is found on
the passenger’s seat only.
The manual recliner control
is located on the side
of
the passenger’s seatback
closest to the door, below
the lumbar control. See
“Manual LumbarSupport’’
earlier in this section.
A telltale light in the button reminds you that the heating
system is in use. The heated seatscan only be used when
To move the seatback forward, turn the hand-wheel
the ignitionis turned on.
control forward. Turn the control rearward to recline
the seatback.
If you have cloth seats, and
if you want to fold the
seatback all the way down provide
to
extra storage, see
“Passenger Seatback Latch” later in this section.
I
-
I
But don’thave a seatback reclined if
your vehicle
is moving.
Sitting in a reclined position when your
vehicle is
in motion canbe dangerous. Evenif you buckle
up, yoursafety belts can’tdo their jobwhen
you’re reclined likethis.
The shoulderbelt can’t do its job
because it
won’t be against yourbody. Instead, itwill be
in frontof you. In a crashyou could go into it,
receiving neck or other injuries.
The lapbelt can’t do its jobeither. In a crash
the belt couldgo up over your abdomen. The
belt forceswould be there, notat yourpelvic
bones. This could cause seriousinternal injuries.
For proper protectionwhen the vehicle is in
motion, havethe seatback upright. Then sit
well back in the seat and wear your safety
belt properly.
Passenger’s Seatback Latch (Option)
Power Recliner
The passenger’s seatback latch
is available on cloth
This feature is available on all driver’s seats andis
optional on passenger’s seats with leather interiors only. seats only.
These controls are located
on the sideof each front
seatback closestto the
door. Press the control
forward or rearward to
adjust the seatback.
The latch is locatedon
the side of the passenger’s
front seatback closest to the
door, above the manual
recliner and lumbar support
control. Lift the latch and
push the passenger’s
seatback toward the front
of
the vehicleto provide extra
storage in your vehicle,
if needed.
Head Restraints
Slide the head restraint up down
or so that the topof the
restraint is closest to the top
of your ears. This position
reducesthechance
of a neckinjury in a crash.
The head restraints tilt forward and rearward also.
1Wtcouldmove
forward in a sudden stop or crash. That
could
cause injury to the person sitting there. Always
press rearward on the seatback to be sure it
is locked.
Removable I= ad Restraints
AC
*
UTION:
If a head restraint is not installed on the
seatback
or stored in the vehicle properly, it could be
thrown about the vehicle ina crash or sudden
maneuver. People inthe vehicle could be injured.
Remove the head restraints only when you need
to fold the seat,and be sure that the head
restraints are stored securely in thetrunk. When
the seat is returned to the passenger position, be
sure the head restraints are installed properly.
For morecargo space or to fold down the front
passenger’s seat, you may need toremove the head
restraint. Press both release buttons at thetop of the
seatback and slide the head restraint out of the height
adjust tubes.
Rear Seats
r
A safety belt that is twisted
or not properly
attached won’t provide the protection needed
in a crash.A person wearing a twisted or
not
properly attached belt couldbe seriously injured.
After raising the rear seatback, always check
to
be sure that the safety belt
is not twisted andis
properly attached.
The head restraint should be stored securely
on the
driver’s sideof the trunk as shown.
Replace the head restraint when
you have finished
carrying cargoor when the passenger’s seat is returned
to its normal upright position.
Folding the Rear Seat
With the rear folding seatbacks, youcan carry long
cargo by folding downpart or all of the rear seat.
Before you can fold the rear seat, you need to unlatch
the center buckle.
Insert a key or a similar
object into the slot as shown
to unlatch the buckle.Move
the belt to the side so it is
not in yourway.
To unlock therear seatback, pressthe pushbutton at the
top of the seat and foldthe seatback forward.To return
the seat to thepassenger position, lift up on the seatback
and pushit rearward untilit latches. After returning the
seat to thepassenger position, pull forward on the
seatback to make sure it is locked into place.
..
...
Return the safety belts to
their original positionsso
they will be availablefor
rear seat passengersto use.
To do so, slide the buckle
into the latch as shown.
The panel behindthe rear seat armrest also folds.
Turn
the knob to the
left and pull the panel forward to gain
access tothe trunk. When finished using the panel,
return it to its original position and
turn the knob to the
right to secure.
Heated Rear Seat (Option)
The heated rear seat
controls are located at the
rear of the centerconsole
under the airoutlets. Press
the button once to turn on
the heating system and
press the button again to
turn the system off.
A telltale light in the button indicates the system is in
use. The heated seats can only be used when the ignition
is turned on. The heating system shuts off automatically
when the ignition is turned off.
Safety Belts: They’re for Everyone
This part of the manual tells you how to use safety belts
properly. It also tells yousome things you should notdo
with safety belts.
And it explains the air bag system.
I
A CAUTION:
I
Don’t let anyone ride where heor she can’t wear
a safety belt properly. If you
are in a crash and
you’re not wearinga safety belt, yourinjuries
can be much worse.You can hit things inside the
vehicle or be ejected from it.
You can be seriously
injured or killed. In the same crash,you might
not beif you are buckled up, Always fasten your
safety belt,and check that your passengers’ belts
are fastened properly too,
Your Catera has a light
that comes on as a reminder
to buckle up. (See “Safety
It is extremely dangerous to ridein acargo area,
inside or outside of a vehicle. In a collision,
people ridingin these areasare morelikely to be
seriously injured or killed. Do not allow people to
ride in any area
of your vehicle that is not
equipped with seats andsafety belts. Be sure
everyone in yourvehicle is in a seat and using a
safety belt properly.
Belt Reminder Light”in
the Index.)
In most states and Canadian provinces,
the law says to
wear safety belts. Here’s why:They work.
You never know if you’ll be in a crash. If you
do have
a crash, you don’t know if it will
be a bad one.
A few crashes are mild, and
some crashes can beso
serious that even buckled
up a person wouldn’t survive.
But most crashes are in between.
In many of them,
people who buckleup can survive and sometimes
walk away. Without belts they could have been badly
hurt or killed.
After more than30 years of safety beltsin vehicles,
the facts are clear.In most crashes buckling up does
matter ... a lot!
Why Safety BeltsWork
When you ride in or on anything, you go as fast as
it goes.
I
Put someone on it.
Take the simplest vehicle.Suppose it's just a seat
on wheels.
Get it upto speed. Then stop the vehicle.
The rider
doesn't stop.
The person keeps going until stopped by something.
In a real vehicle, it could be the windshield
...
or the instrument panel ...
or the safety belts!
With safety belts,you slow down as the vehicle does.
You get moretime to stop. You stop over more distance,
and your strongest bones take the forces. That's
why
safety belts makesuch good sense.
Here Are Questions Many People Ask
About Safety Belts -- and the Answers
@
Won’t I be trapped in the vehicle after an
accident if I’m wearing
a safety belt?
A:
You could be -- whether you’re wearing a safety
belt or not. But youcan unbuckle a safety belt,
even if you’re upside down.And your chance of
being consciousduring and after an accident,so
you can unbuckle and get out,is much greater if
you are belted.
@
If my vehicle has air bags, why should I have to
wear safety belts?
A:
Air bags are in many vehicles today and will be
But they are
in most of them in the future.
supplemental systems only;so they work with
safety belts-- not insteadof them. Every air bag
system ever offeredfor sale has required the use
of safety belts. Evenif you’re in a vehicle that has
air bags,you still have tobuckle up to get the most
protection. That’s true not only in frontal collisions,
but especially in side and other collisions.
&:
A:
If I’m a good driver, and I never drive
far from
home, why shouldI wear safety belts?
You may be an excellent driver, but
if you’re in an
accident -- even one thatisn’t your fault-- you and
your passengers can be hurt. Being
a good driver
doesn’t protect youfrom things beyond your
control, such as bad drivers.
Most accidentsoccur within 25 miles (40 km)of
home. And the greatest numberof serious injuries
and deathsoccur at speeds of less than 40 mph
(65 km/h).
Safety beltsare for everyone.
How to Wear Safety Belts Properly
Adults
This part is only for people of adult size.
A
Be aware that there are special things to know
about
safety belts and children. And thereare different
rules for smaller children and babies.If a child will
be riding in your vehicle, see the part of this
manual called “Children.”Follow those rulesfor
everyone’s protection.
First, you’ll wantto know which restraintsystems
your vehiclehas.
We’ll start withthe driver position.
Driver Position
This part describesthe driver’s restraint system.
Lap-Shoulder Belt
The driver has a lap-shoulder belt. Here’s howto wear
it properly.
1. Close and lock the door.
2. Adjust the seat (to see how, see “Seats” in the Index)
so you can sit up straight.
3. Pick up the latch plate and pull the belt across you.
Don’t let it get twisted.
The shoulder belt maylock if you pullthe belt across
you very quickly. If thishappens, let the beltgo back
slightly to unlockit. Then pull the belt across you
more slowly.
4. Push the latch plate into the buckle until it clicks.
1-19
Pull up on the latch plate tomake sure it is secure.
If the beltisn’t long enough, see “Safety Belt
Extender” at the end of this section.
Make sure the release button on
the buckle is
positioned so you would be able to unbuckle the
safety belt quicklyif you ever had to.
.
5. To make the lap part tight, pull downon the buckle
end of the belt asyou pull up on the shoulder belt.
The lap partof the belt should beworn low and snug on
the hips,just touching the thighs. In a crash, this applies
force tothe strong pelvic bones. And you’d be less likely
to slide under the lap belt.
If you slid under it, the belt
would apply force at your abdomen. This could cause
serious or even fatal injuries. The shoulder belt should
go
over the shoulder and across the chest. These parts
of the
body are best able to take belt restraining forces.
The safety belt locksif there’s a sudden stop or crash, or
if you pull the belt very quickly out
of the retractor.
moulder Belt Height Adjuster
Before you begin to drive, move
the shoulder belt
adjuster tothe height that is rightfor you.
move it down, push in and move the height adjuster
to the desired position. You can move the adjusterup
just by pushing upon the bottom of the height adjuster.
After you movethe adjuster to where you wantit, try to
move it down without pushing in to make sure it has
locked into position.
10
Adjust the height so that the shoulder portionof the
belt is centered on your shoulder.The belt should be
away from your face and neck, but not falling
off
your shoulder.
1-21
a:
What's wrong with this?
-
-
You can be seriously hurt
if your shoulder beltis
too loose. In a crash, you would move forward
too much, which could increase injury. The
shoulder belt should
fit against your body.
A:
The shoulder beltis too loose. It won't give nearly
as much protection this way.
@
What’s wrong with this?
You can be seriouslyinjured if your beltis
buckled inthe wrong place like this.
In a crash,
the belt wouldgo up over your abdomen. The
belt forces wouldbe there, notat the pelvic
bones. This could cause serious
internal injuries.
Always buckle your belt into the buckle
nearest you.
A:
The belt is buckled in the wrong place.
@'
What's wrong with this?
A CAUT-3N:
You can be seriously injured if you wear the
a crash, your
shoulder belt under your arm. In
body would move too far forward, which would
increase the chance
of head andneck injury.
Also, the belt would apply too much force to the
ribs, which aren't as strong as shoulderbones.
You could alsoseverely injure internal organs
like your liver or spleen.
A:
The shoulder beltis worn underthe arm. It should
be worn over the shoulderat all times.
I
Q:
What's wrong with this?
A
CAUTION:
You can be seriously injured by
a twisted belt. In
a crash, you wouldn't have the full width
of the
belt to spread impact forces. If a belt
is twisted,
make it straightso it canwork properly, or ask
your dealer tofix it.
I
1
A:
I
f
I
I
I
I
I
I
The belt is twisted across the body.
I
1
J
I
Safety Belt Use During Pregnancy
Safety beltswork for everyone, including pregnant
women. Like all occupants, they are more likely to be
seriously injured if they don’t wear safety belts.
To unlatch the belt,just push the buttonon the buckle.
The belt shouldgo back out of the way.
Before you close the door,
be sure the belt is out
of the
way. If you slam the door on it, youcan damage both the
belt and your vehicle.
A pregnant woman should wear a lap-shoulder belt, and
the lap portion shouldbe worn as low as possible, below
the rounding, throughoutthe pregnancy.
The best way to protect thefetus is to protect the
mother. When a safety belt
is worn properly, it’s more
likely thatthe fetus won’t be hurt in a crash.For
pregnant women, as for anyone, the key to making
safety belts effective is wearing them properly.
Right Front Passenger Position
To learn how towear the right front passenger’s
safety belt properly, see“Driver Position” earlier in
this section.
The right front passenger’s safety belt works the same
way as the driver’s safety belt-- except for one thing.
If you ever pull the shoulder portion of the belt out all
the way, you will engage the child restraint locking
feature. If this happens, just let the belt go back all
the way and start again.
Air Bag Systems
This part explains the frontal and side
impact air
bag systems.
Your vehicle has air bags-- a “Next Generation” frontal
air bag for the driver and another
“Next Generation”
reduced-force frontal air bagfor the right front
passenger. Your vehicle may also haveside impact air
bags -- a side impact air bagfor the driver and another
side impact air bag for the right front passenger.
If your vehicle has
side impact air bags, it
will sayAIR BAG on
the air bag covering on
the sideof the driver’s
and rightfront
passenger’s seatback
closest to the door.
Next Generation frontal air
bags are designed to help
reduce the risk of injury from the force of an inflating
frontal airbag. But even these air bags must inflate very
quickly if they are to do their
job and comply with
federal regulations.
Here are the most
important things to know about the air
bag systems:
You can beseverely injured orkilled in a crashif
--
you aren’t wearing your safety belt even if you
have air bags. Wearing your safety belt during a
crash helps reduce your chance
of hitting things
inside the vehicle or being ejected from
it. Air
bags are ‘(supplemental restraints” to the safety
belts. All air bags even Next Generation air
bags are designed to work with safety beltsbut
don’t replacethem.
CAUTION: (Continued)
--
--
Next Generation frontalair bags for the driver
and right front passenger are
designed to work
only in moderate to severe crashes where the
front of your vehicle hits something.They aren’t
designed to inflateat all inrollover, rear, side or
low-speed frontal crashes. And, for unrestrained
occupants, Next Generation frontal airbags may
provide less protection in frontal crashed than
more forcefulair bagshave provided in the past.
The side impact air bags for the driver and right
front passengerare designed to inflateonly in
moderate tosevere crashes where something hits
the sideof your vehicle. They aren’t designed to
inflate in frontal, in rollover
or in rear
crashes.
Everyone in yourvehicle should wear a safety
there’s an air bag
belt properly whether or not
for that person.
--
I A CAUTION:
Both frontal andside impactair bags inflate with
great force, faster than the blink
of an eye. If
you’re too close to an inflating air bag, it could
seriously injure you. This is true even with Next
Generation frontalair bags. Safety belts help keep
you in position for air bag inflation before and
during a crash. Always wear your safetybelt, even
with Next Generationfrontal air bags. The driver
should sitas far back as possible whilestill
maintaining controlof the vehicle. Front occupants
should not lean onor sleep against the door.
I
A C WTION:
I
Children who are up against, or very close to, any
air bag whenit inflates can be seriouslyinjured
or killed. This istrue even though your vehicle
has Next Generation frontal air bags. Air bags
plus lap-shoulder belts offerthe best protection
for adults, but not for young children and
infants. Neitherthe vehicle’s safety belt system
nor its air bag system is designed
for them.
Young children and infants need the protection
that a child restraint system can provide. Always
secure children properly in your vehicle. To read
how, seethe part of this manual called
“Children” and see the caution labelson the
sunvisors and the right front passenger’s
safety belt.
I
There is an air bag
readiness light on-the
instrument panel, which
shows the air bag symbol.
How the Air Bag Systems Work
Where are the airbags?
The driver’s frontalair bag is in the middle of the
steering wheel.
The system checks theair bag electrical systemfor
malfunctions. The light tells you if there
is an electrical
problem. See “Air Bag Readiness
Light” in the Index
for more information.
1-30
The right front passenger’s frontal air
bag is in the
instrument panel on the passenger’sside.
The driver’s sideimpact air bagis in the sideof the
driver’s seatback closest to the door.
The right front passenger’s sideimpact air bag is in the
side of the passenger’s seatback closest to the door.
When shouldan air bag inflate?
If something is between
an occupant and an air
bag, the bag might not inflate properly
or it
might forcethe object into that person. The path
of an inflating air bag mustbe kept clear. Don’t
put anything betweenan occupant and an air
bag, and don’t attach or put anything on the
steering wheel hub or on or near any other air
bag coveringand don’t let seat covers block the
inflation path of a side impact air bag.
The driver’s and rightfront passenger’s frontalair bags
are designed to inflate in moderate to severe frontal
or
near-frontal crashes.The frontal air bags are designed to
inflate onlyif the impact speedis above the system’s
designed “thresholdlevel.” If your vehicle goes straight
into a wall that doesn’t movedeform,
or
the threshold
level is about 9 to 15 mph (14 to 24 km/h). The
threshold level can vary, however, with specific vehicle
design, so that it can be somewhat above or below this
range. If your vehicle strikessomething that will move
or deform, such as a parked car, the threshold level
will be higher.The driver’s and right front passenger’s
frontal air bags are not designed
to inflate in rollovers,
side impacts,or rear impacts, because inflation would
not helpthe occupant.
The driver’s and rightfront passenger’s sideimpact air
bags are designed to inflate in moderate to severe side
crashes involving afront door. A side impact air bag
will inflate if the crash severityis above the system’s
designed “threshold level.”The threshold level can
vary with specific vehicledesign. Side impact air bags
are not designed to inflate in frontal or near-frontal
impacts, rollovers or rear impacts,
because inflation
would not help the occupant.
A side impact air bag will
only deploy onthe side of the vehicle thatis struck.
In any particular crash,no one can say whether an air
bag shouldhave inflated simplybecause of the damage
to a vehicleor because of what the repair costs were.
For frontal air bags, inflation isdetermined by the angle
of the impact and how quickly the vehicle slows down
in frontal and near-frontal impacts. Forside impact air
bags, inflationis determined by the location of the
impact and how quicklythe side of the vehicledeforms.
What makes an air bag inflate?
In an impact of sufficient severity,the air bag sensing
system detects that the vehicleis in a crash.For both
frontal and sideimpact air bags,the sensing system
triggers a releaseof gas from the inflator, which inflates
the air bag. The inflator, air bagand related hardware
are all partof the air bag modules inside the steering
wheel, instrument panel and the sideof the front
seatbacks closestto the door.
How does an air bag restrain?
In moderate to severe frontal or near frontal collisions,
even beltedoccupants can contact the steering wheelor
the instrument panel. In moderate to severe side
collisions, even belted occupants can contact the inside
of the vehicle.The air bag supplements the protection
provided by safety belts.Air bags distributethe force of
the impact more evenly over the occupant’supper body,
stopping the occupant more gradually.But the frontal air
bags would not help you in many types
of collisions,
including rollovers,rear impacts, and side impacts,
primarily because an occupant’s motionis not toward
the air bag.Side impact air bags would not help you in
many typesof collisions, including frontal or near
frontal collisions, rollovers, and rear impacts, primarily
because an occupant’s motion is not toward those air
bags. Air bags shouldnever be regarded as anything
more than asupplement to safety belts, and then only
in
moderate to severe frontal or near-frontal collisions
for
the driver’s and rightfront passenger’s frontal air bags,
and only inmoderate to severe side collisions for the
driver’s and rightfront passenger’s side impact air bags.
What will you see after anair bag inflates?
After an air bag inflates, it quickly deflates,
so quickly
that some people may not even realize the air bag
inflated. Some components of the air bag module-- the
steering wheel hubfor the driver’s air bag, the
instrument panelfor the right front passenger’s bag, the
side of the seatback closestto the doorfor the driver and
right front passenger’s side impact air bags -- will be
hot for a short time.The parts of the bag thatcome into
contact with youmay be warm, but not too hot to touch.
There will be some smoke and dust comingfrom the
vents in the deflated air bags. Air bag inflation doesn’t
prevent the driver from seeing or being able to steer the
vehicle, nor does itstop people from leaving the vehicle.
When an air bag
inflates, there is dust in the air.
This dustcould causebreathing problems for
people with a history of asthma or other
breathing trouble. To avoid this, everyone in the
vehicle should get out assoon as it is safe todo so.
If you have breathing problems but
can’t getout
of the vehicle after anair bag inflates,then get
fresh airby opening awindow or a door.
I
In many crashes severe enough to inflate an
air bag,
windshields are brokenby vehicle deformation.
Additional windshield breakage may also occur
from the
right front passenger air bag.
Air bags are designed toinflate only once. Afteran
air bag inflates, you’ll need
some new parts for your
air bag system.If you don’t get them, the
air bag
system won’t be there to help protect you in another
crash. A new system will include air bag modules
and possibly other parts.
The service manualfor your
vehicle covers the need to replace other parts.
0
0
Your vehicle is equipped with a crash sensing and
diagnostic module, which recordsinformation about
the frontal air bag system.The module records
information about the readinessof the system,
when the sensors are activated and driver’s safety
belt usage at deployment.
Let only qualified technicians work onyour air
bag systems. Improper service can mean that an
air bag system won’t work properly.See your dealer
for service.
Servicing Your Air Bag-Equipped Vehicle
Air bags affect how your vehicle should
be serviced.
There are partsof the air bagsystems in several places
around your vehicle.Your dealer and theCatera Service
Manual have information about servicing your vehicle
and the air bag systems.To purchase a servicemanual,
see “Service and Owner Publications” in the Index.
I
For up to 10 seconds after theignition key is
NOTICE:
If you damage the covering for the
driver’s or
the right frontpassenger’s air bag, or the air
bag covering on the driver’s and right front
passenger’s seatback, the bagmay not work
properly. You may haveto replace theair bag
module in the steering
wheel, both the air bag
module and the instrument panel for the right
front passenger’s airbag, or both theair bag
module and seatback for the driver’s and right
front passenger’s sideimpact airbag. Do not
air bag coverings.
open or break the
turned off and the batteryis disconnected, an
air bag can still inflate during improper
service.
You can be injured if you are close to an air bag
when it inflates. Avoid wires wrapped with yellow
felt, wireswrapped with yellow tape oryellow
connectors. Theyare probably part
of the air
bag systems. Be sure tofollow proper service
procedures, and make sure the person
performing work foryou is qualified todo so.
The air bag systems do not need regularmaintenance.
1-35
.
-
.
-
Rear Seat Passengers
Lap-Shoulder Belt
All three rearseating positions have lap-shoulder belts.
It’s veryimportant for rear seat passengersto buckle up!
Accident statistics show that unbelted people in the rear Here’s how to wearone properly.
seat are hurt more often
in crashes than thosewho are
wearing safety belts.
Rear passengers who aren’t safety belted can be thrown
out of the vehiclein a crash. And they can strike others
in the vehicle whoare wearing safety belts.
Rear Seat Passenger Positions
1. Pick up the latch plate and pull the belt across you.
Don’t let it get twisted.
The shoulder beltmay lock if you pull the belt across
you very quickly. If thishappens, let the beltgo back
slightly to unlockit. Then pull the belt across you
more slowly.
1-36
2. Push the latch plate into the buckle until it clicks.
Pull upon the latch plate tomake sure it is secure.
When the shoulder beltis pulled out allthe way, it
will lock.If it does, let it go back all the way and
start again.If the belt is not long enough, see “Safety
Belt Extender” at the end of this section. Make sure
the release button onthe buckle is positioned so you
would be able to unbuckle the safety belt quickly
if
you ever had to.
3. To make the lap part tight, pull down on the
buckle
end of the belt as you pull up on the shoulder part.
1-37
Each position next to the windows has a shoulder belt
height adjuster. Move the shoulder belt adjuster to the
height thatis right for you.
The lap partof the belt should be worn low and snug
on
the hips,just touching the thighs. In a crash, this applies
I
force to the strong pelvic bones. And you'd be less likely
to slide under the lap belt.
If you slid under it, the belt
Press the release button and move the height adjuster
would apply force at your abdomen.
This could cause
to the desired position. After you move the adjuster
serious or even fatal injuries.
The shoulder belt shouldgo
to where you want it, try to move it down without
over the shoulder and across the chest. These parts
of the
pressing the release buttonto make sure it has locked
body are best able to take belt restraining forces.
into position.
The safety belt locksif there's a sudden stopor a crash,
or if you pull the belt very quickly
out of the retractor.
Adjust the heightso that the shoulder portion of the
belt is centeredon your shoulder.The belt should be
away from your face and neck, but not falling off
your shoulder.
1tA CAUTION:
I
You can be seriously hurt if your shoulder belt
is
too loose. In a crash, you would move forward
too much, which could increase injury. The
shoulder belt shouldfit against your body.
To unlatch the belt, just push the button onthe buckle.
Children
Everyone in a vehicle needs protection! That includes
infants and all children smaller than adult size. Neither
the distance traveled nor the age and size
of the traveler
changes the need, for everyone, to use safety restraints.
In fact, the law in every statein the United States andin
every Canadian province says children
up to some age
must be restrained whilein a vehicle.
Smaller Children and Babies
---
A CAUTION:
I
Children who are up against,or very close to,any
air bag whenit inflates can be seriouslyinjured
or killed. This istrue even though your vehicle
has NextGeneration frontal air bags. Air bags
plus lap-shoulder belts offer the best protection
for adults, but not for young children and
infants. Neither the
vehicle’s safety belt system
nor its air bag system is designed
for them.
Young children and infants need the protection
that a child restraint system can provide. Always
secure children properly your
in vehicle.
A CAUTION:
I
Smaller children and babies should always
be
restrained in a child or infant restraint. The
instructions for the restraint will saywhether
it is the right type and size for your child.A
very young child’ship bones are so small that a
regular belt might notstay low on the hips, as it
should. Instead, the beltwill likely be over
the
child’s abdomen. In a crash, the belt would apply
force right on the child’s abdomen, which could
cause seriousor fatal injuries. So, be sure that
any child small enough
for one is alwaysproperly
restrained in a child or inf& rwaink
Infants need complete support, including supportfor
the head and neck.This is necessary because an
infant’s neck is weak and
its head weighsso much
compared with the restof its body. Ina crash, an infant
in a rear-facing restraint settles intothe restraint, so the
crash forcescan be distributed acrossthe strongest part
of the infant’s body, the back and shoulders.
A baby
should be secured in an appropriate infant restraint.
This is so important that many hospitals today won’t
release a newborn infant toits parents unless there is
an infant restraint availablefor the baby’s first trip in
a motor vehicle.
at only 25 mph (40 km/h), a 124b. (5.5 kg) baby
will suddenly become a 240-lb. (110 kg) force on
your arms. The babywould be almost impossible
to hold.
Secure the babyin an infant restraint.
Never hold a baby in your arms
while riding in a
vehicle. A baby doesn’t weigh much until a
crash. Duringa crash a baby will become so
heavy you can’t hold it. For example, in acrash
CAUTION: (Continued)
--
Child Restraints
Every time infants and young childrenride in
vehicles, they should have protectionprovided by
appropriate restraints.
@
What are the differenttypes of add-on
child restraints?
A:
Add-on child restraints are available infour
basic types.When selecting a child restraint, take
into consideration not onlythe child’s weight and
size, but also whetheror not the restraint willbe
compatible with the motor vehicle in which it
will be used.
An infant car bed (A)is a special bed madefor
use in a motor vehicle. It’s an infant restraint
system designed to restrainor position a child on
a continuous flat surface. With an infant car bed,
make sure thatthe infant’s head rests toward the
center of the vehicle.
A rear-facing infant restraint(B) positions an infant
to face the rearof the vehicle. Rear-facing infant
restraints are designedfor infants of up to about
20 lbs. (9 kg) and aboutone year of age. This type
of restraint faces the rear
so that the infant’s head,
neck and body can have
the support they need in
a
crash. Some infant seatscome in two parts-- the
base stays secured in the vehicle and the seat part
is removable.
1-44
A forward-facing child restraint(C-E) positions a
child upright to face forward in the vehicle. These
forward-facing restraints are designed to help protect
children who are from 20 to 40 lbs. (9 to 18 kg) and
about 26 to 40 inches (66 to 102 cm) in height, or up
to around four years of age. One type,a convertible
restraint, is designedto be used either asa rear-facing
infant seat ora forward-facing child seat.
A booster seat (F, G) is designed for children
who are about40 to 60 lbs. (18 to 27 kg) and
of age. It’s designed to
about four to eight years
improve the fit of the vehicle’s safety belt system.
Booster seats with shields use lap-only
belts;
however, booster seats without shields use
lap-shoulder belts.Booster seats can also help
a child to see out the window.
When choosing a child restraint, be sure the child
restraint is designed to be used in a vehicle.If it is, it
will have a label saying thatit meets Federal Motor
Vehicle Safety Standards.
Then follow the instructions for the restraint. You may
find these instructions on the restraint itself or in
a
booklet, or both.These restraints use the belt system
in your vehicle,but the child also has tobe secured
within the restraint tohelp reduce the chance of personal
injury. The instructions that come with the infant or
child restraint will showyou how to do that. Both the
owner’s manual and the child restraint instructions are
important, so if either one of these is not available,
obtain areplacement copy from the manufacturer.
Where toPut the Restraint
Accident statistics show that children are safer
if they
are restrained inthe rear rather thanthe front seat. We at
General Motors therefore recommend that you put your
child restraint in the rear seat. Never put a rear-facing
child restraint inthe front passenger seat. Here’s why:
I
A child ina rearfacing child restraint can be
seriously injured or killed if the right front
passenger’s air bag inflates,even though your
vehicle has Next Generation frontal air bags, This
is because the backof the rearfacing child
restraint would be very closeto the inflating air
bag. Always secure a rearfacing child restraint
in a rear seat,
You may secure a forward-facing child restraint
in the right front seat, but before you do, always
move the front passenger seat as far back as it
will go. It’s better to secure the child
restraint in
a rear seat.
Wherever you install it, be sure to secure the child
restraint properly.
Keep in mind that an unsecured child restraint can
move around in a collision or sudden stop and injure
people in the vehicle.Be sure to properly secure any
child restraint in your vehicle
-- even when no child
is in it.
If your child restraint has a top strap,
it should be
anchored. Ifyou need to havean anchor installed, you
can ask yourCatera dealer to putit in for you. If you
want to installan anchor yourself, your dealer can
tell
you how to do it.
Canadian law requires that child restraints have
a top
strap, and that the strap
be anchored.
You’ll be using the lap-shoulder belt. See the earlier part
about the top strap if the child restraint has one.
Be sure
to follow the instructions thatcame with the child
restraint. Secure the child in the child restraint when and
as the instructions say.
1. Put the restraint on the seat.
2. Pick up the latch plate, and run the lap and shoulder
portions of the vehicle’s safety beltthrough or
around the restraint. The child restraint instructions
will show you how.
If the shoulder belt goes in front of the child’sface or
neck, put it behind the child restraint.
3. Buckle the belt. Make sure the releasebutton is
positioned so you wouldbe able to unbuckle the
safety belt quicklyif you ever had to.
1-49
4. Pull the rest of the shoulder belt all the
way out of
the retractor to set the lock.
I
1-50
5. To tighten the belt, feed the shoulder belt back into the
If
retractor while you push down on the child restraint.
you’re using a forward-facing child restraint, you may
find it helpful to use your knee to push down
on the
child restraint as you tighten the belt.
6. Push and pull the child restraint in different
directions to be sureit is secure.
To remove the child restraint,
just unbuckle the vehicle’s
safety belt and let it go back allway.
the The safety belt
will move freely again and be ready to work
for an adult
or larger child passenger.
Securing a Child Restraint in theRight
Front Seat Position
You’ll be using the lap-shoulder belt.See the earlier
part about the topstrap if the child restraint has one.Be
sure to follow the instructions thatcame with the child
restraint. Secure the child in the child restraint when and
as the instructions say.
1. Because your vehicle has right
a front passenger
air bag, always move the seat as far back as it will
go before securing a forward-facing child restraint.
(See “Seats” in the Index.)
2. Put the restraint on the seat.
Your vehicle hasa right front passenger air bag. Never
lap and shoulder
3. Pick up the latch plate, and run the
put a rear-facing child restraint in this seat. Here’s why:
portions of the vehicle’s safety belt throughor
around the restraint.The child restraint instructions
will show you how.
If the shoulder belt goesin front of the child’sface
or neck, put it behind the child restraint.
I
A child ina rear-facing child restraint can be
seriously injured or killed if the right front
passenger’s air bag inflates,even though your
vehicle has Next Generation frontal air bags. This
is because the backof the rear-facing child
restraint would be very closeto the inflating air
bag. Alwayssecure a rear-facing child restraint
in the rear seat.
4. Buckle the belt. Make sure the release button is
positioned so you wouldbe able to unbuckle the
safety belt quicklyif you ever had to.
1-52
5. Pull the restof the shoulder belt all the
way out of
the retractor to set the lock.
Larger Children
6. To tighten the belt, feed the shoulder belt back into the
retractor while you push down on the child restraint.
You may find it helpfulto use your knee to push down
on the child restraint as you tighten the belt.
7. Push and pull the child restraint in different
directions tobe sure it is secure.
To remove the child restraint,just unbuckle the vehicle’s
safety belt and let it go back all the way.The safety belt
will move freely again and
be ready to workfor an adult
or larger child passenger.
Children whohave outgrown child restraints should
wear the vehicle’s safety belts.
1-53
Accident statistics show that children
are safer if they
are restrained in the rear seat. But they need
to use the
safety belts properly.
Children who aren’t buckled up can be thrown outin
a crash.
Children who aren’t buckled up can strike other
people who are.
Never do this.
Here two children are wearing the samebelt. The
belt can’t properly spread the impact
forces. In a
crash, the two children can be crushed together
and seriously injured.A belt must beused by
only one personat a time.
4
&= What if a child is wearing a lap-shoulder belt,
belt is
but the childis so small that the shoulder
very close to thechild’s face or neck?
A:
If the child is sittingin a seat next to a window,
If
move the child toward the center of the vehicle.
the child is sittingin the center rear seat passenger
position, move the child toward the safety belt
buckle. In either case, be sure that
the shoulder belt
still is on the child’s shoulder,
so that in a crash the
child’s upper body would have the restraint that
belts provide.
A CAUTION:
I
Never do this.
Here a child is sitting in
a seat that has a
lap-shoulder belt, but the shoulder part is behind
the child. If the child wearsthe belt in thisway, in
a crash the child might slideunder the belt. The
belt’s force would then be appliedright on the
child’s abdomen.That could cause seriousor
fatal injuries.
The lap portion of the belt should be worn low and snug
on the hips, just touching the child’s thighs.This applies
belt force to the child’s pelvic bones
in a crash.
Safety Belt Extender
Checking Your Restraint Systems
If the vehicle’s safety belt will fasten around you, you Now and then, make surethe safety belt reminder light
and all your belts, buckles, latch plates, retractors and
should use it.
anchorages are working properly. Look
for any other
But if a safety belt
isn’t long enough to fasten, your
loose
or
damaged
safety
belt
system
parts.
If you see
dealer will order you an extender. It’s free. When go
you
anything that might keep a safety belt system from
in to orderit, take the heaviest coat you will wear,
so the
doing its job, have it repaired.
extender will be long enough for you. The extender will
be just for you, andjust for the seatin your vehicle that
you choose. Don’tlet someone else use it, and use it
only for the seatit is made to fit. To wear it, just attach it
to the regular safety belt.
Torn or frayed safety belts may not protect you in a
crash. They can rip apart under
impact forces. If a belt
is torn or frayed, geta new one right away.
Also lookfor any openedor broken air bag covers, and
have them repaired or replaced.
(The air bag system
does not need regular maintenance.)
Replacing Restraint System Parts
After a Crash
If you’ve had acrash, do you need new belts?
After a very minor collision, nothing may be necessary.
But if the belts were stretched, as they would beif worn
during a more severe crash, then you need new belts.
Autoliv GmbH, Dachau, 0 8 1 3 1 / 2 9 5 - 0
SchloBstrammer, B A M - P T 0502
Umgang nur durch geschultes Personal erlaubtl
CAUTION!
BUCKLE PRETENSIONER
CONTAINS
FLAMMABLE SOLIDS. TO HELP AVOID
PERSONAL INJURY OR MALFUNCTION
DO NOT OPEN, REMOVE OR PUT INTO
ANOTHER VEHICLE. TO BE HANDLED
BY QUALIFIED PERSONS ONLY!
(4&
If you ever see a yellow label on the
driver’s or the right
front passenger’s safety belt buckle, that means to
replace the buckle assembly.Be sure todo so. Then the
new buckle assembly willbe there to help protect you in
a collision.
If belts arecut or damaged, replace them. Collision
damage also may mean you will need
to have safety belt
or seat parts repairedor replaced. New parts and repairs
may be necessary even if the belt wasn’t being used at
the timeof the collision.
If an air bag inflates, you’ll need to replace air bag
system parts. See the parton the air bagsystem earlier
in this section.
1-57
@bNOTES
Section 2 Features and Controls
Here you can learn about the many standard and optional features on your vehicle, information
and
on starting,
shifting and braking. Also
explained are the instrument panel and the warningsystems that tell you if everything
is
working properly -- and what to do if you have a problem.
2-2
2-4
2- 8
2-11
2- 12
2- 13
2- 15
2- 16
2- 16
2- 17
2-19
2-20
2-24
2-25
2-27
Keys
Door Locks
Remote Keyless Entry System (RKE)
Trunk
Theft
Theft-Deterrent System (Option)
Immobilizer
New Vehicle“Break-In”
Ignition Positions
Starting Your Engine
Engine Coolant Heater (If Equipped)
Automatic Transmission Operation
Parking Brake
Shifting Into PARK (P)
Shifting Outof PARK (P)
2-29
2-29
2-30
2-3 1
2-32
2-33
2-33
2-39
2-45
2-46
2-48
2-5 1
2-55
2-60
2-63
Parking Over Things that Burn
Engine Exhaust
Running Your Engine While You’re Parked
Windows
Horn
Tilt SteeringWheel
Turn SignaVMultifunctionLever
Exterior Lamps
Interior Lamps
Mirrors
Storage Compartments
Sunroof (Option)
Universal Transmitter (If Equipped)
Instrument Panel
Warning Lights, Gages and Indicators
2-1
Keys
A CAUTION:
Leaving young children in a vehicle with the
ignition keyis dangerous for many reasons.
A child or others could be badly injured or
even killed.
They could operate power windows or other
controls or even make the vehicle move. Don’t
leave the keys in a vehicle with young children.
One keyis used for the
ignition, the doors and all
other locks. (Note that
there is nolock cylinder
for the tnxnk or the
passenger’s door.)
Your vehicle comes with a sparekey. This key does not
have an immobilizer pellet in it, however,it will still
unlock your vehicle’s doors.Because of the key’s flat
shape, it can be stored in your wallet.
If you’ve lost yourkeys or need tohave a new one
made, you will have to contact your dealer
for the
correct key code.
NOTICE:
Your vehicle has a number of new features that
can help prevent theft.
You can have a lot of
trouble getting into your vehicle
if you ever
lock your keys inside and you may have to
damage your vehicle to getin. Be sure you
have extra keys.
2-3
Door Locks
-A- CAUTION: - Unlocked doors can be dangerous.
Passengers especially children can easily
open the doors and fallout. When a door is
locked, the inside handle won’t open it.
Outsiders caneasily enter through anunlocked
door when you slowdown or stop yourvehicle.
This may not be so obvious: You increase the
chance of being thrown outof the vehicle in a
crash if the doors aren’tlocked. Wear safety belts
properly, lock your doors, andyou will be far
better off whenever you drive yourvehicle.
-0
0-
There are several ways to lock and unlock your vehicle.
From the outside,use your key or the remote keyless
entry transmitter.This will avoid settingoff the optional
theft-deterrent alarrn.
From inside your vehicle,
slide the lock lever down to
lock the door.To unlock the
door, slide the lock lever up.
Central Door UnlockingSystem
Automatic Door Locks
When unlocking the driver’s door from the outside, you
can also unlock the other doors, including the
fuel door,
by holding the key in a turned positionfor several
seconds (twn the key to the left). Pressing theunlock
button on the remote keyless entry transmitter twice in a
row will also open the other doors.
Close the doors and turn on the ignition. Everytime you
move the shift lever out of PARK (P), allof the doors
will lock.The doors will unlock everytime you stop the
vehicle and move the shift lever into PARK (P). If
someone needs to get out
while your vehicle is not in
PARK (P), have thatperson use the manual or power
lock. When thedoor is closed again,it will not lock
automatically. Usethe manual or powerlock to lock the
door again.
Power Door Locks
Programmable Automatic Door Locks
Each remote keyless entry transmitter supplied with
your vehiclecan be programmed to suiteach driver’s
door lock preference. The tworemote keyless entry
transmitters are identified on the
back with either a“1”
or a “2”, which allows either driver to program their
own door locks.
Press the powerdoor lock switch to lock or unlock allof
the doors at once.
The automatic door locks can be programmed to
lock when the shift leveris moved out of PARK (P)
and unlock when the shiftlever is moved back into
PARK (P). Withremote keyless entry, thedoor locks
can be programmed to remain locked whether or not the
shift lever is returnedto PARK (P).
2-5
With the ignition on, the transmission in
PARK (P)
and the brake pedal pressed in, you now
are ready to
begin programming.
Rear Door Security Lock
To disable the door lock feature when shifting in and out
of PARK (P), press thelock button on the remote
keyless entry transmitterfour times withinfive seconds.
The doors will lock when
the shift lever is moved out
of
PARK (P) and will remain locked when the shift lever
is
moved back intoPARK (P).
I_
1
To enable thedoors to lock when shifting outof
PARK (P) and to unlock when shifting back into
PARK (P), press the unlock button on theremote
keyless entry transmitterfour times within five seconds.
n
Your vehicle is equipped
with reardoor security
locks that help prevent
passengers from opening
the rear door of your vehicle
from the inside.The lock is
located on the rear
edge
of each rear door.To use
this lock:
1. Move the lever onthe door all the way down into the
ENGAGED position.
2. Close the door.
3. Do the same thing to the other rear
door lock.
The rear doorsof your vehiclecannot be openedfrom
the inside when this featureis in use.
When youwant to open a rear door when the security
lock is on:
1. Unlock the door from the inside.
2. Then open the door from the outside.
To cancel the rear door lock:
1. Unlock the door from the inside and onen the door
from the outside.
2. Move the lever all the way up.
3. Do the same for the other rear door.
The rear door locks will now work normally.
Anti-Lockout Feature
Leaving your key in any ignition position with any door
open will disable theuse of the power door lock
switches. The anti-lockout feature is disabled when the
ignition is on. If you close the doors, you can lock them
using the remote keyless entry transmitter.It is always
recommended that youremove the ignition key when
locking your vehicle.
Note that the anti-lockout feature can be
overridden
by holding the powerdoor lock switchfor three seconds
or longer.
Leaving Your Vehicle
If you are leaving your vehicle,open me aoor, set the
locks from the inside, get out and closethe door.
Remote Keyless Entry System (RKE)
With this feature, youcan
lock and unlockthe doors,
open the trunk and unlock
the fueldoor from about
10 feet (3m) away using the
remote keyless entry
transmitter supplied with
your vehicle.
Your remote keyless entry transmitter operates on a
radio frequency subject to Federal Communications
Commission (FCC) Rules and with Industry Canada.
This device complies with Part15 of the FCC Rules.
Operation is subject to the
following two conditions:
(1) this devicemay not cause harmful interference,
and (2) this device must accept any interference
received, including interference thatmay cause
undesired operation.
This device complies withRSS-210 of Industry
Canada. Operation is subject to the following two
conditions: (1 ) this device maynot cause interference,
and (2) this devicemust accept any interference
received, including interference that
may cause
undesired operationof the device.
Changes or modifications to this system
by other than an
authorized service facility could void authorization
to
use this equipment.
The range of this system is about10 feet (3 m). At times
you may notice a decrease in range.
This is normalfor
any remote keyless entry transmitter.
If the transmitter
does not work or ifyou have to stand closer to your
vehicle for the transmitter to work, try this:
0
Check to determine if battery replacementis
necessary. See the instructions that follow.
0
Check the distance.You may be too far from your
vehicle. You may need to stand closer during rainy
or snowy weather.
0
Check the location. Other vehicles or objects may be
blocking the signal.Take a few steps to the left or
right, hold the transmitter higher, and try again.
0
If you’re still having trouble, see your dealer or a
qualified technicianfor service.
Operation
6 When you press ths symbol to unlock the driver’s
Matching Transmitter@)To Your Vehicle
door, the parking lamps on your vehicle will blink twice
(the parking lamps and headlamps will remain
on for
about 20 seconds). Pressingthis button again within five
this button
seconds will unlock the other doors. Pressing
will also disarm the optional theft-deterrent system and
turn on the interior lamps (for approximately
20 seconds).
Each remote keyless entry transmitter is coded to
prevent another transmitter from unlocking your vehicle.
If a transmitter is lost or stolen, areplacement can be
purchased through your dealer.
Once your dealerhas
coded the new transmitter, the lost transmitter will not
unlock your vehicle.Each vehicle can have only two
transmitters matched toit.
8 When you pressthis symbol to lock the doors
Battery Replacement
(including the fuel door), the parking lamps will blink
once. This also arms the optional theft-deterrent system.
Under normal use, the battery
in your remote keyless
entry transmitter should last
about four years.
6 Press this symbol toopen the trunk.
93 Press this button to unlock the fuel door.
Note that pressingthe transmitter buttons numerous
times (approximately 500 times) outof the vehicle’s
operating range may cause the transmitter notto work.
Replacing the battery and pressing the transmitter
buttons 10 or more times outof range will alsocause the
transmitter not to work.To reset the transmitter, you
must be within the vehicle’s operating range. Press and
hold the trunk button and, withinone second, pressthe
lock button. Continue to hold both buttons for
approximately three seconds.See your dealerfor service
if your transmitter still doesn’twork properly.
You can tell the batteryis weak if the transmitter won’t
work at the normalrange in any location.If you have to
get close to your vehicle before the transmitter works,
it’s probablytime to change the battery.
NOTICE:
When replacing the battery, use care not to
touch any of the circuitry. Static from your
body transferred to these surfaces may damage
the transmitter.
2-9
..........
I
c
1. Use a coin to pry openthe transmitter.
2. Remove the battery and replaceit with a CR2032
battery. Using the wrong size battery can damage the
transmitter. Make sure the batteryis positioned with
the “plus” (+) facing down.
3. Align the internal pieces of the transmitter, including
the cover. Snap togetherto reinstall.
Trunk
A CAUTION:
It canbe dangerous to drivewith the trunk lid
open because carbonmonoxide (CO) gascan
come into yourvehicle. You can’t see orsmell
CO. It cancause unconsciousnessand even death.
If you must drive with the trunk
lid openor if
electrical wiringor other cable connections must
pass through theseal between thebody and the
trunk lid:
Make sure all otherwindows are shut.
Turn the fan on your heating or
cooling
system to itshighest speed with the setting
on AUTO and the temperaturebetween
65°F (18OC) and 85°F (29°C). That will
force outsideair into yourvehicle. See
“Comfort Controls” in the Index.
0 If you have air outlets on or under the
instrument panel, open them all way.
the
See “Engine Exhaust”in the Index.
Trunk Release
To use this feature,
your vehicle must be in
PARK (P). Press the trunk
release button located onthe
center console next to the
radio to open the trunk.
You can also press the trunk button
on the remote
keyless entry transmitter to access the trunk
compartment. Your vehicle doesn’t havea trunk key
lock cylinder.
2-11
If your vehicle loses power
temporarily, you can
manually openthe trunk
using the trunk release
handle. The handle is
located on the undersideof
the trunk lid on the driver’s
side andcan be accessed
through the fold-down
rear seats.
Fold down the driver’sside rear seat and reach through
to the trunk compartment to find the release handle.
Pulling this handle opens the trunk.For more
information on how tofold the rear seats, see “Folding
the Rear Seat’’in the Index.
Theft
Vehicle theft is big business, especially in some cities.
Although your vehicle has a number
of theft-deterrent
features, we know that nothing we put on
it can makeit
impossible to steal. However, there are ways you
can help.
Key in the Ignition
If you leave your vehicle with the keys inside, an
it’s
easy targetfor joy riders or professional thieves-- so
don’t do it.
When you park your vehicle and
open the driver’s door,
you’ll hear a chime reminding you to remove your key
from the ignition and takeit with you. Alwaysdo this.
Your steering wheel willbe locked, andso will your
ignition and transmission. And remember to lock
the doors.
Parking at Night
Theft-Deterrent System (Option)
Park in a lighted spot, close all windows and
lock your
vehicle. Remember to keep your valuables outof sight.
Put them in a storage area,or take them with you.
Parking Lots
SECURITY
If the ignitionis off and
any door is open, the
SECURITY light will flash
reminding you to activate
the system.
If you park in a lot where someone will be watching
your vehicle, it’s best to
lock it up and take your keys.
But what if youhave to leaveyour key?
0
If possible, park in a busy, well lit area.
1. Open the door.
0
Put your valuables in a storage area, like your
trunk or glove box. Be sure to close andlock the
storage area.
2. Lock the door using the powerdoor lock or the
remote keyless entry transmitter.The SECURITY
light should come on and stayon.
Close all windows.
3. Close all the doors. The SECURITY light shouldgo
off within approximately30 seconds.
0
Lock the glove box.
The horn will sound and the headlarr - will flashfor
several minutes whenthe door ortrunK is opened
without the key or remote keyless entry transmitter.The
horn also sounds if the locks aredamaged.
~
Remember, the theft-deterrent system won’t activate
if
you lock the doors with a key or use the manual door
lock. It activates onlyif you usea power door lock
switch or the remote keyless entry transmitter.
To avoid activating the alarmby accident:
The vehicle should be locked with the key after the
doors are closedif you don’t want to activate the
theft-deterrent system.
Testing the Alarm
1. From inside the vehicle, roll down the window, then
get outof the vehicle, keeping the
door open.
2. From outside the vehicle, withthe door open, lock
Always unlock a door witha key or use the remote
the vehicle using the power
door lock or the remote
keyless entry transmitter. (Pressing the unlock button
keyless entry transmitter and close the door.
Wait
on the remote keyless entry transmitter disables the
30 seconds.
theft-deterrent system.) Unlocking door
a
any other
3. Reach in and unlock the door using the manual
lock
way will activate thealarm. Cycling the ignition
and open the door.The horn will sound and the
without disarming the theft-deterrent system will
headlarnps will flash.
also activate the alarm.
it should, check to see
If you activatethe alarm by accident, unlock the driver’s If the alarm does not sound when
if the horn works.The horn fuse may be blown. To
door with your key.You can also turnoff the alarm by
replace the fuse, see“Fuses and Circuit Breakers”in the
using the remote keyless entry transmitter.
The alarm
Index. If the fuse does not need
to be replaced, you may
won’t stop if you try tounlock a door in any other way.
need to have your vehicle serviced.
To reduce the possibilityof theft, always activate
the optional theft-deterrentsystem when leaving
your vehicle.
2-14
Immobilizer
Your vehicle is equipped
with a passive
theft-deterrent system.
Changes or modifications to this system by other
than an
authorized service facility could void authorization to
use this equipment.
The system works when youturn the key to ON. The key
uses a transponder that matches an immobilizer control
unit in your vehicle. The correct keywill start the vehicle.
When the system senses that someone is using the wrong
key, it may start but it will not continue run.
to If someone
tries to start your vehicle again or uses another key during
this time, the shutdownwill start over again. This
discourages someonefrom randomly trying different keys
with different transponders in an attempt to make
a match.
This device complies with Part15 of the FCC Rules.
Operation is subject tothe following two conditions:
(1) this device may not cause harmful interference,
and (2) this device must accept any interference
received, including interference that may
cause
undesired operation.
This device complies with RSS-210 of Industry
Canada. Operation is subject tothe following two
conditions: (1) thisdevice may not cause interference,
and ( 2 ) this device must accept any interference
received, including interference that may
cause
undesired operation of the device.
If the engine cannot be started, turn the key in the
ignition toON. Wait approximately two seconds; then
start your vehicle again.
If the engine still won’t start, try another key.
You may
also want tocheck the fuses (see “Fuses and Circuit
Breakers” in the Index).
If the starterwon’t work with
the other key, your vehicle needs service. If your vehicle
does start,the first key may be faulty.See your dealer.
If you lose or damage
a key or youcannot start the
engine, see your dealer.
If a keyis lost, bringall
remaining keys to your dealer
for re-programming. In
an emergency, call the Vehicle Roadside Assistance
Center at 1-800-882-1112.
New Vehicle “Break-In”
I NOTICE:
NOTICE:
Your vehicle doesn’t need an elaborate
“break-in.” But it will perform betterin the long
run if you followthese guidelines:
Don’t drive at any one speed fast or
slow for thefirst 500 miles (805 km).
Don’t make full-throttle starts.
Avoid making hard stops for the first
200 miles (322 km) or so. During thistime
your new brake linings aren’t yet broken
in. Hard stopswith new linings can mean
premature wear and earlier
replacement.
Follow this breaking-in guideline
every
time you get new brake linings.
Don’t tow a trailer during break-in.
See “Towinga Trailer” in the Index
for
more information.
--
Ignition Positions
--
~
If your key seems stuck inLOCK and you can’t
turn it, be sureyou are using the correctkey; if
so, is it all theway in? If it is, then turn the
steering wheel left and rightwhile you turn the
key hard. But turn the key only with your hand.
Using a tool to forceit could break thekey or the
ignition switch. If none of this works,then your
vehicle needs service.
Keep in mind that you may
have to turn the steering
wheel as you turn the key in order to rotate the ignition
switch fromLOCK to START -- this is normal. Using
extra effort to remove the key
from the ignition switch,
as compared to other
GM vehicles that you may have
owned, is also normal.
If your key is stuck in the ignition switch and cannot be
turned back toLOCK, your vehicle will need
to be
repaired. See your dealerfor service.
With the key in the
ignition switch, you can
turn the switch to four
different positions.
To lock the steering column, remove the key whilein
LOCK. Turn the steering wheel until you hear a click.
Retained AccessoryPower
The radio is the onlyaccessory on your vehicle that may
be used for up to 10 minutes after the ignition is turned
to OFF.
Power to the fuel door,trunk release and door locks is
available at all times. The power window controls and the
sunroof controls are active until a door is opened
-- there
is no time limit as long as the doors remain closed.
LOCK (e): Before you put the key in, the ignition will
be in LOCK. This is the only position in which you can
remove the key. This position locks theignition, steering
wheel and transmission. It’sa theft-deterrent feature.
OFF (I): This position lets you turn off the engine but
still turn the steering wheel.It doesn’t lock the steering
wheel like LOCK. Use OFF if you musthave your
vehicle in motion while the engine is off (forexample, if
your vehicle is being pushed).
ON (11): The ignition is on in this position.
ON is used
for driving your vehicle.
START (111): This position starts the engine.
Starting Your Engine
Move your shift lever to
PARK (P) or NEUTRAL (N).
Your engine won’t start in any other position-- that’s a
safety feature. To restart when you’re already moving,
use NEUTRAL (N) only.
NOTICE:
Don’t try to shift to PARK (P)if your vehicleis
moving. If you do, you could damage the
transmission. Shift toPARK (P) only when your
vehicle is stopped.
2-17
1. Without pushing the accelerator pedal, turn your
ignition key toSTART. When the engine starts, let
go of the key.The idle speed willgo down as your
engine gets warm.
NOTICE:
Holding your key in START for longer than
15 seconds at a time will cause your battery to be
drained much sooner. Andthe excessive heat can
damage your starter motor. Wait about 15 seconds
between eachtry to help avoid draining your
battery or damaging your starter.
2. If it doesn’t start right away, hold your key in
START for about three seconds at a time until
your
engine starts. Wait about 15 seconds between each
try to help avoid draining your battery or damaging
your starter.
3. If your engine still won’t start (or starts but then
stops), it could be flooded with too much gasoline.
Try pushing your acceleratorpedal all the way to the
floor and holding it there
as you hold the key in
START for about three seconds.If the vehicle starts
briefly but then stops again,do the same thing.
NOTICE:
Your engine is designed to work with the
electronics inyour vehicle. If you add electrical
parts oraccessories, you could change theway
the engine operates.Before adding electrical
equipment, checkwith your dealer. If you don’t,
your engine might not perform properly.
If you ever haveto have your vehicle towed, see
tells how to do it
the part of this manual that
without damaging yourvehicle. See “Towing
Your Vehicle” in theIndex.
Engine Coolant Heater (If Equipped)
ENGINE COOLANT
HEATER ELEC
AIR CLEANER
ASSEMBLY
To Use the Engine Coolant Heater
1. Turn off the engine.
2. Open the hood and unwrapthe electrical cord.
The electrical cordfor the engine coolant heateris in
front of the air cleanerfilter and under the headlamp
cover, on the passenger’s side of the engine.
3. Plug it into a normal, grounded 110-volt AC outlet.
A
HEADLAMP
COVER
In very cold weather, 0°F (- 18°C) or colder,the engine
coolant heater can help. You’ll get easier starting and
better fuel economy during engine warm-up. Usually,
the coolant heater should be
plugged in a minimum of
four hours prior to starting your vehicle.
CAUTION:
Plugging the cord into
an ungrounded outlet
could causean electrical shock. Also, the wrong
kind of extension cord could overheat and cause
a fire. You could be seriously injured. Plug the
cord into a properly grounded three-prong
110-volt AC outlet. Ifthe cordwon’t reach, use a
heavy-duty three-prongextension cord rated for
at least 15 amps.
2-19
4. Before starting the engine,be sure to unplug
and storethe cord as it was before to keep
it away
from moving engine parts. If you don’t, it could
be damaged.
How long should you keep the coolant heater plugged
in? The answer depends on the outside temperature, the
kind of oil you have, andsome other things. Insteadof
trying to list everythinghere, we ask that you contact
your dealer in the area where you’ll
be parking your
vehicle. The dealer can give you the best advice
for that
particular area.
Automatic Transmission Operation
There are several different
positions for the shift lever.
PARK (P): This position locks the transmission drive
shaft. It’s the best positionto use when you start the
engine because your vehicle can’t move easily.
It is dangerous toget out of your vehicle if the
shift leveris not fully in PARK (P) with the
parking brake firmlyset. Your vehicle can roll.
Don’t leave your vehicle when the engine is
running unless you have to. If you have left the
engine running, thevehicle can move suddenly.
You or others could be injured. To be sure your
vehicle won’t move, even when you’re on fairly
level ground, always setyour parking brake and
PARK (P).
move the shift lever to
See “Shifting Into PARK (P)” in the Index.If
you’re pulling a trailer,see “Towing a Trailer” in
the Index.
Ensure the shift lever is fully in PARK (P) range before
starting the engine. Your vehicle has a
Brake-Transmission Shift Interlock (BTSI).
You have to fully apply the regular brakesbefore you
can shift from PARK (P) when the ignition key is in ON.
If you cannot shift out of PARK (P),ease pressure on
into
the shift lever -- push the shift lever all the way
PARK (P)as you maintain brake application.
Then
move the shift leverinto the gear you wish. See
“Shifting Outof PARK (P)” in this section.
REVERSE (R): Use this gear to back up.
To rock your vehicle back andforth to get out of snow,
ice or sand without damagingthe transmission, see
“Stuck: In Sand, Mud, Ice or Snow” in the Index.
NEUTRAL (N):The engine doesn’t connect with the
wheels when drivingin NEUTRAL (N). Use
NEUTRAL (N) to restart your vehicle when you’re
already movingor when your vehicle is being towed.
Shifting out of PARK (P)or NEUTRAL (N) while
your engine is “racing” (runningat high speed)is
dangerous. Unless your foot is firmly on the
brake pedal, yourvehicle could move very
rapidly. You could lose control and hitpeople or
objects. Don’t shift outof PARK (P) or
NEUTRAL (N) while your engineis racing.
NOTICE:
Damage to the transmission caused
by shifting
out of PARK (P) or NEUTRAL (N)with the
engine racingisn’t covered by your warranty.
DRIVE (D): Use this for normal driving.If you need
more powerfor passing, and you’re:
Going less than 35 mph (55 km/h), push the
accelerator pedalabout halfway down.
Going about 35 mph (55 km/h) or more, push the
accelerator all theway down.
The transmission will shift down to the next gear.
THIRD (3): This position is not usedfor normal
driving. It offers more power and lower
fuel economy
than DRIVE (D).
Here are some times you might
choose THIRD (3)
instead of DRIVE (D):
When driving on hilly, winding roads.
When towing a trailer, so there is less shifting
between gears.
When going down a steep hill.
SECOND (2): Driving in this position gives you more
power than driving in THIRD
(3). Use it on hills. Itcan
help control your speed as you
go down steep mountain
roads, but thenyou would also want to use the brakes
off and on.
FIRST (1): This position givesyou more power (Dut
lower fueleconomy) than SECOND (2). You can use it
on very steep hills.If the shift lever isput in FIRST (l),
the transmission won’t shift into first gear until the
vehicle is going slowly
enough.
NOTICE:
If the rearwheels can’t rotate, don’t try to drive.
This might happenif you were stuck invery deep
sand or mud or
you were up againsta solid
object. You could damage the transmission.
Also, if you stop whengoing uphill, don’t hold
your vehicle there with only the accelerator
pedal. This could overheat and damage the
transmission. Use the brakes tohold your vehicle
in position ona hill.
A telltale light on the
instrument panel will
come on when the sport
mode is selected.
Sport Mode Button
For a firmer shft and
increased performance, you
may choose the sport mode.
This button lets you change
from a normal driving mode
to a sport driving mode.
It is located on the shift
lever handle.
Press the “S” button once to select the sport feature.
Press it again to return to the normal driving mode.
When you start theengine, your vehicle willbe in
normal mode.For general driving conditions, usethe
normal mode. It will remain in normal unless you select
the sportfeature.
I
Third-Gear Start
Press this button toprovide
more traction when you are
starting onice or other
slippery surfaces. It only
operates when the shift
lever is in DRIVE(D). The
button is located next to the
shift lever on the console.
The transmission will be inTHIRD (3) when the vehicle
begins to move. After starting in
THIRD (3), the vehicle
will upshift normally.
This feature is for improved traction onlywhen the road
surface is slippery and is not intended
for continuous use
or when the vehicleis stuck in sand, mud, ice, snow or
gravel. Drive as usual for normal road conditions.
Parking Brake
This feature automatically turnsoff when any of the
following conditions occur:
When the ignition is turned off.
If the shift lever is placed inPARK (P), THIRD (3),
SECOND (2),or FIRST (1).
If you press and hold the accelerator pedal past its
resistance pointfor more than two seconds.
0
When speed falls below25 mph (40 km/h).
Once the vehicle reaches67 mph (108 km/h).
To turn this featureoff, press the button again.
Whenever you start your vehicle,the transmission is in
the normal mode.
To set the parking brake, hold
the regular brake pedal
down with your foot and pull up on the parking brake
lever. If the ignitionis on, the brake system warning
light will comeon.
If you start to drive withthe parking brake set, the
BRAKE warning light stays on.See “Brake System
Warning Light” in theIndex for more information.
To release theparking brake, hold the brake pedal down
with yourfoot and pull the parking brake lever up until
you can press the end release button. Holdthe release
button in as you move the brake lever all the waydown.
NOTICE:
Driving with the parking brake on can cause the
rear brakes to overheat.
You may have to replace
them andyou could also damage other
parts of
your vehicle.
If you are towing a trailer and areparking on ahill, see
“Towing a Trailer” inthe Index. This section shows
what to do first to keep the trailerfrom moving.
Shifting Into PARK (P)
I
It can be dangerous get
to out of your vehicle if
the shift leveris not fully in PARK (P) with the
parking brake firmlyset. Your vehicle can roll. If
you have leftthe engine running, the
vehicle can
move suddenly.You or otherscould be injured.
To be sure yourvehicle won’t move, even when
you’re on fairlylevel ground, use the steps that
follow. If you’re pulling a trailer, see “Towing a
Trailer” in the Index.
Console Shift Lever
1. Hold the brake pedal down with your right foot.
2. Move the shift lever intoPARK (P) like this:
Leaving Your Vehicle Withthe
Engine Running
It can be dangerous to leave your
vehicle with the
engine running.Your vehicle could move
suddenly if the shift leveris not fully inPARK (P)
with the parking brake firmly
set. And, if you
leave the vehicle with the engine running, it could
overheat andeven catch fire.You or otherscould
be injured. Don’t leave your vehicle with the
engine running unless you have to.
L
3. Pull the buttonon the shift lever handle up and then
push the shift lever all the way toward the front
of
your vehicle into PARK (P). Release the button.
4. With your right foot still holding the brake pedal
down, set the parking brake.
5 . Move the ignition key to
LOCK.
6. Remove the ignition key and take
it with you. If you
can leave your vehicle with the key
in your hand,
your vehicle is in PARK(P).
If you have to leave your vehicle with the engine
running, be sure your vehicleis in PARK (P) and the
parking brake is firmly set before you leave it. After
you’ve moved the shift leverinto PARK (P), hold the
regular brake pedal down.Then, see if you can move the
shift lever away from PARK (P) without pressing the
button on the shift lever handle. If you can,
it means that
the shift lever wasn’t fully locked
into PARK (P).
Torque Lock
Shifting Outof PARK (P)
If you are parking on a hill and you don’t shift your
transmission intoPARK (P) properly, the weight
of the
vehicle may put too much force on the parking pawlin
the transmission.You may find it difficult to pull the
shift lever out of PARK (P). This is called “torque lock.”
To prevent torque lock, set the parking brake and then
shift intoPARK (P) properly before you leavethe
driver’s seat. To find out how, see “Shifting Into
PARK (P)” in the Index.
Your vehicle has aBrake-Transmission Shift Interlock
(BTSI). You have to fully apply the regular brakes
before you can shiftfrom PARK (P) when the ignition is
in ON. See “Automatic Transmission” inthe Index.
If torque lock does occur, you may need tohave another
vehicle push yours alittle uphill to takesome of the
pressure from the parking pawl in the transmission, so
you can pullthe shift leverout of PARK (P).
If you cannot shift outof PARK (P), ease pressure on
the shift lever -- push the shiftlever all the way into
PARK (P) as youmaintain brake application. Then
move the shift lever into the gear you want.
If you ever
hold the brake pedal down but still
can’t shift out of
PARK (P), try this:
1. Turn the ignition key to OFF. Open and close the
driver’s door to turnoff the Retained Accessory
Power (RAP) feature.
2. Apply and hold the brake until the endof Step 8.
A
3. With both hands,squeeze the base of the shift lever
boot (covering) together (as shown).
6. At the bottom of the shift lever, you will see a yellow
tab. With one hand, push the tab to unlock the
shift lever.
4. Pull the upper partof the base out first and then slide
7. Shift to NEUTRAL (N) with the other hand.
out the lower part
of the base.
5. Lift the shift lever boot (covering)
up to getit out of
your way.
8. Start the engine (if you can) and then shift to the
drive gearyou want.
9. Have the vehicle fixed as soon as you can.
Engine Exhaust
Parking Over Things That Burn
I A CAUTION:
I
Things that can burn
could touch hot exhaust
parts under yourvehicle and ignite, Don’t park
over papers,leaves, dry grass or other things that
can burn.
Engine exhaust cankill. It contains thegas
carbon monoxide (CO),which you can’t see or
smell. It can causeunconsciousness and death,
You might have exhaust coming in if:
0 Your exhaust system sounds strange
or different.
0 Your vehicle gets rusty underneath.
0 Your vehicle was damaged in a collision.
0 Your vehicle was damaged when driving over
high points on the road or over road debris.
Repairs weren’t done correctly.
0 Your vehicle or exhaustsystem had been
modified improperly.
If you ever suspect exhaust is coming into
your vehicle:
0 Drive it only with all the windows down to
blow out anyCO; and
0 Have your vehicle fixed immediately.
Running Your Engine While
You’re Parked
It’s better not to park with
the engine running. Butif you
ever have to, here are some things
to know.
Idling the engine with the climate control
system off could allow dangerous exhaust into
your vehicle (see the earlier Caution under
“Engine Exhaust”).
Also, idling in a closed-in place can let deadly
carbon monoxide (CO)into yourvehicle even if
the fan switchis at the highestsetting. One place
this can happenis a garage. Exhaust with
CO can come in easily. NEVER park in a
garage with the enginerunning.
Another closed-in place can be a blizzard.
(See “Blizzard” in theIndex.)
--
I
2-30
--
It can be dangerous toget out of your vehicle if
the shift leveris not fully in PARK (P) with the
parking brakefirmly set. Your vehiclecan roll.
Don’t leave your vehicle when the engineis
running unless you have to. If you’ve left the
engine running, thevehicle can move suddenly.
You or otherscould be injured.To be sure your
vehicle won’t move,even when you’re on fairly
level ground, always set your parking brake after
to PARK (P).
you move the shift lever
L
Follow the proper steps to be sure your vehicle won’t
move. See “Shifting Into PARK (P)” in the Index.
If you are parking on
a hill and if you’re pulling a
trailer, also see “Towing a Trailer” in the Index.
Windows
Power Windows
When you stop your vehicle and turn the ignition key to
LOCK, you can still usethe power windows.The
electrical power to operatethe windows will not shutoff
until a door is opened -- there is no time limit to this
feature. As soon asa door is opened, power window
movement will stop immediately.
Programming the Power Windows
If the battery on your vehicle has been recharged,
disconnected or is not working, you will need to
reprogram each power window in orderfor the
express-open and close features to work.
The controls are located next to
the console shift lever.
Tap the controlsforward or rearward to raise orlower
the windows in increments.To express-open the
window, press the controlrearward for about one second
and then release.If you want to stopthe window as it is
lowering, tap the control. Pressing the control
forward
for about one second and then releasing it will
express-close the window.
To program each window, your vehicle’s doors mustbe
closed. Press and hold the power window control until
the window has fullyopened. Now hold the power
window control until the window is fully
closed.
Continue holding the control downfor approximately
five more seconds afterthe window is completely up.
The window is now programmed. Repeat this process
for each window.
Anti-Pinch Feature
Rear Window Lockout
If a hand,an a m or another object is in the
way of the
power window express-closing, the window will
immediately stop at the obstruction and express-open to
a preset factory position.
LA C.
LJTION:
Pressing and holding the power
window control
button will turn off the anti-pinch feature.If this
happens, a power window won’t stop if
way. You or others couldbe
something gets in the
injured, and yourwindow could be damaged. Be
careful not to press and hold the power
window
control button.
Pressing this button
rearward will disable the
rear passenger window
controls. This is a useful
feature if you have children
as passengers. Press the
button forward to allow
your passengers to use their
window controls.
I
I
Horn
The horn can be sounded by pressing either horn symbol
on the steering wheel.The symbols are located at about
the 9 and 3 o’clock positions.
Turn SignaVMultifunction Lever
Tilt Steering Wheel
Turn and Lane Change Signals
To signal a turn, move the lever all the way up
or down.
The lever returns automatically when the turn
is complete.
1;
Tilt steering allows youto adjust the steering wheel
before you begin driving. Raising the steering wheel to
the highest level gives yourlegs more room when you
enter and exit your vehicle.
Hold the steering wheel and pull the lever toward you
to tilt the wheel. Adjust the steering wheel to a
comfortable position and then release the lever
to lock
the wheel in place.
This arrow on the
instrument panel will flash
in the direction of the turn
or lane change.
Raise or lower the lever until the arrow starts
to flash to
signal alane change. Holdit there until the lane change
is complete. The lever returns when it’s released.
Arrows that flash rapidly when signaling for a turn
or
lane change maybe caused by a burned-out front signal
bulb (thisdoes not occur with a burned-out rear bulb).
Other drivers won’t see theturn signal. Replace
burned-out bulbs to help avoid possible accidents.
Check thefuse (see “Fuses and Circuit Breakers” in the
Index) andfor burned-out bulbs if the arrow
fails to
work when signaling a turn.
Headlamp HighLow Beam
Windshield Wipers
With the twilight sentinelon or with the lamp control
dial turned to the headlamp position, push the turn
signal leveron the driver’sside of the steering wheel
away from you to turn on the high-beam headlamps.
This light on the instrument
panel will be on, indicating
high-beam usage.
Pull the lever back to the original position to return
to
low-beam headlamps. For more information, see
“Headlamps” later in this section.
Flash-To-Pass
WIPER: Move the leveron the passenger’s side of the
steering wheel up and down to control the wipers.
MIST Tap the lever up and then release
it for a single
wipe cycle. For more cycles, pull and hold the lever.
= (HIGH): Move the lever all the way up for a fast
This feature uses the high-beam headlamps to signal the wiper speed.
driver in front of you that you want
to pass.
(LOW): The third position up controls the low wiper
To use, pull the turn signal lever toward you and release. speed.
-- (DELAY): This is for a controlled delay setting.
Rotate the control dialon the lever to increase or
decrease the delay between wipe cycles.
o (OFF): This Dosition turns off the wipers.
2-34
Be sure to clear ice andsnow from the wiper blades
before using them.If they’re frozen to the windshield,
carefully loosen or thaw them. If the bladesdo become
damaged, replace them with new blades.
Heavy snowor ice can overload the wiper motor.A
circuit breaker will stop the motor untilit cools. Clear
away snow or ice to prevent an overload.
Windshield -washer
Pull and hold the washer
lever to wash the
windshield. Release the
lever whenyou have
enough fluid. The wipers
will clear the windshield
and either stop or returnto
A telltale light on the instrument panel will be displayed
See “Low
when the washer fluid reaches a low level.
Washer Fluid WarningLight” in the Indexfor
more information.
I
A CAUTION:
--
In freezing weather, don’t use your washer until
the windshieldis warmed. Otherwise the washer
fluid can form ice on the windshield, blocking
your vision.
,
Cruise Control
1
a Cruise control can be dangerous where
you
can’t drive safely at a steady speed.So,
don’t use your cruise control on winding
roads or in
heavy trafEc.
a Cruise control can be dangerous
on
slippery roads. On such roads, fast changes
in tire traction can cause
needless wheel
spinning, andyou could lose control. Don’t
use cruise control on slippery roads.
With cruise control, you can maintain a speed
of about
25 mph (40 kmk)or more without keeping your foot
on
the accelerator.This can help on long trips. Cruise
control does not work speeds
at
below about 25 mph
(40 km/h).
If your vehicleis in cruise control when the traction
control system begins to limit wheel spin, the cruise
control will automatically disengage. (See “Traction
Control System” in the Index.) When road conditions
allow you to safely use it again, you
may turn the cruise
control backon.
Cruise control shutsoff when you apply the brakes.
2-36
-
Setting Cruise Control
CAUT1C"J:
/A\
I
I If you leave your cruise control switch on when
you're not using cruise, you might hit a button
and go into cruise when you don't want to.
You
could be startled and even lose control. Keep the
cruise control switchoff until you want to useit.
I
d
1. Accelerate to the speed you want.
2 . Press the SET/ACCEL button at the end of the lever
and releaseit.
3. Remove your foot from the accelerator pedal.
Resuming a Set Speed
Increasing Speed While Using Cruise Control
There are two ways togo to a higher speed:
Use the accelerator pedalto go to a higher speed.
Push the SETIACCEL button at the end
of the lever
and then release the button and
the accelerator pedal.
You’ll now cruise at a higher speed.
0
Press the SET/ACCEL button until the desired speed
is reached. The new speed is maintained when the
button is released. (To increase your speedin very
small amounts, tap the SET/ACCEL button
repeatedly. Each time youdo this, your vehicle will
go about 1 mph (1.6 km/h) faster.)
The accelerate feature will only work after
you have set the
cruise control speed by pushing the SET/ACCEL button.
Setting the cruise controlat a desired speed and then
applying the brake will end the cruise function. Once
you’re going about25 mph (40 km/h) or more, you can
press theRESUMEDECEL button brieflyto reset. This
returns you to your desired preset speed.
Remember, if you hold the SET/ACCEL button in
longer than halfa second, the vehicle will accelerate
until you release the buttonor apply the brake.You
could be startled and even lose control.
So unless you
want to go faster, don’t hold the button in.
2-38
Reducing Speed While Using Cruise Control
There are two ways to reduce your speed while using
cruise control:
0 Press the RESUMEDECEL button at the end of the
lever until you reacha desired lower speed, then
release it.
To slow down in very small amounts, tap the
RESUMEDECEL button repeatedly. Each time
you
do this, you’llgo 1 mph (1.6 km/h) slower.
Passing Another Vehicle While Using Cruise Control
Exterior Lamps
.
Use the accelerator pedalto increase your speed. When
you take your foot off the pedal, your vehicle will slow
down to the cruise control speed you set earlier.
Using Cruise Controlon Hills
How well the cruise control will work on hills depends
upon your speed, load andthe steepness of the hills.
When going up steep hills, you may
have to step on the
accelerator pedal to maintain your speed. When going
downhill, you mayhave to brake or shift to a lowergear
to keep your speeddown. Of course, applying the brake
takes you out of cruise control. Manydrivers find this to
be too much trouble and don’t use
cruise control on
steep hills.
Ending Cruise Control
There are two ways to end cruise control:
0 Step lightly on the brake pedal.
0 Press the OFF button at the end of the cruise lever.
Erasing Speed Memory
The cruise control set speed memoryis erased when you
turn off the cruise control or the ignition.
These controls on the left side
of the instrument panel
operate the followinglamp systems:
-g-Lamp control dial (operates all lamps except
twilight sentinel, fog lamps and brightness control). Pull
this dial toward youto turn on the interior lamps and
push the dial back in
to turn the lamps off.
‘00s
Parking lamps, frontand rear sidemarker
lamps, taillamps, license plate lamps, ashtray lamps,
backlighting to the radio controls and instrument
panel lights.
0
so
Headlamps.
$0 Foglamps.
Twilight sentinel.
OFF Turns the twilight sentinel system off.
Instrument panel brightness control.
Turn thelamp control dialto the right(to the first
position) to turn on the parking lamps, front and rear
sidemarker lamps, taillamps, license plate lamps, ashtray
lamps, instrument panel lights
and backlighting to the
center console controls. Turn the lamp control dial all
the way to the right (to the second position)
to turn on
the low-beam headlamps.
Turn the lamp control dialto the left to turn the
lamps off.
Headlamps
Turn the lamp control dial all the
way to the rightto turn
on the low-beam headlamps.
turn on the high-beam headlamps, the low-beam
headlamps must already beon. Push the turn signal lever
on the left side of the steering wheel away from you
to
engage the high-beam headlamps. Pull the lever toward
you to return to the low-beam headlamps. For more
information, see “Headlamp High/Low Changer” earlier
in this section.
10
Turn the lamp control dial all the way
to the left to turn
the headlampsoff.
Note thatif the headlampsare activated while driving
and then you turn your vehicle’s ignition
off while the
lamp dial is still turned on, the headlamps will turn off.
If, however, you open the driver’s door while the lamp
dial is still turned on, a warning
chime will sound
reminding you to turn the
lamp control dial toOFF. This
will stop the warning chime
from sounding. (If you want
the headlamps to remain on, you must manually turn the
lamp control dialoff and then back on to the headlamp
position. The headlamps will stay on until manually
turned off again.)
Wiper-Activated Headlamps
This feature activates the low-beam headlamps, parking
lamps, sidemarker lamps and taillamps after the
windshield wipers have been in use for about
20 seconds.
The wiper-activated headlamps light the way in poor
weather andalso make your vehicle more visible
to
other drivers. If the wipers are on andthe ignition switch
is turned off, the headlamps will immediately turn off.
The headlamps willalso deactivate if the windshield
wipers have been turnedoff for about 20 seconds.
Perimeter Lighting
This feature turns on the low-beam headlamps,
parking lamps, sidemarker lamps and taillampsfor
about 20 seconds after the unlock button
on the remote
keyless entry transmitteris pressed. Perimeter lighting
immediately ends when your vehicle’s ignitionis turned
to ON or START.
Lamps On Reminder
You will hear a warningchime if you openthe door
while leaving the lamps on,
if the manual headlamp
control is activated. An exception to thisis when you’re
using the twilight sentinel.
Daytime Running Lamps
Daytime Running Lamps(DRL)can make it easier for
others to see thefront of your vehicle during the day.
DIU, can be helpful in many different driving
conditions, but they can be especially helpful in the
short periods after dawn and before sunset.
The DRL system will make the high-beam headlamps
come on at reduced brightness when:
your vehicle’s ignition is in ON or START,
the low-beam headlamps are off (the manual lamp
switch is in the off
or park lamp position) and
your vehicle’s transmission is shifted out of
PARK (P).
When DRL are on, only the high-beam headlamps (at
No other exterior lamps
reduced brightness) will be on.
such asthe parking lamps, taillamps,etc. will be on
when the DRLare being used.The instrument panel
won’t be lit up either.
When the twilight sentinelis on and it’s dark enough
outside, the high-beam headlamps (at reduced intensity)
will changeto low-beam headlamps. When it’s bright
enough outside,the regular lamps willgo off, and the
high-beam headlamps change to the reduced brightness
of DRL.
2-41
__
To idle your vehicle with the headlamps off, turn off the
twilight sentinel switch and shift
the transmission into
PARK (P). Placing your vehiclein PARK (P) disables
the DRL.The DRL will stayoff until you shift out of
PARK (P).
If you're not inPARK (P)
and the twilight sentinel
system is turned off (and it's
dark enough outside),the
DRL will remain active and
this light on the instrument
panel will appear as a
reminder that headlamps
are required.
The following conditions will override the Dm:
Your vehicle's transmission is shifted back into
PARK (P) with the ignitionin ON or START,
The low-beam headlamps are turned on (using the
manual lamp control dial),
The wiper-activated headlamps are in use (DRL
will come back on20 seconds after wipers have
turned off),
0
Using the flash-to-pass feature and
0
Turning on the twilight sentinel.
As with any vehicle, you should turn
on the regular
headlamp systemwhen you need it.
Cornering Lamps
Fog Lamps
I
Use the fog lamps for better
vision in foggyor misty
conditions. Press this button
to turn the fog lamps on and
press the button again to
turn the lamps off. (The fog
lamps only work when the
parking lamps or the
low-beam headlamps
are on.)
The cornering lampscome on when the headlampsor
parking lamps areon and you signal a turn. They
provide more lightfor cornering.
Twilight Sentinel
This feature is below the
lamp control dial on the left
side of the instrument panel.
It automatically switches
the parking lamps and
low-beam headlamps on
and off by sensing how dark
it is outside.
I
I
50
This light on the instrument
panel will come on
when the fog lamp button
is pressed.
If you turn onthe high-beam headlamps, thefog lamps
will turn off. They'll turn back on again when you
switch to low-beam headlamps.
To operate the twilight sentinel, the ignition must
be in
ON or START and the twilight sentinel must be turned
on by pressing the OFF button (an indicator light in the
button will beoff when the twilight sentinelis
activated). If the system sensesit is dark outside, the
lamps will turn on.The lamps turn off when the system
detects thatit is bright outside.
I
11
Ifyou rotate the control dial all thewayup,the lamps
Light Sensor
will remain on for about three minutes after the ignition
has been turned to
OFF or LOCK. If you rotate the
control dial all theway down, the lamps willgo off
quickly. You can adjust the delay time
from a few
seconds up to three minutes.
To turn the twilight sentinel off, press the OFF button
again. The indicator lightin the button will be on.
This
lets the driver know thatthe system has been turned
off.
The twilight sentinel also turns
off if the ignitionis
turned toOFF or to LOCK.
- .
~
~
- This light in the instrument
--
panel will come on if the
ignition is on and:
1
0
1
0
l
~
0
The headlamps have not been manually turned on,
The twilight sentinel senses it is dark outside,
The twilightsentinel is OFF and
0
The transmission is not in PARK (P).
The light sensorfor the twilight sentinelis located in the
center of the front defogger grille.
If you cover the
sensor, it will read “dark” and the parking lamps and
low-beam headlamps will come on.
Interior Lamps
Rear Reading Lamps
Instrument Panel Brightness Control
This control dial is located to the right
of the fog lamp
button. As you rotate the control dial up, the instrument
panel lights will brighten.
Illuminated Entry
This system turns on the courtesylamps (dome lamps
and door entry lamps) for about 20 seconds when any of
the following occur:
0
If you manually unlock your vehicle with the key,
0
If any door is opened,
If you press the unlock button on the remote keyless
entry transmitter,or
0 After the last door on your vehicle is closed.
Illuminated entryimmediately ends when your vehicle’s
ignition is turned to ON or START.
0
The rear reading lamps are located
above each rear door.
These lamps and the interior courtesy lampscome on
when any door is opened and it is dark outside.
Placing thebutton in the center position enablesthe
lamps to come on when any door isopened. Pressing the
button toward the rearof your vehicle disables the lamps
when any door is opened. With the button set toward the
front of the vehicle, the lamps will always
be on.
If the reading lamps areleft on, they automatically shut
off 10 minutes after the ignition has been turned off.
2-45
Mirrors
Map Lamps
Electrochromic DaymightRearview Mirror
. ..........i__._....
_"......"
.
~
These lamps are located in
the front overheadconsole
(near the windshield). Press either buttontuto
rn the
driver's or passenger's sidelamp on and press the button
again to turn the lamp
off.
These lamps also comeon when any dooris opened or
unlocked whenit is dark outside.
This mirror automatically changes to reduce glare
from
headlamps behind you.A photocell on the back
of the
mirror senses whenit is becoming dark outside. Another
photocell built into the mirror surface senses when
headlamps are behind you.
At night, when the glare
is too high, the mirror will
gradually darken to reduce glare
(this change may take a
few seconds).The mirror will returnto its clear daytime
state when the glare is reduced.
Time Delay
Manual Folding Outside Rearview Mirrors
This feature prevents rapid changing of the mirror from
the night modeto the day mode as you drive under
lights and through traffic.
The driver’s and passenger’s outside mirrors move
forward and rearward(“break-away”) to help prevent
injury and/ordamage to your vehicle.
Cleaning Photocells
Use a cotton swab and glass cleaner to clean the
front
and rear photocells that make theauto-dimming
feature work.
Also note that the symbolappearing on each mirror lets
you know that the mirrors are heated mirrors.
To heat
the mirrors, pressthe rear window defogger button.
Power Remote Control Mirror
Your passenger’s side mirror isconvex. A convex
mirror’s surface iscurved so you can see more from the
driver’s seat.
Move the rocker switch to
the left tochoose the
driver’s side mirroror move
the switch to the right to
select the passenger’s side
mirror. To adjust the mirror,
push the control pad inthe
direction you want the
mirror to go.Adjust each
mirror so you can see the
side of your vehicle and the
area behind your vehicle.
Your vehicle’s ignition must be in
ON for this feature
to work.
Convex Outside Mirror
CAUTIO--:
-
A convex mirror can make things (like other
vehicles) look farther away than they really are.
If you cut too sharply into the right lane, you
could hit a vehicle on your right. Check your
inside mirror or glance over your shoulder before
changing lanes.
Storage Compartments
Center Console Storage Area
Glove Box
The glove box is located in frontof the passenger’s seat.
To lock the glove box door, insert the key in the lock
cylinder and turnit to the right. Turn the key
to the left
to unlock the door.
Note that the glovebox is air conditioned. This helps
to
keep snack items cool while traveling. In order
for cool
air to enter the glove
box, the air conditioning must be
turned on. Use the slide control insideof the glove box
to turn the air flowon and off. Moving the slide control
over the small hole turns the cool
air off and moving the
control away from the hole turns the cool air on.
Map Pockets
The front storage area comes with a small storage bin
The maphtorage pockets are located on each front door
and a dual cupholder that unfolds
for use. To open, press
as well as on the passenger’s and driver’s front
and hold the button under the
front edge of the storage
seatbacks. Also located on the driver’s door map pocket
lid
and
lift
up.
is a coin holder.
Convenience Net
The convenience net is on thefloor of the trunk. Put
small loads, like grocery bags, under the net.
It can help
keep them from moving around during sharp turns or
quick starts and stops.
The net is notfor larger, heavier loads.Store them in the
trunk as far forward as you can. When not using the net,
hook it tothe metal loops, securingit to the floor.
NOTICE:
Don’t put papers or other flammable items
into the ashtrays. Hot cigarettes or other
smoking materials could ignite them, causing
a
damaging fire.
The cigarette lighter is located next to the ashtray. Press
it all the wayin and release. It will pop back
by itself
when
it’s
ready
to
light.
You
also
have
a
lighter
on
the
The front ashtray is located below the radio. Press on the
back of the center console near the rear seat air outlet.
cover to access it.To clean the ashtray, pressthe black
tab to the rightof the tray to release it. Now pull up on These lighters (receptacles) work at all times,
even when
the tray toremove and cleanit.
your vehicle’s ignition has been turned off.
To replace the tray after cleaning,
follow these steps.
Ashtrays and Cigarette Lighter
1. Hold the cover (flap) on topof the tray down so it is
not in the way.
2. Insert the traydownward and forward into the
ashtray holder.
3. Press down on the tray t6 ‘slidpit into place.
To use the rear ashtray, lift the lid.
NOTICE:
Don’t hold a cigarette lighter in with your hand
while itis heating. If you do, it won’t be able to
back away from the heating element when it’s
ready. That can make it overheat, damaging the
lighter and the heating element.
Sun Visors
Cellular Telephone(Option)
Illuminated Visor Vanity Mirror
Your vehicle has been prewiredfor dealer installationof
a dual-mode (analog/digital) cellular portable telephone.
Voice activation and hands-free operation are standard
features. For more information, contact your dealer.
A
user’s guide is provided with the telephone.
Turn the sunshade down and lift the cover to see the
mirror. Lighting is automatic.
Power Rear Sunshade (Option)
The power rearsunshade helps reduce the amountof
heat and light from the sun entering through
the rear
window. This sunshade increases the comfort levelof
the rear seatpassengers as well askeeping your vehicle
a little cooler when it’s parked
in a sunny area.
This button is located to the
right of theshift lever onthe
center console. To use, slide
this button rearward -- the
button returns to itsoriginal
position when released. The
rear sunshade automatically
raises. To lower the
sunshade, slide the button
rearward again.
OnStar System (Option)
This system may be ordered if you have the optional
fixed cellular telephone.The following services are
available 24 hours a day:
0
Roadside Service with Location
0
Emergency Services Button
Remote Door Unlock
Theft DetectiodNotification and Stolen-Vehicle
Tracking
Automatic Notification of Air Bag Deployment
Concierge/Customer Convenience Services
For more information, contact your dealer.
Assist Handles
Sunroof (Option)
A handle above each door can be used when getting out
of your vehicle.
Garment Hooks
For convenience, you will findgarment hooks attached
to each assist handle.
Floor Mats
Your vehicle is equipped with rubber-backed front and
rear floor mats. Keep them clean by vacuuming and
using a spot cleaner, if necessary. Do not machine wash.
When you stopyour vehicle and turn the ignition keyto
LOCK, you can still usethe sunroof. The electrical
power to operate the sunroof will not shut
off until a
door is opened -- there is no time limit to this feature.
As soon as a door is opened, sunroof movement will
stop immediately.
4
2-51
to position A fully opens the
Turning the control dial
glass panel and sunshade.The sunshade can also be
opened by hand.If you want tostop the roofin a
partially opened position, turn the control dial to any
position betweenA and E. The positions range from
about 25 percent open to approximately
80 percent
open. Turn the dial to position
E to fully close the glass
panel. To close the sunshade, manually pull it forward.
To raise the glass panel, turn the control dial to the left
to one of the three tilt positions.
The positions range
from about 40 percent tilted (F) to fully tilted
(G). To
close the vent, turnthe dial to the right to position
E.
A. Fully Open
B. About 80% Open
C. About 50% Open
D. About 25% Open
E. Fully Closed
E About 40% Tilted
G . Fully Tilted
Anti-Pinch Feature
Manual Operation
If a hand, an arm or another objectis in the way of
the power sunroof closing, the glass
panel will
immediately stop at the obstruction andopen to a
preset factory position.
Pressing and holding the power sunroof control
dial inthe up position will turn off the anti-pinch
feature. If this happens,the sunroof won’tstop if
something gets inthe way. You or others could be
injured, and your sunroof could be damaged.
Be
careful not to press
and hold the power sunroof
control dial in the
up position.
If a failure in the power supplysystem occurs, the
sunroof can be manually closed by inserting a
screwdriver into the slot as shown. Turningthe
screwdriver to theleft will close the sunroof.
The screwdriver is provided in the toolkit in thetrunk
(with the jack).
2-53
Programming the Sunroof
If the battery on your vehicle
has been recharged,
disconnected or is not working, you will need to
reprogram the sunroof following these steps.
With your vehicle’s ignition on:
4. Turn the control dial to positionA and press until the
sunroof is fully open (about three seconds after the
motor has stopped).
5. Turn to position E and keep pressing the control dial
until the sunroof has fully closed (about three
seconds after the motor has stopped).
1. If the sunroof is closed, turn the control dialto
The sunroof is now programmed.
position E. Press the dialfor about five seconds.
Note that after programming,
if the sunroof keeps
If the sunroof isopen, turn the control dial toE
opening after you attempt to close
it, you will need to
and pressuntil the glass panel has closed.
Now
repeat Steps2 through 5 (up to three timesif needed).
continue pressingthe dial for approximatelyfive
If you are still having problems, consult your dealer
more seconds.
for service.
2. Turn the control dial to positionG and press until the Also keep in mind that ifsomething is in the way ofthe
sunroof is fully tilted (aboutthree seconds after the
sunroof closing during programming and you continue
motor has stopped).
to program the sunroof, the sunroof will only open or
close to the spot where the obstruction occurred.
You
3. Now turn the control dial to positionE and keep
pressing until the sunroof is fully closed (about three will need to reprogram the sunroof again making sure
that the object has been removed.
seconds after the motor has stopped).
Universal Transmitter (Option)
This transmitter allows you to consolidate
the functions
of up to three individual hand-held transmitters. It will
operate garage doors and gates, or other devices
controlled by radiofrequency such as home/office
lighting systems.
The transmitter will learn and transmit the frequencies
of most current transmitters and is powered
by your
vehicle's battery andcharging system.
This device complies with Part 15 of the FCC Rules.
Operation is subject to the
following two conditions:
(1) this device may not cause harmful interference,
and (2) this device must accept any interference
received, including interference that may
cause
undesired operation.
This device complies withRSS-210 of Industry
Canada. Operationis subject tothe following two
conditions: (1) this device may notcause interference,
and (2) this device must acceptany interference,
including interference that may
cause undesired
operation of the device.
Your vehicle’s ignition should be on and engine
the
should be off while programming the transmitter. Follow
these steps to program up to three channels:
1. If you have previously programmed a transmitter
channel, proceed to Step2. Otherwise, hold down
the two outside buttons on the universal transmitter
Changes and modifications to this system
by other than
until the indicator light begins to flash rapidly
an authorized service facility could void authorization to
(approximately 20 seconds). Then release the
use thisequipment.
buttons. This procedure initializes the memory and
erases any previous settingsfor all three channels.
Programming the Transmitter
Do not use the universal transmitter with any garage
door opener that does nothave the “stop and reverse”
safety feature.This includes any garage door opener
model manufactured before April1, 1982.
Be sure that people and objects are clear
of the garage
door you are programming.
2. Decide which one of the three channels you want
to program.
3. Hold the endof the hand-held transmitter about one
inch (2.5 cm) away from the rear surfaceof the
mirror so that you can still seethe indicator light.
4. Using both hands, press the hand-held transmitter
button and the desired button on the universal
transmitter. Continue to holdboth buttons
through Step 5.
5. Hold down both buttons until yousee the indicator
light onthe universal transmitterflash slowly and
then rapidly.The rapid flashing, whichcould take up
to 90 seconds, indicates thatthe universal transmitter
has been programmed. Release both buttons once the
light starts to flash rapidly.
If you havetrouble programming the universal
transmitter, make sure that you
have followed the
directions exactly as described and that the battery
in the
hand-held transmitter is not dead. If you still cannot
program it, rotate the hand-held transmitter end over end
and try again. The universal transmitter may not work
with older garage door openers that do not meet current
Federal Consumer Safety Standards.If you cannot
program the transmitter after repeated attempts, consult
the manufacturer of the unit at 1-800-335-3515.
Be sureto keep the original hand-held transmitter
in case
you need to erase and reprogram the universal transmitter.
Note to Canadian Owners: During programming, the
hand-held transmitter may stop transmitting after one or
two seconds. If you are programmingfrom one of these
transmitters, you should press and re-press the button on
the hand-held transmitter everytwo seconds without ever
releasing the button on the universal transmitter.
You may
have to repeatthis step several times while programming.
Training a Garage Door Opener with
Press and hold the appropriate button on the universal “Rolling Codes” (If Equipped)
Operating the Transmitter
transmitter. The indicator light comes on while the
signal is being transmitted.
Note that the effective transmission range
of the
universal transmittermay differ from your hand-held
transmitter andfrom one channel to another.
Also note thatif the hand-held transmitter appears to
program the universal transmitter but does not open
your garage door, and
if the garage door opener was
manufactured after 1995, the garage door opener may
have a “rolling code” system.A rolling code system
changes the code of the garage door opener every time
you open or close the garage door.
If you have not previously programmed the hand-held
transmitter to the universal transmitter, see
“Programming the Transmitter” earlier in this section.
If
you have completed this programming already, you now
need to train the garage
door opener receiver to
recognize the universal transmitter. Refer
to your garage
door opener owner’s manualfor the proper transmitter
training procedurefor your garage door opener brand.
1. Locate the training button on the
garage door opener
receiver. The exact location and color
of the button
may vary by garagedoor opener brand. If you have
difficulty locating the training button, refer to your
garage door opener manual.
To determine if you have this system, press the button
2. Press the training button on the garage door opener
on the universal transmitter that
you have programmed
receiver for one ortwo seconds. An indicator light will
already. If the indicator light on the universal transmitter
begin to flash when the receiver enters thetrain mode.
flashes rapidly forone or two seconds and then stops
flashing, the garagedoor opener has a rolling code
system. In a rolling code system, the
garage door
receiver must be trained to the universal transmitter.
2-58
3. Return to the universal transmitter in your vehicle and
press the universal transmitter button you have already
programmed for two to three seconds. Press the button
again to make sure that the universal transmitter has
been trained to the garage door opener receiver. Check
that the trainingwas successful. The receiver light
should no longer beflashing.
The garage door opener should now recognize the
universal transmitter.You may either use the universal
transmitter or the hand-held transmitter to open the
garage door.
Erasing Channels
To erase all three programmed channels, hold down the
two outside buttons untilthe indicator light begins to
flash. Individualchannels cannot be erased, but can be
reprogrammed using the procedure
for programming the
transmitter explained earlier.
Accessories
Accessories for the universal transmitter are available
from the manufacturer of the unit.If you would like
additional information, pleasecall 1-800-355-35 15.
If after following these instructions youstill have
problems training the garage door opener, consult
your dealer.
2-59
Instrument Panel
The instrument panel is designed to let you know at a
glance how your vehicle is running. You’ll know
how
fast you’re going, how much fuelyou’re using and
many of the other things you’ll need to know to drive
safely and economically. The main components of the
instrument panel are:
A. Air Outlets
B.
C.
D.
E.
E
Turn SignalMultifunction Lever
Instrument Cluster
Windshield WasherLever
Comfort Controls
Lamp Controls
G. Horn
H. Steering Wheel Touch Controlsfor Audio System
I. Hood Release
J. Hazard Warning Flasher Button
K. Fuel Door Release Button
L. Heated Front Seat Ordoff Button (Option)
M. Ashtray
N. Radio
0. Trunk Release Button
P. Traction Control OdOff Button
Q. Glove Box
Instrument Panel Cluster
United States version shown, Canadian similar
Speedometer and Odometer
The speedometer lets you see your speedin both miles
per hour (rnph) and kilometersper hour (km/h). The
odometer shows how far your vehiclehas been driven,
in either miles (used in the UnitedStates) or kilometers
(used inCanada).
I NOTICE:
Do not operate the engine with the tachometer in
the red areaor engine damagemay occur.
Trip Odometer
Engine Speed Limiter
The trip odometer tells howfar you have driven since
you last resetit. To set it to zero, pressthe knob located
below thespeedometer on theinstrument cluster.
This feature prevents theengine from operating attoo
many revolutions per minute (rpm). When the engine’s
rpm are critically high, the
fuel supply tothe engine is
shut off. Whenthe engine speed slows, thefuel supply
will come on again. This helps prevent damage to
the engine.
This gage indicates the
engine speed in revolutions
per minute (rpm).
m
RPM x 1000
Warning Lights, Gages and Indicators
This part describes the warning lights
and gages that
may be on your vehicle.The pictures will help you
locate them.
Warning lights and gages can signal thatsomething is
wrong before it becomes serious enough cause
to an
expensive repair or replacement. Paying attention to
your warning lights and gages
could also save you or
others from injury.
Warning lights come on when there may be or is a
problem withone of your vehicle’s functions.As you
will see in the details on the next few pages,
some
warning lights come on briefly when
you start the
engine just to let you know they’re working. If you are
familiar with this section, you should not
be alarmed
when this happens.
Gages can indicate when there
may be or is a problem
with one of your vehicle’s functions. Often gages and
warning lights work together let
to you know when
there’s a problem withyour vehicle.
When one of the warning lightscomes on and stays on
when you are driving, or when
one of the gages shows
there may be a problem,check the section that tellsyou
what to do about it. Please follow this manual’s advice.
Waiting todo repairs can be costly -- and even
dangerous. So please get to know your warning lights
and gages.They’re a big help.
Safety Belt Reminder Light
When the keyis turned to ON or START, a chime will
come on for about eight seconds to remind people to
fasten their safety belts, unless the driver’s safety belt is
already buckled.
The safety belt light will
also come on andstay on
for about four seconds,
then it will flash for about
60 seconds. If the driver’s
belt is already buckled,
neither the chime nor the
light willcome on.
Air Bag Readiness Light
There is an air bag readiness light on
the instrument
panel, which shows the air bag symbol. The system
checks the air bag’s electricalsystem for malfunctions.
The light tells you if thereis an electrical problem.The
system check includes the air bag sensors, the air bag
modules, the wiring and the diagnostic module.For
more information on the air bag system,
see “Air Bag”
in the Index.
This light will come on
when you start yourengine,
and it will flash for a few
seconds. Then the light
should go out. This means
the system is ready.
Charging System Indicator Light
El
When you turn the key
to START, this light will
come on briefly to show
that the generator and
battery charging systems
are working.
If this light stayson, you need serviceand you should
take your vehicleto the dealer at once.To save the
battery until you get there, turn
off all accessories.
Brake System Warning Light
Your vehicle’s hydraulicbrake system is divided into
two parts. If one part isn’tworking, the other partcan
still work and stop you.
For good braking, though, you
If the air bag readiness light stays on after you start the need both parts working well.
engine or comes on when you are driving, your air bag
If the warning lightcomes on, there is a brake problem.
system may not work properly.Have your vehicle
Have your brake system inspected right away.
serviced right away.
The air bag readiness light should
flash for a few
seconds when you turn the ignition keyON.
to If the
light doesn’t come on then, haveit fixed so it will be
ready to warn youif there is a problem.
A CAUTIC-J:
BRAKE
United States
Canada
This light should come on briefly when you
turn the
ignition key toON. If it doesn’t come on then, have it
fixed so it willbe ready to warn youif there’s a problem.
Your brake system may not be working properly
if the brakesystem warning light is on. Driving
with the brake system warning light oncan lead
to an accident. If the lightis still onafter you’ve
carefully, have
pulled off the road and stopped
the vehicle towed for service.
When the ignitionis on, the brake system warning light
set your parking brake.The
If the light comeson while you are driving, pull off the will also come on when you
light
will
stay
on
if
your
parking
brake doesn’t release
road and stop carefully.You may notice that the pedal is
fully. If it stays on after your
parking brake is fully
harder to push.Or, the pedal may go closer tothe floor.
It may take longer to stop.
If the light is still on, have the released, it means you have a brake problem.
vehicle towedfor service. (See “Towing Your Vehicle”
in the Index.)
Voltmeter
You can read battery
voltage on the voltmeter. If
it reads less than 12 volts or
more than 16 volts while the
engine is running, andit
stays there, you mayhave a
problem withthe electrical
charging system.
I6h
VOLTS
Have it checked right away. Driving with the voltmeter
reading in the lower warning zone could drain or
damage the battery. Driving with the voltmeter reading
in the upper warning zone couldcause bulbs to burn out
(especially headlamp bulbs), various vehicle modulesto
shut down(due to overload protection) and the
possibility of a battery acidleak.
If you idle the engine for a while, the voltmeter reading
might move into the red zone.
If the readingstays in the
red zone while you are driving, you may have a problem
with the electrical charging system. Haveit checked.
While the voltmeter reads in the red zone, the battery
may not be ableto power certain electrical accessories,
like ABS. (If this happens, the ABS light will
come on.
See “Anti-Lock Brakes System Warning Light” in
this section.)
If you must drive a short distance with
the voltmeter
reading in a warning zone, turn
off all the accessories,
including thecomfort controls andthe audio system.
Anti-Lock Brake System Warning Light
ABS
Traction ControlSystem Warning Light
With the anti-lock brake
system, the light(s) will
come on when you start
your engineand may stay
on for several seconds.
That’s normal.
If the light stays on, turn the ignition
to OFF.Or, if the
light comes on when you’re driving, stop as soon
as
possible and turn the ignition
off. Then start the engine
again to reset the system.If the light still stays on,or
comes on again while you’re driving, your vehicle needs
service. If the regular brake system warning light isn’t
on, you still have brakes, but you don’t
have anti-lock
brakes. If the regular brake system warning light
is also
on, you don’t have anti-lock brakes and there’s a
problem with your regular brakes.
See “Brake System
Warning Light” earlier in this section.
The anti-lock brake system warning light should come
on briefly when you turn
the ignition key toON. If the
light doesn’t come on then, have it fixedso it will be
ready to warn you
if there is a problem.
The warning light will flash
when the system sensesa
traction change.
If it stays on, or comes on and stays on steady when
you’re driving, there may be a problem with your
traction control system and your vehicle may need
service. When this warning light
is on, the system will
not limit wheel spin. Adjust your driving accordingly.
The traction control system warning light may come
on
for the following:
0
If there’s a brake system problem thatis specifically
related to traction control, the traction control system
will turnoff and the warning light will come on.
If the traction control systemis affected by an
engine-related problem, the system will turn off and
the warning light willcome on.
If the traction control system warning light comes on
and stays onfor an extended periodof time when the
system is turned on, your vehicle needs service.
Engine Coolant Temperature
Warning Light
This light tells you that the
engine has overheated. If
this light comes on, you
should stop the vehicle and
turn the engine off as soon
as possible. A warning
chime should also sound if
this light comes on.
As a check,the light shouldcome on for a fewseconds
when you start the engine. Inthe section “Problems on
the Road,” this manual explains what to do.
See “Engine
Overheating” in the Index.
Engine Coolant Temperature Gage
This gage shows theengine
coolant temperature.If the
gage pointer movesinto
the red area, theengine is
too hot!
gH
C
This reading means the same thing as
the warning
light -- the engine coolant has overheated.You should
stop the car and turn the
engine off as soon as possible.
The section “Problems on theRoad” in this manual
explains what to do. See “Engine Overheating” in
the Index.
Low Coolant Warning Light
This warning light should
come on while you are
starting the engine.If the
light doesn’t come on, have
it repaired.
I
Malfunction Indicator Lamp
(Check Engine Light)
CHECK
ENGINE
Your vehicle is equipped
with a computer which
monitors operationof the
fuel, ignition and emission
control systems.
I
Your vehicle is equipped with a low coolant level sensor
(switch and float) that is designed to detect when your This system is called OBD11(On-Board
vehicle’s coolant leveldrops below the set limit. If the
Diagnostics-Second Generation) and is intended to
low coolant level sensor (under the coolant surge
tank)
assure that emissions are
at acceptable levelsfor the life
detects that the level
drops while theengine is running,
of the vehicle, helpingto produce a cleaner
the low coolant indicator will
light and remain lit until
environment. The CHECK ENGINE light comes on to
the ignition switchis turned off. Check the coolant level
indicate that there is
a problem and service is required.
and add coolant as needed.
The light should turn off as
Malfunctions often will be indicated by the system
soon as the coolant levelis at its proper operating range. before any problemis apparent. This may prevent more
serious damage to your vehicle.
This system is also
designed to assist your service technician in correctly
diagnosing any malfunction.
2-70
I
If the LightIs Flashing
NOTICE:
If you keep driving your vehicle with this light
on, after a while, your emission controls may not
work as well, your fuel economy may not
be as
good and your engine may not run as smoothly.
This could lead to costly repairs that may not be
covered by your warranty.
This light should come on, as a check to show youit is
working, when the ignition is on and the
engine is not
running. If the light doesn’t come on, have it repaired.
This light will alsocome on during a malfunction inone
of two ways:
Light Flashing -- A misfire condition has been
detected. A misfire increases vehicleemissions and
may damage the emission control system on your
vehicle. Dealer or qualified service center diagnosis
and service may be required.
Light On Steady -- An emission control system
malfunction has been detectedon your vehicle.
Dealer or qualified service center diagnosis and
service may be required.
The following may prevent more serious damage to
your vehicle:
0
Reducing vehicle speed.
Avoiding hard accelerations.
Avoiding steep uphill grades.
0
If you are towing a trailer, reduce the amount of
cargo being hauled as soon as it is possible.
If the light stops flashing and remains on steady,
see “If
the Light Is On Steady” following.
If the light continues to flash, when it is safedotoso,
stop the vehicle. Find a safe place to park your vehicle.
Turn the key off, wait at least10 seconds and restart the
engine. If the lightremains on steady, see “If the Light
Is On Steady” following. If the lightis still flashing,
follow the previous steps, and drive the vehicle to your
dealer or qualified service center
for service.
Have you recently changed brands offuel?
If the Light Is On Steady
If so, be sure to fuel your vehicle with quality fuel (see
You may be able to correct the emission system
“Fuel” in the Index). Poorfuel quality will cause your
malfunction by considering the following:
engine not torun as efficiently as designed.You may
Did you recently put fuelinto your vehicle?
notice this as stalling after start-up, stalling when you
If so, reinstall the fuel cap, making sure to fully install
put the vehicle into gear, misfiring, hesitation on
the cap.The diagnostic system can determine if the
fuel
acceleration or stumbling on acceleration. (These
cap has been leftoff or improperly installed.A loose or
conditions maygo away once the engineis warmed up.)
missing fuel cap will allow fuel to evaporate into the
This will be detected by the system and cause the light
atmosphere. A few driving trips with the
cap properly
to turn on.
installed should turn the lightoff.
If you experienceone or moreof these conditions,
Did youjust drive through a deep puddle of water?
change thefuel brand you use.It will require at leastone
full tank ofthe proper fuel to turn the light off.
If so, your electrical system may be wet.
The condition
will usually be corrected when the electrical system
If none of the above steps have made the light turn off,
dries out.A few driving trips should turn the light off.
have your dealeror qualified service center check the
vehicle. Your dealer has the proper test equipment and
Are you low on fuel?
diagnostic tools tofix any mechanical or electrical
As your engine starts to run out of fuel, your engine may
problems that may have developed.
not run as efficiently as designed since small amounts of
air are sucked into the fuelline causing a misfire.The
system can detect this. Adding fuel should correct this
condition. Make sureto install the fuel cap properly. It
will take a few driving tripsto turn the light off.
2-72
.
.~
~
-
Oil Pressure LighUGage
The light andgage tell you if there could be a problem
with the engine oil pressure.
When the light comes on and stays on, it means
that oil isn’t flowing through the
engine properly. You
could be lowon oil and you might have some other
system problem.
The gage showsthe engine
oil pressure in pounds per
square inch (psi). Canadian
vehicles show pressure in
kilopascals (Wa).
1A CAUTION:
The oil light goeson when
you turn the key to ON or
START. It goes off once
you start the engine. That’s
a check to be sure the
light works.
1 NOTICE:
If it doesn’t come on, be sure to have it fixedso it will
be there to warn youif something goes wrong.
Don’t keep drivingif the oil pressure is low. If
you do, your engine canbecome so hot thatit
catches fire. You or others could be burned.
Check your oil as soon as possibleand have your
vehicle serviced.
Damage to your engine from
neglected oil
problems can becostly and is not covered by
your warranty.
Check Oil Light
Brake To Shift Light
This light will come onfor
a few seconds when the
ignition is turnedon. If the
light doesn’tcome on, have
it repaired.
If the light comeson while starting and stays on
for
about one minute or comes on while driving, the
engine
oil level shouldbe checked. Prior tochecking the oil
level, be sure your vehicle has been shut
off for several
minutes andis on a level surface. Check the oil level
and bring it to the proper level.
See “Engine Oil” in
the Index.
I
l
l This light will come on to
BRAKE TO
SHIFT
remind you that you must
press the brake pedal to
shift out of PARK (P).
Cruise Control Light
CRUISE
This light comes on
whenever you set your
vehicle’s cruise control.
Low Washer Fluid Warning Light
,- -,
\ #
Fuel Gage
The fuel gage shows
approximately how much
fuel is in the tank.It works
only when the ignitionis
in ON.
This light will come on
when youturn on the
ignition and the windshield
washer fluid containeris
less than one-third full.
Trunk Ajar Light
This light will come on if
your vehicle’s trunkis not
completely closed.
Here are a few concerns some owners have had about
the fuel gage. Allof these situations are normal and do
not indicate that anythingis wrong with the fuel gage.
0
At the gas station the gas pump shuts
off before the
gage reads E
0
The gage may change when you turn, stop or
speed up.
2-75
Low Fuel Light
Leveling Indicator Light
If the fuel levelis low,
approximately two gallons
(7.57 L) of fuel remaining
in the fuel tank, a light will
come on and stay on until
you add fuel.
It will also come onfor a few seconds whenyou first
turn on the ignition as a check to show it’s working.it If
doesn’t come on then, have it fixed.
Automatic Transmission Warning Light
0
This light comes on briefly
when the ignitionis turned
on. If the light remains on
or lightsup while driving,
there maybe a fault in the
automatic transmission.
Have your vehicle serviced.
LEVELING
This light comeson steady
when the rear load level in
your vehicle changes.
Do not drive your vehicle when this light is on. The rear
of your vehicle is too low and part of the body
or the rear
axle may be damaged when driving over bumpy roads.
When the light goes out, leveling is complete.
This
procedure is automatic -- you don’t have todo anytlmng.
If the light comes on flashing, there may be a problem
with the leveling system.You should reduce your
vehicle speed and have your vehicle serviced soon.
Brake Pad Wear Indicator Light
This light comeson when
the brake padson your
vehicle have significantly
worn. The pads will have to
be replaced, so have your
vehicle serviced soon.
Section 3 Comfort Controlsand Audio Systems
In this section, you’ll findout how to operate thecomfort control and audiosystems offered with your vehicle.
Be
sure toread about the particular systems supplied with your vehicle.
3-2
3-2
3-3
3-4
3-6
3-6
3 -7
3-8
3-8
3-9
3-9
3-9
3-13
Comfort Controls
Electronic Climate Control (ECC)
Automatic Operation
Manual Operation
Air Conditioning
Heating
Ventilation System
Defrosting
Rear Window Defogger
Audio Systems
Setting the Clock
AM-FM Stereo with Cassette Tape Player
AM-FM Stereo with Cassette Tape and
Compact Disc Player withRadio Data
Systems (RDS)(If Equipped)
3-21
3-22
3-25
3-26
3-26
3-27
3-27
3-28
3-30
3-30
3-30
Radio Data Systems (RDS) Program Type
(PTY) Selections
Trunk Mounted CD Changer (Option)
CD Adapter Kits
Theft-Deterrent Feature
Audio Steering Wheel Controls
Understanding Radio Reception
Tips AboutYour Audio System
Care of Your Cassette Tape Player
Care of Your Compact Discs
Care of Your Compact Disc Player
Heated Backlite Antenna
3-1
Comfort Controls
Driver’s Side Temperature Knob
This section tells you how to make your air system workThe driver’s side TEMP/AUTO knob adjusts the air
temperature coming through the system. Turn the
for you. Your comfort control system uses
TEMP/AUTO knob to the right to increase the
ozone-friendly R- 134a refrigerant.
temperature andto the leftto decrease the temperature.
You can control the heating, cooling and ventilation
Pressing thisknob puts the climate control system an
in
systems in your vehicle.Guidelines for using these
automatic mode. For more information, see “Automatic
systems are found later in this section.
Operation” later in this section.
Electronic Climate Control (ECC)
Passenger’s Side Temperature Knob
The right front passengercan control the temperatureof
heated air for their own zone, independent from the
driver’s temperature setting.The passenger’s
temperature canbe set anywhere between
60O F (16 C )
and 90°F (32°C).
O
To turn the system on, press the passenger’s side
TEMP/AUTO knob. Rotate theknob to the right to
increase temperature and to the left to decrease. Pressing
the knob again turns
off the dual-zone function and
returns the system to the
one-zone function, where the
driver controls the temperature.
Fan Button
The button with the fan symbol adjusts the fan speed.
Press theup arrow to increase fan speed and the down
arrow to decrease fan speed.
3-2
Outside Temperature Display
Automatic Operation
The outside temperature is always displayed when your
vehicle's ignition is on.If the outside temperature
display begins to flash, this means that icy road
conditions are possible. Adjust your drivingif needed.
The display will flashfor about 30 seconds and then
remain on steady.
Pressing the driver's side TEMP/AUTO knob sets the
system for automatic operation.Once the system is set,
sensors will control theair delivery mode.Air will come
from the floor, middle,side or windshield outlets.The
fan speed will vary as the system maintains the selected
temperature setting. (All previous manually set mode
settings willchange back to a fullyautomatic mode
when the climate controlsystem is turned on this way.)
Mode Button
Press this button to deliver air
through the floor, middle
or windshield outlets. The climate control system will
stay in the selected ECC mode until the MODE buttonis
pressed again or until the TEMP/AUTO
knob is pressed.
Press the up or down arrow to see the availablemodes.
EnglisWetric Display
You can change the temperature display from English
(degrees Fahrenheit) to metric (degrees Celsius)
by
pressing and holdingthe driver's side TEMP/AUTO
knob for approximately three seconds.Repeat the
process tochange back toEnglish from metric.
Be careful not to putanything over the solar sensor
located inthe middle of the instrument panel nearthe
windshield. This sensor is used by the automatic system
to regulate temperature.
To find yourcomfort zone, start with the75 "F (24°C)
setting and allowabout 20 minutes for the system to
regulate air temperature.Adjust the temperature if
necessary. If you choose 60O F (16 "C), the system will
remain at that maximum cooling setting
and will not
regulate fan speed.If you choose the temperature of
90"F (32"C), the system will remain at that maximum
heating setting and will not regulate
fan speed. Choosing
either maximum setting will not
cause the system to heat
or cool any faster.
In cold weather, when the system senses the need for
heat, airflow will be directed out
of the floor outlets.As
the interiortemperature approaches a desired setting, the
blower speed will decrease.To maintain interior
comfort, the airflowmay move to the instrument panel
air outlets and floor outlets (bi-level mode).
On bright
sunny days in cold weather, the airflow
may come out of
the air conditioning outlets(AC mode) to maintain
comfort and prevent stuffiness.
If your vehicle is sitting out
on a hot day andyou have
the climate control system set
for automatic operation,
the air will first flow out
of the floor air outletsduring
cool down. Thatis normal. This is to expel hot air from
the air outlets. As the air is cooled, the airflow will
move through the air conditioning outlets.
To avoid blowing coldair in cold weather, the system will
delay turning on thefan until warm air is available. The
length of delay depends on the outsideair temperature,
engine coolant temperature or the time since the engine
'was last started. As the coolant warms up, the blower fan
speed will gradually increase andair will flow from the
heater outlets, with some airflow to the windshield to
prevent fogging under most normal conditions.
If you leave your vehicle, the
system will remember the
control setting the next time you start your engine,
except for recirculation and rear defrost (heated
backlite). Each ignition cycle cancels recirculation.
Manual Operation
You may manually adjust the air delivery mode
or
fan speed.
w e
+dHEATElUDEFROST: This setting directs air to
the floor outlets and toward the windshield.
-bo
d
AC: This setting directs airflow throughthe middle
instrument panel outlets.
+e
!d BI-LEVEL: This setting directs air into your
vehicle in two ways. Cool air is directed the
to upper
portion of your body through the middle instrument
panel outlets while warm air is directed to the floor.
+@ HEATER: This setting directs warm air through
the floor outlets. Some warm air is diverted to the
windshield to minimize fogging.
DEFROST Press this button to quickly
remove fog or frostfrom the windshield (the blower
works in high-speed).This setting sends mostof the
airflow to the windshield with only
a small amount to
the floor outlets.
# FAN SPEEDS: Press the driver’s side
TEMP/AUTO knob to set the fanspeed for AUTO. At
this setting, thefan speed is automatically controlled. If
it is cold outside,the blower may not run in the
maximum high fan speed right away. The system checks
the temperature of the engine coolant to assureit is
warm enough to provide heat. When theengine coolant
is warm,the controller allows the fan to gradually
increase to a higher speed. This prevents cold airfrom
blowing into the passenger compartment. If you want
the blower fan at a high speed, press theup arrow button
until youreach the highest positionof the display.If you
want the blower fan at a low speed, press thedown
arrow button until thelowest position is displayed.
ON/OFF: Press this button to turn the
system off. Press
this button again to turn thesystem back on. Turning the
climate control system on in this way will recall all
previous manually setmode settings. If the system is
turned onby pushing the driver’s TEMP/AUTOknob
for automatic operation, all of the previous manually set
mode settings willbe changed back to the fully
automatic mode.
AC: Press this button to turn the air conditioning on and
off. The system willcool and dehumidify the air inside
the vehicle. In the automatic operation mode,the display
will show ACOFF when the air conditioning has been
turned off.
RECIRCULATION: Press this button to limit the
amount of fresh air entering your vehicle.
This is helpful
to limit odors entering your vehicle. In theautomatic
operation mode, thesystem will use recirculationas
necessary to cool the air. Pressing
the recirculation
button willchange the operation toa manual mode and
the air will recirculate non-stop. Press this button again
to turnoff the recirculation feature.
If you notice the windows fogging, press the
recirculation button toexit the recirculation mode.
Air Conditioning
Heating
Adjust the interior temperature
to your comfort level by
turning either TEMP/AUTOknob to the right to
increase temperature or to the left to decrease
temperature. If the fan speed needs adjusting, press the
The climate control system will cool and dehumidify the up or down arrow.
Outside air willbe brought in and sent through the floor
air inside the vehicle.While in the automatic operation
outlets. The heater works best if
you keep the windows
mode, the system will use recirculation
as necessary to
closed while usingit.
cool the air.You may also need to adjustthe interior
temperature. Turn either TEMP/AUTO knob to the right In order to obtain the maximum heat setting, both the
to increase thetemperature or to the left to decrease
driver’s and passenger’s TEMP/AUTO knobs must
be
temperature. Adjust thefan speed as needed.
turned to90°F (32°C).
On hot days, open the windows long enough to let hot
inside air escape.This reduces the time it takes for your
vehicle to cool down. Then keep your windows closed
for the air conditioner to work its best.
In order to obtain the maximum cool setting, both the
driver’s and passenger’s TEMP/AUTO knobs must be
turned to60°F (16°C).
Ventilation System
The ventilation system supplies outside air into the
vehicle when it is moving. Outside air will also enterthe
vehicle whenthe heater orthe air conditioning fan
is running.
The direction of airflow for the rear seats can also be
adjusted. Move the center control dial between each
vent up or down to adjust the airflow
from low to high.
Rotate the dial to the “0” position to stop airflow.Move
the lever inthe center of each vent to direct airflow
toward the upper or floor outlets.
The airflow temperature from the rear outletsis the
same as the driver’stemperature setting.
Ventilation Tips
The front outlets are located in the center and ateach
side of the instrument panel. You can adjust the
direction of airflow by moving the center control levers
or you can stop the airflow by moving
the dial located
on each side of the outlets to the“0” position.
0
Keep the hood and front air inlet
free of ice, snow or
any other obstruction (such as leaves).
The heater
and defroster will workfar better, reducing the
chance of fogging the insideof the windows.
0
When you entera vehicle in cold weather, adjustthe
fan to the highest speed
for a few moments before
driving off.This helps clear the intake outlets
of
snow and moisture, andreduces the chance of
fogging the inside of the windows.
0
Keep the air path under the front seats clear
of
objects. This helps circulate air throughout
your vehicle.
Passenger Compartment Air Filter
This ventilation system includes an air filter that helps to
remove dust, pollen, etc.from air flowing into your
vehicle. A restriction inthe airflow coming into the
passenger compartment could be the result
of dirt in the
filter. For more information,see “Passenger
Compartment Air Filter” in the Index. Also see the
Maintenance Schedulebooklet for when to change
the filter.
Rear Window Defogger
The lines you see on the
rear window warm the
glass. With your vehicle’s
engine running, press
this button to turn on the
rear defogger.
Defrosting
Use defrost to remove
fog or icefrom the windshield
quickly in extremely humid or
cold conditions.
The rear window defogger heats the rear window and
Pressing the defrost buttonon the control panel (located both outside rearview mirrors.The system will
automatically shutoff after about 15 minutes. If further
above the rear windowdefogger button) automatically
turns the fan blower to high speed. Make sure that the defogging is desired, pressthe button again.
side air vents are opened.
Rotate both TEMP/AUTO
Do not attach a temporary vehicle license, tapeor decals
knobs to the rightas needed to adjust the temperature.
across the defogger grid on the rear window.
To warm the foot area while in defrost, press the MODE
button until the heateddefrost symbol appears (see
“Manual Operation” earlier in this section).
Note that recirculation is not available
in the
defrost mode.
3-8
NOTICE:
AM-FM Stereo with CassetteTape Player
Do not try to clear frost or other material from
the insideof the rear window with a razor blade
or anything else that
is sharp. This may damage
the rear defogger grid. The repairs wouldn’t be
covered by your warranty.
Audio Systems
Your Cadillac audio system has been designed to operate
easily and give yearsof listening pleasure. You will get the
most enjoyment outof it if you acquaint yourself with it
first. Find out what your audlo system can do and how to
operate all its controls,to be sure you’re getting the most
out of the advanced engineering that went into it.
Playing the Radio
PWRNOL: Press this knob lightly to turn the system
Setting the Clock
on. Press the knob again to turn the system To
off.
Press and holdHR or MN until the time display begins
increase volume, turn theknob to the right. Turn it to the
to change. Release the button as you getclose to the
left to decrease volume. The volume level will appear
correct time. The time may be set anytime the clock is
on the display.
displayed. There is a two-seconddelay before the clock
DSPL: Press this button to display the radio station
goes into time-set mode.
being played.
Finding a Station
2. Press BAND to select AM,EM1 or FM2.
BAND: Press this button to select AM,
FM1 or FM2.
3. Tune in the desired station.
SEEK-TUNE: Press and release this button to seek
to
the next higher orlower radio station. Pressing and
holding this button until
a chime sounds puts the radio
in a tune mode. Inthis mode, higher or lower radio
stations are advanced toin small increments until the
SEEK-TUNE buttonis released. Tuning stops whenyou
release this button.If you press and hold the
SEEK-TUNE button again within
five seconds of being
in the tune mode, tuning will continue. Waiting longer
than five seconds places the radio back
in the
seek mode.
SCAN: Press this button andSCAN will appear on the
display. Use SCAN to listen to stations
for a few
seconds. The radio willgo to a station, stopfor a few
seconds, thengo on to the next station. Press this button
again to stop scanning.
PUSHBUTTONS: The six numbered pushbuttons let
you return to your favorite stations.
You can set up to
18 stations (six AM, six FM1 and six FM2). Just:
1. Turn the radio on.
4. Press and holdone of the six numbered buttonsfor
more than two seconds until you hear a beep.
Whenever you press that numbered button
for less
than two seconds, the station you set will return.
5 . Repeat the stepsfor each pushbutton.
When battery poweris removed and later applied, you
will not have to reset your radio presets because the
radio remembers them.
PRESET SCAN: Press and hold SCAN
for two to
three seconds until PRESET
SCAN appears on the
display to listen to each
of your preset stationsfor a few
seconds (factory presets which
have not been
reprogrammed with your stations will
be ignored). The
radio willgo to thef i s t preset station stored on your
pushbuttons, stopfor a few seconds, thengo on to the
next preset station. Press SCAN again to stop scanning.
If a preset station has weak reception, the radio will not
stop at the preset station.
Setting theTone
Playing a Cassette Tape
BASS: Press this knob lightlyso it extends. Turn
With the radio on,insert a cassette tape.The tape will
begin playing as soon as
it is inserted. When one sideof
your cassette tape is done playing, auto reverse plays the
other side of your cassette tape.If you want to inserta
cassette tape when the ignition is off,first press the
eject button.
the knob to the rightto increase and to the left to
decrease bass.
TREB:Press this knob lightly so it extends. Turn the
knob to theright to increase and to theleft to decrease
treble. If a station is weak or noisy, you may want to
decrease the treble.
Push these knobs backinto their stored positionswhen
you’re not using them.
Adjusting the Speakers
BAL: Press this knob lightly so it extends. Turn the
knob to the right to adjust sound
to the right speakers
and to theleft for the left speakers.The middle position
balances the sound between the speakers.
FADE: Press this knob lightly so it extends. Turn the
knob to the right to adjust the sound to the
front
speakers andto the left for the rear speakers.The middle
position balances the sound between the speakers.
Push these knobs backinto their stored positions when
you’re not using them.
While the tape is playing, use the
VOL, FADE, BAL,
BASS and TREB controlsjust asyou do for the radio.
Other controlsmay have different functions whena tape
is inserted. The display will show TAPE with an arrow
to indicate which side of the tape is playing.PLAY will
appear on the display temporarily whena tape is
playing. The display will then revert back to showing
the time.
If an error occurs while tryingto play a cassette tape,it
could be that:
The cassette tape is tight and the cassette player
cannot turn the hubsof the tape. Hold the cassette
tape with the openend down andtry turning the right
hub to theleft with a pencil. Flip the tape over and
repeat. If the hubsdo not turn easily, your cassette
tape may be damagedand should not be usedin the
player. Try a new tape tobe sure your playeris
working properly.
The cassette tape is broken. (Check to seeif your
tape is broken. Try a new tape.)
REV: Press the left arrow to rewind the tape rapidly.
The radio will play while the tape reverses and
REV
will appear on the display. You may use your station
pushbuttons to tune toanother radio station whilein
REV mode. Press theleft arrow again to return to
playing speed.
FF: Press the rightarrow to fast forward to another part
of the tape.The radio will play while the tape advances
and FF will appear on the display.
You may use your
station pushbuttons to tune to another radio station
while
in FF mode. Press the right arrow again to return to
playing speed.
SEEK-TUNE: Press the right arrow to seek to the next
selection on the tape. Press the left arrow to search
for
the previous selection on the tape (REP will
appear on
the display).Your tape must have at least three seconds
of silence between each selection
for SEEK-TUNE to
work. The sound will mutewhile seeking.
SCAN: Press this button. SCANFF will appear on the
display untilthe next selectionis found and then SCAN
PLAY will appearon the display. Use SCAN to listen to
selections for a few seconds.The tape will go to a
selection, stop for a few seconds, thengo on to the next
selection. Press this button again to stop scanning.
SIDE: Press this buttonto change the sideof the tape
that is playing. (PLAY shows on the display.)
SOURCE: Press this button to select a source. If no
cassette tape is in the tape player,
CASS appears on the
display and then the radio station appears briefly. The
display then reverts back to showing the time of
day. Press
this button again orBAND to switch back to the radio.
4 EJECE Press the upward triangle button to remove
a tape. The radio will play. Eject may be activated with
the radio off. Cassette tapes may be loaded with the radio
off but they will notstart playing until thePWR button is
pressed. Press PWR orturn the ignitionoff to stop the
cassette tape player. The tape will stay in the player
and
resume playat the point where it stopped.
CLN: If this message appears on the display, the
cassette tape player needs to
be cleaned. It will still play
tapes, but you should clean itas soon as possible to
prevent damageto the tapes and player.See “Care of
Your Cassette Tape Player” in the Index. After you clean
the player, press and hold the eject button
for five
seconds to reset the CLN indicator.
The radio will
display --- to show the indicator was reset.
Dolby Noise Reductionis manufactured under a license
from Dolby LaboratoriesLicensing Corporation. Dolby
and thedouble-D symbol are trademarksof Dolby
Laboratories Licensing Corporation.
AM-FM Stereo with CassetteTape and
Compact Disc Player with Radio Data
Systems (RDS)(If Equipped)
SOURCE: Press this button to selecta source. Sources
include cassette andcompact disc. The audio source
must be loaded to play. Available loaded sources are
shown on the display.
If a source is being used, it willbe
underlined on the display. If none of the audio sources
are loaded,NO SOURCE LOADED willappear on the
display. Press this button again
or BAND to switch back
to the radio.
Finding a Station
BAND: Press this button to select AM,
FM 1, FM2
or weather.
Playing the Radio
PWRNOL: Press this knob lightly to turn thesystem
on. Press the knob again to turn the systemoff. To
increase volume, turn theknob to the right. Turn it to the
left to decrease volume.
TUNE-SEEK: When this button is pressed it has two
positions. Press this button to the
first position to
manually tune to higher or
lower stations. If this button
is held at thefirst position for a few seconds, the radio
will continue tuning until this buttonis released. Press
this button to thesecond position and release to seek to
the next higher orlower radio station.
SCAN: Press this buttonfor less than two seconds to
scan radio stations.The radio will go to a station, stop
for five seconds, then go on to the next station. Press
this button again to stop scanning.
PUSHBUTTONS: The six numbered pushbuttonslet
you return to your favorite stations.
The RDS PTY
mode must be offto use this mode.You can set up
to 24 stations (six AM, six FM1, six
FM2 and six
weather). Just:
1. Turn the radio on.
2. Press BANDto select AM, FM1, FM2or weather.
3. Tune in the desired station.
4. Press and hold oneof the six numbered buttonsfor
more than two seconds. Whenever you press that
numbered buttonfor less than two seconds, the
station youset will return.
5. Repeat the steps for each pushbutton.
When battery poweris removed and later applied, you
will nothave to reset your radio presets because the
radio remembers them.
PRESET SCAN: Press and hold SCANfor more than
two seconds until you hear a beep
to listen to eachof
your preset stationsfor five seconds. The radio willgo
to the first preset station stored
on your pushbuttons,
stop for five seconds, thengo on to the next preset
station. PressSCAN again to stop scanning. If a preset
station has weak reception, the
radio will not stop at the
preset station.
Using RDS Mode
Your audio systemis equipped withRadio Data Systems
(RDS). RDS mode gives you many useful new features.
When RDS is on, the radio can:
seek only to stations with the types
of programs you
want to listen to,
seek to stations with traffic announcements,
0 receive announcements concerning local and
national emergencies,
0 receive and display messagesfrom radio stations and
search for a stronger station when a stationis too
weak for listening.
RDS features are only available
for use onFM stations
which broadcast RDS information.
nRDS SELECT Press the orange rectangular
button to use the alternate RDS functions (RDS,
TA,
MSG, PTY and C PTY > ) located on the six numbered
pushbuttons. RDSSELECT will appear on the display.
The alternate RDS functions are only available when
you are using theF M band of your radio.
RDS (1): With RDS off, pressthe RDS SELECT button,
followed by this button to turnRDS on. The RDS
display willturn on. You must have RDS on touse the
new RDS functions. The RDS display will also turn on
if one of the otherRDS function buttonshas been
pressed on. If you aretuned to a station broadcasting
RDS information, the station’scall letters andProgram
Type (PTY) will replace
the station’s frequency on the
display. Afterfive seconds, the program type willbe
replaced on the display by the station’s program type
name. The program type and program type name may be
the same or different. PressBAND to recallthe
frequency and program type displays. If the radio is
tuned to a station that
is not broadcasting RDS
information, the station’sfrequency will remain onthe
display. While RDS is on, the radio will searchfor a
stronger stationin the network when a station gets too
weak for listening. Pressthe RDS SELECT button,
followed by this buttonagain to turnRDS off. All RDS
functions willbe turned off.
REGION: You can also usethe RDS button to access
the region function. When an RDS station becomes
weak, this function searchesfor a stronger station within
the same network. A network can span a great distance.
One network can have stations spread across a country
or continent.Each network breaks down into regions.
With regions, local news
items like weather and traffic
are available to you. When the
region function is on, the
radio only searchesfor stations in the same network and
region. You can only use theregion function whenRDS
is already on. Press the RDS SELECT button.Then
press and hold theRDS button for two seconds.
REGION: ON will appear on the display.
While
REGION: ON appears onthe display, press theRDS
button again to turn the region function off. REGION:
OFF will appear on the display.The region function can
be turned on again by pressing the
RDS button.
TA (2): Press the RDS SELECT button,followed by
this button to receive traffic
announcements.The radio
will turn on theTA display. TP will appear onthe
display if the tuned station broadcasts traffic
announcements. You may also receive traffic
announcements from stations in thenetwork related to
the tuned station.If the current tuned station
does not
broadcast traffic announcements, the radio will
seek to a
station which does. When the radio finds a station which
broadcasts trafficannouncements, it will stop.If no
station is found, NONEFOUND will appear on the
display. WhenSEEK or SCAN is pressed with the
traffic announcement function on, the radio will only
stop at stations which broadcast traffic announcements.
While a traffic announcement plays, the radio uses a
special typeof volume called TA volume. To increase
TA volume, turnthe PWRNOL knob to the right.
3-15
Turn it to theleft to decrease volume.TA VOLUME
will appear on the display
while the volume is
being adjusted.
PTY (4): This button is used to turn on and
off Program
Type (PTY) seeks and scans. Press the RDS SELECT
button, followedby this button.The PTY display will
turn on. RDSSELECT PTY NEWS will appear on the
When a traffic announcement comes on the tuned radio
display for three seconds.(The PTY shown will bethe
station or a related network station,
you will hear it,
last PTY selected.) Press the
RDS SELECT button,
even if the volume is muted or a cassette tape or
followed by this button again to turn the PTY
compact disc is playing.
If the radio tunes toa related
display off.
network stationfor a traffic announcement,it will return
< PTY > (5)(6): With RDS on, press theRDS
to the original station when the announcement is
or > . ThePTY
finished. If the cassette tape or compact disc player was SELECTbutton,followed by
being used,the tape orcompact disc will stay in the
display will turn on, itif is not alreadyon. RDS
SELECT: PTY NEWS willappear on the displayfor
player and resume play
at the point where it stopped.
three seconds. (The PTY shown will be the last PTY
Press theRDS SELECT button,followed by this button
selected.) While thismessageisdisplayed,useand
again to turnTA off.
> to move up and down the PTY
list. If you pause on a
MSG (3): When RDS is on, if the current station has a PTY for three seconds, PRESETPTY NEWS will
message, MSG will appear on the display. Press the
appear on the display.While this messageis displayed,
RDS SELECT button,followed by this button tosee the
you can save thePTY in a preset by pressing
one of the
message. If the whole messagedoes not appear on the
six numbered pushbuttons until you hear a beep. Allow
display, partsof the message willappear every three
three secondsfor the message to disappear you
if do not
seconds until the message is completed.
To see the parts
want to save the PTY in a preset.See “Radio Data
of the message faster than
every three seconds, press this Systems (RDS) Program Type (PTY) Selections” in
button again.A new group of words will appearon the
the Index.
display. Once the complete message has been displayed,
MSG will disappearfrom the display until another new
MSG is received. Each message can only be read once.
When the PTY display is on, press SEEK and SCAN
to
find radio stations of the PTY you want to listen to.
The
last PTY selected willbe used for seek and scan modes.
If a station with the selected PTY
is not found, NONE
FOUND will appear on the display.
If both PTY andTA
are on, the radio will search for stations with traffic
announcements and the selectedPTY.
PUSHBUTTONS: The six numbered pushbuttonslet
you return to your favorite Program Types (PTYs).
These buttons have factory PTY presets.See “Radio
Data Systems (RDS) Program Type (PTY) Selections”
in the Index.You can set up to 12 PTYs (six FMl and
six FM2). Just:
1. Turn PTY on.
2. Press BAND to select FMl or FM2.
3. Tune an RDS station with the PTY you desire.
4. Press and hold one of the six numbered buttons for
more than two seconds until you hear a beep.
Whenever you press that numbered button
for less
than two seconds,the PTY you set will return.
5. Repeat the steps for each pushbutton.
When battery poweris removed and later applied, you
will nothave to reset your RDS presets becausethe
radio remembers them.
HR or MN: Press the RDS SELECT button, followed
by one of these buttonsto display the time for the
current station. STATION TIME IS will be displayed. If
a time has not been sent to the radio, STATION
NO
TIME will be displayed.If you have recently tuned to
the station, you may need
to wait a minute beforethe
time is available to the radio.To set the clockto the
current displayed station time, press and hold
HR or MN
until TIME UPDATEDis displayed. Thereis a two
second delay before the time
is updated. RDS mode
does not have to be
on to use this function, but you must
be tuned to anFM RDS station.
ALERT This type of announcement warnsof national
or local emergencies.You will not be ableto turn off
alert announcements. Alert announcements will
come on
even if RDS mode is turned off. ALERT appearson the
display when an alert announcement plays.
The radio
uses TA volume during these announcements.To
increase volume, turnthe PWRNOL knob to the right.
Turn it to the left to decrease volume.
TA VOLUME
will appear onthe display while thevolume is being
adjusted. When an alert announcement comes
on the
tuned radio stationor a related network station, you will
hear it, even if the volumeis muted or a cassette tapeor
compact discis playing. If the radio tunesto a related
network stationfor an alert announcement,it will return
to the original station whenthe announcement is
finished. If the cassette tapeor compact disc player, play
will stop for the announcement and resume when the
announcement is finished.
Setting the Tone
TONE: Press and release this button until the desired
tone control (BASS or TREBLE)
is found. The radio
keeps separate tone settings
for each band, each preset
(except weather band presets) and
each source.
LEVEL: After selectingthe desired tone control, press
the plus (+) or minus (-) symbol on this buttonto select
the desired level.
Adjusting the Speakers
SPEAKER: Press and release this button until the
desired BALANCE or FADE control
is found.
LEVEL: After selecting the desired BALANCE or
FADE control, press the plus(+) or minus (-) symbol on
this button to select the desired level.
4
until the radio is on.
If you want to insert a cassette tape
when the ignition is off,
first press the eject button.
While the tape is playing, use
the VOL, TONE, LEVEL
and SPEAKER controlsjust as youdo for the radio.
Other controls may have different functions when
a tape
is inserted. The display will showan underlined tape
symbol. TAPE PLAY will appear on the display when a
tape is playing, withan arrow to indicate which side
of
the tapeis playing.
If an error occurs while trying to play a cassette tape,
it
could be that:
The cassette tape is tight and the cassette player
cannot turn the hubsof the tape. Hold the cassette
tape withthe open end downand try turning the right
hub to theleft with a pencil. Flipthe tape over and
repeat. If the hubsdo not turn easily, your cassette
tape maybe damaged andshould not be usedin the
player. Try a new tape to be sure your player
is
working properly.
The cassette tape is broken. (Check to see
if your
Playing a Cassette Tape
tape is broken. Try a new tape.)
With the radioon, insert a cassette tape.The tape will
begin playing as soon as
it is inserted. When one sideof
your cassette tape is done playing, auto reverse plays the
other sideof your cassette tape. Cassette tapes
may be
loaded withthe radio offbut they will not startplaying
3-18
R W Press the left arrow to rewindthe tape rapidly.The
radio will playwhile the tape rewinds. You may use
your stationpushbuttons to tune to another radio station
while in RW mode. Press the leftarrow again to return
to playing speed.
FF: Press the right arrow to fastforward to another part
of the tape.The radio will playwhile the tape advances.
You may use your stationpushbuttons to tuneto another
radio station while in FF mode. Press the right arrow
again to return toplaying speed.
TUNE-SEEK: When thisbutton is pressed, it hastwo
positions. This button worksthe same, whether it is
pressed to the first or second position. Press this button
to seek to the next orprevious selection on the tape.
Your tape musthave at least three seconds of silence
between each selection for TUNE-SEEK to work.The
sound willmute while seeking.
SCAN: Press this button to listen
to selections for a few
seconds. The tape will go to a selection,stop for a few
seconds, thengo on to the next selection. Press this
button again to stop scanning.
SIDE: Press this button tochange the side of the tape
that is playing.
A EJECT Press the upward triangle button to
remove a tape.The radio will play. Eject may
be
activated withthe radio off and/or the ignitionoff.
CLEAN TAPE:If this message appears on the display,
the cassette tape player needsto be cleaned. It will still
play tapes, but you should cleanasitsoon as possible to
prevent damage to the tapes and player.See “Care of
Your Cassette Tape Player” in the Index. After you clean
the player, press and hold the eject button
for three
seconds to reset the CLEANTAPE indicator.
Dolby Noise Reduction is manufactured under a license
from Dolby LaboratoriesLicensing Corporation. Dolby
and thedouble-D symbol are trademarksof Dolby
Laboratories Licensing Corporation.
Auto Cr02 allows the cassette tape player to adjust to
the type of cassette tape for clearer sound
for Cr02
cassette tapes.
Playing a Compact Disc
R W Press and hold theleft arrow to reverse the
compact disc. Releaseit to returnto playing speed.
Insert a disc partway into the slot, label side The
up.
player will pullit in. If the ignition and the radio are on FF: Press and hold the right arrow to forward
fast
to
and the underlined compact disc symbolappears on the
another partof the compact disc.Release it to returnto
display, the disc will begin playing. Compact discs
may
playing speed.
be loaded with the radio off but they will not start
TUNE-SEEK: When this buttonis pressed, it has
playing until the radiois on. If you want to insert disc
a
two positions. This button worksthe same, whetherit
when the ignition isoff, first press the eject button.
is pressed to thefirst or second position. Press this
button to seek to the next previous
or
selection on the
The integral CD player can play the smaller8 cm
compact disc.
compact discs. Full-size compact discs and the smaller
compact discs are loaded in
the same manner.
SCAN: Press this button to listen to selections
for a few
If you’re driving on avery rough road or if it’s very hot,
the disc may not play.If the disc comesout, it could
be that:
The disc is upside down.
seconds. The compact disc will goto a selection, stop
for a few seconds, thengo on to the next selection. Press
this button again to stop scanning.
It is dirty, scratched or wet.
RDM: Press this button to hear
the tracks in random,
rather than sequential, order. Press
RDM again to turn
off random play.
The air is very humid. (Ifso, wait about an hour and
try again.)
A EJECT Press the upward triangle button to
If any error occurs repeatedly or if an error can’t
be
corrected, please contact your dealer.
3-20
remove a compact disc.The radio willplay. Eject may
be activatedwith the radiooff and/or the ignitionoff.
Radio Data Systems(RDS) Program Type
(PTY) Selections
PTY List ......................... Description
Adlt Hit . . . . . . . . . . . . . . . . . . . . . . . . . . . Adult Hits
Any ....................................
Any
Classic1 . . . . . . . . . . . . . . . . . . . . . . . . . . . . . Classical
Classical Rock
Cls Rock .......................
College
College ..............................
Country
Country .............................
Information
Info ..............................
Jazz.. . . . . . . . . . . . . . . . . . . . . . . . . . . . . . . . . . . Jazz
Language . . . . . . . . . . . . . . . . . . . . . . . . . . . Language
News
News .................................
Nostalgia
Nostalga ............................
I
I
Public
PTY List .........................
Description
Oldies ................................
Oldies
Persnlty ..........................
Personality
Public
Public ................................
R & B . . . . . . . . . . . . . . . . . . . . . . .Rhythm and Blues
Re1 Musc . . . . . . . . . . . . . . . . . . . . . ReligiousMusic
Re1 Talk . . . . . . . . . . . . . . . . . . . . . . . .Religious Talk
Rock M . . . . . . . . . . . . . . . . . . . . . . . . . . . Rock Music
Soft.. . . . . . . . . . . . . . . . . . . . . . . . . . . . . . . . . . . Soft
Soft Rock
Soft Rock ..........................
sports . . . . . . . . . . . . . . . . . . . . . . . . . . . . . . . . sports
Talk
Talk ...................................
Top40 . . . . . . . . . . . . . . . . . . . . . . . . . . . . . . . Top40
Weather . . . . . . . . . . . . . . . . . . . . . . . . . . . . . . Weather
Factorv PTY Presets
I
I
Y
Preset
Preset 1
Preset 2
Preset 3
Preset 4
Preset 5
Preset 6
I
I
FMl
Adult Hits
Classical
News
Rock
Country
I
I
I
FM2
Jazz
Oldies
Religious Music
Soft Rock
R&B
Top 40
3-21
Trunk Mounted CD Changer (Option)
With the compactdisc changer, youcan play up to
12 discs continuously. Normal size discs may be
played using the trays supplied in the magazine.
The
smaller discs(8 cm) can be played only with specially
designed trays.
1
If you load adisc label side up,the disc will not play
and anerror will occur. Gently push the tray back
into
the magazine slot. Repeat this procedure
for loading up
to 12 discs in the magazine.
L
.........
....
,".
....:.
........
... .
:~::::::::.
.., .
1
.-.
Once you have loaded the discs in the magazine, slide
open the doorof the compactdisc (CD) changer. Push
You must first load the magazine with discs before you the magazineinto the changer inthe direction of the
arrow marked on topof the magazine.
can play a compact disc. Eachof the 12 trays holdsone
disc. Pressthe button on the back of the magazine and
pull gently on oneof the trays. Load the trays
from
bottom to top, placing disc
a on the tray label side down.
3-22
~_____
~
Whenever a CD magazine with discs is loadedthe
in
changer, theCD changer symbol will appear on the
radio display.If the CD changer is checking the
magazine for CDs, the CD symbol will flash on the
display until thechanger is ready toplay. When a CD
begins playing, a disc and track number will
be
displayed. The disc numbers are listed on
the front of
the magazine.
All of the CD functions are controlledby the radio
buttons, except for ejecting theCD magazine.
Close the door by sliding it all the way to the left. When
the door is closed, thechanger will begin checking for
discs inthe magazine. This will continue for up to one
and a half minutes,depending on the number of
discs loaded.
To eject themagazine from the player, slidethe CD
changer door all the way open.The magazine will
automatically eject. Remember to keep the door closed
whenever possible tokeep dirt and dust from getting
inside the changer.
PUSHBUTTONS: Press buttons one through six to
select compact discs one through six. Press and holdone
of the six pushbuttons until a beepsounds to select
compact discs 7 through 12. These pushbuttons
represent the orderof the discs loaded inthe changer.
DSPL: Press andhold this button tosee the track
elapsed time. (This button is available on the AM-FM
Stereo with Cassette Tape Player only.)
REV/RW Press and hold this button to reverse quickly
through a track selection.
FF: Press andhold this button to advance quickly
through a track selection.
3-23
If your vehicleis equipped withthe AM-FM Stereo with
Cassette Tape Player, use SEEK-TUNE. For all other
audio systems, use TUNE-SEEK.
SEEK-TUNE: Press the right arrowto seek to the next
selection. Press theleft arrow to search for the previous
track selection. The sound will mute while
seeking.
TUNE-SEEK: When this button is pressed, it has two
positions. This button works the same, whether it is
pressed to the first or second position. Pressthis button to
seek to the next or previous selection the
on compact disc.
SCAN: Press this button.You will hear thefirst few
seconds of the first track on each disc. Press this button
again to stop scanning. (This buttonis available on the
AM-FM Stereo with Cassette Tape Player only.)
TRACK SCAN:Press SCANfor less than two seconds.
You will hear thefirst few seconds of each trackon a
disc. Press SCAN againto stop TRACK SCAN. The CD
will mute while scanning and SCAN will appear on the
display. (This function is not available on the AM-FM
Stereo with Cassette Tape Player.)
DISC SCAN: Press SCANfor more than two seconds.
You will hear thefirst few secondsof the first track on
each disc. Press SCAN again stop
to DISC SCAN.
The CD will mute while scanning and SCAN will
appear on the display. (This
function is not available on
the AM-FM Stereo withCassette Tape Player.)
a
al
3-L4
RDM: Press this buttonto hear the tracks in random,
rather than sequential, order. RANDOM will appear on
the display. Press TUNE-SEEK while RDMis on the
display to randomly seek through discs. Press RDM
again to turnoff random play. (This button is not
available on the AM-FMStereo with Cassette
Tape Player.)
SIDE: Press this button to select the next disc in the
changer. If your vehicle is equipped with theAM-FM
Stereo with Cassette Tape Player, CD and the disc
nmber
will appear on the display each time you press
this button.
If your vehicle is equipped with any other audio system,
DISC LOADING will appear on the display and the disc
number on the radio display willgo to that of the next
available CD each time you press
this button.
SOURCE: Press this buttonto select a source. The
audio source must be loaded
to play. If none ofthe audio
sources are loaded, NO SOURCE LOADED will appear
on the display. Press this button again or BAND
to
switch back to the radio. (CD will be displayeda few
for
seconds instead on the AM-FMStereo with Cassette
Tape Player, then the radio will play.)
EJECT: Slide the CD changer door all the way open
and the disc holder will automatically eject.
Compact Disc ChangerErrors
CD Adapter Kits
CD CHANGER ERRORcould be displayed for
the following:
It is possible to useCD
a adapter kit with your cassette
tape player after activating the bypass feature
on your
tape player.
The road is too rough. The disc should play when the
road is smoother.
To activate the bypassfeature, use the following steps:
The disc is dxty, scratched, wet or loaded label side up.
1. Turn the ignition toON (11).
The air is very humid. If so, wait about an hour and
try again.
2. Turn the radio off.
CD CHANGER DOOROPEN is displayed whenthe
CD changer door is left open. (CHEK DOOR will be
displayed insteadon the AM-FM Stereo with Cassette
Tape Player.)Completely close the changer door to
restore normal operation.
If any erroroccurs repeatedly or if an error
cannot be
corrected, please contactyour dealer.
3 . Press and hold the SOURCE buttonfor two seconds.
The tape symbol on the display will flash three
times, indicating thefeature is active.
4. Insert the adapter.
This override routine willremain active untilthe eject
button is pressed.
Theft-Deterrent Feature
Audio Steering Wheel Controls
THEFTLOCK@is designed todiscourage theft of your
radio. Your vehicle has a “built-in” theft-deterrent
feature on each radio thatis automatic -- there is no
programming required.The radio in your vehiclecannot
be used in any other vehicle. When
the radio was
originally installed in your vehicle at the factory,
it
stored the Vehicle Identification Number (VIN). Each
time the ignition is turnedon, the VIN is verified. If the
vehicle’s VIN doesnot match the VIN stored in the
radio, the radio/audiosystem will not play.If the radio is
removed from your vehicle, the original
VIN in the
radio can be used to trace
the radio back to your vehicle.
Some audio controls can be adjusted at the steering
wheel. They include the following:
:Press this button to move forward through preset
radio stations or to the next selection on a or
tape
CD.
4 :Press this button to move rearward through preset
radio stationsor to the previous selectionon a tape
or CD.
.T. (BAND): Press this button tochange between AM,
FM1 or FM2 for the radio.This button also changes a
tape to the other side, restarts
a CD if playing a single
CD or goes to the next available
CD loaded in the trunk
mounted CD changer.
+: Pressing this button increases volume.
Tips About Your Audio System
-:Pressing this button decreases volume.
Hearing damage from loud noise is almost undetectable
until it is too late.
Your hearing can adapt to higher
volumes of sound. Sound that seems normal can be loud
and harmful to your hearing. Take precautions
by
adjusting the volume control on your radioato
safe
sound level before your hearing adapts it.to
o (SOURCE): To change to a tape orCD, press
this button.
Understan h g Radio Reception
AM
The range for most AM stations is greater thanfor FM,
especially at night.The longer range, however,can
cause stations to interfere with each other. AM can pick
up noise from things like storms and power lines. Try
reducing the treble toreduce this noiseif you ever get it.
FM Stereo
EM stereo willgive you the best sound, but FM signals
will reach only about 10 to 40 miles (16 to 65 km). Tall
buildings or hills can interfere with FM signals, causing
the sound tocome and go.
To help avoid hearing lossor damage:
0
Adjust the volume control to thelowest setting.
0
Increase volume slowly until you hear comfortably
and clearly.
Care of Your Cassette Tape Player
NOTICE:
Before you add any sound equipment to your
vehicle like a tape player, CB radio, mobile
telephone or two-way radio be sure you can
add whatyou want. If you can, it’s very
important to do it properly.
Added sound
of
equipment may interfere with the operation
your vehicle’s engine, radio or othersystems, and
even damage them. Your vehicle’s systems may
also interferewith the operationof sound
equipment that hasbeen added improperly.
So, before adding sound equipment,
check with
your dealer and be sure to check Federal rules
covering mobileradio and telephone
units.
--
3-28
--
A tape player that is not cleaned regularly
can cause
reduced sound quality, ruined cassettes
or a damaged
mechanism. Cassette tapes should
be stored in their
cases awayfrom contaminants, direct sunlight and
extreme heat.If they aren’t, they may not operate
properly ormay cause failureof the tape player.
Your tape player shouldbe cleaned regularly after every
50 hours of use. Your radio may display CLN or
CLEAN TAPE to indicate that you
have used your tape
player for 50 hours without resetting the tape clean
timer. If this message appears on the display, your
cassette tape player needs to be cleaned. It still
willplay
tapes, but you should clean
it as soon as possible to
prevent damage to your tapes and player.
If you notice a
reduction in sound quality,
try a known good cassette to
see ifit is the tape or the tape player at fault.
If this other
cassette has no improvement
in sound quality, clean the
tape player.
The recommended cleaning method for your cassette
tape playeris the useof a scrubbing action,
non-abrasive cleaning cassette with pads which scrub
the tape head as the hubs
of the cleaner cassette turn.
The recommended cleaning cassette is available through
your dealership(GM Part No. 12344789).
When using ascrubbing action, non-abrasive cleaning
cassette, it is normal for the cassette to eject because
your unitis equipped with a cut tape detectionfeature
and a cleaningcassette may appear as a broken tape.To
prevent the cleaning cassette from being ejected, use the
following steps.
1.
2.
3.
4.
5.
If your vehicle isequipped with the AM-FM Stereo with
Cassette Tape Player, press and hold the eject button
for
five seconds to reset the CLN indicator after you clean
the player. The radio will display--- to show the
indicator was reset.
If your vehicleis equipped withthe AM-FM Stereo with
Cassette Tapeand Compact Disc Player withRadio Data
Turn the ignition to ON (11).
Systems (RDS), press and hold the eject button
for three
Turn the radio off.
seconds to reset the CLEANTAPE indicator after you
Press and hold the SOURCE button for two seconds.
clean the player.The radio will display CLEANTAPE
The tape symbol on the display will flash three times. MSG CLEAREDto show the indicator was reset.
Turn the radio on and insert the scrubbing action
Cassettes are subject to wear and the sound quality
cleaning cassette.
may degrade over time. Always makesure the cassette
tape is in good condition before you have your tape
Eject the cleaning cassette after the manufacturer's
player serviced.
recommended cleaning time.
When the cleaning cassette has been ejected, thecut tape
detection feature is active again.
You may also choose a non-scrubbing action, wet-type
cleaner which uses acassette with afabric belt to clean
the tape head.This type of cleaning cassette will not
eject on its own. A non-scrubbing action cleaner may
not clean as thoroughly as the scrubbing type cleaner.
The use of a non-scrubbing action, dry-type cleaning
cassette is not recommended.
Care of Your Compact Discs
I
NOTICE:
Handle discs carefully. Store them
in their original cases
or other protective cases and away
from direct sunlight
Do not try to clear frost or other material from
and dust.If the surfaceof a disc is soiled, dampen
a
clean, soft cloth in a mild, neutral detergent solution and the inside of the rear window with a razor blade
or anything else that
is sharp. This may damage
clean it, wiping from the center to the edge.
the rear defogger grid and affect your radio’s
Be sure neverto touch the signal surface when handling
ability to pick up stations clearly. The repairs
discs. Pickup discs by grasping the outer edges or the
wouldn’t be covered by your warranty.
edge of the hole and the outer edge.
Care of Your Compact Disc Player
The use of CD lens cleaner discs is not advised,
due to
the riskof contaminating the lensof the CD optics with
lubricants internal to theCD mechanism.
Heated Backlite Antenna
Your AM-EM antenna is integrated with your rear
window defogger, located in the rear window. Be sure
that the inside surfaceof the rear window isnot
scratched and that the lines on the glass are not
damaged. If the inside surfaceis damaged, it could
interfere with radio reception.
If, when you turn on your rear window defogger, you
hear static on your radio station,
it could mean that a
defogger grid linehas been damaged.If this is true, the
grid line must be repaired.
If you choose to add a cellular telephone to your vehicle,
and the antenna needs to be attached to the glass, be
sure thatyou do not damage the grid linesfor the
AM-FM antenna.
b%
NOTES
b
NOTES
lc"'
-+a
Section 4 Your Driving and the Road
Here you'll find information about driving on different kinds
of roads andin varying weather conditions. We've also
included manyother useful tipson driving.
4-2
4-3
4-6
4-6
4-7
4- 10
4- 12
4- 12
4-13
4- 15
Defensive Driving
Drunken Driving
Control of a Vehicle
Braking
Anti-Lock Brakes (ABS)
Steering
Off-Road Recovery
Passing
Loss of Control
Driving at Night
4- 16
4-19
4-20
4-2 1
4-22
4-22
4-24
4-28
4-30
Driving in Rain andon Wet Roads
City Driving
Freeway Driving
Before Leavingon a Long Trip
Highway Hypnosis
Hill and Mountain Roads
Winter Driving
Loading Your Vehicle
Towing a Trailer
Defensive driving really means"be ready for anything."
On city streets, rural roads or freeways,
it means
"always expect the unexpected."
Assume that pedestriansor other driversare going to be
careless and make mistakes. Anticipate what they rnight
do. Be ready for their mistakes.
Rear-end collisions are about the most preventable
of
accidents. Yet they are common. Allow enough
following distance. It's the best defensive driving
maneuver, in both city and rural driving.You never
know when the vehiclein front of you is going to brake
or turn suddenly.
Defensive Driving
The best advice anyone cangive about driving is:
Drive defensively.
Please start with a very important safety device
in your
Catera: Buckle up. (See "Safety Belts" in the Index.)
Defensive driving requires that a driver concentrate
on the driving task. Anything that distracts
from the
driving task-- such as concentrating on a cellular
telephone call, reading, or reaching for something on
the floor-- makes proper defensive driving more
difficult and can even cause a collision, with resulting
injury. Ask a passengerto help do things like this, or
pull off the road ina safe place to do them yourself.
These simple defensive driving techniques could
save your life.
Drunken Driving
Death and injury associated with drinking and driving
is a national tragedy. It’s
the number one contributor to
the highway death toll, claiming thousands of victims
every year.
Alcohol affects four things thatanyone needs to drive
a vehicle:
Judgment
0
Muscular Coordination
0
Vision
0
Attentiveness.
Police records showthat almost half of all motor
vehicle-related deathsinvolve alcohol. In most cases,
these deathsare the result of someone who was drinking
and driving. In recent years, over 17,000 annual motor
vehicle-related deathshave been associated withthe use
of alcohol, with more than 300,000 people injured.
Many adults-- by some estimates, nearly halfthe
adult population -- choose never to drink alcohol, so
they never drive after drinking.
For persons under21,
it’s againstthe law in every U.S. state todrink alcohol.
There are good medical, psychological
and
developmental reasons for these laws.
The obvious way to solve this highway safety problem
is for people never to drink alcohol and then drive.
But what ifpeople do? How muchis “too much” ifthe
driver plans todrive? It’s alot less than many might
think. Although it depends on each person and situation,
here is some generalinformation on theproblem.
The Blood Alcohol Concentration (BAC) of someone
who is drinking depends upon four things:
0
0
The amount of alcohol consumed
The drinker’s body weight
The amount of food that is consumed before and
during drinking
The length of time it has taken the drinker to
consume the alcohol.
4-3
According to the American Medical Association, a
180-lb. (82 kg) person who drinks three 12-ounce
(355 ml) bottles of beerin an hour will endup with a
BAC of about0.06 percent. The person would reach the
same BAC by drinking three 4-ounce(120 ml)glasses
of wine or three mixed drinks if each had1-1/2 ounces
(45 ml) of a liquor like whiskey, gin
or vodka.
It’s the amount of alcohol that counts. For example,
if
the same person drank three double martinis
(3 ounces
or 90 ml of liquor each) within an hour, the person’s
BAC wouldbe close to 0.12 percent. A person who
consumes foodjust before or during drinking will have
a somewhat lower BAC level.
There is a gender difference, too. Women generally
have a lower relative percentage of body water than
men. Since alcoholis carried in body water, this means
that a woman generally will reach a higher BAC level
than a man of hersame body weight when each has the
same number of drinks.
The law in manyU.S. states sets the legal limitat a BAC
of 0.10 percent. In a growing numberof U.S. states, and
throughout Canada, the limit is0.08 percent. In some
other countries, it’s even lower.
The BAC limitfor all
commercial drivers in the United Statesis 0.04 percent.
The BAC willbe over 0.10 percent after three to
six drinks (in one hour). Of course,
as we’ve seen, it
depends on how much alcoholis in the drinks, and
how quickly the person drinks them.
4-4
-
But the ability to drive is affected well below a BAC
of 0.10 percent. Research shows that the driving skills
of many people are impaired at a BACapproaching
0.05 percent, and that the effects are worse
at night. All
drivers are impaired at BAClevels above 0.05 percent.
Statistics show that the chance of being in a collision
increases sharply for drivers who have a BACof
0.05percent or above. A driver with a BAC levelof
0.06 percent hasdoubled his or her chance of having a
collision. Ata BAC level of 0.10 percent, thechance of
this driver having a collision is 12 times greater; at a
level of 0.15 percent, thechance is 25 times greater!
There’s something else about drinking and driving that
many people don’t know. Medical researchshows that
alcohol in a person’ssystem can make crash injuries
worse, especially injuries to the brain, spinal cord or
heart. This means that when anyone who
has been
drinking -- driver orpassenger -- is in a crash, that
person’s chance of being killed or permanently disabled
is higher thanif the person had not been drinking.
The body takes about an hour torid itself of the alcohol
in one drink. No amount of coffee or numberof cold
showers will speed that up. “I’llbe careful” isn’t the
right answer.What if there’s an emergency, a need to
take sudden action,as when a child darts into the street?
A person witheven a moderate BAC might not be able
to react quickly enough to
avoid the collision.
Drinking and then driving is very dangerous.
Your reflexes, perceptions, attentiveness and
judgment can be affected by even
a small amount
of akohol. You can havea serious or even
fatal collision if you drive after drinking.
Please don’t drink and drive or ride with a
driver who has been drinking. Ride home in a
cab; or if you’re with a group, designate a driver
who will not drink.
--
--
Control of a Vehicle
Braking
You have three systems that make your vehicle
go where
you want it to go. Theyare the brakes, the steering and
the accelerator. All three systems havedo
totheir work
at the places where the tires meet the road.
Braking action involvesperception time and reaction t i m .
First, you have to decide to push
on the brake pedal.
That’s perception time. Then youhave to bring up your
foot anddo it. That’s reaction time.
Average reaction time is about314 of a second. But
that’s onlyan average. It might be less with one driver
and as long as two or three seconds or more with
another. Age, physical condition, alertness, coordination
and eyesightall play a part.So do alcohol, drugs and
frustration. But even in3/4 of a second, a vehicle
moving at60 mph (100 km/h) travels 66 feet (20 m).
That could be a lot
of distance in an emergency,
so
keeping enough space between your vehicle and others
is important.
And, of course, actual stopping distances vary greatly
with the surfaceof the road (whether it’s pavement
or
gravel); the conditionof the road (wet,dry, icy); tire
tread; the conditionof your brakes; the weight
of the
vehicle and the amount
of brake force applied.
Sometimes, as when you’re driving on snow or ice, it’s
easy to ask more of those control systems than the tires
and road can provide. That means
you can lose control
of your vehicle.
Avoid needless heavy braking.Some people drive
in spurts -- heavy acceleration followed by heavy
braking -- rather than keeping pace with traffic.This
is a mistake. Your brakes may not havetime to cool
between hard stops.Your brakes will wearout much
faster if you do a lot of heavy braking. If you keep pace
with the traffic and allow realistic
following distances,
you will eliminatea lot of unnecessary braking.That
means better braking and longer brake life.
If your engine ever stops while you’re driving, brake
normally but don’t pump your brakes.
If you do, the
pedal may get harder to pushdown. If your engine
stops, you willstill have some power brake assist. But
you will useit when you brake. Once the power assist
is used up,it may take longer to stop and the
brake
pedal willbe harder to push.
Anti-Lock Brakes (ABS)
Your vehicle has anti-lock brakes (ABS). ABS an
is
advanced electronic brakingsystem that will help
prevent a braking skid.
When you start yourengine and beginto drive away,
your anti-lock brakesystem will check itself.You may
hear a momentary motor or clicking noise while this test
is going on, and you mayeven notice that your brake
pedal moves a little. This is normal.
ABS
If there’s a problem with
the anti-lock brake system,
this warning light will stay
on. See “Anti-Lock Brake
System Warning Light” in
the Index.
I
I
You can steer around the obstacle while braking hard.
Here’s how anti-lock works. Let’s say the road
is wet.
You’re driving safely. Suddenly an animal
jumps out in
As you brake, your computer keeps receiving updates on
front of you.
wheel speed and controls braking pressure accordingly.
You slam on the brakes. Here’s what happens with ABS.
Remember: Anti-lock doesn’t change the time you need
A computer senses that wheels are slowing down.
If one
to get your foot up to the brake pedal
or always decrease
of the wheels is about to stop rolling, the computer will stopping distance.If you get too close to the vehicle in
separately work the brakes
at each wheel.
front of you, you won’t have timeto apply your brakes
The anti-lock system can change the brake pressure faster if that vehicle suddenly slowsor stops. Always leave
than any driver could. The computer is programmed to
enough room up ahead to stop, even though you have
make the mostof available tire and road conditions.
anti-lock brakes.
4-8
Using Anti-Lock
Don’t pump the brakes.Just hold the brake pedal down
firmly and let anti-lock workfor you. You may hear the
anti-lock pump or motor operate, and feel the brake
pedal pulsate, but thisis normal.
Traction Control System
Your vehicle hasa traction control system that limits
wheel spin. This is especially useful in slippery road
conditions. The system operates only if it senses that
one orboth of the rear wheels are spinning or beginning
to lose traction. When this happens,the system brakes
the spinning wheel and/or reduces engine power to
limit wheel spin.
on
The traction control system automatically comes
whenever you start your vehicle.
To limit wheel spin,
especially in slippery road conditions, you should
always leave the system on. But you can turn the
traction control systemoff if you ever need to.(You
should turn the system
off if your vehicleever gets
stuck in sand, mud,ice or snow. See “Rocking Your
Vehicle” in the Index.)
To turn the system off, press
the TCS OFF button located
next to the radio on the
center console.
You may feel or hear the system working, but this is normal.
This warning light will
come on to let you know if
there’s a problem with your
traction control system.
Braking in Emergencies
See “Traction ControlSystem Warning Light” in the
Index. When this warning lightis on, the system will
not limit wheel spin. Adjust your driving accordingly.
With anti-lock, you can steer and brakeat the same
time. In many emergencies, steering can help you more
than even the very best braking.
4-9
Steering
Power Steering
If you lose power steering assist because the
engine
stops orthe system is not functioning, you
can steer but
it will take much more effort.
Speed Sensitive Steering(SSS)
This system varies the amount
of steering effortin
relation to your vehicle speed. Steering is easier at a
lower speed for maneuvering and parking ease. As your
vehicle speed increases, the steering effort
also increases.
At highway speeds, the amount of steering effort
is
increased to provide manual-like steering for maximum
control and stability.If your vehicle seems harder to steer
than normal when parking or driving slow, something
may be wrong withthe speed sensitive steering system.
You will still have power steering, however, steering will
be stiffer than normal at low speeds.
Steering Tips
Driving on Curves
It’s important to take curves at a reasonable speed.
A lot of the “driver lost control” accidents mentioned
on
the news happen on curves. Here’s why:
4-10
Experienced driveror beginner, eachof us is subject to
the same laws of physics when driving on curves.
The
traction of the tires against the road surface makes
it
possible for the vehicle to change
its path whenyou turn
the front wheels. If there’s no traction, inertia will
keep
the vehicle going in the same direction.
If you’ve ever
tried to steer a vehicle
on wet ice, you’ll understand this.
The traction you can get in a curve depends on the
condition of your tires and the road surface, the angle at
which the curve is banked, and your speed. While you’re
in a curve, speed is the one factor you can control.
Suppose you’re steering through a sharp curve. Then you
suddenly accelerate.Both control systems-- steering and
acceleration -- have todo their work where the tires meet
the road. Adding the sudden acceleration can demand too
much of those places.You can lose control. Refer to
“Traction Control System” in the Index.
What should youdo if this ever happens?Ease up on the
accelerator pedal, steer the vehicle
the way you want it
to go, and slow down.
Speed limit signs near curves warn that you should
adjust your speed.Of course, the posted speeds are
based on good weather and road conditions. Under less
favorable conditions you’ll want
to go slower.
If you need to reduce your speed as youapproach a
curve, do it before you enter the curve,
while your front
wheels are straight ahead.
Try to adjust your speed so you can “drive” throughthe
curve. Maintain a reasonable, steady speed. Wait
to
accelerate until you are out
of the curve, and then
accelerate gently intothe straightaway.
Steering in Emergencies
There are times when steeringcan be more effective
than braking. For example, you come over a hill and
find a truck stopped in your lane,or a car suddenly
pulls out from nowhere, or a child darts outfrom
between parked cars and stops right infront of you.
You can avoid these problems by braking -- if you
can stop in time. But sometimes you can’t; there isn’t
room. That’s thetime for evasive action -- steering
around the problem.
Your vehicle can perform very well inemergencies like
these. First apply your brakes. (See “Braking in
Emergencies” earlier in this section.) It
is better to
remove as much speed as you can from a possible
collision. Then steer around the problem, to the left or
right depending on the space available.
An emergency like this requires close attention and a
quick decision. If you are holding the steering wheel at
the recommended9 and 3 o’clock positions, you can
turn it a full 180 degrees very quickly without removing
either hand.But you have to act fast, steer quickly, and
just as quickly straighten the wheelonce you have
avoided the object.
The fact that such emergency situationsare always
possible is a good reason to practice defensive driving at
all times and wear safety belts properly.
4-11
Passing
Off-Road Recovery
You may find that your right wheels have dropped off the The driver of a vehicle aboutto pass anotheron a
two-lane highway waitsfor just the right moment,
edge of a road onto the shoulder while you’re driving.
accelerates, moves around the vehicle ahead, then goes
back into the right lane again.A simple maneuver?
Not necessarily! Passing another vehicle
on a two-lane
highway is a potentially dangerous move, since the
passing vehicle occupies the same lane as oncoming
traffic for several seconds.A miscalculation, an error in
judgment, or a brief surrenderto frustration or anger can
suddenly put the passing driver
face to face with the
worst of all traffic accidents-- the head-on collision.
So here are some tipsfor passing:
0
“Drive ahead.” Look down the road, to the sides and
to crossroads for situations that might affect your
passing patterns.If you have any doubt whatsoever
about making a successful pass, wait for a better time.
0
Watch for traffk signs, pavement markings and lines.
If you can see a sign up ahead that might indicate a
turn or an intersection, delay your pass.A broken
center line usually indicates it’sall right to pass
(providing the road aheadis clear). Never cross a solid
line on your side of the laneor a double solid line,
even if the road seems empty of approaching traffic.
~
If the levelof the shoulderis only slightly below the
pavement, recovery shouldbe fairly easy.Ease off the
accelerator and then,if there is nothing in the way,
steer so that your vehicle straddles the edge
of the
pavement. You can turn the steering wheel upto
one-quarter turn until the right
front tire contacts the
pavement edge. Then turn your steering wheel to go
straight down the roadway.
0
0
Do not get too close to the vehicle you want to pass
while you’re awaiting an opportunity. For one thing,
following too closelyreduces your area of vision,
especially ifyou’re following a larger vehicle.
Also, you won’thave adequate space if the vehicle
ahead suddenlyslows or stops. Keepback a
reasonable distance.
inside mirror, activate your right lane change signal
and moveback into the right lane. (Remember that
your right outsidemirror is convex.The vehicle you
just passed may seem to be farther away
from you
than it really is.)
0
Try not to pass more thanone vehicle at a time
on two-lane roads. Reconsider before passing the
next vehicle.
0
Don’t overtake a slowly moving vehicle too rapidly.
Even though the brake lamps are not flashing,
it may
be slowing down or starting to turn.
When it looks like achance to pass iscoming up,
start to acceleratebut stay in the rightlane and don’t
get too close. Time your
move so you will be
increasing speedas the time comes to move into the
other lane.If the way is clear to pass, you will
have a
“running start” that more than makes up
for the
distance you wouldlose by dropping back. And if
something happens to cause you to cancel your pass,
you needonly slow down anddrop back again and
wait for another opportunity.
Loss of Control
If other cars arelined up to pass a slow vehicle, wait
your turn.But take care that someone isn’t trying to
pass you as you pull out to pass
the slow vehicle.
Remember toglance over yourshoulder and check
the blind spot.
Let’s review what driving experts say about what
happens when the three control systems (brakes,
steering and acceleration) don’t have enough friction
where the tires meet the road do
to what the driver
has asked.
Check your mirrors, glance over your shoulder, and
start yourleft lane change signal before moving out
of the rightlane to pass. When you are
far enough
ahead of the passed vehicle to see
its front in your
In any emergency, don’t give up. Keep trying to
steer and constantly seekan escape route or areaof
less danger.
If you’re being passed, make it easy for the
following driver to get aheadof you. Perhapsyou
can ease alittle to the right.
4-13
Skidding
In a skid, a driver can lose control of the vehicle.
Defensive drivers avoid most skids by taking reasonable
care suited to existing conditions, and by not “overdriving”
those conditions. But skids are always possible.
The three typesof skids correspond to your vehicle’s
three control systems.In the braking skid, your wheels
aren’t rolling. In the steering or cornering skid, too
much speedor steering in acurve causes tires toslip and
lose cornering force.And in the acceleration skid,too
much throttle causes the driving wheels to spin.
A cornering skidis best handledby easing your footoff
the accelerator pedal.
Remember: Any traction control system helps avoid
only the acceleration skid.
If your traction controlsystem is off, thenan
acceleration skidis also best handledby easing your
foot off the accelerator pedal.
If your vehicle starts to slide, ease your foot
off the
accelerator pedal and quickly steer the
way you want the
vehicle togo. If you start steering quicklyenough, your
vehicle may straighten out. Alwaysbe ready for a
second skid ifit occurs.
Of course, tractionis reduced when water, snow, ice,
gravel or other materialis on the road. For safety, you’ll
want to slow down and adjust your driving to these
conditions. It is important to slow downon slippery
surfaces because stopping distance will
be longer and
vehicle control more limited.
While drivingon a surface with reduced traction, try
your best to avoid sudden steering, acceleration or
braking (includingengine braking by shifting to a
lower gear). Any sudden changes could cause the tires
to slide. You may not realize the surface is slippery
until your vehicle is skidding. Learn to recognize
warning clues-- such as enough water,ice or packed
snow on the road to make a “mirrored surface”
-- and
slow down when you have any doubt.
Remember: Any anti-lock brake system (ABS) helps
avoid only the braking skid.
Here are some tips on night driving.
Driving at Night
0
Drive defensively.
Don't drink and drive.
.................
". ".
.-
Since you can't see as well, you may need to
slow down andkeep more space between you and
other vehicles.
7%
." ............
.................".
.I
""
Slow down, especially onhigher speed roads. Your
headlamps can light up onlyso much road ahead.
0
In remote areas, watch for animals.
If you're tired, pull off theroad in a safe place
and rest.
Night Vision
Night drivingis more dangerous than day driving.
One reason is that some drivers are likely tobe
impaired -- by alcohol or drugs, with night vision
problems, or by fatigue.
No one can see as well at night as in the daytime. But as
we get older these differences increase.
A 50-year-old
driver may require at least twice as much light to the
see
same thing at night
as a 20-year-old.
What you do in the daytime can alsoaffect your night
vision. Forexample, if you spend the day in bright
sunshine you are wise to wear sunglasses.
Your eyes
will have less trouble adjusting to night.
But if you're
driving, don't wear sunglasses at night. They may cut
down on glarefrom headlamps, but they also make a lot
of things invisible.
4-15
You can be temporarily blinded
by approaching
headlamps. It can takea second or two, or even several
seconds, for your eyesto readjust to the dark. When
you are faced with severe glare (as
from a driver who
doesn't lower the high beams,
or a vehicle with
misaimed headlamps), slow down a little.
Avoid
staring directly intothe approaching headlamps.
Driving in Rain and onWet Roads
Keep your windshield andall the glass on your vehicle
clean -- inside andout. Glare at night is made much
worse by dirt on the glass. Even the inside of the glass
can build up a film causedby dust. Dirty glass makes
lights dazzle and flash more than clean glass would,
making the pupilsof your eyes contract repeatedly.
up far less of a
Remember that your headlamps light
roadway whenyou are in a turnor curve. Keep your
eyes moving; thatway, it's easier to pick out dimly
lighted objects. Just as your headlamps should be
checked regularlyfor proper aim,so should your eyes
be examined regularly. Some drivers sufferfrom night
blindness -- the inability to see in dim light
-- and
aren't even awareof it.
Rain and wet roads can mean driving trouble. On a wet
road, you can't stop, accelerateor turn as well because
your tire-to-road tractionisn't as good as on dry roads.
And, if your tiresdon't have much tread left, you'll get
even less traction. It's always wise
to go slower and be
cautious if rain starts to fall while you are driving.
The
surface may get wet suddenly when your reflexes
are
tuned for driving on dry pavement.
The heavier the rain, the harder it is to see. Evenif your
windshield wiper blades arein good shape, a heavy rain
can make it harder to see road signsand traffic signals,
pavement markings, the edge of the road and even
people walking.
It’s wise tokeep your windshield wipingequipment in
good shape and keep your windshield washer tank filled
with washer fluid.Replace your windshield wiper
inserts whenthey show signsof streaking or missing
areas onthe windshield, or when stripsof rubber start to
separate from the inserts.
Driving too fast through large water puddles or even
going through some car washes cancause problems, too.
The water may affect your brakes. Try to avoid puddles.
But if you can’t, try to slow down before you hit them.
Wet brakes can cause accidents. They won’t work
as well in a quick stop and may cause pulling to
one side.You could lose controlof the vehicle.
of water or
After driving through a large puddle
a car wash, apply your brake pedal lightly until
your brakes work normally.
4-17
Hydroplaning
Driving Through Deep Standing Water
Hydroplaning is dangerous.So much water can build up
under your tires that they can actually ridethe
onwater.
This can happen if the road is wet enough and you’re
going fast enough. When your vehicle is hydroplaning,
it has little or no contact withthe road.
NOTICE:
If you drive too quickly through deep puddles or
standing water, water can come in through your
engine’s air intake and badly damage your
engine. Never drive through water that is slightly
lower than the underbody
of your vehicle.If you
can’t avoid deep puddles or standing water, drive
through them very slowly.
Hydroplaning doesn’t happen often.
But it can if your
tires do not have much tread orif the pressure in one or
more is low. It can happen if a lot of water is standing on
the road. If you can see reflections from trees, telephone
poles or other vehicles, and raindrops “dimple” the
water’s surface, there could
be hydroplaning.
Hydroplaning usually happens at higher speeds.
There
just isn’t a hard and fast
rule about hydroplaning. The
best adviceis to slow down when
it is raining.
Some Other Rainy WeatherTips
0
Besides slowing down, allow some extra following
distance. And be especially careful when you pass
another vehicle. Allow yourself more clear room
ahead, and be prepared have
to your view restricted
by road spray.
Have good tires with proper tread depth. (See
“Tires” in the Index.)
4-18
City Driving
Here are ways to increase your safety
in city driving:
Know the best way to get to where you are
going. Geta city map and plan your trip
into an
unknown partof the cityjust as you wouldfor a
cross-country trip.
Try to use the freeways that rim and crisscross
most large cities. You’llsave time and energy.
(See the next part, “Freeway Driving.”)
1
One of the biggest problems with city streets
is the
amount of traffic on them. You’ll wantto watch out for
what the other drivers are doing and pay attention
to
traffic signals.
Treat a green light as a warning signal.A traffic
light is there because thecorner is busy enough to
need it. When’a light turns green, and
just before you
start to move, check both ways
for vehicles that have
not clearedthe intersection or may be running the
red light.
The most important advice on freeway driving Keep
is:
up with traffic and keep tothe right. Drive at thesame
speed mostof the other driversare driving. Too-fast or
flow. Treat the
too-slow driving breaks a smooth traffic
left laneon a freeway as a passing lane.
At the entrance, there is usually a ramp that leads
theto
freeway. If you have a clear viewof the freeway as you
drive along the entranceramp, you should begin to
check traffic.Try to determine where you expect to
blend with the flow. Try to merge into the
gap at closeto
the prevailing speed. Switch on your turn signal,
check
your mirrors and glance
over your shoulderas often as
necessary. Try to blend smoothly with the traffic flow.
Once you are on the freeway, adjust your speed to the
posted limit or to the prevailing rate if it’s slower. Stay
in the right lane unless
you want to pass.
Before changing lanes, check your mirrors. Then use
your turn signal.
Mile for mile, freeways (also called thruways, parkways, Just before you leave the lane,
glance quickly over your
expressways, turnpikes or superhighways)are the safest
shoulder to make sure there isn’t another vehicle in your
of all roads. But they have their own special rules.
“blind” spot.
Freeway Driving
4-20
Once youare moving onthe freeway, make certainyou
allow a reasonable following distance. Expect to move
slightly slower at night.
When you want to leave the freeway, move to the
proper lane well in advance.If you miss yourexit, do
not, under any circumstances,stop and back up. Drive
on tothe next exit.
The exit ramp can be curved, sometimes quite sharply.
The exit speedis usually posted.
Reduce your speed accordingto your speedometer, not
to your sense of motion. After drivingfor any distance
at higher speeds, you may tend to think you are going
slower than you actually are.
Leaving on a Long Trip
service, have it done before starting out.
Of course,
you’ll find experienced and able service experts in
Catera dealerships all across North America. They’ll be
ready and willing to help
if you need it.
Here are some things youcan check before a trip:
a Windshield Washer Fluid: Is the reservoir full? Are
all windows clean inside and outside?
0
Wiper Blades: Are they in good shape?
0
Fuel, Engine Oil, OtherFluids: Have you checked
all levels?
0
Lamps: Are they all working? Are the lenses
clean?
a Tires: They are vitally important to a safe,
trouble-free trip. Is the tread good enoughfor
long-distance driving? Are the tires all inflated
to the
recommended pressure?
Make sure you’re ready. Try
to be well rested. If you
must start when you’re not fresh
-- such as after a day’s a Weather Forecasts: What’s the weather outlook
work -- don’t planto make too many miles that first part
along your route? Should you delay your trip a short
of the journey. Wear comfortable clothing and shoes you
time to avoid a major storm system?
can easily drive in.
a Maps: Do you have up-to-date maps?
Is your ve-hicle ready for a long trip?If you keepit
serviced and maintained, it’s ready
to go. If it needs
Highway Hypnosis
Hill and MountainRoads
Is there actually such a condition as “highway
hypnosis”? Oris it just plain falling asleepat the
wheel? Call it highway hypnosis, lack
of awareness,
or whatever.
There is something aboutan easy stretchof road
with the same scenery, along with the hum
of the
tires on the road, thedrone of the engine, and the rush
of the wind against the vehicle that can make you
sleepy. Don’tlet it happento you! If it does, your
vehicle can leave the road in
less than a second, and
you could crash and be injured.
What can you do about highway hypnosis? First, be
aware that it can happen.
Then hereare some tips:
0
Make sure your vehicleis well ventilated, with a
comfortably cool interior.
0
Keep your eyes moving. Scan the road ahead and to
the sides. Check your rearview mirrors and your
instruments frequently.
0
If you get sleepy, pulloff the road into a rest, service
or parking areaand take a nap,get some exercise,or
both. For safety, treat drowsiness
on the highway as
an emergency.
Driving on steep hills or mountains
is different from
driving in flator rolling terrain.
If you drive regularly in steep country,
or if you’re
planning to visit there, here aresome tips that can make
your trips safer and more enjoyable.
Keep your vehicle ingood shape. Check all fluid
levels and also the brakes, tires, cooling
system and
transmission. These parts can work hard on
mountain roads.
Coasting downhill inNEUTRAL (N)or with
the ignition off is dangerous. Your brakes will
have to do all the work
of slowing down. They
could get so hot that theywouldn’t work well.
You would then have poor brakingor even none
going down a hill. You could crash.Always have
your engine running and your
vehicle in gear
when you go downhill.
Know how to go down hills. The most important
thing to know is this: let
your engine do some of the
slowing down. Shift to alower gear when you go
down a steep or long hill.
~
’
A CAUTION:
If!!y don’t shift down, your brakes could get
so hot that theywouldn’t work well. You would
then have poor brakingor even none going
down a hill. You could crash. Shift down to let
your engine assist your brakes
on a steep
downhill slope.
e Know how to go uphill. You may want to shift down
0
0
to a lower gear. The lower gears help cool your engine
and transmission, and you can climb the hill better.
Stay in your own lane when driving on two-lane
roads in hills or mountains. Don’t swing wide
or cut
across the centerof the road. Drive atspeeds that let
you stay in your own lane.
As you go over the top of
a hill,be alert. There could be
something in your lane, like a stalled car an
oraccident.
You may see highway signs on mountains that warn of
special problems. Examples are long grades, passing or
no-passing zones, a falling rocks area or winding
roads. Be alert to these and take appropriate action.
Winter Driving
Here are some tips for winter driving:
0 Have your vehicle in good shape for winter.
You may want to put winter emergency supplies in
your truok
4-24
Include an ice scraper, a small brush or broom, a supply
of windshield washer fluid, a rag, some winter outer
clothing, a small shovel,a flashlight, a red cloth and
a
couple of reflective warning triangles. And, ifyou will
be driving under severe conditions, include a small bag
of sand, a pieceof old carpet or a couple
of burlap bags
to help provide traction.Be sure you properly secure
these items in your vehicle.
Driving on Snow orIce
Most of the time, those places where your tires meet
the
road probably have goodtraction.
However, if there is snow orice between your tires and
the road, you can have a very slippery situation. You’ll
have a lot less traction or “grip” and will needbeto
very careful.
What’s the worst time for this? “Wet ice.”
Very cold
snow or ice can be slick and hard to drive
on. But wet
ice can be even more trouble
because it may offer the
least tractionof all. You can get wet ice when it’s about
fall.
freezing (32°F; 0°C) and freezing rain begins to
Try to avoid drivingon wet ice until salt and sand crews
can get there.
Whatever the condition-- smooth ice,packed, blowing
or loose snow-- drive with caution.
Keep your traction control system on.
It improves your
ability to accelerate when driving on
a slippery road.
Even though your vehicle hasa traction control system,
you’ll want to slow down and adjust your driving to the
road conditions. See “Traction Control System” in the
Index. Also, see“Third Gear Start” in the Index.
Your anti-lock brakes improve your vehicle’s stability
when you makea hard stop ona slippery road. Even
though you have the anti-lock braking system, you’ll
want to begin stopping sooner than you woulddry
on
pavement. See “Anti-Lock” in the Index.
If You’re Caught in a Blizzard
Allow greater following distance on any
slippery road.
Watch for slippery spots.The road might be fine
until you hit a spot that’s covered with ice. On an
otherwise clear road,ice patches may appearin
shaded areas wherethe sun can’t reach: around
clumps of trees, behind buildings or under bridges.
Sometimes the surfaceof a curveor an overpass may
remain icy when the surrounding roads are clear.
If
you see a patchof ice ahead of you, brake before you
are on it. Try not to brake while you’re actually on
the ice, and avoid sudden steering maneuvers.
If you are stopped by heavy snow, you could
be in a
serious situation.You should probably stay with your
vehicle unless you know for sure that
you are near help
and youcan hike through the snow. Here are some
things to do to summon help and keep yourself and your
passengers safe:
0
4-26
Turn on your hazard flashers.
Tie a red clothto your vehicle to alert police that
you’ve beenstopped by the snow.
Put on extra clothing or wrap a blanket around you.
If you have no blankets or extra clothing, make body
insulators from newspapers, burlap bags, rags, floor
mats -- anything you can wrap around yourself or
tuck under your clothing tokeep warm.
You can run theengine to keep warm,but be careful.
A C1’ UTION:
-
Snow can trap exhaust
gases under yourvehicle.
This can cause deadly CO (carbon
monoxide) gas
to getinside. CO could overcomeyou and kill
you. You can’t see it or smell it,so you might not
know it is in yourvehicle. Clear away snow from
around the baseof your vehicle, especially any
that is blocking your exhaustpipe. And check
around again from time to time to be
snow
sure
doesn’t collect there.
of the
Open a window just a little on the side
vehicle that’s awayfrom thewind. This will help
keep CO out.
Run yourengine only as long as you must. This saves
fuel. When you runthe engine, makeit go a little faster
than just idle. Thatis, push the accelerator slightly.This
uses less fuelfor the heat that you get
and it keeps the
battery charged.You will need a well-charged battery to
restart the vehicle, and possibly
for signaling lateron
with your headlamps. Let the heater run
for a while.
Then, shut theengine off and close the windowalmost
all the way to preserve
the heat. Start the engine again
and repeat this only when you
feel really uncomfortable
from the cold. But doit as little as possible. Preserve the
fuel as long as you can.
To help keep warm, youcan get
out of the vehicle anddo some fairly vigorous exercises
every half hour orso until help comes.
Loading Your Vehicle
cm
*
TIRE-LOADING INFORMATION
OCCUPANTS
VEHICLE CAP. WT.
CTR.
RR.
FRT.
TOTAL LBS.
KG
MAX. LOADING & GVWR SAME AS VEHICLE
CAPACITY WEIGHT
XXX
COLD
TIRE
TIRE SIZE
PRESSURE
SPEED
RTG
PSVKPa
FRT.
RR.
SPA.
IF TIRES ARE HOT, ADD 4PS1/28KPa
SEE OWNER'S MANUAL FOR ADDITIONAL
, INFORMATION
Two labels on your vehicle show how much weight
it
may properly carry.The Tire-Loading Information label
found on the rearedge of the driver's door tells you the
proper size, speed rating
and recommended inflation
pressures for the tires on your vehicle.
It also gives you
important informationabout the number of people that
can be in your vehicle and the total weight that you
can
carry. This weight is called the Vehicle Capacity Weight
and includes the weight
of all occupants, cargo and all
options not installed at
the factory.
4-28
MFD BY GENERAL MOTORS CORP
DATE GVWR GAWR FRT GAWR RR
THIS VEHICLE CONFORMS TO ALL APPLICABLE U.S. FEDERAL MOTOR VEHICLE
SAFETY, BUMPER, AND THEFT PREVENTION
STANDARDS IN EFFECT ON THE DATE OF
MANUFACTURE SHOWN ABOVE.
The other label is the certification label,found on the
rear edge of the driver’s door. It tells you the gross
weight capacity of your vehicle, calledthe Gross
Vehicle WeightRating (GVWR). The GVWR includes
the weight of the vehicle, all occupants, fuel and
cargo. Never exceed the GVWR for your vehicle,
or the GrossAxle Weight Rating (GAWR) for either
the front or rear axle.
If you do have a heavy load, youshould spread it out.
Don’t carry more than176 lbs. (80 kg) in the trunk.
A Cr‘ TJTION:
Do not load your vehicle any heavier than
the GVWR, or either the maximum front or
rear GAWR. If you do, parts on yourvehicle
can break, or it can change way
the your
vehicle handles. These could causeyou to lose
control. Also, overloading can shorten the
life
of your vehicle.
NOTICE:
Your warranty does not cover parts or
components thatfail because of overloading.
If you put things inside your vehicle-- like suitcases,
tools, packagesor anything else -- they will go as fast as
the vehicle goes.If you have to stop or turn quickly, or
if there is a crash, they’ll keep going.
CAUTION:
Things you put inside your vehicle can strike
and injurepeople in a sudden stop or turn, or
in a crash.
0 Put things in thetrunk of your vehicle. In a
trunk, put them as
far forward as you can.
Try to spread theweight evenly.
0 Never stack heavier things, like suitcases,
inside thevehicle so that some of them are
above the topsof the seats.
Don’t leave an unsecured child restraint in
your vehicle.
When you carry somethinginside the
vehicle, secure it whenever you can.
Don’t leave a seat folded down unless
you
need to.
Electronic Level Control
This feature keeps the
sf your vehiclelevelas
the load changes. It’s automatic-- you don’t need to
adjust anything.
4-30
Towing a Trailer
:\ CAUTION:
If you don’t use the correct”equipment and drive
properly, you can lose control when you pull a
trailer. Forexample, if the traileris too heavy, the
brakes may not work well or even at all. You
and your passengers could be seriously injured.
You may also damageyour vehicle; the resulting
repairs would not be coveredby your warranty.
Pull a traileronly if you have followed all the
steps in this
section. Ask your dealer for advice
and information abouttowing atrailer with
your vehicle.
--
Your Catera can tow atrailer if it is equipped with the
proper trailer towing equipment. To identify what the
vehicle trailering capacityis for your vehicle, you
should read theinformation in “Weightof the Trailer”
that appears later in this section. But trailering is
different thanjust driving your vehicleby itself.
Trailering meanschanges in handling, durability and
fuel economy. Successful, safe trailering takes correct
equipment, and it has to be used properly.
your rig will belegal, not only where youlive but
also where you’ll be driving.A good source for this
information can be state or provincial police.
0
Consider using a sway control.You can ask a hitch
dealer about sway controls.
0
Don’t tow a trailer at all during
the first 1,000miles
(1 600 km)your new vehicle is driven. Your engine,
axle or other parts could be damaged.
That’s thereason for this part. In it are many
time-tested, important trailering tips and safety rules.
Many of these areimportant for your safety and thatof
your passengers. So please read this section carefully
before you pull a trailer.
a Then, during the first 500 miles (800 km)that you
tow a trailer, don’t drive
over 50 mph (80 km/h) and
Load-pulling components such as theengine,
transmission, wheelassemblies and tires are forced to
work harder against thedrag of the added weight.The
engine is required to operate at relatively
higher speeds
and under greater loads, generating
extra heat. What’s
more, the trailer adds considerably to wind resistance,
increasing the pulling requirements.
0
If You Do Decide To Pull A Trailer
If you do, here are some important points:
There are many different laws, including speed limit
restrictions, having todo with trailering. Make sure
don’t make starts atfull throttle. This helps your
engine and other partsof your vehicle wear in at
the
heavier loads.
Obey speed limit restrictions when towing a trailer.
Don’t drivefaster than the maximum posted speed
for trailers (or no more than55 mph (90 km/h)) to
save wear on your vehicle’sparts.
Three important considerations have to do with weight:
0
the weight of the trailer,
0
the weight of the trailer tongue
and the total weight on your vehicle’s tires.
Weight of the Trailer
Weight of the Trailer Tongue
The tongue load (A)of any traileris an important
weight to measure becauseit affects the total or gross
It should never weigh more than
1,000 lbs. (454 kg).
weight of your vehicle.The Gross Vehicle Weight
But even that can
be too heavy.
(GVW) includes thecurb weight of the vehicle, any
It depends on how you plan to use your rig.
For
cargo you may carry init, and the people who will be
example, speed, altitude, road grades, outside
riding in the vehicle. And
if you tow a trailer, you must
temperature and how much your vehicle is used to
add the tongue load to the
GVW because your vehicle
pull a trailer are all important. And,
it can also depend
will be carrying that weight, too.
See “Loading Your
on any special equipment that you have on your vehicle. Vehicle,’ inthe Index for more information about your
You can ask your dealerfor our trailering information or vehicle’s maximum load capacity.
advice, or youcan write us at:
How heavy can a trailer safelybe?
Cadillac Customer Assistance Center
Cadillac Motor Car Division
P.O. Box 436004
Pontiac, MI 48343-6004
In Canada, write to:
General Motorsof Canada Limited
Customer CommunicationCentre
1908 Colonel Sam Drive
Oshawa, OntarioLlH 8P7
A
B
If you’re using aweight-carrying hitch, the trailer
tongue (A) should weigh 10 percent of the total loaded
trailer weight (B). If you have a weight-distributing
hitch, the trailer tongue (A) should weigh 12 percent of
the total loaded trailer weight (B).
After you’ve loaded your trailer, weigh the trailer and
then the tongue, separately, to
see if the weightsare
proper. If they aren’t, you maybe able to get them right
simply by moving some items around in the trailer.
Total Weight on Your Vehicle’s Tires
Be sure your vehicle’s tires
are inflated to the upper
limit for cold tires.You’ll find these numberson the
Tire-Loading Information label at the rear edge
of the
driver’s door or see “LoadingYour Vehicle” in the Index.
Then be sure you don’t
go over theGVW limit for your
vehicle, including the weight
of the trailer tongue.
Hitches
It’s important to have the correct hitchequipment.
Crosswinds, large trucks goingby and rough roads are a
few reasonswhy you’ll needthe right hitch. Here are
some rules to follow:
The rear bumper on your vehicle is not intendedfor
hitches. Do not attach rental hitches or other
bumper-type hitches to it. Use only a frame-mounted
hitch thatdoes not attach to the bumper.
Will you have to make any holes inthe body of your
vehicle when you install a trailer hitch?
If you do,
then be sure to seal the holes later when you remove
the hitch. If you don’t sealthem, deadly carbon
monoxide (CO)from your exhaust can get into your
vehicle (see “CarbonMonoxide” in the Index). Dirt
and watercan, too.
4-33
to know your rig. Acquaint yourself with the of
feel
handling and braking with the added weight
of the
You should always attach chains between your vehicle trailer. And always keep in mind that
the vehicle you
and your trailer. Cross the safety chains under the tongue
are driving is now a good deal longer and not nearly as
of the trailer so that the tongue will not
drop to the road
responsive as your vehicle
is by itself.
if it becomes separatedfrom the hitch. Instructions
Before you start, check the trailer hitch and platform
about safety chains may
be provided by the hitch
(and attachments), safety chains, electrical connector,
manufacturer or by the trailer manufacturer. Follow
the
lamps,
tires and mirror adjustment.
If the trailerhas
manufacturer’s recommendationfor attaching safety
electric brakes, start your vehicle and trailer moving and
chains anddo not attach them to
the bumper. Always
then apply the trailer brake controller by hand
to be sure
leave just enough slackso you can turn with your rig.
And, never allow safety chains to drag on the ground. the brakesare working. This lets youcheck your
electrical connection at the same time.
Safety Chains
Trailer Brakes
Because your vehicle has anti-lock brakes, don’t
try to
tap into the hydraulic brake system.
If you do, both
brake systems won’t work well, or all.
at
Be sure to read and
follow the instructionsfor the trailer
brakes so you’ll be able to install, adjust and maintain
them properly.
Driving with a Trailer
Towing a trailer requires
a certain amountof experience.
Before setting out for the open road, you’ll want to get
4-34
During your trip,check occasionally to be sure that the
load is secure, and that the
lamps and any trailer brakes
are still working.
Following Distance
Stay at least twice as
far behind the vehicle ahead as
you
would when driving your vehicle without a trailer.
This
can help you avoid situations that require heavy braking
and sudden turns.
Passing
You’ll need more passing distanceup ahead when
you’re towing a trailer. And, because
you’re a good deal
longer, you’ll needto go much farther beyond the
passed vehicle before you can return
to your lane.
Backing Up
Hold the bottom of the steering wheel withone hand.
Then, to move the trailer to theleft, just move that hand
to the left. To move the trailerto the right, move your
hand to the right. Always back up slowly and,
if
possible, have someone guide you.
Making mrns
I NOTICE:
Making very sharp turns while trailering could
cause the trailer to come in contact with the
vehicle. Your vehicle could be damaged. Avoid
making very sharp turns while trailering.
curbs, road signs, treesor other objects. Avoid jerky or
sudden maneuvers. Signal wellin advance.
Turn Signals When Towinga Trailer
When you towa trailer, your vehicle may need
a
different turn signal flasher and/or extra wiring. Check
with your Catera dealer.The green arrows on your
instrument panel willflash whenever you signal a turn
or lane change. Properly hooked up,the trailer lamps
will also flash, telling other drivers you’re about
to turn,
change lanesor stop.
When towing a trailer, the green arrows
on your
instrument panel will flashfor turns evenif the bulbs on
the trailer are burned out. Thus, you may think drivers
behind you are seeing your signal when they
are not. It’s
important to check occasionallyto be sure the trailer
bulbs are still working.
Driving On Grades
Reduce speedand shift to a lower gearbefore you start
down along or steep downgrade.If you don’t shift
down, you mighthave to use your brakesso much that
they wouldget hot and no longer work well.
When you’re turning with a trailer, make wider turns thanOn a long uphill grade, shift down and reduce your
or less to reduce the
normal. Do this so your trailer won’t strike soft shoulders, speed to around 45 mph (70 km/h)
possibility of engine and transmission overheating.
4-35
Parking on Hills
2. Let up on the brake pedal.
You really should not park your vehicle, with
a trailer
attached, on a hill. If something goes wrong, your rig
could startto move. People can be injured, and both
your vehicle and the trailer can be damaged.
3. Drive slowly until the trailer
is clear of the chocks.
4. Stop and have someone pickup and store the chocks.
Maintenance When Trailer Towing
But if you ever haveto park your rig on a hill, here’s
how to do it:
1.
2.
3.
4.
5.
Your vehicle will need service more often when you’re
pulling a trailer.See the Maintenance Schedule booklet
for more on this. Things that are especially important in
Apply the regular brakes, but do not
shift into PARK (P).
trailer operationare automatic transmission fluid (don’t
Have someone place chocks under the trailer wheels. overfill), engineoil, axle lubricant, drive belt, cooling
system and brake adjustment.
If you’re trailering, it’s a
When the wheel chocks are in place, release the
good idea to review this information before
you start
regular brakes until the chocks absorb the load.
your trip.
Reapply the regular brakes. Then shift
into
Check periodically to see
that all hitch nuts and bolts
PARK (P) firmly and apply the parking brake.
are tight.
Release the regular brakes.
When You Are Ready to Leave After
Parking on a Hill
1. Apply your regular brakes and hold the pedal down
while you:
0
Start your engine;
0
Shift into a gear; and
Be sure the parking brake has released.
4-36
Engine Cooling When Trailer Towing
Your cooling system may temporarily overheat during
severe operating conditions. See “Engine Overheating”
in the Index.
,*e*
-*a
Section 5 Problems on the Road
Here you’ll find what todo about some problems that can occur on the road.
5-2
5-2
5-3
5-7
5- 12
Hazard Warning
Flashers
Other Warning Devices
Jump Starting
Towing
Your
Vehicle
Engine Overheating
5- 14
5-20
5-21
5-3 1
Cooling System
If aTire Goes Flat
Changing Flat
a Tire
If You’reStuck:In Sand, Mud,
Ice or Snow
5-1
Hazard Warning Flashers
Pressing this button on
the center console makes
the front and rear turn
signal lamps flash on and
off. The indicator light on
the button also flashes.
Pressing the button again
turns the flashers off.The
flashers work regardless
of the key position.
When the hazard warning flashers are on, the turn
signals won’t work since they are already flashing.
Other Warning Devices
Your hazard warning flashers let you warn others. They
also let police know you have a problem.
Your front and
rear turn signal lamps will flashon and off.
5-2
If you carry reflective triangles,you can set one up
at the sideof the road about300 feet (100 m) behind
your vehicle.
Jump Starting
NOTICE:
If the battery has run down, you may want to use
another vehicle and some
jumper cables to start your
vehicle. Please follow the steps belowto do itsafely.
~
Batteries canhurt you. They can be
dangerous because:
They contain acid that can burn
you.
0 They contain gas that can
explode or ignite.
They contain enough electricity to
burn you.
If you don’t follow these stepsexactly, some or
all of these things canhurt you.
Ignoring these steps could result costly
in damage
to yourvehicle that wouldn’t be covered by
your warranty.
Trying to start your
vehicle by pushing or pulling
it won’t work, and itcould damage yourvehicle.
1. Check the other vehicle.It must have a 12-volt
battery with a negative ground system.
I
I
NOTICE:
If the othersystem isn’t a 12-volt systemwith a
negative ground, bothvehicles can be damaged.
2. Get the vehicles close enough so the jumper cables
can reach, butbe sure the vehicles aren’t touching
each other. If they are,it could cause a ground
connection you don’t want.You wouldn’t be able to
start your vehicle and the bad grounding could
damage the electrical systems.
I
1
3. Turn off the ignition on both vehicles. Unplug
unnecessary accessories pluggedinto the cigarette
lighter. Turn off all lamps that aren’t needed as well
as the radios. This will avoid sparks and help save
both batteries.In addition, it could save the radio!
CAUTION:
An electric fan can start up even whenthe engine
is notrunning and can injure you. Keep hands,
clothing and tools away from any underhood
electric fan.
I
I
4 CAUTION:
I
Using a match near a battery can causebattery
gas to explode. People have been
hurt doing this,
and some have been blinded. Usea flashlight if
you need more light.
Be sure the battery has enough water.You don’t
need to add water to theACDelco Freedom@
battery installed in every new
GM vehicle. But
if a battery has filler caps, be
sure the right
amount of fluid is there.If it is low, add water to
take care of that first. If you don’t, explosive gas
could be present.
CAUTION: (Continued)
4. Open the hoods and locate the batteries. You’ll also
need to open the power distributionfuse block cover
to access the positive(+) terminal on the battery
(see arrow).
I
=-4
I A CAUTION:
t
I
-1
Battery fluid contains acid that can burn
you.
moving engine parts can injure you
Don’t get it on you. If you accidentally get it in Fans or other
your eyes or on your skin,flushtheplacewith
badly. Keep your hands away from moving parts
water
and
get medical
help
immediately.
once the
engine
is running.
5. Check that thejumper cables don’t have looseor
missing insulation. If they do, you could geta shock.
The vehicles could also bedamaged.
Before you connect the cables, here are some basic
things you should know. Positive (+) will go to
positive (+) and negative (-) will go to a heavy,
unpainted metal part on the
engine of the vehicle
with thedead battery. Don’tconnect positive (+) to
negative (-) or you will get a short that would
damage the battery and maybe other parts,
too. Also,
don’t connect negative (->to negative (-).
For more detailed information, readSteps 6 through
12 following.
6 . Connect the red positive(+) cable to the positive(+)
terminal of the vehicle with the dead battery.
Don’t let the other endof the negative(-) cable touch
anything until the next step.
The other end of the
negative (-) cable doesn ’t go to the dead battery.It goes
to a heavy unpainted metal
part on the engineof the
vehicle with the dead battery.
9. Attach the cable at least 18 inches (45 cm) away
from the dead battery, but not near engine
parts
that move.
8. Now connect the
negative (-) cable to
the good battery’s
negative (-) terminal.
A good spot to attach
the negative (-) cable
is on the bracket
between the air cleaner
and the engine block.
10. Now start the vehicle with the good batteryand run
the enginefor a while.
11. Try to start the vehicle with the dead battery.
If it won’t start after a few tries,
it probably
needs service.
12. Remove the cables in reverseorder to prevent
electrical shorting. Take care that they
don’t touch
each other or any other metal.
Towing Your Vehicle
Try to have a dealeror a professionaltowing service
tow your vehicle.See “Roadside Service” inthe Index.
If your vehicle has been changed
or modified sinceit
was factory-new by adding aftermarket items likefog
lamps, aero skirting or special tires and wheels, these
instructions may not be correct.
Before youdo anything, turn on the hazard
warning flashers.
When you call, tell the towing service:
That your vehicle has rear-wheel drive.
The make, model and yearof your vehicle.
Whether you can still move the shift lever.
A. Heavy Metal Engine Part (Vehicle with
Dead Battery)
B. Good Battery
C. Dead Battery
If there was an accident, what was damaged.
When the towing service arrives, letthe tow operator
know that this manual contains towing instructions and
illustrations. The operator may wantto see them.
This is a sampleof an
R-hook. It is the only
type of hook that may
be used to tow your
vehicle from the front
or from the rear.
0
0
Front and RearTowing
A CAUTION:
To help avoidinjury to you or others:
0 Never let passengers ride in vehicle
a
that is
being towed.
Never tow faster than safeor posted speeds.
Never tow with damaged parts not
fully secured.
CAUTION: (Continued)
5-8
Never get under your vehicle after it has
been lifted by the tow truck.
Always secure the vehicle on each sidewith
separate safety chainswhen towing it.
Use only R-hooks.
A CAUTION:
A vehicle can fall from a car carrier
if it isn’t
adequately secured. This can causecollision,
a
serious personal injury and
vehicle damage. The
vehicle should be tightly secured
with chains or
steel cables beforeit is transported.
Don’t use substitutes (ropes, leather straps,
canvas webbing, etc.) that canbe cut by sharp
edges underneath thetowed vehicle. Always use
R-hooks inserted in the front and rear R-hook
slots. Never use J-hooks. They will damage
drivetrain andsuspension components.
When your vehicle isbeing towed, have the ignition key
turned to OFF.The steering wheel should beclamped in
a straight-ahead position, witha clamping device
designed for towing service. Do not usethe vehicle’s
steering column lock for this. The transmission should
be in NEUTRAL (N) and the parking brake released,
Don’t have your vehicle towed on the drive wheels.
Front Towing
I
NOTICE:
Do not tow with sling typeor wheel-lift
equipment or fascidfog lamp damage
may occur.
Use car-carrier equipmentonly. Additional
ramping may be required for car-carrier
equipment. Use safety chains and wheel straps.
Do not attachwinch cables, T-hooks or J-hooks
to suspension components when using car-carrier
equipment. Always use R-hooks inserted into the
R-hook slots.
Rear Towing
Attach R-hook chains on both sides, in the slotted holes
in the bottomof the frame rails, behind thefront wheels.
These slots are to be used when loading and securingto
car-carrier equipment.
NOTICE:
Do not tow with sling typeor wheel-lift
equipment or rear bumper valance damage
may
occur. Use car-carrier equipmentonly.
Additional rampingmay be required for
car-carrier equipment.Use safety chainsand
wheel straps.
Do not attachwinch cables, T-hooks or J-hooks
to suspension componentswhen using car-carrier
equipment. Always use R-hooks inserted in the
R-hook slots.
Attach R-hook chainsto the R-hook slots in the frame
rails just ahead of the rear wheelson both sides.
These slotsare to be used when loading
and securing to
car-carrier equipment.
5-11
Engine Overheating
You will find the warning light about a hot engine on the
instrument panel.
If Steam Is Coming From Your Engine
Attach a separate safety chain around the bumper energy
absorbing shockhnit on the leftside of the vehicle and
another safety chain on the right side tow hook.
5-12
NOTICE:
Steam from an overheated
engine can burn you
badly, even if you just open the hood. Stay away
from theengine if you see or hear steam
coming
from it. Just turn itoff and get everyone away
from thevehicle until itcools down. Wait until
there is no sign of steam orcoolant before you
open thehood.
If you keep driving when your engine is
overheated, the liquids in it can catch fire.
You or
others could be badlyburned. Stop yourengine if
it overheats, andget out of the vehicle until the
engine iscool.
If your engine catchesfire because you keep
driving with no coolant, yourvehicle can be
badly damaged. The costly repairs would not be
covered by your warranty.
If No Steam Is Coming From Your Engine
If you get the overheat warning but
see or hear no
steam, the problem may not
be too serious. Sometimes
the engine can get a little too hot when you:
0
Climb a long hill on a hot day.
0
Stop after high-speed driving.
0
Idle for long periods in traffic.
0
Tow atrailer.
5-13
If you get the overheat warning with no sign of steam,
try this for a minuteor so:
1. Turn off your air conditioner.
Cooling System
When you decide it’s safe
to lift the hood, here’s what
you’ll see:
2. Dial temperature controlto the highestheat setting
and open the windows, as necessary.
3. If you’re in a trafficjam, shift toNEUTRAL (N);
otherwise, shiftto the highestgear while
driving -- DRIVE (D) or THIRD (3).
If you no longer have the overheat warning,
you can drive. Justto be safe, drive slowerfor about
10 minutes.If the warning doesn’t come back
on,
you can drive normally.
If the warning continues, pull over, stop, and park your
vehicle right away.
If there’s stillno sign of steam, you can
idle the engine
for two or three minutes while you’re parked,
to see if
the warning stops. But then,
if you still have the
A. Coolant SurgeTank with Pressure Cap
warning, turn offthe engine and get everyone out of the
vehicle until it cools down.
B. Electric Engine Cooling Fans
You may decide notto lift the hood but to get service
help right away.
If it isn’t, you may have a leak in the radiator hoses,
heater hoses, radiator, water pumpor somewhere elsein
the cooling system.
An electric engine cooling fan under hood
the can
start upeven when the engineis not running and
can injureyou. Keep hands, clothing andtools
away from any underhood electric fan.
If the coolant inside the coolant surge tankis boiling,
don’t do anything else until it cools down.
Heater and radiatorhoses, and other engine
parts, canbe veryhot. Don’t touch them. If you
do, you can be burned.
Don’t run the engineif there is a leak. If you run
the engine, it could lose all coolant.That could
cause an engine fire, and
you could be burned.
Get any leakfixed before you drive thevehicle.
I NOTICE:
I
I
Engine damage from running your
engine
without coolantisn’t covered by your warranty.
The coolant level shouldbe at or slightly above the
KALTKOLD line (seam).
If there seems to be no leak, with theengine on, check to
see if the electric engine cooling
fans are running. If the
engine is overheating, both fans shouldbe running. If
they aren’t, your vehicle needs service.
How to Add Coolant to theCoolant
Surge Tank
If you haven’t found a problem yet, but the coolant level
isn’t at theKALT/COLD line (seam), add a50/50
mixture of clean water (preferably distilled) and
DEX-COOL@coolant at the coolant surge tank, but be
sure the cooling system, including the coolant surge tank
pressure cap,is cool before youdo it. (See “Engine
Coolant” in the Index
for more information.)
’A
I
CAUTION:
Steam and scalding liquids from a cooling
hot
system can blow out and burnyou badly. They
are under pressure, and
if you turn the coolant
surge tank pressure cap even a little they
can come out athigh speed. Never turn the
cap when the cooling system, including the
coolant surge tank pressure cap,
is hot. Wait
for thecooling system and coolant surge tank
pressure cap tocool if you ever have toturn the
pressure cap.
--
5-16
--
A CAUTION:
Adding only plain water to your cooling system
can be dangerous. Plain
water, or some other
liquid like alcohol, can boil before the proper
coolant mixturewill. Your vehicle’s coolant
warning system is set for the proper coolant
mixture, With plain wateror the wrong mixture,
your engine couldget too hot butyou wouldn’t
get the overheat warning.Your engine could
catch fire andyou or others could be burned.
Use a 50/50 mixture of clean water and
DEX-COOL@coolant.
I NOTICE:
In cold weather, water can freeze and crack the
So
engine, radiator, heater core and other parts.
use the recommended coolant.
I
A CAUTION:
You can be burned if you spill coolant on hot
engine parts. Coolant contains ethylene
glycol
and it will burn if the engine parts are hot
enough. Don’t spill coolant ona hot engine.
5-17
1. You can remove the coolant surge tank pressure
cap when the cooling system, includingthe coolant
surge tank pressurecap and upper radiator hose, is
no longer hot. Turn the pressure cap slowly
counterclockwise untilit first stops. (Don’t press
down while turning the pressure cap.)
If you hear ahiss, wait for that to stop.A hiss means
there is still some pressure left.
5-18
2. Then keep turning the pressurecap slowly, and
remove it.
3. Then fill the coolant surge tank with the proper
mixture, up to theKALTKOLD line (seam).
4. With the coolant surge tank pressure cap off, start the
engine and let it run until you can feel the upper
radiator hose getting hot. Watchout for the engine
cooling fans.
By this time, the coolant level inside the coolant
surge tank maybe lower. If the level is lower, add
more of the proper mixture tothe coolant surge tank
until the level reaches the KALTKOLD line (seam).
If a Tire Goes Flat
It’s unusualfor a tire to “blow out” while you’re driving,
especially if you maintain your tires properly.
If air goes
out of a tire, it’s much more likely to leak out slowly.
But if you should everhave a “blowout,” here are a few
tips about what to expect and what to do:
If a front tire fails, the flat tire will create a drag that
pulls the vehicle toward that side. Take your off
foot
the accelerator pedal and grip the steering wheel firmly.
Steer to maintain lane position, and then gently brake to
a stop well outof the traffic lane.
5. Then replace the pressure cap.Be sure the pressure
cap is tight.
5-20
A rear blowout, particularly on a curve, acts much
like
a skid andmay require the same correction you’d use in
a skid. Inany rear blowout, remove your foot from the
accelerator pedal. Get the vehicle under control
by
steering the way you want the vehicle to go. Itbemay
very bumpy and noisy, but you can still steer. Gently
brake to a stop-- well off the road if possible.
If a tire goesflat, the next part shows how to use your
jacking equipment to change
a flat tire safely.
Changing a Flat Tire
If a tire goes flat, avoid further tire and wheel damage
by driving slowly toa level place. Turn on your hazard
warning flashers.
Changing a tire can cause an injury. The vehicle
can slip off the jack and roll over youor other
people. You and they could be badlyinjured.
Find a level place to change your tire.To help
prevent the vehicle from moving:
1. Put the shift leverin PARK (P).
2. Set the parking brake firmly.
3. Thrn off the engine.
To be even more certain the vehicle won't move,
you can put blocks at the front and rearof the
tire farthest away from the one being changed.
That would be the tire on the other side of the
vehicle, at the opposite end.
I
The following steps willtell you how to use the jack and
change a tire.
'
5-21
Removing the Spare Tireand Tools
I
The equipment you’ll needis in the trunk.On the
driver’s side of the trunkis the spare tire. Pull the
fasteners on the spare tire cover
to access the tire.
Unbuckle the tire and liftit up to remove it from
the trunk.
The jack and tool kit
are located on the
passenger’s side of the
trunk. Pull the red handle
I to remove the cover and
access the equipment.
.
.
The tools you’ll be using include thejack (A), the wheel
wrench (B) and thescrewdriver (C).
Turn the nut holding the jack to the left and remove it.
5-23
--
I___.___..--..........
~
- --
~
~~
~.
--__I
~
~
._.
-
Removing
the
Wheel
Cover
Removing
the
Flat
Tire
and
Installing
the
Spare Tire
Using theflat end of the screwdriver, gently pry
the wheel coveroff. Be careful not to scratch the
wheel edge.
5-24
1. If you have the five-spoke wheel, use the flat end
of the screwdriverto pry off the five black plastic
wheel bolt caps. Be careful not to scratch the
wheel edge.(This step does not apply to the
seven-spokewheel.)
~
2. Using the wheelwrench, loosen all of the wheel
bolts. Don’t remove them yet.
3. Turn the jack handle to the right to raisethe jack lift
head 2 to 3 inches (5 to 7.6 cm).
4. To access the jack hoisting notches, slide the cover
out (located eitherin front of or behnd the tireyou
are changing).
5-25
cm.
(22inches)
cm
(21.3inches)
5. Position thejack under the vehicle.
The base of the jack must line up vertically with the
hoisting notch (jack contact point)
on the vehicle’s
frame, nearest the flat tire. Then, raise jack
the lift
head until it is firmly set into the hoisting notch.
5-26
~
~.
A CAUTION:
Getting under avehicle when it is jacked upis
dangerous. If the vehicle slips off the jack,you
could be badly injuredor killed. Never get under
a vehicle when it is supported only by a jack.
A CAUTION:
Raising yourvehicle with thejack improperly
positioned can damage thevehicle and even
make thevehicle fall. To help avoid personal
injury and vehicle damage, be sure fit
to the jack
lift head into the proper location before raising
the vehicle.
6. Raise the vehicleby turning the jack handle to the
right. Raisethe vehicle far enough off the ground for
the spare tire tofit under the vehicle.
7. Remove all wheel bolts and takeoff the flat tire.
5-27
8. Remove any rust or dirt
from the wheel bolts,
mounting surfaces and
spare wheel.
I
A CAU -ION:
Never use oil or grease onwheel bolts. If you do,
the bolts mightcome loose. Your wheelcould fall
off, causing a serious accident.
9. Place the spare on the wheel-mounting surface.
A CAUTION:
Rust or dirt
on thewheel, or on the parts to
which it is fastened, can make thewheel bolts
become loose after atime. The wheel could come
off and cause an accident. When
you change a
wheel, remove any rust or dirt from places
the
where the wheel attaches to thevehicle. In an
emergency, you can use a cloth or a paper towel
to dothis; but be sure touse a scraper orwire
brush later,if you need to,to get all therust or
dirt off.
5-28
10.Replace the wheel bolts.
Tighten each bolt by
hand until the wheelis
held against the hub.
12. Tightenthe wheel bolts
firmly in a criss-cross
sequence as shown.
11. Lower the vehicle by turning the jack handle to the
left. Lower the jack completely. After removing the
jack, slide the jack hoisting notch cover back in.
Incorrect wheel bolts or improperly tightened
wheel bolts can cause thewheel to becomeloose
and even come off. This could lead toan accident.
Be sure touse the correct wheel bolts. If you have
to replace them, be sure
to get new GM original
equipment wheel bolts.
Stop somewhereas soon as you can and have the
bolts tightened with a torque wrench 80
tolb-ft
(110 Nm).
NOTICE:
Improperly tightenedwheel bolts can lead to
brake pulsation and rotor
damage. To avoid
expensive brake repairs,evenly tighten thewheel
bolts in the proper sequence and to the proper
torque specification.
Storin- a Flat or Spare Tire and Tools
CAU IION:
Storing a jack,a tire or other equipment
in the
passenger compartmentof the vehicle could
cause injury.In a sudden stop collision,
or
loose
equipment could strike someone. Store all these
in the properplace.
After you’veput the spare tire on
your vehicle, you’ll
need to store theflat tire in the trunk. Use
the following
procedure to secure the flat tire in the trunk.
I
LEFT SIDE OF TRUNK:
I
Put theflat tire in the trunk
where the spare is stored
(driver’s side wheel well).
Secure the flat tire with the
straps that are used to hold
the spare in place.
RIGHT SIDE OF TRUNK:
A
JACK
If You’re Stuck: In Sand, Mud,
Ice or Snow
What you don’t want todo when your vehicle is stuck
is to spin your wheels too
fast. The method knownas
“rocking” can help you get out when you’re stuck, but
you must use caution.
SCREWDRIVER
-
‘WRENCH
The jacking tools are stored on the passenger’s side
of the trunkbehind the panel with the red pull handle.
Make sure these tools are
properly secured when not
in use.
If you let your tires spinat high speed, theycan
explode, and you or otherscould be injured.
And, the transmission or other parts
of the
vehicle can overheat. Thatcould cause an engine
compartment fire or other
damage. When you’re
stuck, spin thewheels as little aspossible. Don’t
spin thewheels above 35 mph (55 km/h) as
shown on the speedometer.
NOTICE:
Spinning your wheels can destroy parts of your
vehicle as well as the tires.
If you spin the wheels
too fast while shifting your transmission
back
and forth, you can destroy your transmission.
For informationabout using tire chains on
your vehicle,
see “Tire Chains” in the Index.
5-32
Rocking Your Vehicle To Get It Out
First, turn your steering wheel
left and right.That will
clear the area around your
front wheels. You should
turn your traction controlsystem off. (See “Traction
Control System” in the Index.) Then shift back and forth
between REVERSE (R) and a forward gear, spinning
the
wheels aslittle as possible.Release the accelerator pedal
while you shift, and press lightly on the accelerator
pedal whenthe transmission is in gear.
If that doesn’t
get you out after a few tries, you may need
to be towed
out. If you do need to be towed out, see “Towing
Your
Vehicle’’ in the Index.
&
NOTES
b%
5-34
NOTES
Section 6 Service and Appearance Care
Here you will find information about the
care of your vehicle. This section begins with service and
fuel information,
and thenit shows howto check important fluid and lubricant levels. There
is also technicalinfomation about your
vehicle, and a part devoted
to its appearance care.
6-2
6-3
6-5
6-5
6-8
6-8
6-11
6-15
6-18
6- 19
6-20
6-23
6-24
6-25
6-26
6-29
6-30
Service
Fuel
Fuels in Foreign Countries
Filling Your Tank
Filling a PortableFuel Container
Checking Things Underthe Hood
Engine Oil
Air Cleaner
Automatic Transmission Fluid
Rear Axle
Engine Coolant
Surge Tank PressureCap
Power Steering Fluid
Windshield Washer Fluid
Brakes
Battery
Bulb Replacement
6-36
6-37
6-45
6-46
6-48
6-49
6-50
6-52
6-53
6-54
6-54
6-55
6-63
6-63
6-63
6-64
Wiper Blade Replacement
Tires
Appearance Care
Cleaning theInside of Your Vehicle
Care ofSafety Belts
Cleaning the Outside of Your Vehicle
Cleaning Aluminumor Chrome Wheels
(If Equipped)
Underbody Maintenance
Appearance Care Materials Chart
Vehicle Identification Number (VIN)
Service Parts Identification Label
Electrical System
Replacement Bulbs
Capacities and Specifications
Air Conditioning Refrigerants
Normal Maintenance Replacement Parts
Service
Doing Your Own Service Work
Your dealer knows your vehicle best and wants
you to
be happy with it.We hope you’llgo to your dealerfor
all your service needs. You’ll get
genuine GM parts and
GM-trained and supported service people.
If you want to do some of your own service work,yW11
want to use the proper Cadillac Service Manual. It tells
you much more about how to service your vehicle than
this manual can.To order the proper service manual, see
“Service and Owner Publications” in the Index.
We hope you’ll want to
keep your GM vehicle all GM.
Genuine GM parts haveone of these marks:
Genuine
6-2
Your vehicle hasan air bag system.Before attempting to
do your own service work,see “Servicing Your Air
Bag-Equipped Vehicle” in the Index.
You should keep a record with all parts receipts and list
the mileage and the date of any service work you
perform. See “Maintenance Record”in the Maintenance
Schedule booklet.
Fuel
You can be injured and your vehicle could be
damaged if you try to
do service work on a
vehicle without knowing enough about it.
Be sure you have sufficient knowledge,
experience, the proper replacement parts
and tools before you attempt any vehicle
maintenance task.
Be sureto use the proper nuts, bolts and
other fasteners. “English” and “metric”
fasteners can be easily confused. If you use
the wrong fasteners, parts can later break
or falloff. You could be hurt.
Adding Equip] !nt to the Outside of
Your Vehicle
Things you might add to the outsideof your vehiclecan
affect the airflow aroundit. This may cause wind noise
and affect windshieldwasher performance. Check with
your dealer beforeadding equipment to theoutside of
your vehicle.
Use premium unleaded gasoline rated 9at1 octaneor
higher for best performance. You may use middle grade
or regular unleaded gasolines,but your vehicle may not
accelerate as well.
At a minimum, the gasoline you use
shoula meet
specifications ASTMD4814 in the United States and
CGSB 3 5 M 9 3 in Canada. Improved gasoline
specifications have been developedby the American
Automobile Manufacturers Association (AAMA) for
better vehicleperformance and engine protection.
Gasolines meeting the AAMA specificationcould
provide improved driveability and emission control
system protectioncompared to other gasolines.
Be sure the posted octane for premium is at least
91 (at
least 89 for middle grade and87 for regular).If the octane
is less than87, you may get a heavy knocking noise when
you drive. If it’s bad enough, it can damage
your engine.
If you’re using fuel rated at the recommendedoctane or
higher and you hear heavy
knocking, your engine needs
service. But don’t worryif you heara little pinging
noise when you’re accelerating or driving up a hill.
That’s normal, and you don’t have to buy a higher
octane fuel to get ridof pinging. It’s the heavy, constant
knock that means youhave a problem.
6-3
If your vehicle is certified to meet California Emission To provide cleaner air, all gasolines in the United States
Standards (indicated on the underhood emission control
are now required to contain additives that will help
label), it is designed to operate on fuels that meet
prevent depositsfrom forming in yourengine and fuel
California specifications.If such fuels are not available
system, allowing your emission control system to
in states adopting Californiaemissions standards, your
function properly. Therefore, you should not have add
to
vehicle will operate satisfactorily
on fuels meeting
anything to the fuel. In addition, gasolines containing
federal specifications,but emission control system
oxygenates, such as ethers and ethanol, and
performance maybe affected. The malfunction indicator
reformulated gasolines may be available in your area to
lamp on your instrument panel may turn on and/or your help clean the air. General Motors recommends that you
vehicle mayfail a smog-check test.If this occurs, return use these gasolines if they comply with the
to your authorizedCatera dealer for diagnosis to
specifications described earlier.
determine the cause of failure. In the eventit is
determined that the cause
of the condition is the type
of
fuels used, repairs may not be covered by your warranty. NOTICE:
Some gasolines that arenot reformulated for low
Your vehicle was not designed for fuel that
emissions contain an octane-enhancing additive called
contains methanol. Don’t use it. It can corrode
methylcyclopentadienyl manganese tricarbonyl(MMT);
metal parts in your fuel system and also damage
ask your service station operator whether or notfuel
his
contains MMT. General Motors does not recommend the plastic and rubber parts. That damage wouldn’t
use of such gasolines. If fuels containing MMT are used,
be covered under your warranty.
spark pluglife may be reduced and your emission
control system performance may
be affected. The
malfunction indicator lampon your instrument panel
may turn on.If this occurs, return to your authorized
Catera dealer for service.
Fuels in Foreign Countries
If you plan on driving in another
country outside the
United States or Canada, the proper fuel may be hard to
find. Never use leaded gasoline or any other fuel not
recommended in the previous text on fuel. Costly repairs
caused by use of improper fuel wouldn’t becovered by
your warranty.
Filling Your Tank
A
To check on fuel availability, askan auto club, or
contact a major oil company thatdoes business in the
country where you’llbe driving.
You can also writeus at the following address for
advice. Just tell us whereyou’re going and give your
Vehicle Identification Number (VIN).
General Motors Overseas Distribution Corporation
1908 Colonel Sam Drive
Oshawa, Ontario L1H 8P7
Gasoline vapor is highly flammable. It burns
violently, and that can cause very bad injuries.
Don’t smoke if you’re near gasoline or refueling
your vehicle. Keep sparks, flames and smoking
materials away from gasoline.
6-5
The cap is behind a hinged door on the passenger's side
of your vehicle.
To use this feature,
your vehicle must be in
PARK (P). Press the
FUEL DOOR unlock
button located on the
instrument panel center
console to unlock and open
the fuel door.
You can also press the fuel button on the remote keyless
entry transmitter to access the fuel cap.
A
Your vehicle may or may not have a tetheredfuel cap.
Hang the fuelcap inside the fuel door as shown by
the arrow.
To remove the cap, turnit slowly to the left
(counterclockwise). The cap has a spring init; if you let
go of the cap too soon, it will spring back to the right.
If you get gasoline on yourself
and then
something ignitesit, you could be badlyburned.
Gasoline can spray out you
on if you open the
fuel filler cap too
quickly. This spray can happen
if your tankis nearly full, and
is more likely in
hot weather. Open the fuel filler cap
slowly and
wait for any“hiss” noise to stop.Then unscrew
the cap all the
way.
Be careful not to spill gasoline. Clean gasoline
from
painted surfaces as soon as possible.
See “Cleaning the
Outside of Your Vehicle”in the Index.
When YOU put the cap back on, turn it to the right
(clockwise) untilyou hear a clicking sound. Make sure
YOU fully install the cap.The diagnostic system can
determine if the fuel cap has beenleft off or improperly
installed. This would allow fuel to evaporateinto the
atmosphere. See “Malfunction Indicator Lamp” in
the Index.
NOTICE:
If you need a new cap, be sure get
to the right
type. Your dealer can getone for you. If you get
the wrong type,it may not fit properly. This may
cause your malfunction indicator lamp to light
and yourfuel tank andemissions system maybe
damaged. See “Malfunction Indicator Lamp” in
the Index.
6-7
Fillinn 3 Portable Fuel Container
Never fill a portable fuel container
while it is in
your vehicle. Static electricitydischarge from the
container can ignite the gasoline
vapor. You can
be badly burned and your
vehicle damaged if this
occurs. To help avoid injury toyou and others:
0 Dispense gasoline only into approved
containers.
0 Do not fill a container while it is inside a
vehicle, in avehicle’s trunk, pickupbed or
on any surface other than the ground.
0 Bring the fill nozzle in contact with the
inside of the fill opening before operating
the nozzle. Contact shouldbe maintained
until thefilling is complete.
0 Don’t smoke while pumping gasoline.
6-8
Checking Things Under the Hood
An electric fan under the
hood can start up and
injure you even when the engineis not running.
Keep hands, clothing andtools away from any
underhood electric fan.
Things that burn can
get on hot engine parts and
gasoline,
start a fire. These include liquids like
oil, coolant, brake fluid, windshield washerand
other fluids, and plastic or rubber. You or others
could beburned. Be careful notto drop orspill
things thatwill burn ontoa hot engine.
.
Hood Release
I
Pull the leverinside the
vehicle to open the hood. It
is located on the lower
left
side of the instrument panel.
Then go to the frontof the vehicle and find the
secondary hood release which
is located above the front
grille. Lift up on the release lever asyou raise the hood.
6-9
When you open the hood,you’ll see:
G. Brake Master Cylinder
D. Engine Oil Fill Location
A. Coolant Fill Location
E. Engine Oil Dipstick Location
H. Power Steering Fluid
B. Air Cleaner
C. Passenger’s Compartment
E Windshield Washer Fluid
I. Battery
Air Filter
Before closing the hood,be sure all filler caps areon properly. Then pull thehood down and close it firmly.
Engine Oil
If the lowoil level lighton
the instrument panel comes
on, it means you need to
check your engine oil level
right away. For more
information, see “Low Oil
Level Light” in the Index.
The engine oil dipstickis
located behind the radiator
hose on the driver’s sideof
the engine.The yellow
looped handle helps to
identify it.
You should check your engine oil level regularly; this is
an added reminder.
It’s a good idea tocheck your engine oil every time you
get fuel. In order to get
an accurate reading,the oil must
be warm and the vehicle must be on level ground.
Turn off theengine and give the oila few minutes to
drain back into the oil pan.
If you don’t, the oil dipstick
might not show the actual level.
Checking Engine Oil
When to Add Engine Oil
Pull out the dipstick and clean
it with a paper towel or
cloth, then pushit back in all theway. Remove it again,
keeping the tip down, and
check the level.
If the oil is at or below MIN
the mark, then you’ll need
to add at least
one quart of oil. Butyou must use the
right kind.This part explains what kind
of oil to use.For
crankcase capacity, see “Capacities and Specifications”
in the Index.
NOTICE:
Don’t add too much oil.
If your engine hasso
much oil that the oil level gets above the upper
mark that shows the proper operating range,
your engine could be damaged.
The oil fill cap is located
behind theengine oil
dipstick and next to the
engine block on the driver’s
side of the engine.Turn the
cap to the left to remove
it.
6-12
Be sure to fill it enough to put the levelsomewhere in
the proper operating range.Push the dipstickall the way
back in when you’re through.
RECOMHEHDED SAE VISCOSITY GRADE ENGINE OILS
FOR BEST FUEL ECONOMY AND COW STARTING, SELECT THE LOWEST
SAE VISCOSITY GRADE OIL FOR THE EXPECTED TEMPERATURE RANGE.
What Kind of Engine Oil to Use
Oils recommendedfor your vehiclecan be identified by
looking for the “Starburst” symbol. This symbol
indicates that theoil has been certified by
the American
Petroleum Institute (API). Do not use anyoil which
does not carry this Starburst symbol.
If you change your own oil,
be sure youuse oil that has
the Starburst symbol on the
front of the oil container. If
you have your oil changed
for you, be sure the oil put
into your engine is
American Petroleum
Institute certified for
gasoline engines.
WOK
FI)R THIS
SYMBOL
HOT
WEATHER
“F
“C
t 100
it 38
+ 80
t 27
t60.
t 16
t40.
t4
t20.
-7
0.
I
SAE lOW-30
- 18
,
I
PREFERRED
above 0°F
\
SAE sw-30
(-18°C)
(
\
u
You should also use the proper viscosity oil for your
vehicle, as shown inthe following chart:
COLD
WEATHER
DO NOT USE SAE 2OW-50 OR ANY
OTHER GRADE OIL NOT RECOMMENDED
6-13
As shown in the chart,S A E 1OW-30 is best for your
vehicle. However, youcan use SAE 5W-30 if it’s going
to be colder than
60 O F (16 O C ) before your next oil
change. When it’s very cold, you should use
SAE
5W-30. These numbers on anoil container show its
viscosity, or thickness. Do not use other viscosity oils,
such asSAE 20W-50.
Engine Oil Additives
Don’t add anything to your oil.
Your dealer is ready to
advise if you think something should be added.
When to Change Engine Oil
If any one of these is true for you, use the short
tripkity
maintenance schedule:
0
Most tripsare less than 5 to 10 miles (8 to 16 km).
This is particularly important when outside
temperatures are below freezing.
0
Most trips include extensive idling (such as frequent
driving in stop-and-go traffic).
0
Most tripsare through dusty areas.
0
You frequently tow a trailer
or use a carrieron top of
your Catera.
GM Goodwrench@ oil meets all
the requirements for
your vehicle.
0
The vehicleis used for delivery service, police, taxi
or other commercial application.
If you are in an area where the temperature falls below
-20°F (-29”C),consider using either anSAE 5W-30
synthetic oil or anSAE OW-30 oil. Both will provide
easier cold starting and better protection
for your engine
at extremely low temperatures.
Driving under these conditions causes engine to
oil
break down sooner.If any one of these is true for your
vehicle, then you need to change your oil and filter
every 5,000 miles (8 000 km) or 3 months -- whichever
occurs first.
NOTICE:
Use only engine oil with the American Petroleum
Institute Certified For Gasoline Engines
“Starburst” symbol. Failure to use the
recommended oil can resultin engine damage not
covered by your warranty.
If none of them is true, use the long triphighway
maintenance schedule. Change the oil and filter at the
first 5,000 miles (8 000 km) or 3 months -- whichever
occurs first. Then, change the oil and filter every
10,000 miles (16 000 km) or 12 months -- whichever
occurs first. Driving a vehicle with a fully warmed
engine under highway conditionscauses engine oil to
break down slower.
Air Cleaner
What to Do with Used Oil
Did you know that usedengine oil contains certain
elements that may be unhealthyfor your skinand could
even cause cancer? Don't let used oil stay on your skin
for very long. Clean your skin and
nails with soap and
water, or a good hand cleaner. Wash or properly throw
away clothing or rags containing used
engine oil. (See
the manufacturer's warnings about the use and disposal
of oil products.)
Used oil can be a real threat to theenvironment. If you
change your own oil, be sure to drain all free-flowing
oil
from the filter before disposal. Don't ever dispose of oil
by putting it in the trash,pouring it on the ground, into
sewers, or into streams or bodies of water. Instead,
recycle it by taking it to a place that collects used oil.
If
you have a problem properly disposingof your used oil,
ask your dealer,a service station ora local recycling
center for help.
The air cleaner is located behind
the headlamps on
the passenger's side of the engine. Be sure theengine
has cooled beforefollowing these steps to replace the
air filter.
6-15
I
rI
L1
1. Unhook thefive clips that attach the air cleaner lid
to
the housing (youmay need to use a screwdriver to
help you unhook the clips).
4. Lift the lid, take out[ne air filter and remove any
loose debris that may be found lying in air
the
cleaner base.
2. With a screwdriver, loosen the retaining clamp on
the air intake tube and then disconnect the tube (as
shown by the arrow above).
3. Move the hosegoing to the coolant surge tank outof
the way so the air cleaner lidcan be lifted.
5. Install a newair filter element. See “Normal
Maintenance ReplacementParts” in the Index.
To reinstall the air cleaner assembly, place the air filter
in the air cleaner lid, then insert
the lid and filter
together into the housing. Reattach the five clips, replace
the air intake tube and tighten the clamp. Return the
coolant surge tank hose
to its proper position.
Refer to the Maintenance Schedule to determine when to
replace theair filter.
Passenger Compartment Air
Filter Replacement
See “Scheduled Maintenance Services” inthe
Maintenance Schedule booklet.
The passenger compartment air filter traps most
of the
pollen from the air entering your vehicle.
Like your
vehicle’s air cleaner filter, it may need to be changed
periodically. Forhow often tochange the passenger
compartment air filter, see yourMaintenance
Schedule booklet.
Operating the engine with theair cleaner off can
cause you or others to be burned. The air cleaner
not only cleansthe air, it stops flameif the engine
backfires. If it isn’t there,and the engine
backfires, you could beburned. Don’t drive with
it off, and be careful working onthe engine with
the air cleaner off.
NOTICE:
B
I
If the air cleaner is off, a bachfire can cause a
damaging engine fire. And,
dirt can easily get
into your engine, which willdamage it. Always
have the air cleaner in place when you’re driving.
The access panelfor the passenger compartment air
filter is on the grille, at the base of the windshield,on
the passenger’s side.
1. Open the hood of your vehicle.
2. Lift the engine compartment rear seal (see thearrow
in the illustration) and pull it back
far enough tobe
able tolift open the grille flap.
3. Unhook both retaining clips that secure thefilter
in place.
4. Slide the filter toward thefront of the car and then
pull the filter straight out.
5. Replace the filter by slidingit back in, reattaching
both retainer clips and closing the grille flap.
6 . Replace the engine compartment rear seal.
7. Close the engine hood.
For the typeof filter to use,see “Normal Maintenance
Replacement Parts” in the Index.
Automatic Transmissio~ Fluid
It is not necessary to
check the transmission fluid level.
A transmission fluid leakis the only reason for fluid
loss. If a leak occurs, take your
Catera to a Catera
dealership Service Department and have it repaired
as
soon as possible.You may also have your fluid level
checked by your dealeror service center whenyou have
your oil changed.
Change both the fluid and filter every 50,000 miles
(83 000 km) if the vehicle is mainly driven underone or
more of these conditions:
In heavy city traffic where the outside temperature
regularly reaches 90”F (32”C) or higher.
In hilly or mountainous terrain.
When doing frequent trailer towing.
Uses such as found in taxi, police or delivery service.
Rear Axle
When to Check Lubricant
Refer to theMaintenance Schedule to determine how
often tocheck the lubricant. See “Periodic Maintenance
Inspections” and “ScheduledMaintenance Services” in
the Maintenance Schedule booklet.
How to Check Lubricant
If you do not use your vehicleunder any of these
conditions, thefluid and filter do not requirechanging.
NOTICE:
We recommend you use only fluid labeled
DEXRON@-m,because fluid with that labelis
made especially for your automatic transmission.
Damage caused by fluid other than DEXRON@-III
is not covered by your new vehicle warranty.
If the level is below the bottom
of the filler plughole,
you’ll need toadd some lubricant. Add enough lubricant
to raisethe level to the bottomof the filler plug hole.
What to Use
Protect against rust and corrosion.
Refer to the MaintenanceSchedule to determine what
kind of lubricant to use.See “Recommended Fluids and
Lubricants” in theMaintenance Schedule booklet.
Help keep the properengine temperature.
Let the warning lights and gages work as
they should.
Engine Coolant
NOTICE:
The cooling s stem in your vehicleis filled with
DEX-COOL J engine coolant. This coolant is designed
to remain in your vehiclefor 5 years or 150,000 miles
(240 000
whichever occursfirst, if you add only
DEX-COOL extended life coolant.
When addingcoolant, it is important thatyou use
only DEX-COOL@(silicate-free) coolant.
If coolant other than DEX-COOL
is added to the
system, premature engine, heater core or
radiator corrosionmay result. In addition, the
engine coolantwill require change sooner at
30,000 miles (50 000 km) or24 months,
whichever occurs first. Damage causedby the use
of coolant other than DEX-COOL@
is not
covered by your new vehicle warranty.
krnb
The following explainsyour cooling system andhow to
add coolant when it is low.
If you have a problem with
engine overheating, see “Engine Overheating” in
the Index.
--
A 50/50 mixture of water andDEX-COOL’
coolant will:
a Give freezing protection down to-34°F (-37°C).
Give boiling protectionup to 265 O F (129°C).
6-20
-
What to Use
Use amixture of one-half clean water (preferably
distilled) and one-halfDEX-COOL@coolant which
won’t damage aluminum parts. If you use this mixture,
you don’t need to addanything else.
Adding only plain water to your
cooling system
can be dangerous. Plain water,
or some other
liquid like alcohol, can
boil before the proper
coolant mixturewill. Your vehicle’s coolant
warning systemis set for the proper coolant
mixture. With plain water
or thewrong mixture,
your engine could get too hot you
but wouldn’t
get the overheat warning.
Your engine could
catch fire andyou or otherscould beburned.
Use a 50/50 mixture of clean water and
DEX-COOL@coolant.
NOTICE:
If you use an improper coolant mixture, your
engine could overheat and be badly damaged.
The repaircost wouldn’t be covered by your
warranty. Too much waterin the mixturecan
freeze and crack the
engine, radiator, heater core
and other parts.
If you have to add coolant
more than four times a year,
have your dealercheck your cooling system.
NOTICE:
If you use the propercoolant, you don’t have to
add extra inhibitors or additives
which claim to
improve thesystem. These can be harmful.
6-21
Checking Coolant
=
I
Turning the surge tank pressure cap when the
engine and radiator are hot can allow steam and
scalding liquids to blow out and burn you badly.
Never turn the surge tank pressure capeven a
little when the engine and radiator are hot.
--
--
When your engine is cold, the coolant level should
be at
the KALTKOLD line (seam).
The surge tank is located behind the air cleaner on the
passenger’s sideof the engine.
1
]I I I
If the lightcomes on, it
means you’re low on
engine coolant.
The cooling system when hot is under aoflot
pressure.
If the low coolant warning light on the instrument panel
appears, you will need to add coolant.
For more information, see“Low Coolant Light” in
the Index.
6-22
.- -
------
Adding Coolant
If you needmore coolant, add theproper Dm-COOL@
coolant mixture at the surge tank, but only whenthe
engine is cool.
You can be burned if you spill coolant onhot
engine parts. Coolant contains ethylene
glycol,
and it will burn if the engine parts arehot
enough. Don’t spill coolant aonhot engine.
Surge Tank Pressure Cap
NOTICE:
The surge tank cap is a 15 psi (105 kPa)
pressure-type cap and must be tightly installed to
prevent coolant lossand possible engine damage
from overheating.
If the surge tank pressurecap needs tobe replaced, a
GM cap is recommended.
Thermostat
When replacing the pressurecap, make sureit is tight.
Engine coolant temperature is controlledby a thermostat
in the engine coolant system.The thermostat stops the
flow of coolant through the radiator until the coolant
reaches a preset temperature.
If the thermostat needs tobe replaced, aGM thermostat
is recommended.
Power SteeringFluid
How To Check Power Steering Fluid
When theengine compartment is cool,wipe the cap and
the topof the reservoir clean, then unscrew the
cap and
wipe the dipstick witha clean rag. Replace thecap and
completely tighten it. Then remove the
cap again and
look at the fluid level on the dipstick.
The level shouldbe at the fullmark. There are two lines
on the dipstick. The top line is the “full” mark and the
bottom lineis the “add” mark (which means that fluid
should be added).If necessary, add only enough fluid to
bring the level up to the full mark.
What to Use
The power steering fluid reservoir is located between
the battery and the brake
master cylinder on the driver’s
side of the engine.
When to Check Power SteeringFluid
It is not necessary to regularly check power steering
fluid unlessyou suspect thereis a leak in the system or
you hearan unusual noise.A fluid lossin this system
could indicatea problem. Have the system inspected
and repaired.
6-24
To determine what kind of fluid to use, see
“Recommended Fluids and Lubricants” in the
Maintenance Schedule booklet. Always use the proper
fluid. Failure to use the proper fluid can cause leaks and
damage hoses and seals.
Windshield Washer Fluid
What toUse
When you need windshield washerfluid, be sure to read
the manufacturer’s instructions before use.If you willbe
operating your vehicle inan area wherethe temperature
may fall below freezing, use a fluid that has sufficient
protection against freezing.
Adding Washer Fluid
The windshield washer fluid
reservoir is located behind
the front grille on the
driver’s sideof the engine.
Open the cap with the
washer symbol on it. Add
washer fluid until thetank
is full.
NOTICE:
e When using concentrated washerfluid,
follow the manufacturer’s instructions
for
adding water.
0 Don’t mix water with ready-to-use washer
fluid. Water can cause the solution to freeze
and damage your washer
fluid tank and
other partsof the washersystem. Also,
water doesn’t cleanas well as washerfluid.
0 Fill your washerfluid tank only
three-quarters fullwhen it’s very cold. This
allows for expansionif freezing occurs,
which could damage the tankif it is
completely full.
e Don’t use engine coolant (antifreeze) in
your windshield washer. It can damage
your washer system and paint.
system fured, since a leak means that sooner
or later your
brakes won’t work well, or won’t work
at all.
Brakes
Brake Fluid
So, it isn’ta good ideato “top off’ your brake fluid.
Adding brake fluid won’t correcta leak. If you add fluid
s
i “
when your liningsare worn, then you’ll have too much
fluid when youget new brake linings.You should add
(or remove) brake fluid, as necessary,
only when workis
done on the brake hydraulic system.
A CAV-ION:
Your brake master cylinder reservoir
is here. It is filled
with DOT-3 brake fluid.
If you have too much brake fluid, it can spill
on
is
the engine. The fluid will burn if the engine
hot enough.You or others could be burned,
and your vehicle could be damaged. Add brake
fluid only when workis done on the brake
hydraulic system.
There are only two reasons why the brake fluid level in the
When your brake fluid falls
to a low level, your brake
reservoir might go down. The first
is that the brake fluid
warning light willcome on. See “Brake System Warning
goes down to an acceptable level duringnormal brake
Light” inthe Index.
lining wear. When new linings are put in, the fluid level
goes back up. The other reason is that fluid is leaking out
of the brake system.If it is,you should have your brake
What to Add
NOTICE:
When you do need brakefluid, use onlyDOT-3brake
fluid -- such as DelcoSupreme 11 (GM Part
No. 12377967). Use new brake fluid from a sealed
container only.
@
Always clean the brake fluid reservoir cap and the area
around thecap before removingit. This will help keep
dirt from entering the reservoir.
With the wrong kind of fluid in your brake
system, yourbrakes may not work well,or they
may not even work at all. This could causea
crash. Always usethe proper brake fluid.
1
Using the wrong fluid can badly damage
brake system parts. For example, just a few
drops of mineral-based oil, suchas engine
oil, in yourbrake system can damage brake
system parts so badly that they’ll have to be
replaced. Don’t let someone
put in the
wrong kindof fluid.
If you spill brake fluid on your vehicle’s
painted surfaces, the paint finish can be
damaged. Be careful not to spill
brake fluid
on your vehicle. If you do, washit off
immediately. See “AppearanceCare” in
the Index.
Brake Wear
NOTICE:
Your vehicle has four-wheel disc brakes.
Your vehicle has electronic wear sensors that let you
Continuing to drive with worn-out brake pads
know when thefront brake pads are significantly worn
could result in costly brake repair.
and new pads are needed.
The brake pad wear indicator
light will come on and stay on when the brake pads are
Some driving conditions or climates may cause a brake
worn and need to be replaced.(See “Brake PadWear
squeal when the brakes are
first applied or lightly
Indicator Light”in the Index.)
applied. This does not mean somethingis wrong with
your brakes.
I A CAUTION:
I
The brake pad wear indicator light means that
soon your brakes won’t work well. That could
lead to an accident. When the brake pad wear
indicator light comes on and stays on, have your
vehicle serviced.
6-28
Properly torqued wheel bolts are necessary to help
prevent brake pulsation. When tires are rotated, inspect
brake padsfor wear and evenly torque wheel bolts in the
proper sequence to GM specifications.
Brake linings should always be replaced complete
as
axle sets.
See “Brake System Inspection” in the Maintenance
Schedule booklet underPart C “Periodic Maintenance
Inspections.”
Brake Pedal Travel
Battery
See your dealer if thebrake pedal does not returnto
normal height, orif there is a rapid increase
in pedal
travel. This could be a sign of brake trouble.
Every new Catera has an ACDelco Freedom’ battery.
You never have to add water toone of these. When it’s
time for a new battery,we recommend an ACDelco
Freedom battery. Get one that has the replacement
number shownon the original battery’s label.
Brake Adjustment
Every time you applythe brakes, with orwithout the
vehicle moving, yourbrakes adjust for wear.
Replacing Brake System Parts
The braking system on a modern vehicle is complex. Its
Batteries have acid that can burn you and gas
many partshave to be of top quality and work well
that can explode.You can be badly hurt if you
together if the vehicle is to
have really good braking.
aren’t careful. See “Jump Starting’’ in the Index
Your vehicle wasdesigned and tested with top-quality
for tips on working around a battery without
GM brake parts. When you replace parts
of your braking
getting hurt.
system -- for example, when your brake linings wear
down andyou have to have new ones put in -- be sure
you get newapproved GM replacement parts. If you
Also, for your audio system, see “Theft-Deterrent
don’t, yourbrakes may no longer work properly. For
Feature” in the Index.
example, if someone puts in brake linings that are wrong
for your vehicle, thebalance between yourfront and
rear brakes can change -- for the worse. The braking
performance you’ve come to expect can change in many
other ways if someone puts in the wrongreplacement
brake parts.
Bulb Replacement
Headlamps
I
~
For bulb types, see “Replacement Bulbs” in the Index.
I
I
1 HalogenBulbs
Halogen bulbs have pressurized gas inside and
can burstif you drop or scratch the bulb. You or
others could be injured. Be sure to read and
follow the instructions on the bulb package.
1. With a screwdriver, unscrew the fastener on the
headlamp cover and then remove the cover to gain
access to the headlamps. Note that the inner
bulb is
for the low-beam headlamp and the outer bulb
is for
the high-beam headlamp.
6-30
2. Remove the black rubber cap that protects the
bulb area.
3. Remove the plug connector from the bulb.
6-31
..
4. Squeeze the retaining clip together and then pull
away from the bulb assembly.
6-32
5. Pull the bulb out and then replace.
Headlamp Aiming
Your vehicle has the composite headlamp system.These
headlamps have horizontal and vertical aim indicators.
The aim has been pre-set at the factory and should need
no further adjustment.
If your vehicleis damaged in an accident and the
headlamp aim seemsto be affected, see your dealer.
Headlamps on damaged vehicles may require
recalibration of the horizontal aim by your dealer.
To check the aim, the vehicle should be properly
prepared as follows:
0
Place the vehicle on a level pad
or surface.
0
The vehicle should not have any snow, ice or mud
attached to it.
0
The vehicle should be fully assembled and all
other
work stopped while headlamp aiming is being done.
0
There should not be any cargo
or loading of the
vehicle, exceptit should have a full tank
of fuel and
one person or 160 lbs. (75 kg) on thedriver's seat.
0
Tires should be properly inflated.
0
Rock the vehicleto stabilize the suspension.
I NOTICE:
To make sure your headlamps are aimed
properly, read all the instructions before
beginning. Failure to follow these instructions
could cause damage to headlamp parts.
For the vertical adjustment, state inspection stations
generally will allow a reading
of plus 0.76 degrees or
minus 0.76 degrees from the centerof the bubble.
6-33
1
It is recommended that the upper limit not exceed plus
0.4 degrees from the center
of the bubble. Other drivers
may flash their high beamsat you if your adjustmentis
much above plus0.4 degrees.
If you find that the headlamp aiming needs adjustment,
follow these steps:
2. Check the vertical aimfor each headlamp and adjust
it as necessary.The vertical aim adjustment screwis
located on the outboard side
of the headlamp
assembly. You can see the level through the
headlamp assembly. Turn the vertical aiming screw
until the bubble in the level
is centered at0 (zero).
1. With a screwdriver, unscrewthe fastener on the
headlamp cover and then remove the cover toable
be
to see the back
of the headlamp assembly.
Adjustment screws can be turned with E8
an Tom@
socket or a T15 Torx screwdriver.
6-34
3. If the horizontal aim needs adjusting, see
your dealer.
Front %rn Signal Lamp
1. With a screwdriver, unscrew the fastener on the
headlamp cover and thenremove it to access the turn
signal lamps (see Step 1 under “Headlamps”).
3. Pull the bulb out to replace and then reassemble.
Center High-Mounted Stoplamp (CHMSL)
2. On the outboard side of each low-beam headlamp,
you will find the turn signal bulbs. Turn the
lamp
assembly to theleft to remove.
The CHMSL is equipped with high durability
illumination. If a bulb problem does occur, see your
dealer for assistance.
6-35
It’s a good idea to clean or replace
the wiper blade
assembly on a regular basisor when worn.For proper
windshield wiper blade type,
see “Normal Maintenance
Replacement Parts” later in this section.
6-36
2. Press the tabs together and pull the wiper
blade
assembly down enough to release
it from the “J”
hooked endof the wiperarm.Slide the assembly
away from the arm.
3. Replace the blade.
4. To reinstall the wiper blade assembly, slide it over
the wiper arm to engage the “J” hooked end on the
wiper blade assembly. Pull up on the assembly to
lock it into place.
Tires
Your new vehicle comes with high-quality tires made by
a leading tire manufacturer.If you ever have questions
about your tire warranty andwhere to obtain service,see
your Catera Warranty booklet for details.
Poorly maintained and improperly
used tires
are dangerous.
Overloading your tires can cause overheating
as a result of too much friction. You could
have an a b o u t and a serious accident. See
‘Zoading Your Vehicle’’ in theIndex.
Underinflated tirespose the same dangeras
overloaded tires. The resulting accident
could cause serious injury. Check all tires
frequently to maintain the recommended
pressure. Tire pressure should be checked
when your tires are cold.
Overinflated tires are more likely to be
cut, punctured or broken
by a sudden
impact such as when you hit a pothole.
Keep tires at the recommended pressure.
Worn, old tires can cause accidents.If your
tread is badly worn, ifor
your tires have
been damaged, replace them.
See “Inflation Tire Pressure’’ in this section
for inflation pressure adjustment for higher
speed driving.
--
--
6-37
Inflation -- Tire Pressure
The Tire-Loading Information label, which
is located on
the rear edge of the driver’s door, shows the correct
inflation pressures for your tires when they’re cold.
“Cold” means your vehicle has been sitting
for at least
three hoursor driven no more than 1 mile (1.6 km).
If you’ll be driving at speeds higher than100 mph
(160 km/h) where it islegal, raise the cold inflation
pressure of each tire to 37 psi (250 P a ) . When you end
this very high-speed driving, reduce the cold inflation
pressures to those listed on the Tire-Loading
Information label.
6-38
NOTICE:
~
Don’t let anyonetell you that underinflation or
overinflation is all right. It’s not. If your tires
don’t have enoughair (underinflation), you can
get the following:
0 Too much flexing
0 Too much heat
0 Tire overloading
0 Bad wear
0 Bad handling
0 Bad fuel economy.
If your tires havetoo much air (overinflation),
you can get the following:
0 Unusual wear
Bad handling
0 Rough ride
0 Needless damage from road hazards.
When to Check
Check your tires once a monthor more. Also, check the
tire pressureof the spare tire.
How to Check
Use a good qualitypocket-type gage to check tire
pressure. You can’t tell if yourtires are properly inflated
simply by looking at them. Radial tires may look
properly inflatedeven when they’re underinflated.
The purpose of regular rotation is toachieve more
uniform wearfor all tires onthe vehicle. The first
rotation is the most important.See “Scheduled
Maintenance Services” in the Maintenance Schedule
booklet for scheduled rotation intervals.
7
-
Be sure to put the valve caps back
on the valve stems.
They help prevent leaks by keeping out dirt and moisture.
Tire Inspection and Rotation
Tires shouldbe rotated at 5,000 miles (8 000 km) and
then every 10,000miles (16 000 km) thereafter. Any
time you noticeunusual wear, rotateyour tires as soon
as possible andcheck wheel alignment. Alsocheck for
damaged tires or wheels. See “When It’s Timefor New
Tires” and“Wheel Replacement” later in this sectionfor
more information.
When rotating your tires, always use
the correct rotation
pattern shown here.
After the tires have been rotated, adjust the front and When It’s Time for New Tires
rear inflation pressures as shown on the Tire-Loading
One way to tell when it’s
Information label. Make certain that
all wheel bolts are
time for new tiresis to
properly tightened.See “Wheel Bolt Torque”in
check the treadwear
the Index.
indicators, which will
appear when your tires have
only 1/16 inch (1.6 mm) or
less of tread remaining.
Rust or dirton a wheel, or on the parts to which
it is fastened, can make wheelstuds become loose
and cause
after a time. The wheel could come off
an accident. Whenyou change a wheel, remove
any rust or dirt from places where the wheel
attaches to thevehicle. In an emergency, you can
use a cloth or a paper towel to do this; but be
sure to usea scraper or wire brush later, if you
need to, to get all the rust ordirt off. (See
“Changing a Flat Tire” in the Index.)
You need anew tire if any of the following statements
are true:
0
0
0
6-40
You can see the indicators at three or more places
around the tire.
YOUcan see cord or fabric showingthough the
tire’s rubber.
The tread or sidewallis cracked, cut or snaggeddeep
enough to show cord or fabric.
The tire has a bump, bulge or split.
The tire has a puncture, cut or other damage that
can’t be repaired well becauseof the size or location
of the damage.
Buying New Tires
To find out what kind andsize of tires you need, look at
the Tire-Loading Information label.
The tires installed on your vehicle whenit was new had
a Tire Performance Criteria Specification (TPC
Spec)
number on each tire’s sidewall. Whenyou get new tires,
get ones with thatsame TPC Spec number. Thatway
your vehicle willcontinue to have tires thatare designed
to give proper endurance, handling, speedrating,
traction, ride and other things during normal service on
your vehicle. If your tires havean all-season tread
design, the TPC number will
be followed by an “MS”
(for mud andsnow).
If you ever replace your tires with those not having
a
TPC Spec number, make sure they are
the same size,
load range, speed rating and construction type
(bias,
bias-belted or radial) as your original tires.
Mixing tires could causeyou to lose control while
driving. If you mix tires of different sizesor types
(radial and bias-belted tires), the
vehicle may not
handle properly, andyou could havea crash.
Using tires of different sizes may also cause
damage to yourvehicle. Be sure touse the same
size and type tireson allwheels.
If you use bias-ply tires on your
vehicle, the
wheel rim flangescould developcracks after
many miles of driving. A tire and/orwheel could
fail suddenly, causinga crash. Use only radial-ply
tires with the wheels on your vehicle.
I
Uniform Tire Quality Grading
Treadwear
The following information relatesto the system
developed by the United States National Highway
Traffic Safety Administration, which grades tires
by
treadwear, traction andtemperature performance. (This
applies only to vehicles sold in the United States.)
The
grades are molded on the sidewallsof most passenger
car tires. The Uniform Tire Quality Grading system does
not apply todeep tread, winter-type snow tires,
space-saver or temporary use spare tires, tires with
nominal rim diametersof 10 to 12 inches (25 to30 cm),
or to some limited-production tires.
The treadwear gradeis a comparative rating based on
the wear rateof the tire when tested under controlled
conditions on a specified government test course. For
example, a tire graded150 would wear one and a half
(1 1/2) times as well on the government course as a tire
graded 100.The relative performanceof tires depends
upon the actual conditionsof their use, however, and
may depart significantlyfrom the normdue to variations
in driving habits, service practices and differences in
road characteristics and climate.
While the tires available on General Motors passenger
cars and light trucks
may vary with respectto these
grades, they must also conform to Federal safety
requirements and additionalGeneral Motors Tire
Performance Criteria (TPC) standards.
Traction -- A, B, C
The traction grades, fiom highest to lowest, are B,
A, and
C, and they represent the tire’s abilityto stop on wet
pavement as measured under controlled conditions on
specified government test surfaces of asphalt and concrete.
A tire marked C may have poor traction performance.
Warning: The traction grade assigned to this tire is based
on braking (straight ahead) traction tests and does not
include cornering (turning) traction.
--
Temperature A, B, C
The temperature grades are A (the highest),B, and C,
representing the tire’s resistanceto the generation of
heat andits ability todissipate heat when tested under
controlled conditions on a specified
indoor laboratory
test wheel. Sustained high temperature can cause the
material of the tire to degenerate and reduce tire life, and
excessive temperature can lead to sudden tire failure.
The grade C corresponds to a levelof performance
which all passenger car tires must meet
under the
Federal Motor Vehicle Safety Standard No. 109. Grades
B and A represent higher levels of performance on the
laboratory test wheelthan the minimum required by law.
Warning: The temperature grade for this tire is
established for a tire that is properly inflated and not
overloaded. Excessive speed, underinflation, or
excessive loading,either separately or in combination,
can cause heat buildup and possible tire failure.
Wheel Alignment and Tire Balance
The wheels on your vehicle were aligned and balanced
carefully atthe factory to give you the longest
tire life
and best overallperformance.
Scheduled wheel alignment and wheel balancing are not
needed. However,if you noticeunusual tire wear or
your vehicle pullingone way or the other, thealignment
may need tobe reset. If you notice your vehicle
vibrating when driving on a smooth road, your wheels
may need to be rebalanced.
Wheel Replacement
Replace any wheel that is bent, cracked,or badly rusted
or corroded.If wheel boltskeep corning loose,the wheel
and wheel bolts shouldbe replaced. If the wheel leaks
air, replaceit (except some aluminum wheels, which can
sometimes be repaired). See your dealerif any of these
conditions exist.
Your dealer will know the kindof wheel you need.
Each new wheel should have the same load-carrying
capacity, diameter, width, offset and be mounted the
same way as the one it replaces.
If you need to replace anyof your wheels or wheel
bolts, replace them only with
new GM original
equipment parts. This way, you will be sure to have the
right wheel and wheel bolts
for your Catera model.
I
NOTICE:
The wrong wheel can also cause problemswith
bearing life, brake cooling, speedometer or
odometer calibration, headlamp aim, bumper
height, vehicle ground clearance and tire or tire
chain clearance to the
body and chassis.
A CAUTION:
Using the wrong replacement wheels and wheel
bolts onyour vehicle can be dangerous. It could
affect thebraking and handlingof your vehicle,
make your tireslose air and makeyou lose
control. You could have acollision in which you
or otherscould be injured. Always use the correct
wheel and wheel bolts for reolacement.
in the Index for
See “Changing a Flat Tire”
more information.
I
A CAUTIO1
Putting aused wheel on your vehicle is
dangerous. You can’t knowhow it’s been used or
how far it’s been driven. It could fail suddenly
and cause an
accident. If you have to replacea
wheel, use a new GM original equipmentwheel.
6-44
I
Tire Chains
NOTICE:
Use tire chains only where legaland only when
you must. Use onlySAE Class “S” type chains
that arethe proper size for your tires. Install
them onthe rear tires and tighten themas tightly
as possible withthe ends securely fastened. Drive
slowly and follow the chain manufacturer’s
instructions. If you can hear the chains
contacting your vehicle, stop and retighten them.
If the contact continues,slow downuntil it stops.
Driving too fastor spinning the wheels with
chains on will damage yourvehicle.
Appearance Care
Remember, cleaningproducts can be hazardous. Some
are toxic. Others can burst into flame if you strike a
match or get them ona hot part of the vehicle. Some are
dangerous if you breathe their fumes in a closed space.
When you useanything from a container to clean your
vehicle, be sure to follow the manufacturer’s warnings
and instructions. And always open yourdoors or
windows when you’re cleaning the inside.
Never use these to clean your vehicle:
Gasoline
0 Benzene
0 Naphtha
0 Carbon Tetrachloride
0 Acetone
0 Paint Thinner
0 Turpentine
0 Lacquer Thinner
0 Nail Polish Remover
They can all behazardous -- some more than
others -- and they can all damage your vehicle, too.
Don’t use any of these unless this manual says you can.
In many uses, these willdamage your vehicle:
0 Alcohol
0 Laundry Soap
0 Bleach
0 Reducing Agents
6-45
Cleaning the Insideof Your Vehicle
Use a vacuum cleaner often
to get rid of dust and loose
dirt. Wipe vinyl or leather with a clean, damp cloth.
Using Multi-Purpose InteriorCle;on Fabric
~- - ->
1. Vacuum and brush the areato remove any loosedirt.
Your dealer has two cleaners, Multi-Purpose Interior
2. Always clean a whole trim panelor section. Mask
Cleaner and Capture Non-Solvent Dry Spot and
Soil
surrounding trim along stitch
or welt lines.
Remover. They will clean normal spots and stains very
3. Mix powdered cleaner following the directionson
well. You can get GM-approved cleaning products from
the container label to
form thick suds.
your dealer. (See “Appearance
Care and Materials”in
4. Use suds only and apply with a clean sponge. Don’t
the Index.)
saturate the material and don’t rub
it roughly.
Here are some cleaning tips:
5. As soon as you’ve cleaned the section, use a sponge
Always read the instructions on the cleaner label.
to remove the suds.
Clean up stains as soon asyou can -- before they set.
6. Wipe cleaned area with a clean, damp towel
or cloth.
0 Carefully scrape off any excess stain.
7. Wipe with a clean cloth and let dry.
0
Use a clean clothor sponge, and change to a clean
area often. A soft brush may be used
if stains
are stubborn.
If a ring forms after spot cleaning, clean
the entire
area immediatelyor it will set.
6-46
-~
Special Fabric Cleaning Problems
Cleaning Vinyl
Stains caused by such things as catsup, coffee
(black),
egg, fruit, fruit juice, milk, soft drinks, vomit, urine and
blood can beremoved as follows:
Use warm water anda clean cloth.
Rub with a clean, damp cloth to remove dirt. You
may have to do it more than once.
1. Carefully scrape off excess stain, then sponge the
soiled area withcool water.
2. If a stain remains, follow the multi-purpose interior
cleaner instructions described earlier.
Things like tar, asphalt and shoe polish willstain if you
don’t get themoff quickly. Use a clean cloth anda
vinyvleather cleaner. See your dealer for
this product.
Cleaning Leather
3. If an odor lingers after cleaning vomit or urine,
treat the area witha waterhaking soda solution:
1 teaspoon (5 ml) of baking soda to 1 cup (250 ml)
of lukewarm water.
Use a soft cloth with lukewarm water and
a mild soapor
saddle soap and wipedry with a soft cloth. Then, let the
leather dry naturally.Do not use heat to dry.
4. Letdry.
0
Stains caused by candy, ice cream, mayonnaise, chili
sauce and unknown stains can be removed as follows:
1. Carefully scrape off excess stain.
2. First, clean with cool water and allowto dry
completely.
3. If a stain remains, follow instructionsfor
Multi-Purpose Interior Cleaner.
For stubborn stains, usea leather cleaner. See your
dealer for this product.
Never use oils, varnishes, solvent-based or abrasive
cleaners, furniture polish or shoe polish on leather.
Soiled or stained leather should be cleaned
immediately. If dirt is allowed to work into the
finish, it can harm the leather.
Cleaning the Topof the Instrument Panel
Use only mild soap and waterto clean the top surfaces
of the instrument panel. Sprays containing siliconesor
waxes may cause annoying reflections in the windshield
and even make it difficult to see through
the windshield
under certain conditions.
Cleaning Interior Plastic Components
Use only a mildsoap and water solution on a soft
cloth or sponge. Commercial cleanersmay affect the
surface finish.
Cleaning Speaker Covers
Vacuum around a speakercover gently, so that the
speaker won’t be damaged. Clean spots with
just water
and mild soap.
Care of Safety Belts
Keep belts clean and dry.
6-48
Do not bleach or dye safety belts. If you do,
it
may severely weaken them. In
a crash, they
might not be able to provide adequate protection.
Clean safety belts only with mild soap and
lukewarm water.
Cleaning Glass Surfaces
Glass should be cleaned often.GM Glass Cleaner (GM
Part No. 1050427) or a liquid household glass cleaner
will remove normal tobacco
smoke and dust filmson
interior glass.
Don’t use abrasive cleaners on glass, because they may
cause scratches. Avoid placing decals on the inside rear
window, since they may have to be scraped
off later. If
abrasive cleaners are used
on the insideof the rear
window, an electric defogger elementmay be damaged.
Any temporary license should notbe attached across the
defogger grid.
Cleaning the Outsideof the
Windshield and Wiper Blades
Cleaning the Outsideof Your Vehicle
The paint finish on your vehicle provides beauty, depth
of color, gloss retention and durability.
If the windshield is not clear after using the windshield
washer, orif the wiper blade chatters when running, wax, Washing Your Vehicle
sap or other material may be on the blade or windshield.
The ‘bestway to preserve your vehicle’s finish is to keep
it
Clean the outsideof the windshield with GM
clean by washingit often with lukewarm or cold water.
Windshield Cleaner,Bon Ami@Powder (non-scratching
Don’t wash your vehicle in
the direct raysof the sun.
glass cleaningpowder), GM Part No. 1050011. The
Don’t use strongsoaps or chemical detergents. Use
windshield is clean if beads do not form when yourinse
liquid hand, dish or car washing (mild detergent) soaps.
it with water.
You can get GM-approved cleaningproducts from your
Grime fkom the windshield will stick to the wiper blades
dealer. (See “Appearance Care and Materials”in the
and affect their performance. Clean the blade by wiping Index.) Don’t use cleaning agents that are petroleum
vigorously with a clothsoaked in full-strength windshield
based, or that contain acid
or abrasives. All cleaning
washer solvent. Then rinse the blade with water.
agents shouldbe flushed promptly and not allowed to
dry onthe surface, or they could stain. Dry the finish
Check the wiper blades and clean
them as necessary;
with a soft, cleanchamois or an all-cotton towel to
replace blades thatlook worn.
avoid surface scratches and water spotting.
Weatherstrips
High pressure car washes may
cause water to enter
your vehicle.
Silicone grease on weatherstrips will make them last
longer, seal better, and not stick or squeak. Apply silicone
Cleaning ExteriorLampsLenses
grease with a clean cloth at least every
six months. During
Use lukewarm or cold water, a soft cloth anda liquid
very cold, damp weather more
fiquent application may be
hand, dish or car washing
(mild detergent) soap to clean
required. (See“Recommended Fluids and Lubricants” in
exterior lampsand lenses. Follow instructions under
the Maintenance Schedule booklet.)
“Washing Your Vehicle.”
Finish Care
Occasional waxing or mild polishingof your vehicleby
hand may be necessary to remove residue from the paint
finish. You can get GM-approved cleaning products
from your dealer. (See “Appearance Care and Materials”
in the Index.)
Your vehicle has a “basecoat/clearcoat” paint finish.
The
clearcoat gives more depth
and gloss to the colored
basecoat. Always use waxes and polishes that are
non-abrasive and made for a basecoatlclearcoat
paint finish.
NOTICE:
Machine compounding or aggressive polishing on
may dull the
a basecoaticlearcoat paint finish
finish or leave swirl marks.
necessary, use non-abrasive cleaners that are marked
safe for painted surfaces to remove foreign matter.
Exterior painted surfaces are subject to aging, weather
and chemical fallout thatcan take their toll over
a period
of years. You can help to keep the paint finish
looking
new by keeping your vehicle garaged or covered
whenever possible.
Cleaning Aluminumor Chrome
Wheels (If Equipped)
Keep your wheels clean using a soft clean cloth with
mild soap and water. Rinse with clean water. After
rinsing thoroughly, dry with a soft clean towel.
A wax
may then be applied.
The surface of these wheels is similar to the painted
surface of your Catera. Don’t use strong soaps,
chemicals, abrasive polishes, abrasive cleaners
or
abrasive cleaning brushes on them because you could
damage the surface.You may use chrome polish on
chrome wheels, but avoid any painted surface
of the
wheel, and buff off immediately after application.
Foreign materials such ascalcium chloride and other
salts, ice melting agents,
road oil and tar, tree sap, bird
Don’t take your vehiclethrough an automaticcar wash
droppings, chemicals from industrial chimneys, etc.,
can
damage your vehicle’s finish if they remain on painted that has silicon carbide tire cleaning brushes. These
brushes can also damage the surface
of these wheels.
surfaces. Wash the vehicle as soonas possible. If
Cleaning Tires
Sheet Metal Damage
To clean your tires,use a stiff brush with a tire cleaner.
If your vehicleis damaged and requires sheet metal
repair or replacement, make sure the body repair shop
applies anti-corrosion material to the
parts repaired or
replaced to restore corrosion protection.
NOTICE:
When applying a tire dressing always take care to
wipe off any overspray or splash from all painted
surfaces on the body or wheels of the vehicle.
Petroleum-based products may damage the
paint finish.
Finish Damage
Any stone chips, fracturesor deep scratches in the finish
should be repaired right away. Bare metal will corrode
quickly and may develop into
a major repair expense.
Minor chips and scratchescan be repaired with touch-up
materials availablefrom your dealeror other service
outlets. Larger areasof finish damagecan be corrected
in your dealer’s body and paint shop.
1
Underbody Maintenance
Chemical Paint Spotting
Chemicals used for ice and snow removal and dust control
can collect on the underbody.
If these are not removed,
accelerated corrosion (rust) can occur
on the underbody
parts such as fuel lines, fiame, floor pan and exhaust
system even though they have corrosion protection.
Some weather and atmospheric conditions can create a
chemical fallout. Airborne pollutants can
fall upon and
attack painted surfaces on your vehicle.
This damage
can take twoforms: blotchy, ringlet-shaped
discolorations, and small irregular dark spots etched
into
the paint surface.
At least every spring,flush these materialsfrom the
job causes this, Cadillac
underbody with plain water. Clean any areas where mudAlthough no defect in the paint
to the owner, the surfaces of
and other debriscan collect. Dirt packed in closed areas will repair, at no charge
of the frame should be loosened before being flushed. new vehicles damaged by this fallout condition within
12 months or 12,000 miles (20 0oO km) of purchase,
Your dealer or an underbody car washing systemcan do
whichever occurs first.
this for you.
Appearance Care Materials Chart
~
PART NUMBER
994954
1050172
1050173
1050174
1050214
1050427
1052870
DESCRIPTION
USAGE
Polishing Cloth- Wax Treated 23
Exterior polishing cloth
Tar and Road Oil Remover 16
Removes tar, road oil and asphalt
Use on chrome, stainless steel, nickel, copper and brass Chrome C
Removes soil and black marks from whitewalls White Sidewa
Vinyl Cleaner
Cleans vinyl tops, upholstery and convertible tops
Glass Cleaner
Removes dirt, grime, smoke and fingerprints
Cleans and lightly waxes Wash Wax Concentrate
Protects leather, wood, acrylics, PlexiglasTM,
plastic,
1052918**
8 oz. (0.237 L)
Armor All Protectant
rubber and vinyl
Multi-Purpose Interior Cleans carpets, seats, interior trim, door panels
1052925
16 oz. (0.473 L)
Cleaner
and floor mats
oz. (0.473 L)
Wheel Cleaner 16
1052929
Spray on and rinsewith water
1052930
8 oz. (0.237 L)
Capture Dry Spot Remover
Attracts, absorbs and removes soils
12345002
Cleans and shines a variety of surface types Armor All
oz. (0.473 L)
Cleaner 16
1234572 1
2.5 sq. ft.
Shines vehicle without scratching Synthetic Chamois
12345725
12 oz. (0.354 L)
Spray on tire shine Silicone Tire Shine
12377964
16 oz. (0.473 L)
Finish Enhancer
Removes dust, fingerprints and surface contaminants
16 oz. (0.473 L)
Cleaner Wax
12377966
Removes light scratches and oxidation and protects finish
12377984
oz. (0.473 L)
Removes contaminants, blemishes and swirl marks Surface Clea
See your General Motors Parts Department for these products.
**Not recommended for use on instrument panel vinyl.
See “Fluids and Lubricants” in the Index.
SIZE
in. x 25 in.
oz. (0.473 L)
16 oz. (0.473 L)
oz. (0.473 L)
32 oz. (0.946 L)
23 oz. (0.680 L)
16 oz. (0.473 L)
TM
~
TM
~~
Vehicle Identification Number (VIN)
Engine Identification
The 8th character in your VIN
is the enginecode. This
code will help you identify your engine, specifications
and replacement parts.
mService Parts Identification Label
+
A
D
A
E N G l N E b L
CODE
MODEL YEAR
ASSEMBLY
PLANT
This is the legal identifier for your vehicle.
It appears on
a plate in the front corner
of the instrument panel,on the
driver’s side.You can see it if you look through the
windshield from outside your vehicle. The
VIN also
appears on the Vehicle Certification and Service
Parts
labels and the certificates
of title and registration.
You’ll find
this
label
behind
the
passenger’s
side
access
panel
the
in
trunk
(the
panel
that
covers
the
trunk-mounted CD changer). It’s very helpful if you
ever need to orderparts. On this label is:
yourVIN,
0
the model designation,
paint information and
0
a list of all production options and
special equipment.
Be sure that this labelis not removed from the vehicle.
6-54
Electrical System
Headlamp Wiring
Add-on Electrical Equipment
The headlamp wiring has several fuses which
are
powered by [email protected] electrical overload will
cause the lamps togo on and off, or insome cases to
remain off. If this happens, have the headlamp wiring
checked right away.
I NOTICE:
Don’t add anything electrical to your vehicle
unless you check with your dealer first. Some
electrical equipment can damage your vehicle
and the damage wouldn’t be covered by your
warranty. Some add-on electrical equipment
can keep other components from working as
they should.
Your vehicle has an air bag system.
Before attempting to
add anything electrical to your vehicle,see “Servicing
Your Air Bag-Equipped Vehicle” in the Index.
MaxiFuse is a registeredtrademark of Little Fuse
Incorporated.
Windshield Wiper Fuses
If the windshield wiper motor overheats
due to heavy
snow, etc., the wipers will stop until the motor cools.
If
the overload is causedby some electricalproblem, be
sure to haveit fixed.
Power Windows and Other Power Options
Circuit breakers protect the power windows
and other
power accessories. When the current load too
is heavy,
the circuit breakeropens and closes, protecting the
circuit until the problem is fixed goes
or away.
Power Distribution Fuse Block
Fuses and Circuit Breakers
The wiring circuits in your vehicle are protected
from
the short circuits by a combination of fuses and circuit
breakers. This greatly reducesthe chance of fires caused
by electrical problems.
Look atthe silver-colored band insidethe fuse. If the
band is broken or melted, replace
the fuse. Be sure you
replace a bad fuse withnew
a one of the identical size
and rating.
If you ever have a problem on the road and don’ta have
spare fuse, you can borrow
one that has the same
amperage. Pick some feature
of your vehicle thatyou
can get along without
-- like the radio or cigarette
lighter -- and use its fuse, if it is the correct amperage.
Replace it as soon asyou can.
This fuse block is attached tothe engine compartment
relay center located on top
of the battery. Simplylift the
lid to open.If you have any questions
about the power
distribution fuse block, consult your dealer.
6-56
There are two €use blocks in your vehicle: the
instrument panelfuse blocks and theengine
compartment relay center.
Instrument PanelFuse Block (Driver's Side)
33 HEATER BLOWER
34 RR WDO DEFOG
I
Fuse
The fuse block is located below the steering wheelon
the driver's side. Using a screwdriver, loosen the two
trim fasteners under the trim panel and pull the trim
panel away from the instrument panel to access.
1
2
3
35 PWR
SEAT
I
7
Usage
RH and LH Front Side Door Window
Regulator Motor,LH Front Side Door
Window Switch
Stoplamp Switch
Automatic Transmission Range Switch
and Control Indicator, Power Steering
Control Module, Hazard Warning Switch,
Automatic Transmission Winter
Mode Switch
Fuse
4
Usage
RH and LH RearSeatCushion
Heater Relay
Transmission Control Module
Radio Speaker Amplifier
Fuse
12
Hazard Warning Switch,Instrument
Cluster, DataLink Connector (DLC),
Stoplamp Switch, Gage Cluster, Heater
and A/C Control
13
Remote ControlOutside Rearview Mirror
Switch, A/C Compressor Relay, Coolant
Fan Test Connector,A/C Load Switch
14
Cellular Telephone,RH and LH
Windshield WasherNozzle, Driver and
Passenger Heated Seat Switch, Heater and
A/C Control, Heated Outside Rearview
Mirror andRear Window Defogger Relay
Rear Suspension Leveling Air
Compressor Relay,Instrument Cluster,
Gage Cluster,Cruise Control Switch and
Module, Headlamp Switch, Multifunction
Relay, Passenger andDriver Heated Seat
Relay, BCM, Sunroof Actuator,
Automatic Level Control Sensor,RH and
LH Heated Rear Seat
Switch and Cushion
Relay, Driver Seat Adjuster Memory
Module, LH Front Side Door Window
Switch, Inside Rearview Mirror
RH and LH Rear Side Door Window
Regulator Motor
8
Headlamp Switch,Turn Signal
Switch, Horn Relay,CD Changer,
Multifunction Relay
9
Windshield Wiper Motor and Relay,
Windshield Wiper and Windshield
Washer Switch
10
Body Control Module (BCM), Heater
Water Auxiliary Pump, Fan Control
Relays, ECM Relay, Auxiliary Water
Pump Relay
11
Heater and A/C Control, RH and
LH
Outside Rearview Mirrors,Outside
Remote Control Rear View Mirror Switch
6-58
Usage
15
Usage
Fuse
Fuse
16
Cigarette Lighter (Front and Console)
17
Horn #1 and #2
18
Fuel Pump
19
Electronic BrakeD'raction Control Module
20
Passenger and Driver Heated Seat Relay
21
Daytime Running Lamp (DRL) Relay,
LH High-Beam Headlamp Relay
Usage
27
Automatic Level Control Sensor, Rear
Suspension Leveling Air Compressor
and Relay
28
Remote Control Door Lock Receiver,
Door Lock Relay, Rear Compartment Lid
Release Connector (Not Used)
29
Multifunction Relay
30
RH Parking Lamp and Turn Signal Lamp,
RH Rear Sidemarker Lamp, RH
Stoplamp and Taillamp
22
Headlamp Switch, LH Headlamp
(Low Beam)
23
LH Parking Lamp andTurn Signal Lamp,
LH Rear Sidemarker Lamp, Multifunction
Relay, LH Stoplamp and Taillamp
31
RH Low-Beam Headlamp and Turn
Signal Switch
32
RH High-Beam Headlamp Relay
24
Lifting Magnet, BCM, Gage Cluster
33
25
Sunroof Actuator
Blower Controller,A/C
Compressor Relay
26
Headlamp Switch, RH andLH Front
Sidemarker Lamp, Middle Taillamp, RH
and LH Rear License Plate Lamp, Radio,
Automatic Transmission Control
Indicator, Heater and A/C Control
34
Heated Rear Window Defogger Relay,
Heated Outside Rearview Mirror
Passenger and Driver Seat Adjuster
Switch, Driver Seat Adjuster
Memory Module
35
6-59
Relay Box
f
Relay
I
II
HI BEAM LH
ALC
m
Ip
RR WDO DEFOG
HTD MIRROR
FLASHER
P
PI
HI BEAM RH
HORN
I
High-Beam HeadlampsI' &
IF>
I1
Automatic LevelControl
I11
Rear Window Defog, Heated Mirrors
IV
Hazard Warning Flashers
V
High-Beam HeadlampsI1 (RH)
x
VI
Horn
XI:
VI1
Parking Lamps and Turn Signal Lamps
VI11
Low-Beam Headlamps
rn
m
LO BEAM
lx
\
PRK LP
DRL
The relay box is located on the
lower part of the
instrument panel, to the right
of the steering column.
6-60
Usage
IX
Not Used
X
Not Used
XI
Daytime Running Lamps
Engine Compartment Relay Center
The relay center is located next to the battery
on the
driver’s side of the engine. Lift the cover to access.
Fusemelay Usage
1
Secondary Air InjectionPump
(Relay K12)
Fan Control (Relay K67)
Auxiliary Water Pump (Relay K22)
Windshield Wiper Motor (RelayK8)
6-61
Fusemelay Usage
Fuse/Relay
Usage
5
A/C Compressor (RelayK60)
17
Fan Control
(Relay
K52)
6
Fan Control (Relay K87)
18
Fan Control (Relay K28)
7
Fan Control (Relay K26)
19
8
Fan Control (Fuse 42)
Fan Control Relay, Engine Control
Module (ECM) Relay(Fuse 50)
9
20
Fuel Pump (Relay K44)
27
Heated Oxygen Sensors (Fuse 43)
10
Secondary Air Injection Pump
(Fuse 49)
Engine Controls Power (Relay K43)
28
12
Fan Control (Fuse 40)
Engine Control Module (ECM)
(Fuse 60)
15
Fan Control (Fuse 52)
29
16
Connector C110
Engine Control Module (ECM)
(Relay K48)
Coolant Fan Test Connector
6-62
39
Replacement Bulbs
Application .....................
Bulb Number
Front Turn Signal Lamp ............... 90487485
Headlamps Composite
Inner High Beam . . . . . . . . . . . . . . . . . . . 90512338
Outer Low Beam . . . . . . . . . . . . . . . . . . . 90512338
Rear Turn Signal Lamp and Taillamp . . . . 90002521
Capacities and Specifications
The following approximate capacities aregiven in
English and metric conversions. Please refer to
“Recommended Fluidsand Lubricants” in the
Maintenance Schedule booklet for more information.
Transmission . . . . . . . . . . . . . . . . . . . 7 quarts (6.6 L)
Engine Crankcase
Oil Change With Filter . . . . . . . . . 6 quarts (5.75 L)
Engine Cooling System . . . . . . . . 10.57 quarts(10 L)
Fuel Tank .....................
18 gallons (68L)
R- 134a Refrigerant . . . . . . . . . . . . . 2.9 lbs. (0.95 kg)
Wheel Bolt Torque . . . . . . . . . . . . . 8 0 lb-ft (110 N-m)
Air Conditioning Refrigerants
Not all air conditioning refrigerants are
the same.
If the air conditioningsystem in your vehicleneeds
refrigerant, be sure the proper refrigerant is used.
If you’re not sure,ask your dealer.
Engine Specifications
Displacement . . . . . . . . . 181 cubic inches (2962 cc)
Type . . . . . . . . . . . . . . . . . . . . . . . . . 3.0 L DOHC V6
VIN Engine Code ...........................
R
Horsepower . . . . . . . . . . . . . . 200 (bhp) @ 6000 rpm
149 (kW) @ 6000 rpm
Torque . . . . . . . . . . . . . . . . . 192 (lb-ft) @ 3600 rpm
260 (Nam) @ 3600 rpm
FiringOrder ......................
1-2-3-4-5-6
Thermostat Starts To Open . . . . . . . . . 198°F (92°C)
NOTE: All capacities are approximate. When adding,be
sure tofill to the approximate level, as recommendedin
this manual. Recheck fluid level after filling.
6-63
Normal Maintenance
Replacement Parts
Air Filter Element . . . . . . . . . . . . . . . . . . . 90509318
FuelFilterElement . . . . . . . . . . . . . . . . . . 90542540
25010792
EngineOilFilter ....................
Passenger’s Compartment Air Filter . . . . . 905 10338
Sparkplugs . . . 90541059 (Bosch Plug = FLR9LTE)
Thermostat . . . . . . . . . . . . . . . . . . . . . . . . . 90502201
Windshield Wiper Blades. . . . . . . . . . 90543916 (RH)
90543915 (LH)
Vehicle Dimensions
Wheel Base . . . . . . . . . . . . . 107.4 inches (272.8 cm)
Length . . . . . . . . . . . . . . . . . . . 194 inches (492.8 cm)
Height . . . . . . . . . . . . . . . . . . . 56.3 inches (143.1 cm)
Width . . . . . . . . . . . . . . . . . . . 70.3 inches (178.6 cm)
Front Tread . . . . . . . . . . . . . . . 59.3 inches (150.6 cm)
Rear Tread . . . . . . . . . . . . . . . ..59.8 inches (152 cm)
6-
-A
Section 7 CustomerAssistanceInformation
Here you will find out how to contact Cadillac if you need assistance.
Ths section also tells you how to obtain service
publications and how to report any safety defects.
7-2
7-4
7-5
7-7
7-8
7-8
7-1 1
Customer Satisfaction Procedure
Customer Assistance for TextTelephone
(TTY) Users
Roadside Service
Roadside Service for the Hearing or
Speech Impaired
Gold Key Courtesy Transportation
Transportation Options
GMParticipation in anAlternative Dispute
Resolution Program
7-12
7- 12
7- 13
7- 13
7-13
Warranty Information
Reporting Safety Defects to the United
States Government
Reporting Safety Defects to the
Canadian Government
Reporting Safety Defects to General Motors
Ordering Service and Ownerfiblications
in Canada
Customer Satisfaction Procedure
Catera dealers have the facilities, trained technicians and
up-to-date informationto promptly address any
concerns you may have. However, if a concern has not
been resolved to your complete satisfaction, take the
following steps:
STEP ONE -- Discuss yourconcern with a member
of dealership management. Normally, concerns can
be quickly resolvedat that level.If the matter has
already been reviewed withthe sales, service or parts
manager, contact the ownerof the dealership or the
general manager.
7-2
STEP TWO -- If after contactinga member of
dealership management, it appears your concern cannot
be resolved by the dealership withoutfurther help,
contact the CadillacCustomer Assistance Center,
24 hours a day, by calling 1-800-458-8006. In Canada,
contact GM of Canada Customer Communication
Centre in Oshawa by calling 1-800-263-3777 (English)
or 1-800-243-7854 (French).
For helpoutside of the UnitedStates and Canada,
call the following numbers as appropriate:
In Mexico: (525) 625-3256
In Puerto Rico: 1-800-496-9992 (English) or
1-800-496-9993 (Spanish)
0
In the U.S. Virgin Islands: 1-800-496-9994
In the Dominican Republic: 1-800-75 1-4135
(English) or 1-800-75 1-4136 (Spanish)
In the Bahamas: 1-800-389-0009
In Bermuda, Barbados, Antigua and the British
Virgin Islands: 1-800-534-0 122
0
In all other Caribbean countries: (809) 763-1315
In other overseas locations, call GM Overseas
Distribution Corporation in Canada at:
(905) 644-4112.
For prompt assistance, pleasehave the following
information available to give the
Customer
Assistance Representative:
In Canada, write to:
General Motors of Canada Limited
Customer Communication Centre,163-005
1908 Colonel Sam Drive
Oshawa, Ontario L1H 8P7
0
Your name, address, home and business
telephone numbers
0
Refer to your Warranty and Owner Assistance Information
Vehicle Identification Number (This is available
from the vehicle registration or title, or the plate at booklet for addressesof GM Overseas offices.
the top leftof the instrument panel and visible
When contacting Cadillac, please remember that your
through the windshield.)
concern will likelybe resolved in the dealership, using
the
dealer’s facilities, equipment
and personnel. That is
Dealership name and location
why we suggest youfollow Step One first if you have
Vehicle delivery date and present mileage
a concern.
Nature of concern
0
0
We encourage you to callus so we can give your inquiry
prompt attention. However,if you wishto write
Cadillac, address your inquiry to:
Cadillac Customer AssistanceCenter
Cadillac Motor Car Division
P.O. Box 436004
Pontiac, MI 48343-6004
Customer Assistance for Text
Telephone (TTY) Users
To assist customers who are deaf, hard
of hearing, or
speech-impaired andwho useText Telephones (TTYs),
Cadillac hasTTY equipment available atits Customer
Assistance Center.Any TTY user can communicate with
Cadillac by dialing: 1-800-833-CMCC. (TTYusers in
Canada can dial 1-800-263-3830.)
Roadside Service
Each technician travels witha specially equipped
service vehicle complete with the necessary Catera parts
and tools required to handle most roadside repairs.
Cadillac Roadside Service can
be reached by dialing
1-800-882- 1112,24 hours a day, 365 days a year.
This serviceis provided at no chargefor any
warranty-covered situation andfor a nominal
charge if the Caterais no longer under warranty.
Roadside Serviceis available only in the United
States and Canada.
[email protected]
1=800-882=1112
Cadillac’s exceptional RoadsideService is more than an
auto clubor towing service. It provides every Catera
owner with the advantageof contacting a Cadillac
advisor and, when appropriate,a Catera trained dealer
technician who can provideon-site service.
Cadillac Owner Privileges
TM
Roadside Service provides several Cadillac Owner
Privileges at “no charge,” throughout your
1998
Cadillac Warranty Period-- 48 months/50.000 miles
(80 000 krn).
Emergency Road Serviceis performed on sitefor the
following situations:
0
Towing Service
0
Battery Jump Starting
e Lock Out Assistance
7-6
0
Fuel Delivery
0
Flat Tire Change (Covers change only)
0
Trip Interruption-- If your tripis interrupted due
to a warranty failure, incidental
expenses may be
reimbursed during the48 months/50,000 miles
(80 000 km) warranty period. Items covered are
hotel, meals and rentalcar.
Roadside Service Availability
Wherever you drive inthe United States or Canada,
an advisoris available to assist youover the phone.
A dealer technician,if available, can travel toyour
location within a 30 mile (50 km)radius, of a
participating Catera dealership. If beyond this radius,
we will arrange tohave your car towed to the nearest
Catera dealership.
Reaching Roadside Service
Dial thetoll-free Roadside Service number:
1-800-882-1 112. An experienced Roadside
Service Advisor will assist you and request the
following information:
A description of the problem
0 Name, home address, home telephone number
Location of your Catera and number you are
calling from
The model year, Vehicle Identification Number (VIN),
mileage and date of delivery
Roadside Servicefor the Hearing or
Speech Impaired
Roadside Service is prepared to assist owners
who have
hearing difficulties or arespeech impaired. Cadillac has
installed special telecommunication devices called Text
Telephone (TTY) in the Roadside Service Center.
Any customer who has access toa (TTY)or a
conventional teletypewritercan communicate with
Cadillac by dialing from the United Statesor Canada
1-800-833-CMCC -- daily, 24 hours.
Gold Key Courtesy Transportation
One of your Cadillac Owner Privileges
is Gold Key
Courtesy Transportation. It just
is one more example of
Cadillac’s commitment to provide the services
you
expect and deserve as aCatera owner.
Gold Key Courtesy Transportation helpsyou get where
you need to be when your Caterais in the dealershipfor
warranty service.*
In Canada, please consult yourGM dealer for
information on Courtesy Transportation.
Transportation Options*
Our Cadillac Dealer Technician networkis ready and
able to assist Catera customers at roadside.
Warranty work can frequently be handled in
one day,
but there is often no reason
for you to wait at the
dealership. Cadillac helps minimize inconvenience
to you by providing several transportation options.
Depending on the circumstances, your dealership
can offeryou one of the following options:
Shuttle Service*
Your dealership canprovide you with shuttle service to
get you to your destination with minimal interruption
of
your daily schedule when your Catera is unavailabledue
to a warranty repair.
Courtesy Vehicle*
For repairs that require your vehicle be
to unavailable to
you for an extended period of time, your dealer may
arrange to provide you with a courtesy vehicle
from the
dealership, or one obtained from a local rental agency.
Miscellaneous Service*
Should the situation necessitatemaking your own
arrangements, Gold Key Courtesy Transportation
provides for reimbursement of personally arranged
transportation such as cab fare, reasonablefuel expenses
for a ride provided by another individual or a rental
vehicle obtained from an independent source.
*Some restrictions may apply. Please consult your
Catera dealerconcerning specific Gold KeyCourtesy
Transportation benefits oJjcered by the dealership.
Plan Ahead When Possible
Whenever possible,scheduling an appointment for your
vehicle’s warranty service and advising your service
consultant that you wish to take
advantage of Gold Key
Courtesy Transportation can help minimize your
inconvenience by allowing your dealerto prepare
arrangements to fulfill your transportationneeds in
advance of your visit.
7-9
Owner Responsibilities
You are responsiblefor primary insurancecoverage of
the vehicle provided. In many cases, your own auto
insurance policymay provide this coverage under
provisions for rental caragreements. Please consult your
insurance carrier tobe certain of what’s covered.
While your dealership willcover the rentalexpense of
a vehicle provided underthe provisions of Gold Key
Courtesy Transportation, you are responsible
for
charges incurred for such items asfuel used, additional
insurance coverage and any taxes fees
or levied by state
or local governmental agencies.
7-10
It is important that your vehicle be pickedfrom
up the
dealership promptly following the completion
of your
repairs. If your vehicle isnot picked up from the
of time following
dealership within a reasonable amount
notification from the dealer, you may
be responsible
for any additional rental charges incurred as a result
of this delay.
For Canadian Vehicles
In Canada, for warranty repairs during the Complete
Vehicle Coverage period in the New Vehicle Limited
Warranty, interim transportation may be available under
the Courtesy Transportation Program. Please consult
your dealerfor details.
GM Participation in an Alternative
Dispute Resolution Program
This program is available in all50 states and the District
of Columbia. Canadian owners refer to your Warranty
and Owner Assistance Information booklet for
information on the Canadian Motor Vehicle Arbitration
Plan (CAMVAP). General Motors reserves the right to
change eligibility limitations and/or to discontinue its
participation in thisprogram.
Both Cadillac and your Catera dealer arecommitted
to making sureyou are completely satisfied with your
new vehicle. Our experience has shownthat, if a
situation arises where you feel
your concern has not
been adequately addressed, the Customer Satisfaction
Procedure described earlier in this sectionis
very successful.
There may be instances where an impartial third party
can assist in arriving ata solution to a disagreement
regarding vehicle repairsor interpretation of the New
Vehicle Limited Warranty. To assist in resolving these
disagreements, Cadillac voluntarily participatesin BBB
AUTO LINE.
BBB AUTO LINE is an out-of-court program
administered by the Better Business Bureausystem
to settle automotive disputes. This program is available
free of charge to customers who currently own or leasea
GM vehicle.
If you are not satisfied afterfollowing the Customer
Satisfaction Procedure, youmay contact the BBB using
the toll-free telephone number, or write them at the
following address:
BBB AUTO LINE
Council of Better Business Bureaus, Inc.
4200 Wilson Boulevard
Suite 800
Arlington, VA 22203- 1804
Telephone: 1-800-955-5 100
To file a claim, you will be asked provide
to
your name
and address, your Vehicle Identification Number (VIN)
and a statement of the natureof your complaint.
Eligibility is limitedby vehicle age and mileage, and
other factors.
We prefer you utilize the Customer Satisfaction
Procedure before you resort to AUTO LINE, but you
may contact theBBB at any time. The BBB will attempt
to resolve the complaint serving as
an intermediary. If
this mediation is unsuccessful,an informal hearing will
be scheduled where eligible customers
may present their
case to an impartial third-party arbitrator.
Tne arbitrator will make a decision which you may
accept or reject.If you accept the decision,GM will be
bound by that decision.The entire dispute resolution
procedure should ordinarily take about
40 days from the
time you file a claim until a decision is made.
REPORTING SAFETY DEFECTS
TO THE UNITED STATES
GOVERNMENT
If you believe that your vehicle has a defect which could
cause a crashor could cause injury or death,
you should
immediately informthe National Highway Traffic
Safety Administration (NHTSA),in addition to
notifying General Motors.
If NHTSA receives similar complaints,
it may open an
investigation, andif it finds that a safety defect exists in
a group of vehicles, it may order a recall and remedy
campaign. However, NHTSAcannot become involved
Some state laws may require you to use this program
before filinga claim with a state-run arbitration program in individual problems between
you, your dealer or
General Motors.
or in the courts. For further information, contact the
BBB at 1-800-955-5100 or the Cadillac Customer
To contact NHTSA, you may either
call the Auto Safety
Assistance Center at1-800-458-8006.
Hotline toll-free at 1-800-424-9393 (or 366-0123 in
the Washington,D.C. area) or write to:
Warranty Information
Your vehicle comes witha separate warranty booklet
that contains detailed warranty information.
NHTSA, U.S. Department of Transportation
Washington, D.C. 20590
You can also obtain other information about motor
vehicle safetyfrom the Hotline.
REPORTING SAFETY DEFECTS
TO THE CANADIAN
GOVERNMENT
If you live in Canada, and you believe that your vehicle
has a safety defect, you should immediately notify
Transport Canada, in additionto notifying General
Motors of Canada Limited.You may writeto:
Transport Canada
Box 8880
Ottawa, Ontario K1G 3J2
REPORTING SAFETY DEFECTS
TO GENERAL MOTORS
In addition to notifying NHTSA(or Transport Canada)
in a situation like this, we certainly hope you’ll notify
us. Please call us at 1-800-458-8006 or write:
Cadillac Customer Assistance Center
Cadillac Motor Car Division
P.O. Box 436004
Pontiac, MI 48343-6004
In Canada, please call us at 1-800-263-3777 (English)
or 1-800-263-7854 (French). Or, write:
General Motorsof Canada Limited
Customer Communication Centre, 163-005
1908 ColonelSam Drive
Oshawa, Ontario L1H 8P7
Ordering Service and Owner
Publications in Canada
Service manuals, owner’s manuals and other service
literature are available for purchase for all current and
past model General Motors vehicles.
The toll-free telephone numberfor ordering information
in Canada is 1-800-668-5539.
1998 CADILLAC SERVICE PUBLICATIONS ORDERING INFORMATION
The following publications covering the operation and servicing
of your vehicle can be purchased by filling out
the Service Publication Order Form in this book and mailing it in with your check, money order,
or credit card information to Helm, Incorporated (address below.)
CURRENT PUBLICATIONSFOR 1998 CADILLAC
OWNER’S INFORMATION
SERVICE MANUALS
Service Manuals have the diagnosis and repair information Owner publications are written directly for Owners and
intended to provide basic operational information about the
on engines, transmission, axle, suspension, brakes,
vehicle. The owner’s manual will include the Maintenance
electrical, steering, body, etc.
Schedule for all models.
RETAIL SELL PRICE:$90.00
TRANSMISSION, TRANSAXLE, TRANSFER CASE
UNIT REPAIR MANUAL
This manual provides information on unit repair service
procedures, adjustments and specifications for the
1998 GM transmissions, transaxles and transfer cases.
RETAIL SELL PRICE: $40.00
In-Portfolio: Includes a Portfolio, Owner’s Manual and
Warranty Booklet.
5.00
RETAIL SELL PRICE: $1
Without Portfolio: Owner’s Manual only.
RETAIL SELL PRICE: $10.00
CURRENT & PAST MODEL ORDER FORMS
SERVICE BULLETINS
Service Publications are available for current and past
Service Bulletins give technical service information neededmodel GM vehicles.To request an order form, please
to knowledgeably service General Motors cars and trucks. specify year and model name
of the vehicle.
Each bulletin contains instructions to assist in the
diagnosis and serviceof your vehicle.
PLEASE COMPLETE THE ORDER FORM SHOWN ON
THE FOLLOWING PAGE AND MAIL TO:
Helm, Incorporated P.O. Box 07130 Detroit, MI 48207
OR ORDER TOLL FREE: 1-800-782-4356
Monday-Friday 8:OO AM - 6:OO PM Eastern Time
For Credit Card Orders Only(VISA-MasterCard-Discover)
ORDER TOLL FREE
Orders will be mailed within
10 days of receipt. Please allow ade uate time for postal
service. If further information is needed, write to the address s own below or call
1-800-782-4356. Material cannot be returned for credit without packing slip with return
1-800-782-4356
information within30 days of delivery. On returns, a re-stocking fee may be applied
(Monday-Friday 8:OO AM - 6:OO PM EST)
aaainst theorlama1 order.
FAX Orders Onlv1-313-865-5927
VEHICLE MODEL
PUBLiCATlON FORM
TOTAL
PRICE
’
ITEM DESCRIPTION
NUMBER
EACH*
PRICE
NAME
II YEAR
R
(NOTE: For Credit Card Holders Only)
I
Y
QTY.
It
9
9
8
Service Manual
Car & tight Truck
Transmission Unit Repair
1998
$90.00
1998
$40.00
Owner’s Manual In Portfolio
1998
$15.00
Owner’s Manual Without Portfolio
1998
$10.00
G
-
S
H
I
P
(STATE)
T
O
T
TOTAL MATERIAL
NOTE: Dealers and Companies please provide dealer or company name, and also the
name of the personto whose attention the shipment should be sent.
Order
payable
to
Mail completed order form
to:
Helm,
Inc. (USA funds
HELM, INCORPORATED P.O. Box 07130 Detroit, MI 48207
only do not send cash.)
For purchases outsideU S A . please write to the above address for quotation.
P
A
MasterCard
Y
VISA
M
Discover
E Number:
N Expiration
Date mo/yr:
T
-1
u
(CUSTOMERS
(ATTENTION)
NAME)
Michigan
Purchasers
add 6% sales tax
US. Order Processina
I’
GRAND TOTAL
~~
(STREET ADDRESS440 P.O. BOX NUMBERS)
(CITY)
DAYTIMETELEPHONE NO.
(ZIP CODE)
(
AREA CODE
GM-CAD-ORD98 *(Prices are subject
to change without notice and without incurring
obligation. Allow ample time for delivery.)
1 1 ml
Check
here from
if youryour
billingaddress
is
different
shipping
address shown.
CUSTOMER SIGNATURE
Note to Canadian Customers:All listed prices are quoted in
US. funds. Canadian residents
are to make checks payable
in US. funds. To cover Canadian postage, add$11.50 plus the
US. order processing.
I
b
NOTES
#-A*
J
‘
L
\
Section 8 Index
ABS.........................................
4-7
Adding Equipment to the Outsideof Your Vehicle . . . . . . 6-3
Add-on Electrical Equipment . . . . . . . . . . . . . . . . . . . . . 6-55
Aiming. Headlamps . . . . . . . . . . . . . . . . . . . . . . . . . . . . .
6-33
AirBag . . . . . . . . . . . . . . . . . . . . . . . . . . . . . . . . . . . . . . .
1-27
How Does it Restrain . . . . . . . . . . . . . . . . . . . . . . . . . . 1-33
How the Systems Work ........................
1-30
Location ....................................
1-30
Readiness Light .........................
1.30. 2.65
Servicing . . . . . . . . . . . . . . . . . . . . . . . . . . . . . . . . . . .
1-35
What Makes it Inflate ..........................
1-33
What Will You See After it Inflates . . . . . . . . . . . . . . . 1-34
When Should it Inflate .........................
1-32
Aircleaner ....................................
6-15
AirConditioning ................................
3-6
Air Conditioning Refrigerants .....................
6-63
Alarm. Theft-Deterrent ..........................
2- 13
Alignment and Balance. Tire ......................
6-43
Aluminum Wheels. Cleaning ......................
6-50
Antenna.HeatedBacklite ........................
3-30
Antifreeze . . . . . . . . . . . . . . . . . . . . . . . . . . . . . . . . . . . . .
6-20
Anti-Lock
Brake System Warning Light . . . . . . . . . . . . . . . . 2.68.4.7
4-7
Brakes (ABS) . . . . . . . . . . . . . . . . . . . . . . . . . . . . . . . . .
Anti-LockoutFeature ............................ 2-7
Anti-Pinch Feature .........................
2.32.2.53
AppearanceCare . . . . . . . . . . . . . . . . . . . . . . . . . . . . . . .
6-45
Appearance Care Materials Chart . . . . . . . . . . . . . . . . . . 6-53
Arbitration Program . . . . . . . . . . . . . . . . . . . . . . . . . . . . . 7-11
Ashtrays and Cigarette Lighter ....................
2-49
Assist Handles .................................
2-51
Audio Equipment. Adding ........................
3-28
Audio Steering Wheel Controls . . . . . . . . . . . . . . . . . . . . 3-26
Audio Systems ..................................
3-9
Automatic Door Locks . . . . . . . . . . . . . . . . . . . . . . . . . . . .2-5
Automatic Operation (Climate Controls) . . . . . . . . . . . . . . 3-3
Automatic Transmission
Operation . . . . . . . . . . . . . . . . . . . . . . . . . . . . . . . . . . .
2-20
Shifting . . . . . . . . . . . . . . . . . . . . . . . . . . . . . . . . . . . . . 2-20
2-76
WarningLight ...............................
Fluid . . . . . . . . . . . . . . . . . . . . . . . . . . . . . . . . . . . . . . .
6-18
2-17
Starting Your Engine ..........................
Axle.Rear . . . . . . . . . . . . . . . . . . . . . . . . . . . . . . . . . . . .
6-19
6-29
Battery ......................................
5-3
Jump Starting .................................
Replacement. Remote Keyless Entry . . . . . . . . . . . . . . . 2-9
Warnings ............................
5.3.5.4. 5.5
BBB Auto Line ................................
7-11
Better Business Bureau Mediation. . . . . . . . . . . . . . . . . . 7-11
Blizzard ......................................
4-26
Brake
Adjustment ..................................
6-29
Fluid .......................................
6-26
6-26
Master Cylinder ..............................
Pad Wear Indicator Light .......................
2-76
Parking .....................................
2-24
Pedal Travel . . . . . . . . . . . . . . . . . . . . . . . . . . . . . . . . . 6-29
Replacing System Parts ........................ 6-29
System Warning Light . . . . . . . . . . . . . . . . . . . . . . . . .2-65
To Shift Light ................................
2-74
Transmission Shift Interlock .................... 2-27
Wear . . . . . . . . . . . . . . . . . . . . . . . . . . . . . . . . . . . . . . . 6-28
Brakes,Anti-Lock ...............................
4-7
Braking ........................................
4-6
4-9
Braking in Emergencies ...........................
Break-In, NewVehicle ..........................
2-16
2-45
Brightness Control ..............................
2-27
BTSI .........................................
Bulb Replacement . . . . . . . . . . . . . . . . . . . . . . . . . . . . . .6-30
Capacities and Specifications ....................
6-63
CarbonMonoxide ..............................
4-27
Care of Your Cassette Tape Player . . . . . . . . . . . . . . . . . . 3-28
Care of Your Compact Disc Player . . . . . . . . . . . . . . . . . 3-30
3-30
Care of Your Compact Discs ......................
Cassette Tape Player Errors . . . . . . . . . . . . . . . . . . 3.11.3. 18
CDAdapterKits ...............................
3-25
CD Changer ...................................
3-22
CellularTelephone . . . . . . . . . . . . . . . . . . . . . . . . . . . . . . 2-50
Center Console Storage Area. . . . . . . . . . . . . . . . . . . . . . 2-48
Center High-Mounted Stoplamp,
Bulb Replacement .............................
6-35
Central Door Unlocking System ....................
2-5
CertificationLabel ..............................
4-29
Chains,Safety .................................
4-34
Chains, Tire ...................................
6-45
Changing a Flat Tire . . . . . . . . . . . . . . . . . . . . . . . . . . . . . 5-21
Charging System Indicator Light . . . . . . . . . . . . . . . . . . .2-65
Check Engine Light . . . . . . . . . . . . . . . . . . . . . . . . . . . . .2-70
Check Oil Light ................................
2-74
Checking Your Restraint Systems . . . . . . . . . . . . . . . . . . 1-56
Chemical Paint Spotting.......................... 6-52
1-43
Child Restraints ................................
Securing in a Rear Seat Position . . . . . . . . . . . . . . . . . 1-48
Securing in the Right Front Seat Position . . . . . . . . . . 1-51
Top Strap ...................................
1-48
Wheretoht .........,...................... l-47
CHMSL ......................................
6-35
Chrome Wheels, Cleaning ........................
6-50
2-49
CigaretteLighter ...............................
6-15
Cleaner, Air ...................................
Cleaning
Aluminum or Chrome Wheels . . . . . . . . . . . . . . . . . . . 6-50
Exterior LampsLenses ........................
6-49
Fabric .................................
6.46.6.47
GlassSurfaces ...............................
6-48
Inside of Your Vehicle .........................
6-46
Interior Plastic Components .....................
6-48
Leather .....................................
6-47
Outside of the Windshield and Wiper Blades . . . . . . . 6-49
6-49
Outside of Your Vehicle ........................
Speakercovers ..............................
6-48
Special Problems . . . . . . . . . . . . . . . . . . . . . . . . . . . . .6-47
Tires . . . . . . . . . . . . . . . . . . . . . . . . . . . . . . . . . . . . . . .
6-51
Top of the Instrument Panel .....................
6-48
Vinyl . . . . . . . . . . . . . . . . . . . . . . . . . . . . . . . . . . . . . . .
6-47
Wheels ..................................... 6-50
Climate Control System ...........................
3-2
Clock. Setting the . . . . . . . . . . . . . . . . . . . . . . . . . . . . . . . .
3-9
Comfort Controls ................................
3-2
Compact Disc Changer Errors . . . . . . . . . . . . . . . . . . . . . 3-25
Console Shift Lever . . . . . . . . . . . . . . . . . . . . . . . . . . . . . 2-25
2-48
ConsoleStorage . . . . . . . . . . . . . . . . . . . . . . . . . . . . . . . .
Control of a Vehicle ..............................
4-6
ConvenienceNet . . . . . . . . . . . . . . . . . . . . . . . . . . . . . . .
2-49
2-47
Convex Outside Mirror ..........................
6-20
Coolant . . . . . . . . . . . . . . . . . . . . . . . . . . . . . . . . . . . . . . .
Adding . . . . . . . . . . . . . . . . . . . . . . . . . . . . . . . . . . . . . 6-23
Checking . . . . . . . . . . . . . . . . . . . . . . . . . . . . . . . . . . . 6-22
2- 19
Heater. Engine . . . . . . . . . . . . . . . . . . . . . . . . . . . . . . .
SurgeTank . . . . . . . . . . . . . . . . . . . . . . . . . . . . . . . . . . . 5-14
WhattoUse .................................
6-21
CoolingSystem ................................
5-14
Cornering Lamps ...............................
2-43
CruiseControl .................................
2-36
Cruise Control Light ............................
2-74
Customer Assistance for Text Telephone
7-4
(TTY)Users ..................................
Customer Assistance Information . . . . . . . . . . . . . . . . . . . 7-1
Customer Satisfaction Procedure ....................
7-2
..
6-51
Damage. Finish ...............................
Damage. Sheet Metal . . . . . . . . . . . . . . . . . . . . . . . . . . . . 6-51
Daytime Running Lamps .........................
2-41
DeadBattery ...................................
5-3
Defects. Reporting Safety . . . . . . . . . . . . . . . . . . . 7- 12. 7- 13
Defensive Driving ...............................
4-2
Defogger.RearWindow ..........................
3-8
Defrosting . . . . . . . . . . . . . . . . . . . . . . . . . . . . . . . . . . . . .
3-8
Dimensions.Vehicle . . . . . . . . . . . . . . . . . . . . . . . . . . . . 6-64
Dolby B Noise Reduction . . . . . . . . . . . . . . . . . . . 3.12. 3.19
Door
2-5
Central Unlocking System .......................
Locks . . . . . . . . . . . . . . . . . . . . . . . . . . . . . . . . . . . . . . . 2-4
Drive Position. Automatic Transmission . . . . . . . . . . . . . 2-22
Driver Position . . . . . . . . . . . . . . . . . . . . . . . . . . . . . . . . . 1-19
Driver’s Side Instrument Panel Fuse Block. . . . . . . . . . .6-57
3-2
Driver’s Side Temperature Knob ....................
Driving
City ........................................
4-19
Defensive ....................................
4-2
Drunken .....................................
4-3
Freeway . . . . . . . . . . . . . . . . . . . . . . . . . . . . . . . . . . . . 4-20
In a Blizzard .................................
4-26
In Foreign Countries ...........................
6-5
In the Rain and on Wet Roads . . . . . . . . . . . . . . . . . . . 4-16
Night . . . . . . . . . . . . . . . . . . . . . . . . . . . . . . . . . . . . . .4-15
OnCurves ..................................
4-10
On Grades While Towing a Trailer . . . . . . . . . . . . . . . 4-35
On Hill and Mountain Roads . . . . . . . . . . . . . . . . . . . .4-22
OnSnowandIce . . . . . . . . . . . . . . . . . . . . . . . . . . . . .4-25
Through Deep Standing Water. . . . . . . . . . . . . . . . . . . 4- 18
Winter . . . . . . . . . . . . . . . . . . . . . . . . . . . . . . . . . . . . . .4-24
With a Trailer ................................
4-34
DRL . . . . . . . . . . . . . . . . . . . . . . . . . . . . . . . . . . . . . . . . . 2-41
ECC.........................................
3-2
Electrical Equipment. Adding .....................
2- 18
6-55
Electrical System ...............................
Electrochromic Daymight Rearview Mirror . . . . . . . . . . 2-46
Electronic Climate Control (ECC) . . . . . . . . . . . . . . . . . . . 3-2
Electronic Level Control . . . . . . . . . . . . . . . . . . . . . . . . . 4-30
2- 12
Emergency Trunk Release ........................
Engine .......................................
6-10
Compartment Relay Center .....................
6-61
Coolant . . . . . . . . . . . . . . . . . . . . . . . . . . . . . . . . . . . . . 6-20
Coolant Heater . . . . . . . . . . . . . . . . . . . . . . . . . . . . . . . 2- 19
Coolant Temperature Gage .....................
2-69
Coolant Temperature Warning Light . . . . . . . . . . . . . . 2-69
Cooling When Trailer Towing . . . . . . . . . . . . . . . . . . . 4-36
2-29
Exhaust .....................................
Identification . . . . . . . . . . . . . . . . . . . . . . . . . . . . . . . . 6-54
5-12
Overheating .................................
Running While You’re Parked . . . . . . . . . . . . . . . . . . . 2-30
Specifications ................................
6-63
Speed Limiter ................................
2-63
StartingYour . . . . . . . . . . . . . . . . . . . . . . . . . . . . . . . .2-17
EngineOil ....................................
6-11
Adding .....................................
6-12
Additives ...................................
6-14
Checking ...................................
6-12
6-15
Used .......................................
6-13
What Kind to Use .............................
Whentochange . . . . . . . . . . . . . . . . . . . . . . . . . . . . . . 6-14
3-3
EnglishMetric Display ...........................
Ethanol . . . . . . . . . . . . . . . . . . . . . . . . . . . . . . . . . . . . . . . .6-4
2-29
Exhaust. Engine ................................
2-39
Exterior Lamps .................................
Fabric Cleaning ..........................
6.46.6.47
Fan Button. Climate Control System . . . . . . . . . . . . . . . . . 3-2
Filling a Portable Fuel Container....................
6-8
Filling Your Tank ................................
6-5
Filter. Air ..................................... 6-15
Filter Replacement. Passenger Compartment Air . . . . . . 6-17
6-50
Finish Care ....................................
Finish Damage .................................
6-51
First Gear. Automatic Transmission . . . . . . . . . . . . . . . . 2-22
Flashers. Hazard Warning . . . . . . . . . . . . . . . . . . . . . . . . . 5-2
Flash-To-Pass . . . . . . . . . . . . . . . . . . . . . . . . . . . . . . . . .2-34
Flat Tire. Changing . . . . . . . . . . . . . . . . . . . . . . . . . . . . . 5-21
Floor Mats ....................................
2-51
Fluid
Brake . . . . . . . . . . . . . . . . . . . . . . . . . . . . . . . . . . . . . .6-26
Powersteering . . . . . . . . . . . . . . . . . . . . . . . . . . . . . . . 6-24
WindshieldWasher . . . . . . . . . . . . . . . . . . . . . . . . . . .6-25
FogLmps . . . . . . . . . . . . . . . . . . . . . . . . . . . . . . . . . . . .2-43
Folding the Rear Seat............................
1- 11
Foreign Countries. Fuel . . . . . . . . . . . . . . . . . . . . . . . . . . .6-5
FrenchLanguageManual ........................... 1..1
Front Turn Signal Lamp. Bulb Replacement . . . . . . . . . . 6-35
Fuel ..........................................
6-3
DoorLock ...................................
6-6
Filling a Portable Container ......................
6-8
Filling Your Tank . . . . . . . . . . . . . . . . . . . . . . . . . . . . . . 6-5
Gage . . . . . . . . . . . . . . . . . . . . . . . . . . . . . . . . . . . . . . .2-75
In Foreign Countries ...........................
6-5
Fuse Block. Instrument Panel . . . . . . . . . . . . . . . . . . . . . 6-57
Fuse Block, Power Distribution....................
6-56
Fuses and Circuit Breakers .......................
6-56
Gages
Engine Coolant Temperature . . . . . . . . . . . . . . . . . . . . 2-69
Fuel .......................................
2-75
Oil Pressure .................................
2-73
GarmentHooks ................................
2-51
GAWR .......................................
4-29
Gear Positions, Automatic Transmission . . . . . . . . . . . . . 2-20
GloveBox ....................................
2-48
Gold Key Courtesy Transportation . . . . . . . . . . . . . . . . . .7-8
Gross Axle Weight Rating . . . . . . . . . . . . . . . . . . . . . . . . 4-29
Gross Vehicle Weight Rating ......................
4-29
Guide en Franqais . . . . . . . . . . . . . . . . . . . . . . . . . . . . . . . . . 1..1
GVWR .......................................
4-29
Halogen Bulbs . . . . . . . . . . . . . . . . . . . . . . . . . . . . . . . . 6-30
Handles. Assist . . . . . . . . . . . . . . . . . . . . . . . . . . . . . . . . . 2-51
Hazard Warning Flashers . . . . . . . . . . . . . . . . . . . . . . . . . . 5-2
HeadRestraints . . . . . . . . . . . . . . . . . . . . . . . . . . . . . . . . .1-8
Head Restraints. Removable ....................... 1-9
Headlamps ...............................
2-40. 6-30
Aiming .....................................
6-33
Bulb Replacement ............................
6-30
High/LowBeam ..............................
2-34
OnReminder ................................ 2-41
Wiper-Activated .............................. 2-41
Wiring . . . . . . . . . . . . . . . . . . . . . . . . . . . . . . . . . . . . . 6-55
Hearing Impaired, Customer Assistance . . . . . . . . . . . . . . 7-4
Heated Backlite Antenna .........................
3-30
Heated Seats ...............................
1-6, 1-13
Heating ........................................
3-6
High-Beam Headlamps ..........................
2-34
Highway Hypnosis . . . . . . . . . . . . . . . . . . . . . . . . . . . . . . 4-22
4-22
HillandMountainRoads .........................
Hitches . . . . . . . . . . . . . . . . . . . . . . . . . . . . . . . . . . . . . . . 4-33
8-5
Hood
6-8
Checking Things Under .........................
Release ......................................
6-9
Horn .........................................
2-32
How to Use this Manual.............................
v
Hydraulic Brake Warning Lights . . . . . . . . . . . . . . . . . . . 2-65
Hydroplaning ..................................
4-18
If
You’re Stuck: In Sand. Mud. Ice or Snow . . . . . . . . . 5-31
Ignition Positions ...............................
2- 16
Illuminated Entry ...............................
2-45
Illuminated Visor Vanity Mirror ....................
2-50
2-15
Immobilizer ...................................
Inflation, Tire ..................................
6-38
Instrumentpanel ...............................
2-60
Brightness Control ............................
2-45
2-62
Cluster .....................................
FuseBlock ..................................
6-57
Cleaning ....................................
6-48
2-45
Interior Lamps .................................
Interior Plastic Components, Cleaning . . . . . . . . . . . . . . 6-48
J
ack. Tire ....................................
Jump Starting ...................................
5-23
5-3
.........................................
2-2
Keys
Labels
Certification .................................
2-73
Pressure
4-29
6-54
Service Parts Identification .....................
Tire-LoadingInformation ......................
4-28
Vehicle Identification Number (VIN) . . . . . . . . . . . . . 6-54
2-39. 2-45
Lamps ...................................
Interior .....................................
2-45
Panel ....................................... 2-45
Lamps On Reminder ............................ 2-41
Lap-Shoulder Belt .........................
1-19, 1-36
2-7
Leaving Your Vehicle .............................
Leaving Your Vehicle with the Engine Running . . . . . . . 2-26
Leveling Indicator Light .........................
2-76
Light Sensor, Twilight Sentinel ....................
2-44
Lighter .......................................
2-49
2-41
Lighting,Perimeter .............................
Lights
Air Bag Readiness .......................
1-30, 2-65
Anti-Lock Brake System Warning . . . . . . . . . . . . 2-68, 4-7
Automatic Transmission Warning ................ 2-76
2-76
Brake Pad Wear Indicator ......................
Brake System Warning .........................
2-65
BrakeToShift ...............................
2-74
Charging System Indicator ......................
2-65
2-70
CheckEngine ................................
2-74
CheckOil ...................................
Cruise Control ...............................
2-74
Engine Coolant Temperature Warning . . . . . . . . . . . . . 2-69
2-76
Leveling Indicator ............................
Low Coolant Warning .........................
2-70
2-76
LowFuel ...................................
Low Washer Fluid Warning .....................
2-75
.................................
Oil
I
I
~
~
......
....
?
..J
...!..
.-
.....
... :>.u
-7. . . :
Safety Belt Reminder .....................
1.14.2.64
Traction Control System Warning . . . . . . . . . . . . 2.68.4.9
TrunkAjar ..................................
2-75
Loading YourVehicle ...........................
4-28
Locks
Anti-Lockout Feature ..........................
2-7
Automatic Door . . . . . . . . . . . . . . . . . . . . . . . . . . . . . . .
2-5
Door ........................................
2-4
FuelDoor . . . . . . . . . . . . . . . . . . . . . . . . . . . . . . . . . . . .
6-6
Power Door ..................................
2-5
Programmable Automatic Door . . . . . . . . . . . . . . . . . . . 2-5
Rear Door Security . . . . . . . . . . . . . . . . . . . . . . . . . . . . .
2-6
Loss of Control ................................
4- 13
Low Coolant Warning Light ......................
2-70
LowFuelLight . . . . . . . . . . . . . . . . . . . . . . . . . . . . . . . .
2-76
Low Washer Fluid Warning Light . . . . . . . . . . . . . . . . . . 2-75
Lumbar Controls ................................
1-3
Maintenance. Normal Replacement parts . . . . . . . . . . . 6-64
Maintenance. Underbody .........................
6-52
Maintenance When Trailer Towing . . . . . . . . . . . . . . . . . 4-36
2-70
Malfunction Indicator Lamp ......................
Manual Folding Outside Rearview Mirrors . . . . . . . . . . . 2-47
Manual Front Passenger’s Seat .....................
1-2
Manual Lumbar Support ..........................
1-3
Manual Operation (Climate Controls) . . . . . . . . . . . . . . . . 3-4
MapLamps ...................................
2-46
MapPockets ...................................
2-48
1-5
Memory Seat and Mirrors .........................
Methanol . . . . . . . . . . . . . . . . . . . . . . . . . . . . . . . . . . . . . .
6-4
2-46
Mirrors . . . . . . . . . . . . . . . . . . . . . . . . . . . . . . . . . . . . . . .
Convex Outside ..............................
2-47
Electrochromic Daymight Rearview . . . . . . . . . . . . . . 2-46
Illuminated VisorVanity .......................
2-50
Manual Folding Outside Rearview . . . . . . . . . . . . . . . 2-47
Power Remote Control .........................
2-47
MMT .........................................
6-4
ModeButton . . . . . . . . . . . . . . . . . . . . . . . . . . . . . . . . . . .
3-3..
ModelReference . . . . . . . . . . . . . . . . . . . . . . . . . . . . . . . . . .
11
MountainRoads . . . . . . . . . . . . . . . . . . . . . . . . . . . . . . . . 4-22
Multifunction Lever .............................
2-33
N e t . Convenience ..............................
2-49
Neutral. Automatic Transmission . . . . . . . . . . . . . . . . . .2-21
New Vehicle “Break-In” .........................
2-16
Nightvision . . . . . . . . . . . . . . . . . . . . . . . . . . . . . . . . . . . 4-15
Normal Maintenance Replacement Parts . . . . . . . . . . . . . 6-64
Odometer . . . . . . . . . . . . . . . . . . . . . . . . . . . . . . . . . . . . 2-63
Odometer. Trip .................................
2-63
Off-Road Recovery .............................
4-12
6-11
Oil. Engine ....................................
Oil Pressure LighVGage . . . . . . . . . . . . . . . . . . . . . . . . . . 2-73
OnStar System . . . . . . . . . . . . . . . . . . . . . . . . . . . . . . . . .2-50
Ordering Service and
Owner Publications . . . . . . . . . . . . . . . . . . 7.13.7.14. 7.15
Outside Rearview Mirrors. Manual Folding . . . . . . . . . . 2-47
3-3
Outside Temperature Display .......................
Overheating Engine .............................
5 .12
Owner Publications. Ordering . . . . . . . . . . . 7.13.7.14. 7.15
8-7
P a i n t Spotting. Chemical ........................
6-52
Park
AutomaticTransmission . . . . . . . . . . . . . . . . . . . . . . .2-20
2-25
Shifting Into .................................
Shifting Out of ............................... 2-27
Parking
At Night . . . . . . . . . . . . . . . . . . . . . . . . . . . . . . . . . . . .2- 13
Brake ......................................
2-24
Lots . . . . . . . . . . . . . . . . . . . . . . . . . . . . . . . . . . . . . . . 2-13
On Hills With a Trailer . . . . . . . . . . . . . . . . . . . . . . . . . 4-36
2-29
Over Things That Burn ........................
Passenger Compartment Air Filter . . . . . . . . . . . . . . . . . . . 3-8
Passenger Compartment Air Filter Replacement ....... 6-17
Passenger’s Seatback Latch . . . . . . . . . . . . . . . . . . . . . . . . 1-8
Passenger’s Side Temperature Knob ................. 3-2
Passing . . . . . . . . . . . . . . . . . . . . . . . . . . . . . . . . . . . . . . . 4- 12
2-41
Perimeter Lighting ..............................
Playing a Cassette Tape .....................
3-11. 3-18
Playing a Compact Disc ..........................
3-20
Power
DoorLocks ...................................
2-5
1-8
Recliner .....................................
Remote Control Mirror . . . . . . . . . . . . . . . . . . . . . . . . 2-47
Retained Accessory . . . . . . . . . . . . . . . . . . . . . . . . . . . 2- 17
Seats ........................................ 1-4
Steering ....................................
4-10
SteeringFluid . . . . . . . . . . . . . . . . . . . . . . . . . . . . . . . .6-24
2-31
Windows ...................................
Windows and Other Power Options . . . . . . . . . . . . . . . 6-55
6-56
Power Distribution Fuse Block ....................
Pregnancy. Use of Safety Belts ....................
1-26
8-8
Problems on the Road . . . . . . . . . . . . . . . . . . . . . . . . . . . . 5-1
Programmable Automatic Door Locks ............... 2-5
Programming the Power Windows . . . . . . . . . . . . . . . . . 2-31
Programming the Sunroof . . . . . . . . . . . . . . . . . . . . . . . .2-54
Programming the Universal Transmitter . . . . . . . . . . . . . 2-56
Publications. Service and Owner. . . . . . . . . . . . . . 7- 13. 7- 14
R a d i o Data Systems(RDS) Program Type
(PTY) Selections . . . . . . . . . . . . . . . . . . . . . . . . . . . . . .3-21
Radio Reception ................................ 3-27
Radios . . . . . . . . . . . . . . . . . . . . . . . . . . . . . . . . . . . 3-9.3-13
Rain. Driving In ................................
4-16
RAP . . . . . . . . . . . . . . . . . . . . . . . . . . . . . . . . . . . . . . . . .2-17
Rear
Axle . . . . . . . . . . . . . . . . . . . . . . . . . . . . . . . . . . . . . . . 6-19
Door Security Locks . . . . . . . . . . . . . . . . . . . . . . . . . . . 2-6
ReadingLamps . . . . . . . . . . . . . . . . . . . . . . . . . . . . . .2-45
Seat Passenger Positions . . . . . . . . . . . . . . . . . . . . . . . 1-36
Seatpassengers ..............................
1-36
Seats . . . . . . . . . . . . . . . . . . . . . . . . . . . . . . . . . . . . . . . 1-10
Turn Signal Lamp. Bulb Replacement .............6-36
WindowDefogger . . . . . . . . . . . . . . . . . . . . . . . . . . . . . 3-8
WindowLockout ............................. 2-32
Rearview Mirror. Electrochromic Daymight ......... 2-46
Recirculation . . . . . . . . . . . . . . . . . . . . . . . . . . . . . . . . . . . 3-5
Reclining Front Seatbacks ......................... 1-6
Refrigerants. Air Conditioning .................... 6-63
RelayBox . . . . . . . . . . . . . . . . . . . . . . . . . . . . . . . . . . . . . 6-60
6-6
Remote Fuel Door Release ........................
Remote. Keyless Entry System (RKE) . . . . . . . . . . . . . . . 2-8
1-9
Removable Head Restraints ........................
Replacement
Bulbs ......................................
6-63
Normal Maintenance Parts . . . . . . . . . . . . . . . . . . . . . . 6-64
Wheel . . . . . . . . . . . . . . . . . . . . . . . . . . . . . . . . . . . . . . 6-43
1-57
Replacing Safety Belts ...........................
Reporting Safety Defects ....................
7- 12. 7. 13
Restraints
Checking ...................................
1-56
Child . . . . . . . . . . . . . . . . . . . . . . . . . . . . . . . . . . . . . . .
1-43
1-8
Head ........................................
Replacing System Parts After a Crash . . . . . . . . . . . . . 1-57
Retained Accessory Power ........................
2-17
Reverse. Automatic Transmission . . . . . . . . . . . . . . . . . . 2-21
Right Front Passenger Position ....................
1-27
RKE ..........................................
2-8
7-5
Roadside Service ................................
5-32
Rocking YourVehicle ...........................
Rotation.Tires . . . . . . . . . . . . . . . . . . . . . . . . . . . . . . . . .
6-39
1-13
Safety Belts ..................................
1-19
Adults ......................................
6-48
Careof .....................................
Children ....................................
1-40
DriverPosition ...............................
1-19
Extender ....................................
1-56
1.19
How to Wear Properly .........................
IncorrectUsage .........................
1.54. 1.55
Lap-Shoulder ...........................
1.19. 1.36
1-53
LargerChildren ..............................
Questions and Answers ........................
1.18
Rear Seat Passenger Positions . . . . . . . . . . . . . . . . . . . 1-36
Rear Seat Passengers ..........................
1-36
Reminder Light .........................
1.14.2.64
Replacing Restraint System Parts After a Crash . . . . . 1-57
Right Front Passenger Position . . . . . . . . . . . . . . . . . . 1-27
Shoulder Belt Height Adjuster . . . . . . . . . . . . . . . . . . . 1-21
Smaller Children and Babies ....................
1-40
Use During Pregnancy .........................
1-26
WhyTheyWork ..............................
1-15
Safety Chains ..................................
4-34
Safety Defects. Reporting . . . . . . . . . . . . . . . . . . . 7.12.7.13
v
Safety Warnings and Symbols ........................
Seatback
Passenger’s Latch ..............................
1-8
Power Recliner ................................
1-8
RecliningFront . . . . . . . . . . . . . . . . . . . . . . . . . . . . . . . 1-6
Seats
Heated .................................
1.6.1.13
1-2
ManualFrontPassenger’s .......................
Manual Lumbar Support ........................
1-3
Memory Seat and Mirrors .......................
1-5
Power .......................................
1-4
1-10
Rear .......................................
Restraint Systems ..............................
1.1
1-2
SeatControls .................................
Securing a Child Restraint . . . . . . . . . . . . . . . . . 1.48. 1-51
Second Gear. Automatic Transmission . . . . . . . . . . . . . . 2-22
6-2
Service ........................................
Bulletins. Ordering . . . . . . . . . . . . . . . . . . 7.13.7.14. 7.15
6-2
Doing Your Own Work .........................
Manuals. Ordering . . . . . . . . . . . . . . . . . . 7.13.7.14. 7.15
Parts Identification Label .......................
6-54
8-9
........
.
.
.
.
_
~~
1
~
.
.
.
.
.
Service and Appearance Care ......................
6-1
Service and Owner Publications . . . . . . . . . . . . . . 7- 13. 7. 14
Servicing Your Air Bag-Equipped Vehicle . . . . . . . . . . . 1-35
Setting the Time .................................
3-9
SheetMetalDamage . . . . . . . . . . . . . . . . . . . . . . . . . . . . 6-51
2-20
Shift Lever ....................................
Shifting
2-20
AutomaticTransmission .......................
Into PARK (P) . . . . . . . . . . . . . . . . . . . . . . . . . . . . . . . 2-25
Out of PARK (P) .............................
2-27
Shoulder Belt Height Adjuster.....................
1-21
SignalingTurns ................................
2-33
Skidding ......................................
4- 14
Sound Equipment, Adding ........................
3-28
Speaker Covers, Cleaning . . . . . . . . . . . . . . . . . . . . . . . . 6-48
Specifications and Capacities. . . . . . . . . . . . . . . . . . . . . . 6-63
6-63
Specifications, Engine ...........................
Speech Impaired, Customer Assistance. . . . . . . . . . . . . . . 7-4
Speedometer . . . . . . . . . . . . . . . . . . . . . . . . . . . . . . . . . . . 2-63
Sport Mode Button..............................
2-23
SSS ..........................................
4-10
2-17
Starting Your Engine ............................
Steam ...................................
5-12, 5-13
Steering ...................................... 4-10
In Emergencies ...............................
4- 11
Power ......................................
4-10
Speedsensitive ..............................
4-10
Tips ........................................
4-10
Wheel Controls for Audio System. . . . . . . . . . . . . . . . 3-26
2-33
Wheel, Tilt ..................................
2-48
Storage Area. Center Console .....................
Storage Compartments ...........................
2-48
2-50
Sunvisors ....................................
Sunroof .......................................
2-51
Surge Tank, Coolant . . . . . . . . . . . . . . . . . . . . . . . . . . . . . 5-14
Surge Tank Pressure Cap . . . . . . . . . . . . . . . . . . . . . . . . . 6-23
Symbols, Vehicle . . . . . . . . . . . . . . . . . . . . . . . . . . . . . . . . .vii
Tachometer . . . . . . . . . . . . . . . . . . . . . . . . . . . . . . . . . . 2-63
Taillamp. Bulb Replacement ...................... 6-36
TapePlayerCare ...............................
3-28
Telephone,Cellular .............................
2-50
Temperature Knobs, Climate Control System . . . . . . . . . . 3-2
Theft .........................................
2-12
Theft-Deterrent Alarm System . . . . . . . . . . . . . . . . . . . . 2-13
Theft-Deterrent Feature, Radio . . . . . . . . . . . . . . . . . . . . 3-26
Theftlock' . . . . . . . . . . . . . . . . . . . . . . . . . . . . . . . . . . . .3-26
6-23
Thermostat ....................................
Third Gear, Automatic Transmission . . . . . . . . . . . . . . . . 2-22
Third-Gear Start ................................
2-23
Tilt Steering Wheel . . . . . . . . . . . . . . . . . . . . . . . . . . . . . 2-33
Time, Setting the . . . . . . . . . . . . . . . . . . . . . . . . . . . . . . . . 3-9
.
Tires .........................................
6-37
Alignment and Balance ........................ 6-43
BuyingNew . . . . . . . . . . . . . . . . . . . . . . . . . . . . . . . . . 6-41
Chains . . . . . . . . . . . . . . . . . . . . . . . . . . . . . . . . . . . . .6-45
ChangingaFlat .............................. 5-21
6-51
Cleaning ....................................
6-38
Inflation ....................................
Inspection and Rotation . . . . . . . . . . . . . . . . . . . . . . . .6-39
Loading Information Label .....................
4-28
Pressure ....................................
6-38
6-43
Temperature .................................
Traction ....................................
6-42
Treadwear ...................................
6-42
Uniform Quality Grading .......................
6-42
Wear Indicators ..............................
6-40
Wheel Replacement ...........................
6-43
When It’s Time for New .......................
6-40
TopStrap .....................................
1-48
2-27
TorqueLock ...................................
Torque, Wheel Bolt ........................
5-29, 6-63
4-30
TowingaTrailer ................................
Towing Your Vehicle . . . . . . . . . . . . . . . . . . . . . . . . . . . . . 5-7
Traction
Control System ................................
4-9
Control System Warning Light . . . . . . . . . . . . . . 2-68, 4-9
Trailer
4-34
Brakes .....................................
Driving on Grades ............................
4-35
Drivingwith .................................
4-34
Engine Cooling When Towing. . . . . . . . . . . . . . . . . . . 4-36
Hitches .....................................
4-33
Maintenance When Towing .....................
4-36
4-36
ParkingonHills ..............................
Safety Chains ................................
4-34
4-32
Tongueweight ...............................
Total Weight on Your Vehicle’s Tires . . . . . . . . . . . . . . 4-33
Towing .....................................
4-30
4-35
Turn Signals When Towing .....................
Weight .....................................
4-32
Transmission Fluid, Automatic . . . . . . . . . . . . . . . . . . . .6-18
Transmitters, Remote Keyless Entry System(RKE) ..... 2-8
Transportation, Gold Key Courtesy . . . . . . . . . . . . . . . . . . 7-8
Trip Odometer .................................
2-63
Trunk ........................................ 2-11
AjarLight ...................................
2-75
Release .....................................
2-11
Trunk Mounted CD Changer ......................
3-22
TTYUsers .....................................
7-4
Turn and Lane Change Signals ....................
2-33
Turn SignaVMultifunction Lever . . . . . . . . . . . . . . . . . . .2-33
Turn Signals When Towing a Trailer . . . . . . . . . . . . . . . . 4-35
TwilightSentinel ...............................
2-43
Underbody Maintenance ........................
6-52
Understanding Radio Reception . . . . . . . . . . . . . . . . . . . 3-27
Universal Transmitter ............................
2-55
Vehicle
4-6
Control ......................................
vi
Damagewarnings ..............................
Dimensions .................................
6-64
Identification Number (VIN) ....................
6-54
vii
Symbols ......................................
Ventilation System ...............................
3-7
Visor Vanity Mirror, Illuminated . . . . . . . . . . . . . . . . . . . 2-50
Visors, Sun ....................................
2-50
2-67
Voltmeter . . . . . . . . . . . . . . . . . . . . . . . . . . . . . . . . . . . . .
8-11
w a r n i n g Devices. Other . . . . . . . . . . . . . . . . . . . . . . . . . 5-2
Warning Lights. Gages and Indicators . . . . . . . . . . . . . . . 2-63
Warranty Information ............................ 7- 12
Washing Your Vehicle . . . . . . . . . . . . . . . . . . . . . . . . . . . 6-49
Weatherstrips . . . . . . . . . . . . . . . . . . . . . . . . . . . . . . . . . .6-49
Weight of the Trailer ............................ 4-32
Weight of the Trailer Tongue . . . . . . . . . . . . . . . . . . . . . . 4-32
Wheel
Alignment and Tire Balance .................... 6-43
Bolt Torque . . . . . . . . . . . . . . . . . . . . . . . . . . . . 5-29. 6-63
Replacement . . . . . . . . . . . . . . . . . . . . . . . . . . . . . . . . . 6-43
Wrench ..................................... 5-23
Where to Put Child Restraints ..................... 1-47
Windows ..................................... 2-31
Anti-Pinch Feature . . . . . . . . . . . . . . . . . . . . . . .2.32.2.53
Power . . . . . . . . . . . . . . . . . . . . . . . . . . . . . . . . . . . . . 2-31
.
Programming the Power Windows ............... 2-31
RearLockout ................................
2-32
WindshieldWasher . . . . . . . . . . . . . . . . . . . . . . . . . . . . . 2-35
Fluid ..................................
2-35. 6.25
2-34
Windshield Wipers ..............................
BladeReplacement ...........................
6-36
Fuses . . . . . . . . . . . . . . . . . . . . . . . . . . . . . . . . . . . . . . 6-55
Winter Driving . . . . . . . . . . . . . . . . . . . . . . . . . . . . . . . . . 4-24
Wiper-Activated Headlamps . . . . . . . . . . . . . . . . . . . . . . 2-41
Wiring.Headlamp ..............................
6-55
Wrench. Wheel . . . . . . . . . . . . . . . . . . . . . . . . . . . . . . . . .5-23
8-12
~
.
.
.
.
.
.
...
Front Turn Signal Lar;
See
I