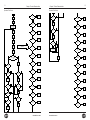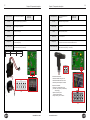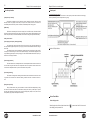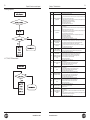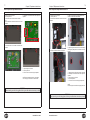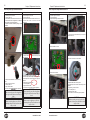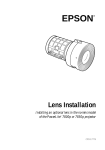
1
Service Manual
Hydra Smart Residential Water Heater
Service Manual
Model
RT-199
Service Manual
(Residential Water Heater)
•Natural Gas(NG) – Factory Default
•Liquid Propane Gas (LP) – Contact Factory
HYDRA SMART RESIDENTIAL WATER HEATER
SCAQMD Rule 1146.2
Hydra Smart Residential Water Heater
Advanced Heating
& Hot Water Systems
WARNING
If the information in these instructions is not followed exactly, a fire or explosion may result,
causing property damage, personal injury, or death.
–Do not store or use gasoline or other flammable vapors and liquids in the vicinity of this or any other appliance.
–WHAT TO DO IF YOU SMELL GAS
·Do not try to light any appliance.
·Do not touch any electrical switch; do not use any phone in your building.
·Immediately call your gas supplier from a neighbor’s phone. Follow the gas supplier’s instructions.
·If you cannot reach your gas supplier, call the fire department.
–Installation and service must be performed by a qualified installer, service agency or the gas supplier.
120 Braley Road, East Freetown, MA 02717 • 1-800-323-9651 • www.htproducts.com
LP-532 REV. 8.13.2014
SCAQMD Rule 1146.2
LP-532 REV. 8.13.2014
1
2
Chapter 1
Product Characteristics
Chapter 2
Chapter 3
Components description
Specifications
6
Dimensions
7
Components description
8
Flow chart
9
Time chart
10
Operation flow chart
11
Wiring diagram
13
Main control board
17
Temperature sensors
18
Burner overheat switch
19
Freeze Protection Heater
20
Gas leak detector sensor
21
Jumper wire connection
22
Air Pressure switch
23
Mixing valve (DHM)
24
Flow control valve (IWM)
25
Inlet water filter
26
Ignition Transformer
27
Flame Detection Sensor
28
Air Gas mixer (AGM)
29
Gas valve
30
BLDC motor
31
Metal Fiber Premix Burner
32
Heat exchanger
33
Condensate trap
34
How to use control panel Function explanation
35
Control panel
36
Controller LCD Specification
36
Control Panel Mode
36
Domestic hot water temperature control
38
LP-532 REV. 8.13.2014
LP-532 REV. 8.13.2014
Domestic hot water high temperature control
38
Water flow rate
39
Fan speed
39
Lock mode
40
Operating temperature (Heat Exchanger)
40
DHW Outlet Water Temperature
41
Exhaust Gas Temperature.
41
DHW Inlet Water Temperature.
42
Supply Power Time (X 10 hours)
42
View Burner Operating Time (unit: 1 Hour)
43
View Burner Operating Time (unit: X1000 Hr)
43
View Ignition Cycles (cycles X 10 times)
44
View Ignition Cycles (cycles X 10,000 times)
44
Fault Code History
45
Clear Error Code History
45
System Reset
46
Change DHW flow rate measurement unit
46
Fan, Max RPM Adjustment
47
Fan, Min RPM Adjustment
47
Cascade Mode Setting
48
Common Vent Mode Setting
48
Cascade Master/Slave Setting
49
Number of Cascade water heater
49
Reset Burner Operating Time
50
Reset Ignition Cycles
50
AGM value correction
51
Flame Detection
52
Gas Detection
52
Sensing Air Signal
53
‘I/T’, ‘DHW’, ‘OP’ sensors
53
3
4
Chapter 4 Troubleshooting
Error code.
54
Gas valve
81
Er 10
56
Condensate trap
82
Er 11
57
Flow control sensor
83
Er 16
58
Cold water inlet filter assembly
84
Er 20
59
Cold water inlet filter
85
Er 29
60
Mixing valve
85
Er 31
61
Air gas mixer(AGM)
86
Er 32
62
BLDC Fan assembly
87
Er 33
63
Er 35
64
Chapter 6
Cleaning Air Intake Filter
88
Er 38
65
Cleaning Cold Water Inlet Water
88
Er 39
66
Flushing Water Heater Pipe
89
Er 40
67
Cabinet Parts
90
Er 41
68
Heat exchanger parts
91
Er 42
69
Er 43
70
Er 65
71
Er 66
72
Er 67
73
Er 72
74
Er 73
75
Er 94
76
Main Controller
77
Ignition Transformer
78
Flame Detection Sensor
79
Gas leak detector
79
Air Pressure Switch
80
Chapter 5
Replacement instructions
LP-532 REV. 8.13.2014
Chapter 7
Maintenance
Components diagram
Memo
LP-532 REV. 8.13.2014
92
5
6
Chapter 1 Product Characteristics
Model Name
RT-199
Gas Input Rate
199,000 Btu/h
MIN
19,900 Btu/h
Energy Factor (Recovery Efficiency)
0.98 (98%)
35°F Rise
11.0 Gal
45°F Rise
8.5 Gal
77°F Rise
5.0 Gal
Hot Water Capacity
Installation
Indoor, Wall Hung, Fully Condensing
Flue System
Sealed Combustion Direct Vent
Vent Run
2” (15 ft), 3″(100ft) Schedule 40 PVC, CPVC, PP
Orifice Size
NG(Orifice/Needle)
9.5 mm (0.374˝) / 9.5 mm (0.374˝)
LP(Orifice/Needle)
Consult the factory
NG
3.5˝ WC to 14˝ WC
Gas Supply Pressure
LP
3.5˝ WC to 14˝ WC
Min (3″)
NG: -0.01”WC, LP: -0.11” WC
Max (3″)
NG: -0.03”WC, LP: -0.09” WC
Main Supply
120V 60Hz
Maximum
Power Consumption
135W
Manifold Pressure
Power Supply
Ignition System
Direct Electronic Ignition / Automatic Flame Sensing
Burner System
Single Orifice Premixed Fuel Modulation Metal Fiber
Infrared
Gas Valve System
Air ratio valve
Minimum Flow Rate
0.5 GPM
Internal Pipe Material
Stainless Steel
Dimensions
W17.3 ″ – H27.6 ″ – D14.8 ″
Weight
88 lbs
Sub Heat Exchanger Water Capacity (DHW)
Under 2 Gallon
Control Panel / Main Controller
P-920C / GTH-9500C
Water Pressure
Min 15 - Max 150 PSI
Connection Sizes
Materials
Cold Water Inlet /
Hot Water Outlet
3/4″NPT
Gas Inlet
3/4″NPT
Casing
Cold Rolled Carbon Steel
Heat Exchanger
Primary Heat Exchanger : Stainless Steel
Secondary Heat Exchanger : Stainless Steel
Safety Devices
LP-532 REV. 8.13.2014
MAX
LP-532 REV. 8.13.2014
Flame Rod, Burner Overheat Cut Off Device (302F/150C),
Gas Leak Detector, Exhaust High Limit Switch
(149F/65C), Freeze Protection Ceramic Heater (turns on
at 41F/5C, turns off at 59F/15C), Water temperature limit
switch (199F/93C).
7
Chapter 1 Product Characteristics
8
Chapter 1 Product Characteristics
NO
Name of Component
NO
Name of Component
1
Exhaust Vent Adapter
19
Exhaust Duct
2
Air Intake Adapter
20
Gas Valve
3
AGM(Air Gas Mixer)
21
Gas Inlet Pipe 2
4
Ignition Transformer
22
BLDC Fan
5
Igniter
23
Air Intake Pipe Adapter
6
Flame Detection Sensor
24
Gas Inlet Adapter
7
Primary Heating Exchanger Assembly
25
Freeze Protector
8
Hot Water Outlet Pipe
26
DHW Outlet Adapter
Description
Diameter
A
Exhaust Outlet Pipe collar
3˝
B
Air intake collar
3˝
C
Gas Inlet Adapter
3/4˝
9
Mixing Valve
27
Condensate Trap
D
DHW Outlet Adapter
3/4˝
10
Air Pressure Switch
28
Cold Water Inlet Adapter
E
DHW Inlet Adapter
3/4˝
11
N/A
29
Cold Water Inlet Filter
F
Condensate drain
1/2˝
12
Manual Power Switch
30
Control Panel
13
Water Adjustment Valve
31
OP NTC
G
DHW Inlet filter
N/A
14
Main Controller
32
H/L Overheat Switch
15
Secondary Heat Exchanger Assembly
33
Ceramic Heater
16
Gas Inlet Pipe 1
34
DHW NTC
17
Flame sight glass
35
Condensate Trap Hose
18
Burner Case
36
Burner Overheat Switch
LP-532 REV. 8.13.2014
LP-532 REV. 8.13.2014
9
Chapter 1 Product Characteristics
Flow chart
10
Chapter 1 Product Characteristics
Time chart
■ If
normal ignition
FAN
IGNITION
GAS VALVE
FLAME DETECTION
3s 1.5s 2s
■ If
Flame Extinguishes
FAN
IGNITION
GAS VALVE
FLAME DETECTION
180s
■ If abnormal ignition (Alarm after the 10 trial)
FAN
IGNITION
GAS VALVE
FLAME DETECTION
3s 1.5s 2s
LP-532 REV. 8.13.2014
LP-532 REV. 8.13.2014
10s 1.5s 2s
N
Y
N
11
Chapter 1 Product Characteristics
Ignition
Y
Chapter 1 Product Characteristics
MCU Testing
Y
Operation Flow Chart
Operation
Flow Chart
Igniter "ON"
S tart
Flame E xtinction >=
8 times
MCU Testing
Y
E R R OR 10
N
Check setting
values (S etting
Temp, E rrors)
Ignition Failure >=
10 times
Initializing equipment
(Timer, S tepping Motor, Gas Valve and
Others)
Water Temperature
>= 199 ¢ µ
Clear Watchdog
Igniter "ON"
Time >=
1.5 sec
N
Y
E R R OR 11
Gas Valve "ON"
Gas Valve "On"
Time >= 2sec
Igninter "OFF"
Detecting R PM,
Flame (Normal)
Check E rror
Check E rror
Opened value for
APS
E R R OR 29
Check Water Flow
(ignore below 0.39
GPM)
Y
N
S tep for
Pre-purge
N
Inlet Temperature
sensor Open or
S hort
E R R OR 31
Igniter, Gas
Valve "OFF"
E xhaust
Temperature sensor
Open or S hort
E R R OR 32
Inlet Temperature
sensor Open or
S hort
E R R OR 33
Y
S et R PM for
Pre-purge
E xhaust
Temperature sensor
Open or S hort
E R R OR 35
Post-purge time
>=
setting R PM
Abnormal MCU
E R R OR 38
Y
Water Flow >=
0.53 GPM
N
S tep for
Post-purge
Y
R PM for Pre-purge,
Time S etting
Finish for
Pre-purge
N
N
Y
Check condition
for R PM, Flame
N
Y
S etting for Fan
stop
N
N
Y
Ignition
Y
N
N
Detecting
False-flame
Decide controlling calue for Fan,
Mixing valve, AGM, IWM
Check Fan R PM
Detecting Gas
leakage
E R R OR 40
MCU Testing
Y
Igniter "ON"
Igniter "ON"
Time >=
1.5 sec
Y
N
Over range of
settingLP-532
R PM
Jumped Wire Disconnected
E R R OR 42
E R R OR 41
REV. 8.13.2014
N
E R R OR 43
Abnormal R PM
sensor
E R R OR 61
Zero reference error
of supply water
valve
E R R OR 65
Zero reference error
of mixing valve
E R R OR 66
Failed self test of
MCU's internal
device
E R R OR 67
MCU E rror
E R R OR 70
Flame is detected
before ignition
E R R OR 72
Abnormal DIP
switch setting
E R R OR 73
Ignition Failure >=
10 times
Water Temperature
>= 199 ℉
E R R OR 39
MCU testing
cycle >= 30min
Y
E R R OR 41
Gas Valve
"OFF"
Y
Water Flow >= 0.39 GPM, and
Doesn't have E rror (Front Panel
"ON")
Over range of
setting R PM
E R R OR 20
Check A/DC
E R R OR12
40
Flame Extinction >=
8 times
Burner High Limit
S witch S witch
Cut-off
Y
Opened High Limit
Detecting Gas
leakage
N
E R R OR 16
Check
communication
MCU testing
cycle >= 30min
LP-532 REV. 8.13.2014
Communication
failure
E R R OR 76
E xhaust
Temperature >=
149¢ µ
E R R OR 94
13
Chapter 1 Product Characteristics
14
Chapter 1 Product Characteristics
Wiring diagram
CN8
CN9
CN1
CN6
CN3
CN11
CN10
CN12
CN14
Jumper Wire
LP-532 REV. 8.13.2014
LP-532 REV. 8.13.2014
CN7
CN5
CN4
15
Chapter 1 Product Characteristics
Connector
Connector
no. of location and
type
CN9
65001WS-12
Pin nr.
CN4
LWD1140-06
CN8
SMW250-04
no. of location and
type
Pin
nr.
-
8
Power Supply Line
HT (120VAC)
2
Unused
HT (120VAC)
9
Igniter
HT (120VAC)
3
Heater
HT (120VAC)
10
Gas Valve
HT (120VAC)
EARTH GROUND
HT (120VAC)
HT (120VAC)
1
-
Unused
2
L
3
CP1
4
IT
5
L(HT)
6
GV
CN7
LWD1140-14
4
11
5
Description
Board
Silk
F.S
HT
SELV
Flame Detect Sensor
SELV (5VDC)
OP.S
Operation water temperature sensor
SELV (5VDC)
DH.S
DHW temperature sensor
SELV (5VDC)
Inlet water temperature sensor
SELV (5VDC)
BG.S
Exhaust temperature sensor
SELV (5VDC)
ST.S
Unused
-
SP.S
Unused
-
I.S
8
N
Power Supply Neutral
9-12
N
AC Power COM Line
HT (120VAC)
RS485 +
SELV (5VDC)
GND
SELV (5VDC)
3
RS485 -
SELV (5VDC)
1
Unused
-
1
2
GND
SELV (30VDC)
AGM Stepper motor coil /Y phase
SELV (24VDC)
2
3
VDD
SELV (14VDC)
AGM Stepper motor coil Y phase
SELV (24VDC)
3
Fan power(start coil)
SELV (30VDC)
AGM Stepper motor coil /X phase
SELV (24VDC)
5
Fan power(end coil)
SELV (30VDC)
AGM Stepper motor coil X phase
SELV (24VDC)
5
6
Fan speed feedback signal
SELV (14VDC)
GND
SELV (24VDC)
6
1
GND
SELV (5VDC)
AGM Stepper motor position
SELV (14VDC)
7
2
ISP /Reset port
SELV (5VDC)
VDD
SELV (24VDC)
1
DHM Stepper motor coil /Y phase
SELV (14VDC)
ISP TOOL0 Data port
SELV (5VDC)
2
DHM Stepper motor coil Y phase
SELV (14VDC)
VCC
SELV (5VDC)
3
DHM Stepper motor coil /X phase
SELV (14VDC)
4
DHM Stepper motor coil X phase
SELV (14VDC)
1
2
4
3
1
8
2
10
3
11
4
12
5
13
6
14
7
15
8
16
CN5
SMW250-10
HT
SELV
1
RS-485
FAN
MCU ISP
4
CN11
LWD1140-16
Descriptions
Board Silk
7
CN1
SMW250-03
16
Chapter 1 Product Characteristics
1
2
HWL
Unused
-
LWL
Unused
-
HD
Unused
-
TH
Connect to the Display Control(Thermostat)
APS
Air Pressure Switch
6
13
7
14
CN12
SMW250-07
CN10
SMW250-08
SELV (14VDC)
SELV (14VDC)
EL
Jumper Wire
SELV (14VDC)
BL
Burner Limit
SELV (14VDC)
HL
High Limit
SELV (14VDC)
FAN RPM Check
SELV (5VDC)
GND
SELV (5VDC)
RPM
12
CN14
SMW250-09
4
DHM
GND
SELV (14VDC)
6
DHM Stepper motor position
SELV (14VDC)
7
Unused
SELV (14VDC)
8
VDD
SELV (14VDC)
1
GND
SELV (14VDC)
2
IWM Stepper motor position
SELV (14VDC)
3
VDD
SELV (14VDC)
4
IWM Stepper motor coil X phase
SELV (14VDC)
5
IWM Stepper motor coil Y phase
SELV (14VDC)
6
VDD
SELV (14VDC)
7
IWM Stepper motor coil /X phase
SELV (14VDC)
8
IWM power IWM Stepper motor coil /Y phase
SELV (14VDC)
9
Unused
-
Unused
SELV (5VDC)
Unused
SELV (5VDC)
Unused
SELV (5VDC)
VCC
SELV (5VDC)
Water Flow Sensor
SELV (5VDC)
GND
SELV (5VDC)
5
IWM
1
2
CN3
SMW250-06
4
6
LP-532 REV. 8.13.2014
WPS
3
5
LP-532 REV. 8.13.2014
AGM
FLUX1
17
Chapter 2 Components description
Description/Part #
Function
Failure Event
Effects
Error Code
Diagonostic
Color / Wire Number
Main Control Board / 7850P-058
Check Point
(Main PCB)
Description/Part #
N/A
Function
This part controls all components contained in the water heater
Failure Event
Abnormal main controller operation.
Effects
When the main controller has abnormal condition, components may not operate
properly.
Error Code
Er 38
Diagonostic
Check each connection and/or wires damage on the PCB
Color / Wire Number
N/A
18
Chapter 2 Components description
NO
1
2
3
4
5
HX Temperature Sensor / 7850P-081
Exhaust Temp. Sensor / 7850P070
Water Outlet Sensor / 7850P-019
Water Inlet Sensor / 7850P-015
CN7
The controller compares each sensor with setting temperature then goes to safety
shutdown when measured temperature is over setting temperature.
Sensor malfunction or overheating condition is detected.
Improper temperature measurement.
Er 16, Er 31, Er 33, Er 35
① Check temperature sensors wiring connection.
② measure sensor resistance using a multi meter.
① Exhaust temperature sensor (white/blue) : Connector ⑤,⑫
② Water Inlet temperature (blue/blue) : Connector ④,⑪
③ Heat Exchanger Temperature Sensor (white/black) : Connector ②,⑨
④ Water Outlet Temperature (yellow/yellow) : Connector ③,⑩
Item
Temperature –
Resistance Type
Idling Condition
Check Point
(Main PCB)
Standard
Temperature(℃)
Resistance(kΩ)
0 ± 0.1 ℃
-10.99
25 ± 0.1 ℃
-3.906
85 ± 0.1 ℃
0.552 ± 3%
Blank is for reference measurement
B Fixed Number
3482.4K ± 2%
(25/85)
Fixed Number of
2.5mW/℃ (Min.) (While not boiling)
Heat dissipation
Fixed Number of
8(15)Sec (Max)(63.2% reaching time
Heating
while boiling)
Range of Workable
-4 ~ 230 F
Temperature
Heat Exchanger temperature
Exhaust temperature Sensor
Water outlet temperature sensor
① ② ③ ④ ⑤ ⑥ ⑦
Water inlet temperature sensor
⑧ ⑨ ⑩ ⑪ ⑫ ⑬ ⑭
CN7
LP-532 REV. 8.13.2014
LP-532 REV. 8.13.2014
19
Chapter 2 Components description
Description/Part #
Function
Failure Event
Effects
Burner Overheat Switch /
7850P-009
Check Point
(Main PCB)
CN9 ,CN11
Bunner Overbheat Switch prevents damages to the burner plate caused by
temperature exceeding 302 F.
Detects overheating temperature is switch has an obnormal condition.
Water Heater shuts down if burner plate temperature exceeds the setting
temperature
Error Code
Er 20, Er 43
Diagonostic
① Check the connection around the burner overheat switch and measure
resistance by using a multi meter.
② Check the Dip Switch setting.
③ Check gas orifice nozzles.
Color / Wire Number
① Burner case (Red) : Connector ⑦,⑮
② Heat exchanger outlet pipe (Red) : Connector ⑧,⑯
20
Chapter 2 Components description
Description/Part #
Function
Failure Event
Effects
Freeze protection heater / 7850P076
Check Point
(Main PCB)
This components prevents the water piping from freezing when water temperature in the
pipes is lower than 33 F.
When temperature is lower than 33 F or ceramic heater is not working properly.
Damage of the product is caused by freezing condition.
Error Code
N/A
Diagonostic
Check the connection around the ceramic heater.
Color / Wire Number
CN9
Ceramic Heater (White) : Connector ⑤,⑪
① ② ③ ④ ⑤ ⑥ ⑦ ⑧
⑨ ⑩ ⑪ ⑫ ⑬ ⑭ ⑮ ⑯
①
②
③
④
⑤
⑥
⑦
⑧
⑨
⑩
⑪
⑫
CN9, CN11
CN9
LP-532 REV. 8.13.2014
LP-532 REV. 8.13.2014
21
Chapter 2 Components description
Description/Part #
Function
Failure Event
Effects
Gas Leak Detection Sensor /
7850P-093
Check Point
(Main PCB)
N/A
Description/Part #
Function
This senosr shutsdown the unit if gas leak is detected
Failure Event
Gas leak detection sensor is not operating properly
Effects
Risk of explosion and personal injury
22
Chapter 2 Components description
Jumper Wire Connection / 7850P-096
Check Point
(Main PCB)
This part is used to jump out circuit
Jumper is disconnected.
Th unit shuts down.
Error Code
Er 40
Error Code
Er 42
Diagonostic
① Follow instruction on the first page of the manual. Check for leakage around the gas
valve and gas piping by using soapy water.
② Check the burner assembly
Diagonostic
① Make sure the jumper is properly connected.
Color / Wire Number
Color / Wire Number
N/A
Jumped wire connection (white) : connector ⑥,⑭
① ② ③ ④ ⑤ ⑥ ⑦ ⑧
⑨ ⑩ ⑪ ⑫ ⑬ ⑭ ⑮ ⑯
CN11
LP-532 REV. 8.13.2014
LP-532 REV. 8.13.2014
CN 11
23
Chapter 2 Components description
Description/Part #
Function
Failure Event
Effects
Check Point
(Main PCB)
APS: Air Pressure Switch /
7850P-047
Description/Part #
Function
① Combustion noise is generated.
② Imperfect and lifting flame occurs.
③ The unit will not ignite.
Failure Event
Effects
Pressure due to exhaust blockage will affect the water heater operation.
Er 29
Diagonostic
① Check APS wiring connection
② Check the hose for blockage or kinking.
③ Check exhaust vent for blockage
④ Check APS resistance using a multi meter.
Color / Wire Number
CN 11
This component monitors the flue for blockage.
Error Code
24
Chapter 2 Components description
Mixing Valve / 7850P054
Check Point
(Main PCB)
CN 10
This component controls DHW outlet temperature by mixing cold and hot water.
① Water flow is not detected and/or water leakage occurs around the mixing valve.
② Abnormal mixing valve operation.
① Ignition sequence does not start.
② Operation of product is stopped once water leakage is detected.
Error Code
Er 66
Diagonostic
① Restart the product.
② Check the connection around the mixing valve.
[Mixing Valve]
Color / Wire Number
Air pressure switch (blue) : connector ⑤, ⑬
① ② ③ ④ ⑤ ⑥ ⑦ ⑧
⑨ ⑩ ⑪ ⑫ ⑬ ⑭ ⑮ ⑯
1.
2.
3.
4.
5.
6.
7.
Cold water and hot water mixed
Step Control Motor Applied.
Operating Fluid : 0℃~80℃ (32 ~ 176℉)
Operating Pressure: 0~0.98Mpa
Supply Voltage : DC24V
PPS material Body
DHM : Domestic Hot water Mixing Modulation
①②③④⑤⑥⑦⑧
CN10
CN11
LP-532 REV. 8.13.2014
DHM Y Phase (black) : connector ①
DHM Y Phase (brown) : connector ②
DHM X Phase (red) : connector ③
DHM X Phase (orange) : connector ④
GND (yellow) : connector ⑤
DHM Position sensor (green) : connector ⑥
Flow2 sensor (blue) : connector ⑦
DC 14V (white) : connector ⑧
LP-532 REV. 8.13.2014
25
Chapter 2 Components description
Description/Part #
Function
Failure Event
Effects
Flow Control Valve / 7850P-053
Check Point
(Main PCB)
CN 14, CN 3
The component detects water flow and regulates water flow rate in order to supply stable hot water (More than 0.5 GPM).
Water flow rate is not detected and water leakage occurs around the flow control valve.
① Ignition sequence does not start.
② Operation of product is stopped once water leakage is detected.
Description/Part #
Function
Failure Event
Effects
Inlet Water Filter / 7850P-017
Noise at the heat exchanger is generated and pipes are blocked by the debris.
Error Code
N/A
Diagonostic
① Restart the unit
② Check the connection around the flow control valve.
Diagonostic
Clean the Cold water inlet filter.
Color / Wire Number
Color / Wire Number
N/A
Input capacity of cold water is not constant and thermal efficiency is poor.
Er 65
GND (yellow) : connector ①
IWM Stepper motor position (green) : connector②
VDD (white) : connector ③
IWM Stepper motor coil X phase (red) : connector ④
IWM Stepper motor coil Y phase (black) : connector ⑤
VDD (blue) : connector ⑥
IWM Stepper motor coil /X phase (orange) : connector ⑦
IWM Stepper motor coil /Y phase (brown) : connector ⑧
Check Point
(Main PCB)
This component consists of durable STS, PPS material for filtering out debris and heavy
metals.
Error Code
[IWM (Inlet Water Modulation)]
26
Chapter 2 Components description
N/A
1. PPS material Body
2. Hall sensor rated voltage
DC5~24V 10mA. Max
3. Operating Fluid :
0℃~80℃ (32 ~ 176℉)
4. Operating range :
1.2 ~ 30ℓ (0.32 ~ 8 gpm)
Inlet water filter
VCC (red) : connector ④
Water flow sensor (white) : connector ⑤
GND (blue) : connector ⑥
①②③④⑤⑥
①②③④⑤⑥⑦⑧
①②③④⑤⑥⑦⑧⑨
LP-532 REV. 8.13.2014
LP-532 REV. 8.13.2014
27
Chapter 2 Components description
Description/Part #
Function
Check Point
(Main PCB)
Ignition Transformer / 7850P-045
CN 9
Failure Event
Failure Event
Sparks energy is not generated.
Effects
Description/Part #
Function
Generates sparks energy to ignite the fuel.
Effects
The unit does not ignite.
28
Chapter 2 Components description
Flame Detection Sensor /
7850P-031
Check Point
(Main PCB)
Detects flame during combustion
Ignition fault.
Abnormal product operation.
Error Code
Er11
Error Code
Er 11, Er 39, Er 72
Diagonostic
① Check wiring for proper connection
② Check voltage range
Diagonostic
① Check the discoloration of flame monitoring window.
② Check the connection around the flame detection sensor.
Color / Wire Number
Ignition Transformer (red) : connector ④
Ignition Transformer (red) : connector ⑩
Input voltage
Output current
Output voltage
120V 60Hz
15 ± 2kW
6 ± 2mA
Color / Wire Number
Flame Detect Sensor (red) ① : connector ①
Flame Detect Sensor (black) ② : connector ⑧
①
①
②
③
④
⑤
⑥
⑦
⑧
⑨
⑩
⑪
⑫
CN 7
②
1. Electrical Characteristics
- Maximum workable voltage :DC 35V
- Maximum allowable current :DC 30mA
- Maximum power dissipation :DC 80mW
2. Optical characteristics
- Dark current : 0.05uA/ MAX ( 0.6uA )
[Condition: 0LX (Intensity of illumination),
10V(Voltage) ]
- Spectrum luminosity curve
: 880nm ( Peak Sensitivity )
- Range of sensing : 800 ~ 1000nm
CN9
① ② ③ ④ ⑤ ⑥ ⑦
⑧ ⑨ ⑩ ⑪ ⑫ ⑬ ⑭
CN7
LP-532 REV. 8.13.2014
LP-532 REV. 8.13.2014
29
Chapter 2 Components description
Description/Part #
Function
Failure Event
Effects
Air Gas Mixer / 7850P-004
CN12
The component provides proper air and gas mixture to the burner.
① Imperfect combustion occurs.
② lifting flame occurs.
Er 67
Diagonostic
① Restart the water heater.
② Check wiring for proper connection.
③ Check the fan intake.
Function
Effects
Air Gas Mixer (black) : ① connector (AGM/Y Phase)
Air Gas Mixer (brown) : ② connector (AGM/Y Phase)
Air Gas Mixer (red) : ③ connector (AGM/X Phase)
Air Gas Mixer (orange): ④ connector (AGM/X Phase)
Air Gas Mixer (yellow) : ⑤ connector (GND)
Air Gas Mixer (green) : ⑥ connector (AGM Position Sensor)
Air Gas Mixer (white) : ⑦ connector (DC 24V)
1. Operating Temperature : 32~140 F
2. Using the gas pressure : 5 kPa
3. Maximum amount of gas: 5.5m3/hr (LNG)
4. T/D(Turn/Down ratio) : 1 : 10
5. Motor Specification
- Type : Stepping Motor
- Phase : 4 Phase
- Drive type : Unipolar Drive / V-Constant
- Supply Power : 24v DC
- Phase excitation system : 2-2
- Step angle : 7.5 deg(2-2Phase), (1-2 Phase : 3.75 deg)
- Direction of rotation : CW / CCW (Bidirectional)
- Reduction ratio : 1 / 60
Description/Part #
Failure Event
① Abnormal product operation.
② Carbon monoxide exceeding the reference.
Error Code
Color / Wire Number
Check Point
(Main PCB)
Check Point
(Main PCB)
Gas Valve / 7850P-012
① Gas leakage occurs.
② Gas valve does not operated. (Unable to open/close)
③ Gas flow is not modulated. (Proportional gas valve)
① Spark is not generated..
③ Operation of product is stopped.
④ Carbon monoxide exceeding the reference is discharged.
Er 10
Diagonostic
① Check wiring for proper connection.
② Check the connection and mounting location.
③ Check resistance by using a multimeter.
Gas Valve (purple) : connector ⑥, ⑫
1. Backpressure
: 1st valve: 50 mbar
: 2nd valve: 10 mbar
①
2. Ambient temperature: : -15℃ ... 70°C (5 ~ 158℉)
3. Max inlet pressure: 60 mbar
⑦
4. Operating Ratings: 24 V /50 Hz
5. Electrical Load
: 1st + 2nd operator 420mA at 24 V RAC
① ② ③ ④ ⑤ ⑥ ⑦
CN12
LP-532 REV. 8.13.2014
CN9
Negative gas valve controls the regulation of gas and air mixture in the combustion
system.
Error Code
Color / Wire Number
LP-532 REV. 8.13.2014
30
Chapter 2 Components description
②
③
④
⑤
⑥
⑧
⑨
⑩
⑪
⑫
CN9
31
Chapter 2 Components description
Description/Part #
Function
BLDC Fan / 7850P-002
Check Point
(Main PCB)
Description/Part #
CN4
Supplies ir and fuel to the burner.
Failure Event
Function
① Abnormal noise occurs at the fan.
② Abnormal fan speed(RPM).
③ Poor connection.
Failure Event
① Abnormal combustion.
② Abnormal noise occurs.
③ The unit does not operated.
Effects
32
Chapter 2 Components description
Effects
Metal Fiber Premix Burner /
7850P-011
Check Point
(Main PCB)
N/A
The component supplies the heat source by mixing and combusting the air and
gas.
① Unable to initialize/sustain combustion.
② Soot occurs on the surface of burner.
③ Gas leakage occurs from burner.
① Abnormal combustion.
② Unstable flame generation.
③ Ignition failure.
Error Code
Er 41
Diagonostic
① Check vent blockage
② Check BLDC fan wiring for proper connection
③ Check voltage range using a multimeter.
Error Code
N/A
[BLDC FAN]
GND (blue) ⓒ : connector ② ,30vDC
Fan start coil (white) ⓔ : connector ④ ,30vDC
Speed feedback signal(yellow) ⓓ : connecotr ⑥ ,30vDC
DC 14V (red) ⓑ : connector ③ ,14vDC
Power(black) ⓐ : connector ⑤ ,30vDC
Diagonostic
Visual inspection: Unstable flame conditions during operation.
Color / Wire Number
Color / Wire Number
1. Rated Specifications
- Motor type : DC BRUSHLESS MOTOR
- Rated Voltage : Vs = 24V / Vc = 12V
- Working Voltage : Vs = 10 ~ 24V / Vc = 12±1.2V
- Working Ampere : As = 140 ~ 800 / Ac = 17±1.7
- Control System : PWM
ⓐ
ⓑ
ⓒ
ⓓ
ⓔ
①
②
③
④
⑤
⑥
CN4
LP-532 REV. 8.13.2014
LP-532 REV. 8.13.2014
N/A
33
Chapter 2 Components description
Description/Part #
Function
Failure Event
Effects
Heat Exchanger(STS) /
7850P-032
Check Point
(Main PCB)
N/A
The component heats the water by absorbing high-temperature heat generated by the
burner.
① Water or exhaust gas leakage through the crack.
② Abnormal heat exchange.
Description/Part #
Function
Failure Event
① Operation of product is stopped.
② Exhaust gas leakage.
③ Abnormal noise occurs.
Effects
Condensate Trap / 7850P-014
Product corrosion and environmental degradation are caused by the
condensate.
Error Code
Er41
Diagonostic
Check the crack on the surface of heat exchanger.
Diagonostic
Check the hose for blockage or bending.
Color / Wire Number
LP-532 REV. 8.13.2014
LP-532 REV. 8.13.2014
N/A
Unneutralized condensate is discharged.
Er33, Er94
N/A
Check Point
(Main PCB)
The component reliably discharges the condensate generated by the
combustion.
Error Code
Color / Wire Number
34
Chapter 2 Components description
N/A
35
Chapter 3 How to use control panel
Function explanation
Chapter 3 How to use control panel
36
Control panel
Customized Temperature Control
Advanced technology used for the flow sensor and heat capacity control makes domestic hot water highly
efficient by maintaining constant temperature during usage.
[Initial power-up condition]
When power is supplied, zero point of the mixing valve is checked for 6 seconds. After that, normal
800 steps function is in progress. At this time, if zero point is not confirmed, Er 66 occurs. After error is
automatically restored when zero point was confirmed, normal 800step function is in progress. [DHW mode]
DHW mode is activated by the flow sensor sensing flow of 0.5 GPM or above. When there is DHW
demand, flow sensor monitor the frequency (range: 8Hz to12Hz), within 2 minutes. DHW temperature can be
set 95~140℉(35℃~60℃). If there is DHW demand, burner starts and mixing valve operates automatically.
Safety device function
[Power supply and frequency stability protection]
If the power supply voltage is less than 90V input for 10 seconds, error code will be displayed, and
all outputs will be stopped except for the fan post-purge. The error will automaticall reset when voltage is
abore 100V.
The reference frequecy value is determined by checking the power supply frequency 50Hz or 60Hz.
If frequency is outside the range of ± 3Hz from the reference frequency, error code will be displayed, and all
outputs will be stopped except for the fan post-purge. The error will automaticall reset when the frequency is
whithin ± 3Hz of frequency standards.
Controller LCD Specification
[Over-heating protection]
The water heater has two overtemperature switch. Over temperature switch is attached to the burner
and the outlet side against the failure of the temperature sensor dual protection device. Overheat error
occurs when the temperature switch is open and close until the fan is operated.
[Gas leakage detecting]
The controller is designed with a builtin gas leak detection sensor that will shut the unit down in case
of gas leak. A fault code will occur if the sensor detects gas leak for more than 10 minutes or 3 times in 1
hour.
[Mixing valve operation]
During a DHW demand, mixing valve modultaes to control the DHW outlet temperature by mixing
the cold and hot water. When there is no DHW demand, mixing valve stands vy at 800 steps. To prevent
the mixing valve mechanism from getting stuck, it moves 2,000 steps (fully closed) for 5 sec, then moves to
default position (fully opened) and finally back to 800 step.
Control Panel Mode
Status display mode
Status display mode will be activated when button B is pressed and held for five seconds
when display panel is powered ON.
LP-532 REV. 8.13.2014
LP-532 REV. 8.13.2014
37
Chapter 3 How to use control panel
38
Chapter 3 How to use control panel
Domestic Hot water temperature control (Range: 95 ~ 122℉)
P-920C
HIGH
HIGH
Parameter
A: Li or A: GA
b: Fr
Detail
Flow 1
Fan rpm
C: Lc
Lock Mode
d: oP
E: dH
F: Eh
h: In
L:rt
OP Temperature
DHW Temperature
Exhaust Temperature
Inlet Temperature
Running Time
Power Supply Time
Burner Operating Time
Burner Operating Time
Ignition Attempts Number
Ignition Attempts Number
N/A
L:rt
J: AG
1: PH
2: rh
3: rH
4: It
5: IH
C
F
Description
Current Flow Value (Li: Liters/min, GA: Gallons/min)
Current Fan RPM Value
Lock Mode is In Use (ON) or Unused (OFF)
Allows user to lock out any temperature change.
Current Operating Temperature
Current DHW Temperature
Current Exhaust Temperature
Current Inlet Temperature
Display Running Time
Power Supply Time: 100 hour increments
Burner Operating Time: 1 hour increments
Burner Operating Time: 1,000 hour increments
Ignition Attempts Number: 10 times unit displayed
Ignition Attempts Number: 10,000 times unit displayed
N/A
Installer Setting Mode.
Status display mode will be activated when button B is pressed and held for five seconds
when display panel is powered OFF.
3: In
OFF
System Reset
4: Fu
GA
Flow Unit
5: FH
6: FL
7: dr
8: dI
9: HA
10: Cn
11: CI
12: Eh
00
00
NO
NO
00
01
ON
N/A
N/A
Reset Burner Operation Time
Reset Number of Ignition
N/A
N/A
N/A
N/A
LP-532 REV. 8.13.2014
C
F
Press ‘heating water temperature
button’ for more than 5secs to
convert temperature unit (F or C).
Press ‘dial button’ to complete
setting.
Domestic Hot water high temperature control (Range: 121℉ ~ 140℉)
HIGH
Description
Most Recent History Error Codes (H0 – H9)
Clears Error History
Restores System to Default Settings
(Burner operation time, Ignition cycles, and Supply
power time will not be reset)
Range: ON or OFF
Displays Flow Rate in Liters/Minute or Gallons/Minute
Range: GA or Li
N/A
N/A
Reset Burner Operation Time
Reset Number of Ignition
N/A
N/A
N/A
N/A
HIGH
C
F
HIGH
Parameter
History
Clear Error History
Turn the dial to set desired DHW
temperature.
HIGH
C
F
Default
E0:00
OFF
C
F
C
F
Press ‘hot water
temperature control
button’ to enter
‘DHW temperature
Press power button to turn on the setting mode. The default temperaunit.
ture is set to 125℉.
P-920C
Index
1: EH
2: cE
HIGH
HIGH
Press power button to turn on the
unit.
HIGH
C
F
Turn the dial to set desired
DHW temperature.
LP-532 REV. 8.13.2014
HIGH
HIGH
¡ É
¢ µ
¡ É
¢ µ
Press ‘hot water
temperature control
Press ‘hot water temperature
button’ to enter ‘DHW temperature button’ for 5 secs to set high
setting mode. The default tempera- temperature.
ture is set 125℉.
HIGH
C
F
Press ‘dial button’ to complete
setting.
39
Chapter 3 How to use control panel
40
Chapter 3 How to use control panel
View System Parameters
Program Lock mode
Water flow rate (GPM or LPM)
HIGH
C
F
C
F
Press power button to turn on the
unit.
Press ‘current status’ for 5
secs and ‘A:GA’ will show up.
Water flow status will be displayed.
(ex : 2.64)
After ‘A:GA’ has been displayed by
pressing ‘current status button’ for 5
secs, turn the dial until it shows ‘d:Lc‘.
C
F
C
F
C
F
C
F
HIGH
HIGH
HIGH
HIGH
HIGH
Press the dial button for 1 sec when
‘d:Lc‘ shows up.
Turn the dial until current status ‘off’
mode turns into ‘on’.
Default setting in common.
HIGH
HIGH
C
F
HIGH
C
F
Press ‘dial button’ for a sec again, to
go back to the previous mode.
C
F
Press ‘dial button’ for a sec again, to
go back to ‘d:Lc‘ mode.
Fan Speed (RPM)
Press ‘current status’ button with
‘d:Lc‘ mode to go back to the initial
status.
Operating Temperature from the Heat Exchanger
HIGH
HIGH
C
F
C
F
HIGH
HIGH
C
F
C
F
HIGH
HIGH
C
F
C
F
Fan RPM’s current status will be
displayed.(ex : 3000rpm)
After ‘A:GA’ has been displayed by
pressing ‘current status button’ for 5
secs, turn the dial until it shows ‘b:Fr‘.
HIGH
C
F
Press ‘dial button’ for a sec again, to
go back to ‘b:Fr’ mode.
After ‘A:GA’ has been displayed
by pressing ‘current status button’
for 5 secs, turn the dial until it
shows ‘E:oP’.
Check RPM by pressing ‘dial button’
for 1 sec when ‘b:Fr’ shows up
HIGH
HIGH
C
F
C
F
Press ‘current status’ button with
‘b:Fr’ mode to go back to the initial
status.
Press ‘dial button’ for a sec again, to
go back to the previous mode.
LP-532 REV. 8.13.2014
LP-532 REV. 8.13.2014
Current return water temperature
status will be displayed. (ex : 108℉)
Press ‘dial button’ for 1 sec when
‘E:oP’ shows up
HIGH
C
F
Press ‘current status button’ during
‘E:oP’ mode to go back to the initial
status.
41
Chapter 3 How to use control panel
DHW Outlet Water Temperature
HIGH
DHW Inlet Water Temperature.
HIGH
C
F
Press ‘dial button’ for 1 sec when
‘F:dH’ shows up
Press ‘dial button’ for a sec again, to
go back to the previous mode.
After ‘A:GA’ has been displayed by
pressing ‘current status button’ for
5 secs, turn the dial until it shows
HIGH
HIGH
C
F
C
F
C
F
Press ‘dial button’ for 1 sec when
‘H:Eh’ shows up.
Current exhaust gas temperature
status will be displayed. (ex : 130℉)
After ‘A:GA’ has been displayed
by pressing ‘current status button’
for 5 secs, turn the dial until it
shows ‘I:rt’.
HIGH
HIGH
C
F
C
F
Current Inlet water temperature status will be displayed. (ex : 75℉)
HIGH
C
F
Press ‘current status button’ with ‘h:In’
mode to go back to the initial status.
View Supply Power Time (displayed values X 100 Hours)
HIGH
C
F
Press ‘dial button’ for 1 sec when
‘h:In’ shows up.
C
F
Press ‘current status button’ during
‘F:dH’ mode to go back to the initial
status.
HIGH
C
F
HIGH
C
F
Exhaust Gas Temperature.
HIGH
After ‘A:GA’ has been displayed by
pressing ‘current status button’ for 5
secs, turn the dial until it shows ‘h:In’.
HIGH
C
F
HIGH
C
F
C
F
Current DHW outlet water temperature
status will be displayed. (ex : 120℉)
HIGH
Press ‘dial button’ for a sec again, to
go back to the previous mode.
HIGH
HIGH
C
F
After ‘A:GA’ has been displayed
by pressing ‘current status button’
for 5 secs, turn the dial until it
shows ‘F:dH’.
42
Chapter 3 How to use control panel
HIGH
C
F
HIGH
C
F
HIGH
C
F
Turn the dial until 1:PH shows up.
Press ‘dial button’ for 1 sec when
‘I:rt’ shows up
HIGH
C
F
C
F
HIGH
C
F
Current power input time will be
shown. (ex : 875×100hr)
Press ‘dial button’ for a sec again, to
go back to the previous mode.
Press ‘current status button’ with
‘H:Eh’ mode to go back to the initial
status.
Press ‘dial button’ for a sec again, to
go back to the previous mode.
LP-532 REV. 8.13.2014
LP-532 REV. 8.13.2014
Press current status button for a sec
after confirmation to go back to the
initial status.
43
Chapter 3 How to use control panel
View Burner Operating Time (Unit: 1hr)
HIGH
View Ignition Cycles (displayed value X 10 times)
Press ‘dial button’ for 1 sec when
‘I:rt’ shows up
Turn the dial until ‘2:rh’ shows up.
HIGH
C
F
C
F
C
F
After ‘A:GA’ has been displayed
by pressing ‘current status button’
for 5 secs, turn the dial until it
shows ‘I:rt’.
HIGH
HIGH
HIGH
C
F
After ‘A:GA’ has been displayed
by pressing ‘current status button’
for 5 secs, turn the dial until it
shows ‘I:rt’.
Press ‘dial button’ for 1 sec when
‘I:rt’ shows up
Current power input time will be
shown. (ex : 375hr)
Press ‘dial button’ for a sec when
2:rh shows up.
Press current status button for 1 sec
after confirmation to go back to the
initial status.
View Burner Operating Time (displayed value X 1000 hours)
HIGH
After ‘A:GA’ has been displayed
by pressing ‘current status button’
for 5 secs, turn the dial until it
shows ‘I:rt’.
HIGH
Press ‘dial button’ for 1 sec when
‘I:rt’ shows up
HIGH
HIGH
C
F
Current ignition attempts number will
be shown.
(ex : 175 ×10 times =1 750times)
Turn the dial until ‘3:rH’ shows up.
HIGH
C
F
C
F
After ‘A:GA’ has been displayed
by pressing ‘current status button’
for 5 secs, turn the dial until it
shows ‘I:rt’.
HIGH
HIGH
C
F
C
F
Press current status button for 1 sec
after confirmation to go back to the
initial status.
View Ignition Cycles (displayed value X 10,000 times)
C
F
C
F
Turn the dial until ‘4:lt’ shows up.
C
F
Press ‘dial button’ for a sec when
‘4:lt’ shows up.
HIGH
HIGH
C
F
C
F
C
F
C
F
C
F
HIGH
HIGH
HIGH
HIGH
C
F
HIGH
C
F
HIGH
HIGH
44
Chapter 3 How to use control panel
C
F
C
F
Press ‘dial button’ for 1 sec when
‘I:rt’ shows up
HIGH
C
F
HIGH
C
F
Turn the dial until ‘5:IH’ shows up.
HIGH
C
F
Current power input time will be
shown. (ex : 75 ×1000hr=75,000hr)
Press ‘dial button’ for a sec when
‘3:rh’ shows up.
Press current status button for 1 sec
after confirmation to go back to the
initial status.
LP-532 REV. 8.13.2014
Press ‘dial button’ for a sec when
‘5:IH’ shows up.
LP-532 REV. 8.13.2014
Current ignition attempts number will
Press current status button for 1 sec
be shown.
after confirmation to go back to the
(ex : 95 ×10000 times=950,000 times) initial status.
45
Chapter 3 How to use control panel
Change System Parameters
Fault Code History
46
Chapter 3 How to use control panel
System Reset
P-920C
HIGH
P-920C
‘1:EH’ is displayed and then press
the dial button for one second to
access the codes.
10 recent fault codes can be viewed
by turning the dial.
HIGH
HIGH
C
F
P-920C
C
F
Turn the dial to set ‘on’ status when
initial ‘of’ shows up.
(Default : off mode)
P-920C
Press ‘dial button’ for 1 sec when
‘2:cE’ shows up.
P-920C
HIGH
HIGH
Turn the dial to set ‘on’ status when
initial ‘off’ shows up.
(Default : off mode)
HIGH
C
F
C
F
C
F
P-920C
C
F
P-920C
P-920C
HIGH
HIGH
Press ‘current status button’ for 5
secs during panel power off to enter
installer setting mode
HIGH
C
F
‘3:In’ is displayed and then press
the dial button for one second.
P-920C
P-920C
HIGH
HIGH
C
F
C
F
Press ‘dial button’ during ‘on’ status to
save the setting.
Press ‘current status button’ for a
sec to go back to initial status after
confirmation.
Change DHW flow rate measurement unit.(GA_gallon or LI_litter)
HIGH
C
F
HIGH
Press ‘current status button’ for 5
secs during panel power off to enter
installer setting mode
P-920C
Clear Error Code History.
P-920C
Turn the dial until ‘3:In’ shows up.
P-920C
Press ‘current status button’ after
confirmation to go back to the initial
status.
P-920C
C
F
C
F
C
F
C
F
Press ‘current status button’ for 5
secs during panel power off to enter
installer setting mode
HIGH
HIGH
HIGH
C
F
P-920C
P-920C
C
F
Press ‘dial button’ during ‘on’ status to
save the setting.
‘2:cE’ is displayed and then press
the dial button for one second.
Press ‘current status button’ for 5
secs during panel power off to enter
installer setting mode
P-920C
P-920C
HIGH
HIGH
C
F
C
F
Turn the dial until ‘4:Fu’ shows up.
P-920C
P-920C
P-920C
HIGH
HIGH
HIGH
C
F
Press ‘current status button’ for a
sec to go back to initial status after
confirmation.
LP-532 REV. 8.13.2014
C
F
Turn the dial to set ‘Li’ when initial
‘GAL’ shows. (Convert Liter to
Gallon)
LP-532 REV. 8.13.2014
C
F
Press ‘dial button’ to save the setting
during ‘Li’ status.
‘4:Fu’ is displayed and then press
the dial button for one second.
P-920C
HIGH
C
F
Press ‘current status button’ for a
sec to go back to initial status after
confirmation.
47
Chapter 3 How to use control panel
Fan, Max RPM Adjustment
Cascade Mode Setting
COMING SOON
P-920C
P-920C
P-920C
HIGH
HIGH
HIGH
C
F
Press ‘current status button’ for 5
secs during panel power off to enter
installer setting mode
C
F
P-920C
P-920C
HIGH
HIGH
C
F
C
F
Turn the dial until ‘5:FH’ shows up.
‘5FH’ is displayed and then press
the dial button for one second.
C
F
Press ‘current status button’ for 5
secs during panel power off to enter
installer setting mode
P-920C
P-920C
P-920C
P-920C
HIGH
HIGH
HIGH
HIGH
C
F
C
F
Turn the dial to the desired setting
when initial 0 is displayed.
(Range: -30 ~ +30, Default : 0)
Press ‘dial button’ to save the setting.
Press ‘current status button’ for a
sec to go back to initial status after
confirmation.
P-920C
P-920C
HIGH
HIGH
HIGH
C
F
Turn the dial until ‘6:FL’ shows up.
P-920C
HIGH
HIGH
C
F
‘7: CA’ is displayed and then press
the dial button for one second.
P-920C
HIGH
HIGH
C
F
Press ‘dial button’ to save the setting.
P-920C
COMING SOON
HIGH
C
F
‘6:FL’ is displayed and then press
the dial button for one second.
Press ‘current status button’ for 5
secs during panel power off to enter
installer setting mode
Press ‘current status button’ for a
sec to go back to initial status after
confirmation.
P-920C
C
F
Press ‘dial button’ to save the setting.
P-920C
P-920C
HIGH
HIGH
C
F
Turn the dial until ‘8:Eh’ shows up.
C
F
‘8:Eh’ is displayed and then press
the dial button for one second.
P-920C
P-920C
HIGH
HIGH
P-920C
HIGH
Turn the dial to the desired setting
when initial 0 is displayed.
(Range: -30 ~ +30, Default : 0)
HIGH
P-920C
C
F
Turn the dial to “on” state.
(Default : off)
C
F
P-920C
C
F
Turn the dial until ‘7:CA’ shows up.
P-920C
Common Vent Mode Setting
P-920C
Press ‘current status button’ for 5
secs during panel power off to enter
installer setting mode
C
F
C
F
Fan, Min RPM Adjustment
C
F
48
Chapter 3 How to use control panel
HIGH
C
F
C
F
Press ‘current status button’ for a
sec to go back to initial status after
confirmation.
LP-532 REV. 8.13.2014
Turn the dial to “on” state.
(Default : off)
LP-532 REV. 8.13.2014
C
F
Press ‘dial button’ to save the setting.
C
F
Press ‘current status button’ for a
sec to go back to initial status after
confirmation.
49
Chapter 3 How to use control panel
Cascade Master/Slave Setting
COMING SOON
Reset Burner Operating Time
P-920C
P-920C
HIGH
HIGH
C
F
P-920C
P-920C
P-920C
HIGH
HIGH
HIGH
C
F
C
F
Press ‘current status button’ for 5
secs during panel power off to enter
installer setting mode
Turn the dial until ‘9:Cn shows up.
P-920C
P-920C
HIGH
HIGH
C
F
Turn the dial to “master product is
01’’,” slave products from the 02 “set.
‘9:Cn’ is displayed and then press
the dial button for one second.
Press ‘dial button’ to save the setting.
Press ‘current status button’ for 5
secs during panel power off to enter
installer setting mode
P-920C
HIGH
HIGH
C
F
C
F
HIGH
C
F
Turn the dial until ‘11:dr’ shows up.
‘11:dr’ is displayed and then press
the dial button for one second.
P-920C
P-920C
HIGH
HIGH
C
F
C
F
C
F
Press ‘current status button’ for a
sec to go back to initial status after
confirmation.
P-920C
C
F
C
F
P-920C
Number of Cascade water heater
COMING SOON
50
Chapter 3 How to use control panel
Turn the dial to ‘on’ status when
initial ‘off’ shows up. (Default : off)
Press ‘dial button’ to save the setting.
Press ‘current status button’ for a
sec to go back to initial status after
confirmation.
Reset Igniting Cycles
P-920C
P-920C
P-920C
P-920C
P-920C
P-920C
HIGH
HIGH
HIGH
HIGH
HIGH
HIGH
C
F
Press ‘current status button’ for 5
secs during panel power off to enter
installer setting mode
C
F
Turn the dial until ‘10:Cl’ shows up.
P-920C
P-920C
HIGH
HIGH
C
F
Turn the dial to set the cascade operation quantity.
C
F
Press ‘dial button’ to save the setting.
C
F
C
F
‘10:C’ is displayed and then press
the dial button for one second.
Press ‘current status button’ for 5
secs during panel power off to enter
installer setting mode
C
F
C
F
Turn the dial until ‘12:dl’ shows up.
‘12:dl’ is displayed and then press
the dial button for one second.
P-920C
P-920C
P-920C
P-920C
HIGH
HIGH
HIGH
HIGH
C
F
C
F
Press ‘current status button’ for a
sec to go back to initial status after
confirmation.
LP-532 REV. 8.13.2014
Turn the dial to ‘on’ status when
initial ‘off’ shows up.(Default : off)
LP-532 REV. 8.13.2014
C
F
Press ‘dial button’ to save the setting.
C
F
Press ‘current status button’ for a
sec to go back to initial status after
confirmation.
51
Chapter 3 How to use control panel
Chapter 3 How to use control panel
1. Flame detection
AGM Value correction
HIGH
HIGH
HIGH
C
F
C
F
C
F
‘11:dr’ is displayed and then press
the dial button for one second.
After ‘A:GA’ being displayed by pressPress ‘dial button’ for 1 sec when
ing ‘current status button’ for 5 secs,
‘J:AG’ shows up
turn the dial until it shows ‘J:AG’.
HIGH
C
F
Turn the dial to ‘on’ status when
initial ‘off’ shows up. (Default : off)
HIGH
C
F
Press ‘dial button’ to save the setting.
2. Gas Detection
LP-532 REV. 8.13.2014
LP-532 REV. 8.13.2014
52
53
Chapter 3 How to use control panel
3. Sensing air pressure.
Error Code
Error Code Description
Er:10
Flame has Extinguished 8
(Eight) Times
Er:11
Ignition has Failed 10
(Ten) Times
Er:16
Operating Temperature
Sensor or DHW Sensor
detects Water
Temperature Greater than
o
o
199 F (93 C)
Er:20
High Limit Overheat
Switch – Closed is
Normal, Open is Fault
Er:29
APS/Condensate –
Closed is Normal, Open is
Fault (Condensate Drain
Trap)
Er:31
Inlet Water Sensor Open
or Short
Er:32
DHW Sensor Open or
Short
Er:33
Operating Temperature
Sensor Open or Short
Er:35
Exhaust Sensor Open or
Short
Er:38
Error Appears When
Control Stores Data, but
Data is not Saved
4. ‘I/T’, ‘DHW’, ‘OP’ Sensor detects
Er:39
LP-532 REV. 8.13.2014
54
Chapter 4 Troubleshootion
Error code.
Flame Detected after
Exiting a Flame On
Condition
LP-532 REV. 8.13.2014
Possible Remedies
Press the Power button to clear the Error Code.
If Error happens again:
1. Monitor the gas pressure to the water heater while in operation. Ensure pressure is between 3.5 and
14” WC.
2. Check gas valve wire. Ensure connection is secure.
3. Check flame detection sensor. Ensure connections are secure. Normal operating settings are more
than 2.5DC before ignition, less than 2.5DC after ignition.
4. Check vent terminations. Ensure there are no blockages.
5. Assure that the flame is stable when lit.
6. If the problem persists, replace the main control.
Press the Power button to clear the Error Code.
If Error happens again:
1. Monitor the gas pressure to the water heater while in operation. Ensure pressure is between 3.5 and
14” WC.
2. Check gas valve wire. Ensure connection is secure.
3. Check flame detection sensor. Ensure connections are secure. Normal operating settings are more
than 2.5DC before ignition, less than 2.5DC after ignition.
4. Check igniter transformer for proper connection.
5. Clean the spark igniter with steel wool to remove oxides. Ensure proper separation (3-4 mm).
6. Replace the spark igniter if damaged.
7. Assure that the flame is stable when lit.
8. If the problem persists, replace the main control.
This Error Code will go away when the DHW temperature decreases.
If Error happens again:
1. Check if dip switch High Fire setting is ON. Switches 6 and 7 should be OFF for normal operation.
2. Check if DHW pipe is blocked. Ensure there is enough water flowing to the water heater.
3. Check DHW sensor at DHW outlet. If resistance is zero, replace the sensor.
4. Check Operating Temperature sensor at the heat exchanger. If resistance is zero, replace the
sensor.
5. If the problem persists, replace the main control.
Press the Power button to clear the Error Code.
1. Inspect the High Limit Overheat switch. Ensure proper connections.
2. Check High Limit Overheat switch resistance. If resistance is zero, replace the switch.
3. If the problem persists, replace the main control.
Press the Power button to clear the Error Code.
1. Check APS/Condensate and main controller connections. Ensure all are secure.
2. Check APS/Condensate resistance. If resistance is zero, replace the switch.
3. Check APS/Condensate hose. Ensure it is connected and in good condition.
4. Check condensate line and termination for blockages.
5. Check exhaust vent for blockages.
6. If the problem persists, replace the main control.
This Error Code will go away when inlet water temperature decreases.
If Error happens again:
1. Check inlet water temperature sensor. Ensure connections are secure.
2. Check sensor resistance. If resistance is zero, replace the sensor.
3. If the problem persists, replace the main control.
This Error Code will go away when outlet water temperature decreases.
If Error happens again:
1. Check DHW outlet temperature sensor. Ensure connections are secure.
2. Check sensor resistance. If resistance is zero, replace the sensor.
3. If the problem persists, replace the main control.
This Error Code will go away when outlet water temperature decreases.
If Error happens again:
1. Check operating temperature sensor. Ensure connections are secure.
2. Check sensor resistance. If resistance is zero, replace the sensor.
3. If the problem persists, replace the main control.
This Error Code will go away when exhaust temperature decreases.
If Error happens again:
1. Check exhaust temperature sensor. Ensure connections are secure.
2. Check sensor resistance. If resistance is zero, replace the sensor.
3. Check exhaust vent for blockage.
4. If the problem persists, replace the main control.
Press the Power button to clear the Error Code.
Replace the main control.
This Error Code will go away when the false flame condition is remedied.
If Error happens again:
1. Check the water heater cover. Ensure it is secure. Flame detection sensor can detect an external
light source.
2. Check flame detection sensor. Ensure connections are secure. Normal operating settings are more
than 2.5DC before ignition, less than 2.5DC after ignition.
3. If the problem persists, replace the main control.
55
Chapter 4 Troubleshootion
Error code.
Error Code
Error Code Description
Er:40
Gas Leakage is Detected
in 10 Minutes, or three
times within One Hour
(Greater than 5 Seconds
Each Time)
Er:41
Fan Speed too High with
Flame On
Er:42
Jumped Wire
Disconnected
Er:43
Burner Overheat Switch
Open
Er:61
Fan Speed Feedback
Signal Abnormal
Er:65
Supply Water Valve Error
Er:66
Mixing Valve Error
Er:67
AGM Error
Er:70
Register, Ram, Rom, I/O
Port, AD Abnormal,
Important EPROM Data or
Safe Data Abnormal
Er:72
Flame Signal Detected
before Ignition
Er:73
DIP Switch is abnormal
Er:76
Poor Communication
Er:94
Exhaust NTC detects Vent
Temperature is Greater
o
o
than 149 F (65 C)
56
Chapter 4 Troubleshootion
Error code
Possible Remedies
IMPORTANT: If you smell gas, STOP! Follow the instructions on page 2, this manual, and call a
qualified service technician or the fuel gas utility.
Press the Power button to clear the Error Code.
If Error happens again:
1. Check the water heater cover. Ensure it is secure.
2. Check gas connections for leakage with a soapy solution. Fix any leaks.
3. Check condition of the burner assembly.
4. If the problem persists, replace the main control.
Press the Power button to clear the Error Code.
If Error happens again:
1. Check the vent connections for blockages.
2. Check the burner assembly.
3. Check fan operation. If fan appears to be operating normally but RPMs are too low or too high,
replace the fan.
4. If the problem persists, replace the main control.
Press the Power button to clear the Error Code.
If Error happens again:
1. Ensure the jumped wire is properly connected.
2. If the problem persists, replace the main control.
Press the Power button to clear the Error Code.
If Error happens again:
1. Check burner overheat switch connections. Ensure connections are secure.
2. Check switch resistance. If resistance is zero, replace the switch.
3. If the problem persists, replace the main control.
This Error Code will go away when the condition is remedied.
If Error happens again:
1. Check the connections to the fan. Ensure all are secure.
2. If the fan does not rotate during the ignition sequence, check for 120V power at the fan connection.
If 120V power is present at the control, replace the fan. If the blower does not have 120V power, check
power at the control. If 120V power is not present at the control, replace the control.
3. If the problem persists, replace the main control.
Press the Power button to clear the Error Code.
If Error happens again:
1. Turn power OFF and ON at the main power switch internal to the water heater.
2. Check wiring connections to supply water valve. Ensure all are secure.
3. Replace supply water valve.
4. If the problem persists, replace the main control.
Press the Power button to clear the Error Code.
If Error happens again:
1. Turn power OFF and ON at the main power switch internal to the water heater.
2. Check wiring connections to mixing valve. Ensure all are secure.
3. Replace mixing valve.
4. If the problem persists, replace the main control.
Press the Power button to clear the Error Code.
If Error happens again:
1. Turn power OFF and ON at the main power switch internal to the water heater.
2. Ensure fan inlet hole is completely open after turning the power OFF and ON.
3. Check wiring connections to the AGM. Ensure all are secure.
4. Check AGM operation.
5. Replace AGM components.
6. If the problem persists, replace the main control.
This Error Code will go away when the condition is remedied.
If Error happens again:
1. Turn power OFF and ON at the main power switch internal to the water heater.
2. If the problem persists, replace the main control.
This Error Code will go away when the condition is remedied.
If Error happens again:
1. Check the water heater cover. Ensure it is secure. Flame detection sensor can detect an external
light source.
2. Check flame detection sensor. Ensure connections are secure. Normal operating settings are more
than 2.5DC before ignition, less than 2.5DC after ignition.
3. If the problem persists, replace the main control.
This Error Code will go away when the condition is remedied.
If Error happens again:
1. Check dip switches. Ensure switches match the ratings plate requirements of the water heater. See
dip switch details, this manual, for default settings.
2. If the problem persists, replace the main control.
This Error Code will go away when the condition is remedied.
If Error happens again:
1. Check connections from main control to display panel.
2. If the problem persists, replace the display and/or the main control.
This Error Code will go away when the condition is remedied.
If Error happens again:
1. Check if dip switch High Fire setting is ON. Switches 6 and 7 should be OFF for normal operation.
2. Check exhaust temperature sensor. Ensure connections are secure.
3. Check sensor resistance. If resistance is zero, replace the sensor.
4. Check exhaust vent for blockage.
5. If the problem persists, replace the control.
6. If the problem persists, replace the heat exchanger.
LP-532 REV. 8.13.2014
Meaning
Cause
Flame Loss
(Manual restore)
If flame loss issue repeats 8 times
while unit is operating, error code
10 will appear.
Failure event
If flame is not detected within 1 minute after ignition trial, the unit restarts. If ignition trial is repeated 8 times
in a row, ignition sequence will stop. Error code will not desappear until display panel is manually reset.
Check point
① Please check wire
color of gas valve
connector on main
controller.
① Ensure gas valve
wiring is properly
connected.
② Please check flame
detector sensor’s
connecting line
and ensure correct
position as shown.
② Please check wire
color of flame sensor
connector on main
controller.
③ Please check tthe blockage of flue (intake and
exhaust pipes)
④ If all things are normal, please replace main controller.
WARNING
Failure to turn the power off to the appliance before repair could result in serious injury or death.
LP-532 REV. 8.13.2014
57
Chapter 4 Troubleshootion
Error code
Meaning
Cause
Ignition failure
(Manual reset)
During ignition trials, if unit failed
to ignite 10 times continuosly, error
code 11 will appear.
58
Chapter 4 Troubleshootion
Error code
Meaning
Cause
DHW overheating issue
(Automatic reset)
If the temperature on the water
temperature sensor (tagged OP on
Pppe) and the water outlet sensor
exceed 199.4F error 16 will appear.
Failure event
Failure event
If the unit failed to detect flame during ignition sequence, pre-purge time will exceed 10 seconds, and error
core Er 11 will appear.
In case that OP and/or DHW temperature exceeds 119.4F, water temperature overheating fault will occur
and all output except for fan post-purge is stopped.
Check point
Check point
① Please
check flame
detector sensor’s
connecting
line and
ensure proper
connection.
① Check to see if the default DIP
SWITCH settings have been changed
from the factory settings - assure
that default settings are set to correct
overheating condition.
② Please check
flame sensor wire
color of connector
in the main
controller.
② If the flame sensing viewing port is excessively discolored,
loss of fame will occur. To correct this problem, replace the flame
viewing glass as shown.
WARNING
Failure to turn the power off to the appliance before repair
could result in serious injury or death.
■ From more than DC 2.5V after ignition safety cut-off will appear
① When setting before ignition is less than DC 2.5V : Replace infrared sensor
② When setting aftet ignition is more than DC 2.5V : Replace infrared sensor
Flame detector sensor setting (Please check after closing
front cover)
ITEM
Normal operating settings
Before ignition
More than DC 2.5V
After ignition
Less than DC 2.5V
② Check if DHW pipe is folded or
blocked.
LP-532 REV. 8.13.2014
LP-532 REV. 8.13.2014
Please check the Water Outlet Sensor. When the value measured with a
multi-meter is 0Ω, replace water outlet
sensor.
59
Chapter 4 Troubleshootion
Error code
Meaning
Operating DHW overheating
switch
(Manual reset)
Cause
Error code
This water heater has two overheating
switches. One attached at burner
and the other at DHW outlet. These
sensors act as dual safety device in
case of DHW temperature sensor’s
malfunction.When the overheating
switch is disconnected an error code is
shown, fan continues to operate until
error code is clear.
Failure event
60
Chapter 4 Troubleshootion
Meaning
Cause
Air Pressure Switch open
(Manual reset)
When exhaust vent or condensate
blockages occur, error code 29 will
appear.
Failure event
In case of vent or condensate blockage, the air pressure in the combustion system exceeds the APS
setting and Er 29 is displayed.
DHW overheating switch faulty or disconnected.
Check point
Check point
① Check APS wiring to
ensure proper connection.
① Perform overheating switch
inspection when error appears and
burner physical temperature is not
high.
② Check APS hose (check hose damages).
④ If above conditions are normal:
Check APS resistance with multimeter
Check for resistance(0L)
If OL does not display replace switch
② Check connector and if no problem,
measure resistance of the overheating
switch located at heat exchanger outlet and
replace overheating switch when the value
is 0Ω.
③ Check condensate
discharging line.
LP-532 REV. 8.13.2014
LP-532 REV. 8.13.2014
61
Chapter 4 Troubleshootion
Chapter 4 Troubleshootion
Meaning
Cause
Error code
Water Inlet Sensor error
(Automatic reset)
When DHW Inlet temperature
sensor wiring line located at DHW
inlet adapter is disconnected or
having issue.
Error code
62
Meaning
Cause
Water Outlet Sensor error
(Automatic reset)
Error is displayed when DHW
outlet temperature sensor wiring
line is disconnected or faulty.
Failure event
Failure event
DHW inlet temperature sensor mulfunction or disconnected
Water outlet sensor faulty or disconnected.
Check point
Check point
① Check if DHW Inlet
temperature sensor’s
wiring connected at
DHW inlet adapter is
disconnected. And
check main control’s
socket.
① Check if Water Outlet Temperature Sensor wiring and main
controller connected at water outlet adapter is disconnected.
Also check main controller's socket.
DHW Inlet water (blue/blue)
② ▶ Connect multimeter leads
to the Water Outlet Sensor
socket and measure the
resistance value (If value is
0Ω it’s a sensor’s malfunction
so replace it)
② Connect multimeter leads
to the DHW Inlet temperature
sensor socket and measure the
resistance value (If value is 0Ω
it’s a sensor’s malfunction so
sensor needs to be replace)
③ If all things are normal, please replace main
controller.
WARNING
Failure to turn the power off to the appliance before repair could result in serious injury or death.
LP-532 REV. 8.13.2014
LP-532 REV. 8.13.2014
63
Chapter 4 Troubleshootion
Error code
Meaning
Cause
Water temperature sensor error
(Automatic reset)
When heat exchanger’s water
temperature sensor wiring line is
disconnected or faulty.
64
Chapter 4 Troubleshootion
Error code
Meaning
Cause
Exhaust Temperature sensor
error (Automatic reset)
When exhaust temperature sensor
wiring line is disconnected or
faulty.
Failure event
Failure event
Exhaust temperature sensor faulty or disconnected.
Water temperature sensor (tagget OP) faulty or disconnected.
Check point
Check point
① Check if water temperature
sensor’s wiring connected
at heat exchanger is
disconnected. Also check main control’s socket.
① Check if exhaust temperature
sensor wiring is disconnected.
Also check main controllers
socket.
Water temperature sensor (black/black)
② Connect multimeter leads
to water temperature sensor’s
socket and measure the
resistance value (If value is 0Ω
it’s a sensor’s malfunction so
replace it)
LP-532 REV. 8.13.2014
Exhaust duct (white/blue)
② Connect multimeter leads
to exhaust temperature sensor
socket and measure the
resistance value (If value is 0Ω
it’s a sensor’s malfunction and will
need to be replaced )
LP-532 REV. 8.13.2014
65
Chapter 4 Troubleshootion
Error code
Meaning
Cause
EEPROM error
(Manual reset)
Check EERPOM setting
temperature is within 95~140℉.
When EEPROM malfunctions,error
occurs and all of the outputs will
stop except fan post-purge.
66
Chapter 4 Troubleshootion
Error code
Meaning
Cause
False flame sensing
(Automatic reset)
If false flame is detected after
combustion is ended, error code
39 will appear.
Failure event
Failure event
When EEPROM malfunctions, error occurs and all of the outputs will stop except post-purge
Flame is detected after combustion is ended.
Check point
Check point
① Ensure the appliance cover is secured. Flame detection
sensor can dtect external light source and cause an error code.
① Replace main controller when error occurs.
WARNING
Failure to turn the power off to the appliance before repair could result in serious injury or death.
Please check flame detection sensor's connecting line and
ensure correct position as shown.
② From more than DC 2.5V after ignition safety cut-off will appear
ⓐ When setting before ignition is less than DC 2.5V : Replace infrared sensor
ⓑ When setting after ignition is more than DC 2.5V : Replace infrared sensor
Flame detector sensor setting (Please check after closing
front cover)
ITEM
Normal operating settings
Before ignition
More than DC 2.5V
After ignition
Less than DC 2.5V
③ If all things are normal, replace main controller.
WARNING
Failure to turn the power off to the appliance before repair
could result in serious injury or death.
LP-532 REV. 8.13.2014
LP-532 REV. 8.13.2014
67
Chapter 4 Troubleshootion
Error code
Meaning
Cause
Gas leakage
(Manual reset)
When gas leakage is detected
during operation error code 40 will
appear.
68
Chapter 4 Troubleshootion
Error code
Failure event
Meaning
Cause
Excess fan speed detected
(Manual reset)
When standard fan speed is
exceeded during combustion, error
code 41 will appear
Failure event
When gas leak is detected for more than 10 minutes continuosly or 3 times in a hour, error code will
appear.
Excess fan speed.
Check point
Check point
① Check vent blockage
① Follow instruction on first page of installation manual.
Check leakage by using soapy water on all related gas
pipe connection and gas valve to determine source of
leak. Once determined, repair leak and reassemble.
Check conditions of O-rings and gaskets and replace
them if damaged.
② If leaks are not present on the gas piping and valve, start
the unit and monitor for leaks around blower assembly and
connection to determine source of leaks.
③ If all things are normal, replace main controller.
WARNING
Failure to turn the power off to the appliance before repair
could result in serious injury or death.
LP-532 REV. 8.13.2014
LP-532 REV. 8.13.2014
69
Chapter 4 Troubleshootion
Error code
Meaning
Cause
Jumped wire disconnected
(Manual reset)
Er 42 will appear if wire is
disconnected.
70
Chapter 4 Troubleshootion
Error code
Failure event
Meaning
Cause
Burner plate overheating
protection switch open
(Manual reset)
If burner temperature is higher
than the switch high limit (302 F),
error code 43 will appear.
Failure event
Jumped wire disconnected.
When burner overheating switch's temperature exceeds 392 F, error code will appear.
Check point
Check point
① Check burner plate for
distortion or burn marks.
If plate shows signs of
overheating, replace entire
burner plate assembly.
① Ensure that jumped wire is properly connected on the main
controller.
② If all things are normal, replace main controller.
WARNING
Failure to turn the power off to the appliance before repair could result in serious injury or death.
② Check to see if the default DIP SWITCH settings
have been changed from the factory settings – assure
that default settings are set to correct overheating
condition.
③ When all the things are normal
check gas nozzle. Check assembly
condition of burner and heat exchanger.
WARNING
Failure to turn the power off to the appliance before repair could result in serious injury or death.
LP-532 REV. 8.13.2014
LP-532 REV. 8.13.2014
71
Chapter 4 Troubleshootion
Error code
Meaning
Cause
DHW flow control valve error
(Manual reset)
Not able to supply hot water in
setting temperature when flow rate
exceeds water heater maximum
capacity
72
Chapter 4 Troubleshootion
Error code
Meaning
Cause
Mixing valve error (Manual reset)
Unable to operate normally due to
manual reset error. When flow rate
decreases temperature gap gets
bigger.
Failure event
Failure event
Mixing valve operation error.
Flow control valve opearation error.
Check point
Check point
① Mixing Valve recognizes zero point after turning off and on the
power. Check indication of error after basically turning off and on the
power.
① Flow control valve recognizes zero point after turning off
and on the power. Check indication of error after basically
turning off and on the power.
② Check wiring line connection
carefully.
② Check wiring line connection
carefully.
③ If above conditions are normal, replace flow control valve
③ If above conditions are normal, replace mixing valve
WARNING
Failure to turn the power off to the appliance before repair could result in serious injury or death.
④ If all things are normal, replace main controller.
WARNING
Failure to turn the power off to the appliance before repair could result in serious injury or death.
LP-532 REV. 8.13.2014
LP-532 REV. 8.13.2014
73
Chapter 4 Troubleshootion
Error code
Meaning
AGM Error
(Manual reset)
Cause
74
Chapter 4 Troubleshootion
Error code
Failed to control gas and air
mixture, the exhaust gas exceeds
limits or causes noises.
Hot water supplied is not reaching
target setting
Failure event
Meaning
Cause
Flame detector error
(Automatic reset)
When flame is detected before
ignition, error code 72 appears.
Failure event
AGM operation error.
Flame detected before ignition.
Check point
Check point
① AGM recognizes zero point after turning off and on the power.
Check indication of error after basically turning off and on the power.
If the erro is still present, turn off the power and manually move the
AGM handle (blue) and turn on the power to clear the error.
① Ensure the appliance cover is secured. Flame detection
sensor can dtect external light source and cause an error code.
Please check flame detection sensor's connecting line and
ensure correct position as shown.
② Check wiring line connection
carefully.
■ From more than DC 2.5V after ignition safety cut-off will appear
① When setting before ignition is less than DC 2.5V : Replace infrared sensor
② When setting after ignition is more than DC 2.5V : Replace infrared sensor
Flame detector sensor setting (Please check after closing
front cover)
③ Check fan inlet/outlet hole is completely
opened after stopping the operation.
LP-532 REV. 8.13.2014
LP-532 REV. 8.13.2014
ITEM
Normal operating settings
Before ignition
More than DC 2.5V
After ignition
Less than DC 2.5V
75
Error code
Meaning
Board setting fault
(Automatic reset)
Chapter 4 Troubleshootion
Chapter 4 Troubleshootion
Cause
Error code
76
Meaning
Exhaust temperature
over heating fault
(Manual reset)
If DIP switch is abnormal,
'Er 73' is displayed
Failure event
Cause
If exhaust NTC detects vent
temperature higher than 149 ◦F,
'Er 94' is displayed.
Failure event
DIP SWITCH abnormal.
Exhaust temperature overheating issue.
Check point
Check point
①Check to see if the default DIP SWITCH
settings have been changed from the factory
settings – assure that default settings are set to
correct overheating condition.
① Please check the blockage of flue (intake and exhaust
pipes).
② Check to see if the default DIP SWITCH settings
have been changed from the factory settings – assure
that default settings are set to correct overheating
condition.
③ ▶ When all check points are normal related to the internal
pin, replace heat exchanger.
WARNING
Failure to turn the power off to the appliance before repair could result in serious injury or death.
WARNING
Failure to wait for appliance to cool before continuing with repair could result in serious injury
or death.
LP-532 REV. 8.13.2014
LP-532 REV. 8.13.2014
77
Chapter 5 Replacement instructions
Main components Replacement Instructions
78
Chapter 5 Replacement instructions
Main components Replacement Instructions
1. Main Controller
2. Igniton Transformer
1. Close the gas shut off valve
6. Assembly is in the reverse order as the part was
2. Turn the power off
repaired.
3. Loosen two screws to remove main controller
cover.
4. Disconnect all the electrical connection to the main
controller
1. Close the gas shut off valve
2. Turn the power off
3. Disconnect the electrical connection to the main
controller
5. Loosen two screws on both sides to remove main
controller.
4. Remove the cable connected to the igniter.
7. Open the gas shut off valve
8. Turn the power on
9. Turn the unit on and ensure proper operation.
5. Remove two screws to separate ignition transformer from the water heater cabinet.
6. Separate ignition transformer from the bracket by
unlocking the palstic pieces on the back side of the
bracket.
7. Replace ignition transformer with new component
8. Assembly is in the reverse order as the part was
repaired.
9. Open the gas shut off valve
10. Turn the power on
11. Turn the unit on and ensure proper operation.
NOTE: When assemble connector, check wiring
color and proper connection to avoid mistake.
NOTE
Ensure the ignition transformer is properly secured.
WARNING
Failure to turn the power off to the appliance before repair could result in serious injury or death.
WARNING
Failure to turn the power off to the appliance before repair could result in serious injury or death.
LP-532 REV. 8.13.2014
LP-532 REV. 8.13.2014
79
Chapter 5 Replacement instructions
Main components Replacement Instructions
80
Chapter 5 Replacement instructions
Main components Replacement Instructions
3. Flame Detection Sensor
4. Gas Leak Detector
5. Air pressure swtich (APS)
1. Close the gas shut off valve
2. Turn the power off
3. Disconnect all the electrical connection to the
flame detection sensor
1. Close the gas shut off valve
2. Turn the power off
3. Disconnect all the electrical connection to the
main controller
1. Close the gas shut off valve
2. Turn the power off
3. Disconnect the electrical connection to the APS
5. Loosen Air Pressure switch bracket’s two
screws.
5. Pluck away PCB’s gas leakage detector.
4. Rotate flame detection sensor 45 degrees
clockwise and pull forward.
4. Separate hose from Air Pressure switch.
6. Replace leak detection with new component.
7. Assembly is in the reverse order as the part was
repaired.
8. Open the gas shut off valve
9. Turn the power on
10. Turn the unit on and ensure proper operation.
5. Replace flame detection sensor with new
component.
6. Assembly is in the reverse order as the part was
repaired.
7. Open the gas shut off valve
8. Turn the power on
9. Turn the unit on and ensure proper operation.
WARNING
Failure to turn the power off to the appliance
before repair could result in serious injury or
NOTE: Ensure the flame detection sensor is
properly secured.
LP-532 REV. 8.13.2014
LP-532 REV. 8.13.2014
6. Replace APS with new component
7. Assembly is in the reverse order as the part was
repaired.
8. Open the gas shut off valve
9. Turn the power on
10. Turn the unit on and ensure proper operation.
81
Chapter 5 Replacement instructions
Main components Replacement Instructions
Main components Replacement Instructions
6. Gas valve
1. Close the gas shut off valve
2. Turn the power off
3. Disconnect all electrical connection to the gas
valve
82
Chapter 5 Replacement instructions
7. Condensate Trap
5. Loosen fours screws to separate gas valve from
upper bracket
6. Loosen fours screws to separate gas valve from
lower bracket
1. Close the gas shut off valve
2. Turn the power off
3. Removed condensate trap drain cap and ensure
it is drained properly.
4. Loosen two screws to open the front cover.
6. Remove hose that connect connected from APS
to condensate trap.
7. Loosen 3 screws on the bottom of the cabinet
that holds condensate trap in place.
4. Disconnect the gas line from the gas valve by
loosing the nuts as shown.
5. Remove hose inlet hocse from the HX
condensate pan connected to condensate trap.
7. Replace gas valve with new component.
8. Assembly is in the reverse order as the part was
repaired.
9. Open the gas shut off valve
10. Turn the power on
11. Turn the unit on and ensure proper operation.
WARNING
Failure to turn the power and gas off to the
appliance before repair could result in serious
injury or death.
8. Replace condensate trap with new component.
9. Assembly is in the reverse order as the part was
repaired.
10. Open the gas shut off valve
11. Turn the power on
12. Turn the unit on and ensure proper operation.
NOTE: You must check for gas leaks around gas
valve assembly. failure to do so will result in death
or serious personal injury.
LP-532 REV. 8.13.2014
LP-532 REV. 8.13.2014
83
Chapter 5 Replacement instructions
Main components Replacement Instructions
Main components Replacement Instructions
8. Flow Control valve
1. Close the gas shut off valve
2. Turn the power off
3. Close all water valves and drain water from unit.
4. Disconnect the electrical connection to the flow
control valve.
5. Loosen two screws to open the front cover.
6. Remove connector connected to flow control
valve and flow detection sensor.
84
Chapter 5 Replacement instructions
8. Separate flow control valve from DHW pipe and
DHW inlet filter.
9. Cold Water Inlet Filter Assembly.
11. Mixing Valve
1. Close the gas shut off valve
2. Turn the power off
3. Close all water valves and drain water from unit.
4. Loosen two screws to open the front cover.
7. Separate flow control valve from DHW pipe and
5. Loosen two screws and remove temperature
sensor connected with DHW inlet filter.
9. Replace flow control valve with new component.
10. Assembly is in the reverse order as the part was
repaired.
11. Open the gas shut off valve
12. Turn the power on
13. Open all water valves.
14. Turn the unit on and ensure proper operation.
DHW inlet filter.
8. Loosen two top screws and four bottom screws
connected with DHW supply filter and adapter.
WARNING
Failure to turn the power off to the appliance
before repair could result in serious injury or
death.
7. Remove two clips from flow control valve.
WARNING
Failure to wait for appliance to cool before
continuing with repair could result in serious
injury or death.
6. Remove two clips from flow control valve.
9. Replace cold water inter filter assembly with new
component.
10. Assembly is in the reverse order as the part was
repaired.
11. Open the gas shut off valve
12. Turn the power on
13. Open all water valves.
14. Turn the unit on and ensure proper operation.
WARNING
Failure to turn the power off to the appliance
before repair could result in serious injury or
death.
WARNING
Failure to wait for appliance to cool before
continuing with repair could result in serious
injury or death.
LP-532 REV. 8.13.2014
LP-532 REV. 8.13.2014
85
Chapter 5 Replacement instructions
Main components Replacement Instructions
86
Chapter 5 Replacement instructions
Main components Replacement Instructions
10. Cold Water Inlet Filter
11. Mixing Valve
12. Air Gas Mixer(AGM)
1. Close the gas shut off valve
2. Turn the power off
3. Close all water valves and drain water from unit.
4. Place a bucket under the appliance to collect the
residual water inside the water heater.
5. Separate cold water inlet filter by rotating counterclockwise.
1. Close the gas shut off valve
2. Turn the power off
3. Close all water valves and drain water from unit.
4.Loosen two screws to access controller
connections
1. Close the gas shut off valve
2. Turn the power off
3. Separate intake pipe attached to AGM.
5. Separate connector connected with mixing valve.
6. Loosen gas pipe nut connected with AGM
7. Loosen burner plate bracket’s by loosen two
screws as shown.
4. Remove AGM connector.
6. Remove two clips connected with mixing valve
and outlet pipe.
8. Loosen two screws to remove AGM
5. Remove fan connector.
6. Clean it with a small brush and clean running water.
7. Open the gas shut off valve
8. Turn the power on
9. Open all water valves.
10. Turn the unit on and ensure proper operation.
WARNING
Failure to turn the power off to the appliance
before repair could result in serious injury or
death.
WARNING
Failure to wait for appliance to cool before
continuing with repair could result in serious
injury or death.
7. Separate mixing valve and outlet pipe
8. Remove mixing valve and replace with new component.
9. Assembly is in the reverse order as the part was
repaired.
10. Open the gas shut off valve
11. Turn the power on
12. Open all water valves.
13. Turn the unit on and ensure proper operation.
9. Replace AGM with new component
10. Assembly is in the reverse order as the part was
repaired.
11. Open the gas shut off valve
12. Turn the power on
13. Open all water valves.
14. Turn the unit on and ensure proper operation.
WARNING
Failure to turn the power off to the appliance
before repair could result in serious injury or
death.
WARNING
Failure to turn the power and gas off to the
appliance before repair could result in serious
injury or death.
WARNING
Failure to wait for appliance to cool before
continuing with repair could result in serious
injury or death.
LP-532 REV. 8.13.2014
LP-532 REV. 8.13.2014
87
Chapter 5 Replacement instructions
Chapter 6 Maintenance
Main components Replacement Instructions
Cleaning Air Intake Filter
13. BLDC Fan Assembly
1. Close the gas shut off valve
2. Turn the power off
3. Separate intake pipe attached to AGM.
6. Loosen gas pipe nut connected with AGM
To properly maintain the water heater, you should clean air intake filter every month.
To clean air intake filter:
1. Press Power button on the control panel to turn off the water heater and
turn off the gas valve.
2. Disconnect power supply to water heater.
3. Remove front cover of water heater.
4. Pull the filter out of air intake adapter.
7. Loosen burner plate bracket’s by loosen two
screws as shown.
4. Remove AGM connector.
8. Loosen three screws to separate AGM cover and
motor.(Loosen AGM’s two screw.)
9. Remove three screws to separate Fan, connected
with AGM.
5. Remove the filter from the plastic assembly and clean it with a small brush and clean running water.
6. Dry the filter completely and then reinsert the filter into the plastic assembly.
7. Replace the front cover and reconnect the power supply to the water heater.
8. Press Power button on the front panel to turn on water heater.
Cleaning cold water Inlet Filter (Draining the Water Heater)
1. Place a bucket under the appliance to collect the residual water inside the water heater.
2. Press Power button on the front control panel to turn off the electrical power to the water heater and
turn off the gas valve.
3. Close water supply valve on the inlet to the appliance.
4. Open the hot water faucets completely.
5. Remove the cold water inlet filter. Clean inlet filter with a small brush and clean running water.
5. Remove fan connector.
10. Replace BLDC fan with new component
11. Assembly is in the reverse order as the part was
repaired.
12. Open the gas shut off valve
13. Turn the power on
14. Open all water valves.
15. Turn the unit on and ensure proper operation.
WARNING
Failure to turn the power and gas off to the
appliance before repair could result in serious
injury or death.
LP-532 REV. 8.13.2014
LP-532 REV. 8.13.2014
88
89
Chapter 6 Maintenance
90
Chapter 7 Components diagram
Main components diagram and part list
Flushing the Water Heater
Flushing the Heat Exchanger is a complicated procedure that should only be performed by a qualified service
technician.
NOTE: Improper maintenance WILL AVOID water heater warranty.
1.Disconnect electrical power to the water heater.
2.Close the shut-off valves on both hot water outlet and cold water inlet lines. (V1 & V2)
3.Connect one hose “D1” to the valve “V3” and place the free end in the bucket. Connect one of the hoses
“D3” to the circulation pump outlet and the cold water inlet line at the valve “V4”. Connect other hose “D2”
to the circulation pump inlet and place the free end in the bucket.
4.Pour the tankless water heater cleaning solution into the bucket. Ensure the cleaning solution is approved for potable water systems.
Place the drain hose (D1) and the hose (D2) to the pump inlet into the cleaning solution.
5.Open service valves (V3 & V4) on the hot water outlet and cold water inlet lines.
6.Turn on the circulation pump. Operate the pump and allow the cleaning solution to circulate through the
water heater for at least 1 hour at a rate of 4 gallons per minute. This will remove any possible harmful scale
deposits.
7.Rinse the cleaning solution from the water heater as follows:
- Remove the free end of the drain hose (D1) from the bucket.
- Close service valve, (V4), and open shut-off valve, (V2). Do not open shut-off valve, (V1).
- Allow water to flow through the water heater for 5 minutes.
- Close shut-off valve (V2).
8. Disconnect all hoses.
9. Remove the cold water inlet filter from water heater and clean out any residues.
10. Reinsert the filter and ensure the filter cap is securely tightened.
11. Connect electrical power to the water heater.
12. Open hot water faucet. Run the water heater continuously for five minutes to ensure all cleaning solution
is purged from the system. Check for leaks and ensure the water heater is operating properly.
LP-532 REV. 8.13.2014
NUMBER
1
2
3
3-1
3-2
3-3
4
5
6
7
7-1
7-2
8
9
10
DESCRIPTION
EXHAUST ASSY
CASE
DOOR ASSY
FRONT COVER
DISPLAY PANEL BRACKET
DISPLAY PANEL
IGNITION TRANSFORMER
GAS INLET NIPPLE
OVERHEAT SENSOR
DHW SUPPLY PIPE ASSY
DHW SUPPLY PIPE
WATER OUTLET SENSOR
N/A
SIPHON ASSY
SIPHON AIR PRESSURE HOSE
LP-532 REV. 8.13.2014
PART NUMBER
7850P-021
7850P-044
7850P-025
7850P-062
7850P-024
7850P-023
7850P-045
7850P-043
7850P-050
7850P-020
7850P-063
7850P-019
N/A
7850P-014
7850P-064
NUMBER
11
12
13
14
15
16
17
18
18-1
18-2
18-3
18-4
19
20
21
DESCRIPTION
AIR PRESSURE SWITCH
DISPLAY BRACKET
DISPLAY
CONTROL
CONTROL BRACKET
ROCKER SWITCH
FLOW CONTROL VALVE
WATER INLET VALVE ASSY
WATER INLET VALVE BODY
WATER INLET SENSOR
WATER INLET FILTER
WATER INLET FILTER CAP
CASE BRACKET (LEFT)
CASE BRACKET (RIGHT)
INTAKE AIR ASSY
PART NUMBER
7850P-047
7850P-065
7850P-057
7850P-058
7850P-066
7850P-059
7850P-053
7850P-018
7850P-067
7850P-015
7850P-017
7850P-016
7850P-068
7850P-069
7850P-022
91
Chapter 7 Components diagram
Memo
Main components diagram and part list
NUMBER
31
31-1
31-2
DESCRIPTION
HEAT EXCHANGER ASSY
EXHAUST PIPE ASSY (UP)
EXHAUST TEMPERATURE SENSOR
31-3
EXHAUST GASKET 1
31-4
EXHAUST PIPE ASSY (DOWN)
31-5
31-6
32
32-1
32-2
32-3
EXHAUST GASKET 2
CONDENSATE GUTTER
FAN ASSEMBLY
FAN
O-RING
AGM (ACTUATOR)
33
SILENCER ELBOW
34
35
35-1
SILENCER BODY
BURNER ASSY
BURNER HEAD
35-2
IGNITION ROD BRACKET
35-3
IGNITION ROD
35-4
BLOWER HEAD BRACKET
35-5
OVERHEAT SENSOR (BURNER)
PART NUMBER
7850P-032
7850P-033
7850P-070
7850P-071
7850P-034
NUMBER
35-6
36
37
38
39
7850P-072
7850P-073
7850P-006
7850P-002
7850P-003
7850P-004
7850P-036
40
41
42
43
44
45
7850P-035
7850P-011
7850P-007
7850P-010
47
47-1
47-2
7850P-008
7850P-074
49
7850P-009
46
48
50
51
DESCRIPTION
METAL FIBER
FLAME DETECTOR SENSOR
MIXING VALVE
WATER TEMPERATURE
SENSOR
WATER TEMPERATURE
OVERHEAT SENSOR
DHW OUTLET PIPE
WATER PIPING CLIP
DHW INLET PIPE
CERAMIC HEATER
GAS VALVE PIPE
GAS VALVE PIPE
GAS VALVE ADAPTER
(STRAIGHT)
GAS VALVE ASSY W/ PLUG
GAS VALVE
GAS VALVE PLUG
GAS VALVE ADAPTER
(90 DEGREE)
GAS VALVE BRACKET
BOTTOM HEAT EXCHANGER
BRACKETS
TOP HEAT EXCHANGER
BRACKETS
PART NUMBER
7850P-075
7850P-031
7850P-054
7850P-081
7850P-051
7850P-049
7850P-055
7850P-048
7850P-076
7850P-039
7850P-040
7850P-077
7850P-078
7850P-012
7850P-013
7850P-079
7850P-080
7850P-028
7850P-082
LP-532 REV. 8.13.2014
LP-532 REV. 8.13.2014
92
93
Memo
LP-532 REV. 8.13.2014
Memo
LP-532 REV. 8.13.2014
94