1
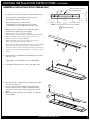
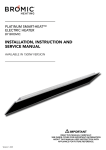
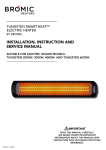
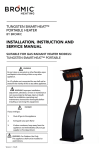
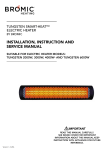
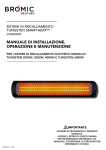
platinum Smart-heat™
eLECTRIC heater
BY BROMIC
Installation, instruction and
service manual
aVAILABLE IN 1500W VERSION
! IMPORTANT
READ THIS MANUAL CAREFULLY.
SEE INSIDE COVER FOR IMPORTANT INFORMATION
ABOUT THIS MANUAL.KEEP INSTRUCTION WITH
APPLIANCE FOR FUTURE REFERENCE.
Version 1.1 AUS
! IMPORTANT
This manual contains important information about the installation, operation, and maintenance
of Platinum Smart-Heat™ Electric Heaters. Please pay close attention to the important safety
information shown throughout this instruction manual. Any safety information will be accompanied
by the following safety alert symbols:
! DANGER,
! WARNING,
! IMPORTANT
• READ THIS MANUAL CAREFULLY before installing or
servicing this product.
• Improper installation, operation, or maintenance can result in
death, severe injury, or property damage.
• This appliance is intended for fixed installation with 220-240V
AC Single phase power supply
• Installation MUST be carried out by a licensed and authorised
technician in accordance with local electrical codes.
Head Office: 1 Suttor Street, Silverwater, Sydney, NSW 2128 Australia
Telephone: 1300 276 642 (within Australia) or +61 2 9748 3900 (from overseas) Fax: +61 2 9748 4289
Email: [email protected] Web: www.bromicheating.com
Note: Bromic Pty Ltd reserves the right to make changes to specifications, parts, components and equipment without prior notification.
This Installation, operation and service manual may not be reproduced in any form without prior written consent from Bromic Pty Ltd.
2
www.bromicheating.com
CONTENTS
IMPORTANT NOTES & WARNINGS
4
PRODUCT OVERVIEW
5
PRODUCT DESCRIPTION
5
SPECIFICATIONS
5
PRODUCT FEATURES
5
HEATER INSTALLATION INSTRUCTIONS
6
CEILING & WALL MOUNTING
6
CEILING RECESS
8
UMBRELLA MOUNTING
9
TUBE SUSPENSION
10
CHAIN SUSPENSION
11
ELECTRICAL INSTALLATION
12
SERVICING
12
REPLACEMENT PART LIST
13
TROUBLESHOOTING
13
WARRANTY
14
www.bromicheating.com
3
IMPORTANT NOTES AND WARNINGS
& licenced service person only. The heater should be
inspected before use and at least annually serviced &
inspected by a qualified & licenced service person.
! WARNING
•
IMPORTANT - Installation MUST be carried out by a
licensed and authorised person.
•
•
Improper installation, adjustment, or alteration and
Failure to follow the warnings and instructions in this
manual could result in severe personal injury, death or
property damage.
Do not perform maintenance until heater has been
turned off, power disconnected, and heater temperature
has cooled to room temperature.
•
The manufacturer is not responsible for any damage
that could happen from improper use. The manufacturer
emphasises that this appliance should be used in a
responsible manner and that all procedures, warnings,
and safety instructions contained in this booklet be
followed strictly.
Certain materials or items, when stored under or near
the appliance, will be subjected to radiant heat and
could be seriously damaged. Combustible materials eg.
walls, floors, furniture, fixtures and plants must be kept a
minimum of 1000mm from the heater.
•
Clothing or other flammable materials should not be
hung from the heater or placed on or near the heater.
•
Be sure the heater is not facing the ceiling or flammable
or combustible substances/materials.
•
This radiant heater is NOT intended to be installed on
recreational vehicles and/or boats.
•
Do not attempt to alter the unit in any manner.
•
Remove transit protection before use.
•
Never operate the heater in an explosive environment
such as areas where petrol or other flammable liquids or
vapours are stored.
•
Do not paint any surface of the heater.
•
Check for damage to the appliance regularly. The heater
must not be used if the black radiant panel or any other
part of the heater is damaged. If damage to the appliance
is suspected, discontinue use immediately and contact
the supplier or qualified person to repair.
After unpacking, make sure the appliance shows no signs
of visible damage or tampering. If the appliance appears
damaged, contact the place of purchase for assistance.
•
•
•
Do not place articles on or against this appliance.
•
Do not use or store flammable materials near this
appliance
•
This Installation, Operation and Service manual should
not be removed from the site of installation. Installer
should leave manual with the customer for future
reference.
•
A minimum safety distance of 1000mm should always be
left in front of the appliance.
•
This unit must be mounted at a minimum of 1800 mm
above the floor.
•
The appliance must not be located directly below or in
front of a wall electricity socket. This is because the heat
radiated from the appliance may damage the electricity
outlet or plug.
•
Any guard or other protective device removed for
servicing (conducted by an authorised person) must be
replaced before operating the heater.
•
This appliance is not intended for use by persons
(including children) with reduced physical, sensory or
mental capabilities, or lack of experience and knowledge,
unless they have been given supervision or instruction
concerning use of the appliance by a person responsible
for their safety.
Heaters are not intended to be installed in wardrobes.
•
4
The installer is to ensure that the requirements of the
local authority, local electrical installation code, municipal
building codes, and any other relevant statutory
regulations are carried out.
•
Children should be carefully supervised when they are in
the area of the heater.
•
Children and adults should be alerted to the hazards of
high surface temperatures and should stay away to avoid
burns, clothing ignition, or other serious personal injury
•
Keep packaging materials out of reach of children
•
Do not spray aerosols or flammable materials in the
vincinty of this appliance while it is in operation
•
Installation and repair must be carried out by a qualified
•
•
This appliance must only be used on a 220-240V AC
Single phase power supply.
•
Do not touch the heating surface at any time, even when
the heater is turned off and has cooled down.
•
Do not touch the heater with wet hands at any time.
•
If the appliance has not been used, or will not be used,
for a long period of time, disconnect power supply
•
At the end of this product’s useful life, it must not be
disposed of as domestic waste, but must be taken to
a collection centre for waste electrical and electronic
equipment. It is the user’s responsibility to dispose of this
appliance through the appropriate channels at the end
of its useful life. Failure to do so may incur the penalties
established by laws governing waste disposal. Proper
differential collection, and the subsequent recycling,
processing and environmentally compatible disposal of
waste equipment avoids unnecessary damage to the
environment and possible related health risks, and also
promotes recycling of the materials used in the appliance.
For further information on waste collection and disposal,
contact your local waste disposal service, or the place of
purchase.
www.bromicheating.com
IMPORTANT NOTES AND WARNINGS CONTINUED ...
•
In case of direct connection to a supply line, a bipolar circuit
breaker with contact opening distance of at least 3mm
must be fitted upstream from the supply line. Contact an
authorised service technician if you are unsure if you have a
circuit breaker installed on the premises.
•
Do not install the heater directly near a bathtub, shower
or swimming pool. Any switches or controls must not
be within reach of a person in the bathtub, shower or
swimming pool.
•
To maintain Ingress Protection Rating (IPX5), only IP55
rated conduit fittings should be used for electrical
installation.
•
A means for disconnection of the heater must be
incorporated in the fixed wiring according to the local
electrical codes.
•
If the supply cord is damaged, it must be replaced by
an authorised and licenced person in order to avoid a
hazard.
PRODUCT OVERVIEW
The Platinum Smart-Heat™ Electric is designed to provide
efficient spot heating for commercial and residential
applications. The non-glowing black radiant surface of the
heater provides a comfortable heat without interfering with
the atmosphere created by your venue.
The heaters are built with corrosion resistant materials, have
electrical approval in Australia and are rated to IPX5 water
Ingress Protection. Making the Platinum Smart-Heat™
Electric the perfect solution for a variety of indoor and
outdoor heating applications.
SPECIFICATIONS
Model
1500W
Part no.
2620230
Heat Output (Watts)
1500W
Power connection required (Volts/Amps)
220-240V - a.c. - 50/60Hz / 6.5 Amps
Dimensions (WxHxDmm)
960 x 162 x 40mm
Weight (kg)
6.2kg
Finish
High-temperature Coating
Approval
PRODUCT FEATURES
Australian Approval Number SGSEA/110842
▪▪ Ultra-thin and stylish design
▪▪ Non-glowing — does not interfere with the atmosphere
created by your venue or environment.
▪▪ Suitable for outdoor and indoor heating applications
such as restaurants, cafes, bars and clubs, factories, office
spaces, designated smoking areas, public areas, hotels and
more.
▪▪ Efficient directional spot heating.
▪▪ Standard Mounting - included with heater.
▪▪ Heat Zones — one or more heaters can be switched on and ▪▪ Optional Mounting - purchased separately from heater:
off simultaneously from a single remote-located switch.
▪▪ Umbrella Mounting
▪▪ Platinum Smart-Heat™ Electric Heaters can also be
▪▪ Ceiling Recess
integrated into smart control systems.
▪▪ Tube Suspension
▪▪ Wind resistant & IPX5 water protection rating.
▪▪ Chain Suspension
www.bromicheating.com
5
HEATING INSTALLATION INSTRUCTIONS
Ceiling & Wall Mounting Brackets
1. Heater must be installed with the minimum installation
clearances shown in diagram.
Minimum distance between heaters measured from
edge of heaters must be at least 500mm.
Minimum distance from edge of the heater to any
adjacent walls must be at least 250mm. Heater must be
away from the fourth wall.
During installation the supply cord should be
positioned such that it exits from the nearest edge
of the heater and not from the centre or across the
heater.
CEILING MOUNTING
WALL MOUNTING
CEILING
160
250
180
CEILING
2400
1800
2200
2580
250
FLOOR
!
FLOOR
WARNING
This heater MUST be permanently installed by
an authorised/licenced person. Do not perform
maintenance, or carry out installation or assembly
procedure while electrical power is switched on.
6
!
WARNING - Outdoor Installation
For longest product life & to maintain product
appearance mount heater under cover & protect
from rain & weather whenever possible.
www.bromicheating.com
2. Mark mounting hole centres on ceiling or wall. Brackets
have 2 different mounting holes options.
30
960
453
438
67.5
HEATING INSTALLATION INSTRUCTIONS CONTINUED...
Mounting Hole Centres
2 & Heater Position
3
4
3. Attach mounting brackets to ceiling or wall using
appropriate fasteners (Not supplied).
4. Assemble rear brackets to heater with M5 screws.
7
6
5. Bring heater up to mounting brackets and lock into
position with M5 screw & nut.
6. Rotate heater to required angle. 15° or 30° in either
direction. Lock into position with M5 screw & nut.
7. Make electrical connection from heater to power
supply.
www.bromicheating.com
5
7
HEATING INSTALLATION INSTRUCTIONS CONTINUED...
Ceiling Recess (Sold separately)
!
WARNING
!
WARNING
Instructions below are suitable for ceiling surfaces 1030mm thick. For ceiling surfaces
thicker than 30mm contact Bromic for alternative
installation options.
The heater shall, under no circumstance, be covered with
insulating material or similar material.
During installation the supply cord should be positioned
such that it exits from the nearest edge of the heater
and not from the centre or across the heater
!
WARNING
Minimum vertical ceiling space clearance measured from
ceiling surface must be 300mm.
Minimum horizontal ceiling space clearance measured
from each edge of ceiling cut out must be 500mm.
Minimum distance between heaters measured from edge
of ceiling cut out must be 500mm.
!
WARNING
Joists, beams and rafters shall not be cut or notched to
install the heater.
1008
210
1. Prepare ceiling cut out. Heater must be installed with
heater surface at least 2400mm above the floor level.
1 Ceiling Cut Out
2
2. Put ceiling support brackets in position.
3. From below, bring ceiling frame up and into ceiling cut
out.
4. Fasten ceiling frame to ceiling support brackets with
M5 screws & nyloc nuts. Which locator hole to use is
iling
dictated by thickness of ceiling surface.
urfaces
r
ear cover
3
e kept clear
4
5. Screw hex spacers into 4 mounting holes. Spacers
must be assembled between heater & rear mounting
brackets.
6. Assemble rear mounting brackets to spacers with M5
screws.
sition
7. Raise one side of heater up into ceiling frame cavity &
p and into
then raise whole heater into cavity.
8. Rotate the heater into horizontal position in the ceiling
th M4x10
ole to use cavity & then lower down onto the ceiling frame.
ace. 9. Ensure all four rear mounting brackets are hooked over
the ceiling frame & centre the heater inside the frame.
10. Make electrical connection from heater to power
supply.
to heater
8
www.bromicheating.com
6
5
HEATING INSTALLATION INSTRUCTIONS CONTINUED...
Heater position relative
to mounting holes
6
25
UMBRELLA MOUNTING (SOLD separately)
Heater must be installed with heater surface at
least 2400mm above the floor level.
162
1. Heater must only be mounted on metal umbrella arms.
117
Drill mounting holes in umbrella arm.
2 x Ø6.0mm holes through both sides of arm.
1 x Ø25.0mm hole through bottom of arm only.
500
960
230
1 Mounting Holes
Ø25.0mm hole must be positioned at the end of
umbrella arm leading to power supply.
Minimum size of pole must be Ø30mm
Mounting pole material must be rated minimum 200°C.
Minimum distance from edge of the heater to any
adjacent surfaces must be 250mm.
Minimum distance from front surface of heater to
surface behind heater must be 180mm.
Any surface/material behind the heater, less than 180mm
from the front surface of the heater, must be rated
minimum 140°C. Surface/material must be positioned to
ensure no contact with mounting pole or surfaces of the
heater.
2
2. Attach bracket to umbrella arm with M5 bolts, washers
and nyloc nuts.
3
Supplied bolt suits umbrella arm up to Ø30.0mm.
3. Assemble heater bracket to heater with M5 screws.
4. Bring heater up to umbrella arm & feed power cable
into power cable hole.
5. Position heater against umbrella arm with heater
bracket channel on the inside of umbrella bracket
channel. Lock into place with self tapping screws 4
places.
6. Make electrical connection from heater to umbrella.
power supply.
6
5
4
www.bromicheating.com
9
HEATING INSTALLATION INSTRUCTIONS CONTINUED...
Tube Suspension (sold separately)
600
1. Heater must be installed with heater surface at least
2400mm above the floor level.
Supplied suspension tubes position heater surface
1000mm below the ceiling surface.
If required, cut down length of suspension tubes to
ensure correct installation height.
Minimum distance from front surface of heater to
ceiling surface must be 180mm.
Minimum distance between heaters measured from
edge of heaters must be at least 500mm.
1
960
20
6.5
10
2. If suspension tubes are cut down, drill new mounting
holes in each tube.
2
3. Feed power cord through hole in rear bracket and
suspension tube.
4. Attach rear bracket to heater with M5 screws.
5. Assemble suspension tubes to rear bracket with M5
screw and nut.
6. Rotate heater to required angle. 15° or 30° in either
direction. Lock into position with M3 screw and nut.
Suspension Tube
Mounting Hole
3
6
5
4
7. Slide ceiling bracket cover over suspension tubes.
8. Assemble supplied rubber grommets in ceiling bracket
to protect power supply cables.
9. Bring ceiling bracket to suspension tubes & feed
power cord through required hole in ceiling
bracket supports. Note: Which hole to feed
power cord through is defined by where the power
is brough into the ceiling bracket in Step 12.
Locate suspension tubes inside ceiling bracket supports.
10. M5 bolts through ceiling bracket supports &suspension
tubes. Secure with nyloc nuts.
11. Raise heater assembly into position. Attach ceiling
bracket to surface through mounting holes with
appropriate fasteners (Not supplied).
12. Bring power into ceiling bracket through ceiling
access holes or side access holes. Use minimum
IP55 rated cable gland in the Ø16mm holes.
If side access holes are not used, assemble supplied
hole plugs.
13. Make electrical connection from suspension tube power
cord to power from ceiling.
14. Slide ceiling bracket cover up suspension tubes into
position. Secure with self tapping screws.
10
11
8
9
10
13
12
7
14
www.bromicheating.com
HEATING INSTALLATION INSTRUCTIONS CONTINUED...
Chain Suspension (sold separately)
417
1. Heater must be installed with heater surface at least
2400mm above the floor level. If required, cut down
length of chain to ensure correct installation height.
1
Minimum distance between heaters measured from
edge of heaters must be at least 500mm.
Minimum distance from front surface of heater to
ceiling surface must be at least 180mm.
960
2
3
2. Feed power cord through hole in rear bracket.
3. Attach rear bracket to heater with M5x10 screws.
4. Attach chains to heater with “S” hooks. Crimp “S”
hooks closed after assembly.
4
7
6
5
5. Prepare ceiling structure for heater. Attach chains to
ceiling structure & suspend heater.
6. Fix heater power cord to ceiling chain with cable ties.
7. Make electrical connection from heater to power
supply.
www.bromicheating.com
11
ELECTRICAL INSTALLATION
!
WARNING
ELECTRICAL INSTALLATION
This heater MUST be permanently installed by
an authorised/licenced person. Do not perform
maintenance, or carry out installation or assembly
procedure while electrical power is switched on.
! WARNING
ELECTRICAL SHOCK HAZARD! Serious injury or death
may occur. Disconnect from electrical supply before
installing or servicing this heater. Read and follow
installation clearance requirements outlined in this
manual. The appliance MUST be connected to a properly
grounded electrical source.
1. Check product label for correct voltage and wattage
- Make sure power source conforms to the heaters
requirements.
2. Use appropriate power supply cables for the heaters’
voltage and wattage with minimum temperature rating
of 105°C. The fixed wiring must be positioned away
from & protected from the enclosure of the heater.
3. Make all connections in accordance with local
electrical code regulations. For outdoor installation all
connections must be made in accordance with local
electrical code regulations for outdoor wiring. Only
use wiring components approved for outdoor use with
minimum IPX5 rating.
SERVICING
! WARNING
MAINTENANCE
ELECTRICAL SHOCK HAZARD!
Serious injury or death may occur.
Disconnect from electrical supply before servicing this
heater.
! WARNING
Servicing and maitenance MUST be carried out by an
authorised and licenced service person only.
! WARNING
If the supply cord is damaged, it must be replaced by
Bromic, a service agent of Bromic or similarly qualified
persons in order to avoid a hazard. Contact Bromic for
further information on replacement of the supply cord.
12
For longest product life & to maintain product appearance
mount heater under cover & protect from rain & weather
whenever possible.
The exterior housing of the heater should be cleaned
regularly. To clean the appliance, ensure heater is off and
has been off for at least 2 hours after operation, and wipe
off any dirt/dust with a soft damp cloth.
For locations near the coast, salt in the air can cause rusting
of metal. Additional cleaning of the heater with a soft
damp cloth fortnightly will increase the life of the products
appearance.
www.bromicheating.com
REPLACEMENT PART LIST
No.
Description
Bromic Part No.
1
Platinum Electric 1500W
2620230
2
Ceiling Recess Kit
2620235
3
Umbrella Mounting Kit
2620236
4
Tube Suspension Kit
2620237
5
Chain Suspension Kit
2620238
TROUBLESHOOTING
SYMPTOM
POSSIBLE CAUSE (S)
CORRECTIVE ACTION
No heat
1. Improper connection
1. Check connection to power supply
Not enough heat
1. Heater too small for application
2. Heater mounted too high or too far
1. Add additional heater(s)
2. Decrease mounting height or distance
Too much heat
1. Heater too large for application
2. Heater mount too low or too close
1. Replace with smaller heater
2. Increase mounting height or distance
www.bromicheating.com
13
WARRANTY
Platinum Electric Smart-Heating Warranty Conditions
Bromic Pty Limited (‘Bromic’) warrants to the original purchaser (‘the Purchaser’) of products supplied by Bromic
Heating (‘the Goods’) that the Goods will be free from defects and/or faults in materials and/or workmanship for
Twelve (12) months from the date of Bromic invoice.
Subject to the following conditions of this Warranty, if a defect and/or fault in materials and/or workmanship are
found during the warranty period, Bromic will replace or repair the Goods (at its option) without charge.
1.
The Goods must have originated from Bromic and must be able to be identified by Bromic personnel as a Bromic
Heating product.
2.
The original invoice details, including serial number where applicable, MUST be provided to Bromic at the time
that any claim is made pursuant to the terms of the Warranty.
3.
Any claim made pursuant to the terms of the Warranty must be made within a reasonable time of the discovery
of any potential fault or defect.
4.
Acceptance of a claim under this Warranty is subject to an assessment of the Goods by Bromic, or its authorised
agent, to determine the cause of the defect prior to Bromic’s authorisation for repairs to be carried out.
5.
Repairs to the Goods must not have been attempted by any person other than an authorised service agent.
Repairs attempted by a non authorised agent will void the warranty.
6.
Where Goods are located or are to be located in premises where the induction of service or installation personnel
is required, any costs for such induction of service or installation agents to gain access to sites is for the account
of the customer and not for Bromic.
7.
The requirement for repair or replacement of the Goods must not be due to misuse, neglect, accident, improper
installation, unauthorised modification or other abuse which in the reasonable opinion of Bromic was occasioned
by the purchaser or any agent or employee of the purchaser.
8.
Repair or supply of a substitute will not extend or renew the warranty period.
9.
Bromic will warrant that any spare parts it provides will be free from defects and/or faults in materials and/or
workmanship for a period of 3 months from the date of purchase provided that these spare parts have been
installed by a Bromic authorised service agent.
10. Bromic will either undertake the repair or nominate a repair agent authorised by Bromic.
11.
Bromic’s repair warranty is restricted to normal business hours on Monday to Friday and excluding public holidays
and weekends.
12. Where Bromic elects to replace rather than repair the Goods and no identical replacement is available for the
Goods being replaced, Bromic may replace the Goods with Goods of a similar standard and design then available
from its range.
13. Bromic is not liable for the costs of the authorised service agents other than standard labour costs during normal
working hours.
14. Bromic is not liable for travelling time in excess of 50 kilometres from an authorised service agent or 1 hour from
the authorised service agent, whichever is the lesser.
15. Bromic is not responsible for any costs involved in gaining access to Goods for the purposes of repairs, checks or
modifications.
16. Bromic’s warranty does not extend to any damage or induced Goods’ failures resulting from an installation that
was undertaken outside the direct control of Bromic or its authorised service/installation agents.
17. Bromic is not liable, and will not authorise repairs pursuant to a claim under this Warranty, for Goods which have
been modified for rental purposes. (All Goods are designed to be operated indoors in a permanent location.
Movement of goods after installation should be restricted to whatever is required for routine cleaning and
maintenance only).
18. Bromic will not be responsible or liable for damage or loss caused during transport and/or testing of the Goods
and will not be liable for the cost of transport or testing of the Goods.
www.bromicheating.com
14
www.bromicheating.com
19. Bromic does not warrant the Goods where the Goods were installed and/or used in conjunction with goods of
a supplier other than Bromic (‘the other goods’) in such a way as to exceed the capacity and/or performance
capabilities of the Goods or the other goods and denies all liability for any damage whatsoever suffered by any
person arising from such use.
20. Bromic shall not be liable for any indirect or consequential loss, loss of profit or any other economic loss as a
result of any actual or alleged failure of the Goods.
21. The obligation of Bromic in relation to the warranty, provided for in the previous paragraphs, is not valid in the
following cases:
a.
Installation does not conform to the instructions given in the Use and Maintenance handbook;
b.
Installation in places other than the original place (disassembly and reassembly in another place);
c.
Carelessness, negligence or inability in use or use other than that for which the product is designed and/or
dimensioned; or
d.
Modifications or tampering with the product.
23. Bromic is not liable for, and will not authorise repairs pursuant to a claim under this Warranty for:
a.
Damage or failure of Goods as a consequence of not removing packaging and transport materials before use;
b.
Parts subject to wear and tear including but not limited to fuses, batteries, handles, locks, hinges, hoses;
c.
Goods which have not been installed in accordance with Bromic’s and/or the manufacturer’s specifcation;
d.
Extraordinary and unforeseeable events (voltage surges, irregular electric power supply, natural events and
disaster, riots etc);
e.
Repairs or replacement of Goods not bearing original serial numbers (where applicable) or compliance plates;
f.
Rust and/or discoloration due to heat or exposure to corrosive environments;
g.
Damage caused to Goods due to improper use of cleaning agents, detergents, bleaches or other chemical
additives or agents of a corrosive nature;
h.
Breakage, either intentional or unintentional, to any part of the Goods;
i.
Any damage arising from any modification of the Goods that has taken place without prior authorisation from
Bromic;
j.
Any use of the Goods for any reason other than its originally specified purpose;
k.
Installation of Goods in places other than the original place (disassembly and reassembly in another place);
l.
Carelessness, negligence or use other than that for which the Goods are designed;
m. Goods not performing correctly as a result of Goods being used in an environment whereby the ambient
temperature and relative humidity are outside the operating parameters specified for those particular goods;
n.
Modifications or tampering with the Goods; or
o.
Heater Failure of the Goods due to;
i.
Incorrect installation of electricty supply;
ii.
lnsufficient regular maintenance (of the type specified by the relevant manufacturer) of components.
iii.
Failure to provide adequate ventilation for the Goods as specified by the manufacturer; or
iv.
Fair wear and tear of the Goods;
24. Please contact Bromic as soon as possible after discovery of a potential defect and/or fault with the Goods to
arrange for it to be tested and/or serviced.
25. All warranty enquiries and/or claims should be directed to Bromic’s Head Office via its postal address - P0 Box
6062 Silverwater NSW 1811 or by telephoning 1300 276 642 (within Australia) or sending a fax to +61 2 9748 4289.
www.bromicheating.com
www.bromicheating.com
15
26. The manufacturer is not responsible for assuring compliance with jurisdictional codes and regulations governing
sales, construction, installation and/or use of the heating products and cannot be responsible for how the product
is installed or used. Before purchase and use of the product, it is the responsibility of the owner to review the
product application and all applicable national and local codes and regulations governing the installation and use
of such heating products and to seek advice from relevant technical persons.
27. In addition to the above, all of Bromic’s other general terms and conditions of trade apply, save for those which
are inconsistent with the terms of this warranty. These general terms and conditions of trade can be obtained on
request from Bromic.
28. In addition to the Warranty extended by Bromic to the Purchaser, the Australian Consumer Law requires that
Bromic provide the following additional guarantees to consumers (as that word is defined by the Competition
and Consumer Act) in respect of consumer goods (as defined by that Act) supplied in Australia.
Our goods come with guarantees that cannot be excluded under the Australian Consumer Law. You are entitled to a
replacement or refund for a major failure and for compensation for any other reasonably foreseeable loss or damage.
You are also entitled to have the goods repaired or replaced if the goods fail to be of acceptable quality and the
failure does not amount to a major failure.
For more information visit our website at www.bromicheating.com or call 1300 276 642.
Head Office: P0 Box 6062 Silverwater, Sydney, NSW 1811 Australia.
Warranty registration ProCeDUre
Any claim under this warranty should be initiated with the dealer/retailer who sold the Goods, or with any other
dealer handling Bromic’s products.
To register your product please fill out your the registration form at http://www.bromicheating.com/warranty
Please ensure you have the following information during this process;
serial number of Heater: ________________________________________
www.bromicheating.com
16
www.bromicheating.com