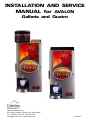
1
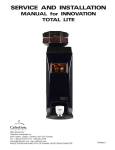
INSTALLATION AND SERVICE MANUAL for AVALON Galleria and Quatro Manufactured by: Cafection Enterprises Inc. 2355, Dalton, Quebec, (Quebec) G1P 3S3 Canada Tel.: 1-800-561-6162 Fax: 1-800-463-2739 [email protected] Revision 8 INSTALLATION AND SERVICE MANUAL for AVALON Galleria and Quatro www.cafection.com (800) 561-6162 Table of Contents 1 SAFETY INSTRUCTIONS.........................................................................................................5 1.1 Food-Contact Parts..................................................................................................5 1.2Warnings...................................................................................................................5 1.3 Power supply............................................................................................................5 1.4 Disconnect the equipment if:..................................................................................5 Table of Contents 2WARRANTY...............................................................................................................................6 2.1 Warranty policy........................................................................................................6 2.2 Warranty return procedure......................................................................................7 2.3 Transport liabilities..................................................................................................7 2 3 INITIAL SETUP..........................................................................................................................8 3.1 On-site installation requirements...........................................................................8 3.1.1 Operating environment...........................................................................8 3.1.2 Power supply...........................................................................................8 3.1.3 Water supply............................................................................................8 3.1.4 Tools required.........................................................................................8 3.1.5 Clearances...............................................................................................8 3.2Unpacking.................................................................................................................9 3.3 Leveling the equipment.........................................................................................10 3.4 Hot water tank preparation...................................................................................10 3.4.1 Tank lid preparation..............................................................................10 3.4.2 Adjusting the tank overflow float........................................................11 3.5 3 Beans canister installation (for the Galleria model)........................................12 3.5.1 Install the 3 beans canister..................................................................12 3.5.2 Lock the cover of the grinder protector..............................................12 3.6 Water line connection............................................................................................13 3.7 Electrical connection.............................................................................................14 3.8 Water temperature.................................................................................................15 3.9 Drip tray and overflow installation.......................................................................16 3.9.1 Overflow drip tray installation.............................................................16 3.9.2 Drip tray installation.............................................................................17 3.10 Loading products...................................................................................................18 3.11 Chute system installation.....................................................................................19 3.12 Brewer and whipping system...............................................................................20 AVALON GALLERIA Rev. 8 04/2013 INSTALLATION AND SERVICE MANUAL for AVALON Galleria and Quatro www.cafection.com (800) 561-6162 3.13 Filter paper installation......................................................................................... 22 3.14 Testing installation................................................................................................. 23 3.15 Main board.............................................................................................................. 24 3.15.1 Main board (PCB) description............................................................. 25 3.16 Programming tips.................................................................................................. 26 3.17 Parameters MENU................................................................................................. 27 3.18 Service overlay....................................................................................................... 28 4 SERVICE SOFWARE............................................................................................................... 29 4.1 Programming charts.............................................................................................. 29 4.2 Free mode & Multi-cup mode................................................................................ 31 4.3 Electronic key option............................................................................................. 32 Table of Contents 5 CLEANING AND SANITIZING................................................................................................. 32 5.1 Automatic rinsing function................................................................................... 32 5.2 Cleaning and sanitizing instructions................................................................... 33 5.3 Recommended cleaning tools.............................................................................. 33 5.4 Cleaning and Sanitizing Schedule....................................................................... 34 5.5 Overall cleaning .................................................................................................... 35 5.6 Exterior cleaning.................................................................................................... 35 5.6.1 Cleaning the drip tray........................................................................... 35 5.6.2 Emptying the waste bin........................................................................ 36 5.7 Interior parts cleaning & sanitizing...................................................................... 37 5.7.1 Coffee canisters.................................................................................... 37 5.7.2 Soluble canisters.................................................................................. 38 5.7.3Whipper.................................................................................................. 38 5.7.4 Coffee brewer........................................................................................ 39 5.7.5Fan.......................................................................................................... 40 5.7.6 Stainless coffee chute.......................................................................... 41 5.7.7 Plastic chute of the 3 beans canister.................................................. 42 6 PREVENTIVE MAINTENANCE............................................................................................... 43 6.1 Preventive maintenance schedule (PM).............................................................. 43 6.2 Brewer assembly................................................................................................... 44 6.3 Water outlet valves................................................................................................ 45 6.4 Hot Water Tank....................................................................................................... 46 AVALON GALLERIA Rev. 8 04/2013 3 INSTALLATION AND SERVICE MANUAL for AVALON Galleria and Quatro www.cafection.com (800) 561-6162 7 SERVICING PARTS.................................................................................................................47 7.1 Draining the hot water tank...................................................................................47 7.2 Shutdown / Storage...............................................................................................48 7.2.1 Storing the brewer assembly...............................................................48 Annex 1 Full maintenance schedule......................................................................................49 Annex 2 Monthly maintenance schedule...............................................................................50 Annex 3 Weekly maintenance schedule................................................................................51 Annex 4 Waste chute position without filtration system......................................................52 Table of Contents Annex 5 Waste chute position with filtration system...........................................................53 4 AVALON GALLERIA Rev. 8 04/2013 INSTALLATION AND SERVICE MANUAL for AVALON Galleria and Quatro www.cafection.com (800) 561-6162 1SAFETY INSTRUCTIONS Basic safety precautions should always be followed when using electrical appliances. Read all instructions before using this brewing equipment. 1.1 Food-Contact Parts We recommend that you clean and sanitize all food-contact parts prior to installation and use. See the cleaning and sanitizing section for more details. 1.2 Warnings 1.3 Power supply ·Always use a grounded 120V AC 60Hz socket outlet rated for 15A service. ·Each brewing equipment must have its own electrical outlet, on a dedicated circuit. ·Extension cords must not be used. ·This equipment is equipped with a polarized alternating current line plug (one blade wider than the other). Only use this plug with an outlet in which the prongs can be fully inserted. Avoid exposure of the prongs on the polarized plug. 1.4 Safety Instructions ·To minimize the risks of fire or electric shock, do not expose this equipment to rain or moisture. ·Do not immerse this equipment in water; it could lead to electric shock or other malfunctions. ·Do not use this equipment other than for its intended use. ·This equipment contains hot water; never move when full. ·This brewing equipment is intended for indoor installation only. Disconnect the equipment if: ·Damage is done to the power cord; ·The equipment doesn’t work properly; ·The temperature of the power cord or plug increases dramatically during use; ·Unusual conditions occur. FAILURE TO COMPLY CAN CAUSE EQUIPMENT DAMAGE, FIRE OR SEVERE BODY INJURIES. AVALON GALLERIA Rev. 8 04/2013 5 INSTALLATION AND SERVICE MANUAL for AVALON Galleria and Quatro www.cafection.com (800) 561-6162 2WARRANTY 2.1 Warranty policy We hereby certify that the products manufactured by Cafection are, to the best of our knowledge, free from all defects and faulty workmanship. The following warranties and conditions are applicable: All parts in contact with water (outlet valves, heating element, probe, inlet valve and tank float) are warranted against material and workmanship defects for a period of 90 days from the date of shipment. All remaining parts of the brewer are warranted against material and workmanship defects for one year from date of shipment. All warranty service and returns must have prior authorization from Cafection. Please contact Cafectioncustomer service at 1-800-561-6162. Conditions Warranty Cafection assumes no responsibility for substitute replacement parts installed on the Avalon brewer that have not been purchased from Cafection. The following circumstances will void the warranty policy: ·· Improper installation or operation of the equipment. ·· Abuse or neglect, including but not limited to, failure to follow the preventive maintenance schedule. ·· Variation in equipment performance due to excessive mineral deposit or local water conditions. ·· Equipment altered in any way and/or dates, codes or serial numbers removed or modified. ·· Equipment damaged in shipping from the customer to Cafection due to improper packaging. Please note that labor is not covered by the warranty and that the repair protocol is limited to replacing the defective part. Should any additional repairs need to be done, they will be charged to the customer. Equipment or parts will not be accepted without a prior notification to Cafection. Please return your warranty card to Cafection via mail or fax to validate your warranty and to register your unit for part upgrades. Cafection Entreprises Inc. 2355, Dalton Sainte-Foy, (Quebec) Canada. G1P 3S3 Tel.: 1-800-561-6162 Fax: 1-800-463-2739 email: [email protected] 6 AVALON GALLERIA Rev. 8 04/2013 INSTALLATION AND SERVICE MANUAL for AVALON Galleria and Quatro www.cafection.com 2.2 (800) 561-6162 Warranty return procedure In order to always offer you better, faster service, we request your cooperation for the return of parts under warranty. We thank you in advance for taking the time to follow this procedure: 1.Please contact the Customer Service department to obtain an authorization number. 2.It is important to fax a copy of the original invoice to Cafection at 1-800-463-2739 for approval. 3.Do not destroy any parts before receiving a written confirmation that this part will or will not be credited or exchanged. 4.Keep a copy of the original invoice for your records. 5.A copy of the original invoice must be included with your parts returned. PLEASE MAKE SURE THE MERCHANDISE IS WELL PACKED! Please use original packaging! Warranty 6.Once the merchandise is received, Cafection will check the parts and apply a credit to your account or exchange the merchandise if the warranty is applicable. Only guaranteed parts are authorized for return. 7.We suggest you keep replacement parts on hand. 8.The warranty covers regular shipping only. Overnight shipping charges will be applied to your order. Orders must be received before 12:00 pm Eastern Standard Time to be shipped the same day*. * Some conditions may apply. 2.3 Transport liabilities YOU ARE RESPONSIBLE, SHIPMENT MUST BE INSPECTED! You can refuse delivery if a shipment is damaged. Do not sign off the shipment without proper inspection. Should you choose to accept the delivery, it is mandatory that you record the following information on the delivery slip. Remember that you take responsibility of the merchandise once you have signed the delivery receipt. You have 24 hours to report and file a claim for concealed damages to the transportation company. *** Failure to comply to this procedure could lead to claim refusal by the carrier. FOR MORE INFORMATION, PLEASE CALL CUSTOMER SERVICE AT 1-800-561-6162 AVALON GALLERIA Rev. 8 04/2013 7 INSTALLATION AND SERVICE MANUAL for AVALON Galleria and Quatro www.cafection.com 3 (800) 561-6162 INITIAL SETUP Before you install the brewer on location, we strongly suggest that it be unpacked, inspected and bench tested before it leaves your warehouse. 3.1 On-site installation requirements 3.1.1 Operating environment For indoor use only. Initial Setup 3.1.2 Power supply Make sure each unit has its own electrical circuit and is located within 6 feet of the dedicated electrical outlet. Use only a polarized grounded receptacle. Domestic 115 VAC / 60 Hz - 15 A Circuit. 3.1.3 Water supply Should be a plastic 1/4” or 3/8’’ O.D. dedicated line branched off a larger line. An easily accessible shut off valve up stream of the unit is highly recommended for ease of installation. Water pressure should be at least 20 PSI and no more than 80 PSI 3.1.4 Tools required #2 Phillips screwdriver Regular medium pliers Adjustable wrench Level indicator Other tools may be required depending on the type of water supply tubing and location. 3.1.5 Clearances Machine Clearance Necessary for : Height 44” 50” Opening the top of the machine. Width 18 1/2” 26” Per side. Key access on one side and door swing on the other. Depth 26” 26 1/2” In front when the door is open. 1.5” Clearance of water hookup, hoses and adequate air circulation Needed only if a filtration system is installed behind the machine Other clearance 6” See footprint and waste chute position in annex 4 and 5. 8 AVALON GALLERIA Rev. 8 04/2013 INSTALLATION AND SERVICE MANUAL for AVALON Galleria and Quatro www.cafection.com 3.2 (800) 561-6162 Unpacking For each brewing equipment kit you should have the following boxes: the brewer and the accessories. Quatro = 1 box for the brewer + 1 box for the accessories (optional) Galleria = 1 box for the brewer + 1 box for the canister and accessories To remove the unit from the box, carefully cut the straps holding the box in place on the skid and then lift the box up. Inspect the unit to see if any damage has occurred in shipment. NOTE: See transport liabilities in section 2.3 on page 7. The parts and accessories that are shipped separately need to be installed on your equipment. In each box, you should find the following items: 1.Drip Tray Grill 2.Plastic Drip Tray 4.Overflow Drip Tray 5.Waste Basket 6.Overflow Drip Tray Support Initial Setup 3.Plastic Drip Tray Support 7.1/4’’ or 3/8’’ Inlet Kit Fitting Part 8.Optional Plastic Chute Kit 9.Front Panel 10. Filter Paper 11. Brush 12. Scissors 13. Brewer Motor Tool * The 3 bean canister is individually packaged for the AVALON GALLERIA model * The keys for the unit are attached to the power cord located in the back of the unit. AVALON GALLERIA Rev. 8 04/2013 9 INSTALLATION AND SERVICE MANUAL for AVALON Galleria and Quatro www.cafection.com (800) 561-6162 3.3 Leveling the equipment For optimal performance of the equipment, it is important to ensure that it is leveled. Avoiding to do so can create variations in product delivery. 1.Place a level on the top of the equipment; 2.Adjust the 4 threaded level glides or legs of the equipment to reach a leveled position. 3.4 Hot water tank preparation Make sure equipment is unplugged! Initial Setup 3.4.1 Tank lid preparation 1.You can acces the water tank by removing the water tank access door or the back panel; 2.Locate the water tank and remove the twist-tie securing the float of the water tank; 3.Remove the silicone tubing from the heating element; 4.Connect the white wire to the prong on the heating element; 5.Replace the access panel. Water tank access door (under the plastic top) Heater safety switch Heating element wire Water safety switch (float) Left side view Water safety switch (float) 10 Heater safety switch Right side view AVALON GALLERIA Rev. 8 04/2013 INSTALLATION AND SERVICE MANUAL for AVALON Galleria and Quatro www.cafection.com (800) 561-6162 3.4.2 Adjusting the tank overflow float It is important to verify that the float is positioned properly in the overflow cup because it can move around in transportation. If this float is not properly in place the switch will not be activated and the unit will automatically shut down sensing an overflow situation. It is important to verify that the Overflow cup is in place with the highest side in front and secured well with the green tape. If you need to remove this cup, please make sure that you replace it with the highest section facing the front and the overflow tube in the cup. Fasten it in place with tape. This will ensure that the float will “float” and will activate the overflow switch if a problem accurs. Initial Setup Location in the brewer Hole in the exit of the tube Cup AVALON GALLERIA Rev. 8 04/2013 11 INSTALLATION AND SERVICE MANUAL for AVALON Galleria and Quatro www.cafection.com (800) 561-6162 3.5 3 Beans canister installation (for the Galleria model) 3.5.1 Install the 3 beans canister Unpack the 3 beans canister. Open the cover of the grinder protector. Install the canister on the shelf by aligning the 3 transmissions of the canister with the 3 motors already fixed on the shelf and the 2 pins on the other side of the shelf. Push backward to fix in place. Initial Setup Motor Transmission Grinder protector cover Pin of the shelf 3.5.2 Lock the cover of the grinder protector Close the cover of the grinder protector and lock using the latch. Latch Grinder protector cover 12 AVALON GALLERIA Rev. 8 04/2013 INSTALLATION AND SERVICE MANUAL for AVALON Galleria and Quatro www.cafection.com 3.6 (800) 561-6162 Water line connection This equipment must be installed in compliance with applicable Federal, State, Provincial and/or Municipal plumbing codes having jurisdiction. Make sure that the equipment is unplugged before proceeding with the water supply installation. Also verify that the incoming water pressure is greater than 20 psi and no more than 80 psi. 1.Prior to installing the equipment, flush out the water line by running approximately 1 gal. of water into a pail. This will ensure no sediment from a new installation can get in the equipment; 2.The incoming water supply should have a shut-off valve connected in-line. Water supply should be a plastic 1/4” or 3/8” O.D. dedicated line branched off a larger supply line; 3.Make sure your water source is turned off. Secure the inlet fitting firmly onto the inlet valve. Do not overtighten; 4.Make sure the equipment is unplugged. Connect the water line to the quick connect inlet fitting; This procedure does not take into consideration the installation of a water filtration system. Please refer to the water filter manufacturer installation instructions and incorporate them into the above procedures. Initial Setup 5.Turn the water valve on, sending water to the brewer. If there are any leaks, tighten connections to stop leakage. Water inlet fitting AVALON GALLERIA Rev. 8 04/2013 13 INSTALLATION AND SERVICE MANUAL for AVALON Galleria and Quatro www.cafection.com (800) 561-6162 3.7 Electrical connection This equipment must be installed in compliance with applicable Federal, State, Provincial and/or Local electrical codes having jurisdiction. Make sure: - The equipment is OFF before plugging it in, - The equipment has its own electrical outlet and - NO extension cord is used. 1.Make sure that the power switch in the back of the unit is in the OFF position before plugging in the unit; 2.Locate the unit’s 6 feet power cord and plug it into its own grounded electrical outlet; Initial Setup 3.Reach to the back of the brewer and toggle the power switch to the ON position. The front lights will turn on and water will automatically enter the brewer. The tank will fill for up to 2-3 minutes maximum. 4.Once the tank is full, it will take 10-15 minutes to heat the water to brewing temperature; 5.Once the brewing equipment is ready, the LCD will indicate “Hi! Make Your Choice”. OFF position! The main power switch turns the equipment ON and OFF. This switch should be turned OFF when servicing any (AC line voltage) electrical components on the equipment. 14 AVALON GALLERIA Rev. 8 04/2013 INSTALLATION AND SERVICE MANUAL for AVALON Galleria and Quatro www.cafection.com 3.8 (800) 561-6162 Water temperature This equipment has a coffee brewing setpoint of 200 °F water temperature to offer a consistent beverage quality to the users. There is a +/- 2 °F tolerance. This is an average and is not what you would get from a manual temperature measure. The actual water temperature fluctuates because cold water is added to the tank after every beverage delivery and time is needed to heat the new incoming water up to setpoint. You can also take the water’s brewing temperature manually by ordering a cup of hot water and measuring its temperature with a thermometer. There may be a slight difference from the tank reading. This is normal. If you are experiencing large temperature differences, verify that your tank is clean and not obstructed by mineral deposits and scale. Unit safety measures In the event of a temperature probe failure, the tank may start to boil. This will cause it to overflow into the “Overflow Cup” and will automatically shut it off. Initial Setup Electronic Thermostat * Temperature can be set by user by accessing in the setup main menu. AVALON GALLERIA Rev. 8 04/2013 15 INSTALLATION AND SERVICE MANUAL for AVALON Galleria and Quatro www.cafection.com (800) 561-6162 3.9 Drip tray and overflow installation 3.9.1 Overflow drip tray installation Initial Setup 1.Screw the overflow drip tray support (05CAB11) under the base of the brewer using the 2 screws included. 2.Take out the 2 wires with connectors found inside the brewer using the chute hole and connect them to the 2 connectors of the overflow drip tray (05ASS30). 3.Put the connected overflow drip tray (05ASS30) on its support (05CAB11). Install the overflow drip tray from inside the equipment. 05ASS30 05CAB11 16 AVALON GALLERIA Rev. 8 04/2013 INSTALLATION AND SERVICE MANUAL for AVALON Galleria and Quatro www.cafection.com (800) 561-6162 3.9.2 Drip tray installation 1.Insert the drip tray support (05DOR02) in the door. 2.Set the drip tray (05CAB17) on the support (05DOR02) inside the restraint. 3.Install the metal grill (05CAB10) on the drip tray (05CAB17). Initial Setup 05CAB10 05CAB17 05DOR02 Restraint AVALON GALLERIA Rev. 8 04/2013 17 INSTALLATION AND SERVICE MANUAL for AVALON Galleria and Quatro (800) 561-6162 www.cafection.com 3.10 Loading products 1.Unlock the main door 2.Remove the plastic top cap 3.Remove the canister lid of which you wish to fill 4.Do not overfill the canisters B C D A By only removing 1 lid at a time, you will reduce the risk of cross contamination of products. Initial Setup A - Ground Coffee (Regular) B - Ground Coffee (Decaf) C - Soluble (Hot Chocolate) D - Soluble (French Vanilla) For the 3 beans canister: Unlock the cover of the canister and open the plastic top cap. Do not overfill the canister. Using a step stool will help you see the hoppers that you are filling. A C D A - 3 Whole Bean Coffees - coffee 1 - coffee 2 - coffee 3 C - Soluble (Hot Chocolate) D - Soluble ( French Vanilla) Caution! Flavored beans could contain ethyl alcohol that could affect beans canister’s longevity. Cafection do not recommend using flavored beans. 18 AVALON GALLERIA Rev. 8 04/2013 INSTALLATION AND SERVICE MANUAL for AVALON Galleria and Quatro www.cafection.com (800) 561-6162 3.11 Chute system installation Metal bracket of the front panel Front panel Initial Setup Metal bracket of the brewer assembly Waste chute Chute base 1.Open the door of the equipment; 2.Insert the chute base inside the chute hole of the cabinet; 3.Insert the large waste chute into the chute base; 4.Install the front panel by aligning the metal bracket behind the front panel with the metal bracket fixed on the brewer assembly. Internal waste bin maximum coffee capacity: 100 cups AVALON GALLERIA Rev. 8 04/2013 19 INSTALLATION AND SERVICE MANUAL for AVALON Galleria and Quatro www.cafection.com (800) 561-6162 3.12 Brewer and whipping system Initial Setup 1 1. 2 Untight the screw that holds the hoses support. 2. Remove the hoses support, (it will be retained by the tubes). Disconnect the coffee whipper wire (in the back of the whipper protector). 3 3. 20 Untighten the whipper support screw. AVALON GALLERIA Rev. 8 04/2013 INSTALLATION AND SERVICE MANUAL for AVALON Galleria and Quatro www.cafection.com (800) 561-6162 4 5 Remove the spout with the coffee whipper by simply pulling it towards you. Cut the filter paper. Then lower the latch of the brewer to unlock it. Funnel Initial Setup 4. 5. 6 6. Withdraw the funnel and the pipe of sillicon which is fixed above. Draw the brewer towards you to take it out the machine. AVALON GALLERIA Rev. 8 04/2013 21 INSTALLATION AND SERVICE MANUAL for AVALON Galleria and Quatro www.cafection.com (800) 561-6162 3.13 Filter paper installation 1.Make sure the power of the brewer is turned ON; 2.Place the filter paper roll on the support bracket so that it dispenses on the left hand side; (See the diagram inside the brewer) 3.Toggle the brewer paper switch ON (SW4), the brew chamber will lift up; Note: the brew chamber will not lift up if the switch does not sense any filter paper Initial Setup 4.Pass it under the left guide bracket of the brew group, under the brew chamber and under the wheel guides by gently lifting them using the yoke; 5.Pull on the paper and carry it through the cabinet chute hole and into the waste bin; 6.Make sure that it is feeding straight. Verify that it stays within the first guide. Improper filter paper feeding will cause a vacuum leak and may cause grounds to spill inside the equipment. Guide bracket 7.Toggle the brewer paper switch back to OFF (SW4 on the main board); 8.The filter paper will advance while the brewer assembly cycles and the brew chamber will settle down on the paper, ready for the next cup. Yoke 22 AVALON GALLERIA Rev. 8 04/2013 INSTALLATION AND SERVICE MANUAL for AVALON Galleria and Quatro www.cafection.com (800) 561-6162 3.14 Testing installation It is important to have the equipment performing several cycles before completing the installation. It is important that you order at least 2 of each product selections to insure that the brewer is operating as per the specifications laid out in this manual. During this process, review the check list as a reminder. You need to be sure that the brewer is clean, safe and functioning once you’re ready to leave it on-site. What to check Inlet valve is free from leaks Brew chamber is empty of coffee Verify that it is secure and not overtightened Verify that the unit is leveled Verify that the chute is properly installed Repeat the installation procedure Soluble mixing bowl is free of leaks Verify that it is on straight and tube is secure Water temperature is acceptable See water temperature Products are loaded Load products Brewer and area are clean and tidy Please tidy up AVALON GALLERIA Rev. 8 04/2013 Initial Setup Filter paper feeds without resistance and goes straight into the waste bin 23 INSTALLATION AND SERVICE MANUAL for AVALON Galleria and Quatro www.cafection.com (800) 561-6162 3.15 Main board 24V DC Output Coffee & soluble motors Overflow Filter paper Cam Low water level Initial Setup 24V DC Output motor & valves Eeprom Microcontroller Unused Unused Setup Link port #1 Counter Unused Link port #2 24 Fan AVALON GALLERIA Rev. 8 04/2013 INSTALLATION AND SERVICE MANUAL for AVALON Galleria and Quatro www.cafection.com (800) 561-6162 3.15.1 Main board (PCB) description Interactive switches and buttons 1.Reset Button (Red) Pressing this button initializes the 3 Bean Brewer (same as the on/off switch) 2.Setup Button (SW1) Black Pressing this button gives you access to the product and brewer software parameters. 3.Counter Button (SW2) White Pressing this button gives you access to the tally counter data. 5.Brewer Switch (SW4) Black - DS37 ON, the switch lifts the brewer head to allow filter paper replacement. The switch must be in the OFF position for default user mode. If activated, it will reset the waste bin counter. 6.Ingredient Switch (SW5) Black - DS12 Allows the neutralization of the ingredient dispensing motors. At OFF, the motors will not dispense ingredients. 7.Water Switch (SW6) Black - DS36 Allow the neutralization of the 4 water dispensing valves. At OFF, the valves will not dispense water. AVALON GALLERIA Rev. 8 04/2013 DS1 - Power 5Volts ok DS18 - Drip tray overflow DS13 - Brewer error DS14 - Filter paper ok DS15 - Low water level Red LEDs The red led will illuminate to indicate the part is in use. DS38 - Power 24Volts ok DS3 - Coffee #1 motor ingredients DS4 - Coffee #2 motor ingredients DS5 - Coffee #3 motor ingredients DS6 - Soluble #1 motor ingredients DS7 - Soluble #2 motor ingredients DS9 - Brewer motor DS10 - Inlet valve DS11 - Grinder motor DS12 - Ingredient output are disable DS21 - Chute Solenoïde DS22 - Coffee hot water valve DS29 - Soluble #1 hot water valve DS31 - Soluble #2 hot water valve DS32 - Hot water valve DS33 - Mixer Motor Soluble #1 DS34 - Mixer Motor Soluble #2 DS36 - 4 water dispensing valves disable Initial Setup 4.Free Vend Switch (SW3) Black OFF, this switch allows users to have free beverages. Green LEDs The green led will illuminate to indicate the following status. 25 INSTALLATION AND SERVICE MANUAL for AVALON Galleria and Quatro www.cafection.com 3.16 Programming tips (800) 561-6162 Reminder Please refer to the main board diagram and description in section 3.15 to better visualise the procedures. To program the product prices and values follow these steps: 1.Unlock and open the door of the equipment 2.Press the SETUP button located on the lower section of the main board (#SW1) The LCD will indicate: Setup mode Press START to exit 3.Keep this in mind for the following steps: (refer to overlay) Initial Setup Cafe Vanilla: Cafe Latte: Strength: Size: Chocolate: Mokaccino Start: Yes / + No / Next Menu / rigth arrow Previous Menu / left arrow Next Window / right arrow Previous Window / left arrow Confirm change / Exit * If you wait more than 45 seconds without pressing on anything you will exit automatically the menu and you will have to start over. 4.Start by pressing on Coffee #1 on the keypad. This is what should be indicated: Sm Coffee #1 Rg Product available Press on «start» if you do not want to change this option and move to the next. If you wish to put this product unavailable press on the «cafe vanilla» button, when the change has been done, press on «start» to confirm. 5.This is what should now be indicated on the screen: Sm Coffee #1 Rg Price $0.00 Press on «chocolate» to move to the right character that you want to change, press on «french vanilla» to increase the price or «cafe vanille» to decrease the price, when the price has been changed, press on «start» to confirm. 6.This is what should now be indicated on the screen: Sm Coffee #1 Rg Quantity 000 Press on the «chocolate» button to move to the right character that you want to change, press on «french vanilla» to increase the value or «cafe vanilla» to decrease the value, when the value has been changed, press on «start» to confirm. 7.Follow these steps for the large coffee #1 regular, small coffee #1 strong, large coffee #1 strong. Then press on the «hot water» button until you see this screen: Setup mode Press START to exit 8.Follow steps 4 through 7 for the other beverage selections. 26 AVALON GALLERIA Rev. 8 04/2013 INSTALLATION AND SERVICE MANUAL for AVALON Galleria and Quatro www.cafection.com (800) 561-6162 3.17 Parameters MENU Parameters These options will allow to : Change the default language of the unit(English / French). Active buzzer Y/N Enable/Disable the sound made by the unit when touching the keypad buttons. Config. Global price Rapidly set prices for all small and large drinks. Setup Dictionary Choose out of 20 coffee names from the dictionary for coffee 1, 2 and 3. Enable large format Enable/Disable the large format to offer 1 or 2 cup sizes. Win option counter Set a number of cups before the machine allows to give a free cup of coffee (ex. 1 free coffee every 10 cups). Overflow detection Enable/Disable the overflow detection. If enabled, the unit will stop giving beverages if an overflow is detected. This option should never be disabled. Default gourmet Promote new products; it will set a default selection to appear on the LCD screen. By simply pressing Start, the customer would automatically get this selection. However, he can choose another selection. Cntr before cleaning Set a certain number of cups before getting the message «Empty the waste bin» Purchase required ? Force the customer to select a drink before having his change back. Thermostat Change the set point of the thermostat. AVALON GALLERIA Rev. 8 04/2013 Initial Setup Choose your language 27 INSTALLATION AND SERVICE MANUAL for AVALON Galleria and Quatro (800) 561-6162 www.cafection.com 28 Hidden button Access Main Menu Initial Setup Confirm Changes 3.18 Service overlay AVALON GALLERIA Rev. 8 04/2013 INSTALLATION AND SERVICE MANUAL for AVALON Galleria and Quatro www.cafection.com 4 (800) 561-6162 SERVICE SOFWARE 4.1 Programming charts Service Software AVALON GALLERIA Rev. 8 04/2013 29 INSTALLATION AND SERVICE MANUAL for AVALON Galleria and Quatro (800) 561-6162 Service Software www.cafection.com 30 AVALON GALLERIA Rev. 8 04/2013 INSTALLATION AND SERVICE MANUAL for AVALON Galleria and Quatro www.cafection.com 4.2 (800) 561-6162 Free mode & Multi-cup mode The electronic key gives acces to free and multi-cup modes. It may only be accessed by the owner of an appropriate pre-programmed electronic key. The advantage is that the main door does not need to be opened to activate the SW3 button. The STD mode is temporarily interrupted from the outside of the coffee brewer. To access these modes, apply a preprogrammed key on the electronic socket. The following message should appear on the screen: Choice special mode Format=Free, STRG=multi AVALON GALLERIA Rev. 8 04/2013 Service Software To enter the free mode press the «format» button. To enter the multi-cup mode press the «strength» button. Otherwise, press the «hot water» button to cancel. If the previous message does not appear on the screen, it means that your key is not programmed. Programmed electronic keys are essential to access the free and multi-cup modes. The following procedure allows the programming for a maximum of nine keys. To enter the configuration menu press the SETUP button (#SW1) on the power board then hit the «strength» button on the user’s panel. Press «start» until you get to «Program new touch key», then press «café vanilla» for yes and press «start» to confirm. Apply an electronic key on the electronic socket. To save this command, press the «hot water» button. Multi-cup 31 INSTALLATION AND SERVICE MANUAL for AVALON Galleria and Quatro www.cafection.com (800) 561-6162 4.3 Electronic key option Free mode Apply a programmed electronic key onto the electronic socket. This should be shown on the screen: Choice special mode Format=Free, STRG=multi Order the beverage of your choice by following the steps in the previous «Test mode» Press on the «format» button on the user’s panel. This should be shown on the screen: --------Free mode! ------- Multi-cup mode Service Software Apply a programmed electronic key onto the electronic socket, this should be shown on the screen: Choice special mode Format=Free, STRG=multi Press on the «strength» button on the user’s panel. This should be shown on the screen: ----Multi-cup mode! ---* Make your choice * Make your selection following steps in the section «Test mode». Press «start» to confirm. 5 CLEANING AND SANITIZING 5.1 Automatic rinsing function A new function is added to our apparatuses to make easier the rinsing of the interior components (brewer, whipper). Instructions to follow: 1.Install a container that could contains at least 20 OZ of liquid; 2.Press on the black setup button (sw1) on the main board; 3.Close the door; 4.Press on the hidden key; 5.Press on Start; 6.Wait until the cycle is finished; 7.Rinse again if it is needed, or press on start to exit. 32 vat. AVALON GALLERIA Rev. 8 04/2013 INSTALLATION AND SERVICE MANUAL for AVALON Galleria and Quatro www.cafection.com 5.2 (800) 561-6162 Cleaning and sanitizing instructions It is important to clean and sanitize this equipment on a regular basis in order to maintain the highest beverage quality.These regulations require that all parts in contact with food be cleaned and sanitized regularly and that hands be cleaned before handling these parts or other commodities such as cups and stirs. Cleaning and sanitizing should be done in separate steps as prescribed by health regulations and good industry practice. Cleaning: Cleaning means “Making free of visible soil, stains or impurities”. This also means removing food soils, oil or mineral deposits that could alter the beverage taste or appearance, and therefore its quality Sanitizing Sanitizing means application of measures designed to protect public health. This is done by reducing bacteria remaining on the surface after it has been cleaned. There are two sanitation methods: Always unplug the unit before cleaning the unit with water. For the sanitation process to work effectively, the part must be cleaned and free of all visible food soil, completely rinsed and preferably air dried. Wiping with towels or cloths can recontaminate sanitized food-contact surfaces. Therefore, we recommend to air dry sanitized food - contact surfaces and not wipe dry. FREQUENCY: There are two important variables that need to be considered when evaluating cleaning and sanitizing frequencies: Cleaning & Sanitizing 1) Chemically, the part can be treated with a bactericidal compound to remove bacteria; 2) With hot water of at least 212 °F, the bacteria can be killed if the temperature of the part is raised high enough. ·· Product consumption ·· Water quality Since the expected customer usage may vary for one location to another, the cleaning and maintenance is recommended upon the given time lines or cycle counts, which ever comes first. Note that these are intended as a guideline to ensure a part does not go without cleaning. We recommend you verify each part listed in this section upon each visit and that they be cleaned as needed. 5.3 Recommended cleaning tools In order to perform the following cleaning procedure effectively, we recommend that you have at least the following tools: ·· Pail or bucket ·· Small tube brush, suitable for food-contact surfaces and hot water ·· Medium size long and flexible brush, suitable for food-contact surfaces ·· Medium brush for coffee grounds, suitable for food-contact surfaces ·· Disposable towels, wet-strength and lint-free ·· Mild nonabrasive detergent for exterior cleaning ·· Urn cleaner packets for coffee parts ·· Spare parts if extensive cleaning is to be done at the shop ·· Garbage bags for the waste bin AVALON GALLERIA Rev. 8 04/2013 33 INSTALLATION AND SERVICE MANUAL for AVALON Galleria and Quatro www.cafection.com (800) 561-6162 5.4 Cleaning and Sanitizing Schedule The cleaning schedule and instructions outlined in this manual must be followed to honor the warranty and ensure consistent product quality and maintain health safety levels. Cleaning & Sanitizing All parts should be visually inspected upon each visit and cleaned as needed. Exterior Daily Waste bin Inspect Canisters Weekly Monthly Quarterly Clean Inspect Drip tray Clean Unit + Stand Clean Interior Daily As needed Clean Weekly Monthly Quarterly As needed Brewer assembly Sanitize Clean Treatment Clean Brewer chamber Sanitize Wipper & Mixing bowls Sanitize Fan Inspect Clean Clean 3 beans canister Sanitize Stainless coffee chute Clean 3 Beans canister plastic chute Clean Rinse cycle Process These recommendations are based on 1,000 cycles per month, medium blend coffee and superior water quality levels . The above recommendations will need to be adjusted if the beverage volume, coffee blends used and water quality differ. 34 AVALON GALLERIA Rev. 8 04/2013 INSTALLATION AND SERVICE MANUAL for AVALON Galleria and Quatro www.cafection.com (800) 561-6162 5.5 Overall cleaning It is important to keep the brewer and its surroundings clean and tidy. Inspect your brewer both inside and out upon each visit and clean where needed. Please make sure that the unit is clean, safe and functioning before you leave. 5.6 Exterior cleaning Frequency: Daily To minimize scratching and preserve appearance, we recommend using a clean damp sponge or soft cloth lightly treated with a nonabrasive detergent for cleaning the exterior of the unit and the base cabinet. After removing all food soils, thoroughly dry with a clean, soft cloth Non food-contact Parts to be verified and wiped clean Plastic Top Cap Stand (optionnal) Metal Cabinet Plastic Door Overflow drip tray Waste bin Parts for this brewer are NOT dishwasher safe! Cleaning & Sanitizing Exterior parts requiring additional cleaning instructions (see below) 5.6.1 Cleaning the drip tray Frequency: Daily or as needed The drip tray is not hooked up to a drain therefore it should be inspected and emptied periodically. WARNING, drip tray may be full. Use caution and keep it level to avoid spilling. Remove the drip tray by simply lifting gently and pulling it out from underneath the door. Rinse both parts under water and dry thoroughly with a clean dry cloth or towel. Reinstall the drip tray onto the brewer and make sure that it is stable. AVALON GALLERIA Rev. 8 04/2013 35 INSTALLATION AND SERVICE MANUAL for AVALON Galleria and Quatro www.cafection.com (800) 561-6162 5.6.2 Emptying the waste bin Frequency: Daily or every 200 cycles After each coffee cycle, the spent grounds and used filter paper are automatically discarded into the waste bin located in the stand. To prevent the bin from overflowing there is an automatic function which stops the brewer and shows the following message on the LCD screen: Needs Service Activate Brewer Cleaning & Sanitizing The maximum setting = 399 The minimum setting = 0 Setting it to 0 will disable the automatic function and will cause an overflow problem if the bin is full. The equipment will not dispense beverages until the bin is emptied and the counter is reset. To reset the counter the brewer switch (#SW4) needs to be activated by being turned on and off. This factory set counter can be adjusted to the waste bin size used. See the machine parameters for more instructions on changing the setting. How to empty the stand waste bin: 1.Open the stand door located directly below the brewer; 2.Cut the filter paper 4 “ below the drum with scissors or tear gently; DO NOT YANK ON THE PAPER! 3.Remove the filled plastic bag from the spent grounds bin and replace with a new one; 4.Activate the brewer switch (#SW4) by turning it on and off (right then left). How to empty the brewer waste bin: 1.Open the brewer door; 2.Take the front panel off; 3.Activate the brewer switch (#SW4) by turning it off (to the left); 4.Cut the filter paper 4” below the drum with scissors or tear gently; DO NOT YANK ON PAPER! 5.Activate the brewer switch (#SW4) by turning it on (to the right); 6.Replace the front panel and close the door. It is very important not to yank on the filter paper. Doing so may prevent the brewer from functioning properly. 36 AVALON GALLERIA Rev. 8 04/2013 INSTALLATION AND SERVICE MANUAL for AVALON Galleria and Quatro www.cafection.com (800) 561-6162 5.7 Interior parts cleaning & sanitizing For sanitary reasons, do not use soap or detergent inside the brewer. Use hot water for onsite sanitation or suitable chemical products in the shop. Wiping with towels or cloths can recontaminate sanitized food-contact surfaces. Therefore, we recommend to air dry sanitized food-contact surfaces and not wipe dry. Allow sufficeint time for the parts to dry thoroughly before closing the door. Use a medium size brush dedicated for coffee grounds and a small dust pan to easily brush away coffee grounds and dust inside the brewer before cleaning with water. Interior Parts to be cleaned 5.7.1 Coffee canisters Removing canisters for cleaning Frequency: Monthly or every 1,000 cycles Cleaning & Sanitizing Canisters Coffee brewer Coffee funnel Fan Stainless coffee chute 3 Beans hopper plastic chute To ensure a constent quality; it is recommended to remove and empty the containers every month. This will ensure that the products do not stick to the walls containers. 1.Unscrew and remove the plastic top fitting part behind the top cap; 2.Remove the top cap of the machine; 3.Unlock the 3 bean canister; 4.Remove the 3 bean canister; 5.Clean and sanitize under hot water and air dry completely; 6.Reinstall all parts in the reverse order. 7.Order a large beverage to confirm that all parts or switches have been replaced. Caution! The rinse water is HOT. Be careful not to get any on you while proceeding with the following steps. AVALON GALLERIA Rev. 8 04/2013 37 INSTALLATION AND SERVICE MANUAL for AVALON Galleria and Quatro www.cafection.com (800) 561-6162 5.7.2 Soluble canisters Removing whipping assembly for cleaning Frequency: Weekly or every 200 cycles If there is residue, remove the assembly for manual cleaning under hot water: Cleaning & Sanitizing 1.Remove the tube from the base; 2.Lift off the funnel and twist off the whipper base; 3.Rinse thoroughly under hot water and use tube brush if necessary for tubing area; 4.Air dry completely; 5.Reinstall all parts in the reverse order. 6.Order a large beverage to confirm that all parts or switches have been replaced. Removing canisters for cleaning Frequency: Monthly or every 1,000 cycles To ensure a consistent product quality, we recommend removing and emptying the canisters on a monthly basis. This will ensure that the product does not adhere to the walls of the canister. 1.Unlock the door; 2.Remove the top cap of the machine; 3.Pull the canister through the top of the brewer to disengage it from the motor and transmission; 4.Clean and sanitize under hot water and air dry completely; 5.Reinstall all parts and reload products in the reverse order; 6.Order a large beverage to confirm that all parts or switches have been replaced. 5.7.3 Whipper To remove the assembly of the whipper for cleaning Frequency: Weekly magazine or every 200 cycles 1.Refer to page 20-21 2.Remove the base of the whipper 3.Rince under hot water 4.Let dry with the free air; 5.Reinstall all the parts in the opposite order; 6.Order a large beverage to confirm that all the parts are in place. 38 AVALON GALLERIA Rev. 8 04/2013 INSTALLATION AND SERVICE MANUAL for AVALON Galleria and Quatro www.cafection.com (800) 561-6162 5.7.4 Coffee brewer Brewer Funnel Hose Support Rinsing the brew chamber: Frequency: Weekly or every 200 cycles Brew chamber Brewer funnel Frequency: As needed or weekly If there are coffee grounds accumulated, remove the assembly for manual cleaning under hot water: 1.Remove the brown water hose; 2.Lift off the funnel and pull out of the brew chamber; 3.Rinse thoroughly under hot water; 4.Air dry completely; 5.Reinstall all parts in the reverse order. 6.Order a large coffee to confirm that all parts have been replaced correctly. Cleaning & Sanitizing 1.Place a large cup or other suitable container below the dispensing nozzle to catch the HOT rinse water; 2.Toggle the ingredient switch to Off (SW5 see main board); 3.Order several coffees for the hot water to flow through the system; 4.Toggle the ingredient switch back ON; 5.Remove the hose and remove the brew chamber’s funnel to dislodge coffee residue trapped underneath it and rinse it out; 6.Replace it and align the opening with the brown water hose so that it is against the wall to form a circular water motion around the funnel; 7.Order a large coffee to confirm that all parts have been replaced correctly. Brewer assembly cleaning Frequency: Monthly or every 1,000 cycles In order to maintain optimal performance of the brewer assembly, we recommend that it be removed from the unit and cleaned / rinsed with hot water. 1.Rinse thoroughly under hot water to remove visible soil; 2.Lift off the funnel and pull out of the brew chamber; 3.Rinse thoroughly under hot water; 4.Air dry completely; 5.Reinstall all parts in the reverse order. 6.Order a large coffee to confirm that all parts have been replaced correctly. AVALON GALLERIA Rev. 8 04/2013 39 INSTALLATION AND SERVICE MANUAL for AVALON Galleria and Quatro www.cafection.com (800) 561-6162 Brewer assembly sanitizing treatment Frequency: Quarterly or Every 3,000 Cycles Cleaning & Sanitizing Regular sanitation treatments of the brewer assembly prevents residue from affecting the vacuum in the brewer mechanism and altering taste in the beverage delivered. 1.Place a large cup or other suitable container below the dispensing nozzle to catch the HOT liquid; 2.Pour 1 portion of commercial urn cleaner (brand such as Urnex as directed by manufacturer) into the brew chamber; 3.Toggle the ingredient switch to Off (SW6 on the main board); 4.Select a small regular coffee on the membrane keypad and hit start; 5.Once the brew chamber is filled with water, turn the brewer OFF via the main switch at the back and wait for 5 minutes; 6.After 5 minutes, turn the brewer back ON to complete the brew cycle; 7.To rinse, make at least 5 brewing cycles of coffee with the ingredients set to “OFF”; 8.Toggle the ingredients switch (SW6) back ON; 9.Make 2 more coffee selections to complete the rinsing cycle of the brewer. 5.7.5 Fan Frequency: Quarterly or as needed Visually inspect the fan located directly to the right. If it requires cleaning: 1.Turn off the unit and unplug it to stop the fan; 2.Unplug the fan and remove the guard for access; 3.Wipe clean with a dry disposable towel; 4.Replace parts in the reverse order. 40 Fan AVALON GALLERIA Rev. 8 04/2013 INSTALLATION AND SERVICE MANUAL for AVALON Galleria and Quatro www.cafection.com (800) 561-6162 5.7.6 Stainless coffee chute Frequency: Monthly or every 1,000 cycles 1.Open the door of the machine; 2.Remove the filter paper; 3.Remove the grinder protector; 4.Unplug the 2 connectors from the solenoid; 5.Remove the stainless chute by unscrewing the 2 screws; 6.Clean the stainless chute by rinsing with hot water; 7.Make sure it is dry before reinstalling. Repeat the steps in reverse order after cleaningfor the reinstallation. Solenoid Grinder protector Cleaning & Sanitizing Stainless coffee chute screw Stainless coffee chute Black connector (at the back) Red connector (in the front) *Image may differ depending on the model of the machine, but the grinder is the same. AVALON GALLERIA Rev. 8 04/2013 41 INSTALLATION AND SERVICE MANUAL for AVALON Galleria and Quatro www.cafection.com (800) 561-6162 5.7.7 Plastic chute of the 3 beans canister Frequency: Monthly or every 1,000 cycles 1.Open the door of the machine; 2.Remove the plastic top fitting part; 3.Remove the plastic top cap; 4.Unlock the 3 bean canister; 5.Remove the 3 bean canister; 6.Clean the interior of the plastic chute (accessible by the back) with the help of a wet clothes. Cleaning & Sanitizing Repeat these steps in reverse order when the cleaning is done. Plastic chute 42 AVALON GALLERIA Rev. 8 04/2013 INSTALLATION AND SERVICE MANUAL for AVALON Galleria and Quatro www.cafection.com 6 (800) 561-6162 PREVENTIVE MAINTENANCE All major parts of this unit need to be maintained as per the schedule to honor the warranty and to prevent them from failing. With adequate maintenance you will extend the life of your unit and deliver a consistent high quality beverage. The preventive maintenance schedule and instructions below must be followed to honor the warranty. Preventive maintenance schedule (PM) All parts should be visually inspected upon each visit and cleaned as needed. Parts Monthly Brewer Inspect Quarterly 25,000 60,000 Replace Outlet valves Inspect Water tank Inspect AVALON GALLERIA Rev. 8 04/2013 10,000 PM PM 100,000 Preventive Maintenance 6.1 43 INSTALLATION AND SERVICE MANUAL for AVALON Galleria and Quatro www.cafection.com (800) 561-6162 6.2 Brewer assembly PM: Yearly or every 25,000 coffee cycles The brewer is the heart of the equipment and is responsible for the taste in the cup. It needs to be serviced regularly to maintain the quality of the beverages served. We recommend having your brewer assembly swapped with a new one that you have on hand and returned to Cafection for Preventive Maintenance every 25,000 coffee cycles. For a minimum charge, CAFECTION will completely clean and replace all necessary parts such as the cylinder, the piston seal and the screen and seal which are all responsible for the vacuum extraction and coffee taste in the cup. It will then be returned with a 1 year warranty against defective parts. Contact CAFECTION for parts and additional instructions. Preventive Maintenance Inspection The following are signs of the vacuum is not functionning adequately and that your brewer may be due for preventive maintenance: • if the seal is damaged; • if air gets into the cylinder and creates bubbles in the coffee; • if there are coffee grounds in the delivered product; • if the spent coffee grounds remain wet. Screen and seal Cylinder Brew chamber Piston seal 44 AVALON GALLERIA Rev. 8 04/2013 INSTALLATION AND SERVICE MANUAL for AVALON Galleria and Quatro www.cafection.com (800) 561-6162 6.3 Water outlet valves Quarterly or every 10,000 cycles To avoid any problems related to mineral deposits over time, we recommend having the 3 valves swapped, and rebuilt in your shop with the kits included in the spare parts briefcase. Refer to the manufacturer’s instructions included with the valve kits. Leaking valve a) Identify the leaking valve, change it and rebuild it b) If the leak comes from under the body of the valve or from the tank exit, try simply changing the conical mounting seal. c) If the coffee valve leaks via the tubing, water will accumulate in the brew chamber. If it drips all night, the first coffee of the morning may cause the chamber to flood since it contained too much water and may be lukewarm. Removing and installing the valves Caution water is hot! Unplug these connectors Tank guard Preventive Maintenance 1.Turn off the machine; 2.Unplug the lid (fig.1.1) and the valves (fig. 1.2); 3.Drain the water from the water tank completely (see section 7.1); 4.Remove the tubes; 5.Unscrew the tank guard to remove the tank; 6.Tilt the tank towards you to have access to the valves; 7.Remove the valves; 8.Reinstall by repeating in the reverse order Tank Lid Fig. 1.1 Valves Double valve Valves Fig. 1.2 If you choose to install a water filtration system, it is recommended that the filter be checked on a monthly basis. AVALON GALLERIA Rev. 8 04/2013 45 INSTALLATION AND SERVICE MANUAL for AVALON Galleria and Quatro www.cafection.com (800) 561-6162 6.4 Hot Water Tank PM: every 60,000 Cycles, quarterly inspection Water level switch To avoid any problems related with mineral deposits over time, we recommend having the water tank assembly delimed to remove all scale in the unit. Upon visual inspection, you may wish to replace the element, probe and the water level and heater safety switch. Use a scale remover product. Such as Scale Kleen by Everpure. Heater switch Preventive Maintenance See the manufacturer instructions for more details. 46 Element Probe AVALON GALLERIA Rev. 8 04/2013 INSTALLATION AND SERVICE MANUAL for AVALON Galleria and Quatro www.cafection.com 7 (800) 561-6162 SERVICING PARTS This section is intended to assist you in servicing various parts of the unit. 7.1 Draining the hot water tank We recommend allowing 3 hours for the hot water to cool prior to emptying the tank. Make sure you have a 0.8 gallon container suitable for holding hot water. 1.Turn off and unplug the brewer; 2.Turn off the main water supply to the machine; 3.Remove the back panel; 4.Locate the drain tube with a red plug; 5.Direct the tube into the pail and remove the red plug. Warning, water may be hot!; 6.Drain the water from the water tank completely; 7.Reinstall by repeating these steps in the reverse order. Red plug Servicing Parts Drain tube AVALON GALLERIA Rev. 8 04/2013 47 INSTALLATION AND SERVICE MANUAL for AVALON Galleria and Quatro www.cafection.com (800) 561-6162 7.2 Shutdown / Storage Should you need to store this brewing equipment for an extended period of time, follow this procedure to avoid any risk of injury or damage to the equipment. 1.Turn the unit off and unplug form the power outlet; 2.Drain the hot water tank (see instructions in section 7.1); 3.Empty the soluble canisters and the 3 beans canister; 4.Clean all parts of the unit before storing (see cleaning instructions in section 5) 5.Disconnect the white wire from the heating element (see installation diagram 6.3) 6.Tie down the water level switch’s arm with a “tie-wrap” to keep the float from pulling down on the switch during transportation. Do not overtighten, this may damage the switch; this is simply to keep the float from bouncing upand down on the switch. Servicing Parts 7.2.1 Storing the brewer assembly 48 The brewer is the heart of equipment and is responsible for the taste of the cup of coffee. It is therefore important that you store it properly when it is not in the brewer. Always disengage your brewer clutch by using a pair of pliers and turning the pin located on the back clockwise until the brew chamber lifts up. This will release the pressure on the screen and seal. Your brewer must be on its back or its left side while on a table top. Do not sit the brewer on its right side (wheels and yoke) or straight up as these positions are not sturdy and could cause it to fall. AVALON GALLERIA Rev. 8 04/2013 INSTALLATION AND SERVICE MANUAL for AVALON Galleria and Quatro www.cafection.com Annex 1 (800) 561-6162 Full maintenance schedule Annex AVALON GALLERIA Rev. 8 04/2013 49 INSTALLATION AND SERVICE MANUAL for AVALON Galleria and Quatro www.cafection.com Monthly maintenance schedule Annex Annex 2 (800) 561-6162 50 AVALON GALLERIA Rev. 8 04/2013 INSTALLATION AND SERVICE MANUAL for AVALON Galleria and Quatro www.cafection.com Annex 3 (800) 561-6162 Weekly maintenance schedule Annex AVALON GALLERIA Rev. 8 04/2013 51 (800) 561-6162 www.cafection.com AVALON GALLERIA Rev. 8 04/2013 52 Annex INSTALLATION AND SERVICE MANUAL for AVALON Galleria and Quatro Annex 4 Waste chute position without filtration system INSTALLATION AND SERVICE MANUAL for AVALON Galleria and Quatro (800) 561-6162 www.cafection.com Annex 5 Waste chute position with filtration system Annex 53 AVALON GALLERIA Rev. 8 04/2013