Download Common Interface
Transcript
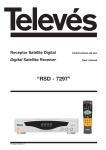
Receptor Satélite Digital
Manual do utilizador
Digital Satellite Receiver
User instructions
“Common Interface”
Ref. 7254
© Copyright, Televés, S.A.
“Common Interface”
CONTEÚDO. . . . . . . . . . . . . . . . . . . . . . . . . . . . . . . . . . . . . . . . . . . . . . . . . . . . . . . . . . . . . . . . . . . . . . .
Precauções
.............................................................................
Informação Geral
Pág.
5
..........................................................................
6
Ligação do equipamento . . . . . . . . . . . . . . . . . . . . . . . . . . . . . . . . . . . . . . . . . . . . . . . . . . . . . . . . . . . . . . . . . . . . .
8
Como ligar o receptor a varios sistemas . . . . . . . . . . . . . . . . . . . . . . . . . . . . . . . . . . . . . . . . . . . . . . . . . . .
8
CAM (Módulo de Acesso Condicional ) Cartão . . . . . . . . . . . . . . . . . . . . . . . . . . . . . . . . . . . . . . . . . . . . . .
9
TV com Antena Terrestre . . . . . . . . . . . . . . . . . . . . . . . . . . . . . . . . . . . . . . . . . . . . . . . . . . . . . . . . . . . . . . .
9
Sistema Móvel com motor USALS . . . . . . . . . . . . . . . . . . . . . . . . . . . . . . . . . . . . . . . . . . . . . . . . . . . . . . . .
9
Observações . . . . . . . . . . . . . . . . . . . . . . . . . . . . . . . . . . . . . . . . . . . . . . . . . . . . . . . . . . . . . . . . . . . . . . . . . . . . . .
10
Ligação DiSEqC 1.0 . . . . . . . . . . . . . . . . . . . . . . . . . . . . . . . . . . . . . . . . . . . . . . . . . . . . . . . . . . . . . . . . . . .
10
..................................................................
10
Operação Simples . . . . . . . . . . . . . . . . . . . . . . . . . . . . . . . . . . . . . . . . . . . . . . . . . . . . . . . . . . . . . . . . . . . . . . . . . .
DiSEqC 1.2 / USALS
11
Função simples
Guia de Menu
......................................................................
11
.............................................................................
13
Menu Principal . . . . . . . . . . . . . . . . . . . . . . . . . . . . . . . . . . . . . . . . . . . . . . . . . . . . . . . . . . . . . . . . . . . . . . .
13
Instalação
13
..........................................................................
Configuração da Antena
Busca Automática
Busca Manual
.........................................................
14
..............................................................
15
.................................................................
16
Editar Satélite . . . . . . . . . . . . . . . . . . . . . . . . . . . . . . . . . . . . . . . . . . . . . . . . . . . . . . . . . . . . . . . . . . .
17
Restauração de Fábrica . . . . . . . . . . . . . . . . . . . . . . . . . . . . . . . . . . . . . . . . . . . . . . . . . . . . . . . . . . .
18
Configuração do USALS . . . . . . . . . . . . . . . . . . . . . . . . . . . . . . . . . . . . . . . . . . . . . . . . . . . . . . . . . .
18
Preferencias . . . . . . . . . . . . . . . . . . . . . . . . . . . . . . . . . . . . . . . . . . . . . . . . . . . . . . . . . . . . . . . . . . . . . . . . .
19
Propiedades do Canal . . . . . . . . . . . . . . . . . . . . . . . . . . . . . . . . . . . . . . . . . . . . . . . . . . . . . . . . . . . .
19
Editar Lista de Programas . . . . . . . . . . . . . . . . . . . . . . . . . . . . . . . . . . . . . . . . . . . . . . . . . . . . . . . . .
20
Desinstalar Satélite . . . . . . . . . . . . . . . . . . . . . . . . . . . . . . . . . . . . . . . . . . . . . . . . . . . . . . . . . . . . . .
21
Guia de Programas . . . . . . . . . . . . . . . . . . . . . . . . . . . . . . . . . . . . . . . . . . . . . . . . . . . . . . . . . . . . . .
21
Mudar código PIN . . . . . . . . . . . . . . . . . . . . . . . . . . . . . . . . . . . . . . . . . . . . . . . . . . . . . . . . . . . . . . .
Configuração do Sistema
23
Hora Local . . . . . . . . . . . . . . . . . . . . . . . . . . . . . . . . . . . . . . . . . . . . . . . . . . . . . . . . . . . . . . . . . . . . .
23
Idioma do Menu . . . . . . . . . . . . . . . . . . . . . . . . . . . . . . . . . . . . . . . . . . . . . . . . . . . . . . . . . . . . . . . . .
23
Idioma do Audio . . . . . . . . . . . . . . . . . . . . . . . . . . . . . . . . . . . . . . . . . . . . . . . . . . . . . . . . . . . . . . . . .
24
Idioma dos Subtítulos (Legendas) . . . . . . . . . . . . . . . . . . . . . . . . . . . . . . . . . . . . . . . . . . . . . . . . . . .
24
Saída SCART . . . . . . . . . . . . . . . . . . . . . . . . . . . . . . . . . . . . . . . . . . . . . . . . . . . . . . . . . . . . . . . . . . .
24
Saída SPDIF . . . . . . . . . . . . . . . . . . . . . . . . . . . . . . . . . . . . . . . . . . . . . . . . . . . . . . . . . . . . . . . . . . . .
24
Canal RF . . . . . . . . . . . . . . . . . . . . . . . . . . . . . . . . . . . . . . . . . . . . . . . . . . . . . . . . . . . . . . . . . . . . . .
25
Modo RF . . . . . . . . . . . . . . . . . . . . . . . . . . . . . . . . . . . . . . . . . . . . . . . . . . . . . . . . . . . . . . . . . . . . . .
25
Informação do Sistema . . . . . . . . . . . . . . . . . . . . . . . . . . . . . . . . . . . . . . . . . . . . . . . . . . . . . . . . . . .
Outras Configurações
Interface Comun
Resolução de Problemas
Características
25
.................................................................
26
.....................................................................
27
....................................................................
28
............................................................................
29
Estrutura do Menu
Garantía
22
..............................................................
.........................................................................
30
..............................................................................
59
3
PORTUGUÊS
Manual do utilizador
Manual do utilizador
“Common Interface”
Precauções
O receptor que acaba de adquirir foi construído conforme as normas internacionais de segurança.
Aconselhamos uma leitura atenta dos seguintes conselhos de segurança.
SOBRECARGA:
Não sobrecarregue as tomadas, extensões, ou adaptadores evitando riscos de incêndio ou descarga eléctrica.
LÍQUIDOS:
Não derrame líquidos sobre o receptor
PEQUENOS OBJECTOS:
Evitar a proximidade de pequenos objectos metálicos. Estes poderão entrar pelas ranhuras de ventilação do
receptor e causar graves danos.
LIMPEZA:
Desligar o receptor da rede antes de efectuar a limpeza.
Utilizar un pano suave, ligeiramente humedecido na água (sem detergentes) para limpar o exterior do receptor.
VENTILAÇÃO:
Colocar o receptor em local bem ventilado com as ranhuras a descoberto.
Evitar a exposição ao sol ou a fontes de calor.
Não colocar outros equipamentos em cima.
LIGAÇÕES:
Efectue somente as ligações recomendadas
LIGAÇÕES AO LNB:
Apague o receptor antes de ligar ou desligar o LNB.
CASO CONTRÁRIO PODERÁ DANIFICAR O LNB.
LIGAÇÃO ao TV ou VCR:
Apague o receptor antes de o ligar ou desligar de um TV ou VCR
CASO CONTRÁRIO PODERÁ DANIFICAR O TV ou VCR.
COLOCAÇÃO:
Colocar o receptor num local interior protegido de descargas, chuva ou sol directo.
WARNING
RISK ELECTRICAL SHOCK
DO NOT OPEN
PARA REDUZIR O RISCO DE DESCARGA ELÉCTRICA,NÃO RETIRE A TAMPA.
NÃO EXISTEM PARTES REPARÁVEIS PELO UTILIZADOR NO INTERIOR.
PARA UMA REPARACÃO, CONSULTE UM TÉCNICO QUALIFICADO
Este símbolo indica "voltagem perigosa" dentro do produto, que pode apresentar
um risco de descarga eléctrica ou danos pessoais.
Este símbolo indica que existem instruções importantes para este produto.
5
PORTUGUÊS
ALIMENTAÇÃO:
90 - 250 V~ 50/60 Hz.
Manual do utilizador
“Common Interface”
Informação Geral
Fig. 1
-
Painel Frontal
Tecla
Função
Ligar ou desligar o receptor "ON" ou "OFF".
MENU
Para aceder Menu principal.
OK
Para confirmar a escolha.
EXIT
Sair de um parâmetro ou cancelar função seleccionada.
CH Up/Down Canal acima canal abaixo ou selecção de item dentro do submenu.
VOL Up/Down Volume de Áudio Acima / Abaixo ou selecção de item no menu.
Display
4 dígitos de 7 segmentos para informação de canal / relógio
2 Slots para Common Interface CAM (VIACCESS, IRDETO, NAGRAVISION, CRYPTOWORKS, CONAX) para Cartão.
----Fig. 2
-
Nome
ANT IN
TV OUT
VIDEO
AUDIO
S/PDIF
TV
0/12V
VCR
LNB
LOOP THROUGH
RS 232
POWER
Fig. 3
-
Painel Posterior
Função
Para ligação da entrada de sinal TV terrestre.
Saída modulada para ligar via cabo coaxial a um TV.
Saída de vídeo para TV ou outro equipamento.
Saída de áudio para TV ou outro equipamento.
Saída para ligar a amplificador digital de áudio.
Para ligar ao TV via Cabo SCART.
Para actuar sobre comutador externo 0/12 V.
Para ligar a um VCR via Cabo SCART.
Entrada de cabo de antena satélite.
Para ligação de sinal de satélite a outro Receptor.
Para ligação a um PC para alteração de SW.
90 ~ 250V AC, 50/60Hz.
Comando á distância
Tecla
MUTE
TV/STB
TV/RADIO
P.STD
P.SIZE
A.L/R
CHAN /
VOLUME +/A.LANG
RECALL
EPG
MENU
EXIT
/
/
OK
SUB-T (Red)
GREEN
INFO (Blue)
YELLOW
SLEEP
0...9
PAUSE
Função
Para comutar entre ligar e desligar.
Para activar ou desactivar o áudio.
Comutar entre modos TV e Receptor
Comutar entre modos TV e Rádio
Para alterar modo de imagem
Para alterar tamanho de imagem
Para seleccionar modo de áudio (Mono, Esquerdo, Direito, Stereo)
Para Incrementar ou decrementar canal
Para subir ou descer volume de áudio
Para seleccionar idioma de áudio
Para voltar ao canal anterior
Para apresentação do Guia de Programa de TV / Radio
Para apresentação do Menu Principal no ecrã ou tornar ao menu anterior
Para voltar à visão normal de um menu
Para andar acima e abaixo num menu
Para andar esquerda direita no menu
Para confirmar a escolha
Para activar ou desactivar as legendas, para visualizar o Teletexto
Para seleccionar programas por satélite e busca por PID
Para apresentação de caixa de informação no ecrã
Para ordenar lista de canais. Para aceder á opção "Reservar"
Para definir tempo para desligar automático
Para inserção de algarismos referentes ao canal e ao código PIN
Para parar ou dar acção à imagem
6
“Common Interface”
PORTUGUÊS
Manual do utilizador
Fig. -1-
Fig. -2-
> 80 %
> 50°C
Fig. -3-
7
< 5°C
Manual do utilizador
“Common Interface”
Ligação do equipamento
Existem várias formas de ligar o receptor ao TV , ao VCR e / ou sistema HI/FI.
Como ligar o Receptor a vários sistemas
1.- Ligue o receptor a um TV
Ligue o receptor a um TV através de
um cabo SCART.
Como alternativa pode utilizar a
saída de vídeo (ficha RCA) ou a
saída de UHF.
2.- Ligar Receptor ao VCR
Ligue o cabo SCART do VCR ao
Receptor.
Como alternativa pode utilizar a
saída de vídeo (ficha RCA) ou a
saída de UHF.
3.- Ligar o Receptor a um sistema
Hi-Fi
Ligue o cabo RCA Stereo das
saídas AUDIO L/R, S/PDIF do
receptor às entradas AUX, SPARE
ou EXTRA do seu sistema HI-FI.
4.- Ligue o Receptor a um Sistema
Digital de Áudio
5.- Loop Through
Se tiver mais um receptor digital, ou
analógico, e deseja utilizar o mesmo
LNB esse pode ser ligado via loop
through. Ligue uma extremidade do
cabo coaxial ao Loop Through do
receptor e a outra extremidade à
entrada LNB IN do segundo
receptor.
Se tem um Amplificador de Áudio
com entrada S/PDIF pode ligar-lhe a
saída respectiva do receptor para
poder usufruir da alta qualidade de
som.
Recepção satélite
Recepção terrestre
Notas:
- Todos os cabos
utilizados para a
ligação aos
receptores serão
blindados.
NAO LIGUE o receptor à
rede até que não tenha
terminado todas as
ligações da unidade.
- O canal de saída do
RSD e por defeito o
C21.
RSD-7254
(Recomendado)
TV
VCR
8
Manual do utilizador
“Common Interface”
CAM (Módulo de Acesso Condicional) Cartão
Atenção
- Por favor não ligue a Alimentação principal do receptor enquanto não tiver todas as ligações efectuadas!
- Se desejar ver canais codificados necessita de comprar a CAM e o respectivo Cartão do servidor de serviços.
- No entanto a emissão de canais é feita por múltiplos operadores requerendo múltiplas CAM's e cartões.
- Por favor consulte os manuais fornecidos pelo fornecedor de serviços para obter detalhes da CAM e do cartão.
- Ver canais livres é possível mesmo não possuindo CAM nem cartão.
- Para os operadores poderem descarregar nova informação e actualizar CAM e Cartão, estas deverão estar sempre
colocadas no receptor.
CAM
Cartão
TV com Antena Terrestre
1.- Ligue uma extremidade do cabo coaxial à saída de TV OUT na
parte posterior do receptor e a outra extremidade à entrada do TV.
2.- Ligue uma extremidade do cabo coaxial de RF na ANT IN na
traseira do receptor e a outra à antena terrestre ou á tomada de TV
existente na parede.
3.- Finalmente ligue o cabo coaxial da antena de satélite na entrada
LNB IN existente no painel posterior do receptor.
Sistema Móvel com motor USALS
1.- Ligue uma extremidade do cabo coaxial à saída de TV OUT na
parte posterior do receptor e a outra extremidade à entrada do TV.
2.- Ligue uma das extremidades do cabo coaxial na entrada LNB IN
do receptor e a outra á saída REC do motor USALS (Ref. 7518).
3.- Ligue o cabo coaxial do LNB à entrada de LNB existente no motor
USALS.
9
PORTUGUÊS
- O receptor que possui só poderá apresentar os canais se a CAM e o cartão forem adquiridos ao operador.
Manual do utilizador
“Common Interface”
Observações
Ligação DiSEqC 1.0
• Todos os receptores Televés estão concebidos para cumprir o protocolo DiSEqC 1.0 e DiSEqC 1.2.
• Tal, permite que várias antenas sejam ligadas ao receptor ao mesmo tempo.
• Se tem duas ou mais antenas fixas ou LNB's recomenda-se a utilização de um comutador DiSEqC 1.0 (Ref. 7268 e 7269,
de 2 e 4 entradas respectivamente).
• Ligue o Cabo Coaxial do primeiro LNB à entrada LNB1 do comutador.
• Faça o mesmo para os restantes LNB's.
• Ligue uma extremidade do cabo coaxial à saída do comutador e a outra à entrada de LNB do receptor.
DiSEqC 1.2/ USALS
• Ao receptor poderá ligar um só LNB ou um sistema multisatélite de dois LNB's. Quando estiver a instalar um sistema
rotativo com motor USALS (Ref. 7518) leia com atenção o manual referente ao motor.
10
Manual do utilizador
“Common Interface”
Operação Simples
Função simples
Depois dos canais terem sido programados, aparecerá uma caixa de
informação de cada vez que se muda de canal.
1.- De cada vez que muda de programas aparecerá uma caixa de
informação durante uns segundos.
2.- Pode mudar de programas com as teclas UP ou DOWN.
Poderá ver "Rodapé de Informação" na parte inferior do ecrã.
2.- Controlo de Volume /Mute
1.- Para controlar o volume de áudio, pressione a tecla de VOLUME.
2.- A barra de Volume aparecerá na parte inferior do ecrã.
3.- Ao fim de 1 segundo a barra de volume desaparecerá. Para
temporariamente desligar o volume, pressione a MUTE.
Para cancelar o MUTE pressione a tecla MUTE novamente ou
pressione a tecla de VOLUME.
3.- Lista Simples de Canais
1.- Se pressionar a tecla OK quando está a receber sinal, poderá ver
"Lista de programas".
2.- Utilizando as teclas UP/DOWN na "Lista de Programas", poderá
seleccionar outro programa.
3.- Depois de se posicionar num programa, de seguida pressione o tecla OK.
4.- Pressione a tecla Vermelho para aceder à lista de canais favoritos.
5. Para poder ordenar a lista de programas pressione a tecla Amarela.
Aparecerá uma janela no ecrã. Seleccione o tipo de organização com
as teclas UP/DOWN e pressione a tecla OK.
6.- Pressione a tecla Verde para aceder à lista de satélites.
7.- Seleccione o tipo de lista que deseja com as teclas UP/DOWN e de
seguida pressione OK para o conseguir.
11
PORTUGUÊS
1.- Informação de Programa
Manual do utilizador
“Common Interface”
4.- Selecção de áudio
1.- Quando desejar alterar o idioma do Áudio do programa que esteja a ver,
pressione a tecla A.LANG.
Do lado esquerdo do ecrã aparecerá um pequeno menu.
2.- Utilize as teclas UP/DOWN para seleccionar os audios que deseja.
3.- Para cancelar ou sair, pressione a tecla A.LANG outra vez.
Poderá definir um idioma como preferido no menu de configuração
5.- Para alterar a saída de Áudio
1.- Pressione a tecla A.L/R no comando para alterar a saída.
2.- No topo direito do ecrã aparecerá um pequeno menu.
3.- Pressione a tecla A.L/R repetidamente para alterar o modo de som
(Mono, Esquerdo, Direito e Stereo).
12
Manual do utilizador
“Common Interface”
Guia de Menu
Menu Principal
1.- Poderá mover-se dentro do submenu desejado utilizando as teclas
UP/DOWN.
2.- Deverá introduzir um código de acesso "PIN" no caso de aceder aos
menus de "Instalação" ou "Configuração do sistema".
3.- Pressione a tecla OK para confirmar a selecção.
4.- Pressione a tecla MENU para regressar ao menu anterior.
Ou pressione a tecla EXIT para sair do menu completamente.
O Menu Principal apresenta as seguintes informações.
Instalação:
Configuração da Antena, Busca automática, Busca Manual, Editar Satélite,
Restauração de fábrica e Configuração USALS.
Preferências:
Propriedades do canal, Editar lista de canais, Desinstalar Satélite, Guia de
Programas e Mudar Código PIN.
Configuração do sistema:
Hora local, Idioma do Menu, Idioma do Áudio, Idioma dos subtítulos
(Legendas), Saída Scart, Saída SPDIF, Canal RF, Modo RF, Informação do
sistema, Tipo de ecrã, Transparência do Menu, Baner do programa,
Bloqueio Parental, Bloqueio do receptor, Bloqueio do Menu, Iniciar
Automático.
Interface Comum:
Neste menu é possível obter informação sobre o serviço disponibilizado
pela(s) CAM(s), presentes nas "slots" do receptor.
Instalação
Neste menu pode definir a antena e proceder à busca de um satélite ou de
um transponder.
Poderá também utilizar a função Valores de Fábrica.
Para utilizar este menu entre no submenu utilizando os teclas UP/DOWN
depois de introduzir o código de acesso "PIN".
O código de acesso "PIN" predefinido é "0000".
13
PORTUGUÊS
Pressione a tecla MENU no comando.
Verá o menu principal no ecrã.
Manual do utilizador
“Common Interface”
Configuração da Antena
Se for seleccionado o menu "Configuração da Antena" um valor alterável
aparecerá no lado direito do ecrã.
Para alterar para o valor desejado utilize os teclas LEFT/RIGHT.
Mova o cursor para o lado direito do ecrã usando a tecla RIGHT. De seguida
seleccione os valores desejados utilizando as teclas UP/DOWN e de
seguida pressione OK.
1.- Configuração da Antena:
Seleccione um número de antena.
Poderá seleccionar no máximo 32 antenas.
2.- Satélite:
Seleccione os satélites que deseja.
3.- Transponder:
Seleccione o transponder que deseja.
4.- LNB Power:
Seleccione LNB Power On ou OFF caso deseje ou não alimentar o LNB
5.- LNB Type:
Seleccione o LNB que deseja
6.- 22KHz:
Está opção é automática e não permite ser alterada.
7.- Tipo de Comutador:
Seleccione o tipo de comutador
(Nenhum, DiSEqC, Motor, USALS)
- Nenhum: Activar esta opção sempre que não utilizar nenhuma das
seguintes opções: DiSEqC, Motor e USALS, normalmente
quando a instalação tiver apenas 1 LNB.
- DiSEqc: Se a antena estiver ligada a um comutador DiSEqC 1.0,
seleccione o tipo de DiSEqC.
- Motor:
Se ligar uma antena DiSEqC 1.2 ao receptor, altere o tipo de
comutador para Motor.
Pode alterar a posição do motor através da Opção.
- USALS : Poderá seleccionar o DiSEqC USALS se o motor a utilizar for
compatível com este sistema.
8.- Opção:
Opções variam de acordo com o tipo de DiSEqC.
Seleccione a opção apropriada.
- DiSEqC: Pode seleccionar e utilizar a porta apropriada para o seu
comutador DiSEqC. (DiSEqC A, DiSEqC B, DiSEqC C,
DiSEqC D.)
Seleccione o comando pressionando a tecla UP/DOWN.
Depois de seleccionar todas as necessidades, pressione a tecla
Vermelha.
Busca Automçatica aparecerá no ecrã.
9.- 0/12V:
Esta opção permite activar ou desactivar a tensão dos 12V, na saída RCA.
14
Manual do utilizador
“Common Interface”
Busca Automática
1.- Seleccione o satélite sobre o qual deseja fazer uma busca usando as
teclas UP/DOWN, de seguida pressione a tecla OK .
2.- Mova para a direita usando o tecla RIGHT, seleccione a opção
"Exploração todos os Canais" ou "Exploração dos canais livres" e de
seguida pressione a tecla OK.
- Exploração Todos os Canais: Busca todos
Codificados).
os
canais
(Livres
e
- Exploração Canais Livres: Busca apenas Canais Livres.
3.- O ecrã de busca automática aparecerá e os canais serão
automaticamente procurados.
4.- Pressione OK para guardar os canais seleccionados em memória, ou
prima EXIT para sair.
Para parar a busca, pressione a tecla MENU ou a tecla EXIT.
15
PORTUGUÊS
A busca Automática permite ao utilizador a busca do satélite desejado
pertencente á lista de satélites.
Manual do utilizador
“Common Interface”
Busca Manual
1.- Satélite:
Seleccione o satélite que pretende.
2.- Frequência:
Introduza a frequência sobre a qual pretende efectuar a busca.
Para introduzir a frequência utilize as teclas numéricas do seu comando.
3.- Polaridade:
Seleccione a polaridade Horizontal ou Vertical.
4.- Velocidade dos símbolos (Symbol Rate):
Seleccione o symbol rate do transponder pretendido.
Para introduzir o symbol rate utilize as teclas numéricas do seu comando.
5.- Velocidade do Código (Taxa de Correcção - FEC):
Seleccione a opção Automático ou o valor, 1/2, 2/3, 3/4, 4/5, 5/6 ou 7/8.
6.- Tipo de Exploração (Modo de Busca):
Seleccione o tipo de busca que pretende: Exploração a Todos os Canais
ou Exploração Canais Livres.
7.- Busca de Rede (Busca por Operador):
Seleccione a opção "Ligado" ou "Desligado". Se seleccionar a opção
"Ligado" podem ser encontrados mais transponders do mesmo
operador.
8.- Busca PID:
Se seleccionar a opção "Manual" pode inserir o PID directamente por
introdução do seu valor.
Seleccione "Manual" no lado direito do ecrã e pressione a tecla OK do
comando.
Nota!!: Para editar um satélite, pressione a tecla vermelha do seu
telecomando, o menu "Editar Satélite", ficará disponível.
16
Manual do utilizador
“Common Interface”
Editar Satélite
Neste menu poderá editar, adicionar ou eliminar satélites ou
transponders.
1.- Ao pressionar a tecla OK ,surgirá um menu que lhe permite editar,
adicionar ou eliminar um determinado satélite da lista de satélites.
2.- Seleccione "Modo" utilizando as teclas LEFT/RIGHT.
3.- Na opção "Satélite", pressione a tecla OK, aparecerá um "teclado" que
lhe permite editar ou adicionar o nome de um determinado satélite.
4.- Pressione a tecla vermelha para confirmar o nome.
5.- Introduza a posição orbital usando o teclado numérico e as teclas
LEFT/RIGHT.
Pressione a tecla OK para guardar.
2.- Transponder
1.- Ao pressionar a tecla OK na lista de transponders, surgirá um menu
que lhe permite editar, adicionar ou eliminar um determinado
Transponder da lista de Transponders.
2.- Seleccione "Modo" utilizando as teclas LEFT/RIGHT.
3.- Introduza a frequência, o Symbol Rate, a polaridade e FEC.
Pressione a tecla OK para guardar.
17
PORTUGUÊS
1.- Satélite
Manual do utilizador
“Common Interface”
Restauração de Fábrica
Atenção!! Use esta opção se tiver de iniciar toda a instalação do
receptor.
Se prosseguir todos os canais e programações, serão apagados.
O receptor ficará com os valores de fábrica.
Se pressionar a tecla OK, irá ser pedida a confirmação.
Para prosseguir prima a tecla OK, ou prima EXIT para sair deste menu.
Configuração do USALS
Neste submenu deverá introduzir a sua posição orbital (Latitude/Longitude).
Se no menu Configuração da Antena, escolheu a opção USALS.
1.- Longitude:
Introduza o valor da sua longitude através do teclado numérico.
Pressionando a tecla OK permuta entre Este e Oeste.
2.- Latitude:
Introduza o valor da sua latitude através do teclado numérico.
Pressionando a OK permuta entre Norte e Sul.
Pressione a tecla EXIT para guardar.
18
Manual do utilizador
“Common Interface”
Preferências
Neste menu, poderá criar um grupo de programas e alterá-los de acordo
com a sua preferência.
PORTUGUÊS
Também poderá alterar o código de acesso "PIN".
Propriedades do Canal
É possível criar quatro grupos de programas favoritos.
1.- Na lista de programas do seu lado esquerdo, seleccione o programa
pretendido, usando as teclas UP/DOWN.
2.- Mova o cursor, utilizando as teclas LEFT/RIGHT para o grupo de
programas favoritos pretendido e pressione a tecla OK. O seu
programa escolhido será adicionado
ao grupo pretendido.
Se pretender eliminar o programa do grupo de favoritos, pressione
novamente a tecla OK.
Alterar o nome do grupo de favoritos
1.- Para atribuir um nome ao grupo de favoritos, pressione a tecla Azul.
2.- Seleccione o grupo de favoritos cujo nome pretende alterar e pressione
a tecla OK.
3.- Seleccione o caracter desejado utilizando as teclas UP/DOWN e
confirme com a tecla OK.
Para eliminar o caracter seleccionado pressione a tecla Verde.
4.- Pressione a tecla Vermelha para confirmar o nome introduzido.
19
Manual do utilizador
“Common Interface”
Editar Lista de Programas
Poderá Bloquear, Eliminar, Mover ou Alterar o Nome do programa.
Deve introduzir o código de acesso "PIN" antes de usar este menu.
O código de acesso "PIN" predefinido é “0000”.
Bloquear
Para impedir as crianças de verem um qualquer programa, poderá bloquear
programas em qualquer lista.
1.- Seleccione Bloquear no lado esquerdo do menu “Editar Lista de
Programas”.
2.- Seleccione o programa que pretende bloquear no lado direito, utilizando
as teclas UP/DOWN e pressione a tecla OK.
Para cancelar pressione mais uma vez a tecla OK.
3.- Para confirmar a lista de programas, pressione a tecla MENU ou a tecla
EXIT. Surgirá uma janela no ecrã. Pressione a tecla OK para guardar ou
a tecla EXIT para sair deste menu.
Nota!! : Este procedimento tem que ser repetido para cada programa.
Quando um programa é bloqueado numa lista, é automaticamente
bloqueado em todas as outras listas a que pertence.
Eliminar
Poderá eliminar programas de TV ou Rádio da actual lista de programas
1.- Seleccione Eliminar no lado esquerdo do menu “Editar Lista de
Programas”.
2.- Seleccione o programa que pretende Eliminar no lado direito, utilizando
as teclas UP/DOWN e pressione a tecla OK, o programa seleccionado
ficará vermelho. Se pressionar novamente a tecla OK, o programa
seleccionado não será eliminado.
3.- Para confirmar a lista de programas, pressione a tecla MENU ou a tecla
EXIT. Surgirá uma janela no ecrã. Pressione a tecla OK para guardar ou
a tecla EXIT para sair deste menu.
Andar (Mover)
Poderá alterar a posição de um programa numa lista de programas.
1.- Seleccione Mover no lado esquerdo do menu “Editar Lista de
Programas”.
2.- Seleccione o programa que pretende mover no lado direito e pressione
a tecla OK.
3.- Mova o programa para a posição pretendida utilizando as teclas
UP/DOWN.
4.- Pressione a tecla OK e a posição do programa será alterada.
Atribuir Novo Nome
Poderá alterar o nome de um programa.
1.- Seleccione Alterar o Nome no lado direito do menu “Editar Lista de
Programas”.
2.- Seleccione o canal que pretende, no lado direito e pressione a tecla OK.
Surgirá um "teclado”.
3.- Seleccione o caracter desejado utilizando as teclas UP/DOWN e
confirme com a tecla OK.
Para eliminar um caracter introduzido pressione a Verde.
4.- Pressione a tecla Vermelha para confirmar o nome introduzido.
20
Manual do utilizador
“Common Interface”
Desinstalar Satélite
1.- Seleccione o satélite a desinstalar na lista de satélites e pressione a
tecla OK.
Para cancelar a desinstalação, pressione novamente a tecla OK.
2.- Para confirmar pressione a tecla Menu ou a tecla Exit.
A confirmação surgirá numa janela que lhe aparecerá no ecrã.
Pressione a tecla Ok para guardar ou a tecla EXIT para sair deste menu.
Guia de Programas
O guia de programas fornece toda a informação, disponibilizada pelo
operador, referente a um determinado programa.
1.- Seleccione a opção "Guia de Programas" no menu de preferências, com a
ajuda das teclas UP/DOWN e pressione a tecla OK.
Quando estiver a ver um determinado programa , pressione a tecla "EPG"
para visualizar esta informação.
Nota!!: A informação do guia de programas nem sempre é fornecida pelo
operador.
Guia de Programas em curso/Guia de Próximos Programas
Apresenta a informação dos programas a ser transmitidos em diferentes
canais.
1.- Seleccione o programa com as teclas UP/DOWN.
2.- Depois de seleccionado o programa pressione a tecla OK.
Acederá á informação detalhada desse programa.
3.- Se pretender alternar entre os vários guias de programas pressione a tecla
Azul.
Guia Semanal de Programas
Apresenta a informação dos programas a ser transmitidos durante a
semana.
1.- Ao pressionar a tecla Azul, alterna entre actual, seguinte e semanal EPG.
2.- Para obter mais informação sobre um determinado programa no Guia de
Programas Semanal (EPG), seleccione o dia pretendido utilizando as teclas
LEFT/RIGHT e pressione a tecla OK.
21
PORTUGUÊS
É possível desinstalar um determinado satélite e a sua lista de programas.
Deve introduzir o código de acesso "PIN" antes de usar este menu.
O código "PIN" predefinido é “0000”.
Manual do utilizador
“Common Interface”
Mudar código PIN
A partir deste menu pode alterar o código de acesso "PIN" predefinido
"0000".
MUITO IMPORTANTE! O código de acesso "PIN" é indispensável para
ter acesso a diversas funções.
1.- Insira o novo código de acesso "PIN" usando as teclas numéricas do
comando.
2.- Volte a digitar o novo código de acesso "PIN" para confirmar.
Note!!: Se esquecer o código PIN pressione as teclas coloridas na seguinte
sequência:
Vermelha - > Verde -> Amarela -> Azul
O PIN será alterado para o seu valor de fábrica: "0000"
22
Manual do utilizador
“Common Interface”
Configuração de Sistema
1.- Seleccione "Configuração de Sistema", no Menu Principal utilizando as
teclas UP/DOWN e pressione a tecla OK.
2.- Seleccione o sub-menu que pretende utilizando as teclas UP/DOWN.
Esse submenu será visualizado no lado direito do ecrã.
Hora Local
O receptor tem um relógio que se ajusta automaticamente com a
informação fornecida pelo sinal de satélite.
1.- Pressione a tecla RIGHT e com as teclas UP/DOWN indique se
pretende aumentar ou diminuir a hora fornecida pelo satélite, de forma a
coincidir com a Hora Local.
O intervalo de tempo é de 30 minutos e é possível variar entre (-12h e
12h).
2.- Pressione a tecla OK, para guardar.
Idioma do Menu
Aqui é possível seleccionar o idioma pretendido em todos menus.
1.- Pressione a tecla RIGHT e com as teclas UP/DOWN seleccione o
Idioma pretendido e pressione a tecla OK.
Estão disponíveis os seguintes idiomas: Inglês; Espanhol; Alemão;
Francês; Italiano e Português.
O idioma seleccionado será aplicado em todos os menus.
23
PORTUGUÊS
Se pretender personalizar o sistema para um funcionamento mais
adequado ao tipo de instalação que possuí, poderá faze-lo a partir do menu
“Configuração de Sistema”.
É necessário introduzir o código de acesso "PIN" para aceder a este menu.
O código de acesso "PIN" predefinido é "0000".
Manual do utilizador
“Common Interface”
Idioma do Áudio
Neste submenu é possível alterar o idioma do áudio sempre que este é
disponibilizado pelo operador.
1.- Pressione a tecla RIGHT e com as teclas UP/DOWN seleccione o
Idioma de áudio preferido e pressione a tecla OK.
Estão disponíveis os seguintes idiomas: Inglês; Espanhol; Alemão;
Francês; Italiano e Português
Idioma dos Subtítulos (Legendas)
Neste submenu é possível alterar o idioma das legendas sempre que estas
são disponibilizadas pelo operador.
1.- Pressione a tecla RIGHT e posteriormente com as teclas UP/DOWN
seleccione o Idioma das legendas preferido e confirme com a tecla OK.
Estão disponíveis os seguintes idiomas: Inglês; Espanhol; Alemão;
Francês; Italiano e Português.
Saída SCART
Se a Scart do seu televisor suporta RGB, seleccione RGB; caso
contrário, seleccione CVBS.
Para seleccionar as diferentes opções pressione as teclas LEFT/RIGHT
Saída SPDIF
Poderá obter um som digital utilizando a saída SPDIF.
1.- Se seleccionar a opção "apagado", a saída de áudio digital não estará
disponível.
2.- Ao seleccionar PCM, o Áudio Digital descomprimido estará disponível
na saída S/PDIF.
3.- Quando é seleccionada a saída Dolby Digital e o programa em questão
disponibiliza o Dolby Áudio, a informação de áudio comprimida estará
disponível.
Para alternar entre as várias opções pressione as teclas LEFT/RIGHT
24
Manual do utilizador
“Common Interface”
Canal RF
Seleccione este menu sempre que pretender alterar o canal de saída
RF.
PORTUGUÊS
Seleccione o canal UHF (21 até 69) que pretende com as teclas
LEFT/RIGHT.
Modo RF
Neste menu pode seleccionar a norma de TV pretendida. Se obtiver
imagem sem áudio isso pode ser indicativo de que o modo RF está
mal definido.
Seleccione o Modo RF com as teclas LEFT/RIGHT.
Modo RF: PAL BG, PAL I, PAL DK, SECAM L, NTSC M.
Informação de Sistema
Visualize toda a informação disponível acerca do seu receptor:
Modelo, Ultima actualização, versão de software, versão de hardware,
versão Loader.
25
Manual do utilizador
“Common Interface”
Outras Configurações
1.- Tipo de Ecrã
Neste menu é possível seleccionar os seguintes formatos de imagem:
4:3 caixa de correio, 4:3 Ecrã completo e 16:9 Ecrã completo.
1.- Seleccione o aspecto de imagem que pretende, utilizando as teclas
LEFT/RIGHT e confirme com a tecla OK.
Nota!! 1: Ecrã completo - preenche todo ecrã, mas corta alguma
informação no lado esquerdo e direito do mesmo.
Nota!! 2: Caixa de Correio - Apresenta a imagem completa, mas com
duas faixas negras uma em cima outra em baixo.
Nota!! 3: Para uma selecção rápida do tipo de ecrã, pressione a tecla
P.SIZE no comando.
2.- Transparência do Menu
É possível variar a transparência do menu desde 60% até 100%.
Seleccione a percentagem de transparência, utilizando as teclas
LEFT/RIGHT.
A transparência escolhida será aplicada no ecrã.
3.- Baner Hora
Sempre que se muda de programa, aparece o banner do programa
durante alguns segundos.
Poderá seleccionar o tempo que o banner do programa deve estar
presente.
1.- Seleccione o tempo que pretende, utilizando as teclas LEFT/RIGHT e
pressione a tecla OK.
2.- O tempo seleccionado será o tempo de duração do banner de canal.
As opções de tempo disponíveis são: 1, 3, 6, 9, 12 e15 segundos.
4.- Bloqueio Parental
Este Submenu permite bloquear/ desbloquear qualquer programa
mediante as opções Ligado/Desligado.
Para seleccionar uma destas opções basta pressionar as teclas
LEFT/RIGHT.
Se seleccionar a opção "Ligado" será necessário introduzir o PIN sempre
que pretender aceder a esse programa.
Se seleccionar "Apagado", acederá a todos os programas sem qualquer
restrição.
5.- Bloqueio do Receptor
Se seleccionar a opção "LIGADO", sempre que ligar o receptor será
necessário introduzir o Código de Acesso "PIN".
6.- Bloqueio de Menu
Se seleccionar "APAGADO", conseguirá aceder a todos os menus sem ser
necessário introduzir o código de acesso "PIN".
7.- Iniciar Automático
1.- Se a opção "Iniciar Automático" estiver "Ligada" o receptor ao
reacender depois de uma falha de tensão irá para o canal em que se
encontrava, antes de se desligar.
2.- Se a função "Iniciar Automático" estiver "Apagada" ao reacender
depois de uma falha de tensão este inicia em modo STANDBY.
26
Manual do utilizador
“Common Interface”
Interface Comum
O seu receptor possui duas "slots" de Interface Comum (CI), aceitando em
qualquer uma módulos PCMCIA.
Se ligar uma CAM apropriada com o seu respectivo cartão, terá acesso aos
programas codificados disponibilizados pelo cartão.
Insira o cartão na CAM e de seguida insira a CAM numa das "slots"
presentes por detrás de uma janela basculante existente no lado direito do
painel frontal do receptor.
A CAM e o respectivo cartão é que determinam quais os programas que
poderá visualizar.
Este receptor funciona automaticamente com dois serviços (ex.:
"Nagravision" e " Irdeto"), sendo apenas necessário possuir duas CAM's,
ligadas uma em cada "slot".
Cada cartão contém os detalhes da subscrição do serviço. E esses
detalhes poderá visualiza-los utilizando o menu interface comum.
1.- Pressione a tecla MENU, e seleccione a slot1 ou a slot 2 e no ecrã
surgirá a informação relativa a cada uma das slots.
Se usar a slot 1 para Nagravision visualizará "Nagravision" no ecrã.
Se usar a slot 2 para "Irdeto" visualizará "Irdeto" no ecrã.
Seleccione o item que pretende e terá informação sobre o cartão.
Pressione a tecla EXIT se desejar sair deste menu.
2.- Quando inserir a CAM com o respectivo cartão no seu receptor e de
seguida ligar o receptor aparecerá a seguinte mensagem "CAM
Iniciando".
3.- Se não inserir o cartão na CAM surgirá a seguinte mensagem "É favor
inserir o seu cartão", após inserir o cartão poderá visualizar o programa
seleccionado.
27
PORTUGUÊS
Os menus ficam activos através do uso de uma CAM (Módulo de
Acesso Condicional) com o seu respectivo cartão.
Manual do utilizador
“Common Interface”
Resolução de Problemas
Problema
Solução
Display do frontal não se ilumina
Verificar a ligação do cabo de alimentação (220 VAC).
Sem Alimentação
Confirmar a posição (ON) do interruptor da alimentação
Sem imagem
Verifique se estão correctas todas as ligações.
Verifique se o canal de sadia RF ou a saída de vídeo estão correctos
Pouca qualidade no sinal de vídeo
Verifique o nível de sinal, se este for baixo tente-o melhorar ajustando a antena
Sem Áudio
Verifique o nível de volume da televisão e do receptor.
Verifique se a função "Mute" do receptor ou da televisão está activa.
Verifique a ligação do áudio.
Comando não funciona
Aponte o comando directamente para o receptor.
Verifique e substitua as pilhas.
Verifique se não existe nenhum objecto na frente do receptor.
Programa não funciona ou está
codificado
Verifique se a CAM e o cartão estão correctamente inseridos.
Esqueceu o seu Código de Acesso
"PIN"
Ir ao menu "Alterar Código PIN".
Confirme se o cartão é o apropriado para o serviço pretendido
28
Manual do utilizador
“Common Interface”
Características
FEC
Auto, 1/2, 2/3, 3/4, 4/5, 5/6, 7/8
Conector de entrada
Ficha tipo "F"
Frequência de entrada
950 - 2150 MHz
Velocidade de símbolo
2 - 45 Msps
Desmodulação
QPSK
Modulador RF
PLL
Canal 21 ao canal 69
Normas TV
Pal B/G, I, D/K, Secam L, NTSC M (selecionável)
Conectores RF
75 Ohms, 169-2 Macho/Fêmea
Gama de Frequência
UHF : 470 - 860MHz
MPEG / A/V Decoder
Resolução de vídeo
720 X 576
Bit Rate (entrada)
Max. 90 Mbit/s
Transport Stream
MPEG-2 ISO/IEC 13818-1
Descodificador de Áudio
MPEG/Musical Layer I & II
Modo de Áudio
Single / Dual Channel
A/V e Data Input/Output
Video
RCA/ Cinch, Vídeo Output (CVBS, RGB)
RCA/Cinch Volume & Mute Controle
Audio
(Resolução: 20 bits DAC, Max 2 Vrms)
S/PDIF of Dolby Digital Bit stream Out
RS-232C
RSs232 (9- pin D-sub), Velocidade de transferencia 115Kbps
Recursos do sistema
Memória Flash
1M byte
Memória RAM
8 Mbyte
Processador
STI 5518
Alimentação
Alimentação na Entrada
90 - 250V AC, 50/60 Hz
Consumo
Max. 25W
Protecção
Fusível Interno
Tipo
SMPS
Especificações Físicas
Tamanho
340 x 60 x 250 (mm)
Peso
2.5 Kg
Temperatura de funcionamento
0º C / 50º C
Temperaturas de armazenamento
-20º / 60º C
Função
Interface Comum
Duas slots
SW Upload
Via RS-232C
29
PORTUGUÊS
Tuner
Manual do utilizador
“Common Interface”
Estrutura do menu
Configuração da Antena
Busca Automática
Instalação
Busca Manual
Editar Satélite
Restauração de Fábrica
Conf. USALS
Propriedades do Canal
Editar Lista de Canais
Preferências
Desinstalar Satélite
Guia de Programas
Mudar Código PIN
Hora Local
Idioma do Menu
Idioma do Áudio
Idioma dos Subtítulos
Configuração do Sistema
Saída Scart
Saída SPIDF
Canal RF
Tipo de Ecrã
Modo RF
Transparência do Menu
Informação do Sistema
Baner Hora
Outras Configurações
Bloqueio Parental
Bloqueio do Receptor
Interface Comum
Bloqueio do Menu
Iniciar Automático
30
“Common Interface”
CONTENTS . . . . . . . . . . . . . . . . . . . . . . . . . . . . . . . . . . . . . . . . . . . . . . . . . . . . . . . . . . . . . . . . . . . . . . .
Pág.
General Safety . . . . . . . . . . . . . . . . . . . . . . . . . . . . . . . . . . . . . . . . . . . . . . . . . . . . . . . . . . . . . . . . . . . . . . . . . . . . .
33
General Information
........................................................................
34
Connecting Your Equipment . . . . . . . . . . . . . . . . . . . . . . . . . . . . . . . . . . . . . . . . . . . . . . . . . . . . . . . . . . . . . . . . . .
36
How to connect your STB to various systems . . . . . . . . . . . . . . . . . . . . . . . . . . . . . . . . . . . . . . . . . . . . . . .
36
CAM (Conditional Access Module) and Smart Card . . . . . . . . . . . . . . . . . . . . . . . . . . . . . . . . . . . . . . . . . .
37
TV with Terrestrial Antenna . . . . . . . . . . . . . . . . . . . . . . . . . . . . . . . . . . . . . . . . . . . . . . . . . . . . . . . . . . . . . .
37
TV with Motorized System (DiSEqC 1.2) . . . . . . . . . . . . . . . . . . . . . . . . . . . . . . . . . . . . . . . . . . . . . . . . . . .
37
Reference
..............................................................................
38
DiSEqC 1.0 Connection . . . . . . . . . . . . . . . . . . . . . . . . . . . . . . . . . . . . . . . . . . . . . . . . . . . . . . . . . . . . . . . .
38
DiSEqC 1.2 / USALS
..................................................................
38
Basic Operation . . . . . . . . . . . . . . . . . . . . . . . . . . . . . . . . . . . . . . . . . . . . . . . . . . . . . . . . . . . . . . . . . . . . . . . . . . . .
39
Basic Function . . . . . . . . . . . . . . . . . . . . . . . . . . . . . . . . . . . . . . . . . . . . . . . . . . . . . . . . . . . . . . . . . . . . . . .
39
Menu Guide
.............................................................................
41
Main Menu . . . . . . . . . . . . . . . . . . . . . . . . . . . . . . . . . . . . . . . . . . . . . . . . . . . . . . . . . . . . . . . . . . . . . . . . . .
41
Installation
41
..........................................................................
Antenna Setup
.................................................................
42
Automatic Search . . . . . . . . . . . . . . . . . . . . . . . . . . . . . . . . . . . . . . . . . . . . . . . . . . . . . . . . . . . . . . .
43
Manual Search
.................................................................
44
Edit Satellite . . . . . . . . . . . . . . . . . . . . . . . . . . . . . . . . . . . . . . . . . . . . . . . . . . . . . . . . . . . . . . . . . . . .
45
Factory Reset . . . . . . . . . . . . . . . . . . . . . . . . . . . . . . . . . . . . . . . . . . . . . . . . . . . . . . . . . . . . . . . . . . .
46
USALS Setup . . . . . . . . . . . . . . . . . . . . . . . . . . . . . . . . . . . . . . . . . . . . . . . . . . . . . . . . . . . . . . . . . . .
46
User Preference . . . . . . . . . . . . . . . . . . . . . . . . . . . . . . . . . . . . . . . . . . . . . . . . . . . . . . . . . . . . . . . . . . . . . .
47
Channel Properties . . . . . . . . . . . . . . . . . . . . . . . . . . . . . . . . . . . . . . . . . . . . . . . . . . . . . . . . . . . . . . .
47
Edit Channel List . . . . . . . . . . . . . . . . . . . . . . . . . . . . . . . . . . . . . . . . . . . . . . . . . . . . . . . . . . . . . . . .
48
Uninstall Satellite . . . . . . . . . . . . . . . . . . . . . . . . . . . . . . . . . . . . . . . . . . . . . . . . . . . . . . . . . . . . . . . .
49
Program Guide . . . . . . . . . . . . . . . . . . . . . . . . . . . . . . . . . . . . . . . . . . . . . . . . . . . . . . . . . . . . . . . . . .
49
Change PIN Code . . . . . . . . . . . . . . . . . . . . . . . . . . . . . . . . . . . . . . . . . . . . . . . . . . . . . . . . . . . . . . .
50
System Setup
.......................................................................
51
Local Time . . . . . . . . . . . . . . . . . . . . . . . . . . . . . . . . . . . . . . . . . . . . . . . . . . . . . . . . . . . . . . . . . . . . .
51
Menu Language . . . . . . . . . . . . . . . . . . . . . . . . . . . . . . . . . . . . . . . . . . . . . . . . . . . . . . . . . . . . . . . . .
51
Audio Language . . . . . . . . . . . . . . . . . . . . . . . . . . . . . . . . . . . . . . . . . . . . . . . . . . . . . . . . . . . . . . . . .
52
Subtitle Language . . . . . . . . . . . . . . . . . . . . . . . . . . . . . . . . . . . . . . . . . . . . . . . . . . . . . . . . . . . . . . .
52
SCART Output . . . . . . . . . . . . . . . . . . . . . . . . . . . . . . . . . . . . . . . . . . . . . . . . . . . . . . . . . . . . . . . . . .
52
S/PDIF Output . . . . . . . . . . . . . . . . . . . . . . . . . . . . . . . . . . . . . . . . . . . . . . . . . . . . . . . . . . . . . . . . . .
52
RF Channel . . . . . . . . . . . . . . . . . . . . . . . . . . . . . . . . . . . . . . . . . . . . . . . . . . . . . . . . . . . . . . . . . . . .
53
RF Mode . . . . . . . . . . . . . . . . . . . . . . . . . . . . . . . . . . . . . . . . . . . . . . . . . . . . . . . . . . . . . . . . . . . . . .
53
System Information . . . . . . . . . . . . . . . . . . . . . . . . . . . . . . . . . . . . . . . . . . . . . . . . . . . . . . . . . . . . . .
53
Other Setting
........................................................................
54
Common Interface . . . . . . . . . . . . . . . . . . . . . . . . . . . . . . . . . . . . . . . . . . . . . . . . . . . . . . . . . . . . . . . . . . . .
55
Troubleshooting
...........................................................................
56
..............................................................................
57
Menu Tree
.............................................................................
58
Guarantee
..............................................................................
59
Specification
31
ENGLISH
User instructions
User instructions
“Common Interface”
General Safety
This STB has been manufactures to satisfy the internacional safety standards.
Please read the following recommended safety precautions carefully.
MAINS SUPPLY:
90 - 250 V~ 50/60 Hz.
OVERLOADING:
Do not overload wall outlets, extension cords or adapters as this can result in fire or electrical shock.
LIQUIDS:
Keep liquids away from the STB.
SMALL OBJECTS:
Coins or other small objects must be kept away from the STB as they can fall through the ventilation slots of the STB
and cause serious damage.
CLEANING:
Disconnect the STB from the wall socket before cleaning it.
Use a cloth lightly dampened with water (no solvents) to clean the exterior of the STB.
VENTILATlON:
Do not block the decoder's ventilation slots.
Ensure that a free airflow is maintained around the STB.
NEVER stand the STB on soft furnishings or carpets.
Do not use or store the STB where it is exposed to direct sunlight or near a heater.
NEVER stack other electronic equipment on top of the STB.
ATTACHMENTS:
Do not use any attachments that are not recommended as these may cause hazards or damage the equipment.
CONNECTION TO THE TV or VCR SET:
Disconnect the STB from the mains before connecting or disconnecting the cable from the satellite dish.
FAILURE TO DO SO CAN DAMAGE THE TV or VCR SET.
LOCATION:
Locate the STB indoor place properly to prevent lightening, raining and direct sunlight.
WARNING
RISK ELECTRICAL SHOCK
DO NOT OPEN
TO AVOID THE RISK OF AN ELECTRIC SHOCK, DO NOT TAKE THE COVER OFF.
THE RECEIVER CANNOT BE REPAIRED BY THE USER.
PLEASE CONSULT QUALIFIED PERSONNEL ONLY.
This symbol indicates that there is the risk of an electric shock.
This symbol indicates that there are some important instructions for this particular
product.
33
ENGLISH
CONNECTION TO THE SATELLITE DISH LNB:
Disconnect the STB from the mains before connecting or disconnecting the cable from the satellite dish.
FAILURE TO DO SO CAN DAMAGE THE LNB.
User instructions
“Common Interface”
General Information
Fig. 1
-
Button
MENU
OK
EXIT
CH Up/Down
VOL Up/Down
Display
----Fig. 2
-
Name
ANT IN
TV OUT
VIDEO
AUDIO
S/PDIF
TV
0/12V
VCR
LNB
LOOP THROUGH
RS 232
POWER
Fig. 3
-
Button
MUTE
TV/STB
TV/RADIO
P.STD
P.SIZE
A.L/R
CHAN /
VOLUME +/A.LANG
RECALL
EPG
MENU
EXIT
/
/
OK
SUB-T (Red)
GREEN
INFO (Blue)
YELLOW
SLEEP
0...9
PAUSE
Front panel
Function
Switch the receiver power “ON” or “OFF”.
To see main menu.
Select a program, a highlighted line or parameter value.
Exit from parameter and cancel selected function.
Channel Up/Down or select item of sub-menu.
Volume Up/Down or select item of sub-menu.
4-digit 7-segment display channel information
2 slots for the CAM and smartcard.
Rear panel
Function
To connect to television antenna input.
To connect a TV via a coaxial cable.
Video connection port to the TV or other equipment.
Audio connection port to the TV or other equipment
Output for connection to a digital amplifier.
Connect this port to the TV via SCART cable.
To connect 12V to an external 0/12V switch.
Connect this port to the VCR via SCART cable.
Satellite antenna signal input.
Satellite signal output to connect to another receiver.
To connect to a personal computer for software upgrade.
90 ~ 250V AC, 50/60Hz.
Remote Control
Function
To switch between operation and stand by mode.
To enable or disable audio.
To switch between TV and STB receive mode
To switch between TV and Radio
To change picture standard.
To change screen size
To select the sound mode.(Mono, Left, Right, Stereo)
To change channel up and down
To increase or decrease the volume
To select the audio language
To return to the previous channel.
To display the TV/Radio program guide
To display the Main Menu on the screen or return to the previous menu
To return the normal viewing mode from a menu
To move up or down on the menu
To move left or right on the menu
To confirm your choice
To enable or disable subtitle, to activate Teletext function.
To see the current information Banner guide. To get the satellite sort list and PID search.
To display the information box on the screen
To sort channel list. To display the reserved list
To select a present time interval for automatic shut off
To select the channel and enter the channel edit and PIN code
To pause or play video
34
User instructions
“Common Interface”
Fig. -1-
Fig. -2-
> 50°C
Fig. -3-
35
< 5°C
ENGLISH
> 80 %
User instructions
“Common Interface”
Connecting Your Equipment
How to connect your STB to various systems
1.- Connect STB to a TV set
3.- Connect STB to a Hi-Fi System
Connect your STB to a TV set with
SCART, if your TV set is equipped
for it.Alternatively you can use A/V,
TV out (UHF) or S/Video jacks.
5.- Loop Through
Connect a RCA stereo cable from
the AUDIO L/R jacks, S/PDIF on
your STB to the LINE,AUX, SPARE
or EXTRA input jacks on your Hi-Fi
System.
2.- Connect STB to a VCR
Connect the SCART jack from the
VCR to the back of your
STB.Alternatively you can use A/V,
TV out (UHF) or S/Video jacks.
4.- Connect STB to a Digital Audio
System
If you have another analogue or
digital STB and you wish to use the
same LNB then you canconnect it
via the loop through. Connect one
end of the coaxial cable to the Loop
Through onthe STB and connect the
other end to the LNB IN on your
second STB.
If you have a DAC with S/PDIF
coaxial cable input, you can connect
the STB with it to enjoyhigher quality
sound. Connect S/PDIF coaxial
cable to a digital amplifier.
Satellite reception
Terrestrial reception
Note:
- All of the cables
that are used in
connection to the
Receiver are
shielded.
DO NOT PLUG THE
RECEIVER INTO THE
MAINS, until all the
cables have been
correctly connected.
- The output channel
of the Digital
Receiver is by
default Ch. 21.
RSD-7254
(Recommended)
TV
VCR
36
User instructions
“Common Interface”
CAM (Conditional Access Module) and Smart Card
CAUTION
- Please do not plug in the main power supply cord until you have finished all of the connections!
- If you want to enjoy watching scrambled broadcasting channels, you need to purchase the CAMs and smart cards from a
service provider’s sales department.
- However, broadcasting channels from multiple service providers call for multiple CAMs and Smart cards.
- STB which who have only the CAMs and smart cards provided by the one service provider can show several broadcasting
channels of the provider. Please refer to manuals provided by service providers for details because the CAM and smart
cards are featured with unique menus, apart from menus given by STB.
- Watching "Free-To-Air" channel is available regardless of the CAM and smart cards.
- As service providers download new information to smart cards if necessary, those who have CAMs and smart cards should
always put the smart cards in proper slots.
CAM
Smartcard
TV with Terrestrial Antenna
2.- Connect one end of RF cable to the ANT IN on the back of the STB
and the other end to a terrestrial antenna connection or the jack for
the public antenna on the wall.
3.- Finally connect the coaxial cable from the LNB to the LNB IN jack
on back of the STB.
Receiver with Motorized System (USALS)
1.- Connect one end of RF cable to the TV OUT on the back of the
STB and the other end to a RF input jack on your TV.
2.- Connect one end of your coaxial cable to the LNB IN connector on
the STB and the other end to the REC or Receiver connector on
the USALS motor ref. 7518.
3.- Connect the coaxial cable from the LNB to the LNB connector on
the USALS motor ref. 7518.
37
ENGLISH
1.- Connect one end of RF cable to the TV OUT on the back of the
STB and the other end to a RF input jack on your TV.
User instructions
“Common Interface”
Reference
DiSEqC 1.0 Connection
• All our receivers are designed to be DiSEqC 1.0 and DiSEqC 1.2 compatible.
• This allows multiple antennas to be connected to the STB at the same time.
• If you have two or more fixed antennas or LNBs then we recommend you use a DiSEqC 1.0 switch (ref. 7268 & 7269).
• Connect the coaxial cable from the first LNB to the LNB 1 or LNB A input connector of the DiSEqC switch.
• Do the same for any other LNBs that you have.
• Connect one end of a coaxial cable to the RF output connector of the DiSEqC switch, connect the other end to the LNB IN
socket on the STB.
DiSEqC 1.2/ USALS
• To the digital receiver, you can connect either a single satellite antenna directly or LNB of multi-feed equipment. When
installing the USALS (ref. 7518) please consult the reference manual for proper operation.
38
User instructions
“Common Interface”
Basic Operation
Basic Function
1.- Program Information
After the television channels have been programmed, you will see
the information box each time you change the channels.
1.- Every time you change channels you will receive program information
for a few seconds.
2.- You may change channel with the UP or DOWN button.
You can get “Channel Banner” on the bottom of screen.
2.- Volume Control/Mute
1.- To control audio volume, press VOLUME button.
2.- Volume control bar will be appeared in bottom of the TV screen.
3.- After time-out in 1 second, volume control bar will disappear. To
temporarily stop the volume, press the MUTE button.
To cancel mute, press the MUTE button again or press the VOLUME
button.
1.- When you press OK button during receiving service stream, you can
get “Channel List” view.
2.- Using UP/DOWN buttons in “Channel List” view, you can choose
another channel.
3.- After moving highlight on a channel, then press OK button.
4.- Press RED button to get the favorite channel list.
5. To get the channel sort list, press the YELLOW button.
Pop up window will be displayed on the screen. When you press
YELLOW button, the sort and CAS sort are toggled.
6.- Press GREEN button to get the satellite list.
7.- Select the sort list you want with UP/DOWN buttons and then press
OK button to get it.
39
ENGLISH
3.- Simple Channel List
User instructions
“Common Interface”
4.- Soundtrack
1.- When you want to change the Audio Language of current channel, press
the A.LANG button on the remote control.
The on-screen menu is displayed on the left side ofthe screen.
2.- Use UP/DOWN buttons to choose the audio you want.
3.- To cancel or exit, press the A.LANG button again. You can change a
default audio language in the system setting menu mode.
5.- To Change the audio output
1.- Press the A.L/R button on the remote control unit to change the
output.
2.- Then on-screen menu is displayed on the top to right side of the
screen.
3.- Press the A.L/R button repeatedly to change the sound mode. (Mono,
Left, Right, Stereo).
40
User instructions
“Common Interface”
Menu Guide
Main Menu
Press the MENU button on the remotecontrol unit.
You will see the “Main Menu” on the screen.
1.- You can move into the desired submenu using UP/DOWN buttons.
2.- You should enter the PIN code in order to move into the corresponding
submenu in case of “Installation” or “User Preference”.
The factory default pin is "0000"
3.- Press OK button to confirm your selection.
4.- Press the MENU button to return to previous menu.
Or press the EXIT button to quit the Menu system completely.
Main Menu shows the following information.
ENGLISH
Installation:
Set Antenna Setup, Automatic Search, Manual Search, Factory Reset, and
USALS setup.
User Preference:
Shows Channel Properties, Edit Channel List, Uninstall Satellite, Program
Guide, and Change PIN Code.
System Setup:
Set Local Time, Menu Language, Audio Language, Subtitle Language,
SCART Output, S/PDIF Output, RF Channel, RF Mode, System
Information, Screen Type, Menu Transparency, Banner Time, Parental Lock,
Receiver Lock, Menu Lock and Auto Power.
CA System:
Shows scrambled channels by using common interface modules.
Installation
In this menu, you can set up antenna and scan satellite or transponder.
You can also use the factory reset function.
To use this menu, enter the submenu you want using the UP/DOWN buttons
after inputting a PIN code.
41
User instructions
“Common Interface”
Antenna Setup
If each of Antenna Setup menus is selected, a changeable value will appear
at the right side of the screen.
To change to the desired value, use the LEFT/RIGHT buttons.
Move the cursor to the right side of the screen using the RIGHT button. Then
select the desired value using the UP/DOWN buttons, and press OK button.
1.- Antenna Setup:
Select your antenna number. You can select maximum 32 antennas.
2.- Satellite:
Select a satellite you want.
3.- Transponder:
Select a transponder you want.
4.- LNB Power:
Select a LNB Power On or OFF.
5.- LNB Type:
Select your LNB Type.
6.- 22KHz:
Auto.
7.- Switch Type:
Select your switch type.
(None, DiSEqC, Motor, USALS)
- None
- DiSEqc: If your antenna has connected to the DiSEqC 1.0, select the
Switch type of DiSEqC.
- Motor:
If you connect a DiSEqC 1.2 antenna to the receiver, select
the switch type to Motor. You can change position of your
Motor through the Option.
- USALS : You can select the DiSEqC USALS system, if it exists.
8.- Option:
Options vary according to the type of DiSEqC.
Select an appropriate option.
- DiSEqC: You can select and use appropriate port for your DiSEqC
switch box. (DiSEqC A, DiSEqC B, DiSEqC C, DiSEqC D.)
Select the command by pressing the UP/DOWN buttons.
After selecting all necessaries, press RED button.
Scan Satellite screen will be displayed on the screen.
9.- 0/12V:
Activate or desactivate the 12V option on RCA output
42
User instructions
“Common Interface”
Automatic Search
The Automatic Search feature allows the user to scan the desired
satellite in the Satellite list.
1.- Select the satellite you want to scan using the UP/DOWN buttons, and
press OK button.
2.- Move right using the RIGHT button, the function "Network Search OFF" appears and with the RIGHT botton you select “ON” or “OFF”.
With the DOWN botton you can select “Scan All Channel” or “Scan Free
Channnel” and then press OK botton
3.- The Automatic Search screen will appear, and channels are searched
automatically.
4.- Press OK or EXIT to save the searched screenin memory.
ENGLISH
To stop searching, press the EXIT or MENU button.
43
User instructions
“Common Interface”
Manual Search
1.- Satellite:
Select a satellite you want.
2.- Frequency:
Introduce the frequency desired with the aid of the NUMERIC button.
3.- Polarity:
Select the Polarity Vertical or Horizontal.
4.- Symbol Rate:
Select the symbol rate of the transponder you want to find. Enter the
value of symbol rate using the NUMERIC button.
5.- Code Rate:
Select the value of Auto, 1/2, 2/3, 3/4, 4/5, 5/6, or 7/8
6.- Scan Mode:
Select the Scan Mode Scan All Channel or Scan Free Channel.
7.- Network Search:
Select On or Off. When you select ‘On’, you can find more transponders
using the home network.
8.- PID Search:
If you select Manual, you can search PID by directly entering the value of
PID. Select Manual at the right side of the screen and press OK button.
Note!!: To edit satellite, press the RED button.
Edit satellite Menu will be displayed on the screen.
44
User instructions
“Common Interface”
Edit Satellite
This option allows to create, to erase or to modify one determined
satellite.
With the UP/ DOWN and after with OK button you can to select the
intended satellite.
1.- Satellite
1.- Press OK button to edit, add, or delete satellite from the satellite list.
Pop up menu will appear.
2.- Select mode using LEFT/RIGHT buttons.
3.- Place the cursor on satellite field and OK button.
The keypad will be displayed so that you can edit or add satellite name
you want.
4.- Press RED button to confirm the name.
5.- Input degree you want using NUMERIC buttons or LEFT/RIGHT
buttons.
And press OK button to save.
2.- Transponder
1.- Press OK button to edit, add, or delete Transponder from the
Transponder list.
Pop up menu will appear.
ENGLISH
2.- Select mode using LEFT/RIGHT buttons.
3.- Input Frequency, Symbol Rate, Polarity, and FEC.
And press OK button to save.
45
User instructions
“Common Interface”
Factory Reset
Use this option only if you have to start the complete installation
procedure from scratch.
If you continue from here, all your previous settings and all channels
will be cleared !
The default data will be loaded.
If you press OK button, it asks for your confirmation.
If you want to reset, press OK button, or press EXIT button to exit this
menu.
USALS Setup
You can input the Longitude and Latitude.
If you select USALS as the switch type from the Dishsetup menu, enter the
value of USALS setup menu.
1.- Longitude:
Press the NUMERIC button and enter the Longitude.
When the OK button is pressed, it can be toggled East/West.
2.- Latitude:
Press the NUMERIC button and enter the Latitude.
When the OK button is pressed, it can be toggled North/South.
Press EXIT button to save.
46
User instructions
“Common Interface”
User Preference
In this menu, you can make channel group and change program guide
according to your preference.
Also, you can change PIN code.
Channel Properties
You can register the channels you enjoy watching in 4 favorite groups.
1.- Among the channels at left side, select the channel you want to register
using the UP/DOWN buttons.
2.- Move cursor to one of favorite group out of four at right side view using
LEFT/RIGHT buttons and press OK button. Then,
mark will be
marked at the selected favorite group.
3.- If you want to rename a favorite list, press the BLUE button. Then
pressing the OK button you can selected the character that will be
printed on the keypad.
To delete the selected character, press the GREEN button.
And if you want to delete the channel name in the favorite channel list, press
OK button once again,
then the mark will be disappeared.
Rename Favorites
1.- To rename favorites, press BLUE button. Pop up window will appear.
2.- Select a favorite group you want to rename and press OK button. Then a
keypad screen will appear.
3.- Select the desired character using the UP/DOWN buttons and press OK
button.
Then the selected character will be imprinted on the keypad.
To cancel the selected character, press the GREEN button.
4.- Select all of selected characters and press the RED button. Then the
name of favorite group will change.
47
ENGLISH
To confirm all of selected characters press the RED button
User instructions
“Common Interface”
Edit Channel List
You can Lock, Delete, Move, or Rename Channels.
You have to input a PIN code before using this menu. The factory default is
“0000”.
Lock
You can lock channels in any of the list to prevent your children from
watching.
1.- Select “LOCK” at the left side in the Edit Channel List.
2.- Select the channel you want to lock at the right side using UP/DOWN
buttons and press OK button.
Then,
mark will be marked at the selected channel.
Press OK once again to cancel.
3.- To confirm the channel list, press the MENU button or EXIT button. The
request window will be displayed on the screen. Press OK button to
save or EXIT button to exit this menu.
Note!! : Repeat the procedure for each channel you want to lock. When you
lock a channel in any list, the channel will be locked automatically in
all other lists.
Delete
You can delete TV or Radio channel from the current list.
1.- Select “Delete” at the left side in the Edit Channel List.
2.- Select the channel you want to delete at the right side using UP/DOWN
buttons and press OK button.
Then, the channel to delete will turn into red.
If you press OK once again, the selected channel will be cancelled.
3.- To confirm the channel list, press the Menu button or EXIT button. The
request window will be displayed on the screen. Press OK button to
save or EXIT button to exit this menu.
Move
You can change the position of the channel you want on the channel
lists.
1.- Select “Move” at the left side in the Edit Channel List.
2.- Select the channel you want to move at the right side and press the OK
button.
3.- Move the channel you want to the desired position using the UP/DOWN
buttons.
Then the channel starts moving
4.- Press OK button. The position of the channel will be moved.
Rename
You can rename the channel.
1. Select “Rename” at the left side in the Edit Channel List.
2. Select the channel at the right side you want to rename and press OK
button.
Then a keypad screen will appear.
3.- Select the desired character using the UP/DOWN buttons and press OK
button. Then the selected character will be imprinted on the keypad.
To cancel the selected character, press the GREEN button.
4.- Select all of selected characters and press the RED button.
Then the name of channel will change.
48
User instructions
“Common Interface”
Uninstall Satellite
You can uninstall satellite channel list from the scanned satellite list.
First, input the PIN code before using this menu.
The factory default is “0000”.
1.- Select the satellite to uninstall from the satellite list and press the OK
button.
To cancel the selected list, press the OK button again.
2.- Press the MENU button or EXIT button to confirm.
The request window will be displayed on the screen.
Press OK button to save or EXIT button to exit this menu.
Program Guide
The program guide supplies information such as program listings and ending
times for all available programs.
1.- Select “Program Guide” in the User Preference Menu with UP/DOWN
buttons and press OK button.
In the viewing program, when you press the EPG button, you can get this
view.
Note!!: The Program Guide information may not be supplied by service
providers.
1.- Select a program with UP/DOWN buttons,
2.- After selecting the program you want, press OK button.
You can see the detailed information.
3.- If you want to change program guide, press BLUE button.
Weekly Program Guide
Shows the information of program that will be played for a week.
1.- When you press the BLUE button,you can alternatively select Now, Next
or Weekly EPG.
2.- To see more information about the program you want on the weekly EPG,
move to the day you want using the LEFT/RIGHT buttons and press the
OK button.
The channel list will be displayed.
49
ENGLISH
Now/Next Program Guide
Shows the information of Present/Following program on different
channels.
To watch the programs you go through the display window:
User instructions
“Common Interface”
Change PIN Code
From here you can change the PIN code from the standard 0000.
DO NOT FORGET IT! Without it, you are not able to access to any of the
functions where the code is required.
1.- Input the New PIN code using NUMERIC button on the remote control.
2.- To verify the new PIN code, re-enter a new PIN code in the highlighted
confirm PIN code.
Note!!: If you forget the PIN code, press the RGYB (Color) button in
sequence.
(i.e. RED-> GREEN-> YELLOW-> BLUE button)
The PIN code will be changed to ‘0000’.
50
User instructions
“Common Interface”
System Setup
If you want to customize the system to suit you better, you can specify
some settings from the submenus in the “System Setup” menu.
First, input the PIN code before using this menu.
The factory default is “0000”.
1.- Select “System Setup” in the main menu with UP/DOWN buttons and
press OK button.
2.- Select sub menu you want in System Setup with UP/DOWN buttons.
The sub menu will be shown at the right side of the screen.
Local Time
The receiver has a clock that it is adjusted automatically with the
information supplied for the satellite signal.
1.- With keyboard keys UP/DOWN it indicates if it intends to increase or to
decrease the hour supplied for the satellite, of form to coincide with the
Local Time.
The time interval is of 30 minutes and is possible to vary between (-12h
and 12h).
Menu Language
Here you may select in which language the menus will be shown.
1.- Press RIGHT button and use the UP/DOWN buttons to move to the
language you want and then press OK button.
You can choose the language from a selection of English, Español,
Deutsch, Francais, Italian and Portuguese.
The selected menu language will be applied on whole menu.
51
ENGLISH
2.- Press OK button to save.
User instructions
“Common Interface”
Audio Language
In this menu You can change default language for audio when changing
services.
1.- Press RIGHT button and use the UP/DOWN buttons to move to
language you want and then press OK button.
You can choose the language from a selection of English, Español,
Deutsch, Francais, Italian and Portuguese.
Subtitle Language
In this menu You can change default language for subtitle when changing
services.
1.- Press RIGHT button and use the UP/DOWN buttons to move to
language you want and then press OK button.
You can choose the language from a selection of English, Español,
Deutsch, Francais, Italian and Portuguese.
SCART Output
If your SCART supports RGB control, select RGB.
Otherwise select CVBS.
Press LEFT/RIGHT buttons to select option you want.
S/PDIF Output
You can hear digital audio of the Dolby 5.1 channel using S/PDIF
Output.
1.- If selecting OFF, the digital audio will not be output.
2.- When selecting PCM, the unzipped digital audio is output through
S/PDIF.
3.- When selecting Dolby Digital, if the current channel is dolby audio
channel, the zipped dolby stream is output through S/PDIF.
52
User instructions
“Common Interface”
RF Channel
Select this alternative if you have to change the RF channel.
Select an UHF Channel you want with LEFT/RIGHT buttons.
The RF Channel ranges from 21 to 69.
RF Mode
You can select the RF Mode. If you get picture but no sound, the RF
Mode selecting might be wrong.
Select an RF Mode you want with LEFT/RIGHT buttons.
RF Mode:PAL BG, PAL I, PAL DK, SECAM L, NTSC M.
System Information
Displays the system information:
ENGLISH
MODEL name, Last Update, S/W, H/W, Loader version information.
53
User instructions
“Common Interface”
Other Setting
1.- Screen Type
If you have a TV set with the 4:3 picture format and the transmission is
in 16:9, you can select 4:3 letterbox, 4:3 full screen and 16:9 fullscreen.
1.- Select the aspect ratio of TV which is connected to STB with
LEFT/RIGHT buttons and then press OK button.
Note!! 1: Fullscreen will fill up the screen but cut off some information on
the left and right sides.
Note!! 2: Letterbox will give a complete picture, but leave black areas at
the top and bottom.
Note!! 3: For easy selection of Screen Type, press the P.SIZE button on
your remote control.
2.- Menu Transparency
From 60% to 100% will give the variable transparency on Video and
OSD screen.
Select an menu blending ratio with LEFT/RIGHT buttons.
The transparency will be applied on the screen.
3.- Banner Time
When you switch channels, an information banner will be shown for a
few seconds.
You can select for how long the banner will be shown.
1.- Select the banner time you want and then press OK button.
2.- Each selectable time items has meaning of the interval time during a
channel banner stays on changed channel screens.
The time ranges 1, 3, 6, 9, 12 and 15 seconds.
4.- Parental Lock
When you change “Parental Lock” to “On”or “Off”, service channel can
get or not from that set values.
If you select “On”, you may need PIN code every time you select the lock
channel program as you set in the channel control.
If you select “Off”, you can see all channels without PIN code.
5.- Receiver Lock
If you select “On”, you will have to enter the PIN code every time you start
the receiver from standby.
6.- Menu Lock
If you select ‘OFF’, you can enter the menu without PIN code, e.g.
installation, edit channel list, uninstall satellite, or change PIN code menu.
7.- Auto Power
1.- If the Auto Power is set to “On” and power is off, the Set turns on
automatically and turns into the channel mode which you were watching
before power breakdown.
2. If the Auto Power is set to “Off” and power is off, the Set turns into the
standby mode.
54
User instructions
“Common Interface”
Common Interface
The menus are provided by the Common Interface module and its
smart card:
Your receiver is equipped with two slots of Common Interface (CI),
accepting both Type 1 and Type 2 PCMCIA modules. Plug in the
appropriate CI module together with a valid smart card.
You will then have access to the respective scrambled and Pay-Per-View
services.
Insert the smart card into the CI module, and the CI module into the slot
behind the flap on the front panel.
The CI and smart card modules determine the programs that can be descrambled.
This receiver supports two CI slots so you can plug intwo different modules,
automatically provide access to both services.
Each smart card contains your subscription details.
You can view your entitlement via the COMMON INTERFACE menu by
using the MENU button as below.
1.- Press MENU button and select Common Interface then Slot1 and Slot2
will be showed up on the screen and the menu will be appeared.
If you use Slot1 for Irdeto, you will see “Irdeto” on the screen.
Also if you use Slot2 for Viaccess, you will see “Viaccess” on the screen.
Select the item and then you will see information for card.
Press EXIT button if you wish to exit from this menu.
2.- If you inserted the smart card with CAM into the receiver, and switch on
the receiver.
Then you will see “CAM Initializing icon” on the top screen.
ENGLISH
3.- If you do not insert the smart card, you will see the message “Please
insert your smart card”.
If you insert the smart card into the CI module then you can watch your
selected channel.
55
User instructions
“Common Interface”
Troubleshooting
Problem
Solution
No display LED on the front panel.
Power cord plug in correctly.
No power supply
Ensure that the STB is switched on.
No Picture
Check connection and correct.
Check channel and video output and correct
Poor picture quality
Check the signal level, if this is low then try adjusting the alignment of your dish.
No Sound
Check the volume level of the TV and STB.
Check the mute status of the TV and STB.
Check the connection of audio cord.
Remote Control does not operate
Point remote control directly towards the receiver.
Check and replace batteries.
Check that nothing blocks the front panel.
Service is not running or
scrambled.
Check the whether the Common Interface module and smart card is correctly
inserted.
You have forgotten your secret PIN
code.
Check that the smart card is appropriate for the selected service.
Refer to Change PIN code of this owner’s manual.
56
User instructions
“Common Interface”
Specifications
Tuner
FEC Modes Rate
Auto, 1/2 , 2/3, 3/4, 4/5, 5/6, 7/8
Input Connector
F type female (75 Ohm)
Frequency Range
950MHz ~ 2150MHz
Symbol Rate
2 ~ 45 Mbaud
Demodulation
QPSK
RF Modulator
PLL type
CH 21-69 for the modulation
TV Standard
PAL B/G, I, D/K, Secam L and NTSC M selectable
RF Connector
75 Ohms, 169-2, Male/Female
Frequency Range
UHF: 470 ~ 860MHz
MPEG TS A/V Decoder
Video Resolution
720x576
Input Bit Rate
Max. 90 Mbit/s
Transport Stream
MPEG-2 ISO/IEC 13818-1
Audio Decoding
MPEG/Musical Layer I&II
Audio Mode
Single / Dual Channel
A/V & Data Input/Output
Video
RCA/Cinch, Video Output(CVBS)/SCART(CVBS, RGB)
RCA/Cinch Volume & Mute Control
Audio
(Resolution: 20 bits DAC, Max 2Vrms)
S/PDIF of Dolby Digital Bitstream Out
RS-232C
Transfer rate 115Kbps, 9 PIND-Sub Type
Flash Memory
1Mbyte
SDRAM
8Mbyte
Main CPU MPEG Chip
STi 5518
Power Supply
Input Voltage
AC 90 to 250V, 50/60Hz
Power Consumption
Max. 25W
Protection
Separate Internal Fuse
Type
SMPS
Physical Specification
Size (WxHxD)
340x60x250(mm)
Net Weight
2.5kg
Operating Temperature
0C ~ 50C
Storage Temperature
-20C ~ 60C
Function
Common Interface
2 Slots of DVB -CI
SW Upload
Via RS-232C
57
ENGLISH
System Resources
User instructions
“Common Interface”
Menu Tree
Antenna Setup
Automatic Search
Installation
Manual Search
Edit Satellite
Factory Reset
USALS Setup
Channel Properties
Edit Channel List
User Preference
Uninstall Satellite
Program Guide
Change PIN Code
Local Time
Menu Language
Audio Language
Subtitle Language
System Setup
SCART Output
S/PDIF Output
RF Channel
Screen Type
RF Mode
Menu Transparency
Systeme Information
Banner Time
Other Setting
Parental Lock
Receiver Lock
Common Interface
Menu Lock
Auto Power
58
“Common Interface”
Garantia
Televés S.A. oferece uma garantia de dois anos calculados a partir da data de compra para os países da UE. Nos
países não membros da UE aplica-se a garantia legal que está em vigor no momento da venda. Conserve a factura de
compra para poder comprovar a data.
Durante o período de garantia, Televés S.A. assume as falhas do produto ocorridas por defeito do material ou de
fabrico. Televés S.A. cumpre a garantia reparando ou substituindo o equipamento defeituoso.
Não estão incluídos na garantia os danos provocados pela utilização indevida, desgaste, manipulação por terceiros,
catástrofes ou qualquer causa alheia ao controlo de Televés S.A.
Guarantee
Televés S.A. offers a two year guarantee, beginning from the date of purchase for countries in the EU. For countries
that are not part of the EU, the legal guarantee that is in force at the time of purchase is applied. Keep the purchase invoice
to determine this date.
During the guarantee period, Televés S.A. complies with the guarantee by repairing or substituting the faulty
equipment.
The harm produced by improper usage, wear and tear, manipulation by a third party, catastrophes or any other cause
beyond the control of Televés S.A. is not included in the guarantee.
59
SUCURSALES
GIJON
A CORUÑA
BARCELONA C.P. 08940
C/ Sant Ferrán, 27 Cornellá - Barcelona
Telfs.
93 377 08 62 / 93 474 29 50
Fax
93 474 50 06
[email protected]
BILBAO
CANTABRIA
LUGO
SANTIAGO
VIGO
OURENSE
LEON
ZAMORA N
PALENCIA
NAVARRA
BARCELONA
SORIA
ZARAGOZA
ZAMORA
SEGOVIA
SALAMANCA
GUADALAJARA
AVILA
OPORTO
CACERES
TOLEDO
LISBOA
CASTELLON
CUENCA
CIUDAD REAL
VALENCIA
PALMA DE
MALLORCA
ALBACETE
BADAJOZ
ALICANTE
CORDOBA
GIJON C.P. 33210
C/Japón, 14
Tfnos : 985 15 25 50 / 985 15 29 67
Fax :
985 14 63 89
[email protected]
TARRAGONA
TERUEL
MADRID
A CORUÑA C.P. 15011
Gregorio Hernández 8.
Tfnos. 981 27 47 31 / 981 27 22 10
Fax
981 27 16 11
[email protected]
GIRONA
HUESCA
BURGOS
LA RIOJA
VALLADOLID
BILBAO C.P. 48150
Iberre kalea, módulo 16, pabellón 15-B
Sangroniz-Sondika
Tfnos. 94 471 12 02 / 94 471 24 78
Fax
94 471 14 93
[email protected]
GUIPUZCOA
ALAVA
JAEN
BALEARES
MURCIA
GRANADA
HUELVA
SEVILLA
ALMERIA
MALAGA
LAS PALMAS C.P. 35006
Gral. Mas de Gaminde 26.
Tfnos. 928 23 11 22 / 928 23 12 42
Fax
928 23 13 66
[email protected]
MADRID C.P. 28005
Paseo de los Pontones 11.
Tfnos. 91 474 52 21 / 91 474 52 22
Fax
91 474 54 21
[email protected]
MURCIA C.P. 30010
Polígono Conver - C/ Rio Pliego 22.
Tfnos. 968 26 31 44 / 968 26 31 77
Fax
968 25 25 76
[email protected]
SEVILLA C.P. 41008
Pol. Ind. Store - C/ A-6. Nave 5
Tfnos. 95 443 64 50 / 95 443 58 00
Fax
95 443 96 93
[email protected]
TENERIFE C.P. 38108
Avda. El Paso, 25 - Los Majuelos
La Laguna.
Tfnos. 922 31 13 14 / 922 31 13 16
Fax
922 31 13 33
[email protected]
VALENCIA C.P. 46020
Plaza Jordi San Jordi s/n
Tfnos. 96 337 12 01 / 96 337 12 72
Fax
96 337 06 98
[email protected]
VIGO C.P. 36204
Escultor Gregorio Fernández, 5
Tfnos. 986 42 33 87 / 986 42 40 44
Fax
986 42 37 94
[email protected]
TELEVES ELECTRONICA PORTUGUESA
MAIA - OPORTO
Via . Dr Francisco Sa Carneiro. Lote 17.
ZONA Ind. MAIA 1. Sector-X MAIA. C.P. 4470 BARCA
Tel.
351 22 9418313
Fax 351 22 9488719 / 9416180
[email protected]
CADIZ
CANARIAS
SUCURSALES
TENERIFE
DELEGACIONES
CEUTA
LAS PALMAS
MELILLA
FABRICAS
DELEGACIONES
ALMERIA C.P. 04008
Campogrís 9.
Tfno.
950 23 14 43
Fax
950 23 14 43
[email protected]
BURGOS C.P.09188
C/Real, s/n, San Adrián de Juarros
Tfno.
947 56 04 58
Móvil: 670 73 75 86
CACERES/ BADAJOZ
C.P. 06010
C/Jacobo Rodríguez
Pereira, nº11-Oficina
Tfno.
924 20 74 83 / 670 70 21 93
Fax.
924 20 01 15
[email protected]
GIRONA C.P. 17190 (Salt)
Ramón Sambola. 9º Ent. 1ª.
Tfno.
972 23 25 43
Móvil
607 23 88 40
[email protected]
GRANADA
Tfno.
958 13 78 29
Móvil: 609 62 70 96
[email protected]
JAEN C.P. 23007
Hermanos Pinzón, 8-bajo
Tfnos. 953 29 50 40 / 953 29 52 11
Móvil
636 984489
Fax
953 29 52 10
[email protected]
PALMA DE MALLORCA
C.P. 07007
Ferrer de Pallares 45. bajo D.
Tfno.
971 24 70 02
Fax
971 24 53 42
[email protected]
LA RIOJA C.P. 26004
San Prudencio 19. bajo
Tfno.
941 23 35 24
Fax
941 25 50 78
[email protected]
SALAMANCA
ZAMORA
VALLADOLID C.P. 47008
C/ Arrecife 12.
Tfno.
983 22 36 66
Fax
983 22 36 66
[email protected]
MALAGA C.P.29004
Brújula, 12.
Tfno.
952 09 32 91
Fax
952 09 32 91
Móvil: 610 40 06 37
[email protected]
MELILLA C.P.52006
Avda. Juan Carlos I, nº 23, 1º Dcha.
Edif. Antares, C, 4ºB
Tfno.
952 68 18 01
Fax
952 68 36 74
[email protected]
HUESCA
ZARAGOZA
C.P. 50002
C/ Monasterio de Alahón 1-3.
Tfno.
976 41 12 73
Fax
976 59 86 86
[email protected]
NAVARRA C.P. (Pamplona) 31007
Avda. Sancho el Fuerte 5.
Tfno.
948 27 35 10
Fax
948 17 41 49
[email protected]
LISBOA
C.P. 1000 Rua Augusto Gil 21-A.
Tel.
351 21 7932537
Fax 351 21 7932418
[email protected]
TELEVES UNITED KINGDOM LTD
Unit 11 Hill Street, Industrial State
CWMBRAN, GWENT NP44 7PG. (United Kingdom)
Tel.
44 01 633 87 58 21
Fax 44 01 633 86 63 11
[email protected]
TELEVES FRANCE S.A.R.L.
TELEVES MIDDLE EAST FZE
P.O. Box 17199
JEBEL ALI FREE ZONE DUBAI,
UNITED ARAB EMIRATES
Tel.
9714 88 343 44
Fax. 9714 88 346 44
[email protected]
Rúa B. de Conxo, 17 -15706 SANTIAGO DE COMPOSTELA
Tel. 981 52 22 00 Fax 981 52 22 62
[email protected]
www.televes.com
103740/0 - 04-05
1 Rue Louis de Broglie
Parc d'Activités de l'Esplanade
77400 St Thibault des Vignes (France)
Tel. +33 1 60 35 92 10
Fax +33 1 60 35 90 40
[email protected]


