1
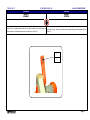
T 55 300 “U.S.”
Volts 230/60 MONOFASE
Matricola - Serial Number
01/ ___________
Manuale Uso e Manutenzione
Operations and Maintenance manual
Conservare per riferimenti futuri
Keep for future reference
Optionals - Extras
01_90 0093 02 50 61_03
T 55 300 “U.S.”
Pag.
3
4
4
5
6
7
8
9
10
11
12
13
14
15
16
17
18
22
25
26
30
31
32
33
34
35
37
40
42
44
46
47
48
01_90 0093 02 50 61_03
Volts 230/60 MONOFASE
ITALIANO
ENGLISH
INDICE
CONTENTS
Descrizione
Indice generale.
Informazioni generali.
Durata e smaltimento della macchina.
Leggere attentamente.
Vocabolario grafico.
Imballaggio
Identificazione della macchina.
Descrizione della macchina.
Caratteristiche tecniche.
Capacità di taglio.
Uso della macchina.
Rilevamento del rumore emesso.
Dimensioni.
Sollevamento e spostamento della macchina.
Predisposizioni.
Fissaggio e livellamento della macchina.
Assemblaggio della macchina.
Norme di sicurezza.
Marcatura di sicurezza.
Dispositivi di sicurezza.
Collegamento elettrico.
Collegamento impianto aspirazione.
Impugnatura di comando.
Arresto normale.
Angoli di taglio.
Utilizzo della macchina.
Regolazione angolazione 0°.
Regolazione angolazioni 45° Dx e Sx
Manutenzione.
Sostituzione della lama.
Regolazione punto fine corsa inferiore.
Schema elettrico.
Parti di ricambio.
Contents
Pag.
3
4
4
5
6
7
8
9
10
11
12
13
14
15
16
17
18
22
25
26
30
31
32
33
34
35
37
40
42
44
46
47
48
Contents.
General information.
Service life and disposal of the machine.
Read carefully.
Key to the graphic symbols.
Packing.
Machine identification.
Description of the machine.
Technical specifications.
Cutting capacity.
Operating the machine.
Noise emission measurements.
Overall dimensions.
Lifting and shifting the machine.
Positioning requrements.
Fixing and livelling the machine.
Machine assembly.
Safty rules.
Safty marking.
Safty devices.
Electrical connections.
Connecting to the dust extractions system.
Control handgrip.
Using the machine.
Cutting angles.
Using the machine.
Setting 0° angle.
Rt and Lf 45° angle adjustment.
Maintenance.
Replacing the blade.
Adjusting lower stop position.
Electrical wiring diagrams.
Spare parts.
Pag. 3
T 55 300 “U.S.”
01_90 0093 02 50 61_03
Volts 230/60 MONOFASE
ITALIANO
ENGLISH
INFORMAZIONI
GENERALI
GENERAL
INFORMATION
La OMGA S.p.a. non potrà essere ritenuta responsabile degli eventuali danni, che risulteranno da un utilizzo non
descritto, in questo manuale, o da una manutenzione effettuata non correttamente.
Tutti i diritti sono riservati alla OMGA S.p.a.
Tutti i dati, descrizioni ed illustrazioni del presente libretto, non sono impegnativi. La OMGA S.p.a. si riseva il diritto di
apportare senza preavviso, tutte le modifiche che riterrà opportune, per esigenze tecniche o migliorative.
Per qualsiasi necessità o consiglio d’uso, rivolgeteVi al Concessionario di zona.
OMGA S.p.A. shall not be held responsible for possible mistakes contained in this manual.
OMGA S.p.A. shall not be held responsible for any mistakes which might result from a use other than that described
in this manual or caused by improper maintenance.
All rights reserved by OMGA S.p.A.
All data, descriptions and pictures in this manual are not binding. OMGA S.p.A. reserves the right to carry out, without
prior notice all the modifications which will be considered as necessary for technical reasons or for the purpose of
improving the machine. For any requirement or advice please contact your local dealer.
GARANZIA
WARRANTY
La macchina è garantita per un periodo di 6 mesi per le parti meccaniche e 3 mesi per le parti elettriche a partire dalla
data della fattura di acquisto. Essa consiste nella sostituzione gratuita, di tutte le parti meccaniche, che presentano
difetto di materiale o di fabbricazione. Inoltre, non sono coperti i guasti o difetti dovuti a fattori esterni, errori di
manutenzione, utilizzo improprio della macchina, uso della stessa in condizioni di sovraccarico, usura naturale, errori
di montaggio, o altre cause a noi non imputabili. La spedizione in sostituzione, è intesa franco nostro stabilimento. La
macchina resa, anche se in garanzia, dovrà essere spedita in porto franco.
The mechanical parts of the machine are guaranteed for 6 months and the electrical ones for 3, starting from the date
of the invoice. The guarantee covers the replacement free of charge of all mechanical parts which feature defects
determined by the use of faulty material or by improper workmanship. Breakdowns and defects arising out of external
reasons, incorrect maintenance or improper use of the machine, use of the machine overloaded, normal wear and
tear, assembly errors and other causes, which we are not responsible for, do not fall within the scope of the guarantee.
Machines returned to us, even under the guarantee, must be shipped on a free port basis.
Per avvalersi del diritto di garanzia nei confronti dell’ OMGA S.p.a. è necessario fornire le seguenti infor- To make use of the OMGA S.p.A. guarantee, it is essential to provide the following information:
mazioni:
1.
Machine model
1.
Modello macchina.
2.
Serial number
2.
Numero di matricola.
3.
Voltage and frequency of the machine
3.
Tensione e frequenza della macchina.
4.
Name of the dealer from which the machine was purchased
4.
Nominativo del Concessionario presso il quale è stata acquistata.
5.
Description of the fault
5.
Descrizione dell’eventuale difetto riscontrato.
6.
Description of the work the machine is used for
6.
Descrizione del tipo di lavorazione eseguita.
7.
Daily hours of work
7.
Ore di utilizzo giornaliere
Should any of the information listed be lacking, we will not be able to carry out the guarantee procedures.
In mancanza dei sopracitati dati anche in maniera parziale non sarà possibile dare corso alla procedura di
Send to:
eventuale garanzia.
Inviare a:
OMGA INC.
3705 WILLIAM RICHARDSON DRIVE
SOUTH BEND.
INDIANA 46628 U.S.A
La macchina è stata costruita nel rispetto dei requisiti essenziali di sicurezza. La sostituzione di pezzi deve pertanto
essere effettuata solo con pezzi adeguati richiesti a OMGA S.p.A. E’ proibito l’impiego di pezzi simili non forniti
direttamente da OMGA S.p.A.
Utilizzare pezzi simili, non forniti da OMGA S.p.A., o non seguire le indicazioni contenute in questo manuale fa
cessare automaticamente la responsabilità di OMGA S.p.A.
Tutte le nostre macchine subiscono in stabilimento un collaudo. Eventuali danni riscontrati al momento del disimballo
devono essere notificati immediatamente al vettore.
Controllare inoltre, la presenza di tutti gli accessori ed opzionali, che compaiono nel documento di accompagnamento.
SMALTIMENTO DELLA MACCHINA
OMGA INC.
3705 WILLIAM RICHARDSON DRIVE
SOUTH BEND.
INDIANA 46628 U.S.A
The machine has been built in accordance to the essential safety requirements. Replacement of parts must be
effected using only suitable spares ordered from OMGA S.p.A. The use of similar parts that have not been supplied
directly by OMGA S.p.A. is prohibited.
The use of similar parts that have not been supplied directly by OMGA S.p.A or failure to follow the instructions given
in this handbook will forfeit the guarantee and relieve OMGA S.p.A from each and every responsibility.
All our machines are commissioned at our factory. Any damage noted when the machine is unpacked must be
reported immediately to the carrier.
Make sure all accessories and optionals mentioned in the shipping documents are present.
DISPOSAL OF THE MACHINE
Una volta cessata l’attività operativa della macchina, lo smaltimento della stessa deve avvenire tramite un normale When the machine’s service life has come to an end, it must be disposed of through an industrial waste collection and
centro di raccolta e smaltimento di rifiuti industriali.
disposal centre.
Pag. 4
T 55 300 “U.S.”
01_90 0093 02 50 61_03
Volts 230/60 MONOFASE
ITALIANO
ENGLISH
LEGGERE
ATTENTAMENTE
READ
CAREFULLY
La sicurezza presuppone l’osservanza delle norme antinfortunistiche vigenti in ogni Pa- For safety purposes it is necessary to observe the accident-prevention standards in force
in the country where the machine is operated.
ese del mondo.
L’Utilizzatore si farà carico dell’istruzione del personale che opererà con questa macchina.
Prima di ogni collegamento a qualsiasi fonte di energia elettrica e pneumatica e prima di
attivare la macchina, l’Operatore dovrà leggere attentamente le norme descritte in
questo manuale.
The user is responsible for training the personnel who are to use this machine.
Before connecting to any electrical or pneumatic energy source and before starting the
machine, the operator must read carefully the rules described in this manual.
All chapters in this manual which describe operating or maintenance procedures involving
even the slightest risk contain graphic symbols to draw the operator’s attention to the risk.
All’interno di questo manuale, in ogni capitolo che descriva modalità di operare o di
The meanings of the graphic symbols are explained clearly on pages 4 in the section
manutenzione che comportino anche una minima possibilità di rischio, sono inseriti simKEY TO GRAPHIC SYMBOLS .
boli grafici che richiamano l’attenzione dell’Operatore.
Ogni simbolo grafico è chiaramente commentato a pagina 4 nel “VOCABOLARIO GRAFICO”.
Pag. 5
T 55 300 “U.S.”
Symbol
01_90 0093 02 50 61_03
ITALIANO
ENGLISH
VOCABOLARIO
GRAFICO
KEY TO GRAPHIC
SYMBOLS
ITALIANO
ENGLISH
VOCABOLARIO
GRAFICO
KEY TO GRAPHIC
SYMBOLS
Divieto di procedere senza aver letto It is forbidden to proceed without
il paragrafo precedente
reading the corresponding section
Attenzione generico
Operazioni vietate
Attenzione al collegamento all’im- Pay attention to dust extraction
system connection
pianto di aspirazione
Prohibited operations
Generic danger
Obbligo di indossare occhiali di proSafety glasses must be worn
tezione
Indossare grembiule protettivo di Protective leather apron must be
cuoio
worn
Obbligo di indossare guanti di proteProtective gloves must be worn
zione
Dotarsi di mezzi di estinzione di in- Fire-fighting equipment must be
cendio
readily available
Obbligo di indossare calzature idonee Suitable footwear must be worn
Dotarsi di cassetta di pronto soccorFirst-aid kit must be readily available
so
Obbligo di indossare cuffie di proteEar defenders must be worn
zione dal rumore
Assunzione di informazioni
Pericolo generico
Generic danger
Pericolo di scarica elettrica e/o pre- Danger of electrical discharge and/
or presence of live parts
senza di tensione
Attenzione al collegamento elettrico
Pay attention to the electrical
connection
Attenzione al collegamento pneuma- Pay attention to the pneumatic
connection
tico
Pag. 6
Symbol
Volts 230/60 MONOFASE
Information
T 55 300 “U.S.”
01_90 0093 02 50 61_03
ITALIANO
ENGLISH
IMBALLAGGIO
PACKING
L’imballaggio è costituito da un cartone rigido di misure 60 X 51 con un’altezza di
58 cm (Fig.1). Il cartone deve presentari chiuso dalle apposite graffette, integro e
senza ammaccature o danneggiamenti derivanti dal trasporto o da manomissione
di terzi.
All’apertura, il cartone si deve presentare come in Fig.2.
La macchina è composta dai seguenti accessori (Fig. 3):
1. Manuale uso & manutenzione.
2. Fermo legno.
3. Set di chiavi Allen 4/5/6/6 speciale.
4. Chiave fissa a una bocca CH 27.
CM
A
B
H
60
51
58
Volts 230/60 MONOFASE
Packing is composed of a hard cardboard box 60 X 51 with a height of 58 cm
(Fig.1). The box must be closed using the appropriate staples, whole and without
dents or damages due to transportation or tampering by third parties.
Upon opening, the box must appear as indicated in fig.2.
The machine is composed of the following accessories (Fig.3):
1. Use and maintenance manual.
2. Wooden workpiece.
3. Set of Allen wrenches 4/5/6/6 Special.
4. A CH 27 open end wrench.
1
2
3
4
H
A
B
Fig. 1
Fig. 2
Fig. 3
Pag. 7
T 55 300 “U.S.”
01_90 0093 02 50 61_03
Volts 230/60 MONOFASE
ITALIANO
ENGLISH
IDENTIFICAZIONE
DELLA MACCHINA
MACHINE
IDENTIFICATION
L’identificazione nominativa della macchina è possibile tramite la targhetta (1) in allumi- The name of the machine can be read on the printed aluminium plate (1) affixed to the
nio serigrafato posta sul carter fisso della macchina. Sulla targhetta (2) appaiono i front of the machine. The following information is given on the front name plate (2):
seguenti dati:
1. Address of the manufacturer.
1. Indirizzo del costruttore.
2. Machine model.
2. Modello della macchina.
3. Serial number.
3. Numero di matricola.
4. Year of manufacture.
4. Anno di costruzione.
5. Frequency in Hertz.
5. Frequenza in Hertz.
6. Total power installed in kW.
6. Potenza totale installata in kWatt.
7. Current draw in Amperes.
7. Assorbimento in Amper.
8. Voltage in Volts.
8. Voltaggio in Volt.
9. Maximum diameter of the blade in inch.
9. Diametro massimo della lama in pollici.
10. Diameter of the blade hole in inch.
10. Diametro del foro in pollici.
11. Minimum diameter of the blade in inch.
11. Diametro minimo della lama in pollici.
12. Overall weight of the machine in N.
12. Peso complessivo della macchina in N.
1
T 55 300“U.S.”
0160
2000
1,2
12”
11” ¾
2
Pag. 8
6
230
1”
274,4
T 55 300 “U.S.”
1.
2.
3.
4.
5.
6.
7.
8.
9.
10.
11.
12.
01_90 0093 02 50 61_03
Volts 230/60 MONOFASE
ITALIANO
ENGLISH
DESCRIZIONE
DELLA MACCHINA
DESCRIPTION
OF THE MACHINE
Impugnatura con interruttore “marcia-arresto” motore lama.
Carter fisso coprilama.
Protezione mobile.
Sponda di appoggio.
Basamento.
Bloccaggio angolazioni autocentranti.
Bloccaggio angolazioni intermedie.
Predisposizione per fissaggio della troncatrice al piano di lavoro.
Tavola girevole.
Fermo di misura.
Fori per montaggio supporti laterali.
Fori per montaggio pressori.
1.
2.
3.
4.
5.
6.
7.
8.
9.
10.
11.
12.
Handgrip with blade motor start-stop switch.
Fixed guard.
Movable guard.
Fences.
Base
Self-centring angle lock.
Intermediate angle lock
Cutting assembly descent balancing device.
Rotary table.
Measurement stop.
Holes for mounting lateral supports.
Clamp mounting holes.
1
2
3
5
4
10
12
6
9
12
8
7
11
12
Pag. 9
T 55 300 “U.S.”
01_90 0093 02 50 61_03
Volts 230/60 MONOFASE
ITALIANO
ENGLISH
DESCRIZIONE
DELLA MACCHINA
DESCRIPTION
OF THE MACHINE
La troncatrice modello T 55 300 “U.S.” é una troncatrice da banco orientabile per tagli di Model T 55 300 “U.S.” is a precision bench mitre saw whose main characteristics are:
precisione. Le caratteristiche principali sono:
1. Turntable with self-centring locking at 0° - 45° - 22°30’ - 15° - 10° in both directions.
1.
Tavola rotante con bloccaggio autocentrante sulle angolazioni 0° - 45° - 22° 30’ - 2. Manual locking at intermediate angles.
15° - 10° in entrambe le direzioni.
3. Transmission of motor-blade motion by means of V-belt.
2.
Bloccaggio manuale sulle angolazioni intermedie.
4. Polycarbonate blade guard.
3.
Trasmissione moto motore/lama tramite cinghia trapezoidale.
The mitre saw can accommodate a wide range of accessories rendering it versatile and
4.
Protezione della lama in policarbonato.
complete.
La troncatrice è predisposta per ricevere una vasta gamma di accessori che la rendono
più versatile e completa.
TECHNICAL
SPECIFICATIONS
CARATTERISTICHE
TECNICHE
SPECIFICHE ELETTRICHE
ELECTRICAL SPECIFICATIONS
230/60 MONOFASE
TENSIONE ALIMENTAZIONE:
1,2 KW
POTENZA TOTALE INSTALLATA
SUPPLY VOLTAGE
TOTAL INSTALLED POWER
IMPIANTO DI ASPIRAZIONE
UNA BOCCA DI ASPIRAZIONE
PORTATA RESIDUO EVACUATO
DEPRESSIONE
1,2 KW
DUST EXTRACTION SYSTEM
1 INTAKE NOZZLE (BLADE)
ø 3” 1/4
21 m/s
VELOCITY IN EXTRACTION DUCT
21 m/s
400 m3/h
WASTE EXTRACTION CAPACITY
400 m3/h
ø 80 mm
VELOCITÀ NEL CONDOTTO DI ASPIRAZIONE
230/60 SINGLE - PHASE
180 mm H20
INTAKE NOZZLE PRESSURE DROP
180 mm H20
TOOLS
UTENSILE CONSIGLIATO
LAMA
ø 300 mm
BLADE
ø 12”
FORO
ø 25,4 mm
EXTERNAL DIAMETER
ø 1”
NUMERO DI DENTI Z=
72
VELOCITÀ ROTAZIONE LAMA
3400 rpm
NO. OF TEETH Z=
BLADE ROTATION SPEED
SPECIFICHE CLIMATICHE
TEMPERATURA DI LAVORO ATTIMALE
TEMPERATURA DI IMMAGAZZINAMENTO
UMIDITÀ SENZA CONDENSA
Pag. 10
72
3400 rpm
AMBIENT CONDITIONS
5° ÷ 45° C
-25° ÷ 55° C
5% ÷ 85 %
OPTIMAL OPERATING TEMPERATURE
37°F ÷ 77°F
STORAGE TEMPERATURE
7°F ÷ 87°F
HUMIDITY (WITHOUT CONDENSATION)
5% ÷ 85 %
T 55 300 “U.S.”
01_90 0093 02 50 61_03
Volts 230/60 MONOFASE
ITALIANO
ENGLISH
CAPACITA
DI TAGLIO
CUTTING
CAPACITY
La troncatrice T 55 300 “US” può eseguire tagli su legno di qualsiasi essenza da 0° a The mitre saw T 55 300 “US” can perform cuts at 0° and 45° on any kind of timber.
45° .
TAVOLA ROTANTE A 0°
ROTARY TABLE AT 0°
ALTEZZA
WORKPIECE
MAX
80 mm
LARGHEZZA
MAX
WORKPIECE
135 mm
5” 1/2
MAX
TAVOLA ROTANTE A 45° DX
ROTARY TABLE AT 45° RH
ALTEZZA
WORKPIECE
MAX
90 mm
MAX
LARGHEZZA
MAX
3” 1/4
WORKPIECE
80 mm
MAX
3” 1/4
TAVOLA ROTANTE A 45° SX
ROTARY TABLE AT 45° LH
ALTEZZA
WORKPIECE
MAX
90 mm
MAX
LARGHEZZA
MAX
3” 1/2
MAX
3” 1/2
WORKPIECE
135 mm
MAX
5” 1/2
Pag. 11
T 55 300 “U.S.”
01_90 0093 02 50 61_03
Volts 230/60 MONOFASE
ITALIANO
ENGLISH
USO
DELLA MACCHINA
INTENDEDUSE
OF THE MACHINE
UTILIZZO
USE
Utilizzando la macchina come troncatrice da banco, si esegue la lavorazione bloccando
manualmente il pezzo da tagliare, a ridosso delle sponde di appoggio ed abbassando il
gruppo operante, sempre manualmente utilizzando l’apposita impugnatura.
IMPORTANTE: LA TRONCATRICE E’ MUNITA DI UNA PROTEZIONE CHE RICOPRE
INTERAMENTE L’ UTENSILE DURANTE L’INTERA MANOVRA DI TAGLIO.
When using the machine as a bench mitre saw, block the workpiece manually against
the fences and lower the cutting assembly manually using the handgrip.
IMPORTANT: THE MITRE SAW IS EQUIPPED WITH A GUARD WHICH COMPLETELY
COVERS THE TOOL WHILE IT IS CUTTING.
UTILIZZI NON CONSENTITI
NON-PERMITTED USES
1.
2.
3.
4.
5.
La macchina non deve venire utilizzata per il taglio di materiale ferroso ad esempio
acciaio e ghisa o resine fenoliche.
Uso in ambienti esterni o atmosfera esplosiva.
La macchina non deve venire utilizzata in operazioni diverse da quelle esplicitamen
te indicate in questo Manuale Uso & Manutenzione, salvo approvazione scritta for
male della OMGA S.p.A.
La macchina non deve venire utilizzata per il taglio di sezioni maggiori di quelle
indicate nel Manuale Uso & Manutenzione.
Non utilizzare la macchina se non é fissata saldamente e in modo stabile su di una
superficie piana che ne garantisca la necessaria sicurezza di utilizzo.
TAGLIO DI INTESTATURA
1.
2.
3.
4.
5.
The machine must not be used for cutting ferrous materials such as steel or cast
iron and fenolic resin.
It must not be used outdoors or in an explosive atmosphere.
The machine must not be used for operations that differ from those specifically
stated in this Operation and Maintenance Manual without the formal written
permission of OMGA S.p.A.
The machine must not be used for cutting workpieces with cross-sections larger
than those specified in this Operation and Maintenance Manual.
Do not use the machine if it is not fixed securely and in a stable manner to a flat
surface that assures adequate safety.
TRIMMING CUT
Per effettuare correttamente il taglio di intestatura, lo sfrido deve essere sufficiente per To obtain correct trimming cuts. The off-cuts should offer a sufficient resting surface (fig.
avere un minimo di appoggio sulla sponda (Fig. A) Se questo appoggio viene a mancare A). If this resting surface is lacking, the off-cut could get caught up between the fence and
(Fig. B) c’è il rischio che lo sfrido si incastri tra sponda e lama con conseguente danneg- the blade and consequently damage both.
giamento di entrambi.
1
Pag. 12
1
T 55 300 “U.S.”
01_90 0093 02 50 61_03
Volts 230/60 MONOFASE
ITALIANO
ENGLISH
RILEVAMENTO DEL
RUMORE EMESSO
NOISE EMISSION
MEASUREMENTS
La macchina è stata installata su piastrine antivibrazione e nella configurazione standard. Il tipo di
apparecchiatura utilizzato per il rilevamento è un fonometro tipo PULSAR 38 P (marca I.S.C. Milano)
avente classe di precisione 2. E’ stato utilizzato legno di abete in varie lunghezze con sezione pari a
40 x 80 mm. Le misurazioni sono state effettuate durante l’esecuzione di una successione di cicli di
lavoro normali e con utensili nuovi; trattandosi di una macchina manuale è stata eseguita una serie
di tagli ripetitivi con cadenza di circa 10 secondi, ipotizzando un ciclo “tipo” di lavoro. E’ stata
identificata una superficie di inviluppo della macchina corrispondente ad un parallelepipedo rettangolo comprendente la sua massima area di ingombro.
The machine was installed on vibration-absorbing plates and in the standard configuration. The
tests were conducted using a PULSAR 38 P sound-level meter (manufactured by I.S.C. Milan) with
a class 2 accuracy rating. 40 x 80 mm spruce stock of various lengths were cut. The measurements
were made during a sequence of normal working cycles using brand new tools. As this is a manual
machine, a series of repetitive cuts was performed at approximately 10 second intervals, assuming
this to be a typical working cycle.
An envelope surface of the machine corresponding to a rectangular parallelepiped was identified,
containing the largest surface of the machine.
CONDIZIONI DI PROVA
TEST CONDITIONS
E’ stata individuata la superficie prescritta, corrispondente ad un parallelepipedo rettangolo contenente la superficie di inviluppo, con facce parallele ad essa e distanti 1 metro. Il microfono è stato
posizionato su questa superficie in corrispondenza del posto Operatore “A”, all’altezza di 1,5 metri.
I valori riportati sono livelli di emissione sonora e non necessariamente livelli operativi sicuri. Sebbene vi sia una correlazione tra i livelli di emissione sonora e quelli di esposizione, questo fatto non può
essere considerato per determinare se sia o non sia richiesto l’uso di ulteriori misure preventive di
sicurezza. I fattori che influenzano il reale livello di esposizione dell’Operatore includono la durata
dell’esposizione, le caratteristiche del luogo di lavoro e il numero di macchine in esso collocate e
altre tipologie di lavorazione che si effettuino nelle immediate vicinanze. Inoltre, i livelli di esposizione sonora consentiti, possono variare da paese a paese. Queste informazioni possono essere di
utilità all’Utente per valutare rischi e pericoli derivanti da esposizione al rumore.
The prescribed surface was determined, corresponding to a rectangular parallelepiped containing
the envelope surface and with the faces parallel to this surface and at a distance of 1 metre. The
microphone was placed on this surface at the Operator A position at a height of 1.5 metres.
The values given are noise emission levels and do not necessarily correspond to safe operating
levels. Although noise emission levels and exposure levels are related, it is not possible to determine
from the above values alone whether further safety measures are required. The true level of operator
exposure can only be calculated by taking into account the duration of exposure, the acoustic
characteristics of the work place, the number of machines and the other types of processing operations
performed in the immediate vicinity. Moreover, permissible noise exposure levels vary from country
to country. Nevertheless, this information may help the user to evaluate the noise exposure risks
and hazards associated with the use of this machine.
LIVELLO DI PRESSIONE
ACUSTICA CONTINUA Lp
(Macchina a carico)
CONTINUOUS SOUND
PRESSURE LEVEL
POS. “A” .... Lpa = 78,4 dB (A)
LIVELLO DI POTENZA SONORA Lw
POS. “A” .... LWA = 92,1 dB (A)
POS. “A” .... Lpa = 78,4 dB (A)
SOUND POWER LEVEL
POS. “A” .... LWA = 92,1 dB (A)
POSIZIONE
A
POSITION
A
Pag. 13
T 55 300 “U.S.”
01_90 0093 02 50 61_03
Volts 230/60 MONOFASE
ITALIANO
ENGLISH
DIMENSIONI
DIMENSIONS
La macchina è stata progettata per essere utilizzata da un solo operatore che deve The machine is designed for use by one operator only, who must stand in the position
occupare la posizione indicata.
shown.
POSIZIONE OPERATORE
OPERATOR POSITION
Pag. 14
T 55 300 “U.S.”
01_90 0093 02 50 61_03
Volts 230/60 MONOFASE
ITALIANO
ENGLISH
SOLLEVAMENTO E SPOSTAMENTO
DELLA MACCHINA
LIFTINGTHE
MACHINE
Per lo spostamento della macchina si raccomanda di utilizzare carrelli o simili di ade- To handle the machine it is recommended to use fork lift trucks or something similar
guata portata. Dopo avere effettuato il disimballo della macchina eseguire le seguenti with a suitable weight capacity. After unpacking the machine, carry out the following
operazioni:
operations:
1.
Verificare la presenza di tutti i dispositivi previsti (Vedi capitolo “Descrizione della 1.
Check that all devices are present (see the chapter “Description of the Machine”).
macchina“).
2. Place the machine on a flat, preferably level surface in a sufficiently lit.
2.
Appoggiare la macchina su una superficie piana e possibilmente uniforme ed in un
locale sufficientemente illuminato.
Non sollevare o forzare la macchina, agganciandosi ai dispositivi di comando.
Do not lift or move the machine holding onto its control devices.
PESO: KG 28 - N 275
WEIGHT: KG 28 - N 275
Pag. 15
T 55 300 “U.S.”
01_90 0093 02 50 61_03
Volts 230/60 MONOFASE
ITALIANO
ENGLISH
PREDISPOSIZIONI
POSITIONING
REQUIREMENTS
La macchina deve essere installata in un’area sufficientemente grande ed illuminata. Nello schema sovrastante è indicata la distanza minima rispetto un altro oggetto o ad una parete che si deve rispettare nel posizionare la macchina. Essa deve
inoltre trovarsi in un locale sufficientemente illuminato. L’illuminazione deve garantire una buona visibilità in ogni punto, non creare riflessi pericolosi e consentire una
chiara lettura delle targhette di identificazione e dei comandi della macchina in
ogni momento.
In merito consultare la normativa vigente.
The machine must be installed in a sufficiently large and luminous area. The diagram
above indicates the minimum distance at which the machine must be kept from
other objects or walls. The machine must be installed in a room with sufficient
lighting. The lighting must grant good visibility over every part of the machine, without
dazzling the operator. It must enable all identification plates to be clearly read and
all machine controls to be perfectly visible.
On this behalf, consult the relevant standards.
Pag. 16
T 55 300 “U.S.”
01_90 0093 02 50 61_03
Volts 230/60 MONOFASE
ITALIANO
ENGLISH
PRESCRIZIONI PER IL FISSAGGIO
ED IL LIVELLAMENTO
INSTRUCTIONS FOR FIXING
AND LEVELLING THE MACHINE
Bloccare rigidamente la macchina su di un piano di lavoro, procedendo come segue: Fasten the machine securely to a work bench as follows:
nuts.
1. Eseguire n° 2 fori di diametro 12 mm sul piano di lavoro utilizzato.
2. Bloccare la macchina al piano mediante n° 2 viti di lunghezza adeguata con r e l a t i v e 1. Drill two 1/2 inches diameter holes in the work bench.
2. Fasten the machine to the work bench using two bolts of adequate length with washers
rondelle e dado di bloccaggio.
and lock.
BASAMENTO TRONCATRICE
PIANO D’APPOGGIO
MITRE SAW BASE
WORK BENCH
Pag. 17
T 55 300 “U.S.”
01_90 0093 02 50 61_03
Volts 230/60 MONOFASE
ITALIANO
ENGLISH
ASSEMBLAGGIO
DELLA MACCHINA
MACHINE
ASSEMBLY
Per assemblare la macchina procedere come segue:
To assemble the machine proceed as follows:
MONTAGGIO FERMO DI MISURA
MOUNTING MEASUREMENT STOP
Montare il fermo di misura (1) indifferentemente a dx oppure a sx della troncatrice. Il Mount the measurement stop (1) either on the right or on the left of the mitre saw. Mount
montaggio deve avvenire in corrispondenza dei fori predisposti all’estremità delle sponde using the holes you will find at the end of the fences. Loosen the knob (2), fit the side rest and
d’appoggio. Svitare il pomello (2), inserire l’appoggio laterale e fermo di misura (1) e stop (1) and tighten the knob (2). Fig. 1.
riavvitare il pomello (2). Fig.1
2
1
Fig. 1
Pag. 18
2
T 55 300 “U.S.”
01_90 0093 02 50 61_03
Volts 230/60 MONOFASE
ITALIANO
ENGLISH
ASSEMBLAGGIO
DELLA MACCHINA
MACHINE
ASSEMBLY
MONTAGGIO DEL GRUPPO MOLLA DI RITORNO
RETURN SPRING UNIT ASSEMBLY
1. Svitare completamente la vite (1) con chiave Allen 6.
2. Portare il carter fisso in posizione alta in modo da consentire alla vite (2) di
passare attraverso l’occhiello del gruppo ammortizzatore (3).
3. Riavvitare la vite (2).
1. Completely loosen the screws (1) with Allen wrench 6.
2. Raise the fixed casing in such a way so that the screws (2) are able to pass
through the eye of the shock absorber unit (3).
3. Re-tighten the screws (2).
1
3
2
Pag. 19
01_90 0093 02 50 61_03
T 55 300 “U.S.”
Volts 230/60 MONOFASE
ITALIANO
ENGLISH
ASSEMBLAGGIO
DELLA MACCHINA
MACHINE
ASSEMBLY
MONTAGGIO LAMA
FITTING THE BLADE
1. Svitare le viti (1) e asportare la protezione in policarbonato (2). Fig.1.
2. Per una maggiore praticità si consiglia di appoggiare la protezione in policarbonato sulla
tavola girevole della macchina Fig. 2.
3. Utilizzando la chiave Allen 6 mm. speciale e la chiave fissa a una bocca CH 27, svitare
il dado di serraggio ed asportare la flangia esterna. Fig. 2/3.
4. Inserire la lama sul mandrino. Fig. 4.
1. Loosen the screws (1) and remove the guard in polycarbonate (2).Fig.1.
2. For the sake of practicality, place the polycarbonate guard on the machine’s rotary table
Fig. 2.
3. Using a 6 mm Allen key and a CH27 wrench undo the securing bolt and remove the
external flange. Fig. 2/3.
4. Fit the blade on the arbor. Fig. 4.
L’UTENSILE UTILIZZATO DEVE AVERE LA CARATTERISTICHE DESCRITTE A PAGINA 10. SI RACCOMANDA L’UTILIZZO DI GUANTI DI PROTEZIONE DURANTE
L’ESECUZIONE DELL’OPERAZIONE DI INSERIMENTO LAMA. ACCERTARSI DEL
CORRETTO INSERIMENTO, RELATIVAMENTE AL SENSO DI ROTAZIONE, COME INDICATA DALLA FRECCIA PRESENTE SUL CARTER COPRILAMA.
THE TOOL MUST HAVE THE CHARACTERISTICS SPECIFIED ON PAGE 10.
PROTECTIVE GLOVES MUST BE WORN WHEN FITTING THE BLADE. MAKE SURE
THAT IT IS FITTED SO THAT IT TURNS IN THE RIGHT DIRECTION AS SHOWN BY
THE ARROW ON THE BLADE GUARD.
5. Inserire la flangia esterna ed il dado di serraggio. Bloccare a fondo il dado di serraggio
Fig. 5.
ATTENZIONE: Prima di eseguire il montaggio della flangia esterna verificare l’asso
luta pulizia della stessa. Verificare l’assenza di grasso oppure di lubrificante tra la
lama e le due flange di bloccaggio.
7. Rimontare la protezione in policarbonato (2) e fissarla al gruppo operante
dellatroncatrice
per mezzo delle viti (1). Fig.6
Pag. 20
5. Insert the external flange and the lock nut. Tighten up the lock nut completely. Fig. 5.
IMPORTANT: Make sure that the external flange is perfectly clean before mounting
it. Check that there is no grease or lubricant between the blade and the two securing
flanges.
7. Refit the polycarbonate guard (2) and secure it to the cutting assembly of the mitre
saw using the screws (1).Fig.6.
T 55 300 “U.S.”
01_90 0093 02 50 61_03
1
Volts 230/60 MONOFASE
ITALIANO
ENGLISH
ASSEMBLAGGIO
DELLA MACCHINA
MACHINE
ASSEMBLY
2
Fig. 1
Fig. 3
Fig. 2
1
Fig. 4
Fig. 5
2
Fig. 6
Pag. 21
T 55 300 “U.S.”
01_90 0093 02 50 61_03
Volts 230/60 MONOFASE
ITALIANO
ENGLISH
NORME DI
SICUREZZA
SAFETY
RULES
La gestione della troncatrice manuale modello T 55 300 “U.S.” da parte di personale
che non sia stato adeguatamente istruito, é altamente rischioso. Si raccomanda di non
attivare le funzioni della macchina fino a che non si siano apprese completamente tutte
le procedure di ciclica, di regolazione, di taratura, di manutenzione e uso generale
descritte in questo manuale.
Operation of the T 55 300 “U.S.” mitre saw by insufficiently trained personnel is extremely
dangerous. Do not attempt to operate the machine until you have acquired a thorough
knowledge of the operating, setting, adjustment and maintenance procedures described
in this Operation and Maintenance manual.
Gli allacciamenti: Elettrico, aspirazione dovranno essere effettuati da personale specia- The electrical and dust extraction system connections must be made by specialised
lizzato, il quale dovrà accertare che nel luogo di installazione della macchina sia pre- personnel, who must also make sure that there is an efficient earthing circuit at the site
sente un idoneo impianto di messa a terra.
where the machine is to be installed.
Effettuati i collegamenti, sarà cura dell’Operatore verificare il corretto senso di rotazione Once the connections have been made, the operator must check that the tools turn in the
degli utensili, se questo fosse errato sarà necessario invertire tra loro due dei fili di linea right direction. If they turn in the wrong direction, two of the phase wires (not the earth
(terra esclusa).
wire) should be swapped over.
L’Operatore tenga presente che, per ottenere una sufficiente evacuazione dei residui di The operator must bear in mind that for efficient removal of machining waste, the machine
lavorazione, dovrà essere applicata una velocità di aspirazione di almeno 21 m/s (valori must be connected to a dust extraction system with a speed of 21 m/second (lower values
più bassi possono non essere sufficienti).
may be insufficient).
Utensili incrinati, saldati e non equilibrati non dovranno essere riutilizzati sulla mac- Cracked, unbalanced or welded tools MUST NOT be used.
china.
TUTTI I SISTEMI DI SICUREZZA TASSATIVAMENTE
NON DEVONO ESSERE RIMOSSI O BY-PASSATI.
NONE OF THE SAFETY SYSTEMS MUST
BE REMOVED OR BYPASSED.
SI RACCOMANDA DI TENERE NEI PRESSI DEL LUOGO DI LAVORO OVE È SITUATA LA
MACCHINA IDONEI MEZZI DI ESTINZIONE DI INCENDIO.
OVE SI MANIFESTINO INIZI DI COMBUSTIONE (TRACCE DI FUMO OPPURE ODORI), OLTRE ALL’ARRESTO IMMEDIATO DELL’IMPIANTO DI ASPIRAZIONE SI DOVRANNO CHIUDERE TUTTE LE VALVOLE IN MODO DA SOFFOCARE IL PIÙ PRESTO POSSIBILE IL FOCOLAIO DI INCENDIO.
SUITABLE FIRE-FIGHTING EQUIPMENT MUST BE KEPT CLOSE TO NEAR WHERE
THE MACHINE IS BEING USED.
IF THERE ARE SIGNS OF FIRE (SMOKE OR SMELL OF BURNING), IMMEDIATELY
STOP THE DUST EXTRACTION SYSTEM AND CLOSE ALL THE VALVES IN ORDER
TO SUFFOCATE THE FIRE AS QUICKLY AS POSSIBLE.
Pag. 22
T 55 300 “U.S.”
01_90 0093 02 50 61_03
Volts 230/60 MONOFASE
ITALIANO
ENGLISH
NORME DI
SICUREZZA
SAFETY
RULES
E’ consigliabile tenere nei pressi del luogo di lavoro ove è situata la macchina una It is advisable to keep a first-aid kit containing disinfectant and materials for simple firstcassetta di pronto soccorso dotata di presidi sanitari in corso di validità e idonei a aid work near to where the machine is being used.
semplici interventi di emergenza.
Le modalità di avvicinamento alla macchina del materiale da lavorare, così come la
raccolta e lo spostamento del materiale di scarto possono rappresentare rischi che
rientrano sotto le responsabilità del Cliente e dell’Operatore.
Le sezioni massime del materiale da tagliare sono indicate pag. 11. La macchina é
stata costruita per soddisfare i requisiti essenziali di sicurezza.
Gli utensili utilizzabili su questa macchina devono essere conformi a quanto contemplato
nelle norme vigenti. Non è consentito l’impiego di utensili aventi caratteristiche inferiori,
incrinati, non equilibrati e saldati.
The operations of moving the workpiece towards the machine and collecting and removing
waste can create risks which are the responsibility of the customer and the operator.
The maximum cross-sections of the workpiece are indicated in page 11. The machine
is constructed in accordance with the essential safety requirements..
The tools which can be used on this machine must comply with the provisions of draft
standards the laws in force.
It is not permitted to use tools which have inferior characteristics or are cracked,
unbalanced or welded.
Durante l’uso della macchina si raccomanda di indossare sempre le protezioni consuete previste dalla generalità delle norme antinfortunistiche: Guanti - Occhiali - Scarpe - Cuffie antirumore.
Togliere capi di abbigliamento pericolosi, ad esempio sciarpe, cravatte. Togliere, inoltre,
anelli, orologi o altra bigiotteria. I polsini devono essere elastici o abbottonati, inoltre i
capelli, se lunghi, devono essere coperti da un cappello. Non cercare di fare funzionare la
macchina mentre siete soggetti a qualsiasi forma di condizionamento che possa ridurre
la vostra attenzione. Prima di effettuare la lavorazione verificare che tutte le leve oppure
pomelli siano bloccati. Non avvicinarsi mai a parti mobili (utensili, pressori di bloccaggio)
durante l’esecuzione del ciclo di lavoro.
When using the machine all the usual safety equipment prescribed by general safety
standards must be worn, including protective gloves, safety glasses, safety footwear,
ear defenders.
Remove all potentially dangerous items of clothing, such as scarves or ties. Remove rings,
watches or any other jewellery. Cuffs must be elasticated or buttoned up. Long hair must be
worn under a cap.
Do not attempt to operate the machine whilst in a state of reduced attention.
Before machining, check that all levers and knobs are tightened and in place.
Never approach the moving parts (tools or clamping elements) during a work cycle.
Gli interventi di manutenzione, di pulizia generale della macchina e sostituzione di
utensili devono essere intrapresi soltanto quando tutte le parti mobili si siano arrestate
e dopo che siano state scollegate o disinserite le fonti di energia elettrica. Mantenere
pulita l’area circostante la macchina, la segatura può rendere sdruciolevole il pavimento. Non lasciare incustodita la macchina durante le fasi di lavoro.
Segnalare con un cartello l’eventuale sosta forzata della macchina (sostituzione di utensili o altro).
Maintenance, machine cleaning and tool replacement operations must be performed
with all moving parts stopped and after the electrical energy sources have been
disconnected or turned off.
Keep the area around the machine clean. Sawdust can make the floor slippery.
Never leave the machine unattended whilst in operation.
Affix a notice to the machine when it is stopped for tool replacement or other reason to
ensure that it is not started up accidentally.
Pag. 23
T 55 300 “U.S.”
01_90 0093 02 50 61_03
Volts 230/60 MONOFASE
ITALIANO
ENGLISH
NORME DI
SICUREZZA
SAFETY
RULES
La sostituzione di parti meccaniche e elettriche deve essere effettuato esclusivamente Mechanical parts must be replaced using only spares supplied by the Manufacturer. The
con parti da richiedere al Costruttore il quale declina assolutamente qualsiasi tipo di latter will refuse each and every responsibility in the event that this rule is not respected
responsabilità nel caso si contravvenga a questa disposizione che, se non rispettata, and any of the following occur:
può generare:
1. Injuries.
1. Incidenti alla persona.
2. Damage to the machine.
2. Danneggiamenti alla macchina.
3. Immediate forfeiture of every guarantee.
3. Decadimento immediato di ogni garanzia.
Conservare con cura questo manuale Uso & Manutenzione sia per fare riferimento alle Keep this Operation and Maintenance Manual with care. It will be needed not only for
istruzioni iniziali e di installazione, ma anche per il costante riferimento dell’utente per le the initial installation and start-up instructions but also for future reference and for any
necessità future che potranno manifestarsi durante la durata della vita della macchina. necessity that arises during use of the machine.
Per ogni e qualsiasi informazione che si rendesse necessaria, contattare il Servizio For any further information contact the OMGA INC. Service Department.
Assistenza OMGA INC.
PER QUALSIASI RICHIESTA DI ASSISTENZA TECNICA E FORNITURA DI PEZZI DI RICAM- FOR TECHNICAL INFORMATION AND/OR WHEN ORDERING SPARE PARTS, ALWAYS
BIO RIFERIRSI SEMPRE AL NUMERO DI MATRICOLA ED ALL’ANNO DI FABBRICAZIONE QUOTE THE SERIAL NUMBER AND YEAR OF MANUFACTURE MARKED ON THE
RIPORTATI SULLA TARGHETTA DI IDENTIFICAZIONE
NAME PLATE.
Pag. 24
T 55 300 “U.S.”
01_90 0093 02 50 61_03
Volts 230/60 MONOFASE
ITALIANO
ENGLISH
MARCATURA
DI SICUREZZA
SAFETY
MARKING
SEGNALETICA DI RIFERIMENTO
SAFETY SIGNS
CODICE 22591: TARGA INFORMAZIONI.
CODE 22591:INFORMATION NAMEPLATE
NEL CASO CHE LA TARGHETTA DI AVVERTIMENTO RISULTI ILLEGGIBILE OPPURE IF THE NAMEPLATE BECOMES UNREADABLE OR IS REMOVED, REPLACE IT
SIA STATA RIMOSSA, SOSTITUIRLA IMMEDIATAMENTE. NON UTILIZZARE LA MACCHI- IMMEDIATELY. DO NOT USE THE MACHINE WITHOUT ITS NAMEPLATE.
NA SE MANCANTE DELLA TARGHETTA.
Cod. 22591
Pag. 25
T 55 300 “U.S.”
01_90 0093 02 50 61_03
Volts 230/60 MONOFASE
ITALIANO
ENGLISH
DISPOSITIVI
DI SICUREZZA
SAFETY
DEVICES
1. Guard blade in polycarbonate.
2. Switch whit Return spring.
3. Spring of the balancing unit.
1. Protezione mobile in policarbonato.
2. Interruttore con ritorno a molla.
3. Molla del gruppo bilanciamento.
1
2
3
Se anche solo uno dei dispositivi sopracitati non è in perfetta efficienza, è vietato If even one of the above mentioned devices is not in perfect working order, the
l’uso della macchina. Si dovrà procedere immediatamente alla manutenzione o so- machine cannot be used. Proceed immediately to service or replace the faulty device.
stituzione del dispositivo non funzionante.
Pag. 26
T 55 300 “U.S.”
01_90 0093 02 50 61_03
Volts 230/60 MONOFASE
ITALIANO
ENGLISH
DISPOSITIVI
DI SICUREZZA
SAFETY
DEVICES
PROTEZIONE MOBILE IN POLICARBONATO
BLADE GUARD IN POLYCARBONATE
Il comando della protezione mobile è di tipo meccanico. L’apertura è progressiva durante la discesa della lama. Con la lama in posizione di riposo la protezione provvede a
coprire interamente la lama stessa. In posizione di taglio massimo provvede a coprire
la parte di lama che non è interessata al taglio. Verificare quotidianamente che la protezione sia in perfetta efficienza ed esente da danni.
The mobile guard is mechanically controlled. The opening progressively widens when
the blade descends. When the blade is in the home position it is totally covered by the
guard. In the maximum cutting position, the part of the blade that is not involved in cutting
is covered. Check daily that the guard is undamaged and in perfect working order.
1
Pag. 27
T 55 300 “U.S.”
01_90 0093 02 50 61_03
Volts 230/60 MONOFASE
ITALIANO
ENGLISH
DISPOSITIVI
DI SICUREZZA
SAFETY
DEVICES
INTERRUTTORE CON RITORNO A MOLLA
SWITCH WITH RETURN SPRING
Questo interruttore (1) non permette l’accidentale accensione della macchina da parte
dell’operatore. Esso è provvisto di un molla di ritorno (2) che al momento della mancata
pressione sull’interruttore arresta il motore e la lama.
Controllare periodicamente tale molla, in caso di mal funzionamento procedere all’immediata sostituzione dell’intero interruttore. E’ ASSOLUTAMENTE VIETATO UTILIZZARE
LA MACCHINA SENZA L’INTERRUTTORE IN PERETTA EFFICIENZA.
This switch (1) doesn’t allow the operator to switch the machine on even accidentally. It
is equipped with a return spring (2) whitch stops both the motor and the saw blade once
it is not pressed.
Check periodically such a spring; incase it is not functioning well, replace the whole switch.
IT IS FORBIDDEN TO USE THE MACHINE WITH A SWITCH NON FUNCTIONING
PERFECTLY WELL.
1
2
2
Pag. 28
T 55 300 “U.S.”
01_90 0093 02 50 61_03
Volts 230/60 MONOFASE
ITALIANO
ENGLISH
DISPOSITIVI
DI SICUREZZA
SAFETY
DEVICES
CONTROLLO MOLLA DEL GRUPPO DI BILANCIAMENTO
CHECKING THE SPRING OF THE BALANCING UNIT
Dal momento che il gruppo di bilanciamento del motore-lama è funzionale alla sicurezza della macchina, è necessario controllare frequentemente il suo stato di efficienza. Per fare questo, è sufficiente verificare periodicamente la
molla a compressione inserita all’interno del gruppo (1).
Anche se la molla è realizzata utilizzando acciaio speciale ad alta resistenza, è sempre possibile che, per l’uso
prolungato e/o per anomalie intrinseche del materiale non riscontrabili al momento dell’assemblaggio in fabbrica,
questa possa perdere con il tempo le sue caratteristiche. Ciò può accadere per due motivi:
·
La molla, con il passare del tempo, ha perso parte delle sue caratteristiche elastiche (ha perso, cioè, parte della
forza con cui spinge il gruppo in posizione di sicurezza tutto alto)
·
La molla può essersi rotta per imperfezioni costruttive o per sollecitazioni a fatica.
Questi eventuali deterioramenti, comunque, non pregiudicano IMMEDIATAMENTE la sicurezza della macchina, dal
momento che il sistema è stato progettato per permettere all’operatore di accorgersi per tempo delle eventuali
anomalie.
Per verificare l’efficienza della molla, infatti, è necessario, AD OGNI NUOVO UTILIZZO DELLA MACCHINA E
PRIMA DI ACCENDERE IL MOTORE, portare il gruppo motore-lama in posizione tutto basso e accertarsi che,
dopo essere stato lasciato, questo ritorni automaticamente e con forza in posizione tutto alto (protezione della lama
completamente chiusa).
Qualora il gruppo, invece, tenda a restare in posizione intermedia o ci si accorga che la spinta di ritorno della molla
sia scemata (il che non permette, in ogni caso, la chiusura completa della protezione alla lama), ciò significa che
si è verificato uno dei due eventi sopra descritti e, quindi, è necessario TASSATIVAMENTE sostituire la molla con
un’altra dello stesso tipo..
La sostituzione della molla e il susseguente ripristino del gruppo di bilanciamento alle condizioni originarie devono
essere effettuate da personale esperto e a conoscenza delle modalità operative del gruppo stesso. E’ consigliabile,
perciò, onde evitare errori di montaggio e/o malfunzionamenti del gruppo, RIVOLGERSI AL PROPRIO FORNITORE
O ALLA CASA MADRE.
Being that the balancing unit of the motor-blade strictly relates to machine safety, it is necessary to frequently
check its efficiency. To carry out this check, it is sufficient to periodically check the compression spring inside the
unit (1).
Even if the spring has been made using special high-tensile steel, it may eventually slacken owing to prolonged use
and/or faults of the material that could not be assessed during factory assembly. This may happen for either of
the two reasons:
·
As time goes by, the spring may loose its elasticity, in other words it has lost part of the force needed to push
the motor-blade unit to its raised, safety, position;
·
The spring may have broken owing to faulty workmanship or to excessive stress.
In any case, wear of the spring does not IMMEDIATELY compromise safe use of the machine, being that the
system has been developed to enable the operator to become aware of this situation in good time.
To check the efficiency of the spring, in fact, it is necessary to lower the motor -blade unit EVERY TIME THE
MACHINE IS USED AND BEFORE STARTING THE MOTOR, in order to assess whether this returns to its fully
raised, safety, position (blade fully covered by its guard) as soon as it is released.
If the unit tends to remain in an intermediate position or if the return movement activated by the spring is not long
enough to enable the unit to reach its raised position (in this case, you will notice that the blade is not fully covered
by its guard), the spring is worn owing to either of the situations listed above and MUST BE replaced with a new one
of the same type.
Replacement of the spring, and the consequent operations needed to restore the balancing unit to its initial working
condition, must be effected by expert personnel that is conversant with the operating modes of the machine itself.
In order to avoid assembly errors and/or malfunctioning, you are highly recommended to CONTACT YOUR
SUPPLIER OR THE MANUFACTURER.
1
Pag. 29
T 55 300 “U.S.”
01_90 0093 02 50 61_03
Volts 230/60 MONOFASE
ITALIANO
ENGLISH
COLLEGAMENTO
ELETTRICO
ELECTRICAL
CONNECTIONS
L’installazione della macchina deve essere eseguita da personale espressamente qualificato, eseguendo tutte le istruzioni indicate in questo manuale Uso & Manutenzione. La macchina richiede
alimentazione con tensione e frequenza come indicato dalla targhetta applicata sul carter fisso della
macchina. Prima di collegare la macchina alla rete di alimentazione elettrica accertarsi che la linea di
alimentazione sia provvista di una messa a terra efficiente. Il punto di collegamento alla fonte di
energia dovrà garantire l’esistenza di tutte le protezioni previste dalle vigenti disposizioni legislative.
The machine must be installed by explicitly authorised and qualified personnel, following all the
instructions given in the Operation and Maintenance Manual. The voltage and frequency of the
machine’s power supply must conform to the ratings shown on the name plate. Before connecting
the machine to the mains, make sure the power supply line is appropriately earthed. The point of
connection to the source of electric energy must be equipped with all the electrical protections as
provided for by the regulations in force in the country where the machine is installed.
Il cavo di alimentazione della macchina non è fornito di presa di corrente, sarà perciò cura The power supply cord has no socket; the User must provode a suitable one.
dell’Utilizzatore installarne una idonea.
If you need to use extension cords, make sure their cross-section is sufficient to withstand the
Se fosse necessario l’uso di prolunghe elettriche, controllare che la sezione dei cavi utilizzati sia power draw of the machine. Use as short an extension cord as possible.
idonea a sopportare l’intensità di corrente assorbita dalla macchina, é consigliabile sempre utilizzare
Never leave the machine UNATTENDED when it is connected to the mains.
prolunghe elettriche piú corte possibile.
Non lasciare MAI INCUSTODITA la macchina con la presa di corrente collegata alla rete di
alimentazione elettrica.
L’uso ininterrotto della macchina nel tempo è sconsigliato per natura del motore Because of the nature of a single phase motor, the uninterrupted use of the machine
nonofase. Dopo un periodo di lavoro continuato di 30/40 minuti circa, spegnere la is not recommended. After a period of continuos usage of 30/40 minutes, the
macchina lasciando raffreddare il motore.
machine should de switched off to allow an appropriate cool off sequence of the
motor.
SPINA DI COLLEGAMENTO ELETTRICO
ELECTRICAL CONNECTING PLUG
Pag. 30
T 55 300 “U.S.”
01_90 0093 02 50 61_03
Volts 230/60 MONOFASE
ITALIANO
ENGLISH
COLLEGAMENTO
IMPIANTO ASPIRAZIONE
CONNECTING TO THE
DUST EXTRACTION SYSTEM
L’installazione della macchina deve essere eseguita da personale espressamente
qualificato, eseguendo tutte le istruzioni indicate in questo manuale Uso & Manutenzione. La macchina é dotata di collegamento con bocca di aspirazione (ø 80 mm.) per
l’evacuazione dei residui di lavorazione, composti prevalentemente da truciolo e polveri.
Si rammenta che per avere una buona evacuazione dei residui di lavorazione é necessario dimensionare il corpo aspiratore in modo da avere una velocità applicata in corrispondenza delle bocche di aspirazione corrispondente alle seguenti situazioni:
The machine must be installed by explicitly authorised and qualified personnel, following
all the instructions included in the Operation and Maintenance Manual. The machine
has an intake nozzle (Ø 3” ¼) for the extraction of waste materials, mainly shavings and
dust.
To provide sufficient evacuation, the aspirator of the dust extraction system must be sized
so that the following speeds are obtained at the intake nozzle:
1.
2.
Velocità pari a 21 m/s con legno leggero secco (umidità inferiore al 18%);
Velocità pari a 28 m/s con legno pesante umido (umidità superiore al 18%).
1.
2.
Speed of 21 m/s with light, dry wood (moisture content of less than 18%).
Speed of 28 m/s with heavy, damp wood (moisture content of more than 18%).
I dati tecnici relativi all’impianto di aspirazione sono riportati nel capitolo “Caratteri- The technical data of the dust extraction system are provided in the General technical
stiche tecniche generali”, a pag.10 del presente manuale Uso & Manutenzione.
specifications chapter on page 10 of this operation and maintenance manual.
ELIMINAZIONE DEI RESIDUI DI LAVORAZIONE
ELIMINATING THE MACHINING RESIDUES
I residui di lavorazione sono composti prevalentemente da segatura convogliata dal- Machining residues consist mainly of sawdust collected by the dust extraction system.
l’impianto di aspirazione. Altri residui devono essere eliminati manualmente seguendo Other residues are eliminated manually following the instructions given in the chapter
le istruzioni date nel capitolo “Frequenza delle operazioni di manutenzione. É a cura entitled “Frequency of Maintenance operations”. The user is responsible for disposing
of these residues in accordance with applicable legislation.
dell’utilizzatore smaltire tutti questi residui secondo le vigenti leggi.
BOCCA DI ASPIRAZIONE
EXTRACTION INTAKE
Pag. 31
T 55 300 “U.S.”
1.
01_90 0093 02 50 61_03
Volts 230/60 MONOFASE
ITALIANO
ENGLISH
IMPUGNATURA
DI COMANDO
CONTROL
HANDGRIP
Impugnatura di comando con interruttore marcia (I) - arresto (O) motore lama,
con ritorno a molla.
1.
Handgrip with blade motor start/stop switch and spring return.
MANTENERE L’IMPUGNATURA DI COMANDO SEMPRE PULITA, ASCIUTTA ED ALWAYS KEEP THE CONTROL HANDGRIP CLEAN AND DRY WITHOUT GREASE
ESENTE DA GRASSO O SPORCIZIA.
OR DIRT RESIDUES.
1
Pag. 32
T 55 300 “U.S.”
01_90 0093 02 50 61_03
Volts 230/60 MONOFASE
ITALIANO
ENGLISH
ARRESTO
NORMALE
NORMAL
STOPPING
L’arresto della macchina avviente automaticamente togliendo la pressione sul pulsan- The machine stops automatically when the start button (1) is released, as it is of the
te di marcia (1), in quanto questo è del tipo “con ritorno a molla”. Il moto del motore si “spring return” type. The motor is started and run by pressing and holding down the start
ottiene facendo e mantenendo pressione sul pulsante di marcia (1).
button (1).
1
0
Pag. 33
T 55 300 “U.S.”
01_90 0093 02 50 61_03
Volts 230/60 MONOFASE
ITALIANO
ENGLISH
ANGOLI DI
TAGLIO
CUTTING
ANGLES
Per ruotare la tavola (1), solidale col gruppo motore-lama, tirare verso di sè la maniglia
(2) e ruotarla in senso orario di oltre 90°. Rilasciarla in modo che lo spinotto si appoggi
contro il bordo esterno della boccola.La tavola può essere posizionata sulle angolazioni
fisse preimpostate 0° - 10° - 15° - 22° 30' (realizzazione ottagono) - 30° (realizzazione
esagono) - 45° (realizzazione quadrato e/o rettangolo) facilmente individuabili sul settore graduato (3) fissato al bordo della tavola stessa Queste regolazioni sono possibili
tanto verso destra quanto verso sinistra. Quando l’angolo fisso desiderato è raggiunto,
riportare la maniglia (2) nella posizione originaria. Per le angolazioni intermedie sbloccare la maniglia (2), come detto prima, ruotare la tavola all’angolo desiderato, rilevabile
sul settore graduato (3), infine bloccarla stringendo il pomello (4).
To rotate the table (1), unite it with the blade motor unit, pull the handle (2) towards
yourself and rotate it clockwise more than 90°. Release it in such a way that the pin rests
against the external edge of the bushing. The table can be positioned on the pre-set
fixed angles 0° - 10° - 15°- 22° 30’ (octagonal realisation) – 30° (hexagonal realisation)
– 45°(square and rectangular realisation) easily recognisable on the on the graduated
scale (3) fixed to the table. These adjustments are equally possible to the right or to the
left. Once the desired angle has been reached, return the handle (2) in its original
position. For intermediate angles lock the handle (2), as described before, rotate the
table to the desired angle, using the graduated scale (3) as a guide, finally lock it by
tightening the knob (4).
1
3
2
Pag. 34
4
T 55 300 “U.S.”
01_90 0093 02 50 61_03
Volts 230/60 MONOFASE
ITALIANO
ENGLISH
UTILIZZO
DELLA MACCHINA
USING
THE MACHINE
CONTROLLI PRELIMINARI GENERALI
GENERAL PRELIMINARY CHECKS
Prima di iniziare il ciclo di lavoro è necessario verificare i seguenti punti:
1. L’effettivo collegamento elettrico della macchina.
2. L’effettivo collegamento della macchina ad un impianto di aspirazione avente caratteristiche appropriate (vedi pag. 10).
3. Verificare la corretta angolazione della tavola rotante.
Before starting the work cycle, carry out the following checks:
1. Make sure that the machine is correctly connected to the electrical power supply.
2. Make sure the machine is connected to a dust extraction system with appropriate
characteristics (see page 10).
3. Make sure that the turntable and vertical head are locked at the right angle.
PER PERIODI DI INATTIVITÁ, ANCHE SOLAMENTE DI POCHE ORE, SI CONSIGLIA THE MACHINE SHOULD BE DISCONNECTED FROM THE ELECTRIC POWER
DI ISOLARE LA MACCHINA DAL CIRCUITO DI ALIMENTAZIONE ELETTRICA.
SUPPLY WHEN NOT BEING USED, EVEN FOR A PERIOD OF JUST A FEW HOURS.
1
2
3
Pag. 35
T 55 300 “U.S.”
01_90 0093 02 50 61_03
Volts 230/60 MONOFASE
ITALIANO
ENGLISH
UTILIZZO
DELLA MACCHINA
USING
THE MACHINE
Eseguiti i controlli preliminari é necessario procedere come segue:
1. Verificare la corretta angolazione di taglio ed il corretto posizionamento di eventuali
fermi di misura.
2. Posizionare il pezzo da tagliare a ridosso delle sponde di appoggio e mantenerlo pre
muto.
3. Premere il pulsante (1) marcia motore lama.
4. Abbassare il gruppo testa ed eseguire il taglio.
5. Finito il taglio accompagnare il gruppo operante nella salita fino a che il gruppo testa
non sarà in posizione di riposo. Per eseguire l’arresto della rotazione del motore la
sciare il pulsante (1).
After carrying out the preliminary checks, proceed as follows:
1. Check that the cutting angle is correct and that the measurement stops are positioned
correctly.
2. Place the workpiece against the fence and keep it pressed firmly.
3. Press the blade motor start button (1).
4. Lower the cutting unit and execute the cut.
5. After the cut has been completed, guide the cutting unit upwards until the head
reaches its top most position. To stop the blade motor, release button (1).
ACCOMPAGNARE CON LA MANO, UTILIZZANDO L’IMPUGNATURA DI COMANDO, IL
GRUPPO OPERANTE DURANTE LE OPERAZIONI DI DISCESA E RISALITA.
ATTENZIONE: UNA MAGGIORE PRESSIONE SULL’IMPUGNATURA NON PROVOCA UNA MAGGIORE VELOCITÀ DI TAGLIO, MA PUÓ PROVOCARE UN ECCESSIVO
SOVRACCARICO DEL MOTORE ED UN FUNZIONAMENTO MENO EFFICIENTE.
SE LA MACCHINA PRESENTA ECCESSIVE VIBRAZIONI, LA CAUSA PRINCIPALE È
DA IMPUTARE ALLA LAMA. QUESTA PUÒ ESSERE NON PIÙ PERFETTAMENTE
EQUILIBRATA (ES. MANCANZA DI DENTI O AFFILATURA NON ESEGUITA ALLA
PERFEZIONE), OPPURE NON PIÙ PERFETTAMENTE TENSIONANTA. IN ENTRAMBI I CASI, PROCEDERE IMMEDIATAMENTE ALLA SUA SOSTITUZIONE.
FOLLOW THE CUTTING ASSEMBLY DURING THE LOWERING/RAISING OPERATIONS WITH
YOUR HAND ON THE HANDGRIP.
NOTE: PUSHING HARDER ON THE HANDGRIP DOES NOT PRODUCE A HIGHER
CUTTING SPEED BUT CAN OVERLOAD THE MOTOR AND RESULT IN LESS
EFFICIENT OPERATION.
IF THE MACHINE IS VIBRATING TOO MUCH, THE MAIN CAUSE IS TO BE GIVEN TO
THE BLADE. IT IS POSSIBLE THAT THE BLADE IS NO LONGER PERFECTLY
BALANCED (EX. MISSING TEETH OR THE SHARPENING HAS NOT BEEN CARRIED
OUT CORRECTLY), OR NO LONGER PERFECTLY TENSIONED, IN BOTH CASES
PROCEED IMMEDIATELY TO ITS SUBSTITUTION.
Pag. 36
T 55 300 “U.S.”
01_90 0093 02 50 61_03
Volts 230/60 MONOFASE
ITALIANO
ENGLISH
REGOLAZIONE
ANGOLAZIONE 0°
SETTING
0° ANGLE
Può essere necessario eseguire alcune piccole regolazioni sul’angolazione a 0°.
Procedere come segue:
It may be necessary to carry out a few small adjustments on the 0° angle.
Proceed as follows:
1. Interrompere l’alimentazione elettrica e assicurarsi che la testa sia in posizione di r i poso.
2. Utilizzando una chiave Allen 4 mm. (1) allentare la vite (2). Fig. 2
3. Utilizzando una chiave ad una bocca CH 27 (3), ruotare la boccola eccentrica (4) in
un senso o nell’altro. Fig. 3
4. Terminata l’operazione di regolazione, ribloccare nuovamente la vite (2).
1. Disconnect the electric energy and make sure that the head is in rest position.
2. Utilising a 4 mm Allen wrench (1) loosen the screw (2). Fig. 2
3. Utilising a CH 27 wrench (3), rotate the eccentric bushing (4) in one direction or the
other. Fig. 3
4. Once the adjustment operation has been terminated, re-tighten the screw (2).
Verificare la regolazione effettuata, procedendo come segue:
Check the adjustment carried out, proceeding as follows:
5.
5.
6.
7.
8.
9.
10.
Tagliare un listello di sezione rettangolare A. Per chiarezza visiva immaginiamolo
da un lato bianco e dall’altro nero.
Capovolgere uno dei due listelli, ruotandolo di 180° lungo il suo asse longitudinale B.
Accostare i due listelli, in modo da fare combaciare le due teste appoggiandole ad
una squadretta di controllo C. Osservando la zona in prossimità del taglio, esso si
presenterà in tre configurazioni possibili D/E/F.
Il contatto tra i due listelli avviene in modo uniforme e regolare D, in questo caso la
macchina non necessita di regolazione.
Il contatto manca nella parte anteriore dei listelli E. In questo caso occorre ripristinare
l’angolazione a 0°, procedere secondo istruzioni punti 1/2/3/4.
Il contatto manca nella parte posteriore dei listelli F. Anche in questo caso occorre
ripristinare l’angolazione a 0°, procedere secondo istruzioni punti 1/2/3/4.
Cut a rectangular strip (A). To make this operation clearer, we have illustrated the
strip with a black side and a white one.
6. Turn over one of the two strips, by turning it 180° with respect to its longitudinal axis
(B).
7. Place the two strips together to make their two top ends meet. Rest them against a
square (C ). Look at the two cut edges; either of the following three options (D-E-F)
can be possible.
8. Contact between the two strips is perfect (D). In this case, the machine requires no
further adjustment.
9. Contact at the top end of the two strips is lacking (E). In this case you will have to adjust
the 0 ° angle following the instructions of steps 1, 2, 3 and 4.
10. Contact is lacking at the bottom end of the strips (F). In this case you will have to
adjust the 0° angle following the instructions of steps 1, 2, 3 and 4.
Pag. 37
T 55 300 “U.S.”
01_90 0093 02 50 61_03
Volts 230/60 MONOFASE
ITALIANO
ENGLISH
REGOLAZIONE
ANGOLAZIONE 0°
SETTING
0° ANGLE
Fig. 1
3
2
1
4
Fig. 2
Pag. 38
Fig. 3
T 55 300 “U.S.”
01_90 0093 02 50 61_03
Volts 230/60 MONOFASE
ITALIANO
ENGLISH
REGOLAZIONE
ANGOLAZIONE 0°
SETTING
0° ANGLE
Pag. 39
T 55 300 “U.S.”
01_90 0093 02 50 61_03
Volts 230/60 MONOFASE
ITALIANO
ENGLISH
REGOLAZIONE ANGOLAZIONE
45° DX E SX
RT AND LF 45°
ANGLE ADJUSTMENT
Può essere necessario eseguire alcune piccole regolazioni sulle angolazioni di taglio
45° Dx e 45° Sx. Dette regolazioni possono essere eseguite SENZA SPOSTARE LA
MACCHINE E SENZA SMONTARE eventuali accessori ad essa collegati. (Ad esempio:
piani diagrammati). Procedere come segue:
It may be necessary to make small adjustments to the 45° right and 45° left cutting
angles. These adjustments can be made WITHOUT MOVING THE MACHINE AND
WITHOUT DISMANTLING accessories connected to it (e.g. scaled tables). Proceed as
follows:
1
2
3
4
Interrompere l’alimentazione elettrica
1
Tirare la levetta (1) e ruotare la tavola all’angolazione oggetto della regolazione (5).
2
Svitare le viti (2) e rimuovere la mostrina freccia (3), rendendo visibile il tamburino di 3
regolazione;
4
Svitare la vite (4) con chiave allen m/m 4 e utilizzando un normale cacciavite, ruotare in
un senso o nell’altro il tamburino (5). Terminata la regolazione ribloccare la vite (4).
Verificare la regolazione effettuata procedendo come segue:
5 Tagliare contemporaneamente, con angolazione 45°, due listelli (G) ed accostarli fra loro
per formare un angolo di 90° (H).
6 Controllare, con una squadretta di controllo, l’angolo formato dai due listelli. Si potranno
osseravare tre configurazioni, (I) e (L) è necessaria la regolazione, (H) è ok e non
necessità di nessuna correzione.
7 L’angolo formato dai due listelli é minore di 90° (I). É necessario ripristinare l’angolazione
a 90°, procedere secondo istruzioni secondo punti 1/2/3/4.
8 L’angolo formato dai due listelli é maggiore di 90° (L). É necessario ripristinare l’angolazione
a 90°, procedere secondo istruzioni 1/2/3/4.
Turn off the electric power supply.
Pull the lever (1) and turn the blade to the angle being set.
Undo the screws (2) and remove the arrow label (3) to make the adjustment drum visible
(5).
Loosen the screws (4) with a 4 mm Allen wrench and using a normal screwdriver turn
the drum one direction or another (5). Once terminated the adjustment re-tighten the
screws (4).
Check the adjustment as follows:
5 Cut two glass-stop strips simultaneously at 45° and place them end-to-end so as to form
an angle of 90°.
6 Control, using a control back square, the angle formed by the two wood strips. There are
three configurations possible; I and L require adjustment, H is ok and does not require
any corrections.
7 The angle formed by the two wood strips is less than 90° I. It is necessary to reset the
angle to 90° and proceed according to the instructions in points 1/2/3/4.
8 The angle formed by the two wood strips is greater than 90° L. It is necessary to reset the
angle to 90° and proceed according to the instructions in points 1/2/3/4.
OGNI INTERVENTO SULLA MACCHINA DEVE ESSERE EFFETTUATO CON L’ALIMENTAZIONE WHEN MAKING ANY ADJUSTMENT TO THE MACHINE, IT MUST BE DISCONNECTED FROM THE
ELETTRICA INTERROTTA E CON LA TESTA IN POSIZIONE DI BLOCCAGGIO DEL GRUPPO.
ELECTRICITY MAINS AND THE HEAD MUST BE IN THE CUTTING ASSEMBLY LOCKING POSITION.
Pag. 40
T 55 300 “U.S.”
01_90 0093 02 50 61_03
Volts 230/60 MONOFASE
ITALIANO
ENGLISH
REGOLAZIONE ANGOLAZIONE
45° DX E SX
RT AND LF 45°
ANGLE ADJUSTMENT
5
2
3
2
4
1
Pag. 41
T 55 300 “U.S.”
01_90 0093 02 50 61_03
Volts 230/60 MONOFASE
ITALIANO
ENGLISH
OPERAZIONI
DIMANUTENZIONE
MAINTENANCE
OPERATIONS
VERIFICHE QUOTIDIANE
DAILY CHECKS
1. Pulizia dell’alloggiamento dell’utensile.
PERSONALE:
Operatore specializzato.
2. Pulizia generale del piano di lavoro.
PERSONALE:
Operatore macchina.
3. Verifica dell’efficienza dei dispositivi di sicurezza ( vedi pag.26).
PERSONALE:
Operatore specializzato.
4. Pulizia interna del basamento della macchina e rimozione di eventuali residui all’inter
no della bocca di aspirazione.
PERSONALE:
Operatore specializzato.
5. Controllo del tagliente della lama.
PERSONALE:
Operatore specializzato.
In caso di malfunzionamento consultare il Costruttore.
1. Clean the seat of the tool.
PERSONNEL:
Qualified operator.
2. General cleaning of the table.
PERSONNEL:
Machine operator.
3. Check the efficiency of the safety devices (pag.26).
PERSONNEL:
Qualified operator.
4. Clean out the base of the machine and remove any dust in the dust extraction outlets.
PERSONNEL:
Qualified operator.
5. Replace the blade.
PERSONNEL:
Qualified operator.
In the event of a malfunction consult the manufacturer.
VERIFICHE MENSILI
MONTHLY CHECKS
1. Sostituzione della lama.
PERSONALE:
Operatore specializzato.
2. Controllo cavo di alimentazione elettrica.
PERSONALE:
Operatore specializzato.
3. Controllo della tensione della cinghia di trasmissione.
PERSONALE:
Operatore specializzato.
Pag. 42
1. Replacing blade.
PERSONNEL:
Qualified operator.
2. Checking electric power supply cable.
PERSONNEL:
Qualified operator.
3. Check the drive belt.
PERSONNEL:
Qualified operator.
T 55 300 “U.S.”
01_90 0093 02 50 61_03
ITALIANO
ENGLISH
OPERAZIONI
DIMANUTENZIONE
MAINTENANCE
OPERATIONS
MOTORE ELETTRICO
E’
1.
2.
3.
Volts 230/60 MONOFASE
opportuno che l’Utilizzatore della macchina ponga attenzione all’insorgere di:
Temperature anomale (al tatto).
Presenza di odori (surriscaldamento) o fumi (bruciature).
Rumorosità anomale.
MANUTENZIONE RELATIVA AGLI UTENSILI
ELECTRICAL MOTOR
The User must check for:
1. Irregular temperatures, by touching the electrical equipment.
2. Irregular smells (overheating) or smoke (burning).
3. Irregular noise.
MAIMENANCE OF TOOLS
La perdita di prestazioni di taglio negli utensili è da imputare principalmente a tre
importanti fattori:
1. Incrostazioni superficiali.
2. Alterazioni della forma e della struttura del tagliente.
3. Usura normale del tagliente.
There are three main factors which impair cutting
performance:
1. Surface encrustation.
2. Alteration of the shape or structure of the cutting edges.
3. Normal weat.
Le incrostazioni superficiali sono causate da resine presenti nel legno che, per
surriscaldamento. Aderiscono alla superficie del tagliente formando una patina che integra i trucioli, impedendone il regolare deflusso Si rende così necessario eseguire, almeno settimanalmente, la pulizia della lama utilizzando solventi capaci di ammorbidire i
grumi. Si consiglia di ricorrere il meno possibile ad interventi meccanici di scrostatura
mediante utilizzo di lamine metalliche, spatole o abrasivi di qualsiasi genere. Liquidi idonei allo scopo si trovano in commercio; si può utilizzare anche una soluzione di acqua e
soda caustica (molto diluita). Non si faccia mai ricorso a soluzioni acide che possano
sviluppare vapori infiammabili e/o tossici.
Surface encrustation is caused by the presence of resin in the wood which, when heated
by the action of the blade, forms a patina to which wood particles become stuck. Blades
should be cleaned at least once a week using solvents capable of softening this patina.
The use of mechanical means to remove the encrustation, such as metal blades, spatulas
or abrasives of any type, should be avoided if possible. Commercial cleaning liquids
specifically far this purpose are available; alternatively a weak soitition of water and caustic
soda may be used. Never use acid solutions, as they can produce inflammable and toxic
vapours.
Afreraflona to the shape or structure of the cutting edges are mainly due to local fractures,
Le alterazioni della forma e della struttura del tagliente sono dovute principalmente a small cracks or local deformation. Pay particular attention to these defects as they make
rotture, piccole incrinature o deformazioni localizzate. Bisogna prestarvi la massima at- the tool unsuitable for accomplishing any operation.
tenzione poiché pregiudicano l’idoneità dell’utensile a proseguire la lavorazione.
The normal wear of the cutting edge is caused by rounding through the repeated penetration
L’usura normale del tagliente è causata dall’arrotondamento dovuto al continuo ripetersi of the tool in the wood. Worn tools must be sharpened correctly to restore the correct
di penetrazioni nel legno; per risolvere questo problema è necessario procedere senza
indugio all’operazione di affilatura che ha lo scopo di ripristinare la geometria esatta del
tagliente.
Pag. 43
01_90 0093 02 50 61_03
T 55 300 “U.S.”
Volts 230/60 MONOFASE
ITALIANO
ENGLISH
SOSTITUZIONE
LAMA
REPLACING
THE BLADE
Procedura per eseguire la sostituzione dell’utensile:
To replace the tool proceed as follows:
1
1
2
3
4
5
Svitare le viti (1) e asportare la protezione (2). Per una maggiore praticità si consiglia di
appoggiare la protezione sulla tavola girevole della macchina,.
Utilizzando la chiave Allen 6 mm. e la chiave fissa a una bocca CH27, svitare il dado di
serraggio ed asportare la flangia esterna.
Inserire la lama sul mandrino.
Inserire la flangia esterna ed il dado di serraggio. Bloccare a fondo il dado di serraggio
utilizzando le chiavi CH 27 e ALLEN 6 mm. ATTENZIONE: Prima di eseguire il montaggio
della flangia esterna verificare l’assoluta pulizia della stessa. Verificare l’assenza di grasso
oppure di lubrificante tra la lama e le due flange di bloccaggio.
Rimontare la protezione (2) e fissarla al gruppo operante della troncatrice per mezzo
delle viti (1).
2
3
4
5
Loosen the screws (1) and remove the guard (2). For practicality it is recommended that
you lean the guard on the machine’s turntable.
Using the 6 mm Allen wrench and the CH27 wrench, loosen the lock nut and remove the
external flange.
Insert the blade into the mandrel.
Insert the external flange and the fixing nut. Lock the fixing nut at the bottom using a CH
27 wrench and an 6 mm Allen wrench. ATTENTION: Before carrying out the assembly of
the external flange make sure that it is absolutely clean. Check that it is free of grease or
lubricant between the blade and the two locking flanges.
Reassemble the guard (2) and fix it to the operating unit of the mitre saw the using
screws (1).
É VIETATO TASSATIVAMENTE L’USO DI UTENSILI SALDATI OPPURE INCRINATI.
THE USE OF WELDED OR CRACKED TOOLS IS PROHIBITED.
Si raccomanda l’utilizzo di guanti di protezione durante l’esecuzione dell’operazione di
inserimento lama. Quando si rimonta la lama accertarsi del corretto inserimento, relativamente al senso di rotazione, come indicato nell’apposita freccia presente sul carter
coprilama. Controllare, inoltre, tassativamente che il diametro esterno e il diametro
interno dell’utensile corrispondano a quelli indicati nella apposita targa fissata al
basamento della troncatrice. Verificare che l’albero portautensile e la flangia di serraggio
esterna siano esenti da grasso e/o olio. FARE ATTENZIONE A NON LASCIARE ALL’INTERNO DELLE CUFFIE UTENSILI DI QUALSIASI GENERE.
Operators must wear protective gloves when they are fitting tools. Make sure the tool is
properly fitted and that it turns in the right direction, as shown by the arrow on the blade
guard. Furthermore, ensure that the outer and inner diameters of the tool correspond to
those indicated on the plate fastened to the base of the mitre saw. Make sure the arbor
and outer fixing flange are free of grease and/or oil. MAKE SURE THAT NO TOOLS ARE
LEFT INSIDE THE BLADE GUARD.
OGNI INTERVENTO SULLA MACCHINA DEVE ESSERE EFFETTUATO CON WHEN MAKING ANY ADJUSTMENT TO THE MACHINE, IT MUST BE
L’ALIMENTAZIONE ELETTRICA INTERROTTA E CON LA TESTA IN POSI- DISCONNECTED FROM THE ELECTRICITY MAINS AND THE HEAD MUST
ZIONE DI BLOCCAGGIO DEL GRUPPO.
BE IN THE CUTTING ASSEMBLY LOCKING POSITION.
Pag. 44
T 55 300 “U.S.”
01_90 0093 02 50 61_03
1
Volts 230/60 MONOFASE
ITALIANO
ENGLISH
SOSTITUZIONE
LAMA
REPLACING
THE BLADE
2
Fig. 1
Fig. 3
Fig. 2
1
Fig. 4
Fig. 5
2
Fig. 6
Pag. 45
T 55 300 “U.S.”
Volts 230/60 MONOFASE
01_90 0093 02 50 61_03
ITALIANO
ENGLISH
REGOLAZIONE PUNTO
DI FINE CORSA INFERIORE
ADJUSTING LOWER
STOP POSITION
Può essere necessario eseguire alcune piccole regolazioni del punto di fine corsa It may be necessary to make some small adjustments to the lower stop position. Proceed
inferiore. Procedere come segue:
as follows:
1.
2.
3.
Interrompere l’alimentazione elettrica,
Allentare la vite all’interno del dado (1),
Avvitare il dado (1) per abbassare il punto di arresto lama.
1. Turn off the electricity supply.
2. Slacken the bolt inside the nut (1).
3. Tighten up the nut (1) to lower the blade stop point.
Verificare quanto eseguito eseguendo qualche taglio di controllo. Al termine della Check the adjustment by making a few test cuts. After completing the adjustment tighten
regolazione riavvitare la vite all’interno del dado (1).
up the bolt inside the nut (1).
OGNI INTERVENTO SULLA MACCHINA DEVE ESSERE EFFETTUATO CON L’ALIMENTA- WHEN MAKING ANY ADJUSTMENT TO THE MACHINE, IT MUST BE DISCONNECTED
ZIONE ELETTRICA INTERROTTA E CON LA TESTA IN POSIZIONE DI BLOCCAGGIO DEL FROM THE ELECTRICITY MAINS AND THE HEAD MUST BE IN THE CUTTING
GRUPPO.
ASSEMBLY LOCKING POSITION.
1
Pag. 46
T 55 300 “U.S.”
01_90 0093 02 50 61_03
Volts 230/60 MONOFASE
ITALIANO
ENGLISH
SCHEMA
ELETTRICO
ELECTRICAL
DIAGRAM
1
2
1
INTERRUTTORE A BILANCIERE CON RITORNO A MOLLA
SWITCH WHIT RETURN SPRING
2
CONDENSATORE
CAPACITOR
Pag. 47
T 55 300 “U.S.”
01_90 0093 02 50 61_03
PARTI DI RICAMBIO
SPARE PARTS
Pag. 48
Volts 230/60 MONOFASE
T 55 300 “U.S”
01_90 0093 02 50 61_03
Volts 230/60 MONOFASE
ITALIANO
PARTI
DI RICAMBIO
SPARE
PARTS
In ogni pagina del capitolo “Parti di ricambio” sono individuate le parti principali d’ogni
gruppo della macchina. Tali parti sono indicate univocamente da un numero progressivo. Nella tabella sottostante le fotografie, sono indicati tali numeri, i codici e una breve
descrizione delle parti corrispondenti ai numeri menzionati nelle fotografie. Al momento dell’ordine di una qualsiasi parte di ricambio dovranno essere inviati all’ OMGA Inc.
i seguenti dati:
Each page of the “Spare parts” section illustrates one of the main units of the machine.
Each part of a unit is identified by a progressive number. The table under the photograph
contains these numbers, the relevant identification codes and a short description of the
part. When ordering spare parts from OMGA Inc., always quote the following information:
1.
Codice della macchina (in copertina sotto il logo OMGA).
2.
Modello della macchina.
3.
Codice della/e parte/i di ricambio.
4.
Quantità.
Non saranno accettati ordini senza i dati sopracitati.
1.
Machine code number (on the cover under the OMGA logo).
2.
Machine model.
3.
Code(s) of the spare part(s).
4.
Quantity
Orders not including the above information will not be accepted.
Pag. 49
T 55 300 “U.S”
01_90 0093 02 50 61_03
Volts 230/60 MONOFASE
ITALIANO
ENGLISH
PARTI
DI RICAMBIO
SPARE
PARTS
7
3
4
5
8
6
9
1
N°
CODE
1
530000140000
2
0801200700
3
2
ITALIANO
ENGLISH
DESCRIZIONE
DESCRIPTION
GRUPPO BLOCCAGIO TAVOLA
LOCKING UNIT
LEVETTA SBLOCCAGGIO
LEVER
4362
SPONDA SX
LH FENCE
4
4361
SPONDA DX
RH FENCE
5
0801004200
VOLANTINO
HANDWHELL
6
3980
MOSTRINA FRECCIA
ARROW STICKER
7
4663
TAVOLA GIREVOLE
ROTARY TABLE
8
3718
BASAMENTO
BASE
9
1684
INSERTO TAVOLA
TABLE INSERT
Pag. 50
T 55 300 “U.S”
01_90 0093 02 50 61_03
Volts 230/60 MONOFASE
ITALIANO
PARTI
DI RICAMBIO
SPARE
PARTS
5
6
1
7
8
4
9
2
3
N°
1
CODE
ITALIANO
ENGLISH
DESCRIZIONE
DESCRIPTION
520010025000 GRUPPO MOTORE
MOTOR UNIT
2
21006
VENTOLA
FAN
3
61569
CALOTTA VENTOLA
FAN COVER
4
13079
CALOTTA MORSETTIERA
TERMINAL BOARD COVER
5
1501500250
STATORE MONOFASE
SINGLE - PHASE STATOR
6
0600200500
CUSCINETTO ANTERIORE
FRONT BEARING
7
0600106200
CUSCINETTO POSTERIORE
REAR BEARINGS
8
9
830010675800 ALBERO ROTORE
0700100541
CONDENSATORE
ROTOR SHAFT
CAPACITOR
Pag. 51
T 55 300 “U.S”
01_90 0093 02 50 61_03
Volts 230/60 MONOFASE
ITALIANO
ENGLISH
PARTI
DI RICAMBIO
SPARE
PARTS
8
9
5
1
4
6
2
3
7
CODE
N°
1
ITALIANO
ENGLISH
DESCRIZIONE
DESCRIPTION
660020000000 GRUPPO MOLLA DI RITORNO
UNIT RETURN SPRING
2
1857
MOLLA INTERNA
BALANCE SPRING
3
1889
ATTACCO MOLLA INFERIORE
LOWER SPRING FITTING
4
47
PARACOLPO
BUFFER
5
1157
DADO CIRCOLARE
CIRCULAR NUT
6
24607
FLANGIA SINISTRA
LH FLANGE
7
2817
FLANGIA DESTRA
RH FLANGE
8
0502109300
INTERRUTTORE A BILANCIERE CON MOLLA DI RITORNO
SWITCH WHIT SPRING RETURN
9
3965
IMPUGNATURA
HANDGRIP
Pag. 52
T 55 300 “U.S”
01_90 0093 02 50 61_03
Volts 230/60 MONOFASE
ITALIANO
PARTI
DI RICAMBIO
SPARE
PARTS
9
N°
1
CODE
1
8
6
7
5
4
2
ITALIANO
ENGLISH
DESCRIZIONE
DESCRIPTION
570130330000 GRUPPO RIPARO Ø 300
3
GUARD ASSEMBLY Ø 300
2
24264
PROTEZIONE LAMA IN POLICARBONATO
POLYCARBONATE BLADE GUARD
3
24793
INSERTO PROTEZIONE
GUARD INSERT
4
24269
SUPPORTO PROTEZIONE
SUPPORT
5
24265
BIELLA
CONNECTING ROD
6
21017
AMMORTIZZATORE
SHOCK ASORBER
7
9693
MOLLA INTERNA
SPRING FITTING
8
21014
ATTACCO TIRANTE
TIE-ROD CONNECTION
9
1832
CUFFIA
BLADE GUARD
Pag. 53
OMGA S.p.A.
Via Carpi-Ravarino, 146 - 41010 LIMIDI DI SOLIERA (MO) - ITALY
Tel. (059) 897333 - Fax. (059) 565000 - Fax Intl. Line ++39 59 850276
E-Mail: [email protected]