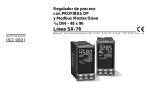
1
Pag. 1 di 32
I
ISTRUZIONI PER L'USO E L’INSTALLAZIONE
INSTRUCTIONS POUR L'UTILISATION ET L’INSTALLATION
OPERATING AND INSTALLATION INSTRUCTIONS
GEBRAUCHSANWEISUNGEN UND INSTALLATION
Barriera irreversibile per controllo traffico veicolare - Barrière irréversible pour le contrôle du trafic véhiculaire
Irreversible barrier for vehicular traffic control - Selbsthemmende Schranke zur Verkehrssteuerung
ECO RAPID PARK
Mod.
300/12”x300/12”
Fig.1
I
1000/39”
1065/42”
3000/118”
Misure in mm/inch - Mesures en mm/inch - Measurements in mm/inch - Abmessungen in mm/inch
IMPORTANTI ISTRUZIONI PER LA SICUREZZA
ATTENZIONE - É IMPORTANTE PER LA SICUREZZA DELLE PERSONE
CHE VENGANO SEGUITE TUTTE LE ISTRUZIONI
1° - Questo libretto d'istruzioni è rivolto esclusivamente a del personale specializzato che
sia a conoscenza dei criteri costruttivi e dei dispositivi di protezione contro gli infortuni per i
cancelli, le porte e i portoni motorizzati (attenersi alle norme e alle leggi vigenti).
2° - Tenete i comandi dell'automatismo (pulsantiera, telecomando etc.) fuori dalla portata dei
bambini. I comandi devono essere posti ad un’altezza minima di 1,5mt dal suolo e fuori dal
raggio d’azione delle parti mobili.
3° - Prima di eseguire qualsiasi operazione di installazione, regolazione, manutenzione
dell’impianto, togliere la tensione agendo sull’apposito interruttore magnetotermico collegato
a monte dello stesso.
ATTENZIONE - UNA SCORRETTA INSTALLAZIONE PUÓ PORTARE A DANNI RILEVANTI
LA DITTA RIB NON ACCETTA NESSUNA RESPONSABILITÀ per eventuali danni provocati
dalla mancata osservanza nell'installazione delle norme di sicurezza e le leggi attualmente in
vigore.
CONSERVARE CON CURA QUESTE ISTRUZIONI
F
INSTRUCTIONS IMPORTANTES POUR LA SECURITE
GB
IMPORTANT SAFETY INSTRUCTIONS
WARNING - IT IS IMPORTANT FOR THE SAFETY OF PERSONS
TO FOLLOW ALL INSTRUCTIONS
1° - This instruction booklet is exclusively dedicated to specialized staff who are aware of
the construction criteria and of the accident prevention protection devices for motorized
gates and doors (according to the current regulations and laws).
2° - Keep the automatic control (push-button, remote control, etc) out of the reach of children.
The control systems must be installed at a minimum hight of 1.5m from the ground surface
and not interfere with the mobile parts.
3° - Before starting any installation and operation or maintenance work make sure to cut off
power supply by turning the general magnetothermic switch off.
WARNING - INCORRECT INSTALLATION CAN LEAD TO SEVERE INJURY
R.I.B. IS NOT LIABLE for any damage caused by not following the safety regulations and laws at
present in force not being observed during installation.
SAVE THESE INSTRUCTIONS
D
WICHTIGE ANWEISUNGEN FÜR DIE SICHERHEIT
IL EST IMPORTANT POUR LA SECURITE DES PERSONNES
DE SUIVRE ATTENTIVEMENT TOUTES INSTRUCTIONS
1° - Ce manuel d'instruction est adressé seulement au personnel specialisé qui a une
connaissance des critères de construction et des dispositifs de protection contre les
accidents en ce qui concerne les portails, les portes et les portes cochères motorisées
(suivre les normes et les lois en vigueur).
2° - Gardez les commandes de l'automatisme (boutons poussoirs, télécommande etc.) hors de la
portée des enfants. Les commandes doivent être placées au minimum à 1,5 m du sol, et
hors de rayon d’action des pièces mobiles.
3° - Avant d’exécuter quelconques opérationd’installation, réglage, entrietien de l’installation,
couper la tension avec l’interrupteur magnétothermique approprié connecté en amont.
ACHTUNG - UM DIE SICHERHEIT VON PERSONEN VOLLKOMMEN
GARANTIEREN ZU KöNNEN, IST ES WICHTIG, DASS ALLE
1° - Diese Montageanweisung ist ausschließlich für geschultes Fachpersonal bestimmt,
das mit den Montagevorschriften und den Schutzvorrichtungen zur Verhinderung von
Unfällen bei motorisierten Toren vertraut ist (nach den aktuellen Normen und Gesetzen).
2° - Bewahren Sie die Geräte für die automatische Bedienung (Drucktaster, Funksender, u.s.w.)
an einem für Kinder unzugänglichen Platz auf. Die Steuerungen müssen auf einer
Mindesthöhe von 1,5 m angebracht werden und sich ausserhalb der Raumes der
bewegenden Teile befinden.
3° - Bevor Sie eine Installation oder Wartungsarbeit an der Anlage durchführen, müssen Sie
kontrollieren, dass die Anlage spannungsfrei geschaltet ist.
ATTENTION - UNE INSTALLATION INCORRECTE PEUT CAUSER DE GRANDS DOMMAGES
L'ENTREPRISE R.I.B. N'ACCEPTE AUCUNE RESPONSABILITÉ pour des dommages
éventuels provoqués par le manque d'observation lors de l'installation des normes de sécurité et
lois actuellement en vigueur.
ACHTUNG - EINE FALSCHE INSTALLATION KANN ZU BEDEUTENDEN SHÄDEN FÜHREN
R.I.B. HAFTET NICHT für eventuelle Schäden, die bei der Installation durch Nichtbeachtung der
jeweils gültigen Sicherheitsvorschriften entstehen.
INSTALLATIONSVORSCHRIFTEN BEACHTET WERDEN
GARDER MODE D’EMPLOI
F
GB
D
Pag. 2 di 32
I
I
F
GB
D
INDICE
Caratteristiche Tecniche ..........................................................................................pag.3
Montaggio ECO RAPID PARK ................................................................................pag.4
Sblocco d’emergenza, Regolazione finecorsa ........................................................pag.4
Regolazione molle di bilanciamento ........................................................................pag.4
Connessioni elettriche e memorizzazione tempi ....................................................pag.5
Funzionamento Accessori di Comando e Sicurezza, Manutenzione.......................pag.6
Accessori ..............................................................................................................pag.27
Dichiarazione di Conformità...................................................................................pag.30
Esploso ..................................................................................................................pag.32
F
INDEX
Caractéristique techniques ......................................................................................pag.9
Montage de la ECO RAPID PARK ........................................................................pag.10
Déblocage d’urgence, reglace fins de course, ......................................................pag.10
Reglage du ressorts d’équilibrage .........................................................................pag.10
Branchements électriques, memorasation des temps ..........................................pag.11
Fonctionnement des accessoires de sécurité et électriques, entretien .................pag.12
Accessoires ..........................................................................................................pag.27
Déclaration de conformité......................................................................................pag.30
Vue éclatée............................................................................................................pag.32
I
FUNZIONI DISPONIBILI DEL QUADRO ELETTRONICO
EUROBAR (VRS. 05 O SUP.) INCORPORATO
Funzionamento automatico
Funzionamento passo-passo
Funzionamento modalità park
Esclusione chiusura automatica
Autotest del microprocessore su ingressi sicurezze
Attivazione tempo di prelampeggio
Attivazione spia di segnalazione di cancello aperto
Led di segnalazione stato della scheda
Velocità lenta in accostamento
Gestione elettromagnete
Possibile esclusione fotocellule in apertura
Scheda per accensione luce box di cortesia (OPTIONAL)
F
FONCTION DISPONIBLES DE COFFRET
ELECTRONIQUE EUROBAR (VRS. 05 O SUP.)
INCORPORE
Fonctionnement automatique
Fonctionnement pas-à-pas
Fonctionnement modalité park
Exclusion fermeture automatique totale
Auto-test du microprocesseur sur les entrées de sécurité
Activation du temps de pré-clignotement
Activation voyant de signalisation porte ouverte
Leddiode électroluminescente ou affichage d'état de la carte
Vitesse lente à l'approche
Gestion électro-aimants pour barrières
Exclusion cellules photoélectriques à l'ouverture
Carte pour l'allumage de la boîte éclairage de courtoisie (OPTIONAL)
GB
INDEX
Technical data .......................................................................................................pag.15
Assembling ECO RAPID PARK.............................................................................pag.16
Emergency release, Limit switch setting ...............................................................pag.16
Balacing springs adjustment..................................................................................pag.16
Electric connections, Timer setting ........................................................................pag.17
Functionning of safety accessories and devices, Maintenance.............................pag.18
Accessories ...........................................................................................................pag.27
Declaration of compliance .....................................................................................pag.30
Exploded view........................................................................................................pag.32
D
INHALT
Technische eingenschaften ...................................................................................pag.21
Montage ECO RAPID PARK .................................................................................pag.22
Notfallfreigabe, einstellung Endschalter, Wartung ................................................pag.22
Einstellung der Ausgleichsfedern ..........................................................................pag.22
Elektoanschlüsse, Speichern der Zeiten ...............................................................pag.23
Betriebsweise des Steuerungszubehörs und Elektrische Sicherheitsvorrichtungen....pag.24
Zubehör ................................................................................................................pag.27
Übereinstimmnugserklärung..................................................................................pag.30
Explosionszeichnungen .........................................................................................pag.32
GB
AVAILABLE FUNCTIONS OF THE BUILT-IN
EUROBAR (VRS. 05 O SUP.) ELECTRONIC CONTROL
BOARD
Automatic control
Step by step control
Operation in PARK modality
Exclusion of the total automatic close function
Microprocessor autotest on the security entries
Activation of the pre-flashing time
Activation of the gate open indicator led
Led or display to segnalise the board state
Slow speed in approach
Elettromagnet operation for barriers
Exclusion of photocells during opening
Control for 1 relay card to turn on the box lamp (OPTIONAL)
D
VERFÜGBARE FUNKTIONEN DES EINGEBAUTEN
ELEKTRONISCHEN STEUERTAFEL EUROBAR (VRS.
05 O SUP.)
Automatischer Betrieb
Schrittweiser Betrieb
Park Betrieb
Ausschluß der automatioschen Schließung
Autotest des Mikroprozessors für Sicherheitseintritte
Zeitbetätigung des Vorblinkens
Betätigung der Leuchtdiode, die das geöffnete Tor signalisiert
Leuchtdiode oder Bildschirmanzeige des Zustandes der Karte
Niedrige Geschwindigkeit beim Endstellung
Betrieb des Elektromagnets für Schranken
Ausschluß der Liktschranken beim Öffnen
Karte zur Betätigung der Hoflichter (OPTIONAL)
Pag. 3 di 32
ITALIANO
➀
➀ Barriera ECO RAPID PARK
➁ Fotocellule di sicurezza
➂ Colonnina porta fotocellula zincata
➃ Costa a fotocellula o pneumatica
➄ Sensore magnetico
- Selettore a chiave
- Antenna radio
➃
➁
➁
➂
➂
➁
➁
➂
➂
➁
➁
➂
➂
➄
Fig.2
Componenti da installare secondo la norma EN12453
TIPO DI COMANDO
a uomo presente
a impulsi in vista (es. sensore)
a impulsi non in vista (es. telecomando)
automatico
USO DELLA CHIUSURA
Persone esperte
Persone esperte
(fuori da area pubblica*) (area pubblica)
A
B
C
C
C
CeD
CeD
CeD
Uso illimitato
CeD
CeD
CeD
* esempio tipico sono le chiusure che non accedono a pubblica via
A: Pulsante di comando a uomo presente (cioè ad azione mantenuta), come cod. ACG2020
B: Selettore a chiave a uomo presente, come cod. ACG1010
C: Costole come cod. ACG3010
D: Fotocellule, come cod.ACG8026
CARATTERISTICHE TECNICHE ECO RAPID PARK
Motoriduttore irreversibile ambidestro utilizzato per movimentare aste
lunghe fino a 5 mt.
Il motore è protetto da surriscaldamenti grazie a una sonda termica che
ne interrompe momentaneamente l'alimentazione.
Il gruppo riduttore con corona e vite senza fine a bagno d'olio è dotato
di sblocco d'emergenza.
La barriera è inoltre accessoriata di quadro elettronico di comando,
lampeggiatore, finecorsa elettrici, finecorsa meccanici e molle di
bilanciamento a compressione.
N.B. È obbligatorio uniformare le caratteristiche dell’impianto alle
norme e leggi vigenti.
CARATTERISTICHE
TECNICHE
ECO RAPID PARK
Lunghezza max.asta
m
3
Tempo di apertura
s
1,5
Coppia max sull'albero porta asta
Nm
50
230V~ 50Hz
Alimentazione e frequenza CEE
Potenza motore
W
190
Assorbimento
A
0,95
Condensatore
µF
10
n° di cicli
n°
1200 - 1,5s/2s
IP MELLANA 100
Tipo di olio
Peso max
Kg
62
Temperatura di lavoro
°C
-10 ÷ +70
Grado di protezione
IP
557
I
T
A
L
I
A
N
O
I
T
A
L
I
A
N
O
Pag. 4 di 32
MONTAGGIO DELLA ECO RAPID PARK
Dopo aver cementato il basamento di fissaggio (cod.ACG8110) nella posizione da Voi
ritenuta ideale, procedete nel fissaggio della ECO RAPID PARK utilizzando i dadi in
dotazione e una chiave esagonale n°19.
Di seguito eseguite il montaggio dell'asta che deve essere effettuato in tre fasi.
1°-A terra si devono assemblare l'asta con il mozzo porta asta utilizzando la vite in
dotazione e una chiave a brugola n°6 (per meglio comprendere le voci citate osservare
la Fig.3-10-11).
2°-La barriera viene fornita con la molla di bilanciamento rilasciata, quindi l'asta con il suo
mozzo deve essere inserita in posizione verticale nell'albero porta asta.
3°-Il fissaggio finale dell'asta si esegue tramite la vite a testa cilindrica con esagono
incassato in dotazione utilizzando la chiave "RIB", dopo di che si applicano i tappi .
L'elettroriduttore è di tipo irreversibile e non necessita di alcun tipo di bloccaggio esterno per
mantenere un'efficace posizione di chiusura.
SBLOCCO DI EMERGENZA
Da effettuare dopo aver tolto l’alimentazione elettrica al motore.
Fig.3
In caso di mancanza di corrente, per poter aprire manualmente la sbarra è necessario
sbloccare l’elettroriduttore.
Per far ciò si utilizza la chiave RIB in dotazione e la si gira manualmente in senso antiorario
fino al fermo (Fig.4).
In questo modo l’asta della barriera è indipendente dal riduttore e la si può muovere
manualmente.
Una volta tornata la corrente si gira la chiave in senso orario fino a bloccare con forza.
REGOLAZIONE FINECORSA
Normalmente la barriera Vi viene fornita con i finecorsa già regolati per permettere il movimento
ideale dell'asta.
In caso di errato livellamento della piastra da cementare, l'asta potrebbe non risultare
perfettamente orizzontale o verticale con un conseguente cattivo risultato estetico
dell'installazione.
Per ovviare a ciò è possibile modificare la corsa dell'asta intervenendo sui finecorsa meccanici ed
elettrici (Fig. 5):
1°-A barriera sbloccata, utilizzate una chiave esagonale n°19 per sbloccare i dadi di fermo (A) e
una chiave a brugola n°8 per svitare o riavvitare le viti a testa svasata (B) di regolazione dei
finecorsa meccanici in modo da delimitare immediatamente il nuovo arco descritto dall'asta
della barriera.
2°-Così facendo i finecorsa elettrici sono ora da regolare in modo tale da delimitare il movimento
elettrico del motore per la nuova corsa che l'asta deve descrivere. Per far ciò è necessario
utilizzare una chiave a brugola n°3 con la quale vengono rilasciate le due camme (C) di
registro finecorsa. Una volta che l'asta è posizionata in base alla battuta di fermo meccanico è
sufficiente ruotare la camme interessata in modo tale da far scattare il microinterruttore di
finecorsa
3° - Ribloccare le camme.
Fig.4
N.B.: Se durante il movimento non interviene la funzione di rallentamento il problema non è
dovuto ad un malfunzionamento della centralina.
La mancanza del rallentamento è dovuta alla errata regolazione delle camme dei finecorsa
elettrici.
In particolare se in apertura (o in chiusura) il finecorsa elettrico di rallentamento interviene prima
che si sia disimpegnato il finecorsa elettrico di rallentamento del lato opposto, il comando di
rallentamento viene ignorato.
E' sufficiente distanziare tra loro leggermente le camme per ripristinare il funzionamento.
A
C
B
REGOLAZIONE MOLLE DI BILANCIAMENTO
Normalmente la barriera Vi viene fornita con le molle di bilanciamento già registrate.
In caso vengano aggiunti pesi all'asta (es. coste pneumatiche o a fotocellula) è necessario
ribilanciare l'asta (Fig 6).
Se l'asta durante il movimento di discesa tende a precipitare, agire sulle molle di
bilanciamento nel seguente modo:
1°- A motoriduttore bloccato sollevare elettricamente l'asta fino alla verticale.
2°- Dopo aver tolto l'alimentazione elettrica al motore, avvitare la ghiera in senso orario in
modo tale da aumentare il grado di compressione delle molle durante il movimento.
Per verificare il corretto bilanciamento dell'asta sbloccare il motoriduttore e muovere l'asta
con la mano. L'asta deve leggermente tendere a salire.
Fig.5
TABELLA REGOLAZIONE MOLLE
LEGENDA
a - Asta 80x40
b - Asta Ø80
c - Costa a fotocellula “Fotocosta”
lista
lista codici
H
N° MOLLE
a
a+c
ACG8516
ACG8516 + ACG7090 + ACG7095 + ACG8610
25mm
15mm
2xØ4
2xØ4,5
b
ACG8491 + ACG8536
35mm
2xØ4
H
Fig.6
Pag. 5 di 32
Fig.7
NL1
MORSETTIERA J1
- Alimentazione 230V 50/60 Hz.
CONNETTORE J2
Alimenta tramite una schedina opzionale (Scheda 1 Relé cod.ACQ9075) una lampada di
cortesia per un tempo settabile ad 1 secondo oppure a 3 minuti (40W max).
Oppure alimenta una schedina opzionale per la gestione di un elettromagnete (fornita
con il Set colonnina con magnete cod. ACG8070).
Per informazioni inerenti le schede ausiliarie richiedere le istruzioni specifiche di
installazione.
L/L
U
V/W
MORSETTIERA J3
- Uscita alimentazione lampeggiatore elettronico 230Vac.
- Comune motore
- Invertitori motore
MORSETTIERA J4
- Contatto (NA), in funzionamento normale (Fig. 8) è operativo come impulso
singolo, in funzionamento park (Fig. 9) abilita la chiusura dopo 1 secondo
dall’avvenuto transito del veicolo.
IN-PARK - Contatto (NA),in funzionamento park se collegato ad un sensore magnetico o
ad una fotocellula segnala la presenza del veicolo in prossimità dell’apertura.
9
- Pulsante di apertura (NA).
11
- Pulsante di chiusura (NA).
8
- Comune dei contatti.
K-OUT
S2 - MICROINTERRUTTORI PER IL SETTAGGIO DELLA CENTRALINA
- A disposizione per implementazioni future.
- Lampeggiatore
- uscita fissa
- uscita lampeggiante -default
- Fotocellule
- interrompono sia in apertura che in chiusura.
- interrompono solo in chiusura - default
- Tipo di Funzionamento
- funzionamento dedicato a parcheggi (PARK).
- funzionamento normale - default
- Tempo di attesa di Chiusura Automatica (max 5 minuti).
- abilitato
- disabilitato - default
- Prelampeggio
- il lampeggiatore è attivo 3 sec. prima del motore.
- il lampeggiatore è attivo contemporaneamente al motore - default
S3 - RESET
Ogni volta che viene eseguito un cambiamento alla posizione dei Dip, ponticellate
successivamente S3 almeno per un secondo o la centralina non accetterà le nuove
impostazioni (questa operazione può essere eseguita anche con un cacciavite).
Dip 1
Dip 2
ON
OFF
Dip 3
ON
OFF
Dip 4
ON
OFF
Dip 5
ON
OFF
Dip 6
ON
OFF
SEGNALAZIONI LED
L1 - (Giallo) - Segnala la presenza delle tensioni secondarie (12Vdc).
L2 - (Rosso) - Indicatore memorizzazione tempi.
MEMORIZZAZIONE TEMPI
Operazione da eseguire a sbarra chiusa (con finecorsa di chiusura premuto).
NOTA - Gli accessori di sicurezza sono attivi durante l’apertura e la programmazione
tempi, pertanto è necessario evitare transiti in prossimità dell’impianto.
Se questo dovesse succedere, si avrà il fermo sbarra e sarà necessario riposizionare in
chiusura la sbarra ed eseguire una nuova programmazione.
Se una delle sicurezze viene impegnata in chiusura, non sarà necessario eseguire una
nuova programmazione in quanto i tempi sono già stati memorizzati, quindi la sbarra
MORSETTIERA J5
Morsetti di collegamento del cavo coassiale d’antenna (tipo RG58-52).
N.B.: Fate attenzione che la massa non tocchi il filo centrale del cavo perché può
limitare la portata dei telecomandi.
10
LSS
2
4
7
8
D+/D-
MORSETTIERA J6
- Contatto fotocellule e coste (NC)
- Contatto finecorsa che abilita il rallentamento del motore sia in apertura che
in chiusura (NA)
- Pulsante di Stop (NC)
- Contatto finecorsa che ferma l’apertura (NC)
- Contatto finecorsa che ferma la chiusura (NC)
- Comune dei contatti
- Alimentazione 12Vdc per fotocellule (ATTENZIONE al loro settaggio!)
CONNETTORE J7
Connettore per l'alloggiamento di radio ricevitori (verranno alimentati a 12Vdc)
effettuerà un’inversione in apertura e ad un successivo comando richiuderà.
Normalmente la sbarra viene fornita con i tempi di funzionamento già inseriti, tuttavia il
tempo di attesa prima della chiusura automatica risulta essere di pochi secondi.
Per personalizzare questo tempo è obbligatorio procedere ad una nuova memorizzazione
come segue:
1) Agendo sullo sblocco manuale chiudere la sbarra ed accertarsi che il finecorsa di
chiusura sia premuto dalla camme, poi bloccare la sbarra avvitando lo sblocco.
2) Premere il pulsante S1 e rilasciarlo immediatamente, il led L2 (rosso) si accende e
rimane acceso.
I
T
A
L
I
A
N
O
I
T
A
L
I
A
N
O
Pag. 6 di 32
3) Premere il pulsante S1 e rilasciarlo immediatamente, la sbarra esegue l’apertura e si
ferma al raggiungimento del finecorsa di apertura (il Led 2 rimane acceso).
4) Attendere il tempo di pausa prima della chiusura automatica max 5 minuti; oltre i quali
la sbarra richiuderà automaticamente. Durante l’attesa il led L2 rimane acceso.
5) Premendo il pulsante S1 (il led L2 si spegne) si fissa il tempo di attesa. La sbarra si
chiude e si ferma raggiungendo il finecorsa di chiusura.
NOTA: ll tempo di attesa prima di ottenere la chiusura automatica verrà determinato solo
se “Dip 5 su ON”.
SCHEMA FUNZIONAMENTO PARK (Dip 4 su ON - Fig. 9)
L’ingresso “IN-PARK” (NA) deve essere collegato ad un sensore magnetico posizionato
nelle immediate vicinanze della sbarra, per segnalare la presenza di una autovettura
prossima al transito (se non si vuole usufruire di questa funzione eseguire un ponticello tra
i morsetti 8 e IN-PARK).
L’ingresso “K-OUT PARK” deve essere collegato al contatto “6” (NA) delle fotocellule
situate in corrispondenza della linea di completamento del passaggio dell’autovettura (Per
ottenere la chiusura al passaggio completo della vettura).
Pertanto l’ingresso “K-OUT PARK” non può essere usato come comando automatico di
tipo Passo-Passo.
L’ingresso “10” (NC) deve essere collegato ad una sicurezza (fotocellule o fotocosta) per
garantire la protezione in fase di chiusura.
MODO DI FUNZIONAMENTO PARK
A condizione che un’autovettura sia presente sul sensore magnetico, può essere
comandata l’apertura della sbarra tramite pulsante apre o contatto radio.
La sbarra rimarrà aperta fin quando l’autovettura non sarà transitata davanti alle
fotocellule situate in corrispondenza della linea di completamento del passaggio.
La chiusura viene eseguita dopo un secondo dall’avvenuto transito (fotocellula liberata), e
viene protetta da fotocellule o fotocosta. Quest’ultime comanderanno l’inversione della
sbarra in apertura anche se l’autovettura permane nel raggio di azione delle sicurezze.
NOTA: Se “Dip 4 su ON” e se “Dip 3 su ON”, automaticamente Dip 3 viene considerato in
OFF (fotocellule attive solo in chiusura).
ATTENZIONE: Il tempo di attesa prima della chiusura automatica sarà conteggiato solo
se “Dip 5 su ON”.
Come conseguenza, se l’autoveicolo rimane troppo a lungo sul sensore magnetico
senza transitare (senza impegnare la fotocellula), la sbarra chiuderà dopo il tempo
preimpostato.
ottenere la chiusura automatica (Se Dip 5 è o sarà attivato).
COSTOLE PNEUMATICHE O FOTOCOSTA
Collegare le costole ai morsetti 8-10.
Se la costola viene azionata si avrà l’inversione di marcia.
COLLEGAMENTO LED SPIA A 12VDC
(PER SEGNALAZIONE AUTOMAZIONE APERTA)
Collegare la spia ai morsetti D- e 7 (max 6 watt).
La segnalazione viene eseguita ad automazione aperta o parzialmente aperta, e
comunque non chiusa totalmente.
LAMPEGGIATORE 230V 40W
Se si desidera la partenza anticipata di tre secondi del lampeggiatore rispetto al motore è
necessario posizionare il “Dip 6 su ON”.
CARATTERISTICHE TECNICHE
Range di temperatura
0 ÷ 70 °C
Umidità
< 95 % senza condensazione
Tensione di alimentazione
230 Vac ±10%
Frequenza
50/60 Hz
Miicrointerruzzioni di rete
20 ms
Potenza gestibile all’uscita del motore
736 W
Carico max uscita lampeggiatore
40 W - 250 Vac cosƒi=1
Assorbimento max scheda (esclusi accessori)
30 mA
Corrente disponibile ai morsetti D+D0,8A ±15% - 12Vdc
Grado di protezione
IP54
Peso apparecchiatura
0,8 Kg
Ingombro
14,7x6x18 cm
SICUREZZE ELETTRICHE
Nella ECO RAPID PARK i finecorsa, il motore, e il lampeggiatore sono già collegati al
quadro elettronico di comando.
Sono da collegare solamente i fili di una pulsantiera, delle fotocellule e, naturalmente,
della tensione di alimentazione.
Le persone e le cose devono essere protette da eventuali schiacciamenti dovuti a un
comando involontario perciò è obbligatorio installare almeno una coppia di fotocellule o un
sensore (pneumatico o a fotocellula) da collocarsi sotto l'asta come in Fig.1-2-12.
Per i collegamenti ed i dati tecnici degli accessori attenersi ai relativi libretti.
FUNZIONAMENTO ACCESSORI DI COMANDO
APERTURA CON BLOCCO DELLE FUNZIONI
TRAMITE INTERRUTTORE O OROLOGIO
Questa funzione è utile nelle ore di punta quando il traffico veicolare risulta rallentato (es.
entrata-uscita operai, emergenze in zone residenziali o parcheggi e temporaneamente per
traslochi).
MODALITÁ DI APPLICAZIONE
Collegando un interruttore e/o un orologio di tipo giornaliero settimanale (al posto di un
pulsante NA tra “8 e 9”) è possibile aprire la sbarra e mantenerla aperta finché
l’interruttore viene premuto o l’orologio rimane attivo.
A barriera aperta vengono inibite tutte le funzioni di comando.
Se la chiusura automatica è attiva “Dip 5 su ON”, rilasciando il pulsante o allo scadere
dell’ora impostata si avrà la chiusura automatica della sbarra, altrimenti sarà necessario
dare un nuovo comando.
PULSANTE DI IMPULSO SINGOLO (Dip 4 su OFF)
Da collegarsi ai morsetti 8 e K del quadro (effettua questi comandi: APRE - STOP CHIUDE - STOP - .....).
PULSANTIERE E SELETTORI
In caso di collegamento di 2 o più pulsantiere, collegare in parallelo tra loro i comandi di
apre e chiude (8-9 e 8-11) ed in serie tra loro i contatti di stop (8-2).
Eventuali selettori a chiave vanno collegati fra i morsetti 8-9 ed 8-11.
Se non vengono previsti pulsanti di stop eseguire un ponticello tra i morsetti 8-2.
TELECOMANDO
A sbarra chiusa esegue l’apertura. Durante l’apertura il telecomando non ha efficacia fino
al raggiungimento del finecorsa di fine apertura.
A sbarra aperta esegue la chiusura.
Se il telecomando viene premuto durante la chiusura la barriera invertirà il movimento.
FUNZIONAMENTO ACCESSORI DI SICUREZZA
FOTOCELLULE (settate a 12Vdc)
Le Fotocellule (inserite come in Figure 2 e 7) hanno la possibilità di interrompere il moto
dell'automatismo sia in fase di apertura che di chiusura “Dip 3 su ON” (con ripristino del
moto a fine interposizione).
In caso di guasto alle fotocellule, se si comanda il moto del cancello, non si avrà la
segnalazione del lampeggiatore e il motore resterà fermo.
Le fotocellule, se impegnate a sbarra aperta, rinnovano il tempo di attesa prima di
MANUTENZIONE
Da effettuare solamente da parte di personale specializzato dopo aver tolto
l'alimentazione elettrica al motore.
Ogni 100.000 manovre complete verificare il bilanciamento dell'asta, il serraggio della
manopola di sblocco e del mozzo porta asta, l'usura delle battute di fermo meccanico,
verificare il fissaggio dell’asta e regolare i finecorsa.
Ingrassare i supporti dell'albero porta asta e la barra filettata guidamolla.
IMPORTANTI ISTRUZIONI DI SICUREZZA
PER L’INSTALLAZIONE
1° - Se non é previsto nella centralina elettrica, installare a monte della medesima
un'interruttore di tipo magnetotermico (onnipolare con apertura minima dei contatti
pari a 3mm) che riporti un marchio di conformità alle normative internazionali.
2° - Per la sezione ed il tipo dei cavi la RIB consiglia di utilizzare un cavo di tipo
NPI07VVF con sezione minima di 1,5mm2 e comunque di attenersi alla norma IEC
364 e alle norme di installazione vigenti nel proprio Paese.
N.B.:É obbligatoria la messa a terra dell'impianto
I dati descritti nel presente manuale sono puramente indicativi.
La RIB si riserva di modificarli in qualsiasi momento.
Realizzare l’impianto in ottemperanza alle norme ed alle leggi vigenti.
Pag. 7 di 32
SCHEMA STANDARD
DIP4 - OFF
Fig.8
SCHEMA PER PARCHEGGI
DIP4 - ON
Entrata o Uscita
A
B
RX-TX = Fotocellule
A
= Sensore Magnetico
B
= Barriera
Fig.9
I
T
A
L
I
A
N
O
I
T
A
L
I
A
N
O
Pag. 8 di 32
SCHEMA DI COLLEGAMENTO PER IL COMANDO CONTEMPORANEO DI DUE BARRIERE
Pag. 9 di 32
FRANÇAISE
➀
➀ Barrière ECO RAPID PARK
➁ Photocellules p/protection
➂ Poteau zingué p/cellule
➃ Cordon de sécurité avec Photocellule
➄ Boucle magnetique
- Selecteur
- Antenne radio
➃
➁
➁
➂
➂
➁
➁
➂
➂
➁
➁
➂
➂
➄
Fig.2
Componenti da installare secondo la norma EN12453
TYPE DE COMMANDE
USAGE DE LA FERMETURE
Personnes expertes
Personnes expertes Usage illimité
(au dehors d’une zone publique*)
homme presente
impulsion en vue (capteur)
impulsion hors de vue (boîtier de commande)
automatique
A
C
C
CeD
(zone publique)
B
C
CeD
CeD
CeD
CeD
CeD
* example typique: fermetures qui n’ont pas d’accès à un chemin public
A: Touche de commande à homme present (à action maintenue), code ACG2020
B: Sélecteur à clef à homme mort, code ACG1010
C: Cordon, code ACG3010
D: Cellules photo-électriques, code ACG8026
CARACTÉRISTIQUES TECHNIQUES ECO RAPID PARK
Motoréducteur irréversible ambidextre (ouverture droite et gauche)
utilisé pour mettre en mouvement des lisses d’une longueur maximale
de 5 m.
Le pilier de fixation peut être fourni dans la version galvanisée et
peinte, ou bien encore dans la version inox.
La lisse de la barrière peut être fournie tout d’une pièce ou, en cas
d’obstacles supérieurs pouvant se trouver sur la trajectoire de la
course, il est possible de commander une lisse articulée, en spécifiant
la hauteur de l’obstacle par rapport au sol (Fig. 12).
La lisse de la barrière avec profil RIB à été conçue de façon à pouvoir
y insérer un cordon pneumatique ou un cordon avec photocellule
(Fig.1-13).
N.B. Il est impératif de conformer les caractéristiques de l’installation
aux normes et aux réglementations en vigueur.
CARACTÉRISTIQUES
TECHNIQUES
ECO RAPID PARK
Longueur maxi de la lisse
m
3
Temps d'ouverture
s
1,5
Couple maxi arbre sortie
Nm
50
230V~ 50Hz
Alimentation et frequence CEE
Puissance moteur
W
190
Absorption
A
0,95
Condensateur
µF
10
Nbre de cycles
n°
1200 - 1,5s/2s
IP MELLANA 100
Type d'huile
Poids maximun
Kg
62
Température de travail
°C
-10 ÷ +70
Indìce de protection IP
IP
557
F
R
A
N
Ç
A
I
S
E
F
R
A
N
Ç
A
I
S
E
Pag. 10 di 32
MONTAGE DE LA ECO RAPID PARK
Après avoir cimenté l'embase de fixation dans la position que vous jugerez idéale, passer à
la fixation de la ECO RAPID PARK en utilisant les écrous fournis et une clef hexagonale
n°19.
Passer ensuite au montage de la lisse qui s'effectue en trois phases:
1° - Assembler au sol la lisse et le moyeu porte-lisse utilisant la vis à tête fraisée fournie et
une clef hexagonale n°6 (Fig.3-10-11).
2° - La barrière est fournie avec le ressort d'équilibrage détendu; il faut donc introduire la
lisse avec son moyeu dans l'arbre porte-lisse en position verticale.
3° - Effectuer la fixation finale de la lisse à l'aide de la vis à tête cylindrique avec l'hexagone
emboîté fourni, en utilisant la clef “RIB” puis appliquer les bouchons.
L'électroréducteur est de type irréversible et n'a besoin d'aucun type de blocage extérieur
pour maintenir une position correcte de fermeture.
PROCÉDURE DE DÉBLOCAGE D’URGENCE
Cette opération ne devra être effectuée qu’après avoir mis le moteur
hors tension.
Fig.3
En cas de coupure de courant, il est indispensable de débloquer l’électro-réducteur pour
ouvrir manuellement la barrière.
Pour cette opération, il suffit de se servir de la clé RIB, fournie avec l’équipement et de la
tourner manuellement à fond dans le sens contraire à celui des aiguilles d’une montre
(Fig.4).
De cette façon, la lisse de la barrière ne dépendra plus du réducteur et il sera donc possible
de la déplacer manuellement. Après que le courant soit revenu, on tourne à fond la clé
dans le sens des aiguilles d’une montre.
REGLAGE FINS DE COURSE
Normalement, la barrière est fournie avec les fins de course déjà réglés de façon à imprimer
à la lisse le mouvement idéal.
En cas de nivellement erroné de la plaque à cimenter, la lisse pourrait ne pas arriver
parfaitement horizontale ou verticale, ce qui compromettrait le résultat esthétique de
l'installation.
Pour éviter ce problème, il est possible de modifier la course de la lisse en intervenant sur
les fins de course mécaniques et électriques.
1° - Sur barrière débloquée, utiliser une clef hexagonale n°19 pour débloquer les écrous
d'arrêt (A) et une clef hexagonale n°8 pour dévisser ou revisser les vis à tête fraisée (B)
de réglage des fins de course mécaniques de façon à délimiter immédiatement le
nouvel arc que suivra la lisse de la barrière.
2° - De cette façon, les fins de course électriques doivent être réglés afin de délimiter le
mouvement électrique du moteur pour la nouvelle course de la lisse. Pour cela, il est
nécessaire d'utiliser une clef hexagonale n°3 à l'aide de laquelle on desserre les deux
cames de réglage fin de course (C). Lorsque la lisse est placée par rapport àla butée
d'arrêt mécanique, il suffit de faire tourner la came intéressée de façon à faire
déclencher le microinterrupteur de fin de course.
3° - La rebloquer à la fin.
N.B: Si pendant le mouvement, la fonction de ralentissement n'intervient pas, le problème
n'est pas dû à un mauvais fonctionnement de la platine électronique.
L'absence de ralentissement est dûe à un mauvais réglage des cames de fins de course.
En particulier si en ouverture (ou en fermeture), le fin de course électrique de
ralentissement de cette manoeuvre intervient avant que le fin de course électrique de
ralentissement de la manoeuvre inverse ne soit relaché, la fonction est alors ignorée.
Il est suffisant d'augmenter légèrement l'espace entre les cames pour rétablir le
fonctionnement.
Fig.4
A
C
REGLAGE RESSORT D'EQUILIBRAGE
La barrière est fournie avec le ressort d'équilibrage déjà réglé.
Au cas où on ajouterait des poids àla lisse (par ex. profilés pneumatiques ou à cellule
photo-électrique) il devient nécessaire d'équilibrer la lisse (Fig 6).
Si la lisse, au cours de la descente tend à précipiter, agir sur le ressort d'équilibrage de la
façon suivante:
1° - A motoréducteur bloqué, soulever électriquement la lisse en position verticale.
2° - Apres avoir coupé l'alimentation, visser la bague dans le sens des aiguilles d'une
montre de façon à augmenter le degré de compression des ressort pendant le
mouvement.
Pour vérifier si l'équilibrage de la lisse est correct, débloquer le motoréducteur et déplacer la
lisse manuellement. La lisse doit avoir une légère tendance à monter.
B
Fig.5
TABLEAU DE REGLAGE DU RESSORTS
LEGENDA
a - Lisse 80x40
b - Lisse Ø80
c - Cordon “Fotocosta”
liste
liste des codes
H
N° ressorts
a
a+c
ACG8516
ACG8516 + ACG7090 + ACG7095 + ACG8610
25mm
15mm
2xØ4
2xØ4,5
b
ACG8491 + ACG8536
35mm
2xØ4
H
Fig.6
Pag. 11 di 32
Fig.7
NL1
BORNIER J1
- Alimentation 230V 50/60 Hz
CCONNECTEUR J2
Au moyen d'une carte fournie en option (Carte 1 Relais code ACQ9075), il alimente une
veilleuse pendant une durée programmable de 1 seconde à 3 minutes (40 W max.).
Autrement, il peut alimenter une carte fournie en option pour la gestion d'un
électroaimant (fournie avec le set de la colonne à aimant, code ACG8070).
Pour tout renseignement sur les cartes auxiliaires, demander les instructions
d’installation spécifiques.
L/L
U
V/W
S2 - MICROINTERRUPTEURS POUR LE RÉGLAGE DE LA CENTRALE
- Disponible pour les installations futures.
- Clignotant
- sortie fixe, utiliser le clignotant avec la carte ACG7010 (pour barrière Eco).
- sortie clignotant, utiliser clignotant Diamond Line ACG7050 (pour barrière Normal).
- Photocellules.
- Interrompent en ouverture comme en fermeture.
- N’interrompent qu’en fermeture.
- Mode de Fonctionnement
- fonctionnement réservé aux parkings (PARK)
- fonctionnement normal
- Temps d’attente avant d’avoir la Fermeture Automatique (5 minutes max.)
- validé
- invalidé
- Pré-clignotement lampes
- le clignotant est activé 3 secondes avant le moteur
- le clignotant est activé en même temps que le moteur
S3 - RESET
Chaque fois qu'un changement de position des Dip est effectué, ponter ensuite S3
pendant au moins une seconde (cette opération peut être également exécutée à
l'aide d'un tournevis) ou le coffret ne pas accept le noveau changements.
Dip 1
Dip 2
ON
OFF
Dip 3
ON
OFF
Dip 4
ON
OFF
Dip 5
ON
OFF
Dip 6
ON
OFF
L1
L2
LEDS
- (Jaune) - Signale la présence de tensions secondaires (12 Vdc)
- (Rouge) - Indicateur de mémorisation des temps
MEMORISATION DES TEMPS
Opération à effectuer lorsque la barre est fermée et le fin de course de fermeture est
pressé par la came.
REMARQUE - Les accessoires de sécurité sont actifs pendant l'ouverture et la
programmation des temps; il est donc nécessaire d’éviter les passages à
proximité de l'installation.
Si cela devait avoir lieu, la barre s'arrête et il est nécessaire de remettre la barre en
fermeture et de refaire la programmation.
BORNIER J3
- Sortie alimentation clignotant électronique 230 Vac
- Commun moteur
- Inverseurs moteur
BORNIER J4
K-OUT - Contact (à fermeture): en mode de fonctionnement normal (Fig. 8), il opère
comme impulsion simple. En mode Park (Fig. 9), il valide la fermeture une
seconde après le passage du véhicule.
IN-PARK - Contact (à fermeture), en mode Park, s'il est raccordé à un capteur
magnétique ou à une cellule photoélectrique, il signale la présence d'un
véhicule à proximité de l'ouverture.
9
- Bouton-poussoir d’ouverture (à fermeture)
11
- Bouton-poussoir de fermeture (à fermeture)
8
- Commun des contacts.
BORNIER J5
Bornes de raccordement du câble coaxial de l’antenne (type RG58-52).
N.B.: Veiller à ce que la masse ne touche pas le fil central du câble car cela
pourrait limiter la portée des telecommandes.
BORNIER J6
- Contact photocellules et cordons (à ouverture)
- Contact fin de course validant le ralentissement du moteur à l'ouverture comme
à la fermeture (à fermeture).
2
- Bouton-poussoir de Stop (à ouverture)
4
- Contact de fin de course arrêtant l'ouverture (à ouverture)
7
- Contact de fin de course arrêtant la fermeture (à ouverture)
8
- Commun des contacts
D+/D- - Alimentation 12Vcc pour photocellules.
10
LSS
CONNECTEUR J7
Connecteur pour le logement de radiorécepteurs (seront alimentés en 12 Vdc)
Si l'une des sécurités est engagée en fermeture, il n’est pas nécessaire de refaire la
programmation, dans la mesure où les temps ont déjà été mémorisés; la barre exécute
donc une inversion en ouverture et elle se referme à la prochaine commande.
Normalement, lorsque la barre est fournie, les temps de fonctionnement sont déjà insérés.
Toutefois, le temps d’attente avant la fermeture n'est que de quelques secondes.
Pour personnaliser ce temps, il est obligatoire de faire une nouvelle mémorisation. Pour
ce faire, suivre la démarche suivante:
1) En agissant sur le déblocage manuel, fermer la barre et s'assurer que le fin de course
de fermeture est pressé par la came; enfin, bloquer la barre en vissant le blocage.
2) Appuyer sur le bouton-poussoir S1 et le relâcher immédiatement; la Led L2 (rouge)
F
R
A
N
Ç
A
I
S
E
F
R
A
N
Ç
A
I
S
E
Pag. 12 di 32
s'allume et reste allumée.
3) Appuyer sur le bouton-poussoir S1 et le relâcher immédiatement; la barre exécute
l'ouverture et s'arrête lorsque le fin de course d’ouverture est atteint (la Led L2 reste
allumée).
4) Attendre le temps de pause avant la fermeture automatique (5 minutes max.); ce temps
étant écoulé, la barre se referme automatiquement. Pendant l’attente, la Led L2 reste
allumée.
5) En appuyant sur le bouton-poussoir S1 (la diode L3 s’éteint), on fixe le temps d’attente.
La barre se ferme et s'arrête lorsqu'elle atteint le fin de course de fermeture.
REMARQUE: Le temps d’attente avant d’obtenir la fermeture automatique n’est
déterminée que si le “Dip 5 ON”.
PLAN DE FONCTIONNEMENT PARK (DIP 4 - ON - Fig. 9)
L’entrée “IN-PARK” (à fermeture) doit être raccordée à un detecteur magnétique placé
aux abords immédiats de la barre, pour signaler la présence d'une voiture prête à passer
(si l’on ne veut pas utiliser cette fonction, exécuter un pontet entre les bornes 8 et INPARK).
L’entrée “K-OUT PARK” doit être raccordée au contact (à fermeture) des photocellules
situées au niveau de la ligne d’achèvement du passage de la voiture (pour obtenir la
fermeture au passage complet de la voiture).
L’entrée “K-OUT PARK” ne peut donc pas être utilisée comme commande automatique de
type pas-à-pas.
L’entrée “10” (à ouverture) doit être raccordée à une sécurité (photocellules ou cordon
photoélectrique) pour garantir la protection en phase de fermeture.
MODE DE FONCTIONNEMENT PARK
Si une voiture est présente sur le detecteur magnétique, l'ouverture de la barre peut être
commandée au moyen du bouton-poussoir d’ouverture ou d'un contact radio. La barre
reste ouverte jusqu'à ce que la voiture ne soit passée devant les photocellules situées au
niveau de la ligne d’achèvement du passage.
La fermeture est exécutée une seconde après que le passage a eu lieu (photocellules
dégagée) et elle est protégée par des photocellules et cordon photoélectriques. Ces
dernières commandent l’inversion de la barre même si la voiture reste dans le rayon
d’action des sécurités.
REMARQUE: Si “Dip4 ON” et “Dip3 ON”, ce dernier est automatiquement considéré
comme étant sur OFF.
ATTENTION: Le temps d’attente avant la fermeture automatique n’est compté que si le
Dip 6 est sur la position ON.
Par voie de conséquence, si le véhicule reste trop long temps sur le detecteur
magnétique sans passer (photocellules dégagée), la barre se ferme après le temps
programmé.
FONCTIONNEMENT DES ACCESSOIRES DE COMMANDE
OUVERTURE AVEC BLOCAGE DES FONCTIONS
À TRAVERS UN INTERRUPTEUR OU UNE HORLOGE
Cette fonction est indispensable lors des heures de pointes, lorsque la circulation des
véhicules est ralentie (ex. entrée/sortie ouvriers, urgences dans les zones résidentielles
ou dans les parkings, ou bien encore en cas de déménagements).
MODALITÉ D’APPLICATION
En connectant un interrupteur et/ou une horloge de type journalier/hebdomadaire (à la
place d’un poussoir NO entre “8 et 9”), il est possible d’ouvrir la barrière et de la maintenir
ouverte tant que l’interrupteur n’est pas enfoncé ou tant que l’horloge est active.
Lorsque la barrière est ouverte, toutes les fonctions de commande sont annulées.
Si la fermeture automatique est actionnée “Dip 5 sur ON”, il suffit de relâcher le poussoir
et, dès l’heure programmée, la barrière se refermera automatiquement; dans le cas
contraire, une autre commande sera nécessaire.
POUSSOIR D’IMPULSION SIMPLE (Dip 4 sur OFF)
Ce poussoir devra être connecté aux bornes 8 et K du tableau (les commandes
effectuées sont les suivantes: OUVRE - STOP - FERME - STOP - .....).
BOUTONS-POUSSOIRS ET SÉLECTEURS
En cas de connexion de 2 ou plusieurs borniers, connecter en parallèle les commandes
d’ouverture et de fermeture (8-9 et 8-11) en en série les contacts de stop (8-2).
Tout éventuel sélecteur à clé devra être connecté entre les bornes 8-9 et 8-11.
Au cas où aucun poussoir de stop n’aurait été prévu, réaliser un pontet entre les bornes 8-2.
RADIO-ÉMETTEUR
Lorsque la barrière est fermée, il la rouvre. Pendant l’ouverture, le radio-émetteur perd
toute son efficacité, jusqu’à ce que le fin de course de fin d’ouverture n’ait été atteint.
Lorsque la barrière est ouverte, il en effectue la fermeture.
Si le radio-émetteur est actionné lors de la fermeture, la barrière inversera le mouvement.
FONCTIONNEMENT DES ACCESSOIRES DE SÉCURITÉ
PHOTOCELLULES (instaurées à 12Vdc)
Les Photocellules (positionnées conformément aux illustrations des Figures 2 et 7) ont la
possibilité d’interrompre le mouvement de l’automatisme, aussi bien en phase d’ouverture
qu’en phase de fermeture “Dip 3 sur ON” (avec rétablissement du mouvement à la fin de
l’interposition).
En cas de dysfonctionnement des photocellules, si l’on commande le mouvement du
portail, le feu clignotant n’émettra aucun signal lumineux et le moteur ne démarrera pas.
Si les photocellules sont obscurcies lorsque la barrière est ouverte, elles renouvellent le
temps d’attente avant d’obtenir la fermeture automatique (Si Dip 5 est ou doit être activé).
CORDONS PNEUMATIQUES OU FOTOCOSTA
Connecter les cordons aux bornes 8-10.
Si le cordon est actionné, il y aura une inversion de marche.
CONNEXION DU VOYANT LUMINEUX À 12VDC
(POUR SIGNALISATION AUTOMATION OUVERTE)
Connecter le voyant lumineux aux bornes D- et 7 (max. 6 watt).
La signalisation est effectuée exclusivement lorsque l’automation est entièrement ou
partiellement ouverte et, quoi qu’il en soit, lorsqu’elle n’est pas complètement fermée.
FEU CLIGNOTANT 230V 40W
Si l’on souhaite que le feu clignotant démarre trois secondes avant le moteur, il suffit de
positionner le “Dip 6 sur ON”.
CARACTERISTIQUES TECHNIQUES
Intervalle de température:
0-70°C
Humidité:
< 95% sans condensation
Tension d’alimentation:
230 Vac ± 10%
Fréquence:
50/60 Hz
Minirupteurs de réseau:
20 µs
Puissance gérée à la sortie du moteur:
736 W
Charge max. sortie clignotant:
40 W - 250 Vac cosƒi=1
Absorption max. carte (accessoires non compris): 30 mA
Courant disponible aux bornes D+D:
0,6A ± 15% - 12 Vdc
Niveau de protection:
IP54
Poids appareillage:
0,8 Kg
Dimensions:
14,7x6x18 cm
SÉCURITÉS ÉLECTRIQUES
En ce qui concerne la ECO RAPID PARK, les fins de course, le moteur et le feu clignotant
sont déjà connectés au coffret électronique de commande.
Il n’y a plus qu’à connecter les fils d’un tableau à poussoirs, ceux des photocellules et,
bien sûr, ceux de la tension d’alimentation.
Les personnes et les choses devront être protégées contre tout risque d’écrasement dû à
une commande involontaire; c’est la raison pour laquelle il est obligatoire d’installer au
moins un couple de photocellules ou bien un détecteur (pneumatique ou à photocellule)
devant être positionné sous la lisse (voir Fig. 1-2-12).
Pour les branchements et les données techniques des accessoires, se conformer aux
livrets correspondants.
ENTRETIEN
Effectuer soulement par personnel specialisé après avoir coupé l'alimentation.
Toutes les 20.000 manoeuvres complètes, vérifier l'équilibrage de la lisse, le serrage de
la poignée de déblocage et de moyeu porte-lisse, l'usure des butées d'arrêt mécanique.
Graisser les supports de l'arbre porte-lisse et la barre filetée guide-ressort.
En cas de difficultes lors de l'installation, consulter le "TABLEAU DES DIFFICULTES
POSSIBLES".
INSTRUCTIONS TRÈS IMPORTANTES EN MATIÈRE DE SÉCURITÉ
POUR L'INSTALLATION
1° - Si la centrale électrique ne dispose d'aucun interrupteur, il faut en installer un de
type magnétothermique en amont de cette dernière (omnipolaire avec ouverture
minimale des contacts correspondant à 3mm); la marque de cet interrupteur devra
être en conformité avec les normes internationales.
2° - En ce qui concerne la section et le type des câbles, le conseil de la RIB est celui
d'utiliser un câble de type NPI07VVF présentant une section minimale de 1,5mm2 et,
quoi qu'il en soit, de se conformer à la norme IEC 364, ainsi qu'aux normes
d'installation en vigueur dans le pays de destination.
N.B.:La mise à terre de l'installation est obligatoire.
Les données figurant dans le présent manuel sont fournies à titre purement indicatif.
La RIB se réserve le droit de les modifier à tout moment, sans aucun préavis.
Effectuer l'installation en conformité avec les normes et les lois en vigueur.
Pag. 13 di 32
PLAN FONCTIONNEMENT NORMAL
DIP4 – OFF
LIGNE
230VAC
Fig.8
PLAN FONCTIONNEMENT POUR PARKINGS
DIP4 - ON
LIGNE
230VAC
Entrée et Sortie
A
B
RX-TX = Photocellules
A
= Détecteur magnétique
B
= Barrière
Fig.9
F
R
A
N
Ç
A
I
S
E
F
R
A
N
Ç
A
I
S
E
Pag. 14 di 32
SCHÉMA DE CONNEXION POUR LA COMMANDE SIMULTANÉE DE DEUX BARRIÈRES
Pag. 15 di 32
ENGLISH
➀
➀ ECO-RAPID PARK barrier
➁ Photoelectric cells
➂ Galvanized column for P.E. cells
➃ Strip with Photo electric cells
➄ Magnetic loop
- Key selector
- Tuned aerial
➃
➁
➁
➂
➂
➁
➁
➂
➂
➁
➁
➂
➂
➄
Fig.2
Parts to install meeting the EN 12453 standard
COMMAND TYPE
with manned operation
with visible impulses (e.g. sensor)
with not visible impulses (e.g. remote control device)
automatic
USE OF THE SHUTTER
Skilled persons
(out of a public area*)
A
C
C
CeD
Skilled persons
(public area)
B
C
CeD
CeD
TECHNICAL
DATA
Unrestricted use
CeD
CeD
CeD
* a typical example are those shutters which do not have access to any public way
A: Command button with manned operation (that is, operating as long as activated), like code ACG2020
B: Key selector with manned operation, like code ACG1010
C: Safety edges, like code ACG3010
D: Photocells, like code ACG8026
ECO RAPID PARK
Max. boom lenght
m/in
Opening time
s
Max. torque
Nm/lbsm
EEC Power supply
1,5
50/110
230V~ 50Hz
Motor capacity
W
190
Power absorbed
A
0,95
Capacitor
µF
10
No. cycles
n°
1200 - 1,5s/2s
Power supply
TECHNICAL FEATURES OF ECO RAPID PARK
Ambidextrous irreversible gearmotor used to actuate booms up to 5 m /
197” inches long.
The column can be supplied in its zinc plated and varnished version, or
in the stainless steel version.
The barrier boom can be supplied as a single piece or, in the case high
objects may hinder its travel, you can require it in the articulated
version, specifying the height of this obstacle from the ground (Fig.12).
The barrier boom with RIB profile is constructed for being fitted with a
pneumatic safety strip or with a photocell strip (Fig.1-13).
N.B. You must make installation features comply with laws and
standards in force.
3/118”
220V~ 60Hz
Motor capacity
W
Power absorbed
A
1
Capacitor
µF
12,5
No. cycles
n°
EEC Power supply
230
1200 - 1,5s/2s
230V~ 50Hz
Motor capacity
W
200
Power absorbed
A
2,1
Capacitor
µF
40
No. cycles
n°
1200 - 1,5s/2s
IP MELLANA 100
Lubrification
Weight of electroreducer
Kg/lbs
62/136,5
Working Temperature
°C
-10 ÷ +70
Protection IP
IP
557
E
N
G
L
I
S
H
Pag. 16 di 32
E
N
G
L
I
S
H
ASSEMBLING THE “ECO RAPID PARK”
After you have cemented in the base plate where you want it, mount ECO RAPID PARK
using the nuts provided and a no. 19 hexagonal wrench.
Then assemble the barrier arm in three phases as follows:1.- Mount the barrier arm fixing attachments to the boom arm using the screw supplied
and a no. 6 Allen key (see Fig.3-10-11).
2.- The barrier is supplied with the balancing spring decompressed so the barrier arm
and its attachment must be inserted, in vertical position, into the barrier arm
fixing attachment.
3.- Finally, the barrier arm is fixed in position with the socket screw provided, using the
“RIB” key, after which fit the screw-caps.
The gear unit is irreversible so no kind of external locking device is necessary to keep the
barrier in securely closed position.
EMERGENCY RELEASE
Carry out only after power supply to the motor has been interrupted!
In the event of a power supply failure, release the gearmotor, so that you can move the
boom by hand.
To do so, use the RIB key supplied and turn it counterclockwise by hand, until the stop is
reached (Fig.4).
By doing so, the barrier boom works independent from the gearmotor and it can be
moved by hand.
When power is supplied again, turn the key clockwise strongly until you block it.
Fig.3
LIMIT SWITCH SETTING
Normally the barrier is supplied to you with the limit switches already set to allow
optimum barrier movement.
If the base plate has not been cemented in on a level plane, the boom might be not
perfectly horizontal or vertical, with the result that the aesthetic appearance of the
installation is poor.
To avoid this, it is possible to alter the trajectory of the boom by adjusting the mechanical
and electrical limit switches.
1. - With the barrier up, use a no. 19 hexagonal wrench to loosen the retaining nuts (A)
and a n°8 Allen key to loosen or tighten the countersunk screws (B) for setting the
mechanical limit stops so as to delimit the arc described by the barrier boom.
2. - Having done this, the limit switches now have to be set so as to determine the
electrical operation of the motor for the new trajectory described by the boom. To do
this, you must use a no. 3 Allen key to release the two limit switch adjusting cams
(C). Once the boom is positioned in accordance with the mechanical stop, you need
only to rotate the cam involved so as to trip the limit switch.
3. - Once this is achieved, retighten the cam.
Fig.4
NB: If during operation there is no slow down movement, please note that this cannot be
necessarily caused by the control panel failure. In fact, the absence of the slow
down movement can be caused by the incorrect adjustment of the electrical limit
switch cams. Especially when the barrier is opening (or closing) and the slow down
electrical limit switch is pressed, if the other slow down limit switch has not been
released, the slow down movement does not operate. In order to eliminate this
problem it is enough to increase the distance between the two cams
A
A
C
BALANCING SPRINGS SETTING
Normally the barrier is supplied to you with the balancing spring already set.
If a weight is added to the boom (e.g. pneumatic or photocell strips), the boom has to be
rebalanced (Fig 6).
If the boom tends to accelerate when it is lowered, adjust the balancing spring as follows:
1.- With the gearmotor engaged, raise the boom under electrical power until vertical.
2.- After disconnecting power supply, screw down the ring nut in a clockwise direction so
as to increase the compression of the springs during the lowering movement.
To check correct boom balance, disengage the gearmotor and move the boom by hand.
The boom should tend to rise a little.
B
Fig.5
SPRINGS ADJUSTMENT TABLE
LEGENDA
a - 80x40 Boom
b - Ø80 Boom
c - Photoelectric strip “Fotocosta”
list
codes list
H
Springs Nr.
a
a+c
ACG8516
ACG8516 + ACG7090 + ACG7095 + ACG8610
25mm
15mm
2xØ4
2xØ4,5
b
ACG8491 + ACG8536
35mm
2xØ4
H
Fig.6
Pag. 17 di 32
E
N
G
L
I
S
H
Fig.7
NL1
J1 TERMINAL BOARD
230V 50/60 Hz power supply
J2 CONNECTOR
Via an optional card (Relay card 1 code no. ACQ9075) this connector powers a garage
light with a time setting between 1 second and 3 minutes (max. 40 W).
Otherwise the connector can power an optional card to control an electromagnet
(supplied with column with magnet set code no. ACG8070).
For information regarding the auxiliary cards, request specific installation instructions.
L/L
U
V/W
K-OUT
IN-PARK
9
11
8
S2 - MICROSWITCHES FOR CONTROL UNIT SETTINGS
For future use
Flasher
fixed output, use flasher unit with card ACG7010.
flasher output, use diamond line flasher unit ACG7050
Photocell
stops movement during opening and closing
stops movement during closing only
Operation mode
park mode
normal operation
Standby time prior to automatic closing (max. 5 min.)
enabled
disabled
Pre-flasher
flasher will start 3 seconds before motor
flasher will start at the same time as motor.
S3 - RESET
Each time the position of dipswitches is changed, loop S3 for at least one second
or the board will not accept the new settings (also possible using a screwdriver).
Dip1
Dip2
ON
OFF
Dip3
ON
OFF
Dip4
ON
OFF
Dip5
ON
OFF
Dip6
ON
OFF
L1
L2
LED
(Yellow) indicates secondary power supply (12Vdc)
(Red) indicates time settings
TIMER SETTINGS
To be performed with the barrier closed and the closing limit switch pressed.
NOTE: Safety devices are enabled during opening and therefore timer programming must
be performed without vehicle transit in the vicinity of the system.
Should transit occur, the barrier stops and must be closed again and the programming
procedure must be repeated.
If one of the safety device is engaged during closing, programming does not need to be
repeated as the times have already been memorised and the barrier will invert direction on
J3 TERMINAL BOARD
230 V ac electronic flasher unit power supply
Motor common
Motor inverters
J4 TERMINAL BOARD
N.O. contact; in normal operation mode (Fig. 8) operates as a sinusoidal
pulse (performs commands OPEN-STOP-CLOSE-STOP...); in park mode
(Fig.9) enables closing 1 second after vehicle transit.
N.O. contact; in park mode, if connected to a magnetic sensor or photocell, it
indicates the presence of a vehicle on approach to entry.
Open pushbutton (N.O.)
Close pushbutton (N.O.)
Contact common
J5 TERMINAL BOARD
Terminals for connection of antenna coax cable (type RG58-52)
N.B. Ensure that the earth does not touch the central wire on the cable as this will
restrict transmitters range.
10
LSS
2
4
7
8
D+/D-
J6 TERMINAL BOARD
Photocells and strips contact (N.C.)
Contact for limit switch that enables motor deceleration on opening and
closing (N.O.)
Stop pushbutton (N.C.)
Limit switch contact to stop opening (N.C.)
Limit switch contact to stop closing (N.C.)
Contact common
12Vdc power supply for Photocells (ATTENTION to set them to this voltage!)
J7 CONNECTOR
Connector for radio receivers (12Vdc power supply).
opening and close on the subsequent command.
The barrier is normally supplied with pre-set times. However, the standby time prior to
automatic closing is set at a few seconds only.
To modify this time setting as required, proceed as follows:
1) Use the manual release to close the barrier and ensure that the closing limit switch is
engaged by the cams; lock the barrier by tightening the release device.
2) Press S1 briefly; led L2 (red) illuminates.
3) Press S1 briefly; the barrier opens and stops when the opening limit switch is reached
(led 2 remains lit).
Pag. 18 di 32
E
N
G
L
I
S
H
4) Wait for the standby time before automatic closing (max. 5 minutes). Led L2 remains lit
until automatic closing is activated.
5) Press S1 (led L2 switches off) to set the standby time. The barrier closes and stops
when the closing limit switch is reached.
NOTE: Standby time prior to automatic closing can only be set with “Dip5 ON”.
LAYOUT PARK MODE (Dip4 - ON - Fig. 9)
The IN-PARK input (N.O.) must be connected to a magnetic sensor positioned close to
the barrier to indicate the presence of a vehicle on approach to transit. (If this function is
not required, loop terminals 8 and IN-PARK).
The K-OUT PARK input must be connected to the contact (N.O.) of the photocells located
on the vehicle transit line to enable closing following vehicle transit.
The K-OUT PARK input can therefore be used as an automatic step-by-step command.
Input 10 (N.C.) must be connected to a safety device (photocell or strip) to guarantee
protection during closing.
PARK OPERATION MODE
When a vehicle is positioned on the magnetic loop, barrier opening can be activated using
the open pushbutton or the radio contact; the barrier remains open until the vehicle
passes the transit line photocells.
Closing is activated 1 second after transit (photocells free) and is protected by photocells
or safety edges. The latter control barrier inversion during opening, even if the vehicle
remains in the safety edge activation radius.
NOTE: if “Dip4 ON” and “Dip3 ON”, Dip3 is automatically considered OFF.
CAUTION: the standby time prior to automatic closing is enabled only if “Dip5 ON”.
If the vehicle remains too long on the magnetic sensor without transit (with
photocells free) the barrier will close after the setted standby time.
230V 40W BLINKER
If you want the Blinker to start three seconds before the motor does, position ´Dip 6 on
mode ON´.
TECHNICAL SPECIFICATIONS
Temperature range
0 - 70°C
Humidity
< 95% condensate free
Power supply voltage
230 V ac ± 10%
Frequency
50/60 Hz
Transient voltage drops
20 ms
Motor output
736 W
Max. flasher output
40 W - 250 Vac cosƒi = 1
Max. card absorption (excluding accessories) 30 mA
Current available for terminals D+D0.8 A ± 15% - 12 V dc
Protection rating
IP54
Equipment weight
0.8 kg
Overall dimensions
14.7x6x18 cm
ELECTRONIC SAFETY DEVICES
The limit switches, the motor and the blinker of ECO RAPID PARK are already connected
to the electronic control panel.
Only one push-button panel, the photocells and, of course, the power voltage need to be
wired.
Persons and things shall be protected against any possible crushing caused by unwanted
commands: to this purpose you must install at least a couple of photocells or a sensor (of
the pneumatic or photocell type) under the boom, as Fig. 1-2-12 shows.
For information about the connections or technical data of accessories, follow the relevant
instruction books.
OPERATION ACCESSORIES FUNCTIONING
OPENING WITH FUNCTIONS SUSPENSION COMMANDED
BY SWITCH OR TIMER
This function can be useful in rush hours, when vehicle traffic is slow (e.g. entry/exit of
workers, emergencies in residential or parking areas, and, temporary, for removals).
APPLICATION MODE
By connecting a switch and/or a daily/weekly timer (to a NO button between ´8 and 9´),
you can open the boom and keep it open as long as the switch is operated or the clock is
activated.
When the barrier is open, all operating functions are inhibited.
If the automatic closing Is selected ´Dip 5 on mode ON´, the boom automatically closes
when the switch is released or at the time previously set; if not, you need to use a
command.
SINGLE – IMPULSE BUTTON (Dip 4 on mode OFF)
to connect with terminals 8 and K of the control board (it operates these commands:
OPEN - STOP - CLOSE - STOP - .....).
PUSH-BUTTON PANELS AND SELECTORS
If 2 or more push-button panels are wired, connect the opening and closing commando in
parallel (8-9 e 8-11), and the stop contacts in series (8-2).
Any key selector shall be connected between terminals 8-9 and 8-11.
If no stop button is requested, connect the terminals through a jumper 8-2.
MAINTENANCE
To be undertaken only by specialized staff after disconnecting power supply.
After every 20.000 cycles check boom balance, the tightness of the release knob and of
the boom holding attachment, and the wear on the mechanical stops.
Grease the bearings of the boom carrier shaft and the threaded spring guide bar.
If there are any problems during installation, consult the "LIST OF POSSIBLE
PROBLEMS".
RADIO TRANSMITTER
It operates the opening of the boom when this is closed. While the gate is opening, the
radio transmitter cannot give any command, until the opening limit switch is reached.
When the boom is open, it operates its closing.
If you press the radio transmitter while the boom is closing, the barrier inverts its
movement.
FUNCTIONING OF SAFETY ACCESSORIES
PHOTOCELLS (set at 12Vdc)
Photocells (fitted as Figures 2 and 7 show) can interrupt the movement of the automation
both when it opens and when it closes
´Dip 3 on mode ON´ (starting the movement again as the interposition is finished).
If you command the gate to move in the event of a photocell breakdown, the blinker will
not emit its signals and the motor will not run.
If photocells are engaged when the boom is open, they reset the waiting time again before
the automatic closing is actuated (if Dip 5 is or will be operated).
PNEUMATIC SAFETY STRIPS OR FOTOCOSTA UNITS
Connect the safety strips to terminals 8-10.
As the safety strip is operated, the movement reverses.
12VDC CONNECTION OF THE WARNING LIGHT LED
(TO SIGNAL THE AUTOMATION IS OPEN)
Connect the warning light to terminals D- and 7 (max. 6 watt).
The signal is given when the automation is open, partly open or, in any case, not totally
closed.
IMPORTANT SAFETY INSTRUCTIONS
FOR THE INSTALLATION
1° - Install a thermal magnetic switch (omnipolar, with a minimum contact opening of 3
mm) before the control board, in case this is not provided with it. The switch shall be
guaranteed by a mark of compliance with international standards.
2° - As far as the cable section and the cable kind are concerned, RIB suggests to use
an NPI07VVF cable, with a minimum section of 1,5mm2, and to follow, In any case,
the IEC 364 standard and Installation regulations In force In your Country.
N.B.: The system must be earthed
Data described by this manual are only Indicative and RIB reserves to modify them at
any time.
Install the system complying with current standards and regulations.
Pag. 19 di 32
E
N
G
L
I
S
H
LAYOUT NORMAL FUNCTIONING
DIP4 - OFF
LINE
230VAC
Fig.8
LAYOUT FUNCTIONING FOR PARKING PLACES
DIP4 - ON
LINE
230VAC
Entry and exit
A
B
RX-TX = Photocells
A
= Magnetic sensor
B
= Barrier
Fig.9
Pag. 20 di 32
E
N
G
L
I
S
H
CONNECTION DIAGRAM FOR CONNECTING TWO BARRIERS AT THE SAME TIME
Pag. 21 di 32
DEUTSCH
➀
➀ ECO-RAPID PARK Schranke
➁ Photozellen
➂ Verzinkte Metallsäule als Photozellenträger
➃ Photozellen Sicherheitskontaktleiste
➄ Magnetschleife
- Schlüsselschalter
- Antenne
➃
➁
➁
➂
➂
➁
➁
➂
➂
➁
➁
➂
➂
➄
Abb. 2
Komponenten zur Installation nach der Norm EN1253
STEUERUNGSSYSTEM
ANWENDUNG DER SCHLIESSUNG
Fachpersonen
Grenzlose
(außer einem öffentlichen Platz*)
(öffentlicher Platz)
Anwendung
A
B
C
C
CeD
C
CeD
CeD
CeD
CeD
CeD
Fachpersonen
mit Totmannschaltung
mit sichtbaren Impulsen (z. B. Sensor)
mit nicht sichtbaren Impulsen (z. B. Fernsender)
automatisch
* ein Musterbeispiel dafür sind jene Türe, die keine Zufahrt zu einem öffentlichen Weg haben
A: Betriebstaste mit Totmannschaltung (das heißt, aktivieren sie eine Funktion, solange man sie gedrückt hält),
wie Code ACG2020
B: Schlüsselselektor mit Totmannschaltung, wie Code ACG1010
C: Kontaktleiste, wie Code ACG3010
D: Photozelle, wie Code ACG8026
TECHNISCHE EIGENSCHAFTEN ECO RAPID PARK
Beidhändiger und selbsthemmender Getriebemotor für die Betätigung
von Schrankenbäumen bis zu 5 m Zoll lang.
Die Säule kann verzinkt und lackiert oder aus rostfreiem Stahl
ausgeführt und geliefert werden.
Der Schrankenbaum kann als Einzelstück geliefert werden oder,
sollten hohe Gegenstände die Öffnungsbewegung des Schrankes
verhindern, ist es möglich, nach vorheriger Angabe der Höhe solcher
Gegenstände vom Boden her, ihn in der geknickerter Version zu
bekommen (Abb.12).
Der Schrankenbaum mit RIB Profil wurde so konstruiert, dass man an
ihn eine pneumatische Kontaktleiste oder eine Photozellleiste
hinzufügen kann (Abb.1-13).
Anmerkung. Man muss die Eigenschaften der Schranke mit den
geltenden Gesetzen und Vorschriften in Einklang
bringen.
TECHNISCHE
EIGENSCHAFTEN
ECO RAPID PARK
Max. Baumlänge
m
3
Öffnungszeit
s
1,5
Max. Drehmoment
Nm
50
Stromspannung und frequenz
230V~ 50Hz
Motorleistung
W
190
Stromaufnahme
A
0,95
Kondensator
µF
10
Anzahl der Zyklen
n°
1200 - 1,5s/2s
IP MELLANA 100
Ölsorte
Motorgewicht
Kg
62
Betriebstemperatur
°C
-10 ÷ +70
Schutzart IP
IP
557
D
E
U
T
S
C
H
Pag. 22 di 32
D
E
U
T
S
C
H
MONTAGE ECO RAPID PARK
Nach Zementeinbettung des Sockels in einer günstigen Position, die Schranke ECO RAPID PARK mit den
beigepackten Schrauben und einem Inbusschlüßel SW 19 montieren.
Darauf hin die Montage des Schrankenbäumes in drei Phasen vornehmen.
1.- Am Boden sind der Schrankenbaum und die nebe für baum die mit bereits beigepackten
Inbusschrauben n°6 und mit passendem Schlußel auf den Schrankenbaum montiert werden (Fig.310-11).
2.- Die Schranke wird mit entspannter Ausgleichsfeder geliefert, daher ist die Armhalterung vertikal auf
die Antriebswelle einzusetzen.
3.- Abschließend den Schrankenbaum mit passendem Inbussschrauben auf die Antriebswelle mit RIBInbusschließel befestigen und die Stöpsel aufsetzen.
Der Getriebemotor ist selbsthemmend, daher wird automatisch ohne Einsatz einer äußeren
Sperrvorrichtung eine wirksame Schließstellung eingehalten.
NOTFALLFREIGABE
Die Notfallentriegelung darf erst nach dem Abschalten der elektrischen
Stromversorgung erfolgen.
Fig.3
Um den Schrank im Falle eines Stromausfalls öffnen können, muss man den Getriebemotor
freigeben, indem man den gelieferten RIB Schlüssel entgegen den Uhrzeigersinn bis zu dem
Anschlag dreht (Abb. 4)
Der Schrankenbaum arbeitet damit unabhängig von dem Getriebemotor, und man kann ihn manuell
betätigen.
Den Schlüssel in Uhrzeigersinn drehen und fest blockieren, als man wieder über die Stromversorgung
verfügt.
EINSTELLUNG ENDSCHALTER
Die Schranke wird normalerweise mit auf die ideale Schrankenbewegung voreingestellten
Endschaltern geliefert.
Bei unebener Bettung der Fundamentplatte kann es vorkommen, daß der Schrankenbaum nicht
perfekt horizontal bzw. vertikal ausgerichtet ist, wodurch die Ästhetik beeinträchtigt wird.
Zur Beseitigung dieses Mangels kann auf die Endanschläge und -Schalter eingegriffen und somit der
Schrankenbaum hub verändert werden.
1. - Bei entsperrter Schranke mit einem Sechskantschlüssel SW 19 die Sperrmuttern (A) lösen und
mit einem Inbusschlüssel SW 8 die Senkschrauben (B) aufdrehen bzw. festziehen, um die
Endanschläge auf die neue Stangenbahn einzustellen.
2. - Nun sind die Endschalter so einzustellen, daß die elektrische Bewegung des Motors auf die neue
Stangenbahn beschränkt wird. Hierfür mit einem Inbusschlüssel SW 3 die beiden Einstellnocken
des Endschalters (C) lösen. Nach Positionierung der Stange gemäß dem mechanischen
Endanschlag den entsprechenden Nocken so verdrehen, daß der Mikro-Endschalter anspricht;
3. - daraufhin den Nocken wieder anziehen.
Wenn die Schranke im Auffahren und Zufahren nicht die richtige Baumposition hat liegt dieses an der
Justierung der Endschalterkamm.
Um zu verhindern das der Baum im Zulauf auf den mechanischen Endanschlag schlägt muss der
Kamm richtig eingestellt sein.
Bitte achten Sie darauf das der erste Mikroschalter die Geschwindigkeit abbremst, macht er dieses
nicht kommt es dazu das die Schranke aufschlägt , oder nicht die 90° Position hat, da der zweite
Mikroschalter die Bewegung des Baumes nicht Stoppen kann.
Fig.4
A
C
EINSTELLUNG DER AUSGLEICHSFEDERN
Normalerweise wird die Schranke mit voreingestellter Ausgleichsfeder geliefert. Falls der
Schrankenbaum mit zusätzlichen Gewichten belastet wird (z.B. pneumatische- oder
Fotozellensicherheitskontaktleiste), muß der Schrankenbaum neu ausgeglichen werden (Fig 6).
Falls der Schrankenbaum während der Senkbewegung zum Fallen neigt, ist folgendermaßen auf die
Ausgleichsfeder einzuwirken:
1. - Bei verriegeltem Getriebemotor den Schrankenbaum elektrisch in die vertikale Stellung anheben.
2. - Ausschliessung der Spannung auszuführen, die Mutter im Uhrzeigersinn aufschrauben, um die
Spannung der Federn während der Bewegung zu erhöhen.
Zur Überprüfung der korrekten Ausgleichung den Getriebemotor entsperren und den Schrankenbaum
per Hand bewegen.
An dem Schrankenbaum muß ein leichter Hang zum Auftrieb festgestellt werden.
B
Fig.5
DIAGRAMM DES EINSTELLUNG
DER AUSGLEICHSFEDERN
LEGENDA
a - Baum 80x40
b - Baum Ø80
c - Fotozellen Kontaktleiste “Fotocosta”
liste
codesliste
H
Zahl der federn
a
a+c
ACG8516
ACG8516 + ACG7090 + ACG7095 + ACG8610
25mm
15mm
2xØ4
2xØ4,5
b
ACG8491 + ACG8536
35mm
2xØ4
H
Fig.6
Pag.23 di 32
D
E
U
T
S
C
H
Abb.7
NL1
KLEMMENLEISTE J1
Spannungsversorgung 230 V 50/60 Hz
STECKVERBINDER J2
Spannungsversorgung über eine Zusatzplatine (Relais-Platine 1 Teile-Nr. ACQ9075)
einer zeitgesteuerten Beleuchtung für eine vorwählbare Dauer von 1 Minute bzw. 3
Minuten (max. 40 W).
Versorgt alternativ hierzu eine Zusatzplatine zur Ansteuerung eines Elektromagneten
(Lieferbestandteil des Säulen-Set mit Magnet Teile-Nr. ACG8070).
Nähere Informationen zu den Zusatzplatinen entnehmen Sie bitte den spezifischen
Installationsanleitungen.
L/L
U
V/W
S2 - MIKROSCHALTER ZUM SETUP DES STEUERGERÄTS
Dip 1 Frei für zukünftige Erweiterungen
Dip 2 Blinkleuchte
ON Festgeschalteter Ausgang, Blinkleuchte mit Platine ACG7010 verwenden (Für
Eco Schranke).
OFF Ausgang für Blinkleuchte, die Blinkleuchte Diamond Line ACG7050 verwenden
(Für Normal Schranke).
Dip 3 Lichtschranke
ON Unterbrechen bei Öffnen und Schließen
OFF Unterbrechen nur bei Schließen
Dip 4 Wahl der Betriebsart
ON Betriebsart PARKPLATZ
OFF Standard-Betriebsart
Dip 5 Wartezeit vor automatischem Schließen (max. 5 Minuten)
ON eingeschaltet
OFF ausgeschaltet
Dip 6 Vorankündigung durch Blinken
ON Blinkleuchte 3 Sekunden vor Motor eingeschaltet
OFF Blinkleuchte gleichzeitig mit Motor eingeschaltet
S3-RESET
Nach jedem Verstellen der Dip-Schalter den Kontakt S3 mindestens eine Sekunde
lang überbrücken. (Hierzu kann man einen Schraubendreher verwenden).
L1
L2
LED
(Gelb) - Spannungskontrolleuchte der Steuerspannung (12Vdc)
(Rot) - Kontrolleuchte Speicherung der Zeiten
SPEICHERN DER ZEITEN
Die Programmierung bei geschlossener Schranke ausführen (mit der SchließenEndschalter vom Nocken angesprochen wird).
HINWEIS - Die Sicherheitseinrichtungen sind während des Öffnens und der
Programmierung der Zeiten aktiviert, daher sind Durchgänge/Durchfahrten in
der Nähe der Schranke zu vermeiden.
Falls dies dennoch geschieht, schließt die Schranke und muß anschließend erneut in die
Geschlossen-Stellung positioniert werden, um damit die Programmierung von vorn zu
KLEMMENLEISTE J3
Ausgang Stromversorgung elektronische Blinkleuchte 230 Vac
Gemeinsamer Kontakt Motor
Umrichter des Motors
KLEMMENLEISTE J4
K-OUT Kontakt (Schließer), bei Normalbetrieb Funktionsweise (Abb. 8) als
Einzelimpuls, bei Betriebsart Parkplatz (Abb. 9) wird 1 Sekunde nach erfolgter
Durchfahrt des Fahrzeugs das Schließen ausgelöst.
IN-PARK Kontakt (Schließer), bei Betriebsart Parkplatz, falls an einen induktiven Sensor
bzw. eine Lichtschranke zur Meldung des Fahrzeugs in Nähe der Öffnung
angeschlossen.
9
Öffnen-Taste (Schließer)
11
Schließen-Taste (Schließer)
8
Gemeinsamer Kontakt
KLEMMENLEISTE J5
Anschluß-Klemmenleiste des Koaxialkabels der Antenne (Typ RG58-52).
HINWEIS: Bitte Beachten Sie darauf, daß der Masseanschluß nicht den mittleren
Draht des Kabels berührt, denn dadurch wird die Empfangsleistung der
Funksender verringert.
10
LSS
2
4
7
8
D+/D-
KLEMMENLEISTE J6
Kontakt der Fotozellen und kontaktleisten (Öffner)
Kontakt des Endschalters zur Freigabe der Motorabbremsung sowohl beim
Öffnen als auch beim Schließen (Schließer)
STOP-Taste (Öffner)
Endschalter-Kontakt zum Anhalten der Öffnen-Bewegung (Öffner)
Endschalter-Kontakt zum Anhalten der Schließen-Bewegung (Öffner)
Gemeinsamer Kontakt
Versorgung 12Vdc für Fotozellen
STECKVERBINDER J7
Steckverbinder für Fach des Funkempfängers (Spannungsversorgung 12Vdc).
beginnen.
Wird eine Sicherheitseinrichtung bei geschlossener Schranke angesprochen, so ist keine
erneute Programmierung erforderlich, denn die Zeiten sind in diesem Fall schon
gespeichert. Daher schaltet die Schranke um auf Öffnen und kann mit einem
anschließenden Befehl wieder geschlossen werden.
Normalerweise wird die Schranke mit schon eingestellten Zeitvorgaben geliefert, in jedem
Fall beträgt die Wartezeit vor dem automatischen Schließen jedoch nur wenige Sekunden.
Um diese Wartezeit individuell anzupassen, speichert man eine neue Zeit wie folgt:
1) Die Schranke mit der manuellen Entriegelung schließen und sicherstellen, daß der
Schließen-Endschalter vom Nocken angesprochen wird. Dann die Schranke durch
Festziehen der Verriegelung blockieren.
Pag. 24 di 32
D
E
U
T
S
C
H
2) Die Taste S1 kurz drücken und sofort wieder loslassen. Hiernach leuchtet beginnt rote
Led L2 dauerzuleuchten.
3) Die Taste S1 kurz drücken und sofort wieder loslassen. Die Schranke öffnet und stoppt
am Endschalter der oberen Endlage (die Led 2 leuchtet weiter).
4) Die Wartezeit bis zum automatischen Schließen (max. 5 Minuten) abwarten, nach
Ablauf der Höchstdauer schließt die Schranke automatisch. Während der Wartezeit
leuchtet die Led 2 weiter).
5) Durch Drücken von Taste S1 (Led L2 verlöscht) speichert man die Wartezeit. Die
Schranke schließt und stoppt bei Erreichen des Schließen-Endschalters.
HINWEIS: Die Wartezeit vor dem automatischen Schließen kann nur eingegeben werden,
wenn Dip-Schalter 5 auf ON geschaltet ist.
BETRIEBSWEISE DES SICHERHEITSZUBEHÖRS
PHOTOZELLEN (auf 12Vdc setzen)
Die Photozellen (wie nach den Abbildungen 2 und 7 eingesteckt) können die Bewegung
des Automatismus sowohl bei der Öffnung, als auch bei der Schließung, unterbrechen
“Dip 3 auf ON” (mit Wiederanlauf der Bewegung nach Durchgangsbeendigung).
Bei einer Photozellenstörung, wenn man das Tor betätigt hat, leucht der Blinker nicht und
arbeitet der Motor nicht.
Sind die Photozellen bei geöffnetem Schrankenbaum in Funktion, starten sie die
Wartezeit wieder, bevor die automatische Schließung erfolgt (falls Dip 5 betätigt ist oder
wird).
PNEUMATISCHE KONTAKTLEISTEN ODER FOTOKONTAKTLEISTEN
Die Kontaktleisten an die Klemmen 8-10 verbinden.
Die Bewegungsumkehr findet statt, wenn die Kontaktleiste betätigt wird.
BETRIEBSART PARKPLATZ (Dip. 4 - ON - Abb. 9)
Der Eingang „IN-PARK“ (Schließer) muß an einen Magnetischer sensor angeschlossen
werden, der in unmittelbarer Nähe der Schranke montiert ist, um die Anwesenheit eines
Fahrzeugs vor der Durchfahrt an der Schranke zu melden (falls man diese Funktion nicht
nutzen möchte, sind die Klemmen B und IN-PARK zu überbrücken).
12V/DC - ANSCHLUSS DER LED DER KONTROLLLEUCHTE
(FÜR DIE MELDUNG – AUTOMATION GEÖFFNET)
Die Kontrollleuchte an die Klemmen D- und 7 verbinden (max. 6 Watt).
Die Meldung wird gegeben, als die Automation ganz geöffnet, teilweise geöffnet, und, auf
jeden Fall, nicht vollständig geschlossen ist.
Der Eingang „K-OUT PARK“ muß an den Kontakt (Schließer) der Lichtschranke an der
Grenzlinie angeschlossen werden, an der das Fahrzeug vollständig durchgefahren ist,
damit die Schranke anschließend schließt.
Daher kann der Eingang „K-OUT PARK“ nicht für einen automatischen Befehl zur TippBedienung verwendet werden.
BLINKER 230V 40W
Wünscht man, dass der Blinker drei Sekunden vor dem Motorbetrieb leuchtet, so ist es
nötig, “Dip 6 auf ON” zu setzen.
Der Eingang „10“ (Öffner) muß an eine Sicherheitseinrichtung (Lichtschranke oder
Lichtkontaktleiste) angeschlossen werden, um eine Absicherung während des
Schließvorgangs zu gewährleisten.
ETRIEBSART PARKPLATZ
Wenn ein Fahrzeug am Magnetischer sensor steht, kann das Öffnen der Schranke über
die Öffnen-Taste bzw. die Funk-Fernsteuerung angesteuert werden. Die Schranke bleibt
geöffnet, bis das Fahrzeug die Lichtschranke an der Grenzlinie der vollständigen
Durchfahrt passiert hat.
Die Schließbewegung erfolgt 1 Sekunde nach erfolgter Durchfahrt (Fotozellen frei) und
wird durch eine Fotozellen bzw. Lichtkontaktleiste abgesichert. Diese
Sicherheitseinrichtungen steuern die Bewegung der Schranke auf Öffnen um, falls das
Fahrzeug im Wirkradius der Sicherheitseinrichtungen bleibt.
HINWEIS: Falls “Dip4 ON” und “Dip3 ON” geschaltet sind, wird die Schaltstellung von Dip
3 als OFF angenommen.
ACHTUNG: Die Zählung der Wartezeit vor dem automatischen Schließen der Schranke
erfolgt nur, wenn “Dip5 ON” geschaltet ist.
Hieraus folgt, daß die Schranke, wenn das Fahrzeug ohne weiterzufahren am
induktiven Sensor stehenbleibt (Fotozellen frei), nach der voreingestellten Zeit
schließt.
BETRIEBSWEISE DES STEUERUNGSZUBEHÖRS
ÖFFNUNG MIT FUNKTIONENSPERRE
DURCH DEN SCHALTER ODER DURCH DIE UHR
Diese Funktion ist in den Spitzenzeiten nützlich, wenn der Fahrzeugverkehr sich
verlangsamt (z. B. Schichtwechsel, Notfall im Wohn- oder Parkplatzbereich und, temporär,
bei Umzügen).
ANBRINGUNGSART
Durch die Verbindung an einen Schalter und/oder eine Uhr des Typs Tag/Woche (anstelle
der Taste NA zwischen 8 und 9), ist es möglich, die Schranke zu öffnen und solange offen
zu halten, bis der Schalter gedrückt wird oder die Uhr aktiv ist.
Bei offener Automation sind alle Steuerfunktionen untersagt.
Wenn die automatische Schließung aktiv ist “Dip 5 auf ON”, erfolgt, bei Freigabe der
Taste oder bei Erreichen der eingestellten Uhrzeit, die sofortige Schließung der Schranke;
anderenfalls ist es notwendig, einen neuen Befehl zu erteilen.
TASTE EINZELIMPULS (Dip 4 auf OFF)
An die Klemmen 8 und K der Tafel zu verbinden (führt diese Befehle durch: ÖFFNEN STOP - SCHLIESSEN - STOP - .....).
DRUCKKNOPFTAFELN UND WAHLSCHALTER
Werden 2 oder mehrere Druckknopftafeln angeschlossen, verbinden Sie die Öffnungsund Schließsteuerungen parallel miteinander (8-9 e 8-11), und die Stopanschlüsse
hintereinander (8-2).
Etwaige Schlüsselwählschalter müssen zwischen den Klemmen 8-9 und 811angeschlossen werden.
Wird keine Stop-Taste vorgesehen, brücken Sie die Klemmen 8-2 zusammen.
FUNKSENDER
Beim geschlossenem Schrankenbaum, betätigt er seine Öffnung. Während der Öffnung
hat der Funksender keine Wirkung, solange er die Endschalter der Öffnungsbeendigung
erreicht hat. Beim offenem Schrankenbaum, betätigt er seine Schließung.
Wird der Funksender während der Schließung gedrückt, kehrt die Schranke ihre
Bewegung um.
TECHNISCHE DATEN
Temperaturbereich
0 - 70 °C
Rel. Feuchte
< 95% (ohne Kondensbildung)
Anschlußspannung
230 Vac ± 10%
Frequenz
50/60 Hz
Netzstrom-Mikroschalter
20 ms
Ansteuerbare Leistung am Motorausgang
736 W
Max. Stromlast am Blinkleuchten-Ausgang
40 W - 250 Vac, cosj = 1
Max. Stromaufnahme d. Platine (ohne Zubehörteile) 30 mA
Stromfestigkeit der Klemmen D+, D0,8 A ± 15 % , 12 Vdc
Schutzart
IP54
Gewicht des Geräts
0,8 kg
Abmessungen
14,7 x 6 x 18 cm
ELEKTRISCHE SICHERHEITSVORRICHTUNGEN
Der Endschalter, der Motor und der Blinker der ECO RAPID PARK sind schon an der
elektronischen Schalttafel verbunden.
Nur die Drähte einer Druckknopftafel, der Photozellen und, natürlich, der
Versorgungsspannung sind zu verbinden.
Personen und Sachen müssen gegen das eventuell durch einen ungewollten Befehl
verursachte Quetschen geschützt werden: daher muss man wenigstens ein Paar von
Photozellen oder einen Sensor (pneumatisch oder mit Photozelle) unter dem
Schrankenbaum wie nach Abb.1-2-12 installieren.
Für die Verbindungen und die technischen Daten halten Sie sich bitte an den
entsprechenden Betriebsanleitungen ein.
WARTUNG
Die Wartungsarbeit nur durch spezialiesierten Fachleuten nach der
Ausschliessung der Spannung auszuführen.
Alle 20.000 Öffnungs- und Schließvorgänge ist die Auswuchtung den Schrankenbaum,
die Spannung des Entriegelungknopfs und der Schrankenbaum Halterung sowie der
Verschleißzustand der Endanschläge zu überprüfen.
Die Halterungen der Stangen-Stützwelle und die Gewindestange zur Federführung
schmieren. Sofern Installationsprobleme auftreten, ziehenSie die "TABELLE VON
EVENTUELLEN PROBLEMEN" zu Rate.
WICHTIGE SICHERHEITSVORSCHRIFTEN
FÜR DIE INSTALLATION
1. – Wenn nicht bereits an der elektrischen Schaltzentrale vorgesehen, muss vor der
Schaltzentrale ein thermomagnetischer Schalter installiert werden (omnipolar, mit
einer minimalen Kontaktöffnung von 3 mm), der ein von den internationalen Normen
anerkanntes Konformitätszeichen besitzt.
2. – RIB empfiehlt den Kabeltyp NPI07VVF mit einem minimalen Querschnitt von 1,5mm2
generell sollten die Normative IEC 364 und alle anderen geltenden Montagenormen
des Bestimmungslandes eingehalten werden.
ANMERKUNG: Die Erdung der Anlage ist obligatorisch
Die in diesem Handbuch aufgeführten Daten sind ausschließlich empfohlene Werte.
RIB behält sich das Recht vor, das Produkt zu jedem Zeitpunkt zu modifizieren.
Die Anlage muss in Übereinstimmung mit den gültigen Normen und Gesetzen montiert
werden.
Pag. 25 di 32
D
E
U
T
S
C
H
NORMALE BETRIEBSWEISE
DIP4 - OFF
LINIE
230VAC
Abb.8
BETRIEBSWEISE FÜR PARKPLÄTZE
DIP4 - ON
LINIE
230VAC
Eingang oder Ausgang
A
B
RX-TX = Photozellen
A
= Magnetischer Sensor
B
= Schranke
Abb.9
Pag. 26 di 32
D
E
U
T
S
C
H
VERBINDUNGSPLAN FÜR DIE GLEICHZEITIGE BETÄTIGUNG VON ZWEI SCHRANKEN
Pag. 27 di 32
ACCESSORI - ACCESSOIRES - ACCESSORIES -ZUBEHÖR
ACG8516 => 3mt (CME5277 + BA01086)
Asta 80x40 con mozzo
Lisse 80x40 avec moyeu
Boom arm 80x40 with fixing hub
Baum 80x40 mit Nabe
BA01086
Mozzo - Moyeu
Fixing hub - Nabe
ACG8537
Mozzo porta asta Ø80
Moyeu pour Lisse Ø80
Fixing hub Ø80
Nabe für Baum Ø80
ACG8491 => 3mt
Asta Ø80
Lisse Ø80
Boom Ø80
Baum Ø80
I
F
GB
D
Fig.10
Fig.11
ACG9130
Colonna di supporto
Fourche de support
Fork type support column
Stützgabel
ACG9060
Sensore di rilevamento presenza massa metallica autotarante
Detecteur electromagnetique autoreglant
Self-adjusting metallic mass detector with an inductive coil
Magnetischer sensor
ACG8516 + ACG7090 + ACG7095
Costa a fotocellula su asta con profilo
80x20 o tonda Ø60
ACG8516 + ACG7090 + ACG7095
Cordon de sécurité sur la lisse 80x20 ou
ronde Ø60
ACG8516 + ACG7090 + ACG7095
Photoelectric cell strip on 80x20 or Ø60
boom arms
ACG8516 + ACG7090 + ACG7095
Photozellen kontaktleiste in der 80x20 oder
Ø60 Schranken
Fig.12
Fig.13
Fig.14
Pag. 28 di 32
I
F
GB
D
Pag. 29 di 32
I
F
GB
D
Pag. 30 di 32
I
R.I.B. S.r.l.
25014 Castenedolo - Brescia - Italy
Via Matteotti, 162
Telefono ++39.030.2135811
Fax ++39.030.21358279 - 21358278
http://www.ribind.it - email: [email protected]
F
GB
automatismi per cancelli
D automatic entry systems
DICHIARAZIONE DI CONFORMITÁ - DECLARATION OF COMPLIANCE
DÉCLARATION DE CONFORMITÉ - ÜBEREINSTIMMNUGSERKLÄRUNG
Dichiariamo sotto la nostra responsabilità che l’operatore ECO-RAPID PARK è conforme alle seguenti norme e Direttive
L’opérateur ECO-RAPID PARK se conforme aux normes suivantes:
We declare under our responsibility that ECO-RAPID PARK operator is conform to the following standards:
Wir erklaeren das der ECO-RAPID PARK den folgenden EN-Normen entspricht
EN 12604
EN 12605
EN 55014-1
EN 55014-2
2000
2000
2000
1997
EN 60335-1
EN 60335-2-103
EN 61000-3-2
EN 61000-3-3
2002
200X
2000
1995
EN 61000-6-1
EN 61000-6-2
EN 61000-6-3
EN 61000-6-4
2001
1999
2001
2001
Inoltre permette un’installazione a Norme - Permit, en plus, une installation selon les normes suivants
You can also install according to the following rules - Desweiteren genehmigt es eine Installation der folgenden Normen:
EN12453
2000
EN 12445
2002
EN 13241-1
2003
Come richiesto dalle seguenti Direttive - Comme demandé par les suivantes Directives
As requested by the following Directives - Gemaß den folgenden Richtlinien
89/106/EEC
93/68/EEC
73/23/EEC
89/336/EEC
92/31/EC
93/68/EEC
Il presente prodotto non può funzionare in modo indipendente ed è destinato ad essere incorporato in un impianto costituito da ulteriori elementi.
Rientra perciò nell’Art. 4 paragrafo 2 della Direttiva 98/37/CEE (Macchine) e successive modifiche, per cui segnaliamo il divieto di messa in
servizio prima che l’impianto sia stato dichiarato conforme alle disposizioni della Direttiva
Le présent dispositif ne peut fonctionner de manière indépendante, étant prévu pour être intégré à une installation constituée d'autres éléments.
Aussi rentre-t-il dans le champ d'application de l'art. 4, paragraphe 2 de la Directive machines 98/37/CEE et de ses modifications successives. Sa
mise en service est interdite avant que l'installation ait été déclarée conforme aux dispositions prévues par la Directive
This product can not work alone and was designed to be fitted into a system made up of various other elements. Hence, it falls within Article 4,
Paragraph 2 of the EC-Directive 98/37 (Machines) and following modifications, to which respect we point out the ban on its putting into service
before being found compliant with what is provided by the Directive
Dieses Produkt kann nicht allein funktionieren und wurde konstruiert, um in einen von anderen Bestandteilen zusammengesetzten System
eingebaut zu werden. Das Produkt fällt deswegen unter Artikel 4, Paragraph 2 der EWG-Richtlinie 98/37 (Maschinen) und folgenden
Legal Representative
- Per la redazione del fascicolo tecnico di installazione nel rispetto della Direttiva Macchine 98/37/CEE, l’installatore può usufruire della
modulistica predisposta da RIB e scaricabile all'indirizzo internet http://www.ribind.it/exe/ribtec.exe
- Pour la redaction du présente notice technique d'installation a été rédigée dans le respect de la Directive Machines 98/37/CEE. Les formulaires RIB
sont à la disposition de l'utilisateur, ils peuvent être déchargés depuis le site http://www.ribind.it/exe/ribtecfr.exe
- For the editing of the technical installation brochure in compliance with the Machine Directive 98/37/CEE, the installer can avail himself of the
forms prepared by RIB, that can also be downloaded from the internet address: http//www.ribind.it/exe/ribtecen.exe
- Zur Verfassung der technischen Installationsbroschüre laut der Maschinenrichtlinie 98/37/CEE verfügt der Installateur über die von der Firma RIB
ausgestellten Vordrucke, die auch von dem Internet unter der Adresse http//www.ribind.it/exe/ribtecde.exe downloadet werden können.
Pag. 31 di 32
REGISTRO DI MANUTENZIONE - DOSSIER D’ENTRETIEN
MAINTENANCE LOG - WARTUNGSREGISTER
Il presente registro di manutenzione contiene i riferimenti tecnici e le registrazioni delle attività di installazione,
manutenzione, riparazione e modifica svolte, e dovrà essere reso disponibile per eventuali ispezioni da parte di
organismi autorizzati.
Ce dossier d’entretien contient les références techniques et les enregistrements des opérations d’installation,
d’entretien, de réparation et de modification effectuées, et devra être rendu disponible pour les inspections éventuelles
de part d’orgenismes autorisée
This maintenance log contains the technical references and records of installation works, maintenance, repairs and
modifications, and must be made available for inspection purposes to authorised bodies.
Dieser Wartungsregister enthält die technischen Hinweise, sowie die Eintragung der durchgeführten Installation-,
Reparatur- und Änderungstätigkeiten, und er muss zur Verfügung der zuständigen Behörden für etwaige Inspektionen
gesetzt werden, wenn sie das erfordern.
ASSISTENZA TECNICA
SERVICE D’ASSISTANCE TECHNIQUE
TECHNICAL ASSISTANCE
TECHNISCHE ASSISTENZ
NOME, INDIRIZZO, TELEFONO - NOM, ADRESSE, TÉlÉPHONE - NAME, ADDRESS, TELEPHONE NUMBER - NAME, ADRESSE, TELEFON
CLIENTE
CLIENT
CUSTOMER
KUNDE
NOME, INDIRIZZO, TELEFONO - NOM, ADRESSE, TÉlÉPHONE - NAME, ADDRESS, TELEPHONE NUMBER - NAME, ADRESSE, TELEFON
MATERIALE INSTALLATO
MATERIEL INSTALLEE
INSTALLATION MATERIAL
INSTALLIERTES MATERIAL
Data
Date
Date
Datum
Descrizione dell’intervento (installazione, avviamento, verifica delle sicurezze, riparazioni, modifiche)
Firma del tecnico
Firma del cliente
Description de l’intervention (installation, mise en marche, réglage, contrôle des sécurités, réparations, modifications)
Signature du techicien
Signature du client
Description of the operation (installation, start-up, adjustement, safety device check, repair, modifications)
Technician’s signature
Customer’s signature
Beschreibung der Kundendienstleistung (Installation, Inbetriebnahme, Überprüfung der Sicherheitsvorrichtungen, Reparaturen Änderungen) Unterschrift des Technikers Unterschrift des Kunden
I
F
GB
D
I
F
GB
D
Codice
Denominazione Particolare
ACG8110
Piastra da cementare
Codice
Denominazione Particolare
CCM6205
Cuscinetto motore 6205 ZZ
CCU6010
Cuscinetto 6010
Pressacavo Ottone N. 1/4
Lampada SF PIC 230V E27 40W
Microswitch a rotella
Condensatore 40µF 450V (110/60)
Condensatore 12,5µF 450V (220/60)
Condensatore 10µF 450V (230/50)
Albero quadro
Albero di traino
BA02160
BA03024
BA03139
BA03140
Portalampada 760 SB/SV
Gruppo finecorsa
Gruppo EURO-BAR 110-60
Gruppo EURO-BAR 230-50/60
BC00194
BC00195
Scheda EURO-BAR 230-50/60
Scheda EURO-BAR 110-60
CAL1354
Distanziale statore
CEL1072
CEL1254
CEL1351
CEL1379
CEL1380
CEL1425
CCA1101
CCA1102
Carcassa colonna
Pannello anteriore
CME1035
CME1087
®
Codice
Denominazione Particolare
CME1271
CME2021
CME2023
CME3047
CME4053
CME5200
CME5201
CME5203
CME5300
CME8009
CME9353
CME9401
Paracolpi
Corona con fermi
Corona con mozzo Z=50
Giunto con innesto
Ingranaggio folle
Bilanciere inferiore
Bilanciere superiore
Tirante filettato
Piatto p/quadro elettrico
Tubo guida molla
Cappellotto
Carcassina
CMO1229
CMO1234
CMO1236
CMO1240
Statore 230/50 monofase
Statore 220/60 monofase
Statore 110/60 monofase
Rotore
CPL1021
CPL1022
CPL1023
CPL1099
CPL1100
CPL1103
CPL1106
CPL1109
CPL1110
CPL1111
CPL1112
CPL1116
CPL1120
CPL1121
CPL1129
CPL1209
Semiscatola
Semiscatola forata
Guarnizione in PVC
Chiave di sblocco
Bussola Ø25
Distanziale
Tampone fermo meccanico
Fermo blocco
Supportino
Carter
Cappellotto lampeggiatore
Bussola snodo
Snodo sferico
Bussola Ø27
Serie camme finecorsa
Distanziale sblocco
CTC1104
CTC1107
CTC1136
CTC1235
CTC1206
CTC1280
CTC1401
Paraolio 50x72x10
Paraolio 25x47x7
Seeger I80
Molla di bilanciamento Ø=4
Molla a tazza 17,3x27,7x0,4
Ghiera KM5
Paraolio 50x80x8
CVA1059
CVA1077
CVA1380
CVA1381
CVA1909
Boccola MB 28-20 DU
Tubetto fermalampada
Copriventola motore
Ventola motore
Chiave a settore
CZM6203
Cuscinetto x rotore 6203ZZ
DTB8x50
Vite TCEI 8x50
25014 CASTENEDOLO (BS)-ITALY
Via Matteotti, 162
Telefono +39.030.2135811
Telefax +39.030.21358279-21358278
automatismi per cancelli
automatic entry systems http://www.ribind.it - email: [email protected]
ECO-RAPID PARK
Cod. CVA1358 - 26062003 - Rev. 10
Pag. 32 di 32