1
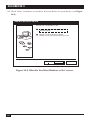
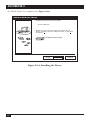
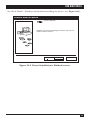
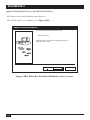
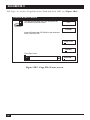
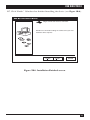
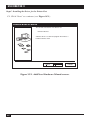
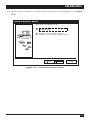
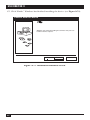
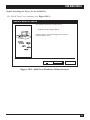
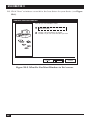
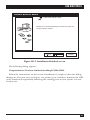
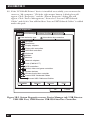
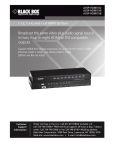
DECEMBER 2000
IC139A-R2
IC139AE-R2
USB Director II
DC
5V
UP
CUSTOMER Order toll-free in the U.S.: Call 877-877-BBOX (outside U.S. call 724-746-5500)
SUPPORT FREE technical support 24 hours a day, 7 days a week: Call 724-746-5500 or fax 724-746-0746
INFORMATION Mailing address: Black Box Corporation, 1000 Park Drive, Lawrence, PA 15055-1018
Web site: www.blackbox.com • E-mail: [email protected]
USB DIRECTOR II
FEDERAL COMMUNICATIONS COMMISSION
and CANADIAN DEPARTMENT OF COMMUNICATIONS
RADIO FREQUENCY INTERFERENCE STATEMENT
Class B Digital Device. This equipment has been tested and found to comply with
the limits for a Class B computing device pursuant to Part 15 of the FCC Rules.
These limits are designed to provide reasonable protection against harmful
interference in a residential installation. However, there is no guarantee that
interference will not occur in a particular installation. This equipment generates,
uses, and can radiate radio frequency energy, and, if not installed and used in
accordance with the instructions, may cause harmful interference to radio
communications. If this equipment does cause harmful interference to radio or
telephone reception, which can be determined by turning the equipment off and
on, the user is encouraged to try to correct the interference by one of the following
measures:
• Reorient or relocate the receiving antenna.
• Increase the separation between the equipment and receiver.
• Connect the equipment into an outlet on a circuit different from that to which
the receiver is connected.
• Consult an experienced radio/TV technician for help.
Caution:
Changes or modifications not expressly approved by the party
responsible for compliance could void the user’s authority to operate
the equipment.
To meet FCC requirements, shielded cables and power cords are required to
connect this device to a personal computer or other Class B certified device.
This digital apparatus does not exceed the Class B limits for radio noise emission from digital
apparatus set out in the Radio Interference Regulation of Industry Canada.
Le présent appareil numérique n’émet pas de bruits radioélectriques dépassant les limites
applicables aux appareils numériques de classe B prescrites dans le Règlement sur le brouillage
radioélectrique publié par Industrie Canada.
1
USB DIRECTOR II
NORMAS OFICIALES MEXICANAS (NOM)
ELECTRICAL SAFETY STATEMENT
INSTRUCCIONES DE SEGURIDAD
1. Todas las instrucciones de seguridad y operación deberán ser leídas antes de
que el aparato eléctrico sea operado.
2. Las instrucciones de seguridad y operación deberán ser guardadas para
referencia futura.
3. Todas las advertencias en el aparato eléctrico y en sus instrucciones de
operación deben ser respetadas.
4. Todas las instrucciones de operación y uso deben ser seguidas.
5. El aparato eléctrico no deberá ser usado cerca del agua—por ejemplo, cerca
de la tina de baño, lavabo, sótano mojado o cerca de una alberca, etc..
6. El aparato eléctrico debe ser usado únicamente con carritos o pedestales que
sean recomendados por el fabricante.
7. El aparato eléctrico debe ser montado a la pared o al techo sólo como sea
recomendado por el fabricante.
8. Servicio—El usuario no debe intentar dar servicio al equipo eléctrico más allá
a lo descrito en las instrucciones de operación. Todo otro servicio deberá ser
referido a personal de servicio calificado.
9. El aparato eléctrico debe ser situado de tal manera que su posición no
interfiera su uso. La colocación del aparato eléctrico sobre una cama, sofá,
alfombra o superficie similar puede bloquea la ventilación, no se debe colocar
en libreros o gabinetes que impidan el flujo de aire por los orificios de
ventilación.
10. El equipo eléctrico deber ser situado fuera del alcance de fuentes de calor
como radiadores, registros de calor, estufas u otros aparatos (incluyendo
amplificadores) que producen calor.
11. El aparato eléctrico deberá ser connectado a una fuente de poder sólo del
tipo descrito en el instructivo de operación, o como se indique en el aparato.
2
USB DIRECTOR II
12. Precaución debe ser tomada de tal manera que la tierra fisica y la polarización
del equipo no sea eliminada.
13. Los cables de la fuente de poder deben ser guiados de tal manera que no
sean pisados ni pellizcados por objetos colocados sobre o contra ellos,
poniendo particular atención a los contactos y receptáculos donde salen del
aparato.
14. El equipo eléctrico debe ser limpiado únicamente de acuerdo a las
recomendaciones del fabricante.
15. En caso de existir, una antena externa deberá ser localizada lejos de las lineas
de energia.
16. El cable de corriente deberá ser desconectado del cuando el equipo no sea
usado por un largo periodo de tiempo.
17. Cuidado debe ser tomado de tal manera que objectos liquidos no sean
derramados sobre la cubierta u orificios de ventilación.
18. Servicio por personal calificado deberá ser provisto cuando:
A: El cable de poder o el contacto ha sido dañado; u
B: Objectos han caído o líquido ha sido derramado dentro del aparato; o
C: El aparato ha sido expuesto a la lluvia; o
D: El aparato parece no operar normalmente o muestra un cambio en su
desempeño; o
E: El aparato ha sido tirado o su cubierta ha sido dañada.
3
USB DIRECTOR II
TRADEMARKS
The trademarks mentioned in this manual are the sole property of their owners.
4
USB DIRECTOR II
CONTENTS
1. Specifications . . . . . . . . . . . . . . . . . . . . . . . . . . . . . . . . . . . . . . . . . . . . . 6
2. Introduction . . . . . . . . . . . . . . . . . . . . . . . . . . . . . . . . . . . . . . . . . . . . . . 7
2.1 General . . . . . . . . . . . . . . . . . . . . . . . . . . . . . . . . . . . . . . . . . . . . . . . 7
2.2 What You Need . . . . . . . . . . . . . . . . . . . . . . . . . . . . . . . . . . . . . . . . . 7
2.2.1 What the Package Includes . . . . . . . . . . . . . . . . . . . . . . . . . . . . 7
2.2.2 What You Need to Supply . . . . . . . . . . . . . . . . . . . . . . . . . . . . . 7
3. Installation . . . . . . . . . . . . . . . . . . . . . . . . . . . . . . . . . . . . . . . . . . . . . . . 8
3.1 Hardware Installation . . . . . . . . . . . . . . . . . . . . . . . . . . . . . . . . . . . . 8
3.2 Software Driver Installation . . . . . . . . . . . . . . . . . . . . . . . . . . . . . . . 8
Step A: Installing the Driver for the Hub Device . . . . . . . . . . . . . . . 9
Step B: Installing the Driver for the RS-232 Serial Port . . . . . . . . . . 14
Step C: Installing the Driver for the Printer Port . . . . . . . . . . . . . . . 20
Step D: Installing the Driver for the COM Port . . . . . . . . . . . . . . . . 25
Step E: Check to Make Sure the USB Devices are
Installed Correctly . . . . . . . . . . . . . . . . . . . . . . . . . . . . . . . . . 30
5
USB DIRECTOR II
1. Specifications
Data Rate—RS-232 interface: 9600 to 115.2 kbps
Distance—RS-232 interface: 50 ft. (15.2 m)
Agency Compliance—CE; FCC Class B, Part 15; UL #E132137
Temperature—Operating: 32 to 158 °F (0 to 70 °C); Storage: 32 to 185°F (0 to
85 °C)
Indicators—(5) LEDs: (1) Power, (3) USB Port, (1) USB RS-232 Printer
Connectors—Interface A: (1) B Type USB, (3) A Type USB; Interface B: (1) DB25
female parallel; Interface C: (1) DB9 male RS-232
Power—Internal: From the RS-232 interface; External: IC139A-R2: 110 VAC,
IC139AE-R2: 220 VAC
Size—1.5"H x 5.6"W x 3.5"D (3.8 x 14.2 x 8.9 cm)
Weight—2.5 lb. (1.1 kg)
6
USB DIRECTOR II
2. Introduction
2.1 General
The USB Director II is an intelligent, stackable expansion module that connects to
a PC or server via the Universal Serial Bus (USB) port. It provides one high-speed
RS-232 serial port, one printer port, and three downstream USB ports for
connecting traditional serial devices and other USB devices. Two models are
available: one for 110 VAC and one for 220 VAC.
By simply plugging in a USB Director II, you will:
• Add one high-speed serial port, one printer port, and three downstream USB
ports to your PC or server in seconds.
• Eliminate the difficult configuration issues associated with higher-priced, older
card solutions, which take up valuable slots in your PC.
• Avoid the hassle of removing your PC cover, or rebooting the operating system
during installation.
2.2 What You Need
2.2.1 WHAT THE PACKAGE INCLUDES
• (1) USB Director II (part number IC139A-R2 or IC139AE-R2)
• (1) 6-ft. (1.8-m) USB cable (AB type)
• (1) switching power adapter (110 VAC for IC139A-R2, 220 VAC for
IC139AE-R2)
• (1) Windows 98 driver diskette (NOTE: For Windows 2000 or Windows ME
compatibility questions, please call Black Box Technical Support at 724-7465500.)
• (1) user’s manual
2.2.2 WHAT YOU NEED TO SUPPLY
• (1) Pentium-class CPU with USB port PC
• (1) available USB type A (downstream) port
7
USB DIRECTOR II
3. Installation
To install the USB Director II, follow these steps:
1. Verify that your system supports USB.
2. If it does not support USB, determine why.
3. Connect the appropriate cables to the connectors on the USB Director II and
to your devices.
4. Install the drivers.
5. Test the USB Director II for related PC platform.
3.1 Hardware Installation
Plug the flat end of the USB cable into the downstream A connector located in the
back of your computer or USB hub port. Plug the upstream B connector into the
USB Director II.
3.2 Software Driver Installation
NOTE
The driver installation is divided into four steps. Make sure you go
through the installation in order from Step A to Step D.
8
USB DIRECTOR II
Step A: Installing the Driver for the Hub Device
A1. Insert the Windows 98 CD into the CD-ROM drive.
NOTE
For Windows 2000 or Windows ME compatibility questions, please call
Black Box Technical Support at 724-746-5500.
A2. Click “Next” to continue (see Figure 3A-1).
Add New Hardware Wizard
Window driver file searches for new drivers for:
Generic USB Hub
A device driver is a software program that makes a
hardware device work.
< Back
Next >
Cancel
Figure 3A-1. Add New Hardware Wizard screen.
9
USB DIRECTOR II
A3. Click “Next” to initiate a search for the best driver for your device (see Figure
3A-2).
Add New Hardware Wizard
What do you want Windows to do?
Search for the best driver for your device,
(Recommended).
Display a list of the drivers in specific
location, so you can select the drive you want.
< Back
Next >
Cancel
Figure 3A-2. What Do You Want Windows to Do? screen.
10
USB DIRECTOR II
A4. Select “CD-ROM drive” or “Specify a location.” Click “Next” to start the search
(see Figure 3A-3).
Add New Hardware Wizard
Windows will search for new drivers in a driver database
on your hard drive, and in any of the following selected
locations. Click Next to start the search.
Floppy disc drives
CD-ROM drive
Microsoft Windows Update
✔ Specify a location
C: Win98
Browse…
< Back
Next >
Cancel
Figure 3A-3. Searching for a Driver.
11
USB DIRECTOR II
A5. Click “Next” to continue (see Figure 3A-4).
Add New Hardware Wizard
Window driver file search for the device.
Generic USB Hub
Windows is now ready to install the best driver for this
device. Click Back to select a different driver, or click Next
to continue.
C:/WINDOWS/INF/USB.INF
< Back
Next >
Figure 3A-4. Installing the Driver.
12
Cancel
USB DIRECTOR II
A6. Click “Finish.” Windows has finished installing the device (see Figure 3A-5).
Add New Hardware Wizard
Generic USB Hub
Windows has finished installing the software that your new
hardware device requires.
< Back
Finish
Cancel
Figure 3A-5. Driver Installation is Finished screen.
13
USB DIRECTOR II
Step B: Installing the Driver for the RS-232 Serial Port
B1. Insert the driver diskette into drive A:.
B2. Click “Next” to continue (see Figure 3B-1).
Add New Hardware Wizard
This wizard searched for new drivers for:
Unknown Device
A device driver is a software program that makes a
hardware device work.
< Back
Next >
Cancel
Figure 3B-1. What Do You Want Windows to Do? screen.
14
USB DIRECTOR II
B3. Click “Next” to initiate a search for the best driver for your device (see Figure
3B-2).
Add New Hardware Wizard
This wizard searched for new drivers for:
Unknown Device
A device driver is a software program that makes a
hardware device work.
< Back
Next >
Cancel
Figure 3B-2. Searching for New Drivers.
15
USB DIRECTOR II
B4. Select “Floppy disk drives.” Click “Next” to start the search (see Figure 3B-3).
Add New Hardware Wizard
Windows will search for new drivers in a driver database
on your hard drive, and in any of the following selected
locations. Click Next to start the search.
✔ Floppy disc drives
CD-ROM drive
Microsoft Windows Update
Specify a location
A:/
Browse…
< Back
Next >
Cancel
Figure 3B-3. Searching the Floppy Drive for Drivers.
16
USB DIRECTOR II
B5. Click “Next” to continue (see Figure 3B-4).
Add New Hardware Wizard
Window driver file search for the device.
Magic Control USB Interface Controller
Windows is now ready to install the best driver for this
device. Click Back to select a different driver, or click Next
to continue.
Location of driver:
A:/MCTUSB.INF
< Back
Next >
Cancel
Figure 3B-4. Continue screen.
17
USB DIRECTOR II
B6. Type “A:” in the “Copy files from” field and click “OK” (see Figure 3B-5).
Add New Hardware Wizard
The file MAGENUM.VXD on Windows 98
CD-ROM cannot be found.
OK
Cancel
Insert Windows 98 CD-ROM in the selected
drive, and click OK
Skip File
Details
Copy files from:
A:/
Figure 3B-5. Copy Files From screen.
18
Browse…
USB DIRECTOR II
B7. Click “Finish.” Windows has finished installing the device (see Figure 3B-6).
Add New Hardware Wizard
Magic Control USB Interface Controller
Windows has finished installing the software that your new
hardware device requires.
< Back
Finish
Cancel
Figure 3B-6. Installation Finished screen.
19
USB DIRECTOR II
Step C: Installing the Driver for the Printer Port
C1. Click “Next” to continue (see Figure 3C-1).
Add New Hardware Wizard
This wizard searched for new drivers for:
Unknown Device
A device driver is a software program that makes a
hardware device work.
< Back
Next >
Cancel
Figure 3C-1. Add New Hardware Wizard screen.
20
USB DIRECTOR II
C2. Click “Next” to initiate a search for the best driver for your device (see Figure
3C-2).
Add New Hardware Wizard
What do you want Windows to do?
Search for the best driver for your device,
(Recommended).
Display a list of the drivers in specific
location, so you can select the drive you want.
< Back
Next >
Cancel
Figure 3C-2. Search for Driver screen.
21
USB DIRECTOR II
C3. Select “Floppy disc drive.” Click “Next” to start the search (see Figure 3C-3).
Add New Hardware Wizard
Windows will search for new drivers in a driver database
on your hard drive, and in any of the following selected
locations. Click Next to start the search.
✔ Floppy disc drives
CD-ROM drive
Microsoft Windows Update
Specify a location
C:/Win98
Browse…
< Back
Next >
Cancel
Figure 3C-3. Selecting the Floppy Drive screen.
22
USB DIRECTOR II
C4. Click “Next” to continue (see Figure 3C-4).
Add New Hardware Wizard
Window driver file search for the device.
USS720 Device
Windows is now ready to install the best driver for this
device. Click Back to select a different driver, or click Next
to continue.
Location of driver:
A:/USS720.INF
< Back
Next >
Cancel
Figure 3C-4. Searching for the Driver.
23
USB DIRECTOR II
C5. Click “Finish.” Windows has finished installing the device (see Figure 3C-5).
Add New Hardware Wizard
USS720 Device
Windows has finished installing the software that your new
hardware device requires.
< Back
Finish
Figure 3C-5. Installation Finished screen.
24
Cancel
USB DIRECTOR II
Step D: Installing the Driver for the COM Port
D1. Click “Next” to continue (see Figure 3D-1).
Add New Hardware Wizard
This wizard searched for new drivers for:
COM port on MCT USB (COM 3)
A device driver is a software program that makes a
hardware device work.
< Back
Next >
Cancel
Figure 3D-1. Add New Hardware Wizard screen.
25
USB DIRECTOR II
D2. Click “Next” to initiate a search for the best driver for your device (see Figure
3D-2).
Add New Hardware Wizard
What do you want Windows to do?
Search for the best driver for your device,
(Recommended).
Display a list of the drivers in specific
location, so you can select the drive you want.
< Back
Next >
Cancel
Figure 3D-2. What Do You Want Windows to Do? screen.
26
USB DIRECTOR II
D3. Select “Floppy disc drive.” Click “Next” to start the search (see Figure 3D-3).
Add New Hardware Wizard
Windows will search for new drivers in a driver database
on your hard drive, and in any of the following selected
locations. Click Next to start the search.
✔ Floppy disc drives
CD-ROM drive
Microsoft Windows Update
Specify a location
A:/
Browse…
< Back
Next >
Cancel
Figure 3D-3. Selecting the Floppy Drive.
27
USB DIRECTOR II
D4. Click “Next” to continue (see Figure 3D-4).
Add New Hardware Wizard
Window driver file search for the device.
COM PORT ON MCT USB
Windows is now ready to install the best driver for this
device. Click Back to select a different driver, or click Next
to continue.
Location of driver:
A:/MCTPORT.INF
< Back
Next >
Cancel
Figure 3D-4. Searching for the Driver.
D5. Click “Finish.” Windows has finished installing the device (see Figure 3D-5).
28
USB DIRECTOR II
Add New Hardware Wizard
COM PORT ON MCT USB
Windows has finished installing the software that your new
hardware device requires.
< Back
Finish
Cancel
Figure 3D-5. Installation Finished screen.
The following dialog appears:
Congratulations! You have finished installing IC139A/E-R2.
Follow the instructions on the screen. Installation is complete when the dialog
disappears. Your one new serial port, one printer port, and three downstream USB
ports, numbered sequentially following the existing ports in your system, are now
ready to use.
29
USB DIRECTOR II
Step E: Check to Make Sure the USB Devices are Installed Correctly
E1. If the “IC139A-R2 COM port” device is installed successfully, you can move
the cursor to “My computer.” Click the right mouse button. Then click
“Properties.” The “System Properties” dialog box will appear. Click “Device
Management,” then select “Ports (COM & LPT).” The dialog box will show a
new direction “COM port on MCT USB[COM3].”
System Properties
General Device Manager Hardware Profiles Performance
View device by type
View device by connection
Floppy disk controllers
Hard disk controllers
Keyboard
Modem
Monitors
Disk Drives
Network adapters
Ports (C0M & LPT)
Communications Port (COM1)
Communications Port (COM2)
ECP Printer Port (LPT1)
COM port on MCT USB
SCSI controllers
Sound, video and game controllers
System devices
Universal serial bus controller
Lucent USS720-based Cables
Properties
Refresh
Print
Remove
OK
Cancel
Figure 3E-1. System Properties screen, Device Manager tab, Universal
Serial Bus Controller.
30
USB DIRECTOR II
E2. If the “IC139A-R2 RS-232” device is installed successfully, you can move the
cursor to “My computer.” Click the right mouse button. Click “Properties.”
The “System Properties” dialog box will appear. Click “Device Management,”
then select “Universal serial bus controller.” You will find that “Generic USB
Hub” and “Magic Control USB Interface Controller” are added under this
path.
System Properties
General Device Manager Hardware Profiles Performance
View device by type
View device by connection
Floppy disk controllers
Hard disk controllers
Keyboard
Modem
Monitors
Network adapters
Ports (C0M & LPT)
SCSI controllers
Sound, video and game controllers
System devices
Universal serial bus controller
Generic USB Hub
Intel 82371AB/EB PCI to USB Universal Host Controller
Magic Control USB Interface Controller
USB Root Hub
Universal serial bus controller
Properties
Refresh
Remove
Print
OK
Cancel
Figure 3E-2. System Properties screen, Device Manager tab, Universal
Serial Bus Controller, USB Director Interface Converter.
31
USB DIRECTOR II
E3. If the “IC139A-R2 Printer” device is installed successfully, you can move the
cursor to “My computer.” Click the right mouse button. A dialog box will
appear. Click “Properties,” and the “System Properties” dialog box will
appear. Click “Device Management,” then select “Lucent USS720-based
Cables” and click it. You will find that “Lucent USS720-based Cables” is added
under this path.
System Properties
General Device Manager Hardware Profiles Performance
View device by type
View device by connection
CD ROM
Disk Drives
Display adapters
Floppy disk controllers
Hard disk controllers
Keyboard
Modem
Monitors
Network adapters
Ports (C0M & LPT)
SCSI controllers
Sound, video and game controllers
System devices
Universal serial bus controller
Lucent USS 720-based Cables
Lucent USS 720-based Cables
Properties
Refresh
Print
Remove
OK
Cancel
Figure 3E-3. System Properties screen, Device Manager tab, USB Director
USB-1284 Port, UDB Director USB-1284 Interface Controller.
32
© Copyright 1999. Black Box Corporation. All rights reserved.
1000 Park Drive
•
Lawrence, PA 15055-1018
•
724-746-5500
•
Fax 724-746-0746