1
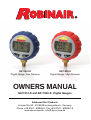
RA11910-E Digital Gauge · Low Pressure RA11920-E Digital Gauge · High Pressure Owners Manual RA11910-E and RA11920-E · Digital Gauges Advanced Test Products Lürriper Str. 62 · 41065 Mönchengladbach · Germany Phone +49 2161 - 59906-0 · Fax +49 2161 - 59906-16 www.atp-europe.de · [email protected] SET UP: Battery Installation: 01. Remove the rubber cover from the gauge by lifting it at the top and gently pulling it back to expose the cover on the unit. 02. Remove the battery cover by unscrewing the small screw on the top of the cover and pulling the cover away from the case. 03. Insert three (3) size “AAA” batteries, TAKING CARE TO NOTE THE BATTERY POLARITY marked on the inside of the case. 04. Replace the battery cover and the rubber boot. To Turn the Gauge On: 01. Press “ON/TARE” button once. The gauge will start up displaying pressure in Bar and Temperature in °C. To change the units of measure: a. Remove the rubber boot from the gauge. b. Using a pen or needle type tool press the small black button on the lower right of the battery cover to choose units: “psi”, “bar”, “kPa”, “MPa”, “kg/cm2”, “inHg” or “mmHg”. c. To enter temperature unit change mode press and hold the button 2 seconds; then press again to choose the temperature scale. d. To return to the Pressure Select range, press and hold the button again for 2 seconds. 2 OPERATION INSTRUCTIONS: 01. Before attaching gauge to a source of pressure, press “ON/OFF” button. All digits of the LCD light up for 2 seconds: 01. 02. And then: 03. LCD will show 0.0 pressure and previous Refrigerant Type and last recorded temperature. 04. If LCD is showing zero, then gauge does not need to be calibrated and can used/installed as is. a. If LCD does not show zero, gauge must be calibrated or “Tared”. In order to do so double click the ON/OFF button. Gauge now is calibrated and will show zero. 02. 04. 05. The gauge should be turned off again before the application of pressure. Press ON/OFF button and hold for 2 seconds, gauge will go off. 06. Install the gauge in the line and apply pressure. 07. Press “ON/OFF” button, all digits light up for 2 seconds. (The battery capacity always shows on display). 07. 3 08. The display will show last stored features (pressure and temperature units, refrigerant type) and current pressure/corresponding temperature reading: 08. 09. If needed, press “R” button to select the type of refrigerant you will be working with. Press “R” button until desired type of refrigerant is shown. Gauge will acknowledge selection by blinking chosen refrigerant number for 3 seconds after selection is made. Note: If “AIR” is selected, “- - -“ will be shown in the temperature and refrigerant sections of LCD. No Temp will be shown in this case. 10. If refrigerant is chosen and pressure is higher or lower than the programmed range “Or” will be shown in the T area; where “Or” indicates “out of range.” 11. If no pressure is detected in the line, the gauge will display the pressure as 0.0 and corresponding temperature value for the refrigerant pressure/ temperature chart. 12. If pressure is detected in the line, LCD will show the corresponding Tempera ture for the selected refrigerant at that pressure. 4 09. 10. 11. 12. 13. If the pressure reading is stable, it will be displayed on the LCD for 15 minutes until the unit automatically turns off. Unit also can be turned off by pressing and holding “ON/OFF” button for 2 seconds. Tare Function: 01. To use tare function just double click “ON/OFF” button while gauge is ON. 02. If gauge has been tared while attached to the line, line pressure reading will go off and will be saved. Gauge will show zero pressure instead. 02. Backlight Operation: 01. To turn on the light, press the YELLOW light button. 02. To turn off the light, press the YELLOW light button; alternatively, the backlight will shutoff automatically in 30 seconds. 5 Low Battery Display: When Low Battery capacity is less than 10 %, display shows: When Battery capacity is between 10 % and 25 %, display shows: When Battery capacity is between 50 % and 75 %, display shows: When Battery capacity is more than 75%, display shows: When Battery capacity is between 25 % and 50 %, display shows: Pressure Overload: If the pressure exceeds the gauge’s range, then “Err” will be shown in pressure display area and “- - -“ in Temperature area. The Type of Refrigerants/Gases: Press “R” button one time, the refrigerant number changes in the following sequence: R12R22R123R124R134AR401A R401BR402AR402BR404AR407CR409A R410AR417AR422AR422DR427AR502R507 R1234yfAIR 6 SPECIFICATIONS: Operation Range: High and Low Gauges: 0 55,15 bar/0 800 psi/0-5515 kPa/0 5,515 MPa/0 56,24 kg/cm2 Vacuum: 0 to -1,01 bar/0 to -29,9 inHg/0 to -760 mmHg Accuracy: High and Low Guages: ±1,5 % full scale, ±1 digit Resolution: High and Low Gauges: 0,01 bar/0,5 psi/1 kPa/0,001 MPa/0,01kg/cm2/0,2 inHg/3 mmHg Temperature: 1°C / 1°F Overpressure: 1000 psi/69 bar/6900 kPa/6,9 MPa/70,3 kg/cm2 Measurement Units: Pressure: bar/psi/kPa/MPa/kg/cm2/inHg/mmHg Temperature: ° C / °F Display: Display Type: Positive LCD with BLUE backlight; 50 x 30 mm Power requirement: Battery Type: 3 x 1.5 V size “AAA” Alkaline Batteries Battery Life: Approximately 140 hours 7 WARRANTY These gauges have been designed and manufactured to provide unlimited service. Should the unit be inoperative, after performing the recommended maintenance, a no-charge repair or replacement will be made to the original purchaser if the claim is made within ONE year from the date of purchase. This warranty applies to all repairable instruments that have not been tampered with or damaged through improper use. This warranty does not cover batteries. If the gauge requires repair or service, please return to the place of purchase. Repaired or replaced tools will carry an additional 90 days warranty. For more information please visit: www.atp-europe.de 8 BEDIENUNGSANLEITUNG EINSTELLUNGEN: Einlegen der Batterien: 01. Entfernen Sie die Gummi-Schutzkappe, indem Sie sie an der Oberseite vorsichtig anheben und sie vorsichtig nach hinten ziehen, bis die Rückseite sichtbar ist. 02. Entfernen Sie den Batteriefachdeckel, indem Sie die kleine Schraube an der Oberseite der Abdeckung abschrauben. 03. Legen Sie drei (3) Batterien vom Typ „AAA“ unter Berück sichtigung der korrekten Polarität ein. 04. Setzen Sie den Batteriefachdeckel wieder ein und bringen Sie die Gummi-Schutzkappe wieder an. Einschalten des Digitalmanometers: 01. Drücken Sie einmal kurz auf “ON/TARE”. Das Manometer zeigt den Druck in Bar und die Temperatur in ° C an. Ändern der angezeigten Einheiten: a. Entfernen Sie die Gummi-Schutzkappe. b. Benutzen Sie einen Stift oder spitzen Gegenstand, um den kleinen, schwarzen Taster auf der unteren rechten Ecke der Akkuabdeckung zu drücken. Sie können zwischen den folgenden Einheiten wählen: “psi”, “bar”, „kPa“, “MPa”, “kg/cm2”, “inHg” oder “mmHg”. c. Um die Temperatureinheit zu wechseln, halten Sie den Taster für 2 Sekunden gedrückt und wählen dann die gewünschte Einheit. d. Halten Sie den Taster erneut für 2 Sekunden gedrückt, um zur Auswahl der Druckeinheit zurückzukehren. 9 BEDIENUNG: 01. Drücken Sie „ON/TARE“ vor der Montage des Manometers. Alle Zeichen des LCD leuchten für 2 Sekunden auf: 01. 02. Anschließend: 03. Das Display zeigt einen Wert von „0.0“ bei der Druckanzeige, den letzten aus gewählten Kältemitteltyp und die ent sprechende Temperatur an. 04. Wird ein Wert von „0.0“ angezeigt, ist keine Kalibrierung notwendig. a. Wird ein anderer Wert angezeigt, muss das Manometer kalibriert oder „tariert” werden. Hierzu drücken Sie zweimal kurz hintereinander „ON/TARE“. Nun ist das Manometer kalibriert und zeigt „0.0“ an. 02. 04. 05. Schalten Sie das Manometer vor der Messung aus, indem Sie „ON/TARE“ für 2 Sekunden gedrückt halten. 06. Bringen Sie das Manometer am Mess kreislauf an und erhöhen Sie den Druck. 07. Drücken Sie “ON/TARE”, alle Zeichen des LCD leuchten für 2 Sekunden auf. 10 (Der Ladestand der Batterien wird immer angezeigt.) 07. 08. Die zuletzt gespeicherten Maßeinhei ten (Druck-/Temperatureinheiten, Kältemittel-Typ) und der aktuelle Messwert für Druck und Temperatur werden angezeigt. 08. 09. Falls nötig drücken sie “R”, um den entsprechenden Kältemittel-Typ aus zuwählen. Das Manometer bestätigt die aktuelle Auswahl durch 3-sekündi ges Blinken der entsprechenden Zahl. Anmerkung: Wenn „AIR“ ausgewählt wurde, wird „-- -„ bei dem Wert für Kältemittel-Typ und Temperatur angezeigt. 10. Falls der gemessene Druck des jeweiligen Kältemittels höher oder niedriger als der programmierte Bereich ist, wird „Or“ (Out of Range) im Temperaturfeld angezeigt. 11. Falls kein Druck gemessen wird, erscheinen „0.0“ und die entspre chende Temperatur des ausgewählten Kältemittels auf dem Display. 12. Wird ein Druck gemessen, zeigt das Display den Wert und die entspre chende Temperatur bei diesem Druck an. 09. 10. 11. 12. 11 13. Bleibt der Druck stabil, wird der gemesssene Wert für 15 Minuten auf dem Display angezeigt. Anschließend schaltet sich das Manometer automa tisch aus. Halten Sie „ON/TARE“ für 2 Sekunden gedrückt, um es manuell abzuschalten. Tara-Funktion: 01. Um die Tara-Funktion zu nutzen, drücken Sie im eingeschalteten Zustand 2 mal kurz hintereinander auf „ON/TARE“. 02. Im angeschlossenen Zustand wird die Druckanzeige ausgeschaltet und gespeichert. Das Manometer zeigt stattdessen „0.0“ an. Hintergrundbeleuchtung: 01. Um die Hintergrundbeleuchtung ein zuschalten, drücken Sie die gelbe Taste. 02. Nach 30 Sekunden oder erneutem Drücken der Taste wird die Hinter grundbeleuchtung wieder ausge schaltet. 12 02. Schwache Batterie: Bei einer Kapazität von weniger als 10 % wird Folgendes auf dem Display angezeigt: Bei einer Kapazität von 10 % bis 25 % wird Folgendes auf dem Display angezeigt: Bei einer Kapazität von 50 % bis 75 % wird Folgendes auf dem Display angezeigt: Bei einer Kapazität von mehr als 75 % wird Folgendes auf dem Display angezeigt: Bei einer Kapazität von 25 % bis 50 % wird Folgendes auf dem Display angezeigt: Überdruckbelastung: Sollte der Druck die Spezifikationen des Manometers übersteigen, wird “Err” im Druck- und “- - -“ im Temperaturbereich angezeigt. Kältemittel-Typen: Drücken Sie “R” um den Kältemitteltyp in folgender Reihenfolge zu wählen: R12R22R123R124R134AR401A R401BR402AR402BR404AR407CR409A R410AR417AR422AR422DR427AR502R507 R1234yfAIR 13 SPEZIFIKATIONEN: Funktionsbereich: Hoch- und Niederdruckmanometer: 0 55,15 bar/0 800 psi/0-5515 kPa/0 5,515 MPa/0 56,24 kg/cm2 Vakuum: 0 bis -1,01 bar/0 bis -29,9 inHg/0 bis -760 mmHg Genauigkeit: Hoch- und Niederdruckmanometer: ±1,5 % vom Endwert, ±1 digit Auflösung: Hoch- und Niederdruckmanometer: 0,01 bar/0,5 psi/1 kPa/0,001 MPa/0,01kg/cm2/0,2 inHg/3 mmHg Temperatur: 1°C / 1°F Überdruck: 1000 psi/69 bar/6900 kPa/6,9 MPa/70,3 kg/cm2 Maßeinheiten: Druck: bar/psi/kPa/MPa/kg/cm2/inHg/mmHg Temperatur: ° C / °F Display: Display Typ: Positiv-LCD mit blauer Hintergrundbeleuchtung; 50 x 30 mm Stromversorgung: Batterie-Typ: 3 x 1,5 V Alkalien Batterien Batterie-Lebensdauer: ca. 140 Stunden 14 GARANTIE: Diese Manometer wurden konzipiert und hergestellt, um unbegrenzte Leistung zu garantieren. Sollte es trotz empfohlener Instandhaltung nicht richtig funktionieren, wird eine kostenfreie Reparatur oder Ersatz dem ursprünglichen Käufer geboten, wenn der Anspruch binnen EINEM Jahr nach dem Kaufdatum angemeldet wird. Diese Garantie trifft auf alle Geräte zu, die nicht unsachgemäß repariert oder durch falschen Gebrauch beschädigt wurden. Batterien sind von der Garantie ausgeschlossen. Sollte das Manometer nicht korrekt arbeiten, senden Sie dieses bitte an den Händler zurück. Reparierte oder ersetzte Geräte haben eine zusätzliche Garantie von 90 Tagen. Für weitere Auskunft besuchen Sie bitte unsere Webseite unter: www.atp-europe.de. 15 MANUEL DE L’UTILISATEUR INSTALLATION: Installation de la batterie: 01. Enlever la protection en caoutchouc qui couvre le manomètre en le soulevant par le dessus et en le tirant délicatement en arrière pour découvrir le couvercle du dispositif. 02. Retirez le couvercle de la batterie en dévissant la vis et en tirant le couvercle de la jauge. 03. Insérer 3 piles AAA (faire attention à la polarité des piles affichée à l’intérieur de l’emplacement). 04. Replacer le capot et la protection en caoutchouc. Mise en marche du manomètre: 01. Appuyez une fois sur le bouton « ON/TARE ». Le manomètre affichera la pression en Bar et la température en °C. Pour changer d’unité: a. Enlever la protection en caoutchouc qui couvre le mano mètre e comme décrit précédemment. b. Ouvrez la porte de la batterie et d’un crayon ou d’un objet pointu, appuyez sur le petit bouton noir sur le coin inférieur droit du compartiment des piles de choisir des unités: psi, bar, kPa, MPa, Kg/cm2, inHg ou mmHg c. Pour l’unité de température, appuyer sur le bouton 2 secondes puis appuyer de nouveau pour choisir l’échelle de température. Pour retourner à la sélection de pression appuyer sur le bouton une nouvelle fois pendant 2 secondes. 16 MODE D’EMPLOI: 01. Avant de connecter le manomètre à une source de pression appuyer sur le bouton ON/OFF. Tous les segments de l’afficheur à cristaux liquides s’allument pendant 2 secondes: 01. 02. Puis: 03. L’affichage montre 0.0 et le type de réfrigérant ainsi que la température enregistrée précédemment. 04. Si l’affichage montre zéro, le mano mètre n’a pas besoin d’être calibré et peut être utilisé tel quel. a. Si l’affichage ne montre pas zéro, le manomètre doit être calibré. Pour ce faire, appuyer deux fois sur ON/ OFF. Le manomètre est ainsi calibré et affichera zéro. 02. 04. 05. Le manomètre doit être une nouvelle fois éteint avant l’application de la pression. Appuyer sur le bouton ON/OFF pendant 2 secondes, le manomètre sera en position OFF. 06. Mettre le manomètre en circuit et appliquer la pression. 07. Appuyer sur ON/OFF, tout les segments s’allument pendant 2 secondes (la capacité de la batterie s’affiche toujours sur l’afficheur.) 07. 17 08. L’affichage montrera les dernières caractéristiques enregistrées (pression, température, type de réfrigérant) et les valeurs actuelles de pression et de température.) 08. 09. Si nécessaire, appuyer sur le bouton R pour sélectionner le type de réfrigérant utilisé. Appuyer jusqu’à ce que le type de réfrigérant choisi soit affiché. Le manomètre acceptera cette sélection par clignotement du réfrigérant choisi pendant 3 secondes après sa sélection. Note: si AIR est choisi „-- -„ sera affiché dans les cases température et réfrigérant aucune température ne sera affichée dans cette case. 10. Pour un réfrigérant choisi, si la pression est supérieure ou inférieure à la gamme programmée, « Or » s’affichera dans la case température « Or » indiquant Out of range. 11. Si aucune pression n’est détectée dans le circuit, le manomètre affichera la pression 0.0 et la valeur de la température correspondante de la courbe température pression du réfrigérant. 18 09. 10. 11. 12. Si une pression est détectée dans le circuit, l’affichage montrera la température correspondant au réfrigérant choisi à cette pression. 12. 13. Si la lecture de la pression est stable, elle sera affichée pendant 15 minutes jusqu’à ce que le dispositif s’éteigne automatiquement. On peut aussi l’éteindre en appuyant sur le bouton « ON/OFF » pendant 2 secondes. Fonction Tarage: 01. Pour utiliser la fonction tarage, cliquer deux fois sur le bouton « ON/OFF » quand le manomètre est en fonction « ON ». 02. Si le manomètre a été taré alors qu’il était raccordé à la ligne, la lecture de la pression de la ligne s’effacera et sera sauvegardée. Le manomètre affichera à la place la pression à zéro. 02. Fonction Lumière: 01. Pour allumer la lumière, appuyer sur le bouton lumière JAUNE. 02. Pour éteindre la lumière, appuyer sur le bouton lumière JAUNE; sinon celle-ci s’éteindra automatiquement au bout de 30 secondes. 19 Batteries faibles: Quand la capacité des batteries est inférieure à 10 %, l’écran affiche: Quand la capacité des batteries est comprise entre 10 % et 25 %, l’écran affiche: Quand la capacité des batteries est comprise entre 50 % et 75 %, l’écran affiche: Quand la capacité des batteries est supérieure à 75 %, l’écran affiche: Quand la capacité des batteries est comprise entre 25 % et 50 %, l’écran affiche: Surpression: Si la pression dépasse les plages du manomètre, alors « Err » apparaîtra dans l’écran d’affichage de la pression et «- - -» dans l’affichage Température. Les types de réfrigérants / Gaz: Appuyer sur le bouton « R » une fois, le nombre des réfrigérants défile dans l’ordre suivant: R12R22R123R124R134AR401A R401BR402AR402BR404AR407CR409A R410AR417AR422AR422DR427AR502R507 R1234yfAIR 20 SPECIFICATIONS: Plage de fonctionnement: Manomètre BP et HP: 0 55,15 bar/0 800 psi/0-5515 kPa/0 5,515 MPa/0 56,24 kg/cm2 Vide: 0 à -1,01 bar/0 à -29,9 inHg/0 à -760 mmHg Précision: Manomètre BP et HP: ±1,5 % de la pression totale, ±1 chiffres Résolution: Manomètre BP et HP: 0,01 bar/0,5 psi/1 kPa/0,001 MPa/0,01kg/cm2/0,2 inHg/3 mmHg Température: 1°C / 1°F Surpression: 1000 psi/69 bar/6900 kPa/6,9 MPa/70,3 kg/cm2 Unités de mesure:: Pression: bar/psi/kPa/MPa/kg/cm2/inHg/mmHg Température: ° C / °F Affichage: LCD positif avec rétro éclairage bleu Dimensions 50 x 30 mm Alimentation: Batteries type: Alcaline 3 x 1,5 V taille « AAA » Durée de vie des batteries: environ 140 heures 21 GARANTIE Ces manomètres ont été conçus et fabriqués pour fournir un service illimité. En cas de non fonctionnement, après avoir réalisé la maintenance recommandée, une réparation gratuite ou un échange sera réalisé auprès de l’acheteur initial si la réclamation est faite durant la première année de la date d’achat. Cette garantie s’applique pour tous les équipements réparables qui n’ont pas été faussés ou endommagés par une mauvaise utilisation. Cette garantie ne couvre pas les batteries. Si le manomètre requiert une réparation ou un service, retourner le à votre fournisseur. Les pièces réparées ou remplacées seront couvertes par une garantie complémentaire de 90 jours. Pour plus d’informations, vous pouvez visiter notre site: www.atp-europe.de 22 MANUAL DEL PROPIETARIO INSTALACION: Instalación de las pilas: 01. Retire el protector de goma del manómetro levantándola de la parte superior y tirando firmemente hacia atrás para mostrar la carcasa de la unidad. 02. Retire la tapa de la baterí a aflojando el tornillo pequeño y tirando de la cubierta hacia fuera de la caja. 03. Inserte 3 pilas de tipo AAA, cuidando la polaridad de las pilas, marcada en el interior de la carcasa. 04. Reinstale la tapa de las pilas y la carcasa de goma. Encienda el manómetro: 01. Pulse el botón “ON/TARE” una vez. 02. El manómetro se encenderá mostrando la presión en bar y la temperatura en ° C. Para cambiar las unidades de medida: a. Retire la carcasa de goma como se ha descrito arriba. b. Con la punta de un bolí grafo, presione el pequeño botón negro de la parte inferior derecha de la puerta de la baterí a para elegir la unidad de medida: “psi”, “bar”, “kPa”, “MPa”, “kg/cm2”, “inHg” o “mmHg”. c. Para acceder al cambio de las unidades de medida mantenga pulsado el botón durante 2 segundos, a continuación púlselo de nuevo para elegir la escala de temperatura. Para volver a seleccionar presiones, manténgalo pulsado de nuevo durante 2 segundos. 23 INSTRUCCIONES DE MANEJO: 01. Antes de conectar el manómetro a una fuente de presión, pulse el botón ON/OFF, todos los dí gitos del display se encenderán durante 2 segundos. 01. 02. Y después: 03. La pantalla mostrará presión 0.0 y el tipo de refrigerante y temperatura registrada de la ultima medición. 04. Si la pantalla muestra cero, no se necesita calibrar el manómetro y se puede usar o instalar como está. a. Si la pantalla no muestra 0.0 hay que tararlo o calibrarlo, para ello simplemente pulse rápidamente dos veces la tecla on/off (doble click). El manómetro ahora está calibrado y mostrará cero. 02. 04. 05. Se debe volver a apagar el manóme tro antes de aplicarle presión. Mantenga pulsado on/off durante dos segundos para que se apague. 06. Instale el manómetro en la lí nea y aplí quele presión. 07. Pulse el botón “ON/OFF”, todos los dí gitos se iluminaran durante 2 segundos. (la carga de las pilas se muestra siempre en la pantalla). 24 07. 08. La pantalla mostrará las ultimas caracterí sticas almacenadas (unidades de presión y temperatura y tipo de refrigerante) y la presión y su lectura correspondiente de temperatura: 08. 09. Si fuera necesario, pulse el botón R para seleccionar el tipo de refriger ante con el que está trabajando. El manómetro le indicará la selección haciendo que el nombre del refriger ante seleccionado parpadee durante 3 segundos. Nota: Si selecciona “AIR”, “- - -“ aparecerá en las secciones de la pantalla destinadas a la temper atura y el refrigerante. No se mostrará temp en este caso. 10. Si se selecciona un refrigerante y la presión está fuera del rango de medida, Or aparecerá en el área de la temp. Or significa fuera de rango. 11. Si no se detecta presión en la lí nea, el manómetro mostrará la presión como 0.0 y el valor correspondiente de temperatura para el refrigerante correspondiente según tablas de presión temperatura. 09. 10. 11. 25 12. Si se detecta presión e la lí nea la pantalla mostrará la temperatura correspondiente para el refrigerante seleccionado a esa. 12. 13. Si la lectura de presión es estable, se mostrara en la pantalla durante 15 min. después la unidad se apagará automáticamente. La unidad se puede apagar manteniendo pulsando durante dos segundos el botón “ON/OFF”. Función Tara: 01. Para usar la función tara haga doble clic en el botón “ON/OFF” mientas el manómetro esté encendido. 02. Si e manómetro se ha tarado mientras estaba conectado a la lí nea, la lectura de presión de la lí nea dejara de mostrarse y se guardará. El manómetro mostrara presión cero en su lugar. Funcionamiento de la retroiluminación: 01. Para encender la luz, pulse el botón amarillo de la luz. 02. Para apagar la luz pulse el botón amarillo de la luz, alternativamente, la luz se apaga automáticamente cuando pasan 30 segundos. 26 02. Pilas gastadas: Cuando la capacidad de las pilas es inferior al 10%, la pantalla muestra: Cuando la carga de las pilas esta entre 10 % y 25 %, el display muestra: Cuando la carga de las pilas esta entre 50 % y 75 %, el display muestra: Cuando la carga de las pilas es mayor que el 75 %, el display muestra: Cuando la carga de las pilas esta entre 25 % y 50 %, el display muestra: Exceso de presión: Si la presión supera el rango del manómetro “Err” se mostrará en el área de presión y “- - -” en el área de la temperatura. Tipos de refrigerantes/gases: Pulsar la tecla “R” una vez, el número del refrigerante cambia según la siguiente secuencia: R12R22R123R124R134AR401A R401BR402AR402BR404AR407CR409A R410AR417AR422AR422DR427AR502R507 R1234yfAIR 27 ESPECIFICACIONES: Rango de medida: Manómetros de Alta y Baja presión: 0 55,15 bar/0 800 psi/0-5515 kPa/0 5,515 MPa/0 56,24 kg/cm2 Vací o: 0 a -1,01 bar/0 a -29,9 inHg/0 a -760 mmHg Precisión: Manómetros de Alta y Baja presión: ±1,5 % en toda la escala, ±1 dí gito Resolución: Manómetros de Alta y Baja presión: 0,01 bar/0,5 psi/1 kPa/0,001 MPa/0,01kg/cm2/0,2 inHg/3 mmHg Temperatura: 1°C / 1°F Sobrepresión: 1000 psi/69 bar/6900 kPa/6,9 MPa/70,3 kg/cm2 Unidades de Medida: Presión: bar/psi/kPa/MPa/kg/cm2/inHg/mmHg Temperatura: ° C / °F Pantalla (display): Tipo: LCD Positivo con retroiluminación azul Tamaño: 50 x 30 mm Alimentación: Tipo de pila: 3 x 1,5 V tamaño “AAA” Pilas alcalinas Vida de las pilas: Aproximadamente 140 horas 28 GARANTIA Estos manómetros se han diseñado y fabricado para ofrecerle un servicio ilimitado. Si la unidad dejara de funcionar, tras realizar el mantenimiento recomendado, se realizara la reparación o cambio sin cargo al comprador original si la reclamación se realiza hasta un año después de la fecha de compra. Esta garantí a se aplica a todos los instrumentos reparables que no hayan sido dañados o estropeados debido a un uso inadecuado. La garantí a no cubre las pilas. Si el manómetro necesita reparación, por favor devuelvalo al lugar de compra. Productos reparados os sustituidos tendrán una garantí a adicional de 90 dí as, si desea más información por favor visite: www.atp-europe.de 29 MANUALE DI ISTRUZIONE CONFIGURAZIONE: Installazione batteria: 01. Rimuovere la copertura in gomma del manometro sollevando in alto e con delicatezza tirandola via in modo da scoprire la parte posteriore. 02. Togliere il coperchio della batteria svitando la piccola vite in alto. 03. Inserire tre (3) batterie tipo “AAA” FACENDO ATTENZIONE A NOTARE LA POLARITA'DEL LE BATTERIA segnata all'interno del contenitore. 04. Rimontare il coperchio della batteria e la copertura in gomma. Selezionare il manometro ON: 01. Premere una volta il pulsante “ON/TARE”. Il manometro visualizzerà la pressione in Bar e la temperatura in °C. Per cambiare le unità di misura: a. Rimuovere la copertura in gomma. b. Usando una penna o uno strumento affilato, premere il piccolo pulsante nero in basso a destra dello sportello della batteria per selezionare le unità: "psi", "bar", “kPa”, "MPa", "kg/cm2", "inHg" o "mmHg". c. Per entrare sul cambio delle unità temperatura premere il pulsante per 2 secondi: poi premere ancora per scegliere la scala della temperatura. d. Per ritornare alla selezione del campo della pressione, premere il pulsante e attendere ancora per 2 secondi. 30 Istruzioni operative: 01. Prima di collegare il manometro alla sorgente di pressione premere il pulsante ”ON/OFF”. Tutti i caratteri LCD si accenderanno per 2 secondi. 01. 02. E dopo: 03. Lo schermo LCD visualizzerà la pressione 0.0 dell precedente tipo di refrigerante e l'ultima temperatura registrata. 04. Se lo schermo LCD sta visualizzando zero, il manometro non ha bisogno di essere calibrato e può essere usato/ installato così come è. a. Se lo schermo LCD non indica zero, il manometro deve essere calibrato o “Tared”. Per fare questo dobbiamo fare doppio click sul pulsante “ON/OFF”. Il manometro ora è calibrato e visualizzerà zero. 02. 04. 05. Il manometro dovrebbe essere ancora spento prima dell 'utilizzo in pressione. Premere il pulsante “ON/OFF” e attendere per 2 secondi, il manometro si spengerà. 06. Installare il manometro sulla linea e immettere la pressione. 31 07. Premere il pulsante “ON/OFF”, tutti i caratteri si illumineranno per 2 secondi. (Lo stato della batteria e ’sempre visualizzato). 08. Lo schermo visualizzerà le ultime letture memorizzate (unità di pressio ne e temperatura e tipo di refrigerante) e leggendo l ´attuale pressione/tempe ratura corrispondente: 07. 08. 09. Se c'è bisogno di selezionare il tipo di refrigerante, premere il pulsante “R” fino a visualizzare il tipo di refrigerante desiderato. Il manometro riconoscerà il numero del refrigerante scelto lampeggiando per 3 secondi dopo che questo e ‘stato selezionato. Nota: Se e ‘selezionato “AIR” , nelle sezioni della temperatura e tipo di refrigerante ´dello schermo LCD verrà visualizzato “---“. T non sarà visualizzato in questo caso. 10. Se la pressione è molto alta oppure molto bassa per il refrigerante scelto e programmato, nell’area T sarà visualizzato “Or”: dove “Or” indica fuori dal campo di misura”. 09. 10. 11. Se non viene rilevata pressione sulla linea, il manometro visualizzerà la pressione con ”0.0” corrispondente al 11. 32 valore della temperatura e pressione refrigerante/tabella temperatura. 12. Se nella linea viene rilevata la pressione, lo schermo LCD visualizzerà la temperatura corrispondente alla pressione del refrigerante selezionato. 12. 13. Se la lettura della pressione è stabile, questa sarà visualizzerà sullo schermo LCD per 15 minuti fino a che l’unità si spengerà automaticamente. L’unità può anche essere spenta premendo il pulsante “ON/OFF” per 2 secondi. Funzione Tara: 01. Per usare la funzione tara, fare doppio click sul pulsante “ON/OFF” mentre il manometro è in posizione ON. 02. Se il manometro è stato tarato mentre era collegato alla linea, la lettura della pressione in linea si interromperà e sarà salvata. Il manometro invece visualizzerà pressione zero. 02. Funzione di retroilluminazione: 01. Per illuminare lo schermo, premere il tasto GIALLO. 02. Per togliere la luminosità dello schermo, premere il tasto GIALLO, in alternativa la retroilluminazione si spengerà automaticamente dopo 30 secondi. 33 Batteria scarica: Quando la capacità della batteria è minore del 10 % lo schermo indica: Quando la capacità della batteria è tra il 10 % e 25 % lo schermo indica: Quando la capacità della batteria è tra il 50 % e 75 % lo schermo indica: Quando la capacità della batteria è più del 75 % lo schermo indica: Quando la capacità della batteria è tra il 25 % e 50 % lo schermo indica: Sovraccarico di pressione: Se la pressione eccede il campo di misura dei manometri, nell’area dello schermo sarà visualizzato “Err” e nell’area T “---“. Tipo di gas refrigeranti: Premere il pulsante “R” per una sola volta, il numero dei refrigeranti cambia nella seguente sequenza: R12R22R123R124R134AR401A R401BR402AR402BR404AR407CR409A R410AR417AR422AR422DR427AR502R507 R1234yfAIR 34 CARATTERISTICHE TECNICHE: Campo di lavoro: Manometro Alta e Bassa Pressione: 0 55,15 bar/0 800 psi/0-5515 kPa/0 5,515 MPa/0 56,24 kg/cm2 Vuoto: 0 to -1,01 bar/0 to -29,9 inHg/0 to -760 mmHg Precisione: Manometro Alta e Bassa Pressione: ±1,5 % su l'intera scala, ±1 cifre Risoluzione: Manometro Alta e Bassa Pressione: 0,01 bar/0,5 psi/1 kPa/0,001 MPa/0,01kg/cm2/0,2 inHg/3 mmHg Temperatura: 1°C / 1°F Sovrappressione: 1000 psi/69 bar/6900 kPa/6,9 MPa/70,3 kg/cm2 Unità di misura: Pressione: bar/psi/kPa/MPa/kg/cm2/inHg/mmHg Temperatura: ° C / °F Schermo: Tipo di schermo: LCD positivo con retroilluminazione BLU Dimensioni LCD: 50 x 30 mm Potenza richiesta: Batteria tipo: 3 x 1,5 V AAA batteria alcalina Durata batteria: circa 140 ore 35 GARANZIA Questi tipi di manometri sono stati progettati e realizzati da prevedere un uso illimitato. Se l’unità dopo avere eseguito le operazioni di manutenzione non dovesse essere operativa, sarà sostituita o riparata gratuitamente sull ’acquisto originale se il reclamo avviene entro un anno dalla data di acquisto. Questa garanzia si applica a tutti gli strumenti riparabili che non sono stati manomessi o danneggiati attraverso un uso improprio. Questa garanzia non copre le batterie. Se il manometro richiede una riparazione o assistenza, si prega di restituirlo presso la sede di acquisto. Gli strumenti riparati o sostituiti porteranno ad un aumento del periodo di garanzia di 90 giorni. Per maggiori informazioni vi preghiamo di visitare il nostro sito: www.atp-europe.de 2013-06