1
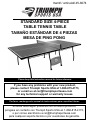
Item# / artículo# 45-6074 STANDARD SIZE 4-PIECE TABLE TENNIS TABLE TAMAÑO ESTÁNDAR DE 4 PIEZAS MESA DE PING PONG Please keep this instruction manual for future reference If you have any problems with your new product, please contact Triumph Sports USA at 1-866-815-4173, or e-mail us at [email protected] for any technical support or warranty issues. Por favor, mantenga este manual de instrucciones para consultas futuras Si usted tiene algún problema con su nuevo producto, póngase en contacto con Triumph Sports USA en 1-866-815-4173, o por correo electrónico a [email protected] para cualquier soporte técnico o por cuestiones de garantía. Limited 90-Day Triumph Sports USA, Inc. Warranty All Triumph Sports USA, Inc. (TSU) games have a limited 90-day from date of purchase warranty. This warrants the retail purchaser for any TSU game purchased to be free from any defect in materials and construction for 90 days from the date of purchase. The only exceptions to the warranty include main frames, tabletops, playing surfaces, batteries or tools. Damaged main frames, tabletops, playing surfaces need to be returned to the store as we are unable to replace these parts. Normal play wear and usage is not covered under the warranty, nor is wear or damage due to improper use of the TSU game. This will void any and all TSU warranties. A PURCHASE RECEIPT (or other proof of purchase date) will be required before any warranty service is initiated. All requests for warranty service can be submitted by email, in writing or by contacting our Customer Service Department at: 1-866-815-4173 or email us at [email protected]. IMPORTANT NOTICE! Please contact us before returning the product to the store. Warnings WARNING:Choking Hazard--Toy contains small balls and/or small parts. Not for children under 3 years of age. WARNING: Rotating the game should be done under adult supervision. Rotating table may cause a pinching hazard for young children and pets. Please exercise caution. At least two adults are needed to put this game table together. Triumph Sports USA 11327 W Lincoln Ave. West Allis, WI 53227 www.triumphsportsusa.com ©2013 Triumph Sports USA. All Rights Reserved. Limitada de 90 días Triumph Sports USA, Inc. Garantía Todos los juegos de Triumph Sports USA, Inc. (TSU) tienen una limitada de 90 días desde la fecha de la garantía de la compra. Esto garantiza al comprador al por menor de cualquier juego TSU comprado está libre de cualquier defecto en los materiales y la construcción durante 90 días a partir de la fecha de compra. Las únicas excepciones a esta garantía incluyen tramas principales, mesas, superficies de juego, baterías o herramientas. Marcos principales dañados, mesas, superficies de juego tienen que ser devueltos a la tienda ya que no podemos reemplazar estas piezas. Reproducción normal desgaste y el uso no está cubierto por la garantía, ni se desgaste o daño debido a un uso inadecuado del juego TSU. Esto anulará cualquier garantía TSU. Se requerirá una factura de compra (u otra prueba de la fecha de compra) antes de iniciar cualquier servicio de garantía. Todas las solicitudes de servicio de garantía pueden ser enviadas por correo electrónico, por escrito o poniéndose en contacto con nuestro Departamento de Servicio al Cliente al: 1-866-815-4173 o envíenos un email a [email protected]. Advertencias ADVERTENCIA: Riesgo de asfixia - Toy contiene pequeñas bolas y / o partes pequeñas. No recomendado para niños menores de 3 años de edad. ADVERTENCIA: Al girar el juego debe hacerse bajo supervisión de un adulto. Mesa giratoria puede producir riesgos para pellizcar para los niños pequeños y las mascotas. Por favor tenga cuidado. Se necesitan por lo menos dos adultos para poner este juego de mesa juntos. Asegúrese de revisar todos los juegos emocionantes Triumph Sports USA. tiene para ofrecer. Visite nuestro sitio web en: BILLAR DARDOS MESAS DE JUEGO Triumph Sports USA 11327 W Lincoln Ave. West Allis, WI 53227 www.triumphsportsusa.com ©2013 Triumph Sports USA. All Rights Reserved. CASINO JUEGOS AL AIRE LIBRE DIANAS English Español Herramientas Necesarias TOOLS REQUIRED Phillips Screwdriver - Not Included Standard (Flat Head Screwdriver) - Not Included Wrench - Included Allen Key - Included CAUTION ! Power Tools - Set Low Torque Destornillador Phillips - No Incluido Destornillador de Cabeza Plana - No incluido Llave Inglesa - Incluido Llave Allen - Incluido High Torque over tightened Electric Screwdrivers may be helpful during assembly; however, please set a low torque and use extreme caution. Los destornilladores eléctricos pueden ser de gran ayuda durante el ensamblado; sin embargo, por favor ajuste el par de giro bajo y sea extremadamente precavido. ASSEMBLY TIPS 1 - Please read the instructions carefully, and follow all assembly, operation or safety instructions properly in order to avoid damage or injury. For the assembly, at least two adults are required. 2 - Some figures or drawings may not look exactly like your product. Please read and understand the text before beginning each assembly step. CONSEJOS PARA EL ENSAMBLADO 1 - Por favor lea las instrucciones con cuidado y siga todo durante el montaje, la operación o instrucciones de seguridad correctamente para evitar el daño o la herida. Para el montaje, por lo menos se requieren dos adultos. 2 - Algunas figuras o dibujos podrían parecer no estén exactamente como su producto. Por favor lea y entienda el texto antes de iniciar cada paso del montaje. AVISO IMPORTANTE! IMPORTANT NOTICE! 1 - This product is intended for INDOOR use only. 1 - Este producto está destinado para el uso INTERIOR solamente. 2 - Please Do Not sit, climb or lean on the game table. 2 - Por favor No sientes, subas o inclínes la mesa de juego. 3 - Please Do Not drag the table when moving it in order to avoid the damaged on the legs. 3 - Por favor No arrastres la mesa cuando está en movimiento para evitar el daño sobre las piernas. 4 - Please only use spray furniture polish to clean the exterior surfaces on the game table. 4 - Por favor use sólo la cera espray de muebles para limpiar las superficies exteriores sobre la mesa de juego. 5 - This is not a child's toy, adult supervision is required for children playing this game. 5 - Esto no es un juguete de niños, se requieren la supervisión adulta para niños cuando está jugando este juego. CAUTION ! Changes or modifications not expressly approved by the party responsible for compliance could void the user’s authority to operate the equipment. WARNING: Adult Assembly Required. WARNING: Los cambios o modificaciones no expresamente aprobado por la parte responsable del cumplimiento podrían anular la autoridad del usuario para operar el equipo. ADVERTENCIA: Las tareas de montaje debe realizarlas un adulto. ADVERTENCIA: PELIGRO DE ASFIXIO - - Este artículo contiene piezas pequeñas y / o pequeñas bolas. No apto para menores de 3 años. X4 Strong Adults Needed No Children in Assembly Area Keep away from pets Adultos fuertes necesarios Ningunos niños en el área de asamblea Mantenga lejos de animal doméstico 45-6074 (Continued on the next page.) Do not use or keep product outdoors. For indoor use only. No wet/humid conditions. No use y no guarde el produco al aire libre. Para el empleo de interior sólo. Ningunas condiciones mojadas/húmedas. (Continúe en la siguiente página.) English Español 45-6074 PARTS LIST / LISTA DE PARTES 1 2 3 x2 Table Surface-A Superficie de Mesa-A 5 4 x2 x2 Table Surface-B Table Tennis Paddle Superficie de Mesa-B 6 Paleta de Tenis de Mesa 7 x2 Tubo de Conexión Linkage Tube Curved Outer Leg Pierna Exterior Curved Inner Leg Pierna Interior con Corchete with Cap Curvado con Gorra with Cap Curvado con Gorra with Stop Bracket de Parada 10 9 11 x6 Bracket 13 Safety Strap - Long Correa de Seguridad - Largo Plastic Corner Wheel 22 Plastic Panel with Frame Panel Plástico con Marco “T” Washer 6MM Washer Tornillo M5 X 13MM Tornillo M4 X 12MM M6 X 50MM Bolt x1 Espacio 16mm M6 Nut x1 Llave Inglesa (Continued on the next page.) Allen Key 1 Cerrojo M6 X 50MM x10 A9 Wrench Corchete de Pierna - B x10 x8 Arandela 6mm x88 M5 X 13MM Screw Leg Bracket - B A6 16MM Spacer A8 A7 Corchete de Pierna - A A5 x28 Cerrojo M6 X 45MM Poste de Red x4 x47 M4 X 12MM Screw Arandela “T” x8 M6 X 45MM Bolt Net Post A2 x2 A4 A3 Red A1 x2 Delantal Lateral (1.25m) x2 x8 Leg Bracket - A Rueda Side Apron (1.25m) 20 x4 Rincón Plástico 21 Net 19 x4 x4 x1 Correa de Seguridad - Corto 18 17 Tubo de Conexión 16 x2 Safety Strap - Short Linkage Tube Delantal Final (1.35m) 15 x1 45-6074 End Apron (1.35m) 14 x2 x2 Cerradura de Gravedad Gravity Lock Bola de Tenis de Mesa 12 x2 Corchete Table Tennis Ball 8 x2 x2 x2 Llave Allen (Continúe en la siguiente página.) Tuerca 6mm English Español 45-6074 PRE-INSTALLED PARTS / PIEZAS PREINSTALADAS P1 P2 x4 Outer Leg Cap Gorra de Pierna Exterio x4 Inner Leg Cap Gorra de Pierna Interior ASSEMBLY INSTRUCTIONS: INSTRUCCIONES DE ENSAMBLAJE 1. Find a clean, level place to begin the assembly of your Table Tennis Table Game. We recommend that two adults work together to assemble this table tennis table game. 1. Encuentre un lugar limpio, plano para comenzar el montaje de su Mesa de Tenis de Mesa. Recomendamos dos adultos trabajen juntos para montar este juego de tenis de mesa. 2. Remove all the parts from the box and verify that you have all of the listed parts as shown on the Parts list page. Carefully cut or tear the four corners of the box so that the bottom of the box can be used as your work surface. 2. Quite todas las partes de la caja y verifique que están todas las partes catalogadas como mostrado en la página de lista de partes. Con cuidado de cortar o rasgar los cuatro rincones de caja de modo que el fondo de la caja podría ser usado como su superficie de trabajo. 45-6074 (Continued on the next page.) 2 (Continúe en la siguiente página.) Español English 1 X2 2 X2 9 X6 13 X1 14 X2 A1 X3 A7 X 24 FIG. 1A A7 9 A1 14 13 FIG. 1 Pla / J yer ug ad or 1 Note: Align the inside seams of each sections so that pre-drilled holes line up across from each other. 2 Nota: Alinee las costuras interiores de cada secciones de modo que los agujeros pre-taladrados alinee a través el uno del otro. Ce nte 2 r/ Ce ntr o 1 9 Note: Center gap tolerance approximately 10~13mm. Pla / J yer ug ad or Nota: La tolerancia de la distancia central está aproximadamente de 10~13mm. A1 14 FIG.1 FIG.1 3. Place Table Surface-A (#1) and Table Surface-B (#2) with the painted surface facing down on a flat surface. 3. Coloque la Superficie de Mesa-A (#1) y la Superficie de Mesa-B (#2) con la superficie pintada cara hacia abajo sobre una superficie plana. 4. Connect Table Surfaces together using three Brackets (#9) using twelve Screws (#A7). See FIG. 1 and 1A. 4. Conecte juntos usando 3 Corchetes (#9) usando 12 Tornillos (#A7). Vea la FIG.1 y 1A. 5. Attach the Safety Strap - Long (#13) and Safety Strap - Short (#14) to the surface using three Screws (#A1). See FIG. 1. 45-6074 (Continued on the next page.) 5. Adjunte la Correa de Seguridad-Largo (#13) y la Correa de Seguridad-Corto (#14) a la superficie usando 3 Tornillos (#A1). Vea la FIG. 1. 3 (Continúe en la siguiente página.) English Español A7 5 X2 6 X2 19 X8 20 X4 A7 X 64 NOTE: Make sure that the oval cut-out in the Leg Bracket are facing the center of the table for proper installation. FIG. 2A 19 NOTA: Asegúrese que el recorte oval en el Corchete de Pierna está cara hacia el centro de la mesa para una instalación apropiada. P1 5 P2 FIG. 2 A7 19 6 This is hole for “Gravity Lock” assembly. / Este agujero es para montar la “Cerradura de Gravedad”. Pla / J yer ug ad or 20 19 A7 19 20 Ce nte r/ Ce ntr o 19 Pla / J yer ug ad or FIG.2 6. Place one Curved Outer Leg with Cap (#5) on the player end of the table half and one Curved Inner Leg with Cap (#6) on the center end of the table half. 7. Attach the Leg Bracket (#19 & #20) to the Curved Outer Leg (#5) and the Curved Inner Leg (#6) using Screws (#A7). See FIG. 2A. (Continued on the next page.) 6. Coloque la Pierna Exterior Curvado con Gorra (#5) sobre el jugador final de la mitad de mesa y una Pierna Interior Curvado con Gorra (#6) sobre el centro final de la mitad de mesa. 7. Adjunte el Corchete de Pierna (#19 & #20) a la Pierna Exterior Curvado (#5) y la Pierna Interior Curvado (#6) usando Tornillos (#A7). Vea la FIG. 2A. 8. Repeat the above steps for the other table half. 45-6074 FIG.2 8. Repita dichos pasos para la otra mitad de mesa. 4 (Continúe en la siguiente página.) English Español FIG. 3A 7 X2 8 X2 5 A2 A5 A4 A4 A6 8 A2 X8 A4 X 16 A5 X8 A6 X8 A8 X1 A9 X1 5 FIG. 3 6 A8 Pla / J yer ug ad or 8 7 Ce nte r/ Ce ntr o A9 FIG. 3B Pla / J yer ug ad or FIG.3 Note: Be careful of the assembly direction on pictures when you assemble the Linkage Tube #7 and #8 in order to fit the folding function. A6 7 A4 Nota: Que tenga cuidado sobre la dirección de montaje de cuadros cuando ud. está montando el Tubo de Conexión #7 & #8 para encajar la función plegable. A4 A2 6 A5 FIG.3 9. Attach one end of the Linkage Tube (#8) to the inside of the Curved Outer Leg (#5) using one Bolt (#A2), two Washers (#A4), one Spacer (#A5) and one Nut (#A6). See FIG. 3A. 9. Adjunte una final del Tubo de Conexión (#8) a la parte interna de la Pierna Exterior Curvado (#5) usando 1 Cerrojo (#A2), 2 Arandelas (#A4), 1 Espacio (#A5) y 1 Tuerca (#A6). Vea la FIG. 3A. 10. Repeat the same for the other end of this Linkage Tube, only attaching it to the outside of the Curved Inner Leg (#6). 10. Repita el paso para la otra final del mismo Tubo de Conexión, lo adjunte solamente a la parte externa de la Pierna Interior Curvado (#6). 11. Attach one end of the Linkage Tube with Stop Bracket (#7) to the inside of the Curved Outer Leg (#5) using one Bolt (#A2), two Washers (#A4), one Spacer (#A5) and one Nut (#A6). 11. Adjunte una final del Tubo de Conexión con Corchete de Parada (#7) a la parte interna de la Pierna Exterior Curvado (#5) usando 1 Cerrojo (#A2), 2 Arandelas (#A4), 1 Espacio (#A5) y 1 Tuerca (#A6). 12. Repeat the same for the other end of this Linkage Tube, only attaching it to the outside of the Curved Inner Leg (#6). See FIG. 3B. 12. Repita el paso para la otra final del mismo Tubo de Conexión, lo adjunte solamente a la parte externa de la Pierna Interior Curvao (#6). Vea la FIG. 3B. 13. Repeat the above steps for the other table half. 13. Repita dichos pasos para la otra mitad de mesa. 45-6074 (Continued on the next page.) 5 (Continúe en la siguiente página.) English A1 Español FIG.4A 11 X2 12 X4 17 X4 A1 X 44 17 17 FIG. 4 12 A1 11 A1 Pla / J yer ug ad or 17 Ce nte r/ Ce 12 ntr o Pla / J yer ug ad or FIG.4 FIG.4 15. Place the End Apron (#11) between the corners and flush with the table edge at the Player end of table using six Screws (#A1) per End Apron. See FIG. 4. 15. Coloque el Delantal Final (#11) entre los rincones y levante con el borde de mesa al Jugador final de la mesa, usando 6 Tornillos (#A1) por Delantal Final. Vea la FIG. 4. 14. Place the Plastic Corner (#17) flush with table corner and attach using three Screws (#A1) per Corner. See FIG. 4A. 14. Coloque el Rincón Plástico (#17) levante con el rincón de mesa y lo adjunte con 3 Tornillos (#A1) por Rincón. Vea la FIG. 4A. 16. Place the Side Apron (#12) flush with table edge at the side of the table using five Screws (#A1) per Side Apron. See FIG. 4. NOTE: Make sure the all Aprons are inside the Plastic Corners. 45-6074 (Continued on the next page.) 6 16. Coloque el Delantal Lateral (#12) levante con el borde de mesa al lado de la mesa, usando 5 Tornillos (#A1) por Delantal Lateral. Vea la FIG. 4. NOTA: Asegúrese que todos los Delantales están dentro de los Rincones Plásticos. (Continúe en la siguiente página.) Español English 18 X4 21 X2 A3 X4 A4 X4 A9 X1 FIG. 5 21 18 P2 6 A9 P1 A3 A4 21 18 A3 5 A4 Pla / J yer ug ad or FIG.5 FIG.5 17. Make sure the Outer Leg Caps (P1) and Inner Leg Caps (P2) are installed into the ends of the leg. Then place the Wheel (#18) into the Legs. See FIG. 5. 17. Asegúrese que las Gorras de Pierna Exterior (#P1) y Gorras de Pierna Interior (#P2) están instalados dentro de los finales de la pierna. Luego coloque la Rueda (#18) a las Piernas. Vea la FIG. 5. 18. With the logo upside-down, attach the Plastic Panel with Frame (#21) to the Curved Inner Leg (#6) using two Bolts (#A3) and two Washers (#A4) per frame. NOTE: Do not tighten securely at this time. 45-6074 (Continued on the next page.) 18. Con el logo revés, adjunte el Panel Plástico con el Marco (#21) a la Pierna Interior Curvado (#6) usando 2 Cerrojos (#A3) y 2 Arandelas (#A4) por marco. NOTA:No haga bien apretado en este momento. 7 (Continúe en la siguiente página.) Español English Warning / Advertencia FIG. 6 FIG. 6B FIG. 6A At least two adults / Por lo menos dos adultos. NOTE: Lift off floor and turn in the air / Nota:Levante desde el piso e gire al aire. FIG. 6D FIG. 6C Do not lean table on legs! / Que no apoyes la mesa sobre piernas. A. TURN TABLE ON ITS SIDE A.Voltee la mesa a su lado A B. FOLD LEGS AND TABLE HALVES AND LOCK IN PLACE NOTE: Place on all 2 wheels at once / NOTA:Coloque por una sóla vez sobre las 2 ruedas. C. LIFT TABLE AND TURN IN THE AIR B.Doble las piernas y C.Levante la mesa e gire al aire mitad de la mesa y cerrado en su posición B C CAUTION: Two strong adults are recommended to turn the table over as shown. 45-6074 (Continued on the next page.) D. DO NOT LEAN TABLE ON ITS LEGS! D.Que no apoyes la mesa sobre sus piernas D E. SET TABLE DOWN EVENLY ON ALL WHEELS, TO PREVENT BREAKING LEGS E.DEJE LA MESA REGULARMENTE SOBRE TODAS LAS E PRECAUCION: Recomienda voltear la mesa por cuatro adultos fuertes como mostrado. 8 (Continúe en la siguiente página.) Español English 5 A3 X4 A4 X4 A9 X1 6 Pla / J yer ug ad or FIG. 7 Ce nte r/ Ce ntr o Note: Center gap tolerance approximately 10~13mm. Nota: La tolerancia de la distancia central está aproximadamente de 10~13mm. A3 A4 21 A9 FIG.7 FIG.7 20. One person should stand at each center of the table and turn the table over completely so that it rests on its legs. 20. Una persona debería estar de pie a cada centro de la mesa y voltee la mesa completamente de modo que posarse sobre sus piernas. 21. Standing at the sides of the table, place the two table halves so they are inches apart. NOTE: Be careful that you do not push either half backwards as this may cause the legs to fold! 21. Está de pie a los lados de la mesa, coloque las dos mitades de mesa de modo que están aparte de pulgadas. NOTE: ¡ Que tenga cuidado, no empujes ninguna mitad hacia atrás sino se podría causar las piernas dobladas! 22. Attach the Plastic Panel with Frame (#21) to the opposite table half using two Bolts (#A3) and two Washers (#A4) per frame.See FIG. 7. Now go back and tighten all the connections. 22. Adjunte el Panel Plástico con Marco (#21) a la mitad de mesa opuesta usando 2 Cerrojos (#A3) y 2 Arandelas (#A4) por marco. Vea la FIG. 7. Ahora vuelva y aprieta todas las conexiones. 19. Before turning the table over, make sure to push the 19. Antes de voltear la mesa, asegúrese de empujar la Curved Inner Leg (#6) towards the center of the table in Pierna Interior Curvado (#6) hacia el centro de la mesa order to fix leg in right position. para contratar la parada. NOTE: Two adults are required to turn this table over. NOTA:Dos adultos requeridos para voltear la mesa. 45-6074 (Continued on the next page.) 9 (Continúe en la siguiente página.) Español English 10 X2 22 X2 A2 X2 A4 X4 A6 X2 FIG. 8 6 6 HARDWARE AFTER ASSEMBLY / HARDWARE LUEGO DE LA ENSAMBLADURA FIG. 8A A4 A2 A4 22 6 A2 A6 A6 22 10 FIG.8 (Continued on the next page.) 10 FIG.8 23. Attach one Gravity Lock (#10) to the Curved Inner Leg (#6) using one Bolt (#A2), two Washers (#A4), one “T” Washer (#22) and one Nut (#A6) per Gravity Lock. See FIG. 8A. 45-6074 A4 23. Adjunte la Cerradura de Gravedad (#10) a la Pierna Interior Curvado (#6) usando 1 Cerrojo (#A2), 2 Arandelas (#A4), 1 Arandela “T” (#22) y 1 Tuerca (#A6). Vea la FIG. 8A. 10 (Continúe en la siguiente página.) Español English 15 X1 16 X2 FIG. 9 FIG. 9A 15 16 15 16 16 FIG.9 FIG.9 24. Attach the Net Post (#16) at the middle of the table and slide the net over the post. Stretch the Net (#15) across the center of the table and slip the net over the post on the opposite side. See FIG. 9A. 45-6074 (Continued on the next page.) 24. Adjunte el Juego de Poste de Red (#16) a la mitad de la mesa y deslice la red sobre el poste. Estire la Red (#15) a través del centro de la mesa y deslice la red sobre el poste al lado opuesto. Vea la FIG. 9A. 11 (Continúe en la siguiente página.) English Español FIG. 10A FIG. 10 FIG. 10B FIG. 10D 10 FIG. 10C 13 1 2 Gravity Lock / Cerradura de Gravedad a ers Inv / e ers Rev Safety Straps / Correas de Seguridad 14 FIG.10 FIG.10 26. Folding the table - First fold the side of the table without the Net Post. Hold the end securely and lift the table. Make sure the Gravity Lock (#10) is locked. Repeat for the other side. Attach the Safety Strap Long and short (#13, #14) together to prevent the sides from falling. See FIG.10 26. Doblando la mesa-Doble primero el lado de la mesa sin el Poste de Red. Mantenga la parte final firmemente y levante la mesa. Asegúrese que la Cerradura de Gravedad (#10) está cerrada. Repita para el otro lado. Adjunte juntos las Correas de Seguridad Larga y Corta (#13 & #14) para impedir la caída de los lados. 27. To unfold the table - First release the Gravity Lock (#10) and Safety Strap (#13 & #14). Then pull the bottom of the outer leg and slowly lower the table to the floor. 27. Para desdoblar la mesa-Solte primero la Cerradura de Gravedad (#10) y las Correas de Seguridad (#13 & #14). Luego empuje el fondo de la pierna exterior y baje lentamente la mesa al piso. 25. Engrane con la Cerradurqa de Ruedas. 25. Engage the Wheels Lock. NOTE: When the table is in its storage position, always attach the safety strap to prevent the sides from falling. NOTA: Cuando la mesa esta en posicion de almace-namiento, siempre usar la correa de seguridad para prevenir que la mesa se caiga. YOU ARE NOW READY TO PLAY! ¡USTED ESTA AHORA LISTO PARA JUGAR! 45-6074 (The last page) 12 (La ultima página)