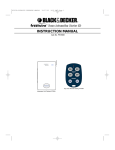
1
621538-00 FW3000 MANUAL 1/5/04 11:02 AM Page 1
Home Automation Starter Kit
INSTRUCTION MANUAL
Cat. No. FW3000
5
6
7
8
3
4
9
2
10 11
1
12
13
ON
14
15 16
ROOM COLOR
OFF
ON
ON
ON
OFF
OFF
OFF
ON
ON
ON
MOOD 1
MOOD 2
HOUSE
OFF
OFF
OFF
Outdoor Lamp Receiver Catalog # FWLROD
Indoor Remote Catalog # FWIR
Lamp Receiver Catalog # FWLR
Messenger Hub Catalog # FWMH
621538-00 FW3000 MANUAL 1/5/04 11:02 AM Page 2
GENERAL SAFETY RULES
WARNING: Read and understand all instructions. Failure to follow all instructions listed below may result in electric shock, fire, property damage
and/or serious personal injury.
SAVE THESE INSTRUCTIONS
WARNING: Do not use any FREEWIRE product to control any device where unexpected or unattended turn on/off could cause
serious personal injury and/or property damage. Interference, interruptions, or surges in the electrical system, or malfunction may cause
unexpected turn on/off of plugged in devices.
WARNING: Do not use any FREEWIRE product to control any device where failure to operate could cause serious personal injury
and/or property damage. Interference, interruptions or surges in the electrical system, or malfunction may cause plugged in devices to fail to
operate as expected.
WARNING: Do not use any FREEWIRE product to control any medical device. Using any FREEWIRE product to control any type of
medical device could result in serious personal injury.
WARNING: Do not use any FREEWIRE product to control any device that exceeds the rating for that FREEWIRE product. Using a
FREEWIRE product to control a device that exceeds the rating for that product could result in serious personal injury and/or property damage.
The ratings for FREEWIRE products are as follows:
• BULB RECEIVER - 150 watts - incandescent bulbs only.
• LAMP RECEIVER - 300 watts - lamps with incandescent bulbs only.
• MESSENGER HUB - 500 watts - lamps with incandescent bulbs only.
• OUTDOOR LAMP RECEIVER - 500 watts - lamps with incandescent, fluorescent, halogen or low voltage bulbs only.
• APPLIANCE RECEIVER - 15 amp resistive load small appliances, 1/3HP motor load, 500 watts lamps with incandescent, fluorescent or halogen
bulbs only, 400 watts for television.
If the FREEWIRE product you intend to use is not listed here, consult the instruction manual for that FREEWIRE product or call 1-800-544-6986
to determine the applicable rating before plugging in or using that FREEWIRE product.
WARNING: To reduce the risk of electric shock or fire, do not expose any FREEWIRE product to rain or moisture. If a FREEWIRE
product is exposed to rain or moisture, immediately disconnect the FREEWIRE product from the AC outlet to reduce the risk of electric shock
or fire and consult authorized service personnel. NOTE: Outdoor Lamp Receiver may be used outdoors. Bulb Receiver may also be used
outdoors if mounted in correct orientation.
WARNING: To reduce the risk of electric shock, do not disassemble any FREEWIRE product. No user-serviceable parts are inside.
WARNING: To reduce the risk of electric shock, do not use any type of plug adaptor with this product.
WARNING: Do not use a Bulb Receiver, Lamp Receiver, Messenger Hub or Outdoor Lamp Receiver to control an appliance. Using a
Bulb Receiver, Lamp Receiver, Messenger Hub or Outdoor Lamp Receiver to control an appliance could damage the appliance or the receiver,
which could result in serious personal injury and/or property damage.
WARNING: Do not use a Bulb Receiver or Lamp Receiver to control a lamp or fixture that already has a dimmer on it. Using a Bulb
Receiver or Lamp Receiver to control a lamp or fixture that already has a dimmer on it could damage the lamp, fixture or receiver, which could
result in serious personal injury and/or property damage.
WARNING: Use only incandescent bulbs in lamps that are to be controlled by the Lamp Receivers. Using any other type bulbs could
damage bulbs and/or Lamp Receivers.
WARNING: Use only incandescent bulbs in Bulb Receivers. Using any other type bulbs could damage bulbs and/or Bulb Receivers.
WARNING: Do not use any intercom or monitoring system, including a baby monitor, that uses the house wiring to transmit signals
in permanent transmit (or talk) mode when using FREEWIRE products. Transmissions from an intercom or monitoring system that uses
the house wiring to transmit signals could interfere or block out FREEWIRE transmissions in permanent transmit (or talk) mode. It is also
possible that a neighbor's intercom or monitoring system could cause unexpected operation, including failure to operate, of your FREEWIRE
system, or that your FREEWIRE SYSTEM could cause unexpected operation, including failure to operate, of your neighbors intercom or
monitoring system.
WARNING: If unintended operation of any FREEWIRE product is observed, unplug all FREEWIRE products immediately until (1) the
source of the interference is identified and eliminated through selection of a different HOUSE CODE to ensure that neither system
causes unintended operation of the other system or (2) a blocking filter, Black and Decker Model number PZZ01, is installed. Call 1888-678-7278 to order. Professional installation recommended. If you cannot identify the source of interference by talking with neighbors
who are using a FREEWIRE or compatible system and you do not want to install a blocking filter, or if you have any questions about identifying
or eliminating interference, please call 1-800-544-6986 before plugging in or using any FREEWIRE product.
Remember to exercise good common sense when using your FREEWIRE system - especially when attaching unattended appliances
or devices to the system. There can be unexpected consequences if FREEWIRE products are not used with care. For example, an empty
coffee pot can be remotely turned on due to unintended operation or interference from a neighbor's FREEWIRE or compatible system. If that
should happen, your coffee pot could be damaged from overheating, which in turn could cause a fire or create a risk of electrical shock. As
another example, if an electric heater is turned on unexpectedly while clothing is draped over it, a fire could result. Accordingly, DO NOT USE
the FREEWIRE system for the control of medical devices, heating appliances, such as portable heaters, or any other appliance or device that
could cause physical injury or property damage if turned on or off while unattended. Similarly, DO NOT USE the FREEWIRE system for the
control of any appliance or device that could cause physical injury or property damage if it fails to operate as expected. Interference,
interruptions or surges in the electrical system, or malfunction may cause plugged in appliances or devices to fail to operate as expected. For
example, if a pipe heater controlled by a FREEWIRE system fails to operate as expected, the pipes could freeze and rupture. For these
reasons, it is important to read, understand and follow all instructions in this manual, and to consider carefully the potential consequences of
unattended or unexpected operation, or failure to operate, of an appliance or device before you attach it to a FREEWIRE system.
2
621538-00 FW3000 MANUAL 1/5/04 11:02 AM Page 3
GENERAL SAFETY RULES (CONTINUED)
FCC CAUTION
THIS DEVICE COMPLIES WITH PART 15 OF THE FCC RULES.
OPERATION IS SUBJECT TO THE FOLLOWING TWO CONDITIONS:
(1) THIS DEVICE MAY NOT CAUSE HARMFUL INTERFERENCE, AND
(2) THIS DEVICE MUST ACCEPT ANY INTERFERENCE RECEIVED, INCLUDING INTERFERENCE THAT MAY CAUSE UNDESIRED OPERATION.
This equipment generates and uses radio frequency energy, and if not installed and used properly, that is, in strict accordance with the
manufacturers instructions, it may cause interference to radio and television reception. It has been type tested and found to comply with the
limits for remote control devices in accordance with the specifications in Sub Parts B and C of Part 15 of FCC Rules, which are designed to
provide reasonable protection against such interference in a residential installation. However, there is no guarantee that interference will not
occur in a particular installation.
If this equipment does cause interference to radio or television reception, which can be determined by unplugging the equipment, try
to correct the interference by one or more of the following measures.
• Reorient the antenna of the radio/TV experiencing the interference.
• Relocate the interference with respect to the radio/TV.
• Move the interference away from the radio/TV.
• Plug the interface into an outlet on a different electrical circuit from the radio/TV experiencing the interference.
• If necessary, consult your local Dealer for additional suggestions
NOTE: Modifications to any of the components in this kit will void the user’s authority to operate this equipment.
3
621538-00 FW3000 MANUAL 1/5/04 11:02 AM Page 4
Getting familiar with your
home automation kit.
The MESSENGER HUB is the brain of the Freewiretm system. When it is plugged into an AC
outlet it has the ability to receive Radio Frequency (RF) signals from the remotes and the
ability to send messages through existing house wiring to all receivers that are dialed to the
same house code.
It is also used to control incandescent lamps only, rated up to 500 watts, connected to the
plug receptacle at the bottom of the MESSENGER HUB.
FWMHMESSENGER HUB
Note: For additional restrictions and instructions see MESSENGER HUB section.
6
7
8
3
5
A LAMP RECEIVER must be used in conjunction with at least one active MESSENGER
HUB. It is used to control incandescent lamps only rated up to 300 watts.
Note: For additional restrictions and instructions see LAMP RECEIVER section.
2
13
FWIRINDOOR REMOTE
ON
14
15 16
ROOM COLOR
OFF
ON
ON
ON
OFF
OFF
OFF
ON
ON
ON
MOOD 1
MOOD 2
HOUSE
OFF
OFF
OFF
FWLRLAMP RECEIVER
An OUTDOOR LAMP RECEIVER must be used in conjunction with at least one active
MESSENGER HUB. It is used to control indoor or outdoor incandescent, fluorescent,
halogen and low voltage lights rated up to 500 watts.
Note: For additional restrictions and instructions see OUTDOOR LAMP RECEIVER section.
FWLRODOUTDOOR LAMP RECEIVER
4
1
12
Note: For instructions see INDOOR REMOTE section.
10 11
Note: Walls and other obstructions may reduce the effective range of the RF signal.
4
9
The INDOOR REMOTE sends Radio Frequency (RF) signals to the MESSENGER HUB.
These signals can go through walls, so you can use this remote to control lights (or
appliances with approved appliance receiver only) from anywhere in or around your home.
621538-00 FW3000 MANUAL 1/5/04 11:02 AM Page 5
DEFINITIONS OF TERMS USED IN THIS MANUAL
What is the UNIT CODE?
The unit code allows you to assign a number (1 - 16) to any Freewire unit in your home system. For
example, if you assign the unit code number 5 to a Lamp Receiver, the lamp will turn on and off when you
activate the number 5 on your Freewire remote control. If you want a multiple of Lamp Receivers to
respond to a single number on your remote, there is no problem with setting them all to the same unit code
number.
What is the HOUSE CODE?
The house code prevents interference with other Freewire systems that may be in your neighborhood.
When you set your house code to a letter (A - P) you are choosing a distinct communication language
between all parts of your Freewire system. It is essential that all units in your Freewire system are set to
the same house code letter for it to operate correctly.
What is the Remote Control SYNCHRONIZATION?
When you first install your Freewire units it is essential that your match up the wireless Remote Controls
(Indoor Remote and Keychain Remote) with the plugged in Receiver Hub. This will synchronize their
wireless communication in a distinct way that prevents interference with other Freewire systems that may
be in your neighborhood.
Why are there COLOR SEGMENTS on the unit code wheels?
The six colors (or zones) help you to allocate unit codes to various parts of your house. For example, if you
wanted to control three plug in lamps in your living room you might allocate them the unit code numbers 5,
6 and 7 which are part of the green segment (green zone). Green becomes a quick reference to controlling
those lamps from your remote control.
What are GROUPS?
Groups are shortcut buttons to operating any combination of up to four receiver unit codes. For example,
you may wish to create a 'welcome home' group control. If you had your entrance light(s) set to 1, your hall
lamp set to 5, your living room lamp set to 8 and your kitchen light set to 11 they could all be turned on/off
by a single group key. It is essential to first program the group with the Messenger Hub and Indoor Remote
before you can use this function.
What does the HOUSE button do?
When you press HOUSE ON all the Lamp Receivers and the Messenger Hub in your Freewire system will
turn on (for safety reasons, it will not turn on appliance receivers). When you press HOUSE OFF any unit
in your Freewire system will turn off (both lamp and appliance receivers) - this is fast way to turn off all your
Freewire units.
5
621538-00 FW3000 MANUAL 1/5/04 11:02 AM Page 6
PLEASE FOLLOW THE SEQUENCE LAID OUT IN THIS MANUAL TO AVOID CONFUSION
Step by step instructions to set up the MESSENGER HUB:
A Quick Note Before You Set Up The MESSENGER HUB:
WARNING: For indoor use only. If a FREEWIRE product is exposed to rain or moisture, immediately disconnect the FREEWIRE product
from the AC outlet to reduce the risk of electric shock or fire and consult authorized service personnel.
WARNING: Use only incandescent bulbs (up to 500 watts total) in lamps that are to be controlled by the Messenger Hub.
Each receiver has a specific address made up of a HOUSE CODE (bottom dial) and a UNIT CODE (upper dial) which is used to communicate
with the MESSENGER HUB.
The function of the HOUSE CODE is to prevent interference from another FREEWIRE or other compatible system. If you experience
interference with another system at any time, which may result in unexpected turn on/off of devices plugged into either system, unplug all
FREEWIRE devices immediately until (1) the source of the interference is identified and eliminated through selection of a different HOUSE
CODE to ensure that neither system causes unintended operation of the other system or (2) a blocking filter, Black and Decker Model number
PZZ01, is installed. Call 1-888-678-7278 to order. Professional installation recommended. If you cannot identify the source of interference by
talking with neighbors who are using a FREEWIRE or compatible system and you do not want to install a blocking filter, or if you have any
questions about identifying or eliminating interference, please call 1-800-544-6986 before plugging in or using any FREEWIRE device.
Step 1:
Plug the MESSENGER HUB into any operational AC outlet within your home.
Rotate antenna to the upright position. Open the front door to expose the control
panel as shown in Figure 1. NOTE: Placing the MESSENGER HUB on the
inside wall closest to driveway or entry way, will often maximize range of the
KEY CHAIN REMOTE.
1
On/Off Button
Unit Code Dial
House Code Dial
Step 2:
Select a HOUSE CODE on the MESSENGER HUB, any letter A - P. (Note: The
house code you select for the MESSENGER HUB will dictate what letter you will
select for all of the RECEIVERS you plan to control with this MESSENGER HUB.)
Run / Learn Slide Switch
Step 3:
Select a UNIT CODE on the MESSENGER HUB, any number 1 - 16. The number
and corresponding color you pick will control the lamp outlet located on the
underside of this MESSENGER HUB. (If you select the same number and same
house code for any additional receivers on this system they will operate in conjunction with this hub.)
Plug Receptacle
Step 4:
Synchronize your INDOOR REMOTE with your MESSENGER HUB so they understand how to communicate with each other. (Note: Any
additional remote that is introduced to the system must also be synchronized.)
To synchronize, move the MESSENGER HUB slide switch to LEARN.
6
7
8
3
5
2
10 11
1
12
13
Now, move the slide switch on the MESSENGER HUB to RUN.
ON
(Note: Door cannot be closed while MESSENGER HUB is in the LEARN mode.)
Step 5:
Turn lamp on first, then plug into the receptacle on the underside of the MESSENGER HUB. Use only
incandescent bulbs up to 500W. Be sure the lamp has been turned on prior to plugging into MESSENGER
HUB.
Press the Local Lamp “ON/OFF” button on the MESSENGER HUB to check that the MESSENGER HUB is
operating correctly. You will hear a “click” when the MESSENGER HUB turns this lamp on and off.
You are now ready to operate the lamp connected to this MESSENGER HUB with the INDOOR REMOTE.
6
Press
middle“ON”
button for 5
seconds
4
2
9
While facing the MESSENGER HUB, press and hold the middle “ON” button of the INDOOR REMOTE for 5
seconds - Figure 2. Be sure to see the green light flash on the MESSENGER HUB. The flash will indicate
that the MESSENGER HUB is now synchronized with the INDOOR REMOTE.
14
15 16
ROOM COLOR
OFF
ON
ON
ON
OFF
OFF
OFF
ON
ON
ON
MOOD 1
MOOD 2
HOUSE
OFF
OFF
OFF
621538-00 FW3000 MANUAL 1/5/04 11:02 AM Page 7
Step by step instruction to operate the INDOOR REMOTE:
A Quick Note before You Set Up the INDOOR REMOTE:
WARNING: For indoor use only. If the INDOOR REMOTE is exposed to rain or moisture, consult authorized service personnel.
12
3
4
13
14
1
6
7
8
16
The numbers and colors on the INDOOR REMOTE's dial match the numbers and colors on the MESSENGER HUB
and LAMP RECEIVERS.
The colors on the dial for the Unit Code can be used to divide your home into zones with up to 3 dedicated Unit
Codes per color (except red which only has one Unit Code.) (eg. Green = Living Room)
9
15
11
3
10
Open door to the INDOOR REMOTE to expose the colored dial shown in Figure 3.
2
ON
5
OFF
The numbers are used to differentiate one receiver from another in each color/zone.
Reference Label Set Up
For your convenience, a blank reference label is located on the back of your INDOOR REMOTE. Write your own
customized applications on this blank key. Figure 4:
Example:
Red Unit Codes have been selected for the BULB RECEIVER in the Entrance
Gray Unit Codes have been selected for the RECEIVERS in the Dining Room
Green Unit Codes have been selected for the RECEIVER in the Living Room etc.
4
NOTE: The top button on the KEY CHAIN REMOTE will only activate UNIT CODE 1(RED). We recommend that
you control the lighting near your entrance way by UNIT CODE 1(Red ) so that it can be activated by your KEY
CHAIN REMOTE. See KEY CHAIN REMOTE instructions on page 11 for further instructions.
Step 1:
Set the dial on your INDOOR REMOTE to the same UNIT CODE (color) that you selected on the MESSENGER HUB in the previous section.
9
Step 2:
8
7
6
Gray 2 - Controlled by the top row, left switch
1
Gray 3 - Controlled by the top row, center switch
2
3
ON
OFF
ON
13
6
ON
3
4
14
1
Note: You may have to press and momentarily hold the button before it activates.
6
7
8
16
You should now be able to turn the lamp on and off with the corresponding button on the INDOOR REMOTE.
9
15
12
ON
The small round ON button and OFF button shown in Figure 6 allow you to turn on or off all RECEIVERS set to
that color.
11
Gray 4 - Controlled by the top row, right switch.
5
4
10
Example:
5
16
Each of the 3 individual codes on that color can be turned on and off individually, using the 3 white ON/OFF buttons
located just below the dial as shown in Figure 5.
2
ON
ON
INDOOR REMOTE Battery Replacement
Open the battery compartment clip (located on the bottom of the back cover) with your fingernail and install a
CR2032 replacement lithium battery as shown in Figure 7. Note: Writing on battery must face back cover of
INDOOR REMOTE or INDOOR REMOTE will not operate.
Note: If indoor remote is without battery power, for more than 3 hours, the remote’s internal security code must be
reset. To do this, install new batteries, press and hold any button on the remote for 5 seconds, repeat step 4 on page
6 to synchronize remote with messenger hub.
7
7
ON
5
OFF
ON
621538-00 FW3000 MANUAL 1/5/04 11:02 AM Page 8
Step by step operating instructions for the LAMP RECEIVERS
A Quick Note before You Set Up the LAMP RECEIVERs:
WARNING: For indoor use only. If a LAMP RECEIVER is exposed to rain or moisture, immediately disconnect the LAMP RECEIVER from the
AC outlet to reduce the risk of electric shock or fire and consult authorized service personnel.
WARNING: Use only incandescent bulbs (up to 300 watts total) in lamps that are to be controlled by Lamp Receivers. Do not use
fluorescents, halogens or low voltage lighting systems. Using any other type bulbs could damage bulbs and/or Lamp Receivers. Attempting to
control any other device by the Lamp Receivers, could damage that device and may damage the Lamp Receiver, which could result in serious
personal injury and/or property damage.
CAUTION: Touch activated lamps should not be used with Lamp Receivers. Damage to lamp may occur.
CAUTION: Do not use the LAMP RECEIVER with a lamp that is connected to a timer or photo-sensor switch. Damage to timer or switch
could occur.
Step 1:
Set the HOUSE CODE to the same letter that you selected on the MESSENGER HUB, then plug the LAMP RECEIVER into the AC outlet
currently being used by the lamp you wish to control.
Step 2:
Select a UNIT CODE color to match the zone color that you laid out on the back of the INDOOR REMOTE. Now
you will need to assign a specific UNIT CODE for the LAMP RECEIVER. Within the color that you have picked you
have 3 number choices. In the example in Figure 8 the LAMP RECEIVER is set to Yellow 8.
8
Step 3:
Turn lamp on first, then plug into the receptacle on the underside of the LAMP RECEIVER.
Step 4:
Turn color dial on INDOOR REMOTE so that it matches the color setting on the LAMP RECEIVER. To turn the
lamp on and off, press the switch which corresponds with the number selected on the LAMP RECEIVER.
9
Figure 9 depicts activating LAMP RECEIVER set to Yellow 8.
1
2
15
16
4
13 14
3
6
12
5
7
NOTE: Lamps connected to LAMP RECEIVERS can still be controlled by the lamps switch. Remember
that lamp switch must be turned on in order for the lamp to be controlled by the Freewire system.
8
ON
8
9
10
11
OFF
ON
ON
ON
OFF
OFF
OFF
ON
ON
ON
MOOD 1
MOOD 2
HOUSE
OFF
OFF
OFF
621538-00 FW3000 MANUAL 1/5/04 11:02 AM Page 9
Step by step instruction to developing GROUP SETTINGS
A Quick Note before You Program the Mood Settings:
In the Lamp Receiver section you learned how to set up individual LAMP RECEIVERs. These LAMP RECEIVERs are turned on and off by
pressing the appropriate rocker switch that corresponds to the receivers unique UNIT CODE. The purpose of the GROUP buttons (blue) are to
link multiple receivers (up to 4) so that they can be turned on or off by the GROUP button. See Figure 16.
Example: If you have a LAMP RECEIVER in one room and it is set to the number 7 on its UNIT CODE and you have another LAMP RECEIVER
in another room and it is set up to the number 13 on its UNIT CODE, the two lamps can be turned on at the same time using a GROUP.
2
14
13
Unit Code Dial
Rocker Switch
House Code Dial
4
3
ON
5
OFF
ON
ON
ON
OFF
OFF
OFF
ON
ON
ON
MOOD 1
MOOD 2
HOUSE
OFF
OFF
OFF
Run / Learn Slide Switch
Group Button
House Button
15
Step1:
With the MESSENGER HUB still plugged into an AC outlet, set the slide switch to LEARN as shown in Figure 15.
ON
ON
ON
MOOD 1
MOOD 2
HOUSE
OFF
OFF
OFF
3
Step 3:
Set the UNIT CODE dial of the INDOOR REMOTE to match the UNIT CODE of the LAMP RECEIVER
that you want to turn on and off. Press on the rocker switch (white) corresponding to that LAMP
RECEIVER as shown in Figure 17. Wait for the MESSENGER HUB indicator to flash indicating the code
has been stored in the GROUP function.
16
9
Step 2:
While facing the MESSENGER HUB, press GROUP 1 ON switch on the INDOOR REMOTE. Figure 16 The MESSENGER HUB’s green indicator light will flash.
17
4
ON
ON
Step 4:
Repeat step 3 a maximum of 3 more times to link up to 4 LAMP RECEIVERs / BULB RECEIVERs with
that GROUP key. The 4 LAMP RECEIVERs can be in any combination of UNIT CODES.
5
6
7
8
ON
OFF
ON
Rocker Switch
Step 5:
Return the slide switch on the MESSENGER HUB to RUN - Figure 18. The ON/OFF button of GROUP 1 will now turn 18
on and off all of the LAMP RECEIVERs / BULB RECEIVERs that were linked in Step 4. There may be up to a 3 second
delay between the time that you press the button and the time that the lights respond.
Step 6:
To set up GROUP 2 key, repeat steps 1 thru 5 substituting GROUP 2 key for GROUP 1.
NOTE: Pressing either GROUP ON key while in LEARN mode clears all stored codes for that GROUP.
Using ALL on, ALL off House Button
Pressing the INDOOR REMOTE HOUSE BUTTON (figure 19) “on” will activate the MESSENGER HUB, LAMP RECEIVERs
and BULB RECEIVERs set to the system’s HOUSE CODE. OUTDOOR LAMP RECEIVERs and APPLIANCE RECEIVERs will
not respond to the all “on” command. Pressing the INDOOR REMOTE HOUSE BUTTON “off” will deactivate the above
receivers as well as all OUTDOOR LAMP RECEIVERs and APPLIANCE RECEIVERs.
9
19
ON
HOUSE
OFF
621538-00 FW3000 MANUAL 1/5/04 11:02 AM Page 10
Step by step operating instructions for the OUTDOOR LAMP RECEIVER
A Quick Note before You Set Up the OUTDOOR LAMP RECEIVER:
The OUTDOOR LAMP RECEIVER can be used indoors and outdoors.
WARNING: When used outdoors, only use with outlets equipped with ground fault protection.
WARNING: Do not submerge. Keep connections dry. Failure to do this could result in electric shock.
WARNING: Read and understand warnings on your extension cord. Failure to do this could result in electric shock.
WARNING: To prevent shock hazard, always assume the power is present even if the red indicator light is not lit. Failure to do this
could result in electric shock.
WARNING: Do not abuse extension cord. Do not yank extension cord to disconnect it from receptacle. Keep cord from heat, oil and
sharp edges. Periodically inspect extension cords and replace if damaged. Failure to do this could result in electric shock.
Unlike LAMP and APPLIANCE RECEIVERS the OUTDOOR LAMP RECEIVER does not have any code wheels. You set its code up from the
MESSENGER HUB and it then remembers this code, even after a power outage. For ease of programming, initially place the OUTDOOR LAMP
RECEIVER in the same wall outlet that the MESSENGER HUB is plugged into. After programming you can move it to its final location.
Step 1:
Set the unit code on the INDOOR REMOTE to the color and number that you want to use to control the OUTDOOR LAMP RECEIVER in its
final location. (Example : Blue 11)
Step 2:
Plug the OUTDOOR LAMP RECEIVER into the same wall outlet as the MESSENGER HUB or you can move the
MESSENGER HUB and plug into the same wall outlet as the OUTDOOR LAMP RECEIVER. (The Messenger Hub will not
lose its memory and it can be moved back later.) See Figure 23. The red indicator light on the OUTDOOR LAMP
RECEIVER should now be on.
23
Within 30 seconds of plugging OUTDOOR LAMP RECEIVER in, press and hold for 5 seconds the on button on the
INDOOR REMOTE that corresponds to the UNIT CODE that you have selected. After a few seconds, the red indicator light
on the OUTDOOR LAMP RECEIVER will flash indicating that the code has been learned. If the switch in the OUTDOOR
LAMP RECEIVER is on, the red indicator light will remain lit. If the OUTDOOR LAMP RECEIVER switch is off, the red
indicator light will not be lit.
NOTE: If the red indicator light does not turn on in 5 seconds, unplug the OUTDOOR LAMP RECEIVER, re-plug and
repeat step 2. If indicator light still does not turn on, move the MESSENGER HUB and OUTDOOR LAMP RECEIVER to a
different outlet in a different room and repeat step 2.
Step 3:
You may now move the OUTDOOR LAMP RECEIVER to its final location.
CAUTION: For outdoor use with extension cords: Plug OUTDOOR LAMP RECEIVER directly into wall outlet, then plug “outdoor rated”
extension cord into OUTDOOR LAMP RECEIVER to reduce the risk of electric shock.
OUTDOOR LAMP RECEIVER NOTES:
1.) OUTDOOR LAMP RECEIVER can be used with incandescents, fluorescents, halogens and low voltage lights rated up to 500 watts.
2.) If outlet is controlled by a wall switch, you must leave wall switch on at all times otherwise the OUTDOOR LAMP RECEIVER will not
have AC power and you won’t be able to control it remotely.
3.) To change the unit code, that the OUTDOOR LAMP RECEIVER responds to, unplug OUTDOOR LAMP RECEIVER and repeat
steps 1 through 3.
4.) Unplug OUTDOOR LAMP RECEIVER when not in use.
5.) Operating Temperatures -4°F to 122°F.
Storage Temperatures -40°F to 158° F.
10
621538-00 FW3000 MANUAL 1/5/04 11:02 AM Page 11
PROGRAMMING AND INFORMATION GUIDE
The HomeLink Wireless Control System is a factory installed feature packaged on many vehicle models. HomeLink is typically located in
either the sun visor, overhead console or rearview mirror. HomeLink provides a convenient way to replace up to three hand-held radiofrequency (RF) transmitters used to activate devices such as gate operators, garage door openers, entry door locks, security systems, and
home lighting. Additional HomeLink information can be found on the Internet at www.homelink.com or by calling 1-800-355-3515.
NOTE: Black and Decker Freewire products are compatible with select 2001 and newer HomeLink equipped vehicles. Please contact
HomeLink Customer Service at 1-800-355-3515 to check compatibility.
NOTE: Some vehicles may require the ignition switch to be turned "on" or to the second (“accessories”) position for programming and/or
operation of HomeLink.
If you already have HomeLink programmed to operate devices such as garage doors or gates, please skip to STEP 2. If you have not
programmed HomeLink to operate these devices, please start with STEP 1.
1. Press and hold the two outer HomeLink buttons in the vehicle (buttons one and three) - releasing only when the HomeLink indicator light begins
to flash (after 20 seconds). Do not hold the buttons for longer than 30 seconds and do not repeat STEP 1 to program a second and/or third handheld transmitter or Freewire Indoor Remote function to the remaining two HomeLink buttons.
2. Turn the dial on your Freewire INDOOR REMOTE to the ZONE and UNIT CODE that you would like to program into HomeLink.
The example depicts that the INDOOR REMOTE is set to Blue 12.
NOTE: You will have to program a separate HomeLink button for each ON and/or OFF function of your Freewire indoor remote
or key chain. For example the second Homelink button can be programmed to turn Blue 12 “On” and the third Homelink button
can be programmed to turn Blue 12 “Off”.
3. Position the end of your Freewire indoor remote 1-3 inches (5-14 cm) away from the HomeLink button you wish to program while keeping the
indicator light in view.
4. Simultaneously press and hold both the chosen HomeLink button and Freewire indoor remote button (ON or OFF). Do not release the buttons
until step 5 has been completed.
NOTE: It is recommended that you use your Freewire indoor remote to program HomeLink. If you are programming HomeLink with your Freewire
key chain remote, you will need to “cycle” the key chain remote button while programming HomeLink. To “cycle”: continue to press and hold the
HomeLink button while you press and release - every two seconds (“cycle”) the key chain remote ON button until the frequency signal has
successfully been accepted by HomeLink. (The indicator light will flash slowly and then rapidly.)
5. After the HomeLink indicator light changes from a slow to a rapidly blinking light, release both the HomeLink and Freewire indoor remote or key
chain button.
6. HomeLink is now programmed to operate your Freewire system. To operate HomeLink, simply press and release the programmed HomeLink
button to activate your Freewire system. You can also continue to use your INDOOR REMOTE to control Freewire.
REPROGRAMMING A SINGLE HOMELINK BUTTON
To program a device to HomeLink using a HomeLink button previously trained, follow these steps:
1. Press and hold the desired HomeLink button. Do NOT release until step 4 has been completed.
2. When the HomeLink indicator light begins to flash slowly (after 20 seconds), position the hand-held-transmitter or remote 1 to 3 inches away
from the HomeLink surface.
3. Press and hold the hand-held transmitter or remote button. The HomeLink indicator light will flash, first slowly and then rapidly.
4. When the HomeLink indicator light begins to flash rapidly, release both buttons.
The previous device has now been erased and the new device can be activated by pushing the HomeLink button that has just been
programmed. This procedure will not affect any other programmed HomeLink buttons.
For questions or comments, contact HomeLink at:www.homelink.com or 1-800-355-3515.
HomeLink and the HomeLink house are registered trademarks of Johnson Controls, Inc.
HOMELINK FAQS
Why does HomeLink only turn on (or off) the device I have programmed it to?
“ON” and “OFF” are two different functions and have to be programmed to HomeLink separately. For example, you would program one
HomeLink button for “ON” and a second HomeLink button for “OFF”.
How can I get HomeLink?
HomeLink is packaged as a standard feature, bundled within a specific trim level package or as an option on over 150 different vehicles. For a
list of these vehicles, visit www.homelink.com or call HomeLink Customer Service at 1-800-355-3515. HomeLink can also be purchased and
professionally installed in existing cars. Please visit www.homelink.com or call 1-800-355-3515 for further information.
Why can't I train HomeLink to my Freewire remote?
Freewire remotes are compatible with select 2001and newer HomeLink equipped vehicles. Please visit www.homelink.com or contact
HomeLink Customer Service at 1-800-355-3515 for compatibility.
11
621538-00 FW3000 MANUAL 1/5/04 11:02 AM Page 12
TROUBLESHOOTING
DIFFICULTY PROGRAMMING RECEIVERS
If you are experiencing problems when programming the BULB RECEIVER or OUTDOOR LAMP RECEIVER, it may be due to electrical
interference on the power lines caused by large appliances such as refrigerators or TV’s. To avoid the interference, move the RECEIVER and
the MESSENGER HUB while it is being programmed to a different wall outlet that is further away from large appliances.
SOME RECEIVERS DON’T RESPOND
Most houses are fed from a 240 volt service which is then split into two phases of 120 volts each in the circuit breaker panel. The most
commonly encountered problem with systems which use the existing house wiring to transmit signals is that the signals are received by some
Receivers, but not by others. For example, the MESSENGER HUB controls some lights but not others or controls some lights intermittently.
This can happen sometimes when the Receiver to be controlled is on the opposite phase of the house wiring to the phase which the
MESSENGER HUB is connected to.
If some of the Receivers are not working it may be necessary to:
• move the Receiver to a different wall outlet to test that it works.If it still doesn’t work:
• move the Receiver to a different room. If it still doesn’t work:
• move the Receiver to the closest outlet that the MESSENGER HUB is plugged into or move the MESSENGER HUB to the closest
outlet to the Receiver that is not working.
RECEIVERS TURN ON BY THEMSELVES
If it is suspected that Receivers have turned on or off by themselves, it is possible that a neighbor has a FREEWIRE or compatible system,
which could result in unexpected operation of both systems. Unplug all FREEWIRE devices immediately until (1) the interference is identified
and eliminated through selection of a different HOUSE CODE to ensure that neither system causes unintended operation of the other system
or (2) a blocking filter, Black and Decker Model number PZZ01, is installed. Call 1-888-678-7278 to order. Professional installation
recommended. If you cannot identify the source of interference by talking with neighbors who are using a FREEWIRE or compatible system
and you do not want to install a blocking filter, or if you have any questions about identifying or eliminating interference, please call 1-800-5446986 before plugging in or using any FREEWIRE device.
THREE WAY BULBS
Three way bulbs may be used, however, only one level of brightness can be activated using the Freewire system. To change brightness level
you will need to turn the switch at the lamp to the desired level of brightness. NOTE: When using the BULB RECEIVER, you cannot control the
lamp by the lamp’s switch. Turning the lamp switch off and then sending a Freewire signal within 30 seconds of power being applied to the
lamp, will cause the BULB RECEIVER to go into program mode and will need to be reprogrammed. See BULB RECEIVER section / manual.
INTERCOM AND MONITORING SYSTEMS
Intercom and monitoring systems, including baby monitors, that use the house wiring to transmit signals can “block out” FREEWIRE
transmissions while the intercom or monitoring system is in “permanent transmit” or “talk” mode. It is NOT possible to have a wireless
intercom or monitoring system and a MESSENGER HUB operating in the same house. It is possible that a neighbor’s wireless intercom or
monitoring system could cause unexpected operation, including failure to operate, of your FREEWIRE system, or that your FREEWIRE
SYSTEM could cause unexpected operation, including failure to operate, of your neighbors intercom or monitoring system.
KEY CHAIN REMOTE RANGE OF USE
Placing the MESSENGER HUB on the inside wall closest to driveway or entry way, will often maximize range of KEY CHAIN REMOTE.
MAINTENANCE
Use only mild soap and damp cloth to clean the product. Never let any liquid get inside the product; never immerse any part of the product into
a liquid. Avoid using solvents when cleaning plastic parts. Most plastics are susceptible to various types of commercial solvents and may be
damaged by their use.
ACCESSORIES
Recommended accessories for use with your product are available from your local dealer or authorized service center. If you need assistance
regarding accessories, please call: 1-800-544-6986.
WARNING: The use of any accessory not recommended for use with this product could be hazardous.
SERVICE INFORMATION
Black & Decker offers a full network of company-owned and authorized service locations throughout North America. All Black & Decker Service
Centers are staffed with trained personnel to provide customers with efficient and reliable power tool service. Whether you need technical
advice, repair, or genuine factory replacement parts, contact the Black & Decker location nearest you. To find your local service location, refer
to the yellow page directory under "Tools—Electric" or call: 1-800-544-6986.
FULL TWO-YEAR HOME USE WARRANTY
Black & Decker (U.S.) Inc. warrants this product for two years against any defects in material or workmanship. The defective product will be
replaced or repaired at no charge in either of two ways.
The first, which will result in exchanges only, is to return the product to the retailer from whom it was purchased (provided that the store is a
participating retailer). Returns should be made within the time period of the retailer’s policy for exchanges (usually 30 to 90 days after the
sale). Proof of purchase may be required. Please check with the retailer for their specific return policy regarding returns that are beyond the
time set for exchanges.
The second option is to take or send the product (prepaid) to a Black & Decker owned or authorized Service Center for repair or replacement
at our option. Proof of purchase may be required. Black & Decker owned and authorized Service Centers are listed under "Tools-Electric" in
the yellow pages of the phone directory.
This warranty does not apply to accessories. This warranty gives you specific legal rights and you may have other rights which vary from
province to province. Should you have any questions, contact the manager of your nearest Black & Decker Service Center.
Black & Decker (U.S.) Inc.,
701 E. Joppa Rd.
Towson, MD 21286 U.S.A.
See ‘Tools-Electric’
– Yellow Pages –
for Service & Sales
621538-00 FW3000 MANUAL 1/5/04 11:02 AM Page 13
freewire Equipo básico de automatización para el hogar
mr
MANUAL DE INSTRUCCIONES
No. de catálogo FW3000
5
6
7
8
3
4
9
2
10 11
1
12
13
ON
14
15 16
ROOM COLOR
OFF
ON
ON
ON
OFF
OFF
OFF
ON
ON
ON
MOOD 1
MOOD 2
HOUSE
OFF
OFF
OFF
Control Remoto De Exterior No. de catálogo FWLROD
Control remoto de interior No. de catálogo FWIR
Receptor para lámparas No. de catálogo FWLR
Centro mensajero No. de catálogo FWMH
13
621538-00 FW3000 MANUAL 1/5/04 11:02 AM Page 14
NORMAS DE SEGURIDAD GENERAL
ADVERTENCIA: Lea y asegúrese de comprender bien todas las instrucciones. El incumplimiento con alguna de las instrucciones
enumeradas más abajo puede resultar en descarga eléctrica, incendio y/o lesiones corporales serias.
GUARDE ESTAS INSTRUCCIONES
ADVERTENCIA: No use ningún producto FREEWIRE para controlar un dispositivo donde el encendido y apagado no planeado o no
supervisado pudiera causar graves lesiones personales y/o daños a la propiedad. Las interferencias, interrupciones o sobrevoltaje o mal
funcionamiento en el sistema eléctrico pueden ocasionar que los dispositivos enchufados se enciendan o se apagan de manera inesperada.
ADVERTENCIA: No use ningún producto FREEWIRE para controlar un dispositivo donde el cese de funcionamiento podría causar graves
lesiones personales y/o daño a la propiedad. Las interferencias, interrupciones o sobrevoltaje o mal funcionamiento en el sistema eléctrico
pueden ocasionar que los dispositivos enchufados no funcionen como se espera.
ADVERTENCIA: No use ningún producto FREEWIRE para controlar un dispositivo médico. El uso de un producto FREEWIRE para
controlar cualquier tipo de dispositivo médico puede resultar en grave lesión personal.
ADVERTENCIA: No use ningún producto FREEWIRE para controlar un dispositivo que exceda la potencia nominal de ese producto
FREEWIRE. si se usa un producto FREEWIRE para controlar un dispositivo que excede la potencia nominal de ese producto puede resultar
en graves lesiones personales y/o daños a la propiedad. Las potencias nominales de los productos FREEWIRE son las siguientes:
• RECEPTOR PARA BOMBILLA - 150 vatios - solamente bombillas incandescentes.
• RECEPTOR PARA LÁMPARA - 300 vatios - solamente lámparas con bombillas incandescentes.
• CENTRO MENSAJERO - 500 vatios - solamente lámparas con bombillas incandescentes.
• RECEPTOR PARA LÁMPARA DE EXTERIOR - 500 vatios - solamente lámparas con bombillas incandescentes, fluorescentes,
halógenos, o bombillas de bajo voltaje.
• RECEPTOR PARA APARATO - 15 amp de carga resistiva para aparatos pequeños, carga automotriz de 1/3 c. de f. (HP), 500
vatios solamente lámparas con bombillas incandescentes, fluorescentes, halógenos, 400 vatios para televisión.
Si el producto FREEWIRE que usted piensa utilizar no está nombrado aquí, consulte el manual de instrucción sobre ese producto FREEWIRE
o llame al 1-800-544-6986 para determinar la potencia nominal aplicable antes de enchufar o utilizar dicho producto FREEWIRE .
ADVERTENCIA: Para reducir el riesgo de electrochoque o incendio, no exponga ningún producto FREEWIRE a la lluvia o la humedad. Si
un producto FREEWIRE ha sido expuesto a la lluvia y la humedad, desconecte el producto FREEWIRE inmediatamente de la toma de
corriente alterna para reducir el riesgo de electrochoque o incendio y consulte con personal de servicio autorizado. NOTA: El Receptor Para
Lámpara De Exterior se puede utilizar afuera. El RECEPTOR PARA BOMBILLA también se puede utilizar afuera si se monta en la orientación
correcta.
ADVERTENCIA: Para reducir el riesgo de electrochoque, no desarme ningún producto FREEWIRE. No hay piezas que el usuario pueda
reparar dentro de los productos FREEWIRE.
ADVERTENCIA: Para reducir el riesgo de electrochoque no use ningún tipo de adaptador de enchufe con este producto.
ADVERTENCIA: No use un Receptor Para Bombilla, Receptor Para Lámpara, Centro Mensajero o Receptor para Lámpara de Exterior
para controlar un aparato. Usar un Receptor Para Bombilla, Receptor Para Lámpara, Centro Mensajero o Receptor para Lámpara de Exterior
para controlar un aparato podría dañar el aparato o el receptor, lo cual podría resultar en lesión personal grave y/o daño a la propiedad.
ADVERTENCIA: No use un Receptor Para Bombilla o Receptor Para Lámpara para controlar una lámpara o dispositivo que ya tiene
instalado un reductor de luz. Usar un Receptor Para Bombilla o Receptor Para Lámpara para controlar una lámpara o dispositivo que ya tiene
instalado un reductor de luz podría dañar la lámpara, el dispositivo o el receptor, lo cual podría resultar en lesión personal grave y/o daño a la
propiedad.
ADVERTENCIA: Use solo bombillas incandescentes en lámparas que serán controladas por los Receptores Para Lámparas. El usar
cualquier otro tipo de bombillas podría dañarlas y/o los Receptores Para Lámparas.
ADVERTENCIA: Use solo bombillas incandescentes en Receptores Para Bombillas. Utilizar otro tipo de bombillas podría dañarlas y/o los
Receptores Para Lámparas.
ADVERTENCIA: No utilice sistemas de intercom y monitor, incluyendo los monitores de bebé que utilizan el cableado de la casa para
transmitir las señales en el modo de transmisión permanente (o de conversación) cuando usa productos FREEWIRE. Las transmisiones de
un sistema de intercom o monitor que utiliza el cableado de la casa para transmitir señales puede interferir o bloquear las transmisiones de
FREEWIRE en modo de transmisión permanente (o de conversación). Es también posible que el sistema inálambrico de intercom o monitor
de un vecino origine operaciones no programadas en su sistema FREEWIRE, incluso que su sistema deje de funcionar, o que su sistema de
FREEWIRE cause en el sistema de intercom o monitor de sus vecinos operaciones no programadas, y que incluso deje de funcionar.
ADVERTENCIA: Si usted en algún momento observa interferencia de algún producto FREEWIRE, desenchufe todos los productos
FREEWIRE inmediatamente hasta que (1) el origen de la interferencia haya sido identificado y eliminado mediante la selección de un
CÓDIGO DE CASA diferente para asegurar que ninguno de los sistemas ocasionan operaciones no planeadas en el otro sistema o (2) usted
haya instalado un filtro de bloqueo, Black and Decker Modelo numero PZZ01. Llame al 1-888-678-7278 para hacer su pedido. Se
recomienda instalación profesional. Si usted no puede identificar el origen de la interferencia mediante conversaciones con los vecinos que
utilizan FREEWIRE o sistemas compatibles y usted no desea instalar un filtro de bloqueo, o si usted tiene preguntas acerca de cómo
identificar o eliminar interferencias, favor llamar al 1-800-544-6986 antes de enchufar o usar algún producto FREEWIRE
Recuerde que debe ejercer su buen sentido común cuando utiliza el sistema FREEWIRE - especialmente cuando conecta al sistema aparatos
o dispositivos no supervisados. Pueden surgir consecuencias inesperadas si los productos FREEWIRE no se utilizan con cuidado. Una
cafetera vacía, por ejemplo, puede activarse por control remoto debido una operación no planeada o interferencia de un sistema FREEWIRE
o sistema compatible del vecino. De ocurrir esto, su cafetera podría dañarse por sobrecalentamiento, lo cual a su vez podría provocar un
incendio o crear un riesgo de electrochoque. Otro ejemplo sería si un calentador eléctrico se prende inesperadamente mientras está cubierto
con prendas de vestir, lo cual podría provocar un incendio. Por lo tanto, NO USE el sistema FREEWIRE para controlar dispositivos médicos,
aparatos de calentamiento, tales como calentadores portátiles, o algún otro aparato o dispositivo que pudiera causar lesiones físicas o daño a
la propiedad si estos se encienden o se apagan mientras no estén supervisados. Similarmente, NO USE el sistema FREEWIRE para
controlar un aparato o dispositivo que pueda causar lesiones físicas o daños a la propiedad si deja de funcionar inesperadamente. Las
14
621538-00 FW3000 MANUAL 1/5/04 11:02 AM Page 15
interferencias, interrupciones o sobrevoltaje o mal funcionamiento en el sistema eléctrico pueden ocasionar que los dispositivos enchufados
dejen de funcionar inesperadamente. Por ejemplo, si un calentador de cañería controlado por un sistema FREEWIRE deja de funcionar como
debería, las cañerías podrían congelarse y romperse. Por estas razones, es importante leer, comprender y seguir todas las instrucciones de
este manual y considerar con mucho cuidado, antes de conectar un aparato o dispositivo a un sistema FREEWIRE, las posibles
consecuencias que puedan surgir si estos se activan inesperadamente o dejan de funcionar.
REGLAS GENERALES DE SEGURIDAD
ADVERTENCIA DE LA FCC (COMISIÓN FEDERAL DE COMUNICACIONES, EN INGLÉS)
ESTE DISPOSITIVO CUMPLE CON LA SECCIÓN 15 DEL REGLAMENTO DE LA FCC.
SU OPERACIÓN ESTÁ SUJETA A LAS SIGUIENTES DOS CONDICIONES:
(1) ESTE DISPOSITIVO NO PUEDE CAUSAR INTERFERENCIA DAÑINA, Y
(2) ESTE DISPOSITIVO DEBE ACEPTAR CUALQUIER INTERFERENCIA RECIBIDA, INCLUYENDO AQUELLA QUE PODRÍA INTERFERIR
CON LA OPERACIÓN DEL DISPOSITIVO.
Este equipo genera y utiliza energía de radiofrecuencia y si no es debidamente instalado y utilizado, es decir, en pleno cumplimiento con las
instrucciones del fabricante, podría causar interferencia con la recepción de radio y televisión. Ha sido sometido a pruebas de prototipo y se
ha encontrado que cumple con los límites establecidos para los dispositivos con control remoto, de acuerdo a las especificaciones en las
subpartes B y C de la Sección 15 del reglamento de la FCC, el cual está diseñado para proporcionar un nivel de protección razonable contra
este tipo de interferencia en una instalación residencial. Sin embargo, no existe garantía alguna que la interferencia no ocurrirá en una
instalación en particular.
Si este equipo interfiere con la recepción de radio o televisión, lo cual puede ser determinado simplemente desenchufando el
equipo, intente corregir la interferencia siguiendo uno o más de los siguientes pasos.
• Cambie la orientación de la antena de la radio o televisión con la cual está interfiriendo.
• Cambie la ubicación de la interferencia con respecto a la radio o televisión.
• Aleje la interferencia de la radio o televisión.
• Enchufe la interfaz a una toma de corriente que esté en un circuito eléctrico diferente al de la radio o televisión con la cual
está interfiriendo.
• Si es necesario, consulte a su concesionario local para obtener sugerencias adicionales.
NOTA: Las modificaciones realizadas a cualquiera de los componentes de este equipo anularán la autoridad del usuario para
operarlo.
Familiarización con su equipo freewire de automatización
para el hogar.
mr
MR
El CENTRO MENSAJERO es el cerebro del sistema Freewire . Cuando se enchufa en una
toma de corriente alterna tiene la habilidad de recibir señales de radiofrecuencia (RF) desde
los controles remotos y la habilidad de enviar mensajes mediante la instalación eléctrica
existente en el hogar a todos los receptores que están conectados al mismo código de la
casa.
Además es utilizado para controlar sólo lámparas incandescentes, de hasta 500 vatios, que
estén conectadas al enchufe hembra que se encuentra en la parte inferior del CENTRO
MENSAJERO.
FWMH-CENTRO
MENSAJERO
NOTA: Para restricciones e instrucciones adicionales vea la sección CENTRO
MENSAJERO.
6
7
8
3
5
NOTA: Vea la sección CONTROL REMOTO DE INTERIOR para instrucciones.
NOTA: Para restricciones e instrucciones adicionales vea la sección RECEPTOR PARA
LÁMPARA.
15
1
12
NOTA: Las paredes y otros obstáculos pueden reducir el alcance efectivo de la señal de RF.
Un RECEPTOR PARA LÁMPARAS debe ser utilizado conjuntamente con al menos un
CENTRO MENSAJERO activo. Es utilizado para controlar sólo bombillas incandescentes de
hasta 300 vatios. Nota: Vea la sección RECEPTORES PARA LÁMPARAS para información
acerca de restricciones e instrucciones.
2
10 11
13
FWIR-CONTROL
REMOTO DE INTERIOR
FWLR-RECEPTOR
PARA LÁMPARAS
4
9
El CONTROL REMOTO DE INTERIOR emite señales de radiofrecuencia (RF) al CENTRO
MENSAJERO. Estas señales pueden atravesar paredes por lo que el control remoto puede
ser utilizado para controlar luces (o aparatos eléctricos que tengan un receptor aprobado
para ello) desde cualquier lugar de la casa.
ON
14
15 16
ROOM COLOR
OFF
ON
ON
ON
OFF
OFF
OFF
ON
ON
ON
MOOD 1
MOOD 2
HOUSE
OFF
OFF
OFF
621538-00 FW3000 MANUAL 1/5/04 11:02 AM Page 16
Familiarización con su equipo freewire de automatización
para el hogar.
mr
Un RECEPTOR PARA LÁMPARA DE EXTERIOR debe ser utilizado
conjuntamente con al menos un CENTRO MENSAJERO activo. Es utilizado para
controlar luces interiores y exteriores incandescentes, fluorescentes, de halógeno
y de bajo voltaje de hasta 500 vatios de potencia nominal.
NOTA: Para restricciones e instrucciones adicionales vea la sección RECEPTOR
PARA LÁMPARAS DE EXTERIOR.
Control Remoto De Exterior
No. de catálogo FWLROD
DEFINICIONES DE LOS TÉRMINOS
UTILIZADOS EN ESTE MANUAL
¿Qué significa el CÓDIGO DE UNIDAD?
El código de unidad le permite asignar un número (1 al 16) a cualquier unidad Freewire de su sistema de hogar. Si por ejemplo, usted asigna
el código número 5 a un Receptor Para Lámpara, la lámpara se encenderá y se apagará cuando usted activa el número 5 en su control
remoto Freewire. Si usted desea que varios Receptores Para Lámparas respondan a un solo número en su control remoto, se pueden
configurar todos al mismo número de código.
¿Qué significa el CÓDIGO DE CASA?
El código de casa evita la interferencia de otros sistemas Freewire que puedan encontrarse en su vecindario. Cuando usted configura su
código de casa a una letra (A - P) usted está escogiendo un lenguaje distintivo de comunicación entre todas las partes de su sistema
Freewire. Es esencial que todas las unidades de su sistema Freewire estén configurados a la misma letra de código de casa para que el
sistema funcione correctamente.
¿Qué significa la SINCRONIZACIÓN del Control Remoto?
Cuando usted instala sus unidades Freewire inicialmente, es esencial que los controles remotos inalámbricos (Control Remoto de Interior y
Control Remoto de Llavero) correspondan con el Centro Mensajero enchufado. Esto sincronizará su comunicación inalámbrica en forma
distintiva lo cual evita interferencia con otros sistemas Freewire que puedan hallarse en su vecindario.
¿Por qué hay SEGMENTOS DE COLOR en los cuadrantes de código de unidad?
Los seis colores (o zonas) le ayudan a adjudicar los códigos de unidades a varias partes de su casa. Por ejemplo, si usted desea controlar
tres lámparas enchufadas de su cuarto de estar, usted les puede adjudicar los números de código de unidad 5, 6 y 7, los cuales forman parte
del segmento verde (zona verde). El verde se vuelve una referencia rápida para controlar esas lámparas desde su control remoto.
¿Qué significa GRUPOS?
Grupos son botones de acción abreviada para operar cualquier combinación de hasta cuatro códigos de receptores para unidades. Por
ejemplo, usted decide crear un control de grupo de 'bienvenido a casa'. Si usted tiene las luces de entrada configuradas a 1, la lámpara del
vestíbulo configurada a 5, la lámpara de la sala de estar configurada a 8 y la luz de la cocina configurada a 11, todos podrían
encenderse/apagarse mediante una sola tecla de grupo. Es esencial programar primero el grupo con el Centro Mensajero y el Control Remoto
de interior antes de utilizar esta función.
¿Qué hace el botón HOUSE (de casa)?
Cuando usted presiona HOUSE ON todas los Receptores de Lámparas y el Centro Mensajero de su sistema Freewire se encenderán (no se
encenderán los receptores de aparatos por razones de seguridad). Cuando usted presiona HOUSE OFF se apagarán todas las unidades de
su sistema Freewire (tanto los receptores de lámparas como de aparatos) - esto es una manera rápida de apagar todas sus unidades
Freewire.
16
621538-00 FW3000 MANUAL 1/5/04 11:02 AM Page 17
POR FAVOR SIGA LA SECUENCIA DESCRITA EN ESTE MANUAL PARA EVITAR CONFUSIONES
Instrucciones detalladas para configurar el CENTRO MENSAJERO:
Una nota corta antes de configurar el CENTRO MENSAJERO:
ADVERTENCIA: Sólo para uso interior. Si un producto FREEWIRE ha sido expuesto a la lluvia y la humedad, desconecte el producto
FREEWIRE inmediatamente de la toma de corriente alterna para reducir el riesgo de electrochoque o incendio y consulte con personal de
servicio autorizado.
ADVERTENCIA: Utilice sólo bombillas incandescentes (de hasta 500 vatios) en lámparas que serán controladas por el CENTRO
MENSAJERO.
Cada receptor tiene una dirección específica compuesta por un CÓDIGO DE CASA o HOUSE CODE (cuadrante inferior) y un código de
unidad o unit code (cuadrante superior) los cuales son utilizados para entablar comunicación con el CENTRO MENSAJERO.
La función del CÓDIGO DE CASA es evitar que ocurra interferencia con otro sistema FREEWIRE u otro compatible. Si usted en algún
momento experimenta interferencia con otro sistema que puede ocasionar que otros dispositivos enchufados a alguno de los sistemas se
enciendan o se apaguen intempestivamente, desenchufe todos los dispositivos FREEWIRE inmediatamente hasta que (1) el origen de la
interferencia haya sido identificado y eliminado mediante la selección de un CÓDIGO DE CASA diferente para asegurar que ninguno de los
sistemas ocasionan operaciones no planeadas en el otro sistema o (2) usted haya instalado un filtro de bloqueo, Black and Decker Modelo
numero PZZ01. Llame al 1-888-678-7278 para hacer su pedido. Se recomienda instalación profesional. Si usted no puede identificar el
origen de la interferencia mediante conversaciones con los vecinos que utilizan FREEWIRE o sistemas compatibles y usted no desea instalar
un filtro de bloqueo, o si usted tiene preguntas acerca de cómo identificar o eliminar interferencias, favor llamar al 1-800-544-6986 antes de
enchufar o usar algún dispositivo FREEWIRE.
Paso 1:
Enchufe el CENTRO MENSAJERO en cualquier toma de corriente alterna que funcione dentro de su casa. Coloque la antena en posición
vertical. Abra la puerta delantera para exponer el panel de control, como lo
muestra la Figura 1. NOTA: Si coloca el CENTRO MENSAJERO en la pared
1
Botón On/Off (de
interna que se encuentre más cercana a la entrada para automóviles o la
encendido y apagado)
entrada de la casa, generalmente maximizará el alcance del CONTROL
REMOTO DE LLAVERO.
Cuadrante del
código de unidad
Paso 2:
(Unit Code)
Seleccione un CÓDIGO DE CASA en el CENTRO MENSAJERO, cualquier letra
Cuadrante del código
entre la A y la P. (Nota: El CÓDIGO DE CASA que seleccione en el CENTRO
de casa (House Code)
MENSAJERO determinará la letra que seleccionará para todos los otros
RECEPTORES que piensa controlar con este CENTRO MENSAJERO.
Conmutador de
Run/Learn (de
Paso 3:
operación/ aprendizaje)
Seleccione un CÓDIGO DE UNIDAD en el CENTRO MENSAJERO, cualquier
número del 1 al 16. El número y color correspondiente que elija controlará la toma
Enchufe hembra
de corriente para lámparas ubicado en la parte inferior de este CENTRO
MENSAJERO. (Si selecciona el mismo número y el mismo código de casa para
cualquier otro receptor adicional, operará conjuntamente con este centro.)
Paso 4:
Sincronice su CONTROL REMOTO DE INTERIOR con su CENTRO MENSAJERO para que entiendan cómo comunicarse entre sí.
(Nota: Cualquier control remoto adicional que sea introducido al sistema deberá ser sincronizado también.)
5
6
7
8
3
4
9
2
10 11
1
12
Para sincronizar, ponga el conmutador deslizante del CENTRO MENSAJERO en LEARN (APRENDIZAJE).
2
Con el CENTRO MENSAJERO de frente, oprima y mantenga presionado el botón “ON” del medio en el
CONTROL REMOTO DE INTERIOR por 5 segundos - Figura 2. Asegúrese de ver la luz verde destellando
en el CENTRO MENSAJERO. El destello indicará que el CENTRO MENSAJERO está sincronizado con el
CONTROL REMOTO DE INTERIOR.
Ahora, coloque el conmutador deslizante del CENTRO MENSAJERO en RUN (OPERACIÓN).
Presione el
(Nota: La puerta no se podrá cerrar mientras el CENTRO MENSAJERO esté en la modalidad
botón “ON”
LEARN.)
del medio por
5 segundos
Paso 5:
Encienda la lámpara primero, luego conéctela con el enchufe hembra en la parte inferior del CENTRO
MENSAJERO. Use sólo bombillas incandescentes de hasta 500 vatios. Asegúrese que la lámpara haya sido
encendida antes de enchufarla al CENTRO MENSAJERO.
Presione el botón “ON/OFF” para la lámpara local en el CENTRO MENSAJERO para comprobar que el
CENTRO MENSAJERO esté funcionando debidamente. Escuchará un ‘clic’ cuando del CENTRO
MENSAJERO encienda o apague esta lámpara.
13
ON
14
15 16
ROOM COLOR
OFF
ON
ON
ON
OFF
OFF
OFF
ON
ON
ON
MOOD 1
MOOD 2
HOUSE
OFF
OFF
OFF
Ahora está listo para hacer funcionar la lámpara conectada a este CENTRO MENSAJERO con el CONTROL REMOTO DE INTERIOR.
17
621538-00 FW3000 MANUAL 1/5/04 11:02 AM Page 18
Instrucciones detalladas para la operación del CONTROL REMOTO DE INTERIOR:
Una nota corta antes de configurar el CONTROL REMOTO DE INTERIOR:
ADVERTENCIA: Sólo para uso interior. Si el CONTROL REMOTO DE INTERIOR ha sido expuesto a la humedad o la lluvia, consulte con
personal de servicio autorizado.
12
3
4
13
14
1
6
7
8
16
Los números y colores en el cuadrante del CONTROL REMOTO DE INTERIOR combinan con los números y
colores en el CENTRO MENSAJERO y los RECEPTORES PARA LÁMPARAS.
9
15
11
3
10
Abra la puerta al CONTROL REMOTO DE INTERIOR para exponer el cuadrante de colores de la Figura 3.
Los colores en el cuadrante del CÓDIGO DE UNIDAD pueden usarse para dividir su hogar en zonas con hasta 3
códigos de unidad dedicados por color (con la excepción del rojo que sólo tiene un CÓDIGO DE UNIDAD). (por
ejemplo, verde = sala de estar)
2
ON
5
OFF
Los números se usan para diferenciar un receptor del otro en cada color/ zona.
4
Configuración de la etiqueta de referencia
Para su conveniencia, hay una etiqueta de referencia en blanco en la parte posterior del CONTROL REMOTO
DE INTERIOR. Escriba sus propias aplicaciones personalizadas en esta clave en blanco. Figura 4:
Ejemplo:
entrada.
Los CÓDIGOS DE UNIDAD rojos han sido seleccionados para el receptor para bombillas de la
Los CÓDIGOS DE UNIDAD grises han sido seleccionados para los RECEPTORES en el comedor.
Los CÓDIGOS DE UNIDAD verdes han sido seleccionados para el RECEPTOR de la sala de estar,
etc.
9
NOTA: El botón superior del CONTROL REMOTO DE LLAVERO sólo activará el CÓDIGO DE UNIDAD 1 (ROJO). Recomendamos que
controle la iluminación de su entrada y alrededores con el CÓDIGO DE UNIDAD 1 (rojo) para que pueda ser activada con su
CONTROL REMOTO DE LLAVERO. Vea las instrucciones referentes al CONTROL REMOTO DE LLAVERO en la página 11 para mayor
información.
1
Ponga el cuadrante de su CONTROL REMOTO DE INTERIOR en la misma configuración del CÓDIGO DE
UNIDAD (color) que seleccionó en el CENTRO MENSAJERO, en la sección anterior.
6
7
8
16
5
2
6
13
14
ON
3
4
15
Gris 4 – Controlado por la fila superior, conmutador de la derecha.
9
Gris 3 – Controlado por la fila superior, conmutador del centro
OFF
ON
12
ON
Gris 2 – Controlado por la fila superior, conmutador de la izquierda
5
4
11
Cada uno de los 3 códigos individuales en ese color puede ser encendido y apagado individualmente, con los 3
botones blancos de ON/OFF que se encuentran justo debajo del cuadrante, como lo muestra la Figura 5.
Ejemplo:
3
ON
Paso 2:
10
Paso 1:
1
2
ON
ON
Ya debería ser capaz de encender y apagar la lámpara con el botón correspondiente del CONTROL REMOTO DE
INTERIOR.
7
Nota: Puede que tenga que presionar y sostener momentáneamente el botón para que se active.
CONTROL REMOTO DE INTERIOR CAMBIO DE PILA
Abra la tapa del compartimiento de la pila (ubicado en la parte inferior de la parte de atrás) con su uña e instale
una pila de litio CR2032 nueva, como lo muestra la Figura 7. Nota: La pila debe ser colocada con el texto impreso
en ella mirando hacia la parte posterior del CONTROL REMOTO DE INTERIOR o sino el CONTROL REMOTO DE
INTERIOR no funcionará.
Nota: Si el CONTROL REMOTO DE INTERIOR queda sin pila por más de 3 horas, el código interno de seguridad
del control remoto se debe volver a configurar. Para esto instale pilas nuevas, oprima y sostenga presionado algún
botón del control remoto por 5 segundos, repita el paso 4 de la página 6 para sincronizar el CONTROL REMOTO
DE INTERIOR con el CENTRO MENSAJERO.
18
6
7
8
16
Los botones pequeños y redondos ON y OFF que muestran la Figura 6, le permiten encender o apagar todos los
RECEPTORES configurados con ese color.
ON
5
OFF
ON
621538-00 FW3000 MANUAL 1/5/04 11:02 AM Page 19
Instrucciones detalladas para la operación de los RECEPTORES PARA LÁMPARAS
Una nota corta antes de configurar los RECEPTORES PARA LÁMPARAS:
ADVERTENCIA: Sólo para uso interior. Si un RECEPTOR PARA LÁMPARA ha sido expuesto a la lluvia y la humedad, desconecte el
RECEPTOR PARA LÁMPARA inmediatamente de la toma de corriente alterna para reducir el riesgo de electrochoque o incendio y consulte
con personal de servicio autorizado.
ADVERTENCIA: Utilice sólo bombillas incandescentes (de hasta 300 vatios) en lámparas que serán controladas por
RECEPTORES PARA LÁMPARAS. No utilice sistemas de iluminación con fluorescentes, halógenos o de bajo voltaje. El utilizar cualquier otro
tipo de bombillas podría dañar las mismas y/o RECEPTORES PARA LÁMPARAS. El tratar de controlar algún otro dispositivo mediante los
RECEPTORES PARA LÁMPARAS podría dañar el dispositivo y el RECEPTOR PARA LÁMPARA, lo cual podría resultar en lesiones graves y
/o daños a la propiedad.
PRECAUCIÓN: No se deben utilizar lámparas de activación por contacto con los RECEPTORES PARA LÁMPARAS. La lámpara
podría dañarse
PRECAUCIÓN: No utilice el RECEPTOR PARA LÁMPARA con una lámpara conectada a un temporizador o interruptor fotosensor.
El temporizador o el interruptor podrían dañarse.
Paso 1:
Configure el CÓDIGO DE CASA con la misma letra seleccionada en el CENTRO MENSAJERO, luego enchufe el RECEPTOR PARA
LÁMPARAS en la toma de corriente alterna ocupada actualmente por la lámpara que desea controlar.
Paso 2:
Seleccione un color de CÓDIGO DE UNIDAD que corresponda a la zona de color que usted configuró en la parte
de atrás del CONTROL REMOTO DE INTERIOR. Ahora necesitará asignar un CÓDIGO DE UNIDAD específico
para el RECEPTOR PARA LÁMPARAS. Para el color elegido tiene 3 opciones de números. En el ejemplo de la
Figura 8, el RECEPTOR PARA LÁMPARAS está configurado como Amarillo 8.
8
Paso 3:
Primero prenda la lámpara, luego enchúfela a la toma de corriente de la superficie inferior del RECEPTOR PARA
LÁMPARAS.
Paso 4:
1
2
15
16
4
13 14
3
Gire el cuadrante de color del CONTROL REMOTO DE INTERIOR para colocarlo en el color del RECEPTOR
PARA LÁMPARAS. Para encender y apagar la lámpara, presione el conmutador que corresponda con el
número seleccionado en el RECEPTOR PARA LÁMPARAS. La Figura 9 muestra la activación del
9
RECEPTOR PARA LÁMPARAS en Amarillo 8.
6
12
5
7
ON
NOTA: Las lámparas conectadas a RECEPTORES PARA LÁMPARAS aún pueden ser controladas por
el conmutador de la lámpara. Recuerde que el conmutador de la lámpara debe estar encendido para
que la lámpara pueda ser controlada por el sistema Freewire.
19
ON
OFF
8
9
10
ON
OFF
11
OFF
ON
OFF
ON
ON
ON
MOOD 1
MOOD 2
HOUSE
OFF
OFF
OFF
621538-00 FW3000 MANUAL 1/5/04 11:02 AM Page 20
Instrucciones detalladas para desarrollar configuraciones de GRUPO
Una nota corta antes de programar los ambientes:
En la sección de receptores para lámparas aprendió cómo configurar RECEPTORES individuales PARA LÁMPARAS. Estos RECEPTORES
PARA LÁMPARAS se encienden y apagan al presionar el conmutador basculante apropiado que corresponda al CÓDIGO DE UNIDAD único
del receptor.
El propósito de los botones de GRUPO (azules) es de vincular receptores múltiples (hasta 4) de manera que puedan encenderse y apagarse
con el botón de GRUPO. Vea la Figura 16.
Ejemplo: Si usted tiene un RECEPTOR PARA LÁMPARA en un cuarto que está configurado al número 7 en el CÓDIGO DE UNIDAD y tiene
otro RECEPTOR PARA LÁMPARA en otro cuarto que está configurado al número 13 en el CÓDIGO DE UNIDAD, se pueden encender las
dos lámparas al mismo tiempo utilizando un GRUPO.
2
14
13
ON
Cuadrante del
código de unidad
Cuadrante del código
de casa
Conmutador deslizante
run/ learn (de operación/
aprendizaje)
Conmutador
basculante
Botón Group
3
4
5
OFF
ON
ON
ON
OFF
OFF
OFF
ON
ON
ON
MOOD 1
MOOD 2
HOUSE
OFF
OFF
OFF
Botón HOUSE (de
casa)
Paso 1:
Con el CENTRO MENSAJERO aún enchufado en una toma de corriente alterna, coloque el conmutador deslizante en
posición LEARN (APRENDIZAJE), como lo muestra la Figura 15.
15
Paso 2:
Con el CENTRO MENSAJERO de frente, presione el conmutador GRUPO 1 ON (encendido) del CONTROL
REMOTO DE INTERIOR. Figura 16 – La luz verde del CENTRO MENSAJERO destellará.
16
ON
ON
ON
9
Paso 3:
MOOD 1
MOOD 2
HOUSE
Coloque el cuadrante del CÓDIGO DE UNIDAD del CONTROL REMOTO DE INTERIOR en la misma
OFF
OFF
OFF
posición que la configuración del CÓDIGO DE UNIDAD del RECEPTOR PARA LÁMPARAS que desea
encender y apagar. Presione el conmutador basculante (blanco) que corresponda a ese RECEPTOR
PARA LÁMPARAS, como lo muestra la Figura 17. Espere a que el indicador del CENTRO MENSAJERO destelle indicando que ha sido
almacenado en la función de GRUPO.
3
17
Paso 4:
Repita el Paso 3 hasta un máximo de 3 veces más para vincular hasta 4 RECEPTORES PARA
LÁMPARAS / RECEPTORES PARA BOMBILLAS con esa clave de GRUPO. Los 4 RECEPTORES PARA
LÁMPARAS pueden tener cualquier combinación de CÓDIGOS DE UNIDAD,
4
ON
5
ON
6
7
ON
8
OFF
ON
Paso 5:
OFF
OFF
OFF
Regrese el conmutador deslizante del CENTRO MENSAJERO a la posición RUN (OPERACIÓN) - Figura
18. El botón ON/OFF (prende /apaga) del GRUPO 1 encenderá y apagará todos los RECEPTORES PARA
Conmutador basculante
LÁMPARAS / RECEPTORES PARA BOMBILLAS que fueron vinculados en el Paso 4. Puede que exista un
retraso de hasta 3 segundos entre el momento en que presione el botón y el momento en que las luces respondan.
18
Paso 6:
Para configurar la clave del GRUPO 2, repita los pasos 1 al 5 utilizando la clave del GRUPO 2 en lugar de la del
GRUPO 1.
NOTA: Presionar cualquier clave de GRUPO ON mientras se encuentra en el modo LEARN borra todos los códigos
almacenados por ese GRUPO.
Cómo utilizar el Botón HOUSE (de casa) para encender o apagar TODAS las luces
Al presionar el BOTÓN DE CONTROL REMOTO HOUSE (de casa) (figura 19) en “on” (encendido) se activará el CENTRO
MENSAJERO, RECEPTORES PARA LÁMPARAS y RECEPTORES PARA BOMBILLAS configurados al sistema del CÓDIGO
19 ON
DE CASA. Los RECEPTORES PARA LÁMPARAS de EXTERIOR y RECEPTORES PARA APARATOS no responderán a la
orden de todos “on” (encendido). Al presionar el BOTÓN DE CONTROL REMOTO HOUSE (DE CASA) en “off” (apagado) se
HOUSE
desactivarán los receptores arriba nombrados así como todos los RECEPTORES PARA LÁMPARAS DE EXTERIOR y
OFF
RECEPTORES PARA APARATOS.
20
621538-00 FW3000 MANUAL 1/5/04 11:02 AM Page 21
Instrucciones detalladas del RECEPTOR PARA LÁMPARA DE EXTERIOR
Una nota corta antes de configurar el RECEPTOR PARA LÁMPARA DE EXTERIOR:
El RECEPTOR PARA LÁMPARA DE EXTERIOR se puede usar tanto dentro como fuera de la casa.
ADVERTENCIA: Cuando se usa afuera, úselo solo con tomas de corriente equipados con protección de toma a tierra.
ADVERTENCIA: No lo sumerja. Mantenga las conexiones secas. No hacerlo puede resultar en electrochoque.
ADVERTENCIA: Lea y comprenda las advertencias en su cable de extensión. No hacerlo puede resultar en electrochoque.
ADVERTENCIA: Para evitar el peligro de electrochoque, siempre debe suponer que la corriente está presente aunque la luz roja
indicadora no está iluminada. No hacerlo puede resultar en electrochoque.
ADVERTENCIA: No maltrate el cable de extensión. No le dé un tirón para desconectarlo del enchufe. Mantenga el cable alejado
del calor, aceite y bordes afilados. Inspeccione los cables de extensión periódicamente y reemplácelos si están dañados. No hacerlo
puede resultar en electrochoque.
A diferencia de los RECEPTORES PARA LÁMPARAS Y APARATOS, el RECEPTOR PARA LÁMPARA DE EXTERIOR no tiene cuadrantes de
código. Usted configura el código del receptor de exterior desde el CENTRO MENSAJERO y luego el centro recuerda este código, aun
después de una falla en el suministro de corriente. Para que la programación sea más fácil, coloque primero el RECEPTOR PARA LÁMPARA
DE EXTERIOR en la misma toma de corriente de pared donde va enchufado el CENTRO MENSAJERO. Después de la programación usted
lo puede trasladar a su ubicación definitiva.
Paso 1:
Configure el código de unidad del CONTROL REMOTO DE INTERIOR al color y número que usted desea utilizar para controlar el
RECEPTOR PARA LÁMPARA DE EXTERIOR en su ubicación definitiva. (Ejemplo: Azul 11)
Paso 2:
Enchufe el RECEPTOR PARA LÁMPARA DE EXTERIOR en la misma toma de corriente de pared que el CENTRO
MENSAJERO o si quiere, puede trasladar el CENTRO MENSAJERO y enchufar éste en la misma toma de corriente de
pared que el RECEPTOR PARA LÁMPARA DE EXTERIOR. (el CENTRO MENSAJERO no perderá su memoria
pudiéndose regresar al sitio original más tarde). Vea la Figura 23. Ahora la luz indicadora roja del RECEPTOR PARA
LÁMPARA DE EXTERIOR debe haberse encendido.
23
Dentro de los 30 segundos después de haber enchufado el RECEPTOR PARA LÁMPARA DE EXTERIOR, oprima y
mantenga presionado por 5 segundos el botón ON del CONTROL REMOTO DE INTERIOR que corresponda con el
CÓDIGO DE UNIDAD que usted escogió. Después de algunos segundos, la luz indicadora roja del RECEPTOR PARA
LÁMPARA DE EXTERIOR destellará indicando que el código ha sido aprendido. Si el conmutador del RECEPTOR PARA
LÁMPARA DE EXTERIOR está encendido, la luz indicadora roja permanecerá encendida. Si el conmutador del
RECEPTOR PARA LÁMPARA DE EXTERIOR está apagado, la luz indicadora roja no estará iluminada.
NOTA: Si la luz indicadora roja no se enciende en 5 minutos, desenchufe el RECEPTOR PARA LÁMPARA DE EXTERIOR,
vuelva a enchufar, y repita el paso 2. Si la luz indicadora todavía no se enciende, traslade el CENTRO MENSAJERO y el
RECEPTOR PARA LÁMPARA DE EXTERIOR a otra toma de corriente en un cuarto distinto y repita el paso 2.
Paso 3:
Ahora ya puede usted trasladar el RECEPTOR PARA LÁMPARA DE EXTERIOR a su ubicación definitiva.
PRECAUCIÓN: Para uso exterior con cables de extensión: Enchufe el RECEPTOR PARA LÁMPARA DE EXTERIOR directamente a la
toma de corriente de la pared, luego enchufe el cable de extensión “con potencia nominal para exteriores”en el RECEPTOR PARA LÁMPARA
DE EXTERIOR a fin de reducir el riesgo de electrochoque.
NOTAS ACERCA DEL RECEPTOR PARA LÁMPARA DE EXTERIOR:
1.) El RECEPTOR PARA LÁMPARA DE EXTERIOR se puede usar con luces incandescentes, fluorescentes, halógenos y de bajo
voltaje con potencia nominal de hasta 500 varios.
2.) Si la toma de corriente está controlada por un conmutador de pared, usted debe dejar este conmutador prendido en todo
momento, de no hacerlo el RECEPTOR PARA LÁMPARA DE EXTERIOR no tendrá la corriente alterna y usted no podrá controlarlo
de manera remota.
3.) Para cambiar el CÓDIGO DE UNIDAD para que el RECEPTOR PARA LÁMPARA DE EXTERIOR responda a ese código,
desenchufe el RECEPTOR PARA LÁMPARA DE EXTERIOR y repita los pasos 1 a 3.
4.) Desenchufe el RECEPTOR PARA LÁMPARA DE EXTERIOR cuando no se utiliza.
5.) Temperaturas de operación -20°C a 50°C.
Temperaturas de almacenamiento -40°C a 70° C.
21
621538-00 FW3000 MANUAL 1/5/04 11:02 AM Page 22
SISTEMA DE CONTROL INALÁMBRICO HOMELINK
GUÍA DE PROGRAMACIÓN E INFORMACIÓN
El sistema de control inalámbrico HomeLink es una característica instalada de fábrica que viene con muchos modelos de vehículos. HomeLink
está típicamente ubicado ya sea en la visera, la consola superior o el espejo retrovisor del vehículo. HomeLink puede convenientemente
reemplazar hasta tres transmisores de radiofrecuencia (RF) de mano utilizados para activar dispositivos tales como operadores de portones,
abridores de puertas de garaje, seguros de puertas de entrada, sistemas de seguridad y controles de luces en el hogar. Puede encontrar
mayor información acerca de HomeLink en la Internet en www.homelink.com o si llama al 1-800-355-3515.
NOTA: Los productos Freewire de Black and Decker son compatibles con algunos vehículos de 2001 y con vehículos más nuevos equipados
con HomeLink. Por favor llame a la línea de servicio al cliente de HomeLink al 1-800-355-3515 para averiguar sobre compatibilidad.
NOTA: Algunos vehículos pueden requerir que el conmutador de arranque esté encendido o en la segunda posición (para accesorios) para
programar y/u operar HomeLink.
Si ya tiene programado a HomeLink para operar dispositivos tales como puertas de garaje o portones, sáltese por favor al PASO 2.
Si no ha programado a HomeLink aún para operar estos dispositivos, por favor empiece con el PASO 1.
1. Presione y sostenga los dos botones externos de HomeLink en el vehículo (los botones uno y tres) – soltándolos sólo cuando la luz del
indicador de HomeLink empiece a destellar (después de 20 segundos). No sostenga los botones por más de 30 segundos y no repita el
PASO 1 para programar los dos botones HomeLink con un segundo y/o un tercer transmisor de mano o función del control remoto para el
interior Freewire.
2. Gire el dial de su CONTROL REMOTO PARA EL INTERIOR Freewire a la ZONA y CÓDIGO DE UNIDAD que le gustaría
programar en HomeLink. El ejemplo en la muestra que el CONTROL REMOTO PARA EL INTERIOR está puesto en Azul 12.
NOTA: Tendrá que programar un botón HomeLink diferente para cada función de ENCENDIDO y/o APAGADO de sus
controles de remoto para el interior o el llavero Freewire. Por ejemplo, el segundo botón Homelink puede ser programado para
encender a Azul 12 y el tercer botón Homelink puede ser programado para apagar a Azul 12.
3. Sitúe el extremo de su control remoto para el interior Freewire 3 a 8 cm (1 a 3 pulg.) de distancia del botón HomeLink que desea
programar, teniendo la luz del indicador visible.
4. Presione y sostenga simultáneamente el botón HomeLink seleccionado y el botón del control remoto para el interior Freewire (ON u OFF –
de encendido o apagado, respectivamente). No suelte los botones hasta que no haya completado el paso 5.
NOTA: Se recomienda que use su control remoto para el interior Freewire para programar a HomeLink. Si está programando a HomeLink con
su control remoto de llavero Freewire, deberá ciclar el botón del control remoto de llavero mientras programa a HomeLink. Para ciclar: siga
presionando y sosteniendo el botón HomeLink mientras presiona y suelta cada dos segundos (cicla) el botón ON (de encendido) del control
remoto de llavero, hasta que la señal de frecuencia haya sido aceptada por HomeLink. (La luz del indicador destellará lenta y luego
rápidamente.)
5. Una vez que la luz del indicador HomeLink cambie de un destello lento a uno rápido, suelte el botón HomeLink y el del control remoto de
interior o de llavero Freewire.
6. HomeLink está ahora programado para operar su sistema Freewire. Para operar a HomeLink, simplemente presione y suelte el botón
HomeLink reprogramado para activar su sistema Freewire. También puede seguir usando su CONTROL REMOTO DE INTERIOR para
controlar a Freewire.
REPROGRAMACIÓN DE UN SOLO BOTÓN HOMELINK
Para programar un dispositivo en HomeLink con un botón HomeLink previamente programado, siga los siguientes pasos:
1. Presione y sostenga el botón HomeLink deseado. NO lo suelte hasta que el paso 4 no haya sido completado.
2. Cuando la luz del indicador HomeLink empiece a destellar lentamente (luego de 20 segundos), coloque el transmisor de mano o el control
remoto a 3 a 8 cm (1 a 3 pulg.) de distancia de la superficie de HomeLink.
3. Presione y sostenga el transmisor de mano o botón del control remoto. La luz del indicador HomeLink destellará, primero lenta y luego
rápidamente.
4. Cuando la luz del indicador HomeLink empiece a destellar rápidamente, suelte ambos botones.
El dispositivo anterior se habrá borrado y el nuevo dispositivo podrá ser activado al presionar el botón HomeLink que acaba de ser
programado. Este procedimiento no afectará ningún otro botón HomeLink programado.
Contacte a HomeLink en: www.homelink.com o llamando al 1–800–355–3515, para respuestas a preguntas o para hacer algún comentario.
HomeLink y la casa HomeLink son marcas comerciales registradas por Johnson Controls, Inc.
RESPUESTAS A PREGUNTAS FRECUENTES SOBRE HOMELINK
¿Por qué HomeLink sólo enciende (o apaga) el dispositivo para el cual lo he programado?
El encendido y apagado son dos funciones diferentes y deben ser programados a HomeLink en forma independiente. Por ejemplo,
programaría un botón HomeLink para el encendido y otro botón HomeLink para el apagado.
¿Dónde puedo obtener HomeLink?
HomeLink viene equipado como característica estándar en paquetes específicos de características o como opción en más de 150 vehículos
diferentes. Para una lista de estos vehículos, visite a www.homelink.com o llame a la línea de servicio al cliente HomeLink al 1-800-355-3515.
HomeLink puede también ser comprado e instalado por un profesional en automóviles existentes. Por favor visite a www.homelink.com o
llame a la línea de servicio al cliente HomeLink al 1-800-355-3515 para mayor información.
¿Por qué no puedo programar a HomeLink a mi control remoto Freewire?
Los controles remotos Freewire son compatibles con algunos vehículos de 2001 y con vehículos más nuevos equipados con HomeLink. Por
favor visite a www.homelink.com o llame a la línea de servicio al cliente HomeLink al 1-800-355-3515 para averiguar sobre compatibilidad.
22
621538-00 FW3000 MANUAL 1/5/04 11:02 AM Page 23
RESOLUCIÓN DE PROBLEMAS
PROBLEMAS EN LA PROGRAMACIÓN DE RECEPTORES
Si experimenta problemas al programar el RECEPTOR PARA BOMBILLA o RECEPTOR PARA LÁMPARA DE EXTERIOR, esto se puede
atribuir a interferencia eléctrica en las líneas de alimentación ocasionadas por aparatos grandes tales como refrigeradoras o televisores. Para
evitar interferencia, traslade el receptor durante su programación a una toma de corriente diferente que esté más alejada de aparatos
eléctricos grandes.
ALGUNOS RECEPTORES NO RESPONDEN
La mayoría de las casas son alimentadas con un servicio de 240 voltios que se divide en dos fases de 120 voltios cada una en el panel de
disyuntores. El problema más común con sistemas que utilicen la instalación eléctrica existente de la casa para transmitir señales es que las
señales no sean recibidas por todos los receptores. Por ejemplo, que el CENTRO MENSAJERO no controle todas las luces o controle
algunas luces en forma intermitente. Esto puede suceder a veces cuando el receptor a ser controlado se encuentra en la fase opuesta de la
instalación eléctrica de la casa a la que se encuentra conectado el CENTRO MENSAJERO.
Si algunos receptores no funcionan, puede que sea necesario:
• trasladar el receptor a una toma de corriente diferente para ver si funciona. Si aún no funciona:
• traslade el receptor a otro cuarto. Si aún no funciona:
• traslade el receptor a la toma de corriente más cercana a la que esté conectado el CENTRO MENSAJERO o traslade el CENTRO
MENSAJERO a la toma de corriente más cercana al receptor que no funciona.
LOS RECEPTORES SE ENCIENDEN SOLOS
Si se sospecha que los RECEPTORES se encienden o se apagan solos, es posible que un vecino tenga un sistema FREEWIRE u otro
sistema compatible, que puede resultar en operaciones inesperadas en ambos sistemas. Desenchufe todas las unidades FREEWIRE
inmediatamente hasta que (1) el origen de la interferencia haya sido identificado y eliminado mediante la selección de un CÓDIGO DE CASA
diferente para asegurar que ninguno de los sistemas ocasionan operaciones no programadas en el otro sistema o hasta que (2) usted haya
instalado un filtro de bloqueo, Black and Decker Modelo numero PZZ01. Llame al 1-888-678-7278 para hacer su pedido. Se recomienda
instalación profesional. Si usted no puede identificar el origen de la interferencia mediante conversaciones con los vecinos que utilizan
FREEWIRE o sistemas compatibles y usted no desea instalar un filtro de bloqueo, o si usted tiene preguntas acerca de cómo identificar o
eliminar interferencias, favor llamar al 1-800-544-6986 antes de enchufar o usar algún dispositivo FREEWIRE.
BOMBILLAS DE TRES NIVELES
Se puede utilizar bombillas de tres niveles, si embargo, el sistema FREEWIRE solo activará un nivel de luminosidad. Para cambiar el nivel de
luminosidad usted deberá girar el conmutador de la lámpara hacia el nivel de luminosidad deseado. NOTA: Al usar el RECEPTOR PARA
BOMBILLA, usted no puede controlar la lámpara a través del conmutador de ésta. Si apaga la lámpara con el conmutador de ésta y luego
manda una señal FREEWIRE dentro de los 30 segundos en que la corriente se aplica a la lámpara, hará que el RECEPTOR PARA
BOMBILLA entre al modo de programación y necesitará ser reprogramado. Vea la sección de RECEPTOR PARA BOMBILLA.
SISTEMAS DE INTERCOM Y MONITOR
Los sistemas de intercom y monitor, incluyendo los monitores de bebé que utilizan el cableado de la casa para transmitir las señales, pueden
“bloquear” las transmisiones de FREEWIRE cuando el sistema de intercom o monitor está en el modo de “transmisión permanente” o de
“conversación”. NO es posible tener un sistema inalámbrico de intercom o monitor y un CENTRO MENSAJERO operando en la misma casa.
Es posible que el sistema inálambrico de intercom o monitor de un vecino origine operaciones no programadas en su sistema FREEWIRE,
incluso que su sistema deje de funcionar, o que su sistema de FREEWIRE cause en el sistema de intercom o monitor de sus vecinos
operaciones no programadas, y que incluso deje de funcionar.
ALCANCE DEL CONTROL REMOTO DE LLAVERO
Si coloca el CENTRO MENSAJERO en la pared interior más cercana a la entrada de automóviles o entrada de la casa, podrá maximizar el
alcance del CONTROL REMOTO DE LLAVERO.
MANTENIMIENTO
Utilice solamente jabón suave y agua para limpiar el producto. Nunca permita que ningún líquido se introduzca dentro del mismo; nunca
sumerja ninguna parte del producto dentro de algún líquido. Evite usar disolventes al limpiar piezas plásticas. La mayoría de los plásticos son
susceptibles a varios tipos de disolventes comerciales y pueden dañarse si se aplican a las piezas plásticas.
ACCESORIOS
Los accesorios que se recomiendan usar con su producto están disponibles donde su distribuidor o centro de servicio local. De necesitar
asistencia para obtener un accesorio, favor llamar a: 1-800-544-6986.
ADVERTENCIA: Puede ser peligroso usar cualquier accesorio no recomendado.
INFORMACIÓN ACERCA DE NUESTROS CENTROS DE SERVICIO
Black & Decker ofrece una red completa de centros de servicio y centros autorizados en toda Norteamérica. Todos los centros de servicio
Black & Decker disponen de personal entrenado para dar un servicio eficiente y confiable a las herramientas eléctricas de sus clientes. De
necesitar orientación técnica, reparación o repuestos originales de fábrica, diríjase al centro Black & Decker local. Para hallar la ubicación del
centro de servicio más cercano, busque en las páginas amarillas de la guía telefónica bajo "Herramientas—Eléctricas" o llame a: 1-800-5446986.
GARANTÍA COMPLETA DE DOS AÑOS PARA USO DOMÉSTICO
Black & Decker (U.S.) Inc. garantiza este producto por dos años contra todo defecto de material y fabricación. El producto defectuoso será
reemplazado o reparado sin costo en una de las dos formas siguientes.
La primera opción, que resultará en intercambio solamente, será devolviendo el producto al minorista donde fue comprado (siempre que la
tienda sea un minorista participante). Las devoluciones deberán hacerse dentro del período de intercambio que el minorista tiene por política
(generalmente de 30 a 90 días después de la venta). La prueba de compra podrá ser requerida. Favor informarse con el minorista sobre la
política específica de devolución en cuanto a devoluciones hechas en fecha posterior a la fijada para intercambios.
La segunda opción es llevar o enviar el producto (pre-pagado) a un centro de servicio Black & Decker o un centro autorizado para
reparaciones o reemplazo, a nuestra discreción. La prueba de compra podrá ser requerida. Los centros de servicio Black & Decker o centros
autorizados se anuncian bajo "Herramientas - Eléctricas" en las páginas amarillas de la guía telefónica.
Esta garantía no aplica a los accesorios. Esta garantía le otorga a usted derechos legales específicos y otros derechos que pueden variar de
estado a región. Si tiene alguna pregunta, comuníquese con el gerente de su centro de servicio Black & Decker más cercano.
Para servicio y ventas consulte
“HERRAMIENTAS ELECTRICAS”
en la sección amarilla.
SECCI N
AMARILLA
Si funciona…
y funciona muy bien.
BLACK & DECKER S.A. DE C.V.
BOSQUES DE CIDROS ACCESO RADIATAS NO. 42
COL. BOSQUES DE LAS LOMAS.
05120 MÉXICO, D.F
TEL. 3-26-71-00
23
621538-00 FW3000 MANUAL 1/5/04 11:02 AM Page 24
Cat No. FW3000
Form #621538-00
(DEC-03) Copyright © 2003 Black & Decker
Printed in China