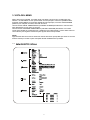
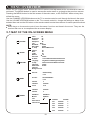
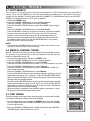
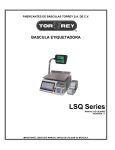
1
IMPORTANTE: INSTRUCCIONES DE SEGURIDAD
PRECAUCIÓ N:
Lea todas estas instrucciones. Guarde estas instrucciones para uso futuro. Siga todas las
advertencias e instrucciones marcadas en el equipo de audio.
1. Lea estas instrucciones.
2. Guarde estas instrucciones.
3. Haga caso a las advertencias
4. Siga todas las instrucciones
5. No use este aparato cerca del agua.
6. Limpie solo con paño seco
7. No obstruya ningún orificio de ventilación. Instale de acuerdo con las instrucciones del
fabricante.
8. No instale cerca de ninguna fuente de calor como radiadores, calentadores, estufas, u
otros aparatos (incluyendo amplificadores) que produzcan calor.
9. Los aparatos de la clase II, poseen ficha de 2 espigas planas sin toma de tierra, pues
poseen doble aislacion o aislacion reforzada en todas sus partes.
No la elimine colocando un adaptador o reemplazando la ficha por otra de 2 espigas
cilindricas, ya que la misma es compatible con los tomacorrientes con toma de tierra.
Para su seguridad, su instalacion debe estar provista de un conductor de tierra.
De no ser as , realice la adecuacion con personal especializado.
10. Proteja el cable de pisadas o pinchadura particularmente cerca de los enchufes,
receptáculos y el punto desde donde ellos salen del equipo.
11. Solamente utilice accesorios y adjuntos especificados por el fabricante.
12. Utilice solamente con el carro, tr pode, repisa o mesa especificada por el fabricante o
vendida con el aparato. Cuando se utiliza un carro, tenga precaución al mover la
combinación carro-aparato para evitar lesiones al tropezarse.
13. Desenchufe este aparato durante tormentas eléctricas o cuando no se va a usar por
largos per odos de tiempo.
14. Refiera todos los servicios a personal de servicio calificado. Se requiere servicio
cuando el aparato ha sido dañado en cualquier forma, por ejemplo cuando se daña el
cable o el enchufe, cuando se derraman l quidos encima o se han ca do objetos dentro
del aparato, cuando el aparato ha sido expuesto a la lluvia o humedad, cuando no
funciona normalmente o cuando se ha ca do al piso.
PRECAUCIÓ N:
Uso de controles, ajustes o procedimientos distintos de los especificados en este manual puede
causar exposición a radiación dañina.
El destello luminoso con un s mbolo con cabeza de flecha dentro de un
triángulo equilátero presente alertar al usuario de la presencia de “voltaje
dañino” sin aislamiento dentro del interior del producto que puede ser de
suficiente magnitud para constituir riesgo de shock eléctrico a la persona.
El punto de exclamación dentro de un triángulo equilátero pretende alertar al
usuario de la presencia de importantes instrucciones (servicio) de mantención
y operación en la literatura que acompaña al aparato.
PRECAUCIÓ N: PARA REDUCIR EL RIESGO
DE SHOCK ELÉCTRICO, NO REMUEVA LA
CUBIERTA (O POSTERIOR) NO CONTIENE
PARTES Ú TILES PARA EL USUARIO.
REFIERA SERVICIO A PERSONAL DE
SERVICIO CALIFICADO.
El aparato no deberá ser expuesto a goteos o salpicaduras ni a objetos llenos
de l quido, como floreros, puestos sobre el aparato.
PRECAUCION;
RIESGO DE SHOCK
ELÉCTRICO. NO
ABRIR.
ADVERTENCIA: PARA REDUCIR EL RIESGO DE INCENDIO O SHOCK ELÉCTRICO
NO EXPONGA ESTE APARATO A LLUVIA O HUMEDAD.
2
PROTECCIÓ N Y UBICACIÓ N DE SU APARATO
1.
+ No use este televisor cerca de agua…por ejemplo, tinas, lavamanos, cañerías, o
lavaderos, en un sótano húmedo, o cerca de una piscina, etc.
+ Nunca exponga el equipo a la lluvia o a agua. Si el equipo ha sido expuesto a lluvia o
agua, desenchúfelo de la muralla y refiéralo a personal de servicio calificado.
2.
3.
Elija un lugar donde la luz (Artificial o natural) no ilumine directamente la pantalla.
Evite lugares polvorientos, ya que la acumulación de polvo dentro del chasis del televisor
puede causar falla en el equipo cuando la humedad persiste.
4. El aparato tiene ranuras, o aberturas en la caja para propósitos de ventilación, para
proporcionar un funcionamiento confiable del receptor, para protegerlo del calentamiento
excesivo.
+ Nunca cubra las ranuras o aberturas con un paño u otro material.
+ Nunca bloquee las ranuras de ventilación de la parte inferior colocando el equipo sobre
una cama, sofá, alfombra, etc.
+ Nunca ubique el equipo cerca de un radiador o una rejilla de aire caliente.
+ Nunca ubique el equipo cerca en muebles empotrados, a menos que se provea una
ventilación adecuada.
PROTECCIÓ N Y UBICACIÓ N DE SU APARATO
1.
Si se conecta una antena exterior al televisor, asegúrese de que su sistema de antena
tiene conexión a tierra para otorgar protección contra subidas de tensión o carga estática.
La sección 810 del Código Eléctrico nacional, NFPA No. 70-1975, proporciona información
con respecto a la correcta conexión a tierra del mástil y la estructura que lo soporta,
conexión a tierra de la entrada de corriente a la unidad de descarga de la antena, tamaño
de los conductores de conexión a tierra, ubicación de la unidad de descarga de la antena,
conexión al electrodo de conexión a tierra, y requisitos para el electrodo a tierra.
EJEMPLO DE CONEXIÓ N A TIERRA DE LA ANTENA SEGÚ N EL ONES DE CÓ DIGO
NACIONAL DE ELECTRICIDAD (NEC).
EJEMPLO DE CONEXIÓ N A TIERRA DE UNA
ANTENA SEGÚ N INSTRUCCIONES DE L CÓ DIGO
NACIONAL ELÉ CTRICO
CABLE DE LA ENTRADA
DE LA ANTENA
ABRAZADERA DE
CONEXIÓ N A TIERRA
UNIDAD DE DESCARGA DE
LA ANTENA (NEC SECCIÓ N
810-20)
CONDUCTORES DE
CONEXIONA A TIERRA (NEC
SEC. 810-21)
EQUIPO DE SERVICIO
ELÉ CTRICO
ABRAZADERA DE TIERRA
SISTEMA DE ELECTRODOS
DE TIERRA DE L SERVICIO
DE POTENCIA (NEC ART. 250
PARTE H)
CÓ DIGO NACIONAL DE ELÉ CTRICIDAD
NEC
3
2. Un sistema de antena exterior no debe estar ubicado en la proximidad de las l neas de
energ a u otras luces eléctricas o circuitos de energ a, o donde pudiera caerse sobre
estas l neas o circuitos de energ a. Cuando instale una sistema de antena externo, se
debe poner extremo cuidado de no tocar las l neas de energ a o circuitos, ya que el
contacto con estos podr a ser fatal.
3. Para protección adicional de este televisor durante una tormenta eléctrica o cuando no
está bajo atención y no se ha usado en largos per odos de tiempo, desenchúfelo del
enchufe de la pared y desconecte la antena. Esto prevendrá daño debido a rayos y
subidas de voltaje.
4
OPERACIÓ N DE SU EQUIPO
1. Este televisor debe ser operado solamente con el tipo de corriente indicado en la
etiqueta de las caracter sticas. Si no está seguro del tipo de la fuente de energ a que
tiene su casa, consulte con su distribuidor de televisor local o compañ a de electricidad.
Para equipos de televisión diseñados para operar con energ a de bater as, referirse a
las instrucciones de operación.
2. Si el televisor no funciona normalmente siguiendo las instrucciones de operación,
desenchufar este equipo del enchufe de la pared y referir el servicio a personal
calificado. Ajustar solamente aquellos controles que están cubiertos en las
instrucciones de operación ya que ajustes impropios u otros controles pueden resultar
en daño y requerirán a menudo un trabajo más extenso con un técnico calificado para
devolver al televisor a su funcionamiento normal.
3. Si su televisor debe permanecer sin uso por un per odo extenso de tiempo, apague el
equipo y desenchúfelo de la salida de energ a.
SI EL TELEVISOR NO FUNCIONA ADECUADAMENTE
1. Si usted no puede restituir las operaciones normales siguiendo el procedimiento
detallado en sus instrucciones de operación, no intentar ningún otro ajuste.
Desenchufar el televisor y llamar a su distribuidor o técnico de servicio.
2. Siempre que el televisor esté dañado o falla, o un cambio distinto en el desempeño
indica la necesidad de servicio, desenchufar el equipo y hacer revisar por un técnico de
servicio profesional.
3. Es normal para algunos televisores hacer sonidos de chasquidos o pequeños estallidos
en forma ocasional, particularmente cuando son encendidos o apagados. Si
continuaran frecuentemente, desenchufe el televisor y consulte con su distribuidor o
técnico de servicio.
PARA SERVICIO Y MODIFICACIÓ N
1. No use accesorios no recomendados por el fabricante del televisor ya que puede
causar peligros.
2. Cuando se necesitan partes de repuestos, asegúrese de que el servicio técnico ha
usado partes especificadas por el fabricante, con las mismas caracter sticas de las
partes originales. Sustitutos no autorizados pueden resultar en incendio, shock eléctrico
u otros peligros.
3. Cuando se complete un servicio de reparación al televisor, pedir al técnico de servicio
desarrollar un chequeo de seguridad rutinario para determinar que el televisor está
operando en condiciones seguras.
5
ÍNDICE
1. INTRODUCCIÓ N
1.1 Características
1.2 Descripción de teclas de control y
conectores
1.2.1 Panel frontal
1.2.2 Terminal Posterior Y Laterales
1.3
Operación del control remoto
1.3.1 Descripción de teclas del control
Remoto
1.3.2 Instalación de baterías
1.3.3 Uso efectivo de control remoto
2. CONEXIONES
2.1
Conexiones de antena /Cable
2.2
Conexiónes externas
3. MENÚ
3.1 Mapa de menú en pantalla
4. OPERACIÓ N DE TV
4.1 Encienda el televisor
4.2 Apague el televisor
4.3 Seleccione canals
4.4 Seleccione menú principal
4.5 Seleccione submenú
4.6 Ajuste opción
4.7 Seleccione idioma
4.8 TV / TV Cable (CATV)
4.9 Sistema de selección de color
4.10 Visualizador
4.11 Mudo (Mute)
4.12 TV/AV
5. Ajuste de sonido
5.1 Stereo MTS
5.2 Ajuste de Bajos (Bass), Agudos
(Treble), y Balance
5.3 Ajuste de efecto de sonido
5.4 Sonido surround (envolvente)
6. CONFIGURACION DE CANALS
(CHANNEL PRESET)
6.1 Búsqueda Automática (Auto Search )
6.2 Sintonización manual de canal
6.3 Sintonía Fina
6.4 Agregar o borrar canals
6.5 Configuración de canals favoritos
7. AJUSTE DE IMAGEN
7.1 Configuración manual de imagen
7.2 Configuración automática de imagen
8. FUNCIÓ N DE TEMPORIZADOR
8.1 Configuración de Reloj
8.2 Temporizador Encendido (ON)
8.3 Temporizador Apagado (OFF)
9. SUBTITULO (Closed Caption NTSC)
10. FUNCION SUPER
10.1 Cuaderno (Notebook)
10.2 Calendario (Calendar)
10.3 Reloj Biológico (Biological Clock)
10.4 Temporizador Inteligente (Smart Timer)
11. DETECCIÓ N Y SOLUCION DE
PROBLEMAS (TROUBLESHOOTING)
12. ESPECIFICACIONES
1. INTRODUCCIÓ N
1.1. CARATERÍSTICAS
AV I/O
- 2 entradas RCA tipo AV
- 1 S-Video entrada
- 1 salida RCA -tipo AV
- 1 Yuv entrada
Funciones Ú tiles
- Temporizador para dormir (10120 min)
- Apagado automático (Auto
Off )(después de 15 minutos
sin señal)
- Selección de Fondo Azul (sin
señal)(Blue Background
selection)
- 3 Ajustes Predeterminados, 1
Auste de imágen para el
usuario
- 3 Ajustes Predeterminados, 1
ajuste de sonido para el
usuario
- Agregar/borrar canal
- Stereo MTS
- Sonido Surround (envolvente)
- Temporizador
Encendido/Apagado (Timer
On/Off)
- Cuaderno (Notebook)
- Calendario (Calendar)
- Reloj biológico (Biological
Clock)
- Ajuste canal favorito
- Pre arreglo de programa
- Bloqueo de canal
- Visualizador de Subtítulo
- Visualizador de menú en 4
idiomas.
9.1 Operación de Subtitulaje
6
INTRODUCCIÓ N
1.2 DESCRIPCION DE TECLAS DE CONTROL Y CONECTOR
1.2.1 PANEL FRONTAL
6 5 4
1.
BOTON DE PODER (POWER)
Interruptor de encendido o apagado.
2.
SENSOR REMOTO
Para recibir la señal infrarroja del
control remoto.
3.
BOTONES DE CANALS (/)
Selecciona el número de programa en
forma cíclica.
Para encender el televisor cuando
esta en modo de detención (standby)
Para seleccionar el ítem en los
submenús.
4.
5.
3
2 1
BOTONES (/) DE CONTROL
VOLUMEN
Para disminuir/aumentar/ el nivel de
volumen.
Para encender el televisor cuando
esta en modo de detención (standby )
BOTÓ N MENÚ /BOTONES DE PRESENTACIÓN
EN PANTALLA
Para visualizar el menú principal en la
pantalla.
Para mostrar el número de canal, el sistema
de color y el modo de sonido actuales.
6.
BOTÓ N TV/AV
Para cambiar entre programa de TV y
entrada AV.
Para encender el televisor cuando
esta en modo de detención (standby).
YUV INPUT
AV
INPUT 2
AV
OUTPUT
VIDEO
L(MONO)
AUDIO
R
1.2.2. TERMINALES POSTERIORES Y LATERALES
75 OHM
ANTENNA
INPUT
S-VIDEO
VIDEO
Y
L
L
(MONO)
AUDIO
Cb
R
R
IN1
Cr
4
3
2
1
6
5
4. YUV ENTRADA
5. ENTRADA AV 1
6. ENTRADA S-VIDEO
1. ENTRADA ANTENA 75 OHM
2. SALIDA AV
3. ENTRADA AV 2
7
INTRODUCCIÓ N
1.3.
OPERACIÓ N DEL CONTROL REMOTO
1.3.1. DESCRIPCIÓ N DE TECLAS DEL CONTROL REMOTO
INTRODUCCIÓ N DE FUNCIONES DE
TECLAS
Este televisor incluye un control remoto de
función totales. Para un diseño de unidad
más compacto, algunas de las teclas son
múltiples, con más de una función. El siguiente
texto describe la función de las teclas en la
unidad de control remoto. Las funciones
relacionadas con la operación del cuaderno
(notebook) están marcadas con un símbolo *.
1. BOTON DE DETENCION (STANDBY)
Cuando la energía principal está encendida,
para encender/apagar el televisor (modo de
detención /standby mode)
2. BOTON DE APAGADO
AUTOMATICO( SLEEP)
Ajustar el temporizador de apagado
automático (sleep timer) desde 10 a 120
minutos presionando el botón SLEEP en
forma repetida. Para visualizar el tiempo
restante, presionar el botón SLEEP una vez.
Para cancelar el temporizador de apagado
automático (Sleep timer), presionar el botón
SLEEP hasta que aparece OFF (APAGADO)
1
4
3
5
6
2
17
8
7
9
11
12
10
16
14
15
15
14
13
19
18
3. BOTON TV/AV
Para cambiar entre un canal de TV un fuentes de entrada AV.
4. BOTON MUDO (MUTE)
Para apagar temporalmente el sonido y reestablecerlo presionando nuevamente le
botón.
5. BOTON CUADERNO (NOTEBOOK)
* Para ingresar o salir de la ventana cuaderno (notebook) directamente.
6. BOTON SUBTITULO (CAPS)
* Para seleccionar la forma de entrada entre letras mayúsculas y minúsculas.
7. BOTON SISTEMA/* INSERTAR (COLOR/*INSERT)
En modo TV presione el botón para cambiar el sistema de color COMO: AUTO,
NTSC358, PAL-M, PAL-N.
En modo AV, presione el botón para cambiar el sistema de color como: AUTO,
NTSC358, PAL-M, PAL-N, PAL443, NTSC443.
* Para insertar o sobre escribir una letra, dígito o símbolo cuando edite la información
previamente almacenada en el cuaderno (notebook)
8. BOTON DISPLAY/* DEL
Para visualizar el número de canal actual y el estado de función.
Presione el botón una vez más para visualizar la hora actual en la pantalla.
* En el modo cuaderno (notebook), para borrar la palabra o símbolo antes almacenados.
9. BOTON FAVORITO (FAVORITE)
Para buscar los canals configurados en la Lista de Favoritos.
10. BOTON OK
Dentro del menú en pantalla, presionar algunas funciones especiales como Calendario,
(Calendar), Lista de favoritos (Favorite List), etc.
11. TECLAS DE DIGITOS (0-9)
Para seleccionar el número de CANAL directamente.
* En Cuaderno (Notebook), para entrar un dígito, una letra o un símbolo.
12. BOTON LLAMADA (RECALL)
Presione para volver al último canal visto.
8
INTRODUCCIÓ N
13. BOTON MENÚ
Presione para visualizar el menú principal. También retrocede al menú en pantalla
anterior o sale del menú en pantalla.
14. BOTÓ N CANAL ARRIBA/ABAJO (CHANNEL UP/DOWN BUTTON)
Para seleccionar en forma cíclica el número de canal
Para seleccionar el ítem en sistemas de menú.
15. BOTÓ N VOLUMEN ARRIBA/ABAJO
Para disminuir o aumentar el nivel de volumen
Para activar las selecciones en el sistema de menú, o para cambiar la configuración de
audio y video.
16. BOTÓ N IMAGEN INTELIGENTE (SMART PICTURE)
Selecciona en forma cíclica los 4 ajustes de imagen: Estándar, Suave, Personal,
Dinámico (Standard-Mild-Personal-Dynamic)
17. BOTÓ N CALENDARIO (CALENDAR)
Para visualizar o salir del calendario (calendar) directamente.
18. BOTON MTS
Para seleccionar cíclicamente el modo de sonido: Mono, Stereo, SAP y Mono+SAP
19. BOTON DE SONIDO INTELIGENTE
Para elegir entre los 4 ajustes de efectos de sonido: Concierto, Emisora, Teatro,
Personal
1.3.2. INSTALACIÓ N DE BATERÍAS
ABRA LA CUBIERTA DE COMPARTIMIENTO
DE BATERÍA
INSTALE DOS BATERÍAS R06 (TAMAÑ O AA)
EN LA DIR ECCIÓ N CORRECTA
CIERRE LA CUBIERTA DE BATERÍA
1.3.3.
USO EFECTIVO DEL CONTROL
REMOTO
SENSOR
OBSERVACIONES:
•
La vida útil de las baterías puede durar hasta
un año, dependiendo de cuan seguido se usa el
control remoto. Para el mejor desempeño, las
baterías deben ser reemplazadas en
anualmente, o cuando la operación del control
remoto no es correcta.
•
Asegúrese de ubicar las baterías en la dirección
correcta, como se muestra a la izquierda
•
No mezcle baterías nuevas y antiguas, o
diferentes tipos.
•
Las baterías antiguas pueden derramar
sustancias químicas y dañar el control remoto.
Siempre retire las baterías tan pronto estás se
debiliten.
Apunte el control remoto hacia el sensor remoto
infrarrojo en la unidad principal, como se muestra a la
izquierda.
NOTAS:
•
Si la luz directa del sol, la luz incandescente o
cualquier otra fuente de luz intensa golpea el
sensor del control remoto, el control remoto
podría funcionar incorrectamente.
•
Si hay un obstáculo entre la unidad principal y
el control remoto, la señal del control remoto
puede no ser recibida.
•
Se deben usar las baterías R06 (TAMAÑ O AA)
9
CONEXIONES
2.1. CONEXIONES CABLE/ANTENA
Antes de enchufar la antena Rod UHF/VHF en la ANT (enna). Dentro del orificio
compruebe que la punta no este doblada. Si está doblada enderece la punta tal como se
ilustra, luego enchufe el alfiler en la antena en el orifi cio.
ADVERTENCIA FCC: Este equipo puede generar o usar energía de radiofrecuencia. Los
cambios o modificaciones pueden causar interferencia dañina a menos que las
modificaciones estén expresamente aprobadas en el manual de instrucciones. El usuario
podría perder la autorización para operar el equipo si se hacen modificaciones o se cambia
sin autorización.
Enderezado
Debe ser enderezado
Antena de rodillo
UHF/VHF
Suministrada
Caja *CATV o
caja satélite no
suministrada
Antena VHF no incluida
* Algunos sistemas de televisión por cable usan
señales codificadas y requieren un convertidor
especial para recibir estos canals consulte a su
compañía de cable local.
Antena UHF no incluida
Desde un sistema de
cable o antena satelital
75 OHM cable coaxial.
Cable coaxial 75OHM
O
O
Desde sistema de cable
VHF/UHF No
suministrada
VHF/UHF Combinación
antena no suministrada
Observación para los instaladotes del sistema CATV.
Este recordatorio es para los instaladotes del sistema CATV: Atención al artículo 820-4D del NEC que
entrega pautas para conexión a tierra adecuada, y, en particular, especifica que el cable a tierra deberá
estar conectado en el sistema a tierra del edificio tan cerca como sea posible al punto de entrada de cable.
2.2. CONEXIONES EXTERNAS
YUV INPUT
AV
INPUT 2
AV
OUTPUT
75 OHM
ANTENNA
INPUT
VIDEO
Y
L
L
(MONO)
AUDIO
Cb
R
R
Cr
Un VCR, DV D playeru otro
sistema u otro componente audio/video
puede conectarse aqui.
A VCR u otro video component puede
ser conectado a esta unidad por doblaje.
Para cambiar desde los canals de televisor al equipo conectado de audio/video, presione el botón TV/AV
repetidamente
10
3. VISTA DEL MENÚ
Dentro del menú en pantalla, se pueden lograr casi todas las funciones y ajustes para este
televisor. El botón MENU se usa para accesar el menú principal o volver a la pantalla anterior.
Presionar el botón MENU en la primera pantalla del menú principal, o el botón VISUALIZADOR
(DISPLAY) en cualquier momento, hará salir del menú.
Use los botones CANAL ARRIBA/ABAJO (CHANNEL UP/DOWN) del televisor o control remoto
para desplazarse por los ítems en el menú.
Use los botones VOLUMEN ARRIBA/ABAJO (VOLUME UP/DOWN) del televisor o el control
remoto para cambiar las configuraciones o estado del ítem seleccionado y usar el botón OK en el
control remoto para ingresar el submenú para algunas funciones especiales.
NOTA:
Algunas teclas del control remoto tienen las mismas funciones que aquellas que están en el menú.
Pueden usarse por si solas o para acompañar las del visualizador de la pantalla.
3.1
11
4. OPERACIONES BASICAS
4.1. ENCENDER EL TELEVISOR
• Después de que el televisor esta conectado presionar el botón POWER en la unidad
principal para encender el televisor.
• Si en indicador de detención (standby) se enciende, presionar el botón DETENCION
(STANDBY) en el control remoto o el CHANNEL ARRIBA/ABAJO (CHANNEL
UP/DOWN ) o el botón TV/AV en el panel frontal en la unidad principal.
4.2. APAGAR EL TELEVISOR
• Presionar el botón POWER en la unidad principal para encender el televisor.
• O presionar el botón DETENCION (STANDBY) en el control remoto para cambiar el
televisor a modo de detención (Standby) y el indicador DETENCION (STANDBY) se
encenderá.
4.3. SELECCION DE CANALS
• Presionar el botón CANAL ARRIBA/ABAJO(CHANNEL UP/DOWN) para seleccionar el
próximo número de canal superior o inferior.
• Usar los dígitos en el control remoto directamente para seleccionar el canal.
4.4. SELECCION DEL MENU PRINCIPAL
• Presionando el botón MENU, aparecerá la barra de menu principal en la
parte superior de la pantalla, y IMAGEN (PICTURE) aparecerá destacado,
lo que significa que el MENU de avance (IMAGEN) PICTURE es selecciona
do y los correspondientes submenús se muestran bajo este.
• Luego, presionar el botón VOLUMEN ARRIBA/ABAJO (VOLUME UP/DOWN)
en el televisor o control remoto, puede mover el cursor a la derecha o izquierda
para seleccionar otros menús de avance en la barra del menú principal (SONIDO
(SOUND), CARACTERISTICA (FEATURE), TEMPORIZADOR(TIMER) O
CONFIGURAR(PRESET)).
• Para salir del menú principal, presionar el botón menú nuevamente.
50
Color
Brightness
50
50
Contrast
Sharpness
50
Tint
50
Blue Back
On
Noise Red.
Off
C. Temp
Normal
4.5. SELECCION DE SUB-MENU
• Después de seleccionar el menú de función, presionar el botón CANAL ABAJO
(CHANNEL DOWN) para ingresar la selección de submenú. Luego presionar el
botón CANAL ARRIBA o ABAJO (CHANNEL UP o DOWN) para seleccionar el
ítem deseado en el submenú (por ejemplo “Brillo” (“Brightness”) en el menú
IMAGEN PICTURE)).
• Para visualizar las características de algunos submenú especiales tales como
Juegos, Lista de Favoritos, etc. presionar el botón OK.
4.6. AJUSTAR OPCION
• Presionar el botón VOLUMEN ARRIBA/ABAJO (VOLUME UP/DOWN) para
ajustar la configuración del ítem seleccionado (por ejemplo, el Brillo se ajusta a
65% como se muestra.
50
Color
Brightness
50
Contrast
50
Sharpness
50
Tint
00
Blue Back
On
Noise Red.
Off
C. Temp
Normal
Brightness
4.7. SELECCION DE IDIOMA
Puede seleccionar el menú de la pantalla del televisor en Inglés, Francés, Portugués o español.
• Activar el menú CARACTERISTICA (FEATURE)
• Presionar el botón CANAL ABAJO (CHANNEL DOWN) para entrar la selección del
submenú.
• Presionar el botón CANAL UP/DOWN para seleccionar Idioma (Language).
Presionar el botón VOLUMEN ARRIBA/ABAJO (VOLUME UP/DOWN) para seleccionar el
idioma deseado, Inglés (o Portugues, Francés, Español):
12
65
Language
English
C.Capt
Off
Child Lock
Off
Smart timer
Off
Calendar
Biological Clock
4. OPERACIONES BASICAS
4.8. TV/CABLE TV (CATV)
Es importante saber que tipo de señal de cable TV (CATV) o una antena normal (TV)
si esta usando. Para comunicar al televisor si esta usando una señal de cable de TV,
onfigurar el TV/CATV para TV o CATV como se indica a continuación.
• Activar el menu CONFIGURAR (PRESET)
• Presionar el botón CANAL ABAJO (CHANNEL DOWN) para entrar el submenu
de selección.
• Presionar el botón CANAL ARRIBA/ABAJO (CHANNEL UP/DOWN) para seleccionar
TV/CATV.
• Presionar el botón VOLUMEN ARRIBA/ABAJO (VOLUME UP/DOWN) para
seleccionar TV o CATV.
Elegir CATV si usted tiene un servicio de television por cable. Si no tiene este
servicio y conecta una antena al televisor, elegir TV.
TV/CATV
TV
Channel
2
Add/Erase
Add
Manual
Up
Fine
0
Auto search
Favourite list
4.9. SELECCIONAR SISTEMA DE COLOR
Esta característica le permite seleccionar el sistema de color que usted desee. Si se
selecciona Auto , el respectivo sistema de color será automáticamente seleccionado de
acuerdo al sistema de transmisión.
Nota: Seleccione su sistema de solor deseado manualmente si la recepción es pobre.
• Presionar el botón COLOR una vez para visualizar el sistema de color actual.
• Presionar el botón COLOR en forma repetida para seleccionar sus sistema de
color deseado (Auto, NTSC358, PAL-M, PAL-N)
4.10. DISPLAY (VISUALIZADOR)
• Presionar el botón VISUALIZADOR (DISPLAY) en el control remoto para visualizar
el estado actual del televisor, tal como el número de canal actual (o entrada AV)
• Presionar el botón VISUALIZADOR (DISPLAY) nuevamente, la hora actual sera
mostrada en la parte superior de la pantalla si usted configure la hora actual en el
submenu de TEMPORIZADOR (TIMER).
4.11. MUDO (MUTE)
• Presionar MUDO (MUTE) en el control remoto para apagar el sonido temporalmente
y el signo de MUDO (MUTE) aparecerá en la pantalla como se muestra. Presionar el
otón MUTE (MUDO) nuevamente pra reestablecer el sonido. A parte, presionar el
botón VOLUME ARRIBA (VOLUME UP) puede también reestablecer la salida del
sonido normal.
4.12. SELECCIONAR TV/AV
Presionar el botón TV/AV en forma repetida para seleccionar la salida de TV o Audio/Video
(AVor S-video, YUV).
TV(CATV)
AV 1 (Or S-VIDEO)
YUV
13
AV 2
5. AJUSTE DE SONIDO
5.1 STEREO MTS
Este televisor esta equipado con una caractarrística conocida como Sonido de TV multi canal
(Multi-Channel TV Sound) o MTS. La transmisión MTS realza en gran medida el hecho de ver
televisión dando a sus programas un sonido de alta fidelidad stereo. MTS también proporciona
un canal extra llamado Segundo Programa de Audio o SAP (Second Audio Program) que los
emisores pueden usar para transmitir un segundo idioma para transmisiones bilingues o para
otros propósitos.
Escuchar en Sonido Stereo
Cuando el televisor se enciende o se hace una selección de canal, asegurese de que la
palabra “STEREO” aparece en la pantalla. Esto significa que esta disponible la transmisión
Stereo. Usted puede disfrutar de sonido stereo en el parlante izquierdo y derecho.
Cuando se recive una transmisión MONO, no se visualiza ninguna indicación.
Si la señal de transmisión no es lo suficientemente fuerte o o se dispone de sonido stereo claro,
presionar en botón MTS para cambiar a sonido MONO. El ruido debería ser eliminado.
Presionarlo nuevamente para volver al sonido stereo.
Escuhar en SAP
Cuando el televisor se enciende o se hece una selección de canal, asegurese de que las letrs
“SAP” aparezcan en la pantalla. Esto significa que la transmisión en Segundo programa de
Audio esta disponible.
Presionar el botón MTS en forma cíclica para seleccionar el ajuste de audio deseado.
Mono
Stereo
SAP
Mono+SAP
5.2 BAJOS, AGUDOS, Y AJUSTES DE BALANCE (BASS, TREBLE AND BALANCE
ADJUSTMENTS)
• Activar el menú SONIDO (SOUND)
• Presionar el botón CANAL ARRIBA/ABAJO (CHANNEL UP/DOWN) para seleccionar
Bajos (Bass)
• Presionar VOLUMEN ARRIBA/ABAJO (VOLUME UP/DOWN) para ajustar su sonido
favorito, es decir, ajustar Bajos (Bass) a 30.
• El mismo procedimiento es aplicable a Volumen, Agudos (Treble) y Balance.
Notas:
• Bajos (Bass): Disminuir la frecuencia Baja (Bass) ajustando hacia 0, aumentar la
frecuencia baja (Bass) ajustando hacia 100.
• Agudos (treble): Disminuir la frecuencia alta (Treble) ajustando hacia 0, disminuir la
frecuencia alta (Treble) ajustando hacia 100.
• Balance: Ajustar la posición de la fuente de sonido des parlante izquierdo al centro al
parlante derecho ya que el balance esta ajustado de L50(-50) a R(50)(+50) (L=I, R=D)
5.3 AJUSTE DE EFECTO DE SONIDO
• Activar el menú SONIDO (SOUND)
• Presionar el botón CANAL ABAJO (CHANNEL DOWN) para entrar el submenu de
selección.
• Presionar el bot ón CANAL ARRIBA/ABAJO /CHANNEL UP/DOWN) para seleccionar
el Efecto de Sonido (S.Effect)
• Presionar el botón VOLUMEN ARRIBA/ABAJO (VOLUME UP/DOWN) para seleccionar
el modo de efecto de sonido que desea (Teatro (o Concierto, Programa, Personal) :
Theater
Concert
Broadcast
Personal
5.4 AJUSTE DE EFECTO DE SONIDO
El método para encender /apagar el surround (sonido envolvente) es el mismo que
el de los ajustes para efectos de sonido.
14
Volume
Bass
Treble
Balance
Surround
S.Effect
50
50
50
00
On
Theater
Volume
Bass
Treble
Balance
Surround
S.Effect
50
50
50
00
On
Theater
Volume
Bass
Treble
Balance
Surround
S.Effect
50
50
50
00
On
Theater
On
Off
6. CONFIGURACION DE CANALS (CHANNEL PRESET)
6.1 BUSQUEDA AUTOMATICA
Usted puede configurar su televis or para recibir canals de television locales (desde una
antena) o canals CATV (cuando dispone de servicio de televisión por cable). Luego, usar
BUSQUEDA AUTOMATICA (AUTO SEARCH) para configurar los canals que están
disponibles para usted. Esto le facilita la selección de las estaciones de TV disponibles
cuando presiona el botón CANAL ARRIBA O ABAJO (CHANNEL UP o DOWN). Antes de
de comenzar la BUSQUEDA AUTOMATICA (AUTO START), conectar la Antena o señal de
CATV como se detalla.
• Activar el menu CONFIGURAR (PRESET).
• Presionar el botón CANAL ABAJO (CHANNEL DOWN) para entrar la selección de
submenu.
• Presionar el botón CANAL ARRIBA/ABAJO (CHANNEL UP/DOWN) para seleccionar
TV/CATV.
• Presionar el botón VOLUMEN ARRIBA/ABAJO (VOLUME UP/DOWN) para seleccionar
el TV o CATV para ser la fuente de señal.
• Presionar el botón PROGRAMA ARRIBA/ABAJO (PROGRAM UP/DOWN) para seleccionar
BUSQUEDA AUTOMATICA (AUTO SEARCH).
• Presionar el botón VOLUMEN ARRIBA (VOLUME UP) para comenzar la búsqueda
automática, y luego todos los canals disponibles serán almacenados desde el número 1
(en modo CATV) o número 2 (en modo TV) y en orden ascendente. La búsqueda
automática se detendrá después de que todas las bandas de frecuencia son buscadas,
y el último programa que selecciona antes de que la acción de búsqueda automática
reaparezca en la pantalla. Presionar el botón VOLUMEN ABAJO (VOLUME DOWN) si
necesita detener la BUSQUEDA AUTOMATICA (AUTO SEARCH) durante el proceso.
NOTA:
• Presionar y sostener el botón MENU en el panel frontal de la unidad por unos
pocos segundos para comenzar la acción de búsqueda automática directamente.
6.2 SINTONIZACION DE CANAL MANUAL
La Sintonización de Canal Manual le permite rápidamente seleccionar el próximo canal
disponible. Por ejemplo, si busca un canal entre el 60 y 70, comenzar la búsqueda en el
canal 60 y subir.
• Primero seleccionar la fuente de señal. Activar el menu CONFIGURAR (PRESET).
• Presionar el botón CANAL ABAJO (CHANNEL DOWN) para entrar la selección de
submenu.
• Presionar el botón CANAL ARRIBA/ABAJO (CHANNEL UP/DOWN) para seleccionar
TV/CATV.
• Presionar el botón VOLUMEN ARRIBA/ABAJO (VOLUME UP/DOWN) para seleccionar
TV o CATV ( el que usted disponga)
• Presionar el botón CANAL ARRIBA/ABAJO (CHANNEL UP/DOWN) para seleccionar
Canal (Channel).
• Press el botón VOLUMEN ARRIBA/ABAJO (VOLUME/UP DOWN) para entrar un
número de Canal desde el que usted quiera comenzar la búsqueda.
• Presionar el botón CANAL ARRIBA/ABAJO (CHANNEL UP/DOWN) para seleccionar
Manual.
• Presionar el botón VOLUMEN ARRIBA (VOLUME UP) para comenzar la búsqueda en
forma ascendente (por ejemplo, comenzando en el canal 60 y subiendo a 61,62,63, etc.
Presionar el botón VOLUMEN ABAJO (VOLUME DOWN) cuando encuentre el canal
que usted quiera. Esto detiene la búsqueda, de otra manera la búsqueda se detendrá en
el primer canal disponible.
O presionar el botón VOLUMEN ABAJO (VOLUME DOWN) para comenzar buscando en
forma descendente (por ejemplo, comenzando en el canal 60 y despues 59, 58, 57, etc.)
Presionar el botón VOLUMEN ARRIBA (VOLUME UP) cuando encuentre el canal deseado.
Esto detendrá la búsqueda, de otra forma la búsqueda se detendrá en el primer canal
disponible.
• Cuando se ha completado la correcta sintonización, presionar el botón MENU para salir del
menu o esperar unos pocos segundos sin efectuar ninguna otra acción.
15
TV/CATV
TV
Channel
2
Add/Erase
Add
Manual
Up
Fine
0
Auto search
Favourite list
Programming
P l e a s e Wa i t
TV
3
TV/CATV
CATV
Channel
60
Add/Erase
Add
Manual
Up
Fine
0
Auto search
Favourite list
CATV
TV/CATV
Channel
61
Add/Erase
Add
Manual
Up
Fine
0
Auto search
Favourite list
TV/CATV
Channel
Add/Erase
Manual
Fine
Auto search
Favourite
TV/CATV
Channel
Add/Erase
Manual
Fine
Auto search
Favourite
CATV
59
Add
Down
0
list
CATV
59
Add
Down
0
list
6.3 SINTONIZACION FINA (FINE TUNING)
La función de sintonización fina puede mejorar la calidad de recepción para algunos
canals débiles/inestables ajustando el canal de frecuencia manualmente.
•
•
•
•
Primero seleccionar la fuente de señal. Activar el menu CONFIGURAR (PRESET), luego la
barra destacada esta en TV/AV. Presionar el botón VOLUMEN ARRIBA/ABAJO (VOLUME
UP/DOWN) para seleccionar TV oCATV para que sea la fuente de señal.
Presionar el botón CANAL ARRIBA/ABAJO (CHANNEL UP/DOWN) para seleccionar Canal
(Channel) , luego presionar VOLUMEN ARRIBA/ABAJO(VOLUME UP/DOWN) para
ingresar un número de canal, por ejemplo 08.
Presionar el botón CANAL ARRIBA/ABAJO (CHANNEL UP/DOWN) para seleccionar
FINO (FINE), luego presionar hacia arriba o hacia abajo hasta que la imágen satisfactoria y
calidad de sonido sean alcanzadas.
Cuando se ha completado la sintonización fina, presionar el botón MENU para salir del
menu, o esperar unos segundos sin efectuar ninguna otra acción.
6.4 AGREGAR O BORRAR CANALS (ADDING OR ERASING CHANNELS)
Puede agregar o eliminar canals de la lista en la memoria del televisor.
• Usando las TECLAS DE DIGITOS (DIGIT KEYS), seleccionar el canal que desea
agregar o borrar.
• Activar el menú CONFIGURAR (PRESET)
• Presionar el botón CANAL ABAJO (CANAL DOWN) para ingresar la selección de submenú.
• Presionar el botón CANAL ARRIBA/ABAJO (CHANNEL UP/DOWN) para seleccionar
Agregar/ Borrar (Add, Erase).
• Presionar el botón VOLUMEN ARRIBA/ABAJO (VOLUME UP/DOWN) para seleccionar
Agregar o Borrar (Add o Erase). Si usted selecciona Agregar (Add), el canal estará
disponible cunado presione los botones CHANNEL UP (CANAL ARRIBA) o DOWN
(ABAJO) para moverse a través de los canals. Elegir Borrar (ERASE) eliminará el
canal de la memoria del televisor. El canal estará disponible cuando presione los botones
CANAL ARRIBA (CHANNEL UP) y DOWN (ABAJO) para moverse a través de los canals
• Presionar el botón MENU para confirmar su selección y salir.
• Si quiere agregar o eliminar otro canal, seguir el procedimiento arriba indicado.
6.5 CONFIGURACION DE CANAL FAVORITO (FAVORITE CHANNEL SETTING)
Usted puede almacenar cinco canals favoritos en la memoria y dar una vista
preliminar a esos canals con el botón FAVORITO (FAVORI TE).
• Activar el menu CONFIGURACION (PRESET).
• Presionar el botón CANAL ABAJO (CHANNEL DOWN) para ingresar la
selección de submenu.
• Presionar el botón CANAL ARRIBA/ABAJO (CHANNEL UP/DOWN) para
seleccionar Lista de Favoritos (Favorite List).
• Presionar el botón OK para visualizar las caraterísticas de la Lista de Favoritos
(Favorite List) como se muestra.
• Cuando la barra destacada está en TV/AV , presionar el botón VOLUMEN
ARRIBA/ABAJO (VOLUME UP/DOWN) para seleccionar TV o CATV para ser
la fuente de señal, por ejemplo CATV.
• Presionar el botón CANAL ARRIBA/ABAJO (CHANNEL UP/DOWN) para seleccionar
CH 3, luego presionar el botón VOLUMEN ARRIBA/ABAJO (VOLUME UP/DOWN)
para seleccionar el número de canal que quiere almacenar en esta posición, como
por ejemplo 8.
• Repetir los procesos arriba indicados para configurar otros cuatro canals favoritos.
• Presionar el botón MENU dos veces para salir del visualizador de menú.
16
TV/CATV
Channel
Add/Erase
Manual
Fine
Auto search
Favourite
CATV
59
Add
Down
0
list
TV/CATV
TV
Channel
18
Add/Erase
Add
Manual
Up
Fine
0
Auto search
Favourite list
TV/CATV
TV
Channel
2
Add/Erase
Add
Aft
On
Fine
0
Auto search
Favourite list
TV/CATV
CATV
CH 1
CATV
1
CH 2
CATV
2
CH 3
CATV
8
CH 4
CATV
4
CH 5
CATV
5
7. AJUSTE DE IMAGEN (PICTURE ADJUSTMENT)
7.1 CONFIGURACION DE IMAGEN MANUAL (MANUAL PICTURE SETTING)
•
•
•
•
Activar el menú IMAGEN (PICTURE)
Presionar el botón CANAL ABAJO (CHANNEL DOWN ) para ingresar la selección
de submenú.
Presionar el botón CANAL ARRIBA/ABAJO (CHANNEL UP/DOWN) para seleccionar
el ítem, por ejemplo Contraste (Contrast)
Presionar el botón VOLUMEN ARRIBA/ABAJO (VOLUME UP/DOWN ) para ajustar la
imagen hasta que este satisfecho, y la configuración de Contraste (Contrast) será
almacenada automáticamente en la memoria del televisor. El mismo procedimiento
de ajuste es aplicable a configuración de Brillo (Brightness), Nitidez (Sharpness), Color
(color), Tinte (Tint)
Notas:
Brillo (Brightness)
Color (Color)
Contraste (Contrtast)
Nitidez (Sharp)
Tinte (Tint)
Fondo Azul(Blue Back)
Reducción de ruido
(Noise Red.)
:
Temperatura del color :
: Da brillo a las partes más oscuras de la imagen
: Agrega o reduce el color
: Ajusta la distinción entre las partes blancas y negras de la imagen.
: Mejora los detalles de la imagen
: Obtiene tonos naturales de la piel
:Encender (ON) o Apagar (OFF) esta opción. Si elige Encender
(ON), un fondo de pantalla azul intenso aparecerá si el televisor
está sintonizado en un canal débil (por ejemplo, si la recepción es
muy pobre o si la estación ha salido del aire durante la noche).
Después de estar en ese canal durante 15 minutos, el televisor se
apaga solo automáticamente.
Encender (ON) o apagar (OFF) esta
opción. Si decide encenderla (ON) , reducirá el ruido y
mejorará la calidad de la imagen.
50
Color
Brightness
50
Contrast
66
Sharpness
50
Tint
00
Blue Back
On
Noise Red.
Off
C. Temp
Normal
50
Color
Brightness
50
Contrast
66
Sharpness
50
Tint
00
Blue Back
On
Noise Red.
Off
C. Temp
Normal
Contrast
50
Color
Brightness
50
Contrast
66
Sharpness
50
Tint
00
Blue Back
On
Noise Red.
Off
C. Temp
Normal
seleccionar Normal (Normal), Tibio (Warm) o Frío (Cold) (C.Temp)
para temperatura del color.
7.2 CONFIGURACION DE IMAGEN AUTOMÁTICA (AUTO PICTURE SETTING)
Ya sea que este viendo películas o un juego de video, su televisor tiene configuraciones de
imagen automáticas correspondientes a su programa actual.
Esta función reajusta la configuración del video del televisor para diferentes tipos de programa y
condiciones de vista. Cada configuración de imagen está preajustada de fábrica para ajustar el
brillo, color, contraste, nitidez y tinte.
• Presionar el botón IMAGEN (PICTURE) en el control remoto. La configuración actual de la
imagen aparecerá en la pantalla.
• Presionar el botón IMAGEN (PICTURE) en forma repetida para seleccionar Dynamic
(Dynamic), Estándar (Standard), Suave o Memoria (Memory).
La configuración Personal es la que usted especifica con el ajuste de la imagen como se
describe en el ítem 7.1. Personal es la única configuración de la Imagen (Picture Setting)
que usted puede cambiar. Todos los demás son configurados en la fábrica durante la
producción.
17
66
Standard
8. FUNCION DE TEMPORIZADOR (TIMER FUNCTION)
La función de temporizador está provista por el microcomputador del televisor. Una vez ajustado
la hora Encendido (ON) Apagado (Off) y funciones de visualizador de la hora pueden comenzar
a funcionar. El televisor conservará el tiempo correcto desde que el televisor es encendido,
incluso si el televisor ha sido a pagado a modo de detención (Standby mode)
Off Time
8.1 CONFIGURACION DEL RELOJ (CLOCK SETTING)
Seguir estos pasos para configurar el reloj de su televisor.
• Activar el menú TEMPORIZADOR (TIMER)
• Presionar el botón CANAL ABAJO (CHANNEL DOWN) para ingresar la selección de
submenú.
• Presionar el botón CANAL ARRIBA/ABAJO (CHANNEL UP/DOWN) para seleccionar Reloj
(Clock).
• Presionar el botón VOLUMEN ARRIBA o ABAJO (VOLUME UP o DOWN) en forma repetida
para ingrsar la hora actual, por ejemplo 9:30. Presionar el botón VOLUMEN ARRIBA o
ABAJO (VOLUME UO or DOWN) para cambiar el tiempo rápidamente en incrementos de
10 minutos.
Nota:
• Si falla la energía deberá reajustar su reloj.
8.2 TEMPORIZADOR ENCENDIDO (ON TIMER)
Para encender el televisor en un canal específico a una hora específica, usar el
Temporizador Encendido (On-Timer). Antes de comenzar, ajustar el reloj correctamente.
Los detalles son los descritos en 8.1
• Activar el menu TEMPORIZADOR (TIMER)
• Presionar el botón CANAL ABAJO (CHANNEL DOWN) para ingresar la selección de
submenu.
• Presionar el botón Canal (Channel) ARRIBA /ABAJO (CHANNEL UP/DOWN).
• Presionar el botón VOLUMEN ARRIBA/ABAJO (VOLUME UP/DOWN) para ingresar el
número de canal. Este sera el canal en el cual desea que el televisor se encienda o cambia
en un momento específico.
• Presionar el botón CANAL ARRIBA/ABAJO (CANAL UP/DOWN) para seleccionar En
tiempo (On Timer).
• Presionar el botón VOLUMEN ARRIBA/ABAJO (VOLUME UP/DOWN) para seleccionar
Apagado (OFF), Una vez (Once), o diariamente (Daily). Si usted selecciona UNA VEZ
(ONCE), el temporizador encenderá la televisión una vez dentro de las próximas 24
horas. Si selecciona Diariamente (Daily), el temporizador encenderá el televisor a la misma
hora y en el mismo canal todos los días. Elegir Desconectar (OFF) para cancelar el
Temporizador Encendido (On-Timer)
• Si selecciona DIARIAMENTE (DAILY) o UNA VEZ (ONCE) , presionar el botón CANAL
ABAJO (CHANNEL DOWN) a 0:00 debajo de En Tiempo (On Time).
• Presionar el botón VOLUMEN ARRIBA/ABAJO (VOLUME UP/DOWN) para ingresar el En
Tiempo (On Time). Esta será la hora en que el televisor se encenderá automaticamente.
• Presionar el botón MENU para salir del menu, o esperar uno segundos sin efectuar ninguna
otra acción.
8.3 TEMPORIZADOR APAGADO (OFF TIMER)
Para apagar el televisor en una hora específica, usar el TEMPORIZADOR APAGADO (OFF
TIMER). Antes de comenzar, configurar el reloj correctamente. Los detalles se explican en 8.1
• Activar el menu TEMPORIZADOR (TIMER)
• Presionar el botón CANAL ABAJO (CHANNEL DOWN) para ingresar la selección de
submenú.
• Presionar el botón CANAL ARRIBA/ABAJO(CHANNEL UP/DOWN).
• Presionar el botón CANAL ARRIBA/ABAJO (CHANNEL UP/DOWN) para seleccionar En
Tiempo (on Time).
18
On Time
Channel
TV/CATV
Clock
Off Time
On Time
Channel
TV/CATV
Clock
Off Time
On Time
Channel
TV/CATV
Clock
Off Time
On Time
Channel
TV/CATV
Clock
Off Time
On Time
Channel
TV/CATV
Clock
Off
0:00
Off
0:00
2
TV
9:30
Off
0:00
Once
9:59
2
TV
9:30
Off
0:00
Once
9:59
11
CATV
9:30
Once
0:00
Once
9:59
11
TV
9:30
Once
22:59
Once
9:59
11
TV
9:30
•
•
•
•
Presionar el botón VOLUMEN ARRIBA/ABAJO (VOLUME UP/DOWN) seleccionar Apagado
(OFF), UNA VEZ (ONCE), o DIARIAMENTE (Daily). Si selecciona (UNA VEZ) ONCE, el
temporizador (timer) encenderá la televisión una vez dentro de las 24 horas. Si selecciona
Diariamente (Daily), el temporizador (timer) encenderá el televisor al mismo tiempo y mismo
canal todos los días. Elegir APAGAR (OFF) para cancelar Temporizador Encendido (OnTimer).
Si selecciona DIARIAMENTE (DAILY) o UNA VEZ (ONCE), presionar el botón CHANNEL
PROGRAM DOWN a 0:00 debajo de En Tiempo (On Time).
Presionar el botón VOLUME UP/DOWN para ingresar el En tiempo. Este será el tiempo en
el que el televisor se encenderá automáticamente.
Presionar el botón MENU para salir del menú, o esperar unos pocos segundos sin efectuar
ninguna opción.
9.
SUBTITULADO (CLOSED CAPTION SOLO EN NTSC)
Puede ver programas etiquetados (cc), películas, noticias, cintas pregrabadas, etc. con un diálogo
subtitulado o visualizador de texto agregado al programa con sistema de color NTSC..
MODO SUBTITULADO (CAPTION MODE)
*Los caracteres pueden ser visualizados en la pantalla del televisor cuando la señal de emisión
recibida contiene la señal de subtitulo.
* Hay tres modos de visualización del subtitulo:
Modo Paint-on : Muestra los caracteres de entrada en la pantalla del televisor inmediatamente.
Modo Pop-on : Una vez que los caracteres son almacenados en la memoria, son mostrados todos
a la vez.
Modo Roll-up: Muestra los caracteres continuamente a través del desplazamiento, (máximo 4
líneas).
MODO TEXTO
* Para mostrar el texto en la pantalla a través del desplazamiento( máximo 7 líneas)
Notas:
• Si la señal de transmisión recibida no contiene la señal de subtítulo o señal de texto pero el
modo de subtítulo o modo de texto está seleccionado, ningún cambio ocurrirá.
• Cuando su televisor recibe una señal de reproducción de efectos especiales (por ejemplo
Búsqueda (search), Lento (slow), Congelado (still) desde un canal de salida de video VCR
(Ch3 o Ch4), su televisor puede no mostrar el subtítulo correcto o texto.
Los subtítulos y textos pueden no coincidir con la voz del televisor exactamente.
• El subtítulo o caracteres de texto no serán mostrados cuando el visualizador de menú o
visualizador de función se muestra.
• Si usted ve esta pantalla:
Una caja negra se muestra en la pantalla, esto significa que su televisor está configurado para
modo texto.
Para limpiar la pantalla seleccionar C.Capt (Subtítulos) a Apagado (Off).
9.1 FUNCIONAMIENTO DE SUBTITULOS (CLOSED CAPTION OPERATION)
• Activar el menú CARATERISTICA (FEATURE).
• Presionar el botón CANAL ABAJO (CHANNEL DOWN) para ingresar la selección de
submenú.
• Presionar el botón CANAL ARRIBA/ABAJO (CHANNEL UP/DOWN) para seleccionar el
submenú de Subtítulo (C.Capt.)
• Presionar el botón VOLUME UP/DOWN para seleccionar un subtítulo o canal de texto que
desee ver.
• Para cancelar el subtítulo o modo texto, simplemente configurar SubtítuloC.Capt.)
(
a
Apagado (Off).
• Presionar el botón menú dos veces para salir del menú, o esperar unos pocos segundos
sin efectuar ninguna otra operación.
Nota:
• C. Mudo (C. Mute) ajusta el televisor para mostrar subtítulos cerrados cuando presiona el
botón MUDO (MUTE). El volumen del televisor será inhabilitado hasta que presione el
botón MUDO (MUTE) nuevamente para restablecer el sonido.
19
Language
English
C.Capt
Off
Child Lock
Off
Smart timer
Off
Calendar
Biological Clock
Off
C1
T4
T3
C2
T2
C3
T1
C4
C.Mute
10.SUPER FUNCION
10.1CUADERNO(NOTEBOOK)
La función de cuaderno le permite almacenar información como
número de teléfono, dejar mensaje, etc., y puede ser usado como
alarma de recordatorio.
Como ingresar y corregir información en el cuaderno
Presionar el botón CUADERNO (NOTEBOOK) en el control
remoto para activar la ventana de cuaderno, y el visualizador se
muestra como a la derecha;
• Luego ingresar la información con dígitos 0-9, letra A-Z (a-z), o
tecla simbólica.
Ejemplo: si quiere ingresar el contenido: [email protected].
1. Presionar el botón MAYUSCULAS (CAPS) en el control remoto
para apagar la función mayúscula, el color de MAYUSCULAS en
a pantalla se pondrá azul;
2. Presionar la tecla “2” dos veces para ingresar la letra “a”;
presionando la tecla “2” en forma repetida puede ingresar en
forma cíclica “2,a, b” y “c”. El mismo procedimiento es aplicable
al ingreso de otros dígitos o pequeñas letras.
3. Presionar el botón de MAYUSCULAS (CAPS) nuevamente para
encender la función de mayúsculas, el color de MÁYUSCULAS
(CAPS) se pondrá rojo.
4. Presionar la tecla “2” tres veces para ingresar la letra “B”;
presionando “2” en forma repetida puede ingresar en forma
cíclica “2, A, B” y “C”. El mismo procedimiento es aplicable al
ingreso de otros dígitos o pequeñas letras.
5. Luego ingresar la letra pequeña “c” como el procedimiento de
ingreso descrito en el paso 2.
6. Para ingresar símbolos como “@”, presionar el botón 1 en forma
repetida hasta que el símbolo “@” aparezca. Presionar la tecla
“1” en forma repetida puede seleccionar en forma repetida
puede seleccionar en forma cíclica 1, espacio en blanco, marcas
comunes y signos de puntuación “+ - . , : ; (=) @ % $ # ! ?” como
se muestra.
• Después de terminar la escritura de información, puede usar el
botón BORRAR (DELETE) en el control remoto para borrar las
palabras no deseadas o incorrectas. Presionar el botón
INSERTAR (INSERT) en el control remoto para seleccionar
modo INS o OVER en la pantalla, luego insertar la palabra en la
información almacenada o escribir sobre ella.
• Presionar el botón OK para almacenar el mensaje, y la palabra
“GUARDANDO” (SAVING) aparece en la pantalla. Después de que el mensaje es
almacenado, el televisor saldrá del estado de CUADERNO (NOTEBOOK)
automáticamente.
NOTE BOOK
•
OFF
INS
NOTE BOOK
a
2abc
2
a
b
c
B
C
NOTE BOOK
aB
2ABC
2
A
NOTE BOOK
Bc @
NOTE BOOK SAVING
BC@ 21cn.com
OFF
INS
OFF
INS
CAPS
Meet aunty Li at airport
tonight.
Cómo utilizar la función cuaderno (notebook)
Mover el cursor para seleccionar el signo
con los botones VOLUME/PROGRAM
UP/DOWN, luego presionar el botón OK para cambiar a como se muestra. Esto
significa que la ventana cuaderno (notebook window) con mensajes almacenados
aparecerán en la pantalla primero cuando el televisor se enciende para recordar algo a
alguien. Por ejemplo, cuando su esposa encienda el televisor, primero la pantalla mostrará
el mensaje que usted dejó: llamar a tu madre. Si usted presiona el botón OK para cambiar
a , luego la ventana cuaderno (notebook window) con mensajes almacenados no
aparecerán en la pantalla cuando el televisor este encendido.
20
CAPS
Give your mother a
call.
INS
•
CAPS
CAPS
Si quiere visualizar el mensaje a una hora específica, primero mover el cursor para seleccionar
el signo , luego presionar el botón OK para cambiar APAGADO (OFF) a 0:00, luego
presionar el botón CH.UP/DOWN para configurar la hora deseada, por ejemplo 17:40. Que
quiere decir que la ventana de cuaderno (notebook window) con el mensaje almacenado
aparecerá en la pantalla automáticamente a las 17:40 para recordarle reunirse con su tía Li
esta noche, incluso si el televisor esta en modo de detención.
NOTA:
La hora configurada en el cuaderno debe es tar basada en la hora ajustada en el RELOJ
(CLOCK) del menú TEMPORIZADOR (TIMER). La hora configurada en el cuaderno debe ser
más tarde que la hora fijada en el reloj.
10.2 CALENDARIO (CALENDAR)
La función calendario le permite ver la fecha en forma muy conveniente.
• Presionar el botón CALENDARIO (CALENDAR) en el control remoto para ingresar al
visualizador del calendario directamente.
• Presionar el botón VOLUME UP/DOWN para seleccionar el mes deseado.
• Presionar PROGRAM UP/DOWN para seleccionar el año que desea.
Presionar el botón CALENDARIO (CALENDAR) nuevamente para salir del visualizador de
calendario
10.3 RELOJ BIOLÓ GICO (BIOLOGICAL CLOCK)
Esta función le permite saber sobre mareas baja, marea alta , y estado crítico de su intelecto,
emoción y fuerza en un día determinado para vivir en armonía con los ritmos del medio ambiente.
• Activar el menú CARACTERISTICA (FEATURE).
• Presionar el botón CANAL ABAJO (CHANNEL DOWN) para ingresar la selección del
submenú.
• Presionar el botón CHANNEL UP/DOWN para seleccionar Reloj Biológico (Biological Clock)
• Presionar el botón OK, el visualizador aparecerá como se muestra.
• Presionar el botón CANAL ARRIBA/ABAJO (CHANNEL UP/DOWN) para seleccionar el
año, mes y día.
• Presionar el botón VOLUMEN ARRIBA/ABAJO (VOLUME UP/DOWN) para ajustar la fecha
correcta de su cumpleaños, y fecha correcta del día del objetivo.
• Luego desde el visualizador en la pantalla puede concluir en que etapa está su intelecto,
emoción, y fuerza. Si casi todos están en niveles altos muestra que us ted tiene la mayoría
de oportunidades de hacer las cosas correctamente o viceversa.
NOTA:
El día de objetivo debe estar ajustado un día después de su cumpleaños
10.4 TEMPORIZADOR INTELIGENTE (SMART TIMER)
Si el Temporizador Inteligente (Smart Timer) se enciende, el televisor se
apagará después de 4 horas sin ninguna operación.
• Activar el menú CARACTERISTICA (FEATURE)
• Presionar el botón CANAL ABAJO (CHANNEL DOWN) para
ingresar el submenú.
• Presionar el CANAL ARRIBA/ABAJO (CHANNEL UP/DOWN)
para seleccionar TEMPORIZADOR INTELIGENTE (SMART TIMER).
• Presionar el botón VOLUMEN ARRIBA /ABAJO (VOLUME UP/DOWN)
para encenderlo o apagarlo.
21
BIOLOGICAL CLOCK
BIRTHDAY
1977-04-18
TARGET DAY
2002-07-01
INTELLECT
EMOTION
FORCE
ADJUST
SELECT SUM
Language
English
C.Capt
Child Lock
Smart timer
Calendar
Biological
Off
Off
Off
Clock
11.
DETECCION Y SOLUCION DE PROBLEMAS (TROUBLESHOOTING)
En ocasiones un problema de desempeño puede ser rápidamente resuelto revisando
aparentes pero a menudo posibilidades que pasamos por alto.
Antes de llamar por servicio, revisar estos ítem. Le puede ahorrar tiempo y dinero.
Problemas de Subtítulos
(Closed Caption Prolems NTSC problems)
Mi televisor muestra subtítulos que están mal
deletreados.
Mi televisor no muestra el texto
completamente o hay un atraso de lo que se
esta diciendo.
Mi subtítulo esta codificado con cuadros
blancos en la pantalla.
Mi guía de programas anuncia un programa
de televisión como subtitulado, pero ninguno
de los subtítulos se visualiza.
Mi casete de video pregrabado no muestra
ningún subtítulo. La caja indica que esta
subtitulado.
Mi pantalla e televisor muestra un cuadro
negro en algunos canals.
22
Solución Pos ible
Esta viendo una emisión en vivo y errores de
deletreo realizado por la empresa de
subtitulaje que se emiten sin corrección. Un
programa pregrabado no mostrará errores en
deletreo debido al tiempo normal disponible
para editar los subtítulos.
Los subtítulos que están atrasados unos
pocos segundos detrás del diálogo real son
comunes en las emisiones en vi vo. La
mayoría de las empresas de subtitulaje
pueden mostrar un diálogo a un máximo de
220 palabras por minuto. Si un diálogo
sobrepasa este rango, se usa edición
selectiva para asegurar que los subtítulos
permanezcan actualizados con el diálogo
actual de la pantalla del televisor.
La interferencia causada por edificios, líneas
eléctricas, tormentas eléctricas, etc. pueden
causar que aparezcan subtítulos codificados
o incompletos.
Las emisiones pueden a veces usar un
proceso de compresión del programa real
para que los avisos publicitarios puedan ser
entregados. Debido a que el decodificador no
puede leer la información comprimida, los
subtítulos se pueden perder.
El video casete puede ser una copia ilegal o
la compañía que duplico el video dejo fuera
accidentalmente las señales de subtítulo
durante el proceso de copia.
Usted está en modo TEXTO (TEXT).
Seleccionar el modo SUBTITULO (CAPTION)
o SUBTITULO (APAGADO)(OFF)
Imagen borrosa
No hay imagen ni
sonido
Imagen OK,
Imagen pobre
Sonido OK,
Imagen pobre
Fantasmas en la
imagen
Líneas o rayas en
la imagen
Imagen débil
Recepción pobre
en varios canals
No hay color
Rollos de imagen
vertical
Imagen
distorsionada
El control remoto
no funciona
ü
Barras en la
pantalla
No hay energía
PROBLEMA
ü
POSIBLE
SOLUCION
Esta conectado el cable?
ü
ü
Esta encendido el
televisor?
Intentar un nuevo canal, si
funciona bien es posible
que sea un problema del
cana.. ¿Está el televisor
en modo de detención?
Está conectada una
antena al terminal de la
salida del equipo?
Si esta usando antena
externa, verificar que no
esté quebrada
Verificar interferencia de
bloqueo
Apagar el interruptor y
luego encenderlo después
de un minuto
ü
ü
ü
ü
ü
ü ü
ü
ü ü
ü
ü
ü ü
ü
ü
ü
ü
ü
ü
ü
ü
ü
ü
ü
ü
ü
ü
ü
ü
ü
ü
ü
ü
Ajustar control de color
Ajustar control de
CONTRASTE Y BRILLO
Revisar baterías en control
remoto
ü
ü
ü
23
ü
ü
ü
12. ESPECIFICACIONES UNIDAD PRINCIPAL
Sistema de Recepción del televisor
Sistema de color AV
Sistema de subtítulos
Cobertura de canals
VHF
UHF
CATV
Sistema de sintonizador
PAL M/N, NTSC-M
NTSC3, 58, NTSC4, 43, PAL4, 43, PAL M/N
SS 15.119/FCC
2-13
14-69
2-13, a-w,+1 W+84,A-5 A-1, 5A
Sistema de sintonizador de frecuencia
sintetizada de 181 Canals
Acceso de canals
Teclado de Acceso Directo
Escáner programable Arriba(Up)/Down(abajo)
Inglés, Español, Francés y Portugués
VHF/UHF/CATV 750HM No balanceado (Tipo-F)
74CM
75-ohm 1.0p-p, RCA
10k ohm 0.5 Vrms, alta impedancia
1k ohm 0.5 Vrms
6W+6W
110 -240V , 50/60HZ
130 W
29”
812 x 519 x 622 MM
45 Kg
Idioma de OSD
Entrada de Antena
Tamaño CRT
Entrada /Salida de Video
Entrada de Audio
Salida de Audio
Energía Salida Audio
Voltaje de operación
Consumo de energía
Tubo de imágen
Dimensiones
Peso Neto
CONTROL REMOTO INFRAROJO
Características
Poder Efectivo de Distancia
Suministro de energía
Control Remoto de Función Completa
8 metros
DC 3V (dos baterías , tamaño AA)
LISTA DE LO EMPACADO
1. Control Remoto Manual – uno
2. Manual de Operación – uno
El producto está sujeto a cambios sin previo aviso
24
IMPORTANT SAFETY INSTRUCTIONS
CAUTION:
Read all of these instructions. Save these instructions for later use. Follow all warnings and
instructions marked on the audio equipment.
CAUTION:
Use of controls, adjustments or procedures other than those specified herein may result in
hazardous radiation exposure.
The lighting flash with arrowhead symbol, with an equilateral triangle is intended to
alert the user to the presence of uninsulated dangerous voltage within the product s
enclosure that may be of sufficient magnitude to constitute a risk of electric shock to
the person.
The exclamation point within an equilateral triangle is intended to alert the user to the
presence of important operating and maintenance (servicing) instructions in the
literature accompanying the appliance.
CAUTION: TO REDUCE THE RISK OF
ELECTRICAL SHOCK, DO NOT REMOVE
COVER (OR BACK). NO USER SERVICEABLE
PARTS INSIDE. REFER SER VICING TO
QUALIFIED SERVICE PERSONNEL.
CAUTION
RISK OF ELECTRIC
SHOCK DO NOT OPEN.
Apparatus shall not be exposed to dripping or splashing and no objects filled with
liquids, such as vases, shall be placed on the apparatus.
WARNING: TO REDUCE RISK OF FIRE OR ELECTRIC SHOCK, DO NOT
EXPOSE THIS APPLIANCE TO RAIN OR MOISTURE.
2
PROTECTION AND LOCATION OF YOUR SET
1.
• Do not use this television set near water ... for example, near a bathtub, washbowl, kitchen sink, or laundry tub, in a
wet basement, or near a swimming pool, etc..
• Never expose the set to rain or water. If the set has been exposed to rain or water, unplug the set from the wall
outlet and refer servicing to qualified service personnel.
2.
Choose a place where light (artificial or sunlight) does not shine directly on the screen.
3.
Avoid dusty places, since piling up of dust inside TV chassis may cause failure of the set when high humidity persists.
4.
The set has slots, or openings in the cabinet for ventilation purposes, to provide reliable operation of the receiver, to
protect it from overheating. These openings must not be blocked or covered.
• Never cover the slots or openings with cloth or other material.
• Never block the bottom ventilation slots of the set by placing it on a bed, sofa, rug, etc..
• Never place the set near or over a radiator or heat register.
• Never place the set in a built-in enclosure, unless proper ventilation is provided.
PROTECTION AND LOCATION OF YOUR SET
1.
If an outside antenna is connected to the television set, be sure the antenna system is grounded so as to provide some
protection against voltage surges and built-up static charges, Section 810 of the National Electrical Code, NFPA No.
70-1975, provides information with respect to proper grounding of the mast and supporting structure, grounding of the
lead-in wire to an antenna discharge unit, size of grounding conductors, location of antenna discharge unit, connection
to grounding electrode, and requirements for the grounding electrode.
EXAMPLE OF ANTENNA GROUNDING AS PER NATIONAL ELECTRICAL CODE INSTRUCTIONS
EXAMPLE OF ANTENNA GROUNDING AS PER
NATIONAL ELECTRICAL CODE
ANTENNA
LEAD- IN WIRE
GROUND CLAMP
ANTENNA DISCHARGE
UNIT (NEC SECTION
810-20)
GROUNDING
CONDUCTORS
(NEC SECTION 810-21)
ELECTRIC SERVICE
EQUIPMENT
GROUND CLAMPS
POWER SERVICE GROUNDING
ELECTRODE SYSTEM
(NEC ART 250. PART H)
NEC-NATIONAL ELECTRICAL CODE
2.
Note to CATV system installer: (Only for the television set with CATV reception)
This reminder is provided to call the CATV system installer s attention to Article 820-40 of the NEC that provides
guidelines for proper grounding and, in particular, specifies that the cable ground shall be connected to the grounding
system of the building, as close to the point of cable entry as practical.
3.
An outside antenna system should not be located in the vicinity of overhead power lines or other electric lights or power
circuits, or where it can fall into such power lines or circuits. When installing an outside antenna system, extreme care
should be taken to keep from touching such power lines or circuits as contact with them might be fatal.
4.
For added protection for this television set during a lightning storm, or when it is left unattended and unused for long
periods of time, unplug it from the wall outlet and disconnect the antenna. This will prevent damage due to lightning
and power-line surges.
3
OPERATION OF YOUR SET
1.
This television set should be operated only from the type of power source indicated on the marking label. If you are not
sure of the type of power supply at your home, consult your television dealer or local power company. For television
sets designed to operate from battery power, refer to the operating instructions.
2.
If the television set does not operate normally by following the operating instructions, unplug this television set from the
wall outlet and refer servicing to qualified service personnel. Adjust only those controls that are covered in the operating
instructions as improper adjustment of other controls may result in damage and will often require extensive work by a
qualified technician to restore the television set to normal operation.
3.
If your television is to remain unused for an extended period of time, turn the set off and unplug it from the power
outlet.
IF THE SET DOES NOT OPERATE PROPERLY
1.
If you are unable to restore normal operation by following the detailed procedure in your operating instructions,
do not attempt any further adjustment. Unplug the set and call your dealer or service technician.
2.
Whenever the television set is damaged or fails, or a distinct change in performance indicates a need for
service, unplug the set and have it checked by a professional service technician.
3.
It is normal for some TV sets to make occasional snapping or popping sounds, particularly when being
turned on or off. If the snapping or popping is continuous or frequent, unplug the set and consult your
dealer or service technician.
FOR SERVICE AND MODIFICATION
1.
Do not use attachments not recommended by the television set manufacturer as they may cause hazards.
2.
When replacement parts are required, be sure the service technician has used replacement parts specified
by the manufacturer that have the same characteristics as the original parts. Unauthorized substitutions
may result in fire, electric shock, or other hazards.
3.
Upon completion of any service or repairs to the television set, ask the service technician to perform
routine safety checks to determine that the television is in safe operating condition.
4
TABLE OF CONTENTS
1.
INTRODUCTION
1.1
1.2
1.2.1
1.2.2
1.3
1.3.1
1.3.2
1.3.3
2.
3.
ANTENNA/CABLE CONNECTIONS
2.2
EXTERNAL CONNECTIONS
5.
MAP OF THE ON-SCREEN MENU
TURN ON THE TV
TURN OFF THE TV
SELECT CHANNELS
SELECT MAIN MENU
SELECT SUB-MENU
ADJUST OPTION
SELECT LANGUAGE
TV/CABLE TV(CATV)
SELECT COLOR SYSTEM
DISPLAY
MUTE
TV/AV
NOTEBOOK
CALENDAR
BIOLOGICAL CLOCK
SMART TIMER
11.
TROUBLESHOOTING
12.
SPECIFICATION
1.
INTRODUCTION
1.1
FEATURES
AV I/O
Useful functions
MTS STEREO
BASS, TREBLE & BALANCE ADJUSTMENT
SOUND EFFECT ADJUSTMENT
SURROUND SOUND
CHANNEL PRESET
AUTO SEARCH
MANUAL CHANNEL TUNING
FINE TUNING
ADDING OR ERASING CHANNELS
FAVORITE CHANNEL SETTING
PICTURE ADJUSTMENT
7.1
7.2
CLOSED CAPTION OPERATION
SUPER FUNCTION
10.1
10.2
10.3
10.4
SOUND ADJUSTMENT
6.1
6.2
6.3
6.4
6.5
7.
10.
CLOCK SETTING
ON TIMER
OFF TIMER
CLOSED CAPTION
9.1
TV OPERATION
5.1
5.2
5.3
5.4
6.
9.
MENU OVERVIEW
4.1
4.2
4.3
4.4
4.5
4.6
4.7
4.8
4.9
4.10
4.11
4.12
TIMER FUNCTION
8.1
8.2
8.3
CONNECTIONS
2.1
3.1
4.
8.
FEATURES
DESCRIPTION OF CONTROL
KEYS & CONNECTORS
FRONT PANEL
REAR TERMINAL & SIDE AV
OPERATION OF REMOTE CONTROL
DESCRIPTION OF
REMOTE CONTROL KEYS
INSTALLATION OF BATTERIES
EFFECTIVELY USING THE
REMOTE CONTROL
MANUAL PICTURE SETTING
AUTO PICTURE SETTING
5
- 2 RCA-type AV Input
- 1 YUV Input
- 1 S-video Input
- 1 RCA-type AV output
- Sleep Timer (10-120min.)
- Auto Off (after 15 min with
no signal)
- Blue Background
selection (while no signal)
- 3 Default ,1 User Picture
Settings
- 3 Default ,1 user sound
Settings
- Channel Add/Erase
- MTS Stereo
- Surround Sound
- On/Off Timer
- Notebook
- Calendar
- Biological Clock
- Favorite Channel Setting
- Channel Prearrange
- Child Lock
- Closed Caption Display
- 4 language menu display
1. INTRODUCTION
1.2
DESCRIPTION OF CONTROL KEYS & CONNECTOR
1.2.1
FRONT PANEL
65 4
1. POWER BUTTON
Switch mains power on or off.
2 1
Channel searching upward/downward in
FINE TUNE menu.
2. REMOTE SENSOR
To receive the infra-red signals from remote
handset.
5. MENU/AUTO SEARCH BUTTON
To select the PICTURE, SOUND, FEATURE,
TIMER and PRESET menus.
Press and hold this button for 3 seconds, TV
will perform AUTO SEARCH function.
3. CHANNEL ( / ) BUTTONS
Select channel number cyclically.
To turn on the TV when it is in standby mode.
To select the item in sub-menus.
6. TV/AV BUTTON
To switch between TV channel and AV input.
4. VOLUME/PICTURE CONTROL ( / )
BUTTONS
To decrease/increase the sound volume and
picture settings level.
REAR TERMINAL & SIDE AV
REAR TERMINAL
AUDIO
R
SIDE AV
YUV INPUT
AV
INPUT 2
AV
OUTPUT
VIDEO
L(MONO)
75 OHM
ANTENNA
INPUT
VIDEO
S-VIDEO
1.2.2
3
Y
L
L
(MONO)
AUDIO
Cb
R
R
IN1
Cr
4
3
2
6
1
5
4. YUV INPUT
5. AV INPUT 1
6. S-VIDEO INPUT
1. 75 OHM ANTENNA INPUT
2. AV OUTPUT
3. AV INPUT 2
6
1. INTRODUCTION
1.3 OPERATION OF REMOTE CONTROL
1.3.1DESCRIPTION OF REMOTE CONTROL KEYS
4. NOTEBOOK BUTTON
To enter or exit the notebook window
directly.
5. DISPLAY/ DEL. BUTTON
To display the current channel number
and function status.
Press the button once again to display
the current time on the screen.
In notebook mode, to delete the word
or symbols previously stored.
+-?
ABC
DEF
GHI
JKL
MNO
PQR
STU
VWX
6. COLOR/ INSERT BUTTON
To select the color system directly without
going into the submenu.
To insert or overwrite a letter, digit or symbol
when you edit the information previously
stored in notebook.
9
YZ
7. FAVORITE BUTTON
To browse the channels preset in the
Favorite List.
CH.
8. RECALL BUTTON
Press to return to the previously viewed
channel.
CH.
9. OK BUTTON
Within the on-screen menu, press to
enter some special functions such as
Calendar, Favorite List and so on.
INTRODUCTION OF KEY FUNCTION
This TV features with a full-function remote
handset. For a more compact remote unit design, some
of the keys are multiple with more than one function. The
following text describes the function of keys on remote
control unit. Function related to notebook operated are
marked with a symbol .
1. STANDBY BUTTON
When the main power is on, to turn the TV set on
or off(standby mode).
2. TV/AV BUTTON
To switch between the TV channel and AV input
sources.
3. MUTE BUTTON
To temporarily turn off the sound and to restore it
by pressing the button again.
7
10. CAPS BUTTON
To select the input form between capital
and small letter.
11. SLEEP BUTTON
Set the sleep timer from 120 to 10
minutes by pressing the SLEEP button
repeatedly. To display the remaining
time, press the SLEEP button once. To
cancel the sleep timer, press the
SLEEP button until OFF appears.
12. CALENDAR BUTTON
To display or exit calendar directly.
1. INTRODUCTION
13. DIGIT (0-9) KEYS
To select channel number directly.
To select 0-9 digits, A-Z(or a-z) letters, common marks
and punctuation marks when write data or information to
be stored in notebook.
16. VOLUME UP/DOWN BUTTON
To decrease or increase the volume level.
To activate the selections in the menu
system, or to change audio and video
settings.
17. SOUND EFFECT BUTTON
To switch between the 4 sound effect settings:
Concert, Broadcast, Personal ,Theatre.
14. PICTURE BUTTON
Cyclically selects the 4 picture settings:
Mild-Standard-Dynamic-Personal
18. MTS BUTTON
To select the sound modes cyclically:
Mono, Stereo, SAP and Mono+SAP.
15. CHANNEL UP/DOWN BUTTON
To cyclically select the channel number.
To select the item in menu systems.
19. MENU BUTTON
Press to display the main menu. Also goes
back to the previous screen menu or exits
the menu from screen.
1.3.2 INSTALLATION OF BATTERIES
1. Open the battery compartment cover.
NOTES:
2. Install two R06 (size AA) batteries in correct
direction.
• The life time of the batteries may last up to
one year, depending on how often the
remote control is used. For the best
performance, the batteries should be
replaced on a yearly basis, or when remote
operation becomes erratic.
• Be sure to place the batteries in the correct
direction, as shown left.
• Do not mix old and new batteries, or
different types.
• Old batteries may leak chemical and
damage the remote control. Always remove
batteries as soon as they become weak.
3. Close the battery cover.
1.3.3
EFFECTIVELY USING THE
REMOTE CONTROL
Point the remote handset toward the infra-red
remote sensor on the main unit as shown left.
NOTES:
If direct sunlight, incandescent light, or any
other strong light sources hit the remote
control sensor, the remote control may not
operate properly.
If there is an obstacle between the main
unit and the remote control, the remote
control signal may not be received.
R06 (SIZE AA) batteries should be used.
SENSOR
8
2. CONNECTIONS
2.1 CABLE/ANTENNA CONNECTIONS
Before plugging the UHF/VHF Rod Antenna into the
ANT(enna). In jack, check that the pin is not bent. If
it is bent, straighten the pin as illustrated, then plug
the pin into the ANT(enna). In jack.
FCC WARNING -This equipment may generate or use radio
frequency energy. Changes or modifications to this equipment
may cause harmful interference unless the modifications are
expressly approved in the instruction Manual. The user could
lose the authority to operate this equipment if an unauthorized
change or modification is made.
Bent pin
Cable
Plug
(Needs to be straightened)
( straight pin)
UHF/VHF Rod
Antenna
(Supplied)
*Some cable TV systems use scrambled
signals and require a special converter
to receive these channels. Consult your
local cable company.
VHF
Antenna
(Not supplied)
CATV Box*
or Satellite Box
(Not supplied)
UHF
Antenna
(Not supplied)
IN
OUT
75-ohm
Coaxial Cable
ANT.IN
OR
OR
From Cable System
or Satellite Antenna
75-ohm
Coaxial Cable
From Cable System
VHF/UHF
Combiner
(Not supplied)
VHF/UHF
Combination Antenna
(Not supplied)
Note to CATV system installer:
This reminder is provided to call the CATV system installer's attention to Article 820-40
of the NEC that provides guidelines for proper grounding and, in particular, specifies that
the cable ground shall be connected to the grounding system of the building as close to
the point of cable entry as practical.
2.2 EXTERNAL CONNECTIONS
YUV INPUT
AV
INPUT 2
AV
OUTPUT
75 OHM
ANTENNA
INPUT
VIDEO
Y
L
L
(MONO)
AUDIO
Cb
R
R
Cr
To switch between the TV channels and the connected audio/video equipment, press the TV/AV
button repeatedly.
9
3. MENU OVERVIEW
Within the on screen menu, almost all of the functions and adjustments for this television can be
achieved. The MENU button is used to access the main menu or go back to the previous screen.
Pressing the MENU button in the first screen of the main menu, or the DISPLAY button at any time,
will exit the menu.
Use the CHANNEL UP/DOWN buttons on the TV or remote control to scroll through the items in the menu.
Use the VOLUME UP/DOWN buttons on the TV or remote control to change the settings or status of the
selected item and use the OK button on the remote control to enter the submenu for some special functions.
NOTE:
Some keys on the remote control have the same functions as those in the menu. They can be
used on their own or to compliment the on screen display.
3.1 MAP OF THE ON-SCREEN MENU
PICTURE
SOUND
FEATURE
Color
Brightness
Contrast
Sharpness
Tint
Blue Back
Noise Red.
C. Temp
Volume
Bass
Treble
Balance
Surround
S. Effect
50
50
50
50
00
On/Off
On/Off
Normal/Warm/cold
50
50
50
00
On/Off
Concert/Broadcast/Theater/Personal
Language
English/French/Portuguese/Spanish
C.Capt
Off/C1/C2/C3/C4/C.Mute/T1/T2/T3/T4
Child lock
On/Off
Smart timer
On/Off
Calendar
Biological clock
Off Time
Off/Once/Daily
On Time
OFF/ONCE/DAILY
0: 00
TIMER
PRESET
0: 00
Channel
2
TV/CATV
TV/CATV
Clock
0: 00
TV/CATV
TV/CATV
Channel
2
Add/Erase
Add/Erase
Manual
Up/Down
Fine
+0
Auto Search
Favorite List
10
TV/CATV
TV/CATV
Ch 1
TV/CATV
2
Ch 2
TV/CATV
3
Ch 3
TV/CATV
4
Ch 4
TV/CATV
5
Ch 5
TV/CATV
6
4. BASIC OPERATION
4.1 TURN ON THE TV
After the power of the TV is connected, press the POWER button on the main unit to turn on the TV set.
If the standby indicator lights up, TV is in standby mode.
To turn on the TV from STANDBY mode, press STANDBY button on the remote control or the CHANNEL UP
/DOWN, or TV/AV button on the front panel of the main unit.
4.2 TURN OFF THE TV
Press the POWER button on the main unit to turn off the TV set.
Or press STANDBY button on the remote control to switch the TV to standby mode and the STANDBY
indicator will light up.
4.3 SELECTING CHANNELS
Press CHANNEL UP/DOWN button to select the next higher or lower channel number.
Use the digit keys on the remote control directly to select the channel.
4.4 SELECTING MAIN MENU
By pressing the MENU button, the main menu bar will appear on the top screen,
and PICTURE will be highlighted, which means the pull-down menu PICTURE
is selected and its corresponding sub-menus are displayed underneath it.
Then press the VOLUME UP/DOWN button on the set or remote control, you
can move the cursor right or left for selecting other pull-down menus in the
main menu bar(SOUND, FEATURE, TIMER or PRESET).
50
Color
Brightness
50
Contrast
50
Sharpness
50
Tint
50
Blue Back
On
Noise Red.
Off
C. Temp
Normal
To exit the main menu, press the MENU button again.
4.5 SELECTING SUB-MENU
After selecting function menu, press CHANNEL DOWN button to enter the
submenu selection. Then press the CHANNEL UP or DOWN button to select
the desired item in the submenu (e.g. Brightness
in the PICTURE menu )
To display the features of some special submenu such as Game, Favorite List
and so on, press the OK button.
4.6 ADJUSTING OPTION
Press VOLUME UP/DOWN button to adjust the settings of the selected item(e.g.,
the Brightness is adjusted to 65% as shown.).
50
Color
Brightness
50
Contrast
50
Sharpness
50
Tint
00
Blue Back
On
Noise Red.
Off
C. Temp
Normal
Brightness
65
4.7 SELECTING LANGUAGE
You can set the TV on-screen menu to be English, French, Portuguese or Spanish.
Activate the FEATURE menu.
Press CHANNEL DOWN button to enter the submenu selection.
Press the CHANNEL UP/DOWN button to select Language.
Press the VOLUME UP/DOWN button to select your desired language,
English (or Portuguese, French, spanish):
11
Language
English
C.Capt
Off
Child Lock
Off
Smart timer
Off
Calendar
Biological Clock
4. BASIC OPERATION
4.8 TV/CABLE TV (CATV)
It is important to know what type of signal-Cable TV(CATV) or a normal
antenna (TV)-you are using. To tell the TV whether you are using a Cable
TV signal, set the TV/CATV to TV or CATV as follows:
Activate the PRESET menu.
Press CHANNEL DOWN button to enter the submenu selection.
Press the CHANNEL UP/DOWN button to select TV/CATV.
Press the VOLUME UP/DOWN button to select TV or CATV.
Choose CATV if you have Cable TV service. If you do not have
Cable TV service and you connected an antenna to the TV, choose TV.
TV/CATV
TV
Channel
2
Add/Erase
Add
Manual
Up
Fine
0
Auto search
Favourite list
4.9 SELECTING COLOR SYSTEM
This feature allows you to select your desired Color system. If Auto is selected, the
respective color system will be automatically selected according to the transmission
system.
Note: Select your desired color system manually if reception is poor.
Press the COLOR button once to display the current color system.
Press the COLOR button repeatedly to select your desired color system(Auto,
NTSC358, PAL-M, PAL-N).
4.10 DISPLAY
Press the DISPLAY button on remote control to display the current status of the
TV set, such as the current channel No. (or AV input), and the sound status.
Press DISPLAY button again, the current time will be displayed on the top screen
if you set the current time in the sub-menu of TIMER.
4.11 MUTE
Press MUTE button on remote control to temporarily turn off the sound and
the sign of MUTE as shown will appear on the screen. Press the MUTE button
once again to restore the sound. Besides, press VOLUME UP button can
also restore the normal sound output.
4.12 SELECTING TV/AV
Press TV/AV button repeatedly to select the TV or Audio/Video Inputs(AV,
S-video or YUV).
TV(CATV)
AV1(Or S-VIDEO)
YUV
12
AV2
5. SOUND ADJUSTMENT
5.1 MTS STEREO
This TV is equipped with a feature known as Multi-channel TV Sound or MTS. MTS broadcasts
greatly enhance the TV viewing by bringing you channels with high fidelity stereo sound. MTS
also provides an extra channel called the Second Audio Channel or SAP which broadcasters
Listening to Stereo Sound
When the TV is turned on or a channel selection is made, make certain that the word
STEREO
When a Mono broadcast is received, no indication is displayed.
If the broadcast signal is not strong enough or clear stereo sound is not available, press the MTS
button to change to mono sound. The noise should be eliminated. Press it again to return to the stereo
sound.
Listening to SAP
When the TV is turned on or a channel selection is made, make certain that the letters SAP
appears on the screen. This means that Second Audio Channel broadcasting is available.
Press the MTS button cyclically to select the desired audio setting:
Mono
Stereo
SAP
Mono+SAP
5.2 BASS, TREBLE, BALANCE ADJUSTMENTS
Activate the SOUND menu.
Press CHANNEL DOWN button to enter the submenu selection.
Press CHANNEL UP/DOWN button to select Bass.
Press VOLUME UP/DOWN to adjust to your favourable sound,
e.g. adjust Bass to 30.
The same adjusting procedure is applicable to Volume, Treble & Balance.
Notes:
Bass
Volume
Bass
Treble
Balance
Surround
S.Effect
Theater
: Decrease the low frequency (Bass) by adjusting toward 0,
increase the low frequency (Bass) by adjusting toward 100.
Treble : Decrease the high frequency (Treble) by adjusting toward 0,
increase the high frequency (Bass) by adjusting toward 100.
Balance : Adjust the sound source position from left speaker to centre to
right speaker as balance is adjusted from L50(-50) to R50(+50).
5.3 SOUND EFFECT ADJUSTMENT
Activate the SOUND menu.
Press CHANNEL DOWN button to enter the submenu selection.
Press the CHANNEL UP/DOWN button to select S.Effect.
Press the VOLUME UP/DOWN button to select your desired sound effect
mode, Theatre(or Concert, Broadcast, Personal):
Theater
Concert
Broadcast
Personal
5.4 SURROUND SOUND
The method to turn on/off the surround sound is the same as the sound effect
adjustment.
13
50
50
50
00
On
Volume
Bass
Treble
Balance
Surround
S.Effect
50
50
50
00
On
Theater
Volume
Bass
Treble
Balance
Surround
S.Effect
50
50
50
00
On
Theater
On
Off
6. CHANNEL PRESET
6.1 AUTO SEARCH
You can set your TV to receive local TV channels (from an antenna) or CATV channels (when you have Cable TV
service ). Then, use AUTO SEARCH to set up the channels that are available for you. This makes it easy for you
to select only the available TV stations when press the CHANNEL UP or DOWN button. Before you start AUTO
SEARCH, connect the Antenna or CATV signal as detailed.
Activate the PRESET menu.
Press the CHANNEL DOWN button to enter submenu selection.
Press the CHANNEL UP/DOWN button to select TV/CATV.
TV/CATV
TV
Press the VOLUME UP/DOWN button to select TV or CATV to be the signal
Channel
2
Add/Erase
Add
source.
Manual
Up
Press the CHANNEL UP/DOWN button to select Auto search.
Fine
0
Auto search
Press the VOLUME UP button to start the auto searching, and then all available
Favourite list
channels will be stored from No.1(in CATV mode) or No. 2(in TV mode) and
upward in order. Auto-searching will stop after all the frequency bands are
searched, and the last programme which you select before auto search action
will reappear on the screen. Press the VOLUME DOWN button if you need to
stop AUTO SEARCH during the process.
Programming
Please Wait
NOTE:
TV
3
Press and hold the MENU button on the front panel of the unit for a few
seconds to start auto search action directly.
6.2 MANUAL CHANNEL TUNING
Manual Channel Tuning lets you quickly select the next available channel.
For example, if you are looking for a channel between 60 and 70, start the
search at channel 60 and go up.
First select the signal source. Activate the PRESET menu.
Press the CHANNEL DOWN button to enter submenu selection.
Press the CHANNEL UP/DOWN button to select TV/CATV.
Press the VOLUME UP/DOWN button to select TV or CATV(whichever you have).
Press the CHANNEL UP/DOWN button to select Channel.
Press the VOLUME UP/DOWN button to enter a Channel No. at which you
want to begin the search.
Press the CHANNEL UP/DOWN button to select Manual.
Press the VOLUME UP button to start searching upward(for example, starting at
channel 60 and going up to 61, 62, 63,etc.). Press the VOLUME DOWN button
when you find the channel you want. This stop the search, otherwise the search
will stop at the first available channel.
Or press the VOLUME DOWN button to start searching downward(for example,
starting at channel 60 and going up to 59, 58, 57,etc.). Press the VOLUME UP
button when you find the channel you want. This stop the search, otherwise the
search will stop at the first available channel.
When fine tuning is completed, press the MENU button to quit menu, or menu
will quit after a few seconds without further action.
TV/CATV
CATV
Channel
60
Add/Erase
Add
Manual
Up
Fine
0
Auto search
Favourite list
CATV
TV/CATV
Channel
61
Add/Erase
Add
Manual
Up
Fine
0
Auto search
Favourite list
TV/CATV
Channel
Add/Erase
Manual
Fine
Auto search
Favourite
CATV
59
Add
Down
0
list
6.3 FINE TUNING
Fine tuning function may improve the receiving quality for some weak /unstable
channels by adjusting the channel frequency manually.
First select the signal source. Activate the PRESET menu, then the highlight
bar is on TV/AV. Press the VOLUME UP/DOWN button to select TV or CATV
to be the signal source.
Press the CHANNEL UP/DOWN button to select Channel, then press VOLUME
UP/DOWN button to entera channel No., e.g. 08.
14
TV/CATV
Channel
Add/Erase
Manual
Fine
Auto search
Favourite
CATV
59
Add
Down
0
list
6. CHANNEL PRESET
Press CHANNEL UP/ DOWN button to select FINE, then press VOLUME UP
/DOWN button to fine tune the channel upward or downward until satisfied
picture and sound quality are achieved.
When fine tuning is completed, press the MENU button to quit menu, or menu
will quit after a few seconds without further action.
TV/CATV
Channel
Add/Erase
Manual
Fine
Auto search
Favourite
CATV
59
Add
Down
0
list
6.4 ADDING OR ERASING CHANNELS
You can add or erase channels from the list in the TV s memory.
Using the DIGIT KEYS, select the channel you wish to add or erase.
Activate the PRESET menu.
Press CHANNEL DOWN button to enter the submenu selection.
Press the CHANNEL UP/DOWN button to select Add/Erase.
Press the VOLUME UP/DOWN button to select Add or Erase. If you select
Add, the channel will be available when you press the CHANNEL UP and
DOWN buttons to move through channels. Choosing Erase will remove the
channel from TV s memory. The channel will be available when you press
the CHANNEL UP and DOWN buttons to move through channels.
Press the MENU button to confirm your selection and exit.
If you want to add or erase other channel, follow the above procedure.
TV/CATV
TV
Channel
18
Add/Erase
Add
Manual
Up
Fine
0
Auto search
Favourite list
6.5 FAVORITE CHANNEL SETTING
You can store five favorite channels in memory and preview those channels
by FAVORITE button.
Activate the PRESET menu.
Press CHANNEL DOWN button to enter the submenu selection.
Press the CHANNEL UP/DOWN button to select Favorite List.
Press the OK button to display features of Favorite List as shown.
When the highlight bar is on TV/AV, press the VOLUME UP/DOWN button
to select TV or CATV to be the signal source, e.g. CATV.
Press CHANNEL UP/DOWN button to select CH 3 , then press the
VOLUME UP/DOWN button to select channel number you want to store into
this position, such as 8.
Repeat the above procedure to set other four favorite channels.
Press the MENU button twice to exit menu display.
15
TV/CATV
TV
Channel
2
Add/Erase
Add
Aft
On
Fine
0
Auto search
Favourite list
TV/CATV
CATV
CH 1
CATV
1
CH 2
CATV
2
CH 3
CATV
8
CH 4
CATV
4
CH 5
CATV
5
7. PICTURE ADJUSTMENT
7.1 MANUAL PICTURE SETTING
Adjust the level of CONTRAST, BRIGHTNESS, COLOR, SHARPNESS, and TINT
to get the most favorable picture
Activate the PICTURE menu.
Press CHANNEL DOWN button to enter the submenu selection.
Press the CHANNEL UP/DOWN button to select the item, e.g. Contrast.
Press VOLUME UP/DOWN button to adjust the picture until you are satisfied,
and the Contrast setting will be automatically stored in the memory of the
TV set. The same adjustment procedure is applicable to Brightness, Sharpness,
Color and Tint setting.
Notes:
Brightness
: Brighten the darkest parts of the picture.
Color
: Add or reduce color.
Contrast
: Adjust the distinction between the black and white parts
Sharpness
: Improve picture detail.
Tint
: Obtain natural skin tones.
Blue Back
: Turn this option ON or OFF. If you choose ON, a solid
of the picture.
50
Color
Brightness
50
Contrast
66
Sharpness
50
Tint
00
Blue Back
On
Noise Red.
Off
C. Temp
Normal
50
Color
Brightness
50
Contrast
66
Sharpness
50
Tint
00
Blue Back
On
Noise Red.
Off
C. Temp
Normal
Contrast
66
blue background screen will appear if the TV is on a
weak channel (for example, if reception is very poor
or if the station has gone off the air for the night). After
being on such a channel for 15 minutes, the TV turns
itself off automatically.
Noise Red.
: turn this option ON or OFF. If you choose On, it will
C. Temp
: select Normal, Warm or Cold for color temperature.
50
Color
Brightness
50
Contrast
66
Sharpness
50
Tint
00
Blue Back
On
Noise Red.
Off
C. Temp
Normal
reduce the noise and improve the picture quality.
7.2 AUTO PICTURE SETTING
Whether you are watching a movies or a video game, your TV has automatic picture
settings matched for your current channel. This function resets TV s video settings
for different types of channels and viewing conditions. Each picture setting is preset
at the factory to automatically adjust the TV s brightness, color, contrast, sharpness
and tint.
Press the PICTURE button on the remote control. The current picture setting will
appear on the screen.
Press the PICTURE button repeatedly to select Dynamic, Standard, Mild or Memory.
The Personal setting is what you specify with the picture adjustment as described
in item 7.1. Personal is the only Picture setting you can change. All others are set at
the factory during production.
16
Standard
8. TIMER FUNCTION
Timer function is provided by the microcomputer of TV set. Once it is set, the ON/OFF time and time displaying
functions can start functioning. The TV set will keep the correct time as long as the main power is on, even if the
TV has been turned off into standby mode.
8.1 CLOCK SETTING
Follow these steps to set your TV s clock.
Activate the TIMER menu.
Press the CHANNEL DOWN button to enter submenu selection.
Press the CHANNEL UP/DOWN button to select Clock.
Press the VOLUME UP/DOWN button repeatedly to enter the current time ,
e.g. 9:30. Press and hold VOLUME UP or DOWN button to change the time
quickly in 10-minute increments.
Note:
if the power fails, you must reset the clock.
Off Time
On Time
Channel
TV/CATV
Clock
Off
0:00
Off
0:00
2
TV
9:30
8.2 ON TIMER
To turn on the TV to a specific channel at a specific time, use the On-Timer. Before
you begin, set the clock correctly. Details are as 8.1
Activate the TIMER menu.
Press the CHANNEL DOWN button to enter submenu selection.
Press the CHANNEL UP/ DOWN button Channel.
Press the VOLUME UP/DOWN button to enter a channel number. This will be
the channel to which the TV turns on or switches to at the specified time
Press the CHANNEL UP/ DOWN button to select On Time.
Press the VOLUME UP/DOWN button select Off, Once, or Daily. If you select
ONCE, the timer will turn on the TV one time within the next 24 hours only.
If you select Daily, the timer will turn on the TV at the same time and to the
same channel every day. Choose OFF to cancel the On-Timer.
If you select DAILY or ONCE, press the CHANNEL DOWN button to 0:00
beneath On Time.
Press the VOLUME UP/DOWN button to enter the ON time. This will be the
time at which the TV will turn itself on.
Press the MENU button to quit menu, or menu will quit after a few seconds
without further action.
Off Time
On Time
Channel
TV/CATV
Clock
Off Time
On Time
Channel
TV/CATV
Clock
Off
0:00
Once
9:59
2
TV
9:30
Off
0:00
Once
9:59
11
CATV
9:30
8.3 OFF TIMER
To turn off the TV at a specified time, use the OFF-TIMER. Before you begin, set
the clock correctly. Details are as 8.1
Activate the TIMER menu.
Press the CHANNEL DOWN button to enter submenu selection.
Press the CHANNEL UP/ DOWN button Channel.
Press the CHANNEL UP/ DOWN button to select On Time.
Press the VOLUME UP/DOWN button select Off, Once, or Daily. If you select
ONCE, the timer will turn on the TV one time within the next 24 hours only.
If you select Daily, the timer will turn on the TV at the same time and to the
same channel every day. Choose OFF to cancel the On-Timer.
If you select DAILY or ONCE, press the CHANNEL DOWN button to 0:00
beneath On Time.
Press the VOLUME UP/DOWN button to enter the ON time. This will be the
time at which the TV will turn itself on.
Press the MENU button to quit menu, or menu will quit after a few seconds
without further action.
17
Off Time
On Time
Channel
TV/CATV
Clock
Off Time
On Time
Channel
TV/CATV
Clock
Once
0:00
Once
9:59
11
TV
9:30
Once
22:59
Once
9:59
11
TV
9:30
9. CLOSED CAPTION
You may view labeled (cc)TV programs, movies, news, prerecorded tapes, etc.with either a dialogue
caption or text display added to the program.
CAPTION MODE
Characters can be displayed on the TV screen when the received broadcast signal contains the caption
signal.
There are three modes for the caption display:
Paint-on mode: Displays input characters on the TV screen immediately.
Pop-on mode: Once characters are stored in memory, it is displayed all at once.
Roll-up mode: Displays the characters continuously by scrolling (max. 4 lines).
TEXT MODE
To display the text on the screen by scrolling.(max. 7 lines)
Notes:
If the received broadcast signal does not contain the caption signal or text signal but the caption
mode or text mode is selected, no change will occur.
When your TV receives a special effects playback signal (i.e. Search, Slow, Still) from a VCR' s video
output channel (Ch3 or Ch4), your TV may not display the correct caption or text.
Captions and texts may not match the TV voice exactly.
The caption or text characters will not be displayed while the menu display or function's display is
shown.
If you see this screen:
A black box is shown on the TV screen, this means that your TV is set to text mode.
To clear screen, select C.Capt to Off.
9.1 CLOSED CAPTION OPERATION
Activate the FEATURE menu.
Press the CHANNEL DOWN button to enter the submenu selection.
Press the CHANNEL UP/DOWN button to select the submenu C.Capt.
Press the VOLUME UP/DOWN button to select a caption or text channel you
want to watch.
To cancel the caption or text mode, just set C.Capt to off.
Press the menu button twice to exit menu, or menu will quit after a few seconds
without further operation.
Note:
C.Mute sets the TV to show closed captions when you press the MUTE
button. The TV volume will be disabled until you press the MUTE button
again to restore the sound.
18
Language
English
C.Capt
Off
Child Lock
Off
Smart timer
Off
Calendar
Biological Clock
Off
C1
T4
T3
C2
T2
C3
T1
C4
C.Mute
10. SUPER FUNCTION
10.1 NOTEBOOK
NOTE BOOK NO SAVE
Notebook function enables you to store information such as phone number,
leave message and etc, and can be used as a reminder.
How to input and correct information in notebook
OFF
Press the NOTEBOOK button on the remote control to activate the notebook
window, and the display is shown as right;
Then input information with 0-9 digit, A-Z (a-z)letter, or symbolic key.
Example: if you want to input the content: [email protected].
1. Press the CAPS button on the remote control to turn the capital function off,
the color of CAPS on the screen will turn into blue;
2. Press 2 key twice to input the letter a ; pressing 2 key repeatedly can
cyclically input 2, a, b and c . The same procedure is applicable to other
digit or small letters input.
3. Press the CAPS button again to turn on the capital function, the color of
CAPS on the screen will turn into red.
4. Press 2 key three times to input the letter B ; pressing 2 key repeatedly
can cyclically input 2, A, B and C . The same procedure is applicable to
other digit or capital letters input.
5. Then input the small letter c as the procedure to input a in step2.
6. To input symbols like @ , press 1 button repeatedly until the symbol @
appears. Pressing 1 key repeatedly can cyclically select 1, blank space,
the common marks and punctuation marks + - . , : ; ( = ) @ % $ # ! ?
as shown.
After finishing information writing, you can use DELETE button on the remote
control to delete the unwanted or incorrect word. And press INSERT button on
the remote control to select INS or OVER mode on the screen, then insert
word into the stored information or overwrite it.
Press the OK button to store the message, and the word SAVING appears on
the screen. After the message is stored, the TV will exit NOTEBOOK status
automatically.
How to utilize notebook function
Move the cursor to select the sign with the VOLUME/CHANNEL UP/DOWN
buttons, then press the OK button to turn
into
as shown. That means
the notebook window with stored message will appear on the screen first when
the TV is turned on to remind someone of something. For example, when your
wife turn on the TV, firstly the screen will display the message you left: give
your mother a call. If you press OK button to turn into , then the notebook
window with stored message will not appear on the screen when the TV is
turned on.
If you want to display the message at a specified time, first move the cursor to
select the sign
, then press the OK button to turn OFF into 0:00, then
press CH. UP/DOWN button to set the desired time, e.g. 17:40 . That means
the notebook window with stored message will appear on the screen automatically
at 17:40 to remind you to meet your aunty Li tonight even if the TV is in standby
mode.
NOTE:
the time setting in notebook must be based on the time set in CLOCK of TIMER
menu. The time set in notebook must be later than the time set in CLOCK.
19
INS
CAPS
NOTE BOOK NO SAVE
a
2abc
2
a
b
c
NOTE BOOK NO SAVE
aB
2ABC
2
A
B
C
NOTE BOOK NO SAVE
Bc @
NOTE BOOK SAVING
BC@ 21cn.com
OFF
INS
CAPS
NOTE BOOK
Give your mother a
call.
OFF
INS
CAPS
NOTE BOOK
Meet aunty Li at airport
tonight.
17:40 INS
CAPS
10. SUPER FUNCTION
10.2 CALENDAR
Calendar function enables you to look up date very conveniently.
Press the CALENDAR button on the remote control to enter the calendar
display directly.
Press the VOLUME UP/DOWN button to select your desired month.
Press the CHANNEL UP/DOWN to select your desired year.
Press the CALENDAR button again to exit the calendar display.
Note:
The year can be selected from 1900 to 2099.
10.3 BIOLOGICAL CLOCK
This function can make you know about the low tide, high tide and critical stage
of you intellect, emotion and force at a certain day so as to live harmony with the
rhythms of environment.
Activate the FEATURE menu.
Press CHANNEL DOWN button to enter submenu selection.
Press CHANNEL UP/DOWN button to select Biological Clock.
Press OK button, the display as shown will appear.
Press CHANNEL UP/DOWN button to select the year, month and day.
Press VOLUME UP/DOWN button to adjust to the correct date of your birthday,
and correct date of the target day.
Then from the display on the screen you can conclude that your intellect,
emotion and force are at what stage. If almost all in high tide shows that you
have most chance doing things successfully, or vice versa.
BIOLOGICAL CLOCK
BIRTHDAY
1977-04-18
TARGET DAY
2002-07-01
INTELLECT
EMOTION
FORCE
ADJUST
SELECT SUM
NOTE:
The target day should be set to a day after your birthday.
10.4 SMART TIMER
If Smart Timer is turned on, the TV will turn off automatically after 4 hours without
any operation on the set.
Activate the FEATURE menu.
Press the CHANNEL DOWN button to enter the submenu.
Press the CHANNEL UP/DOWN button to select Smart Timer.
Press the VOLUME UP/DOWN button to turn it on or off.
20
Language
English
C.Capt
Off
Child Lock
Off
Smart timer
Off
Calendar
Biological Clock
11. TROUBLESHOOTING
Sometimes a performance problem can be easily solved by checking apparent but often overlooked
possibilities.
Before arranging for service,check these items. It could save your time and money.
Closed Caption Problem
Possible Remedy
You are watching a live broadcast and spelling errors made by the closed
captioning production company pass through uncorrected. A prerecorded
program will not show any misspelled words because of the normal time
available for editing the captions.
My TV is showing captions that are
misspelled.
My TV will not show the text in its entirety
or there is a delay of what is being said.
My caption are scrambled with white boxes
on the screen.
Captions that are delayed a few seconds behind the actual dialogue are
common for live broadcast. Most captioning production company can
display a dialogue to maximum of 220 words per minute. If a dialogue
exceeds that rate. Selective editing is used to ensure that the captions
remain up-to-date with the current TV screen dialogue.
Interference caused by building, power lines, thunderstorms, etc. may
cause scrambled or incomplete captions to appear.
My program guide listed a TV show as being Broadcasters may at times use a time compression process to the actual
program so that additional advertisting time can be given.Since the decoder
closed captioned, but none of the captions
cannot read the compressed information, captions will be lost.
were displayed.
My prerecorded videotape does not show The videotape was either an illegal copying or the tape duplicating company
any caption. The tape box mentions it being accidentally left out the captioning signals during the copying process.
closed captioned.
POSSIBLE REMEDY
Is TV power cord connected.
Is the power switch turned on?
Try a new channel, if OK, possible
station trouble.Is TV in standby mode?
Is antenna connected to terminal
on the jack of the set?
If outside antenna is being used,
check for broken wire.
Check for lock interference.
Turn off the power switch and
then turn it on after one minutes.
Adjust color control.
Adjust CONTRAST&BRIGHTINESS
control
Check batteries in remote control
21
Picture blured
No picture or sound
Picture OK,sounds poor
Sounds OK,picture poor
Ghosts in picture
Weak picture
Lines or streaks in
picture
No color
Poor reception on some
channel
Picture rolls vertically
Picture distorted
Bars on screen
You are in the TEXT mode. Select CAPTION mode or CAPTION (OFF)
Remote control doesn't
work
No power
PROBLEM
My TV screen show a black box on
certain channels.
12. SPECIFICATION
MAIN UNIT
TV Receiving System
AV Colour System
Closed Caption System
Channel Coverage
VHF
UHF
CATV
Tuning system
Channel Access
Language of OSD
Antenna Input
CRT Size
Video Input/Output
Audio Input
Audio Output
Audio Output Power
Operating V oltage
Power Consumption
Dimensions
Net W eight
PAL M/N, NTSC-M
NTSC3,58 , NTSC4.43 , PAL4.43 , PAL M/N
SS 15.119/ FCC
2-13
14-69
2-13, a-w,w+1~W+84, A-5~A-1, 5A
181 Channels Frequency synthesized tuning system
Direct Access Keyboard
Channel Up/Down
English, Spanish, French and Portuguese
VHF/UHF/CATV 75OHM Unbalanced (F-Type)
74CM
75-ohm 1.0Vp-p, RCA
10k ohm 0.5 Vrms, high impedance
1k ohm 0.5 Vrms
6W+6W
110-240V~, 50/60Hz
130W
812X519X622 MM
45 kg
INFRA-RED REMOTE CONTROL
Features
Effective Distance Power
Power Supply
Full Function Remote Control
8 meters
DC 3V (two batteries, size AA)
PACKING LIST
1. Remote Control Handset - one set
2. Operation Manual - one pc
Product is subjected to change without notice.
72-BA71S6-X489B
22