1
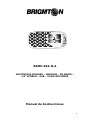
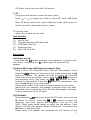
BAMP-604-N-A
ALTAVOZ MULTIMEDIA – MICROSD - RADIO FM PANTALLA 1.8” – USB – GRABADORA
Manual de Instrucciones
1
Gracias por comprar nuestro producto. Para garantizar un
funcionamiento correcto lea cuidadosamente este manual antes de
usarlo.
Medidas importantes de seguridad
- Mantenga los altavoces alejados del agua y otros líquidos.
- Mantenga los altavoces alejados de cualquier fuente de calor.
- Ajuste el volumen a un nivel adecuado a fin de evitar daños a sus
oídos, o la propia unidad.
- Cargue la batería por completo antes de usar por primera vez.
Solución de problemas
1. ¿Qué debo hacer si la tarjeta Micro SD o USB Flash Disk no
funcionan?
(1) Asegúrese de que la tarjeta Micro SD o USB Flash Disk está en
buenas condiciones. Compruebe también que los archivos de audio
son los formatos correctos - MP3 / WMA.
(2) Puede que exista algún problema de compatibilidad de la tarjeta
Micro SD / disco flash USB. Le recomendamos formatear la tarjeta
Micro SD o el USB stick a los formatos de archivos FAT32.
2. Estoy usando el modo de FM, pero no recibe ninguna estación de
radio. ¿Cómo puedo mejorar la fuerza del que habla la señal de FM?
Asegúrese que el altavoz está en un área capaz de recibir una señal
de FM. Por favor, trate de usar un conjunto de auriculares o un cable
de audio a modo de antena externa para mejorar la señal.
3. ¿Qué debo hacer si la función USB AUDIO no funciona?
(1) Conecte el altavoz al ordenador por medio del cable USB incluido,
entrar en el modo USB AUDIO. A continuación, reproducir el
vídeo/audio desde el ordenador.
(2) Si no puede usar esta función puede ser debido a problemas de
incompatibilidad de la tarjeta de sonido del altavoz con el ordenador.
Por favor, intente los siguientes pasos: haga clic derecho en Mi PC,
haga clic en Propiedades en el menú contextual, haga clic en el
hardware, haga clic en el administrador de dispositivos, haga clic en
el signo "+", haga clic en el dispositivo de audio USB, haga clic en la
desinstalación. Cambie el altavoz para el modo USB AUDIO de nuevo.
El equipo se actualizará automáticamente para lograr la
compatibilidad.
ESPECIFICACIONES
- Pantalla a color 1,8": Muestra el estado de trabajo, nombre de la
canción, estaciones, etc.
- Conductor de altavoz doble: Doble bobina de voz interna que
2
permite un mejor sonido y Super Bass.
- Entrada USB-MicroSD: Soporta audio MP3-WMA-WAV
- Radio FM: con memorias. (FM Gama de frecuencias 87,5 MHz-108
MHz)
- Función de grabación
- Imagen y vídeo: AVI/AMV con resolución 128x160 e imágenes
JPEG/BMP/GIF.
- Reloj, alarma, temporizador y apagado automático
- Conexión Usb para PC
- Batería de litio, bajo consumo, 1000 mAh (BL-5C).
CONTENIDO
Unidad
Cable USB
Cable de audio de 3.5mm
Batería (1000 mAh)
Manual de Usuario
Correa
Bolsa de transporte
FUNCIONAMIENTO
BOTÓN PLAY
Mantenga pulsado este botón para encender/apagar el altavoz
En modo Micro SD/USB: una pulsación corta para reproducir o pausar
En modo FM / AUX IN / USB AUDIO: Pulse brevemente para
reproducir o silenciar.
BOTÓN AVANCE/RETROCESO
En modo Micro SD/USB: pulsación corta de la canción
anterior/siguiente
En modo FM: Pulse brevemente para acceder a la estación
anterior/siguiente de FM
BOTÓN M
Mantenga pulsado este botón para acceder al menú principal
Pulse AVANCE/RETROCESO para seleccionar el modo deseado y
confirme la selección de nuevo con el botón M.
CONTROL DE VOLUMEN
Ajuste el volumen.
CONEXIONES
- Entrada auxiliar
- Conexión cable mini-USB para carga y PC
- Entrada USB
- Entrada de auriculares jack 3.5 mm,
- Entrada de tarjetas microSD
3
INICIO RÁPIDO
Encendido/Apagado: Mantenga pulsado el botón PLAY/PAUSA para
encender el altavoz, se mostrará el menú principal. Mantenga pulsado
de nuevo para apagar el altavoz.
Reproducción de MicroSD/USB: Coloque una tarjeta Micro SD o USB
en el altavoz, pulse brevemente los botones para seleccionar el modo
de música, a continuación, pulse el botón M para confirmar. El altavoz
reproducirá el dispositivo insertado. Pulse brevemente
avance/retroceso para pasar a la pista anterior o siguiente. Mantenga
pulsado estos botones para avanzar rápidamente. Mantenga pulsado
el botón M para salir de este modo.
Nota: En el modo música, la unidad reproducirá el último dispositivo
insertado.
Radio FM: Pulse brevemente los botones para seleccionar el modo
FM, pulse el botón M para confirmar. Pulse los botones para
seleccionar el canal de radio anterior / siguiente (FM 87.5 a 108
MHz). Pulse brevemente el botón M para seleccionar ajustes
secundarios como búsqueda automática, guardar estación, grabar
radio, eliminar estación, etc. Mantenga pulsado el botón M para salir
de este modo.
Nota: La unidad reproducirá la estación que se escucho por última
vez. Puede mejorar la señal con un cable de auriculares o un cable de
audio a modo de antena externa.
Grabadora: Insertar una tarjeta microSD o USB en la unidad. Pulse
brevemente los botones para seleccionar el modo de grabación, pulse
el botón M para confirmar. Pulse brevemente el botón PLAY para
comenzar, parar y continuar con la grabación. Mantenga pulsado el
botón PLAY para guardar los archivos grabados. Mantenga pulsado el
botón M para salir de este modo.
Entrada auxiliar: Seleccione el modo de entrada auxiliar. Utilice el
cable de audio de 3,5 mm incluido para conectar el altavoz a una
fuente de audio (PC, MP3/MP4, teléfonos móviles).
USB: Use el cable USB para conectar el altavoz al ordenador, pulse
brevemente el botón Mode para entrar en el modo de audio USB, que
le permitirá usar el altavoz como altavoz de su ordenador. La primera
vez que use esta función, el ordenador identificará automáticamente
el altavoz e instalará el controlador para ello.
Reproducción de imágenes y vídeos:
Introduzca una tarjeta microSd o USB con imágenes o vídeos. Pulse
los botones para seleccionar el modo imagen o vídeo, a continuación,
4
pulse el botón M para confirmar. Pulse el botón play para reproducir.
Mantenga pulsado el botón M para salir de este modo.
Función tarjeta de memoria:
Ponga la tarjeta micro SD en el altavoz y utilice el cable USB para
conectarlo al ordenador. El altavoz se encenderá automáticamente y
cambiará modo lector de tarjetas. Entonces, el ordenador reconocerá
automáticamente el dispositivo y podrá guardar información en la
tarjeta Micro SD directamente.
Carga de batería:
Conecte el altavoz a su ordenador con el cable USB para la carga de
la batería. También puede utilizar un adaptador 5V/1000mA (no
incluido) Nota: No carga el altavoz más de 4 horas.
FUNCIONAMIENTO
Mantenga pulsado el botón M para salir del modo de trabajo actual.
La pantalla LED mostrará el menú principal. Pulse cualquiera de los
botones avance/retroceso para seleccionar el modo deseado: SYS
Configuración, Calendario, entrada auxiliar, USB audio, música,
vídeo, grabación, modo de FM o imagen. Pulse el botón M para
confirmar.
1. Calendario
Entre en el modo calendario desde el menú principal. Para ver la
fecha, hora, día de la semana y el año use los botones de avance y
retroceso. La hora y fecha actual se pueden cambiar en el modo
configuración del sistema.
2. Música
En este modo, el altavoz reproducir música desde la tarjeta MicroSD
o USB. La pantalla LED muestra la información relacionada de la
canción incluyendo el título de la canción, artista, álbum, tiempo de
reproducción, la ecualización y el orden de reproducción.
(1) Cuando la música está en reproducción, presione el botón "M"
para entrar en diferentes funciones como EQ, modo de repetición,
etc. Pulse los botones avance/retroceso para seleccionar y el botón
"M" para confirmar.
(2) Modo de repetición: Entre en la función de repetición e
introduzca el modo de repetición (el icono
se mostrará en la parte
inferior izquierda de la pantalla). Cuando la letra A comience a
parpadear, pulse el botón play para ajustar el punto de inicio. Cuando
la letra A deja de parpadear, el punto de inicio está establecido.
Cuando la letra B comienza a parpadear, pulse el botón play para
establecer el punto final. La función de repetición comenzará cuando
las letras A&B dejen de parpadear.
5
(3) Eliminar archivos: Pulse el botón play para pausar la reproducción
de la canción. A continuación, pulse el botón M para entrar en el
menú de configuración de archivo y elija entre estas opciones:
Eliminar archivos: Borrar todo, Atrás y Salir. Uso de los botones de
avance/retroceso para elegir y el botón de M para confirmar.
3. Radio FM
La primera vez que utilice la función de radio FM, necesita sintonizar
las emisoras. Entre en el modo FM, pulse el botón M para: "Búsqueda
automática, Guardar, Grabación de FM, Eliminar, Eliminar todas
Bandas, Salida." Pulse los botones avance/retroceso para seleccionar
y el botón MENU para confirmar. Después de terminar la búsqueda
automática de FM, los canales de radio se guardarán
automáticamente.
4. Grabadora
Entre en el modo de grabación, pulse brevemente el botón play para
iniciar la función de grabación, mantenga pulsado el botón play para
guardar los archivos grabados. Pulse brevemente el botón M
seleccionar otros ajustes: "Ubicación (MicroSD/USB), Tipo de REC y
Salir". Desde el tipo de REC puede establecer 32K-64K-128K. A
mayor tamaño de byte, mayor calidad de sonido pero los archivos
grabados ocuparán más espacio en la memoria.
5. Fotos y vídeos
Entre en el modo de fotos. El dispositivo soporta los formatos
JPEG/BMP/GIF y resolución 160x128. Pulse el botón play para ver las
fotos, pulse avance/retroceso para pasar a la imagen
anterior/siguiente y pulse el botón play otra vez para salir del modo
de imagen. Después de salir de este modo, pulse el botón M para
entrar en el ajuste secundario donde podrá seleccionar Micro
SD/USB, eliminar archivos, eliminar todo y salir. Utilice los botones
avance/retroceso para seleccionar y pulse el botón M para confirmar.
Entre en el modo vídeo. El dispositivo es compatible con AMV/AVI y
resolución a 160x128. Pulse el botón play para reproducir vídeo.
Pulse los botones avance/retroceso para seleccionar archivos
anterior/siguiente y pulse el botón play otra vez para salir del modo.
Después de salir de este modo, pulse el botón M para entrar en el
ajuste secundario donde podrá seleccionar Micro SD/USB, eliminar
archivos, eliminar todo y salir". Utilice los botones avance/retroceso
para seleccionar y pulse el botón M para confirmar.
6. Settings
Entre en el modo configuración del sistema:
(1) Ajuste de la alarma
En la alarma, puede establecer las siguientes sub-opciones pulsando
los botones avance/retroceso y M para confirmar: Alarma (on / off),
tiempo, ciclo, señal de alarma, volumen, y salir. Y a continuación,
6
pulse el botón para volver al menú anterior.
(2) Ajuste de la hora
Entre en la función de introducir la hora, use los botones de
avance/retroceso para ajustar el año/mes/fecha/hora. Pulse el botón
M para confirmar. Y a continuación, pulse el botón para volver al
menú anterior.
(3) Ajuste de la hora de apagado
Entre en el menú de ajustes, podrá elegir la hora de apagado de la
unidad. En el sub-menú: Apague Set-Set Time FM-Salir. Mediante el
uso de los botones de avance/retroceso podrá ajustar el tiempo de
apagado automático. Pulse el botón M para guardar la configuración.
(4) Ajustes Radio FM
Podrá seleccionar “Apague Set-Set Time FM-Salir. A continuación,
entrará en el ajuste secundario "Set Time FM, grabación de FM,
Tiempo FM, banda FM y salida". Mediante el uso de los botones de
avance/retroceso podrá ajustar el tiempo de apagado automático.
Pulse el botón M para guardar la configuración.
“Las especificaciones pueden cambiar sin previo aviso”
Importado: I.R.P., S.L.
Avda. Santa Clara de Cuba 5
41007 Sevilla
Spain
DECLARACIÓN DE CONFORMIDAD
I.R.P., S.L. declara bajo su responsabilidad que el aparato indicado
cumple los requisitos de las siguientes directivas:
DIRECTIVAS EMC
EN55013:2001+A1:2003+A2:2006
EN61000-3-2:2006+A1:2009+A2:2009
EN61000-3-3:2008
EN55020:2007
Descripción del aparato:
Modelo BRIGMTON BAMP-604-A-N
Radio con altavoz incorporado
Importador: I.R.P., S.L.
Dirección: Avda. Santa Clara de Cuba 5, 41007, Sevilla.
7
BAMP-604-N-A
MULTIMEDIA SPEAKER – MICROSD - FM RADIO –
1,8” SCREEN – USB – VOICE RECORDER
Manual de Instrucciones
8
Dear customer,
Thank you for purchasing our product. To ensure correct operation,
please read this user manual carefully before using it.
Important Safety Instructions
◆ Keep speaker away from water and other liquids.
◆ Keep speaker away from any source of heat.
◆ Adjust the volume to a suitable level so as to avoid damaging your
hearing, or the unit itself.
◆ Charge the battery after totally using up for the first time working.
Troubleshooting
1. What should I do if the Micro SD card or USB Flash Disk do not
work?
(1) Ensure that the Micro SD card or USB Flash Disk is in good
condition. Also check that the audio files are the correct formats MP3 / WMA.
(2) Beside the above case, the problem maybe the compatibility of
the Micro SD card/USB flash disk. We recommend you formatting
the Micro SD Card/USB flash disk to FAT32 file formats.
2. I’m using FM mode but the speaker cannot receive any radio
channels. How can I improve the speaker’s FM signal strength?
Make sure the speaker is in an area capable of receiving an FM signal.
Please try using a set of earphone or an audio cable with the speaker.
They act as an external antenna to enhance the signal. Or please try
adjusting the speaker’s direction for better FM signal reception.
3. What should I do if the USB AUDIO function could not work?
(1) Connect the speaker to the computer via the USB cable included,
and enter the USB AUDIO mode. And then play the video/ audio
from the computer.
(2) If it could not work, it may be the problem that the sound card of
the speaker is incompatible with the computer. Please try below
steps: right click My Computer---click Properties from the shortcut
menu---click the hardware---click the device manager--- click the
“+” in front of the Voice video and games controller---right click
the USB Audio device---click the uninstall. Then please switch the
speaker to USB AUDIO mode again. The computer will
automatically update the USB sound card drive to achieve the
compatibility
Features
9
● 1.8" Color screen display
Display the working status, song’s name& lyric both in Chinese and
English with easily operation
●Dual Voice Coil Driver
Peculiar Dual voice coil internal magnetic driver design, with better
sound and super bass
●USB Flash Disk / Micro SD Card Music Playing
Dual decodes of MP3/WMA/WAV, support the entire MP3/WMA coding
rate
●FM Radio
Support auto scan and save the FM channels, support FM Record (FM
frequency Range 87.5 MHz—108MHz)
●Record Function
Record the sound and playing
●Browse Picture and Video playing
Support 128*160 Resolution JPEG/BMP/GIF format picture and
AMV/AVI video
●Timer ,alarm and power off setting
Support Time/alarm. Power off setting
●Card Reader and One Cable Function
The 2.0 card reader, USB sound card and charging functions can be
achieved via the same USB cable
●Removable Li battery
Low power consumption design with the 1000 mAh BL-5C battery.
Package Contents
Speaker, USB Cable, 3.5mm Audio Cable, Lithium-Ion battery(1000
mAh), User Manual, Strap, speaker pouch.
Keys
(1)
Long press this button to power on/ off the speaker
Micro SD Card/ USB Flash Disk Mode: short press to play/Pause
FM/AUX IN/USB AUDIO: Short press to play/mute.
(2)
Micro SD Card/ USB Flash Disk Mode: short press for the previous
song
FM Mode: Short press for previous FM channel
(3)
Micro SD Card/ USB Flash Disk Mode: short press for the next
song
10
FM Mode: Short press for next FM channel
(4) M
Long press this button to enter the main menu
Press
or
to select the mode of Micro SD Card, USB Flash
Disk, FM Radio, Record etc., when select the mode, Short press ‘M’
button to confirm and enter into the mode.
(5) Volume roller
Adjust the volume via the roller
Jack and Slot
(1)
(2)
(3)
(4)
(5)
Aux In jack
Charging and the USB Cable jack
USB Flash Disk Slot
Earphone Jack
Micro SD Card Slot
Quick Start
(1) Power on/off
Long press the " " button to power on the speaker, it will show the
main menu. Long press the " " button again to power off the
speaker.
(2) Micro SD Card/ USB Flash Drive Music Play
Place a Micro SD Card/USB Flash Disk into the speaker, short
press the / buttons to select the music mode, then press the M
button to confirm. The speaker will play the Micro SD card/USB
Flash Disk music accordingly. Short press the
/
buttons for
previous/next song, long press the
/
buttons for fast –
forward or fast-reverse. Press the
button for play/pause. Long
press the M button to exit this mode.
Please Note: Under Music mode, the last inserted device will be
played first. For example: The speaker is playing music from USB
flash disk, then inserting the Micro SD card, the speaker will begin
to play music form Micro SD card.
(3) FM Radio
Short press the / buttons to select the FM mode, then press the
M button to confirm. Press the
/
buttons to select the
previous/ next radio channel (FM frequency from 87.5 to 108
MHZ). Short press the M button to select the sub setting: “Auto
Search, FM Save, FM Record, Delete Channel etc.” Long press the
M button to exit this mode.
Please Note: The speaker can remember the FM channel of last
11
time played before power off. When inserting the earphone or
3.5mm audio cable into the speaker, which can act as the external
antenna to enhance the FM signal.
(4) Recorder
Please put the Micro SD Card/ USB disk into the speaker. Short
press the / buttons to select the Record mode, then press the
M button to confirm. Short press the
button to “begin, pause
and continue the record”. Long press the
button to save the
recorded files. Long press the M button to exit this mode.
(5) Aux In
Enter the Aux In mode. Use the 3.5mm audio cable included to
connect the speaker to an audio source (PC, MP3/MP4, mobile
phone). The speaker will play the music from the audio source.
(6) USB AUDIO
Please use the USB cable to connect the speaker to the computer,
short press the Mode button to enter the USB Audio Mode, which
will work as a computer speaker. The first time to use this
function, computer will automatically identify the speaker and
install the driver for it.
(7) Browse Picture and Video playing
Please put the Micro SD Card/ USB disk into the speaker (Saved
/
buttons to select
with the picture/ video). Press the
Picture/video mode, then press the M button to confirm. Press the
button to browse the picture/play video. Long press the M
button to exit this mode.
(8) Card Reader Function
Put Micro SD card into the powered off speaker and use the USB
cable to connect it to the computer. The speaker will automatically
power on and switch to card reader mode, and display
on
the LED. The computer will then automatically recognize the
device and the Micro SD card will be able to be read /written on
the computer directly. Please note the card reader function is for
Micro SD Card Only.
(9)Charging Function
Please connect the speaker to the computer by the included USB
cable for charging. It also can use the branded 5V/1000mA
adaptor for charging.
Please Note: Not charging the speaker more than 4 hours
12
Instructions
Long press the M button to exit the current working mode. The LED
screen will display the main menu. Press either
/
buttons to
select the mode you require: SYS Settings, Calendar, Aux In, USB
AUDIO, Music, Video, Record, FM Mode or Picture. Press the M button
again to confirm.
1. Calendar
Enter the calendar mode, to view the date, time, day of the week,
and year by using the |<</ >>|buttons. The current time and
date can be set in the system time under system setting.
2. Music
Under this mode, the speaker will play music from Micro SD Card/
USB Flash Disk. The LED screen will display the related information
of the song including the song’s title, artist, album, playing time,
code rate, EQ and the playing order.
(1) When music is under playing, press the “M” button to enter
“Cycle Mode, EQ Setting, Repeat Mode, and Exit”. Press the
|<</>>| buttons to choose and the “M” button to confirm.
(2) Repeat Mode: From MENU, enter the repeat function for
“Repeat Mode, Repeat Times and Repeat Interval”.
Enter Repeat Mode (the
icon will be displayed at the left
bottom of the LED screen). When the letter A begins to flash,
press the >>| button to set the start point. When the letter A
stops flashing, the start point is set. When the letter B begins to
flash, press the >>| button to set the end point. The repeat
function will commence when the letters A&B stop flashing.
Enter Repeat Times can set the times of the repeated content.
Enter Repeat Interval can set the repeat content’s intervals.
(3) Delete File: Press the >|| button to pause playing the song.
Then press M button to enter the file setting menu: “Micro SD
Card Files, USB Flash Disk Files, Delete Files, Delete All, Back and
Exit”. Using the |<</>>| buttons to choose and the M button to
confirm.
3. FM
The first time to use the FM function, need to auto search the local
FM channels. Enter the FM mode, press the M button for: “Auto
Search, Save Channel, FM record, Delete Channel, Delete All,
Common Band, Japan band, Exit.” Please press the |<</>>|
buttons to choose and the MENU button to confirm. After finishing
the FM auto search, the radio channels will be saved on the
speaker.
13
4. Recorder
Enter the Recorder mode, short press the
button to start the
record function, long press the
button to save the recorded
files. Short Press the M button for the sub setting “Record Gain
Set(Micro SD/USB), REC Type and Exit”. From the REC Type can
set the record byte (32K-64K-128K).The byte larger, the sound
quality will be higher, meanwhile the recorded files will take up
more memory space.
5. Browse Picture and Video playing
Enter the picture mode, the speaker supports to browse picture
(format: JPEG/BMP/GIF), and the resolution at 160*128. Press the
button to browse the pictures, press the |<</>>| buttons for
previous/next picture, and press the
button again to exit the
picture mode. After exiting this mode, press the M button to enter
the sub setting ” Micro SD/USB Files, Playing Setting, Delete Files,
Delete All, Exit ”. Use the |<</>>| buttons to choose, and press
the M button to confirm.
Enter the Video mode, the speaker supports to play the video
format AMV/AVI, and the resolution at 160*128. Press the
button to play video, press the |<</>>| buttons for previous/next
button again to exit the picture mode.
video, and press the
After exiting this mode, press the M button to enter the sub
setting ” Micro SD /USB Files, Playing Setting, Delete Files, Delete
All, Exit ”. Use the |<</>>| buttons to choose, and press the M
button to confirm.
6. System Setting
Enter the system setting, it will display: “Alarm, System Time,
Backlight, Tool, Firmware Version, Reset Setting, Exit”. Press the
button to return to the previous menu.
(1) Alarm Setting
In Alarm, you can set the following sub-settings by pressing
the |<</>>| buttons and M button to confirm: Alarm (on/off),
Time, Cycle, Alarm Signal, Volume, and Exit. And then press
the
button to return to the previous menu.
(2) System Time Setting
Enter System Time and use the |<</>>| buttons to adjust the
year/month/date/time. Press M button to confirm. And then
press the
button to return to the previous menu.
(3) Power Off Time Setting
Enter the Tool setting. In Tool, you can choose the power off
set from the sub menu ‘’Power off Set, Time FM Set, and Exit’’.
By using the |<</>>| buttons to adjust the power off time
(with the unit of minute), and press the M button to save the
setting.
14
(4) Time FM Set
Enter the Tool setting. In Tool, you can choose the Time FM set
from the sub menu ‘’Power off Set, Time FM Set, and Exit’’.
Then will enter the sub setting “Time FM Set, FM Record, FM
Time, FM band and Exit”. By using the |<</>>| buttons enter,
and press the M button to save the setting.
“Features can change without notice”
Imported: I.R.P., S.L.
Avda. Santa Clara de Cuba 5
41007 Sevilla
Spain
DECLARATION OF CONFORMITY
I.R.P., SL declare under our responsibility that the equipment meets
the requirements indicated in the following directives:
EMC DIRECTIVES
EN55013: 2001 + A1: 2003 + A2: 2006
EN61000-3-2: 2006 + A1: 2009 + A2: 2009
EN61000-3-3: 2008
EN55020: 2007
Description of apparatus:
BRIGMTON Model BAMP-604-A-N
Radio with built-in speaker
Importer: I.R.P., SL
Address: Avenida Santa Clara de Cuba 5, 41007, Sevilla.
15