1
F-04C
INSTRUCTION MANUAL
’11.1
DOCOMO W-CDMA System
Thank you for purchasing "docomo STYLE series F-04C" mobile terminal.
Before using F-04C, read this manual to ensure safe use and handling.
Instruction manuals for F-04C
The operations of F-04C are described in this manual, "使いかたガイド (Guide)" (installed in FOMA terminal) and "Instruction manual (detailed version)"
(PDF file).
・
・
・
・
Instruction manual (this manual)
This manual provides information about screens and operations of basic functions.
*
is index term for "使いかたガイド (Guide)". (In Japanese only)
"使いかたガイド (Guide)"
(installed in FOMA terminal)
This guide provides overviews and operations of frequently-used functions. (In Japanese only)
In F-04C Stand-by display, mef LifeKite* GuideeSelect a search method
"Instruction manual (detailed
version)" (PDF file)
This manual provides detailed information and operations of all the functions. (In Japanese only)
<From a PC> This manual can be downloaded from NTT DOCOMO website.
http://www.nttdocomo.co.jp/support/trouble/manual/download/index.html
* The URL and contents are subject to change without prior notice.
In this "F-04C INSTRUCTION MANUAL", "F-04C" mobile terminal is usually referred to as "FOMA terminal".
In this manual, screen images with Kisekae Tool and Color scheme set to "White" are provided.
The images or illustration used in this manual are examples. They may differ from the actual displays.
In this manual, "authenticate" indicates the operating procedure for entering the terminal security code in 4-8 digits (⇒P31).
Basic package
F-04C
(including Back Cover
F56 and warranty)
Battery Pack F19
Instruction manual
(Japanese version)
CD-ROM
for F-04C
Touch pen F01
Compatible options ⇒P76
・ Unauthorized copying of parts of or this entire manual is prohibited.
・ The contents in this manual, URL and contents are subject to change without prior notice.
Contents
Introduction
Enjoy
FOMA terminal ...............................................................
What you can do with F-04C .........................................
Part names and functions..............................................
Precautions (Always follow these directions) .............
Handling precautions .....................................................
2
3
4
7
14
Basic Operation
Before Using...................................
Screen Explanation........................
Character Entry ..............................
Sound/Screen Setting...................
Lock/Security .................................
Introduction
Camera ............................................
1Seg.................................................
Music ...............................................
i-αppli ..............................................
i-motion/Movie...............................
53
56
58
60
61
More Convenient
17
20
23
25
30
Connect
Osaifu-Keitai ...................................
i-concier...........................................
Convenient tools ............................
Data Management..........................
62
63
64
66
Support ............................................................................
Appendix..........................................................................
Index.................................................................................
70
77
88
Others
Connect
Call Telephone................................
Mail..................................................
Phonebook......................................
37
45
48
i-mode/Full Browser......................
i-Channel.........................................
49
52
Basic
Operation
Search
Enjoy
More
Convenient
Search
Others
1
FOMA terminal
・ Because your FOMA terminal uses wireless transmission, it may
Introduction
・
・
・
・
2
not function in locations where it is difficult for radio waves to
penetrate, such as tunnels, underground passages and some
buildings, in areas where radio waves are weak, or out of service
area. Even when you are high up in a tall building or condominium
and nothing blocks your view outside, your FOMA terminal may
not be able to receive or transmit signals. Also, communication
may be interrupted even when the signal meter on your FOMA
terminal indicates there are strong radio waves and you are not
moving (traveling).
Use your FOMA terminal in a way that does not disturb others in
public spaces, crowded locations or quiet places.
Because your FOMA terminal uses radio waves to communicate,
it is possible that a third party may attempt to tap your calls.
However, the W-CDMA system automatically applies a
confidential communication function to all calls, so even if a third
party could somehow tap a call, they only hear noise.
Your FOMA terminal encodes voice communication as digital
data. When you are operating your FOMA terminal while moving
to a location subject to weaker radio wave conditions, the
transmitted digital data may not be correctly decoded and as a
result the decoded voice may differ somewhat from the actual
voice.
Maintain a separate record of the data (Phonebook, Schedule,
Notepad, Recorded messages, Voice memos, Moving picture
memos, etc.) you registered in your FOMA terminal. Note that
DOCOMO assumes no responsibility for any loss of saved
contents of data resulting from malfunction, repair, changing of
the model or other handling of FOMA terminal.
・ You are recommended to save important data to microSD card.
Using DOCOMO keitai datalink, you can transfer and save
phonebook, mail, schedule and other data to a PC.
・ The user hereby agrees that the user shall be solely responsible
for the result of the use of SSL/TLS.
Neither DOCOMO nor the certifier as listed herein makes any
representation and warranty as for the security in the use of SSL/
TLS. If the data should be erased, DOCOMO assumes no
responsibility for the loss of any data.
Certifier: VeriSign Japan K.K., Cybertrust Japan Co., Ltd.,
GlobalSign K.K., RSA Security Japan Ltd., SECOM Trust Systems
Co., Ltd., Comodo CA Ltd., Entrust, Inc.
・ This FOMA terminal supports FOMA Plus-Area and FOMA HIGHSPEED Area.
・ FOMA terminal can be used only via the FOMA network provided
by DOCOMO and DOCOMO's roaming area.
What you can do with F-04C
i-concier 63
iコンシェルは
あなたの欲しい情報を
お届けします。
"ひつじのしつじくん®
(Butler Sheep)"
©NTT DOCOMO
使いかたガイド (Guide)
23
Guide is useful for checking an operating
procedure of the function you want to use
on FOMA terminal. Without Instruction
manual at hand, you can check the
operations immediately. (In Japanese
only)
International Roaming (WORLD WING) Highly-functional camera 53
Camera offers a lot of high functionality
like digital camera such as "Tracking
focus", "Smile-finder", "Find-me focus" or
"Face correction".
Approximately 130 pixels (effective pixel)
in-camera allows you to shoot yourself
finely.
Kid-safe mode Introduction
i-concier is a service for supporting your
life like a butler or concierge. It stores your
data (residential area information,
schedule, ToruCa, phonebook, etc.) to
deliver matching information for area or
location or your preference at the right
time.(In Japanese only)
35
You can restrict usable functions, so you
can let your child use FOMA terminal
without anxiety.
43
While staying overseas, you can use the
same FOMA terminal, phone number and
mail address as those used in Japan (3G
Areas are supported).
3
Part names and functions
Part names of F-04C and major functions assigned to each part are as follows. Some keys work for the different function by pressing length. When
using function, check the operation with this manual or "使いかたガイド (Guide)" (in Japanese only) installed in the FOMA terminal.
Introduction
Connecting Stereo Earphone Set 01 (Optional) for external connection jack
*Use AC adapter jack.
Stereo Earphone
Set 01
*Illustrations are examples. Printed characters and mark vary by the color of
FOMA terminal body color.
4
AC adapter
External connection
jack
n Kurukuru-key (Multi-cursor key)⇒P22
Move the cursor or operate a menu
g : Perform an operation.
u : Display Scheduler, or adjust the
volume.
d : Display Phonebook, or adjust the
volume.
l : Display Received calls.
r : Display Redial.
* Operation in eight directions is available
depending on the functions.
o C Camera key
Activate the still camera shooting/Graffiti
picture
p I i-mode/i-αppli key
Display iMenu or i-αppli folder
q f Power/End key
Turn on/off FOMA terminal or exit a
function
r # #/Silent mode key
Enter "#" or punctuation, or start/cancel
Silent mode
s s Multitask key
Perform another function during call or
operation (Multi-access/Multi-task)
t Mirror
u FOMA antenna (built-in)
* Do not cover it with your hand.
v Out-camera
Shoot still image/moving picture or send
image via Videophone
w Infrared data port
Use this port for infrared communication or
infrared remote control function
x
Mark
Use Osaifu-Keitai or send/receive data by
iC transmission
y Back cover
* To access UIM slot and the microSD card slot,
remove the back cover and the battery pack.
z Charging jack
A Speaker
Hear ring alert or voice of the caller using
the handsfree function
B Light/Shooting light
Use as camera light for still image shooting
or Handy light
C Strap opening
D External connection jack
Connect optional AC adapter, DC adapter,
FOMA USB Cable with Charge Function 02,
Stereo Earphone Set 01 etc.
E z Lock key
Turn the screen off in slide style or activate
Operation lock in closed style
F Z Side camera key
Stop each alarm sound or vibration,
activate quick recording message during
incoming call or activate/deactivate Voice
memos or movie memo during call, or
activate the still camera shooting
G N Side multi-key
Perform another function during call or
operation (Multi-access/Multi-task)
H 1Seg antenna
* Extend it when watching for fully reception of
the air waves.
I Microphone
* Do not cover it during use.
Introduction
a Light sensor
* Do not cover the sensor with your hand or a
sticker.
b Earpiece
c Display (Touch panel)⇒P20, 55
* Used as touch panel only for Graffiti picture.
d m MENU key
Display a menu
e a Mail key/Character key
Display the mail menu or switch input
mode
f n Start a voice call key
g c ch/Clear key
Display i-Channel or return to the previous
screen
h 0-9 Keypads
Enter phone number or characters, or
select an item
i * */Public mode (Drive mode) key
Enter "*" or voiced/semi-voiced sound, or
start/cancel Public mode (Drive mode)
j T i-Widget/TV key
Start/Exit i-Widget or start 1Seg
k U Search key
Activate Quick search
l In-camera
Shoot yourself or send your image via
Videophone
m Light
Turn on or blink when the battery charges,
receiving call, etc.
5
Usage style
You can use the FOMA terminal function even when the FOMA
terminal is closed.
Point
・ Do not give excessive force when opening/closing the FOMA terminal. It
may cause malfunction or damage of the keypad or the display.
Introduction
・ Do not close the FOMA terminal with the strap held inside. It may cause
malfunction or damage.
・ Do not put label, sticker, etc. on the back side of the display or the keypad
side. It may cause malfunction or damage.
・ When you carry the FOMA terminal, close the FOMA terminal and activate
Closed style
Slide style
(Closed)
(Opened)
*Illustrations are examples. Printed characters and mark vary by the color of FOMA
terminal body color.
Operation lock by pressing z to avoid erroneous key operation and save
battery consumption.
・ Do not place the terminal with the face of display downward on a desk etc.
It may cause scratch on the display surface.
・ When you put the terminal in a bag etc., be careful not to have a scrape on
the display by solid object. It may cause scratch, malfunction or damage.
Slide the FOMA terminal upward (open the FOMA terminal) to use
in slide style. To use in closed style, slide in the reverse direction
(close the FOMA terminal).
Slide style
All key operations are available in slide style.
Closed style
In closed style, vertical and horizontal views can be switched
according to tilt of the FOMA terminal by the auto rotation in
Motion sensor.
In closed style, menu operations, power ON/OFF operation can be
done.
Information
6
・ You can set to view editing screen etc. by opening the FOMA terminal 【 スライド編集設定 (Slide and edit)】or answer an incoming voice call by
opening the FOMA terminal 【
着信オープン応答 (Open and answer)】.
Precautions (Always follow these directions)
・ Before using the FOMA terminal, or when necessary, read the
DANGER
WARNING
CAUTION
This sign denotes that death or serious
injury may directly result from improper use.
This sign denotes that death or serious
injury may result from improper use.
This sign denotes that minor injury or
damage to property may result from
improper use.
・ The symbols below show specific directions.
This symbol denotes that the action is prohibited.
Don’t
No disassembly
No wet hands
No liquids
Do
Unplug
This symbol denotes that disassembling the phone or its
components is not allowed.
Introduction
precautions below to ensure safe use and handling. After reading
this manual, keep it carefully.
・ These precautions are intended to protect you and others around
you. Read and follow them carefully to avoid injury, damage to the
product or damage to property.
・ The signs below differentiate between the levels of danger that can
occur if the product is not used within the specified guidelines.
This symbol denotes that using the phone or its
components with wet hands is not allowed.
This symbol denotes that using the phone or its
components in a bathroom or other highly humid area is
not allowed.
This symbol denotes that an instruction must be obeyed at
all times.
This symbol denotes that the equipment should be
unplugged.
■ Precautions contain the description below.
Handling FOMA terminal, battery pack, adapter, UIM and touch pen (common)
............................................................................................................................ 8
Handling FOMA terminal...................................................................................... 9
Handling battery pack ......................................................................................... 10
Handling adapter................................................................................................. 11
Handling UIM....................................................................................................... 12
Handling touch pen............................................................................................. 12
Handling mobile phones near electronic medical equipment ........................ 12
7
WARNING
Handling FOMA terminal,
battery pack, adapter, UIM and
touch pen (common)
Introduction
DANGER
Do not use, store, or leave the
equipment in hot areas such as near
Don’t flames or in areas under strong direct
sunlight such as inside a vehicle.
Don’t
Do not disassemble or remodel the
equipment.
Turn FOMA terminal OFF and stop
charging before entering a place such
as a gas station where flammable
gases are generated.
Do
The gas may catch fire.
When using Osaifu-Keitai in a place as a gas
station, turn OFF the terminal before using it.
(When IC card lock is activated, deactivate it
before turning OFF the terminal.)
May cause fire, burns, injuries, electric shock.
Use the battery pack and adapter
specified by NTT DOCOMO for your
FOMA terminal.
Do
If the equipment starts giving off a
strange smell, overheats, becomes
discolored or deformed during use,
charging or in storage, immediately
perform the following operations.
・ Remove the power plug from the wall
outlet or cigarette lighter socket.
・ Turn FOMA terminal OFF.
・ Remove the battery pack from FOMA
terminal.
Failure to do so may cause fire, burns,
injuries, electric shock.
The terminal may fall and cause injuries.
Do not store the equipment in
extremely humid, dusty or hot areas.
Don’t
Do
Do not let the terminal get wet with
water, drinking water, urine of pet
No liquids animals, etc.
8
Don’t
Do not cover or wrap the terminal
with a blanket, etc while using or
Don’t charging.
May cause fire or burns.
Failure to do so may cause fire, burns,
injuries, electric shock.
Do not leave the equipment on
unstable or sloping surfaces.
May cause fire, burns, injuries, electric shock.
May cause fire, burns, injuries, electric shock.
No disassembly May cause fire, burns, injuries, electric shock.
Do
May cause fire, burns, injuries, electric shock.
Keep conductive materials (metal
pieces, pencil lead, etc.) from coming
Don’t in contact with the charging jack or
external connection jack. Do not put
those materials inside the terminal.
May cause fire, burns or injuries.
Do not put the terminal into heating
cooking device such as microwave
Don’t oven or high-pressure container.
CAUTION
Do not throw the equipment or give
hard shock to it.
May cause fire, burns, electric shock.
Children using the equipment should
be instructed in proper operation by
an adult. Do not allow them to use the
equipment without adult supervision.
May cause injuries.
Store the equipment out of reach of
small children.
Do
Do
May be accidentally swallowed or cause
injuries.
Be careful especially when using
FOMA terminal connected to the
adapter continuously for a long time.
If you use i-αppli, a videophone call or 1Seg
watching while charging the battery for a
long time, FOMA terminal, battery pack and
adapter may be heated.
Directly touching a hot part for a long time,
you may have redness, itching or rash on
your skin, or it may result in low-temperature
burns depending on your constitution and/or
health condition.
Handling FOMA terminal
WARNING
Do
Do not direct the infrared data port
toward home electric appliances etc.
Don’t equipped with infrared device when
using infrared communication.
May cause an accident because of
malfunction of infrared device.
Do
May impair eyesight. And may cause
accidents like injury etc., by dazzling or
astounding other people.
Do not put foreign objects such as
liquid like water, metal pieces or
Don’t burnable things into UIM slot or
microSD card slot.
Don’t
Failure to do so may cause the equipment to
fail or malfunction.
* Examples of electronic equipment to avoid.
Hearing aids, implanted pacemakers or
defibrillators, other electronic medical equipment,
fire alarms, automatic doors and other automatic
control equipment.
Users wearing implanted pacemakers or
defibrillators or other electronic medical
equipment should check with the manufacturer or
sales outlet about the effect of radio frequencies
on the equipment.
Do
Do
If you have weak heart, be careful
when setting the Vibrate alert
(vibration) or alert volume setting.
May cause harmful effect on heart.
May disturb driving and cause an accident.
Do
Do
To sound the high-pitched alarm,
always keep FOMA terminal away
from your ears.
Failure to do so may cause hearing defect.
When you use electronic medical
equipment, check with the equipment
manufacturer to determine how the
device is affected by radio waves
before using.
May cause harmful effect on electronic
medical equipment etc.
When the display or camera lens is
accidentally broken, be careful of
broken glass or exposed internal parts
of FOMA terminal.
Surfaces of display and camera lens are made
of plastic panels and they are structured for
the glass not to scatter, however, if you
mistakenly touch broken or exposed parts,
you may be injured.
Too loud volume may cause a hearing loss.
And, if you cannot hear the sound around you
clearly, it may cause an accident.
May cause fire, burns, injuries, electric shock.
Do not turn on the light aiming
directly at the driver of the car etc.
When you talk by setting handsfree or
ring alert is sounding, keep FOMA
terminal away from your ear.
And, when connecting the earphone/
microphone to FOMA terminal and
play a game or music, adjust the
volume moderately.
Turn FOMA terminal OFF near highprecision electronic control
equipment or electronic equipment
using low-power signals.
Introduction
May cause harmful effect on eyes.
Do not turn on the light by getting the
lighting part closer to other person's
Don’t eyes.
Do
Failure to do so may cause electronic
equipment or electronic medical equipment
to fail or malfunction. If the function which
automatically turns the power ON is set,
cancel the setting before turning the power
OFF.
When using the phone in a medical facility, be
sure to observe the regulations of the facility.
If you do prohibited act such as using the
phone in an airplane, you will be punished
according to law.
Do not direct the infrared data port
toward your eye and transmit signals.
Don’t
Turn FOMA terminal OFF in areas
where use is prohibited, such as in
airplanes and hospitals.
CAUTION
Do not swing FOMA terminal by its
antenna or strap.
Don’t
May cause accident such as injury to yourself
or others by hitting.
9
Do not use damaged FOMA terminal.
May cause fire, burns, injuries, electric shock.
Don’t
Do
Introduction
When using the motion tracking or
motion sensor, check the safety
Don’t around you, hold FOMA terminal
firmly, and do not shake it
unnecessarily.
May cause accident such as injuries.
If the display part is accidentally
broken and liquid crystal leaks out, do
Don’t not make the liquid contact with your
skin of face or hands.
May cause loss of sight or skin problems.
If the liquid gets into your eyes or mouth,
rinse it with clean water and see a doctor
immediately.
And, if the liquid adheres to skin or clothing,
use alcohol etc. to wipe it off, then wash with
soap.
Do
To use the terminal in car, check with
automobile manufacturer or dealer to
determine how the device is affected
by radio waves before using.
In rare cases, using the phone in some vehicle
models can cause the vehicle's electronic
equipment to malfunction. In that case, stop
using the terminal immediately.
Do
10
Mobile phones can give some users
skin problems such as itching, allergic
reactions or rashes. If you develop skin
problems, stop using the phone
immediately, and see a doctor. ⇒
"Material list (P13)"
When opening or closing FOMA
terminal, take care not to have your
fingers or strap caught by the
terminal.
Do not throw the battery pack into the
fire.
Don’t
May cause accident such as injuries.
Do
When watching the display, take a
certain distance from the display in a
fully bright place.
Do not nail the battery pack, hit with
a hammer or step on it.
Don’t
May reduce visual acuity.
Handling battery pack
■ Check that the battery type matches the
type displayed on the battery pack label.
Display
Li-ion 00
Do
DANGER
Check the orientation of battery pack
to install it to FOMA terminal, and do
Don’t not try to force the battery pack onto
FOMA terminal if you are having
trouble installing it.
May cause battery pack to ignite, burst, heat
or leak.
If the battery packs fluid etc. contacts
eyes, immediately flush the eyes with
clean water and see a doctor right
away. Do not rub the eyes.
WARNING
If the battery pack seems to have
abnormalities such as deformation or
Don’t scratches due to falling, never use it.
May cause battery pack to ignite, burst, heat
or leak.
Do not connect a wire or other metal
objects to the jack. And, do not carry
Don’t or store FOMA terminal with objects
like a metal necklace.
May cause battery pack to ignite, burst, heat
or leak.
May cause battery pack to ignite, burst, heat
or leak.
May cause loss of sight.
Battery type
Li-ion battery
May cause battery pack to ignite, burst, heat
or leak.
Do
If the battery pack leaks or gives off a
strange smell, immediately remove it
from the vicinity of open flames.
The vapors from leaking battery pack fluid
may ignite or explode.
Be careful not to let your pet bite the
battery pack.
Do
May cause battery pack to ignite, burst, heat
or leak.
CAUTION
Do not discard old battery packs
together with other garbage.
Don’t
Do not use or charge a wet battery
pack.
Don’t
Do
May cause battery pack to ignite, burst, heat
or leak.
If fluid etc. leaks out from battery
pack, do not make the fluid contact
with your skin of face or hands.
May cause loss of sight or skin problems.
If the fluid etc. put into your eyes or mouth, or
contacts skin or clothes, immediately flush
the contacted area with clean water.
If the fluid put into the eyes or mouth,
immediately see a doctor after flushing.
Handling adapter
WARNING
Do not use the adapter cord if it gets
damaged.
Don’t
May cause fire, burns, electric shock.
Do
May cause fire, burns, electric shock.
Always use the DC adapter with a
negative-ground vehicle. Do not plug
Don’t it into a positive-ground vehicle.
If incorrect voltage is used, this may cause
fire, burns or electric shock.
AC adapter : AC100V
DC adapter : 12 or 24V DC (specific for
negative ground vehicle)
AC adapter for global use : Between 100V and
240V AC (Connect to the AC outlet for
internal household use)
May cause fire, burns, electric shock.
When it starts to thunder, do not
touch adapter.
Don’t
May cause electric shock.
Do not short the charging jack while it
is connected to the outlet or cigarette
Don’t lighter socket. Do not touch the
charging jack with a part of your body
such as your hand or finger.
Only use with the specified power
source and voltage.
When charging FOMA terminal
overseas, use AC Adapter for global
use.
Introduction
May cause igniting or environmental
destruction. Tape the terminals of old battery
packs to insulate them, and then bring them
into a sales outlet such as docomo Shop. If
your local municipality has a battery recycling
program, dispose of them as provided for.
Do not use the AC adapter or desktop
holder in a bathroom or other highly
Don’t humid area.
If the DC adapter's fuse blows, replace
it only with the specified fuse.
Do
Failure to do so may cause fire, burns, electric
shock. For the specified fuse, see the
instructions that come with the DC adapter.
May cause fire, burns, electric shock.
Do not place heavy objects on the
adapter cord.
Don’t
Wipe off any dust that accumulates on
the power plug.
Do
May cause fire, burns, electric shock.
When you insert and remove AC
adapter from power outlet, do not
Don’t contact a metal strap or other metal
objects with the jack.
Do
No wet hands May cause fire, burns, electric shock.
When you connect the AC adapter to
an outlet, do not fail to properly
connect to the outlet.
May cause fire, burns, electric shock.
May cause fire, burns, electric shock.
Do not touch the adapter cord or
outlet with wet hands.
Failure to do so may cause fire, burns, electric
shock.
Do
When you disconnect the adapter
from the outlet or cigarette lighter
socket, do not pull the adapter cord
with excessive force. Instead, hold the
power plug to disconnect.
May cause fire, burns, electric shock.
11
Always remove the power plug from
the outlet or cigarette lighter when
Unplug not using the adapter for an extended
period.
Do not swing around the FOMA
terminal by the touch pen when the
Don’t touch pen is attached to the FOMA
terminal.
Introduction
Failure to do so may cause fire, burns, electric
shock.
Immediately remove the power plug
from the outlet or cigarette lighter
Unplug socket if water or other fluids get into
the adapter.
May cause fire, burns, electric shock.
Always remove the power plug from
the outlet or cigarette lighter socket
Unplug when cleaning the equipment.
Failure to do so may cause fire, burns, electric
shock.
May cause accident such as injury to yourself
or others by hitting.
Be careful of the cut surface when
removing UIM.
Do
May cause injuries.
Handling touch pen
WARNING
Do not point the touch pen at person.
Don’t
12
May cause injury or loss of sight by hitting
yourself or others.
FOMA terminal's signals may affect the
operation of implanted pacemakers or
defibrillators, and other devices.
Handling mobile phones near
electronic medical equipment
■ These precautions are based on the
guidelines produced at the Electromagnetic
Compatibility Conference Japan, regarding
the protection of electronic medical
equipment from radio waves emitted by
mobile phone units.
WARNING
Handling UIM
CAUTION
Do
Obey the following rules inside
medical facilities.
Do
・ Do not bring FOMA terminal into operating
rooms (ORs), intensive care units (ICUs) or
coronary care units (CCUs).
・ Turn FOMA terminal OFF in hospital wards.
・ Turn FOMA terminal OFF in hospital
lobbies and corridors if electronic medical
equipment could be nearby.
・ If the medical facility has specified zones
where use or possession of mobile devices
is prohibited, obey those instructions.
・ If the function to automatically turn ON the
power is set, cancel the setting before
turning the power OFF.
Turn FOMA terminal OFF in crowded
trains or other public places where
pacemaker or defibrillator wearers
could be nearby.
Do
Wearers of implanted pacemakers or
defibrillators must carry and use
FOMA terminal at least 22 cm away
from the implanted device.
FOMA terminal's signals may affect the
operation of implanted pacemakers or
defibrillators, and other devices.
Do
When electronic medical equipment
other than implanted pacemakers or
defibrillators are in use outside of
medical facilities (such as in home care
settings), check with the device
manufacturer to determine how the
device is affected by electrical signals.
FOMA terminal's signals may affect the
performance of electronic medical
equipment.
Material list
Material
Surface
treatment
Kurukuru-key cover
PC+ABS resin UV hard
coating
Movable PA-GF resin
part
Display
UV hard
coating
Movable side
operation key
PC resin
Rear side mirror
Movable ABS resin
part
Exterior
side
surface
UV hard
coating
Material
Movable Stainless steel UV hard
part Back
coating
surface
Movable ABS resin
part Rear
surface
(top end
side)
UV hard
coating
Back
cover
UV hard
coating
Acrylic resin
UV hard
coating
Battery
contacts
Gold
plating
Operation keys
PC resin
UV hard
coating
Screw (Battery install Stainless steel None
recess)
Side keys
PC resin
UV hard
coating
Battery install recess
face
PC board
Lock key
PC resin
UV hard
coating
Charging jack
Stainless steel Gold
plating
Camera panel
Acrylic resin
UV hard
coating
UIM card tray
POM resin
None
Battery
pack
PC resin
None
Wrinkled
Fixed part Screw cap Silicon rubber None
Fixed part PC+ABS resin UV hard
Battery
coating
PC+ABS resin UV hard
coating
Movable part Screw
cap
ABS resin
UV hard
coating
Display panel
Acrylic
resin+PET
sheet
None
Kurukuru-key
PC resin
UV hard
coating
Surface
treatment
None
Acrylic resin
External connection
jack cap
Elastomer
resin (TPEE)
External connection
jack
Stainless steel Tin
plating
Antenna for Antenna
digital
top
terrestrial
Pipe
broadcasting
Root
bend
section
PC+ABS resin Wrinkled
Root
rotation
part
UV hard
coating
Battery
contacts
Material
Battery
PPS resin
contacts
connector
body
Mobile light panel
Fixed part PC+ABS resin UV hard
Keypad
coating
Part
Battery
pack
Beryllium
copper
Contacts Beryllium
copper
Introduction
Surface
treatment
Part
Exterior
case
Part
Gold
plating
Gold
plating
Stainless steel None
Nickel
titanium
None
Stainless steel Nickel
plating
13
Handling precautions
General
Introduction
14
FOMA terminal
・ Do not get wet.
・ Do not press the surface of the touch panel strongly or operate it with sharp
- The FOMA terminal, battery pack, adapter, UIM are not waterproof. Do not use
in a bathroom or other highly humid area or do not let rain attached. Or putting
the terminal on your body, humidity of sweat may cause internal corrosion and
malfunction. Note that malfunctions, which are determined to be caused by such
water as result of inspections, are not covered by the warranty. Since these
conditions are outside the scope of the warranty, a repair, if at all possible, is
charged.
・ Clean FOMA terminal with a dry soft cloth (such as a cloth for eyeglasses).
- Rubbing it roughly with a dry cloth may scratch the display.
- Drops of water or dirt left on the display may cause stains.
- If FOMA terminal is wiped with alcohol, paint thinner, benzine or detergent, the
printing may disappear or color may fade.
・ Clean the jack occasionally with a dry cotton swab etc.
- If the jack is soiled, connection gets worse and it may cause power to be turned
off or insufficient battery charge, so clean the jack with a dry cotton swab etc.
Also, be careful never to damage the jack when cleaning it.
・ Do not place FOMA terminal near an air-conditioner outlet.
- The rapid change in temperature may cause condensation, causing internal
corrosion and malfunction.
・ When using, be careful not to subject excessive force to FOMA terminal or the
battery.
- If FOMA terminal is crammed into a brimming bag or placed in a pocket and sat
on, display, internal PCBs or battery pack may be damaged or malfunction. And,
if external devices are plugged into the external connection jack (earphone/
microphone jack), the breakage of the connector or malfunction may result.
・ Do not rub or scrape the display with a metal piece etc.
- It may scratch the display, causing malfunction or damage.
・ Carefully read the separate instructions that come with the battery pack,
adapter and desktop holder.
objects such as a nail, a ballpoint pen and a pin.
- It may damage the touch panel.
・ Avoid extreme temperature.
- Use the FOMA terminal where the temperature ranges between 5 and 35℃ and
humidity ranges between 45 and 85%.
・ FOMA terminal may affect land-line phones, TVs or radios in use nearby, so use
it as far as possible from these appliances.
・ Maintain a separate record of the data you saved in your FOMA terminal.
- If the data is deleted, DOCOMO assumes no responsibility for the loss of any
data.
・ Do not drop FOMA terminal or subject it to shocks.
- May cause malfunction or damage.
・ Do not plug external devices into the external connection jack (earphone/
microphone jack) at a slant, or do not pull it forcibly while it is plugged.
- May cause malfunction or damage.
・ Do not close FOMA terminal with the strap etc. held inside.
- May cause malfunction or damage.
・ It is normal for FOMA terminal to become warm during use or charging.
Continue to use it.
・ Do not leave FOMA terminal with the camera in areas under strong direct
sunlight.
- May cause discoloring or burn-in of materials.
・ FOMA terminal should normally be used with the external connection jack cap
closed.
- Dust and/or water brought into FOMA terminal cause troubles.
・ Do not use FOMA terminal with the back cover removed.
- It may cause the battery to come off, or may cause a malfunction or damage.
・ Do not put extremely thick stickers on the key side.
- May cause malfunction or damage.
・ Do not put label, sticker, etc. on the back side of the display of FOMA terminal.
Battery pack
・ The battery pack is a consumable part.
- Replace the battery pack if FOMA terminal has extremely short operation time
on a full charge, though it may vary by operating conditions. Purchase a new
battery pack of the specified type.
・ Charge the battery in an area within the proper ambient temperature range (535℃).
・ The operation time provided by the battery pack varies by the operating
environment and battery pack's deterioration.
・ The battery pack may swell out as it comes to near the end of its lifetime
depending on the usage conditions, but it is not a problem.
・ Be careful especially about the following points when preserving the battery
pack.
- Keeping under the state of the full charge (right after charging ends)
- Keeping under the state of the empty charge (too exhausted to turn on FOMA
terminal)
They may cause the battery pack performance to be degraded or its lifetime to be
shortened.
A recommended battery level to preserve the battery pack is the battery icon in 2
cells as a guide.
Adapter
・ Charge the battery in an area within the proper ambient temperature range (535℃).
・ Do not charge the battery in the areas below.
- In areas of excessive humidity, dust or vibrations
- Near land-line phones or TVs/radios
・ It is normal for the adapter to become hot while charging. Continue to use it.
・ When using the DC adapter for charging, keep the vehicle engine running.
- The vehicle's battery could become flat.
・ When using an outlet with a mechanism preventing unplugging, follow the
handling instructions for that outlet.
・ Do not give strong shock. Do not deform the charging jack.
- May cause malfunction.
Introduction
- Label, stickers, etc. may become lodged when opening or closing FOMA
terminal, and may cause malfunction or damage.
・ While microSD card is being used, do not take the card out and do not turn off
FOMA terminal.
- May cause data loss or malfunction.
・ Do not bring magnetic cards etc. close to FOMA terminal or clip it with the
terminal.
- Magnetic data in cash cards, credit cards, telephone cards, floppy disks, etc. may
be erased.
・ Do not bring magnetized objects close to FOMA terminal.
- Bringing strong magnetism close may cause malfunction.
UIM
・ Do not use excessive force to install/remove UIM.
・ Note that DOCOMO assumes no responsibility for malfunctions occurring as the
result of inserting and using a UIM with another IC card reader/writer.
・ Always keep UIM ICs clean.
・ Clean UIM with a soft, dry cloth (such as a cloth for eyeglasses).
・ Maintain a separate record of the data you saved in UIM.
- If the data is deleted, DOCOMO assumes no responsibility for the loss of any
data.
・ To preserve the environment, bring the old UIM to a sales outlet such as
docomo Shop.
・ Take care not to scratch, touch accidentally or short IC.
- May cause data loss or malfunction.
・ Do not drop UIM or subject it to shocks.
- May cause malfunction.
・ Do not bend UIM or place heavy objects on it.
- May cause malfunction.
・ Do not install UIM into the FOMA terminal with a label or sticker put on UIM.
- May cause malfunction.
15
Touch pen
・ Use the attached touch pen for operating Graffiti picture.
Introduction
- If you use other than specified accessory, it may cause damage or turbidity of
the display.
・ Do not use the attached touch pen for another device.
- It may cause malfunction or damage of the device.
FeliCa reader/writer
・ FeliCa reader/writer function of FOMA terminal uses weak waves requiring no
licenses for radio stations.
・ It uses 13.56 MHz frequency band. When using other reader/writers in your
surroundings, keep FOMA terminal away sufficiently from them. Before using
the FeliCa reader/writer, confirm that there are no radio stations using the same
frequency band nearby.
CAUTION
・ Do not use a remodeled FOMA terminal. Using a remodeled terminal violates
the Radio Law.
FOMA terminal is certified according to technical standard conformance of
specified wireless equipment based on the Radio Law, and as a proof of it, the
"Technical Compliance Mark " is depicted on the engraved sticker of FOMA
terminal.
If you remodel FOMA terminal by removing its screws, your certification of
technical standard conformance becomes invalid.
Do not use FOMA terminal with its certification of technical standard conformance
invalid as it violates the Radio Law.
・ Be careful when you use FOMA terminal while driving a car etc.
Using a mobile phone while driving is subject to penal regulations.
However, absolutely necessary cases such as rescue of a sick person or
maintaining public's safety are exempted.
・ Use FeliCa reader/writer function only in Japan.
FeliCa reader/writer function of FOMA terminal conforms to Japanese radio
standards.
If you use this function overseas, you may be punished.
16
Before Using
Attaching UIM/battery pack
After turning power OFF, close FOMA terminal and hold it in your
hand so that you can properly attach UIM/battery pack.
✜ Removing Back Cover
Hold the FOMA terminal firmly in one hand not to slide, while
pressing the back cover with a thumb of the other hand, slide
approximately 3 mm in the direction of the arrow and remove it.
✜ Installing battery pack
With the label side of the battery pack upward,
align convex parts of the battery pack with concave parts of FOMA
terminal and insert the battery pack in the direction of a, press the
battery pack in the direction of b to set it in.
Convex
parts
Basic Operation
Press here with your thumb
Back cover
Battery pack
✜ Attaching UIM
Pull the tab with your finger and pull out the tray until it clicks (a).
Hold UIM with the IC side down, align the corner cut with the tray (b)
and push into the tray until it stops (c).
Tab
UIM
Concave parts
✜ Installing back cover
Align the 6 tabs of the back cover to the notches of the FOMA terminal,
press the back cover in the direction of a without forming any gap
between the FOMA terminal and back cover and slide it in the
direction of b to install.
Back cover
IC
b
Corner cut
Tray
a
Point
・ UIM (blue) is not available for this FOMA terminal. If you have the UIM
(blue), bring it to a docomo Shop.
17
Before Using
Charging
The battery pack does not have a full charge at time of purchase.
Use AC adapter for FOMA terminal to charge the battery before
using FOMA terminal.
Charging using AC adapter
Basic Operation
a Open jack cap (a) of FOMA terminal, hold the
connector horizontally with the arrows side upward
and insert it to the jack (b)
b Unfold the power plug and insert it into a 100V AC
outlet
* Check that the light turns on.
c When charging is over, pull out the power plug from
the outlet, and pull out from FOMA terminal
horizontally while pressing the release buttons on both
sides of the connector
Charging using desktop holder
a Insert the AC adapter connector to the Desktop Holder
with the arrow marks side upward
b Unfold the AC adapter's power plug and insert it into a
100V AC outlet
c With FOMA terminal closed, insert it into the attached
desktop holder
* Check that the light turns on.
d After charging is completed, remove FOMA terminal
from the desktop holder
AC adapter
Light
Power plug
Release
buttons
External connection jack
100V AC outlet
Insert at the back side
Connector
Light
Power
plug
100V AC outlet
Connector
Desktop holder
Release buttons
AC adapter
Jack cap
18
✜ Operations for charging
When charging starts, a charge start alert sounds. While charging, the
light turns on and the battery icon on the display blinks. When
charging is over, a charge completion alert sounds.
Before Using
Before Using
Turning power ON - Configuring default setting
User information
Perform the following operations after turning the power ON for
the first time.
Check your own phone number.
For details of checking/changing a mail address, refer to "Mobile
Phone User's Guide [i-mode] FOMA version".
a f (2 sec. or more)
b On a confirmation screen of enlarged
menu setting, "Yes" or "No"
a me0 User information
The screen shown to the right appears.
The screen shown to the right appears.
Always set Terminal security code. If you
exit without setting, Initial setting screen
reappears when the power is turned ON the
next time.
<Initial setting screen>
d On a confirmation screen of software update function,
g
The stand-by display appears.
Point
・ If no operation is performed, the display light is turned off automatically
according to the settings in Light time-out or eco mode. The display light
turns on again by any operation (other than rotating Kurukuru-key),
incoming call, etc.
・ You cannot turn off the power while Operation lock is set.
Turning power off : f (2 sec. or more)
Changing the initial setting : mehgeg
Changing screen display to English : mehbfceSelect "English"
<User information
screen>
Basic Operation
c Set required itemseC [Complete]
Point
・ Besides your phone number and mail address, birthday, postal code/
address, company name, etc. can be saved in User information.
Editing user information : On User information edit screen, Ce
AuthenticateeEditeC
Checking User information during a call etc. : s or Ne0
19
Screen Explanation
Viewing display
Basic Operation
20
The current state can be checked by the icon appearing on the screen. Major icons are as follows.
: Unreceived i-mode mail exists in i: Call alert volume OFF
Top of the display
: Vibrator for voice call ON
mode Center
Battery level (Battery icon)
: Displaying SSL/TLS page etc.
: In Public mode (Drive mode)
: Auto-send mail exists
: Record message ON
: Music&Video Channel program
: Keypad dial lock ON
Ample
Almost exhausted
charge
(Charge the battery)
obtaining reservation exists
: Personal data lock ON
: During i-αppli operation
: Music&Video Channel program
Signal strength (Antenna icon)
: i-αppli call exists
obtaining failure
: Alarm clock ON
: Reading UIM
Out of service area or where
: Schedule reminder ON
: IC card lock ON
Strong
Weak
radio waves do not reach
: In OFFICEED area
: Available multi-cursor key
: Self mode ON
: Performing reserved 1Seg recording
: In data transfer mode
: i-αppli Auto start failed
Bottom of the display
: Connecting to i-mode
: microSD card installed during
: Infrared communication in operation
Communication mode
: The total calls cost exceeds the limit
: Connected to external device using
Arrival information (Starting from the left,
: Communication using handsfreeUSB cable
missed call, recorded message, voice mail
compatible device in progress
: Pedometer/ACT monitor is set
service, unread message, unread ToruCa,
: Handsfree ON
: Software update rewrite notice
call)
i-αppli
: eco mode ON
: Auto-update of latest pattern definition
* On the stand-by display with arrival
: Security lock ON
failure
information icon or i-concier information
: Secret attribute is set to phonebook
displayed, Info/calendar layout or shortcut
entry or schedule
icons set, press g to change the display to
: High-pitched alarm ON
focus mode that allows you to quickly display
: Kid-safe mode ON
the related information. To cancel focus mode,
: Unread Area Mail exists
press c or f.
: Unread i-mode mail exists
: Silent mode ON
: Arrival i-concier information exists
Screen Explanation
Menu operation
On the stand-by display, press m and then perform the functions
from the menu. You can select a menu item with shortcut operations,
which use the keypad, * and #, or with multi-cursor operation,
which uses the multi-cursor key to move the cursor.
* Illustrations are examples. Printed characters and mark vary by the color
of FOMA terminal body color.
<Example> Selecting "Calculator"
You can switch among "Kisekae menu", the design of which can be
changed using Kisekae Tool (⇒P29), "Basic menu", which has the
fixed menu numbers, and "Custom menu", to which menu items
can be saved freely.
A Kisekae menu matched with the color of FOMA terminal is set by
default.
Shortcut operations
Multi-cursor key operations
a meMove the cursor to "g Accessory"eg
[Select]eMove the cursor to "d Calculator"eg
[Select]
C
I
Point
Basic Operation
a me7e4
Switching menu screens
・ Even when a function is running, you can perform the same operation if
"MENU" is displayed on the guide area.
・ To return to the previous screen, press c. To return to the stand-by
display, press f.
Guide area and key operation
Operations that can be performed by
pressing m, a, g, C and
I are displayed in the guide area.
To perform an operation in the guide
area, press the corresponding key.
on the guide area corresponds to
multi-cursor keys k.
<Basic menu>
Guide area
<Kisekae menu>
<Custom menu>
Point
・ In some types of Kisekae menus, the menu structure is changed according
to usage frequency, or the number assigned to menu item (item number)
may not be applicable.
・ The menu that appears when m is pressed on the stand-by display can
be changed in Select startup menu. ⇒ P27
21
Screen Explanation
Kurukuru-key
You can operate menu item, move the cursor, activate function,
etc. by rotating Kurukuru-key left or right or pressing up/down/left/
right or center (multi-cursor key).
Using as multi-cursor key
Kurukuru-key corresponds to the following multi-cursor key.
Basic Operation
(Schedule/↑ key)
(Received calls/← key)
(Redial/→ key)
(OK key)
(Phonebook/↓ key)
Using by rotating
Rotate Kurukuru-key to move the cursor, scroll the browser
screen, adjust each sound volume, adjust camera zoom, stop
alarm clock, etc. Rotating operations are according to Kurukurukey setting.
Direction of motion by rotating corresponds to the cursor motion
on the screen as follows.
<Menu list>
<Deco-mail
picture list>
<Mail detail
screen>
<Volume
adjustment screen>
Kurukuru-key setting
Set rotating operation of Kurukuru-key to be enabled/disabled,
activating function by direction of motion or rotation, or rotating
speed.
a meh Settings & NWserviceseg Clock & Other
e* Kurukuru-key settingeSet required itemseC
[Set]
When you rotate in ultrafast speed on the mail detail screen or
browser screen with Maximum speed setting set to "Ultrafast
speed", appears on the top of the display.
Point
・ When Stand-by start is set to other than "No setting", set function can be
activated by rotating Kurukuru-key on the stand-by display. When it is set
to "Navi keys display", the operation guide of multi-cursor key appears.
・ Direction of motion setting does not apply to sound volume, camera zoom
or some of numerical entries.
22
Screen Explanation
Character Entry
使いかたガイド (Guide)
Entering characters
You can check overviews and operations of functions, and
troubleshooting. (In Japanese only)
There are two methods to enter characters.
a mef LifeKite* GuideeSelect
a search method
Point
・ On a description screen, select "この機能を使う (Use this function)" to
perform a function. Selecting a link item in "関連機能 (Related functions)",
or "→コチラ (See more)" displays a corresponding description screen.
・ Terms indicated with 【 】in this manual are index terms in "Guide".
Outline
5-touch input
2-touch input
Multiple characters are
A character is entered by
assigned to each key and the pressing a combination of 2
character is switched every keys.
time a key is pressed.
"ろ" : 9 (5 times)
"ろ" : 95
"っ " : 4 (3 times)e* "っ " : 8043
"ぽ" : 6 (5 times)e* "ぽ" : 8065
(twice)
05 "ん" : 0 (3 times)
"ん" : 03
"ぎ" : 2 (twice)e*
"ぎ" : 2204
Operation n : Return to the previous
during
character.
ー
entry
(Example : お⇒え⇒う⇒ …)
c : Delete character
* : Add voiced sound/semi-voiced sound mark or switch
upper/lower case
Character
entry
(in
Hiragana
/Kanji
mode)
Basic Operation
目次 (Contents) : Search from a list of
functions.
索引 (Index) : Search from a list of words
sorted according to Japanese syllabary.
フリーワード検索 (Free word search) :
Enter a keyword to search for.
ブックマーク (Bookmark) : Search from a
<Guide screen>
list of registered bookmarks.
困ったときには (Troubleshooting) : Search from lists of
troubles or error messages.
Difference of input methods
23
Switching input modes
Each time you press a on the character entry screen, the input
mode switches as "One-byte alphabet" ⇒ "One-byte number"
⇒ "Hiragana/Kanji" ⇒ "One-byte katakana" ⇒ "One-byte
alphabet" ….
・ j switches two-byte or one-byte characters.
Text input
Basic Operation
Set a text input method or operation during text entry.
a meh Settings & NWserviceseg Clock & Other
ec Text inputee Text input methodeSet required
itemseC [Set]
Entering pictograms/smileys
Entering pictograms
a On the character entry screen, when [Pict/Sym] is
displayed, C [Pict/Sym]
Type of the current displayed pictogram list.
Pictogram list switches between [Pictogram] and
[PictgrmD] each time you press C.
Recently used pictograms appear as input logs.
When there are multiple pages, press a
[PrevPage] or I [NextPage] to switch pages.
For Pictogram D, press n to switch folders.
b Select a pictogram
Press c to close the pictogram list.
Entering smiley on mail message editing screen
a On the character entry screen, mee Smiley/Quot/
Phraseea SmileyeSelect a smiley typeeSelect a
smiley
Entering on the other character entry screen :
meeceSelect a smiley typeeSelect a smiley
Information
24
・ You can save often-used sentences and words. 【 文字入力 (Character Entry) 定型文登録|単語登録 (Save phrase/Save word)】
・ You can copy, cut and paste entered characters. 【 文字入力 (Character Entry) コピー|切り取り|貼り付け (Copy/Cut/Paste)】
Sound/Screen Setting
Sound settings
You can set tones, such as changing a ring alert, adjusting the
volume, or muting the sound emitted from FOMA terminal.
You can set the volume of a ring alert, alarm sound, etc.
Setting ring alerts and sound
<Example> Setting Call alert volume
You can set your favorite melody for a ring alert or alarm.
<Example> Setting Call ring alert (Call ring alert/V.phone ring alert)
a meh Settings & NWservicese
a Alerts & Soundseb Adjust
volume
Basic Operation
a meh Settings & NWservicese
a Alerts & Soundsea Ring alerts &
Sounds
In addition to the volume of the ring alert,
you can set the volume of the alerts such
as mail ring alert, message ring alert and iconcier ring alert.
In addition to ring alerts, you can set alerts
such as mail ring alert, messages ring alert
or i-concier ring alert.
b a Call ring alertea Call ring alert
or b V.phone ring alerteSet
required itemseC [Set]
Adjusting volume
b a Alert/Call volumeea Call alert
volumeekeg [Select]
The volume can be selected from "Silent",
"Level 1" - "Level 6" or "Steptone".
<Sound setting
screen>
Point
・ When Call ring alert is set, the setting applies to Call alert and Videophone
alert.
・ Some music or moving pictures/i-motion may not be set to the ring alert.
・
Point
appears on the stand-by display when "Silent" is set.
a vibrator for Call vibrate alert is also set.
<Volume setting
screen>
appears when
Information
・ You can set a call ring alert and image, a call vibrator operation pattern, and a light alert. 【 電話着信設定 (Call ring alert)】【 テレビ電話着信設定
(V.phone ring alert)】
・ Incoming calls or alarms are notified with vibration, instead of a tone. 【 バイブレータ設定 (Vibrate alert/effect)】
25
Silent mode
This function mutes the sound emitted from the FOMA terminal
such as ring alert, Keypad/Touch sound, Slide sound, Kurukurukey Sound, Alarm sound, Bar code reading alert, etc. and notify
you of an incoming call with the vibrator (vibration). Microphone
is sensitized in Silent mode. You can call even in a small voice.
a # (1 sec. or more)
Basic Operation
appears on the stand-by display in Silent mode.
Canceling Silent mode : # (1 sec. or more)
Point
・ Countdown sound for shooting or shutter sound is emitted even in Silent
mode.
Muting keypad sound
Mute sound emitted when you press keys or perform touch
operation in Graffiti picture.
a meh Settings & NWservicese
a Alerts & Soundsea Ring alerts &
Soundsee System sound
Besides keypad/touch sound, you can
mute slide sound or Kurukuru-key sound
or change shutter sound.
b a Keypad/Touch soundee OFF
After a message indicating canceling the
keypad/touch sound appears, the screen
returns to the one shown in the right.
The tone can be selected from "a Key/
touch sound 1" - "d Sol-fa".
Information
・ You can set Silent mode operations to each incoming call and alarm. 【 オリジナルマナーモード (Personalized silent mode)】
26
<System sound
setting screen>
Sound/Screen Setting
Setting display
Stand-by display
Font size
You can change the default stand-by display.
You can change a size of the characters in i-mode site, the mail
creation screen, phonebook, etc.
<Example> Setting a preinstalled image to the stand-by display
a meh Settings & NWserviceseb Displayea
Stand-by displayea Image/i-αppliea Set image
b "Yes"ef PreinstalledeSelect an imagee"Yes"
Select startup menu
Set the menu displayed when pressing m on the stand-by
display.
a meh Settings & NWserviceseb Displayeb
Menu preferenceea Select startup menuea
Kisekae menu - c Shortcut menu
a m eh Settings & NWserviceseb Displayef
Font & Languageea Font sizeea Allea Smallest
- g Largest
For some font sizes selected, a confirmation screen for
changing the font size for menu appears. When pressing "Yes",
Kisekae Tool applicable to the selected font size can be
selected.
Basic Operation
When Kisekae Tool is set, a confirmation screen for canceling
appears.
<Example> Changing the font sizes collectively
Point
・ When you change the font size at once but the items do not support the
selected font size, the closest font size is set.
Information
・ You can set display/not display the clock on the stand-by display or change the design.【 時計表示設定 (Clock display format)】
・ The stand-by display can be divided into several areas, to each of which you can make settings to display arrival information, schedule, calendar, list of
notes or contents of a note, step/activity information. 【
待受画面設定 (Stand-by display)
カレンダー/待受カスタマイズ (Info/calendar layout)】
・ You can set a level of difficulty for the view to be seen. 【 プライバシービュー (Privacy view) レベル設定 (Privacy view level)】
27
Privacy view
Display light time
This function allows the display to be less-visible to the people
around you. You can start/cancel Privacy view on screens
including the stand-by display.
a s (1 sec. or more) or z (1 sec. or more)
Canceling Privacy view : s (1 sec. or more) or z (1 sec. or
more)
You can set the duration, for which the display light is turned on.
<Example> Setting "Normal use"
a meh Settings & NWserviceseb Displayed
Display & Key lightea Display light time
b a Normal useea 0 sec - g Always on
Point
Basic Operation
・ When setting to "Phone setting" by selecting other than "Normal use" in
Setting Machi-chara
Step 2, the lighting time set in "Normal use" applies.
You can set a character to be displayed on the stand-by display.
a meh Settings & NWserviceseb Displayeg
Display Machi-charaeSet required itemseC [Set]
Point
・ Machi-chara does not appear when moving picture/i-motion or i-αppli is
set for the stand-by display.
・ A confirmation message when you make settings can be changed to the
speech in Machi-chara talk expression. You can also use Friendly message
support Machi-chara that displays a message according to the FOMA
terminal condition or content of entered text.
"ドロンジョ様" and "バカボンのパパ" stored by default are the friendly
message support Machi-chara.
©Tatsunoko,YTV 2008 designed by DEVILROBOTS
©赤塚不二夫/ぴえろ (Fujio Akatsuka/Pierrot)
Information
・ You can adjust brightness of the display light or set when the display light is turned off. You can also turn Keypad light ON/OFF, and select a color of
28
the light. 【 照明/キーバックライト設定 (Display & Key light)
Keypad light)】
明るさ調整|画面オフ時間設定|キーバックライト設定 (Brightness/Light time-out/
Sound/Screen Setting
Sound/Screen Setting
Light setting
Kisekae Tool
You can set light alerts for incoming call, receiving mail, missed
calls, etc.
You can set the stand-by display, menu, incoming/outgoing call
screens, etc. at once with a predefined combination.
<Example> Setting a preinstalled Kisekae Tool
Light alert
Set the lighting patterns and colors used for an incoming call,
receiving mail or during a call.
a meh Settings & NWservicese
b Displayee Light alert
To display the details, move the cursor to a Kisekae Tool, and
then press a.
To enlarge the images of the stand-by display and menu
screen, move the cursor to a Kisekae Tool and then press g.
Besides for incoming call/receiving mail,
you can set light alert during a call or when
sliding the FOMA terminal.
Basic Operation
<Example> Setting a light alert
a mee Data Boxeg Kisekae Tooleb Preinstalled
eMove the cursor to a Kisekae TooleC [Set]
b a Light alerteSet required itemse
C [Set]
<Light setting screen>
Indicator light
The light notifies you of missed calls, unread messages (i-mode
mail or SMS).
a meh Settings & NWserviceseb Displayec
Color & Action imageee Info display & lighteb
Indicator lightea ON or b OFF
Point
・ The light blinks at approximately 10 seconds interval. If you do not
confirm arrival information and then turn the FOMA terminal OFF and ON,
it blinks at approximately 30 minutes interval.
<Detail screen>
<Enlarged image of
Style theme>
b "Yes"
Information
・ You can set FOMA terminal so that the stand-by displays switch, or
Silent mode or Privacy mode starts at a specified time. 【 ライフスタ
イル設定 (Timed theme)】
・ Depending on Kisekae Tool, some Normal menu screens may not be
switched to English ones. When you set Kisekae Tool in "Preinstall"
folder, a menu screen specifically for English appears.
29
Sound/Screen Setting
Lock/Security
eco mode
Security codes of FOMA terminal
Adjust the display light or sound temporarily to save the battery.
Security codes vary by functions. A security code is important to
protect your personal information. Take extreme care of the
security code.
a meh Settings & NWserviceseb Displayeh
eco modeea eco mode ON/OFF
Each time you select the option, ON/OFF switches.
When you set it to ON, appears on the display.
Basic Operation
30
eco mode options
You can set options for eco mode.
a meh Settings & NWserviceseb Displayeh
eco modeeb eco mode optionsea Std. saving or
b Full saving
Std. saving : Adjust system sound, brightness of the display,
keypad light, light alerts, etc. to save the battery.
Full saving : With Std. saving setting applied, restrict use of
Motion sensor, Display Machi-chara, Immobile sensor of
Security lock, Pedometer/ACT monitor function to save the
battery.
・ When setting a security code, do not use a number that can be
easily known to others, such as "birth date", "a part of a phone
number", "street number or room number", "1111" or "1234". Keep
a separate note of the set security code.
・ Be careful never to reveal your security code to others. If a security
code is known to and misused by others, DOCOMO assumes no
responsibility for damages resulted from it.
・ If you forget your security codes, you need to bring a document (a
driver's license etc.) to identify your subscription, the FOMA
terminal and the UIM to a docomo Shop.
For details, contact "General Inquiries" on the last page of this
manual.
Terminal security code (Default : 0000)
The code is the security code to be used when changing settings
or deleting all the items at once. To change the code, perform the
following operation.
Point
・ If a wrong terminal security code is entered 5 times consecutively, the
power is turned OFF.
PIN1/PIN2 code (At subscription : 0000)
hdeca, and then set PIN1 code ON/OFF to "ON".
・ Even if PIN2 code is locked by entering incorrect PIN2 code 3 times
consecutively, making/receiving calls or sending/receiving mail is
available; if PIN1 code is locked by entering incorrect PIN1 code 3 times
consecutively, these operations are unavailable.
・ If the PIN1/PIN2 code is locked by entering an incorrect code 3 times
consecutively, enter the PIN unblocking key (PUK) provided at
subscription. If the UIM is locked after entering incorrect PUK code 10
times consecutively, contact a docomo Shop.
・ PUK code is written on the subscription form (copy for user) handed to
you at subscription in docomo Shop. If you subscribed to FOMA service
other than docomo Shop, you need to bring a document to identify your
subscription (a drivers license etc.) and the UIM to a docomo Shop, or
contact "General Inquiries" on the last page of this manual.
Basic Operation
a meh Settings & NWservicesed Security &
Locksef Change security codeeAuthenticatee
Enter a new terminal security codeeEnter the new
terminal security code in New terminal security codecheck fieldeC [Save]
Point
・ To display the PIN1 code entry screen when turning power on, me
You can set 2 security codes to the UIM: PIN1 code and PIN2 code.
The PIN1 code is used for identifying the user when attaching UIM
or turning on the FOMA terminal.
The PIN2 code is the security code to be used when requesting the
issuance of a user certificate, resetting Total calls cost or resetting
the total call costs.
To change either code, perform the following operation. When
changing PIN1 code, set PIN1 code ON/OFF to "ON".
a meh Settings & NWservicesed Security &
Locksee UIMea Change PIN code or b Change
PIN2 codeeAuthenticateeEnter the current PIN code
eEnter the new PIN code in New PIN code and the
New PIN code - check fieldseC [Save]
31
Lock/Security
✜ Network security code (At subscription : Set any code)
Network security code is required when DOCOMO identifies the
subscriber to accept orders at docomo Shop, docomo Information
Center or "お客様サポート (user support)" or when you use Network
Services.
To change the code, "iMenu" in i-mode site ⇒ "お客様サポート (User
support)" ⇒ "各種設定 (確認・変更・利用) (Settings (Check/Change/
Use))"⇒"ネットワーク暗証番号変更 (Change Network security code)"
by yourself (in Japanese only).
Basic Operation
✜ i-mode password (At subscription : 0000)
i-mode password is required to register/delete site in My Menu, use
Message Service, subscribe/cancel i-mode charged services, etc.
To change the password, "iMenu" in i-mode site ⇒ "English" ⇒
"Options" ⇒ "Change i-mode Password".
✜ microSD password
You can set a password to microSD card. When using another
terminal with the password-protected microSD card installed, setting
a password to that terminal is also required. On PCs or terminals that
do not have ability to set passwords, data in the microSD card cannot
be used and the card cannot be formatted. However, some microSD
cards may not support this function.
✜ Password (for children) (Default : 1111)
This password is used as the password for children in Kid-safe mode.
When entry of the password is required, you can alternatively enter
the terminal security code.
Kid-safe mode ⇒P35
32
Various lock functions
Various lock functions are provided in FOMA terminal. Use them
for your purpose.
All lock
Any operations other than answering calls, receiving messages
and turning power ON/OFF are unavailable.
Activate : mehdaceAuthenticate
Deactivate : Enter the terminal security code
Self mode
All functions requiring communication are unavailable.
Activate/Deactivate : c (1 sec. or more)e"Yes"
Personal data lock
Personal information such as phonebook, messages or schedule is
not displayed.
Activate/Deactivate : mehdadeAuthenticateea or b
Keypad dial lock
Calls can be made only by using phonebook.
Activate/Deactivate : mehdafeAuthenticateea or b
Operation lock
Security lock
When a set time has passed with no operation after the display is
screen-off, key operations can be locked.
Activate : mehdabeAuthenticateeSet required items
eC
Deactivate temporarily : In screen-off, zeAuthenticate
IC card lock
Osaifu-Keitai, obtainment of ToruCa from IC card reader, iC
transmission, etc are unavailable.
Activate : r (1 sec. or more)e"Yes"
Deactivate : r (1 sec. or more)eAuthenticate
Privacy mode
You can set options for using personal information.
・ For the operation, refer to "使いかたガイド (Guide)" installed in
this FOMA terminal (in Japanese only).
Omakase Lock
The personal data of phonebook etc. or IC card function of OsaifuKeitai is locked only by contacting DOCOMO in case FOMA
terminal is misplaced etc.
Setting/Canceling Omakase Lock
0120-524-360 Business hours : 24 hours (open all year round)
(In Japanese only)
* Unavailable from part of IP phones.
* Omakase Lock can be set/canceled from My docomo site using a PC etc. (in
Japanese only).
・ For details, refer to "Mobile Phone User's Guide [Basic Usage]".
Data Security Service
Basic Operation
The screen display turns off (screen-off) and any key operations
can be locked when FOMA terminal is closed. However, you can
operate pressing z or pressing N for 1 second or more.
During a call with the FOMA terminal closed, pressing z turns off
the screen display (screen-off), and pressing Z or N, pressing Z
for 1 second or more and rotating Kurukuru-key are locked.
Activate/Deactivate : z (In addition to key operation, it activates
when the screen is off)
This service allows you to back up data saved in the FOMA
terminal to Data Center so as to restore the saved data to the
FOMA terminal in case of misplacement, mistaken data erasion,
etc.
Point
・ Note that using Data Security Service overseas may require a higher
packet communication fee than in Japan (not covered by i-mode packet
flat-rate service).
・ For details of Data Security Service, refer to "Mobile Phone User's Guide
[i-mode] FOMA version".
・ Data Security Service is a charged service requiring subscription
(Subscription is required subscription of i-mode).
33
Lock/Security
Incoming call restriction
There are some ways to restrict incoming calls.
Specifying Accept/Reject call for each
phone number
Basic Operation
Set each phonebook, and then activate settings of Accept/Reject
call (setting of Specified caller).
When using this function, it is recommended that you use both
Caller ID request and Anonymous caller.
a deSearch the phonebookeMove the cursor to a
phonebook entryemec Edit/Settingsed
Advanced settingsec Accept/Reject calle
AuthenticateeSelect a phone numberea Accept call
- c No setting
b Following the operation above, on the stand-by
display, meh Settings & NWservicesee Call &
Answeree Reject/Accept callea Specified callere
Authenticateea Cancel settings - c Accept call
Anonymous caller
For each reason for hiding caller ID, you can set a receiving
operation.
a meh Settings & NWservicesee Call & Answer
eb Anonymous callereAuthenticateea
Anonymous - c UnavailableeSet required itemse
C [Set]
34
Ring alert delay
To prevent prank calls such as one-ring phone scam or calls from
anonymous callers, you can set FOMA terminal so that you will
not immediately answer calls from the party not saved in
phonebook.
a meh Settings & NWservicesea Alerts &
Soundsee Ring alert delayeSet required itemse
C [Set]
Unregistered caller
You can reject calls from phone numbers not saved in phonebook.
a meh Settings & NWservicesee Call & Answer
ee Reject/Accept calleb Unregistered callere
Authenticateea ON or b OFF
Lock/Security
Lock/Security
Resetting to default
Kid-safe mode
Reset
You can restore functions in red characters on the menu list to the
default settings. ⇒P77
Delete all data
You can delete the saved or registered data in FOMA terminal, and
restore the settings of each function to default.
a meh Settings & NWserviceseg Clock & Other
ee Info & Resetef Delete all dataeAuthenticate
e"Yes"
All data is deleted while restarting. Do not turn power off until
the stand-by display is displayed.
Point
・ Even after all data is deleted, the data registered by default is not deleted.
・ Among Osaifu-keitai compatible i-αppli, data of which is not saved to the
IC card, "iD appli" is restored to the default by deleting all data, but the
other i-αppli are deleted.
・ i-αppli other than Osaifu-Keitai compatible i-αppli are restored to the
default by deleting all data, however, upgraded i-αppli is deleted.
Setting Kid-safe mode
You can set whether to use Kid-safe mode.
When Kid-safe mode is set to "ON", menu operations for PIN code
is restricted. If you do not use PIN1 code entry, set PIN1 code ON/
OFF to "OFF" in advance.
a meh Settings & NWservicesed Security &
Locksec Kid-safe modeeAuthenticateea Kid-safe
modeea ON or b OFF
When "ON" is set,
appears at the top of the display.
Basic Operation
a meh Settings & NWserviceseg Clock & Other
ee Info & Resetee ReseteAuthenticateeSelect
items to reseteC [Reset]e"Yes"
You can restrict available functions so that you can let your
children use FOMA terminal without anxiety.
Changing password (for children)
Before operating, set Kid-safe mode to "ON". The password that is
the same as the terminal security code cannot be set.
a meh Settings & NWservicesed Security &
Locksef Change security codeeAuthenticatee
Enter a new passwordeEnter the new password in Reenter password fieldeC [Save]
35
Function lock
You can lock outgoing calls, messages, 1Seg, the camera
(including shooting for Graffiti picture), i-mode/full browser,
i-αppli, etc.
Before operating, set Kid-safe mode to "ON".
Basic Operation
a meh Settings & NWservicese
d Security & Locksec Kid-safe
modeeAuthenticateeb Function
lock
The screen shown to the right appears.
b Set required items
Call/Mail : When "Phonebook contacts" is
set, calls/mails can be made/sent only to
the parties registered to phonebook.
<Function lock screen>
i-αppli : When "Saved only" is set, i-αppli
cannot be downloaded. Only i-αppli in FOMA terminal can
be used.
c C [Set]
Point
・ When Mail is set to "ON", incoming mails are automatically received. In
this case, no incoming operation with tones or images is performed, or no
arrival information is displayed.
36
Call Telephone
Making a call/videophone call
To specify a phone number to call, you can directly enter a phone
number, or select it from Redial/Received calls, Recorded
messages, voice memo while talking or phonebook.
Entering a phone number
Always enter area code even when calling from the same city.
a Enter a phone number (Up to 80 digits)en (voice
call) or C (videophone call) eWhen ending the call,
f
Up to 30 items are recorded in each of Redial and Received calls.
When the maximum is exceeded, older logs are overwritten first.
a r (Redial) or l (Received calls)
b Move the cursor to the partyen (voice call) or I
(videophone call)
To display the details of a party, move the cursor to the party,
and then press g.
Point
・ DOCOMO videophone specifications conform to "3G-324M, an
a deSearch phonebook
The phonebook list of the Show all names
can be displayed by default.
Switch lines with h or pages with a
or I.
b Move the cursor to the partyen
<Phonebook search
result screen>
To make a videophone call, move the cursor to the party and
operate as follows.
From Show all names : meaaeSelect the call method
fieldebeC
From other search : I
Connect
Using redial/received calls
Using phonebook
Point
・ You can make calls using logs of mails, etc if phone numbers are saved in
phonebook.
・ When mail address is registered to the phonebook, you can create i-mode
mail from the phonebook list.
Creating mail from Show all names : deSearch phonebookeMove the
cursor to the partyeC
Creating mail from other search : deSearch phonebookeMove the
cursor to the partyea
international standard prepared by 3GPP". The connection with the
videophones of different specifications cannot be established.
37
International calls
You can make international calls from Japan using WORLD CALL.
✜ WORLD CALL
Connect
"WORLD CALL" is the international call service available from
DOCOMO mobile phones. You are subscribed to "WORLD CALL" at the
time of subscription to the FOMA service (Unless you request not to
subscribe to it).
・ No subscription or monthly charges apply.
・ For details of "WORLD CALL" charges, available charging plans, etc,
contact "General Inquiries" on the last page of this manual.
・ To use international call services except DOCOMO service, contact
the carrier for details.
・ For countries and overseas telecommunications carriers available,
refer to "Mobile Phone User's Guide [International Services]" or
DOCOMO International Services website.
・ The image of the other party displayed on FOMA terminal may be
distorted or connection may not be established depending on the
other party's terminal connected through the international
videophone line.
Caller ID notification (At subscription : Notify)
You can notify your phone number (caller ID) to the other party's
terminal when making a voice call.
a meh Settings & NWserviceseh NW Servicese
d Caller IDea Caller ID notificationea Activate/
Deactivateea Notify
Select "b Not notify" if you do not want to inform.
Point
・ Caller ID is your important personal information. Carefully consider
whether you want to include caller ID information when making a call.
・ If an announcement of requesting caller ID is heard when making a call,
make a call again after setting Caller ID notification or adding prefix "186".
a Enter "010"eCountry codeeEnter a phone number
without the leading "0" of the area code (City code)e
n
In some countries and areas such as Italy, "0" is required.
Information
・ You can set whether to automatically convert an international call access code, or whether to add a country code for a call made from overseas. Also,
you can save/edit international call access codes and country codes.【
38
国際ダイヤルアシスト設定 (Int'l call assist)】
・ You can notify/hide your caller ID on the other party's terminal for each call.【 発信者番号通知/非通知 (Caller ID notification/Not notify) 186/184】
・ You can set calling conditions each time you make a call.【 発信オプション (Call option)】
Call Telephone
Call Telephone
Receiving a call/videophone call
Operation during a call
Below are operations when FOMA terminal receives incoming
calls.
You can use useful functions during a call.
a An incoming call
b n (voice/videophone call) or I (videophone call)
c When ending the call, f
A melody is played while a call is on hold. For a videophone call,
the videophone on-hold image is displayed on the phone of the
other party and yourself.
a During a call, g [OnHold]
Point
Canceling the voice call on hold : g or n
Canceling the videophone call on hold (send the image before the call was
placed on hold) : g
Canceling the videophone call on hold (send the camera image) : I /
n
Canceling the videophone call on hold (send the substitute image) : a
Connect
You are notified of an incoming call with ring alert, light alert,
the display, etc. On the display, a phone number appears if it
is notified or a name appears when you registered his/her
phone number to the phonebook. Also, if the phone number is
not notified, a reason (Anonymous, Payphone, Unavailable)
appears.
j : Adjust the alert volume
Z : Stop ring alert and vibration
On hold
Listening volume
Point
・ When you cannot answer an incoming call,
(The digit indicates the
number of missed calls) appears on the stand-by display. The incoming
calls are recorded as missed calls in Received calls.
・ To answer a videophone call with substitute image, press a instead of
n or I.
You can adjust listening volume during a call.
a During a call, j
Point
・ This setting applies to Listen volume in Adjust volume.
Information
Information
・ You can set FOMA terminal so that you can answer an incoming voice
call by pressing any key other than n.【
(Any key answer)】
エニーキーアンサー設定
・ There are various ways for restricting incoming calls with conditions
set.⇒P34
・ You can set to answer a voice call by opening FOMA terminal when
receiving a call. 【
着信中オープン応答 (Open and answer)】
・ According to the volume of the other party or ambient noise, the other
party's voice becomes easier to hear with 【 はっきりボイス (Voice
clear)】, or the voice slows down with 【 ゆっくりボイス (Voice
slowing)】.
・ You can record voice/image of the other party by pressing Z for 1
second or more during a call.【 通話中音声メモ/動画メモ (Voice
memo during a call/Movie memo)】
39
Call Telephone
When you cannot answer a call/videophone call
Use an appropriate function according to a situation or place
where you cannot answer a call.
Record message
When Record message is set to "ON", a greeting message is played
and the caller can record message when you cannot answer the call.
a med Phonebook & Logseg Record msg.&Voice
memoea Record messageea ON
appears on the stand-by display.
Connect
Point
・ You can record up to 4 voice/videophone calls in total, approximately 30
seconds for each call. When reaching the savable number,
appears on
the stand-by display and Record message does not work. Delete
unnecessary recorded messages.
・ Even when Record message is not set to "ON", you can activate it only
once by pressing Z for 1 second or more for the incoming call.
・ Even when the greeting message is being played or a message is being
recorded, a call can be answered by pressing n. For videophone call,
send your image with I or substitute image with a. However, the
message before the call was answered is not recorded.
Playing a recorded message : medgbeSelect a messageeSelect
whether to delete
Public mode
Public mode (Drive mode)
When there is an incoming call, an announcement is played to
inform the other party of the reason you cannot answer the call
and request to call back before the call ends.
a * (1 sec. or more)
appears on the stand-by display.
Point
・ In Public mode (Drive mode), no receiving action is performed, and calls
are recorded as Missed call.
Canceling : * (1 sec. or more)
Public mode (Power OFF)
When there is an incoming call while you are turning power off, an
announcement is played to inform the other party of the reason
you cannot answer the call and request to call back before the call
ends.
a Enter "*25251"en
Even when Public mode (Power OFF) is set, no indicators such
as icons appear on the display.
Point
Canceling : Enter "*25250"en
Checking the settings : Enter "*25259"en
Public mode is an automatic answering service putting emphasis
on manners in a highly public place or when driving a car.
Information
40
・ When you cannot immediately answer a call, press f while receiving the call to put it on hold. When the call is put on hold, the other party hears a
status message. For a videophone call, the videophone on-hold image is displayed on the phone of the other party and yourself.【
応答保留 (On hold)】
Call Telephone
Network Service
You can use the DOCOMO network services below with FOMA
terminal.
Application
Required
Required
Required
Not required
Not required
Required
Not required
Required
Required
Required
Not required
Not required
Required
Monthly charge
Charged
Charged
Free
Free
Free
Charged
Free
Charged
Charged
Charged
Free
Free
Charged
・ Network services are not available out of service area or where
radio waves are hard to reach.
・ For subscription and details of the services, contact "General
Inquiries" on the last page of this manual.
・ For details, refer to "Mobile Phone User's Guide [Network
Services]".
・ "OFFICEED" is a service requiring subscription. For details, refer
to DOCOMO's business website (http://www.docomo.biz/html/
service/officeed/ (In Japanese only)).
Below are the procedures of major network services.
Service
Voice Mail service
Operating procedure
meh Settings & NWserviceseh NW
Servicesea Voice Mailea Voice Mail
serviceePerform the following operation
Activate : ae"Yes"e"Yes"eEnter ring
time
Deactivate : ce"Yes"
Play messages : eea or be"Yes"e
Follow the guidance to operate
Call Waiting
meh Settings & NWserviceseh NW
Serviceseb Call waiting/forwardea Call
waitingePerform the following operation
Activate : ae"Yes"
Deactivate : be"Yes"
Call Forwarding Service meh Settings & NWserviceseh NW
Serviceseb Call waiting/forwardeb Call
forwardingePerform the following
operation
Activate : ae"Yes"e"Yes"eEnter a phone
numbereCe"Yes"eEnter ring time
Deactivate : be"Yes"
Connect
Service
Voice Mail service
Call Waiting Service
Call Forwarding Service
Nuisance Call Blocking Service
Caller ID Request Service
Dual Network Service
English guidance
Multi Number
2in1
OFFICEED
Public mode (Drive mode)
Public mode (Power OFF)
Melody Call
Setting network service
Point
・ When ring time is set to "0sec." for Voice Mail service or Call Forwarding
service, incoming calls are not recorded in Received calls.
・ To answer a call from another party during a call when call waiting is
activated, press n. When a party is put on hold, press I to switch
the parties to talk to.
41
Call Telephone
Emergency call
The following emergency calls can be made from the FOMA
terminal.
Police
Fire and ambulance
Marine emergencies
Connect
42
110 (no area code)
119 (no area code)
118 (no area code)
・ This FOMA terminal is applicable to "Emergency Location
Report". When making an emergency call to 110, 119, 118, etc.,
information of your location (location information) is
automatically informed to an emergency call receiving
organization such as police. For some locations and/or wave
reception conditions, the emergency call receiving organization
cannot recognize the correct location.
When the caller ID is hidden for the call, i.e., by appending "184"
to the dialed number, none of location information or your
phone number is notified; however, the organization may
acquire the location information and phone number regardless
of your settings, if they have determined that such information
is necessary for the protection of life etc. The area and timing of
implementing "Emergency Location Report" vary by the
preparatory state of respective emergency call receiving
organizations.
・ When calling to 110, 119 or 118 from FOMA terminal, inform
them that you are calling from a mobile phone and give your
phone number and your current location precisely since the
police or fire department has to call you back for confirmation.
To make sure that you are not cut off during the call, do not
move when making the call and do not turn OFF the phone after
the call, but keep it on for about 10 minutes.
・ For some areas you are calling from, you are not connected to
the local police or fire department. Use a public payphone or
land-line phone in that case.
・ When Auto redial as voice of Operation is set to "ON",
videophone call to 110, 119 or 118 from the FOMA terminal
changes automatically to voice call.
Call Telephone
Using overseas
You can talk with FOMA terminal and use i-mode overseas.
ー : Unavailable
✜ International Roaming (WORLD WING)
International roaming is a service that allows you to make voice
calls and access i-mode using network of DOCOMO affiliated
telecommunications carriers even overseas. Before using this
service, check its subscription status. For details, contact "General
Inquiries" on the last page of this manual.
・ The service is available in 3G Network service area. Also, it is
Available services overseas
Available communication services vary by the
telecommunications carrier and the network of the country you
stay. The icon of the network in use and a name of the connected
telecommunications carrier appear on the stand-by display.
Voice call
Videophone call
i-mode*1 i-mode mail
SMS*2
i-Channel*1, 3
i-concier*4 i-Widget*5 Packet communication (PC
connection)
*1
*2
*3
*4
*5
3G
GSM
○
○
○
○
○
○
○
○
○
ー
ー
ー
ー
ー
ー
ー
ー
ー
ー
ー
ー
ー
ー
ー
ー
ー
ー
ー
ー
Connect
available in countries or districts where 3G 850 MHz is applied.
Check the service area.
・ Refer to the following documents before using the FOMA terminal
overseas.
- "海外ご利用ガイド" preinstalled in My Document in Data Box (In
Japanese only)
- "Mobile Phone User's Guide [International Services]"
- DOCOMO International Services website
Communication service
Network
GPRS
International settings of i-mode are required.
To send to FOMA terminal, enter the party's phone number as well as in
Japan.
International settings of i-Channel are required. Packet communication
fee is also charged for auto update for Basic channel (included in iChannel usage fee in Japan).
International Settings of i-concier is required. Packet communication
fee is charged each time you receive information.
i-Widget roaming set is required. When multiple Widget Appli
communicate, a packet communication fee is charged per one
communication.
43
Making a call from overseas
You can make a call in simple operation using memory No. (Quick
dial). When you enter a number within 2-digits overseas to make
a call, a screen asking for selecting "Quick dial" or "Call" appears.
Select "Call" to call with the number as it is (used for emergency
call overseas).
Point
・ Regardless of the country, from which the call is made, the call is
Making an international call (including Japan)
internationally forwarded from Japan. The caller is charged for call fees to
Japan, and the receiver is charged for receiving the call.
a 0 (1 sec. or more)
Setting after returning to Japan
"+" is entered.
Connect
b Country code ("81" to Japan)eEnter a phone number
without the leading "0" of the area code (City code)e
n (voice call) or C (videophone call)
In some countries and areas such as Italy, "0" is required.
Making a call inside the country you stay
a Enter a phone number en (voice call) or C
(videophone call) e"No, use original"
The call may be made with no message displayed.
Making a call to WORLD WING user overseas
a 0 (1 sec. or more)eEnter "81"eEnter a phone
number without the leading "0" of the area code (City
code)en (voice call) or C (videophone call)
Point
・ The call is forwarded internationally from Japan even when staying in the
same country as the party to be called, so enter "+" and the country code
of Japan, "81".
44
Receiving a call inside the country you stay
a A call is received en (voice call) or I
(videophone call)
When you turn the FOMA terminal ON, the connection to the
FOMA network is established automatically. If connection is not
automatically established, set Network search setting to "Auto".
Mail
Sending i-mode mail/SMS
Sending i-mode mail
Attachments
Only by subscribing to i-mode, i-mode mails can be exchanged
not only with i-mode terminals but also via Internet.
・ For details of i-mode mail, refer to "Mobile Phone User's Guide
[i-mode] FOMA version".
a aea [Write]
You can attach up to 10 files (images, sound, moving picture files/
i-motion, etc.) of up to 2 Mbytes in total to a mail.
a On the mail creation screen, select the attachment field
eSelect a file to attacheEdit a maileC [Send]
Point
The screen shown below appears.
・ Sending an attachment file of a big size may take time. After sending such
Subject field
Attachment field
Auto Deco-mail
Connect
file, a lot of mail in Outbox may be deleted.
Changing attachment : On the mail creation screen, move the cursor to an
attachmenteaeSelect a file to attach
Removing attachment : On the mail creation screen, move the cursor to the
attachmenteIe"Yes"
Receiver field
Sending SMS
Message entry
Total bytes of characters
and decoration entered
to Message
<Mail creation screen>
b Enter an address, title and texteC [Send]
When sending is completed correctly, the mail is automatically
saved in a folder of Outbox.
Point
Adding addresses (Simultaneous sending) : On the mail creation screen,
move the cursor to the receiver fieldeI
When you do not know the receiver's address, you can enter his/
her phone number as the address to send the mail.
・ SMS can be sent to or received from parties using overseas
service providers except DOCOMO. For countries and overseas
telecommunications carriers available, refer to "Mobile Phone
User's Guide [International Services]" or DOCOMO International
Services website.
a aeg SMS/Area Mailea SMSea Compose
SMSeEnter a recipient and messageeC [Send]
Point
・ A file cannot be attached to SMS.
・ When receiving SMS, it operates the same as receiving i-mode mail (⇒
P47).
45
Mail
Deco-mail/Decome-Anime
You can create amusing mails using decoration or images.
Deco-mail
You can change a font size or background color, or insert still images,
Deco-mail picture or Deco-mail pict. To decorate characters, specify
decoration and then enter characters, or vice versa.
<Example> Specifying decoration before entering characters
a On the mail creation screen, select "Msg"eI
[Deco.]
Connect
b Select a decoration iconeDecorate
Decome-Anime
You can create expressive mails using Flash graphics with
messages or images inserted.
a aec Compose Decome-Anime
b "Edit"eMove the cursor to a
template
To preview, press g.
c C [Load]
d Edit the text or image
Decoration types are as follows.
Insert image
Change a font
color
Change a font
size
Change a
background color
Blink
Ticker
Swing
Word alignment
Insert line
c Edit a maileC [Send]
Changing template : mea DecomeAnimee"Yes"eMove the cursor to a
templateeC
e C [Complete]eEdit a maileC
[Send] <Decome-Anime
template list>
Point
・ To preview, load the template, move the cursor to the Decome-Anime text
Point
・ When "Auto Deco-mail" is selected after message entry, the message is
field or the Decome-Anime edit screen, and then press I. To return to
the previous screen, press I.
automatically decorated according to the message content. Press C to
display Deco-mail options one after another.
・ On the character entry screen, press me0 to preview the
decoration result. The bytes of the remaining data amount you can enter
is displayed in the lower-right portion of the preview screen. To return to
the previous screen, press g.
Information
46
・ You can easily create Deco-mail or Decome-Anime using templates stored by default.【 メールテンプレート (Mail template)】
Mail
Receiving i-mode mail
No specific operations or settings are required for receiving mails
(mail automatic reception).
a Receive i-mode mails
Replying to mails
a Move the cursor to a mail on the list screen of received
mails eC [Reply]ea Compose Message - f OK
eEdit a maileC [Send]
Blinking
The screen shown to the right
appears.
b a MaileSelect a mail
Auto-sort method
When multiple mails are
received at the same time or the
mails are sorted out to Message
i-αppli folder, a folder list
appears.
Sent/Received mails can be automatically sorted.
<Reception result
screen>
b b Inbox sort or c Outbox sorteC [Add]eSet sort
methodeSelect a folder to sorteSelect a priority
Connect
a aei Mail settingseb Sort methodea Autosort ON/OFFeSet each option to "ON"eC [Set]
Point
Checking a mail in the mailbox : aea or d or eeSelect a foldere
Select a mail
Checking new messages
You can make inquiry for any i-mode mail delivered while you
were out of service area or the power was turned OFF.
a a (1 sec. or more)
Information
・ Folders can be added in each Inbox/Outbox/Unsent messages. You can name added folders.【 iモードメール (i-mode mail)
フォルダ作成/削除
(Add/Delete folder)】
・ You can check the subject of mail in the i-mode Center and then specify if you receive the mail or delete it without receiving.【
(Receive option setting)】
メール選択受信設定
47
Mail
Phonebook
Early warning "Area Mail"
Adding phonebook entries
This is a service that you can receive emergency earthquake flash
report etc. delivered by the Meteorological Agency. i-mode
subscription is not required.
There are two types of phonebook: FOMA terminal phonebook and UIM
phonebook. Saving to the FOMA terminal phonebook is explained here.
Receiving Area Mail
When received Area Mail,
turns on, and you are notified of
reception with light alert, the dedicated buzzer alarm and vibrate
alert.
Point
a d (1 sec. or more)eEnter a name
The screen shown to the right appears.
b Set required items
In addition to items in the screen shown
to the right, you can save "URL".
c C [Save]
Connect
・ Area mail cannot be received during a call or when Omakase Lock is
activated.
Receive setting
You can set if you receive Area Mail.
a aeg SMS/Area Maileb Early warning "Area
Mail" settingea Receive settingeRead the noticee
Select the option fieldea YES or b NOeC [Set]
<Phonebook new entry screen>
Point
Saving UIM phonebook entries : meddeEnter a nameeSet required itemseC
Adding to phonebook from Redial/Received calls list
a r (Redial) or l (Received calls)eMove the cursor to
the partyemee Addea Add to phonebook or b
Update phonebookea In phone memory or b In UIM
To update a phonebook entry, select the entry to add a phone number to.
b Set required itemseC [Save]
Information
・ You can set the beep time, or the alert method when receiving Area
48
Mail in Silent mode or Public mode (Drive mode).【 緊急速報「エリア
メール」(Early warning "Area Mail") 設定 (Settings)】
Point
Searching phonebook : medaea - g
Editing phonebook entry : deSearch phonebookeMove the cursor to a
phonebook entryemecaeSelect an item and editeCe
"Overwrite" or "New entry"
Deleting phonebook entry : deSearch phonebookeMove the cursor to a
phonebook entryemedea or b (efor All contacts, authenticate)
e"Yes"
i-mode/Full Browser
Displaying i-mode site/website
With i-mode, you can use services such as site connection,
Internet connection or i-mode mail by the display of i-mode
terminal. You can use Full Browser to display websites created for
a PC.
・ i-mode is a charged service requiring subscription.
・ For details, refer to "Mobile Phone User's Guide [i-mode] FOMA
version".
・ The contents of sites and Internet websites are generally protected
a IeSelect an item to view
During i-mode communication, blinks at
the top of the display.
To display English menu, scroll down to
the bottom of the iMenu screen and select
"English".
b When quitting viewing a site, fe
"Yes"
Displaying web pages designed for PC
a meb i-modee* Full Browser Home
A confirmation screen for using Full Browser appears by
default.
Search
by copyright laws. All or any portion of text, image or other data
imported to your i-mode terminal from a site or website cannot be
altered except for personal use, and cannot be sold or
redistributed in any form without the express permission of the
copyright holder.
・ When installing a UIM except yours or you turn ON the FOMA
terminal without UIM, still images/i-motion/melodies downloaded
from sites, attached files sent/received by mail, screen memos and
MessageR/F for some models cannot be displayed or played.
・ When the stand-by display, ring alert, etc. is set by data with the
UIM operation restriction, if you replace the UIM with another one
or turn the power ON without UIM, the settings return to default.
・ i-mode and Full Browser have different charging systems. It is
recommended that you subscribe to i-mode packet flat-rate
service because a high packet communication fee is required to
use Full Browser according to data communication volume.
Displaying i-mode website
b After reading a website, fe"Yes"
Switching browsers
Switching i-mode to Full Browser : While a site is displayed, m
eeb
Switching Full Browser to i-mode : While a website is displayed,
megb
Information
・ You can change actions of i-mode and Full Browser in i-mode settings.【 iモード/フルブラウザ (i-mode/Full Browser) iモード設定 (i-mode
settings)】.
49
i-mode/Full Browser
Useful functions
Entering URL
a meb i-modeee Enter URLea Enter URLe
Enter a URL (up to 2,048 one-byte characters)eSelect
a i-mode Browser or b Full Browser in the Browser
type fieldeC [Connct]
When you select Full Browser, a confirmation screen for using
Full Browser appears. When you select "Yes (default)", the
confirmation screen does not appear again.
Bookmark
Search
You can bookmark frequently visited sites or websites to quickly
display them the next time you want to visit.
Saving : While a site or website is displayed, meabeEnter
a title (up to 12 two-byte (24 one-byte) characters)eCe
Select a folder where the bookmark is added
Displaying : mebbeSelect a foldereSelect a bookmark
Screen memo
Currently displayed contents of a site or website can be saved as
a screen memo or captured image.
Saving : While a site or website is displayed, mebbe "Yes"
Displaying : mebce Select a screen memo
Point
・ To save the captured image only, select "Only displayed" in the last step
of saving the screen memo.
・ If the site or website disapproves of saving screen memos etc, the screen
50
memo may not be saved.
RSS reader
You can collect the latest information of websites by saving RSS
to RSS reader.
Saving : While a website is displayed, me0beSelect RSSe
"Yes"
Displaying : mebieSelect a channeleSelect an item
Using link functions
You can make calls or send mail from link items.
However, some functions are not available depending on the site,
website or mails sent from a PC, etc.
a Display a site or websiteeMove the cursor to a link
itemeg [Select]
Depending on the selected item, you can perform the
following operations :
Phone number (Phone To (AV Phone To)) : Make a call with
some conditions.
Mail address (Mail To) : Create an i-mode mail and send it to
the selected mail address.
Phone number (SMS To) : Create SMS and send it to the
selected phone number.
URL (Web To) : Connect to the site or website.
1Seg information (Media To) : Watch 1Seg or make a
recording reservation.
i-mode/Full Browser
Viewing and operating screen
Operating the browser screen
When a site or website is displayed, you can perform operations
by pressing m or C.
To do
Connect to the previously
displayed page (Last URL)
Connect to iMenu or Full
Browser
Reload information
Display a URL
Show/hide the pointer
Show/hide the guide area
Send a URL with i-mode
mail
Open/close/switch tabs
Switch pages, zoom*2, drag,
select text scope or paste,
etc
Change a font size
Search for a character string
Display the visit history/a
list of tabs
Display PagePilot screen
(the entire page)
Add to phonebook
Save an image
*1 When using i-mode
*2 When using Full Browser
Operation
meceSelect a URL
med
mef*1 or e*2
meg*1 or f*2ec
meheea or b
mehh
meiea or b
Ceaea - c
Cebea - i*1 or a - 0*2
CeceSelect a font size
CedeEnter text in the search text
entry field (Up to 25 two-byte (50 onebyte) characters)eC
Cee
Search
As with Internet websites on your PC, you can similarly operate
sites and websites.
Scrolling up and down* : k
Status, Title/URL
Scrolling up and down
continuously* : k (1 sec. or
more)
* When Display Mode in Full
Pointer
Browser is set to PC layout
mode, h / h (1 sec. or more)
to scroll right and left/scroll right
and left continuously.
<Browser screen>
Closing a tab/Ending a
browser : ce"Yes"
Switching normal/scroll mode : n
・ In normal mode
Changing pages : a [Back]/ I [Next]
View history : a [Back] (1 sec. or more)/ I [Next] (1 sec.
or more)
・ In scroll mode
Scrolling up or down : a [▲]/ I [▼]
Scrolling up and down continuously : a [▲] (1 sec. or more)/
I [▼] (1 sec. or more)
Cef
Move the cursor to a phone number or
mail addresseCehea or b
Ceiea - e
51
i-Channel
Using i-Channel
Search
This is a service that the information such as news or weather is
distributed to terminals compatible with i-Channel. The information
is automatically received, and a ticker appears on the stand-by
display. You can display the channel list by pressing c. Two
types of i-Channel shown below are available. (In Japanese only)
● Basic Channel
The channel is provided by DOCOMO, and the packet
communication fee for automatically updating the distributed
information is not charged.
● Okonomi (Optional) Channel
The channel is provided by an IP (Information Provider), and the
packet communication fee for automatically updating the distributed
information is separately charged.
When viewing detail information in Basic Channel or Okonomi
Channel, a packet communication fee is separately charged. For
overseas use, packet communication fee is charged for both
automatic update and viewing detail information.
・ i-Channel is a charged service requiring subscription. i-mode
subscription is required for the service.
・ For details, refer to "Mobile Phone User's Guide [i-mode] FOMA
version".
To view the detail information of the ticker displayed, perform the
following operation.
a On the stand-by display, ce
Select a channel
The site is connected and the detail
information appears.
Point
・ When the detail information of i-Channel is displayed, the same
operations as the ones when i-mode sites or websites are available.⇒P51
Information
・ You can change the display options of the i-Channel ticker. 【 iチャネル (i-Channel) iチャネル設定 (i-Channel setting)】
52
Camera
Camera
Viewing shooting screen
Shooting still images/moving pictures
You can shoot still images/moving pictures with
the camera in FOMA terminal.
<Example>
a
b
Shooting still images
a C or Z (1 sec. or more)
b Point the camera at the object, g [Shoot] or Z
c g [Save] or Z
c
d
<Still image shooting
screen>
<Moving picture
shooting screen>
a Auto optimized shooting
mode icon
b Zoom ratio
・ With j, display the
zooming adjustment panel
to zoom in/out.
c
d
: Scene mode/effect
: Brightness
: White balance
: Frame
: Shake reduce
: Skew correction
: Continuous/Panorama
shooting
: Quality
: Quality:Movie camera
: Size restrictions
: Image size
・ You can change the settings
by pressing h on the
shooting screen.
a mef LifeKited Cameraeb Movie camera
b Point the camera at an object, g [Shoot] or Z
c When you want to stop shooting, g [Stop] or Z
d g [Save] or Z
Point
・ If FOMA terminal is left in a warm place or exposed to direct sunlight for
a long time, images to be shot may be deteriorated.
・ If no operations are performed for approximately 3 minutes during
shooting stand-by, the camera ends.
Switching In-camera/Out-camera : On the shooting screen, a
Enjoy
: Save to
: Recording Type
: Light
: Macro shooting
: Auto timer
: Face detection/Smile
finder
: Compatible mode
Indicator, Counter
Shooting moving pictures
53
Camera
Camera
Shooting still images in various procedures
Viewing still images/moving pictures
On the still image shooting screen, you can switch shooting
procedures from the submenu.
Followings are major shooting procedures.
Viewing still images after shooting
Enjoy
Shooting
Effects and procedures
procedure
The camera detects a subject, switches to the optimized
Scene
mode/effect scene and then focus the subject (Auto optimized
shooting mode).
Setting scene mode/effect : meaaeSelect
required items
Smile finder When a SmileRate of shooting subjects reaches
specified rate, a still image is shot.
Setting SmileRate : mecbeSelect SmileRate
Auto timer Use this function for not only shooting yourself but also
preventing hand shake.
Setting the remaining time in seconds before shutter
clicks : meeeSelect seconds
Continuous/ You can specify the number of frames for continuous
4 frames/
and 4 frames shooting, and shoot a panorama view
Panorama using the camera's auto-connecting technology.
shooting
Selecting a shooting procedure : mefeSelect a
shooting procedure
Information
・ Tracking an moving object 【 トラッキングフォーカス (Tracking
54
focus)】and detecting registered person's face 【 サーチミーフォーカ
ス (Find-me focus)】, etc. are available.
・ You can change various shooting settings such as the image size,
image quality, number of images for continuous shooting, auto-save,
location to save or shutter tone.【 カメラ (Camera) 静止画詳細設定
(Image settings)】
a mee Data Boxea My Pictureea Camerae
Select an image
Displayed
name
Image
number/
Total
I
Comment
<Selected image preview>
<Full-screen preview>
Playing moving pictures after shooting
a mee Data Boxed i-motion/Movieeb Camera
eSelect a moving picture
Point
Creating a mail with attachment : On the list screen, move the cursor to dataea
Information
・ You can save still images/moving pictures to a microSD card (⇒P67),
and sort them in created folders or albums.【 フォルダ (Folder) 追
加/削除 (Add/Delete)】
・ You can set a still image or a moving picture to the stand-by display (
⇒P27). 【 待受画面設定 (Stand-by display) 待受画面選択 (Image/iαppli)】
Camera
Graffiti picture
Use the attached touch pen to decorate still images. You can
create graffiti picture by shooting on the dedicated screen or from
saved still images.
Touch panel
You can use the display as touch panel only for creating graffiti
picture.
✜ Precautions on using touch panel
・ For touch panel operation, use the attached touch pen.
・ Touching the touch panel may not work in the following cases. Note
that it may cause erroneous operation.
- Operation with a foreign object on the touch panel
- Operation with protective sheet or seal on the touch panel
・ Do not press with sharp objects such as a nail, a ballpoint pen and a
pin or press with the finger strongly.
・ Do not press forcibly the frame part around the display. The touch
panel may operate erroneously.
Basic touch operations
To remove the cap, hold the cap with your hand and turn the pen
counterclockwise.
To attach the cap, hold the cap with your hand and turn the pen
clockwise. At this time, make sure to lock it firmly.
Creating graffiti picture
The way of shooting photo to create graffiti picture is explained
here.
a C (1 sec. or more)eSelect [はじめから (From the
start)]
When you create graffiti picture with saved still image, select
[らくがきから (From the graffiti)].
b According to the onscreen instructions, touch itemse
Touch [撮影スタート (Start shooting)] or g or Z
Countdown starts and photo is shot after approximately 3
seconds.
c Check shot still imageeTouch [らくがき開始 (Start
graffiti)] or g or ZeEdit the still image
Enjoy
Touch : Press the screen lightly once and release it
Drag : With pressing the screen lightly, move the touch pen
✜ Attaching/Removing touch pen cap
On the editing screen, you can draw picture and paste stamps
with the touch pen.
d Touch [完成 (Complete)]eSelect a saving locatione
Select an operation
Information
・ If the touched point by touch pen does not match to actual sensed point
Example: Touch
Example: Drag
on the FOMA terminal, you can make correction.【
(Touch panel) 補正 (Correction)】
タッチパネル
55
1Seg
Watching 1Seg
Enjoy
56
● Using 1Seg
1Seg is a service provided by TV broadcasting enterprises (stations),
etc. A communication fee for receiving video picture and sound is
not required. Contact NHK for details on your NHK viewing fees.
* For viewing "Data broadcasting site", "i-mode site", etc., packet
communication fees are charged. Some sites require information fees (i-mode
pay sites).
* For details of "1Seg" service, refer to the following websites.
The Association for Promotion of Digital Broadcasting
From a PC : http://www.dpa.or.jp/english/
From i-mode : http://www.dpa.or.jp/1seg/k/ (in Japanese only)
● Airwaves
1Seg is one of the broadcast services and a different type of radio
waves (airwaves) from that of FOMA service is received. In the
following cases, 1Seg may not work correctly.
・ A place far from the tower that the airwaves are sent from
・ Mountain-ringed regions or a place between buildings
・ Tunnel, underground or far back from a building
* To make the reception condition better, stretch out the 1Seg antenna. To
receive stronger radio waves, try changing the direction of the antenna,
moving the FOMA terminal closer or further from your body, or moving to
another location.
● Screen appearing when using 1Seg for the first time
A confirmation screen for disclaimers appears. If you agree and then
select "OK", the confirmation screen does not appear again.
Creating a channel list using preset (for the first-time
creation)
To watch 1Seg, create a channel list at the beginning. Loading
broadcasting stations and channels that are pre-registered to the
FOMA terminal is explained here.
a mef LifeKitei 1Segeg Channel liste"Yes"
e"Use preset"
"Auto setting" searches for channels that can be received in
your current location. Perform Auto setting with extending
1Seg antenna in digital terrestrial broadcasting service area.
b Select an areae"Yes"
Setting a channel list
When you have multiple channel lists or move to another area,
you need to switch the channel lists.
a mef LifeKitei 1Segeg Channel listeMove
the cursor to a channel listeI [Set]
A list of channel numbers appears. To watch a channel, move
the cursor to the channel, and then press g.
Starting 1Seg
a T (1 sec. or more)
1Seg
Viewing and operating watching screen
You can watch 1Seg in full screen, or divide the screen to watch
the data broadcasting.
To watch 1Seg in horizontal display, change to closed style.
Watching/Recording reservation
You can automatically activate 1Seg watching or recording, or set
the alarm to notify you of start of a program.
a mef LifeKitei 1Seged Set/Timer list
b mea Set new timereSelect timer optioneC
[Save]
<Horizontal display (full-screen)>
Point
・ Pressing m while watching displays the submenu, from which you can
reserve watching/recording, set OFF timer, turn 1Seg eco mode ON/OFF,
etc.
Displaying key function help : While watching, mei
c C [Save]
Point
・ When recording a long program, specify the saving location that has more
free space in "REC setting" on the recording reservation screen.
Enjoy
Selecting channel : 1 - 9, *, 0, #
Switching the watching screen : n
Adjusting volume : a [Low]/ I [High]
Starting/Stopping video recording : Z (1 sec. or more)
* When you press f to end recording, you can select the option to end
only watching (recording continues) or the option to end watching/
recording.
Recording still images : Z
When selecting "Manual reception" or "Manual recording",
you proceed to set the reservation details such as time and
date or channel.
Selecting "By program guide" activates program guide i-αppli.
When you reserve watching or recording a program by
selecting it in the program guide i-αppli, the reservation
information is saved and displayed on the setting screen.
Playing recorded program
a mee Data Boxe0 1SegeSelect the location of
the recorded programeSelect data
57
Music
Music&Video Channel
Music&Video Channel is a service which automatically distributes
a program of up to approximately 1 hour at night. You can also
enjoy high-quality video program of up to approximately 30
minutes. (In Japanese only)
・ Music&Video Channel is a charged service requiring subscription.
・
・
・
*
Enjoy
58
・
Subscriptions to i-mode and i-mode packet flat-rate services are
required for the service.
Information fee may be required additionally for some programs
besides Music&Video Channel service fee.
If UIM is used on a Music&Video Channel incompatible FOMA
terminal after subscribing to Music&Video Channel, Music&Video
Channel cannot be used. Note that the service fee is charged
unless Music&Video Channel is unsubscribed.
Program setting and downloading are unavailable during
international roaming*. Stop distribution of programs before
leaving Japan. When you return to Japan, resume distribution of
programs.
Note that attempting program setting or downloading during international
roaming requires packet communication fee for i-mode connection.
For details, refer to "Mobile Phone User's Guide [i-mode] FOMA
version".
Setting programs
To set programs, registering Music&Video Channel program site
in My Menu may be required.
a mei MUSICeb Music&Video
Channel
The screen shown to the right appears.
b "Set program"eSet a program
according to instructions on the
screen
<Music&Video
Channel screen>
Playing a program
a mei MUSICeb Music&Video
ChanneleSelect a program
The following operations are available on
the player screen.
Pausing/Playing : g [PAUSE/PLAY]
Adjusting the volume : j
Rewinding/Fast forwarding : h (1 sec. or
more)
Jumping to the beginning of the chapter : <Music&Video Channel
When the chapter is played for 3
player screen>
seconds or more, l
Jumping to the previous chapter : When the chapter is played
within 3 seconds, l
Jumping to the next chapter : r
Music
MUSIC Player
You can play Chaku-uta full downloaded from a site and Windows
Media® Audio (WMA) files imported from music CDs, the Internet,
etc. to a PC. And Uta-moji lyrics downloaded from a site can be
displayed on the player screen by setting Link lyrics & song.
* For details of MUSIC Player, refer to NTT DOCOMO website. For
Windows Media Player, contact the manufacturer of your PC.
Downloading Chaku-uta full
a Display a siteeSelect Chaku-uta fulle"Save"eC
[Set]
Saving a WMA file on a PC to a microSD card
For connection to a PC, FOMA USB Cable (optional) is required.
For details, refer to "Manual for PC Connection" in the attached CDROM.
b With Windows Media Player activated, connect FOMA
terminal to a PC using USB cableeSend WMA file from
the PC
a mei MUSICea MUSIC Player
eb All music - g YeareSelect
music data
The following operations are available on
the player screen.
Pausing/Playing : g [PAUSE/PLAY] or Z
Adjusting the volume : j
Rewinding/Fast forwarding : h (1 sec. or
more)
<MUSIC Player screen>
Jumping to the beginning of the song :
When the song is played for 3 seconds or more, l
To the previous song : When the song is played within 3
seconds, l
To the next song : r
Adding to Quick playlist : Z (twice quickly)
Stopping : Z (1 sec. or more)
Point
・ When downloading music data from Internet websites etc., check the use
Enjoy
a mef LifeKiteb Ir/iC/PC connectionee USB
mode settingec MTP modee"Yes"
Playing the music data
conditions.
・ Music data saved in FOMA terminal or microSD card is allowed for
personal use only. When using the music data, take extreme care not to
infringe intellectual property rights of a third party such as copyrights etc.
59
i-αppli
i-αppli/i-Widget
i-αppli is a software for i-mode compatible mobile phones, which
updates the information of stock price or weather automatically, or
provides games that can be played without connecting to network.
i-Widget is a convenient function that allows you to easily access
frequently-used contents and tools (Widget Appli) such as
calculator, clock or stock price information.
Either i-αppli or i-Widget can be downloaded from i-mode site or
sites provided by IPs (Information Providers). For details, refer to
"Mobile Phone User's Guide [i-mode] FOMA version".
・ When downloading or displaying i-Widget screen, etc. a packet
communication fee may be separately charged.
・ When i-Widget screen is displayed, multiple Widget Appli may
communicate.
・ A packet communication fee for overseas use differs from the one
in Japan.
・ DOCOMO assumes no responsibility for the information set in
Osaifu-Keitai compatible i-αppli (IC card).
Downloading
a Display a siteeSelect i-αpplieAfter completion of
downloading, "Yes" or "No"
Downloaded i-αppli is saved to "My folder" of Software list.
When Message i-αppli is downloaded, the folders for Message
i-αppli are automatically created in the folder list.
Starting i-αppli
a I (1 sec. or more)eSelect a foldereSelect i-αppli
Point
Starting Osaifu-Keitai compatible i-αppli : me*aeSelect i-αppli
Starting Map Application : mefgbeSelect i-αppli
Starting i-Widget
a TeSelect Widget Appli
Enjoy
Information
・ If you delete stored i-αppli, you can download the software from "@Fケータイ応援団 (@ F mobile phone supporters)" site.
60
"@Fケータイ応援団 (@F mobile phone supporters)" (as of November, 2010)
iMenu ⇒ メニューリスト (Menu list) ⇒ ケータイ電話メーカー (Mobile phone manufacturer) ⇒ @Fケータイ応援団 (@ F
mobile phone supporters) (In Japanese only)
*The access method may be changed without previous notice.
QR code for site
access
i-motion/Movie
Playing i-motion/movie
You can obtain i-motion/movie (images, sound, etc) from sites or
websites.
✜ Playable i-motion
Type
Playing action
Standard
While the i-motion data is downloaded, it is played.
type (can be ・ The downloaded i-motion can be operated in the same
saved*)
way as the i-motion which is played after entire data is
downloaded.
After the entire i-motion data is downloaded, it is played.
Streaming While the i-motion data is downloaded, it is played.
type (cannot ・ After the i-motion data is played, it is deleted.
be saved)
* Some i-motion cannot be saved.
On-demand
distribution
Playback starts while data is downloaded or when the
download is completed. When a movie ends playback, it
returns automatically to the site screen.
Saving i-motion : "Save"eEnter a display name (Up to 36
characters)eC
Point
・ Note that communication of a large amount of data, such as downloading
a movie, requires high charges.
Playing action
The movie is distributed in real time.
・ Pausing/Resuming play/Moving play
position are unavailable.
Distribute movies that are prepared in
advance.
a mee Data Boxed i-motion/MovieeSelect a
foldereSelect a moving picture/i-motion
The following operations are available during playback.
Adjusting the volume : j
Rewinding/Fast forwarding : h
Pausing/Playing/Playing from the beginning (in stop) : g
Setting a bookmark : Ie"Yes"
Stopping : C
Enjoy
Distribution
method
Streaming Real-time
type (cannot distribution
be saved)
a Select i-motion/movie while site or website is
displayed
Playing moving picture/i-motion
✜ Playable movies
Type
Downloading i-motion/movies
Information
・ You can set whether to automatically play normal type i-motion while downloading or after it is downloaded.【 動画自動再生設定 (Movie auto play)】
・ Up to 100 titles of i-motion that is saved to FOMA terminal without replay restriction applied can be saved to playlist at once.【 動画/iモーション
(Movie/i-motion)
プレイリスト作成/削除 (Create/delete playlist)】
61
Osaifu-Keitai
Using Osaifu-Keitai
Osaifu-Keitai is equipped with IC card and allows you to pay money
or to use coupon, stamp-rally, etc. only by holding FOMA terminal
over the IC card reader in stores etc. You can access a site or website,
obtain the latest coupon, check credit or payment of electronic
money, etc. by holding FOMA terminal over the IC card reader.
Various security systems are also equipped. For details, refer to
"Mobile Phone User's Guide [i-mode] FOMA version".
・ The data (including electronic money, points, etc.) in the IC card
may be lost or modified because of the malfunction of FOMA
terminal (When we take your Osaifu-Keitai for repair etc., as we
cannot take it with data remained, you are required to erase the
data by yourself). For support such as reissuance, restoration,
temporary preservation or transfer of data except transfer by iC
transfer service, confirm with Osaifu-Keitai compatible service
provider. For important data, be sure to use a service with backup
service.
・ If the data in the IC card is lost, modified or damaged by any
means related to Osaifu-Keitai compatible service such as
malfunction or model change, DOCOMO assumes no
responsibility for the loss of data.
・ If FOMA terminal is stolen or misplaced, immediately contact
Osaifu-Keitai compatible service provider for an advice.
More Convenient
62
Steps for using Osaifu-Keitai
You can start Osaifu-Keitai compatible i-αppli to credit money or
check the balance or usage. You can use the Osaifu-Keitai services
compatible with Osaifu-Keitai Web plug-in from a site.
a Download Osaifu-Keitai compatible i-αppli as
necessary
b Start Osaifu-Keitai compatible i-αppli and make the
initial settings of the service
c Hold
mark over IC card reader
In this case, starting
IC card reader
Osaifu-Keitai compatible
i-αppli is not required.
mark
If IC card is not detected
successfully when you
hold
mark of the
FOMA terminal over IC
card reader, try moving
the FOMA terminal back, forth and around.
Information
・ You can disable IC card function. ⇒P33
・ When replacing Osaifu-Keitai in such cases as model change or repair, data in an IC card can be transferred collectively to a new Osaifu-Keitai. 【 iC
お引っこしサービス (iC transfer service)】
・ You can obtain electronic card such as a coupon from IC card reader or site. 【 トルカ (ToruCa)】
i-concier
Using i-concier
Receiving information and displaying details
Information is automatically sent.
When information is received, the
screen shown to the right
appears.
"ひつじのしつじくん®
(Butler Sheep)"
©NTT DOCOMO
<Information
reception screen>
a me# i-conciereSelect a piece of information
Some pieces of information may have schedule or ToruCa attached or
contain a link to a site. To display details, select its icon.
Information
・ You can set whether to display information on the stand-by display
when i-concier information is received. 【
定 (Information display)】
インフォメーション表示設
More Convenient
i-concier is a service that a character on the stand-by display (Machichara) supports your life like a butler or concierge (in Japanese only).
It stores your information such as residential area, schedule, ToruCa,
phonebook and delivers you information that suits your area,
location or preference at the right time. Also, it can automatically
update schedules, ToruCa, etc. stored in FOMA terminal and
automatically add useful information such as shop business hours
etc. to the phonebook. You can share the stored schedule and
images with a group such as friends or family. The stored images
can be printed easily.
・ i-concier is a charged service requiring subscription (Subscription
is required subscription of i-mode).
・ If you do not subscribe Data Security Service, when you subscribe
i-concier, you subscribe Data Security Service, too.
・ A packet communication fee is separately required to receive
information except for some information.
・ A packet communication fee is separately required to use detail
information.
・ To use i-concier overseas, International service settings require to
be set. For using international roaming services, a packet
communication fee is charged for both receiving and viewing
detail information (it differs from the charge in Japan).
・ Information fee may be additionally required for some contents
besides i-concier monthly service fee.
・ Automatic updating i-schedule/ToruCa/phonebook, etc. requires a
packet communication fee separately.
・ For details, refer to "Mobile Phone User's Guide [i-mode] FOMA
version".
63
Convenient tools
Convenient tools
Scheduler
Alarm clock
You can manage schedules with FOMA terminal.
Alarm clock sounds at a specified time. You can set 1Seg to start
after the alarm sounds.
Saving schedule
a u (1 sec. or more)eSelect a
number
a uemea New entry
The screen shown to the right appears.
The screen shown to the right appears.
b h to switch the screen to set
required items
b h to switch the screen to set
required items
c C [Save]
c C [Set]
<Alarm setting screen>
<Schedule new entry
screen>
Point
Saving quickly from the stand-by display (Quick schedule) : On the standby display, enter the date to save a schedule (for 10:00 on March 3, enter
"03031000")eueSave the schedule
Checking a schedule
a ueSelect the date on which a schedule is savede
Select the schedule
More Convenient
64
Information
・ Two types of schedulers are available : "Normal" in which i-schedule
downloaded from i-concier, birthdays saved in the phonebook, etc. can
be displayed and "Classic" in which you can scroll and enlarge the
calendar. 【 スケジュール帳 (Scheduler) スケジュール帳表示設定
(Scheduler view type)】
Point
・ In "Snooze (Snz)", set the intervals, at which the alarm sounds for 30
minutes.
・ When "Activate 1Seg" on 1Seg alarm screen is set to "Yes", 1Seg starts
when the alarm is turned off or stopped (1Seg alarm clock), and ends at
the time specified in "Time out".
・ While alarm clock is sounding, it stops or starts snooze with no operations
for approximately 1 minute, by pressing a key other than f, T and
z, rotating Kurukuru-key, or performing double-tap. Press f to end
the alarm clock.
Information
・ You can set FOMA terminal so that even when it is turned off, it can be
turned on when the alarm sounds. 【
(Alarm auto power ON)】
アラーム自動電源ON設定
Convenient tools
Convenient tools
Bar code reader
Dictionaries
You can read and use information of JAN code, QR code, NW7
code, CODE39 code and CODE128 code.
You can search word meanings, spelling of English word, etc. with
Dictionaries.
a mef LifeKitea Bar code reader
a meg Accessoryee Dictionaries
b Move Out-camera over the code
b a Jpn Dic (Gakken Mobile Jpn Dic) - c EJ Dic (Gakken
Mobile EJ Dic)
When scanning is completed, a
confirmation sound is heard and the
scanned data appears. On the screen after
scanning, you can copy or save the data
from the submenu. For some data, you
can save certain types of data to
phonebook, or create mails, or connect to
sites or websites.
c Enter a word (up to 20
two-byte (40 onebyte))
d Select a word from
the search result list
<Scanning screen>
Point
・ Press # to switch to Macro OFF before scanning large size codes. The
readability of code may be raised by pressing d to set zoom to OFF.
・ Scratches, dirt, damages, low print quality and the strong reflection of
light may disable code reading.
・ If the code is not scanned well, try changing the distance between the
code and camera, the angle or direction of camera, or using auto focus.
・ To read CODE128 code, downloading compatible i-αppli is required.
Entry field
Search result list
Detail information
of a highlighted
word in search
result list
<Search result screen>
Point
・ To search "Today's trivia" or "Today in history", press d or e in Step 2.
Using search history : megeea - cemeae Select a word
More Convenient
65
Data Management
Using microSD card
You can save still images/moving pictures or melodies, or back up
data of phonebook, schedule, etc. in microSD card.
・ F-04C supports microSD card of up to 2 Gbytes, and microSDHC
card of up to 16 Gbytes (as of November, 2010). For information
about latest operation check results, refer to the following sites.
Note that information described is the result of operation
confirmation and does not guarantee all operations.
From i-mode : iMenu ⇒ メニューリスト QR code for site
(Menu list) ⇒ ケータイ電話メーカー access
(Mobile phone manufacturer) ⇒ メモ
リーカード対応情報 (Memory card
support information) (In Japanese
only)
From PC : FMWORLD (http://www.fmworld.net/) ⇒ 携帯電話
(Mobile phone) ⇒ microSD対応状況、microSDHC対応状況
(microSD/microSDHC support report) (In Japanese only)
* The access method may be changed without previous notice.
✜ Notes on using microSD card
・ The data saved to microSD card/microSDHC card from another device
More Convenient
66
such as a PC may not be displayed or played in FOMA terminal. Also,
the data saved to microSD card/microSDHC card from FOMA terminal
may not be displayed or played in another device.
Installing
a Turn FOMA terminal OFF
and remove the battery
pack
b Insert the microSD card
slowly into the slot with
metal contacts side down
(as shown right), and insert
it further until it clicks
* To remove the microSD card, push it lightly to pop it out, and then pull
it out.
Formatting
Format microSD card with FOMA terminal before using.
a mef LifeKitec microSDeC [Format]e
"Regular format"eAuthenticatee"Yes"
Point
・ You can minimize processing to format a formatted microSD card by
selecting "Quick format". Formatting microSD card deletes all the data in
the card.
Quick format : Format only data management area. It reduces formatting
time by executing minimum processing.
Regular format : Format both data management area and data area.
Data Management
Exchanging data between the FOMA terminal and microSD card
Save important data in FOMA terminal to microSD card.
Displaying data in microSD card
Moving/Copying to microSD card
a mef LifeKitec microSDea Multimedia - h
OthereSelect a foldereSelect data
<Example> Moving/Copying one item of My Document
a mee Data Boxef My DocumenteSelect a
folder
b Move the cursor to dataemec Move/Copyed
Move to microSD or e Copy to microSDea One item
or a One iteme"Yes"
Point
・ You cannot move or copy the data that is inhibited to output from FOMA
terminal.
Backing up at once
You can back up Phonebook, Schedule, mail, Notepad, Bookmark
and setting item data all at once in microSD card. Data is
overwritten for the second-time backup or later.
a mef LifeKitec microSDeg Backup/Restore
ea Backup to microSD
b "Yes"eAuthenticate
When phonebook is not saved, omit Step 3.
Moving/Copying to FOMA terminal
c "Yes" or "No"
<Example> Moving/Copying one item of My Document
a mef LifeKitec microSDec My Documente
Select a folder
b Move the cursor to dataemec Move/Copyea
Move to phone or b Copy to phoneea One item or
a One iteme"Yes"
Point
・ Some restrictions apply, such as moving pictures saved in phonebook or
the part of the attachment files in excess of 100 Kbytes are not backed up.
・ Select "b Restore to phone" at the end of Step 1 to delete the latest data
in FOMA terminal and overwrite save it.
another device correctly.【
microSDカード (microSD card)
使用状況|情報更新 (Memory Status/Sync data info)】
・ You can organize still images into album regardless of saved location, and view them. 【 マイコレクション (My collection)】
More Convenient
Information
・ The FOMA terminal provides menu for checking the memory status of microSD card or synchronizing the data which was changed, added or deleted in
67
Data Management
Infrared communication/iC transmission
You can send/receive data to/from devices such as FOMA terminal
supporting infrared communication function or iC transmission
function. Check the locations of the other party's infrared port and
mark, and refer to the following images to establish connection.
Infrared data port
Face
marks to each
other
*Approx.1 cm distant or
less
Approx.
20 cm or less
Infrared communication
a mef LifeKiteb Ir/iC/PC connectionea
Receive Ir dataea Receivee"Yes"eSend data from
a sendereAfter receiving, "Yes"
Receiving an item via iC transmission
iC transmission
Point
・ When sending/receiving all data items, the sender and receiver need to
More Convenient
68
a mef LifeKiteb Ir/iC/PC connectioneb Send all Ir
data or c Send all via iCeSelect an itemeAuthenticatee
Enter an authentication passworde"Yes"
Receiving an item via infrared communication
15°
15°
Sending all items via infrared communication/iC
transmission
determine a 4-digit authentication password in advance. For infrared
communication, the receiver's terminal must be ready for communication
first.
・ When sending/receiving all data items, the data saved in the receiver is
deleted, and the newly received data is saved. However, some data (data in
"Preinstalled" folder, etc) may not be deleted, or the saving locations, folder
names or the orders of data may be different from those in the sender.
・ While charging, sending data by iC transmission is unavailable.
Sending a phonebook entry via infrared
communication/iC transmission
a Move the cursor to a phonebook entryemeh
Send via Ir/iCea Send Ir data or c iC transmissione
"Yes"
a Send data item from a sendereWith the stand-by
display on a receiver, place
marks close to each
othereAfter receiving, "Yes"
Receiving all items via infrared communication
a mef LifeKiteb Ir/iC/PC connectionea Receive
Ir dataeb Receive alleAuthenticateeEnter an
authentication passworde"Yes"eSend data from a
sendereAfter receiving, "Yes"
Receiving all items via iC transmission
a Send data from a sendereWith the stand-by display
on a receiver, place
marks close to each othere
AuthenticateeEnter an authentication passworde
Place the
marks close to each other eAfter
receiving, "Yes"
Data Management
Connecting to a PC
You can connect FOMA terminal to a PC to transfer WMA files or
images in the microSD card.
Also, connecting to the Internet for data communication is
available.
・ FOMA USB Cable with Charge Function 02 (optional) or FOMA
USB Cable (optional) is required.
USB mode setting
From a PC, you can operate data in a microSD card in FOMA
terminal.
a mef LifeKiteb Ir/iC/PC connectionee USB
mode settingeSelect a mode
Communication mode : Set for packet communication, 64K
data communication or data transfer by connecting to a PC.
microSD mode : Set for recognizing the microSD card in FOMA
terminal as a drive and operating the data by PC operation.
MTP mode : Set for music data transfer to microSD card using
Windows Media Player.
DOCOMO keitai datalink
DOCOMO keitai datalink is a software for backing up phonebook,
mail and other data in your mobile phone to a PC and editing
them. It can be downloaded from NTT DOCOMO website. For
details and downloading, refer to the following website. You can
also access to the site below from the attached CD-ROM.
http://datalink.nttdocomo.co.jp/
For details including downloading procedures, data that can be
transferred, operating environments, installing procedures and
operations, refer to the website above. For operations after
installation, see Help in the software.
Point
・ To perform data transfer using data communication or DOCOMO keitai
datalink, installation of FOMA communication configuration file from the
attached CD-ROM. For details, refer to "Manual for PC Connection" in the
attached CD-ROM.
・ When USB mode is set to "microSD mode" or "MTP mode", installation of
FOMA communication configuration file is not necessary.
b "Yes"
More Convenient
69
Support
Troubleshooting
Check for the necessity of software update first, and update the software if necessary. ⇒P73
When checking the following items not to improve the state, contact "Repairs" on the last page of this manual (in Japanese only) or
DOCOMO-specified repair office.
✜ Power supply and charging
Others
● FOMA terminal cannot be turned ON.
・ Is the battery pack installed correctly?
・ Is the battery exhausted?
● FOMA terminal cannot be charged (the charging
light does not turn on).
・ Is the battery pack installed correctly?
・ Are the adapter and FOMA terminal set correctly?
・ Is the AC adapter connector securely inserted to
FOMA terminal or to Desktop holder (Optional)
when you use AC adapter (Optional)?
・ Is AC adapters power plug or cigarette lighter
plug inserted to the outlet or cigarette lighter
socket correctly?
・ Is the charging jack of FOMA terminal dirty when
you use desktop holder? If it is dirty, clean with a
dry cotton swab etc.
・ If you call, perform communication or operate
other function for a long time while charging,
temperature of FOMA terminal rises and the light
may turn off. Charging is stopped in high
temperature state due to safety. Wait until the
temperature of FOMA terminal drops after using
the terminal and charge again.
✜ Terminal operation
● Turning the power off or restarting automatically
happens.
If the jack of battery pack is dirty, the contact may
become poor and the power may shut OFF. If it is
dirty, clean with a dry cotton swab etc.
70
● No operations are performed even by keypad
operation.
Have you activated All lock, Omakase Lock,
Operation lock, or Security lock?
● The operation time provided by the battery pack is
short.
・ Is your terminal left for a long time under the
state of out of service area? Out of service area,
more power is consumed to search available
radio waves.
・ The operation time provided by the battery pack
varies by the operating environment and battery
pack's deterioration.
・ The battery pack is a consumable part. Each time
it is charged, time available with each charging
reduces. Even the full charge state, when the
operation time is too short, purchase a new
battery pack of the specified type.
● The UIM is not recognized.
・ Is UIM installed in the right direction?
・ Is UIM (blue) inserted?
● FOMA terminal etc. become hot while operating/
charging.
While operating or charging, or if you use i-αppli,
videophone call, 1Seg watching, etc. for a long time
while charging the battery, FOMA terminal, battery
pack and adapter may become hot. There is no
problem about safety and continue to use it.
● Clock is not correct.
In the state of turning on the power over a long
period of time, the clock time may become
incorrect. Set Auto time adjust of Date and time
setting to "ON" and turn off/on the power in a place
with strong radio wave conditions.
✜ Calls
● Calls are not connected (Even when moving, "圏外
(out of service area)" does not disappear or
although radio waves are enough, making/
receiving calls is unavailable).
・ Turn the power off and on, or remove and attach
battery pack or UIM.
・ Even when the signal meter on your FOMA
terminal indicates there are strong radio waves,
due to the type of radio waves, making/receiving
calls may be unavailable. Move to call again.
・ Is Specified caller, Anonymous caller or
Unregistered caller set?
・ Due to the crossing of radio waves, at the
crowded public places, calls/mails are crossed
and the connection status may not be good. In
this case, "Please wait for a while" appears and
the caller hears a busy tone. Move to other place
or call again at other time.
● Calls cannot be made using the keypads.
Have you activated All lock, Omakase Lock, Self
mode, Keypad dial lock, Security lock, or Call/Mail in
Function lock of Kid-safe mode?
✜ Osaifu-Keitai
● Osaifu-Keitai function is unavailable.
・ Do you hold
mark of FOMA terminal over IC
card reader?
・ When removing the battery pack, IC card
functions are unavailable regardless of the IC card
lock settings.
・ Have you activated Omakase Lock or IC card lock?
Support
Warranty and After-Sales Service
Warranty
・ FOMA terminal is provided with a written warranty. Make sure
that you receive it. Check the written contents and items such as
"販売店名・お買い上げ日 (Shop name/date of purchase)" and
keep it in a safe place. If it does not contain the necessary
information, immediately contact the shop where you bought it.
The warranty is valid for a period of one year from the date of
purchase.
・ This product and all accessories are subject to change, in part or
whole, for the sake of improvement without prior notice.
After-Sales Service
✜ When problems occur
Before requesting repair, read the section on "Troubleshooting" in this
manual or in "使いかたガイド (Guide)" installed in FOMA terminal (in
Japanese only). If the problem still persists, contact "Repairs" on the
last page of this manual (in Japanese only).
✜ If the result of inquiries indicates that a repair is
required
Others
Take your FOMA terminal to DOCOMO-specified repair office. Be sure
to check the opening hours of the office before you go. Note that,
repair may take longer time depending on the state of damage.
In the warranty period
・ FOMA terminal is repaired at no charge subject to the conditions of
the warranty.
・ The warranty must be presented to receive warranty service. The
subscriber is charged for the repair of items not covered in the
warranty or repairs of defects resulting from misuse (damage of the
liquid crystal or connector, etc), accident, neglect, etc. even during
the warranty period.
・ The subscriber is charged even during the warranty period for the
repair of failures caused by the use of devices or consumable items
that are not DOCOMO-specified.
Repairs may not be possible in the following cases.
・ When judged as malfunction due to moisture at the repair office
(e.g. when detected in a moisture seal reaction)
・ When corrosion due to moisture, condensation, perspiration, etc. is
detected, or if any of the internal boards are damaged or deformed
(repairs may not be possible if external connection jack, earphone/
microphone jack or liquid crystal panel is damaged, or the terminal
outer case is lifted)
* Even in case that a repair is possible, since those conditions are outside the
range of the warranty, a repair is charged.
After expiration of the warranty
All repairs that are requested are charged.
Replacement parts
Replacement parts (parts required to maintain the product functions)
are basically kept in stock for at least 6 years after termination of
production. However, repair may not be possible due to lack of repair
parts etc.
71
Support
✜ Notes
・ Do not modify FOMA terminal or its accessories.
・
・
・
・
Others
72
- Repair may be refused depending on the nature of modification.
The following cases may be regarded as modifications.
- A sticker etc. is put on the LCD or keypad part
- FOMA terminal is embellished with adhesive material etc.
- Exteriors are replaced with other than DOCOMO's genuine parts
- Repair of failures or damage caused by modification is charged
even during the warranty period.
Do not remove any inscription stickers attached to FOMA terminal.
If confirmation of the inscription sticker's content is impossible,
determination of whether specific technical standards are satisfied
cannot be made. Therefore, repair may be refused.
Function settings and information such as total calls may be cleared
(reset) by malfunctions, repair or other handling of FOMA terminal.
Should that happen, set up the functions again.
Magnetic components are used in the earpiece, speaker, etc. of
FOMA terminal. Do not allow cash cards or other devices that are
vulnerable to magnetism to come into contact with the phone.
If the FOMA terminal gets wet or moist, immediately turn the power
off, remove the battery pack, and bring the terminal to a repair office
as soon as possible. However, repair may not be possible
depending on the condition of FOMA terminal.
i-mode fault diagnosis site
Using your FOMA terminal, you can check whether sending/
receiving of messages and downloading of images and melodies
are normally performed. When FOMA terminal is assumed to have
malfunctions as the result of the diagnosis, contact "Repairs" on
the last page of this manual (in Japanese only).
Accessing to "iモード故障診断サイト (imode fault diagnosis site)"
i-mode site : iMenu⇒お知らせ (Notice)⇒サポート情報 (Support
information)⇒お問い合わせ (Inquiries)⇒故障・電波状況お問い
合わせ先 (Checking malfunction/radio wave condition)⇒iモー
ド故障診断 (i-mode fault diagnosis site) (In Japanese only)
QR code for site
access
・ The access method may be changed without previous notice.
・ Accessing from overseas is charged.
Support
Updating software
This function allows you to connect the network and check if
software in the FOMA terminal needs to be updated, and if
software update is necessary, download a part of software using
packet communication and update the software.
Software update information is posted in "お客様サポート (user
support)" on NTT DOCOMO website or iMenu (in Japanese only).
Software may be updated in 3 methods: "Auto-update",
"Immediate update" and "Reserved update".
* Software update can be done even when various data, such as a
phonebook registered in FOMA terminal, camera images, downloaded
data, are remaining; note that data protection sometimes cannot be
secured according to the conditions of your FOMA terminal (such as
malfunction, damage, or water leak). DOCOMO recommends backing up
necessary data. However some data such as downloaded data may not be
backed up.
✜ When updating software
・ Do not remove the battery pack while updating software. The
update may fail.
functions are disabled during software update (Only incoming voice
calls can be answered while downloading.).
・ It is recommended that software update be executed in good radio
wave conditions with three bars of the antenna icon displayed and
the terminal not moved. If radio wave conditions become weaker
during software download or the download is stopped, retry
software update in a place with strong radio wave conditions.
FOMA terminal (model, serial number, etc.) is automatically sent to
the server (the server for software update managed by DOCOMO).
DOCOMO does not use the sent information for purposes except
software update.
・ When software update has failed, "Rewrite failed" appears and all
operation becomes unavailable. In that case, please bring FOMA
terminal to DOCOMO-specified repair office.
Set auto-update (Default : Auto-update)
Select automatic update of software or alert notification of the
necessity of update.
a meh Settings & NWserviceseg Clock & Other
ed Software updateeAuthenticatee"Set autoupdate"eSet required itemseC [Set]
When "Auto-update" is set and update is required, the update
file is automatically downloaded, and
(rewrite notice icon)
appears on the stand-by display. Select the icon to confirm or
change the start time of update.
When "Only notification" is set and update is required,
(update notification icon) appears.
Others
・ Software update should be done with battery fully charged.
・ Software update (downloading or rewriting) may take time.
・ Making/Receiving calls, communications functions and other
・ When updating software, your private information concerning
73
Immediate update
When download takes time, or the server is busy, reserve the
update time.
<Example> Selecting the notification icon to update
a On Software Update screen,
"Reserve"
a geSelect
(update notification
icon)e"Yes"eAuthenticate
b "Now update"eAfter about 5
seconds, download starts
automatically
Canceling download : On the downloading
<Software update
screen, g
screen>
When the server is busy, a selection
screen prompts you to reserve the update time or cancel
update.
c Download is completed and after about 5 seconds,
software update starts automaticallyeWhen update is
completed, restart is automatically madee"OK"
Others
74
Reserved update
Select
(update notification icon) on the stand-by display or an
item on the menu.
Immediate update may not be available when the server is busy.
<Example> Selecting from displayed options
Available dates for reservation are shown
by the time of the server.
b Select preferred day and timee"Yes"
e"OK"
Selecting "Others" allows you to select
other date and time options than
displayed ones. When setting is
completed,
(reservation icon) appears
on the stand-by display.
<Preferred date and
time selection screen>
Checking software update reservation
You can check or change the reserved date and time.
a meh Setting & NWserviceseg Clock & Othere
d Software updateeAuthenticatee"Update"
A reservation confirmation screen appears.
b Check the reservatione"OK"
Point
Changing the reservation : On a reservation confirmation screen, "Change"
eSelect a dateeSelect a time periodeSelect a date and timee"Yes"e
"OK"
Canceling the reservation : On a reservation confirmation screen, "Cancel"
e"Yes"e"OK"
Support
Scanning function (Security Scan)
For the data or programs that are imported to FOMA terminal, this
function detects data and deletes data or inhibits activation of
applications that may cause troubles.
・ The Scanning function provides a certain countermeasure against
Warning
level
Actions
"OK" : Continue processing of the started
application
invasion of data which causes some trouble in the mobile phone,
when viewing website, receiving messages, etc. Note that, if pattern
definition corresponding to specific troubles has not been
downloaded to the mobile phone or such pattern definition does not
exist, this function cannot prevent those troubles from occurring.
・ Different pattern definition is used for different FOMA terminal
models. Note that DOCOMO may stop distribution of pattern
definition for models that have been on the market for 3 years or
more.
0
● Update pattern definition
Update pattern definition first, then keep the pattern definition up-todate.
2
Set auto-update
Scan result
screen
1
"Yes" : Stop processing of the application
that may cause troubles
"No" : Continue processing of the started
application
"OK" : Stop processing of the application
that may cause troubles
3
"Yes" : Delete data that may cause troubles
"No" : Stop processing of the application
that may cause troubles
a meh Settings & NWservicesed Security &
Lockseg Scanning functioneb Set auto-updatee
"Enable"e"Yes"e"Yes"e"OK"
When the Auto-updating pattern definitions is completed,
or appears on the stand-by display.
"OK" : Delete data that may cause troubles
4
Others
You can set FOMA terminal so that pattern definitions can be
automatically updated.
* Selecting "Detail" on each screen displays a list of names of the detected
problem elements. When 6 or more problem elements have been detected, the
names of the 6th and subsequent problem names are omitted.
75
Support
Introduction of options and related devices
Others
76
Combining FOMA terminal with optional accessories supports a
wide variety of uses from personal use to business use. Some
products are unavailable depending on the area.
For details, contact a sales outlet such as docomo Shop. For
details about the optional devices, refer to the instruction manual
for each device.
・ FOMA AC Adapter 01/02*1
・ FOMA DC Adapter 01/02
・ FOMA Dry Battery Adapter 01
・ In-Car Hands-Free Kit 01*2
・ FOMA In-Car Hands-Free Cable 01
・ Battery pack F19
・ In-Car Holder 01
・ Desktop Holder F33
・ Back Cover F56
・ Carry Case L 01
・ Carry Case 02
・ FOMA USB Cable*3
・ FOMA USB Cable with Charge Function 02*3
・ FOMA Portable Charging Adapter 01/02
・ Flat-plug Earphone/Microphone with Switch P01*4/P02*4
・ Flat-plug Stereo Earphone Set P01*4
・ Earphone Plug Adapter 01
・ Earphone Plug Adapter P001*4
・ Earphone/Microphone with Switch P001*5/P002*5
・ Stereo Earphone Set P001*5
・ Earphone/Microphone 01
・ Stereo Earphone Set 01
・ Remote controller with microphone F01*4
・ Earphone Terminal P001*5
・ Earphone Plug Adapter for External connector terminal 01
・ FOMA AC Adapter 01 for Global use*1
・ FOMA Indoor Booster Antenna*6
・ FOMA Indoor Booster Antenna (Stand Type)*6
・ Bone conduction microphone/receiver 01*4
・ Touch pen F01
*1 When using FOMA terminal overseas, use the adapter plug that is
suitable for use in your travel destination. Also, do not charge the
battery with a transformer for overseas travel.
*2 FOMA In-Car Hands-Free Cable 01 is required to use/charge F-04C.
*3 If you use USB HUB, operations may not be performed correctly.
*4 Earphone Plug Adapter for External connector terminal 01 is required
to connect to F-04C.
*5 Earphone Plug Adapter for External connector terminal 01 and
Earphone Plug Adapter P001 are required to connect to F-04C.
*6 Use this only in Japan.
Appendix
Menu list
・ Menu list for the case Select startup menu is set to "Basic menu" is described.
・ Settings of menus indicated in red can be restored to the default in Reset (including the menu whose partial sub content menu will be
reset to the default).
■Mail
Enter URL
Inbox
i-Channel
Compose message
Enter URL
i-αppli shortcuts
URL enter history
About i-αppli
i-Channel list
Compose Decome-Anime
i-Channel setting
■Phonebook & Logs
Unsent messages
Reset i-Channel
Phonebook
i-modeBrowserSetting
Phonebook new entry
FullBrowser Setting
Add group
SMS
Common Setting
Phonebook (UIM) new entry
Early warning "Area Mail"
setting
Check i-mode setting
Received calls
Reset i-mode setting
Redial
i-mode settings
Outbox
Check new message
SMS/Area Mail
Access shortcuts
Receive option
Mail settings
Record msg.&Voice memo
RSS reader
Recorded messages
Sort method
Full Browser Home
Record voice memo
Signature
Search engine
Reply setting
Voice memos
Mail logs
Auto-reply
■i-αppli
Mail group
Software list
User information
Blog/SNS setting
i-αppli call log
Display settings
i-αppli settings
■Data Box
Auto-start
My Picture
Check msg. option
Software info disp.
MUSIC
Decome
Display light time
Music&Video Channel
Decome-Anime
Brightness
i-motion/Movie
Vibrate effect
Melody
Sound effect volume
My Document
iMenu Search
i-Widget settings
Kisekae Tool
Bookmark
i-αppli call DL set
Machi-chara
Screen memo
Last URL
Display history
Chara-den
Others
Sort software
■i-mode
Sent msg. log
Received msg. log
Auto save setting when editing
Template
Record message
Alert settings
77
My collection
Guide
1Seg
Mirror
■LifeKit
■Accessory
Bar code reader
Scheduler
Light alert
Receive Ir data
Notepad
Font & Language
Send all Ir data
Alarm clock
Display Machi-chara
Send all via iC
Calculator
Data exchange settings
Dictionaries
Ir/iC/PC connection
USB mode setting
Today's trivia
Graffiti picture
Today in history
Data Security
Data check/How to update etc.
Exchanging history
Fake call
Send img in Phonebook
Backup phonebooks etc./
Update
Others
1Seg
Privacy view level
Kisekae/Themes
Kisekae Tool
Style theme
Timed theme
Security & Locks
Locks
Privacy mode
Kid-safe mode
Receive display option
Activate
UIM
Alert&Time settings
Change security code
Handy light
Scanning function
Backup settings/Update
■ Settings & NWservices
Backup images
Alerts & Sounds
Ring alerts & Sounds
Password manager
microSD password setting
Call & Answer
Sound & Image
Show map
Adjust volume
Anonymous caller
Map appli
Vibrate alert/effect
Any key answer
Select Map
Silent mode
Headset
Steps/Activity/Calories info
Ring alert delay
Reject/Accept call
Set Pedometer/Activity
monitor
Stereo sound effect
Make/Receive call
BGM play
Call session
Activate 1Seg
Program guide
1Seg image/video
Set/Timer list
Recording result
TVlink
Channel list
78
eco mode
Jpn Dic (Gakken Mobile Jpn
Dic)
Movie camera
High-pitched alarm
Pedometer/ACT monitor
Display & Key light
EJ Dic (Gakken Mobile EJ Dic)
Countdown timer
Map
Color & Action image
Still camera
Sound recorder
Stand-by display
Menu preference
JE Dic (Gakken Mobile JE Dic)
microSD
Camera
Display
User setting
Self mode
Videophone
V.phone dialing img.
Videophone alert
Operation
Data session arv. act
Image setting
External device
Notify switchable mode
Clock & Other
Slide and edit
ToruCa setting
ToruCa from IC card
Text input
ToruCa auto-read
Software update
ToruCa sort rule
Info & Reset
ToruCa from 1Seg
Side multi key shortcut
Check IC owner
Motion sensor
Change IC owner
Femtocell setting
Phone refresh
NW Services
ToruCa alert
Clock
Search by i-mode
Touch panel correction
■User information
Kurukuru-key setting
User information
Voice Mail
Call waiting/forward
■i-concier
Chaku-moji
i-concier Caller ID
OFFICEED
2in1 setting
Melody Call
Other
Overseas network search
Overseas setting
Overseas service
■MUSIC
MUSIC Player
Music&Video Channel
Others
■Osaifu-Keitai
IC card content
DCMX
ToruCa content
IC card settings
Lock/Unlock
Lock preference
Timed lock
Programed activation
IC lock(power-off)
79
Appendix
Main specifications
■Phone
Product name
F-04C
Size
Approx. 111 mm (H)×50 mm (W)×14.9 mm (T)
(Thickest part : Approx. 17.1 mm)
Weight
Approx. 128 g (with battery)
Continuous FOMA/3G
stand-by
time*1, 2, 3
Stationary : Approx. 550 H
Moving : Approx. 380 H
Continuous FOMA/3G
call time*2,
Voice call : Approx. 220 min.
Videophone call : Approx. 100 min.
3, 4
*2, 5
1Seg watching time
Approx. 240 min.
(1Seg eco mode : Approx. 320 min.)
Charging time*6
AC adapter : Approx. 140 min.
DC adapter : Approx. 140 min.
Display
Type
TFT 262,144 colors
Size
Approx. 3.0 inches
Type
Out-camera : CMOS
In-camera : CMOS
Size
Recording
section
Others
80
Camera
section
Up to approx. 690 images (default)
Continuous
shooting of still
images
2-9
File format for
still image
JPEG
Moving picture
shooting time*8
Up to approx. 57 min. (save to phone/default)
Up to approx. 180 min. (save to 2GB microSD
card)
Moving picture
file format
MP4
1Seg recording
time
Up to approx. 18 min. (save to phone/default)
Up to approx. 640 min. (save to 2GB microSD
card)
Playing
music
Continuous play i-motion : Approx. 1,140 min.*9
time
Chaku-uta full : Approx. 4,761 min.*9, 10
WMA file : Approx. 4,467 min.*10
Music&Video Channel (sound) :
Approx. 4,761 min.*10
Music&Video Channel (moving picture) :
Approx. 299 min.
Out-camera : 1/4.0 inches
In-camera : 1/6.0 inches
Recording
size
Chaku-uta/
Chaku-uta full
Number of
effective pixels
Out-camera : Approx. 5,100,000 pixels
In-camera : Approx. 1,300,000 pixels
Number of
recording pixels
(Max.)
Out-camera : Approx. 5,000,000 pixels
In-camera : Approx. 1,300,000 pixels
Zoom (digital)
Out-camera : Up to approx. 16.0 x
In-camera : Up to approx. 2.0 x
*1 Continuous stand-by time indicates the estimated time when FOMA terminal is closed and
able to receive radio waves normally. Stationary continuous stand-by time indicates the
average utilization time FOMA terminal is closed and able to receive radio waves normally
remains stationary. Moving continuous stand-by time indicates the average utilization time
when FOMA terminal is closed and able to receive radio waves normally with a
combination of "stationary", "moving", and "out of service area" status.
*2 Call, communication or stand-by time may be reduced to about half, or 1Seg watching time
may be reduced due to battery pack charging condition, function settings, operating
environment such as ambient temperature, radio wave conditions in the area of use (the
radio waves are weak or absent), etc.
Number of pixels 409,920 pixels (480 dots×854 dots)
Image
pickup
device
Savable still
images*7
小悪魔 PINK, STAR SPLASH : Approx. 62MB
LOVE SWEET PINK : Approx. 61MB
*3 The call, communication or stand-by times are reduced by making i-mode
communications, creating i-mode mail, activating downloaded i-αppli, making i-αppli
stand-by display settings, downloading or playing Music&Video Channel program,
playing tune with MUSIC Player, activating or recording 1Seg, etc.
*4 Continuous call time indicates the approximate time that the phone can send or receive
radio waves normally.
*5 1Seg watching time indicates the approximate watching time with receiving radio waves
normally and using Stereo Earphone Set 01 (optional).
*6 Charging time indicates the estimated time for charging an empty battery with FOMA
terminal turned OFF. Charging with FOMA terminal turned ON or charging in lower
temperature require longer time.
*7 The number of savable still images is based on Image size "QVGA(240×320)", Quality
"Standard" and file size 25 Kbytes.
*8 The moving picture shooting time means allowable time for one movie. The number is
based on Image size "QCIF(176×144)" and Quality "STD(Standard)". Varies depending
on the moving picture to be recorded.
*9 AAC format files.
*10 Background playing is available.
Savable/Recordable/Protectable number
Type
Savable/Recordable
number
Protectable number
Phonebook*1
Up to 1,000
ー
UIM phonebook
Up to 50
ー
Kisekae Tool*1
Up to 50
Mail*1, 2
Received messages
Up to 2,500
ー
Up to 1,250
Sent messages
Up to 500
Up to 250
Unsent messages
Up to 200
Up to 100
Area Mail
Up to 30
Up to 15
Bookmark*3
Up to 200
Screen memo*1, 3
Up to 100
ー
Up to 100
Music*1
Chaku-uta full
Up to 100
ー
Uta-moji Lyrics
Up to 100
ー
■Battery Pack
Quality
Battery pack F19
i-αppli*1, 4
Up to 100
ー
Battery used
Li-ion battery
Images*1
Up to 3,000
ー
Nominal voltage
3.7V
ー
Nominal capacity
820 mAh
Moving picture/i-motion/sound Up to 200
recorded with Sound recorder*1
Melodies*1
ー
Up to 10
ー
Images
Up to 100
ー
Scheduler*5
Up to 2,600
ー
Notepad
Up to 50
ー
*1 Depending on the size of data or usage status of common memory space, the actual number
of items that can be saved and recorded may be fewer.
*2 The total number of i-mode mail and SMS.
*3 The total number of i-mode and Full Browser.
*4 Total number of i-αppli and Message i-αppli. Up to 5 items of Message i-αppli can be
saved.
*5 Total number of schedules, schedules in i-schedule and watching/recording reservation of
1Seg. Up to 100 items of watching/recording reservation of 1Seg in total can be saved.
Others
Up to 500
Video
1Seg *1
81
Appendix
Specific absorption rate (SAR) of mobile phone
Others
82
This model F-04C mobile phone complies with Japanese technical regulations
and international guidelines regarding exposure to radio waves.
This mobile phone was designed in observance of Japanese technical
regulations regarding exposure to radio waves (*1) and limits to exposure to
radio waves recommended by a set of equivalent international guidelines. This
set of international guidelines was set out by the International Commission on
Non-Ionizing Radiation Protection (ICNIRP), which is in collaboration with the
World Health Organization (WHO), and the permissible limits include a
substantial safety margin designed to assure the safety of all persons,
regardless of age and health condition.
The technical regulations and international guidelines set out limits for radio
waves as the Specific Absorption Rate, or SAR, which is the value of absorbed
energy in any 10 grams of tissue over a 6-minute period. The SAR limit for
mobile phones is 2.0 W/kg. The highest SAR value for this mobile phone when
tested for use at the ear is 0.659 W/kg. There may be slight differences between
the SAR levels for each product, but they all satisfy the limit.
The actual SAR of this mobile phone while operating can be well below that
indicated above. This is due to automatic changes to the power level of the
device to ensure it only uses the minimum required to reach the network.
Therefore in general, the closer you are to a base station, the lower the power
output of the device.
This mobile phone can be used in positions other than against your ear. This
mobile phone satisfies the international guidelines when used with a carrying
case or a wearable accessory approved by NTT DOCOMO, INC.(*2) In case you
are not using the approved accessory , please use a product that does not
contain any metals, and one that positions the mobile phone at least 1.5 cm
away from your body. The World Health Organization has stated that present
scientific information does not indicate that there are harmful effects attributed
to the use of mobile devices. They recommend that if you are worried about
your exposure then you can limit your usage or simply use a hands-free kit to
keep the mobile device away from the head and body.
Please refer to the WHO website if you would like more detailed information.
http://www.who.int/docstore/peh-emf/publications/facts_press/
fact_english.htm
Please refer to the websites listed below if you would like more detailed
information regarding SAR.
Ministry of Internal Affairs and Communications Website: http://
www.tele.soumu.go.jp/e/sys/ele/index.htm
Association of Radio Industries and Businesses Website: http://www.aribemf.org/index02.html (in Japanese only)
NTT DOCOMO, INC. Website: http://www.nttdocomo.co.jp/english/product/sar/
FUJITSU LIMITED Website: http://www.fmworld.net/product/phone/sar/
*1 Technical regulations are defined by the Ministerial Ordinance Related to Radio Law
(Article 14-2 of Radio Equipment Regulations).
*2 Regarding the method of measuring SAR when using mobile phones in positions other
than against the ear, international standards (IEC62209-2) were set in March of 2010.
On the other hand, technical regulation is currently being deliberated on by national
council. (As of November, 2010)
Declaration of Conformity
The product "F-04C" is declared to conform with the essential requirements of
European Union Directive 1999/5/EC Radio and Telecommunications Terminal
Equipment Directive 3.1(a), 3.1(b) and 3.2.The Declaration of Conformity can be
found on http://www.fmworld.net/product/phone/doc/.
This mobile phone complies with the EU requirements for exposure to radio
waves.
Your mobile phone is a radio transceiver, designed and manufactured not to
exceed the SAR* limits** for exposure to radio-frequency(RF) energy, which
SAR* value, when tested for compliance against the standard was 0.508W/Kg.
While there may be differences between the SAR* levels of various phones and
at various positions, they all meet*** the EU requirements for RF exposure.
*
The exposure standard for mobile phones employs a unit of measurement
known as the Specific Absorption Rate, or SAR.
**
The SAR limit for mobile phones used by the public is 2.0 watts/kilogram (W/
Kg) averaged over ten grams of tissue, recommended by The Council of the
European Union. The limit incorporates a substantial margin of safety to give
additional protection for the public and to account for any variations in
measurements.
*** Tests for SAR have been conducted using standard operation positions with
the phone transmitting at its highest certified power level in all tested
frequency bands. Although the SAR is determined at the highest certified
power level, the actual SAR level of the phone while operating can be well
below the maximum value. This is because the phone is designed to operate
at multiple power levels so as to use only the power required to reach the
network. In general, the closer you are to a base station antenna, the lower the
power output.
Federal Communications Commission
(FCC) Notice
・ This device complies with part 15 of the FCC rules.
・
Operation is subject to the following two conditions :
a this device may not cause harmful interference, and
b this device must accept any interference received, including interference
that may cause undesired operation.
Changes or modifications made in or to the radio phone, not expressly
approved by the manufacturer, will void the user's authority to operate the
equipment.
FCC RF Exposure Information
Others
This model phone meets the U.S. Government's requirements for exposure to
radio waves.
This model phone contains a radio transmitter and receiver. This model phone
is designed and manufactured not to exceed the emission limits for exposure
to radio frequency (RF) energy as set by the FCC of the U.S. Government. These
limits are part of comprehensive guidelines and establish permitted levels of RF
energy for the general population. The guidelines are based on standards that
were developed by independent scientific organizations through periodic and
thorough evaluation of scientific studies.
The exposure standard for wireless mobile phones employs a unit of
measurement known as the Specific Absorption Rate (SAR). The SAR limit set
by the FCC is 1.6 W/kg. Tests for SAR are conducted using standard operating
positions as accepted by the FCC with the phone transmitting at its highest
certified power level in all tested frequency bands. Although the SAR is
determined at the highest certified power level, the actual SAR level of the
phone while operating can be well below the maximum value. This is because
the phone is designed to operate at multiple power levels so as to use only the
power required to reach the network. In general, the closer you are to a wireless
base station antenna, the lower the power output level of the phone.
Before a phone model is available for sale to the public, it must be tested and
certified to prove to the FCC that it does not exceed the limit established by the
U.S. government-adopted requirement for safe exposure. The tests are
performed on position and locations (for example, at the ear and worn on the
body) as required by FCC for each model. The highest SAR value for this model
phone as reported to the FCC, when tested for use at the ear, is 0.380W/kg, and
when worn on the body, is 0.485W/kg. (Body-worn measurements differ
among phone models, depending upon available accessories and FCC
requirements).
While there may be differences between the SAR levels of various phones and
at various positions, they all meet the U.S. government requirements.
The FCC has granted an Equipment Authorization for this model phone with all
reported SAR levels evaluated as in compliance with the FCC RF exposure
guidelines. SAR information on this model phone is on file with the FCC and
can be found under the Equipment Authorization Search section at http://
www.fcc.gov/oet/ea/fccid/ (please search on FCC ID VQK-F04C).
For body worn operation, this phone has been tested and meets the FCC RF
exposure guidelines when used with an accessory designated for this product
or when used with an accessory that contains no metal and which positions the
handset at a minimum distance of 1.5 cm from the body.
* In the United States, the SAR limit for wireless mobile phones used by the general public
is 1.6 Watts/kg (W/kg), averaged over one gram of tissue. SAR values may vary
depending upon national reporting requirements and the network band.
This equipment has been tested and found to comply with the limits for a Class
B digital device, pursuant to part 15 of the FCC Rules.
83
These limits are designed to provide reasonable protection against harmful
interference in a residential installation. This equipment generates, uses and
can radiate radio frequency energy and, if not installed and used in accordance
with the instructions, may cause harmful interference to radio
communications. However, there is no guarantee that interference will not
occur in a particular installation.
If this equipment does cause harmful interference to radio or television
reception, which can be determined by turning the equipment off and on, the
user is encouraged to try to correct the interference by one or more of the
following measures:
- Reorient or relocate the receiving antenna.
- Increase the separation between the equipment and receiver.
- Connect the equipment into an outlet on a circuit different from that to
which the receiver is connected.
- Consult the dealer or an experienced radio/TV technician for help.
Important Safety Information
Others
84
AIRCRAFT
Switch off your wireless device when boarding an aircraft or whenever you are
instructed to do so by airline staff. If your device offers flight mode or similar
feature consult airline staff as to whether it can be used on board.
DRIVING
Full attention should be given to driving at all times and local laws and
regulations restricting the use of wireless devices while driving must be
observed.
HOSPITALS
Mobile phones should be switched off wherever you are requested to do so in
hospitals, clinics or health care facilities. These requests are designed to
prevent possible interference with sensitive medical equipment.
PETROL STATIONS
Obey all posted signs with respect to the use of wireless devices or other radio
equipment in locations with flammable material and chemicals. Switch off your
wireless device whenever you are instructed to do so by authorized staff.
INTERFERENCE
Care must be taken when using the phone in close proximity to personal
medical devices, such as pacemakers and hearing aids.
Pacemakers
Pacemaker manufacturers recommend that a minimum separation of 15 cm be
maintained between a mobile phone and a pace maker to avoid potential
interference with the pacemaker. To achieve this use the phone on the opposite
ear to your pacemaker and does not carry it in a breast pocket.
Hearing Aids
Some digital wireless phones may interfere with some hearing aids. In the
event of such interference, you may want to consult your hearing aid
manufacturer to discuss alternatives.
For other Medical Devices :
Please consult your physician and the device manufacturer to determine if
operation of your phone may interfere with the operation of your medical
device.
Appendix
Appendix
Export Administration Regulations
Intellectual Property Right
This product and its accessories may be under coverage of the Export
Administration Regulations of Japan ("Foreign Exchange and Foreign Trade
Control Laws" and the related laws and regulations). When exporting this
product and its accessories, take necessary procedures on your responsibility
and expense. For details, contact Ministry of Economy, Trade and Industry of
Japan.
Copyrights and portrait rights
Except for the case protected by copyright laws such as personal use, use of
FOMA terminal to reproduce, alter, or publicly transmit recorded pictures or
sounds, or copyrighted text, images, music or software downloaded from
websites without the copyright holder's authorization is prohibited.
Note that taking photos or recordings at some demonstrations, performances
or exhibitions may be prohibited even when only for personal use.
Avoid taking pictures of others with FOMA terminal without their consent or
disclosing recorded pictures of others without their consent to general public
through Internet websites etc., because they may infringe on portrait rights.
Trademarks
Others
Company and product names mentioned in this manual are trademarks or
registered trademarks of their respective holders.
・ "FOMA", "i-mode", "i-αppli", "i-motion", "Deco-mail", "Chara-den", "ToruCa",
"WORLD CALL", "DCMX", "i-area", "WORLD WING", "OFFICEED", "2in1",
"docomo STYLE series" and logos of "docomo web mail", "i-mode", "i-αppli",
"Music&Video Channel" and "iC" are trademarks or registered trademarks of
NTT DOCOMO.
・ "Catch Phone (Call waiting service)" is a registered trademark of Nippon
Telegraph and Telephone Corporation.
・ McAfee® is registered trademarks or trademarks of McAfee, Inc. and/or its
affiliates in the US and/or other countries.
・ G-GUIDE, G-GUIDE MOBILE and their logos are registered
trademarks in Japan of U.S. Gemstar-TV Guide International, Inc.
and/or its affiliates.
・ Contains Adobe® Flash® Lite® and Adobe Reader® Mobile technology by
Adobe Systems Incorporated.
Adobe Flash Lite Copyright© 2003-2010 Adobe Systems Incorporated. All
rights reserved.
Adobe Reader Mobile Copyright© 1993-2010 Adobe Systems Incorporated.
All rights reserved.
85
・
・
・
・
・
・
・
・
・
・
Others
・
・
・
86
Adobe, Adobe Reader, Flash and Flash Lite are either
registered trademarks or trademarks of Adobe Systems
Incorporated in the United States and/or other countries.
This product contains NetFront Browser,
NetFront Sync Client of ACCESS CO., LTD.
ACCESS, the ACCESS logo and NetFront are registered trademarks or
trademarks of ACCESS CO., LTD. in the United States, Japan and/or other
countries.
Copyright© 2010 ACCESS CO., LTD. All rights reserved.
Powered by JBlend™ Copyright 2002-2010 Aplix Corporation. All
rights reserved.
JBlend and JBlend-related trademarks are trademarks or registered
trademarks of Aplix Corporation in Japan and other countries.
is a registered trademark of FeliCa Networks, Inc.
FeliCa is a registered trademark of Sony Corporation.
QR code is a registered trademark of Denso Wave Inc.
microSDHC Logo is a trademark of SD-3C,LLC.
"Multitask" is a registered trademark of NEC Corporation.
QuickTime is a registered trademark of Apple Inc., in the US and other
countries.
Microsoft®, Windows®, Windows Vista® and Windows Media® are
trademarks or registered trademarks of "Microsoft Corporation" in the US
and other countries.
The abbreviations of operating systems (Japanese versions) below are used
in this manual.
- Windows 7 stands for Microsoft® Windows® 7(Starter, Home Basic, Home
Premium, Professional, Enterprise Ultimate).
- Windows Vista stands for Windows Vista® (Home Basic, Home Premium,
Business, Enterprise and Ultimate).
- Windows XP indicates the Microsoft® Windows® XP Professional
operating system or Microsoft® Windows® XP Home Edition operating
system.
Google and Google Map for Mobile are trademarks of Google Inc.
Manufactured under license from Dolby Laboratories.
Dolby and the double-D symbol are trademarks of Dolby Laboratories.
Java and Java-based trademarks are trademarks or registered trademarks of
Sun Microsystems, Inc. in the U.S. and other countries.
・ ATOK + APOT of Justsystem Corporation is installed in this product as
・
・
・
・
・
・
・
Japanese character conversion function.
"ATOK" "APOT (Advanced Prediction Optimization Technology)" are
registered trademarks of Justsystem Corporation.
This product contains software licensed by Symbian Foundation Limited.
Symbian is a registered trademark of Symbian Foundation Limited.
"Privacy mode" is a registered trademark of FUJITSU LIMITED.
"Uni-Type" is a universal designed font jointly-developed by LIM Corp., Ltd.
and Faculty of Engineering, Chiba University.
"Uni-Type" is a registered trademark of LIM Corp., Ltd.
"丸ゴシック (Maru Gothic)", "レイミン (Reimin)" and "丸フォーク (Maru
Fork)" are provided by Morisawa & Company, Ltd. and the copyrights of
these font data belong to them. Names of "レイミン" and "丸フォーク" are
their trademarks.
OBEX™ is a trademark of Infrared Data Association®.
Blu-ray Disc and its logo are trademarks.
Other company and product names mentioned in this manual are
trademarks or registered trademarks of their respective holders.
Others
・ FeliCa is a contactless IC card technology developed by Sony Corporation.
・ This product contains a module developed by the Independent JPEG Group.
・ This product is equipped with the technologies of GestureTek, Inc.
Copyright© 2006-2010, GestureTek, Inc. All Rights Reserved.
・ "学研モバイル国語辞典 (Gakken Mobile JpnDic)", "学研モバイル和英辞典
・
・
Others
(Gakken Mobile JE Dic)", "学研モバイル英和辞典 (Gakken Mobile EJ Dic)", "今
日は何の日 (Today's trivia)" and "今日の歴史 (Today in history)" are
copyrighted by GAKKEN CO., LTD.
This product is licensed based on MPEG-4 Visual Patent Portfolio License.
The use of MPEG-4 Video Codec function is allowed for personal and
nonprofit use only in the cases below.
- Recording moving pictures and i-motion that conform to MPEG-4 Visual
Standard (hereinafter referred to as MPEG-4 Video)
- Playing MPEG-4 Videos recorded personally by consumers not engaged in
profit activities
- Playing MPEG-4 Video supplied from the provider licensed from MPEG-LA
For further utilizing such as promotion, in-house use or profit-making
business, please contact MPEG LA, LLC in U.S.
Content owners use Windows Media digital rights management technology
(WMDRM) to protect their intellectual property, including copyrights. This
device uses WMDRM software to access WMDRM-protected content. If the
WMDRM software fails to protect the content, content owners may ask
Microsoft to revoke the software's ability to use WMDRM to play or copy
protected content. Revocation does not affect unprotected content. When
downloading licenses for protected content, you agree that Microsoft may
include a "Revocation List" with the licenses. Content owners may require
you to upgrade WMDRM to access their content. If you decline an upgrade,
you cannot access a content that requires the upgrade.
87
Index
A
AC adapter .........................................................18
Accept/Reject call ..............................................34
Adjust volume ...................................................25
After-Sales Service............................................71
Alarm clock ........................................................64
All lock ................................................................32
Anonymous caller .............................................34
Attachments .......................................................45
Auto optimized shooting mode.......................54
Auto timer ..........................................................54
Auto-sort method ..............................................47
Available services overseas .............................43
B
Back Cover .........................................................17
Backup at once ..................................................67
Bar code reader .................................................65
Basic menu.........................................................21
Battery pack .......................................................17
Bookmark ...........................................................50
Decome-Anime ..................................................46
Delete all data ....................................................35
Desktop Holder ..................................................18
Dictionaries ........................................................65
Display light time ..............................................28
Displaying i-mode website ..............................49
Displaying phone number ...............................19
Displaying web pages ......................................49
DOCOMO keitai datalink ..................................69
E
Early warning "Area Mail"................................48
eco mode............................................................30
eco mode options .............................................30
Emergency call ..................................................42
Export Administration Regulations ................85
F
FeliCa (Osaifu-Keitai) ........................................62
Focus mode .......................................................20
Font size .............................................................27
Full Browser .......................................................49
C G
Call Forwarding Service ...................................41
Others
Call Waiting ........................................................41
Caller ID notification .........................................38
Chaku-uta full .....................................................59
Channel list ........................................................56
Character entry ..................................................23
Charging .............................................................18
Check new message .........................................47
Closed style ......................................................... 6
Continuous shooting ........................................54
D
88
Data Security Service .......................................33
Deco-mail ...........................................................46
Graffiti picture....................................................55
Guide ..................................................................23
Guide area ..........................................................21
I
i-αppli .................................................................60
IC card lock .........................................................33
iC transmission ..................................................68
i-Channel ............................................................52
i-concier ..............................................................63
Immediate update .............................................74
i-mode fault diagnosis site ..............................72
i-mode mail ..................................................45, 47
i-mode password ..............................................32
i-motion/movie ..................................................61
Incoming call restriction ..................................34
Indicator light ....................................................29
Information ........................................................63
Infrared communication ..................................68
Initial setting ......................................................19
Input method .....................................................23
Input mode.........................................................24
International calls..............................................38
International Roaming (WORLD WING).........43
i-Widget ..............................................................60
K
Keypad dial lock ................................................32
Keypad/Touch sound........................................26
Kid-safe mode ...................................................35
Kisekae menu ....................................................21
Kisekae Tool ......................................................29
Kurukuru-key .....................................................22
Kurukuru-key setting ........................................22
L
Light alert ...........................................................29
Listen volume ....................................................39
M
Machi-chara setting ..........................................28
Making a call/videophone call .........................37
Menu List ...........................................................77
Menu operation .................................................21
microSD card ...............................................66, 67
microSD password ...........................................32
Moving picture display.....................................54
MUSIC Player ....................................................59
Music&Video Channel ......................................58
N
Network security code......................................32
Network service ................................................ 41
O
Omakase Lock ................................................... 33
On hold............................................................... 39
Operation lock ................................................... 33
Options and related devices ............................ 76
Osaifu-Keitai ...................................................... 62
Overseas use ..................................................... 43
P
Panorama shooting .......................................... 54
Password (for children) ..............................32, 35
PC connection ................................................... 69
Personal data lock............................................. 32
Phonebook ...................................................37, 48
Phonebook new entry ...................................... 48
Pictogram........................................................... 24
PIN1/PIN2 code.................................................. 31
Playing recorded program............................... 57
Privacy mode ..................................................... 33
Privacy view....................................................... 28
Public mode ....................................................... 40
Q
QR code .............................................................. 65
Quick dial ........................................................... 44
R
S
SAR ..................................................................... 82
Savable/Recordable/Protectable number ...... 81
Scanning function ............................................ 75
Scene mode/effect ............................................ 54
Scheduler ........................................................... 64
Screen memo .................................................... 50
Security code..................................................... 30
Security lock ...................................................... 33
Security Scan (Scanning function) ................. 75
Select startup menu ......................................... 27
Self mode........................................................... 32
Sending mail ..................................................... 45
Sending SMS .................................................... 45
Set auto-update .......................................... 73, 75
Shooting moving pictures ............................... 53
Shooting still images ....................................... 53
Shortcut menu .................................................. 21
Silent mode ....................................................... 26
Slide style ............................................................ 6
Smile finder ....................................................... 54
Smiley ................................................................ 24
Specification ...................................................... 80
Specified caller.................................................. 34
Stand-by display ............................................... 27
Still image display ............................................ 54
T
Terminal security code .................................... 31
Text input ........................................................... 24
Touch panel ....................................................... 55
Touch pen .......................................................... 55
Troubleshooting ............................................... 70
URL entry ........................................................... 50
USB mode setting ............................................ 69
User Information .............................................. 19
V
Videophone call .......................................... 37, 39
Voice Mail service............................................. 41
W
Warranty ............................................................ 71
Watching reservation ....................................... 57
WMA file ............................................................ 59
WORLD CALL .................................................... 38
WORLD WING ................................................... 43
z
1Seg ................................................................... 56
1Seg alarm clock .............................................. 64
4 frames shooting............................................. 54
Others
Receive setting .................................................. 48
Received calls .................................................... 37
Receiving a call/videophone call .................... 39
Receiving mail ................................................... 47
Record message ............................................... 40
Recording reservation ...................................... 57
Redial .................................................................. 37
Reply ................................................................... 47
Reserved update ............................................... 74
Reset ................................................................... 35
Restricting usage .............................................. 36
Ring alert delay ................................................. 34
Ring alerts & Sounds ....................................... 25
RSS reader ......................................................... 50
U
UIM ..................................................................... 17
Unregistered caller ........................................... 34
Updating software ............................................ 73
89
Please ask checking/changing subscription detail, application of various services and request of various information materials online.
From i-mode
From PCs
iMenu ⇒ お客様サポート (Support) ⇒ お申込・お手続き (Application/Procedures) ⇒ 各種お申込・お手続き
(Various application/Procedures)
No packet communication charges * In Japanese only
My docomo (http://www.mydocomo.com/) ⇒ 各種お申込・お手続き (Various application/Procedures)
* You need your "Network security code" to use the site from i-mode.
* No packet communication charge applies to access the site from i-mode. Packet
communication charge applies to access from overseas.
* You need "docomo ID/Password" to access the site from your PC.
Using mobile phone with your manners!
When using your mobile phone in a public place, don’t
forget to show common courtesy and consideration for
others around you.
Always turn OFF your FOMA terminal in cases below
■ In a place where use of mobile phones is prohibited
・Always turn OFF your FOMA terminal in an aircraft or hospital.
Always set Public mode in cases below
* In Japanese only
* If you do not have or forget "Network security code" or "docomo ID/Password",
contact to the numbers for "General Inquiries" on the last page of this manual.
* You may not use the services depending on your subscription.
* There are cases where the site may not be available to system maintenance, etc.
DOCOMO’s environmental effort
Fewer pages in the instruction manual
In Japanese version, instruction manual covers instructions only for
basic functions to reduce pages and paper usage.
For frequently-used functions and their details, see 使いかたガイド
(Guide) (installed in this FOMA terminal, in Japanese only) or visit
NTT DOCOMO website.
■ When driving
・Using a mobile phone by holding it with the hand while driving is
subject to penalty.
■ In public places such as a theater, movie theater or art
museum
Consider privacy
Please be considerate of the privacy of individuals
around you when taking and sending photos using
camera-equipped mobile phones.
Recycle of mobile phones
To protect environment and recycle the precious
resources, mobile phone and PHS enterprises collect
phones, batteries and chargers, regardless of brands
and manufacturers, at shops labeled with the mark
shown to the left. Bring these devices to your nearest
docomo Shop.
General Inquiries <docomo Information Center>
0120-005-250 (toll free)
* Service available in: English, Portuguese, Chinese, Spanish, Korean.
* Unavailable from part of IP phones.
Repairs
■ From DOCOMO mobile phones
(In Japanese only)
(No prefix) 113 (toll free)
■ From land-line phones
(In Japanese only)
0120-800-000 (toll free)
(Business hours : 9:00 a.m. to 8:00 p.m.)
* Unavailable from land-line phones, etc.
■ From DOCOMO mobile phones
(In Japanese only)
(Business hours : 24 hours (open all year round))
■ From land-line phones
(In Japanese only)
(No prefix) 151 (toll free)
* Unavailable from land-line phones, etc.
* Unavailable from part of IP phones.
0120-800-000 (toll free)
* Unavailable from part of IP phones.
(Business hours : 9:00 a.m. to 8:00 p.m. (open all year round))
● Please confirm the phone number before you dial.
● For Applications or Repairs and After-Sales Service, please contact the above-mentioned information center or the docomo shop etc. near you on the NTT DOCOMO website or the i-mode site.
NTT DOCOMO website http://www.nttdocomo.co.jp/english/ i-mode site iMenu⇒お客様サポート (user support)⇒ドコモショップ (docomo Shop) * In Japanese only
Loss or theft of FOMA terminal or payment of cumulative cost overseas
<docomo Information Center>
(available 24 hours a day)
(available 24 hours a day)
■ From DOCOMO mobile phones
International call access code
for the country you stay
Failures encountered overseas
<Network Support and Operation Center>
■ From DOCOMO mobile phones
*
-81-3-6832-6600 (toll free)
International call access code
for the country you stay
-81-3-6718-1414* (toll free)
* You are charged a call fee to Japan when calling from a land-line phone, etc.
※If you use F-04C, you should dial the number +81-3-6832-6600 (to enter '+',
press and hold the '0' key for at least one second).
* You are charged a call fee to Japan when calling from a land-line phone, etc.
※If you use F-04C, you should dial the number +81-3-6718-1414 (to enter '+',
press and hold the '0' key for at least one second).
■ From land-line phones <Universal number>
■ From land-line phones <Universal number>
Universal number
international prefix
Universal number
international prefix
*
-8000120-0151
* You might be charged a domestic call fee according to the call rate for the country you stay.
※For international call access codes for major countries and universal number
international prefix, refer to DOCOMO International Services website.
-8005931-8600*
* You might be charged a domestic call fee according to the call rate for the country you stay.
※For international call access codes for major countries and universal number
international prefix, refer to DOCOMO International Services website.
● If you lose your FOMA terminal or have it stolen, immediately take the steps necessary for suspending the use of the FOMA terminal.
● If the FOMA terminal you purchased is damaged, bring your FOMA terminal to a repair counter specified by DOCOMO after returning to Japan.
To prevent damage to the environment,
bring used battery packs to a docomo
service counter, a docomo agent or a
recycle center.
Don't forget your mobile phone ・・・ or your manners!
When using your mobile phone in a public place, don't forget to
show common courtesy and consideration for others around you.
2011.1 (1st Edition)
CA92002-6342
F-04C_E1kou
F-04C
Manual for PC Connection
Data Communication . . . . . . . . . . . . . . . . . . . . . . . . . . . . . . . . . . . . . . . . . . 1
Before use . . . . . . . . . . . . . . . . . . . . . . . . . . . . . . . . . . . . . . . . . . . . . . . . . . . 2
Flow of setup for data transfer (OBEX communication) . . . . . . . . . . . . 4
Flow of setup for data communication . . . . . . . . . . . . . . . . . . . . . . . . . . . 4
Connecting up PC to the FOMA terminal . . . . . . . . . . . . . . . . . . . . . . . . . 5
Installing FOMA communication configuration file (driver) . . . . . . . . . . 6
Using DOCOMO Connection Manager . . . . . . . . . . . . . . . . . . . . . . . . . . . . 9
Setting communications without using DOCOMO Connection Manager 15
AT command . . . . . . . . . . . . . . . . . . . . . . . . . . . . . . . . . . . . . . . . . . . . . . . . 25
About Manual for PC Connection
This manual describes about data communications using F-04C and how
to install "FOMA communication configuration file" and "DOCOMO
Connection Manager" contained in CD-ROM.
Depending on the environment of your PC, some of operation procedures
and/or screens may be different.
'11.1 (Issue 1)
CA92002-6347
F-04C_E1kou
Data Communication
There are 3 communication modes available by connecting FOMA terminal and a PC : data
transfer (OBEX communication), packet communication and 64K data communication.
・ To make packet communications or 64K data communications or edit data such as the phonebook using
a PC connected, installation of the software in the attached CD-ROM and various settings are required.
・ When performing packet communication overseas, use IP connection (packet communication is
unavailable with PPP connection). 64K data communication cannot be used overseas.
・ FOMA terminal does not support FAX communication or Remote Wakeup.
・ Data communication can be performed connecting with DOCOMO's PDA like sigmarion III. However,
FOMA terminal does not support high-speed communication compatible with HIGH-SPEED area.
❖ Data transfer (OBEX communication)
You can send and receive data such as image, music, phonebook or mail etc. to/from other FOMA terminals
or PCs etc.
・ Transferable data varies depending on transfer method. For data that can be transferred by each transfer
method, see "Instruction manual (detailed version)" (in pdf format) of the FOMA terminal (in Japanese
only).
Infrared communication
iC transmission
F-04C
F-04C
FOMA USB Cable with Charge Function 02
microSD card
DOCOMO keitai datalink
❖ Packet communication
You can connect to the Internet and perform data communication (packet communication).
Packet communication charges are based on the amount of data sent and received, which makes it suitable
for high-speed exchange of comparatively small amounts of data as in sending and receiving mail. No
communication charges are required when no data are exchanged even if you are connected to the
network. Therefore, sending/receiving data as needed while remaining connected to the network is
possible.
High-speed packet communication can be performed at a maximum reception speed of 7.2Mbps and a
maximum transmission speed of 384kbps by using access points that support FOMA packet
communication such as mopera U of DOCOMO's Internet connection service. Best effort method which the
actual communication speed varies with the environment and the rate of congestion offers.
Note that communications of large-size data such as viewing websites containing images and downloading
will require high charges.
* The communication speed may be slower when connecting out of FOMA HIGH-SPEED area, connecting to access points
incompatible with HIGH-SPEED, or using devices incompatible with HIGH-SPEED such as DOCOMO's PDA; sigmarion
III.
* Maximum speed of reception 7.2Mbps and transmission 384kbps are the values in technical standards, thus they are not
indicated actual communication speed. Actual communication speed varies by the network congestion or environment of
communication.
1
F-04C_E1kou
❖ 64K data communication
You can connect to the Internet and perform 64K data communication.
Communication charges are based on the duration of the connection to the network regardless of the
volume of data, which makes it suitable for sending and receiving relatively large amounts of data as in
downloading multi-media contents.
Access points that support FOMA 64K data communication services such as mopera U of DOCOMO's
Internet connection service or ISDN synchronized 64K access points can be used.
Please be careful that a high cost will be charged for long-time communications.
Before use
◆ Operating environment
The operation environment for using data communication is as shown below. They may vary depending
on the PC system configurations.
Item
Requirements
Computer
PC/AT compatible computer with USB port (conform to USB specification 1.1/
2.0)
Recommended 1,024×600 dots (1,024 ×768 dots*) or more in display resolution
and High Color 16 bits or more
OS (Japanese version)
Windows XP, Windows Vista, Windows 7
Memory requirements
Windows XP : 128MB or more Windows Vista : 512MB or more
Windows 7 : 1GB or more for 32-bit, 2GB or more for 64-bit
Hard disk capacity
5MB (10MB*) or more free disk space
Web browser*
Internet Explorer 6.0 or more
Mailer software*
Windows Mail and Outlook Express 6.0
* For operating environment of using DOCOMO Connection Manager.
・ For the latest information about operating environment, refer to NTT DOCOMO website.
・ DOCOMO will not guarantee operations on upgraded OS or added/changed operating environment.
・ Note that utilization may not be possible in certain operating environments. DOCOMO assumes no
responsibility for pertaining to operation under conditions other than that described above.
・ Recommended environment for operating the menu is Microsoft Internet Explorer 7.0 or later (For
Windows XP, Microsoft Internet Explorer 6.0 or later). If no menu appears when CD-ROM is set, take
actions given below.
a Under Windows 7, Windows Vista : Click
(Start)→"すべてのプログラム (All programs)"→"アクセサ
リ (Accessories)"→"ファイル名を指定して実行 (Run)".
Under Windows XP : Click "スタート (Start)"→"ファイル名を指定して実行 (Run)".
b Enter as follows in "名前 (Name)" and click "OK".
<CD-ROM drive name> : ¥index.html
* CD-ROM drive name varies depending on a PC to be used.
・ When the CD-ROM is inserted into the PC's CD-ROM drive, the warning screen may be displayed. This
warning depends on the security settings of Internet Explorer but it is not a problem for use. Click "はい
(Yes)".
* Depending on the environment of your PC, the screen may be different.
◆ Devices required
The following devices are required in addition to FOMA terminal and a PC.
・ FOMA USB Cable with Charge Function 02 (optional) or FOMA USB Cable (optional)
・ Attached CD-ROM "CD-ROM for F-04C"
✔INFORMATION
・ USB cable for PC is not available because the connector type is different.
・ When using USB HUB, it may not operate properly.
2
F-04C_E1kou
◆ Usage precautions
❖ Internet service provider usage charges
When using the Internet on a PC, usage charge to your Internet service provider (hereinafter referred to as
Provider) is required. This charge is paid directly to the Provider, and is separated from the FOMA service
charge. For details, contact your Provider.
・ DOCOMO's Internet connection service mopera U is available. mopera U is a charged service requiring
subscription.
❖ Dialup connection (Provider etc.)
Different dialup connections are required for packet communication and 64K data communication. When
performing packet communication, use the dialup connection for packet communication. When performing
64K data communication, use the dialup connection for FOMA 64K data communication or ISDN
synchronized 64K data communication.
・ Connections to DoPa access points are unavailable.
・ For service and connection/settings of mopera, refer to mopera website.
http://www.mopera.net/mopera/index.html
❖ User authentication
Some dialup connections require user authentication before a connection can be established. If user
authentication is required, you must use your communication software or dialup network to enter your ID
and password and connect. Your ID and password will be assigned by the network administrator of the
connection destination such as your provider or corporate LAN. For details, contact your provider or
network administrator.
❖ Access authentication during using PC browser
If FirstPass (user certificate) is required for the access authentication during using PC browser, use FirstPass
PC software. It is provided on NTT DOCOMO website. For details and download, refer to the following
website. You can also access to the following website from the attached CD-ROM.
Details of the service : http://www.nttdocomo.co.jp/service/safety/firstpass/
Download : http://www.nttdocomo.co.jp/support/utilization/application/foma/utility/firstpass/index.html
❖ Conditions of packet communication and 64K data communication
To perform data communication in Japan, the following conditions must be satisfied.
- You must be within the FOMA service area.
- Packet communication requires an access point that supports FOMA packet communications.
- 64K data communication requires a dialup connection that supports FOMA 64K data communications or ISDN
synchronized 64K.
* Note that even when the above requirements are satisfied, you may not be able to perform data communication if base
station traffic is heavy or the radio wave conditions are poor.
◆ Using CD-ROM
The attached CD-ROM includes software to use the data communication with FOMA terminal, "Kuten Code
List" in the PDF version, etc.
❖ Introduction of DOCOMO keitai datalink
DOCOMO keitai datalink is software to back up and edit your phone information such as phonebook and
mail. It is provided on NTT DOCOMO website. For details and download of this software, refer to the
following website. You can also access to the following website from the attached CD-ROM.
http://datalink.nttdocomo.co.jp/
・ To use DOCOMO keitai datalink, installing FOMA communication configuration file in advance is
required.
3
F-04C_E1kou
・ For details of downloading procedure, data that can be transferred, operating environments, installing
procedure, operation procedure, etc., refer to the website above. For operations after installation, see
Help in the software.
・ To use DOCOMO keitai datalink, USB cable is required.
Flow of setup for data transfer (OBEX
communication)
When using FOMA USB Cable with Charge Function 02 (optional), install FOMA
communication configuration file in advance.
Downloading and installing FOMA communication configuration file
Installing from attached CD-ROM
Downloading from DOCOMO website and installing
Data transfer
Flow of setup for data communication
Preparation for using packet communication or 64K data communication is described.
aDownloading or installing FOMA communication configuration file→P6
・Installing from attached CD-ROM
・Downloading from DOCOMO website and installing
bConnecting FOMA terminal to a PC→P5
cConfirming FOMA communication configuration file→P8
Installing DOCOMO Connection Manager→P11
Setting data communication by DOCOMO Connection Manager*
Setting communications without using
DOCOMO Connection Manager→P15
Performing communication
* For setting of DOCOMO Connection Manager, refer to "ドコモ コネクションマネージャ操作マニュアル (DOCOMO
Connection Manager operation manual)".
4
F-04C_E1kou
❖ FOMA communication configuration file
When performing Packet communication or 64K data communication by connecting to a PC with USB
cable, install FOMA communication configuration file.
❖ DOCOMO Connection Manager
When DOCOMO Connection Manager (found on the attached CD-ROM) is installed on a PC, a number of
settings required for packet communication or 64K data communication can be simply operated from a PC.
◆ Precautions for installation/uninstallation
・ Before starting operation, make sure that no other program is running and exit the program if any.
* Exit any resident programs on Windows including antivirus software.
Example : Right-click the icon displayed in the task bar, click "閉じる (Close)" or "終了 (End)".
・ For installing/uninstalling FOMA communication configuration file or DOCOMO Connection Manager,
make sure that a user with administrator's privilege performs the operation. Installing/uninstalling the
software by other users may produce an error. For details on PC administrator privileges, contact your
PC manufacturer or Microsoft Corporation.
・ When "ユーザーアカウント制御 (User account control)" screen is appeared, perform the following
operations (it does not appear on Windows XP).
- Windows 7 : Click "はい (Yes)", or enter password and click "OK".
- Windows Vista : Click "許可 (Permit)" or "続行 (Continue)", or enter password and click "OK".
・ For operations of a PC, settings of administrator privileges, etc., refer to the Instructions Manual of the
PC.
Connecting up PC to the FOMA terminal
Connecting/disconnecting to PC is explained here. Installing FOMA communication
configuration file is described separately.→P6
・ If you connect FOMA terminal to a PC before installing FOMA communication configuration file,
Windows may automatically detect that USB cable has been inserted, and may request the driver. In such
a case, click "キャンセル (Cancel)" on the displayed screen to end.
・ The connection should be made with a PC and FOMA terminal both turned ON.
・ In this manual, the description takes the case of FOMA USB Cable with Charge Function 02 (optional) for
example.
◆ Inserting USB cable
1
Insert the connector of the USB cable into FOMA terminal's external
connection jack.
5
F-04C_E1kou
2
Insert the other end of the USB cable connector into the PC USB port.
Face up the front side shown
with a stamp, seal, etc.
Connector
・ When a PC and FOMA terminal are connected,
Open the jack cap
appears on the stand-by display of FOMA
terminal.
❖ Removing USB cable
1
Press the USB cable's release buttons on both sides of the connector (a) and
remove the connector from FOMA terminal (b).
Release buttons
a
b
Connector
2
Remove the USB cable out from the PC.
✔INFORMATION
・ Be careful not to give excessive force to the connecter of the USB cable when connecting/disconnecting the cable
to/from FOMA terminal.
When disconnecting the connector, be sure to pull it straight while pressing the release button. Applying an
excessive force to disconnect the connector may give damage to it.
・ Do not remove the USB cable during data communication. The data communication is disconnected and it may
cause data loss or malfunction.
Installing FOMA communication configuration file
(driver)
To make data communication by connecting FOMA terminal and a PC with USB cable, FOMA
communication configuration file (driver) is required. Install the file before connecting FOMA
terminal for the first time to the PC.
・ Before operating, refer to "Precautions for installation/uninstallation".→P5
・ Do not connect FOMA terminal until a message that instructs you to connect FOMA terminal to a PC
appears in Step 5.
6
F-04C_E1kou
<Example> Installing under Windows 7
1
2
Insert the CD-ROM into the PC's CD-ROM drive.
Click "データリンクソフト・各種設定ソフト (Data link software/Configuration
software)".
3
Click "インストール (Install)" of "FOMA通信設定ファイル (USBドライバ)
(FOMA communication configuration file (USB driver))" and double-click
"F04Cst.exe" icon from a window displayed.
4
5
Click "インストール開始 (Start installation)".
When a message indicating to connect FOMA terminal to the PC appears,
connect FOMA terminal to the PC.
・ Connect FOMA terminal while the power is ON.
6
On the Installation completion screen, click "OK".
Installing "DOCOMO Connection Manager"→P11
7
F-04C_E1kou
◆ Confirming FOMA communication configuration file
・ When a PC does not detect FOMA terminal correctly, settings and communication cannot be performed.
<Example> Checking on Windows 7
1
(Start)→"コントロールパネル (Control panel)"→"システムとセキュリティ
(System and security)"→"デバイスマネージャー (Device manager)" in the "シ
ステム (System)" category.
Under Windows Vista
Click
(Start)→"コントロールパネル (Control panel)"→"システムとメンテナンス (System and
maintenance)"→"デバイスマネージャ (Device manager)".
Under Windows XP
a Click "スタート (Start)"→"コントロールパネル (Control panel)"→"パフォーマンスとメンテナンス
(Performance and maintenance)"→"システム (System)".
b On the "システムのプロパティ (Property of system)" screen, click "ハードウェア (Hardware)" tab
→"デバイスマネージャ (Device manager)".
2
Double-click the type of each device→Confirm that the name of the following
devices are registered.
・ Device types and names are shown as
below.
The order to be displayed differs
depending on OSs.
-ポート(COMとLPT) (Port (COM and LPT)) :
FOMA F04C Command Port (COMx)*
FOMA F04C OBEX Port (COMx)*
-モデム (Modem) : FOMA F04C
-ユニバーサルシリアルバスコントローラ
(Universal Serial Bus Controller) or USB
(Universal Serial Bus) コントローラ
(Controller) : FOMA F04C
* Depending on the PC environment, x
represents different numbers.
◆ Uninstalling FOMA communication configuration file
・ Before operating, refer to "Precautions for installation/uninstallation".→P5
・ Before operating, remove FOMA terminal from the PC.
<Example> Uninstalling the driver under Windows 7, Windows Vista
1
Click
(Start)→"コントロールパネル (Control panel)"→"プログラムのアンイ
ンストール (Uninstall programs)" in the "プログラム (Programs)" category.
Under Windows XP
Click "スタート (Start)"→"コントロールパネル (Control panel)"→"プログラムの追加と削除 (Add/
delete Programs)".
8
F-04C_E1kou
2
Select "FOMA F04C USB" and click "アンインストールと変更 (Uninstall and
change)" (for Windows XP, "変更と削除 (Change and delete)").
3
4
Confirm that "FOMA F04C Uninstaller" is displayed and click "はい (Yes)".
The uninstall process starts.
If the "ドライバを削除しました (Driver deleted)" screen appears, click "OK".
✔INFORMATION
・ When "FOMA F04C USB" is not displayed on the deletion screen, execute the operations in "Installing FOMA
communication configuration file" again and uninstall.→P6
Using DOCOMO Connection Manager
DOCOMO Connection Manager is convenient software to use flat-rate data communication
or pay-as-you-go data communication. You can easily subscribe to mopera U and make a PC
setting according to your subscription status.
Also, you can check an estimate of data communication volume or usage fees by the charge
counter function.
The method of installing DOCOMO Connection Manager is explained here.
Not displayed in default setting.
For details, refer to ヘルプ (Help)
of ドコモ コネクションマネージャ
"DOCOMO Connection Manager".
Fee counter
Connect/Disconnect button
・ For Internet connection with FOMA terminal, you need to subscribe to Internet service provider (mopera
U etc.) applicable to services and data communication.
For details, refer to NTT DOCOMO website.
✔INFORMATION
Using pay-as-you-go data communication (including i-mode flat-rate packet communication services)
・ Note that communications of large-size data such as viewing websites containing images using packet
communication and downloading (example: updating of application, music, movie, OS or anti-virus software) will
require high charges.
Note that FOMA flat-rate packet services such as Pake-hodai and Pake-hodai full are not applied to the data
communication by connecting the FOMA terminal to a PC or another device.
Using flat-rate data plan
・ For using of flat-rate data plan, you need to subscribe to Internet service provider applicable to flat-rate data
communication charging plan. For details, refer to NTT DOCOMO website.
Using mopera
・ For connection/settings of mopera, refer to mopera website.
http://www.mopera.net/mopera/support/index.html
9
F-04C_E1kou
◆ Before installing DOCOMO Connection Manager
Before installing DOCOMO Connection Manager, check the items below and perform to change setting of
software/uninstall as required.
・ Prepare your FOMA terminal, FOMA USB Cable with Charge Function 02 (optional) or FOMA USB Cable
(optional).
・ Check the contents of subscription for services and Internet service provider.
・ If installing connection software except for DOCOMO Connection Manager, change the setting not to be
activated automatically as required.→P10 "Using connection software except for DOCOMO Connection
Manager"
❖ Changing setting of Internet Explorer
・ Before installing DOCOMO Connection Manager, set to "ダイヤルしない (No dialing)" for connection
setting at "インターネットオプション (Internet option)" field of Internet Explorer in advance.
<Example> Changing under Windows 7, Windows Vista
1
Click
(Start)→"すべてのプログラム (All programs)"→"Internet Explorer".
Under Windows XP
Click "スタート (Start)"→Select "すべてのプログラム (All programs)" → Click "Internet Explorer".
2
3
Click "ツール (Tool)"→"インターネットオプション (Internet option)".
4
Click "OK".
Click "接続 (Connection)" tab→Select "ダイヤルしない (No dialing)".
❖ Using connection software except for DOCOMO Connection Manager
DOCOMO Connection Manager includes same function as that of software below and using together is not
required. Perform to change setting not to be activated or uninstall as required.
・ mopera U start up tool
・ mopera U connection & setting tool
・ FOMA PC configuration software
・ FOMA Byte counter
To use Mzone (docomo Public wireless LAN service) by DOCOMO Connection Manager, uninstall the
following public wireless LAN connection software. And, when installing all at once, Mzone connection
cannot be used by DOCOMO Connection Manager.
・ U公衆無線LANユーティリティソフト (U public wireless LAN utility software)
・ ドコモ公衆無線LANユーティリティソフト (DOCOMO public wireless LAN utility software)
・ ドコモ公衆無線LANユーティリティプログラム (DOCOMO public wireless LAN utility program)
10
F-04C_E1kou
◆ Installing DOCOMO Connection Manager
<Example> Installing under Windows 7
1
2
Insert the CD-ROM into the PC's CD-ROM drive.
3
Click "インストール (Install)" field in Step c of "本CD-ROMからのFOMAデー
タ通信の設定方法 (Setting method of FOMA data communication from this
CD-ROM)".
Click "インターネット接続 (Internet connection)".
・ When the warning screen of security is displayed, click "実行 (Execute)".
・ For Windows XP, when the confirmation screen for installing of MSXML6/Wireless LAN API is
displayed, click "Install" to install MSXML6/Wireless LAN API. After performing to install MSXML6/
Wireless LAN API, reboot Windows to start installation of DOCOMO Connection Manager
automatically.
11
F-04C_E1kou
4
Click "次へ (Next)".
5
Confirm "注意事項 (Precautions)" and click "次へ (Next)".
6
Confirm the contents of ソフトウェア使用許諾契約 (Software license
agreement) and if you agree to the agreement, select "使用許諾契約の条項に
同意します (Agree to the clauses of the agreement)" and click "次へ (Next)".
12
F-04C_E1kou
7
Confirm the installing folder and click "次へ (Next)".
・ To change the installation destination, click "変更 (Change)" and specify any installation
destination.
8
Click "インストール (Install)".
9
When the "InstallShieldウィザードを完了しました (InstallShield wizard is
completed)" screen appears, click "完了 (Done)".
Installation starts.
Installing DOCOMO Connection Manager is completed.
✔INFORMATION
・ Installation may take a few minutes.
・ When a message notifying you to reboot Windows is displayed, follow the instruction of screen and reboot.
・ Do not install during data communication.
13
F-04C_E1kou
◆ Starting DOCOMO Connection Manager
・ Before operating, make sure that a PC and FOMA terminal are properly connected.
<Example> Setting under Windows 7, Windows Vista
1
Click
(Start)→"すべてのプログラム (All Programs)"→
"NTT DOCOMO"→"ドコモ コネクションマネージャ (DOCOMO Connection
Manager)"→"ドコモ コネクションマネージャ (DOCOMO Connection
Manager)".
Under Windows XP
Click "スタート (Start)"→Select "すべてのプログラム (All programs)"→"NTT DOCOMO"→"ドコモ
コネクションマネージャ (DOCOMO Connection Manager)" and click "ドコモ コネクションマネージャ
(DOCOMO Connection Manager)".
DOCOMO Connection Manager starts.
When booting a PC at first time, the setting wizard screen appears automatically.
・ According to the setting wizard, perform to set for making data communication connecting to
Internet.
After setting, you can perform communication using DOCOMO Connection Manager.
For details, refer to "ドコモ コネクションマネージャ操作マニュアル (DOCOMO Connection
Manager operation manual)".
✔INFORMATION
・ Just exiting the Internet browser or mail software may not disconnect communication. When you do not use
communication, be sure to disconnect the communication from "切断する (Disconnect)" button of DOCOMO
Connection Manager.
・ Please note that if auto update is set for OS update etc., the software is updated automatically and high cost may
be charged for the packet communication fee.
Connect/Disconnect button
14
F-04C_E1kou
Setting communications without using DOCOMO
Connection Manager
The method of dialup connection setup without DOCOMO Connection Manager is explained.
・ When using an access point compatible with HIGH-SPEED such as mopera for packet communication,
make settings using DOCOMO Connection Manager.
◆ Flow of dialup network setting
・ Flow of setup for data communication→P4
・ Before operating, make sure that a PC and FOMA terminal are properly connected.
Setting the dialup connection (APN)*→P15
・When the access point is mopera U or mopera, you do not need to set.
Setting Show/Hide caller ID*→P17
・Set as required.
Setting Dialup Network
・Setting for Windows 7, Windows Vista→P18
・Setting for Windows XP→P20
* Set for packet communication.
Communication software to input AT commands is required for settings.
The method of setting using "ハイパーターミナル (Hyper terminal)" that comes with Windows XP is
explained here. Windows 7 and Windows Vista do not support "ハイパーターミナル (Hyper terminal)". For
Windows 7 and Windows Vista, set using the software supported by Each OS (Follow the method for the
software to be used.).
◆ Setting the dialup connection (APN)
❖ The dialup connection (APN) and registration number (cid)
The dialup connections (APN) for packet communication can be set for registration numbers (cid) between
1 and 10 in FOMA terminal. By default, "mopera.ne.jp" (APN) to connect to mopera is registered in cid1,
"mopera.net" (APN) to connect to mopera U is registered in cid2 and 3, and "mpr.ex-pkt.net" (APN) to
connect in 128K communication is registered in cid4. For connecting to other providers or corporate LANs,
register APN for cid5-10.
・ For the dialup connections (APN), inquire your provider or network administrator.
・ The dialup connection settings can be considered as phonebook entries registered for packet
communication. The comparison between dialup connection settings and FOMA terminal phonebook is
as shown below.
Connection (APN)
Phonebook item
Registration number (cid)
Registration number (Phonebook No.)
Connection name (APN)
Party's name
*99***<cid># (packet communication)
Party's phone number
・ The registered cid become the connection number in the dialup connection numbers setting.
15
F-04C_E1kou
❖ Setting the dialup connection (APN)
<Example> Setting under Windows XP
1
Click "スタート (Start)"→Select "すべてのプログラム (All programs)"→"アク
セサリ (Accessories)"→"通信 (Communication)" and click "ハイパーターミナ
ル (Hyper terminal)".
2
Enter the desired dialup connection name in "名前 (Name)"→Click "OK".
・ The following characters (one-byte) cannot be
used in "名前 (Name)".
¥/:*?<>|”
3
Enter a fictional phone number (such as "0") for "電話番号 (Phone number)"
→Confirm "接続方法 (Connection method)" is set to "FOMA F04C"→Click
"OK".
・ "市外局番 (Area code)" differs depending on the
PC environment. The code does not relate to
Dialup connection (APN) setup. So no need to
change.
4
5
Click "キャンセル (Cancel)" on the "接続 (Connect)" screen.
Enter the dialup connection (APN) in the format "AT+CGDCONT =<cid>,
"<PDP_TYPE>", "<APN>""→
<cid> : Enter any number between 5-10.
<PDP_TYPE> : IP or PPP
<APN> : Dialup connection (APN)
・ +CGDCONT command→P32 "Supplement to AT
command"
・ If nothing is displayed even when AT command is
entered, enter ATE1 and press .
16
F-04C_E1kou
6
Confirm that "OK" is displayed and click "ファイル (File)"→Click "ハイパー
ターミナルの終了 (End HyperTerminal)".
7
When confirming disconnection, click "はい (Yes)"→When confirming saving,
click "いいえ (No)".
◆ Setting Show/Hide caller ID
You can set to show/hide call ID for packet communication at once.
Caller ID is your important information. Take care when deciding to disclose your caller ID.
・ If "Not notify" is set when using mopera U or mopera, connection is unavailable.
<Example> Setting under Windows XP
1
2
Perform Step 1 - 4 in "Setting the dialup connection (APN)".
3
Confirm that "OK" is displayed and click "ファイル (File)"→Click "ハイパー
ターミナルの終了 (End HyperTerminal)".
4
When confirming disconnection, click "はい (Yes)"→When confirming saving,
click "いいえ (No)".
Enter notify/not notify of caller ID in the format "AT*DGPIR=<n>"→
.
<n> : 0-2
0 : Connect directly (Default)
1 : Connect prefixing 184 (Not notify)
2 : Connect prefixing 186 (Notify)
・ If nothing is displayed even when AT command is
entered, enter ATE1 and press .
❖ Show/Hide caller ID function by dialup network settings
The dialup network settings can also be used to append 186 (Notify)/184 (Not notify) to the dialup
connection number.
・ The Show/Hide of caller ID when both of the *DGPIR command and dialup network settings are set is
as shown below.
Setting made by *DGPIR
command
Dialup network
setting (<cid>=3)
*99***3#
No setting
Caller ID is sent
Caller ID is not sent
Caller ID is sent
Caller ID is not sent
Caller ID is sent
184*99***3#
Caller ID is not sent
186*99***3#
Caller ID is sent
17
F-04C_E1kou
◆ Setting dialup network
In this manual, the description takes the case of IP connection to mopera U via packet communication for
example.
・ When connecting to mopera U or mopera via packet communication, enter the following number in the
phone number field.
mopera U (PPP connection) : *99***2#
mopera U (IP connection) : *99***3#
128K communication (PPP connection) : *99***4#
mopera (PPP connection) : *99***1#
・ When connecting to mopera U or mopera via 64K data communication, enter the following number in
the phone number field to connect to.
mopera U : *8701
mopera : *9601
❖ Setting for Windows 7, Windows Vista
1
Click
(Start)→"コントロールパネル (Control panel)"→"ネットワークの状態
とタスクの表示 (Network status and tasks)" in the "ネットワークとインター
ネット (Network and Internet)" category.
Under Windows Vista
Click
(Start)→"接続先 (Dialup connection)".
2
Click "新しい接続またはネットワークのセットアップ (Setup new connection
or network)".
Under Windows Vista
Click "接続またはネットワークをセットアップします (Set up connection or network)".
3
Select "ダイヤルアップ接続をセットアップします (Set up dialup connection)"
and click "次へ (Next)".
When the "どのモデムを使いますか? (Which modem will you use?)" screen is displayed
Click "FOMA F04C".
18
F-04C_E1kou
4
Enter the phone number of the dialup connection in "ダイヤルアップの電話番
号 (Dialup phone number)" ("*99***<cid>#" for packet communication)
with one-byte→Enter "ユーザー名 (User name)"→Enter "パスワード
(Password)"→Enter "接続名 (Connection name)" and click "接続 (Connect)".
<cid> : The number registered in P16 "Setting the dialup connection (APN)"
・ In "ユーザー名 (User name)" and "パスワード
(Password)", enter the user name and password
specified by your provider or network
administrator.
・ When the access point is mopera U or mopera,
you do not need to enter "ユーザー名 (User
name)" or "パスワード (Password)".
・ You cannot use "." (one-byte period) at the
beginning of "接続名 (Connection name)". Also,
the following characters (one-byte) cannot be
used.
¥/:*?<>|
5
6
On the connecting screen, click "スキップ (Skip)".
・ Only make settings without connecting to the Internet right away.
On the "接続の使用準備ができました (Preparation for using is completed)"
screen, click "閉じる (Close)".
Under Windows Vista
a On the "インターネット接続テストに失敗しました (Failed in Internet connection test)" screen,
click "接続をセットアップします (Set up connection)".
b Click "閉じる (Close)".
7
On the "ネットワークと共有センター (Network and shared center)" screen,
click "アダプターの設定の変更 (Change adapter configuration)" appeared on
the left of the top.
Under Windows Vista
Click
(Start)→"接続先 (Dialup connection)".
8
9
Right-click the dialup connection created and click "プロパティ (Property)".
Confirm the setting of each item in "全般 (General)" tab.
・ When multiple modems are connected, select
only "モデム-FOMA F04C (Modem-FOMA F04C)"
in "接続の方法 (Connection method)".
・ Uncheck ( ) other than selected modem.
・ COM port number assigned to the modem
displayed at "接続の方法 (Connection method)"
field differs by the environment of a PC you use.
・ Uncheck ( ) "ダイヤル情報を使う (Use dial
information)".
19
F-04C_E1kou
10
Click "ネットワーク (Network)" tab→Set each item as shown below.
・ Uncheck (
) "インターネットプロトコルバージョ
ン6 (TCP/IPv6) (Internet Protocol Version 6 (TCP/
IPv6))".
・ When settings of IP and DNS information have
been requested from the provider, etc. select "イ
ンターネットプロトコルバージョン4 (TCP/IPv4)
(Internet Protocol Version 4 (TCP/IPv4))", click "プ
ロパティ (Property)" and set various information.
・ When settings of other items have been
requested from the provider, etc., check/uncheck
as required.
11
12
Click "オプション (Option)" tab→Click "PPP設定 (PPP settings)".
13
Click "OK".
Uncheck all items (
) and click "OK".
Performing communication→P23
❖ Setting for Windows XP
1
Click "スタート (Start)"→Select "すべてのプログラム (All programs)"→"アク
セサリ (Accessories)"→"通信 (Communication)" and click "新しい接続ウィ
ザード (New connection wizard)".
2
On the "新しい接続ウィザードの開始 (Start new connection wizard start)"
screen, click "次へ (Next)".
3
Select "インターネットに接続する (Connect to Internet)" and click "次へ
(Next)".
4
Select "接続を手動でセットアップする (Set up connection manually)" and
click "次へ (Next)".
5
Select "ダイヤルアップモデムを使用して接続する (Use dialup modem to
connect)" and click "次へ (Next)".
When "デバイスの選択 (Device selection)" screen is displayed
Select "モデム-FOMA F04C (Modem-FOMA F04C)" and click "次へ (Next)".
20
F-04C_E1kou
6
Enter the desired dialup connection name in "ISP名 (ISP name)"→Click "次へ
(Next)".
・ You cannot use "." (one-byte period) at the
beginning of "ISP名 (ISP name)". Also, the
following characters (one-byte) cannot be used.
¥/:*?<>|”
7
Enter the phone number of the dialup connection in "電話番号 (Phone
number)" ("*99***<cid>#" for packet communication) with one-byte→
Click "次へ (Next)".
<cid> : The number registered in P16 "Setting the dialup connection (APN)"
8
Enter "ユーザー名 (User name)"→Enter "パスワード (Password)"→Enter "パス
ワードの確認入力 (Password confirmation entry)"→Select all items as shown
below and click "次へ (Next)".
・ In "ユーザー名 (User name)" and "パスワード
(Password)", enter the user name and password
specified by your provider or network
administrator.
・ When the access point is mopera U or mopera,
you do not need to enter "ユーザー名 (User
name)", "パスワード (Password)" or "パスワード
の確認入力 (Password confirmation entry)".
9
On the "新しい接続ウィザードの完了 (New connection wizard is completed)"
screen, click "完了 (Done)".
10
Click "スタート (Start)"→Select "すべてのプログラム (All programs)"→"アク
セサリ (Accessories)"→"通信 (Communication)" and click "ネットワーク接続
(Network connection)".
21
F-04C_E1kou
11
Select the created dialup connection icon and click "ファイル (File)"→Click
"プロパティ (Property)".
12
Confirm the setting of each item in "全般 (General)" tab.
・ When multiple modems are connected, select
only "モデム-FOMA F04C (Modem-FOMA F04C)"
in "接続方法 (Connection method)".
・ Uncheck ( ) other than selected modem.
・ COM port number assigned to the modem
displayed at "接続方法 (Connection method)"
field differs by the environment of a PC you use.
・ Uncheck (
) "ダイヤル情報を使う (Use dial
information)".
13
Click "ネットワーク (Network)" tab→Set each item as shown below→Click
"設定 (Settings)".
・ When settings of IP and DNS information have
been requested from the provider, etc. select "イ
ンターネットプロトコル (TCP/IP) (Internet
protocol (TCP/IP))", click "プロパティ (Property)"
and set necessary information.
・ Since "QoSパケットスケジューラ (QoS packet
scheduler)" settings in "この接続は次の項目を使用
します (Use these items for this connection)" can
not be changed, leave it as it is.
22
F-04C_E1kou
14
Uncheck all items (
15
Click "OK".
) and click "OK".
Performing communication→P23
◆ Performing communication via dialup connection
Starting communication and disconnection are explained here.
<Example> Under Windows 7
1
Connect FOMA terminal to a PC.
2
Click
(Start)→"コントロールパネル (Control panel)"→"ネットワークの状態
とタスクの表示 (Network status and tasks)" in the "ネットワークとインター
ネット (Network and Internet)" category.
For USB cable connection→P5
Under Windows Vista
Click
(Start)→"接続先 (Dialup connection)"→Select the dialup connection and click "接続
(Connect)".→Go to Step 4
Under Windows XP
Click "スタート (Start)"→Select "すべてのプログラム (All programs)"→"アクセサリ (Accessories)"→
"通信 (Communication)" and click "ネットワーク接続 (Network connection)"→Double-click the
connection icon.→Go to Step 4
3
On the "ネットワークと共有センター (Network and shared center)" screen,
click "アダプターの設定の変更 (Change adapter configuration)" appeared on
the left of the top→Double-click the connection icon.
4
Enter "ユーザー名 (User name)"→Enter "パスワード (Password)"→Click "ダイ
ヤル (Dial)".
・ In "ユーザー名 (User name)" and "パスワード
(Password)", enter the user name and password
specified by your provider or network
administrator.
・ When using mopera U or mopera, you do not
need to enter "ユーザー名 (User name)" or "パス
ワード (Password)".
・ When "ユーザー名 (User name)" was entered or
"パスワード (Password)" was saved while
settings, these entries are no longer necessary.
・ Click "OK" when the connection established
screen is displayed.
23
F-04C_E1kou
✔INFORMATION
・ FOMA terminal displays a connecting screen when you execute packet communication or 64K data
communication. The following screens are displayed when a connection has been established.
For packet
For 64K data
communication
communication
・ The communication speed displayed on your PC may differ from actual speed.
・ The communication is available only with FOMA terminal that was connected when the connection icon was
created.
❖ Disconnecting communication
Just exiting the PC browser may not disconnect communication. To ensure disconnection, perform the
following operation.
<Example> Under Windows 7
1
Click
on the task tray→Connection name to disconnect→"切断
(Disconnect)".
Under Windows Vista
Right-click
in the task tray→Select "切断 (Disconnect)" and click the dialup connection to
disconnect.
Under Windows XP
Click dial-up icon in the task tray→Click "切断 (Disconnect)".
24
F-04C_E1kou
AT command
AT commands are commands for setting FOMA terminal functions using a PC. FOMA
terminals comply with AT commands and support some extended commands and
proprietary AT commands.
❖ AT command input format
"AT" must be entered before each AT command. Commands must be entered in one-byte alphanumeric
characters.
<Example> Connecting to mopera U with ATD command
ATD*99***3#
Return character : Press Enter key. (Command separator)
Parameter : Command's argument
Command : Command name
AT commands and their parameters must be entered on a single line. All the characters from the first
character until the character directly preceding
must be entered on a single line. Each line can be up to
256 characters including "AT".
❖ AT command input mode
To operate FOMA terminal using AT commands, a PC must be in terminal mode. Terminal mode is a mode
that lets the PC operate as a single communication terminal. When terminal mode is set, the characters
entered from the keyboard are sent directly to the communication port to operate FOMA terminal.
・ Offline mode
FOMA terminal is in stand-by. FOMA terminal must be in stand-by status to use AT commands to control
it.
・ Online data mode
FOMA terminal is communicating. If you enter AT commands when FOMA terminal is performing
communication, the sent characters are sent directly to the communication receiver and may cause the
receiver's modem to malfunction. Do not enter AT commands while FOMA terminal is performing
communication.
・ Online command mode
AT commands can be used even when FOMA terminal is in communication mode. These operations
make it possible to execute AT commands without interfering with the connection to the communication
receiver, and normal communication can continue after the commands have finished executing.
Switching between online data mode and online command mode
To switch FOMA terminal from online data mode to online command mode, you can use either of the
following procedures.
・ Enter +++ command or code set in the S2 register.
・ Turn the RS-232C*ER signal OFF when set in "AT&D1".
* The USB interface emulates an RS-232C signal line so RS-232C signal control using communication applications is
possible.
To switch from online command mode to online data mode, enter "ATO ".
✔INFORMATION
・ When making a call or sending an AT command from external device, it is sent from Number A with 2in1 in Dual
mode or A mode, and from Number B in B mode.
25
F-04C_E1kou
◆ List of AT command
・ The followings are AT command that can be used via the FOMA F04C (Modem).
・ Entering "¥" may cause "\" to appear depending on the font setting for a PC or communication software.
・ If the battery pack is removed from FOMA terminal before the terminal power is turned off, the setting
values may not be recorded.
Upper slot : Command
Lower slot : Example
A/
A/
OK
AT
AT
OK
ATA
RING
ATA
CONNECT
ATD
ATD*99***1#
CONNECT 460800
ATE<n>*1
ATE1
OK
ATH
ATH
NO CARRIER
ATI<n>
Description
Execute the previously executed command again.
When previous response is "ERROR", "ERROR" is returned.
Use commands on this list by prefixing to commands other than A/ or +++. When using only
this command, "OK" is returned with FOMA terminal enabled for using AT commands.
Perform the receiving process when entered while receiving a packet communication or
64K data communication.
The following commands can be entered when receiving a packet communication.
ATA184 : Handling of incoming calls : Send caller ID function OFF
ATA186 : Handling of incoming calls : Send caller ID function ON
ATD*99***<cid># : Performs calling process for packet communication.
If <cid> or ***<cid> is omitted, <cid>=1 is set.
ATD [parameter] [phone number] : Perform calling process for 64K data communication.
Calling process is not permitted if phone number contains characters other than the
following.
0-9, *, #, A, a, B, b, C, c
The following characters and a space can be entered but are not recognized in dialing.
,(comma), !, -, @, D, d, P, p, T, t, W, w
Setting Show/Hide caller ID is enabled by inserting 186 or 184 after ATD.
ATDN or ATDL can be used for redial calling.
Set whether FOMA terminal will return echo for command sent from a PC.
n=0 : Echo OFF n=1 : Echo ON (default)
Normal usage is n=1. If the PC has an echo function, setting this command to n=0 prevents
double display of characters.
Disconnect line when entered during a communication.
Execute in online command mode.→P25
ATI0
NTT DoCoMo
OK
Display the confirmation code.
n=0 : "NTT DoCoMo" n=1 : Display model name of FOMA terminal
n=2 : Display version of FOMA terminal n=3 : Display elements of ACMP signals
n=4 : Display details of functions that can be communicated by FOMA terminal in numeric
ATO
Return from online command mode to online data mode during communication.
ATO
CONNECT 460800
ATQ<n>*1
ATQ0
OK
ATS0=<n>*1
ATS0=0
OK
ATS2=<n>
ATS2=43
OK
ATS3=<n>
ATS3=13
OK
Set whether to display result code.
n=0 : Display (default) n=1 : Not display
When ATQ1 is executed, "OK" is not returned.
Set number of rings until FOMA terminal receives communication automatically.
n=0 : Not receive automatically (default)
n=1-255 : Receive automatically with specified number of rings
ATS0? : Display current settings
Set escape character.
n=0-127 (default : n=43) When n=127 is set, escape is unavailable.
ATS2? : Display current settings
Set the carriage return (CR) character that identifies the end of AT command character
string. Appended to end of echoed command character string and result code.
n=13 (fixed value)
ATS3? : Display current settings
26
F-04C_E1kou
Upper slot : Command
Lower slot : Example
ATS4=<n>
ATS4=10
OK
ATS5=<n>
ATS5=8
OK
ATS6=<n>
ATS6=5
OK
ATS8=<n>
ATS8=3
OK
ATS10=<n>*1
ATS10=1
OK
ATS30=<n>
ATS30=0
OK
ATS103=<n>
ATS103=1
OK
ATS104=<n>
ATS104=1
OK
ATV<n>*1
ATV1
OK
ATX<n>*1
ATX4
OK
ATZ*3
Description
Set the line feed (LF) character. When result code is displayed as alphabetic characters,
appends the character after the carriage return (CR) character.
n=10 (fixed value)
ATS4? : Display current settings
Set the back space (BS) character. When this character is detected during command input,
the last character in the input buffer is deleted.
n=8 (fixed value)
ATS5? : Display current settings
Set pause time (seconds) until dialing commences but do not operate.
n=2-10 (default : n=5)
ATS6? : Display current settings
Set pause time (seconds) until commas are dialed but do not operate.
n=0-255 (default : n=3)
ATS8? : Display current settings
Set the delay time (1/10 seconds) for automatic disconnection but do not operate.
n=1-255 (default : n=1)
ATS10? : Display current settings
Set a period of time (minutes) with no data transmission/reception to terminate the
connection for 64K data communications.
n=0-255 : (default : n=0, n=0 indicates that inactive timer is set to OFF.)
ATS30? : Display current settings
Set the separator of received sub addresses for 64K data communication.
n=0 : * n=1 : / (default) n=2 : ¥ or \
ATS103? : Display current settings
Set the separator of sent sub addresses for 64K data communication.
n=0 : # n=1 : % (default) n=2 : &
ATS104? : Display current settings
Set result code display method.
n=0 : Number display n=1 : Alphabetical display (default)
When ATV0 is executed, "0" is not returned to the same line.
Set whether to detect busy or dial tones and whether to display the speed in the
"CONNECT" display for the connection.
Busy tone detection : Send "BUSY" response when dialup connection is busy.
Dial tone detection : Detect whether FOMA terminal is connected.
n=0 : No busy tone, no dial tone detected, and no speed is displayed
n=1 : No busy tone, no dial tone detected, and speed is displayed
n=2 : No busy tone, dial tone detected, and speed is displayed
n=3 : Busy tone detected, no dial tone detected, and speed is displayed
n=4 : Busy tone detected, dial tone detected, and speed is displayed (default)
When n=0 is set, AT&E and AT¥V command will be unavailable.
ATZ
OK (When in offline mode)
Reset the current setting to the registered state.
When this command is executed during communication, the terminal is reset after the line
is disconnected (displaying "NO CARRIER").
AT%V
Display FOMA terminal version.
AT%V
Ver1.00
OK
AT&C<n>*1
AT&C1
OK
AT&D<n>*1
AT&D2
OK
Set the operating conditions of the circuit CD (DCD) for DTE.
n=0 : Always ON n=1 : Vary according to line connection status (default)
When set to n=0, the CD signal is set to ON directly before sending "CONNECT" when
ending connection. The CD signal is set to OFF directly before the line is disconnected and
"NO CARRIER" is sent.
Set the operation performed when circuit ER (DTR) signal received from DTE is switched
from ON to OFF while online data mode takes effect.
n=0 : Ignore status (status is always considered to be ON)
n=1 : Move to online command mode when status changes from ON to OFF
n=2 : Disconnect line and move to offline mode when status changes from ON to OFF
(default)
27
F-04C_E1kou
Upper slot : Command
Lower slot : Example
AT&E<n>*1
AT&E1
OK
AT&F
AT&F
OK (When in offline mode)
AT&S<n>*1
AT&S0
OK
AT&W
Description
Set the speed display used when connection is made.
n=0 : Display communication speed of wireless zone
n=1 : Display communication speed between a PC and FOMA terminal (default)
Reset the current setting to the default.
When this command is executed during communication, the terminal is reset after the line
is disconnected (displaying "NO CARRIER").
Set control of the data set ready (DR) signal to be output to DTE.
n=0 : Always ON (default) n=1 : ON at time of connection
Register the current settings in FOMA terminal.
AT&W
OK
AT*DANTE
AT*DANTE
*DANTE : 3
OK
AT*DGANSM=<n>*2
AT*DGANSM=0
OK
AT*DGAPL=<n> [,<cid>]*2
AT*DGAPL=0,1
OK
AT*DGARL=<n> [,<cid>]*2
AT*DGARL=0,1
OK
AT*DGPIR=<n>*2
AT*DGPIR=0
OK
AT*DRPW
AT*DRPW
*DRPW : 0
OK
AT+CAOC
Indicate FOMA terminal reception level in the "*DANTE : <n>" format.
n=0 : Out of service area n=1 : Received signal level of FOMA terminal is 0 or 1 antenna.
n=2 : Received signal level of FOMA terminal is 2 antennas.
n=3 : Received signal level of FOMA terminal is 3 antennas.
AT*DANTE=? : Display a list of displayable values
Set to reject or permit incoming packet communications.
n=0 : Reject setting = OFF, Accept setting = OFF (default)
n=1 : Reject setting=ON n=2 : Accept setting=ON
AT*DGANSM? : Display current settings
AT*DGANSM=? : Display a list of assignable values
Set the dialup connections (APN) to permit incoming packet communications. APN uses
<cid> defined by +CGDCONT command.
n=0 : Add to list of APN permitted for incoming communications
n=1 : Delete from list of APN permitted for incoming communications
If the <cid> is not defined by the +CGDCONT command, it can still be added to/deleted from
the list.
If the <cid> is omitted, all the <cid> are added to/deleted from the list.
AT*DGAPL? : Display current settings
AT*DGAPL=? : Display a list of assignable values
Set the dialup connections (APN) to refuse incoming packet communications. APN uses
<cid> defined by +CGDCONT command.
n=0 : Add to list of APN rejected for incoming communications
n=1 : Delete from list of APN rejected for incoming communications
If the <cid> is not defined by the +CGDCONT command, it can still be added to/deleted from
the list.
If the <cid> is omitted, all the <cid> are added to/deleted from the list.
AT*DGARL? : Display current settings
AT*DGARL=? : Display a list of assignable values
Set Caller ID notification when packet communication connection is being performed. This
command is available when a communication is sent or received.
n=0 : Connect to APN directly (default) n=1 : Connect to APN prefixing 184
n=2 : Connect to APN prefixing 186
When Show/Hide caller ID is specified by dialup network→P17
AT*DGPIR? : Display current settings
AT*DGPIR=? : Display a list of assignable values
Indicate an index for the reception power of the radio waves that FOMA terminal receive.
AT*DRPW=? : Display a list of displayable values
Display last call cost.
AT+CAOC
+CAOC : "000024"
OK
AT+CBC
AT+CBC
+CBC : 0,100
OK
Display FOMA terminal's battery level in the "+CBC : <bcs>,<bcl>" format.
bcs=0 : Powered by the battery pack bcs=1 : Not powered by the battery pack
bcs=2 : Battery pack removed bcs=3 : Power-supply error
bcl=0 : No battery remained or battery pack removed bcl=1-100 : Battery remained
AT+CBC=? : Display a list of displayable values
28
F-04C_E1kou
Upper slot : Command
Lower slot : Example
AT+CBST=<n>,1,0*1
AT+CBST=116,1,0
OK
AT+CDIP=<n>*1
AT+CDIP=0
OK
AT+CEER
AT+CEER
+CEER : 36
OK
AT+CGDCONT*2
Description
Set the line to use (Setting of bearer service)
n=116 : 64K data communication (default) n=134 : 64K videophone
AT+CBST? : Display current settings AT+CBST=? : Display a list of assignable values
Set to notify/not to notify the sub address when receiving in packet communication or 64
data communication. And, subscription status of Multi Number can be confirmed.
n=0 : The information of sub address is not displayed. (default)
n=1 : The information of sub address is displayed.
m=0 : Multi Number not subscribed. m=1 : Multi Number subscribed.
AT+CDIP? : Display the current settings and status in the "+CDIP:<n>,<m>" format
AT+CDIP=? : List of the settable values is displayed.
Display the reason of immediate disconnection.
Disconnection reason list→P31
Set dialup connection (APN) for packet communication.→P32
→P32
AT+CGEQMIN*2
→P33
AT+CGEQREQ*2
→P33
AT+CGMR
Set the criteria for judging whether to permit QoS (Quality of Service) provisioned by the
network when packet communication is established.→P33
Set QoS (Quality of Service) requested to the network at the transmission of packet
communication.→P33
Display FOMA terminal version.
AT+CGMR
1234567890123456
OK
AT+CGREG=<n>*1
AT+CGREG=0
OK
AT+CGSN
Set whether to report network service registration status (Within/Out).
n=0 : Not notified (default)
n=1 : When the terminal is moved from Within service area to Out of service area or vice
versa, the status is reported in the "+CGREG : <stat>" format.
stat=0 : Out of packet service area stat=1 : Within packet service area
stat=4 : Unknown
stat=5 : Within packet service area (during international roaming)
AT+CGREG? : Display the current settings and status in the "+CGREG : <n>,<stat>" format
AT+CGREG=? : Display a list of assignable values
Display FOMA terminal serial No.
AT+CGSN
123456789012345
OK
AT+CLIP=<n>*1
AT+CLIP=0
OK
AT+CLIR=<n>*2
AT+CLIR=2
OK
AT+CMEE=<n>*1
AT+CMEE=0
OK
Set whether to display sender's caller ID on a PC when receiving 64K data communication.
n=0 : Not display result (default) n=1 : Display result
m=0 : Network setting not to send caller ID
m=1 : Network setting to send caller ID m=2 : Unknown
AT+CLIP? : Display the current settings and status in the "+CLIP : <n>,<m>" format
AT+CLIP=? : Display a list of assignable values
Set Caller ID notification when sending 64K data communication.
n=0 : Use the setting in Caller ID notification of FOMA terminal n=1 : Not send
n=2 : Send (default)
m=0 : CLIR not operating (always sends) m=1 : CLIR operating (never sends)
m=2 : Unknown m=3 : CLIR temporary mode (default=does not send)
m=4 : CLIR temporary mode (default=sends)
AT+CLIR? : Display the current settings and status in the "+CLIR : <n>,<m>" format
AT+CLIR=? : Display a list of assignable values
Set whether to display an error report at FOMA terminal.
n=0 : Display "ERROR" and no result code (default)
n=1 : Use result code, displaying reason as number
n=2 : Use result code, displaying reason as alphabetic characters
Display reasons in the "+CME ERROR : xxxx" format when n=1 or n=2 is set (xxxx = number
or alphabetic characters).→P32 "Error messages list"
AT+CMEE? : Display current settings AT+CMEE=? : Display a list of assignable values
29
F-04C_E1kou
Upper slot : Command
Lower slot : Example
AT+CNUM
AT+CNUM
+CNUM : ,"090XXXXXXXX",
129
OK
AT+COPS=<n>,2,
<oper>*2
AT+COPS=0
OK
AT+CPAS
AT+CPAS
+CPAS : 0
OK
AT+CPIN="<pin>",
"<newpin>"
AT+CPIN="0000"
OK
AT+CR=<n>*1
AT+CR=0
OK
AT+CRC=<n>*1
AT+CRC=0
OK
AT+CREG=<n>*1
AT+CREG=0
OK
AT+CUSD=<n>,"<str>"*1
AT+CUSD=0,"012345678"
OK
AT+FCLASS=<n>*1
AT+FCLASS=0
OK
AT+GCAP
AT+GCAP
+GCAP : +CGSM,+FCLASS,
+W
OK
Description
Display FOMA terminal's own phone number in the "+CNUM : ,"<number>",<type>" format.
number : Own phone number (With 2in1, display Number B in B mode or Number A in
other mode)
type=129 : International access code + not included
type=145 : International access code + included
Set search method for network operator to connect.
n=0 : Auto (default) n=1 : Manual n=3 : No mapping
When n=1 is set, set PLMN Number in hexadecimal value for <oper>.
AT+COPS? : Display current settings AT+COPS=? : Display a list of assignable values
Display whether FOMA terminal can send and receive AT commands to external devices in
"+CPAS : <n>" format.
n=0 : Possible n=1 : Impossible n=2 : Status unknown
n=3 : Possible and receiving
n=4 : Possible and communicating
AT+CPAS=? : Display a list of displayable values
Enter these commands for entering PIN1/PIN2 codes or PUK with PIN1 code ON. To enter
PUK, enter new PIN1/PIN2 code in <newpin>. Even if entering in <newpin> when entry of
PIN1/PIN2 code is request, PIN1/PIN2 code cannot be changed.
n=READY : Entry of code not requested n=SIM PIN : Entry of PIN1 code waited
n=SIM PIN2 : Entry of PIN2 code waited
n=SIM PUK : Entry of PUK waited due to failure in unblocking PIN1 code
n=SIM PUK2 : Entry of PUK waited due to failure in unblocking PIN2 code
AT+CPIN? : Display the code currently requested in "+CPIN : <n>" format
Set whether to display the communication type before "CONNECT" is displayed during
connection.
n=0 : Not display (default)
n=1 : Display the communication type in the "+CR : <serv>" format
serv=GPRS : Packet communication serv=SYNC : 64K data communication
serv=AV64K : 64K videophone
AT+CR? : Display current settings AT+CR=? : Display a list of assignable values
Set whether to use +CRING result codes when communication is received.
n=0 : Not use (default)
n=1 : Use "+CRING : <type>" result codes
type=GPRS "PPP",,,"<APN>" : Packet communication
type=SYNC : 64K data communication
type=AV64K : 64K videophone
AT+CRC? : Display current settings AT+CRC=? : Display a list of assignable values
Set whether to report network service registration status (Within/Out).
n=0 : Not notified (default)
n=1 : When the terminal is moved from Within service area to Out of service area or vice
versa, the status is reported in the "+CREG : <stat>" format.
stat=0 : Out of sound service area stat=1 : Within sound service area
stat=4 : Unknown
stat=5 : Within sound service area (during international roaming)
AT+CREG? : Display the current settings and status in the "+CREG : <n>,<stat>" format
AT+CREG=? : Display a list of assignable values
Set Additional service (Register USSD) of Network Services. Enter Service code provided
by DOCOMO in <str>.
n=0 : Not answer mid result (default)
n=1 : Answer mid result in "+CUSD : <m>, "<str>",0" format
m=0 : Information not requested m=1 : Information requested
AT+CUSD? : Display current settings AT+CUSD=? : Display a list of assignable values
Set communication type supported by FOMA terminal.
n=0 : Only data supported (fixed value)
AT+FCLASS? : Display current settings
AT+FCLASS=? : Display a list of assignable values
Display the range of AT commands supported by FOMA terminal in the "+GCAP : <n>"
format.
n=+CGSM : Support GSM commands (including the case for supporting a part)
n=+FCLASS : Support +FCLASS commands n=+W : Support +W commands
30
F-04C_E1kou
Upper slot : Command
Lower slot : Example
AT+GMI
Description
Display FOMA terminal manufacturer name.
AT+GMI
FUJITSU
OK
AT+GMM
Display model name of FOMA terminal.
AT+GMM
FOMA F04C
OK
AT+GMR
Display FOMA terminal version.
AT+GMR
Ver1.00
OK
AT+IFC=<n,m>*1
AT+IFC=2,2
OK
Set how to control local flow between a PC and FOMA terminal.
n, m=0 : No flow control n, m=1 : Perform XON/XOFF flow control
n, m=2 : RS/CS (RTS/CTS) Perform flow control (default)
AT+IFC? : Display the current settings and status in the "+IFC : <n>,<m>" format (n is the
value of DCE by DTE, and m is the value of DTE by DCE)
AT+IFC=? : List of the settable values is displayed
AT+WS46=<n>*1
Display wireless network used when sending communication in n number.
When entering AT+WS46=<n>, ERROR is returned because it cannot be changed.
n=25 : 3G network (FOMA) (default)
AT+WS46? : Display current settings AT+WS46=? : Display a list of assignable values
AT¥S
Display the currently set commands and S register settings.
AT¥S
E1 Q0 V1 X4 &C1 &D2
&S0 ・・・ (snip) ・・・
S104=001
OK
AT¥V<n>*1
AT¥V0
OK
+++
+++ (not displayed)
OK
Set whether to use expanded result codes when connection is made.
n=0 : Not use expanded result codes (default)
n=1 : Use expanded result codes
Move from online data mode to online command mode when entered during a
communication.
The escape guard interval is 1 second (fixed value).
*1 Registered in FOMA terminal by &W command.
*2 Not reset by &F and Z commands.
*3 When Z command is executed before the &W command, the terminal is reset to the last status registered in memory, and
prior changes are erased.
◆ Disconnection reason list
■ Packet communication
Value
26
Description
APN is not present or is incorrect.
27
30
Disconnected by network.
33
Terminal does not subscribe to packet communication.
36
Normal disconnection.
31
F-04C_E1kou
■ 64K data communication
Value
Description
1
Specified number does not exist.
16
Normal disconnection.
17
Communication is impossible because remote device is busy.
18
You made a call but did not receive a response within the specified time.
19
The remote device is called but no response.
21
The remote device rejected incoming calls.
63
The service and option of the network are not valid.
65
Unavailable processing speed was specified.
88
You made a call to a terminal or received a call from a terminal with different terminal
properties.
◆ Error messages list
No.
10
Text display
SIM not inserted
Description
UIM is not set.
15
SIM wrong
Other than DOCOMO SIM (IC card equivalent to UIM) is inserted.
16
incorrect password
Incorrect password
100
unknown
Unknown error
◆ Supplement to AT command
・ <cid> is the number used to control dialup connection (APN) for packet communication to be registered
in FOMA terminal. "1-10" can be registered in FOMA terminal.
・ By default, the following APNs are registered in cid1-4.
cid1 : mopera.ne.jp (APN mopera, PPP connection)
cid2 : mopera.net (APN mopera U, PPP connection)
cid3 : mopera.net (APN mopera U, IP connection)
cid4 : mpr.ex-pkt.net (APN mopera U, PPP connection, 128K communication)
・ <APN> is an optional string for each connection to indicate dialup connection.
■ Command name : +CGDCONT=[parameter]
・ Outline
Set dialup connection (APN) for packet communication.
・ Format
+CGDCONT= [<cid> [,"<PDP_TYPE>" [,"<APN>"] ] ]
・ Parameter description
<cid> : 1-10
<PDP_TYPE> : IP or PPP
<APN> : Optional
・ Example of execution
The command used to register an APN named "abc" for PPP connection (when <cid>=5).
AT+CGDCONT=5,"PPP","abc"
OK
・ Operation performed when parameter is omitted
AT+CGDCONT= : Return all <cid> to the setting by default.
AT+CGDCONT=<cid> : Return the specified <cid> to the setting by default.
AT+CGDCONT? : Display current settings.
AT+CGDCONT=? : Display a list of assignable values.
32
F-04C_E1kou
■ Command name : +CGEQMIN=[parameter]
・ Outline
・
・
・
・
Set the criteria for judging whether to permit QoS (Quality of Service) provisioned by the network when
packet communication is established.
Format
AT+CGEQMIN= [<cid> [,,<Maximum bitrate UL> [,<Maximum bitrate DL>] ] ]
Parameter description
<cid> : 1-10
<Maximum bitrate UL> : None (default) or 384
<Maximum bitrate DL> : None (default) or 7,232
* For <Maximum bitrate UL> and <Maximum bitrate DL>, the maximum communication speed (kbps) is set for both
upload and download traffic between FOMA terminal and the base station. If the parameter is set to "None (default)", all
speeds are permissible. If "384" and "7,232" are set, any connection at a speed less than the above limit is not permitted,
and chances are that packet communication will not be connected.
Example of execution
- Command used to permit all speeds both upload and download (when <cid>=5)
AT+CGEQMIN=5
OK
- Command used to permit only 384kbps upload and 7,232kbps download (when <cid>=6)
AT+CGEQMIN=6,,384,7232
OK
- Command used to permit only 384kbps upload and all speeds download (when <cid>=7)
AT+CGEQMIN=7,,384
OK
- Command used to permit all speeds upload and only 7,232kbps download (when <cid>=8)
AT+CGEQMIN=8,,,7232
OK
Operation performed when parameter is omitted
AT+CGEQMIN= : Returns all <cid> to the setting by default.
AT+CGEQMIN=<cid> : Returns the specified <cid> to the setting by default.
AT+CGEQMIN? : Displays current settings.
AT+CGEQMIN=? : Displays a list of assignable values.
■ Command name : +CGEQREQ=[parameter]
・ Outline
Set QoS (Quality of Service) requested to the network at the transmission of packet communication.
・ Format
AT+CGEQREQ= [<cid>]
・ Parameter description
Only commands that require connection at 64-384kbps upload, 64-7,232kbps download can be set. The
contents are set by default for each <cid>.
<cid> : 1-10
・ Example of execution
(when <cid>=3)
AT+CGEQREQ=3
OK
・ Operation performed when parameter is omitted
AT+CGEQREQ= : Returns all <cid> to the setting by default.
AT+CGEQREQ=<cid> : Returns the specified <cid> to the setting by default.
AT+CGEQREQ? : Displays current settings.
AT+CGEQREQ=? : Displays a list of assignable values.
33
F-04C_E1kou
◆ Result codes
・ When ATV command is set to n=1 (default), the result code is displayed in alphabetic characters. When
the command is set to n=0, the result code is displayed numerically.→P27
■ Result codes
No.
Text display
Meaning
0
OK
Operation performed normally
1
CONNECT
Terminal connected to other party
2
RING
Incoming call
3
NO CARRIER
Line disconnected
4
ERROR
Unable to accept command
6
NO DIALTONE
Unable to detect dial tone
7
BUSY
Detecting the busy tone
8
NO ANSWER
Completed connection Time-out
100
RESTRICTION
Network restriction in place (The communication network is
busy. Please wait for a while and retry.)
101
DELAYED
Redial call restricted
■ Extended result code
・ When AT&E is set to n=0
No.
Text display
Connection speed between FOMA terminal and base station
122
CONNECT 64000
64000bps
125
CONNECT 384000
384000bps
133
CONNECT 3648000
3648000bps
135
CONNECT 7232000
7232000bps
・ When AT&E is set to n=1
No.
Text display
Connection speed between FOMA terminal and a PC
5
CONNECT 1200
1200bps
10
CONNECT 2400
2400bps
11
CONNECT 4800
4800bps
13
CONNECT 7200
7200bps
12
CONNECT 9600
9600bps
15
CONNECT 14400
14400bps
16
CONNECT 19200
19200bps
17
CONNECT 38400
38400bps
18
CONNECT 57600
57600bps
19
CONNECT 115200
115200bps
20
CONNECT 230400
230400bps
21
CONNECT 460800
460800bps
* To retain compatibility with a modem connected via conventional RS-232C, communication speed is displayed, but it
differs from the actual connection speed because FOMA terminal is connected to a PC with a USB cable.
34
F-04C_E1kou
■ Communication protocol result code
No.
Text display
Meaning
1
PPPoverUD
Connect via 64K data communication (BC=UDI, +CBST=116,1,0)
3
AV64K
Connect via 64K videophone
5
PACKET
Connect via packet communication
■ Display example of result code
When ATX0 is set
Regardless of the settings of AT¥V command, only "CONNECT" is displayed upon completion of
connection.
Text display example : ATD*99***1#
CONNECT
Number display example : ATD*99***1#
1
When ATX1 is set
・ When ATX1, AT¥V0 (default) is set
Upon completion of connection, the result code is displayed in the following format : "CONNECT <speed
between FOMA terminal - PC>".
Text display example : ATD*99***1#
CONNECT 460800
Number display example : ATD*99***1#
1 21
・ When ATX1, AT¥V1 is set*1
The code is displayed upon completion of connection in the following format.
"CONNECT<speed between FOMA terminal - PC><Communication protocol><dialup connection (APN)>/
<upstream maximum speed (between FOMA terminal→radio base station)>/<downstream maximum
speed (between FOMA terminal←radio base station)>"*2
Text display example : ATD*99***1#
CONNECT 460800 PACKET mopera.ne.jp/384/7232
(Indicates the terminal is connected to mopera.ne.jp providing a maximum upload speed of 384kbps and
a maximum download speed of 7,232kbps.)
Number display example : ATD*99***1#
1 21 5
*1 When ATX1 and AT¥V1 are set at the same time, it is likely that dialup connection will fail. It is recommended that
only AT¥V0 be used.
*2 When AT¥V1 is set, <dialup connection (APN)> and the following are displayed only when packet is used for
connection.
35
Kuten Code List
For entering characters using code, see "Entering characters using code" in the attached manual.
Note that some characters in the code input list may look different from actual ones.
1st
-3rd
010
011
012
013
014
015
016
017
018
019
020
021
022
023
024
026
027
028
029
4th digit of code
1 2 3 4
5 6 7 8
(スペース) 、 。 , . ・ : ;
! ゛ ゜ ´ `
¨^  ̄ _
ヾ ゝ ゞ 〃 仝 々 〆 〇 ー
‐ / \ ∼ ‖ | … ‥ ‘
“ ”( )〔
〕 [ ]{
〈 〉《 》「
」 『 』【
+ − ± × ÷ = ≠ < >
≧ ∞ ∴ ♂ ♀ ° ′ ″ ℃
$ ¢ £ % # & * @ §
★ ○ ● ◎ ◇
◆ □ ■ △ ▲ ▽ ▼ ※
→ ← ↑ ↓ 〓
∈ ∋ ⊆
⊂ ⊃ ∪ ∩
∧ ∨ ¬ ⇒ ⇔ ∀ ∃
0
∠ ⊥ ͡ ∂ ∇
∽ ∝ ∵ ∫ ∬
Å ‰ ♯
⃝
9
?
ヽ
―
’
}
】
≦
¥
☆
〒
⊇
1st
-3rd
081
082
083
130
131
132
133
134
135
136
137
138
139
0 1
┴ ┼
┫ ┻
┥┸
4th digit of code
2 3 4
5 6 7 8 9
━ ┃ ┏ ┓ ┛ ┗ ┣ ┳
╋ ┠ ┯ ┨ ┷ ┿ ┝ ┰
╂
① ② ③ ④
⑪ ⑫ ⑬ ⑭
Ⅰ Ⅱ Ⅲ Ⅳ
㍉ ㌔ ㌢
㍗ ㌍ ㌦ ㌣
㎎ ㎏ ㏄ ㎡
㍻
㊥ ㊦ ㊧ ㊨ ㈱
≒ ≡ ∫ ∮ Σ
∵ ∩ ∪
⑤
⑮
Ⅴ
㍍
㌫
⑩
⑳
Ⅹ
㍑
㎞
⑥
⑯
Ⅵ
㌘
㍊
⑦
⑰
Ⅶ
㌧
㌻
⑧
⑱
Ⅷ
㌃
㎜
⑨
⑲
Ⅸ
㌶
㎝
№ ㏍ ℡ ㊤
㈲ ㈹ ㍾ ㍽ ㍼
√ ⊥ ∠ ∟ ⊿
あ
≡ ≒ ≪ ≫ √
♭ ♪ † ‡ ¶
160
161
162
163
164
葵
梓
鮎
鞍
亜
茜
圧
或
杏
唖
穐
斡
粟
娃
悪
扱
袷
阿
握
宛
安
以
惟
緯
域
芋
淫
陰
伊
意
胃
育
鰯
胤
隠
位
慰
萎
郁
允
蔭
韻
哀
渥
姐
庵
愛
旭
虻
按
挨
葦
飴
暗
姶
芦
絢
案
逢
鯵
綾
闇
依
易
衣
磯
印
偉
椅
謂
一
咽
囲
為
違
壱
員
夷
畏
遺
溢
因
委
異
医
逸
姻
い
031
032
033
034
035
036
037
038
039
040
041
042
043
044
045
046
047
048
f g h
p q r
z
ぁ あ
お か が
ご さ ざ
ぞ た だ
と ど な
ひ び ぴ
ぼ ぽ ま
ゆ ょ よ
ゐ ゑ を
ぃ
き
し
ち
に
ふ
み
ら
ん
050
051
052
053
054
055
056
057
058
オ
ゴ
ゾ
ト
ヒ
ボ
ユ
ヰ
ァ
カ
サ
タ
ド
ビ
ポ
ョ
ヱ
ィ
キ
シ
チ
ニ
フ
ミ
ラ
ン
060
061
062
063
064
065
0 1 2 3
4 5 6 7
A
H I J K
R S T U
ア
ガ
ザ
ダ
ナ
ピ
マ
ヨ
ヲ
8
B
L
V
9
C
M
W
a
k
u
D
N
X
b
l
v
E
O
Y
c
m
w
F
P
Z
d
n
x
G
Q
い
ぎ
じ
ぢ
ぬ
ぶ
む
り
ぅ
く
す
っ
ね
ぷ
め
る
う
ぐ
ず
つ
の
へ
も
れ
ぇ
け
せ
づ
は
べ
ゃ
ろ
え
げ
ぜ
て
ば
ぺ
や
ゎ
ぉ
こ
そ
で
ぱ
ほ
ゅ
わ
イ
ギ
ジ
ヂ
ヌ
ブ
ム
リ
ヴ
ゥ
ク
ス
ッ
ネ
プ
メ
ル
ヵ
ウ
グ
ズ
ツ
ノ
ヘ
モ
レ
ヶ
ェ
ケ
セ
ヅ
ハ
ベ
ャ
ロ
エ
ゲ
ゼ
テ
バ
ペ
ヤ
ヮ
ォ
コ
ソ
デ
パ
ホ
ュ
ワ
i j
s t
Α Β Γ Δ
Κ Λ Μ Ν Ξ
Υ Φ Χ Ψ Ω
α β
θ ι κ λ μ
σ τ υ φ χ
070
071
072
073
074
075
076
077
078
А Б В Г
И Й К Л М
Т У Ф Х Ц
Ь Э Ю Я
080
─ │ ┌ ┐
б
к
ф
ю
в г д е
л м н о
х ц ч ш
я
e
o
y
Ε Ζ Η Θ Ι
Ο Π Ρ Σ Τ
γ δ ε ζ η
ν ξ ο π ρ
ψ ω
Д Е Ё Ж З
Н О П Р С
Ч Ш Щ Ъ Ы
а
ё ж з и й
п р с т у
щ ъ ы ь э
┘ └ ├ ┬ ┤
164
165
166
167
168
169
170
威
移
井
稲
引
尉
維
亥
茨
飲
院
吋
う
170
171
172
173
迂 雨 卯 鵜 窺
唄 欝 蔚 鰻 姥
云 運 雲
173
174
175
176
177
178
曳
衛
閲
掩
艶
栄
詠
榎
援
苑
永
鋭
厭
沿
薗
荏
泳
液
円
演
遠
餌
洩
疫
園
炎
鉛
178
179
180
181
182
凹 央
押
鴎 黄
牡 乙
奥
旺
岡
俺
往
横
沖
卸
応
欧
荻
恩
仮
家
禍
蝦
我
介
恢
伽
科
稼
嘩
画
解
戒
晦
階
涯
垣
格
郭
笠
活
樺
栢
刈
巻
感
価
暇
箇
貨
臥
回
拐
械
貝
碍
柿
核
閣
樫
渇
鞄
茅
苅
喚
慣
佳
果
花
迦
芽
塊
改
海
凱
蓋
蛎
殻
隔
橿
滑
株
萱
瓦
堪
憾
右 宇 烏 羽
丑 碓 臼 渦 嘘
厩 浦 瓜 閏 噂
え
叡
瑛
益
堰
焔
鴛
営
盈
駅
奄
煙
塩
嬰
穎
悦
宴
燕
影
頴
謁
延
猿
映
英
越
怨
縁
お
於 汚 甥
殴 王 翁 襖 鴬
億 屋 憶 臆 桶
温 穏 音
か
182
183
184
185
186
187
188
189
190
191
192
193
194
195
196
197
198
199
200
201
202
蟹
慨
馨
拡
赫
顎
恰
叶
噛
勘
幹
何
寡
禾
課
牙
会
懐
魁
開
概
蛙
撹
較
掛
括
椛
鴨
粥
勧
患
1
加
架
苛
過
蛾
壊
可
歌
茄
霞
賀
廻
嘉
河
荷
蚊
雅
快
下
夏
火
華
俄
餓
怪
化
嫁
珂
菓
峨
駕
悔
灰
劾
街
鈎
獲
革
梶
葛
兜
界
外
該
劃
確
学
鰍
褐
竃
皆
咳
鎧
嚇
穫
岳
潟
轄
蒲
絵
害
骸
各
覚
楽
割
且
釜
芥
崖
浬
廓
角
額
喝
鰹
鎌
乾 侃 冠 寒 刊
姦 完 官 寛 干
換 敢 柑 桓 棺
4th digit of code
3 4
5 6 7
漢 澗 潅 環 甘
緩 缶 翰 肝 艦
鑑 間 閑 関 陥
岸 巌 玩 癌 眼
顔 願
き
企 伎 危
嬉 寄 岐 希 幾 忌
期 棋 棄
帰 毅 気 汽 畿 祈
規 記 貴 起 軌 輝
偽 儀 妓 宜 戯 技
祇 義 蟻 誼 議 掬
喫 桔 橘 詰 砧 杵
虐 逆 丘 久 仇 休
急 救 朽 求 汲 泣
笈 級 糾 給 旧 牛
拠 挙 渠 虚 許 距
亨 享 京
侠 僑 兇 競 共 凶
喬 境 峡 強 彊 怯
橋 況 狂 狭 矯 胸
鏡 響 饗 驚 仰 凝
曲 極 玉 桐 粁 僅
斤 欣 欽 琴 禁 禽
衿 襟 謹 近 金 吟
く
1st
-3rd
203
204
205
206
207
0
款
竿
諌
舘
贋
207
208
209
210
211
212
213
214
215
216
217
218
219
220
221
222
223
224
225
226
基 奇
旗 既
機
紀 徽
鬼 亀
犠 疑
吉 吃
客 脚
宮 弓
究 窮
巨 拒
禦 魚
供
卿 叫
挟 教
蕎 郷
業 局
巾 錦
芹 菌
226
227
228
229
230
231
232
倶 句 区 狗
駒 具 愚 虞
串 櫛 釧 屑
掘 窟 沓
栗 繰 桑 鍬
郡
1
歓
管
貫
丸
雁
2
汗
簡
還
含
頑
8
監
莞
韓
岩
9
看
観
館
翫
喜 器
揮 机
季
飢
擬
菊
黍
及
灸
去
鋸
稀
騎
欺
鞠
却
吸
球
居
漁
協
恐
脅
尭
勤
筋
銀
匡
恭
興
暁
均
緊
九
矩 苦 躯 駆 駈
空 偶 寓 遇 隅
玖
喰
屈
靴
勲
轡 窪 熊 隈 粂
君 薫 訓 群 軍
け
232
233
234
235
236
237
238
239
240
241
242
243
珪
携
繋
鶏
傑
倹
建
肩
鹸
絃
卦
型
敬
罫
芸
欠
倦
憲
検
見
元
舷
袈
契
景
茎
迎
決
健
懸
権
謙
原
言
祁
形
桂
荊
鯨
潔
兼
拳
牽
賢
厳
諺
係
径
渓
蛍
劇
穴
券
捲
犬
軒
幻
限
孤
袴
鼓
悟
鯉
勾
后
巷
控
洪
紘
荒
鋼
合
国
惚
此
昆
己
股
五
梧
交
厚
喉
幸
攻
浩
絞
行
閤
壕
穀
骨
頃
根
庫
胡
互
檎
佼
口
坑
広
昂
港
綱
衡
降
拷
酷
狛
今
梱
弧
菰
伍
瑚
侯
向
垢
庚
晃
溝
耕
講
項
濠
鵠
込
困
混
傾
恵
畦
計
戟
結
剣
刑
慶
稽
詣
撃
血
喧
兄
慧
系
警
激
訣
圏
啓
憩
経
軽
隙
月
堅
圭
掲
継
頚
桁
件
嫌
献 研 硯 絹 県
遣 鍵 険 顕 験
弦 減 源 玄 現
こ
243
244
245
246
247
248
249
250
251
252
253
254
255
256
257
258
259
260
261
姑
糊
顧
御
乞
効
巧
拘
江
紅
航
砿
号
告
忽
昏
乎
戸
虎
午
碁
候
個
故
誇
呉
語
倖
古
枯
跨
吾
誤
光
呼
湖
鈷
娯
護
公
固
狐
雇
後
醐
功
好
康
更
甲
考
貢
香
豪
黒
孔
弘
杭
皇
肯
購
高
轟
獄
孝
恒
校
硬
肱
郊
鴻
麹
漉
宏
慌
梗
稿
腔
酵
剛
克
腰
工
抗
構
糠
膏
鉱
劫
刻
甑
坤 墾 婚 恨 懇
痕 紺 艮 魂
2008.9 (Issue 1)
CA92002-5477
1st
-3rd
261
262
263
264
265
266
267
268
269
270
271
272
273
0
1
2
叉
鎖
塞
采
際
榊
搾
笹
察
鯖 捌
惨 撒
讃 賛
唆
裟
妻
犀
剤
肴
昨
匙
拶
錆
散
酸
佐
詐
哉
災
載
堺
咋
鮭
4th digit of code
3 4
5 6 7
さ
嵯
坐
宰
砕
在
咲
朔
冊
撮
鮫
桟
餐
左
座
彩
砦
材
崎
柵
刷
擦
皿
燦
斬
沙
催
栽
細
冴
鷺
索
8
9
瑳
再
歳
菜
坂
作
錯
些
砂
最
済
裁
阪
削
桜
差
挫
才
祭
罪
埼
窄
査
債
採
斎
財
碕
策
札
晒
珊
暫
殺 薩 雑 皐
三 傘 参 山
産 算 纂 蚕
残
し
273
274
275
276
277
278
279
280
281
282
283
284
285
286
287
288
289
290
291
292
293
294
295
296
297
298
299
300
301
302
303
304
305
306
307
308
309
310
311
312
313
314
315
使
子
施
紙
諮
字
耳
軸
湿
屡
社
尺
惹
腫
綬
終
輯
従
夙
述
旬
醇
署
恕
妾
彰
松
照
紹
詳
丈
情
醸
蝕
心
疹
身
尋
刺
屍
旨
紫
資
寺
次
自
宍
漆
蕊
紗
杓
主
趣
需
宗
繍
週
戎
宿
俊
楯
順
書
鋤
勝
娼
承
梢
症
肖
象
丞
擾
錠
拭
辱
慎
真
辛
甚
司
市
枝
肢
賜
慈
滋
蒔
雫
疾
縞
者
灼
取
酒
囚
就
習
酋
柔
淑
峻
殉
処
薯
除
匠
宵
抄
樟
省
菖
賞
乗
条
嘱
植
尻
振
神
進
尽
史
師
止
脂
雌
持
治
辞
七
質
舎
謝
爵
守
首
収
州
臭
酬
汁
祝
春
淳
初
藷
傷
升
将
招
樵
硝
蒋
醤
冗
杖
埴
殖
伸
新
秦
針
腎
嗣
志
死
至
飼
時
爾
汐
叱
実
写
車
酌
手
儒
周
修
舟
集
渋
縮
瞬
準
所
諸
償
召
小
掌
沼
礁
蕉
鉦
剰
浄
飾
燭
信
晋
紳
震
訊
四
思
氏
視
歯
士
指
獅
詞
事
仕
始
支
祉
詩
似
仔
姉
孜
私
試
侍
伺
姿
斯
糸
誌
児
璽
鹿
執
蔀
射
遮
釈
朱
受
痔
式
失
篠
捨
蛇
錫
殊
呪
磁
識
嫉
偲
赦
邪
若
狩
寿
示
鴫
室
柴
斜
借
寂
珠
授
而
竺
悉
芝
煮
勺
弱
種
樹
愁
蒐
醜
獣
粛
竣
潤
暑
助
拾
衆
什
縦
塾
舜
盾
曙
叙
洲
襲
住
重
熟
駿
純
渚
女
秀
讐
充
銃
出
准
巡
庶
序
秋
蹴
十
叔
術
循
遵
緒
徐
哨
少
捷
消
祥
衝
鍾
城
状
商
尚
昇
渉
称
裳
鐘
場
畳
唱
庄
昌
湘
章
訟
障
壌
穣
嘗
床
昭
焼
笑
証
鞘
嬢
蒸
奨
廠
晶
焦
粧
詔
上
常
譲
織
侵
森
臣
人
迅
職
唇
榛
芯
仁
陣
色
娠
浸
薪
刃
靭
触
寝
深
親
塵
食
審
申
診
壬
笥
吹 垂 帥 推
遂 酔 錐 錘
枢 趨 雛 据
諏
水
随
杉
瀬
政
盛
醒
斥
跡
節
宣
浅
制
棲
製
税
積
拙
舌
戦
煎
す
315
316
317
318
319
320
須
炊
瑞
椙
酢
睡
髄
菅
澄
図
粋
崇
頗
摺
厨
翠
嵩
雀
寸
逗
衰
数
裾
せ
320
321
322
323
324
325
326
327
328
329
330
331
勢
栖
西
脆
籍
接
蝉
扇
煽
姓
正
誠
隻
績
摂
仙
撰
旋
繊
選 遷
征
清
誓
席
脊
折
先
栓
穿
羨
銭
性
牲
請
惜
責
設
千
栴
箭
腺
銑
世
成
生
逝
戚
赤
窃
占
泉
線
舛
閃
畝
整
精
青
昔
蹟
説
専
洗
是
星
聖
静
析
碩
雪
尖
染
凄
晴
声
斉
石
切
絶
川
潜
1st
-3rd
332
332
333
334
335
336
337
338
339
340
341
342
343
344
345
346
347
348
349
350
351
352
353
354
354
355
356
357
358
359
360
361
362
363
363
364
365
366
366
367
368
369
370
371
372
373
373
374
375
376
377
378
379
380
381
382
383
384
385
386
4th digit of code
0 1 2 3 4
5 6 7
全 禅 繕 膳 糎
そ
噌 塑 岨
曽 楚 狙 疏 疎 礎 祖 租
組 蘇 訴 阻 遡 鼠 僧 創
倉 喪 壮 奏 爽 宋 層 匝
捜 掃 挿 掻 操 早 曹 巣
漕 燥 争 痩 相 窓 糟 総
草 荘 葬 蒼 藻 装 走 送
霜 騒 像 増 憎
臓 蔵 贈 造 促 側 則
捉 束 測 足 速 俗 属 賊
卒 袖 其 揃 存 孫 尊 損
た
他 多 太 汰 詑 唾 堕 妥
柁 舵 楕 陀 駄 騨 体 堆
岱 帯 待 怠 態 戴 替 泰
腿 苔 袋 貸 退 逮 隊 黛
台 大 第 醍 題 鷹 滝 瀧
宅 托 択 拓 沢 濯 琢 託
諾 茸 凧 蛸 只
叩 但 達 辰 奪 脱 巽
棚 谷 狸 鱈 樽 誰 丹 単
担 探 旦 歎 淡 湛 炭 短
綻 耽 胆 蛋 誕 鍛 団 壇
暖 檀 段 男 談
ち
値 知 地
智 池 痴 稚 置 致 蜘 遅
畜 竹 筑 蓄 逐 秩 窒 茶
中 仲 宙 忠 抽 昼 柱 注
註 酎 鋳 駐 樗 瀦 猪 苧
丁 兆 凋 喋 寵
帖 帳 庁 弔 張 彫 徴
暢 朝 潮 牒 町 眺 聴 脹
調 諜 超 跳 銚 長 頂 鳥
直 朕 沈 珍 賃 鎮 陳
つ
津
槌 追 鎚 痛 通 塚 栂 掴
漬 柘 辻 蔦 綴 鍔 椿 潰
嬬 紬 爪 吊 釣 鶴
て
亭 低
剃 貞 呈 堤 定 帝 底 庭
悌 抵 挺 提 梯 汀 碇 禎
艇 訂 諦 蹄 逓
邸 鄭 釘 鼎 泥 摘 擢
的 笛 適 鏑 溺 哲 徹 撤
鉄 典 填 天 展 店 添 纏
転 顛 点 伝 殿 澱 田 電
と
堵
賭
怒
宕
盗
答
鐙
憧
鴇
独
寅
頓
塗
途
倒
島
淘
筒
董
陶
撞
匿
読
酉
呑
妬
都
党
嶋
湯
糖
蕩
頭
洞
得
栃
瀞
曇
屠
鍍
冬
悼
涛
統
藤
騰
瞳
徳
橡
噸
鈍
徒
砥
凍
投
灯
到
討
闘
童
涜
凸
屯
9
措
粗
双
惣
槍
綜
遭
曾
素
叢
想
槽
聡
鎗
即 息
族 続
村 遜
惰
対
滞
鯛
卓
鐸
打
耐
胎
代
啄
濁
竪
嘆
端
弾
辿
坦
箪
断
弛
馳
嫡
虫
著
恥
築
着
衷
貯
懲 挑
腸 蝶
勅 捗
墜 椎
槻 佃
坪 壷
停 偵
廷 弟
程 締
奈
謎 灘 捺 鍋 楢
軟 難 汝
388
389
390
二 尼
虹 廿 日 乳 入
如 尿 韮 任
392
393
393
394
395
396
397
398
399
400
401
402
403
404
405
405
406
407
408
409
410
411
412
413
414
415
4th digit of code
0 1 2 3 4
5 6 7
祢 寧 葱 猫 熱 年 念 捻
粘
の
乃 廼 之 埜 嚢 悩 濃
脳 膿 農 覗 蚤
は
巴 把 播
波 派 琶 破 婆 罵 芭 馬
拝 排 敗 杯 盃 牌 背 肺
倍 培 媒 梅 楳 煤 狽 買
陪 這 蝿 秤 矧 萩 伯 剥
柏 泊 白 箔 粕 舶 薄 迫
爆 縛 莫 駁 麦
函 箱 硲 箸 肇 筈 櫨
畑 畠 八 鉢 溌 発 醗 髪
抜 筏 閥 鳩 噺 塙 蛤 隼
半 反 叛 帆 搬 斑 板 氾
犯 班 畔 繁 般 藩 販 範
頒 飯 挽 晩 番 盤 磐 蕃
ひ
卑
比
誹
枇
肘
百
評
蛭
敏
否
泌
費
毘
鼻
弼
謬
豹
鰭
瓶
妃
疲
避
琵
柊
必
俵
廟
品
庇
皮
非
眉
稗
畢
彪
描
彬
彼
碑
飛
美
匹
筆
標
病
斌
不
扶
譜
葡
復
腹
分
紛
付
敷
負
蕪
幅
複
吻
雰
埠
斧
賦
部
服
覆
噴
文
怖
芙
舞
副
福
物 鮒
粉 糞
422
423
424
425
426
幣 平 弊 柄 並
僻 壁 癖 碧 別
片 篇 編 辺 返
鞭
426
427
428
429
430
431
432
433
434
435
436
保 舗 鋪
穂 募 墓 慕
俸 包 呆 報
抱 捧 放 方
法 泡 烹
蜂 褒 訪 豊
亡 傍 剖 坊
望 某 棒 冒
鉾 防 吠 頬
牧 睦 穆 釦
本 翻 凡 盆
436
437
438
439
440
摩
昧 枚 毎 哩 槙
鱒 桝 亦 俣 又
繭 麿 万 慢 満
漫 蔓
440
441
味 未
蜜 湊 蓑 稔 脈
441
442
夢 無 牟 矛 霧
442
443
444
名 命 明 盟 迷
免 棉 綿 緬 面
444
445
446
孟 毛 猛 盲 網
目 杢 勿 餅 尤
府
膚
武
伏
覇
俳
輩
売
博
曝
杷
廃
配
賠
拍
漠
幡
伐
伴
汎
釆
蛮
肌
罰
判
版
煩
匪
悲 扉 批 披 斐
秘 緋 罷 肥 被
樋 簸 備 尾 微
疋
逼
氷
秒
浜
髭
桧
漂
苗
瀕
彦
姫
瓢
錨
貧
膝
媛
票
鋲
賓
菱
紐
表
蒜
頻
夫
普
赴
封
婦
浮
阜
楓
富
父
附
風
冨
符
侮
葺
布
腐
撫
蕗
淵 弗 払 沸 仏
墳 憤 扮 焚 奮
聞
へ
丙 併 兵
蔽 閉 陛 米
瞥 蔑 箆 偏
遍 便 勉 娩
斗
砺
刀
搭
燈
杜
努
唐
東
当
渡
度
塔
桃
痘
兎
登
土
塘
梼
祷
謄
働
胴
特
突
惇
豆
動
萄
督
椴
敦
踏
同
道
禿
届
沌
逃
堂
銅
篤
鳶
豚
吐
菟
奴
套
棟
等
透
導
峠
毒
苫
遁
圃
戊
奉
朋
砲
邦
妨
紡
北
勃
塀
頁
変
弁
捕 歩 甫 補 輔
暮 母 簿 菩 倣
宝 峰 峯 崩 庖
縫
鋒
帽
肪
僕
没
胞
飽
忘
膨
卜
殆
芳
鳳
忙
謀
墨
堀
萌
鵬
房
貌
撲
幌
蓬
乏
暴
貿
朴
奔
那 内 乍 凪 薙
馴 縄 畷 南 楠
磨 魔 麻 埋 妹
幕 膜 枕 鮪 柾
抹 末 沫 迄 侭
み
魅 巳 箕 岬 密
妙 粍 民 眠
む
務
鵡 椋 婿 娘
め
弐 迩 匂 賑 肉
妊 忍 認
ぬ
冥
銘 鳴 姪 牝 滅
麺
も
濡
ね
禰
2
納 能
ふ
415
416
417
418
419
420
421
422
に
390
8 9
撚 燃
ほ
敵 滴
轍 迭
甜 貼
な
386
387
388
1st
-3rd
391
392
ま
390
船 薦 詮 賎 践
鮮 前 善 漸 然
8
摸 模 茂 妄
耗 蒙 儲 木 黙
戻 籾 貰 問 悶
1st
-3rd
447
447
448
449
449
450
451
452
452
453
454
455
456
4th digit of code
0 1 2 3 4
5 6 7
紋 門 匁
や
也 冶 夜 爺 耶
矢 厄 役 約 薬 訳 躍 靖
鑓
ゆ
愉 愈 油 癒
諭 輸 唯 佑 優 勇 友
悠 憂 揖 有 柚 湧 涌 猶
祐 裕 誘 遊 邑 郵 雄 融
よ
余
揚
窯
養
与
揺
羊
慾
誉
擁
耀
抑
輿
曜
葉
欲
預
楊
蓉
沃
傭
様
要
浴
8
9
野 弥
柳 薮
宥 幽
猷 由
夕
予
幼 妖 容 庸
洋 溶 熔 用
謡 踊 遥 陽
翌 翼 淀
ら
456
457
458
羅
雷 洛 絡 落 酪
藍 蘭 覧
螺 裸 来 莱 頼
乱 卵 嵐 欄 濫
り
458
459
460
461
462
463
464
465
葎
隆
両
糧
厘
466
瑠 塁 涙 累 類
利 吏
履 李
痢
掠
竜
凌
良
林
梨
裏
略
龍
寮
諒
淋
理
裡
劉
侶
料
遼
燐
璃
里
流
慮
梁
量
琳
離
溜
旅
涼
陵
臨
陸
琉
虜
猟
領
輪
律
留
了
療
力
隣
率
硫
亮
瞭
緑
鱗
立
粒
僚
稜
倫
麟
る
れ
466
467
468
469
470
嶺 怜 玲 礼 苓
齢 暦 歴 列 劣
漣 煉 簾 練 聯
蓮 連 錬
470
471
472
473
呂
露 労 婁 廊 弄
牢 狼 篭 老 聾
肋 録 論
令 伶 例 冷 励
鈴 隷 零 霊 麗
烈 裂 廉 恋 憐
ろ
魯 櫓 炉 賂 路
朗 楼 榔 浪 漏
蝋 郎 六 麓 禄
わ
473
474
475
480
481
482
483
484
485
486
487
488
489
490
491
492
493
494
495
496
497
498
499
500
501
502
503
504
505
506
507
508
509
倭 和
枠 鷲 亙 亘 鰐
碗 腕
乖
亟
仂
佝
侑
俑
倅
偃
傀
僮
儡
兢
冏
冫
几
刎
剞
劒
勣
甸
匸
卮
厰
叭
吩
咒
咥
弌 丐 丕 个
乘 亂 亅 豫
亠 亢 亰 亳
仗 仞 仭 仟
佗 佇 佶 侈
佯 來 侖 儘
俚 俐 俤 俥
伜 俶 倡 倩
假 會 偕 偐
傚 傅 傴 傲
僉 僊 傳 僂
價 僵 儉 儁
儺 儷 儼 儻
竸 兩 兪 兮
冑 冓 冕 冖
决 冱 冲 冰
處 凩 凭 凰
刧 刪 刮 刳
剔 剪 剴 剩
剱 劈 劑 辨
辧 劬 劭 劼
勦 飭 勠 勳
匍 匐 匏 匕
區 卆 卅 丗
夘 卻 卷 厂
厶 參 簒 雙
叺 吁 吽 呀
吝 呎 咏 呵
呻 咀 呶 咄
咬 哄 哈 咨
話 歪 賄 脇 惑
詫 藁 蕨 椀 湾
丱
亊
亶
价
侏
俔
倚
倬
偈
丶
舒
从
伉
侘
俟
倨
俾
做
丼
弍
仍
佚
佻
俎
倔
俯
偖
丿
于
仄
估
佩
俘
倪
們
偬
乂
亞
仆
佛
佰
俛
倥
倆
偸
僖
儂
儿
冀
冤
况
凵
刹
剳
僞
儖
兀
冂
冦
冽
凾
剏
剿
僥
儕
兒
囘
冢
凅
刄
剄
剽
僭
儔
兌
册
冩
凉
刋
剋
劍
僣
儚
兔
冉
冪
凛
刔
剌
劔
劵
勵
匚
卉
厖
叟
听
咎
咐
勁
勸
匣
卍
厠
曼
吭
呟
咆
勍
勹
匯
凖
厦
燮
吼
呱
哇
勗
匆
匱
卞
厥
叮
吮
呷
咢
勞
匈
匳
卩
厮
叨
吶
呰
咸
1st
-3rd
510
511
512
513
514
515
516
517
518
519
520
521
522
523
524
525
526
527
528
529
530
531
532
533
534
535
536
537
538
539
540
541
542
543
544
545
546
547
548
549
550
551
552
553
554
555
556
557
558
559
560
561
562
563
564
565
566
567
568
569
570
571
572
573
574
575
576
577
578
579
580
581
582
583
584
585
586
587
0
唔
售
咯
喩
嘔
嘴
嚀
嚼
囹
圷
坿
埔
堡
墟
壗
壻
夭
奢
姜
婀
嫋
嬌
孀
學
寔
寳
尹
岑
峇
崗
嵌
嶢
巓
帑
幟
廁
廬
彜
彎
徃
徠
悳
怕
恊
悁
惠
愆
愍
愴
慴
憇
應
懣
戉
扞
抓
拆
挌
捍
掉
揉
攝
撓
舉
擺
攵
敞
斷
旡
昜
1
咫
哽
啜
喊
喇
嗷
嘶
嚊
囁
圀
圈
圸
垉
埒
塢
墫
壙
壼
夲
奠
奸
妍
婬
嫂
嬋
孑
斈
寐
尅
屁
屐
岔
峙
嵜
嵒
嶝
巒
帛
幢
廂
廖
廱
弋
弯
徂
徨
忿
怫
恆
悍
悄
惓
惶
愎
愽
慯
憬
懷
懶
戍
戞
扣
抖
擔
拮
搜
掟
插
搗
撥
據
擠
攀
攷
敝
旃
旱
晏
2
哂
哮
啅
喟
喨
嘖
嘲
嚠
囃
囿
國
坎
垓
埓
塋
墺
壘
壽
夸
奧
妁
姙
婉
媽
嬖
孕
孺
寤
將
屆
屏
妛
峩
崟
嵎
嶬
巖
帶
幤
廈
廣
廳
弑
彑
彿
徭
怡
怦
恍
惧
悛
悴
惷
慇
慂
慥
憔
懈
懺
戌
戡
扛
拔
拈
拱
捏
掵
揶
搨
撩
擒
擡
擽
收
敲
旆
杲
晄
4th digit of code
3 4
5 6 7
咤 咾 咼 哘 哥
哭 哺 哢 唹 啀
啖 啗 唸 唳 啝
啻 啾 喘 喞 單
嗚 嗅 嗟 嗄 嗜
嗾 嗽 嘛 嗹 噎
嘸 噫 噤 嘯 噬
嚔 嚏 嚥 嚮 嚶
囀 囈 囎 囑 囓
圄 圉
圍 圓 團 圖 嗇
圻 址 坏 坩 埀
垠 垳 垤 垪 垰
堊 埖 埣 堋 堙
塰 毀 塒 堽 塹
壞 墻 墸 墮 壅
壥 壜 壤 壟 壯
夂 夊 夐 夛 梦
夾 竒 奕 奐 奎
奬 奩
妝 佞 侫 妣 妲
姚 娥 娟 娑 娜
娵 娶 婢 婪 媚
嫣 嫗 嫦 嫩 嫖
嬲 嫐 嬪 嬶 嬾
孚 孛 孥 孩 孰
宀 它 宦 宸 寃
實 寢 寞 寥 寫
專 對 尓 尠 尢
屎 屓
孱 屬 屮 乢 屶
岫 岻 岶 岼 岷
峽 峺 峭 嶌 峪
崛 崑 崔 崢 崚
嵋 嵬 嵳 嵶 嶇
嶮 嶽 嶐 嶷 嶼
巛 巫 已 巵 帋
帷 幄 幃 幀 幎
幇 幵 并 幺 麼
廐 廏
廝 廚 廛 廢 廡
廰 廴 廸 廾 弃
弖 弩 弭 弸 彁
彖 彗 彙 彡 彭
徊 很 徑 徇 從
徼 忖 忻 忤 忸
恠 怙 怐 怩 怎
怏 怺 恚 恁 恪
恣 恃 恤 恂 恬
悃 悚
悖 悗 悒 悧 悋
忰 悽 惆 悵 惘
愀 惴 惺 愃 愡
愾 愨 愧 慊 愿
慄 慳 慷 慘 慙
慱 慟 慝 慓 慵
憚 憊 憑 憫 憮
懃 懆 憺 懋 罹
懴 懿 懽 懼 懾
戔 戛
截 戮 戰 戲 戳
扠 扨 扼 抂 抉
抃 抔 拗 拑 抻
拜 拌 拊 拂 拇
挧 挂 挈 拯 拵
掖 掎 掀 掫 捶
捫 捩 掾 揩 揀
揄 搖 搴 搆 搓
搏 摧 摯 摶 摎
撈 撼
擅 擇 撻 擘 擂
抬 擣 擯 攬 擶
攘 攜 攅 攤 攣
攸 畋 效 敖 敕
數 斂 斃 變 斛
旁 旄 旌 旒 旛
昊 昃 旻 杳 昵
晉 晁 晞 晝 晤
3
8
哦
啣
喙
啼
嗤
噐
噪
嚴
囗
9
唏
啌
喀
喃
嗔
營
嚆
囂
囮
圜
垈
埃
堝
墅
壓
壺
夥
奚
圦
坡
埆
塲
墹
壑
壹
夬
奘
姆
娉
媼
嫺
孃
孳
寇
寰
尨
姨
娚
媾
嫻
孅
孵
寉
寶
尸
屹
峅
崋
崙
嶄
巉
帚
幗
广
岌
岾
崕
崘
嶂
巍
帙
幔
庠
廨
弉
彈
彳
徙
忱
怱
恷
恫
廩
彝
彌
彷
徘
忝
怛
恟
恙
惡
慍
惻
愼
慚
憙
懌
懍
戀
悸
愕
惱
愬
慫
憖
懊
懦
戈
扁
找
拏
抛
捐
掣
揆
搦
攪
扎
抒
拿
拉
挾
掏
揣
搶
撕
擱
擴
攫
敍
斟
旙
昶
晧
擧
擲
攴
敘
斫
无
昴
晨
1st
-3rd
588
589
590
591
592
593
594
595
596
597
598
599
600
601
602
603
604
605
606
607
608
609
610
611
612
613
614
615
616
617
618
619
620
621
622
623
624
625
626
627
628
629
630
631
632
633
634
635
636
637
638
639
640
641
642
643
644
645
646
647
648
649
650
651
652
653
654
655
656
657
658
659
660
661
662
663
664
665
4th digit of code
0 1 2 3 4
5 6 7
晟 晢 晰 暃 暈 暎 暉 暄
曁 暹 曉 暾 暼
曄 暸 曖 曚 曠 昿 曦
曵 曷 朏 朖 朞 朦 朧 霸
朶 杁 朸 朷 杆 杞 杠 杙
枉 杰 枩 杼 杪 枌 枋 枦
枷 柯 枴 柬 枳 柩 枸 柤
柢 柮 枹 柎 柆 柧 檜 栞
桀 桍 栲 桎 梳 栫 桙 档
梟 梏 梭 梔 條 梛 梃 檮
梵 梠 梺 椏 梍 桾 椁 棊
椢 椦 棡 椌 棍
棔 棧 棕 椶 椒 椄 棗
棹 棠 棯 椨 椪 椚 椣 椡
楷 楜 楸 楫 楔 楾 楮 椹
楙 椰 楡 楞 楝 榁 楪 榲
榿 槁 槓 榾 槎 寨 槊 槝
榧 樮 榑 榠 榜 榕 榴 槞
樛 槿 權 槹 槲 槧 樅 榱
樔 槫 樊 樒 櫁 樣 樓 橄
樶 橸 橇 橢 橙 橦 橈 樸
檍 檠 檄 檢 檣
檗 蘗 檻 櫃 櫂 檸 檳
櫑 櫟 檪 櫚 櫪 櫻 欅 蘖
欖 鬱 欟 欸 欷 盜 欹 飮
歉 歐 歙 歔 歛 歟 歡 歸
殀 殄 殃 殍 殘 殕 殞 殤
殯 殲 殱 殳 殷 殼 毆 毋
毬 毫 毳 毯 麾 氈 氓 气
氣 汞 汕 汢 汪 沂 沍 沚
汾 汨 汳 沒 沐 泄 泱 泓
泅 泝 沮 沱 沾
沺 泛 泯 泙 泪 洟 衍
洽 洸 洙 洵 洳 洒 洌 浣
浚 浹 浙 涎 涕 濤 涅 淹
涵 淇 淦 涸 淆 淬 淞 淌
淅 淺 淙 淤 淕 淪 淮 渭
渙 湲 湟 渾 渣 湫 渫 湶
湃 渺 湎 渤 滿 渝 游 溂
滉 溷 滓 溽 溯 滄 溲 滔
溥 滂 溟 潁 漑 灌 滬 滸
滲 漱 滯 漲 滌
漾 漓 滷 澆 潺 潸 澁
潛 濳 潭 澂 潼 潘 澎 澑
澳 澣 澡 澤 澹 濆 澪 濟
濔 濘 濱 濮 濛 瀉 瀋 濺
瀏 濾 瀛 瀚 潴 瀝 瀘 瀟
瀲 灑 灣 炙 炒 炯 烱 炬
炮 烟 烋 烝 烙 焉 烽 焜
煕 熈 煦 煢 煌 煖 煬 熏
熕 熨 熬 燗 熹 熾 燒 燉
燠 燬 燧 燵 燼
燹 燿 爍 爐 爛 爨 爭
爲 爻 爼 爿 牀 牆 牋 牘
犂 犁 犇 犒 犖 犢 犧 犹
狆 狄 狎 狒 狢 狠 狡 狹
猗 猊 猜 猖 猝 猴 猯 猩
獎 獏 默 獗 獪 獨 獰 獸
獺 珈 玳 珎 玻 珀 珥 珮
琅 瑯 琥 珸 琲 琺 瑕 琿
瑁 瑜 瑩 瑰 瑣 瑪 瑶 瑾
璧 瓊 瓏 瓔 珱
瓠 瓣 瓧 瓩 瓮 瓲 瓰
瓷 甄 甃 甅 甌 甎 甍 甕
甦 甬 甼 畄 畍 畊 畉 畛
畩 畤 畧 畫 畭 畸 當 疆
疊 疉 疂 疔 疚 疝 疥 疣
痃 疵 疽 疸 疼 疱 痍 痊
痣 痞 痾 痿 痼 瘁 痰 痺
瘋 瘍 瘉 瘟 瘧 瘠 瘡 瘢
瘰 瘻 癇 癈 癆 癜 癘 癡
癩 癪 癧 癬 癰
癲 癶 癸 發 皀 皃 皈
皖 皓 皙 皚 皰 皴 皸 皹
盍 盖 盒 盞 盡 盥 盧 盪
眈 眇 眄 眩 眤 眞 眥 眦
眸 睇 睚 睨 睫 睛 睥 睿
瞎 瞋 瞑 瞠 瞞 瞰 瞶 瞹
8 9
暘 暝
曩
朮
杣
枡
柞
框
桷
梹
椈
曰
朿
杤
枅
柝
栩
桿
桴
棘
棣
棆
楴
榮
榻
槨
樞
樌
樢
椥
楹
椽
槐
槃
樂
槭
橲
檐
檬
櫺
歇
歹
殪
毓
氛
沁
沽
櫞
欒
歃
歿
殫
毟
氤
沛
泗
洶
涓
渕
淨
湮
湍
溪
滕
滾
洫
浤
渊
淒
渮
渟
溘
溏
漿
澀
濂
濕
瀑
瀰
炸
焙
燻
燔
潯
潦
濬
瀁
瀾
炳
煥
熄
燎
爬
牴
犲
狷
猥
獵
珞
瑟
璋
爰
牾
狃
倏
猾
獻
璢
瑙
璞
瓱
甓
畆
疇
痂
痒
痲
瘤
癢
瓸
甞
畚
畴
疳
痙
痳
瘴
癨
皋
皺
蘯
眛
睾
瞿
皎
盂
盻
眷
睹
瞼
1st
-3rd
666
667
668
669
670
671
672
673
674
675
676
677
678
679
680
681
682
683
684
685
686
687
688
689
690
691
692
693
694
695
696
697
698
699
700
701
702
703
704
705
706
707
708
709
710
711
712
713
714
715
716
717
718
719
720
721
722
723
724
725
726
727
728
729
730
731
732
733
734
735
736
737
738
739
740
741
742
0
瞽
砌
碚
碾
礫
禊
秕
稟
穢
窖
竊
竦
笞
筧
箚
箴
簇
簟
籘
粭
粽
糲
紵
經
緇
緘
縡
縵
繙
辮
纎
罟
羇
羮
翦
耙
聚
聿
胛
脛
腦
膣
臂
臠
舍
艝
艷
苣
苞
茯
茣
莨
菷
菻
蒂
蒿
蒡
蓼
薨
藉
蘊
虍
蚋
蛔
蜀
蜷
蝴
螽
蟯
1
瞻
砒
碌
碼
磧
祀
禝
秧
禀
穩
窩
竍
竭
笵
筺
筰
箋
篆
簓
簷
籟
粢
糀
糴
紂
絆
綉
綽
緝
縒
縹
繚
繿
纛
罅
罠
羌
羶
翩
耜
聟
肄
胥
脩
隋
腴
腟
膺
臧
舐
艚
艸
苟
茆
茵
茫
莎
菴
萇
葭
葩
蒟
蔡
蕀
蕁
蕭
薺
蘓
乕
蚌
蛞
蜃
蜻
蝗
蝓
蟀
蟲
2
矇
礦
碣
磅
磚
祠
禧
秬
稱
龝
竈
竏
竰
笨
笄
筱
箒
篝
篳
簫
籤
粫
糅
糶
紜
絳
絛
綫
緤
縱
繃
繹
纈
纜
罌
罨
羔
羸
翳
耡
聢
肆
胙
脣
腆
膃
膓
臉
臺
舖
艟
艾
苒
苜
茴
茗
莇
萓
菠
萪
葆
蓙
蓿
蕣
蘂
薔
藏
蘋
虔
蚶
蛩
蛻
蜥
蝨
蝣
蟐
蟠
4th digit of code
3 4
5 6 7
矍 矗 矚 矜 矣
砠 礪 硅 碎 硴
碵 碪 碯 磑 磆
磊 磬
磽 磴 礇 礒 礑
祗 祟 祚 祕 祓
齋 禪 禮 禳 禹
秡 秣 稈 稍 稘
稻 稾 稷 穃 穗
穰 穹 穽 窈 窗
窰 窶 竅 竄 窿
竕 竓 站 竚 竝
笂 笏 笊 笆 笳
笶 筐
筍 笋 筌 筅 筵
筬 筮 箝 箘 箟
箏 筝 箙 篋 篁
篩 簑 簔 篦 篥
篷 簗 簍 篶 簣
簽 籌 籃 籔 籏
籖 籥 籬 籵 粃
粡 粨 粳 粲 粱
糂 糘 糒 糜 糢
糺 紆
紕 紊 絅 絋 紮
絖 絎 絲 絨 絮
綏 絽 綛 綺 綮
總 綢 綯 緜 綸
緞 緻 緲 緡 縅
縟 縉 縋 縢 繆
縷 縲 縺 繧 繝
繪 繩 繼 繻 纃
纉 續 纒 纐 纓
缸 缺
罍 罎 罐 网 罕
罩 罧 罸 羂 羆
羞 羝 羚 羣 羯
譱 翅 翆 翊 翕
翹 飜 耆 耄 耋
耨 耿 耻 聊 聆
聨 聳 聲 聰 聶
肅 肛 肓 肚 肭
胝 胄 胚 胖 脉
脯 腋
脾 腓 腑 胼 腱
膈 膊 膀 膂 膠
膩 膰 膵 膾 膸
臍 臑 臙 臘 臈
臻 臾 舁 舂 舅
舩 舫 舸 舳 艀
艤 艢 艨 艪 艫
芍 芒 芫 芟 芻
苴 苳 苺 莓 范
茉 苙
茖 茲 茱 荀 茹
茘 莅 莚 莪 莟
莊 荼 莵 荳 荵
菫 菎 菽 萃 菘
菲 萍 萢 萠 莽
萼 蕚 蒄 葷 葫
萬 葯 葹 萵 蓊
蓍 蒻 蓚 蓐 蓁
蓴 蔗 蔘 蔬 蔟
蕘 蕈
蕋 蕕 薀 薤 薈
薛 藪 薇 薜 蕷
薹 藐 藕 藝 藥
藾 藺 蘆 蘢 蘚
號 虧 虱 蚓 蚣
蚯 蛄 蛆 蚰 蛉
蛬 蛟 蛛 蛯 蜒
蜑 蜉 蜍 蛹 蜊
蜩 蜚 蝠 蝟 蝸
蝮 蝙
蝪 蠅 螢 螟 螂
雖 螫 蟄 螳 蟇
蠏 蠍 蟾 蟶 蟷
8
矮
碆
磋
9
矼
硼
磔
礙
祺
禺
稙
穉
窕
邃
竡
笘
礬
祿
秉
稠
穡
窘
竇
竢
笙
筥
箍
篌
籠
簧
籀
粐
粮
鬻
筴
箜
篏
簀
簪
籐
粤
粹
糯
紲
絏
綣
綟
縊
繦
繖
緕
纔
紿
絣
綵
綰
縣
縻
繞
繽
纖
罔
羃
羲
翔
耒
聒
聹
冐
胯
罘
羈
羹
翡
耘
聘
聽
肬
胱
腮
膕
膽
臚
與
艙
舮
芬
苻
腥
膤
臀
臟
舊
艘
艱
苡
苹
荐
莢
莠
萋
萸
蒭
葢
蓆
蔕
荅
莖
莉
菁
蔆
葮
蒹
蓖
蔔
薑
蕾
藜
蘰
蚩
蠣
蜆
蜴
蝌
薊
薐
藹
蘿
蚪
蚫
蜈
蜿
蝎
螯 蟋
蟆 螻
蠎 蟒
1st
-3rd
743
744
745
746
747
748
749
750
751
752
753
754
755
756
757
758
759
760
761
762
763
764
765
766
767
768
769
770
771
772
773
774
775
776
777
778
779
780
781
782
783
784
785
786
787
788
789
790
791
792
793
794
795
796
797
798
799
800
801
802
803
804
805
806
807
808
809
810
811
812
813
814
815
816
817
818
819
0
蠑
衄
衵
袍
裝
褓
褸
覈
覺
訃
詒
誨
諚
諞
謳
證
讓
豐
貍
貳
賻
賍
趾
跟
蹂
蹣
躊
躱
軾
輌
轆
辭
逅
逧
遞
邊
郛
酥
醪
釟
鈕
鉋
鋩
鍼
鏨
鐓
鑒
鑷
閔
閹
關
陏
險
雋
霈
霹
靤
靺
鞴
韶
顏
飆
餞
饐
馮
駲
驅
驢
髏
髫
1
蠖
衂
衽
袤
裹
襃
襌
襦
覊
覽
訖
詆
誡
諫
諛
鞫
譖
譟
讖
豕
貎
貮
贄
贔
趺
跣
踵
蹇
蹕
躓
躾
輊
輦
轎
辯
迹
逶
遏
遨
邉
鄂
酩
醵
釡
鈑
鉐
錏
錙
鍮
鏥
鐃
鑄
鑽
閖
閾
闡
陋
陝
隧
雉
霓
霽
靦
鞆
韃
韵
顋
顱
飩
餤
饋
馼
駻
驂
驥
髑
髮
2
蠕
衒
袵
袰
褂
褞
褝
襤
覓
覿
訐
詈
誑
諳
謌
謦
譛
譬
讙
豢
貔
貶
贅
贖
跏
跼
踰
蹉
蹶
躑
軅
輅
輳
轗
辷
迺
逵
遐
遯
邏
鄒
酳
醴
釛
鉞
銜
鋺
錢
鍖
鏘
鐇
鑛
鑚
閘
闊
闥
陷
陟
隱
雍
霎
霾
靨
鞋
韆
頏
顫
顴
飫
餠
饑
駟
駸
驀
驤
髓
髴
4th digit of code
3 4
5 6 7
蠢 蠡 蠱 蠶 蠹
衙 衞 衢 衫 袁
衲 袂 袗 袒 袮
袿 袱 裃 裄 裔
裼 裴 裨 裲 褄
褥 褪 褫 襁 襄
襠 襞
襭 襪 襯 襴 襷
覘 覡 覩 覦 覬
觀 觚 觜 觝 觧
訌 訛 訝 訥 訶
詼 詭 詬 詢 誅
誥 誦 誚 誣 諄
諧 諤 諱 謔 諠
謇 謚 諡 謖 謐
謫 謾 謨 譁 譌
譚 譫
譯 譴 譽 讀 讌
讚 谺 豁 谿 豈
豬 豸 豺 貂 貉
豼 貘 戝 貭 貪
賈 賁 賤 賣 賚
贊 贇 贏 贍 贐
赧 赭 赱 赳 趁
跚 跖 跌 跛 跋
踈 踉 跿 踝 踞
踴 蹊
蹌 蹐 蹈 蹙 蹤
蹲 蹼 躁 躇 躅
躔 躙 躪 躡 躬
軈 軋 軛 軣 軼
輕 輒 輙 輓 輜
輻 輹 轅 轂 輾
轜 轢 轣 轤 辜
迚 迥 迢 迪 迯
逑 逕 逡 逍 逞
逹 迸
遑 遒 逎 遉 逾
遶 隨 遲 邂 遽
邨 邯 邱 邵 郢
鄙 鄲 鄰 酊 酖
酲 醋 醉 醂 醢
醺 釀 釁 釉 釋
釼 釵 釶 鈞 釿
鉗 鉅 鉉 鉤 鉈
銖 銓 銛 鉚 鋏
鍄 錮
錚 錣 錺 錵 錻
鎰 鎬 鎭 鎔 鎹
鏃 鏝 鏐 鏈 鏤
鐐 鐶 鐫 鐵 鐡
鑠 鑢 鑞 鑪 鈩
鑼 鑾 钁 鑿 閂
閙 閠 閨 閧 閭
濶 闃 闍 闌 闕
闢 阡 阨 阮 阯
陜 陞
陦 陲 陬 隍 隘
隲 隰 隴 隶 隸
襍 雜 霍 雕 雹
霑 霏 霖 霙 霤
靄 靆 靈 靂 靉
勒 靫 靱 靹 鞅
鞏 鞐 鞜 鞨 鞦
韈 韋 韜 韭 齏
頌 頸 頤 頡 頷
顯 顰
顳 颪 颯 颱 颶
餃 餉 餒 餔 餘
餬 餮 餽 餾 饂
饒 饌 饕 馗 馘
駛 駝 駘 駑 駭
騁 騏 騅 駢 騙
驃 騾 驕 驍 驛
驩 驫 驪 骭 骰
體 髞 髟 髢 髣
髱 髷
4
8
蠧
衾
袙
裘
褌
褻
9
蠻
袞
袢
裙
褊
褶
襾
覯
觴
詁
誂
諍
諢
謗
譏
覃
覲
觸
詛
誄
諂
諷
謠
譎
讎
豌
貅
貽
賽
齎
趙
跪
踐
讒
豎
貊
貲
賺
贓
跂
跫
踟
蹠
躄
躰
軻
輟
轌
辟
邇
逖
踪
躋
軆
軫
輛
轉
辣
迴
逋
遖
邁
郤
酘
醫
釐
鈔
銕
銹
遘
邀
扈
酣
醯
釖
鈬
鈿
銷
鍜
鏖
鐚
鐺
鑰
閇
閼
闔
陂
鍠
鏗
鐔
鑁
鑵
閊
閻
闖
陌
隕
隹
霄
霪
靜
靼
鞣
韲
頽
隗
雎
霆
霰
靠
鞁
鞳
竟
顆
飄
餡
饉
馥
駮
騫
驗
骼
髦
飃
餝
饅
馭
駱
騷
驟
髀
髯
1st
-3rd
820
821
822
823
824
825
826
827
828
829
830
831
832
833
834
835
836
837
838
839
840
0
鬨
魎
鮠
鯣
鰔
鰛
鱠
鴃
鵁
鶫
鶸
鷯
麋
麭
黠
黽
齔
齲
1
髻
鬩
魑
鮨
鯢
鰉
鰥
鱧
鴆
鴿
鵝
鵯
鶺
鷽
麌
靡
黥
鼇
齣
齶
堯
2
鬆
鬪
魘
鮴
鯤
鰓
鰤
鱶
鴪
鴾
鵞
鵺
鷆
鸚
麒
黌
黨
鼈
齟
龕
槇
4th digit of code
3 4
5 6 7
鬘 鬚 鬟 鬢 鬣
鬮 鬯 鬲 魄 魃
魴 鮓 鮃 鮑 鮖
鯀 鯊 鮹 鯆 鯏
鯔 鯡 鰺 鯲 鯱
鰌 鰆 鰈 鰒 鰊
鰡 鰰 鱇 鰲 鱆
鱸 鳧 鳬 鳰 鴉
鴦 鶯 鴣 鴟 鵄
鵆 鵈
鵤 鵑 鵐 鵙 鵲
鶚 鶤 鶩 鶲 鷄
鷏 鷂 鷙 鷓 鷸
鸛 鸞 鹵 鹹 鹽
麕 麑 麝 麥 麩
黎 黏 黐 黔 黜
黯 黴 黶 黷 黹
皷 鼕 鼡 鼬 鼾
齠 齡 齦 齧 齬
龜 龠
遙 瑤 凜 熙
8
鬥
魏
鮗
鯑
鯰
鰄
鰾
鴈
鴕
9
鬧
魍
鮟
鯒
鰕
鰮
鱚
鳫
鴒
鶉
鷁
鷦
麁
麸
點
黻
齊
齪
鶇
鶻
鷭
麈
麪
黝
黼
齒
齷
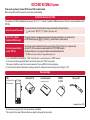

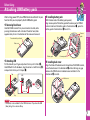
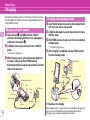
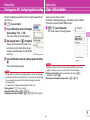

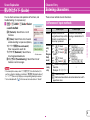
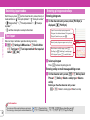
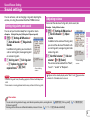
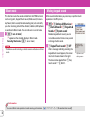
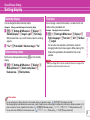
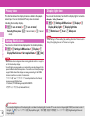
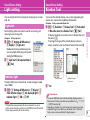
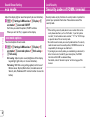
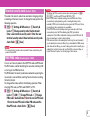
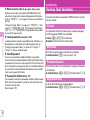
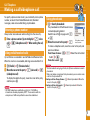

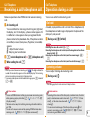
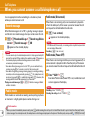
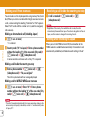
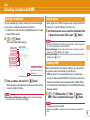
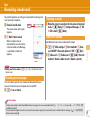

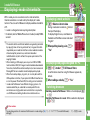
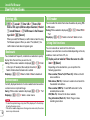
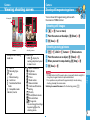

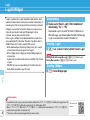
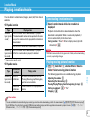
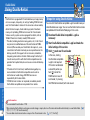

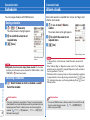
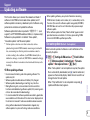


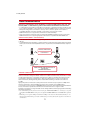
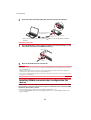
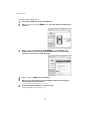
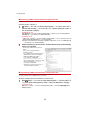
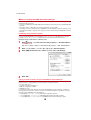
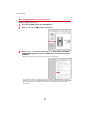
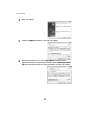
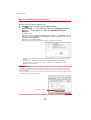
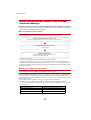
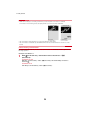
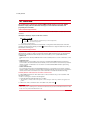

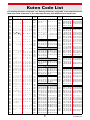
![取扱説明書 [F-03B] - Altehandys.de](http://vs1.manualzilla.com/store/data/006538124_2-9b53d14369fe3af8b4369d863b7cba7c-150x150.png)
![取扱説明書 [F-03B]](http://vs1.manualzilla.com/store/data/006579972_2-0a07ffbd1bff8b8fa162fa034a5b1bdf-150x150.png)

![取扱説明書 [F-02B] - Altehandys.de](http://vs1.manualzilla.com/store/data/006624109_2-964909a0eaf853a4068a164035e61306-150x150.png)
![取扱説明書 [F-07C]](http://vs1.manualzilla.com/store/data/006691876_2-1de7bfbf0557c95f9762afb62b02d873-150x150.png)
![取扱説明書 [F-01C] - Altehandys.de](http://vs1.manualzilla.com/store/data/006698700_2-1423e4aa8845601d17d5495c0fe871e1-150x150.png)