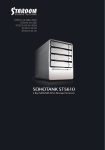
Download DR5-WBS3 操作手冊下載
Transcript
DR5-WBS3 » STARDOM Safe Capsule Series User Manual ..................... » STARDOM Safe Capsule Serie Bedienungsanleitung ........... 1 User Manual » Série STARDOM Safe Capsule Manuel de l’utilisateur ......... 1 » Manual de usuario de STARDOM Safe Capsule Serie .......... 2 ....................... 3 » STARDOM Safe Capsule シリーズユーザーマニュアル ................ 4 » STARDOM Safe Capsule » STARDOM Safe Capsule .................... 5 SOHORAID DR5 User Manual » SOHORAID DR5 Series User Manual ............................................................3 » SOHORAID DR5 Serie Bedienungsanleitung .................................................9 » Série SOHORAID DR5 Manuel de l’utilisateur ..............................................15 » Manual de usuario de SOHORAID DR5 Series .............................................21 » SOHORAID DR5 系列產品使用說明 ..............................................................27 » SOHORAID DR5 系列产品使用说明 ..............................................................33 » SOHORAID DR5 シリーズユーザーマニュアル ............................................39 » SOHORAID DR5 시리즈 사용 설명서 ............................................................45 2 SOHORAID DR5 User Manual Introduction Thank you for purchasing STARDOM products. This manual will introduce the SOHORAID DR5 Series. Before using your SOHORAID DR5, please read this manual thoroughly. Although all information contained in this user manual has been carefully verified before publishing, however, the actual product specification will be based on the time of delivery from STARDOM. Any updates to the product specifications or relevant information may be found on www.stardom.com.tw. Products are subject to change without prior notifications. If you have any questions regarding the products of STARDOM, or you would like to know the latest product information, user manual update, or firmware update, please contact your local supplier or visit www.stardom.com.tw for further information. Copyright © RAIDON TECHNOLOGY, INC. All rights reserved. Table of Contents 1. 2. 3. 4. 5. 6. 7. 8. 9. Package Contents and Product Views Environmental Requirements Hardware Requirements and Precautions Hardware Installation Description of Front Panel Operation and LCD Information Replacement of Malfunctioning Drive and Data Rebuild Instructions System Temperature Overheat and Fan Failure Management Visual Status Indicator Definitions Frequently Asked Questions 1. Package Contents and Product Views Open the package and you should find the following: DR5-WBS3 DR5-WBS3x1 ( with removable drive tray enclosed x 5 ) Firewire 800 (1394b) Cable x1 Firewire 400 (1394a) Cable x1 e-SATA Cable x1 USB 3.0 Cable x1 AC Power Cable x1 Accessories Kit User Manual Please make sure that the contents listed above are not damaged or missing. If you should find damages or missing contents, please contact your supplier immediately. 3 SOHORAID DR5 User Manual Front and Rear View A. Hard drive status indicator B. Removable drive tray C. Key access opening D. LCM display E. UP button F. DOWN button G. ENTER button H. ESC button I. Mute button J. Power indicator K. Alarm indicator L. Power Switch M. Power socket N. Cooling fan O. USB3.0 interface connection P. e-SATA interface connection Q. FireWire 800 (1394b) interface connection R. FireWire 400 (1394a) interface connection S. Anti-theft cord slot Drive Position Drive position (1) Drive position (2) Drive position (3) Drive position (4) Drive position (5) Storage Mode Definition Independent mode ( JBOD ) : Five independent storage disks. (this is the factory default setting) Speed mode ( Raid 0 ) : One large independent storage disk for fast data access, but no data redundancy. Clone mode : Five redundant storage disks. Safe mode (RAID 1) : Mirrored storage capacity allowing data protection. Large mode : One large storage disk without fast data access and without data redundancy. Safe mode ( Raid 5 ) : One large independent storage disk with data redundancy Safe mode ( Raid 3 ) : One large independent storage disk with data redundancy Safe mode ( Raid 10 ) : One independent storage disk with data redundancy. - RAID 5 mode is the safest and fast storage mode of those safe systems listed above. - RAID 0 mode is the fastest storage (access) mode of those listed. - The DR5-WBS3 comes with two FireWire 800 (1394b) ports and one 1 FireWire 400 (1394a) port that allow you to daisy chain other FireWire supported devices. 2. Operating Information Operating Temperature : 0 ∼ 40 ℃ (32 ~ 104 ℉) Storage Temperature : -10 ∼ 70 ℃ (14 ~ 158 ℉) Line Voltage : 100 ∼ 240V AC 4 SOHORAID DR5 User Manual 3. Hardware Requirements and Precautions 1. Only one interface connection may be used at once per computer system. 2. The data formation of RAID 5 / RAID 3 uses four disks with space equal to the smallest disk of the four; RAID 0 / Large is built of five disks; RAID 10 is built of two disks and used for its large storage space; therefore, before using this system, it is recommended that each disk be installed before use and that each disk be new and of the same brand and specification. Also, when you need to switch in a new disk, it is recommended that you buy a new disk that is of the same brand and specification, and same size as the old disk. If that is not possible, please choose a disk that is at least 20GB larger than the other disk. 3. The actual storage capacity of DR5-WBS3 recognized by the system may differ from the total capacity stated on the hard drives once the drives have been formatted. 4. When connected to the computer system, it’s prohibited to remove, insert or swap the hard drive while data transfer is being performed. 5. It’s prohibited to change the positioning of the drives once the initial installation has been completed as the changes made to the drive positions may destroy the RAID formation. 6. If you discover that hard drive failure is taking place, go to Section 6 “Replacement of Malfunctioning Drive and Data Rebuild Instructions” and follow the steps accordingly. 7. Whenever turning off or unplugging the DR5-WBS3 from your computer system becomes necessary, always remember to safely remove it from your operating system first. 8. RAID 5 / RAID 3 / RAID 10 / RAID 1 storage systems only allow one disk to malfunction at a time. Therefore, when you find that two or more disks have malfunctioned, your data on those disks may be damaged or lost; when you find that one or more disks have malfunctioned in RAID 0 / LARGE, your data on those disks may be damaged or lost. It is recommended that you find a disk recovery specialist in your area to attempt to recover your damaged or lost data. 9. It is highly recommended for users to back up important data contained within the DR5-WBS3 unit on a regular basis or whenever the user feels necessary to a remote or a separate storage device. Stardom will not be responsible for any lost of data caused during the use of the unit or the recovery of the data lost. 4. Hardware Installation Please follow the instructions below to complete the hardware installation. Step 1 Open the package and take out the product making sure that all the enclosed contents are not damaged or missing. Should you find damages or missing contents, please contact your supplier immediately. Step 2 If you want to install a DR5 system in the rackmount, please fasten the handle to the two panels of the DR5. Then, use the screws from the component bag to screw the DR5 system to the slot inside of the rackmount. Finally, make sure the DR5 is securely fastened. Step 3 If you choose to place the system on a desktop, please fasten the foot pads to the bottom of the system and place the system on a stable, level surface. Also, make sure that the heat sink fans are not blocked and that the sides of the system have ample space to displace heat. (Please select dry spaces and environments that are not harmful to the system.) Step 4 Use the key included in the accessory kit and inserted into the key access opening to eject the removable drive tray latch and extract the removable drive tray. 5 SOHORAID DR5 User Manual Step 5 Mount your hard drives onto the removable drive tray and secure it with the screws included in the accessory kit to avoid any damage to the hard drive due to accidental movements. Step 6 When the hard drive installation has been completed, insert the hard drive tray into the system horizontally and secure the latch into place. Step 7 Connect the AC power cable to the DR5-WBS3, and then plug the AC power to the wall socket. Boot-up the unit. Step 8 Set the storage mode using the LCD and buttons on the front (please refer to section 5 for front panel and LCD information). Step 9 Connect the cable to the PC and the DR5-WBS3 port. Step10 After booting up, your operating system will automatically recognize the RAID storage setup. After RAID has been successfully recognized, please format your disks as instructed by your operating system to suit your own storage needs. After formatting is complete, you may begin to use your DR5 system. 5. Description of Front Panel Operation and LCD Information Level 0 Level 1 Quick Setup Disk Manager EXTERNAL 5 BAY HARDWARE RAID RAID Manager System Manager Level 2 Level 3 Create One RAID Delete All RAID Identify Disk Show Disk Info Identify RAID Create RAID Delete RAID RAID Info Change RAID Pwd Rebuilding Priority Standby Timer System Info Change Password Logout From Menu Alarm Control Hardware Monitor 6 Level 4 RAID 0 / Clone / Large / RAID 1 / RAID 5 / RAID 3 / RAID 10 Disk 1 Check Disk LED Disk 2 Check Disk LED Disk 3 Check Disk LED Disk 4 Check Disk LED Disk 5 Check Disk LED < Disk Info > Select RAID RAID 0 / Clone / Large / RAID 1 / RAID 5 / RAID 3 / RAID 10 Select RAID < Password > for RAID setup Highest/High/Medium/Low/Lowest < 99999min > Firmware Version < Password > for System Info < Y or N > Mute the Buzzer Voltage Monitor < 3.3V / 5V / 12V > Temp. Monitor < Temp. > FAN Monitor <Fan Speed/Fan Level> SOHORAID DR5 User Manual 6. Replacement of Malfunctioning Drive and Data Rebuild Instructions When a front hard drive indicator has lit up red and the audio alarm sounds, this could mean the indicated hard drive may be malfunctioning. If this occurs, you may press the mute button at the rear of the system to shut off the audio alarm and power off the system immediately if in the allowed operational state, and then re-power on the system to double check and see if in fact the indicated hard drive has malfunctioned. If the problem persists, please turn off the system and follow the directions below : Step 1 Remove the drive tray containing the malfunctioned hard drive and disassemble the hard drive from drive tray. Step 2 Mount the new hard drive onto the tray and insert it back to the empty drive position of the DR5, then push the latch into place making sure it is secured and locked. Step 3 After swapping out for a new disk in RAID 5 / RAID 3 / RAID 10 / Clone and turning the power on, you will see blinking red and blue lights on the new disk reader box which indicate that the data on that disk is being rebuilt; At this time, you can use the DR5-WBS3 as normal; when the red and blue indicators stop flashing, your data on the disk has been rebuilt. Under RAID 0 / Large the failure of one disk will cause data corruption, so after replacing a disk, please reformat the system disks. 7. System Temperature Overheat and Fan Failure Management If the alarm indicator has lit up red and the audio alarm sounds, this could mean that either a system fan has stopped operating entirely or the system temperature has exceeded over the default temperature of 60°C. When this occurs, you may press the mute button at the rear of the system to shut off the audio alarm and power off the system immediately if in the allowed operational state to let the system cool. Check and see if the overall operation environment is well ventilated and make sure there are no blockages to the enclosed fan and then re-power on the system to continue use. If the problem persists, please turn off the system and contact your supplier or the STARDOM tech support for further assistance. 8. Visual Status Indicator Definitions States Front LED buzzer Power LED Alarm LED HDD LED Power on Blue ------ Blue flash -> Blue No disk Disk Fail RAID Fail Blue Blue Blue ---------------- -----Red Red 1 long when booting finished ----------4 short Disk Idle Format Access Blue Blue Blue ---------------- Blue Blue flash Blue flash ---------------- Fan Fail Blue Red Blue 4 short Over Temp Blue Red Blue 4 short Rebuilding Blue ------ Source: Blue flash Target: Blue and Purple light on alternatively ------ 7 SOHORAID DR5 User Manual 9. Frequently Asked Questions Q1. Which drive format should I choose to format the hard drives in the DR5-WBS3? A : It depends on the computer system you most often use. See the below suggestions: 1. Use NTFS format for Windows 2000/XP/Vista/Windows 7 system 2. Use HFS+ (Mac OS Extended) format for a Mac OS X system 3. Choose FAT32 format if you’ll use the DR5 in both Windows and Mac environments (the maximum size of one single file may not exceed 4 GB). Q2. Why can’t my DR5-WBS3 reach the transfer performance speed of 200 MB/s via e-SATA interface as stated on your website? A : 1. Please first check if your PCI-E SATA host adapter would only support PCI-E (1X). This type of host adapters cannot reach the transfer performance speed beyond 135MB/s. 2. It is recommended to purchase STARDOM SJ20-x8 (PCI-E 8X) host adapter to enhance the transfer speed performance via e-SATA. 3. The DR5-WBS3 will need to be set to the RAID 0 mode also. 8 SOHORAID DR5 User Manual Über diese Anleitung Vielen Dank für den Kauf eines STARDOM Produkts. Dieses Bedienungsanleitung beschreibt das STARDOM SOHORAID DR5 Produkt. Bevor Sie dieses Produkt benutzen, lesen Sie diese Anleitung bitte sorgfältig durch. Obwohl alle Informationen in dieser Anleitung vor der Veröffentlichung sorgfältig überprüft wurden, beziehen sich die tatsächlichen Produktspezifikationen auf die Zeit der Auslieferung durch STARDOM. Aktualisierungen der Produktspezifikationen können auf der Webseite www.stardom.com.tw gefunden werden. Änderungen der Produkte ohne vorherige Nachricht vorbehalten. Wenn Sie Fragen zu den Produkten von STARDOM haben, oder mehr über die aktuellsten Produktinformationen, Aktualisierungen der Bedienungsanleitung oder Firmwareupdates erfahren möchten, kontaktieren Sie bitte Ihren Händler vor Ort oder besuchen Sie www.stardom.com.tw für weitere Informationen. Copyright © RAIDON TECHNOLOGY, INC. All Rechte vorbehalten. Inhaltsverzeichnis 1. Packungsinhalt und Produktansichten 2. Betriebsbedingungen 3. Hardwarevoraussetzungen und Vorsichtsmaßnahmen 4. Hardwareinstallation 5. Description of Front Panel Operation and LCD Information 6. Austausch eines defekten Laufwerks und Anweisungen zur Datenwiederherstellung 7. Verhalten bei Systemüberhitzung und Lüfterausfall 8. Beschreibung der visuellen Statusanzeige 9. Oft gestellte Fragen 1. Packungsinhalt und Produktansichten Öffnen Sie das Paket und Sie sollten die folgenden Dinge vorfinden: DR5-WBS3 DR5-WBS3 x 1 (mit integriertem Wechselrahmen x 4) FireWire 800 (1394b) Kabel x 1 FireWire 400 (1394a) Kabel x 1 eSATA Kabel x 1 USB 3.0 Kabel x 1 Stromkabel x 1 Zubehörset DR5-WBS3 Bedienungsanleitung Bitte stellen Sie sicher, dass die oben aufgelisteten Inhalte nicht beschädigt sind oder fehlen. Falls Schäden oder fehlende Inhalte festgestellt werden, kontaktieren Sie bitte umgehend Ihren Händler. 9 SOHORAID DR5 User Manual Vorder- und Rückansichten A. Festplatten-Statusanzeige B. Wechselrahmen C. Schlüsselzugangsöffnung D. LCD Anzeige E. UP Taste F. DOWN Taste G. ENTER Taste H. ESC Taste I. Stummtaste J. Netzanzeige K. Alarmanzeige L. Netzschalter M. Netzbuchse N. Kühllüfter O. USB 3.0 Anschluss P. e-SATA Anschluss Q. FireWire 800 (1394b) Anschlüsse R. FireWire 400 (1394a) Anschlüsse S. Steckplatz für Kensingtonschloss Laufwerkposition Laufwerkposition 1 Laufwerkposition 3 Laufwerkposition 2 Laufwerkposition 4 Laufwerkposition 5 Speichermodus Beschreibung Unabhängiger Modus (JBOD): Fünf unabhängige Speicherfestplatten. (dieses ist normalerweise die Standardeinstellung) Geschwindigkeitsmodus (RAID 0): Eine große, unabhängige Speicherfestplatte für erhöhte Datenzugriffsgeschwindigkeit, aber ohne Datenredundanz. Sicherer Modus (Raid 1): für individuelle Speicherkapazität und Datenschutz. Klonmodus: Fünf redundante Speicherfestplatten. Großer Modus: Eine große Speicherfestplatte ohne schnellen Datenzugriff und ohne Datenredundanz. Sicherer Modus (Raid 5): Eine große, unabhängige Speicherfestplatte mit Datenredundanz. Sicherer Modus (Raid 3): Eine große, unabhängige Speicherfestplatte mit Datenredundanz. Sicherer Modus (Raid 10): Eine große, unabhängige Speicherfestplatte mit Datenredundanz. - RAID 5 ist der sicherste und schnellste Speichermodus der oben aufgeführten Speichersysteme. - RAID 0 ist der von den aufgeführten Modi derjenige mit dem schnellsten Speicher(zugriff). - Der DR5-WBS3 verfügt über zwei FireWire 800 (1394b)-Ports und einen 1 FireWire 400 (1394a)-Port, so dass Sie die Möglichkeit haben, andere Geräte anzuschließen, die auch FireWire unterstützen. 2. Betriebsbedingungen Betriebstemperatur : 0 ~ 40 ℃ (32 ~ 104 ℉) Lagertemperatur : -10 ~ 70 ℃ (14 ~ 158 ℉) Spannung : 100 ~ 240V AC 10 SOHORAID DR5 User Manual 3. Hardwarevoraussetzungen und Vorsichtsmaßnahmen 1. Pro Computersystem kann immer nur ein Anschluss genutzt werden. 2. Bei der Datenaufbereitung werden bei RAID 5 / RAID 3 vier Festplatten genutzt. Dabei ist die Speicherkapazität so groß wie die der kleinsten der vier Festplatten. RAID 0 / Großer Modus besteht aus fünf Festplatten. RAID 10 wird aus zwei Festplatten gebildet, und es wird aufgrund seiner großen Speicherkapazität verwendet. Daher wird vor Benutzung dieses Systems empfohlen, alle Festplatten zu installieren, wobei nur neue Festplatten derselben Marke und derselben Spezifikationen verwendet werden sollten. Auch wenn eine Festplatte ausgewechselt werden muss, sollte wieder eine neue Festplatte derselben Marke, derselben Größe und derselben Spezifikationen verwendet werden. Ist das nicht möglich, muss die neue Festplatte mindestens 20 GB größer sein als die andere Festplatte. 3. Die tatsächliche vom System erkannte Speicherkapazität von DR5-WBS3 kann von der auf den Festplatten angegebenen Gesamtkapazität abweichen, nachdem die Laufwerke formatiert wurden. 4. Während der Verbindung mit dem Computersystem ist ein Entfernen, Einlegen oder Austauschen der Festplatte zu vermeiden, wenn ein Datentransfer ausgeführt wird. 5. Nach dem Abschluss der Erstinstallation dürfen die Laufwerke nicht mehr in ihrer Position verändert werden, da Änderungen an den Laufwerkspositionen zu einer Zerstörung der RAID-Anordnung führen könnte. 6. Wenn Sie feststellen, dass ein Festplattenfehler aufgetreten ist, gehen Sie zu Abschnitt 6 “Austausch eines defekten Laufwerks und Anweisungen zur Datenwiederherstellung” und folgen Sie den entsprechenden Schritten. 7. Wann immer ein Ausschalten oder Abtrennen von DR5-WBS3 von Ihrem Computer notwendig wird, vergessen Sie nicht, es vorher immer aus Ihrem Betriebssystem zu entfernen. 8. Bei den Speichersystemen RAID 5/RAID 3/ RAID 10 darf jeweils immer nur eine Festplatte ausfallen. Wenn Sie feststellen, dass zwei oder mehrere Festplatten nicht richtig funktionieren, ist es möglich, dass die Daten auf diesen Festplatten beschädigt sind oder verloren gegangen sind. Auch wenn Sie bei RAID 0 und im Großen Modus feststellen, dass zwei oder mehrere Festplatten nicht richtig funktionieren, können die Daten darauf beschädigt oder verloren gegangen sein. Es wird empfohlen, beschädigte oder verloren gegangene Daten durch einen Datenwiederherstellungsspezialisten wiederherstellen zu lassen. 9. Es wird dringend empfohlen, alle auf den DR5-WBS3 Laufwerken befindlichen Daten regelmäßig oder wenn immer es der Benutzer für nötig hält auf einem fern gewarteten oder externem Speicherlaufwerk zu sichern. Stardom ist weder verantwortlich für Datenverluste, die während der Benutzung des Geräts entstehen, noch für die Wiederherstellung verlorener Daten. 4. Hardwareinstallation Bitte folgen Sie den unten stehenden Anweisungen, um die Hardwareinstallation durchzuführen: Schritt 1 Öffnen Sie die Verpackung und nehmen Sie das Produkt heraus. Stellen Sie sicher, dass sämtliche Inhalte unbeschädigt sind und nicht fehlen. Falls Sie Schäden oder fehlende Inhalte feststellen sollten, kontaktieren Sie bitte umgehend Ihren Händler. Schritt 2 Wenn Sie ein DR5-System in das Rack einbauen möchten, müssen die Griffe an den zwei Platten des DR5 befestigt werden. Schrauben Sie dann das DR5-System mit den mitgelieferten Schrauben im Rack fest. Prüfen Sie, ob das DR5-System sorgfältig festgeschraubt ist. Schritt 3 Wenn Sie das System auf einem Tisch aufstellen möchten, befestigen Sie die Gummifüße an der Unterseite des Systems. Stellen Sie es auf einer stabilen, ebenen Fläche auf. Stellen Sie sicher, dass die Lüfter des Heatsinks gut laufen und dass das System an den Seiten ausreichend Platz hat, um die Wärme aus dem Inneren abzuleiten. (Wählen Sie als Aufstellort nur trockene Umgebungen, die keine schädlichen Einflüsse auf das System haben.) Schritt 4 Benutzen Sie den mitgelieferten Schlüssel im Zubehörset und stecken Sie ihn in die Schlüsselzugangsöffnung, um die Wechselrahmenklappe auszuwerfen und den Wechselrahmen zu entnehmen. 11 SOHORAID DR5 User Manual Schritt 5 Entfernen Sie den Laufwerksstabilisator vom Wechselrahmen. Montieren Sie die Festplatte auf dem Wechselrahmen und sichern Sie sie mit den Schrauben aus dem Zubehörset. Schritt 6 Legen Sie das Laufwerk nach Abschluss wieder zurück in die Laufwerksposition und schließen Sie den Hebel. Schritt 7 Schließen Sie das AC-Stromkabel an den DR5-WBS3 und das AC-Netzkabel an eine Wandsteckdose an. Starten Sie das Gerät. Schritt 8 Legen Sie den Speichermodus über die LCD-Anzeige mit den Tasten an der Vorderseite fest (Informationen zur Gerätevorderseite und der LCD-Anzeige finden Sie in Abschnitt 5). Schritt 9 Schließen Sie das Kabel an den PC und an den DR5-WBS3-Anschluss an. Schritt10 Nach dem Systemstart erkennt das Betriebssystem automatisch den RAID-Speicher. Nachdem das RAID erkannt wurde, formatieren Sie die Festplatten nach den Anweisungen des Betriebssystems entsprechend Ihrem Speicherbedarf. Nach dem Formatieren können Sie das DR5-System verwenden. 5. Description of Front Panel Operation and LCD Information Level 0 Level 1 Quick Setup Disk Manager EXTERNAL 5 BAY HARDWARE RAID RAID Manager System Manager Level 2 Level 3 Create One RAID Delete All RAID Identify Disk Show Disk Info Identify RAID Create RAID Delete RAID RAID Info Change RAID Pwd Rebuilding Priority Standby Timer System Info Change Password Logout From Menu Alarm Control Hardware Monitor 12 Level 4 RAID 0 / Clone / Large / RAID 1 / RAID 5 / RAID 3 / RAID 10 Disk 1 Check Disk LED Disk 2 Check Disk LED Disk 3 Check Disk LED Disk 4 Check Disk LED Disk 5 Check Disk LED < Disk Info > Select RAID RAID 0 / Clone / Large / RAID 1 / RAID 5 / RAID 3 / RAID 10 Select RAID < Password > for RAID setup Highest/High/Medium/Low/Lowest < 99999min > Firmware Version < Password > for System Info < Y or N > Mute the Buzzer Voltage Monitor < 3.3V / 5V / 12V > Temp. Monitor < Temp. > FAN Monitor <Fan Speed/Fan Level> SOHORAID DR5 User Manual 6. Austausch eines defekten Laufwerks und Anweisungen zur Datenwiederherstellung Wenn eine vordere Festplattenanzeige rot aufleuchtet und ein Audiosignal ausgegeben wird, dann könnte dies bedeuten, dass das betreffende Laufwerk eine Fehlfunktion aufweist. Falls dies geschieht, können Sie auf die Stummtaste an der Rückseite des Systems drücken, um das Audiosignal abzuschalten und das System, falls es der Betriebszustand zulässt, sofort ausschalten und anschließend wieder neu starten, um sicherzugehen, dass das betreffende Laufwerk wirklich defekt ist. Falls das Problem weiterhin besteht, schalten Sie das System bitte aus und folgen Sie den unten stehenden Anweisungen: Schritt1 Entfernen Sie den Wechselrahmen mit der defekten Festplatte und entfernen Sie die Festplatte vom Wechselrahmen. Schritt2 Montieren Sie die neue Festplatte auf dem Wechselrahmen und bringen Sie ihn zurück in die leere Laufwerksposition des DR5-WBS3. Drücken Sie anschließend auf den Hebel, um sicherzustellen, dass der Wechselrahmen befestigt und gesichert ist. Schritt3 Wenn Sie im RAID 5-/RAID 3-/RAID 10- oder Klonmodus eine Festplatte austauschen und dann das System einschalten, blinkt die rote und blaue LED an der neuen Festplattenbox, um anzuzeigen, dass die Daten auf der Festplatte wiederhergestellt werden. Jetzt schon können Sie den DR5-WBS3 normal verwenden. Wenn die rote und blaue LED nicht mehr blinkt, ist der Vorgang zur Wiederherstellung der Daten abgeschlossen. Wenn im RAID 0-Modus oder im großen Modus eine Festplatte ausfällt, können Daten beschädigt werden. Daher müssen die Systemfestplatten nach dem Auswechseln einer Festplatte formatiert werden. 7. Verhalten bei Systemüberhitzung und Lüfterausfall Falls die Alarmanzeige rot aufleuchtet und der Audioalarm ertönt, könnte dies bedeuten, dass entweder ein Systemlüfter komplett ausgefallen ist oder die Systemtemperatur die Standardtemperatur von 60°C überschritten hat. Wenn dies passiert, können Sie die Stummtaste an der Rückseite des Systems drücken, um den Audioalarm auszuschalten und das System, falls es der Betriebszustand zulässt, sofort herunterzufahren und das System abkühlen zu lassen. Prüfen Sie, dass die gesamte Arbeitsumgebung gut belüftet wird und stellen Sie sicher, dass der Lüfter nicht blockiert wird. Starten Sie das System anschließend neu, um mit der Benutzung fortzufahren. Falls das Problem noch weiter besteht, schalten Sie das System bitte aus und kontaktieren Sie Ihren Händler oder den Technischen Kundendienst von STARDOM, um weitere Hilfe zu erhalten. 13 SOHORAID DR5 User Manual 8. Beschreibung der visuellen Statusanzeige States Front LED buzzer Power LED Alarm LED HDD LED Power on Blue ------ Blue flash -> Blue No disk Disk Fail RAID Fail Disk Idle Format Access Blue Blue Blue Blue Blue Blue ------------------------------- -----Red Red Blue Blue flash Blue flash 1 long when booting finished ----------4 short ---------------- Fan Fail Blue Red Blue 4 short Over Temp Blue Red Blue 4 short ------ Source: Blue flash Target: Blue and Purple light on alternatively ------ Rebuilding Blue 9. Oft gestellte Fragen Q1. Welches Laufwerksformat sollte ich wählen, um die Laufwerke für den DR5-WBS3 zu formatieren? A : Das hängt von Ihrem verwendeten Computersystem ab. Siehe folgende Vorschläge: 1. Benutzen Sie NTFS für Windows 2000/XP/Vista/Windows 7. 2. Benutzen Sie das HFS+ (MAC OS Extended) Format für ein MAC OS X System. 3. Wählen Sie das FAT32 Format, wenn Sie den DR5-WBS3 sowohl in Windows als auch Mac Umgebungen benutzen (die maximale Größe einer einzelnen Datei darf 4GB nicht überschreiten). Q2. Warum kann mein DR5-WBS3 nicht die hohe Übertragungsgeschwindigkeit von mehr als 200 MB/Sek. über die e-SATA Schnittstelle, wie auf Ihrer Webseite angegeben, erreichen? A : 1. Bitte prüfen Sie zunächst, ob Ihr PCI-E SATA Host Adapter nur PCI-E (1X) unterstützt. Diese Art von Host Adapter kann keine Übertragungsgeschwindigkeiten über 140 MB/s erreichen. 2. Es wird empfohlen, den STARDOM SJ20-8x (PCI-E 8X) Host Adapter zur Erhöhung der Übertragungsgeschwindigkeit über e-SATA zu erwerben. 14 SOHORAID DR5 User Manual A propos de ce manuel Merci pour l’achat d’un produit STARDOM. Ce manuel présente la série de produits STARDOM DR5. Veuillez entièrement lire ce manuel avant l’utilisation de ce produit. Toutes les informations contenues dans ce manuel ont été attentivement vérifiées avant la publication, toutefois, les caractéristiques actuelles du produit sont basées sur le moment de livraison par STARDOM. Toutes mises à jour des caractéristiques du produit ou des informations relatives sont disponibles sur www.stardom.com.tw. Les produits sont sujets à des modifications sans notice préalable. Si vous avez des questions concernant les produits de STARDOM, ou si vous souhaitez obtenir les dernières informations sur un produit, une mise à jour du manuel ou du firmware, veuillez contacter votre fournisseur local ou allez sur le site www.stardom.com.tw pour plus d’informations. Droit de Reproduction © RAIDON TECHNOLOGIE, INC. Tous droits réservés. Table des matières 1. Contenu de la boîte et description du produit 2. Conditions ambiantes 3. Besoins en matériel et précautions 4. Installation du matériel 5. Description des opérations du panneau avant et Informations sur le LCD 6. Remplacement d'un disque défectueux et instructions pour reconstruire les données 7. Gestion de surchauffe du système et de panne du ventilateur 8. Définition des indicateurs visuels de statut 9. Foire Aux Questions 1. Contenu de la boîte et description du produit Ouvrez l’emballage et vous devriez trouver les éléments suivant : DR5-WBS3 1 x DR5-WBS3 (avec 4 x lecteurs amovibles fermés) 1 x Câble FireWire 800 (1394b) 1 x Câble FireWire 400 (1394a) 1 x Câble eSATA 1 x Câble USB 3.0 1 x Cordon d’alimentation Kit d’accessoires Manuel utilisateur du DR5-WBS3 Veuillez vous assurer que le contenu énuméré ci-dessus n’est ni endommagé ni manquant. S’il y a des éléments endommagés ou manquant, veuillez contacter votre fournisseur immédiatement. 15 SOHORAID DR5 User Manual Vues de devant et de derrière A. Indicateur du statut du disque dur B. Baie de disque amovible C. Serrure d’ouverture de l’accès D. Panneau d’affichage LCD E. Bouton UP F. Bouton DOWN G. Bouton ENTER H. Bouton ESC I. Touche de silence J. Indicateurs d’alimentation électrique K. Indicateur de l’alarme L. Interrupteur d’alimentation M. Prise d’alimentation N. Ventilateur de refroidissement O. Interface de connexion USB 3.0 P. Interface de connexion e-SATA Q. Interface de connexion FireWire 800 (1394b) R. Interface de connexion FireWire 800 (1394b) S. Cordon antivol Position du disque Emplacement du lecteur 1 Emplacement du lecteur 3 Emplacement du lecteur 2 Emplacement du lecteur 4 Emplacement du lecteur 5 Définition des modes de stockage Mode indépendant (JBOD) : Cinq disques de stockage indépendants. (c'est le réglage par défaut) Mode Vitesse (Raid 0) : Un disque de grande capacité de stockage indépendant pour un accès rapide aux données, mais pas de redondance des données. Mode de sécurité (Raid 1) : active la capacité de stockage individuelle et la protection de données. Mode Clone : Cinq disques de stockage redondants. Mode Large : Un grand disque de stockage sans accès rapide aux données et sans redondance des données. Mode Sécurité (Raid 5) : Un grand disque de stockage indépendant avec redondance des données Mode Sécurité (Raid 3) : Un grand disque de stockage indépendant avec redondance des données Mode Sécurité (Raid 10) : Un disque de stockage indépendant avec redondance des données. - Le mode RAID 5 est le mode de stockage le plus sûr et rapide de ces systèmes sûrs énumérés cidessus. - Le mode RAID 0 est le mode de stockage (accès) le plus rapide de ceux énumérés. - Le DR5-WBS3 est livré avec deux ports FireWire 800 (1394b) et un port FireWire 400 (1394a) qui vous permettent de connecter en chaîne d'autres périphériques FireWire pris en charge. 2. Conditions ambiantes Température de fonctionnement : 0 ~ 40 ℃ (32 ~ 104 ℉) La température de stockage : -10 ~ 70 ℃ (14 ~ 158 ℉) Tension secteur : 100 ~ 240V C.A. 16 SOHORAID DR5 User Manual 3. Besoins en matériel et précautions 1. Une seule interface de connexion à la fois peut être utilisée par système d’ordinateur. 2. La formation des données de RAID 5 / RAID 3 utilise quatre disques avec un espace égal au plus petit des quatre disques, la configuration RAID 0 / Large est constituée de cinq disques; RAID 10 est constitué de deux disques et utilisé pour son grand espace de stockage; par conséquent, avant d'utiliser ce système, il est recommandé que chaque disque soit installé avant l'utilisation, et que chaque disque soit neuf et de même marque, avec les même spécifications. Aussi, lorsque vous avez besoin de passer sur un nouveau disque, il est recommandé d'acheter un disque neuf de même marque et avec les mêmes spécifications, et la même taille que l'ancien disque. Si cela n'est pas possible, choisissez un disque qui a au moins 20 Go de plus que l'autre disque. 3. La capacité de stockage réel de la série DR5-WBS3 identifiée par le système peut différer de la capacité totale indiquée sur les disque dur combinés une fois que les disques ont été formatés. 4. Lors de la connexion à un système informatique, il est interdit de retirer, insérer ou échanger le disque dur pendant le transfert de données. 5. Il est interdit de changer la position des disques une fois que l'installation initiale est terminée, sinon vous risquez de détruire la formation RAID. 6. Si vous découvrez que l'un des disques dur est en panne, veuillez consulter la section 6 "Remplacement d'un disque défectueux et instructions pour reconstruire les données" et suivez les instructions. 7. Chaque fois que vous devez éteindre ou débrancher le DR5-WBS3 de votre ordinateur, n’oubliez pas de toujours le déconnecter (éjecter) de votre système d'exploitation en premier. 8. Les systèmes de stockage RAID 5 / RAID 3 / RAID 10 autorisent le dysfonctionnement d'un seul disque à la fois. Par conséquent, lorsque vous constatez que deux ou plusieurs disques ont mal fonctionné, vos données sur ces disques peuvent être endommagées ou perdues; Lorsque vous trouvez qu'un ou plusieurs disques ont mal fonctionné en mode RAID 0 / LARGE, vos données sur ces disques peuvent être endommagées ou perdues. Il est recommandé de trouver un spécialiste de récupération de disque dans votre région pour tenter de récupérer vos données endommagées ou perdues. 9. Il est extrêmement recommandé aux utilisateurs de sauvegarder régulièrement les données importantes contenues dans l’unité DR5-WBS3 ou si l’utilisateur le souhaite, vers un appareil de stockage distant et distinct. Stardom ne sera pas tenu responsable de la perte de données survenant lors de l’utilisation de l’unité, ni de la récupération des données perdues. 4. Installation du matériel Veuillez suive les instructions ci-dessous afin de réaliser l’installation du matériel : Etape1 Ouvrez la boîte et sortez le produit en vous assurant que tous les éléments inclus ne sont pas endommagés ni manquant. Si vous trouviez des éléments endommagés ou manquant, veuillez contacter votre fournisseur immédiatement. Etape2 Si vous souhaitez installer un système DR5 dans le montage en rack, fixez la poignée sur les deux panneaux du DR5. Ensuite, utilisez les vis de la poche de composants pour visser le système DR5 dans le logement à l'intérieur du montage en rack. Enfin, assurez-vous que le DR5 est solidement fixé. Etape3 Si vous choisissez de placer le système sur un ordinateur de bureau, fixez les tampons sur le fond du système et placez le système sur une surface plane et stable. De plus, assurez-vous que les ventilateurs du dissipateur de chaleur ne sont pas bloqués et que les côtés du système ont suffisamment d'espace pour évacuer la chaleur. (Choisissez des endroits et environnements secs qui ne soient pas nocifs pour le système.) Etape4 Utilisez la clé fournis dans le kit d’accessoires et insérez-là dans l’ouverture pour éjecter le cache du plateau de disque extractible et enlever le plateau de disque extractible. 17 SOHORAID DR5 User Manual Etape5 Enlevez le stabilisateur de disque du plateau amovible. Monter le disque dur sur le plateau et vissez les vis fournies dans le kit d'accessoires. Etape6 Une fois terminé, insérez le plateau dans le rangement A et poussez le loquet afin de le bloquer. Etape7 Branchez le câble d'alimentation secteur au DR5-WBS3, puis branchez l'alimentation secteur à la prise murale. Démarrez l'unité. Etape8 Réglez le mode de stockage à l'aide de l'écran LCD et des boutons sur le panneau avant (reportez-vous à la section 5 pour les informations concernant le panneau avant et l'écran LCD). Etape9 Connectez le câble à l'ordinateur et au port du DR5-WBS3. Etape10 Après le démarrage, votre système d'exploitation reconnaîtra automatiquement la configuration de stockage RAID. Une fois que le RAID a été reconnu, formatez vos disques comme indiqué par votre système d'exploitation pour répondre à vos besoins de stockage. Lorsque le formatage est terminé, vous pouvez commencer à utiliser votre système DR5. 5. Description des opérations du panneau avant et Informations sur le LCD Level 0 Level 1 Quick Setup Disk Manager EXTERNAL 5 BAY HARDWARE RAID RAID Manager System Manager Level 2 Level 3 Create One RAID Delete All RAID Identify Disk Show Disk Info Identify RAID Create RAID Delete RAID RAID Info Change RAID Pwd Rebuilding Priority Standby Timer System Info Change Password Logout From Menu Alarm Control Hardware Monitor 18 Level 4 RAID 0 / Clone / Large / RAID 1 / RAID 5 / RAID 3 / RAID 10 Disk 1 Check Disk LED Disk 2 Check Disk LED Disk 3 Check Disk LED Disk 4 Check Disk LED Disk 5 Check Disk LED < Disk Info > Select RAID RAID 0 / Clone / Large / RAID 1 / RAID 5 / RAID 3 / RAID 10 Select RAID < Password > for RAID setup Highest/High/Medium/Low/Lowest < 99999min > Firmware Version < Password > for System Info < Y or N > Mute the Buzzer Voltage Monitor < 3.3V / 5V / 12V > Temp. Monitor < Temp. > FAN Monitor <Fan Speed/Fan Level> SOHORAID DR5 User Manual 6. Remplacement d'un disque défectueux et instructions pour reconstruire les données Lorsque l'un des indicateur de statut s'allume en rouge et qu'une alarme sonore se met à sonner, cela peut indiquer que le disque dur concerné fonctionne mal. Si cela arrive vous devez appuyez sur le bouton silence situé à l'arrière du boîtier pour éteindre l'alarme sonore et éteindre immédiatement le boîtier, puis rallumer le boîtier pour vérifier si ce n'est pas l'indicateur de statut du disque dur qui fonctionnait mal. Si le problème persiste, veuillez éteindre le boîtier et suivre les instructions suivantes : Etape 1 Enlevez le plateau contenant le disque dur fonctionnant mal et dévissez le disque dur du plateau. Etape 2 Montez le nouveau disque dur sur le plateau et insérez le dans le rangement vide du boîtier DR5-WBS3, puis poussez le loquet pour bien verrouiller le rangement. Etape 3 Après avoir échangé par un nouveau disque en RAID 5 / RAID 3 / RAID 10 / Clonez et mettez sous tension, vous verrez des voyants rouge et bleu clignoter sur le nouveau boîtier du lecteur de disque indiquant que les données sur ce disque sont en cours de reconstruction; À ce moment, vous pouvez utiliser le DR5-WBS3 normalement, quand les voyants rouge et bleu ne clignotent plus, vos données sur le disque ont été reconstruites. Dans une configuration RAID 0 / Large la défaillance d'un disque entraînera la corruption de données, donc après le remplacement d'un disque, reformatez les disques du système. 7. Gestion de surchauffe du système et de panne du ventilateur Si l’indicateur d’alarme arrière s’allume en rouge et que l’alarme auditive se met en marche, cela peut signifier soit un ventilateur s’est arrêté de fonctionner soit la température du système a dépassé la température par défaut de 60°C. Lorsque cela arrive, vous devez appuyer sur la touche de silence à l’arrière du boîtier afin d’éteindre immédiatement l’alarme auditive et le système si cela est autorisé dans les opérations permises. Puis laissez le système refroidir. Vérifiez si le système est bien ventilé et assurez-vous que les ventilateurs internes ne sont pas bloqués puis rallumer le système. Si le problème persiste, veuillez éteindre le système et contacter votre revendeur ou le support STARDOM pour d’avantage d’assistance. 19 SOHORAID DR5 User Manual 8. Définition des indicateurs visuels de statut States Front LED buzzer Power LED Alarm LED HDD LED Power on Blue ------ Blue flash -> Blue No disk Disk Fail RAID Fail Disk Idle Format Access Blue Blue Blue Blue Blue Blue ------------------------------- -----Red Red Blue Blue flash Blue flash 1 long when booting finished ----------4 short ---------------- Fan Fail Blue Red Blue 4 short Over Temp Blue Red Blue 4 short ------ Source: Blue flash Target: Blue and Purple light on alternatively ------ Rebuilding Blue 9. Foire Aux Questions Q1. Quel format de disque devrais je choisir pour formater le disque dur dans le DR5-WBS3? A : Cela dépend du système informatique que vous utilisez le plus souvent. Voir les suggestions cidessous : 1. Utilisez le format NTFS pour les système Windows 2000/XP/Vista/Windows 7. 2. Utilisez le format HFS+ (Mac OS étendu) pour un système Mac OS X. 3. Choisir le format FAT32 si vous allez utiliser DR5-WBS3 dans des environnements de Windows et de Mac (la taille maximum d’un fichier peut ne pas dépasser 4 Go). Q2. Pourquoi mon DR5-WBS3 ne peut pas atteindre la vitesse de 200 MB/s via l’interface e-SATA comme indiqué sur votre site Web ? A : 1. Veuillez vérifier d’abord si votre adapteur de centre serveur PCI-E SATA soutiendrait seulement PCI-E (1X). Ce type d’adapteurs de centre serveur ne peut pas atteindre de vitesse de transfert au delà de 140 MB/s. 2. Il est recommandé d’acheter l’adapteur de centre serveur STARDOM SJ20-8x (PCI-E 8X) pour augmenter la performance de vitesse de transfert par l’intermédiaire de e-SATA. 20 SOHORAID DR5 User Manual Acerca de este manual Gracias por haber adquirido los productos STARDOM. Este manual le presentará el producto STARDOM SOHORAID DR5. Lea atentamente este manual antes de utilizar el producto. Aunque toda la información contenida en este manual del usuario ha sido verificada cuidadosamente antes de ser publicada, las especificaciones reales del producto estarán basadas en la fecha de lanzamiento desde STARDOM. Cualquier actualización de las actualizaciones del producto o cualquier información relevante será accesible desde www.stardom.com.tw. Los productos están sujetos a cambios sin previo aviso. Si tiene alguna pregunta acerca de los productos de STARDOM o le gustaría conocer la última información sobre un producto, actualización del manual de usuario o del firmware, contacte con su proveedor local o visite www.stardom.com.tw para más información. Derechos de Autor © RAIDON TECHNOLOGY, INC. Todos los derechos reservados. Índice de contenidos 1. Contenido del paquete y vistas del producto 2. Requisitos ambientales de funcionamiento 3. Requisitos de Hardware y precauciones 4. Instalación del Hardware 5. Description of Front Panel Operation and LCD Information 6. Sustitución del disco duro que no funcione correctamente. Instrucciones para la reconstrucción de los datos 7. Sistema de gestión del sobrecalentamiento de la temperatura y del fallo del ventilador 8. Definiciones del indicador visual de estado 9. Resolución de preguntas frecuentes 1. Contenido del paquete y vistas del producto Cuando abra el paquete encontrará los siguientes elementos : DR5-WBS3 DR5-WBS3 x 1 (junto con la bandeja desmontable de disco x 4) Cable FireWire 800 (1394b) x 1 Cable FireWire 400 (1394a) x 1 Cable eSATA x 1 Cable USB 3.0 x 1 Cable de alimentación x 1 Kit de accesorios Manual de usuario DR5-WBS3 Asegúrese de que no falte o esté dañado ninguno de los elementos listados anteriormente. Si hubiera contenidos dañados o faltara alguno, contacte inmediatamente con su proveedor. 21 SOHORAID DR5 User Manual Vista frontal y posterior A. Indicador de estado del disco duro B. Bandeja de disco extraíble C. Abertura de la llave de acceso D. Panel con pantalla LCD E. Botón UP F. Botón DOWN G. Botón ENTER H. Botón ESC I. Indicador de encendido J. Indicador de alarma K. Conexión de la interfaz USB 3.0 connection L. Conexión de la interfaz e-SATA M. Conexión de la interfaz FireWire 800 (1394b) N. Botón de silencio O. Interruptor de encendido P. Toma de corriente Q. Ventilador de refrigeración R. Ranura del cable antirrobo Ubicación de la unidad de disco Ubicación de la unidad de disco 1 Ubicación de la unidad de disco 2 Ubicación de la unidad de disco 3 Ubicación de la unidad de disco 4 Ubicación de la unidad de disco 5 Definiciones del Modo Almacenamiento Modo independiente ( JBOD ) : cinco discos de almacenamiento independientes. (esta es la configuración predeterminada de fábrica) Modo velocidad ( Raid 0 ) : un disco de almacenamiento independiente para acceso rápido a datos, pero sin redundancia de datos. Safe mode (Raid 1): Permite la capacidad de almacenamiento individual y la protección de datos. Modo clonación: cinco discos de almacenamiento redundante. Modo gran capacidad: un disco de almacenamiento sin acceso rápido a datos y sin redundancia de datos. Modo seguro ( Raid 5 ) : un disco grande de almacenamiento independiente con redundancia de datos Modo seguro ( Raid 3 ) : un disco grande de almacenamiento independiente con redundancia de datos Modo seguro ( Raid 10 ) : un disco de almacenamiento independiente con redundancia de datos. - El modo RAID 5 es el modo de almacenamiento más seguro de los sistemas seguros mencionados arriba. - El modo RAID 0 es el modo (de acceso) a almacenamiento más rápido de los mencionados. - El sistema DR5-WBS3 viene con dos puertos FireWire 800 (1394b) y un 1 puerto FireWire 400 (1394a) que le permite crear una cadena de margarita con otros dispositivos FireWire soportados. 2. Requitisitos ambientales de funcionamiento Temperatura de funcionamiento : 0 ~ 40 ℃ (32 ~ 104 ℉) Temperatura de almacenamiento : -10 ~ 70 ℃ (14 ~ 158 ℉) Voltaje de línea :100 ~ 240V AC 22 SOHORAID DR5 User Manual 3. Requisitos de Hardware y precauciones 1. Utilice una sola conexión de interfaz por sistema informático. 2. La formación de datos de RAID 5 / RAID 3 utiliza cuatro discos con un espacio equivalente al disco más pequeño de los cuatro; RAID 0 / grande se crea con cinco discos; RAID 10 se crea con dos discos y se utiliza para un gran espacio de almacenamiento; por tanto, antes de usar este sistema, se recomienda que todos los discos estén instalados antes de usar y que cada disco sea nuevo y de la misma marca y especificaciones. Además, cuando necesite cambiar un disco por otro, se recomienda que compre uno nuevo que sea de la misma marca y especificaciones y del mismo tamaño que el disco antiguo. Si no es posible, elija un disco que sea al menos 20GB más grande que el otro disco. 3. La capacidad real de almacenamiento del DR5-WBS3 Series reconocida por el sistema puede diferir de la capacidad total especificada en los discos duros una vez que éstos hayan sido formateados. 4. Cuando se conecte al sistema informático, no extraiga, inserte o cambie el disco duro cuando se está llevando a cabo una transferencia de datos. 5. Está prohibido modificar las posiciones de los discos una vez completada la instalación inicial, ya que los cambios realizados podrían destruir la formación RAID. 6. Si descubre que hay un fallo en un disco duro, vaya a la Sección 6 “Sustitución de disco que no funciona correctamente. Instrucciones de reconstrucción de los datos” y siga los pasos correspondientes. 7. Siempre que sea necesario apagar o desconectar el DR5-WBS3 del sistema del ordenador, recuerde que primero debe extraerlo de forma segura de su ordenador. 8. Los sistemas de almacenamiento RAID 5 / RAID 3 / RAID 10 sólo permiten el fallo de un disco de una vez. Por lo tanto, cuando un disco o más tengan fallos, sus datos en dichos discos pueden dañarse o perderse; si detecta que uno o más discos han fallado en RAID 0 / GRANDE, sus datos en dichos discos pueden haberse dañado o perdido. Se recomienda que contacte con un especialista de recuperación de discos en su zona para recuperar sus datos dañados o perdidos. 9. Se recomienda encarecidamente que, regularmente o cuando se considere necesario, los usuarios realicen una copia de seguridad de los datos más importantes guardados en la unidad DR5 a un dispositivo de almacenamiento distinto o remoto. Stardom no se hará responsable ni de la pérd. 4. Instalación del Hardware Siga las siguientes instrucciones para realizar la instalación del hardware : Paso 1 Abra el paquete y saque el producto asegurándose de que no falte o esté dañado ningún elemento. Si hubiera daños o faltara algún elemento, contacte inmediatamente con su proveedor. Paso 2 Si desea instalar un sistema DR5 en el equipo, fije el asa a los dos paneles del DR5. Luego, utilice los tornillos de la bolsa de componentes para atornillar el sistema DR5 en la ranura dentro del equipo. Finalmente, asegúrese de que el DR5 esté bien colocado. Paso 3 Si elige colocar el sistema en sobremesa, coloque los pies en la parte inferior del sistema y coloque el sistema sobre una superficie estable y nivelada. Además, asegúrese de que los ventiladores de disipación del calor y los laterales del sistema tengan espacio suficiente para disipar el calor. (Seleccione sólo espacios secos y entornos que no sean dañinos para el sistema) Paso 4 Utilice la llave proporcionada en el kit de accesorios e insértela en la abertura de la llave de acceso para expulsar el seguro de la bandeja de disco desmontable y extraer la bandeja de disco desmontable. 23 SOHORAID DR5 User Manual Paso 5 Extraiga el estabilizador de disco de la bandeja extraíble. Instale el disco duro en la bandeja y asegúrelo con los tornillos suministrados en el kit de accesorios. Paso6 Cuando haya terminado, introduzca de nuevo la bandeja en la posición de disco y coloque el seguro en su sitio. Paso7 Conecte el cable de alimentación AC al DR5-WBS3, y luego enchufe la alimentación AC en la toma de corriente. Arranque la unidad. Paso8 Ajuste el modo de almacenamiento usando el LCD y los botones frontales (consulte la sección 5 para información sobre el panel frontal y la pantalla LCD). Paso9 Conecte el cable al PC y al puerto DR5-WBS3. Paso10 Tras reiniciar, su sistema operativo reconocerá automáticamente la configuración de almacenamiento RAID. Tras haber reconocido la RAID con éxito, formatee los discos siguiendo las instrucciones de su sistema operativo según sus necesidades de almacenamiento. Tras completarse el formateo, podrá comenzar a usar su sistema DR5. 5. Description of Front Panel Operation and LCD Information Level 0 Level 1 Quick Setup Disk Manager EXTERNAL 5 BAY HARDWARE RAID RAID Manager System Manager Level 2 Level 3 Create One RAID Delete All RAID Identify Disk Show Disk Info Identify RAID Create RAID Delete RAID RAID Info Change RAID Pwd Rebuilding Priority Standby Timer System Info Change Password Logout From Menu Alarm Control Hardware Monitor 24 Level 4 RAID 0 / Clone / Large / RAID 1 / RAID 5 / RAID 3 / RAID 10 Disk 1 Check Disk LED Disk 2 Check Disk LED Disk 3 Check Disk LED Disk 4 Check Disk LED Disk 5 Check Disk LED < Disk Info > Select RAID RAID 0 / Clone / Large / RAID 1 / RAID 5 / RAID 3 / RAID 10 Select RAID < Password > for RAID setup Highest/High/Medium/Low/Lowest < 99999min > Firmware Version < Password > for System Info < Y or N > Mute the Buzzer Voltage Monitor < 3.3V / 5V / 12V > Temp. Monitor < Temp. > FAN Monitor <Fan Speed/Fan Level> SOHORAID DR5 User Manual 6. Sustitución del disco duro que no funcione correctamente. Instrucciones para la reconstrucción de los datos. Cuando el indicador frontal del disco se encienda de color rojo y suene la alarma sonora, se indica que el disco duro puede estar funcionando incorrectamente. Si esto ocurre, pulse el botón mute (silencio) ubicado en la parte posterior del sistema para apagar la alarma sonora y apague el sistema inmediatamente si se permite en ese estado operacional. Vuelva a encender el sistema para verificar que el disco duro indicado no está funcionando correctamente. Si el problema persiste, apague el sistema y siga las siguientes instrucciones: Paso 1 Extraiga la bandeja de discos que contenga el disco duro que no funcione y extráigalo de la bandeja. Paso 2 Instale un disco duro Nuevo en la bandeja y vuélvala a colocar en la posición vacante del DR5WBS3. Coloque el seguro en su sitio para asegurar que la bandeja esté asegurada y bloqueada. Paso 3 Tras el intercambio para introducir un nuevo disco en RAID 5 / RAID 3 / RAID 10 / Clonar y encender la alimentación, verá una luz roja y azul parpadeando en la nueva caja lectora de discos indicando que los datos de ese disco están reconstruyéndose; en este momento, puede utilizar el sistema DR5-WBS3 de forma normal; cuando los indicadores rojo y azul dejen de parpadear, sus datos habrán sido reconstruidos en el disco. Bajo la configuración RAID 0 / Grande, el fallo de un único disco puede provocar problemas de corrupción de datos, por tanto tras cambiar un disco, vuelva a formatear los discos del sistema. 7. Sistema de gestión del sobrecalentamiento de la temperatura y del fallo del ventilador Si el indicador de alarma se enciende de color rojo y suena la alarma sonora correspondiente, se indica que el ventilador del sistema ha dejado de funcionar o que la temperatura del sistema ha sobrepasado la temperatura máxima predeterminada (60°C). Cuando esto ocurra, pulse el botón de silencio situado en la parte posterior del sistema para silenciar la alarma y apague el sistema inmediatamente si lo permite el estado de funcionamiento para que el sistema se refrigere. Compruebe que el ambiente donde se utiliza el dispositivo está bien ventilado y asegúrese de que el ventilador integrado no esté bloqueado. A continuación, encienda de nuevo el sistema para seguir utilizándolo. Si el problema persiste, apague el sistema y contacte con su proveedor o con el servicio técnico de STARDOM para más asistencia. 25 SOHORAID DR5 User Manual 8. Definiciones del indicador visual de estado States Front LED buzzer Power LED Alarm LED HDD LED Power on Blue ------ Blue flash -> Blue No disk Disk Fail RAID Fail Disk Idle Format Access Blue Blue Blue Blue Blue Blue ------------------------------- -----Red Red Blue Blue flash Blue flash 1 long when booting finished ----------4 short ---------------- Fan Fail Blue Red Blue 4 short Over Temp Blue Red Blue 4 short ------ Source: Blue flash Target: Blue and Purple light on alternatively ------ Rebuilding Blue 9. Resolución de preguntas frecuentes Q1. Qué formato de disco debería seleccionar para formatear los discos duros en el DR5-WBS3? A : Depende del sistema informático que utilice frecuentemente, Siga las siguientes sugerencias: 1. Utilice NTFS para el sistema Windows 2000/XP/Vista/Windows 7. 2. Utilice el formato HFS+ (Mac OS extendido) para el sistema MAC OS X. 3. Seleccione el formato FAT32 si va a utilizar el DR5-WBS3 para Windows y Mac (el tamaño máximo de un archivo no puede exceder los 4 GB). Q2. Por qué mi DR5-WBS3 no puede alcanzar una velocidad alta de rendimiento de transferencia de más de 200 MB/s a través de la interfaz e-SATA como se especifica en su página web? A : 1. Compruebe en primer lugar si su adaptador Host SATA PCI-E solo admite PCI-E (1X). Este tipo de adaptadores host no puede alcanzar la velocidad de rendimiento de transferencia más allá de los 140 MB/s. 2. Se recomienda adquirir el adaptador host STARDOM SJ20-8x (PCI-E 8X) para aumentar el rendimiento de velocidad de transmisión a través de e-SATA. 26 SOHORAID DR5 User Manual 中文 關於這份手冊 感謝您使用 STARDOM 的產品。 本手冊將介紹 STARDOM DR5 產品。在您開始使用 SOHORAID DR5 系 列產品前,建議您先閱讀過本手冊。 手冊裡的資訊在出版前雖已被詳細確認,實際產品規格仍將以出貨時 為準;任何產品規格或相關資訊更新請您直接到 www.stardom.com.tw 網站查詢,本公司將不另行通知。 若您想獲得 STARDOM 最新產品訊息、使用手冊、韌體,或對 STARDOM 產品有任何疑問,請您聯絡當地 供應商或到 www.stardom.com.tw 取得相關訊息。 本手冊相關產品內容歸 銳銨科技股份有限公司 版權所有 目錄索引 1. 產品外觀及包裝內容 2. 環境需求 3. 硬體需求與注意事項 4. 硬體安裝 5. 前面板操作及LCD 訊息說明 6. 故障硬碟更換步驟及資料重建功能說明 7. 系統過熱及風扇故障狀況排除 8. 指示燈號說明 9. 常見問題 1. 產品外觀及包裝內容 打開包裝外盒後,包裝內容應包含下列組件: DR5-WBS3 DR5-WBS3 產品本體x1 ( 內含抽取盒x 5 ) Firewire 800 (1394b) 連接線x1 Firewire 400 (1394a) 連接線x1 eSATA 連接線 x1 USB 3.0 連接線x1 電源線x1 零件包 操作使用手冊 請確認相關配件與產品本身是否有受損或配件缺少,若有任何疑問請與本產品供應商聯絡。 27 SOHORAID DR5 User Manual 正面與背面示意圖 A. 硬碟狀態指示燈 B. 硬碟抽取盒 E. UP 按鍵 F. DOWN 按鍵 I. 靜音按鈕 J. 電源指示燈 L. 電源開關 M. 電源插座 O. USB3.0 連接埠 P. e-SATA 連接埠 R. FireWire 400 (1394a) 連接埠 硬碟位置 硬碟位置 1 硬碟位置 2 C. 鑰匙孔 D. LCM 顯示幕 G. ENTER 按鍵 H. ESC 按鍵 K. 系統警示燈 N. 風扇 Q. FireWire 800 (1394b) 連接埠 S. 防竊鎖孔 硬碟位置 3 硬碟位置 4 硬碟位置 5 儲存模式解說 Independent mode ( JBOD ) : 五個獨立資料儲存容量。(出廠設定即在此模式) Speed mode ( Raid 0 ) : ⼀一個大的獨立資料儲存容量並可加速資料存取但無資料保護功能。 Safe mode ( Raid 1 ) : ⼀一個獨立資料儲存容量並包含資料保護功能。 Clone mode:五個⼀一樣的資料。 Large mode:⼀一個獨立的大容量,無資料加速存取功能,也無資料保護的功能。 Safe mode ( Raid 5 ) : ⼀一個獨立大資料儲存容量並包含資料保護功能。 Safe mode ( Raid 3 ) : ⼀一個獨立大資料儲存容量並包含資料保護功能。 Safe mode ( Raid 10 ) : ⼀一個獨立資料儲存容量並包含資料保護功能。 • RAID 5 mode 上述儲存模式中最安全且兼具安全的。 而 RAID 0 mode 是上述儲存模式中最快速的。 • DR5-WBS3 機型提供兩組 FireWire 800 (1394b) 介面與1組 FireWire 400 (1394a) 介面,方便您串接其 他FireWire裝置。 2. 環境需求 工作溫度 : 0 ~ 40 ℃ (32 ~ 104 ℉) 儲存溫度 : -10 ~ 70 ℃ (14 ~ 158 ℉) 工作電壓 : 100 ~ 240V AC 28 SOHORAID DR5 User Manual 3. 硬體需求與注意事項 1. 本系統同⼀一時間只可透過⼀一組介面與⼀一台電腦執行資料傳輸。 2. RAID 5 的容量形成是將硬碟中最小容量乘上四倍後,RAID 0 / Large 則是乘上五倍, RAID 10 則是乘 上二倍 之後會被視為⼀一個大儲存容量;因此,用本系統前建議每顆硬碟裝置槽都已完成硬碟安裝,並建 議全部使用相同品牌與同規格之全新硬碟。同時,如果需要更換新的硬碟時,也請您務必購買規格、容 量、廠牌相同的硬碟,若您無法購買到符合上述條件的硬碟時,請選購容量大於另⼀一硬碟最少 20GB。 3. 硬碟格式化後,由電腦主機作業系統所辨識 DR5-WBS3 的實際總容量會與硬碟廠所標示的容量加總 後,將有所差異。 4. 當系統運作時,請勿任意移除任何⼀一顆硬碟,以免導致資料遺失。 5. 完成系統初始化安裝後,在使用上請勿任意變更硬碟位置;此動作將可能導致系統無法形成 RAID。 6. 當您發現硬碟故障時,請參考章節 6 "硬碟故障排除與硬碟更換步驟說明",並依照程序進行故障硬碟的 更換。 7. 當您需要關閉或移除 DR5-WBS3 時,務必透過您所操作的作業系統中執行硬碟安全移除後,方進行電 源關閉的動作。 8. 在 RAID 5 / RAID 3 / RAID 10 模式下儲存系統僅容許單顆硬碟故障。因此,當您發現二顆以上的硬碟顯 示故障時,您先前巳存儲的資料可能已毀損或遺失;在 RAID 0 / LARGE 模式下,當您發現⼀一顆以上的 硬碟顯示故障時,您先前巳存儲的資料可能已毀損或遺失。建議您可尋找專業硬碟資料救援服務,試著 將您毀損或遺失的資料重新取回。 9. 強烈建議除了使用 DR5-WBS3 系列的資料儲存功能外,請針對重要資料備份到另⼀一個儲存裝置上或遠 端備份,雙重備援您重要的資料。若您儲存在 DR5-WBS3 系列的資料損毀或遺失,STARDOM 將不負 任何的責任。 4. 硬體安裝 請參照以下步驟完成硬體安裝 步驟1 拆開外包裝,並取出產品主體。(請確認相關配件與產品本身是否有受損或是缺少 配件,若有任何疑 問,請與您的經銷商或業務人員聯絡) 步驟2 如果你是要將 DR5 系統安裝於機架上,請將配件中的把手鎖定於 DR5 系統面板兩側,並使用配件 包的螺絲來將 DR5 系統鎖定於機架內的軌道位置,並確定 DR5 系統呈現平穩狀態。 步驟3 如果你選擇擺放系統於桌面,請將配件中的腳墊鎖定於系統下方,並將系統擺放於穩固平台,並確 認散熱風扇口沒有被其他物體擋住,系統四周有適當的散熱空間。(擺放環境請避免接近潮濕或其 他易對產品造成損傷的環境) 步驟4 請使用零件包內附的頂針插入鑰匙孔後,抽取盒門閂將會輕彈開啟,即可將硬碟抽取盒取出。 29 SOHORAID DR5 User Manual 步驟5 將硬碟安裝到抽取盒上,並以零件包內附的螺絲加以固定,以避免不必要的移動對硬碟造成傷害。 步驟6 硬碟安裝完成後,請將抽取盒平移放入主機內,並關上把手。 步驟7 將 AC Power 電源線與 DR5-WBS3 連接,再將 AC Power 電源線與電源插座後,執行開機。 步驟8 透過前方的LCD與按鍵來設定您所需求的儲存模式。( 請參考第5項 前面板操及LCD 訊息說明) 步驟9 將附件中的連接線分別接到 PC 與 DR5-WBS3 的相關連接埠。 步驟10 開機後,您的作業系統將會自動辨識到 RAID 容量;待辨識成功後,請依據您所需的儲存格式,將 系統內的硬碟依照作業系統的指示完成格式化。待硬碟格式化完成後,便可直接使用DR5系統。 5. 前面板操及LCD 讯息说明 Level 0 Level 1 Quick Setup Disk Manager EXTERNAL 5 BAY HARDWARE RAID RAID Manager System Manager Level 2 Level 3 Create One RAID Delete All RAID Identify Disk Show Disk Info Identify RAID Create RAID Delete RAID RAID Info Change RAID Pwd Rebuilding Priority Standby Timer System Info Change Password Logout From Menu Alarm Control Hardware Monitor 30 Level 4 RAID 0 / Clone / Large / RAID 1 / RAID 5 / RAID 3 / RAID 10 Disk 1 Check Disk LED Disk 2 Check Disk LED Disk 3 Check Disk LED Disk 4 Check Disk LED Disk 5 Check Disk LED < Disk Info > Select RAID RAID 0 / Clone / Large / RAID 1 / RAID 5 / RAID 3 / RAID 10 Select RAID < Password > for RAID setup Highest/High/Medium/Low/Lowest < 99999min > Firmware Version < Password > for System Info < Y or N > Mute the Buzzer Voltage Monitor < 3.3V / 5V / 12V > Temp. Monitor < Temp. > FAN Monitor <Fan Speed/Fan Level> SOHORAID DR5 User Manual 6. 故障硬碟更換步驟及資料重建功能說明 步驟1 取出故障硬碟所存放的抽取盒,再將硬碟從抽取盒上拆解下。 步驟2 將新的硬碟安裝至抽取盒後,再將新硬碟的抽取盒插回 DR5-WBS3 空的硬碟槽位置並將抽取盒門 閂鎖上,確認硬碟已完全插入。 步驟3 RAID 5 / RAID 3 / RAID 10 / Clone 模式下,將電源打開時,您將會看到所更換的新硬碟抽取盒旁 的指示燈號呈現閃爍紅藍燈的狀態表示更換上的硬碟資料正在進行重建;此時,您仍可正常使用 DR5-WBS3 工作;待資料重建指示燈號停止,即代表資料重建完成。 RAID 0 / Large 模式下,因單顆硬碟故障所造成所有資料損毀,更換新硬碟後,請重新將系統內的 硬碟格式化。 7. 系統過熱與風扇故障狀況排除 SOHORAID DR5-WBS3 內建故障警示功能,若 DR5-WBS3 內部溫度超過 60℃、DR5-WBS3風扇發生故 障時,DR5-WBS3 內建的蜂鳴器會發出警告聲響,前面板的紅色警示燈號也會亮起;此時你可選按系統背 面的靜音按鈕,先將警示聲關閉,並在允許的狀況下關閉 DR5-WBS3 電源讓機器降溫;同時,請先確認機 體擺放環境是否通風良好,沒有任何物體擋住風扇孔,⼀一併檢查 DR5-WBS3 的風扇是否停止運轉;待上述 檢查確認後,再將電源開啟繼續使用本系統。若問題還是無法獲得解決,請與此產品供應商或 STARDOM 連絡,以便取得進⼀一步的支援。 31 SOHORAID DR5 User Manual 8. 指示燈燈號說明 States Front LED buzzer Power LED Alarm LED HDD LED Power on Blue ------ Blue flash -> Blue No disk Disk Fail RAID Fail Disk Idle Format Access Blue Blue Blue Blue Blue Blue ------------------------------- -----Red Red Blue Blue flash Blue flash 1 long when booting finished ----------4 short ---------------- Fan Fail Blue Red Blue 4 short Over Temp Blue Red Blue 4 short ------ Source: Blue flash Target: Blue and Purple light on alternatively ------ Rebuilding Blue 9. 常見問題 Q1. 我應該選擇何種資料模式來格式化 DR5 系列產品內的硬碟? A : 這將取決於您平常所使用的電腦系統,關於此點我們有以下建議 : 1. Windows 2000/XP/Vista/windows 7 使用 NTFS 2. Mac OS X 使用 HFS+ ( Mac OS Extended ) 3. 如必須同時使用於 PC 或 Mac,請使用 FAT32 ( 單⼀一檔案的最大限制是 4GB ) Q2. 為什麼我所購買的 DR5-WBS3 透過 e-SATA 介面無法達到網站上所公佈的 200MB/s 以上的傳輸速度? A : 1. 請先檢查您所購置的 PCI-E SATA 擴充卡是否僅支援 PCI-E (1X),此類擴充卡無法達 到 135MB/s 以上的傳輸速度。 2. 建議您搭配選購 STARDOM SJ20-x8 ( PCI-E 8X )傳輸卡來讓 電腦在使用e-SATA 時的傳輸速度達 到最佳化。 3. DR5-WBS3 儲存模式必須設定為 RAID 0 或 RAID 5 模式。 32 SOHORAID DR5 User Manual 中文 关于这份手册 感谢您使用 STARDOM 的产品。本手册将介绍 STARDOM DR5 产品。在您开始使用 SOHORAID DR5 系 列产品前,建议您先阅读过本手册。手册里的资讯在出版前虽已被详细确认,实际产品规格仍将以出货时 为准;任何产品规格或相关资讯更新请您直接到 www.stardom.com.tw 网站查询,本公司将不另行通知。 若您想获得STARDOM 最新产品讯息、使用手册、韧体,或对STARDOM 产品有任何疑问,请您联络当地供 应商或到 www.stardom.com.tw 取得相关讯息。 本手册相关产品内容归锐铵科技股份有限公司版权所有 目录索引 1. 产品外观及包装内容 2. 环境需求 3. 硬件需求与注意事项 4. 硬件安装 5. 前面板操作及LCD 讯息说明 6. 故障硬盘更换步骤及资料重建功能说明 7. 系统过热及风扇故障状况排除 8. 指示灯号说明 9. 常见问题 1. 产品外观及包装内容 打开包装外盒后,包装内容应包含下列组件: DR5-WBS3 DR5-WBS3 产品本体x1 ( 内含抽取盒x 4 ) Firewire 800 (1394b) 连接线x1 Firewire 400 (1394a) 连接线x1 eSATA 连接线 x1 USB 3.0 连接线x1 电源线x1 零件包 操作使用手册 请确认相关配件与产品本身是否有受损或配件缺少,若有任何疑问请与本产品供应商联络。 33 SOHORAID DR5 User Manual 正面与背面示意图 A. 硬盘状态指示灯 B. 硬盘抽取盒 E. UP 按键 F. DOWN 按键 I. 静音按钮 J. 电源指示灯 L. 电源开关 M. 电源插座 O. USB3.0 连接埠 P. e-SATA 连接埠 R. FireWire 800 (1394b) 连接埠 硬盘位置 硬盘位置 1 硬盘位置 2 C. 钥匙孔 D. LCM 显示幕 G. ENTER 按键 H. ESC 按键 K. 系统警示灯 N. 风扇 Q. FireWire 800 (1394b) 连接埠 S. 防窃锁孔 硬盘位置 3 硬盘位置 4 硬盘位置 5 储存模式模式解说 Independent mode ( JBOD ) : 五个独立资料储存容量。(出厂设定即在此模式) Speed mode ( Raid 0 ) : ⼀一个大的独立资料储存容量并可加速资料存取但无资料保护功能。 Safe mode(RAID 1):⼀一个独立资料储存容量并包含资料保护功能。 Clone mode:五个⼀一样的资料。 Large mode:⼀一个独立的大容量,无资料加速存取功能,也无资料保护的功能。 Safe mode ( Raid 5 ) : ⼀一个独立资料储存容量并包含资料保护功能。 Safe mode ( Raid 3 ) : ⼀一个独立大资料储存容量并包含资料保护功能。 Safe mode ( Raid 10 ) : ⼀一个独立资料储存容量并包含资料保护功能。 • RAID 5 mode 上述储存模式中最安全且兼具安全的。而RAID 0 mode 是上述储存模式中最快速的。 • DR5-WBS3 机型提供两组FireWire 800 (1394b) 介面與⼀一组FireWire 400 (1394a) 介面,方便您串接与 延伸至其他 FireWire 装置。 2. 环境需求 工作温度 : 0 ~ 40 ℃ (32 ~ 104 ℉) 储存温度 : -10 ~ 70 ℃ (14 ~ 158 ℉) 工作电压 : 100 ~ 240V AC 34 SOHORAID DR5 User Manual 3. 硬件需求与注意事项 1. 本系统同⼀一时间只可透过⼀一组介面与⼀一台电脑执行资料传输。 2. RAID 5 的容量形成是将硬盘中最小容量乘上四倍后,RAID 0 / Large 乘上五倍,之后会被视为⼀一个大 储存容量;因此,用本系统前建议每颗硬盘装置槽都已完成硬盘安装,并建议全部使用相同品牌与同 规格之全新硬盘。同时,如果需要更换新的硬盘时,也请您务必购买规格、容量、厂牌相同的硬盘, 若您无法购买到符合上述条件的硬盘时,请选购容量大于另⼀一硬碟最少20GB。 3. 硬盘格式化后,由电脑主机作业系统所辨识DR5-WBS3 的实际总容量会与硬盘厂所标示的容量加总 后,将有所差异。 4. 当系统运作时,请勿任意移除任何⼀一颗硬盘,以免导致资料遗失。 5. 完成系统初始化安装后,在使用上请勿任意变更硬盘位置;此动作将可能导致系统无法形成RAID。 6. 当您发现硬盘故障时,请参 考章节6 "硬碟故障排除与硬盘更换步骤说明",并依照程序进行故障硬盘的 更换。 7. 当您需要关闭或移除 DR5-WBS3 时,务必透过您所操作的作业系统中执行硬盘安全移除后,方进行电 源关闭的动作。 8. 在RAID 5 / RAID 3 / RAID 10 模式下储存系统仅容许单颗硬盘故障。因此,当您发现二颗以上的硬盘 显示故障时,您先前巳存储的资料可能已毁损或遗失;在RAID 0 / Large 模式下,当您发现⼀一颗以上的 硬盘显示故障时,您先前巳存储的资料可能已毁损或遗失。建议您可寻找专业硬盘资料救援服务,试 着将您毁损或遗失的资料重新取回。 9. 强烈建议除了使用 DR5-WBS3 系列的资料储存功能外,请针对重要资料备份到另⼀一个储存装置上或远 端备份,双重备援您重要的资料。若您储存在 DR5-WBS3 系列的资料损毁或遗失,STARDOM 将不负 任何的责任。 4. 硬件安装 请参照以下步骤完成硬件安装 步骤1 拆开外包装,并取出产品主体。 (请确认相关配件与产品本身是否有受损或是缺少配件,若有任何疑 问,请与您的经销商或业务人员联络) 步骤2 如果你是要将DR5 系统安装于机架上,请将配件中的把手锁定于DR5 系统面板两侧,并使用配件 包的螺丝来将DR5 系统锁定于机架内的轨道位置,并确定DR5 系统呈现平稳状态。 步骤3 如果你选择摆放系统于桌面,请将配件中的脚垫锁定于系统下方,并将系统摆放于稳固平台,并确 认散热风扇口没有被其他物体挡住,系统四周有适当的散热空间。 (摆放环境请避免接近潮湿或其 他易对产品造成损伤的环境) 步骤4 请使用零件包内附的顶针插入钥匙孔后,抽取盒门闩将会轻弹开启,即可将硬盘抽取盒取出。 35 SOHORAID DR5 User Manual 步骤5 将硬盘安装到抽取盒上,并以零件包内附的螺丝加以固定,以避免不必要的移动对硬碟造成伤害。 步骤5 硬盘安装完成后,请将抽取盒平移放入主机内,并关上把手。 步骤6 将AC Power 电源线与DR5-WBS3 连接,再将AC Power 电源线与电源插座后,执行开机。 步骤7 透过前方的LCD与按键来设定您所需求的储存模式。 ( 请参考第5项前面板操及LCD 讯息说明) 步骤8 将附件中的连接线分别接到PC 与DR5-WBS3 的相关连接埠。 步骤9 开机后,您的作业系统将会自动辨识到 RAID 容量;待辨识成功后,请依据您所需的储存格式,将 系统依照作业系统的指示完成格式化。待硬盘格式化完成后,便可直接使用 DR5 系统。 5. 前面板操作及LCD 讯息说明 Level 0 Level 1 Quick Setup Disk Manager EXTERNAL 5 BAY HARDWARE RAID RAID Manager System Manager Level 2 Level 3 Create One RAID Delete All RAID Identify Disk Show Disk Info Identify RAID Create RAID Delete RAID RAID Info Change RAID Pwd Rebuilding Priority Standby Timer System Info Change Password Logout From Menu Alarm Control Hardware Monitor 36 Level 4 RAID 0 / Clone / Large / RAID 1 / RAID 5 / RAID 3 / RAID 10 Disk 1 Check Disk LED Disk 2 Check Disk LED Disk 3 Check Disk LED Disk 4 Check Disk LED Disk 5 Check Disk LED < Disk Info > Select RAID RAID 0 / Clone / Large / RAID 1 / RAID 5 / RAID 3 / RAID 10 Select RAID < Password > for RAID setup Highest/High/Medium/Low/Lowest < 99999min > Firmware Version < Password > for System Info < Y or N > Mute the Buzzer Voltage Monitor < 3.3V / 5V / 12V > Temp. Monitor < Temp. > FAN Monitor <Fan Speed/Fan Level> SOHORAID DR5 User Manual 6. 故障硬盘更换步骤及资料重建功能说明 步骤1 取出故障硬盘所存放的抽取盒,再将硬盘从抽取盒上拆解下。 步骤2 将新的硬盘安装至抽取盒后,再将新硬盘的抽取盒插回DR5-WBS3 空的硬盘槽位置并将抽取盒门 闩锁上,确认硬盘已完全插入。 步骤3 RAID 5 / RAID 3 / RAID 10 / Clone 模式下,将电源打开时,您将会看到所更换的新硬盘抽取盒旁 的指示灯号呈现闪烁红蓝灯的状态表示更换上的硬碟资料正在进行重建;此时,您仍可正常使用 DR5-WBS3 工作;待资料重建指示灯号停止,即代表资料重建完成。 RAID 0 / Large 模式下,因单颗硬盘故障所造成所有资料损毁,更换新硬盘后,请重新将系统内的 硬盘格式化。 7. 系统过热及风扇故障状况排除 SOHORAID DR5-WBS3 内建故障警示功能,若DR5-WBS3 内部温度超过60℃、DR5-WBS3风扇发生故 障时,DR5-WBS3 内建的蜂鸣器会发出警告声响,前面板的红色警示灯号也会亮起;此时你可选按系统背 面的静音按钮,先将警示声关闭,并在允许的状况下关闭DR5-WBS3 电源让机器降温;同时,请先确认机 体摆放环境是否通风良好,没有任何物体挡住风扇孔,⼀一并检查DR5-WBS3 的风扇是否停止运转;待上述 检查确认后,再将电源开启继续使用本系统。若问题还是无法获得解决,请与此产品供应商或STARDOM 连络,以便取得进⼀一步的支援。 8. 指示灯号说明 States Front LED buzzer Power LED Alarm LED HDD LED Power on Blue ------ Blue flash -> Blue No disk Disk Fail RAID Fail Disk Idle Format Access Blue Blue Blue Blue Blue Blue ------------------------------- -----Red Red Blue Blue flash Blue flash 1 long when booting finished ----------4 short ---------------- Fan Fail Blue Red Blue 4 short Over Temp Blue Red Blue 4 short ------ Source: Blue flash Target: Blue and Purple light on alternatively ------ Rebuilding Blue 37 SOHORAID DR5 User Manual 9. 常见问题 Q1. 我应该选择何种数据模式来格式化 DR5 系列产品内的硬盘? A : 这将取决于您平常所使用的电脑系统, 关于此点我们有以下建议 : 1. Windows 2000/XP/Vista/windows 7 使用 NTFS 2. Mac OS X 使用 HFS+ ( Mac OS Extended ) 3. 如必须同时使用于 PC 或 Mac, 请使用 FAT32 (单⼀一 档案的最大限制是 4 GB) Q2. 为什么我所购买的 DR5-WBS3 透过 e-SATA 介面无法达到网站上所公布的 200MB/s 以上的传输速度? A : 1. 请先检查您所购置的 PCI-E SATA 扩充卡是否仅支援 PCI-E (1X), 此类扩充卡无法达到 135MB / s 以上的传输速度. 2. 建议您搭配选购 STARDOM SJ20-x8 (PCI-E 8x) 传输卡来让电脑在使用 e-SATA 时的传输速度达到 最佳化. 3. DR5-WBS3 储存模式必须设定为 RAID 0 或 RAID 5 模式。 38 SOHORAID DR5 User Manual このマニュアルについて この度はSTARDOM製品をお買い上げいただき、ありがとうございます。 当マニュアルは、STARDOM製品SOHORAID DR5について説明をしております。お買い上げの製品をご 利用になる前に、当マニュアルをよくお読みください。 当ユーザーマニュアルの記載内容は、出版前に 十分チェックを行っておりますが、実際の製品仕様はSTARDOMから出荷される製品を基本とします。 製品仕様の更新や関連情報はwww.stardom.com.twに掲載されます。製品は予告なしに変更される場合が あります。STARDOM製品に関するご質問、最新の製品情報、ユーザーマニュアルやファームウェアの アップデートに関しては、現地の販売代理店にお尋ねになるか、www.stardom.com.twをご参照くださ い。 © RAIDON TECHNOLOGY, INC。全権留保。 目次 1. パッケージ内容と製品図について 2. 動作環境 3. ハード ドライブの要件と注意 4. ハードウェアの取り付け方法 5. 前面パネルの操作およびLCD情報についての説明 6. 故障したドライブの交換とデータ再構築の説明 7. システム過熱とファン故障の管理 8. 状態インジケーターの説明 9. よくあるお問い合わせ 1. パッケージ内容と製品図について パッケージを開けると、以下の項目が入っています : DR5-WBS3 DR5-WBS3 x 1 (リムーバルディスクトレイx 4内蔵) FireWire 800 (1394b)ケーブル x 1 FireWire 400 (1394a)ケーブル x 1 eSATAケーブル x 1 USB 3.0ケーブル x 1 電源コード x 1 アクセサリーキット DR5-WBS3ユーザーマニュアル 上記⼀一覧の内容に欠品等が無いかご確認ください。欠品をしている場合は、すぐに販売代理店までご連 絡下さい。 39 SOHORAID DR5 User Manual 前面と背面図 A. ハードドライブ状態インジケーター B. リムーバブルドライブトレイ C. 鍵挿入口 D. LCDディスプレイ パネル E. UP ボタン F. DOWN ボタン G. ENTER ボタン H. ESC ボタン I. ミュート ボタン J. 電源インジケーター K. アラーム インジケーター L. 電源スイッチ M. 電源ソケット N. 冷却ファン O. USB 3.0インタフェース接続 P. e-SATAインタフェース接続 Q. FireWire 800 (1394b)インタフェース接続 R. FireWire 400 (1394a)インタフェース接続 S. 防犯コードスロット ドライブ位置 ドライブ位置 1 ドライブ位置 2 ドライブ位置 3 ドライブ位置 4 ドライブ位置 4 ストレージモードの定義 独立モード(JBOD):5 台の独立したストレージディスクです。 (これは工場出荷時のデフォルト設 定です) スピードモード(Raid 0):1 台の大型の独立したストレージディスクで、高速データアクセスが可能で すが、データ冗長性はありません。 セーフモード( Raid 1):認識容量は⼀一台分となりますがデータの安全性を最優先にしたRAIDモードで す。データ保護機能があります。 クローンモード:5 台の冗長ストレージディスクです。 ラージモード:高速データアクセスとデータ冗長性のない 1 台の大型ストレージディスクです。 セーフモード(Raid 5):データ冗長性のある 1 台の独立した大型ストレージディスクです。 セーフモード(Raid 3):データ冗長性のある 1 台の独立した大型ストレージディスクです。 セーフモード(Raid 10):データ冗長性のある 1 台の独立したストレージディスクです。 - RAID 5 モードは、上に記載されたセーフシステムのモードのうち最も安全で高速なストレージモード です。 - RAID 0 モードはこれらのうち最も(アクセスが)高速なモードです。 - DR5-WBS3 は 2 つの FireWire 800 (1394b) ポートと 1 つの FireWire 400 (1394a) ポートを搭載、他の FireWire 対応機器へのデイジーチェーンが可能です。 2. 動作環境 動作温度 :0 ~ 40 ℃ (32 ~ 104 ℉) 保存温度 :-10 ~ 70 ℃ (14 ~ 158 ℉) 電源電圧 :100 ~ 240V AC 40 SOHORAID DR5 User Manual 3. ハード ドライブの要件と注意 1. コンピュータシステム毎に対して、⼀一本のインタフェース接続のみ使用することができます。 2. RAID 5 / RAID 3 のデータ形成には最小容量のディスクと同じ容量の 4 台のディスクが使用されま す。RAID 0 / ラージモードは 5 台のディスクから構成されます。RAID 10 は 2 台のディスクから構 成され、その大きなストレージ領域のために使用されます。したがって、このシステムを使用する 前に、各ディスクをインストールし、かつ各ディスクが新しく、同⼀一のブランドおよび規格である ようにすることを推奨します。 また、新しいディスクに交換する必要がある場合、古いものと同⼀一 のブランドおよび規格、容量のものを購入することを推奨します。 これが可能でない場合、他方の ディスクより少なくとも 20GB 大きいディスクを選択してください。 3. ドライブのフォーマット後、システムが認識したDR5-WBS3の実際ストレージ容量はハードドライブ に表示された容量の総計と異なる場合があります。 4. コンピュータ本体に接続されている状態で、データ転送中のハードディスクドライブの削除、追加、 交換は絶対行わないでください。 5. ドライブ位置の変更はRAID構造を破壊する場合がありますので、初期インストールを完成した後、 ドライブ位置の変更は禁止です。 6. ハードドライブが故障した場合、セクション6の「故障ドライブの交換とデータの再構築」を参照し て処理ステップに従ってください。 7. DR5-WBS3をオフにしたり、コンピュータシステムから取り外す場合は、必ずオペレーティングシス テムから安全な取り外しを行ってからにしてください。 8. RAID 5 / RAID 3 / RAID 10 ストレージシステムは⼀一度に 1 台のディスク故障しか許容しません。 こ のため、2 台以上のディスクに故障が発見された場合、それらディスク上のデータに破損または損失 が生じた可能性があります。RAID 0 / ラージモードで 1 台以上のディスクに故障が発見された場 合、それらディスク上のデータに破損または損失が生じた可能性があります。 お近くのディスク復 旧専門業者に依頼して破損した、または失われたデータの復旧を試みることを推奨します。 9. DR5-WBS3本体に含まれる重要なデータは、定期的または必要に応じて、リモートまたは別のスト レージ装置にバックアップすることを強くお勧めします。Stardomは本体の使用の際に生じたいかな るデータの損失および損失データの復旧に対して責任を負いかねます。 4. ハードウェアの取り付け方法 以下の手順に従って、ハードウェアの取り付けを完了してください: ステップ1 パッケージを開き、内容物の損傷や欠品がないことを確認しながら製品を取り出します。損 傷または欠品している場合は、すぐ販売店に連絡を取ってください。 ステップ2 ラックマウントに DR5 システムをインストールする場合、DR5 の 2 つのパネルにハンドル を固定してください。 その後、付属品袋の中のネジを使用して、ラックマウント内のスロッ トに DR5 システムを固定します。 最後に DR5 がしっかりと固定されていることを確認しま す。 ステップ3 システムをデスクトップ上に配置することを選択した場合、システムの底面にフットパッド を取り付け、安定した平らな表面上にシステムを配置します。 また、放熱ファンが遮られて おらず、システムの周囲に放熱に適した空間があることを確認します。 (システムに有害な 影響を生じないように、乾燥した空間と環境を選択してください。) ステップ4 アクセサリー キット付属のキーを鍵挿入口に差し込んで、リムーバブルドライブ トレイ ラッチを取り出し、リムーバブルドライブ トレイを引き出します。 41 SOHORAID DR5 User Manual ステップ5 リムーバブルトレイからドライブスタイビライザーを取り出します。使用するハード ドライ ブをトレイに装着し、アクセサリー キット付属のねじで固定します。 ステップ6 完了したら、ドライブトレイをドライブに戻し、ラッチをはめます。 ステップ7 AC 電源ケーブルを DR5-WBS3 に接続してから、AC 電源を壁のコンセントに接続します。 ユニットを起動します。 ステップ8 LCD と正面のボタンを使用してストレージモードを設定します(正面パネルと LCD に関す る情報はセクション 5 を参照してください)。 ステップ9 PC と DR5-WBS3 のポートをケーブルで接続します。 ステップ10 起動後、オペレーティングシステムが自動的に RAID ストレージのセットアップを認識しま す。 RAID が正常に認識された後、オペレーティングシステムの指示に従い、ストレージの ニーズに合わせてディスクをフォーマットしてください。 フォーマットの完了後、DR5 シ ステムの使用を開始できます。 5. 前面パネルの操作およびLCD情報についての説明 Level 0 Level 1 Quick Setup Disk Manager EXTERNAL 5 BAY HARDWARE RAID RAID Manager System Manager Level 2 Level 3 Create One RAID Delete All RAID Identify Disk Show Disk Info Identify RAID Create RAID Delete RAID RAID Info Change RAID Pwd Rebuilding Priority Standby Timer System Info Change Password Logout From Menu Alarm Control Hardware Monitor 42 Level 4 RAID 0 / Clone / Large / RAID 1 / RAID 5 / RAID 3 / RAID 10 Disk 1 Check Disk LED Disk 2 Check Disk LED Disk 3 Check Disk LED Disk 4 Check Disk LED Disk 5 Check Disk LED < Disk Info > Select RAID RAID 0 / Clone / Large / RAID 1 / RAID 5 / RAID 3 / RAID 10 Select RAID < Password > for RAID setup Highest/High/Medium/Low/Lowest < 99999min > Firmware Version < Password > for System Info < Y or N > Mute the Buzzer Voltage Monitor < 3.3V / 5V / 12V > Temp. Monitor < Temp. > FAN Monitor <Fan Speed/Fan Level> SOHORAID DR5 User Manual 6. 故障したドライブの交換とデータ再構築の説明 ハードドライブインジケータが赤色に点灯し、音声アラームが鳴る場合、ハードドライブが故障した可 能性がります。この状況では、システム背面のミュートボタンを押してアラーム音を切りま す。まだ操作可能の状態であれば、すぐシステムの電源を切ってください。そして電源を入 れ直して、ハードドライブが故障するかどうかを再確認してください。同じ状況が続いて発 生した場合、以下の支持に従ってください。 ステップ 1 故障したハードドライブのドライブトレイを取り外し、ドライブトレイからハードドライブ を取り外します。 ステップ 2 新しいハードドライブをトレイに固定し、DR5-WBS3上の空きドライブ位置に挿入して戻 し、そしてラッチを押してドライブが固定でロックであることを確かめてください。 ステップ 3 RAID 5 / RAID 3 / RAID 10 / クローンモードで新しいディスクに交換した後、電源を入れる と、新しいディスクの読み出しボックスの赤と青のインジケータが点灯し、そのディスクの データが再構築中であることを示します。このとき、DR5-WBS3 を通常通り使用することが できます。赤と青のインジケータの単滅が停止したら、ディスクの再構築が完了したことを 示します。 RAID 0 / ラージモードでは、単⼀一のディスク故障によりデータ破損が引き起こされるため、 ディスクの交換後、システムディスクをフォーマットしてください。 7. システム過熱とファン故障の管理 アラームインジケータが赤く点灯し、アラーム音が鳴る場合、本体のファンが、完全に作動するのを止 めたか、またはシステム温度がデフォルトの60℃を超えたことを表示する可能性があります。この場 合、本体後部のミュートボタンを押してアラームを切ります。システムを冷却するために、本体がまだ 操作可能の状態であれば、すぐ本体の電源を切ってください。全体運転環境の通風性がよく、内蔵ファ ンには障害物がないことを確認し、システムの電源を入れ直して使用してください。問題が続く場合、 システムをオフにし、サプライヤーまたはSTARDOM技術サポートにお問い合わせて支援を求めてくだ さい。 43 SOHORAID DR5 User Manual 8. 状態インジケーターの説明 States Front LED buzzer Power LED Alarm LED HDD LED Power on Blue ------ Blue flash -> Blue No disk Disk Fail RAID Fail Disk Idle Format Access Blue Blue Blue Blue Blue Blue ------------------------------- -----Red Red Blue Blue flash Blue flash 1 long when booting finished ----------4 short ---------------- Fan Fail Blue Red Blue 4 short Over Temp Blue Red Blue 4 short ------ Source: Blue flash Target: Blue and Purple light on alternatively ------ Rebuilding Blue 9. よくあるお問い合わせ Q1. DR5-WBS3内のハードドライブをフォーマットする時、どんなドライブフォーマットを選択します か? A : これはご使用のオペレーティングシステムによります。以下のお勧めをご参照ください: 1. Windows 2000/XP/Vista/Windows 7ではNTFSフォーマットを使用してください。 2. Mac OS XシステムではHFS+ (Mac OS Extended)フォーマットを使用してください。 3. DR5-WBS3をWindowsとMac環境の双方に併用させる場合はFAT32フォーマットを選択してくだ さい(単⼀一ファイルの最大容量は4 GBを超えてはいけません)。 Q2. DR5-WBS3の転送速度が貴社Webサイトで開示されていたe-SATAインタフェース経由時の200 MB/ 秒に達すことができないのはなぜですか? A : 1. ご使用になられているPCI-E SATAホストアダプタがPCI-E (1X)のみのサポートかどうかをご確 認ください。このタイプのホストアダプタの転送速度は140 MB/秒を超えることができません。 2. e-SATA接続時に転送パフォーマンスを強化させたい場合は、STARDOM SJ20-8x (PCI-E8X)ホス トアダプタを購入することをお勧めします。 44 SOHORAID DR5 User Manual 이 설명서에 관하여 STARDOM 제품을 구매해 주셔서 감사합니다. 이 사용 설명서는 STARDOM SOHORAID DR5 제품을 소개합니다. 이 제품을 사용하시기 전에, 이 설명서 를 완전히 읽어 주십시오. 이 사용 설명서에 포함된 모든 정보는 출시 전 신중히 검증되었지만 실제 제품 스펙은 STARDOM으로부터 배송되는 시점을 기반으로 합니다. 제품 스펙의 업데이트 또는 관련 정보는 www.stardom.com.tw에서 찾 을 수 있습니다. 제품은 사전 통지없이 변경될 수 있습니다. STARDOM의 제품에 대하여 질문사항이 있으 시거나 최신 제품에 대한 정보, 사용자 메뉴얼 또는 펌웨어 업데이트 등에 대하여 알고 싶으시다면 지역 판 매자에게 연락하거나 www.stardom.com.tw을 방문하여 더 많은 정보를 얻으실 수 있습니다. 저작권© RAIDON TECHNOLOGY, INC. 모든 권리를 보유함. 목차 1. 2. 3. 4. 5. 6. 7. 8. 9. 포장 내용 및 제품 보기 환경 요구 사양 하드웨어 요구사양 및 사전 주의사항 하드웨어 설치 전면 패널 작동 설명 및 LCD 정보 고장난 드라이브 교체 또는 데이터 재구축 설명 시스템 온도 과열 및 팬 오류 관리 상태 표시등 설명 자주 묻는 질문 1. 포장 내용 및 제품 보기 포장을 열면 다음과 같은 내용물이 보입니다 : DR5-WBS3 DR5-WBS3 x 1 이동식 드라이브 트레이x 4개가 넣어진 FireWire 800 (1394b) 케이블 x 1 FireWire 400 (1394a) 케이블 x 1 eSATA 케이블 x 1 USB 3.0 케이블 x 1 파워코드 x 1 부속품 키트 사용 설명서 상기 목록 안의 부품들이 손상 또는 손실되지 않았는지 확인하십시오. 손상 또는 손실된 내용물이 있으면, 판매상에게 즉시 연락하십시오. 45 SOHORAID DR5 User Manual 전면도 및 후면도 A. 하드 드라이브 상태 표시등 D. LCD 디스플레이 패널 G. ENTER 버튼 I. 소리 멈춤 버튼 K. 경보 표시등 L. 전원 스위치 O. USB 3.0 인터페이스 커넥션 Q. FireWire 800 인터페이스 커넥션 S. 도난 방지 슬롯 드라이브 위치 드라이브 위치 1 드라이브 위치 2 B. 휴대형 드라이브 트레이 C. 키 꽂이 구멍 E. UP 버튼 F. DOWN 버튼 H. ESC 버튼 J. 전원 표시등 M. 전원 소켓 N. 전원 스위치 P. e-SATA 인터페이스 커넥션 R. FireWire 400 인터페이스 커넥션 드라이브 위치 3 드라이브 위치 4 드라이브 위치 5 스토리지 모드 정의 독립 모드( JBOD ) : 5 개의 독립적인 저장 디스크. (공장 기본 설정) 고속 모드( Raid 0 ) : 하나의 독립적인 대용량 저장 디스크로 데이터에 빠르게 액세스할 수 있지만, 데이터 보호 기능이 없습니다. 안전 모드(RAID 1): 개별 스토리지 공간 및 데이터 보호 활성화。 복제 모드: 5개의 중복 저장 디스크. 대용량 모드: 하나의 대용량 저장 디스크로, 데이터에 대한 빠른 액세스도 데이터 보호 기능도 없습니다. 안전 모드 ( Raid 5 ) : 데이터 보호 기능이 있는 하나의 독립적인 대용량 저장 디스크. 안전 모드 ( Raid 3 ) : 데이터 보호 기능이 있는 하나의 독립적인 대용량 저장 디스크. 안전 모드 ( Raid 10 ) : 데이터 보호 기능이 있는 하나의 독립적인 저장 디스크. - RAID 5 모드는 위의 안전 시스템 중에서 가장 안전하고 빠른 저장 모드입니다. - RAID 0 모드는 위의 모드 중에서 가장 빠른 저장(액세스) 모드입니다. - DR5-WBS3에는 두 개의 FireWire 800(1394b) 포트와 한 개의 FireWire 400(1394a) 포트가 탑재되어 있 어 다른 FireWire 지원 장치를 데이지 체인으로 연결할 수 있습니다. 2. 환경 요구 사양 작동 온도 : 0 ~ 40 ℃ (32 ~ 104 ℉) 보관 온도:-10 ~ 70 ℃ (14 ~ 158 ℉) 라인 전압:100 ~ 240V AC 46 SOHORAID DR5 User Manual 3. 하드웨어 요구사양 및 사전 주의사항 1. 컴퓨터 시스템 당 한 번에 한 인터페이스 커넥션만을 사용해야 합니다. 2. RAID 5 / RAID 3의 데이터 정보는 4개의 디스크 중에서 가장 작은 용량의 디스크와 동일한 용량으로 디스크 4개를 사용합니다. RAID 0 / 대용량 모드는 5개의 디스크로 구축됩니다. RAID 10은 2개의 디스 크로 구축되며 대용량 저장 공간이 사용됩니다. 따라서 이 시스템을 사용하기 전에 각 디스크를 먼저 설치하고, 동일한 브랜드와 사양의 새 디스크를 사용할 것을 권장합니다. 새 디스크로 교체해야 할 경 우에도 이전 디스크와 같은 크기의 동일한 브랜드와 사양의 새 디스크를 구입할 것을 권장합니다. 이 것이 불가능하면 다른 디스크보다 최소 20GB 큰 용량의 디스크를 선택하십시오. 3. 시스템에서 인식하는 DR5-WBS3 실제 저장 용량은 하드 드라이브들이 포맷되면 하드 드라이브에 공 표된 전체 용량과 다를 수 있습니다. 4. 컴퓨터 시스템에 연결된 경우, 데이터가 전송되고 있을 때는 하드 드라이브를 제거, 삽입 또는 교환하 면 안됩니다. 5. 한번 초기 설치가 완료되면 드라이브 위치 변경은 RAID구조를 훼손시킬 수도 있기 때문에 드라이브 위치 변경은 금지되어 있습니다. 6. 만약 하드 드라이브 고장이 발생하면, 섹션 6 “고장난 드라이브 교체 또는 데이터 재구축 설명”으로 가 단계를 적절히 따라 주십시오. 7. DR5-WBS3의 전원을 끄거나 컴퓨터와 연결을 끊을 때는 항상 운영체제(OS)에서 시스템을 먼저 안전 하게 제거해야 하는 것에 유의하십시오. 8. RAID 5 / RAID 3 / RAID 10 저장 시스템은 한 번에 하나의 디스크 고장만을 허용합니다. 따라서 두 개 이상의 디스크가 고장을 일으킨 경우, 해당 디스크에 저장된 데이터는 손상되거나 손실될 수 있습니다. RAID 0 / 대용량 모드에서는 한 개 이상의 디스크에 고장이 발생하면 해당 디스크에 저장된 데이터가 손상되거나 손실될 수 있습니다. 손상되거나 손실된 데이터의 복구는 디스크 복구 전문가에게 요청할 것을 권장합니다. 9. DR5-WBS3 장치에 포함된 중요한 데이터는 정기적으로 백업하거나, 또는 사용자가 필요할 때 원격 또 는 분리형 스토리지 장치에 백업을 해놓으십시오. Stardom은 장치의 사용 또는 손실된 데이터 복구하 는 중에 발생한 어떠한 데이터 손실에 대해서도 책임을 지지 않습니다. 4. 하드웨어 설치 아래 지침에 따라 하드웨어 설치를 완성하십시오 : 단계1 포장을 열고 제품을 꺼내 동봉된 모든 내용물이 손상되거나 분실되지 않았는지 확인하십시오. 내 용물에 손상이 있거나 분실된 경우, 즉시 공급업체에 문의하십 시오. 단계2 DR5 시스템을 랙마운트에 설치하려면 DR5의 패널 양쪽에 핸들을 고정시키십시오. 그런 다음, 부 품 주머니에 들어있는 나사를 사용하여 DR5 시스템을 랙마운트 안쪽 슬롯에 고정시키십시오. 마 지막으로, DR5가 단단하게 고정되어 있는지 확인하십시오. 단계3 시스템을 데스크 위에 설치하려면 시스템의 밑면에 풋패드를 설치한 다음 평평하고 수평이 맞는 표면 위에 설치하십시오. 또한, 히트 싱크 팬이 막히지 않아야 하며, 시스템의 측면에 열 발산을 위 한 충분한 공간을 확보해야 합니다. (건조한 장소, 시스템에 유해하지 않은 환경을 선택하십시오.) 단계4 액세서리 키트에 제공된 키를 키 삽입구에 넣으면 이동식 드라이브 트레이 래치 가 열립니다. 이동 식 드라이브 트레이를 빼내십시오. 47 SOHORAID DR5 User Manual 단계5 드라이브 안정대를 탈착식 트레이로부터 제거하십시오. 하드 드라이브를 트레이 에 장착한 후 액 세서리 키트에 제공된 나사를 이용하여 안전하게 고정시킵니다. 단계6 완성되었으면 드라이브 트레이를 드라이브 포지션 A에 다시 삽입한 후 래치(걸쇠)를 밀어 넣습니 다. 단계7 AC 전원 케이블을 DR5-WBS3에 연결한 다음, AC 전원을 벽 콘센트에 꽂습니다. 장치를 부팅합니 다. 단계8 앞 패널에 있는 버튼과 LCD를 사용하여 스토리지 모드를 설정합니다(앞 패널 및 LCD에 대한 내용 은 5 섹션을 참조하십시오). 단계9 케이블을 PC와 DR5-WBS3 포트에 연결합니다. 단계10 부팅 후 운영 체제가 자동으로 RAID 저장 설정을 인식하게 됩니다. RAID가 성공적으로 인식되면 운영 체제의 지시에 따라 저장 필요에 맞게 디스크를 포맷하십시오. 포맷 작업이 완료되면 DR5 시 스템을 사용할 수 있습니다. 5. 전면 패널 작동 설명 및 LCD 정보 Level 0 Level 1 Quick Setup Disk Manager EXTERNAL 5 BAY HARDWARE RAID RAID Manager System Manager Level 2 Level 3 Create One RAID Delete All RAID Identify Disk Show Disk Info Identify RAID Create RAID Delete RAID RAID Info Change RAID Pwd Rebuilding Priority Standby Timer System Info Change Password Logout From Menu Alarm Control Hardware Monitor 48 Level 4 RAID 0 / Clone / Large / RAID 1 / RAID 5 / RAID 3 / RAID 10 Disk 1 Check Disk LED Disk 2 Check Disk LED Disk 3 Check Disk LED Disk 4 Check Disk LED Disk 5 Check Disk LED < Disk Info > Select RAID RAID 0 / Clone / Large / RAID 1 / RAID 5 / RAID 3 / RAID 10 Select RAID < Password > for RAID setup Highest/High/Medium/Low/Lowest < 99999min > Firmware Version < Password > for System Info < Y or N > Mute the Buzzer Voltage Monitor < 3.3V / 5V / 12V > Temp. Monitor < Temp. > FAN Monitor <Fan Speed/Fan Level> SOHORAID DR5 User Manual 6. 고장난 드라이브 교체 또는 데이터 재구축 설명 단계1 고장난 하드 드라이브를 담고있는 드라이브 트레이를 제거하고 하드 드라이브를트레이로부터 분 리합니다. 단계2 새 하드 드라이브를 트레이에 장착하고 DR5-WBS3의 빈 드라이브 포지션에 다시 삽입한 후 래치 (걸쇠)를 밀어넣고 안전하게 잠겨졌는지 확인합니다. 단계3 RAID 5 / RAID 3 / RAID 10 / 복제 모드에서 새 디스크로 교체하고 전원을 켜면 새 디스크 리더 박 스에 빨강과 파랑 표시등이 점멸하는 것을 볼 수 있습니다. 이것은 해당 디스크에 데이터가 재구축 되고 있음을 나타냅니다. 이 때에도 DR5-WBS3을 정상적으로 사용할 수 있습니다. 빨강과 파랑 표 시등이 점멸을 멈추면 디스크에 데이터가 재구축된 것입니다. RAID 0 / 대용량 모드에서는 하나의 디스크에 장애가 발생하면 데이터가 손상되므로 디스크를 교 체한 후 시스템 디스크를 다시 포맷해 주십시오. 7. 시스템 온도 과열 및 팬 오류 관리 뒷면의 경보 표시등에 빨간 불이 반짝이고 소리 경보가 울리면, 시스템 팬이 완전히 작동을멈추었거나, 시 스템 온도가 기본설정 온도 60°C를 초과한 것입니다. 이러한 상황이 발생하면, 시스템 뒷면에 있는 소리 멈 춤 버튼을 눌러 소리 경보를 끈 다음 작동이 허용된다면 시스템 온도를 낮추기 위해 즉시 시스템 전원을 끄 십시오. 전체 작동 환경의 환기가 잘 되는지, 팬에 이물질이 없는지 확인한 후 시스템을 다시 시작하여 계속 사용합니다. 문제가 계속되면 시스템 전원을 끄고, 도움을 위해 공급업체 또는 STARDOM 기술지원에 문 의하십시오. 49 SOHORAID DR5 User Manual 8. 상태 표시등 설명 States Front LED buzzer Power LED Alarm LED HDD LED Power on Blue ------ Blue flash -> Blue No disk Disk Fail RAID Fail Disk Idle Format Access Blue Blue Blue Blue Blue Blue ------------------------------- -----Red Red Blue Blue flash Blue flash 1 long when booting finished ----------4 short ---------------- Fan Fail Blue Red Blue 4 short Over Temp Blue Red Blue 4 short ------ Source: Blue flash Target: Blue and Purple light on alternatively ------ Rebuilding Blue 9. 자주 묻는 질문 Q1. DR5-WBS3 안의 하드 드라이브를 포맷하기 위해 어느 드라이브 포맷을 선택해야 합니까? A : 사용자가 가장 자주 사용하는 컴퓨터 시스템에 의해 결정됩니다. 아래의 제안을 참조: 1. Windows 2000/XP/Vista/Windows 7 시스템에는 NTFS를 사용. 2. Mac OS X 시스템에는 HFS+ (Mac OS Extended) 포맷을 사용. 3. DR5-WBS3을 Windows와 Mac 환경 모두에서 사용한다면, FAT32 포맷을 선택합니다.(파일 한 개 의 최대 크기는 4GB를 초과못함) Q2. 왜 제 DR5-WBS3는 웹사이트에 공표된 것처럼 e-SATA 인터페이스를 통하여 200MB/sec 이상의 높은 전송 실행속도에 미치지 못하나요? A : 1. 먼저, 사용자의 PCI-E SATA 호스트 어댑터가 오직 PCI-E (1X)만을 지원하는 지 확인하십시오. 이 러한 타입의 호스트 어댑터는 140 MB/s 이상의 전송 실행 속도에도달할 수 없습니다. 2. e-SATA를 통해 전송 속도를 높이려면, STARDOM SJ20-8x (PCI-E 8X) 호스트 어댑터를 구매하시 기 바랍니다. 50 SOHORAID DR5 User Manual 51 SOHORAID DR5 User Manual 52 SOHORAID DR5 User Manual 53 SOHORAID DR5 User Manual 54 SOHORAID DR5 User Manual 55 SOHORAID DR5 User Manual www.stardom.com.tw 56


