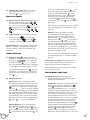
1
Pattern House Longlands Stalybridge Home owner manual How to navigate this CD Navigating using the chapter squares (left of page) To move straight to the start of any one of the five chapters: Click once with your mouse on any of the five chapter squares to the left of the screen. Navigating via links in the text The document contains links throughout the text, enabling you to navigate by simply clicking on them. These are most commonly found on the contents page, however related topics are also linked, i.e. where you see the words ‘refer to Chapter X or see Chapter X’ To utilise this option: Click once with your mouse on a word and you will be transferred to the related page or topic. Accessing web and email addresses You can also access external websites and email addresses direct from the document. To utilise this option: Click once only with your mouse on the desired website or email address (clicking more than once will cause several windows to open). Should the website/email not appear, you can check whether it has opened up behind the document by holding down the ‘Alt’ and ‘Tab’ keys. To access the Urban Splash website, simply click on the blue ‘Urban Splash’ logo in the top right of each page. Navigating via the ‘tool bar’ (right of page) On each page of the manual, the tool bar on the right side of the screen, allows you to move in the following ways: ‘Introduction’ - takes you directly to the document introduction ‘Contents’ - takes you directly to the contents page Introduction Contents 1. Useful information and contacts 2. Looking after your home 3. Apartment fixtures, fittings and finishes 4. Apartment systems and services 5. Estate systems and services 6. Ecohomes Part 1: using your home 7. Ecohomes Part 2: local amenities Continued... Content of the CD The CD contains the following separate documents: - Pattern House Home Owner Manual -Other supplementary manuals and instructions (see contents for details) How to access documents on the CD Once the CD has run successfully, the required document can be selected from the on-screen menu. How to print from the manual Reduce the manual display on the screen by pressing the ‘escape’ button. Select ‘print’ from the ‘file’ option on the Acrobat tool bar menu. Choose to print either the whole document or selected pages. How to revert to ‘full screen’ display Click on the ‘window’ option of the Acrobat tool bar menu and select ‘full screen view’. Additional copies of the home owner manual Copies of the manual in CD format, from which a printed version can be produced, may be ordered and purchased from Urban Splash. Urban Splash reserves the right to charge an administration fee for any additional copies ordered. Introduction Contents 1. Useful information and contacts 2. Looking after your home 3. Apartment fixtures, fittings and finishes 4. Apartment systems and services 5. Estate systems and services 6. Ecohomes Part 1: using your home 7. Ecohomes Part 2: local amenities Preface Welcome to Pattern House. Pattern House sits in a landscaped setting on the banks of the River Tame. Its architecture is bold, strong and colourful with the shape of the interlocking concrete walls seen from the outside telling you what is going on on the inside. If it looks two storey from the outside then it's two storey on the inside. We hope you agree Pattern House looks fantastic and we hope you enjoy living there. Urban Splash Introduction Contents 1. Useful information and contacts 2. Looking after your home 3. Apartment fixtures, fittings and finishes 4. Apartment systems and services 5. Estate systems and services 6. Ecohomes Part 1: using your home 7. Ecohomes Part 2: local amenities Introduction The home owner manual This manual is a guide to your apartment, what’s in it and how it works, the Pattern House building and the arrangements for management of the estate. It also includes important contact details and guidance on what to do in the event of problems or queries. It is important that you familiarise yourself with the full content of the manual, but we know that you might have a lot to think about when you move home, so we have also provided a separate set of printed sheets "Preparing To Move In and Quick Reference Sheets" to get you started with the essential items when you first move into Pattern House. The manual and quick reference sheets will also be useful if you have tenants (if you let your apartment) and should be kept safe as a source of information for future owners should you decide to sell the apartment. Notes Content of the manual Urban Splash Limited has provided the information in this manual to assist the owners of the apartments at Pattern House but the company reserves the right to make alterations or amendments to the information contained herein at any time. Nothing contained in this manual implies a contract or invitation by Urban Splash Limited and the information is given without responsibility of Urban Splash Limited, its directors or employees. The information is believed to be accurate, but neither the content nor its accuracy is warranted by Urban Splash Limited. Introduction Contents 1. Useful information and contacts 2. Looking after your home 3. Apartment fixtures, fittings and finishes 4. Apartment systems and services 5. Estate systems and services 6. Ecohomes Part 1: using your home 7. Ecohomes Part 2: local amenities Contents 1. Useful information and contacts 2. Looking after your home 3. Apartment fixtures, fittings and finishes 4. Apartment systems and services 5. Estate systems and services 6. Ecohomes Part 1: using your home 7. Ecohomes - Part 2: local amenities Contents 7.1 7.2 7.3 1. Useful information and contacts CD appendices 1.1 1.2 1.3 1.4 1.5 1.6 2.1 2.2 2.3 2.4 3.1 3.2 3.3 3.4 3.5 3.6 3.7 4.1 4.2 4.3 4.4 4.5 4.6 4.7 5.1 5.2 5.3 5.4 5.5 5.6 5.7 6.1 6.2 6.3 6.4 6.5 6.6 6.7 Introduction 2. Looking after your home 3. Apartment fixtures, fittings and finishes 4. Apartment systems and services 5. Estate systems and services 6. Ecohomes Part 1: using your home 7. Ecohomes Part 2: local amenities Building warranty and Urban Splash Customer Care Apartment repairs and emergencies Communal area repairs and emergencies Useful contacts Postal address and deliveries Energy General care and maintenance guidance Servicing and maintenance Leaving the apartment Making changes to your home Lighting Windows Kitchen units and appliances Bathrooms Doors Flooring Decoration Fire protection and detection Electricity Water Heating and hot water Ventilation Home entertainment Telephone and Internet Access, parking and security Pedestrians access Basement car park Fire Lighting Lifts Refuse disposal and recycling Environmental design features Energy Water usage Recycling & waste Sustainable DIY Emergency information Further information Public transport Local amenities Responsible purchasing Digital appliance manuals 1. Useful information and contacts Introduction Contents 1. Useful information and contacts 2. Looking after your home 3. Apartment fixtures, fittings and finishes 4. Apartment systems and services 5. Estate systems and services 6. Ecohomes Part 1: using your home 7. Ecohomes Part 2: local amenities 1. Useful information and contacts 1.1 Building warranty and Urban Splash Customer Care Your new home is covered by: - - Zurich Building Guarantee 10 year warranty Urban Splash Customer Care service Zurich Building Guarantee Under the terms of the Zurich Building Guarantee, Urban Splash is responsible for any defects covered by the Zurich Building Guarantee for 2 years from the effective date shown on the Certificate. From the end of this 2 year period until the end of the 10 year guarantee period the apartment is covered against defects defined by Zurich Building Guarantee. For further guidance on the terms and cover provided by the guarantee, refer to the documents issued to your solicitor or contact Zurich Building Guarantee directly (see section 1.4 for contact details). Urban Splash Customer Care In addition to the Zurich Building Guarantee, as part of the Urban Splash Customer Care service, Urban Splash will attend to all defects (whether these would be covered by the Zurich Building Guarantee or not) within the first 12 months from legal completion. A list detailing any defects which the purchaser believes require attention should be submitted to Urban Splash Customer Care no later than 10 days after legal completion. Once addressed, Urban Splash will only attend to emergency or urgent defects that arise in the property until the 12 month customer care period is due to expire. At the expiry of the 12 month customer care period, Urban Splash will write to the purchaser inviting them to raise any remaining defects which they feel should be addressed. If Urban Splash agree that the items reported are genuine defects for which they are responsible, then arrangements will be made to attend to the problems within a reasonable timescale agreed with the purchaser. Introduction Contents 1. Useful information and contacts 2. Looking after your home 3. Apartment fixtures, fittings and finishes 4. Apartment systems and services 5. Estate systems and services 6. Ecohomes Part 1: using your home 7. Ecohomes Part 2: local amenities 1. Useful information and contacts What the home owner is required to do if a problem or defect arises In the event of problems in the apartment, the home owner should follow the guidance below: During the first 12 months from legal completion - The home owner should contact Urban Splash. After 12 months but within 2 years of legal completion - The home owner should contact Urban Splash, but noting that Urban Splash will only attend to defects which they are required to deal with within the 2 year period under the terms of the Zurich Building Guarantee. Any defects which occur during this period which are not covered by Zurich Building Guarantee must be dealt with by the homeowner at their own expense. Between years 2 and 10 after legal completion - The home owner should contact Zurich Building Guarantee, but noting that any defects which are not covered by Zurich Building Guarantee must be dealt with by the homeowner at their own expense. Relevant contact details are provided in section 1.4 Notes 12-month Urban Splash Customer Care period Urban Splash Customer Care is available for the first purchaser of the property only, and this benefit does not pass to subsequent owners. Urban Splash will not take responsibility for general wearand-tear or any problems or defects that arise out of abuse, accident, neglect or are the fault of the purchaser, their tenant or visitors. Sole point of contact Only Urban Splash Customer Care can accept calls and arrange for appropriate advice, or support for any items covered by the 12-month defects warranty, requiring attention within office hours. Access to apartments After legal completion has taken place, Urban Splash will neither retain nor take responsibility for any keys to a property unless this is necessary in order to carry out agreed remedial works. Introduction Contents 1. Useful information and contacts 2. Looking after your home 3. Apartment fixtures, fittings and finishes 4. Apartment systems and services 5. Estate systems and services 6. Ecohomes Part 1: using your home 7. Ecohomes Part 2: local amenities Appliance and system warranties Warranty documentation (e.g. kitchen appliances) must be completed and promptly registered with the manufacturers. Problems with appliances should be reported directly to the manufacturer (see sections 1.4 and 3.3). Routine servicing of appliances and systems Urban Splash and their agents are not responsible for routine servicing. Failure to operate or maintain appliances and systems in accordance with manufacturers’ instructions and guidelines may invalidate warranty claims. 1. Useful information and contacts 1.2 Apartment repairs and emergencies During the 12-month Urban Splash Customer Care period Any faults within the apartment should be reported directly to: The Customer Care Team Urban Splash Group Ltd Customer Care Department Timber Wharf 16 - 22 Worsley Street Castlefield Manchester M15 4LD Office hours Monday to Friday 09:00 to 17:00 0161 214 0752 [email protected] Out-of-hours customer care Calls will automatically be diverted to an answerphone and messages will be dealt with on the next working day. Response times Response times will depend upon the timing of the report, the nature of the problem and the availability of resources. In an emergency during the 12-month Urban Splash customer care period In the event of an out-of-hours emergency in the apartment, residents should contact an independent external contractor to address the issue. If the resident considers the issue to be the responsibility of Urban Splash (either because the apartment is still within the 12-month Customer Care period, or the problem should be covered by Urban Splash under the terms of Zurich Building Guarantee) please obtain a full written report from the contractor and a receipt for any works. The report and invoice should then be forwarded to the Urban Splash Customer Care address. Where there is a genuine apartment emergency for which Urban Splash are liable, Urban Splash will meet the associated costs of the call-out upon receipt of invoice and full written report from the independent contractor. However, if nonemergency items (or problems that arise from abuse, accident or the fault of the occupant, their tenant, a visitor or their neighbours) are reported, the occupier will be responsible for the charges. Introduction Contents 1. Useful information and contacts 2. Looking after your home 3. Apartment fixtures, fittings and finishes 4. Apartment systems and services 5. Estate systems and services 6. Ecohomes Part 1: using your home 7. Ecohomes Part 2: local amenities Please note this procedure does not apply to out-of-hours issues in the communal areas of the development, which should be referred to the managing agent (see section 1.3). After the 12-month Urban Splash Customer Care period Refer to the Zurich Building Guarantee to check if the problem is covered. If not, the resident should employ a contractor at their own expense. 1. Useful information and contacts 1.3 Communal area repairs and emergencies The day-to-day care and maintenance of the shared areas of Pattern House (e.g. cleaning, door entry systems, lift, lighting, roof leaks or flooding) is the responsibility of the managing agent, Residential Management Group Ltd (RMG). Who to contact Residential Management Group Ltd (RMG) Chelford House Gadbrook Park Northwich CW9 7LN Telephone 0845 002 4444 Fax 0845 002 4455 [email protected] www.rmgltd.co.uk And for specific customer care queries: www.rmgliving.co.uk Office hours 08:00 - 18:00 Monday to Friday (excluding Bank Holidays) Out of hours emergency number 0845 002 4444 Introduction Contents 1. Useful information and contacts 2. Looking after your home 3. Apartment fixtures, fittings and finishes 4. Apartment systems and services 5. Estate systems and services 6. Ecohomes Part 1: using your home 7. Ecohomes Part 2: local amenities 1. Useful information and contacts 1.4 Useful contacts Developer Urban Splash Limited 0161 839 2999 www.urbansplash.co.uk Managing agent Residential Management Group Ltd (RMG) [email protected] 0845 002 4444 www.rmgltd.co.uk Utilities EON 0845 059 9905 (general enquiries) 0845 052 0000 (bill payments) www.eon-uk.com Local Authority Tameside Metropolitan Council 0161 342 8355 www.tameside.gov.uk Public transport information Greater Manchester Passenger Transport Executive www.gmpte.com Traveline 0871 200 2233 (note that charges apply) Telephone BT 0800 800 150 www.bt.com Zurich Building Guarantee Zurich House 2 Gladiator Way Farnborough Hampshire GU14 6GB 0125 237 7474 [email protected] www.zurich.co.uk Government legislation on housing matters www.communities.gov.uk Introduction Contents 1. Useful information and contacts 2. Looking after your home 3. Apartment fixtures, fittings and finishes 4. Apartment systems and services 5. Estate systems and services 6. Ecohomes Part 1: using your home 7. Ecohomes Part 2: local amenities Kitchen units and appliances Accent Kitchens 01274 370 533 www.accentkitchensuk.co.uk Appliance servicing Fagor Appliances 0844 557 3750 www.fagor.co.uk 1. Useful information and contacts Engineered timber flooring Workspace Technology 0121 354 4894 Carpets John Abbott Flooring 0161 624 8246 TV system installer Rooms Cable Systems 0161 428 1781 www.roomscable.com Satellite TV Sky 0870 240 0024 www.sky.com Freeview TV Freeview 0870 880 9980 www.freeview.co.uk Top Up TV Top Up TV 0870 054 3210 www.topuptv.com Introduction Contents 1. Useful information and contacts 2. Looking after your home 3. Apartment fixtures, fittings and finishes 4. Apartment systems and services 5. Estate systems and services 6. Ecohomes Part 1: using your home 7. Ecohomes Part 2: local amenities 1. Useful information and contacts 1.5 Postal address and deliveries All apartments in Pattern House have the same address format, which is: Apartment [number] Pattern House Longlands Stalybridge SK15 1AP Activation of the address To receive post the address and postcode must be activated by the resident. This can be done by telephone, by calling Royal Mail on 08456 011 110 and following menu option 3 then option 1. Postal deliveries & postboxes Post will be delivered to the individual apartment postboxes located in the main entrance lobby. A set of keys for the postbox will be provided on completion, but please note that residents must make their own arrangements if additional or replacement keys are required. Additional or replacement keys Additional or replacement keys can be obtained from the postbox supplier: Postbox Solutions 0844 561 6726 www.postboxsolutions.co.uk Each postbox contains a sticker with an unique code which must be quoted so that the correct replacement key can be supplied (there will be a charge for this service). Even if the postbox is locked the code should normally be visible on the side or back wall of the box if the flap is lifted, but this may not be the case if the postbox is full, so residents are advised to take note of their code. Without the reference code, a replacement lock and keys will have to be ordered from Postbox Solutions, but the resident will need to arrange for the new lock to be fitted by someone suitably qualified, without damaging the postal unit (the cost will be significantly greater than ordering a replacement key using the reference code described above). Introduction Contents 1. Useful information and contacts 2. Looking after your home 3. Apartment fixtures, fittings and finishes 4. Apartment systems and services 5. Estate systems and services 6. Ecohomes Part 1: using your home 7. Ecohomes Part 2: local amenities 1. Useful information and contacts 1.6 Energy Energy labeling - SAP notice The Standard Assessment Procedure (SAP) is a methodology for assessing the energy performance of a property. The SAP rating establishes a means for home owners to understand the running costs and environmental impact of the property. SAP ratings range from 1 to 100, with the higher number reflecting a more energy efficient home. There is no statutory minimum or maximum SAP rating and the rating cannot be used to accurately predict running costs. Energy performance certificate (EPC) An Energy Performance Certificate gives a property an energy efficiency on a scale of A - G. The most efficient homes - which should have the lowest fuel bills - are in band A. The EPC also tells you, on a scale of A - G, about the impact the home has on the environment. Better-rated homes should have less impact through carbon dioxide (CO2) emissions. The average property in the UK is in bands D - E for both ratings. The EPC includes recommendations on ways to improve the home’s energy efficiency to save you money and help the environment. Tips on saving energy -Switch off your television, video, DVD player and music system at the set, as when left on standby they still use power -Turn the thermostat down by 1 degree - you won't notice the difference but will save on your heating bill - Turn off lights when you are not in the room -Use low-energy light bulbs wherever you can, as they use less than a quarter of the electricity used by standard light bulbs and will last up to 15 times longer - Switch your computer off when it is not in use -Regularly defrost your fridge/freezer to keep it running efficiently. Remembering not to leave fridge and freezer doors open for too long will also help, for each minute that the door is left open it takes a further three minutes to return to the original temperature -Try not to use more water than you need when boiling the kettle - Do not run the heating system when windows are open -Unplug or switch off mobile phone and other chargers at the mains when not in use Introduction Contents 1. Useful information and contacts 2. Looking after your home 3. Apartment fixtures, fittings and finishes 4. Apartment systems and services 5. Estate systems and services 6. Ecohomes Part 1: using your home 7. Ecohomes Part 2: local amenities Tips to help reduce your bills -Hot water - ensure that the hot water cylinder is correctly programmed. The incorrect use of these can lead to excessive bills -Heating programmes - ensure that the programme for the whole apartment matches your occupancy pattern -Electricity tariff - ensure the tariff that you are on best matches your occupancy and usage -Bills payment - depending on tenancy it may be appropriate to agree a direct debit arrangement with the electricity provider so that payment for usage is spread over the calendar year and not concentrated in the heating season -Online accounts - going for paperless billing through an online account will get a better tariff 2. Looking after your home Introduction Contents 1. Useful information and contacts 2. Looking after your home 3. Apartment fixtures, fittings and finishes 4. Apartment systems and services 5. Estate systems and services 6. Ecohomes Part 1: using your home 7. Ecohomes Part 2: local amenities 2. Looking after your home 2.1 General care and maintenance guidance To maintain the integrity of the apartment, including the appliances, systems and services, residents should observe the guidance provided in this manual and the manufacturers’ appliance manuals which have been provided. Residents are advised that no structural or electrical alterations to an apartment should be undertaken without the prior written approval of the landlord, and attention is drawn to: - The covenants contained in the lease -The latest regulations relating to procedures for carrying out electrical work, see section 2.4 In the event of any doubt or queries concerning repair and maintenance matters, residents should contact the managing agent for guidance. Ventilation and temperature control When cooking the kitchen hob extractor should always be used to: -Minimise the effects of condensation on the decorations and reduce the risk of mould - Reduce the circulation of cooking odours -Minimise the risk of the apartment smoke or heat detector alarms sounding unnecessarily Drying out The presence of water in construction materials means that it is essential to allow the property to dry out as naturally as possible. Adequate natural ventilation is the best method of achieving this. When feasible, windows should be opened to allow a through flow of air to all rooms. Movement and shrinkage Materials used in the construction of the apartment will expand and contract due to changes in temperature and moisture and as the drying out process occurs - this may cause small cracks to appear. These cracks are not structural defects and can be filled and covered in the normal process of periodic redecoration. Minor cracking of this nature is normal and is not classified as a defect to be rectified by Urban Splash. Introduction Contents Decoration Emulsion paint is a breathable product and has been used to allow walls and ceilings to dry out before redecoration this should take between 3 to 6 months and it is advisable not to redecorate until this period has elapsed. Any minor shrinkage cracks should be left for this period and then filled with a DIY product such as ‘Polyfilla’ or a flexible decorator’s caulk before redecoration. 1. Useful information and contacts Notes 2. Looking after your home Urban Splash will not be held responsible for the quality of any redecoration carried out by the resident. 3. Apartment fixtures, fittings and finishes 4. Apartment systems and services 5. Estate systems and services 6. Ecohomes Part 1: using your home 7. Ecohomes Part 2: local amenities 2. Looking after your home 2.2 Servicing and maintenance It is suggested that the following items should be considered for regular servicing, maintenance or testing. Refer to the manufacturer's or installer's guidance where available. Floor coverings Clean timber flooring, carpet and tiles. Windows Clean internal frames/glazing and lubricate accessible hinges and locks. Use an extendable cleaning arm for high level windows. Doors Lubricate hinges and service door closers. Smoke and heat detectors Clean and test units, replace batteries. Cooker hood Clean and/or replace filter. Ventilation fan Clean and/or replace filter. Vehicle gate radio transmitter unit (where applicable) Replace battery. Consumer unit Test RCD circuit breaker. Baths, sinks and showers Regularly clean and flush plug holes and waste traps for hygiene and to minimise the risk of blockages. Ceramic hob Remove spillages and repair any scratches in accordance with manufacturer's instructions. Terrace (where applicable) Remove debris from timber decking. Ensure sliding door frames are free from obstruction. Notes Introduction Contents 1. Useful information and contacts 2. Looking after your home 3. Apartment fixtures, fittings and finishes 4. Apartment systems and services 5. Estate systems and services 6. Ecohomes Part 1: using your home 7. Ecohomes Part 2: local amenities Record keeping It is recommended that servicing records and receipts are retained for future reference (e.g. when letting or selling the apartment). Owners who let their apartments Take note of and comply with all relevant statutory requirements relating to testing and certification of electrical installations and appliances in the apartment. 2. Looking after your home 2.3 Leaving the apartment If the apartment is likely to be left empty for a prolonged period please note the following suggestions: Electricity supply The supply should be left on to maintain power to: - - - Smoke and heat detector units The ventilation system The fridge/freezer (if desired) Water supply Ensure all taps are turned off. The cold water supply may be turned off at the isolator valve located in the cylinder cupboard. Ventilation Any ventilators should be left open and extract ventilation left running to maintain air flow and minimise the build-up of stale air and mould. Security Where fitted set the intruder alarm and make sure that all doors and windows are secured. Managing agent Advise the managing agent of the dates of absence and provide contact details for alternative key holders who can be contacted if necessary. Introduction Contents 1. Useful information and contacts 2. Looking after your home 3. Apartment fixtures, fittings and finishes 4. Apartment systems and services 5. Estate systems and services 6. Ecohomes Part 1: using your home 7. Ecohomes Part 2: local amenities 2. Looking after your home 2.4 Making changes to your home Before undertaking any changes to the apartment you should consider the following: Restrictions within the lease Residents should always ensure that any proposed alterations to the property are not forbidden by the terms of the lease. Maintaining the integrity of fire and acoustic protection Each apartment has been designed to minimise the spread of fire and noise within the building in accordance with building regulations. Making structural changes (such as kitchen or bathroom renovations) could damage or compromise fire or acoustic protection and should only be undertaken after consulting the managing agent and seeking the prior approval of the landlord. Suitable fixings Light and medium-weight fixtures can be attached directly to the finished dry-lined walls using fixings which are compatible with the wall system. Any heavy fixtures to support items such as a plasma or LCD televisions should be fixed and installed by a professional. Fitting items to floors, walls or ceilings Caution should be exercised as electrical cables and water pipes may be present. Cables, which usually run in a vertical direction from switches and sockets, may be located by use of a cable detector. Ensure that the fixings used will support the load and are appropriate for the material which is being fixed into. Consider employing a competent person to undertake all work. Electrical work in the home Prior to contemplating or undertaking any work to the electrical installations within the apartment, you need to be aware that there are restrictions upon what you may do as prescribed by: - - Covenants contained in the lease Government legislation Therefore for legal reasons and your own health and safety you are strongly advised to consult the managing agent for further guidance prior to undertaking any changes or alterations to the apartment electrical installation. Sustainability Please give consideration to the following points: Introduction Contents 1. Useful information and contacts 2. Looking after your home 3. Apartment fixtures, fittings and finishes 4. Apartment systems and services 5. Estate systems and services 6. Ecohomes Part 1: using your home 7. Ecohomes Part 2: local amenities Timber Use timber from a certified sustainable source such as FSC, SFI, PEFC, CTF or MTCC and look out for the "tick tree" trademark used in DIY stores. Paint Most manufacturers produce non-VOC paints which are durable and less harmful to health and the environment. Whichever paint is used, make sure you follow the manufacturer's guidelines and dispose of any excess in a safe and responsible manner. White goods When buying new or replacement appliances, products with an A or A+ rating under the EU Energy Efficiency Labelling Scheme are recommended. Light bulbs Energy saving light bulbs use up to four times less electricity to generate the same amount of light. 3. Apartment fixtures, fittings and finishes Introduction Contents 1. Useful information and contacts 2. Looking after your home 3. Apartment fixtures, fittings and finishes 4. Apartment systems and services 5. Estate systems and services 6. Ecohomes Part 1: using your home 7. Ecohomes Part 2: local amenities 3. Apartment fixtures, fittings and finishes 3.1Lighting Apartments are fitting with the following: Hallway Lamps and Lighting Stars range. Cat No IRS 113/WH rated to IP20 (image 1). 1 Bathroom ceiling Lamps and Lighting Ice IP65 Downlighter. Cat No LVE 50SX/CH and LVTE 60/LH (image 2). and/or Lamps and Lighting Elios Dinki Maxi range. Cat No LVE 50DD/CH and LVTE 60/LH 50 watt 12 volt QR-CB51 (GU5.3) low voltage recessed maxi downlighter. Living Room and Bedrooms Eaton MEM CIRCA Ceilling Range Cat No F1000 and F1200 20 watt low energy compact fluorescent lamp pendant (image 3). 2 and/or Lamps and Lighting Stars range. Cat No IRS 133/WH rated to IP20. Kitchen Strip Lighting Triphosper Strip Lights Cat No L530ST. Lamps and Lighting Elios Dinki Maxi range. Cat No LVE 50DD/CH and LVTE 60/LH 50 watt 12 volt QR-CB51 (GU5.3) low voltage recessed maxi downlighter (image 4). 3 Stairs (located at top of landing) Eaton MEM CIRCA Ceilling Range Cat No F1000 and F1200 20 watt low energy compact fluorescent lamp pendant. and/or Lamps and Lighting Stars range. Cat No IRS 133/WH rated to IP20. Terrace lighting (where applicable) Exterior direct burial IP67 LED uplighter complete with a stainless steel bezel, flat frosted 'walk over' glass 16 No, white LED's and control gear. 4 Introduction Contents 1. Useful information and contacts 2. Looking after your home 3. Apartment fixtures, fittings and finishes 4. Apartment systems and services 5. Estate systems and services 6. Ecohomes Part 1: using your home 7. Ecohomes Part 2: local amenities 3. Apartment fixtures, fittings and finishes 3.2Windows The windows are manufactured from a Kawneer aluminium curtain walling system. All opening vents are operated via a lockable handle mounted on the window front. There are trickle vents fitted to allow background ventilation, which are opened and closed by twisting the plastic handle. Window cleaning Windows should be cleaned from the balcony decking where present, high level windows should be cleaned by an extendable cleaning arm. The exterior fascia and some windows will be inaccessible and will be cleaned by the building management. Window breakages or problems Any breakages or problems with the windows should be reported to the managing agent, who will arrange for a suitably qualified contractor to attend or for repairs to be undertaken (note that, depending on the nature of the problem, repairs may be charged to the resident). Introduction Contents 1. Useful information and contacts 2. Looking after your home 3. Apartment fixtures, fittings and finishes 4. Apartment systems and services 5. Estate systems and services 6. Ecohomes Part 1: using your home 7. Ecohomes Part 2: local amenities 3. Apartment fixtures, fittings and finishes 3.3 Kitchen units and appliances Units and worktops The kitchen units have been especially manufactured for Pattern House by Accent Kitchens UK. In the event of any problems with the kitchen units outside of the 12 month defect period or requirements for additional components, please contact the kitchen supplier, see section 1.4 for contact details. Care and maintenance Doors Occasional marks can, in most cases, be removed with a soft damp cloth. More persistent marks can be removed using a mild solution of water and household detergent and dried with a soft cloth. Never use solvents or abrasive cleaners, as these could permanently damage the finish. Carcasses Do not use polish on any of the surfaces. Only clean the surface with a damp soapy cloth. Bleaches, scouring pads and multi-surface cleaners should not be used. Always clear away concentrated juice, corrosive liquid and food colourant spills, including water, as prolonged exposure can mark the surface. Drawers, runners, doors and hinges These should be wiped out with a damp soapy cloth and wiped dry. The roller runners are lubricated and should not be cleaned with a degreasing agent, as this may impair their function. Never lean on partially or fully open doors and drawers. The hinges are only designed to support the door plus the additional weight of a small wire rack (e.g. for small jars of herbs). If a waste bin is required, please use one supported by the carcass and not attached to the door. Cupboard door hinges If the cupboard door feels unsteady or is poorly fitted, this is typically because the hinges require adjustment; carefully adjust the screws on the hinge to bring the door back into alignment. Stiff hinges can be eased using a suitable lubricant. Wall units Care should be taken not to position appliances that create large amounts of heat or steam, such as a kettle or fryer, directly underneath a wall unit, as excessive heat or moisture can damage the units, doors and light fittings. Introduction Contents 1. Useful information and contacts 2. Looking after your home 3. Apartment fixtures, fittings and finishes 4. Apartment systems and services 5. Estate systems and services 6. Ecohomes Part 1: using your home 7. Ecohomes Part 2: local amenities 3. Apartment fixtures, fittings and finishes Worktops The worktop joints and inserts are not guaranteed against water ingress, which can lead to damage. Therefore, moisture should be avoided in surface joints (e.g. between two worktops or at the joint with the metal edging) and spillage or standing water should be wiped off immediately. Do not rest hot pans or use knives on the worktop without suitable protection, otherwise the laminate surface may be permanently damaged. Stainless steel sinks, drainers and chrome taps These are best cleaned with warm soapy water, wiped dry and then buffed with a soft cloth to restore the polished surface. If undiluted disinfectant and bleaches spill on to the sink or taps, they will leave a permanent stain, if not removed immediately. Persistent water stains may be removed with vinegar and the sink should then be rinsed with water and detergent. Glass splashback Clean with mild detergent or non - abrasive cleaner. Notes Use of hob To avoid damage to the kitchen units and surrounding finishes do not switch the ceramic hob on before placing a pan on the ring(s) to be heated. Similarly, do not leave the hob switched on if there are no pans on the heated ring(s). Introduction Contents 1. Useful information and contacts 2. Looking after your home 3. Apartment fixtures, fittings and finishes 4. Apartment systems and services 5. Estate systems and services 6. Ecohomes Part 1: using your home 7. Ecohomes Part 2: local amenities 3. Apartment fixtures, fittings and finishes Appliances Oven Fagor FSO500X 0844 557 3750 Ceramic hob Fagor FVH650R 0844 557 3750 1 Canopy cooker hood Baumatic CAN 52 0118 933 6911 Build under fridge with icebox (Kitchen Type 1) Statesman B60RF 0844 848 5860 Integrated fridge/freezer (Kitchen Types 2 & 3) Fagor FIC-541UK 0844 557 3750 Care and maintenance Refer to the individual appliance manufacturer’s manual. Placing service calls When reporting problems with appliances, you will need to provide the following information: - Resident’s full name and postal address. -Make and model of the appliance, with brief description of the fault. -Product identification number(s), which can be found either on a plate on the appliance or on the appliance instruction booklet. -Date on which the original apartment sale was legally completed. Integrated waste recycling bin One kitchen unit is fitted with integral containers to facilitate segregation of waste materials to be deposited in the estate recycling bins (image 1). Provision for washing machine The appliance is not provided but power and plumbing provision has been made for installation by the resident. Notes Introduction Contents 1. Useful information and contacts 2. Looking after your home 3. Apartment fixtures, fittings and finishes 4. Apartment systems and services 5. Estate systems and services 6. Ecohomes Part 1: using your home 7. Ecohomes Part 2: local amenities Before order or attempting to fit any new appliances it is advisable to check all measurements to ensure that the appliances will fit into the available space. 3. Apartment fixtures, fittings and finishes 3.4Bathrooms Apartments are fitted with the following sanitary ware and fittings: Bathroom Bath Kaldewei form plus bath 1700 x 700 Bath/shower mixer Vado Zoo 130 bath/shower mixer Shower rail Bath shower rail kits (1.75m hose) Vado Multi function slide rail kit 600mm slide rail Chrome finish 0.5 Bar LP Shower screen Hinged square edge bath screen by Aqua Dart 1500x700mm WC Wall mounted Vitra Retro with WC Frame-Grohe Rapid SL 0.82m. VitrA Retro WC seat, white. Grohe, Front Access Rapid SL WC concealed cistern 0.82 m, 6/3 l. Grohe, Skate Air WC Wall plate WHB Set 1 VitrA Retro square 550 x 425 basin, Wall mounted, with half pedestal, white, 1 tap hole. 1 1/4" Tall Bottle Trap WHB Set 2 VitrA Retro cloakroom basin 450 x 380mm basin. Wall mounted, 1 tap hole, with half pedestal. 1 1/4" Tall Bottle Trap WHB taps Vado Zoo single lever mono basin mixer with pop-up waste 0.2 bar LP - ZOO-100-FR-C/P Introduction Contents 1. Useful information and contacts 2. Looking after your home 3. Apartment fixtures, fittings and finishes 4. Apartment systems and services 5. Estate systems and services 6. Ecohomes Part 1: using your home 7. Ecohomes Part 2: local amenities 3. Apartment fixtures, fittings and finishes Shower room Shower rail Shower rail kit (1.5m hose). Vado Multi function slide rail kit 600mm slide rail Chrome Finish 0.5 Bar LP Shower valve Vado Celsius thermostatic exposed shower valve With H2Eco flow regulator Chrome Finish 1 Shower tray Mira Flight Low Rectangle 1400x760x40mm. Vado abs turbo shower tray waste 50mm Shower screen Merlyn fixed Series 8 Shower Wall WC Wall mounted Vitra Retro with WC Frame-Grohe Rapid SL 0.82m 2 WHB VitrA Retro cloakroom basin 450 x 380mm basin. Wall mounted, 1 tap hole, with half pedestal. 1 1/4" Tall Bottle Trap WHB taps Vado Zoo single lever mono basin mixer with pop-up waste 0.2 bar LP - ZOO-100-FR-C/P Drying Hooks Wall hooks are provided so that clothes can be hung over the bath to dry. Note that the line itself is not provided (image 1) Shaver socket The shaver socket is fitted adjacent to the mirrored bathroom cabinet (image 2) Notes Water usage To reduce water consumption, taps and shower heads are fitted with integral flow restrictors and the toilet uses a dual-flush system. Introduction Contents 1. Useful information and contacts 2. Looking after your home 3. Apartment fixtures, fittings and finishes 4. Apartment systems and services 5. Estate systems and services 6. Ecohomes Part 1: using your home 7. Ecohomes Part 2: local amenities 3. Apartment fixtures, fittings and finishes Care and maintenance instructions Basins and baths Trays and tops should be cleaned and dried as soon as possible after use to prevent build up of soap residue. If the water is hard, insoluble lime salts and grime will harden on the surface and become increasingly difficult to remove. To prevent scratching of bathroom fittings it is important that only nonabrasive cleaners are used. In the interests of safety, baths and shower trays must not be polished with wax or silicone polish. A sealant has been applied around the bath and / or shower tray where water splashes occur. This should be checked regularly and maintained as required to ensure water resistance. Shower heads Heads should be cleaned and de-scaled if necessary. Taps and hinges Under no circumstances should cleaners containing any abrasive agents or chemicals be used. The use of cleaners of this type, whether on stainless steel, chrome, gold or white taps or hinges, will abrade any protective surfaces and cause corrosion. Soapy water, silicone or wax polishes should be used instead. Toilet cisterns Each toilet cistern incorporates an integral overflow system. This system should reduce the amount of water wasted due to a faulty cistern valve and alert residents more quickly to a problem. In the event of the valve failing to stop water entering the toilet cistern: -The toilet pan flush buttons may be disabled and it may not be possible to flush the toilet -The excess water will continuously be disposed of directly into the toilet pan To gain access to the cistern flushing unit: - Open the mirrored door to the bathroom cabinet -Lift the bottom green panel inside the unit to reveal the toilet cistern Access to bath and shower trap Access to bath and shower traps are not proprietary and not lockable, when access is required, cut out silicone seal and remove panel. Introduction Contents 1. Useful information and contacts 2. Looking after your home 3. Apartment fixtures, fittings and finishes 4. Apartment systems and services 5. Estate systems and services 6. Ecohomes Part 1: using your home 7. Ecohomes Part 2: local amenities 3. Apartment fixtures, fittings and finishes 3.5Doors Apartment front doors These are FD30 in a standard size. The design and colour of the doors facing into the common parts must not be changed by the resident as these are part of the architectural design of Pattern House. If there are any queries relating to the doors please contact the managing agent in the first instance. Front door ironmongery -Euro profile master keyed cylinder with patent protected key section with 2 keys per cylinder -Satin Stainless Steel Hinges BS EN 1935 Grade 13 with screws CE marked and fire tested -Heavy Sprung Din standard mortise sashlock case 60mm backset -Satin Stainless Steel Full cover and plated arm overhead door closer Fig 1 and 66 CE marked and certifier approved BS EN 1154 -RBAI-Baden designer lever furniture on concealed fixing sprung 6mm rose solid stainless steel with bolt through fixing steel sub rose and heso spindle -RBAI door viewer to suit door thickness 54mm Care and maintenance of doors To keep the doors looking at their best: -Carry out routine cleaning (e.g. removal of finger marks), using proprietary products and a soft cloth; do not use any abrasive household cleaning materials -Take care not to scratch paintwork or numbering with keys or sharp objects Sliding doors (where present) Sliding doors in some apartments allow flexible use of space. The sliding doors are top hung. Notes Acoustic separation The sliding-folding doors are designed as a room dividing feature and are not intended to provide the same level of acoustic separation as a fixed wall. Introduction Contents 1. Useful information and contacts 2. Looking after your home 3. Apartment fixtures, fittings and finishes 4. Apartment systems and services 5. Estate systems and services 6. Ecohomes Part 1: using your home 7. Ecohomes Part 2: local amenities 3. Apartment fixtures, fittings and finishes 3.6Flooring Engineered timber -Atkinson Kirby Contrace range 14mm x 148mm Single Strip White Oak micro-bevelled, natural UV oiled finish -Timber stair to falt B and C in solid oak and sealed in Ronseal Quick Cure Floor Seal The following general care and maintenance guidance is suggested: Do - Clean the floor regularly - Wipe up any spilt liquids immediately - Use protective pads under all furniture legs -Use barrier mats at all external doors to protect your floor from grit -Note that stiletto heels and pets claws will damage the floor - Keep the ambient room temperature between 18-20ºC Don’t -Allow liquid to stand on the floor, as this can cause the wood to expand -Use a wet mop to clean the floor - always use the mop damp - Use abrasive cleaners, as these will damage the seal -Allow sharp or abrasive objects to come into contact with the floor - Walk on the floor in stiletto heels or spiked shoes For detailed guidance refer to the manufacturer’s instructions. Bathroom tiles Floors Freestyle White 297x97x6mm with Mapei Ultracolor 112 grey grout Wall Freestyle White 297x97x6mm with Mapei Ultracolor 100 white grout Freestyle Grey 297x97x6mm with Mapei Ultracolor 112 grey grout Introduction Contents 1. Useful information and contacts 2. Looking after your home 3. Apartment fixtures, fittings and finishes 4. Apartment systems and services 5. Estate systems and services 6. Ecohomes Part 1: using your home 7. Ecohomes Part 2: local amenities 3. Apartment fixtures, fittings and finishes Bedroom carpet - Cormar New Oakland, in linnet. The following general care and maintenance guidance is suggested: -Good carpet maintenance is best achieved by avoiding particles of loose dirt and dust from working their way into the carpet pile, where they will act abrasively on the fibres and discolour the carpet. -Vacuum the new carpet regularly, at least two or three times a week. Cleaning For spillages, the following guidance is offered. For more persistent or unusual stains, contact a professional carpet cleaner. -Spillages are more easily removed if tackled immediately, blot off all the liquid stain with dry kitchen roll or a clean dry white cloth. Semi-solid substances should be removed with a plastic spatula. -To clean off any remaining stain, use a clean damp cloth soaked in warm water to blot the stain. Use a dabbing action with the cloth and then blot out the remaining liquid with dry kitchen towel. -Do not rub the pile surface of your carpet or over soak the stain. -Always work from the outside of the stain inwards to minimise the stain spreading. For detailed guidance refer to the manufacturer for instructions. Introduction Contents 1. Useful information and contacts 2. Looking after your home 3. Apartment fixtures, fittings and finishes 4. Apartment systems and services 5. Estate systems and services 6. Ecohomes Part 1: using your home 7. Ecohomes Part 2: local amenities 3. Apartment fixtures, fittings and finishes 3.7Decoration Apartments have been decorated using the following products and finishes. Walls and ceilings (where applicable) Glidden Trade Contract Matt, standard white Woodwork Crown satin (white) Sliding doors (where applicable) Glidden Trade Satin Finish, standard white. Apartment ceilings Concrete In general, the apartments in Pattern House have exposed concrete soffits in the living, bedroom and corridor areas. This finish is an intended part of the architectural design to provide a deliberate contrast to the crisp white walls and new flooring. No finish is provided or required to these ceilings. Painted plasterboard Glidden Trade Contract Matt, standard white. Some ceilings of apartments have painted plasterboard ceilings - this is necessary to cover substantial structural elements and building services. Painted plasterboard ceilings are also provided in certain kitchen areas. Bathroom ceilings Glidden Durable Acrylic Eggshell, standard white. Introduction Contents 1. Useful information and contacts 2. Looking after your home 3. Apartment fixtures, fittings and finishes 4. Apartment systems and services 5. Estate systems and services 6. Ecohomes Part 1: using your home 7. Ecohomes Part 2: local amenities 4. Apartment systems and services Introduction Contents 1. Useful information and contacts 2. Looking after your home 3. Apartment fixtures, fittings and finishes 4. Apartment systems and services 5. Estate systems and services 6. Ecohomes Part 1: using your home 7. Ecohomes Part 2: local amenities 4. A partment systems and services 4.1 Fire protection and detection Fire protection The apartments are designed to meet fire containment standards in accordance with the building regulations. To provide fire containment within the apartment: -The front door, has an automatic adjustable closer unit fitted onto the frame and will contain a fire for 60 minutes -An intumescent strip, is recessed into the top and sides of the door frame (when subjected to heat the strip will automatically expand to reduce the rate at which heat and smoke penetrate the doorways) To maintain protection and contain a fire: - Keep fire doors properly closed at all times -Do not remove or disconnect the automatic door closer, or hold doors open - Do not store materials that might exacerbate a fire -Do not obstruct escape routes or the access into or out of the apartment Notes Redecoration of doors To avoid affecting the fire protection properties, do not paint over the intumescent strip around the doors. Care and maintenance of automatic door closers Periodically oil the connecting chain and spring cylinder, to maintain smooth operation. Door closers contain a powerful spring, which is inserted into the body of the unit, when under pressure. For safety reasons, only a competent tradesperson should be employed to repair or replace a door closer unit. Introduction Contents 1. Useful information and contacts 2. Looking after your home 3. Apartment fixtures, fittings and finishes 4. Apartment systems and services 5. Estate systems and services 6. Ecohomes Part 1: using your home 7. Ecohomes Part 2: local amenities 4. A partment systems and services Fire detection Each apartment is fitted with an independent fire detection system which is not linked to any central or remote monitoring services. There are two linked detector units that incorporate alarm sounders: - A smoke detector located in the hall ceiling (image 1) -A heat detector located in the kitchen ceiling (image 2) 1 The detectors constantly monitor the immediate areas - they are powered from the apartment electricity supply and have internal back-up batteries. Checking detectors are operating normally Refer to the manufacturer’s operating instructions for guidance to check that: - - 2 The units are receiving mains power The batteries are healthy When a potential fire risk condition occurs The alarm will sound and a red LED will flash on the activated unit. In the event of a false alarm If the activation is a false alarm, the unit may be silenced by pressing the “test/hush” button for a few seconds. This action will silence the alarm for approximately 10 minutes, after which the unit will automatically re-set. However, if the smoke density increases when in silenced mode, the alarm will automatically restart. - - Open windows and doors to clear the air Apply vacuum nozzle around the affected smoke detector Notes Fire detector system testing and maintenance Regular testing and maintenance is the responsibility of the resident and should be carried out in accordance with the manufacturer’s operating instructions. Back-up battery replacements The detector unit will beep every 60 seconds to indicate that a battery needs to be changed; use only batteries recommended by the manufacturer. Introduction Contents 1. Useful information and contacts 2. Looking after your home 3. Apartment fixtures, fittings and finishes 4. Apartment systems and services 5. Estate systems and services 6. Ecohomes Part 1: using your home 7. Ecohomes Part 2: local amenities 4. A partment systems and services 4.2Electricity Electricity supply to Pattern House The electricity supply for Pattern House is provided from a connection to the national grid. The current energy provider is EON. Meter reading and billing arrangements The Service Provider is EON. 1 EON have installed smart meters in this development which allow the meter readings to be done remotely, meaning you should never receive an estimated bill. The meters are centrally located within the meter room in the car parking area. The meter can be read by residents in order to verify the remote readings taken by the Service Provider; the readings should be identical to those on the bill. Should you wish to view your meter you will have to make arrangements with the building manager. Any queries or problems with meters, billing or electricity tariff should be directed to Switch 2 (see section 1.4 for contact details). Electricity consumer unit and residual current device (RCD) The electricity consumer unit for each apartment is located in the services cupboard or at high level adjacent to the entrance door and individual circuits are appropriately labelled (image 1). The consumer unit includes an RCD protection which will quickly cut off the supply if a fault occurs. The RCD should be tested quarterly (see appendices for details). Electricity supply failure or problems If the power supply to the apartment fails and cannot be restored from the consumer unit contact EON who will investigate to determine the nature of the problem and how it can be addressed. Please note that if an engineer or electrician is required to deal with a problem which can be attributed to misuse or incorrect operation by a resident, then the resident will be responsible for the associated costs. Introduction Contents 1. Useful information and contacts 2. Looking after your home 3. Apartment fixtures, fittings and finishes 4. Apartment systems and services 5. Estate systems and services 6. Ecohomes Part 1: using your home 7. Ecohomes Part 2: local amenities 4. A partment systems and services 4.3Water Water supply for Pattern House The water to Pattern House is supplied by United Utilities via individual meters and the building is connected to the public drainage and sewerage system. Meters are located in the ceiling outside the apartment entrance door (image 1). 1 Billing Residents will be billed monthly by the provider. See section 1.4 for contact details. Cold water distribution system The water supply for Pattern House is fed via a centrally operated system that pumps water around the building and maintains water pressure within each apartment. There is no separate cold water storage tank within the apartment and under normal working conditions the water pressure should remain constant. Water supply failure or problems The apartment cold water supply may be interrupted or fail for a variety of reasons, such as: 2 - - - A mains water supply failure to the building A mains electricity supply failure to the building A central water pumping system failure Water supply isolators The water supply isolator tap for the apartment can be found in the services cupboard (image 2). Hard water The water supply in Pattern House is not softened by any chemical means before being distributed to the apartments. Any queries about the hardness of the water supply should be directed to United Utilities or British Water. Introduction Contents 1. Useful information and contacts 2. Looking after your home 3. Apartment fixtures, fittings and finishes 4. Apartment systems and services 5. Estate systems and services 6. Ecohomes Part 1: using your home 7. Ecohomes Part 2: local amenities 4. A partment systems and services 4.4 Heating and hot water Heating and hot water supply for Pattern House Pattern House apartments are heated through an electrical underfloor heating system. Hot water is provided through an electric hot water cylinder. 1 Heating timer and temperature control Each apartment is heated in separate zones. Each zone is controlled via a 24 hour, 7 day programmable unit (image 1). For further details refer to manufacturers operating instructions. Notes Important Floor areas should not be 'masked' with thick rugs or mattresses directly placed onto the floor as this prevents the system from transferring heat efficiently into the room and can slow the system down. 2 3 Introduction Contents 1. Useful information and contacts 2. Looking after your home 3. Apartment fixtures, fittings and finishes 4. Apartment systems and services 5. Estate systems and services 6. Ecohomes Part 1: using your home 7. Ecohomes Part 2: local amenities Hot cylinder Each apartment is fitted with an electric hot water cylinder (image 2). This is connected to a programmable control (image 3). For further details refer to manufacturer's operating instructions. 4. A partment systems and services 4.5Ventilation Background ventilation The apartment is equipped with a mechanical ventilation system which gently removes stale and moisture-laden air from the bathroom and kitchen areas, through ventilation points located in the ceilings (image 1). 1 The system is powered by a fan unit which constantly draws air through the ventilation grilles and expels it through ducting booster to kitchen, activated via grid switch plate located at one side of the kitchen, which discharges the air through the elevation. The fan unit will boost on detection of humidity via humidistat or switch. The fan unit is mounted at high level in a cupboard or services cupboard (depending on the apartment type). To maintain minimum ventilation, the main power to the fan unit should be kept permanently on. 2 Care and maintenance instructions To avoid the build up of dust, which can impede the operation of the fan on in severe cases lead to overheating, the filter should be inspected and cleaned every six months. To clean the filter, remove it from the unit and wash it in tepid water using a mild detergent. Shake out the excess water and allow the filter to dry naturally before replacing it in the unit. Servicing the ventilation unit The ventilation system has been commissioned by the installer to run efficiently and should only be serviced or adjusted by a competent person. For safety, prior to any maintenance work being carried out, the power supply to the fan units should be switched off and isolated at the consumer unit. Cooker hood Kitchens are fitted with an electric re-circulating extractor hood to remove cooking smells (image 2). The extractor has an integral light and a boost facility. The extractor filter should be cleaned regularly and be replaced in accordance to the manufacturer's guidance provided. Introduction Contents 1. Useful information and contacts 2. Looking after your home 3. Apartment fixtures, fittings and finishes 4. Apartment systems and services 5. Estate systems and services 6. Ecohomes Part 1: using your home 7. Ecohomes Part 2: local amenities 4. A partment systems and services 4.6 Home entertainment Radio and television services overview Pattern House is fitted with a communal aerial system to provide the following media services to the apartments: 1 - Terrestrial Very High Frequency Stereo Radio (FM) - Terrestrial Digital Audio Broadcasts (DAB) -Terrestrial Analogue Television (i.e. BBC1, BBC2, ITV1, CH4, CH5) -Terrestrial Digital Television (Freeview e.g. BBC News 24, ITV2) -Sky and Sky+ Digital Satellite Radio, Television and Interactive services Access to these services will depend upon: -The resident’s receiving equipment (e.g. TV receivers,adapters, decoders) -The services currently available from the service providers (e.g. Sky, Freeview) -The resident’s subscription to the service provider, where required Connection to terrestrial TV services Services will be readily available from the main outlet socket (image 1). Viewing TV signals in other rooms Before any services can be received in additional rooms, the sockets in these rooms will need to be made active from the main outlet socket as shown on the media connection diagrams which are enclosed. To do this, the resident must purchase the following items from a TV retailer: - - - Co-axial cable UHF splitter Barrel connector Media connection diagrams from the system installer are included in the manual appendix. Viewing Sky channels Only one decoder box can be installed in each apartment and only the channel being watched via the main socket can be viewed in a separate room. Introduction Contents 1. Useful information and contacts 2. Looking after your home 3. Apartment fixtures, fittings and finishes 4. Apartment systems and services 5. Estate systems and services 6. Ecohomes Part 1: using your home 7. Ecohomes Part 2: local amenities 4. A partment systems and services Service providers New Sky subscribers Since there is a communal distribution system already provided in the building, Sky will pass you directly to a specialist installer who will make an appointment to visit the apartment, arrange a subscription contract with Sky and install the appropriate equipment. Sky will then bill the subscriber directly and the installer will be responsible for any technical problems with the installation under a 12-month warranty. Existing Sky subscribers Connect the digibox/decoder in accordance with Sky system instructions to the main satellite outlet sockets and advise Sky of the change of address. 08702 400 024 www.sky.com Freeview Freeview offers a free terrestrial TV service, with no subscription channels. To view Freeview channels a digital receiver will be required - this can either be a separate “box” or an integrated digital receiver in the TV (this is common for all new TV sets). For further information, refer to the service provider. 0870 880 9980 www.freeview.co.uk Top Up TV Top Up TV, offers a terrestrial TV service distributing a number of TV channels for a monthly subscription. For further information, refer to the service provider. 0870 054 3210 www.topuptv.com Notes Television licences Residents are responsible for paying their own television licence fee and making sure that they are in possession of an up to date licence. Sky satellite service subscriptions Although the reception is via a communal distribution system, residents are responsible for paying their own Sky service subscription fees. Introduction Contents 1. Useful information and contacts 2. Looking after your home 3. Apartment fixtures, fittings and finishes 4. Apartment systems and services 5. Estate systems and services 6. Ecohomes Part 1: using your home 7. Ecohomes Part 2: local amenities Reception of terrestrial TV channels The terrestrial television signals will be received from the Winter Hill transmitter. Information about reception quality or high definition TV transmissions can be found as follows: www.ofcom.org.uk www.bbc.co.uk/digital System installer For further guidance upon any aspects of the TV distribution system, residents are advised to contact the system installer (see section 1.2 for contact details). 4. A partment systems and services Use of TV set to identify visitors When a visitor buzzes the apartment using either of the door entry panels at the lobby, as well as being able to speak with the caller using the audio entry phone, a CCTV camera view of the caller may also be simultaneously displayed on the living room TV set (see section 5.1). To use this facility, the TV set must be tuned to receive the analogue signals from the door entry control panels, as if tuning another television channel. The camera image will be available on one or more of the following analogue channels: Channel 22 (478 - 486 MHz) Channel 24 (494 - 502 MHz) Channel 26 (510 - 518 MHz) Most TV sets will automatically pick up the signal from the door entry system - refer to your TV instructions for detailed guidance on how to programme channels. When the door entry phone sounds If the TV set is switched on, select the pre-allocated TV channel (see above) to view the camera image of the visitor on the screen. Note that it is still necessary to use the audio entry phone to speak with the visitor and to remotely open the main entrance doors, see chapter 5.2. Introduction Contents 1. Useful information and contacts 2. Looking after your home 3. Apartment fixtures, fittings and finishes 4. Apartment systems and services 5. Estate systems and services 6. Ecohomes Part 1: using your home 7. Ecohomes Part 2: local amenities 4. A partment systems and services 4.7 Telephone and Internet The apartment has been cabled with analogue telephone and internet services. Availability of ISDN or ADSL services should be checked with BT. A single line has been cabled in to the apartment terminator box, located in the cupboard adjacent to the consumer unit (image 1). 1 Blanked outlet sockets are located in the living room and bedrooms. An additional socket on the living room multi-media outlet panel, is provided for connection to interactive TV services. Notes Residents must contact BT to make arrangement to activate the telephone line, obtain a telephone number and set up an account. A standard connection charge will apply and this must be paid by the resident. BT 0800 800 150 www.bt.com Cable services No provision has been made for cable services to be available within the apartments. Introduction Contents 1. Useful information and contacts 2. Looking after your home 3. Apartment fixtures, fittings and finishes 4. Apartment systems and services 5. Estate systems and services 6. Ecohomes Part 1: using your home 7. Ecohomes Part 2: local amenities 5. Estate systems and services Introduction Contents 1. Useful information and contacts 2. Looking after your home 3. Apartment fixtures, fittings and finishes 4. Apartment systems and services 5. Estate systems and services 6. Ecohomes Part 1: using your home 7. Ecohomes Part 2: local amenities 5. Estate systems and services 5.1 Access, parking and security Pedestrian access to the building The building entrance lobby door is fitted with a secure door entry system which is operated as follows: For residents: Using a proximity fob. For visitors: Using the numeric calling panels located adjacent to either of the entrance doors; the call panels link to the intercom handset in the apartments, allowing residents to admit visitors remotely. Refer to section 5.2 for further details. Undercroft access and parking The roller shutter gate to the undercroft car park is opened using a remote radio transmitter fob, which will be issued to all residents who have a undercroft parking space (see section 5.3). Please note the following parking rules: -Residents must only park their car in the specific space which has been allocated and not in any other locations within the basement or estate. -No caravans, trailers, boats etc may be parked in the car parking spaces. -There are no spaces for visitor or commercial vehicles within the estate. -All vehicle routes must be accessible at all times to service and emergency vehicles; private vehicles must not be parked anywhere or in a manner which causes blockage or an obstruction. -Inappropriately parked vehicles may be clamped or towed away on the instruction of the managing agent - this may incur a release fee to be paid by the owner or driver of the vehicle. Bicycle storage Bicycle storage racks for residents to use are located in the undercroft car park. To help maintain security, any loose fixings or damage to the bicycle racks should be reported to the managing agent as soon as possible. Residents must provide their own bicycle locks and chains. Introduction Contents 1. Useful information and contacts 2. Looking after your home 3. Apartment fixtures, fittings and finishes 4. Apartment systems and services 5. Estate systems and services 6. Ecohomes Part 1: using your home 7. Ecohomes Part 2: local amenities Removal arrangements and delivery of furniture or bulky items For ease and to minimize inconvenience to others living in Pattern House, residents should discuss arrangements in advance with the managing agent - this will help to ensure that suitable vehicle access is available and that measures can be put in place where necessary to avoid damage to finishes, the lobby doors and lift. 5. Estate systems and services CCTV CCTV coverage (image 1) is limited to the access points of Longlands. The images are recorded but not monitored. Footage is overwritten at set intervals. Notes 1 Replacement door entry or car park access fobs Replacement fobs may only be ordered from the managing agent and only after a previously issued fob has been disabled. Residents are responsible for the cost of replacement fobs. Vehicle and bicycle insurance arrangements Residents are responsible for insuring vehicles and bicycles kept within the estate. Bicycle storage Bicycles must not be secured to any parts of the building or the estate other than the dedicated racks which are provided - any damage caused by this will be charged to the owner of the bicycle. Introduction Contents 1. Useful information and contacts 2. Looking after your home 3. Apartment fixtures, fittings and finishes 4. Apartment systems and services 5. Estate systems and services 6. Ecohomes Part 1: using your home 7. Ecohomes Part 2: local amenities 5. Estate systems and services 5.2 Pedestrians access Residents Residents will be issued with two uniquely identifiable proximity fobs per apartment (image 1). To enter the lobby entrance door, the proximity fob should be presented within a 4cm range of the proximity reader. 1 In response to an authorised fob, the door will automatically unlock and then automatically relock after a pre-set delay period. Visitors To call an apartment from the entry panel: -Enter the apartment number using the numeric pad (e.g. for apartment number 307 enter 3 + 0 + 7) and press the ‘bell’ button (image 2). -The panel will emit a ringing tone to indicate that the apartment has been called. 2 -The entry phone unit within the apartment will sound to notify the resident of your arrival. To admit a visitor Pick up the handset (image 3) to speak to the caller (the resident may also view the caller by selecting the TV channel programmed for this service - see section 4.6 for further guidance. If you wish to admit the caller, press the ‘key’ button to open the lobby entrance door. 3 After the visitor has entered the building, the lobby door will close and automatically relock after a pre-set delay period. To open the entrances/gate without a caller from apartment You can also call/open the door to from your apartment to do so: -Lift the handset - Press button 2 to activate the handset - Press button 2 again to select camera/entrance - Speak to visitor via handset - Press blue button to release door 4 Introduction Leaving the building The electric door lock release switch is located on the wall adjacent to the door. Contents Press the button marked ‘press to exit’ (image 4). 1. Useful information and contacts The door can then be opened and will automatically relock after a pre-set delay period. 2. Looking after your home 3. Apartment fixtures, fittings and finishes 4. Apartment systems and services 5. Estate systems and services 6. Ecohomes Part 1: using your home 7. Ecohomes Part 2: local amenities 5. Estate systems and services Care and maintenance of the door entry system The door entry system is part of the communal system and is powered from the landlord’s electrical supply. The handsets within apartments are the responsibility of the resident. The handset can be cleaned with a soft cloth - do not spray liquid based cleaning products directly onto the unit or handset. Any problems with the system should be reported to the managing agent. Note that, depending upon the nature of the problem, the resident may be required to pay the cost of repair or replacement. Notes If the lobby door fails to open Lift the cover and press the button on the adjacent green box to release the lock and report the problem to the managing agent. Note that residents will be charged for any repairs to the break glass panel resulting from unnecessary or inappropriate use. If the fire alarm system is activated The door locks will automatically release - if not, the lock can be released using the break glass panel described above. Note that residents will be charged for any repairs to the break glass panel resulting from unnecessary or inappropriate use. If the building power supply fails The door entry system will continue to operate from a back-up battery for a limited period of time. Once the battery is exhausted, the door will remain unlocked until the power supply is restored. Nuisance calls To guard against nuisance calls, the action of calling successive apartment numbers will automatically cancel the call to your apartment. If the entry phone unit sounds but connection with the caller is impossible or the handset does not operate, this may be due to a caller pressing apartment numbers in quick succession rather than a fault with the system. Introduction Contents 1. Useful information and contacts 2. Looking after your home 3. Apartment fixtures, fittings and finishes 4. Apartment systems and services 5. Estate systems and services 6. Ecohomes Part 1: using your home 7. Ecohomes Part 2: local amenities 5. Estate systems and services 5.3 Basement car park The basement car park is accessed via a high-speed roller shutter door, which is operated remotely using a radio controlled transmitter fob. Use of the fob to access/exit the car park Drive slowly towards the shutter door (when approaching the car park from the outside, take particular care to drive slowly on the ramp). On approaching the roller shutter door, press the button once (a light on the unit should illuminate to indicate that a signal is being transmitted). The unit should function within a 10 metre range of the roller shutter door without being accurately directed. The roller shutter door will automatically open so the vehicle can pass, then close after a pre-set time. If the car park roller shutter door is obstructed The shutter door will remain open if the sensor detects any obstruction in the line of the gate. However, to avoid damage or potential injury, the shutter door must not be deliberately obstructed. If the car park roller shutter door fails to open or close Contact the managing agent as soon as possible to report the problem. Fob battery replacement The battery should be replaced at approximately 12-monthly intervals. Open the fob carefully, remove the battery (and disposed of appropriately) and replace it with a new battery of the same type. Reassemble the unit and check that the light illuminates. Notes Security of radio transmitter units and vehicles To reduce the risk of vehicle theft from the basement car park, radio transmitter units should neither be left inside nor on display in vehicles. Introduction Contents 1. Useful information and contacts 2. Looking after your home 3. Apartment fixtures, fittings and finishes 4. Apartment systems and services 5. Estate systems and services 6. Ecohomes Part 1: using your home 7. Ecohomes Part 2: local amenities Use of car park fob For safety and security reasons, the unit should only be activated when in sight of the roller shutter door. Replacement car park fobs Replacement fobs may only be ordered from the managing agent and only after a previously issued fob has been disabled. Residents are responsible for the cost of replacement fobs. 5. Estate systems and services 5.4Fire The communal areas are protected by a building fire protection system, which includes break glass panels at key locations, alarm sounders and opening vents which provide smoke ventilation in the event of a fire. If a fire is discovered in the communal areas: 1 2 -Activate the alarm using the nearest break glass panel (image 1). This will open the nearest smoke vent. - Telephone the emergency services on 999 and take instruction on whether or not to leave the building. The attending fire officers will instigate evacuation procedures if necessary. -Do not do anything which would endanger you or others. -If required to leave the building, close all doors as you go and use a fire escape stair and not the lift. Exit the building using the fire escape door on the ground floor level of the staircase. -Do not re-enter the building until it is declared safe by the attending fire officers. Notes False alarms Report any false alarm to the managing agent immediately. Vent control panel The vent control panel (image 2) is for use by the building manager and emergency services only. Misuse of the fire alarm system The fire alarm system must only be used in a genuine emergency. Any resident or visitor responsible for misuse of the system or deliberate false alarms may be held liable for all associated costs - these costs may include engineer’s call-out charges, repair and re-setting of the fire alarm system and charges levied by the emergency services for unnecessary call out. Introduction Contents 1. Useful information and contacts 2. Looking after your home 3. Apartment fixtures, fittings and finishes 4. Apartment systems and services 5. Estate systems and services 6. Ecohomes Part 1: using your home 7. Ecohomes Part 2: local amenities 5. Estate systems and services 5.5Lighting Common parts lighting To reduce electricity consumption, the lights to the communal and external areas are controlled with photocells and/or movement sensors. The communal and external lighting system is maintained by the managing agent. Please advise the managing agent if any lights are not working correctly. Notes Mains power failure In the event of electricity supply failure the communal emergency lighting will be maintained from a battery back-up supply. Introduction Contents 1. Useful information and contacts 2. Looking after your home 3. Apartment fixtures, fittings and finishes 4. Apartment systems and services 5. Estate systems and services 6. Ecohomes Part 1: using your home 7. Ecohomes Part 2: local amenities 5. Estate systems and services 5.6Lifts There is one lift in Pattern House, which serves all floor levels, including the undercroft car park. Apartment numbers are prefaced by the floor level (e.g. 403 is on level 4). To call a lift Press the ‘call’ button and the indicator light will illuminate to confirm the request. To ascend or descend Press the appropriate floor level button on the control panel. Floor level numbers will be displayed and announced automatically. Control of lift doors To hold the doors open, or to re-open doors to let someone in or out, press the ‘door open’ button ( <I> ) on the control panel. After a short period without movement in or out of the doorway, the lift car doors will automatically try to close (the automatic time period can be adjusted if required - refer to the managing agent). If the door sensors detect either movement, or an obstruction in the doorway, the lift car doors will remain open for a further period. After multiple failed attempts to close, the lift car doors will eventually lock open. Passengers must not lean against or attempt to prop doors open because this will affect the operation and may damage the lift. Emergency procedures For emergency purposes, the lift cars are fitted with a push-button alarm, an emergency telephone line and battery back-up lighting. If a passenger is trapped in a lift car Press the emergency alarm button for at least 5 seconds; the lift car is automatically connected to the lift company control centre using the telephone line. The emergency operator will talk to the passenger and advise them how long it may be before an engineer can release them. Any residents hearing the alarm should try to talk to the trapped passenger and, if necessary, call the managing agent. Introduction Contents 1. Useful information and contacts 2. Looking after your home 3. Apartment fixtures, fittings and finishes 4. Apartment systems and services 5. Estate systems and services 6. Ecohomes Part 1: using your home 7. Ecohomes Part 2: local amenities If the lift doors fail to open If the lift car travels to a floor, but the doors fail to open automatically or when the ‘door open’ push-button ( <I> ) has been pressed, the passenger should attempt to return to the floor on which they entered the lift BEFORE activating the ‘alarm’ push-button. 5. Estate systems and services Notes Use of the lifts The lifts are primarily intended to carry passengers and their light luggage, but the lifts can be used to move furniture and bulky items. If this is necessary, prior arrangements should be made with the managing agent so that protective cladding for the lift car can be installed (if needed). The managing agent will also be able to issue a key to the hold the lift doors open whilst objects are loaded / unloaded. Lift weight restriction and measurements Refer to the managing agent for guidance - residents are strongly advised to check these details before purchasing or attempting to move any bulky objects. Damage to the lifts Residents will be held responsible for any damage caused to the lift and the cost of repairs, particularly if the above guidance is not followed. Problems with the lifts All problems with the lift should be reported to the managing agent immediately. Introduction Contents 1. Useful information and contacts 2. Looking after your home 3. Apartment fixtures, fittings and finishes 4. Apartment systems and services 5. Estate systems and services 6. Ecohomes Part 1: using your home 7. Ecohomes Part 2: local amenities 5. Estate systems and services 5.7 Refuse disposal and recycling Refuse arrangements The residential refuse store is located in the undercroft car park. There are no waste chutes or compactors in Pattern House. Residents are required to: -Take their refuse to the refuse storage located in the undercroft car park. -Place recyclable materials in the appropriate containers, when provided. -In the interests of hygiene, ensure that waste is transferred in secure bags, avoiding spillage in the communal areas. Bulky waste There is no specific facility for the storage and disposal of bulk waste in Pattern House. Residents must make their own separate arrangements for the collection and of bulk waste, such as unwanted appliances, furniture or packaging materials. The Local Authority offers a bulk waste collection service and should be contacted as needed. Recycling Space has been provided in the basement refuse store for recycling of specified waste products in accordance with the Local Authority recycling strategy and the appropriate bins will be installed when available. Notes Residents are personally responsible for transferring their refuse to the dedicated waste chutes. Residents must not leave refuse or bulk waste in the communal areas. Any waste which is dropped or any spillages which occur when transferring waste to the basement store must be cleaned up by the resident. Introduction Contents 1. Useful information and contacts 2. Looking after your home 3. Apartment fixtures, fittings and finishes 4. Apartment systems and services 5. Estate systems and services 6. Ecohomes Part 1: using your home 7. Ecohomes Part 2: local amenities 6. Ecohomes part 1: using your home Introduction Contents 1. Useful information and contacts 2. Looking after your home 3. Apartment fixtures, fittings and finishes 4. Apartment systems and services 5. Estate systems and services 6. Ecohomes Part 1: using your home 7. Ecohomes Part 2: local amenities 6. Ecohomes part 1: using your home Ecohomes is an environmental rating system for buildings in the UK. Developed by the Building Research Establishment In 2000, and updated in 2006, it has been used to analyse the development of Pattern House, evaluating not only the built form, but how the design interacts with local amenities, transport links and accounting for the end user energy consumption of dwellings within it. Pattern House has been designed to be Ecohomes “Good”. 6.1 Environmental design features The design of the homes at Pattern House incorporated many environmental features which reduce the level of energy consumption when lived in. The building envelope is made of a suspended cladding system, which is produced off site in high quantities which makes it use up less resources. The system is designed to incorporate high levels of insulation to increase the thermal performance - in fact the system is more efficient than a standard cavity filled brickwork wall. The installation of panels is very quick and construction activity decreased, again reducing resources required. The thermal performance of the building is enhanced again by using high performance floor to ceiling windows, with a low U-value of thermal transmittance. This traps thermal energy from the sun and retains it inside the dwelling. As the apartments are mostly surrounded or have party walls with other heated dwellings, they perform higher than an isolated detached house. Heating inside the apartment uses energy efficient, thermostat and timer controlled, underfloor heating system, making it more efficient than other comparative types of heating. Water heating is done by the fully insulated 170 ltr water tank - also thermostat and timer controlled. Addition to this mechanical services use water flow restrictors on all water consumable installations and also humidistats to regulate the amount of ventilation the bathroom uses. Introduction Contents 1. Useful information and contacts 2. Looking after your home 3. Apartment fixtures, fittings and finishes 4. Apartment systems and services 5. Estate systems and services 6. Ecohomes Part 1: using your home 7. Ecohomes Part 2: local amenities Pattern House is assessed using the Building Research Establishment’s Ecohomes criteria. The development has scored well in terms of building footprint, ecological enhancements, transport links and local amenities. The construction process scores well for global warming potential of building materials and site impacts. Other items such as dwelling emission rate and renewable energy generation do not score as well due to the fact the scheme was designed to meet pre-2010 building regulations. A copy of the Ecohomes certificate is included in your home owners pack. 6. Ecohomes part 1: using your home 6.2Energy In line with the requirements set out in Building Regulations Part L1, full information regarding installation, programming and repair of both heating systems and mechanical ventilation systems are contained within your home owner pack. Urban Splash have employed a third party Health & Safety consultant to confirm that the information supplied allows users to make seasonable adjustments and easy to use step by step maintenance. All energy fittings in the entire development are classified as low energy, which use considerably lower amounts of electricity. The building envelope incorporates 200mm of insulation. The building envelope can be made to be more efficient through installation of draft excluders and keeping ventilation to a minimum. The programmable timers and thermostats on both heating systems will assist in lowering the energy consumption of the dwelling. Further energy saving measure can be incorporated, such as not leaving appliances on standby, reducing the amount of electrical items on charge from the mains and replacing light fittings with energy efficient bulbs. The Energy Saving Trust estimates that if best practice guidelines are put into effect, the average household saving would be over £250 (equivalent to 1.5 tonnes of CO2). Introduction Contents 1. Useful information and contacts 2. Looking after your home 3. Apartment fixtures, fittings and finishes 4. Apartment systems and services 5. Estate systems and services 6. Ecohomes Part 1: using your home 7. Ecohomes Part 2: local amenities 6. Ecohomes part 1: using your home 6.3 Water usage The toilets have been designed to be “low flow” to reduce water consumption. The baths have been specified within the BRE’s best practice standards, plus additionally in line with Ecohomes requirements. No dishwasher appliances have been installed as they are highly energy inefficient. Across the home these water saving fittings will use on average over 25% less water than standard fittings. These measures can be built upon by residents if they follow good practice advice, such as not leaving the tap running when brushing their teeth and only washing clothes in the machine when there is a full load. Showers rather than baths are also advised as this uses less water. Introduction Contents 1. Useful information and contacts 2. Looking after your home 3. Apartment fixtures, fittings and finishes 4. Apartment systems and services 5. Estate systems and services 6. Ecohomes Part 1: using your home 7. Ecohomes Part 2: local amenities 6. Ecohomes part 1: using your home 6.4 Recycling and waste Pattern House benefits from a segregated recycling and normal refuse strategy, which has been approved by Tameside Council This includes 6,600 ltrs of general waste, 1,200 ltrs of paper, 420 ltrs of plastic and 420 ltrs of glass, collected every week. The fitted bins in the kitchens allows users to segregate materials for depositing in the individual receptacle bins. The refuse strategy does not cover some waste, such as redundant fridge/freezers and computer equipment. This can be taken to the nearest municipal household waste site, located at Bayley Street, Stalybridge. If you have any queries regarding this please contact Tameside Council on 0161 342 8355. Introduction Contents 1. Useful information and contacts 2. Looking after your home 3. Apartment fixtures, fittings and finishes 4. Apartment systems and services 5. Estate systems and services 6. Ecohomes Part 1: using your home 7. Ecohomes Part 2: local amenities 6. Ecohomes part 1: using your home 6.5 Sustainable DIY Whilst your apartment at Pattern House probably wont need any work, if you feel it does please ensure you use sustainable supplies of building materials, such as certified sustainable timber, low-voltage electrical appliances and environmentally friendly paint and other finishes. Introduction Contents 1. Useful information and contacts 2. Looking after your home 3. Apartment fixtures, fittings and finishes 4. Apartment systems and services 5. Estate systems and services 6. Ecohomes Part 1: using your home 7. Ecohomes Part 2: local amenities 6. Ecohomes part 1: using your home 6.6 Emergency information The apartments are installed with heat detectors in the kitchen and smoke detectors. Instructions regarding them are contained in the home owner manual. They have a simple reset button on the fitting. They are not linked into the communal sensing system as the apartments benefit from full fire 60-minute fire containment. In the event of an emergency the nearest accident and emergency department is located at: Tameside General Hospital Fountain Street Ashton-under-Lyne Lancashire OL6 9RW Remember that in the event of an emergency please telephone 999. Introduction Contents 1. Useful information and contacts 2. Looking after your home 3. Apartment fixtures, fittings and finishes 4. Apartment systems and services 5. Estate systems and services 6. Ecohomes Part 1: using your home 7. Ecohomes Part 2: local amenities 6. Ecohomes part 1: using your home 6.7 Links, references and other information www.energysavingtrust.org.uk 020 7222 0101 21 Dartmouth Street London SW1H 9BP Charitable agency tasked with increasing awareness of energy saving methods. http://actonco2.direct.gov.uk/home.html 0800 512012 Campaign by EST centred around household energy consumption. www.sustrans.org.uk 0117 926 8893 2 Cathedral Square College Green Bristol BS1 5DD Charitable pro-cycling organization with nationwide event and campaign network. www.tameside.gov.uk 0161 342 8355 Council Office Wellington Road Ashton-under-Lyne OL6 6DL Local authority for Pattern House - all services including council tax, schools and local services. Introduction Contents 1. Useful information and contacts 2. Looking after your home 3. Apartment fixtures, fittings and finishes 4. Apartment systems and services 5. Estate systems and services 6. Ecohomes Part 1: using your home 7. Ecohomes Part 2: local amenities 7. Ecohomes part 2: local amenities Introduction Contents 1. Useful information and contacts 2. Looking after your home 3. Apartment fixtures, fittings and finishes 4. Apartment systems and services 5. Estate systems and services 6. Ecohomes Part 1: using your home 7. Ecohomes Part 2: local amenities 7. Ecohomes part 2: local amenities 7.1 Public transport Stalybridge bus station is within 140m walking distance of Longlands Mill, as indicated on the map below. The list of bus services is also included. These are subject to change from time to time so it is advisable to check the operators websites listed below. Timetables Local bus routes noted above are available here: www.tfgm.com Introduction Contents 1. Useful information and contacts 2. Looking after your home 3. Apartment fixtures, fittings and finishes 4. Apartment systems and services 5. Estate systems and services 6. Ecohomes Part 1: using your home 7. Ecohomes Part 2: local amenities 7. Ecohomes part 2: local amenities Introduction Contents 1. Useful information and contacts 2. Looking after your home 3. Apartment fixtures, fittings and finishes 4. Apartment systems and services 5. Estate systems and services 6. Ecohomes Part 1: using your home 7. Ecohomes Part 2: local amenities 7. Ecohomes part 2: local amenities Introduction Contents 1. Useful information and contacts 2. Looking after your home 3. Apartment fixtures, fittings and finishes 4. Apartment systems and services 5. Estate systems and services 6. Ecohomes Part 1: using your home 7. Ecohomes Part 2: local amenities 7. Ecohomes part 2: local amenities Stalybridge train station is within 300m walking distance of Longlands Mill as shown on the plan below. Stalybridge benefits from a large number of local and national train services linking Liverpool, Manchester, Leeds and beyond. Further details can be found at: www.nationalrail.co.uk www.thetrainline.com Introduction Contents 1. Useful information and contacts 2. Looking after your home 3. Apartment fixtures, fittings and finishes 4. Apartment systems and services 5. Estate systems and services 6. Ecohomes Part 1: using your home 7. Ecohomes Part 2: local amenities 7. Ecohomes part 2: local amenities 7.2 Local amenities Local green space is nearby with Stamford and Cheetham Parks close to the site, The town path along the Huddersfield Canal also leads out to open countryside beyond Hartshead Power Station. Introduction Contents 1. Useful information and contacts 2. Looking after your home 3. Apartment fixtures, fittings and finishes 4. Apartment systems and services 5. Estate systems and services 6. Ecohomes Part 1: using your home 7. Ecohomes Part 2: local amenities 7. Ecohomes part 2: local amenities 39 cycle storage racks are available to residents; they are securely located under the podium deck and available to anyone who lives at Pattern House. The local cycle path network map can be viewed here: www.tameside.gov.uk/cycling/maps Over 80 vehicular parking spaces are provided at Longlands, located in two car parks - one beneath the podium and one adjacent to buildings, and they are available to all residents. Long leaseholds can be purchased with apartments and license options are available also. Contact Urban Splash Sales for more information. Due to Longlands’ central location it has easy access to the town centre and its amenities, less than 140m to the central bus station and 300m to the train station. Introduction Contents 1. Useful information and contacts 2. Looking after your home 3. Apartment fixtures, fittings and finishes 4. Apartment systems and services 5. Estate systems and services 6. Ecohomes Part 1: using your home 7. Ecohomes Part 2: local amenities 7. Ecohomes part 2: local amenities 7.3 Responsible purchasing The white goods supplied in the apartments are all A-rated and as such replacements should be the same, if not better, to upkeep the high environmental standard of the development Low-energy fittings have been used, which only accept replacement low-energy bulbs. As such replacements should be the same. When purchasing consumables, why not try the nearby shops. Introduction Contents 1. Useful information and contacts 2. Looking after your home 3. Apartment fixtures, fittings and finishes 4. Apartment systems and services 5. Estate systems and services 6. Ecohomes Part 1: using your home 7. Ecohomes Part 2: local amenities CD appendices INSTALLATION - Once installed, the appliance must be no less than 70cm away from a Caple gas hob. - If the instructions for the installation of an alternative gas hob specify a greater distance, please take this into account. Electrical Connection - Before making any electrical connections, make sure that the voltage of the electrical mains corresponds with the value indicated on the appliance rating sticker. It is highly recommended that the electrical connection be made by a qualified electrician. If the appliance is fitted with a plug, insert the plug into a socket that complies with the applicable norms in force. Once plugged into the socket, the plug must be easily accessible. If you intend to connect the hood directly to the electrical mains, remove the plug and add a standard bipolar switch with a minimum contact opening of 3 mm. If the appliance is not fitted with a plug, fit a standard plug or a standard bipolar switch compliant with the applicable norms in force, with a minimum contact opening of 3 mm. The manufacturer will not be held responsible for any problems arising from failure to comply with the above instructions. CLASS I APPLIANCES MUST BE EARTHED The connection must be made as follows: BROWN = L (current) BLUE = N (neutral) YELLOW/GREEN = (earth) CLASS 2 APPLIANCES DO NOT HAVE TO BE EARTHED Class 2 appliances labelled with a rating sticker featuring the symbol in the form of a double square must be connected as follows: BROWN = L (current) BLUE = N (neutral) USE The hood is designed to be used either to filter and re-circulate air or in a ducted vented mode OUTDOOR VENTED INSTALLATION The air is ducted to the outside along a pipe which should be connected to the Ø 120-150mm hood outlet opening by means of connector ring "A" (Fig. 1). The hood outlet should not be connected to a duct where hot air circulates or used to vent the flue gases of appliances that run on energy sources other than electricity. Take care when operating a vented hood at the same time as a burner or furnace which uses the air inside the room (powered by an energy source other than electricity), as the suction action of the former removes the ambient air necessary for the combustion of the latter. For the safe operation of your appliance, ensure the room is suitably aired, by opening doors, windows or by means of specific technical devices. Follow the guidelines set by the applicable norms in force for outdoor venting. The cooking vapours must not be vented to the outside along a flue used for the flue gases of appliances powered by energy sources other than electricity. VENTLESS FILTERING INSTALLATION When the air cannot be vented to the outside, the hood can be fitted with an activated carbon filter "D". The air is purified by the filter and recirculated into the room. To use this operating mode, proceed as follows: - Insert the carbon filter "D" (Fig. 2); The air is re-circulated into the room via a Ø 120-150 mm pipe passing through the cabinet and fastened to the connector ring "A"; 1 The metal filter has an almost unlimited life, and should be washed like the synthetic filter, leaving it to dry thoroughly before repositioning. The forged aluminium grids should be washed by hand or in your dishwasher once a month. Allow them to dry thoroughly before remounting. Failure to comply with the washing instructions could result in a fire hazard. Carbon filter The activated carbon filter is only used by the ventless, filtering version, and is designed to trap odours and clean the air. The carbon filter is saturated after a varying amount of time depending on the type of cooker used and on how regularly the grease filter is cleaned. In any case, the cartridge must be replaced at least once every four months. TO REMOVE IT, PROCEED AS FOLLOWS: - Remove the frame; - Turn the central knob on the carbon filter anticlockwise and pull the filter out of its seat (Fig. 2); To mount the new filter, repeat the above instructions in the reverse order. Wipe off all deposits from the fan and other hood surfaces frequently, using a cloth dampened with denatured alcohol or non-abrasive mild liquid detergents. INCANDESCENT LAMP REPLACEMENT 40W (E14) max - Unplug the appliance from the electrical power supply; - Remove the grid; - Replace the faulty lamp with one of the same wattage. INSTALLING THE HOOD Once you have decided on which installation you prefer, proceed with the actual installation. - This appliance is designed to be built into a cabinet or other support. - The cut-out on the bottom of the cabinet should feature the dimensions shown in figure 4. To fasten the hood in place, proceed as follows: - Remove the frame by pressing buttons "B" (Fig. 3); *WARNING: if your hood is fitted with halogen lamps, disconnect connectors "F" (Fig. 3.1); - Fit the hood into the cut-out; - Screw in the screws provided with the appliance in slots "C", securing the unit to the cabinet (Fig. 4); - Reposition the frame. *WARNING: if your hood is fitted with halogen lamps, connect the spotlights before repositioning the frame. MAINTENANCE The correct operation of the hood is directly related to how often it is cleaned and serviced, especially the grease filter and the activated carbon filter. Grease filter The grease filter traps any grease particles and solids suspended in the air. It therefore tends to clog over time, depending on how often the hood is used and on the type of cooker installed. In any case, it should be cleaned or replaced at least every other month. The grease filter is available in four versions: acrylic, paper, metal or forged aluminium grids. The acrylic filter should be hand washed in lukewarm water with mild liquid detergent, leaving it to soak until it is free of all grease and impurities. Leave to dry without wringing. The paper filter cannot be washed and must be replaced when the red lines appear on the bottom (these can be seen through the openings in the grid). WARNING! ELECTRIC HOUSEHOLD APPLIANCES CAN BE DANGEROUS IN CERTAIN CIRCUMSTANCES. - Do not attempt to check the filters when the hood is in operation. - Do not obstruct any air outlets. 2 - Do not touch the lamps or lamp diffusers after prolonged use of the hood. - Do not flambé food underneath the hood. - Avoid leaving an open flame uncovered, as it could damage the filters and increase the risk of fire. - Never leave frying food unattended to prevent hot oil from catching fire. - Disconnect the hood from the electrical mains before performing any maintenance operations. - If the supply cord is damaged it must be repaired by its manufacturer, its Service Agent or a similarly qualified person in order to avoid a hazard. - This appliance must be installed following the national regulations for electrical installations. - The manufacturer will not be held responsible for any damage caused due to failure to comply with the above warnings. NOT WORKING PROPERLY? Light bulb doesn’t come on? A replacement bulb is probably necessary, but first check that the bulb is firmly fitted. If the filament is broken, remember, remember that the light bulbs are not covered by our guarantee. Remember to disconnect the power supply before removing the bulb. Motor is on but fan doesn’t seem to be as efficient as usual? Check the grease filter mat. If it hasn’t been cleaned recently, it might be clogged with grease. If the filter mat is relatively clean, check the charcoal filter. If this hasn’t been replaced for more than six months, remove it and insert a new one. Works normally but cooking smells linger? If you’re using the unit in re-circulation mode, change the charcoal filter. It is obviously past it’s prime. Control fails to switch motor on? Check the plug, socket and fuse. If these are in order and the fault persists, it could be that an accumulation of grease has impaired the efficiency of the switch mechanism. Try rapidly moving the switch on and off several times in succession to clear grease deposits. If the fault continues, call the service agent. Appliance does not work at all? Check your extractor is switched on at the mains. Next, check for an unexpected power failure by switching on adjacent lights etc. Still not working? Call the service agent on 0870 2411 1 3 Uniclass L532: P511 EPIC E411: X52/3 CI/SfB (43) Contract Range Pre-Finished Hardwood Flooring Hi3 ATKINSON & KIRBY LTD HAVE BEEN PRODUCING HARDWOOD FLOORING FOR OVER 100 YEARS, AND OUR REPUTATION PRECEDES US. WE PRIDE OURSELVES ON ONLY MANUFACTURING AND SUPPLYING QUALITY HARDWOOD FLOORING AND ACCESSORIES AND PRESENTING THEM TO OUR CUSTOMERS WITH THE HIGHEST LEVELS OF CUSTOMER SERVICE AND EFFICIENCY. ALL OUR PARTNER MILLS ARE VISITED REGULARLY TO ENSURE THAT THEY MEET OUR STANDARDS AND TO ENSURE THAT PRODUCT QUALITY IS MAINTAINED. THE CONTRACT COLLECTION HAS BEEN SPECIFICALLY PUT TOGETHER TO MEET THE DEMANDS OF THE COST, YET QUALITY, CONSCIOUS CONTRACT MARKET. OAK IS BY FAR THE MOST POPULAR TIMBER SPECIES FOR WOOD FLOORING AND THE CONTRACT COLLECTION RECOGNISES THIS BY UTILISING IT IN MANY FORMATS. Solid Maple Mill Run CONTRACT RANGE SOLID CONTRACT SOLID OOZES CHARACTER, WITH ALL THE KNOTS AND COLOUR VARIATION THAT YOU WOULD EXPECT TO SEE IN A NATURAL REAL WOOD FLOOR. THIS LITTLE TOUCH OF LUXURY UNDER FOOT IS SUITABLE FOR USE IN BOTH COMMERCIAL AND DOMESTIC AREAS. White Oak Natural CONTRACT RANGE MULTI-LAYER WHEN AFFORDABILITY IS OF PRIME IMPORTANCE, CONTRACT MULTI-LAYER IS AN IDEAL CHOICE. DURABLE OILED AND LACQUERED FINISHES ARE AVAILABLE IN A CHOICE OF 3 STRIP OR PLANK CONSTRUCTION. FOR THOSE WHO WOULD LIKE THE ADDED REASSURANCE THAT THEIR FLOORING COMES FROM WELL MANAGED SOURCES, THE LACQUERED FINISHES ARE AVAILABLE AS FSC CERTIFIED (TT-COC-002266), SO YOU CAN BE EXTRA SAFE IN THE KNOWLEDGE THAT YOUR FLOORING HAS COME FROM A SUSTAINABLE SOURCE. White Oak Plank MADE TO THE SAME SPECIFICATION AS CONTRACT MULTI-LAYER BUT ENCOMPASSING THE CONVENIENCE OF A CLICK PROFILE. IF YOU ARE LOOKING FOR THE CHARACTER AND GRAIN OF OAK, BUT STILL WANT SOMETHING A LITTLE DIFFERENT THEN ASIDE FROM THE STANDARD LACQUERED 3 STRIP AND PLANK, CLICK ALSO INCLUDES WHITE BIRCH, HONEY AND COFFEE STAINED OAK IN AN OILED FINISH. White Oak Click 3 Strip CONTRACT SOLID RANGE SPECIFICATIONS Thickness: Length: Face Width: Finish: 18mm Random (Average varies according to width) White Oak: 90mm, 110mm, 120mm, 130mm and 150mm Maple: 125mm 7 coats of UV acrylic seal or Brushed and UV Oiled. Tongue, grooved and end matched with micro bevelled edges. Load bearing when laid on to joists or battens. Maple Mill Run White Oak Natural (Prime also available) CONTRACT MULTI-LAYER RANGE SPECIFICATIONS Single Strip (Plank) Single Strip (Plank) 15mm 15 x 189 x 1830mm 7 coats of UV cured seal. Square edges. Hardwood Wear Layer: 4mm Softwood Core: 9mm Back Veneer: 2mm Grade: Natural Thickness: Board Size: Finish: 14mm 14 x 148 x 1830mm 7 coats of UV cured seal or UV Oil. Micro bevelled edges. Hardwood Wear Layer: 3.6mm Softwood Core: 9mm Back Veneer: 1.4mm Grade: Natural Thickness: Board Size: Finish: 3 Strip 14mm 14 x 189 x 2200mm 7 coats of UV cured seal. Square edges. Hardwood Wear Layer: 3.6mm Softwood Core: 9mm Back Veneer: 1.4mm Grade: Natural Thickness: Board Size: Finish: White Oak Plank White Oak Plank (Oiled) White Oak 3 Strip CONTRACT CLICK RANGE SPECIFICATIONS Plank 3 Strip 14 x 127mm x Random lengths (White Birch) 15 x 189 x 1830mm Finish: 7 coats of UV lacquer or Brushed & UV Oiled. Micro bevelled edges. Hardwood Wear Layer: 4mm Grade: Natural Board Size: Finish: Board Size: 14 x 189 x 2200mm 7 coats of UV lacquer Square edges. Hardwood Wear Layer: 3mm Grade: Natural 2 Strip 14 x 189 x 2200mm 7 coats of UV lacquer Square edges. Hardwood Wear Layer: 3mm Softwood Core: 9mm Grade: Natural Board Size: Finish: White Birch White Oak Honey Oak Coffee Oak TECHNICAL INFORMATION GRADE DESCRIPTIONS Natural Grade A flooring product that contains the natural character of the timber, will contain variations in colour and varying characteristics. Open characters such as checks and knotholes are admitted but must be sound and readily filled. Mill Run Unselected, as the timber will provide. Prime/Select This is the highest grade containing predominantly heartwood but containing some sapwood. And provides a floor with a generally uniform appearance. Allow for small burs and equivalent characters such as tight checks and it will be as the timber produces. MAINTENANCE GUIDANCE The Diamond Range is suitable for use in Commercial and Domestic situations. As with all Hardwood Floors maintenance is the key to lifelong service and beauty. Wood will mature with age, some colours will change and get a richer tone by exposure to UV light (sunlight). By following these simple maintenance guidelines you will maintain the natural beauty of the floor. You should always remember, wood is a natural product; its looks will improve as the floor matures. By following these simple guidelines your Atkinson & Kirby Hardwood Floor will remain attractive and give many years of use. STAINS As with all floor coverings stains should be removed whilst they are still wet. After removal of the stain wipe the floor with a clean damp cloth. REPAIRS Small nicks and scratches can be touched up using our colour-matched fillers. For slightly larger areas a small amount of our Touch-Up sealer can be mixed with the filler. In the case of larger areas of damage the floor can be sanded and resealed. Only a suitable expert should carry out this type of work. RE-SEALING / REJUVENATING ROUTINE MAINTENANCE Dirt and Grit are the enemies of all Wooden Floors. Make sure that a sturdy doormat is in place both inside and outside all exterior access doorways. Sharp objects can damage your floor. Always protect the floor by using felt pads on furniture legs. Don’t forget that pet’s claws, stiletto heels and sharp objects can scratch and damage the floor. VACUUM & DAMP CLEAN After a period of time you may find that in some areas (entranceways, high traffic areas etc.) the floor starts to look dull. In the first instance use Atkinson & Kirby’s Refinisher. For best results this should be used with our Refinisher Applicator. With correct maintenance your Hardwood Floor will give many years of use, adding a warmth and beauty. Supplies of Atkinson & Kirby maintenance products are available from your local supplier. Use a Vacuum cleaner on a daily basis. This will remove Dirt and Grit and prevent it from scratching the floor surface. For more thorough cleaning use a damp mop or cloth with a light spray of Atkinson & Kirby Finitec Cleaner. Remember, you must never use too much water on wooden floors. Standing water should be removed immediately. IMPORTANT DO’S AND DONT’S DO DON’T • Clean the floor regularly. • Wipe up any spilt liquids immediately (wood will absorb liquids and expand). • Use protective pads under all furniture legs. • Use barrier mats at all external doors. • Protect your floor from grit. • Keep the ambient temperature to 20ºC. • Use a DAMP mop to clean the floor. • Allow liquid to stand on the floor, this can cause the wood to expand. • Use abrasive cleaners, these will damage the seal. • Allow sharp or abrasive objects to come into contact with the floor. Please note that stiletto heels and pet’s claws may damage hardwood flooring. For further information on fitting and maintenance, please contact your hardwood flooring supplier or Atkinson & Kirby direct. Other ranges also available: Traditional Range Solid Unfinished Hardwood Flooring Diamond Range Solid and Multi-Layer Pre-Finished Hardwood Flooring Platinum Range 15mm Pre-Finished Multi-Layer Hardwood Flooring Platinum Clic 15mm Pre-Finished Glueless Multi-Layer Hardwood Flooring Platinum Fine Line 15mm Contemporary Pre-Finished Multi-Layer Hardwood Flooring © Discounts for CFA members. The FSC Logo identifies products which contain wood from well managed forests certified in accordance with the rules of the Forest Stewardship Council. TT- COC-002266 © 1996 Forest Stewardship Council A.C. Head Office: Atkinson & Kirby Ltd., Atkinson Road, Ormskirk, Lancashire, L39 2AJ T +44 (0) 1695 573234 F +44 (0) 1695 586902 London Office: Atkinson & Kirby Ltd., Unit 4, Inwood Business Centre, Whitton Road, Hounslow, Middlesex, TW3 2EB T +44 (0) 208 577 1100 F +44 (0) 208 577 0400 E [email protected] W www.akirby.co.uk Refrigerator - Freezer GB Thank you for your trust and for buying this appliance. We hope it will successfully serve the purpose for many years. Refrigerator with freezer is for domestic use only. The lower part of the appliance is refrigerator and is used for storing fresh foods at the temperature of 0°C and higher. The upper part is freezer and is used for freezing fresh foods and storing frozen foods for longer periods of time (up to one year, depending on the kind of foods you store). The compartment is marked with four stars. Before Putting Into Use................................................ 11 Instructions for Use Mounting Instructions We Care for the Environment Tips for Energy Savings Operation Control.........................................................14 Temperature Selection Use ..................................................................................14 Important ...................................................................... 12 Disposing of the Worn Out Appliance Placing and Installation ............................................... 12 Choosing the Right Place Connection to Power Supply Adjusting the height of the appliance Description of the Appliance ....................................... 12 Storing Fresh Foods Freezing Fresh Foods Storing Frozen Foods Defrosting Frozen Food How to make ice cubes Maintenance and Cleaning...........................................16 Automatic Defrosting of the Refrigerator Manual Defrosting of the Frezing Compartment Cleaning the Appliance Switch Off the Appliance When Not In Use Trouble-Shooting Guide ...............................................17 Before Putting Into Use • Before connecting the appliance to the mains supply, place it on the location where it will later on be installed and leave it for about 2 hours, which will reduce a possibility of malfunctions in the cooling system due to transport handling. • Clean the appliance, and be thorough, especially in the interior (See Cleaning and Maintenance). • In case the interior accessories are not correctly placed, rearrange them as described in chapter "Description of the Appliance". Instructions for Use These instructions for use are intended for the user. They describe the appliance and its correct and safe use. They were prepared for various types of refrigerators therefore you might find in it some functions that do not apply to your appliance and description of the accesories that your appliance does not include. • When your appliance finally wears out, please try not to burden the environment with it; call your nearest authorised service agent. (See Disposing of the Worn Out Appliance) Tips for Energy Savings • Try not to open the door too often, especially when the weather is wet and hot. Once you open the door, mind to close it as soon as possible. This is especially important if you have an upright model. • Check periodically if the appliance is provided with sufficient cooling (undisturbed circulation of air through the bottom rail openings). Mounting Instructions Integrated appliances are equipped with instructions for mounting the appliance into the kitchen unit. The appliance should be mounted by qualified technician and instructions are for his use only. We Care for the Environment • Our products use environmentally friendly packaging, which can be either recycled or disposed of in an environmentally friendly manner. To this end, individual packaging materials are clearly marked. • These instructions are printed either on recycled paper or chlorine free bleached paper. Instructions for Use 11 • Use higher thermostat settings only when required or recommended. • Before loading the appliance with packages of fresh foods, make sure they are cooled to ambient temperature. • Ice and frost layer increase energy consumption, so do clean the appliance as soon as the layer is 3-5 mm thick. • If the gasket is damaged or if it turns out that the sealing is poor, the energy consumption is substantially higher. To restore efficiency, replace the gasket. • Condenser at the bottom of the appliance must always be clean and dust free (see Section Cleaning of the Appliance). • Always consider instructions stated in sections Positioning and Energy Saving Tips, otherwise the energy consumption is substantially higher. Important • If you have bought this appliance to replace an old one equipped with a lock that cannot be opened from inside (lock, bolt), make sure that the lock is broken. This will make it impossible for children to lock themselves inside the appliance and suffocate. • The appliance must be correctly connected to the mains supply. (see: Connecting to the Mains Supply). • Do not touch the cooled surfaces while the appliance operates, especially not with wet hands, because the skin may stick to the cold surfaces. • Do not freeze bottles containing liquid, especially not soft drinks, such as mineral water, sparkling wine, beer, cola etc., because liquid expands during freezing and the glass bottle is very likely to blow up. • Do not eat frozen food (bread, fruit, vegetables), because you can get frostbites. • If the food has strange smell or color, throw it away, because it is very likely that it is spoiled and therefore dangerous to eat. • Disconnect the appliance from the power supply before repairing it (only a qualified technician should repair it), before cleaning and before replacing the light bulb. • Do not defrost the appliance with other electric appliances (as for example with hair dryer) and never scrape the frost layer with sharp objects. Use only enclosed tools or tools recommended by the manufacturer. • For the sake of environment protection - be careful not to damage the rear wall of the appliance (the condenser unit or the tubes - for example when moving the appliance) or any part of the refrigerating system inside the appliance. • The refrigerating system of the appliance is filled with refrigerant and oil, so when the appliance is damaged, handle it with care and dispose it of in compliance with environmental protecting precautions. (See We Care for the Environment). • In the supply cord is damaged, it must be replaced by the manufacturer or his service agent or a qualified person in order to avoid hazard. • The rating plate is inside the appliance or outside on the rear wall. The symbol on the product or on its packaging indicates that this product may not be treated as household waste. Instead it shall be handed over to the applicable collection point for the recycling of electrical and electronic equipment. By ensuring this product is disposed of correctly, you will help prevent potential negative consequences for the environment and human health, which could otherwise be caused by inappropriate waste handling of thisproduct. For more detailed information about recycling of this product, please contact your local city office, your household waste disposal service or the shop where you purchased the product. Disposing of the Worn Out Appliance • When your appliance finally wears out, dispose it of. If the appliance has a lock, break it, in order to prevent eventual accidents (danger of children get locked inside the appliance). • The refrigerating system of the appliance is filled with refrigerant and insulating substances which should be separately treated and processed. Call your nearest authorised service agent or specialised servicing centre. If you don't find one, contact your local authorities or your distributor. Be careful not to damage the tubes on the rear wall of the appliance (danger of pollution). • To avoid pollution of the environment make sure not to damage the hose at the bottom of the appliance. Placing and Installation regulations. The appliance resists temporary voltage tolerance up to -15 to +10 %. Choosing the Right Place Place the appliance in dry and regularly ventilated room. Allowed ambient temperature depends on the model (class) of the appliance and is stated on the rating plate of the appliance. Never place the appliance near heat emitting devices (e.g. cooker, radiator, water heater or similar devices) and do not expose it to direct sunlight. The appliance should be positioned at least 3 cm away from the electric or gas cooker and at least 30 cm away from the oil or coal stove. If this is not possible, use an appropriate insulation. Class SN (sub-normal) N (normal) Adjusting the height of the appliance The appliance is equipped with four adjustable legs, so that the height may be adjusted from 82 to 90 cm. The height must be adjusted prior building the appliance into the opening slot, and it should be set at such height that the top panel of the appliance fits exactly below the kitchen worktop (see Mounting Instructions). Ambient temparature from + 10°C to + 32°C from + 16°C to + 32°C Connection to Power Supply Connect the appliance with the cable and plug to the power supply socket outlet with a ground terminal (safety socket). Required nominal voltage and frequency are indicated on the rating plate. The connection to the mains supply and earthing have to be made according to current standards and 12 Instructions for Use Description of the Appliance Refrigerator (A) Refrigerator is used for storing fresh foods for few days. Freezer (B) Freezer is used for freezing fresh foods and for storing already frozen foods. Opening the freezer door − select the height of your choice and push the shelf all the way in to the rear end of the guide slot. In case you may wish to remove the shelf from the appliance: − lift the shelf by hand and pull it towards you until it reaches the crack in the guide slot; − at the guide interruption point lift the left side of the shelf up and pull it out from the appliance in the inclined position, − reinsertion is carried out in the opposite procedure. Glass shelves are protected with plastic edge frames. Quickly perishable food should be stored on the back i.e. the coldest part of the shelves. Defrost Water Outlet (2) Regularly check the defrost water outlet and the channel, because they should never be clogged (as for example with food rests). If clogged, use a plastic straw and clean it. Crisp tray and serving tray (3) Shelf (1) The shelf may be placed randomly upon any of the guide slots within the interior of the appliance. It is protected against sliding out. In case you may wish to alter the position of the shelf: − lift the shelf by hand and pull it towards you until it reaches the crack in the guide slot; − at the guide interruption point the shelf may be adjusted at random height; The tray at the bottom of the refrigerator is covered with the serving tray. This cover protects the stored fruit and vegetables from excessive drying. Door Liner The door liner consists of various shelves or holders used for storing eggs, cheese, butter and yogurt as well as other smaller packages, tubes, cans etc. The lower shelf is used for storing bottles. Instructions for Use 13 Illumination in the Interior of the Refrigerator The light for illuminating the interior of the appliance is on, when the door is opened. The operation of the light does not depend on the position of the thermostat knob. Operation Control The appliance is controlled with thermostat knob, situated in the right upper part inside the appliance. Turn the knob clockwise from STOP (0) position towards 7 and backwards. Temperature Selection • In STOP (0) position the appliance does not operate (the cooling system is switched off), yet power supply is not interrupted (the light is on, when you open the refrigerator door). • Temperature in the refrigerator and in freezing compartment depends on the frequency of opening the door as well. • Higher settings on the knob (towards 7) mean lower temperatures (colder) in all three compartments of the appliance. At higher settings temperature in the interior of the appliance may even drop below 0°C. When the ambient temperature is normal, we recommend medium setting. • Changes of the ambient temprature affect temperature in the interior of the appliance (choose correct setting of the thermostat knob). Use Storing Fresh Foods Proper use of the appliance, adequately packed food, correct temperature and taking into account hygienic precautions will substantially influence the quality of the food stored. • Foods to be stored in the refrigerator should be properly packed as to prevent mixing various moisture degrees and odors (in polyethylene bags or sheet, aluminium foil, wax paper, or stored in covered containers or bottles). • Before storing food in the refrigerator, remove the excessive packaging (like yoghurt in multi-package). • Pack systematically and make sure that foodstuffs do not touch each other (various odours may mix). Assure adequate air circulation around packages. • Never store inflammable, volatile or explosive substances. • Beverages with high alcohol percentage shall be stored in tightly sealed bottles in vertical position. • Food should not touch the rear wall of the refrigerator! • Some organic solutions like volatile oils in lemon and orange peel, acid in butter etc. can cause damages when in contact with plastic surfaces or gaskets for longer period of time. • Foods should be cooled down before storing. 14 • Crispy and delicate foods should be stored in the coldest parts of the refrigerator. • Try not to open the door too often. • Set the thermostat to the setting where lowest temperatures are reached. Set the thermostat gradually as to avoid freezing of the foods. Use a thermometer and measure the temperature in the individual compartments. Place the thermostat in a glass vessel filled with water. Temperature readings are most reliable few hour after steady state is reached. • Unpleasant odor inside the refrigerator is a sign that something is wrong with foods or that your refrigerator needs cleaning. Unpleasant odor can be eliminated or reduced by washing the interior of the refrigerator with a mild solution of water and vinegar. We also recommend using activated carbon filters to clean the air or to neutralize odors. • If you plan a longer journey, make sure to remove quickly perishable articles of food out of the appliance before you leave. Instructions for Use Fresh Food Storage Time in the Refrigerator Article of food Butter Eggs Meat: fresh uncut chopped smoked Fish Marinade Root Cheese Sweets Fruit Prepared dishes Legend: 1 + + + + + + + + + + + + 2 + + + = + = + + + + + + + reccomended storage time 3 + + = 4 + + 5 + + Storage time (days) 6 7 8 9 + + = = + + + + 10 = + 11 = = 12 = = 13 14 = = + + + + + + + + = = = = + + + = = = + + + = = = + + = = = + + = = = + + = + + = + = = + = = = = = = = = = = = = = = = = = = = possible storage time put in the appliance turn the thermostat dial to the operating temperature (see temperature selection).. • The next time you want to freeze fresh foods, repeat the freezing procedure and be careful that packages with fresh foods do not touch frozen packages. • For freezing smaller amount of foods (up to 1 kg) there is no need to change the thermostat setting (see Temperature Selection). Freezing Fresh Foods • Carefully select food you intend to freeze; it should be of adequate quality and suitable for freezing. • Use correct packaging and wrap it right. − The packaging should be air tight and shouldn't leak since this could cause substantial vitamin loss and dehydration of foods. − Foils and bags should be soft enough to tightly wrap around the foods. • Mark packages with following data: kind and amount of foods and the date of loading. • It is most important that the food is frozen as quickly as possible. Therefore we recommend the size of the package not to be too large and to be cooled before loading into the freezer. • The amount of fresh foods that can be loaded in the freezer within 24 hours is indicated on the rating plate (freezing capacity). If the loaded amount is too large, the quality of freezing is reduced which affects the quality of frozen foods. Storing Frozen Foods Store the frozen food in the freezer. Commercially Frozen Foods The storage time and the recommended temperature for storing commercially frozen foods are indicated on the packaging. For storing and using consider the manufacturer's instruction. When shopping, be careful and choose only adequately packed foods provided with complete data and stored in freezers where the temperature is not higher than 18°C. Do not buy packages of food covered with frost layer. This indicates that the package was thawed before at least once. Be careful that packages don't start to thaw, as the temperature raise reduces the quality of foods. Freezing Procedure • Before it starts freezing, set the thermostat to the position 57 for 24 hours. 24 hours from the time when fresh food was Approximate Storage Time for Frozen Foods Food 1 Vegetable Fruit Braed, Pastries Milk Redy-made meals Meat: Beef Veal Pork Poultry Game Minced meat Smoked sausages Fish: lean fat Offal 2 3 4 Storage time (in months) 5 6 7 8 + 9 + 10 + + 11 12 + + + + + + + + + + + + + + + + + + + + + + + + + Defrosting Frozen Food How to make ice cubes Partially thawed or defrosted foods should be used as soon as possible. Cold air preserves the food but it does not destroy microorganisms which rapidly activate after defrosting and make foods perishable. Partial defrosting reduces the nutritional value of foods, especially of fruits, vegetables and ready-made meals. Recommended thermostat position for ice making is on the middle setting. Fill two thirds of the ice tray with cold water or any other liquid convenient for freezing. Insert the ice tray into the guides or on the cooling plate. Time required for the ice to form, largely depends on ambient temperature, thermostat setting and on how often you open the door. It usually takes 2-6 hours (depends on which model of refrigerator you have). Instructions for Use 15 With smaller refrigerators we recommend you make a stock of ice cubes (store them in a separate plastic box). The easiest way to empty the ice tray is to turn the tray around, pour it with cold water and slightly twist it (bend it). Maintenance and Cleaning Automatic Defrosting of the Refrigerator The refrigerator requires no defrosting, since the ice at the rear wall melts automatically. Ice, formed at the rear end during the operation of the compressor, melts when the compressor is off, and water drops slide downwards through the hole in the rear wall o the condenser collecting receptacle, placed at the bottom of the appliance. Manual Defrosting of the Frezing Compartment When the frost and ice layer in the frezing compartment is 3-5 mm thick, you should clean the freezer. • Turn the thermostat knob to STOP (0) position, and disconnect the power supply. Empty the compartment and take care that the packages remain frozen. • Melted water, collected at the bottom of the appliance, should be mopped with an absorbing cloth. • Avoid using defrosting sprays, as they may cause damage to the plastic parts and may be hazardous to health. Cleaning the Appliance Disconnect the power supply before cleaning the appliance. Do not use coarse or aggressive cleaning agents as you can damage the surface. Be careful to remove any cleanser agent remaining after cleaning. • Clean the exterior with water and detergent. Varnished surfaces are cleaned with soft cloth and an alcohol based cleaning agent (for example glass cleaners). You may also use alcohol (ethanol or isoprophylic alcohol). The application of abrasive and specially aggressive cleaners, such as the stainless steel cleaners, is not appropriate for the cleaning of plastic and coated parts. • Remove the detachable accesories in the interior of the appliance and clean it with water and liquid detergent. Plastic parts cannot be washed in washing machine. • Wash the interior of the appliance with lukewarm water, in which you added one or two spoonfuls of vinegar. • The air openings in the bottom rail should be cleaned or vacuumed periodically. Periodical cleaning of the condenser In order to optimize the operation of the appliance and save energy, it is recommended to clean periodically the dust from the condenser at the back of the appliance. Disconnect the appliance from the mains prior the commencement of cleaning! • Empty the contents of the appliance. • Remove the supporting panel from the bottom of the kitchen cabinet. • Remove the screws fixing the appliance to the kitchen worktop. • Pull the appliance out and expose the condenser at the back of the appliance. • Unscrew the screws from the condenser bonnet and remove the bonnet. • Clean the dust and dirt from the condenser. After cleaning return the appliance to its place, plug in the mains power cord and fill with food. Cleaning of the condenser Dust from the condenser should be vacuumed in the following manner: − push the finger through the opening in the bottom rail and release the fastener; − pull the rail towards you and remove it; − remove the bottom board of the kitchen cabinet − pull the condenser dish out; − use the vacuum cleaner to clean the dust from the condenser; − replace the condenser dish and the bottom rail in the opposite order. After cleaning, connect the appliance to power supply and reload the packages. 16 Instructions for Use power supply, take out the foods and defrost and clean the appliance. Leave the door slightly open. Switch Off the Appliance When Not In Use If you do not intend to use the appliance for a longer period, set the thermostat knob to the STOP (0) position, disconnect the Trouble-Shooting Guide During the service, you can come across some troubles that in most cases result from improper handling of the appliance and can easy be eliminated. The Appliance Fails to Operate After connecting to the Mains Supply • Check the supply in the outlet socket and make sure the appliance is switched on (thermostat in operating position). Water drains into the bottom compartment of the appliance Water leaks from the refrigerator if the drain hole is clogged, or if the water drips past the collection gutter. • Clean the clogged opening, for example with a plastic straw. • Manually defrost the increased ice layer. See "Ice Formation on the Inner Back Wall". Noise Continuous Operation of the Refrigerating System • the door was frequently opened or it was left opened for too long; • the door is not properly closed (the door may sag, the gasket may be polluted or damaged); • perhaps you have overloaded the appliance with fresh foods; • Insufficient cooling of compressor and condenser. Check the air circulation through the bottom rail openings and if necessary clean or vacuum the dust from the condenser. See Section Cleaning and Maintenance. Ice Formation on the Inner Rear Wall Until the water is drained through the hole in the rear and into the receptacle at the bottom of the appliance, normal automatic defrosting of the appliance is guaranteed. In case the ice formation on the inner back wall is increased (35 mm), ice should be manually defrosted. Set the thermostat knob to STOP (0) position and leave the door open. Never use electric devices for defrosting and do not scrape the ice or frost layer with sharp objects. After completed defrosting, turn the knob to desired position and close the refrigerator door. The cause of increased ice formation may be one of the following: − the door does not seal well (clean the gasket if it is contaminated, or replace it if it is damaged); − the door was frequently opened or it was left opened for too long; − the food stored in the refrigerator was warm; − the food or dish is touching the inner back wall. Sound alarm Excessive dust upon the condenser is signaled by the sound alarm, audible with each opening of the door, until the fault is removed. Check the air circulation through the bottom rail openings and if necessary clean or vacuum the dust from the condenser. See Section Cleaning and Maintenance. Cooling in refrigerating-freezing appliances is enabled by the refrigerating system with compressor, which produces noise. How noisy the appliance is depends on where it is placed, how it is used and how old the appliance is. • During the operation of the compressor the noise of liquid is heard and when the compressor is not operating, the refrigerant flow is heard. This is a normal condition and it has no influence whatsoever on the lifetime of the appliance. • After starting the appliance, the operation of the compressor and the refrigerant flow may be louder, which does not mean that something is wrong with the appliance and it has no influence on the lifetime of the appliance. Gradually the noise is reduced. • Sometimes unusual and stronger noise is heard, which is rather unusual for the appliance. This noise is often a consequence of inadequate placing. − The appliance shall be placed and levelled firmly on solid base. − It should not touch the wall or kitchen units standing next to it. − Check the accesories in the interior of the appliance, they should be placed correctly in their positions; also check the bottles, tins and other vessels that might touch each other and rattle. Bulb Replacement Before replacing the light bulb, disconnect the appliance form the power supply. Press the cover at the rear side (in the arrow 1 direction) and remove the plastic cover (in the arrow 2 direction). Replace the bulb with a new one (E14, max. 15 W). Don't forget: the old bulb does not belong to organic waste. Light bulb is consuming good therefore our in-guarantee service does not relate to it. WE RESERVE THE RIGHT TO ALTER THE SPECIFICATIONS WITH NO INFLUENCE ON THE OPERATION OF THE APPLIANCE. Instructions for Use 17 Fridge-Freezer EN Thank you for your trust and for buying this appliance. We hope it will successfully serve the purpose for many years. Fridge-Freezer is for domestic use only. The upper part of the appliance is refrigerator and is used for storing fresh foods at the temperature of 0°C and higher. Fridge-Freezer .............................................................. 11 Before Putting Into Use................................................ 11 Instructions for Use Mounting Instructions We Care for the Environment Tips for Energy Savings The lower part is freezer and is used for freezing fresh foods and storing frozen foods for longer periods of time (up to one year, depending on the kind of foods you store). The compartment is marked with four stars. Freezer (B) Operation Control.........................................................14 Temperature Selection Use ..................................................................................14 Important ...................................................................... 12 Storing Fresh Foods Freezing Fresh Foods Storing Frozen Foods Food safety.....................................................................16 Storing Time During Power Supply Interruption Disposing of the Worn Out Appliance Temperature Indicator Environmental protection............................................ 12 Placing and Installation ............................................... 12 Choosing the Right Place Connection to Power Supply Description of the Appliance ....................................... 13 Refrigerator (A) Maintenance and Cleaning...........................................16 Automatic Defrosting of the Refrigerator Manual Defrosting of the Freezer Cleaning the Appliance Switch Off the Appliance When Not In Use Trouble-Shooting Guide ...............................................17 Before Putting Into Use • Before connecting the appliance to the mains supply, leave it stand for about 2 hours, which will reduce a possibility of malfunctions in the cooling system due to transport handling. • Clean the appliance, and be thorough, especially in the interior (See Cleaning and Maintenance). • In case the interior accessories are not correctly placed, rearrange them as described in chapter "Description of the Appliance". Instructions for Use These instructions for use are intended for the user. They describe the appliance and its correct and safe use. They were prepared for various types/models of appliances therefore you may find in it description of some functions and accesories that your appliance does not have. Mounting Instructions Integrated appliances are equipped with instructions for mounting the appliance into the kitchen unit. The appliance should be professionally mounted by qualified technician and instructions are for his use only. We Care for the Environment • Our products use environmentally friendly packaging, which can be either recycled or disposed of in an environmentally friendly manner. To this end, individual packaging materials are clearly marked. • These instructions are printed either on recycled paper or chlorine free bleached paper. • When your appliance finally wears out, please try not to burden the environment with it; call your nearest authorised service agent. (See Disposing of the Worn Out Appliance) Tips for Energy Savings • Try not to open the door too often, especially when the weather is wet and hot. Once you open the door, mind to close it as soon as possible. This is especially important if you have an upright model. • Every now and then check if the appliance is sufficiently ventilated (adequate air circulation behind the appliance). • Set thermostat to lower settings as soon as possible (depends on the amount of food loaded, ambient temperature etc). • Never use continuous operation unless unnecessarily required; switch the operation mode selection switch to the setting for automatic operation as soon as possible. • Before loading the appliance with packages of fresh foods, make sure they are cooled to ambient temperature. • Ice and frost layer increase energy consumption, so do clean the appliance as soon as the layer is 3-5 mm thick. • If the gasket is damaged or if it turns out that the sealing is poor, the energy consumption is substantially higher. To restore efficiency, replace the gasket. • The condenser on the rear wall should be always clean, free of dust or any impurities. • Always consider instructions stated in sections Positioning and Energy Saving Tips, otherwise the energy consumption is substantially higher. Instructions for Use 11 Important • This appliance is not intended for use by persons (including children) with reduced physical, sensory or mental capabilities, or lack of experience and knowledge, unless they have been given supervision or instruction concerning use of the appliance by a person responsible for their safety. • If you have bought this appliance to replace an old one equipped with a lock that cannot be opened from inside (lock, bolt), make sure that the lock is broken. This will make it impossible for children to lock themselves inside the appliance and suffocate. • The appliance must be correctly connected to the mains supply. (see: Connecting to the Mains Supply). • If the food has strange smell or color, throw it away, because it is very likely that it is spoiled and therefore dangerous to eat. • Disconnect the appliance from the power supply before repairing it (only a qualified technician should repair it), before cleaning and before replacing the light bulb. • Do not defrost the appliance with other electric appliances (as for example with hair dryer) and never scrape the frost layer with sharp objects. Use only enclosed tools or tools recommended by the manufacturer. • For the sake of environment protection - be careful not to damage the rear wall of the appliance (the condenser unit or the tubes - for example when moving the appliance) or any part of the refrigerating system inside the appliance. • The refrigerating system of the appliance is filled with refrigerant and oil, so when the appliance is damaged, handle it with care and dispose it of in compliance with environmental protecting precautions. (See We Care for the Environment). • Heating element incorporated in the appliance, all around the rim, is controlled by the operation of the compressor and it prevents the door gasket to freeze on to the freezer housing. • If the supply cord is damaged, it must be replaced by the manufacturer or his service agent or a qualified person in order to avoid hazard. • The rating plate is inside the appliance or outside on the rear wall. • Warning: Ventilation slots on the appliance or built-in element should always be kept clean and unobstructed. • Warning: Do not use any mechanical accessories when thawing the refrigerator, except for those explicitly recommended by the manufacturer. • Warning: To prevent any pollution be careful not to damage the insulation or refrigeration tubes at the rear wall during the installation, cleaning and disposal of the appliance. • Warning: Do not use any electrical devices inside the appliance, except for those explicitly recommended by the manufacturer. Storing Time During Power Supply Interruption Storing Time During Power Supply Interruption. Do not open the freezer in case of failure or power supply interruption! In case the interruption is extended over longer period of time 13 hours take food out of the freezer and use it, or make sure that is sufficiently cooled. Disposing of the Worn Out Appliance • When your appliance finally wears out, dispose it of. If the appliance has a lock, break it, in order to prevent eventual accidents (danger of children get locked inside the appliance). • The refrigerating system of the appliance is filled with refrigerant and insulating substances which should be separately treated and processed. Call your nearest authorised service agent or specialised servicing centre. If you don't find one, contact your local authorities or your distributor. Be careful not to damage the tubes on the rear wall of the appliance (danger of pollution). Environmental protection This appliance’s packaging material is recyclable. Help recycle it and protect the environment by dropping it off in the municipal receptacles provided for this purpose. Your appliance also contains a great amount of recyclable material. It is marked with this label to indicate that in countries that are a members of the European Union the used appliances should not be mixed with other waste. This way, the appliance recycling organised by your manufacturer will be done under the best possible conditions, in compliance with European Directive 2002/96/EC on Waste Electrical and Electronic Equipment. Contact your town hall or your retailer for the used appliance collection points closest to your home. We thank you doing your part to protect the environment. Placing and Installation Choosing the Right Place Place the appliance in a dry and regulariy ventilated room. Allowed ambient temperature depends on the model (class) of the appliance and is stated on the rating plate of the appliance. Never place the appliance near heat emitting devices (e.g. cooker, radiator, water heater or similar devices) and do not expose it to direct sunlight. The appliance should be positioned at least 3 cm away from the electric or gas cooker and at least 30 cm away from the oil or coal stove. If this is not possible, use an appropriate insulation. Behind the appliance there should be free space at least 200 cm2 wide and above the appliance the high kitchen units should be at least 5 cm away from the appliance in order to assure adequate ventilation of the condenser unit. 12 Class SN (sub-normal) N (normal) ST (sub-tropical) T (tropical) Ambient temparature from + 10°C to + 32°C from + 16°C to + 32°C from + 16°C to + 38°C from + 16°C to + 43°C Connection to Power Supply Connect the appliance with the cable and plug to the power supply socket outlet with a ground terminal (safety socket). Required nominal voltage and frequency are indicated on the rating plate. The connection to the mains supply and earthing have to be made according to current standards and regulations. The appliance resists temporary voltage tolerance up to -6 to +6 %. Your appliance is compliant with European Directives as well as their modifications. Instructions for Use Description of the Appliance Refrigerator (A) Defrost Water Outlet (2) Refrigerator is used for storing fresh foods for few days. Shelf (1) (number depends on the model) Shelf can be optionally placed on the guides inside the appliance. It is protected against pulling out. If you want to remove it, slightly lift up the back part and pull it out. Glass shelves (some models only have them) are protected with plastic spacers. Before pulling the shelf out, spacers must be moved towards you. Spacers can be also removed, however, it is better to keep them for any later transport. Quickly perishable food should be stored on the back i.e. the coldest part of the shelves. Bottle rack (in some models only) Bottle rack (number depends on model) is intended for storing the bottles. There are two installation positions available (horizontal or lifted in the front) thus enabling the positioning of bottles on the stopper as well. It is protected against pulling out. If you want to pull it out, simply lift its rear part and pull it towards you. Warning! If the door contains storing shelves, install the rack in such position that the length of the bottles will not hinder the closing of the door. The rack may carry 9 bottles of 0,75 l or more at the maximum (total weight max. 13 kg). The interior of the refrigerator is cooled with cooling plate incorporated in the rear wall. Under the plate there is a channel and an outlet for defrost water. Regularly check the defrost water outlet and the channel, because they should never be clogged (as for example with food rests). If clogged, use a plastic straw and clean it. Fruit and Vegetable Container (3) The container is on the bottom under the glass shelf and is used mainly for storing fruits and vegetables. It provides adequate humidity which has favourable effect on food stored (less dehydration). The fan (certain models only) • The fan distributes evenly the inside temperature and reduces dew on storage shelf surfaces. • When the refrigerator door is opened, the fan stops operating. • It is recommended to switch the fan on: − when the ambient temperature in the room is increased (above 30°C), − in case of increased humidity (during summer season). • Switching the fan on/off ON = OFF = 0 Note: Energy consumption is increased during fan operation. Instructions for Use 13 Door Liner Freezer (B) The door liner consists of various shelves or holders used for storing eggs, cheese, butter and yogurt as well as other smaller packages, tubes, cans etc. The lower shelf is used for storing bottles. Freezer is used for freezing fresh foods and for storing already frozen foods. Illumination in the Interior of the Refrigerator is used for freezing fresh foods. The light for illuminating the interior of the appliance is on, when the door is opened. The operation of the light does not depend on the position of the thermostat knob. Freezing Compartment (4) Storing Compartment (5) is used for storing packages of frozen foods. Defrost Water Outlet (6) (See Cleaning and Maintenance). NOTE: • The appliance can be equipped with various accesories, depending on the model of the appliance. • Various accesories (spice container, tube holder or additional shelves) can be bought in authorized centres. Operation Control The appliance is controlled with thermostat knob, situated in the right upper part inside the refrigerator. Turn the knob clockwise from STOP (0) position towards 7 and backwards. interrupted (the light is on, when you open the refrigerator door). • When the fan is on (only for models with built-in fan), we recommend new setting of temperature in the appliance. Temperature Selection • Higher settings on the knob (towards 7) mean lower temperatures (colder) in all compartments of the appliance. At higher settings temperature in the interior of the appliance may even drop below 0°C. When the ambient temperature is normal, we recommend medium setting. • Changes of the ambient temprature affect temperature in the interior of the appliance (choose correct setting of the thermostat knob • In STOP (0) position the appliance does not operate (the cooling system is switched off), yet power supply is not Use Storing Fresh Foods Proper use of the appliance, adequately packed food, correct temperature and taking into account hygienic precautions will substantially influence the quality of the food stored. • Foods to be stored in the refrigerator should be properly packed as to prevent mixing various moisture degrees and odors (in polyethylene bags or sheet, aluminium foil, wax paper), or stored in covered containers or bottles. • Before storing food in the refrigerator, remove the excessive packaging (like yoghurt in multi-package). • Pack systematically and make sure that foodstuffs do not touch each other (various odours may mix). Assure adequate air circulation around packages. • Never store inflammable, volatile or explosive substances. • Beverages with high alcohol percentage shall be stored in tightly sealed bottles in vertical position. • Food should not touch the rear wall of the refrigerator! • Foods should be cooled down before storing. • Crispy and delicate foods should be stored in the coldest parts of the refrigerator. • Try not to open the door too often. • Set the thermostat to the setting where lower temperatures are reached. Set the thermostat gradually as to avoid freezing of the foods. Use a thermometer and measure the temperature in the individual compartments. Place the thermostat in a glass vessel filled with water. Temperature readings are most reliable few hour after steady state is reached. • Some organic solutions like volatile oils in lemon or orange peel, acid in butter etc. can cause damage and when in contact with plastic surfaces or gaskets for longer period of time they can cause accelerated ageing of the plastic material. 14 • Unpleasant odor inside the refrigerator is a sign that something is wrong with foods or that your refrigerator needs cleaning. Unpleasant odor can be eliminated or reduced by washing the interior of the refrigerator with a mild solution of water and vinegar. We also recommend using activated carbon filters to clean the air or to neutralize odors. • If you plan a longer journey, make sure to remove quickly perishable articles of food out of the appliance before you leave. Instructions for Use Fresh Food Storage Time in the Refrigerator Fresh Food Storage Butter Eggs Meat: fresh uncut chopped smoked Fish Marinade Root Cheese Sweets Fruit Prepared dishes Legend: 1 + + + + + + + + + + + + 2 + + + = + = + + + + + + + recommended storage time 3 + + = 4 + + 5 + + Storage time (days) 6 7 8 9 + + = = + + + + 10 = + 11 = = 12 = = 13 14 = = + + + + + + + + = = = = + + + = = = + + + = = = + + = = = + + = = = + + = + + = + = = + = = = = = = = = = = = = = = = = = = = possible storage time Freezing Fresh Foods • Carefully select food you intend to freeze; it should be of adequate quality and suitable for freezing. • Use correct packaging and wrap it right. − The packaging should be air tight and shouldn't leak since this could cause substantial vitamin loss and dehydration of foods. − Foils and bags should be soft enough to tightly wrap around the foods. • Mark packages with following data: kind and amount of foods and the date of loading. • It is most important that the food is frozen as quickly as possible. Therefore we recommend the size of the package not to be too large and to be cooled before loading into the freezer. • The amount of fresh foods that can be loaded in the freezer within 24 hours is indicated on the rating plate (freezing capacity). If the loaded amount is too large, the quality of freezing is reduced which affects the quality of frozen foods. • For freezing smaller amount of foods (up to 1 kg) there is no need to change the thermostat setting (see Temperature Selection). Storing Frozen Foods Packages of frozen foods are stored in the basket. If you remove the baskets, you can store frozen packages directly on the cooling shelves. Commercially Frozen Foods The storage time and the recommended temperature for storing commercially frozen foods are indicated on the packaging. For storing and using consider the manufacturer's instruction. When shopping, be careful and choose only adequately packed foods provided with complete data and stored in freezers where the temperature is not higher than 18°C. Do not buy packages of food covered with frost layer. This indicates that the package was thawed before at least once. Be careful that packages don't start to thaw, as the temperature raise reduces the quality of foods. Freezing Procedure • If you have a model without the integrated switch for intensive cooling, turn the thermostat knob to position 4-6 some 24 hours before loading. After 24 hours load the freezer shelf with fresh food packages. Some 24 hours after loading, turn the thermostat knob to operating position if necessary (see "Temperature selection"), and then reload the frozen packages into the storage baskets (storing compartment). If you have a model with integrated switch for intensive cooling, switch it on some 24 hours before loading the appliance with larger amounts of fresh foods and turn the thermostat knob to position 4-6. After 24 hours load the appliance with fresh food packages. After loading, wait for another 24 hours and switch off the switch and turn the thermostat knob to required position (see "Temperature selection"). The switch is ON when the marking (I)or colour marking (0) is visible or is visible, and OFF when the marking colour marking is not visible (depending on model). • The next time you want to freeze fresh foods, repeat the freezing procedure and be careful that packages with fresh foods do not touch frozen packages. Instructions for Use 15 Approximate Storage Time for Frozen Foods Food 1 Vegetable Fruit Bread, pastries Milk Ready-made meals Meat: Beef Veal Pork Poultry Game Minced meat Smoked sausages Fish: lean fat Offal 2 3 4 Storage time (in months) 5 6 7 8 + 9 + 10 + + 11 12 + + + + + + + + + + + + + + + + + + + + + + + + + Defrosting Frozen Food Partially thawed or defrosted foods should be used as soon as possible. Cold air preserves the food but it does not destroy microorganisms which rapidly activate after defrosting and make foods perishable. Partial defrosting reduces the nutritional value of foods, especially of fruits, vegetables and ready-made meals. Food safety Temperature Indicator The temperature indicator, situated in the coolest part of refrigerator, helps to control correct temperatures of the appliance. Adequate temperature is indicated with O.K. mark. If this mark does not show, the temperature of this compartment is too high. Use the thermostat to reduce the temperature in a particular compartment (see chapter "Control of the appliance"). Do not change the setting too often; before temperature checking or when setting it anew, please, wait for 12 hours at least. Remark! After the appliance has been loaded with fresh food, or when the door is open too frequetnly or for a too long time, the OK mark will not be visible. The coolest area of refrigerator, which appears immediately above the shelf covering the crisper pan, is about 20 cm in height. Foor Arranging Compartment Freezing compartment Refrigerator areas:: Cold area Crisper pan Top shelves Door compartments Colder area Middle shelves The Coldest area Above the shelf covering the crisper pan Food Ice, frozen food,fresh food intended for freezing… Fresh fruits, vegetable,… Butter, cheese, eggs, yoghourth, beverages,… Products of milk, sweets, prepared dishes (e.g. sauces and other faty dishes),soft & fresh cheese, delicatessen, sweets,… Meat (especially poultry, venition, fish), delicatessen or other prepared food, salads, short pastry based on eggs or cream, fresh puff pastry, spongecake, yeats dough for pizzas, fresh products and cheeses made of uncooked fresh milk, vegetables ready and adequately wrapped or all fresh products, the consumption date of which is conditioned by a saving temperature which must be lower or equal to +4°C. Max. storing time: 1-2 days Remark: Bananas, potato, garlic and anion are not kep in the refrigerator. Fermented cheeses are not kept in refrigerator,except if we wish to stop its ripening. They must be well wrapped. Maintenance and Cleaning Automatic Defrosting of the Refrigerator in the inner back wall into the drain pan situated above the compressor, from where it evaporates. There is no need to defrost the refrigerator, because ice depositing on the inner back wall is defrosted automatically. Ice is depositing on the inner back wall during the compressor operation; later on, when the compressor is not operating ice is defrosting and water drops collect and drain through the outlet 16 Manual Defrosting of the Freezer When the frost and ice layer in the freezer is 3-5 mm thick, you should clean the freezer. Instructions for Use • Few hours before defrosting set the thermostat to position 7, so that packages are well frozen. Reset the thermostat to STOP (0) position and disconnect the power supply. Empty the freezer and take care that the packages remain frozen. • Insert the enclosed pipe into the groove in the bottom of the appliance and place a vessel underneath to collect the defrost water. Defrosting is accelerated if the door is left open. • Every now and then wipe the condenser on the rear wall. Use soft non-metal brush or vacuum cleaner. • Do not forget to clean also the defrost water receptacle above the refrigerator compressor (do not remove the receptacle). • Avoid using defrosting sprays, as they may cause damage to the plastic parts and may be hazardous to health. Cleaning the Appliance Disconnect the power supply before cleaning the appliance. Do not use coarse or aggressive cleaning agents as you can damage the surface. Be careful to remove any cleanser agent remaining after cleaning. • Clean the exterior with water and detergent. Varnished surfaces are cleaned with soft cloth and an alcohol based cleaning agent (for example glass cleaners). You may also use alcohol (ethanol or isoprophylic alcohol). The application of abrasive and specially aggressive cleaners, such as the stainless steel cleaners, is not appropriate for the cleaning of plastic and coated parts. • Remove the detachable accesories in the interior of the appliance and clean it with water and liquid detergent. Plastic parts cannot be washed in washing machine. • Wash the interior of the appliance with lukewarm water, in which you added one or two spoonfuls of vinegar. After cleaning, connect the appliance to power supply and reload the packages. Switch Off the Appliance When Not In Use If you do not intend to use the appliance for a longer period, set the thermostat knob to the STOP (0) position, disconnect the power supply, take out the foods and defrost and clean the appliance. Leave the door slightly open. Trouble-Shooting Guide During the service, you can come across some troubles that in most cases result from improper handling of the appliance and can easy be eliminated. The Appliance Fails to Operate After connecting to the Mains Supply • Check the supply in the outlet socket and make sure the appliance is switched on (thermostat in operating position). Continuous Operation of the Refrigerating System • The door was frequently opened or it was left opened for too long. • The door is not properly closed (the door may sag, the gasket may be polluted or damaged). • Perhaps you have overloaded the appliance with fresh foods. • The reason may be inadequate ventilation of the compressor and condenser (assure adequate air circulation and wipe off the condenser). • Continuous operation button activated (see section Freezing of Food). − the door does not seal well (clean the gasket if it is contaminated, or replace it if it is damaged); − the door was frequently opened or it was left opened for too long; − the food stored in the refrigerator was warm; − the food or dish is touching the inner back wall. Water is Leaking From the Refrigerator In case the discharge water outlet is clogged, or the defrost water drips over the channel, water leaks from the refrigerator. • Clean the clogged opening, for example with a plastic straw. • Manually defrost the increased ice layer. See "Ice Formation on the Inner Back Wall". The Freezer Door is Hard to Open If you want to open the door that has just or recently been closed, you may find it hard to open. The reason why this happens is, that when you open the door, warm air gets into the appliance and when it is getting cool, the underpressure seals the door. After few minutes (5-10), the door can easily be opened. Ice Formation on the Inner Rear Wall Noise As long as the defrost water runs to the channel and through the opening to the drain pan on the compressor, automatic defrosting of the appliance is assured. In case the ice formation on the inner back wall is increased (35 mm), ice should be manually defrosted. Set the thermostat knob to STOP (0) position and leave the door open. Never use electric devices for defrosting and do not scrape the ice or frost layer with sharp objects. After completed defrosting, turn the knob to desired position and close the refrigerator door. The cause of increased ice formation may be one of the following: Cooling in refrigerating-freezing appliances is enabled by the refrigerating system with compressor, which produces noise. How noisy the appliance is depends on where it is placed, how it is used and how old the appliance is. • During the operation of the compressor the noise of liquid is heard and when the compressor is not operating, the refrigerant flow is heard. This is a normal condition and it has no influence whatsoever on the lifetime of the appliance. • After starting the appliance, the operation of the compressor and the refrigerant flow may be louder, which does not mean that something is wrong with the appliance Instructions for Use 17 and it has no influence on the lifetime of the appliance. Gradually the noise is reduced. • Sometimes unusual and stronger noise is heard, which is rather unusual for the appliance. This noise is often a consequence of inadequate placing. − The appliance shall be placed and levelled firmly on solid base. − It should not touch the wall or kitchen units standing next to it. − Check the accesories in the interior of the appliance, they should be placed correctly in their positions; also check the bottles, tins and other vessels that might touch each other and rattle. Press the cover at the rear side (in the arrow 1 direction) and remove the plastic cover (in the arrow 2 direction). Replace the bulb with a new one (E14, max. 15 W). Don't forget: the old bulb does not belong to organic waste. Light bulb is consuming good therefore our in-guarantee service does not relate to it. Bulb Replacement Before replacing the light bulb, disconnect the appliance form the power supply. WE RESERVE THE RIGHT TO ALTER THE SPECIFICATIONS WITH NO INFLUENCE ON THE OPERATION OF THE APPLIANCE. 18 Instructions for Use EN AFTER SALES SERVICE Any maintenance on your equipment should be undertaken by: − either your dealer, − or another qualified mechanic who is an authorized agent for the brand appliances. When making an appointment, state the full reference of your equipment (model, type and serial number). This information appears on the manufacturer's nameplate attached to your equipment. Instructions for Use 19 e s p a ñ o l Manual de instrucciones Muy importante: Lee íntegramente este manual antes de utilizar la placa. Este manual está diseñado de forma que los textos estén relacionados con los dibujos correspondientes. 0 Int. Nominal por fases 14 A 16,5 A 380-415V 3N~ Placa de 60 cm Placa >60cm Int. Nominal por fases 11 A 13 A 380-415V 2N~ Placa de 60 cm Placa >60cm Int. Nominal por fases 16 A 19 A Identificación Identifica el modelo de tu placa (“a”, “b”, “c”, “d”, “e”, “f”, “g”, “h”, “i”, “j”, “k”, “l”, “m”, “n”, “o”) comparando el número y disposición de los focos de tu aparato con el de las ilustraciones. 1 220-240V 3~ Placa de 60 cm Placa >60cm Instalación 1.1 Desembalaje. Retira todos los elementos de protección. 1.2 Encastre en el mueble. Ten siempre en cuenta los datos de la placa de características (1.2.1) y las medidas del mueble en el que se va encastrar la placa (1.2.2, 1.2.3). Si no vas a colocar horno debajo de la placa, debes instalar una tabla protectora según las medidas indicadas (1.2.4). Pega la junta de espuma a lo largo del contorno exterior de la placa para lograr una buena estanqueidad (1.2.5). Da la vuelta a la placa e introdúcela en el hueco (1.2.6). Sujétala al mueble con los cuatro enganches suministrados (1.2.7). No utilizar materiales no removibles como la silicona. 1.3 Conexión a la red eléctrica. La placa se suministra con cable de alimentación. • De 5 hilos: a) azul oscuro, b) azul claro, c) marrón, d) rojo, e) verde amarillo. (1.3.1) • Preparado para placa de 230V~. (1.3.2) • Preparado para placa de 220-240V~: consulta tabla. (1.3.3) • Potencia total: Placa 60cm 6,8kW, Placa >60cm 7,8kW 220-240V~ Placa de 60 cm Placa >60cm Int. Nominal por fases 30 A 34 A • Si el tipo de conexión es distinto a 220240V~, retira el cable y realiza la conexión según esquemas (1.3.3, 1.3.4). Este aparato es conforme a las directivas europeas 73/23/CEE y 89/336/CEE Recomendación: La instalación de la placa debe ser efectuada por un instalador autorizado, que seguirá las instrucciones y esquemas del fabricante. 2 Uso Con vitrocerámica son válidos los recipientes de barro, cobre o inoxidable. Los de aluminio no son aconsejables porque pueden formar manchas sobre el vidrio de la placa. 2.1 Selección de la zona de cocción. Dispones de varios focos para colocar los recipientes. Elige el más adecuado en función del tamaño del recipiente. durante 3 2.2 Encendido de la placa. Pulsa segundos para encender la placa, se activan los de las distintas zonas de cocción. 0 Nota: Para poder seleccionar si la función seguridad niños está activada, desactivala pulsando durante 3 segundos la tecla (2.13). 2.3 Activación del foco. Activa el foco donde has colocado el recipiente pulsando sobre la tecla (2.3.1, correspondiente (2.4.2) 2.3.2). o pulsa Nota: Si tardas más de 5 segundos en seleccionar el foco, la placa se apaga automáticamente, como medida de seguridad. 1 e s p a ñ o l 2.4 Selección de la potencia. Ajústala deslizando el dedo por la barra (2.4.1) ó pulsando ó (2.4.2, 2.4.3). el reloj (2.8.8). Tras 5 segundos el tiempo queda validado y se vizualizará de forma en el foco alternativa la potencia y temporizado. Transcurrido el tiempo emitirá una señal acústica y parpadeará . Para anular la temporización pulsa sobre el hasta visualizar . icono 00 FOCOS ESPECIALES 2.5 Foco doble, Foco triple. Después de haber , seleccionado la potencia, pulsa y accionará el foco doble (2.5.1, 2.5.3). Si pulsa de nuevo (2.5.2) ó (2.5.4) accionará el foco triple. Para anular pulsa , ( , , ). 2.6 Foco fuente. Este foco puedes utilizarlo de forma circular o de forma conjunta, . Pulsa para como foco fuente activarlo y pulsa de nuevo para desactivarlo. Recomendación: en los modelos con focos halógenos, la luz es tan intensa que se aconseja no mirar fijamente cuando está en funcionamiento sin el recipiente. 00 Nota: El temporizador se apagará automaticamente si tardas más de 10 segundos en seleccionar el tiempo. Modelos e: Una vez activado un foco y seleccionada la potencia, pulsa de nuevo la tecla de selección del foco a . (2.8.11). temporizar, aparece una Selecciona el tiempo con , (2.8.12) y valida pulsando de nuevo la tecla del foco temporizado (2.8.13). La potencia se visualizará con un punto que indica que el foco está temporizado. Una señal acústica y una indicación advierten que el tiempo a concluido (2.8.14). Pulsa cualquier tecla y la señal acústica desaparecerá. FUNCIONES DE TIEMPO . Al conectar la placa, 2.7 Puesta en hora los dígitos del reloj parpadean y marcan (2.7.1). Ajusta la hora con las las teclas , (2.7.2). Realiza la misma operación cada vez que se desconecte o haya un corte de suministro eléctrico. Para cambiar la hora pulsa durante 5 (2.7.3). La hora segundos la tecla empezará a parpadear y oirás un pitido, ajústala con las teclas , . Nota: El temporizador se apagará automaticamente si tardas más de 10 segundos en seleccionar el tiempo. Consideraciones sobre la temporización: Si el nivel de potencia es 9 el máximo tiempo a temporizar será de 60 min. Si es distinto el máximo podrá ser 99 min. Una vez concluido el tiempo la alarma sonará mientras no pulses ninguna tecla. FUNCIONES DE PROGRAMACION 2.8 Selección de tiempo. Modelos abc: Una vez activado un foco y seleccionada la potencia, tienes 5 segundos (2.8.1). de parpadeo para pulsar la tecla Selecciona el tiempo necesario pulsando , (2.8.2). Tras cinco segundos el tiempo queda validado y se visualizará la hora y un punto luminoso bajo el icono del foco temporizado (2.8.3). Para modificar o ver el tiempo restante, pulsa sobre el icono del foco temporizado (2.8.4). Para anular la programación pulsa las teclas , simultáneamente (2.8.5). Modelos dfghkmo: Una vez activado un foco y seleccionada la potencia, pulsa la sobre el reloj. Aparece y tecla en cada foco (2.8.6). Pulsa del una parpadeará (2.8.7). foco a temporizar y Selecciona el tiempo con , sobre 00 2 2.9 Calentamiento rápido. Alcanza rápidamente la temperatura máxima para pasar de forma automática a la temperatura de mantenimiento. Modelos abc: Activa un foco y lleva la barra y aparece a la máxima potencia. Pulsa en el display del foco seleccionado una (2.9.1). Tienes 5 segundos para seleccionar el nivel deseado, se recomienda esté entre los niveles 3 y 6 (2.9.2). Tras cinco segundos el calentamiento rápido queda validado y la potencia de forma y se visualizará alternativa. Alcanzada la temperatura máxima desaparece quedando la potencia de mantenimiento. El foco seguirá funcionando de forma convencional. Si deseas cancelar el calentamiento rápido pulsa el icono del foco programado y selecciona una nueva potencia. e s p a ñ o l Modelos dfghjklmo: Selecciona un foco y ponlo a la máxima potencia pulsando hasta visualizar un 9 y un punto (2.9.3). Regula la potencia pulsando se recomiendan los niveles 3 a 6 (2.9.4). Tras 5 segundos, calentamiento rápido queda validado y se visualizará la potencia seguida de un punto (2.9.5). Alcanzada la temperatura máxima, el punto decimal desaparece y el foco seguirá funcionando de forma convencional. Para cancelar la función, pulsa la tecla del foco programado y selecciona una nueva potencia. 2.10 Vitros con mandos. Asegúrate que el foco que vas a accionar corresponde al foco que quieres utilizar (2.10.1). Gira el mando a la posición deseada y se encenderá el piloto de funcionamiento (2.10.2) que también señala el calor residual cuando el foco se apaga. En los modelos con foco doble o foco fuente, girando el mando a la izquierda se regula una parte del foco y girando el mando a la derecha se regula el foco entero (2.10.3). 2.11 Apagado del foco. Selecciona la potencia del foco que deseas apagar. 0 • La base del recipiente ha de ser plana y estar seca. • Cuida que los diámetros de los recipientes sean mayores o iguales al foco a utilizar y céntralo sobre el foco de calor. • Procura no mover los recipientes, podría rayarse el vidrio. • Utiliza el aparato sólo para la preparación de alimentos. No utilices la placa como mesa de trabajo. • No viertas agua fría directamente en la placa cuando está caliente. Atención: El funcionamiento discontinuo de las zonas de cocción, no es una avería. Funcionan en periodos de encendido y apagado más o menos largos en función de la potencia deseada. 3 Mantenimiento y limpieza • No utilices un limpiador de vapor. 2.12 Calor residual. Después de utilizar la placa los focos se mantienen calientes por un tiempo que varía en función de la potencia o un seleccionada y se visualiza una punto en los focos aun calientes. No toques esos focos, existe el riesgo de quemarse. • Limpia a menudo la superfície de tu placa cuando se haya enfriado. No utilices productos ó esponjas abrasivas. Limpia con un paño húmedo y agua jabonosa (3.1.1). Atención: Si se produce un corte de corriente eléctrica, al restablecerse de nuevo, la indicación no se visualizará aún estando caliente la zona de cocción. Ten en cuenta esta circunstancia. • Una vez a la semana, limpia en profundidad con productos específicos para vitrocerámicas. Te recomendamos VITROCLEN para la limpieza y conservación de tu vitrocerámica. 2.13 Función bloqueo. Para evitar manipulaciones por parte de los niños. Ten pulsado durante 3 segundos la tecla y activarás el bloqueo. Para desbloquearlo repite la operación. Recomendaciones: • Evita golpes de los recipientes sobre el cristal. • Los recipientes de aluminio no son aconsejables, pues podrían formar manchas sobre el vidrio, a no ser que tengan fondo con protección de acero inoxidable. • Las suciedades fuertemente adheridas se eliminan con el raspador de vidrio (3.1.2). • Si por descuido se quema azúcar, elementos azucarados o plástico sobre la placa, elimínalos cuanto antes con un raspador aún en caliente. De no hacerlo pueden quedar manchas permanentes. • Utiliza la cuchilla del rapador en perfecto estado, remplázala en caso de presentar algún deterioro. • Los focos de calor no deben funcionar sin recipiente. 3 e s p a ñ o l 4 Seguridad • El circuito de la red que alimenta la placa, debe tener un interruptor de corte omnipolar de al menos 3 mm de separación entre contactos. • La instalación de la placa debe se efectuada por un instalador autorizado que seguirá las instrucciones y esquemas del fabricantes. • La instalación debe estar dimensionada a la potencia máxima indicada en la placa de características y la toma de corriente con toma de tierra reglamentaria. • Si el cable está dañado, debe ser sustituido por su servicio postventa ó personal cualificado similar con el fin de evitar un peligro. 5 Medio-ambiente La placa ha sido diseñada pensando en la conservación del medio ambiente. Respeta el medio ambiente. Utiliza las potencias adecuadas para cada cocción y selecciona los recipientes de tamaño adecuado a las cantidades de alimento que se vayan a preparar. Cuando el fondo del recipiente y el diámetro de la zona de cocción tienen el mismo tamaño, la transmisión de calor es óptima. • El foco está equipado con un limitador de temperatura interior que desconecta el foco en caso de calentarse excesivamente la placa. Al terminar la cocción si lo deseas deja el recipiente en el mismo lugar para utilizar el calor residual acumulado. De este modo ahorrarás energía. • Después de cada utilización, desconecta el foco mediante su control. Utiliza una tapa siempre que puedas para reducir la pérdida de calor por evaporación. • Si la superficie del vidrio se agrieta o rompe, desconecta de inmediato el aparato de la red para evitar un posible choque eléctrico. No utilices la placa hasta cambiar el vidrio (4.1.1). Gestión de residuos de aparatos eléctricos y electrónicos. • En caso de desbordamiento sobre las teclas de mando la placa se para y emite una señal acústica (4.1.2). El símbolo indica que no debe eliminarse el aparato utilizando los contenedores tradicionales para residuos domésticos. Entrega tu placa en un centro especial de recogida. • Si mantienes pulsado algún sensor demasiado tiempo o hay algún objeto activando los sensores, la placa se para y emite una señal acústica (4.1.3). El reciclado de electrodomésticos evita consecuencias negativas para la salud, el medio ambiente y permite ahorrar energía y recursos. • No coloques recipientes con el fondo caliente sobre los sensores, puedes quemarte al pulsarlos (4.1.3). Para mas información, contacta con las autoridades locales o establecimiento donde adquiriste la placa. • Mantener alejados a los niños pequeños, las superficies de calentamiento pueden calentarse fuertemente durante su funcionamiento. Utiliza el sistema de bloqueo para evitar que puedan jugar con los mandos. • Este aparato no está destinado a ser utilizado por personas con capacidades reducidas. • Permanece siempre en las inmediaciones de al cocinar platos ó alimentos con grasa ó aceite. El calor excesivo puede hacer que se inflamen. 4 • Si la placa está instalada por encima de un cajón, no deberán guardarse objetos inflamables. français Notice d’Utilisation Très important: Lisez attentivement ce manuel avant d’utiliser votre table de cuisson. Tous les dessins de cette notice sont en étroite relation avec le texte voisin. 0 Identification Identifiez le modèle de votre table de cuisson (“a”, “b”, “c”, “d”, “e”, “f”, “g”, “h”, “i”, “j”, “k”, “l”, “m”, “n”, “o”) en comparant le nombre et la disposition des foyers de votre appareil avec celui des illustrations. 1 Installation 1.1 Déballage. Retirez tous les éléments de protection. 1.2 Encastrement dans un meuble. Veillez à bien respecter les caractéristiques de la plaque signalétique de l’appareil (1.2.1) et les dimensions du meuble d’encastrement (1.2.2, 1.2.3). Si vous n’allez pas installer un four sous la table de cuisson, vous devrez installer une plaque de protection, conformément aux dimensions indiquées (1.2.4). Collez le joint mousse sous l’appareil, en suivant le pourtour des surfaces en appui sur votre plan de travail, pour assurer une bonne étanchéité (1.2.5). Retournez la table de cuisson et déposez-la sur l’orifice (1.2.6). Fixez-la au meuble à l’aide des quatre clips fournis avec l’appareil (1.2.7). Ne pas utiliser de matériaux non amovibles comme de la silicone. 1.3 Raccordement électrique. La table de cuisson est livrée avec un câble d’alimentation. • À 5 fils: a) bleu foncé, b) bleu clair, c) marron, d) rouge, e) vert-jaune (1.3.1). • Préparé pour table de cuisson de 230V~. (1.3.2) • Préparé pour table de cuisson de 220240V~: consulter tableau (1.3.3) • Puissance totale: Table de cuisson 60cm 6,8kW, Table de cuisson >60cm 7,8kW. 220-240V~ Int. Nominale par paliers. Table de cuisson de 60 cm 30 A Table de cuisson > 60cm 34 A • En cas de branchement autre que 220240V~, retirer le câble et procéder au raccordement conformément aux croquis (1.3.3, 1.3.4). 220-240V 3~ Int. Nominale par paliers. Table de cuisson de 60 cm 14 A Table de cuisson > 60cm 16,5 A 380-415V 3N~ Int. Nominale par paliers. Table de cuisson de 60 cm 11 A Table de cuisson > 60cm 13 A 380-415V 2N~ Int. Nominale par paliers. Table de cuisson de 60 cm 16 A Table de cuisson > 60cm 19 A Cet appareil est conforme aux Directives Européennes 73/23/CEE et 89/336/CEE. Avertissements: L’installation de la table de cuisson doit être réalisée par un installateur agréé, conformément aux instructions et croquis du fabricant. 2 Mode d’emploi La plupart des récipients en céramique, cuivre ou acier inoxydable sont aptes pour la vitrocéramique. Les récipients en aluminium ne sont pas recommandables; ils risquent de produire des taches sur la vitrocéramique. 2.1 Sélection de la zone de cuisson. Votre table de cuisson dispose de plusieurs foyers. Choisissez toujours le récipient le mieux adapté aux dimensions du foyer. 2.2 Mise en marche de la table de cuisson. durant 3 secondes pour allumer Appuyez sur la table de cuisson, les voyants lumineux des différentes zones de cuisson s’allument. 0 Remarque : Si la fonction « sécurité enfants » est activée, il faudra la désactiver pour pouvoir manipuler les commandes. Pour ce faire, appuyez durant 3 secondes sur (2.13). 2.3 Fonctionnement des foyers. Pour activer un foyer, appuyez sur la touche correspondante 5 français (2.3.1, 2.3.2). ou appuyez sur (2.4.2) Remarque: Si vous attendez plus de 5 secondes avant de sélectionner le foyer, la table de cuisson s’éteint automatiquement, par mesure de sécurité. 2.4 Sélection de la puissance. Faites glisser le doigt sur la barre (2.4.1) ou appuyez sur ou (2.4.2, 2.4.3). FOYERS SPÉCIAUX 2.5 Foyer double, Foyer triple. Après avoir , sélectionné la puissance, appuyez sur pour activer le foyer double (2.5.1, 2.5.3). Si vous appuyez de nouveau sur (2.5.2) (2.5.4) le foyer triple s’allumera. Pour ou , annuler, appuyez sur ( , , ). 2.6 Foyer Grand Plat. Vous pouvez utiliser uniquement le cercle principal de ce foyer ou augmenter la surface pour cuisiner . avec des récipients à forme allongée pour l’activer et appuyez Appuyez sur de nouveau sur cette même touche pour le désactiver. Attention: Sur les modèles à foyers halogènes, ne pas regarder fixement le foyer lorsqu’il est allumé. FONCTIONS MINUTERIE . Lors du branchement 2.7 Mise à l’heure de la table de cuisson, les chiffres de l’horloge clignotent et marquent (2.7.1). Réglez l’heure à l’aide de , (2.7.2). Procédez de la même manière après chaque déconnexion de l’appareil ou après une panne de courant. Pour modifier l’heure, appuyez durant 5 (2.7.3). L’heure commence à secondes sur clignoter et l’appareil émet un bip. Réglez l’heure à l’aide des touches , . 2.8 Réglage du temps de cuisson. Modèles abc: Après avoir activé le foyer et sélectionné la puissance souhaitée, le témoin lumineux se met à clignoter et vous avez 5 (2.8.1). Réglez secondes pour appuyer sur le temps de cuisson souhaité en appuyant sur , (2.8.2). Après 5 secondes, le temps est validé et l’affichage indique l’heure et un point lumineux sous le symbole du foyer programmé (2.8.3). Pour modifier le temps 6 programmé ou voir le temps restant, appuyez sur le symbole du foyer programmé (2.8.4). Pour annuler la programmation, appuyez sur , simultanément (2.8.5). Modèles dfghkmo: Après avoir activé le foyer et sélectionné la puissance souhaitée, appuyez de l’horloge. L’afficheur sur la touche indique et sur chaque foyer (2.8.6). Appuyez sur du foyer à programmer et commencera à clignoter (2.8.7). Réglez le temps de cuisson à l’aide de , de l’horloge (2.8.8). Après 5 secondes, le temps est validé et l’affichage indique alternativement la puissance sur le foyer programmé. Le temps et programmé une fois écoulé, l’appareil émet un signal sonore et fait clignoter . Pour annuler la programmation, appuyez sur du symbole jusqu’à ce que l’affichage indique . 00 00 00 Remarque: Vous avez 10 secondes pour sélectionner le temps de cuisson. Ensuite, la minuterie s’éteindra automatiquement. Modèles e: Après avoir activé le foyer et sélectionné la puissance souhaitée, appuyez de nouveau sur la touche de sélection du foyer à . (2.8.11). programmer. L’affichage indiquera Réglez le temps de cuisson souhaité à l’aide de , (2.8.12) et validez en appuyant de nouveau sur la touche du foyer programmé (2.8.13). L’affichage indiquera la puissance accompagnée d’un point, confirmant ainsi que le foyer est programmé. La durée programmée une fois écoulée, un signal sonore et l’indication vous préviendront de la fin de la cuisson (2.8.14). Appuyez sur une touche quelconque et le signal sonore disparaîtra. Remarque: Vous avez 10 secondes pour sélectionner le temps de cuisson. Ensuite, la minuterie s’éteindra automatiquement. Observations concernant la programmation: Si le niveau de puissance est 9, le temps maximum programmable est de 60 minutes. Avec d’autres niveaux de puissance, il pourra atteindre les 99 minutes. Une fois le temps de cuisson écoulé, la table de cuisson fera retentir une alarme, jusqu’à ce que vous appuyiez sur une touche quelconque. FONCTIONS PROGRAMMATION 2.9 Chauffage rapide. Permet d’atteindre rapidement la température maximale et de passer ensuite automatiquement à la température de maintien. français Modèles abc: Activez un foyer et sélectionnez la puissance maximale. Appuyez sur et l’afficheur indiquera sur le foyer sélectionné (2.9.1). Vous avez 5 secondes pour sélectionner le niveau souhaité. Il est recommandé de sélectionner un niveau entre 3 et le 6 (2.9.2). Après 5 secondes, le chauffage rapide est validé et l’affichage indique et la puissance sélectionnée alternativement. La température maximale une fois atteinte, le disparaît et l’affichage indique uniquement la puissance de maintien. Le foyer continue à fonctionner de manière conventionnelle. Pour annuler le chauffage rapide, appuyez sur le symbole du foyer programmé et sélectionnez une nouvelle puissance. Modèles dfghjklmo: Sélectionnez un foyer et sélectionnez la puissance maximale en appuyant sur jusqu’à ce que l’affichage indique 9 et un point (2.9.3). Réglez la puissance en appuyant sur . Il est recommandé de sélectionner les niveaux 3 à 6 (2.9.4). Après 5 secondes, le chauffage rapide est validé et l’affichage indique la puissance sélectionnée accompagnée d’un point (2.9.5). Une fois la température maximale atteinte, le point disparaît et le foyer continue à fonctionner de manière conventionnelle. Pour annuler la fonction chauffage rapide, appuyez sur la touche du foyer programmé et sélectionnez une nouvelle puissance. 2.10 Vitrocéramiques à commandes. Assurezvous que la commande que vous allez actionner correspond bien au foyer que vous voulez utiliser (2.10.1). Tournez la commande jusqu’à la position souhaitée. Le voyant de fonctionnement s’allume (2.10.2). Le foyer une fois éteint, l’affichage indiquera le symbole de chaleur résiduelle. Sur les modèles munis d’un foyer double ou d’un foyer Grand Plat, tournez la commande à gauche pour régler une partie du foyer et à droite pour régler le foyer dans sa totalité (2.10.3). 2.11 Éteindre foyer. Sélectionnez la puissance foyer que vous souhaitez éteindre. 0 du 2.12 Chaleur résiduelle. Après leur utilisation intensive, les foyers restent chauds pendant un certain temps, qui varie en fonction de la puissance ou un point sélectionnée. L’affichage indique sur les foyers encore chauds. Ne touchez pas les foyers chauds, pour éviter de vous brûler. Attention: Après une panne de courant, l’appareil même si la zone de n’affichera pas l’indication cuisson est encore chaude. Veillez à ne pas vous brûler. 2.13 Fonction verrouillage. Pour éviter que les enfants manipulent la table de cuisson, appuyez durant 3 secondes sur et activer ainsi le verrouillage des commandes. Pour le désactiver, procédez de la même manière. Avertissements: • Évitez les chocs des récipients sur la vitrocéramique. • Les récipients en aluminium ne sont pas recommandables; ils pourraient produire des taches sur la vitrocéramique, à moins que leur fond ne soit muni d’une protection en acier inoxydable. • Les foyers ne doivent pas fonctionner sans récipient. • La base du récipient doit être plate et sèche. • Veillez à ce que le diamètre du récipient soit supérieur ou égal à celui du foyer à utiliser et déposez ce dernier au centre de la zone de cuisson. • Evitez de frotter les récipients sur la vitrocéramique; ils pourraient la rayer. • Utilisez cet appareil uniquement pour la cuisson d’aliments. Ne jamais utiliser cette plaque de cuisson comme table de travail. • Ne jamais verser d’eau froide directement sur la table de cuisson lorsqu’elle est encore chaude. Attention: Le fonctionnement discontinu des zones de cuisson n’est pas une panne. Les foyers fonctionnent par cycles de marche/arrêt plus ou moins longs, en fonction de la puissance sélectionnée. 3 Entretien et Maintenance • Ne pas utiliser de nettoyeur à vapeur. • Nettoyez souvent la surface de votre table de cuisson une fois refroidie. N’utilisez jamais d’éponges ou de produits abrasifs. Utilisez uniquement un chiffon humide et de l’eau savonneuse (3.1.1). • Une fois par semaine, nettoyez votre table de cuisson en profondeur avec des produits spéciaux pour vitrocéramique, qui entretiennent et protégent la plaque. Nous vous recommandons la marque VITROCLEN pour le nettoyage et l’entretien de votre vitrocéramique. 7 français • Enlevez les salissures recuites à l’aide d’une raclette spéciale pour vitrocéramique (3.1.2). • Si vous brûlez fortuitement du sucre (ou des produits sucrés) ou du plastique sur la plaque, éliminez-le immédiatement, avec la raclette spéciale pour vitrocéramique, quand il est encore chaud. Dans le cas contraire, les taches pourraient rester. • Veillez à ce que la lame de la raclette spéciale pour vitrocéramique soit toujours en parfait état. Remplacez-la si nécessaire. 4 • Ne déposez pas de récipients chauds sur les commandes, vous risquez de vous brûler en les activant (4.1.3). • Veillez à ce que les enfants ne s’approchent pas de l’appareil, car pendant le fonctionnement de la table de cuisson, la zone autour des foyers s’échauffe. Utilisez le dispositif de verrouillage, pour éviter que les enfants jouent avec les commandes. • Cet appareil ne doit pas être utilisé par des personnes aux capacités réduites. Sécurité • L’installation électrique qui alimente la table de cuisson doit comporter un dispositif de coupure omnipolaire avec une ouverture des contacts d’au moins 3 mm. • L’installation de la table de cuisson doit être réalisée par un installateurs agréé, conformément aux instructions et croquis du fabricant. • Le raccordement doit être choisi en conformité avec la capacité électrique de l’installation et des fusibles, avec prise de terre et conformément aux normes en vigueur. • Si le câble est endommagé, il doit être remplacé par le fabricant, son Service Après-Vente ou du personnel qualifié, afin d’éviter tout risque d’accident. • Chaque zone de cuisson est équipée d’un limiteur de température, qui coupe automatiquement le foyer en cas de surchauffe de l’appareil. • Éteignez le foyer après chaque utilisation. • En cas de cassure, fêlure ou fissure de la vitrocéramique, débranchez immédiatement votre appareil pour éviter un risque de choc électrique. Contactez le Service Après-Vente pour le faire remplacer. Ne pas utiliser la plaque de cuisson entre-temps (4.1.1). • En cas de débordement sur les touches de commande, la table de cuisson s’arrête et émet un signal sonore (4.1.2). • Si vous maintenez appuyée un touche durant trop longtemps ou en cas d’objet posé sur les 8 touches, la table de cuisson s’arrête et émet un signal sonore (4.1.3). • Ne vous éloignez pas de votre table de cuisson lorsque vous préparez des mets avec de la graisse ou de l’huile. Ils risquent de s’enflammer par excès de chaleur. • Si la table de cuisson est installée sur un tiroir, veillez à ne pas y ranger des objets inflammables. 5 Environnement Cette table de cuisson a été conçue dans un souci de préservation de l’environnement. Soyez respectueux de l’environnement. Utilisez les puissances adaptées à chaque cuisson et des récipients adaptés à la quantité d’aliments à cuire. Utilisez des casseroles et des récipients aux diamètres identiques à ceux des foyers, pour une transmission optimale de la chaleur. Éteignez le foyer 5 à 10 minutes avant la fin de la cuisson, pour profiter de la chaleur résiduelle et économiser ainsi de l’énergie. Placez un couvercle sur le récipient, si cela est compatible avec votre recette, pour éviter la perte de chaleur par évaporation. Mise au rebut des appareils électriques et électroniques. Les appareils usagés ne doivent pas être mélangés avec d’autres déchets. Portez votre table de cuisson à un point de collecte des appareils usagés. Le recyclage des électroménagers favorise la prévention des conséquences négatives pour l’environnement et la santé humaine et permet d’économiser de l’énergie et des ressources. Pour plus d’informations, adressez-vous aux autorités locales ou à votre revendeur. português Manual de instruções Muito importante: Leia integralmente este manual antes de utilizar a placa. Este manual está elaborado para que os textos se relacionem com os desenhos correspondentes. 0 Int. nominal por fases 14 A 16,5 A 380-415V 3N~ Placa de 60 cm Placa >60cm Int. nominal por fases 11 A 13 A 380-415V 2N~ Placa de 60 cm Placa >60cm Int. nominal por fases 16 A 19 A Identificação Identifique o modelo da sua placa (“a”, “b”, “c”, “d”, “e”, “f”, “g”, “h”, “i”, “j”, “k”, “l”, “m”, “n”, “o”) comparando o número e a disposição dos focos do seu aparelho com os das figuras. 1 220-240V 3~ Placa de 60 cm Placa >60cm Instalação 1.1 Desembalar. Retire todos os elementos de protecção. 1.2 Encastre no móvel. Tenha sempre em conta os dados das características (1.2.1) e as medidas do móvel onde vai encastrar a placa (1.2.2, 1.2.3). Se não vai colocar o forno debaixo da placa, deve instalar uma tábua de protecção segundo as medidas indicadas (1.2.4). Fixe a junta de espuma ao longo do contorno exterior da placa para obter uma boa estanqueidade (1.2.5). Vire a placa e introduza-a na folga (1.2.6). Aperte-a no móvel com os quatro engates fornecidos (1.2.7). Não utilize materiais não amovíveis como o silicone. 1.3 Ligação à rede eléctrica. A placa é fornecida com cabo de alimentação. • De 5 fios: a) azul escuro, b) azul claro, c) castanho, d) vermelho, e) verde amarelo. (1.3.1) • Preparado para placa de 230V~. (1.3.2) • Preparado para placa de 220-240V~: consulte a tabela. (1.3.3) • Potência total: 220-240V~ Placa de 60 cm Placa >60cm Placa 60cm 6,8kW, Placa >60cm 7,8kW Int. nominal por fases 30 A 34 A • Se o tipo de ligação é diferente de 220240V~, retire o cabo e faça a ligação segundo os esquemas (1.3.3, 1.3.4). Este aparelho está em conformidade com as directivas europeias 73/23/CEE e 89/336/CEE Recomendação: A instalação da placa deve ser efectuada por um instalador autorizado, que seguirá as instruções e os esquemas do fabricante. 2 Utilização Com vitrocerâmica são válidos os recipientes de barro, cobre ou aço inoxidável. Os de alumínio não são aconselháveis porque podem formar manchas sobre o vidro da placa. 2.1 Selecção da zona de cozedura. Disponha de vários focos para colocar os recipientes. Escolha o mais adequado em função do tamanho do recipiente. durante 3 2.2 Acender a placa. Ao premir segundos para acender a placa, são activados os das diferentes zonas de cozedura. 0 Nota: Para poder seleccionar se a função de segurança crianças está activada, desactive-a premindo durante 3 segundos a tecla (2.13). 2.3 Activação do foco. Active o foco onde colocou o recipiente premindo a tecla correspondente (2.3.1, (2.4.2) 2.3.2). ou prima Nota: Se demorar mais de 5 segundos ao seleccionar o foco, a placa apagase automaticamente, como medida de segurança. 9 português 2.4 Selecção da potência. Ajuste-a deslizando o dedo pela barra (2.4.1) ou premindo ou (2.4.2, 2.4.3). Após 5 segundos o tempo é validado e serão visualizados alternadamente a no foco temporizado. potência e Passado esse tempo será emitido um sinal sonoro e piscará . Para anular a no ícone até temporização prima visualizar . 00 FOCOS ESPECIAIS 2.5 Foco duplo, Foco triplo. Depois de ter , seleccionado a potência, prima e accionará o foco duplo (2.5.1, 2.5.3). Se premir de novo (2.5.2) ou (2.5.4) accionará o foco triplo. Para anular prima , ( , , ). 2.6 Foco fonte. Pode utilizar este foco circular ou conjuntamente, como foco fonte . Prima para o activar e prima-o de novo para o desactivar. Recomendação: Nos modelos com focos a halogéneo, a luz é tão intensa que se aconselha a não olhar fixamente quando estiver em funcionamento sem o recipiente. 00 Nota: O temporizador apagar-se-á automaticamente se demorar mais de 10 segundos ao seleccionar o tempo. Modelos e: Uma vez activado um foco e seleccionada a potência, prima de novo a tecla de selecção do foco a . (2.8.11). temporizar, aparece um Seleccione o tempo com , (2.8.12) e valide premindo de novo a tecla do foco temporizado (2.8.13). A potência será visualizada com um ponto que indica que o foco está temporizado. Um sinal sonoro e uma indicação avisam que o tempo foi concluído (2.8.14). Prima uma tecla qualquer e o sinal sonoro desaparecerá. FUNÇÕES DO TEMPO . Ao ligar a placa, 2.7 Introduzir a hora os dígitos do relógio piscam e marcam (2.7.1). Ajuste a hora com as as teclas , (2.7.2). Faça a mesma operação de cada vez que se desligue ou haja um corte de energia eléctrica. Para alterar a hora prima durante 5 segundos (2.7.3). A hora começará a piscar a tecla e ouvirá um sinal sonoro, ajuste-a com as teclas , . Nota: O temporizador apagar-se-á automaticamente se demorar mais de 10 segundos ao seleccionar o tempo. Considerações sobre a temporização: Se o nível de potência é 9 o tempo máximo a temporizar será de 60 min. Se é diferente o máximo poderá ser 99 min. Uma vez concluído o tempo o alarme soará enquanto não premir nenhuma tecla. FUNÇÕES DE PROGRAMAÇÃO 2.8 Selecção do tempo. Modelos abc: Uma vez activado um foco e seleccionada a potência, tem 5 segundos Seleccione a piscar para premir a tecla o tempo necessário premindo , (2.8.2). TApós cinco segundos o tempo é validado e serão visualizados a hora e um ponto luminoso abaixo do ícone do foco temporizado (2.8.3). Para modificar ou ver o tempo restante, prima o ícone do foco temporizado (2.8.4). Para anular a programação prima as teclas , simultaneamente (2.8.5). Modelos dfghkmo: Uma vez activado um foco e seleccionada a potência, prima a no relógio. Aparece e um tecla em cada foco (2.8.6). Prima do foco a piscará (2.8.7). Seleccione temporizar e o tempo com , no relógio (2.8.8). 00 10 2.9 Aquecimento rápido. Alcance rapidamente a temperatura máxima para passar automaticamente para a temperatura de manutenção. Modelos abc: Active um foco e coloque a barra na potência máxima. Prima no visor do foco e aparece um seleccionado (2.9.1). Tem 5 segundos para seleccionar o nível desejado, recomenda-se que esteja entre os níveis 3 e 6 (2.9.2). Após cinco segundos o aquecimento rápido é e a potência validado e serão visualizados alternadamente. Alcançada a temperatura máxima desaparece restando a potência de manutenção. O foco continuará a funcionar convencionalmente. Se deseja cancelar o aquecimento rápido prima o ícone do foco programado e seleccione uma nova potência. português Modelos dfghjklmo: Seleccione um foco e coloque-o na potência máxima premindo até visualizar um 9 e um ponto (2.9.3). Regule a potência premindo recomendam-se os níveis 3 a 6 (2.9.4). Após 5 segundos, o aquecimento rápido é validado e será visualizada a potência seguida de um ponto (2.9.5). Alcançada a temperatura máxima, o ponto decimal desaparece e o foco continuará a funcionar convencionalmente. Para cancelar a função, prima a tecla do foco programado e seleccione uma nova potência. 2.10 Vidro com botões. Assegure-se de que o foco que vai accionar corresponde ao foco que quer utilizar (2.10.1). Rode o botão para a posição desejada e acender-se-á a luz piloto de funcionamento (2.10.2) que também assinala o calor residual quando o foco se apaga. Nos modelos com foco duplo ou foco fonte, rodando o botão para a esquerda é regulada uma parte do foco e rodando o botão para a direita é regulado o foco inteiro (2.10.3). 2.11 Apagar o foco. Seleccione a potência do foco que deseja apagar. 0 • Os focos de calor não devem funcionar sem recipiente. • A base do recipiente tem de ser plana e estar seca. • Certifique-se de que os diâmetros dos recipientes sejam maiores ou iguais ao foco a utilizar e centre-o sobre o foco de calor. • Tente não mover os recipientes, poderia quebrar o vidro. • Utilize o aparelho só para a preparação de alimentos. Não utilize a placa como mesa de trabalho. • Não despeje água fria directamente na placa quando estiver quente. Atenção: O funcionamento descontínuo das zonas de cozedura, não é uma avaria. Funcionam nos períodos de ligar e desligar mais ou menos longos em função da potência desejada. 3 Manutenção e limpeza 2.12 Calor residual. Depois de utilizar a placa os focos mantêm-se quentes durante algum tempo que varia em função da potência ou um seleccionada e é visualizado um ponto nos focos ainda quentes. Não toque nesses focos, corre o risco de se queimar. • Não utilize um vaporizador para limpar. Atenção: Se se produzir um corte de corrente eléctrica, ao ser restabelecida de novo, a não será visualizada estando ainda indicação quente a zona de cozedura. Tenha em conta esta circunstância. • Uma vez por semana, limpe a fundo com produtos específicos para vitrocerâmica. Recomendamos o VITRO-CLEN para a limpeza e a manutenção da sua placa em vitrocerâmica. 2.13 Função bloqueio. Para evitar o manuseamento por parte das crianças. Mantenha premida durante 3 segundos a tecla e activará o bloqueio. Para o desbloquear repita a operação. • A sujidade fortemente agarrada é eliminada com o raspador de vidro (3.1.2). Recomendações: • Evite golpes dos recipientes sobre o cristal. • Os recipientes de alumínio não são aconselháveis, pois poderiam formar manchas sobre o vidro, a não ser que tenham um fundo com protecção em aço inoxidável. • Limpe a fundo a superfície da sua placa quando tiver arrefecido. Não utilize produtos ou esfregões abrasivos. Limpe com um pano humedecido e água com sabão (3.1.1). • Se por descuido queima açúcar, elementos açucarados ou plástico sobre a placa, elimineos o quanto antes com um raspador ainda quente. Se não o fizer podem deixar manchas permanentes. • Utilize a colher do raspador em bom estado, substitua-a no caso de apresentar alguma deterioração. 11 português 4 Segurança • O circuito da rede que alimenta a placa deve ter um interruptor de corte omnipolar de pelo menos 3 mm de distância entre os contactos. • A instalação da placa deve ser efectuada por um instalador autorizado que seguirá as instruções e os esquemas de fabricantes. • A instalação deve estar regulada para a potência máxima indicada na placa de características e a tomada de corrente com a tomada de terra regularizadas. • Se o cabo estiver danificado, deve ser substituído pelo seu serviço de pós-venda ou pessoal igualmente qualificado com o fim de evitar um acidente. • O foco está equipado com um limitador de temperatura interior que desliga o foco no caso de aquecimento excessivo da placa. • Após cada utilização, desligue o foco através do seu controlo. • Se a superfície do vidro se quebra ou parte, desligue de imediato o aparelho da rede eléctrica para evitar um possível choque eléctrico. Não utilize a placa até substituir o vidro (4.1.1). • No caso de transbordarem líquidos sobre as teclas de funções a placa é interrompida e emite um sinal sonoro (4.1.2). • Se mantiver premido algum sensor durante muito tempo ou houver algum objecto que esteja a activar os sensores, a placa é interrompida e emite um sinal sonoro (4.1.3). • Não coloque recipientes com o fundo quente sobre os sensores, pode queimar-se ao premilos (4.1.3). • Mantenha afastadas as crianças pequenas, as superfícies de aquecimento podem aquecer excessivamente durante o seu funcionamento. Utilize o sistema de bloqueio para evitar que possam brincar com os botões. • Este aparelho não se destina a ser utilizado por pessoas com capacidades reduzidas. 12 • Permaneça sempre por perto ao cozinhar pratos ou alimentos com gordura ou óleo. O calor excessivo pode fazer com que se inflamem. • Se a placa está instalada em cima de um balcão, não deverão ser guardados objectos inflamáveis. 5 Meio ambiente A placa foi elaborada a pensar na conservação do meio ambiente. Respeito pelo meio ambiente. Utilize as potências adequadas para cada cozedura e seleccione os recipientes de tamanho adequado para as quantidades dos alimentos que vão ser preparados. Quando o fundo do recipiente e o diâmetro da zona de cozedura têm o mesmo tamanho, a transmissão de calor é óptima. Ao terminar a cozedura, se o desejar, deixe o recipiente no mesmo lugar para utilizar o calor residual acumulado. Deste modo poupará energia. Utilize uma tampa sempre que possa para reduzir a perda de calor por evaporação. Gestão de resíduos de aparelhos eléctricos e electrónicos. Não elimine os aparelhos misturando-os com resíduos domésticos gerais. Deposite a sua placa num centro especial de recolha. A reciclagem de electrodomésticos evita consequências negativas para a saúde e o meio ambiente e permite poupar energia e recursos. Para mais informações, contacte as autoridades locais ou o estabelecimento onde adquiriu a placa. e n g l i s h Instruction Manual Very important: Read this manual thoroughly before using the hob. This manual is designed so that the texts relate to the corresponding illustrations. 0 Identification Identify the model of your hob (“a”, “b”, “c”, “d”, “e”, “f”, “g”, “h”, “i”, “j”, “k”, “l”, “m”, “n”, “o”) by comparing the number and layout of the elements on your appliance with that shown in the illustrations. 1 Installation 1.1 Unpacking. Remove all the protective materials. 1.2 Insertion into the unit. Always take into account the details on the characteristics plate (1.2.1) and the measurements of the unit into which the hob is going to be inserted (1.2.2, 1.2.3). If you are not going to fit an oven beneath the hob, you must install a protective panel in accordance with the measure indicated (1.2.4). Stick the foam join along the outer edge of the hob to make it watertight (1.2.5). Turn the hob over and insert it into the hole (1.2.6). Secure it to the unit with the four hooks supplied (1.2.7). Do not use non-removable materials such as silicone. 1.3 Connection to the power supply. The hob is supplied with a power cable. • With 5 wires: a) dark blue, b) light blue, c) brown, d) red, e) green yellow. (1.3.1) • Prepared for a 230V~ hob. (1.3.2) • Prepared for a 220-240V~ hob: see table. (1.3.3) • Total power: 60cm hob 6.8kW, >60cm hob 7.8kW 220-240V~ 60 cm hob >60cm hob Nominal switch by phases 30 A 34 A • If the type of connection is other than 220240V~, remove the cable and make the connection as per diagrams (1.3.3, 1.3.4). 220-240V 3~ 60 cm hob >60cm hob Nominal switch by phases 14 A 16,5 A 380-415V 3N~ 60 cm hob >60cm hob Nominal switch by phases 11 A 13 A 380-415V 2N~ 60 cm hob >60cm hob Nominal switch by phases 16 A 19 A This appliance is compliant with European directives 73/23/EEC and 89/336/EEC Recommendation: The hob must be installed by an authorised installer, who shall follow the manufacturer’s instructions and diagrams. 2 Use Clay, copper or stainless steel receptacles can be used with vitroceramic hobs. Aluminium receptacles are not recommended as they can stain the glass of the hob. 2.1 Selecting the cooking zone. You have various elements on which to place the receptacles. Choose the most suitable one depending on the size of the receptacle. for 3 2.2 Turning on the hob. Press seconds to turn on the hob; the of the different cooking zones will be activated. 0 N.B.: In order to be able to select whether the child safety function is activated, key for 3 deactivate it by pressing the seconds (2.13) 2.3 Activating the element. Activate the element on which you have placed the receptacle by pressing the corresponding key (2.3.1, 2.3.2). or (2.4.2) press N.B.: If you take longer than 5 seconds to select the element, the hob will automatically turn itself off, as a safety measure. 13 e n g l i s h 2.4 Selecting the power. Adjust it by sliding your finger along the bar (2.4.1) or by pressing or (2.4.2, 2.4.3). SPECIAL ELEMENTS 2.5 Double element, Triple element. Once you , have selected the power, press and this will activate the double element (2.5.1, 2.5.3). If you press (2.5.2) or (2.5.4) again, this will activate the triple , element. To cancel, press ( , , ). 2.6 Large hotplate. You can use this element in a circular way or in a joint way, . Press to as a large hot plate activate it and press again to deactivate it. Recommendation: on the models with halogen elements, the light is so bright that we advise you not to look at it when it is on without the receptacle. TIMER FUNCTIONS . When the hob is 2.7 Setting the time plugged in, the digits on the clock will flash and will show (2.7.1). Adjust the time with the keys , (2.7.2). Follow the same procedure whenever the appliance is unplugged or the power supply is cut off. key for 5 To change the time, press the seconds (2.7.3). The time will start to flash and you will hear a beep; adjust it with the keys , . 00 00 N.B.: The timer will automatically turn itself off if you take longer than 10 seconds to select the time. Models e: Once an element has been activated and the power selected, press again the selection key of the element to will appear. (2.8.11). be timed, and a Select the time with , (2.8.12) and set it by pressing the timed element key again (2.8.13). The power will be displayed with a dot indicating that the element is on a timer. You will hear a sound and see to indicate that the time has passed (2.8.14). Press any key and the sound will stop. N.B.: The timer will automatically turn itself off if you take longer than 10 seconds to select the time. Observations on timing: If the power level is 9, the maximum time for the timer will be 60 min. Otherwise, the maximum will be 99 min. Once the time has passed, the alarm will sound until you press any key. PROGRAMMING FUNCTIONS 2.9 Rapid heating. Reaches maximum temperature quickly to automatically go to the constant temperature. 2.8 Selecting the time. Models abc: Once an element has been activated and the power selected, you have 5 seconds of flashing in which to press the key (2.8.1). Select the time required by pressing , (2.8.2). After five seconds the timer is set and the time will be displayed with an illuminated dot beneath the icon of the timed element (2.8.3). To alter or see the time remaining, press the icon of the timed element (2.8.4). To cancel the programming, , keys simultaneously press the (2.8.5). Models dfghkmo: Once an element has been activated and the power selected, key on the clock. and a press the will appear on each element (2.8.6). Press will on the element to be timed and 00 14 flash (2.8.7). Select the time with , on the clock (2.8.8). After 5 seconds the time will be will be set and the power and displayed alternately on the timed element. Once the time has passed, you will hear a sound and will flash. To cancel the on the icon until is timing, press displayed. Models abc: Activates an element and takes the bar to the maximum power. Press will appear on the display screen and a of the selected element (2.9.1). You have 5 seconds to select the desired level, you are advised to use levels from 3 to 6 (2.9.2). After five seconds the rapid heating will be set and will appear on the display screen of the selected element (2.9.1). You have 5 seconds to select the desired level, you are advised to use levels from 3 to 6 (2.9.2). After five seconds the rapid heating will be set and and the power will be displayed alternately. Once the maximum temperature has been will disappear, leaving the reached, power constant. The element will continue operating in the conventional way. If you want e n g l i s h to cancel the rapid heating, press the icon of the programmed element and select a new power. Models dfghjklmo: Select an element and set it at the maximum power by pressing are displayed (2.9.3). until a 9 and a dot Adjust the power by pressing ; levels 3 to 6 are recommended (2.9.4). After 5 seconds, fast heating is set and the power will be displayed followed by a dot (2.9.5). Once the maximum temperature has been reached, the decimal point will disappear and the element will continue operating in the conventional way. To cancel the function, press the key of the programmed element and select a new power. 2.10 Vitros with controls. Make sure that the element you are going to activate is the element you want to use (2.10.1). Turn the control to the desired position and the ‘on’ light will come on (2.10.2) which also indicates the residual heat when the element is turned off. On the models with double elements or a large hotplate, turning the control to the left will adjust a part of the element and turning the control to the right will adjust the whole element (2.10.3). 2.11 Turning the element off. Select the power of the element you want to turn off. 0 2.12 Residual heat. After using the hob, the elements will stay hot for some time, which will vary according to the power selected or a dot will be displayed on the and a elements that are still hot. Do not touch these elements, as there is a risk of burning yourself. Caution: If the power supply is cut off, when icon will not be displayed it is restored, the even if the cooking zone is hot. It is important to remember this fact. 2.13 Locking function. To prevent children from handling the appliance. Press down the key for 3 seconds and this will activate the lock. To unlock it, repeat the procedure. Recommendations: • Avoid knocking receptacles against the glass. they can stain the glass, unless they have a stainless steel protective base. • The heat elements should not be operated without a receptacle. • The base of the receptacle must be flat and dry. • Make sure that the diameters of the receptacles are larger than or the same as the element to be used and place them in the centre of the heat source. • Try not to move the receptacles as this can scratch the glass. • Only use the appliance for cooking food. Do not use the hob as a worktop. • Do not apply cold water directly onto the hob when it is hot. Caution: Intermittent operation of the cooking zones is not a fault. They operate with longer or shorter on and off periods depending on the desired power. 3 Maintenance and cleaning • Do not use a steam cleaner. • Clean the surface of your hob regularly once it has cooled down. Do not use abrasive products or sponges. Clean with a damp cloth and soapy water (3.1.1). • Once a week, clean thoroughly with products specifically designed for vetroceramic hobs. We recommend VITRO-CLEN for cleaning and maintaining your vitroceramic hob. • Stubborn stains can be removed with the glass scraper (3.1.2). • If you accidentally burn some sugar, sugary elements or plastic on the hob, remove it as soon as possible with a scraper while it is still hot. If this is not done, you may be left with permanent marks. • Use the blade of the scraper in perfect condition; replace it if is damaged. • Aluminium receptacles are not advisable as 15 e n g l i s h 4 Safety • The power circuit supplying the hob must have an all-pole circuit breaker with at least 3mm space between contacts. • The hob must be installed by an authorised installer, who shall follow the manufacturer’s instructions and diagrams. • The installation must be of the appropriate size for the maximum power indicated on the characteristics plate and the power socket with the regulatory earth. • If the cable is damaged, it must be replaced by the post-sales service or similarly qualified personnel for safety purposes. • The element is equipped with an inner temperature limiter which turns the element off in the event of the hob overheating. • After each use, switch the element off using its control. • If the surface of the glass is cracked or broken, unplug the appliance immediately to avoid the possibility of an electric shock. Do not use the hob until the glass has been replaced (4.1.1). • If anything spills onto the control keys, the hob will stop and emit a sound (4.1.2). • If you press a sensor down for too long or there is an object activating the sensors, the hob will stop and emit a sound (4.1.3). • Do not place receptacles with hot bases onto the sensors; you can burn yourself when pressing them (4.1.3). • Keep young children well away; the heating surfaces can be extremely hot when in use. Use the locking system to prevent children from playing with the controls. • This appliance is not designed for use by people with disabilities. • Always stay nearby when cooking dishes or food with fat or oil. Excessive heat could cause them to catch fire. • If the hob is installed above a drawer, no flammable objects must be stored inside. 16 5 Environment The hob has been designed with protection of the environment in mind. Be environmentally aware. Use the adequate power for each cooking operation and select the receptacles of a suitable size for the food you are going to prepare. The heat transmission is best when the base of the receptacle and the diameter of the cooking zone are the same size. When you have finished cooking, if you like you can leave the receptacle where it is to make use of the residual heat accumulated. This will save energy. Use a lid whenever you can in order to reduce the heat lost through steam. Electrical and electronic appliance waste management. Do not dispose of appliances by mixing them with general domestic waste. Take your hob to a special collection centre. The recycling of domestic appliances avoids negative consequences to our health, the environment and enables us to save energy and resources. For further information, contact your local authority or the establishment from where you purchased your hob. deutsch Bedienungsanleitung Achtung, wichtig: Lesen Sie diese Bedienungsanleitung vollständig durch, bevor Sie das Kochfeld benutzen. Diese Bedienungsanleitung ist so konzipiert, dass die Texte mit den entsprechenden Abbildungen in Zusammenhang stehen 0 Zuordnung des Modells Ordnen Sie das Modell Ihres Kochfeldes („a“, „b“, „c“, „d“, „e“, „f“, „g“, „h“, „i“, „a“, „j“, „k“, „l“, „m“, „n“, „o“) durch Vergleich der Anzahl und Anordnung der Kochzonen Ihres Gerätes mit denen auf den Abbildungen zu. 1 Installation 1.1 Auspacken. Entfernen Sie alle Schutzelemente. 1.2 Bauen Sie das Gerät in den Schrank ein. Beachten Sie stets die auf dem Typenschild angegebenen Daten (1.2.1) sowie die Maße des Schrankes, wo das Kochfeld eingebaut werden soll (1.2.2, 1.2.3). Wenn Sie den Herd nicht unter dem Kochfeld einbauen, ist ein Schutz entsprechend der angegebenen Maße (1.2.4) anzubringen. Kleben Sie die Schaumdichtung längs des Außenrandes des Kochfeldes an, um eine gute Dichtheit (1.2.5) zu erreichen. Drehen Sie das Kochfeld und führen Sie sie in die Öffnung ein (1.2.6). Befestigen Sie sie mit den vier mitgelieferten Haken (1.2.7) am Schrank. Verwenden Sie keine herausnehmbaren Materialien wie z. B. Silikon. 1.3 Anschluss ans Stromnetz. Das Kochfeld wird mit Netzkabel geliefert. • 5 Leitungen: a) dunkelblau, b) hellblau, c) braun, d) rot, e) gelbgrün (1.3.1). heraus und nehmen Sie den Anschluss entsprechend der Schemata vor (1.3.3, 1.3.4). 220-240V 3~ Nennstromstärke pro Phase Kochfeld, 60 cm 14 A Kochfeld, > 60 cm 16,5 A 380-415V 3N~ Nennstromstärke pro Phase Kochfeld, 60 cm 11 A Kochfeld, > 60 cm 13 A 380-415V 2N~ Nennstromstärke pro Phase Kochfeld, 60 cm 16 A Kochfeld, > 60 cm 19 A Dieses Gerät entspricht den europäischen Richtlinien 73/23/EWG und 89/336/EWG Empfehlung: Die Installation des Kochfeldes ist durch einen autorisierten Installateur vorzunehmen, der den Anweisungen und Anleitungen des Herstellers folgt. 2 Gebrauch Für Glaskeramikkochfelder sind Behälter aus Ton, Kupfer oder Edelstahl geeignet. Es wird davon abgeraten, Behälter aus Aluminium zu benutzen, da diese zu Flecken auf der Glasoberfläche des Kochfeldes führen können. 2.1 Wählen Sie die Leistungsstufe aus. Es stehen verschiedene Kochzonen zur Verfügung, auf die die Behälter gestellt werden können. Verwenden Sie diejenige Kochzone, die größenmäßig am Besten für den jeweiligen Behälter geeignet ist. • Geeignet für Kochfelder mit 230 V~. (1.3.2) • Geeignet für Kochfelder mit 220 - 240 V~: Schauen Sie in der Tabelle nach (1.3.3). • Gesamtleistung: Kochfeld 60 cm 6,8 kW, Kochfeld > 60 cm 7,8 kW 220-240V~ Nennstromstärke pro Phase Kochfeld, 60 cm 30 A Kochfeld, > 60 cm 34 A • Wenn es sich nicht um einen Anschluss von 220 - 240 V~ handelt, ziehen Sie das Kabel 2.2 Einschalten des Kochfeldes. Drücken Sie , um das Kochfeld 3 Sekunden lang einzuschalten. Es werden die der verschiedenen Leistungsstufen aktiviert. 0 Anmerkung: Um auswählen zu können, ob die Sicherheitsverriegelung aktiviert ist, deaktivieren Sie sie, indem Sie 3 Sekunden lang die Taste gedrückt halten (2.13). 2.3 Aktivierung der Kochzone. Aktivieren Sie die Kochzone, auf die Sie den Behälter gestellt haben durch Drücken der entsprechenden Taste 17 deutsch (2.3.1, 2.3.2) oder drücken Sie (2.4.2) Anmerkung: Wenn Sie zum Auswählen der Kochzone länger als 5 Sekunden benötigen, schaltet sich das Kochfeld aus Sicherheitsgründen automatisch ab. 2.4 Auswahl der Leistung. Stellen Sie die Leistung durch Gleiten des Fingers über die Leiste (2.4.1) bzw. (2.4.2, oder durch Drücken von 2.4.3) ein. SPEZIALKOCHZONEN 2.5 Doppel-Kochzone, Dreifach-Kochzone. Nach , zur Auswahl der Leistung drücken Sie Aktivierung der Doppel-Kochzone (2.5.1, 2.5.3). Bei erneutem Drücken von (2.5.2) bzw. (2.5.4) wird die Dreifach-Kochzone aktiviert. Zum , Löschen drücken Sie ( , , ). 2.6 Bräterzone. Sie können diese Kochzone kreisförmig oder gemeinsam als Bräterzone verwenden. Drücken Sie zum Aktivieren und erneut zum Deaktivieren. Empfehlung: Bei mit Halogen-Kochzonen ausgestatteten Modellen ist das Licht so intensiv, dass empfohlen wird, nicht direkt in das Licht zu schauen, wenn das Gerät ohne Behälter in Betrieb ist. ZEITFUNKTIONEN . Beim Anschließen des 2.7 Einstellen der Zeit Kochfeldes blinken die Ziffern der Uhr und zeigen an (2.7.1). Stellen Sie die Zeit mit den Tasten , (2.7.2) ein. Gehen Sie genau so vor, wenn sich das Gerät abschaltet oder wenn es zu einer Stromabschaltung kommt. Um die Zeit zu ändern, drücken Sie 5 Sekunden (2.7.3). Die Stundenanzeige lang die Taste beginnt zu blinken und Sie hören ein akustisches Signal. Stellen Sie die Zeit mit den Tasten , ein. 2.8 Auswahl der Zeit. Modelle abc: Nach Aktivierung einer Kochzone und Auswahl der Leistung stehen Ihnen 5 Sekunden zur Verfügung (Sie sehen ein Blinken), (2.8.1). zu drücken. Wählen um die Taste Sie die erforderliche Zeit aus, indem Sie , drücken (2.8.2). Nach fünf Sekunden bleibt die Zeit eingestellt und es werden die Zeit sowie ein Leuchtpunkt unter dem Symbol der zeitgesteuerten Kochzone (2.8.3) sichtbar. Um Anpassungen vorzunehmen oder die 18 verbleibende Zeit zu sehen, drücken Sie auf das Symbol der zeitgesteuerten Kochzone (2.8.4). Um die Programmierung zu löschen, drücken Sie gleichzeitig die Tasten , (2.8.5). Modelle dfghkmo: Nach Aktivierung einer Kochzone und Auswahl der Leistung drücken Sie über der Uhr. Es erscheint die Taste sowie auf jeder Kochzone (2.8.6). Drücken Sie für die Zeitsteuerung der Kochzone. Es blinkt (2.8.7). Wählen Sie die Zeit mit , über der Uhr (2.8.8). Nach 5 Sekunden ist die Zeit eingestellt auf der und alternativ wird die Leistung und zeitgesteuerten Kochzone angezeigt. Nach Ablauf der Zeit ertönt ein akustisches Signal und es blinkt . Um die Zeitsteuerung aufzuheben, drücken Sie auf dem Symbol zu sehen , bis ist. 00 00 00 Anmerkung: Die Zeitsteuerung schaltet sich automatisch ab, wenn Sie länger als 10 Sekunden zum Auswählen der Zeit benötigen. Modell e: Nach Aktivierung einer Kochzone und Auswahl der Leistung drücken Sie erneut die Taste für die Auswahl der zeitlich zu steuernden (2.8.11). Stellen Sie Kochzone. Es erscheint die Zeit mit , (2.8.12) ein und bestätigen Sie durch erneutes Drücken der Taste der zeitgesteuerten Kochzone (2.8.13). Die Leistung wird durch einen Punkt dargestellt, der anzeigt, dass die Kochzone zeitgesteuert ist. Ein akustisches Signal und ein Hinweis geben an, dass die Zeit beendet ist (2.8.14). Drücken Sie eine beliebige Taste um das akustische Signal abzustellen. Anmerkung: Die Zeitsteuerung schaltet sich automatisch ab, wenn Sie länger als 10 Sekunden zum Auswählen der Zeit benötigen. Anmerkungen zur Zeitsteuerung: Bei einer Leistungsstufe von 9 beträgt die steuerbare Höchstzeit 60 Min. Bei anderen Leistungsstufen kann die Höchstzeit 99 Min. betragen. Nach Beendigung der Zeit erklingt der Alarm, wenn keine Taste betätigt wird. PROGRAMMIERFUNKTIONEN 2.9 Schnelles Erhitzen. Die Höchsttemperatur wird schnell erreicht, um automatisch auf Betriebstemperatur zu gehen. Modelle abc: Aktivieren Sie eine Kochzone und bringen Sie die Leiste auf Höchstleistung. Drücken . Es erscheint auf dem Display der Sie gewählten Kochzone (2.9.1). Sie haben 5 Sekunden Zeit, um die gewünschte Stufe auszuwählen. Es wird empfohlen, dass diese zwischen Stufe 3 deutsch und 6 liegt (2.9.2). Nach fünf Sekunden ist das schnelle Erhitzen eingestellt und es erscheint auf dem Display der gewählten Kochzone (2.9.1). Sie haben 5 Sekunden Zeit, um die gewünschte Stufe auszuwählen. Es wird empfohlen, dass diese zwischen Stufe 3 und 6 liegt (2.9.2). Nach fünf Sekunden ist das schnelle Erhitzen eingestellt und es erscheint sowie alternativ die Leistung. Ist die Höchsttemperatur erreicht, verschwindet wobei die Betriebsleistung bestehen bleibt. Die Kochzone bleibt auf herkömmliche Weise in Betrieb. Wenn Sie das schnelle Erhitzen aufheben möchten, drücken Sie das Symbol für die programmierte Kochzone und wählen Sie eine neue Leistung aus. Modelle dfghjklmo: Wählen Sie eine Kochzone aus und setzen Sie sie durch Drücken von auf Höchstleistung, bis 9 und ein Punkt zu sehen sind (2.9.3). Regulieren Sie die Leistung durch Drücken von . Es werden die Stufen 3 bis 6 empfohlen (2.9.4). Nach 5 Sekunden ist das schnelle Erhitzen eingestellt und es wird die Leistung gefolgt von einem Punkt angezeigt (2.9.5). Ist die Höchsttemperatur erreicht, verschwindet der Dezimalpunkt und die Kochzone bleibt weiterhin auf herkömmliche Weise in Betrieb. Um diese Funktion zu löschen, drücken Sie die Taste der programmierten Kochzone und wählen Sie eine neue Leistung aus. 2.10 Glaskeramik mit Steuerung. Stellen Sie sicher, dass die Kochzone, die Sie betreiben, der Kochzone entspricht, die sie benutzen möchten (2.10.1). Drehen Sie die Steuerung auf die gewünschte Position. Es leuchtet die Betriebskontrollleuchte (2.10.2), die gleichzeitig die Restwärme anzeigt, wenn die Kochzone abschaltet. Bei den Ausführungen mit Doppel- oder Bräterzone wird durch Drehen der Steuerung nach links ein Teil der Kochzone eingestellt. Durch Drehen der Steuerung nach rechts wird die gesamte Kochzone eingestellt (2.10.3). 2.11 Ausschalten der Kochzone. Wählen Sie die Leistung der Kochzone, die Sie ausschalten möchten. 0 2.13 Sicherheitsverriegelung. Die Sicherheitsverriegelung dient dazu, um Manipulation 3 durch Kinder zu vermeiden. Halten Sie die Taste Sekunden lang gedrückt, um die Sperre zu aktivieren. Zum Entsperren gehen Sie ebenso vor. Empfehlungen: • Vermeiden Sie, dass die Behälter auf das Glas stoßen. • Aluminiumbehälter sind nicht zu empfehlen, denn es können sich Flecken auf dem Glas bilden – es sei denn, die Behälter sind mit einen Edelstahlschutz ausgestattet. • Die Kochzonen dürfen nicht ohne Behälter betrieben werden. • Der Boden des Behälters muss flach und trocken sein. • Achten Sie darauf, dass die Durchmesser der Behälter größer oder gleich groß sind wie das Kochfeld, die Sie benutzen und stellen Sie sie in die Mitte der Kochzone. • Versuchen Sie, die Behälter nicht zu bewegen. Es könnte sonst zu Kratzern auf dem Glas kommen. • Verwenden Sie das Gerät nur zur Zubereitung von Speisen. Benutzen Sie das Kochfeld nicht als Arbeitstisch. • Gießen Sie kein kaltes Wasser direkt auf das Kochfeld, wenn die Kochzonen heiß ist. Achtung: Unterbrechungen während des Betriebs der Leistungsstufen stellen keine Störung dar. Abhängig von der gewünschten Leistung erfolgt der Betrieb in Zeitintervallen, in denen sie sich mehr oder weniger lange ab- und einschalten – . 3 Pflege und Reinigung • Verwenden Sie keinen Dampfreiniger. 2.12 Restwärme. Nach Benutzung des Kochfeldes bleiben die Kochzonen einige Zeit heiß. Dies hängt von der ausgewählten Leistung ab. Auf den noch heißen Kochzonen ist bzw. ein Punkt zu sehen. Berühren Sie diese Kochzonen nicht. Es besteht Verbrennungsgefahr. Achtung: Bei einer wieder auftretenden Stromabschaltung wird bei Wiederinbetriebnahme nicht angezeigt, obwohl die Kochzone noch heiß sein könnte. Denken Sie daran. • Reinigen Sie Ihre Kochzonen häufig und nur wenn diese abgekühlt sind. Verwenden Sie keine Produkte oder Schwämme, welche die Oberfläche zerkratzen könnten. Reinigen Sie die Fläche mit einem feuchten Lappen und Seifenwasser (3.1.1). • Führen Sie ein Mal pro Woche eine gründliche Reinigung mit speziell für Glaskeramik geeigneten Produkten durch. Wir empfehlen 19 deutsch Ihnen zur Reinigung und Pflege der Glaskeramik VITRO-CLEN. • Starke, klebende Verschmutzungen werden mit dem Glasschaber entfernt (3.1.2). • Wenn versehentlich Zucker, gezuckerte Speisen oder Plastik auf des Kochfeldes anbrennen, entfernen Sie sie so schnell wie möglich mit einem Schaber, solange diese noch warm sind. Erfolgt keine sofortige Entfernung, können dauerhafte Flecken zurückbleiben. • Benutzen Sie das Messer des Schabers nur in einwandfreiem Zustand und ersetzen Sie es, wenn Sie Abnutzungen feststellen. 4 Sicherheit • Der Stromkreis, durch den das Kochfeld gespeist wird, muss mit einem allpoligen Schalter mit einem Kontaktabstand von mindestens 3 mm ausgestattet sein. • Die Installation des Kochfeldes muss durch einen autorisierten Installateur durchgeführt werden, der Anweisungen und Anleitung des Herstellers befolgt. • Die Installation muss gemäß der auf dem Typenschild angegebenen Maximalleistung bemessen werden und die Steckdose mit Erdung muss den Vorschriften entsprechen. • Wenn das Stromkabel beschädigt ist, muss es durch Ihren Kundendienst oder ähnlich qualifiziertes Personal ausgetauscht werden, damit Gefahren vermieden werden. • Die Kochzone ist mit einem inneren Temperaturbegrenzer ausgestattet, der die Kochzone im Falle von übermäßigem Aufheizen des Kochfeldes abschaltet. • Stellen Sie die Kochzone nach jedem Gebrauch mittels ihrer Steuerung ab. • Wenn die Glasfläche zerkratzt oder ist oder Brüche aufweist, schalten Sie das Gerät sofort ab, um möglichen Stromschlag zu vermeiden. Verwenden Sie das Feld erst nach Austausch des Glases wieder (4.1.1). • Bei Überlaufen von Speisen auf die Tasten der Steuerung stoppt das Kochfeld und Sie hören ein akustisches Signal (4.1.2). 20 • Wenn Sie einen Sensor zu lange gedrückt halten oder ein Gegenstand die Sensoren aktiviert, schaltet sich das Kochfeld aus und Sie hören ein akustisches Signal (4.1.3). • Stellen Sie keine Behälter mit erwärmten Böden auf die Sensoren; beim Drücken derselben besteht Verbrennungsgefahr (4.1.3). • Halten Sie kleine Kinder vom Gerät fern. Die Heizflächen können während des Betriebs stark aufheizen. Verwenden Sie die Sicherheitsverriegelung, um zu vermeiden, dass Kinder mit den Bedienelementen spielen. • Dieses Gerät ist nicht für die Nutzung durch Personen mit geistiger Behinderung geeignet. • Halten Sie sich beim Kochen von Gerichten bzw. Speisen mit Fett oder Öl immer in unmittelbarer Nähe auf. Übermäßige Hitze kann dazu führen, dass diese sich entzünden. • Befindet sich das Kochfeld über einer Schublade, dürfen darin keine entzündbaren Gegenstände aufbewahrt werden. 5 Umwelt Das Kochfeld wurde unter Berücksichtigung des Umweltschutzes konzipiert. Denken Sie an die Umwelt. Kochen Sie stets mit der angemessenen Leistung und verwenden Sie Behälter in der für die vorzubereitenden Mengen geeigneten Größe. Wenn der Boden des Behälters und der Durchmesser der Kochzone in der Größe übereinstimmen, ist die Wärmeübertragung optimal. Bei Beendigung des Kochens können Sie den Behälter an der gleichen Stelle stehen lassen, um noch vorhandene Wärme zu nutzen. So sparen Sie Energie. Benutzen Sie wenn möglich stets einen Deckel, um den Wärmeverlust durch Verdampfung zu verringern. Handhabung von Abfallprodukten elektrischer und elektronischer Geräte. Entsorgen Sie Geräte nicht zusammen mit Haushaltsmüll. Bringen Sie das Feld in ein Entsorgungszentrum. Die Entsorgung von Elektrohaushaltsgeräten verhindert negative Auswirkungen auf Gesundheit, Umwelt und ermöglicht das Einsparen von Energie und Ressourcen. Für weitere Informationen wenden Sie sich an die lokalen Behörden oder an das Geschäft, in dem Sie das Feld erworben haben. nederlands Instructiehandleiding Zeer Belangrijk: Lees voor gebruik van de kookplaat deze handleiding in zijn geheel door. Deze handleiding is dusdanig vormgegeven dat de teksten betrekking hebben op de bijbehorende tekeningen. 0 220-240V 3~ Nominale st. in fases Kookplaat van 60 cm 14 A Kookplaat >60cm 16,5 A Typenummer Ga na welk model kookplaat u heeft (“a”, “b”, “c”, “d”, “e”, “f”, “g”, “h”, “i”, “j”, “k”, “l”, “m”, “n”, “o”) door het aantal kookvelden en de positie ervan op uw kookplaat te vergelijken met de afbeeldingen. 1 380-415V 3N~ Nominale st. in fases Kookplaat van 60 cm 11 A Kookplaat >60cm 13 A 380-415V 2N~ Nominale st. in fases Kookplaat van 60 cm 16 A Kookplaat >60cm 19 A Installatie 1.1 Het uitpakken. Verwijder alle beschermende materialen 1.2 Inbouwen in een meubel. Houd altijd rekening met de gegevens die op het plaatje met technische gegevens staan (1.2.1) en de afmetingen van het keukenmeubel waarin u de kookplaat gaat inbouwen (1.2.2, 1.2.3). Wanneer u geen oven gaat plaatsen onder de kookplaat, dient u een beschermplaat aan te brengen in overeenstemming met de aangegeven maten (1.2.4). Plak de schuimrubber voeg rondom aan de rand van de kookplaat zodat er een volledig dichte aansluiting tot stand komt (1.2.5). Draai de kookplaat om en plaats hem in de opening (1.2.6). Maak de kookplaat aan het meubel vast met de vier meegeleverde klemmen (1.2.7). Gebruik geen onverwijderbare materialen zoals silicone. 1.3 Aansluiting op het elektriciteitsnet. De plaat wordt geleverd met een voedingskabel. • Met 5 draden: a) donkerblauw, b) lichtblauw, c) bruin, d) rood, e) groengeel. (1.3.1) • Geschikt voor een kookplaat van 230V~. (1.3.2) • Geschikt voor een kookplaat van 220-230V~: raadpleeg de tabel. (1.3.3) • Totaal vermogen: Kookplaat 60cm 6,8kW, Kookplaat > 60cm 7,8kW 220-240V~ Nominale st. in fases Kookplaat van 60 cm 30 A Kookplaat >60cm 34 A • Si el tipo de conexión es distinto a 220-240V~, retira el cable y realiza la conexión según esquemas (1.3.3, 1.3.4). Dit apparaat voldoet aan de Europese richtlijnen 73/23/EEG en 89/336/EEG Aanbeveling: De installatie van de kookplaat dient te worden uitgevoerd door een geautoriseerde installateur met inachtneming van de instructies en de schema’s van de fabrikant. 2 Gebruik Met een vitrokeramische kookplaat kunt u pannen van aardewerk, koper en roestvrij staal gebruiken. Afgeraden wordt aluminium pannen te gebruiken omdat die vlekken op het glas van de kookplaat kunnen veroorzaken. 2.1 Selectie van de kookzone. U hebt de beschikking over verschillende kookvelden om de pannen op te plaatsen. Kies het kookveld dat het meest geschikt is voor de afmeting van de pan. 2.2 De kookplaat inschakelen. Druk gedurende om de kookplaat in te 3 seconden op schakelen, de van de verschillende kookzones worden geactiveerd. 0 Opmerking: Om hem in te kunnen schakelen wanneer de kinderbeveiliging ingeschakeld is, drukt u gedurende 3 seconden op de toets (2.13) om die uit te schakelen. 2.3 Inschakelen van het kookveld. Schakel het kookveld in waarop u de pan hebt geplaatst door te drukken op de desbetreffende toets (2.3.1, 2.3.2). of druk op (2.4.2) 21 nederlands Opmerking: Wanneer u langer dan 5 seconden wacht voordat je het kookveld inschakelt, zal de beveiliging geactiveerd worden en de kookplaat automatisch uitgaan. 2.4 Selectie van het vermogen. Stel het vermogen in door met een vinger over de schuif te gaan of (2.4.2, (2.4.1) of door te drukken op 2.4.3). SPECIALE KOOKVELDEN 2.5 Dubbel kookveld, drievoudig kookveld. Nadat u het vermogen hebt geselecteerd, drukt , en schakelt u het dubbele u op kookveld in (2.5.1, 2.5.3). Wanneer u opnieuw drukt op (2.5.2) of (2.5.4) schakelt u het drievoudige kookveld in. Om te annuleren drukt , u op ( , , ). 2.6 Ovaal kookveld. Dit kookveld kan als een cirkel gebruikt worden of gecombineerd als . Druk op om die ovaal kookveld functie in te schakelen en druk opnieuw om die uit te schakelen. Aanbeveling: Bij modellen met halogeen-kookvelden is het licht zo intens dat aangeraden wordt daar niet lang in te kijken wanneer die ingeschakeld zijn en er geen pan opstaat. TIJDFUNCTIES . Bij het aansluiten van 2.7 De tijd instellen de kookplaat knipperen de cijfers van de klok en geven (2.7.1) aan. Stel de tijd , (2.7.2). Herhaal in met de toetsen deze handeling elke keer dat de kookplaat losgekoppeld wordt of nadat er zich een stroomstoring heeft voorgedaan. Om de tijd te veranderen, drukt u gedurende (2.7.3). De 5 seconden op de toets tijdweergave zal beginnen te knipperen en u zult een pieptoon horen; pas de tijd aan met de toetsen , . 2.8 De tijd selecteren. Modellen abc: Na inschakeling van een kookveld en selectie van het vermogen, hebt u 5 seconden de tijd om de knipperende toets (2.8.1) in te drukken. Selecteer de benodigde tijd door te drukken op , (2.8.2). Na 5 seconden is de tijd ingesteld en zult u de tijd en een oplichtende punt zien onder het pictogram van het geprogrammeerde kookveld (2.8.3). Om de tijd te wijzigen of de resterende 22 tijd te zien, drukt u op het pictogram van het geprogrammeerde kookveld (2.8.4). Om de timerinstelling te annuleren, drukt u tegelijkertijd op de toetsen , (2.8.5). Modellen dfghkmo: Na inschakeling van een kookveld en selectie van het vermogen, drukt u boven de klok. Bij elk kookveld op de toets wordt en een weergegeven (2.8.6). Druk op de van het kookveld waarvan de zal gaan tijd moet worden ingesteld en knipperen (2.8.7). Selecteer de tijd met , boven de klok (2.8.8). Na 5 seconden is de tijd ingesteld en zal afwisselend het vermogen bij het geprogrammeerde kookveld en weergegeven worden. Wanneer de tijd voorbij is, zult u een akoestisch signaal horen en zal knipperen. Om de timerinstelling te annuleren, drukt u op boven het pictogram totdat weergegeven wordt. 00 00 00 Opmerking: De timer zal automatisch uitschakelen wanneer u langer dan 10 seconden wacht bij het selecteren van de tijd. Modellen e: Na inschakeling van een kookveld en selectie van het vermogen, drukt u opnieuw de selectietoets van het te programmeren kookveld in en zal er een worden weergegeven (2.8.11). Selecteer de tijd met , (2.8.12) en bevestig die door opnieuw de toets van het geprogrammeerde kookveld in te drukken (2.8.13). Het vermogen zal worden weergegeven met een punt daarnaast, wat aangeeft dat het kookveld geprogrammeerd is. Een akoestisch signaal en de weergave van geven aan dat de tijd beëindigd is (2.8.14). Druk op een willekeurig toets en het akoestische signaal zal uitgeschakeld worden. Opmerking: De timer zal automatisch uitschakelen wanneer u langer dan 10 seconden wacht bij het selecteren van de tijd. Overwegingen bij het gebruik van de timer: Wanneer het niveau van het vermogen 9 is, zal de maximaal instelbare tijd 60 min bedragen. Bij een ander niveau bedraagt die 99 min. Na beëindiging van de tijd zal er zolang een alarm weerklinken totdat er op een toets wordt gedrukt. PROGRAMMEERFUNCTIES 2.9 Snel opwarmen. Bereikt snel de maximumtemperatuur en blijft daarna automatisch op de ingestelde temperatuur. Modellen abc: Schakel een kookveld in nederlands en verplaats de schuif naar het maximale vermogen. Druk op en er zal een worden weergegeven op de display van het geselecteerde kookveld (2.9.1). U hebt 5 seconden om het gewenste niveau in te stellen; aanbevolen wordt een niveau te kiezen tussen 3 en 6 (2.9.2). De snelle opwarmingsfunctie is na vijf seconden vastgelegd en afwisselend zullen en het vermogen worden weergegeven. Wanneer de maximumtemperatuur bereikt is, verdwijnt en wordt het ingestelde vaste vermogen weergegeven. Het kookveld zal op gewone wijze blijven functioneren. Wanneer u de snelle opwarmfunctie wilt annuleren, drukt u op het pictogram van het geprogrammeerde kookveld en selecteert u een nieuw vermogen. Modellen dfghkmo: SSelecteer een kookveld en stel het maximale vermogen in door te drukken op totdat u een 9 ziet met een punt (2.9.3). Stel het vermogen in door te drukken op ; aanbevolen wordt een niveau te kiezen tussen 3 en 6 (2.9.4). De snelle opwarmingsfunctie is na 5 seconden vastgelegd, daarna zal het vermogen worden weergegeven met daarachter een punt (2.9.5). Na het bereiken van de maximale temperatuur zal de decimale punt verdwijnen en zal het kookveld op conventionele wijze functioneren. Om de functie uit te schakelen, drukt u op het geprogrammeerde kookveld en selecteert u een nieuw vermogen. 2.10 Vitrokeramische kookplaten met knoppen. Vergewis u ervan dat het kookveld dat u wilt inschakelen overeenkomt met het kookveld dat u wilt gebruiken (2.10.1). Draai de knop op de gewenste positie en het waarschuwingslichtje zal gaan branden (2.10.2); dit is zowel een indicatie van het functioneren van de kookplaat als van de restwarmte na uitschakeling ervan. Bij modellen met een dubbel of ovaal kookveld, wordt een gedeelte van het kookveld ingesteld door de knop naar links draaien en wordt het gehele kookveld ingeschakeld door de knop naar rechts te draaien (2.10.3). 2.11 Uitschakelen van het kookveld. Selecteer het vermogen voor het kookveld dat u wilt uitschakelen. 0 2.12 Restwarmte. Na gebruik van de kookplaat blijven de kookvelden warm gedurende een periode die afhangt van het geselecteerde vermogen en zal er een of een punt worden weergegeven bij de kookvelden die nog warm zijn. Raak deze kookvelden niet aan, u kunt zich branden. Let op: Wanneer er zich een stroomstoring voordoet, zal er, wanneer die opgelost is, geen meer worden weergegeven ook al is de kookzone nog warm. Houd hier rekening mee. 2.13 Blokkeerfunctie. Zorg ervoor dat aanraken door kinderen geen gevolgen heeft. Houdt gedurende ingedrukt en u zult de 3 seconden de toets blokkeerfunctie inschakelen. Om de blokkering op te heffen herhaalt u deze handeling. Aanbevelingen: • Zorg ervoor dat u niet met de pannen hard tegen de glasplaat stoot. • Het gebruik van aluminium pannen wordt afgeraden omdat die vlekken maken op de glasplaat, tenzij ze een bodem hebben met een beschermlaag van roestvrij staal. • De kookvelden dienen niet ingeschakeld te worden zonder pan. • De onderkant van de pan moet vlak en droog zijn. • Let erop dat de diameters van de pannen groter of gelijk zijn aan het kookveld dat u gaat gebruiken en plaats ze goed in het midden van het kookveld. • Zorg ervoor dat u de pannen niet verschuift; ze kunnen krassen op de glasplaat veroorzaken. • Gebruik het apparaat alleen voor de bereiding van voedingsmiddelen. Gebruik de kookplaat niet als werkblad. • Giet geen koud water direct op de plaat wanneer die nog warm is. Let op: Onderbrekingen in het functioneren van de kookzones is geen defect. Ze schakelen tijdens min of meer lange periodes in en uit, afhankelijk van het gewenste vermogen. 3 Onderhoud en reiniging • Gebruik geen stoomreiniger. • Maak het oppervlak van de kookplaat vaak schoon nadat die is afgekoeld. Gebruik geen schuurmiddelen of schuursponsjes. Gebruik voor het schoonmaken een doek bevochtigd met water en zeep (3.1.1). • Maak de plaat eenmaal per week grondig 23 nederlands schoon met producten die speciaal bedoeld zijn voor vitrokeramische platen. Wij raden het gebruik van VITRO-CLEN aan voor het schoonmaken en het behoud van de vitrokeramische plaat. • Vuil dat erg vastzit wordt verwijderd met de glasschraper (3.1.2). • Wanneer er per ongeluk suiker, suikerhoudende producten of plastic op de plaat verbrandt, dient u die zo snel mogelijk met de schraper te verwijderen terwijl die nog warm zijn. Anders zullen er permanente vlekken achterblijven. • Het mes van de schraper dient in perfecte staat te verkeren; vervang het wanneer het gebreken vertoont. 4 • Wanneer u een sensor te lang ingedrukt houdt of wanneer die door een of ander voorwerp geactiveerd wordt, zal de kookplaat uitschakelen en zal er een akoestisch signaal weerklinken (4.1.3). • Plaats geen pannen met een warme onderkant op de sensoren; je zou je bij het aanraken ervan kunnen branden (4.1.3). • Houd kleine kinderen uit de buurt; de verwarmingsvlakken kunnen erg heet worden tijdens het functioneren. Gebruik het blokkeersysteem om te voorkomen dat ze met de bedieningselementen kunnen spelen. • Dit apparaat is niet bedoeld voor gebruik door personen met een handicap. Veiligheid • Het stroomnet dat de kookplaat voedt dient te zijn voorzien van een omnipolaire schakelaar met een afstand tussen de contacten van ten minste 3 mm. • De installatie van de kookplaat dient te worden uitgevoerd door een geautoriseerde installateur met inachtneming van de instructies en de schema’s van de fabrikanten. • De installatie dient geschikt te zijn voor het maximale vermogen dat staat aangegeven op het productplaatje en het stopcontact dient te zijn geaard in overeenstemming met de desbetreffende regelgeving. • Wanneer de kabel beschadigd is moet deze, om gevaar te voorkomen, worden vervangen door de afdeling after-sales of door overeenkomstig gekwalificeerd personeel. • Het kookveld is voorzien van een interne temperatuurbegrenzer, die het kookveld uitschakelt wanneer de kookplaat te warm wordt. • Schakel het kookveld na ieder gebruik uit met de desbetreffende knop. • Wanneer er scheuren zichtbaar worden in het oppervlak van de glasplaat of wanneer die breekt, schakel dan onmiddellijk de stroom van het apparaat uit om een mogelijke elektrische schok te voorkomen. Gebruik de plaat niet totdat de glasplaat vervangen is (4.1.1). • Wanneer er voedsel of vloeistof terechtkomt op de 24 bedieningstoetsen van de kookplaat, zal er een akoestisch signaal weerklinken (4.1.2). • Blijf altijd in de buurt wanneer u gerechten of voedingsmiddelen bereidt met vet of olie. Door overmatige hitte kunnen ze gaan branden. • Wanneer de kookplaat boven een lade geïnstalleerd wordt, dienen daarin geen ontvlambare voorwerpen te worden bewaard. 5 Milieu Bij het ontwerp van de kookplaat heeft men rekening gehouden met de bescherming van het milieu. Respecteer het milieu. Gebruik de juiste vermogens voor elke bereiding en selecteer pannen die een afmeting hebben in overeenstemming met de hoeveelheid voedingsmiddelen die bereid gaat worden. De warmteoverdracht is optimaal wanneer de onderzijde van de pan en de diameter van de kookzone hetzelfde formaat hebben. Aan het einde van de bereiding kunt u, wanneer u dat wilt, de pan op dezelfde plaats laten staan om de restwarmte die zich opgehoopt heeft te gebruiken. Op die manier zul je energie besparen. Gebruik, wanneer dat mogelijk is, altijd een deksel om warmteverlies door verdamping te voorkomen. Behandeling van elektrisch en elektronisch afval. Gooi die apparaten niet weg met het gewone huisvuil. Breng uw kookplaat naar een speciaal inzamelpunt. Door het recycleren van huishoudelijke apparaten worden negatieve gevolgen voor gezondheid en milieu voorkomen en bespaart u energie en geld. Voor meer informatie neemt u contact op met de plaatselijke autoriteiten of met de winkel waar u de kookplaat hebt gekocht. Русский Руководство по эксплуатации Очень важно: Прочти полностью это руководство, прежде чем начать использование плиты Это руководство составлено таким образом, что тексты относятся к соответствующим рисункам. 0 Идентификация Определи модель своей плиты (“a”,“b”,“c”,“d”, “e”,“f”,“g”,“h”,“i”,“j”,“k”,“l”,“m”,“n”,“o”), сравнив номер и расположение конфорок своего аппарата с аппаратом, изображенном на рисунке. 1 Установка 220-240V 3~ Плита 60 см Плита >60 см Вн. Номинал по фазам 14 А 16,5 А 380-415V 3N~ Плита 60 см Плита >60 см Вн. Номинал по фазам 11 A 13 A 380-415V 2N~ Плита 60 см Плита >60 см Вн. Номинал по фазам 16 A 19 A Этот аппарат соответствует европейским директивам 73/23/СЕЕ и 89/336/СЕЕ 1.1 Распаковка. Удали все детали упаковки. 1.2 Встрой плиту в кухонную мебель. TИмей всегда в виду характеристики плиты (1.2.1), а также размеры кухонной мебели, в которую будет встраиваться плита (1.2.2, 1.2.3). Если ты не будешь устанавливать под плитой духовку, то должен поместить защитную пластину в соответствии с указанными размерами (1,2,4). Нанеси на внешние края плиты пенистый изоляционный материал для обеспечения хорошей герметичности (1,2,5). Переверни плиту и помести ее в вырез (1,2,6). Закрепи плиту в кухонной мебели при помощи прилагаемых скоб (1,2,7). Не используй материалы, которые невозможно удалить, такие как силикон. 1.3. Подключение к сети электроснабжения. Плита поставляется с кабелем питания. • Из пяти жил: а) темно-синяя, b) голубая, c) коричневая, d) красная, e) зелено-желтая. (1.3.1) • Годный для плиты 230V~. (1.3.2) • Годный для плиты 220-240V~: смотри таблицу. (1.3.3) • Общая мощность: Плита 60 см 6,8 kW, Плита >60 см 7,8 kW 220-240V~ Плита 60 см Плита >60 см Вн. Номинал по фазам 30 A 34 A • Если тип подключения не равен 220-240V~, отключи кабель и подключи в соответствии со схемами (1.3.3, 1.3.4). Рекомендация: Установка плиты должна производиться специалистом, который осуществит ее в соответствии с инструкциями и схемами производителя. 2 Использование Если плита изготовлена из стеклокерамики, то может быть использована посуда из глины, меди или нержавеющей стали. Не рекомендуется использовать алюминиевую посуду, так как она может оставить пятна на стеклянной поверхности плиты. 2.1 Выбор зоны варки. В твоем распоряжении имеется несколько конфорок, на которые можно поместить посуду. Выбери наиболее подходящую из них в соответствии с размером посуды. 2.2 Включение плиты. Нажми и удерживай в для того, чтобы течение 3 секунд клавишу включить плиту; активизируются значки различных точек готовки. 0 Примечание: Для отключения системы блокировки, не позволяющей детям пользоваться плитой, нажми и удерживай в течение 3 секунд клавишу (2.13) 2.3 Включение конфорки. Включи конфорку, на которую поставил посуду, путем нажатия на соответствующую клавишу (2.3.1, 2.3.2). или нажми на (2.4.2) 25 Русский Примечание: Если ты будешь выбирать более 5 секунд, на какую клавишу следует нажать, плита автоматически отключится в целях безопасности. 2.4 Выбор мощности. Установи ее, скользя пальцем по шкале (2.4.1) или нажимая на (2.4.2, 2.4.3). или СПЕЦИАЛЬНЫЕ КОНФОРКИ 2.5 Двойная конфорка, Тройная конфорка. , и Выбрав мощность, нажми на включится двойная конфорка (2.5.1., 2.5.3). Если нажать снова (2.5.2) или (2.5.4), включится тройная конфорка. Для отключения , нажми ( , , ). 2.6 Конфорка-источник. Эту конфорку ты или можешь использовать по кругу совместно в качестве конфорки-источника , чтобы включить ее и . Нажим на нажим еще раз, чтобы выключить. Рекомендация: В моделях плит с галогенными конфорками свет настолько яркий, что не рекомендуется пристально смотреть на зажженную конфорку, если на ней нет посуды. ФУНКЦИИ ВРЕМЕНИ . После включения 2.7 Установка времени плиты цифры на часах начинают мигать и затем (2.7.1). Установи покажут время время, нажимая на клавиши , (2.7.2). Повторяй эту операцию каждый раз, когда плита отключится, или когда прекратится подача электроэнергии. Чтобы изменить время, нажми и удерживай (2.7.3). в течение 5 секунд клавишу Цифры начнут мигать, и ты услышишь свист. Скорректируй время при помощи клавиш , . 2.8 Выбор времени Модели abc: Как только включена плита и выбрана мощность, в твоем распоряжении имеется 5 секунд мигания цифр, чтобы (2.8.1). Выбери нажать на клавишу необходимое время, нажав на клавиши (2.8.2). Через пять секунд время , установится, его можно видеть, а под иконкой запрограммированной конфорки появится светящаяся точка (2.8.3). Чтобы изменить время или увидеть, сколько его осталось, нажми на иконку запрограммированной конфорки (2.8.4). Чтобы аннулировать 26 программу, нажми одновременно на клавиши (2.8.5). , Модели dfghkmo: Как только включена конфорка и выбрана мощность, нажми на на часах. Появится и значок клавишу на каждой конфорке (2.8.6). Нажми на конфорки, которую надо запрограммировать, (2.8.7). Выбери время и начнет мигать при помощи , на часах. (2.8.8). Через пять секунд время установится и можно будет увидеть попеременно величину мощности на запрограммированной конфорке. По прошествии времени раздастся звуковой сигнал и начнет мигать . Чтобы аннулировать программу, нажми на на иконке и держи до тех пор, пока не появится . 00 00 00 Примечание: Таймер погаснет автоматически, если будешь выбирать время более 10 секунд. Модели е: Как только включена конфорка и выбрана мощность, нажим вновь на клавишу выбора конфорки, которую следует запрограммировать, и появится значок .(2.8.11). Выбери время при помощи , (2.8.12) и установи его, нажимая снова на клавишу программируемой конфорки. (2.8.13). Мощность высветится в виде точки, это означает, что конфорка запрограммирована. Звуковой сигнал и значок ¯. предупредят, что время закончилось (2.8.14). Нажми на любую клавишу, и звуковой сигнал прекратится. Примечание: Таймер погаснет автоматически, если будешь выбирать время более 10 секунд. Соображения относительно программирования: Если уровень мощности составляет 9, то максимальное время программирования должно равняться 60 мин. Если уровень иной, то максимальная величина может составлять 99 мин. Как только время закончится, прозвучит сигнал, если ты не нажмешь ни на какую клавишу. ФУНКЦИИ ПРОГРАММИРОВАВНИЯ 2.9 Быстрый нагрев. Быстро достигает максимальной температуры, чтобы автоматически перейти к поддерживаемой температуре готовки. Модели abc: Включи конфорку и выведи шкалу на максимальную мощность. Нажми и на дисплее выбранной конфорки появится (2.9.1). В твоем распоряжении значок имеется 5 секунд для того, чтобы выбрать желаемый уровень; рекомендуется, чтобы Русский он был между значениями 3 и 6 (2.9.2). Через пять секунд установится быстрый нагрев и обозначатся попеременно и мощность. Как только будет достигнута максимальная температура, исчезнет значок и останется поддерживаемая мощность готовки. Конфорка продолжит функционировать в обычном режиме. Если желаешь остановить быстрый нагрев, нажми на иконку запрограммированной конфорки и выбери новую мощность. Модели dfghjklmo: Выбери конфорку и включи ее на максимальную мощность для чего до тех пор, пока не появится нажимай на 9 и значок (2.9.3). Регулируй мощность, нажимая на рекомендуются уровни от 3 до 6 (2.9.4). Через 5 секунд установится быстрый нагрев и будет видно значение мощности, а за ним - точка. (2.9.5). Как только будет достигнута максимальная температура, цифровая точка исчезнет и конфорка продолжит функционировать в обычном режиме. Для прекращения функционирования нажим на клавишу запрограммированной конфорки и выбери новую мощность. 2.10 Плиты с управлением. Убедись в том, что конфорка, которую ты будешь включать, соответствует той, которую ты хочешь использовать. (2.10.1). Поверни выключатель в желаемом направлении и зажжется пилот функционирования (2.10.2), который также показывает остаточное тепло, когда конфорка выключена. В моделях с двойной конфоркой или конфоркойисточником при повороте выключателя влево регулируется часть конфорки и при повороте выключатели вправо регулируется вся конфорка (2.10.3). 2.11 Выключение конфорки. Выбери мощность конфорки, которую хочешь погасить. 0 2.12 Остаточное тепло. После окончания пользования плитой конфорки остаются нагретыми в течение некоторого времени, которое зависит от величины выбранной мощности, и появится значок или точка на еще горячих конфорках. Не прикасайся к этим конфоркам во избежание получения ожогов. Внимение: Если вдруг отключится подача электроэнергии, то по ее возобновлении указатель не появится, хотя зона готовки еще будет оставаться горячей. Имей в виду это обстоятельство. 2.13 Функция блокировки. Для избежания пользования плитой детьми. Нажми и удерживай . Этим самым ты в течение 3 секунд клавишу активируешь блокировку. Для снятия блокировки повтори эту операцию. Рекомендации: • Избегай ударов посудой по стеклянной поверхности плиты. • Алюминиевая посуда не рекомендуется для использования, так как она может оставить пятна на стеклянной поверхности плиты. Исключение составляет алюминиевая посуда с утолщенным защитным слоем дна, изготовленным из нержавеющей стали. • Нагретые конфорки не должны функционировать, если на них нет посуды. • Дно посуды должно быть ровным и сухим. • Следи за тем, чтобы диаметр посуды был большим или таким же, как диаметр конфорки, которую ты собираешься использовать, и ставь посуду по центру конфорки. • Старайся не двигать посуду, так как могут остаться царапины на стекле. • Используй аппарат исключительно для приготовления пищи. Не используй плиту в качестве своего рабочего стола. • Не наливай холодную воду непосредственно на плиту, если она находится в нагретом состоянии. Внимание: Прерывающееся функционирование зон готовки не означает, что случилась авария. Конфорки функционируют в течение более или менее продолжительных периодов зажженными или погашенными в зависимости от выбранной мощности. 3 Содержание и уход • Не используй паровой очиститель. • Часто чисти поверхность своей плиты, когда она остынет. Не используй абразивных продуктов чистки и таких же мочалок. Чисти при помощи влажной ткани и мыльной воды. (3.1.1). • Раз в неделю проводи тщательную чистку при помощи специальных продуктов для изделий из стеклокерамики. Рекомендуем продукт ВИТРО-КЛЕН для чистки и лучшей сохранности твоей стеклокерамической плиты. 27 Русский • Сильно приставшая грязь очищается при помощи стеклянного скребка (3.1.2). • Если по неосторожности на раскаленной поверхности плиты сгорит сахар, засахаренные продукты или изделия из пластика, удали их как можно скорей при помощи скребка с пока еще раскаленной поверхности плиты. Если этого не сделать, то пятна могут остаться навсегда. 4 • Не подпускать маленьких детей к нагретой плите, так как поверхности конфорок могут сильно нагреться во время их функционирования. Используй систему блокировки, чтобы дети не могли играть выключателями. • Этот аппарат не рассчитан на использование лицами с ограниченными способностями. Безопасность • Сеть электроснабжения, питающая плиту, должна быть оборудована однополярным рубильником, контакты которого должны быть расположены по меньшей мере на расстоянии 3-х мм друг от друга. • Установка плиты должна осуществляться специалистом, который выполнит ее в соответствии с инструкциями и схемами производителя. • Установка должна быть осуществлена с учетом максимальной мощности, указанной на этикетке характеристик, а розетка должна быть обязательно заземлена. • Если кабель окажется поврежденным, его следует заменить во время обслуживания после продажи или любым квалифицированным специалистом во избежание опасности. • Конфорка оборудована ограничителем внутренней температуры, который отключает конфорку, если плита излишне нагревается. • После каждого использования отключай плиту при помощи выключателя. • Если на стеклянной поверхности плиты появляются трещины или она ломается, немедленно отключи аппарат от сети электроснабжения во избежание электрошока. Не используй плиту до тех пор, пока не будет заменена ее стеклянная поверхность (4.1.1). • В случае, если на клавиши управления прольется готовящаяся пища, плита выключится, издав звуковой сигнал (4.1.2). • Если ты держишь нажатым какой-либо из сенсоров долгое время или же какой-то предмет активизировал сенсоры, плита выключится, издав звуковой сигнал (4.1.3). 28 • Не ставь посуду с нагретым дном на сенсоры, так как ты можешь обжечься при нажатии на них (4.1.3). • Всегда находись поблизости во время приготовления пищи с использованием жира или масла. Чрезмерное тепло может спровоцировать их возгорание. • Если плита установлена поверх какого-либо ящика, в нем не должны храниться возгораемые предметы. 5 Окружающая среда Плита сконструирована с учетом сохранения окружающей среды. Относись с уважением к окружающей среде. Используй мощности, соответствующие каждой готовке, и выбирай посуду, размеры которой соответствуют количеству пищи, которую собираешься готовить. Когда дно посуды и диаметр зоны готовки совпадают по размерам, то передача тепла является оптимальной. По окончании готовки, если желаешь, можешь оставить посуду на том же месте, чтобы использовать остаточное аккумулированное тепло. Таким образом ты сэкономишь электроэнергию. Используй крышку всякий раз, когда это возможно, чтобы уменьшить потерю тепла из-за испарения. Использование отслуживших электрических и электронных аппаратов. Не смешивай отслужившие аппараты с обычными домашними хозяйственными отходами. Сдай свою плиту в специальный пункт приемки. Переработка электробытовых товаров способствует избежанию негативных последствий для здоровья, для окружающей среды и позволяет сберегать электроэнергию и ресурсы. Для получения более детальной информации свяжись с местными властями или с торговой точкой, где была приобретена плита. č e s k y Návod k použití Velmi důležité. Než začnete varnou desku používat, přečtěte si pečlivě tento návod. Tento návod je uspořádán tak, že se texty vztahují k příslušným vyobrazením. 0 Určení modelu Určete model své varné desky (“a”, “b”, “c”, “d”, “e”, “f”, “g”, “h”, “i”, “j”, “k”, “l”, “m”, “n”, “o”) tak, že porovnáte počet a uspořádání prvků svého přístroje s vyobrazeními. 1 Instalace Jmenovitý spínací proud podle fází 14 A 16,5 A 380-415V 3N~ 60 cm deska >60cm deska Jmenovitý spínací proud podle fází 11 A 13 A 380-415V 2N~ 60 cm deska >60cm deska Jmenovitý spínací proud podle fází 16 A 19 A Tento přístroj splňuje požadavky evropských směrnic 73/23/EEC a 89/336/EEC 1.1 Vybalení. Odstraňte všechny ochranné materiály. 1.2 Vložení do jednotky. Vždy si zkontrolujte údaje na datovém štítku (1.2.1) a rozměry jednotky, do níž budete varnou desku vkládat (1.2.2, 1.2.3). Když nebudete pod varnou desku instalovat troubu, bude potřeba nainstalovat ochranný panel podle uvedených rozměrů (1.2.4). Nalepte pěnovou pásku kolem vnějšího okraje varné desky, aby byla spára vodotěsně uzavřená (1.2.5). Otočte varnou desku a vložte ji do otvoru (1.2.6). Upevněte ji k jednotce čtyřmi přiloženými háčky (1.2.7). Nepoužívejte neodstranitelné materiály jako např. silikon. 1.3 Připojení k elektrické síti. Varná deska je napájená síťovým kabelem. • S 5 vodiči: a) tmavě modrým, b) světle modrým, c) hnědým, d) červeným, e) zelenožlutým. (1.3.1) • Připraveným pro 230V~ desku. (1.3.2) • Připraveným pro 220-240V~ desku: viz tab.. (1.3.3) • Celkový příkon: 60cm deska 6,8kW, >60cm deska 7,8kW 220-240V~ 60 cm deska >60cm deska 220-240V 3~ 60 cm deska >60cm deska Jmenovitý spínací proud podle fází 30 A 34 A • Pokud je typ napájení jiný než 220240V~, odpojte kabel a proveďte zapojení podle schémat (1.3.3, 1.3.4). Upozornění: Varnou desku musí nainstalovat oprávněný instalační technik v souladu s návodem a schématy výrobce. 2 Použití Na sklokeramických varných deskách se mohou používat kameninové, měděné a nerezové nádoby. Hliníkové nádoby se nedoporučují, protože způsobují skvrny na skle desky. 2.1 Volba varné zóny. Na desce jsou různé zóny, na něž můžete umístit nádobu. Zvolte nejvhodnější zónu podle velikosti nádoby. 2.2 Zapnutí varné desky. Zapněte varnou desku tak, že stisknete a 3 vteřiny podržíte tlačítko ; aktivuje se na různých varných zónách. 0 Pozn.: Abyste mohli zvolit, zda bude aktivovaná dětská bezpečnostní funkce, 3 vteřiny deaktivujte ji podržením tlačítka (2.13). 2.3 Aktivace varné zóny. Aktivujte varnou zónu, na niž jste umístili nádobu stisknutím odpovídajícího tlačítka (2.4.2) (2.3.1, 2.3.2) nebo stisknutím Pozn.: Když Vám bude volba varné zóny trvat déle než 5 vteřin, varná deska se z bezpečnostních důvodů vypne. 29 č e s k y 2.4 Volba výkonu. Upravte výkon posouváním prstu po pruhu (2.4.1) nebo pomocí tlačítek nebo (2.4.2, 2.4.3). SPECIÁLNÍ VARNÉ ZÓNY 2.5 Dvojité těleso, trojité těleso. Po zvolení , čímž aktivujete výkonu stiskněte dvojitou zónu (2.5.1, 2.5.3). Když znovu stisknete (2.5.2) nebo (2.5.4), aktivuje se trojitá zóna. Když budete chtít , tuto volbu zrušit, stiskněte ( , , ). 2.6 Oválná varná deska. Tuto zónu můžete nebo spojeně jako používat kruhově . Toto nastavení oválnou varnou zónu a deaktivujete aktivujete stisknutím opětovným stisknutím téhož tlačítka. Doporučení: U modelů s halogenovými zónami je světlo tak jasné, že Vám doporučujeme, abyste se do něj nedívali, když na něm není postavená nádoba. FUNKCE ČASOVÉHO SPÍNAČE . Když 2.7 Nastavení časového spínače se varná deska zapne, číslice na hodinách budou blikat a ukazovat (2.7.1). Nastavte čas pomocí tlačítek , (2.7.2). Postupujte stejně po odpojení přístroje od sítě nebo výpadku elektrické energie. Když budete chtít změnit čas, stiskněte na (2.7.3). Časový údaj 5 vteřin tlačítko začne blikat a ozve se pípnutí. Nastavte čas pomocí tlačítek , . 2.8 Volba času. Modely a, b, c: Po aktivaci varné zóny a zvolení výkonu bude časový údaj blikat 5 vteřin. Během této doby stiskněte tlačítko (2.8.1). Zvolte požadovaný čas stisknutím tlačítka , (2.8.2). Po pěti vteřinách bude časový spínač nastavený a zobrazí se čas se svítící tečkou pod ikonou zvolené varné zóny (2.8.3). Když budete chtít změnit nebo zobrazit zbývající čas, stiskněte ikonu aktivované varné zóny (2.8.4). Když budete chtít nastavení zrušit, stiskněte zároveň tlačítka , (2.8.5). Modely d, f, g, h, k, m, o: Po aktivaci varné zóny a zvolení výkonu stiskněte tlačítko na hodinách. U každé zóny se zobrazí 30 00 (2.8.6). Stiskněte a na zóně, začne pro niž chcete nastavit čas, a blikat (2.8.7). Zvolte čas pomocí , na hodinách (2.8.8). Po 5 vteřinách bude čas nastavený a střídavě se bude zobrazovat u zvoleného varného tělesa. Po výkon a uplynutí nastaveného času se ozve zvukový signál a bude blikat . Když budete chtít na ikoně nastavení zrušit, podržením nastavte . 00 00 Pozn.: Časový spínač se automaticky vypne, když Vám bude nastavení času trvat déle než 10 vteřin. Model e: Po aktivaci varné zóny a zvolení výkonu znovu stiskněte tlačítko volby zóny, pro něž chcete nastavit čas, a objeví se (2.8.11). Zvolte čas pomocí , (2.8.12) a potvrďte jej opětovným stisknutím tlačítka zvolené varné zóny (2.8.13). Zobrazí se výkon s tečkou signalizující, že pro danou zónu je nastaven čas. Po uplynutí nastaveného času se ozve zvukový signál a zobrazí (2.8.14). Zvukový signál vypnete stisknutím libovolného tlačítka. Pozn.: Časový spínač se automaticky vypne, když Vám bude nastavení času trvat déle než 10 vteřin. Poznámky k používání časového spínače: Když bude úroveň výkonu 9, bude maximální možné nastavení časového spínače 60 minut. Jinak bude maximum 99 min. Po uplynutí nastaveného času bude znít zvukový signál, dokud nestisknete libovolné tlačítko. PROGRAMOVACÍ FUNKCE 2.9 Rychlý ohřev. Zajišťuje rychlé dosažení maximální teploty a automatický přechod na konstantní teplotu. Modely a, b, c: Aktivuje zónu a zapojí a na maximální výkon. Stiskněte displeji zvolené varné zóny se zobrazí (2.9.1). Během 5 vteřin zvolte požadovanou úroveň, doporučuje se použít úrovně od 3 do 6 (2.9.2). Po pěti vteřinách bude rychlý ohřev nastavený a na displeji se bude střídavě zobrazovat a výkon. Po dosažení maximální teploty zmizí a výkon zůstane konstantní. Varná zóna bude nadále fungovat běžným způsobem. Když budete chtít rychlý ohřev zrušit, stiskněte ikonu programovaného tělesa a zvolte nový výkon. č e s k y Modely d, f, g, h, j, k, l, m, o: Zvolte varnou zónu a nastavte je na maximální výkon pomocí tak, aby se zobrazila 9 s (2.9.3). Upravte výkon pomocí tečkou tlačítka ; doporučuje se úroveň 3 až 6 (2.9.4). Po 5 vteřinách bude rychlý ohřev nastaven a zobrazí se výkon následovaný tečkou (2.9.5). Po dosažení maximální teploty tečka zmizí a zóna bude fungovat běžným způsobem. Když budete chtít tuto funkci zrušit, stiskněte tlačítko zvoleného varné zóny a zvolte nový výkon. 2.10 Varné desky s ovladači. Dbejte na to, aby varná zóna, které se chystáte aktivovat, byla zóna, již chcete používat (2.10.1). Otočte ovladač do požadované polohy a rozsvítí se kontrolka „zapnutí“, která rovněž signalizuje zbytkové teplo, když se zóna vypne. U modelů s dvojitými zónami nebo oválnou varnou zónou otočením ovladače doleva zapnete část varné zóny a otočením ovladače doprava zapnete celou (2.10.3). 2.11 Vypnutí varné zóny. Zvolte napájení varné zóny, kterou chcete vypnout. 0 2.12 Zbytkové teplo. Po použití varné zóny zůstanou varné zóny určitou dobu, která závisí na nastaveném výkonu, horké a u zóny, která je ještě horká, bude zobrazen nebo tečka. Nedotýkejte symbol se těchto varných zón, protože je zde nebezpečí popálení. Pozor: V případě výpadku napájení se po obnovení dodávky proudu nebude ikona zobrazovat, i když bude příslušná zóna ještě horká. Je důležité si tuto skutečnost uvědomit. • Dno nádoby musí být ploché a suché. • Dbejte na to, aby průměr nádoby byl větší než průměr použité varné zóny a nádobu pokládejte do středu zdroje tepla. • Snažte se nepohybovat s nádobami po varné desce, protože by mohly poškrábat sklo. • Používejte přístroj výhradně k vaření jídel. Nepoužívejte jej jako pracovní desku. • Nelijte studenou vodu přímo na desku, když je horká. Pozor: Přerušovaná funkce varných zón není závada. Zóny se na kratší nebo delší dobu zapínají a vypínají podle požadovaného výkonu. 3 Údržba a čištění • Nepoužívejte parní čistič • Pravidelně čistěte povrch varné desky ihned, jakmile vychladne. Nepoužívejte brusné prostředky nebo drátěnky. Očistěte desku vlhkým hadrem namočeným v mýdlové vodě (3.1.1). • Jednou za týden desku důkladně očistěte pomocí produktů speciálně určených na sklokeramické desky. Jako ideální přípravek k čištění a údržbě Vaší sklokeramické desky doporučujeme VITRO-CLEN. • Úporné skvrny se mohou odstraňovat pomocí škrabky na sklo (3.1.2). 2.13 Funkce zámku. Tato funkce brání dětem v manipulaci s přístrojem. Zámek aktivujete stisknutím a podržením tlačítka 3 vteřiny. Když budete chtít zámek odblokovat, postup opakujte. • Jestliže náhodou na desce připálíte cukr, výrobky s cukrem nebo plast, odstraňte je co nejdříve pomocí škrabky, dokud budou ještě horké. Když to neprovede, mohou na desce zůstat trvalé skvrny. Doporučení: • Udržujte čepel škrabky v dokonalém stavu. V případě poškození ji vyměňte. • Vyhněte se úderům nádobami do skla. • Hliníkové nádoby se nedoporučují, protože mohou způsobovat skvrny na skle, pokud nemají ochranné dno z nerez oceli • Varná zóna by se neměla uvádět do chodu bez nádoby. 31 č e s k y 4 Bezpečnost • Elektrický obvod napájející desku musí být vybaven vypínacím zařízením s odpojováním všech pólů s min. vzdáleností kontaktů 3mm v rozpojeném stavu. • Desku musí nainstalovat oprávněný instalační technik v souladu s návodem a schématy výrobce. • Instalace musí být vhodně dimenzovaná pro max. výkon uvedený na typovém štítku a síťová zásuvka musí mít předepsané uzemnění. • Když dojde k poškození síťového kabelu, musí jej z bezpečnostních důvodů vyměnit oprávněný servis nebo jiný k tomu kvalifikovaný personál. • Varná zóna je vybavena vnitřním omezovačem teploty, který ji vypne v případě jejího přehřátí. • Po každém použití vypněte varnou zónu pomocí ovladače. • Když zjistíte, že je skleněný povrch desky prasklý nebo rozbitý, okamžitě přístroj vypněte, aby nedošlo k zásahu elektrickým proudem. Desku nepoužívejte, dokud sklo nebude vyměněno. • Když se cokoli rozlije na ovládací tlačítka, deska se vypne a vydá výstražný signál (4.1.2). • Když budete senzor držet příliš dlouho nebo když na desce bude předmět aktivující senzor, deska se vypne a vydá výstražný signál (4.1.3). • Nedávejte nádoby s horkými dny na senzory; při jejich stisknutí byste se mohli popálit. • Udržujte malé děti v dostatečné vzdálenosti, protože varné plochy mohou být během používání extrémně horké. Používejte zámek, aby si děti nehrály s ovládacími prvky. • Přístroj není určen k používání lidmi s postižením. • Při vaření jídel s tukem nebo olejem vždy buďte poblíž. Nadměrné teplo může způsobit jejich vznícení. 32 • Když bude varná deska nainstalovaná nad zásuvkou, nesmí v ním být uloženy hořlavé předměty. 5 Životní prostředí Varná deska byla zkonstruována s ohledem na ochranu životního prostředí. Chovejte se ekologicky. Při každém vaření používejte odpovídající výkon a volte nádobu odpovídající velikosti pro jídlo, které budete připravovat. Přenos tepla je nejlepší, když dno nádoby a průměr varné zóny budou stejné. Po dokončení vaření můžete nechat nádobu stát na varné desce, abyste využili nahromaděného zbytkového tepla. Tím ušetříte energii. Pokud můžete, používejte pokličku, aby se snížily tepelné ztráty z odcházející páry. Likvidace elektrických a elektronických přístrojů. Při likvidaci nevyhazujte přístroje společně s běžným komunálním odpadem. Odneste varnou desku do speciálního sběrného střediska. Recyklace domácích přístrojů předchází negativním důsledkům pro naše zdraví a životní prostředí a umožňuje nám šetřit energii a zdroje. Další informace získáte od místních úřadů nebo prodejce, kde jste varnou desku zakoupili a na www.elektrowin.cz. m a g y a r Kezelési útmutató Nagyon fontos: a főzőlap használatba vétele előtt olvassa el figyelmesen ezt az útmutatót Ezt az útmutatót úgy alakítottuk ki, hogy a szövegek a megfelelő ábrákhoz kapcsolódjanak. 0 Azonosítás Válassza ki főzőlapjának típusát („a”, „b”, „c”, „d”, „e”, „f”, „g”, „h”, „i”, „j”, „k”, „l”, „m”, „n”, „o”) a főzőzónák számát és elhelyezkedését összehasonlítva az ábrákon láthatókkal. 1 Üzembe helyezés 1.1 Kicsomagolás. Távolítsa el a védőcsomagolást. 1.2 Elhelyezés. Mindig vegye figyelembe az adattábla (1.2.1) és a kiválasztott hely jellemzőit (1.2.2, 1.2.3), ahova a főzőlapot be kívánja szerelni. Ha nem helyez sütőt a főzőlap alá, be kell szerelni egy megadott méretekkel rendelkező védőpanelt (1.2.4). Illessze a tömítő habot a főzőlap külső széléhez az áteresztés megakadályozása érdekében (1.2.5). Fordítsa meg a főzőlapot és tegye a helyére (1.2.6). Rögzítse a készüléket a mellékelt négy szorítókapoccsal (1.2.7). Ne használjon el nem távolítható anyagokat, például szilikont. 1.3 Hálózati csatlakoztatás. A főzőlapot tápkábellel szállítjuk. • 5 vezetékes: a) sötétkék, b) világoskék, c) barna, d) piros, e) zöld-sárga. (1.3.1) • 230V~ főzőlaphoz. (1.3.2) • 220-240V~ főzőlaphoz: lásd a táblázatot. (1.3.3) • Teljes teljesítmény: 60 cm-es főzőlap 6,8 kW, >60 cm-es főzőlap 7,8 kW Névleges kapcsolási fázisok 220-240V~ 60 cm-es főzőlap 30 A >60 cm-es főzőlap 34 A • Ha a csatlakozás típusa nem 220-240V~, szerelje le a kábelt és végezze el a csatlakoztatást az ábrák szerint (1.3.3, 1.3.4). 220-240V 3~ Névleges kapcsolási fázisok 60 cm-es főzőlap 14 A >60 cm-es főzőlap 16,5 A Névleges kapcsolási fázisok 380-415V 3N~ 60 cm-es főzőlap 11 A >60 cm-es főzőlap 13 A Névleges kapcsolási fázisok 380-415V 2N~ 60 cm-es főzőlap 16 A >60 cm-es főzőlap 19 A Ez a készülék megfelel a 73/23/EGK és 89/336/EGK európai irányelveknek Javallat: A főzőlapot arra jogosult szerelőnek kell beszerelnie a gyártó utasításainak megfelelően az ábrák figyelembe vételével. 2 Használat Az üvegkerámia főzőlapokkal agyag, réz vagy rozsdamentes acél edények használhatók. Alumínium edények használata nem javasolt, mert azok elszínezhetik a főzőlap üvegét. 2.1 A főzőzóna kiválasztása. Az edényeket a főzőzónák bármelyikén elhelyezheti. Válassza ki az edény méretének leginkább megfelelőt. 2.2 A főzőlap bekapcsolása. A főzőlap bekapcsolásához tartsa nyomva 3 gombot. Megjelenik a másodpercig a főzőzónák jelzése. 0 Megjegyzés: ha kérdéses, hogy a gyermekzár funkció be van-e kapcsolva, kapcsolja ki a gomb 3 másodperces nyomva funkciót a tartásával (2.13) 2.3 A főzőzóna bekapcsolása. Kapcsolja be a kiválasztott főzőzónát a megfelelő gombbal (2.3.1, 2.3.2), gombot (2.4.2) vagy nyomja meg a Megjegyzés: ha 5 másodpercnél tovább tart a főzőzóna kiválasztása, a főzőlap biztonsági okokból automatikusan kikapcsol. 33 m a g y a r 2.4 A teljesítmény kiválasztása. A teljesítményt úgy állíthatja be, hogy az ujját végighúzza a vagy sávon (2.4.1) vagy megnyomja a gombot (2.4.2, 2.4.3). SPECIÁLIS FŐZŐZÓNÁK 2.5 Dupla főzőzóna, tripla főzőzóna. A teljesítmény kiválasztása után nyomja meg , gombot a dupla főzőzóna a bekapcsolásához (2.5.1, 2.5.3). A (2.5.2) vagy (2.5.4) ismételt megnyomásával a tripla főzőzónát választhatja ki. A , kikapcsoláshoz nyomja meg a , , gombot. 2.6 Nagy főzőzóna. Ezt a főzőzónát körkörösen vagy együttesen, nagy főzőzónaként használhatja. A bekapcsoláshoz gombot, a nyomja meg a kikapcsoláshoz pedig nyomja meg ismét. Javallat: halogén főzőzónákkal rendelkező típusok esetén a fény olyan erős, hogy javasoljuk, ne nézzen a főzőzónára, amikor nincs rajta edény. IDŐZÍTŐ FUNKCIÓK . Ha a főzőlap áram 2.7 Az óra beállítása alatt van, az óra számjegyei villognak és a (2.7.1) jelenik meg. Állítsa be az időt a , (2.7.2) gombokkal. Ha kihúzta a készüléket, vagy áramszünet esetén, végezze el újra a műveletet. Az idő módosításához tartsa nyomva 5 másodpercig a gombot (2.7.3). Az óra villogni kezd, és hangjelzést hall. Végezze el , a beállítást a gombokkal. 2.8 Az idő kiválasztása. Az a, b és c típusok esetén: A főzőzóna bekapcsolása és a teljesítmény kiválasztása után az óra 5 másodpercig villog, ez alatt gombot (2.8.1). Válassza nyomja meg a ki a kívánt időt a , gombokkal (2.8.2). Az öt másodperc eltelte után az időzítő beállítása megtörtént, és az idő megjelenik egy világító ponttal a beállított főzőzóna ikonja alatt (2.8.3). Az időzítés beállításának módosításához, vagy az idő ellenőrzéséhez nyomja meg a beállított főzőzóna ikonját (2.8.4). A programozás törléséhez nyomja , gombokat (2.8.5). meg egyszerre a A d, f, g, h, k, m és o típusok esetén: A főzőzóna bekapcsolása és a teljesítmény 34 kiválasztása után nyomja meg az óra és a gombját. A zónákon megjelenik a (2.8.6). Nyomja meg a gombot az időzíteni villogni kezd (2.8.7). kívánt zónán és az Állítsa be az időt az óra , gombjával (2.8.8). 5 másodperc elteltével az idő beállítása megtörtént, és a kiválasztott főzőzóna kijelzőjén jelzés. felváltva látható a teljesítmény és az A beállított idő elteltekor hangjelzés hallható és a villogni kezd. Az időzítés kikapcsolásához tartsa nyomva a gombot az ikonon, míg . megjelenik a 00 00 00 Megjegyzés: az időzítő automatikusan kikapcsol, ha az idő kiválasztása 10 másodpercnél hosszabb időt vesz igénybe. Az e típus esetén: Egy főzőzóna bekapcsolása és a teljesítmény kiválasztása után nyomja meg ismét az időzíteni kívánt főzőzóna kiválasztó gombját. Az jelzés jelenik meg. (2.8.11). Állítsa be az időt a , (2.8.12) gombokkal, majd nyugtázza a beállítást az időzített főzőzóna kiválasztó gombjának ismételt megnyomásával (2.8.13). A kijelzőn megjelenik a teljesítmény és egy pont, amely azt jelzi, hogy a főzőzóna időzítve van. Az időtartam elteltekor hangjelzés hallható, és megjelenik a jelzés (2.8.14). A hangjelzés kikapcsolásához nyomja meg bármelyik gombot. Megjegyzés: ha az idő kiválasztása 10 másodpercnél több időt vesz igénybe, az időzítő automatikusan kikapcsol. Az időzítővel kapcsolatos észrevételek: Ha a teljesítményszint 9, az időzítő maximális beállítása 60 perc. Egyéb esetekben a maximális beállítás 99 perc. A beállított idő elteltekor hangjelzés hallható, amíg bármely gombot megnyomja. PROGRAMOZÁS FUNKCIÓK 2.9 Gyors melegítés. Ez a funkció lehetővé teszi, hogy a készülék gyorsan elérje a maximális hőmérsékletet, majd az elért állandó hőmérsékletet automatikus megtartsa. Az a, b és c típusok esetén: Egy főzőzónát bekapcsol és a teljesítményt a maximumra gombot, és az állítja. Nyomja meg a jelzés jelenik meg a főzőzóna kijelzőjén (2.9.1). Önnek 5 másodperce van a kívánt szint kiválasztásához. Javasoljuk a 3-6 szintek használatát (2.9.2). Öt másodperc elteltével a gyors melegítés beállítása megtörténik, az jelzés és a teljesítmény beállítása jelenik m a g y a r meg felváltva. A maximális hőmérséklet elérése után az eltűnik és a teljesítmény állandó marad. A főzőzóna tovább működik a hagyományos módon. Ha ki kívánja kapcsolni a gyors melegítést, nyomja meg a beprogramozott főzőzóna ikonját és válassza ki az új teljesítményt. A d, f, g, h, j, k, l, m és o típusok esetén: Válassza ki a főzőzónát és állítsa a maximális nyomva tartásával. A 9 teljesítményre a jelenik meg (2.9.3). Állítsa és egy pont be a teljesítményt a ; gombbal. A 3-6 teljesítmények beállítása javasolt (2.9.4). 5 másodperc elteltével a gyors melegítés beállítása megtörténik, a teljesítmény és egy pont jelenik meg (2.9.5). A maximális teljesítmény elérésekor a tizedespont eltűnik és a főzőzóna a hagyományos módon működik tovább. A funkció kikapcsolásához nyomja meg a beprogramozott főzőzóna gombját és válassza ki az új teljesítményt. 2.10 Az üvegkerámia főzőlapok vezérlése. Ellenőrizze, hogy a használni kívánt főzőzónát kapcsolta-e be (2.10.1). Állítsa a szabályzót a kívánt helyzetbe, az „on” kontrollámpa bekapcsol (2.10.2), amely a maradékhőt is jelzi a főzőzóna kikapcsolása után. A dupla vagy nagy főzőzónával rendelkező típusokon a szabályzó balra forgatása a főzőzóna egyik részét, míg jobbra fordítása a teljes főzőzónát vezérli (2.10.3). 0 2.11 A főzőzóna kikapcsolása. Válassza ki a teljesítményt a kikapcsolni kívánt főzőzónán. 2.12 Maradékhő. A főzőlap használata után a főzőzónák a kiválasztott teljesítménytől függően bizonyos ideig forrók maradnak. jelzés és A még forró főzőzónákon a egy pont látható. Ne érintse meg ezeket a főzőzónákat, mert megégetheti magát. Figyelem: a készülék áramtalanítása esetén a ikon nem jelenik meg visszakapcsoláskor a akkor sem, ha a főzőzóna még forró. Fontos, hogy ezt soha ne felejtse el. 2.13 Gyermekzár funkció. Ezzel a funkcióval megakadályozhatja, hogy a gyermekek kezelni tudják a készüléket. A gyermekzár bekapcsolásához tartsa nyomva 3 másodpercig a gombot. A gyermekzár feloldásához ismételje meg az eljárást. Javallatok: • Ügyeljen, hogy az edények ne ütődjenek az üveglaphoz. • Alumínium edények használata nem javasolt, mert elszínezhetik az üveget, kivéve, ha rozsdamentes acél védőréteggel rendelkezik. • Ne működtesse a főzőzónákat edény nélkül. • Az edények alja legyen sík és száraz. • Ügyeljen arra, hogy az edények átmérője nagyobb vagy azonos legyen a használt főzőzónáéval és a hőforrás közepére helyezze az edényeket. • Lehetőleg ne mozgassa az edényeket, mert megkarcolhatják az üveget. • A készüléket kizárólag ételek főzésére használja. Ne használja a főzőlapot munkapultként. • Ne kerüljön hideg víz közvetlenül a főzőlapra, amikor az forró. Figyelem: A főzőzónák szakaszos működése nem meghibásodás. A kiválasztott teljesítménytől függően hosszabb vagy rövidebb időközökkel működnek. 3 Karbantartás és tisztítás • Ne használjon gőztisztítót. • Lehűlés után rendszeresen tisztítsa a főzőlap felületét. Ne használjon dörzshatású tisztítószert vagy súrolószivacsot. Szappanos vízzel megnedvesített konyharuhával tisztítsa a készüléket (3.1.1). • Hetente egyszer tisztítsa meg a készüléket üvegkerámia főzőlapokhoz készült tisztítószerrel. Az üvegkerámia főzőlap tisztításához és karbantartásához javasoljuk VITRO-CLEN használatát. • A makacs szennyeződések eltávolításához üvegkaparó használata javasolt (3.1.2). • Ha véletlenül cukor, cukortartalmú anyag vagy műanyag ég a főzőlapra, a lehető leghamarabb távolítsa el a kaparóval, 35 m a g y a r amíg forró. Ennek elmulasztása esetén elképzelhető, hogy tartós nyoma marad. a gyermekek ne játszhassanak a készülék kezelőszerveivel. • A kaparót csak tökéletes állapotú pengével használja. Ha megsérül, cserélje. • A készüléket nem segítséggel élő személyek általi használatra tervezték. 4 • Zsírt vagy olajat tartalmazó ételek főzésekor maradjon a készülék közelében, mert az erős hő hatására meggyulladhatnak. Biztonság • A főzőlap tápellátását biztosító áramkört minden érintkezőt leválasztó kapcsolóval kell ellátni, melynek érintkezői között a minimális távolság 3 mm legyen. • A főzőlapot arra jogosult személynek kell üzembe helyeznie, akinek követnie kell a gyártó utasításait és ábráit. • Az üzembe helyezést az adattáblán feltűntetett maximális teljesítményhez megfelelő méretezéssel és szabványos földeléssel rendelkező tápcsatlakozóval kell megvalósítani. • A kábel sérülése esetén annak cseréjét biztonsági okokból kizárólag a vevőszolgálat vagy azzal megegyező minősítéssel rendelkező személy végezheti el. • A készülék belső hőkioldóval rendelkezik, ami túlmelegedés esetén kikapcsolja a főzőlapot. • Minden használat után kapcsolja ki a készüléket a szabályzóval. • Ha az üveg felülete megreped vagy eltörik, azonnal húzza ki a készüléket egy esetleges áramütés megelőzése érdekében. Ne használja a főzőlapot az üveg cseréje nélkül (4.1.1). • Ha valami a vezérlő gombokra ömlik, a főzőlap kikapcsol és figyelmeztető hangjelzés hallható (4.1.2). • Ha túl hosszú ideig tart nyomva egy érzékelőt, vagy valamilyen tárgy működteti az érzékelőt, a főzőlap kikapcsol és figyelmeztető hangjelzés hallható (4.1.3). • Ne tegye a forró edényeket az érzékelőkre, mert megégetheti magát, amikor megnyomja azokat (4.1.3). • Ne engedjen kisgyermekeket a készülékhez, mert a főzőfelület használat közben nagyon forró lehet. Használja a gyermekzárat, hogy 36 • Ha a főzőlapot fiók fölé szerelte be, ne tároljon éghető anyagokat a fiókban. 5 Környezetvédelem A főzőlap tervezésekor kiemelt figyelmet fordítottunk a környezetvédelemre. Védje Ön is környezetét. A főzés során a megfelelő teljesítményt használja és válasszon a készíteni kívánt ételhez megfelelő méretű edényeket. A hőátadás akkor a legkedvezőbb, ha a főzőzóna átmérője megegyezik az edény aljának átmérőjével. A főzés befejezésekor, ha kívánja, a főzőzónán hagyhatja az edényt, így felhasználva a felgyülemlett maradék hőt. Ezzel energiát takarít meg. Amikor csak lehetséges, használjon fedőt a párolgás által okozott hőveszteség csökkentése érdekében. Elektromos és elektronikus készülékek hulladékkezelése. Ne dobja ki a készüléket a háztartási hulladékkal. Szállítsa a főzőlapot megfelelő hulladékgyűjtő helyre. A háztartási készülékek újrahasznosításával megelőzhetők az egészségre és környezetre gyakorolt negatív hatások és hozzájárulhat az energia és egyéb erőforrások megtakarításához. További információért kérjük, vegye fel a kapcsolatot a helyi hatóságokkal vagy az üzlettel, ahol a főzőlapot vásárolta. slovensky Návod na inštaláciu a obsluhu Dôležité: Starostlivo si prečítajte tento návod pred prvým použitím varnej dosky. Text tohto návodu korešponduje s obrázkami v obrázkovej prílohe. 0 Identifikácia dosky Identifikujte model Vašej dosky (“a”, “b”, “c”, “d”, “e”, “f”, “g”, “h”, “i”, “j”, “k”, “l”, “m”, “n”, “o”) porovnaním počtu a rozmiestnenia varných zón na varnej doske s obrázkami v návode 1 Inštalácia 220-240V 3~ 60 cm doska >60 cm doska Menovitý prúd istenia fáze 14 A 16,5 A 380-415V 3N~ 60 cm doska >60 cm doska Menovitý prúd istenia fáze 11 A 13 A 380-415V 2N~ 60 cm doska >60 cm doska Menovitý prúd istenia fáze 16 A 19 A Tento výrobok je v zhode s Direktívami EÚ č. 73/23/EEC a 89/336/EEC 1.1 Rozbalenie. Odstráňte všetky časti obalu 1.2 Umiestnenie do nábytku. Vždy vezmite do úvahy rozmery dosky (1.2.1) a rozmery otvoru, do ktorého sa chystáte dosku umiestniť (1.2.2, 1.2.3). Ak pod doskou nebude umiestnená rúra, musíte inštalovať ochranný panel v súlade s rozmermi podľa obrázku (1.2.4). Okolo celého obvodu dosky nalepte tesniacu pásku, aby ste zabezpečili tesnosť styku dosky a podložky (1.2.5). Otočte dosku a umiestnite ju do otvoru (1.2.6). Zabezpečte dosku štyrmi úchytkami dodávanými v príslušenstve (1.2.7). Nepoužívajte žiadne lepidlá, ani silikón. 1.3 Pripojenie do elektrickej siete. Doska je napájaná cez prívodný kábel. • S 5 vodičmi: a) tmavo modrý, b) bledo modrý, c) hnedý, d) červený, e) žltozelený. (1.3.1) • Doska pripravená pre 230V~. (1.3.2) • Doska pripravená pre 220-240V~ : pozri tabuľku. (1.3.3) • Max. príkon: 220-240V~ 60 cm doska >60 cm doska 60 cm doska = 6.8kW, >60 cm doska = 7.8kW Menovitý prúd istenia fáze 30 A 34 A • Ak ste zvolili inú schému zapojenia, ako 220-240V~, demontujte kábel a použite pripojenie podľa diagramu (1.3.3, 1.3.4). Odporúčanie: Táto doska musí byť inštalovaná odborne spôsobilou osobou, v súlade s inštrukciami výrobcu a podľa priložených diagramov. 2 Použitie Na vitrokeramických doskách môžete používať hlinené, medené alebo oceľové nádoby. Hliníkové a plastové nádoby nie je dovolené používať, pretože môžu poškodiť sklo dosky. 2.1 Výber varnej zóny. Máte na výber niekoľko zón na varenie. Vždy vyberte najvhodnejšiu zónu podľa veľkosti použitej nádoby. na 3 2.2 Zapnutie dosky. Stlačte volič sekundy a doska sa zapne; na displeji varných zón sa rozsvieti symbol . 0 Pozn.: V prípade, že bola predtým aktivovaná detská poistka, deaktivujte ju na 3 sekundy (2.13) stlačením voliča 2.3 Zapnutie varnej zóny. Zapnite varnú zónu, na ktorej je umiestnená nádoba stlačením príslušného voliča (2.3.1, 2.3.2) alebo stlačením voliča (2.4.2) Pozn.: Ak pridržíte prst na voliči dlhšie, ako 5 sekúnd, doska sa z bezpečnostných dôvodov automaticky vypne. 37 slovensky 2.4 Voľba výkonu. Výkon nastavíte posúvaním prsta po voliči (2.4.1) alebo stláčaním alebo (2.4.2, 2.4.3). ŠPECIÁLNE VARNÉ ZÓNY 00 00 2.5 Dvojitá zóna. Trojitá zóna. Ak ste už zvolili , a tým zapnete výkon, stlačte dvojitú zónu (2.5.1, 2.5.3). Ak stlačíte (2.5.2) alebo (2.5.4) znovu, zapne sa aj trojitá zóna. Ak chcete voľbu zrušiť, stlačte , , , . 2.6 Oválna zóna. Túto zónu môžete použiť alebo ako oválnu pre ako kruhovú . Stlačte volič na pekáče zapnutie v oválnom režime a znovu stlačte pre návrat. Odporúčanie: V modeloch vybavených halogénovou zónou Vám odporúčame nepozerať do halogénovej zóny bez nádoby, pretože svetlo je príliš intenzívne. FUNKCIA ČASOVAČA . Po prvom zapnutí 2.7 Nastavenie času dosky bude na displeji blikať , (2.7.1). Nastavte čas pomocou voličov (2.7.2). Rovnako postupujte po každom odpojení dosky alebo po výpadku dodávky energie. Ak chcete zmeniť čas, stlačte volič na 5 sekúnd (2.7.3). Údaj na displeji bude blikať a budete počuť pípnutie, na , nastavenie použite voliče . 2.8 Programovanie času varenia Modely a, b, c: Po zvolení varnej zóny a nastavení výkonu počas 5 sekúnd blikania (2.8.1). Potom nastavte stlačte volič požadovaný čas varenia pomocou , (2.8.2). Po uplynutí 5 sekúnd je čas nastavený a pod symbolom príslušnej zóny bude svietiť bodka (2.8.3). Pre zobrazenie alebo zmenu nastaveného času stlačte volič naprogramovanej varnej zóny (2.8.4). Pre zrušenie naprogramovaného času stlačte voliče , súčasne (2.8.5). Modely d, f, g, h, k, m, o: APo zvolení varnej zóny a nastavení výkonu stlačte na hodinách. Symboly a volič sa objavia na displeji každej zóny (2.8.6). Stlačte na zóne, ktorú nastavujete a začne blikať (2.8.7). Nastavte symbol čas pomocou , hodín(2.8.8). Po 5 00 38 sekundách bude čas nastavený a výkon bude zobrazovaný striedavo so symbolom . Po uplynutí nastaveného času zaznie zvukový signál a bude blikať. Ak na hodinách chcete zrušiť čas, stláčajte až kým sa na displeji nezobrazí . Pozn.: Časovač sa automaticky vypne, ak nenastavíte čas v priebehu 10 sekúnd. Modely e: Po zvolení varnej zóny a nastavení výkonu znovu stlačte volič programovanj zóny a objaví sa symbol (2.8.11). Nastavte čas pomocou , (2.8.12) a potvrďte ho opätovným stlačením voliča zóny (2.8.13). Za označením výkonu bude svietiť bodka, čo znamená, že zóna je načasovaná. Po uplynutí zvoleného času budete počuť signál a na displeji sa objaví (2.8.14). Zvukový signál vypnete symbol stlačením ľubovoľného voliča. Pozn.: Časovač sa automaticky vypne, ak nenastavíte čas v priebehu 10 sekúnd. Obmedzenia časovača: Ak je výkon varnej zóny nastavený na stupeň 9, časovač je obmedzený na 60 minút. Inak je možné nastaviť čas až 99 minút. Po uplynutí nataveného času budete počuť signál, kým nestlačíte ľubovoľný volič. PROGRAMOVANIE FUNKCIÍ 2.9 Rýchly ohrev. Rýchlo dosiahnete maximálnu teplotu a potom automaticky prejdete na konštantnú teplotu. Modely a, b, c: Aktivujte varnú zónu a nastavte maximálny výkon. Stlačte a na displeji zvolenej zóny sa objaví (2.9.1). V priebehu 5 sekúnd nastavte požadovaný výkon, odporúčame medzi 3 a 6 (2.9.2). Po 5 sekundách sa nastaví rýchly ohrev a na displeji sa bude striedavo zobrazovať symbol a nastavená hodnota výkonu. Po dosiahnutí maximálnej teploty sa symbol stratí a nastaví sa zvolený výkon. Varná zóna bude ďalej pracovať v štandardnom režime. Ak chcete zrušiť rýchly ohrev, stlačte volič príslušnej varnej zóny a nastavte novú hodnotu výkonu. Modely d, f, g, h, j, k, l, m, o: Zvoľte varnú kým nenastavíte výkon zónu a stláčajte (2.9.3). Nastavte 9 a potom bodku za požadovaný výkon pomocou voliča slovensky ; odporúčame stupne 3 až 6 (2.9.4). Po uplynutí 5 sekúnd je rýchly ohrev zvolený a na displeji svieti výkon a bodka (2.9.5). Po dosiahnutí maximálnej teploty sa bodka stratí a výkon sa nastaví zvolený stupeň. Varná zóna bude ďalej pracovať v štandardnom režime. Ak chcete zrušiť rýchly ohrev, stlačte volič príslušnej varnej zóny a nastavte novú hodnotu výkonu. 2.10 Dosky s otočnými ovládačmi. Uistite sa, že ovládač, ktorý používate je určený pre Vami zvolenú varnú zónu (2.10.1). Otočte ovládačom do požadovanej pozície a príslušný indikátor sa rozsvieti (2.10.2). Indikátor tiež signalizuje zostatkové teplo po vypnutí dosky. Pre modely s dvojitou alebo oválnou zónou otáčaním ovládača doľava zapnete len časť zóny, otáčaním ovládača doprava zapnete celú varnú zónu (2.10.3). ako priemer použitej varnej zóny a nádobu umiestnite vždy do stredu zdroja tepla. • Neposúvajte nádoby po skle, pretože sa tým môže sklo poškriabať. • Používajte varnú dosku len na varenie. Nepoužívajte ju ako pracovnú podložku. • Studená voda nesmie prísť do kontaktu s teplou varnou zónou. Pozor: Prerušované fungovanie varných zón nie je chybou dosky. Zóny sa striedavo zapínajú a vypínajú podľa stupňa výkonu, ktorý ste zvolili. 3 Údržba a čistenie • Nepoužívajte parné čističe 2.11 Vypnutie varnej zóny. Nastavte výkon ak ju chcete vypnúť. varnej zóny na 0 2.12 Zostatkové teplo. Varná zóna zostáva určitý čas teplá aj po vypnutí. Čas závisí od výkonu a na displeji horúcej zóny sa objaví alebo bodka, čo znamená, že symbol táto zóna je ešte horúca. Nedotýkajte sa takejto varnej zóny, pretože hrozí riziko popálenia. • Pravidelne čistite povrch dosky, vždy keď je chladná. Nepoužívajte drsné čistiace prostriedky. Čistite mäkkou handričkou a vodou s pridaním saponátu (3.1.1). • Jeden krát týždenne vyčistite sklo dosky špeciálnym prostriedkom na vitrokeramické dosky. Na údržbu a čistenie Vám odporúčame používať prostriedky VITROCLEAN. Pozor: Ak nastane odpojenie dosky počas po pripojení dosky doby, keď svieti symbol sa symbol znovu neobjaví, aj keď zóna môže byť ešte horúca. Pamätajte na to. • Na odolné škvrny použite škrabku na sklo (3.1.2). 2.13 Zamknutie ovládania. Zabraňuje deťom manipulovať s doskou. Stlačte na 3 sekundy volič a ovládanie sa zablokuje. Pre odblokovanie postup zopakujte. • Ak sa Vám na skle pripáli cukor, sladký roztok alebo plast, okamžite ho odstráňte škrabkou ešte za tepla. V opačnom prípade pripálený materiál môže zanechať trvalé stopy na skle. Odporúčania: • Nebúchajte hrncami o sklo varnej dosky. • Udržujte ostrie škrabky v dobrom stave. Vymeňte škrabku, ak má poškodené ostrie. • Nepoužívajte hliníkové nádoby, ak nemajú oceľové dno. Hliník môže pri zahriatí poškodiť sklo dosky. • Varné zóny by nemali byť v prevádzke bez nádob. • Dno nádoby musí byť rovné, suché a čisté. • Používajte nádoby, ktorých priemer je väčší, 39 slovensky 4 varíte masť, tuk alebo olej. V dôsledku intenzívneho tepla sa môžu vznietiť. Bezpečnosť • Do obvodu napájania dosky musí byť zaradený vypínací prvok všetkých pólov, vzdialenosť kontaktov v rozopnutom stave je najmenej 3 mm. • Dosku musí inštalovať odborne spôsobilá osoba, ktorá musí rešpektovať odporúčania výrobcu a diagramy. • Inštalácia musí byť navrhnutá pre maximálny príkon dosky podľa štítku dosky a spotrebič musí byť dokonale uzemnený. • Ak je prívodný kábel poškodený, musí ho z bezpečnostných dôvodov ihneď vymeniť autorizovaný servis alebo odborne spôsobilá osoba • Každá varná zóna je vybavená snímačom teploty, ktorý zónu vypne v prípade jej prehriatia. • Po každom použití vypnite varné zóny pomocou ovládacieho panelu. • Ak je sklo dosky prasknuté, alebo zlomené, okamžite odpojte spotrebič od siete, aby ste zabránili úrazu elektrickým prúdom. Nepoužívajte varnú dosku, kým nebude sklo vymenené (4.1.1). • Ak sa niečo vyleje na ovládací panel, doska sa automaticky vypne a zaznie zvukový signál (4.1.2). • Ak budete stláčať senzor príliš dlho, alebo necháte na ňom položený predmet, doska sa vypne a zaznie signál. (4.1.3). • Neklaďte na ovládací panel teplé nádoby, neskôr sa môžete popáliť od horúceho skla pri stláčaní senzorov (4.1.3). • Udržujte deti v bezpečnej vzdialenosti od dosky počas varenia, pretože povrch je veľmi horúci. Uzamykajte ovládanie, aby sa deti nemohli hrať s ovládaním varnej dosky. • Spotrebič nebol navrhnutý pre používanie osobami so zníženými mentálnymi schopnosťami. • Vždy sa zdržujte v blízkosti dosky, ak 40 • Ak je varná doska inštalovaná nad zásuvkou, neskladujte v nej žiadne horľavé predmety. 5 Ochrana životného prostredia Varná doska bola navrhnutá s ohľadom na ochranu životného prostredia. Buďte aj Vy enviromentálne vnímavý. Pri každom varení používajte adekvátny výkon a pri výbere varnej zóny vždy zohľadnite veľkosť použitej nádoby. Prenos tepla je najlepší v prípade, že je veľkosť dna nádoby zhodná s veľkosťou varnej zóny. Tesne pred dovarením vypnite varnú zónu a nádobu neodkladajte, aby ste využili zostatkové teplo v nej akumulované. Tým ušetríte energiu. Ak je to možné používajte pokrievky, aby ste znížili straty odparovaním. Zber a recyklácia použitých spotrebičov. Nikdy neodhadzujte nepotrebný spotrebič do bežného komunálneho odpadu. Odovzdajte nepotrebný spotrebič do špecializovaných zberných miest. Odovzdaním domácich spotrebičov na recykláciu zabraňujete negatívnym vplyvom na životné prostredie a zdravie ľudí. Šetríte tým energiu a zdroje surovín. Ďalšie informácie získate vo Vašom obchode, miestnom úrade alebo na stránkach www. envidom.sk . ϝΎϤόΘγϻϞϴϟΩ ϞϴϟΪϟϞϛϊΟέΪΟϢϬϣ ΔΤϴϔμϟϝΎϤόΘγϞΒϗ ΔϘϳήτΑϢϤμϣϞϴϟΪϟάϫ ϊϣΔϗϼόϟΎϬϟΕήϘϔϟϥ ΔϘΑΎτϤϟϡϮγήϟ ϒϳήόΘϟ 0 ΔΤϴϔμϟωϮϨΑϒϳήόΘϟ “f”, “g”, “h”, “i”, (“a”, “b”, “c”, “d”, “e”, ΪΟϮΘϟϭΩΪόϟΰϴϤϣ(“j”, “k”, “l”, “m”, “n”, “o” ΓήϫΎμΘϤϟϊϣίΎϬΠϟήΌΒϠϟ ΐϴϛήΘϟ 1 ΔϳΎϤΤϟΩϮϣϊϴϤΟωΰϧ ϒϴϠϐΘϟωΰϧ ΙΎΛϷϲϓΐϛέ ΕΎϤϴϠόΘϠϟΔΤϴϔμϠϟΦϳέϮΘϟΎϤΩΐϗέ ΔΤϴϔμϟϊπΗϑϮγϦϳΙΎΛϸϟβϴϳΎϘϤϟϭ ϥήϓΐϴϛήΗΪϳήΗϻΫ·) ΐδΣΔϳΎϤΤϟΔϟϭΎσΐϛήΗϥΐΠϳΔΤϴϔμϟΖΤΗ ϰϠϋϲϐγήϟΔϘλϻϖμϟΔϨϴΒϤϟβϴϳΎϘϤϟ ϰϠϋϝϮμΤϠϟΔΤϴϔμϠϟΔϳήΪϟΔΣΎδϤϟϝϮσ ύήϔϟϲϓΎϬΒϛέϭΔΤϴϔμϟέΩϦδΣΐϴϛήΗ ϚγΎδϣϊΑέϷΔτγϮΑΙΎΛϷϲϓϚδϣ ϞΜϣΔϟΪΒϣήϴϏΩϮϣϞϤόΘδΗϻΓήϓϮϤϟ ΎϧϮϜϳϞϴδϟ ϲΎΑήϬϜϟέΎϴΘϟΎΑϞλϮϟ ςϴΨϟϊϣϡΪϘΗΔΤϴϔμϟ ΔϗΎτϠϟϞλϮϤϟ ϲϓΎλϕέίEϢΗΎϗϕέίDρϮϴΧϦϣ• ϱήϔλήπΧHήϤΣGϲϨΑF ) a9ϦϣΔΤϴϔμϠϟΰϬΠϣ• a9˰ϦϣΔΤϴϔμϠϟΰϬΠϣ• ϝϭΪΠϟϊΟέ .:ϢγΔΤϴϔλΔϣΎΘϟΓϮϘϟ• .:ϢγΔΤϴϔλ ϯΪΣΈΑήϴϐϣϞΧΩ a9˰ $ $ ϢγΔΤϴϔλ ϢγΔΤϴϔλ ˰ϦϣήϴϏέΎϴΘϟϦϛΫ·• ΔϴϠϤόϟϢΗϭςϴΨϟωΰϧa9 ϢγήϟΐδΣ ϯΪΣΈΑήϴϐϣϞΧΩ a9˰ $ $ ϢγΔΤϴϔλ ϢγΔΤϴϔλ ϯΪΣΈΑήϴϐϣϞΧΩ $ $ ϢγΔΤϴϔλ ϢγΔΤϴϔλ ϯΪΣΈΑήϴϐϣϞΧΩ $ $ a19˰ a19˰ ϢγΔΤϴϔλ ϢγΔΤϴϔλ ΕΎϤϴϠόΘϠϟϖΑΎτϣίΎϬΠϟάϫ &((ϭ&((ΔϴΑέϭϷ ΕΎϴλϮΗ ϥϮϜϳϥΐΠϳΔΤϴϔμϟΐϴϛήΗ ϱάϟϭϪϟκΧήϣΐϛήϣϑήσϦϣ ΞΘϨϤϟϡϮγέϭΕΎϤϴϠόΗϊΑΎΘΑϥΐΠϳ ϝΎϤόΘγϻ 2 ϝΎϤόΘγϦϜϤϳϚϴϣήϴγϮΘϴϔϟΔτγϮΑ βϛϮϨϳϹϭαΎΤϨϟϦϴτϟέΪϗ ϭΎϬΑΡϮμϨϣήϴϏϡϮϴϨϣϮϟϻϲϧϭ ΔΤϴϔμϟϰϠϋΏϮγέΞΘϨΗϥϦϜϤϣΎϬϧϷ ΦΒτϟΔϘτϨϣέΎϴΘΧ έΪϘϟϊοϮϟήΌΑΓΪϋϰϠϋϱϮΘΤϳ ϢΠΣΐδΣϢϜϟΔΒγΎϨϤϟέΎΘΧ ϞϤόΘδϤϟέΪϘϟ ΔΤϴϔμϟϞϴϐθΗ ΔΤϴϔμϟϞόθϟϲϧϮΛΓΪϤϟ ςϐο ϦϣϞϜϟ ϭϞόθΗΔΤϴϔμϟ ΦΒτϟϖσΎϨϣ 0 ϞϤόϳϥΎϛϥ·ϝΎϔσϸϟϥΎϣϷϡΎπϧέΎϴΘΧϻΔτϘϧ ϞϔϘϟϲϧϮΛΓΪϤϟςϐπϟΎΑϪϜϓ ) ΓέΆΒϟϞϴϐθΗ έΪϘϟΖόοϭϦϳΓέΆΒϟϞϐη ΐγΎϨϤϟέΰϟϰϠϋςϐπϟΎΑ έΰϟςϐοϭ ϲϧϮΛϦϣήΜϛήΧ΄ΘϟϦϴΣΔτϘϧ ΎϔψϨΗΔΤϴϔμϟΓέΆΒϟέΎϴΘΧϲϓ ϡΎπϨϟΔϴϜΗΎϣϮΗΔϘϳήτΑ ϥΎϣϷ 41 ΓϮϘϟέΎϴΘΧ ΩϮϤόϟϰϠϋϊΒλϷϚϳήΤΘΑΎϬϟΪϋ ϭςϐπϟΎΑϭ. ΔλΎΨϟέΆΒϟ ΔϴΛϼΜϟΓέΆΒϟΔΟϭΩΰϤϟΓέΆΒϟ ΓϮϘϟέΎϴΘΧΪόΑ ΔΟϭΩΰϤϟΓέΆΒϟϞϐη ΪϳΪΟϦϣςϐπϟΪϨϋ , (2.5.2) (2.5.4)ϭ ςϐοξϓήϠϟΔϴΛϼΜϟΓέΆΒϟϞϐΘθϳ ( , , , ). έΪμϤϟΓέΆΒϟ ΔϳήΩΔϘϳήτΑΎϬϠϴϐθΗϦϜϤϣΓέΆΒϟϩάϫ ΎϬϠϴϐθΘϟ .ςϐο ΔΟϭΩΰϣΔϘϳήτΑϭ ξϓήϠϟΪϳΪΟϦϣςϐοϭ ΕΎϴλϮΗ έϮϨϟΔϴϮπϟέΆΒϟϪϟϱάϟωϮϨϟϲϓ ήπϨϳϻϥμϨϳάϬϟΓήϴΒϛΓϮϗϪϟ ΔϠόΘθϣϥϮϜΗΎϣΪϨϋΎΗήηΎΒϣ έΪϘϟϥϭΪΑ ΖϴϗϮΘϟϞϤϋ ΔϋΎδϟϊοϭ ΔϋΎδϟΪϫΎθϣΔΤϴϔμϟϞϴϐθΗΪϨϋ (2.7.1)ϞΠδΗϭϒηήΗ έίϷΔτγϮΑΔϋΎδϟϝΪϋ ωΎτϘϧϦϴΣϭΔϋΎδϟωΰϨΗΓήϣϞϛΔϴϠϤόϟΪϋ ϲΎΑήϬϜϟέΎϴΘϟ έίϷϲϧϮΛΓΪϤϟςϐοΔϋΎδϟήϴϐΘϟ ϦϴϧέϊϤδΗϭϒηήϟϲϓΪΒΗΔϋΎδϟ (2.7.3) έίϷΔτγϮΑϝΪϋ ΖϴϗϮΘϟέΎϴΘΧ DEFωϮϨϟ ϲϧϮΛϚϳΪϟΓϮϘϟέΎϴΘΧϭΓέΆΒϟϞϴϐθΗΪϨϋ ΐγΎϨϤϟΖϗϮϟέΎΘΧ (2.8.1).έίϷςϐπϟϒηήϠϟ ϰϘΒϳΖϗϮϟϲϧϮΛΔδϤΧΪόΑςϐπΑ ΓέΆΒϟΖΤΗ˯ϮοϭΔϋΎδϟήϬψΗϭΪϛΆϣ ϲϘΒΘϤϟΖϗϮϟΓΪϫΎθϣϭήϴϐΘϠϟΔΗϮϗϮϤϟ ΔΗϮϗϮϤϟΓέΆΒϟέΰϟςϐο ξϓήϠϟ ˰έΰϟςϐοΔϤπϧϻ ΔϗήϔΘΑ Dfghkmo ωϮϧϷ ςϐοΓϮϘϟέΎϴΘΧϭΓέΆΒϟϞϴϐθΗΪόΑ ήϬψϳϭΔϋΎδϟϰϠϋέΰϟ ΓέΆΑϞϛϲϓ Ϛϟάϛϭ 00 ήϬψϳϭΔΗϮϗϮϤϟΓέΆΒϠϟςϐο ΔτγϮΑΖϗϮϟέΎΘΧϒθΗήϣ 42 ϲϧϮΛΪόΑΔϋΎδϟϰϠϋ ϭΓϮϘϟΓΩΪόΘϣΔϘϳήτΑήϬψϳϭΕϮϗϮϣϰϘΒϳΖϗϮϟ ΖϗϮϟέϭήϣΪόΑΔΗϮϗϮϤϟΓέΆΒϟϲϓ ΔϔθΗήϣΔϘϳήτΑήϬψϳϭϲΗϮλϦϴϧέΞΘϨϳ ΓέΆΒϟϰϠϋ±ςϐοΖϴϗϮΘϟξϓήϟ ΔηΎθϟϰϠϋήϬψϳϰΘΣ 00 ΪϨϋΔϴϜΗΎϣϮΗΔϘϳήτΑϒϗϮΘϳΖϴϗϮΘϟΔτϘϧ ΖϗϮϟέΎϴΘΧϲϓϲϧϮΛϦϣήΜϛήϴΧ΄Θϟ HωϮϧϷ ϦϣςϐοΓϮϘϟϞϳΪόΗϭΓέΆΒϟϞϴϐθΗΪόΑ ήϬψϳΓέΆΒϠϟΖϴϗϮΘϟέΎϴΘΧϻέΰϟΪϳΪΟ ΔτγϮΑΖϗϮϟέΎΘΧ ΔΗϮϗϮϤϟΓέΆΒϟέίΪϳΪΟϦϣςϐπΑΪϛϭ ϥϰϠϋήηΆϳϱάϟϭΔτϘϨΑήϬψΗΓϮϘϟ ±ΓέΎη·ϭϲΗϮλϦϴϧέΔΗϮϗϮϣΓέΆΒϟ ϲϘΒΘϤϟΖϗϮϟϥέάΤΗ ϲϔΘΨϳϲΗϮμϟϦϴϧήϟϭέίϱςϐο ΔϴϜΗΎϣϮΗΔϘϳήτΑϒϗϮΘϳΖϴϗϮΘϟΔτϘϧ ϲϧϮΛϦϣήΜϛήϴΧ΄ΘϟϦϴΣ ΖϗϮϟέΎϴΘΧϲϓ ΖϴϗϮΘϟϯϮΘδϣϰϠϋϢϴψϨΘϟ ϥϮϜϳήϳάΤΘϟϲϓήΒϛϷΖϗϮϟΓϮϘϟΖϧΎϛΫ· ϦϜϤϳήΒϛϷήϴϏϥϮϜϳΎϤϨϴΣϭΔϘϴϗΩ ΖϗϮϟΔϳΎϬϧϦϴΣΔϘϴϗΩϥϮϜϳϥ έίϱςϐπΗϻϦϴΣΝϭήΨϟϲϓΪΒϳϦϴϧήϟ ΞϣήΒϟϞϤϋ ϊϳήδϟϦϴΨδΘϟ ϯϮμϘϟΓέήΤϟΔϋήδΑώϠΒϳ ϯϮΤϧΔϴϜΗΎϣϮΗΔϘϳήτΑήϤϳϲϜϟ ΔϧΎϴμϟΓέήΣ DEFωϮϧϷ ϯήΒϜϟΓϮϘϟϯϮΤϧήϤϤϟϞϘϧϭΓέΆΒϟϞϐη ςϐοΪϨϋ ήϬψϳ ΔϠόΘθϤϟΓέΆΒϟήϫΩϲϓ ϰΟήϤϟϯϮΘδϤϟέΎϴΘΧϻϲϧϮΛϚϳΪϟ ίϭΕΎϳϮΘδϤϟϦϴΑϥϮϜϳϥΎΑμϨϳ ήϬψϳϭϞϤόΘδϣΒμϳϊϳήδϟϦϴΨδΘϟϲϧϮΛΔδϤΧΪόΑ ϯήΒϜϟΓέήΤϟϞμΗΔϳΩΎϋΔϘϳήτΑΓϮϘϟϭ ϞϐΘθϳϰϘΒϳΓέΆΒϟΔϧΎϴμϟΓϮϗϰϘΒΗϭ ϲϔΘΨΗ ϦϴΨδΘϠϟΐϠτϟϲϐϟϦϴΣϲϓΔϳΩΎϋΔϘϳήτΑ έΎΘΧϭΓέΎΘΨϤϟΓέΆΒϠϟέΰϟςϐοϊϳήδϟ ΓΪϳΪΠϟΓϮϘϟ dfghjklmoωϮϧϷ ϯϮμϘϟΓϮϘϟϲϓΎϬόοϭΓέΆΑέΎΘΧ ΔτϘϧϭήϬψϳϰΘΣςϐπΑ ΕϻΪόϤϟΎΑμϨϳ±ςϐπΑΓϮϘϟϝΪϋ ϦϴΨδΘϟϲϧϮΛΪόΑϰΘΣϦϣ ΔτϘϧϦϣΔϴΗϵΓϮϘϟήϬψϳϭέΎΘΨϣϰϘΒϳϊϳήδϟ ϲϔΘΨΗΔϳήθόϟΔτϘϨϟϯήΒϜϟΓϮϘϟύϮϠΑΪόΑ ΔόΑΎΘΘϣΔϘϳήτΑϞϐΘθΗϰϘΒΗΓέΆΒϟϭ ΓέΎΘΨϤϟΓέΆΒϠϟέΰϟςϐοΔϴϠϤόϟξϓήϟ ΓΪϳΪΟΓϮϗέΎΘΧϭ ϢϜΤΘϟΎΑΎϔμϟ ϞϴϐθΘϟΪϳήΗϲΘϟΓέΆΒϟϥϦϣΪϛ΄Η ϞϤόϠϟΔΒγΎϨϤϟΓέΆΒϟϱϭΎδΗ ΪϫΎθϟϞόΘθϳϭΓΎΟήϤϟΔϴόοϮϠϟϢϴϜΤΘϟέΩ ΓέήΤϟήϬψϳϚϟάϛϭϞϴϐθΘϠϟ ΓέΆΒϟ˯Ύϔσ·ΪϨϋΔϴϘΒΘϤϟ ϊΒϨϤϟϭΔΟϭΩΰϤϟέΆΒϟΕΫωϮϧϷΪϨϋ ΓέΆΒϟϦϣ˯ΰΟΪόϳέΎδϴϟϯϮΤϧϢϜΤΘϟέΩ ΓέΆΒϟϝΪόϳϦϴϤϴϟϯϮΤϧϢϴϜΤΘϟΓέΩ·ϭ ΎϬϠϣΎϜΑ ΓέΆΒϟϖϠϏ ΎϬΎϔσ·ΪϳήΗϲΘϟΓέΆΒϠϟ0 ΓϮϘϟέΎΘΧ ΔϴϘΒΘϤϟΓέήΤϟ ήϴϐΘϣΕϮϟΔϨΧΎγϰϘΒΗέΆΒϟΔΤϴϔμϟϝΎϤόΘγΪόΑ ήϬψϳϭέΎΘΧΓϮϘϟΐδΣ ΔϨΧΎδϟέΆΒϟϰϠϋΔτϘϧϭ ϕήΤϟήτΧϙΎϨϫέΆΒϟβϤϠΗϻ ΎϬΗΩϮϋΪϨϋϭ˯ΎΑήϬϜϟωΎτϘϧϦϴΣϱέΫΎΣ ΓέΎηϹΪϳΪΟϦϣ ΔϨΧΎγΔΣΎδϤϟΖϧΎϛϮϟϭϰΘΣήϬψΗϻ ΔϟΎΤϟϩάϫΐϗήΗ ϖϠϐϟϡΎπϧ ΓΪϤϟςϐοίΎϬΠϟΎΑϝΎϔσϷΐόϟΐϨΠΗϞΟϦϣ ϡΎψϨϟϞϐθΗϭϞϔϘϟϰϠϋϲϧϮΛ ΔϴϠϤόϟΪϋϚϔϠϟ Ύμϧ ΔτγϮΑΝΎΟΰϟϰϠϋΏήπϟΐϨΠΗ• ϲϧϭϷ ϦϜϤϣϲϬΑΡϮμϨϣήϴϏϡϮϴϨϣϮϟϻέΪϗ• ΓΪϋΎϗϭΎϬΑϲΘϟϻ·ΝΎΟΰϟϰϠϋϊϘΑΞΘϨϳϥ Ϊδϛ΄ΘϠϟΔϠΑΎϗήϴϏ ϼΑϞϤόΘδΗϥΐΠϳϻΔϳέήΤϟέΆΒϟ• έΪϗ ϱέΫΎΣ ΐτόΑβϴϟΦΒτϟϖσΎϨϤϟήϤΘδϤϟϝΎϤόΘγϻ ϞϳϮτϟϑϮϗϮϟϭϖϳήΤϟϞΣήϣϲϓϞϤόΗ ΔϠϤόΘδϤϟΓϮϘϟΐδΣϯΪϤϟ ϒϴψϨΘϟϭΔϧΎϴμϟ 3 έΎΨΒϟΎΑϒπϨϣϞϤόΘδΗϻ• ϚϟάϟϦϴΣϦϣΔΤϴϔμϟΔΣΎδϣϒπϧ• ΔτηΎϛΔϔθϨϣϭΩϮϣϞϤόΘδΗϻΩήΒΗϥΪόΑ ϥϮΑΎμϟϭ˯ΎϤϟΎΑϞϠΒϣϞϳΪϨϣΔτγϮΑϒπϧ ΔτγϮΑϖϤόΑϒπϧωϮΒγϷϲϓΓήϣ• μϨϧϭΝΎΟΰϟΎΑΔλΎΧΩϮϣ ϦϴϠϛ˰ϭήΘϴϓμϨϧϚϴϣήϴγϭήΗϲϔϠϟ ϚϴϣήϴγϮΘϴϔϟϰϠϋυΎϔΤϟϭϒϴψϨΘϠϟ ΎϬϨϣκϠΨΘϟϦϜϤϣΔϴϘΒΘϤϟΥΎγϭϷ• ΝΎΟΰϟρήΧΔτγϭ ΔΒϏέϥϭΪΑήϜδϟϕϭήΣΔϟΎΣϲϓ• ΔΤϴϔμϟϕϮϓϚϴΘγϼΒϟϭΔϳήϜγΩϮϣ ρήΧΔτγϮΑΖϗϭΏήϗϲϓϪϋΰϧ ϦϜϤϣβϜόϟΔϟΎΣϲϓϦΧΎγϥϮϜϳΎϣΪϨϋ ΔϤΩΎϳΎϘΑϙΎϨϫϰϘΒΗϥ ϝΎΣϦδΣϲϓωϮϨϟϦϴϜγϞϤόΘγ• ΐτόϟΔϟΎΣϲϓΎϫήϴϏϭ ΔϳϮΘδϣϥϮϜΗϥΐΠϳέΪϘϟΓΪϋΎϗ• ΔϔηΎϧϭ ϭϞΜϣϥϮϜϳϥέΪϘϟϢΠΣϰϠϋφϓΎΣ• ςγϮϟϰϠϋΰϴϛήΘΑΓέΆΒϟϦϣήΒϛ ΔΤϴϔμϟΓΪϋΎϗϰϠϋ ήΠϟΎΑέΪϘϟϙήΤΗϻϥϝϭΎΣ• ΝΎΟΰϟεΪΨΗϻϰΘΣ ήϴπΤΗϞΟϦϣςϘϓίΎϬΠϟϞϤόΘγ• ΔϟϭΎτϛΔΤϴϔμϟϞϤόΘδΗϻ˯άϐϟ ϞϤόϟ ΔΤϴϔμϟϰϠϋΩέΎΒϟ˯ΎϤϟΐϜδΗϻ• ΔϨΧΎγϥϮϜΗΎϣΪϨϋΎΗήηΎΒϣ 43 ϥΎϣϷ 4 ϥΐΠϳΔΤϴϔμϟϱάϐϳϱάϟέΎϴΘϟ• ϰϠϋϪϟϱήϫΎχϊτϘϟϞϔϗϰϠϋϱϮΘΤϳ ϝΎμΗϻϦϴΑΪόΒϟϦϣϢϣϞϗϷ ϲϬΑϡϮϘϳϥΐΠϳΔΤϴϔμϟΐϴϛήΗ• ϥΐΠϳϱάϟϭκΧήϣϭκΘΨϣΐϛήϣ ϡϮγήϟϭΞΘϨϤϟΕΎϤϴϠόΗϊΑΎΘϳ ϯήΒϜϟΓϮϘϠϟϖΑΎτϣϥϮϜϳϥΐΠϳΐϴϛήΘϟ• αϮΑΩϲϓϭΕΎϤϴϠόΘϟΔΤϴϔμϟϲϓΔϨϴΒϤϟ ϖΑΎτϣϲοέϞλϭϞλϮϟ ϩήϴϐΗΐΠϳςϴΨϟΐτόΗΔϟΎΣϲϓ• ΔμΘΨϤϟιΎΨηϷϭϟΎμϤϟϑήσϦϣ έΎτΧϷΐϨΠΗϞΟϦϣϚϟΫϭΔμΧήϤϟ ϲϠΧΩΓέήΤϟϝΪόϣϰϠϋϱϮΘΤΗΓέΆΒϟ• ϦϴΨδΘϟΔϟΎΣϲϓΓέΆΒϟϞμϔϳϱάϟϭ ΔΤϴϔμϠϟΪΰϟ ϞμϓϝΎϤόΘγΔϴϠϤϋϞϛΪόΑ• ϢϜΤΘϟϖϳήσϦϋΓέΆΒϟ ΎϬϘϘθΗϭΔΤϴϔμϟΔΣΎδϣΐτόΗΔϟΎΣϲϓ• ϱΐϨΠΘϟέΎϴΘϟϦϋΔΤϴϔμϟϞμϓ ΔΤϴϔμϟϞϤόΘδΗϻϲΎΑήϬϛϖόλ ΝΎΟΰϟήϴϐΗϰΘΣ ϢϜΤΘϟϞϔϘϟϰϠϋϥϼϴδϟΔϟΎΣϲϓ• ϰϠϋΕϮλΞΘϨΗϭϒϗϮΘΗΔΤϴϔμϟ ϦϴϧέϞϜη ϝϮσΔϴϨϣίΓΪϤϟϞϔϘϟςϐοΔϟΎΣϲϓ ϞϔϘϟϞϐθϳ˯ϲηϪϴϠϋΪΟϮϳϭ ϦϴϧέΕϮλΞΘϨΗϭϒϗϮΘΗΔΤϴϔμϟ ΔϨΧΎδϟΓΪϋΎϘϟϱϭΫέΪϘϟϊπΗϻ• ΎϬϗήΤΗϥϦϜϤϣϪϧϷϞϔϘϟϰϠϋ ϕήΤΗϥϦϜϤϣ ΔϨΧΎδϟΕΎΣΎδϤϟϦϋΪϴόΑϝΎϔσϷϙήΗ• ϞϤόϟ˯ΎϨΛήΒϛΔϤϴϘΑϦΨδΗϥϦϜϤϣΎϬϧϷ ΐόϟΐϨΠΘϟΔϳΎϤΤϟϡΎπϧϞϤόΘγ ϞϔϘϟΎΑϝΎϔσϷ ϦϣϪϟΎϤόΘγϻωϮϨμϣήϴϏίΎϬΠϟάϫ• ΔϗΎϋϹϱϭΫιΎΨηϑήσ ΦΒσΪϨϋΦΒτϤϟέϮΟϲϓΎϤΩϰϘΑ• ΔΠΘϨϤϟΓέήΤϟΔϴΘϳΰϟϭΔϤγΪϟΩϮϤϟ ϥήϴϧϲϓΐΒδΗϥϦϜϤϣ 44 ΐϛήϣϰϠϋΔΒϛήϣΔΤϴϔμϟϥϮϜΗΎϣΪϨϋ• ΔϠόηΩϮϣυΎϔΣΐΠϳϻ ϲΌϴΒϟ˰ςϴΤϤϟ 5 ϲϓήϜϔϣΖόϨλΔΤϴϔμϟ ϲΌϴΒϟςϴΤϤϟϰϠϋυΎϔΤϟ ϲΌϴΒϟςϴΤϤϟϰϠϋφϓΎΣ ΦΒσΔϴϠϤϋϞϜϟΔΒγΎϨϤϟΓϮϘϟϝΎϤόΘγ ΔΒγΎϨϤϟΔϴϤϜϟΐδΣΐγΎϨϤϟέΪϘϟέΎΘΧϭ ΓΪϋΎϗϥϮϜΗΎϣΪϨϋΎϫήϴπΤΗϰΟήϤϟ˯άϐϠϟ ΔΒγΎϨϣΞΘϨΗΓέήΤϟΓέΆΒϟϢΠΣϞΜϣέΪϘϟ ΕΩέΫ·ΦΒτϟϦϣΔϳΎϬϨϟΪόΑ ΔϗΎτϟϝΎϤόΘγϻϥΎϜϤϟβϔϧϲϓέΪϘϟϙήΗ ΔϗΎτϟϰϠϋφϓΎΤΗΔϘϳήτϟϩάϬΑΔΠΘϨϤϟ ήϴπΤΘϟ˯ΎϨΛέΪϘϟϰϠϋ˯ΎτϏϞϤόΘγ ήΨΒΘΗϻϲϜϟΔϤΟΎϨϟΔϗΎτϟϰϠϋυΎϔΤϠϟ έΎΨΒϟϊϣ ϭΔΒϜϧϥϭήΘϜϟϹΓΰϬΟϷΕΎϳΎϔϧήϴδΗ ΔϴΎΑήϬϜϟ ϊϣΎϬϴϣήΑΓΰϬΟϷϦϣκϠΨΘΗϻ ΔϣΎόϟΔϴϟΰϨϤϟΕΎϳΎϔϨϟ ΔμΘΨϤϟΰϛήϤϟϰϟ·ΔΤϴϔμϟϡΪϗ κϠΨΘϟΎΑ ΔΒγΎϨϣΔϘϳήτΑΔΤϴϔμϟϦϣκϠΨΘϟ ΔΤμϟϰϠϋΔϴΒϠδϟΞΎΘϨϟϦϣϊϨϤϳ ΔϗΎτϟήϴϓϮΗϤδϳϭϲΌϴΒϟςϴΤϤϟ ΎϫέΩΎμϣϭ ϟΎμϤϟΎΑϞμΗΕΎϣϮϠόϤϟϦϣΪϳΰϤϟ ΎϬϴϓωΎΒΗϲΘϟΰϛήϤϟϭΔϴϠΤϤϟ Ύϔμϟ c a t a l à Manual d’instruccions Molt important: llegeix íntegrament aquest manual abans d’utilitzar la placa. Aquest manual està dissenyat de manera que els textos estiguin relacionats amb els dibuixos corresponents. 0 Int. nominal per fases 14 A 16,5 A 380-415V 3N~ Placa de 60 cm Placa >60cm Int. nominal per fases 11 A 13 A 380-415V 2N~ Placa de 60 cm Placa >60cm Int. nominal per fases 16 A 19 A Identificació Identifica el model de la teva placa (“a”, “b”, “c”, “d”, “e”, “f”, “g”, “h”, “i”, “j”, “k”, “l”, “m”, “n”, “o”) comparant el nombre i la disposició dels focus del teu aparell amb el de les il·lustracions. 1 220-240V 3~ Placa de 60 cm Placa >60cm Instal·lació 1.1 Desembalatge. Retira tots els elements protectors. 1.2 Encast en el moble. Tingues sempre en compte les dades de la placa de característiques (1.2.1) i les mides del moble on s’ha d’encastar la placa (1.2.2, 1.2.3). Si no tens intenció de col·locar un forn a sota de la placa, has d’instal·lar una fusta protectora de les mides que s’indiquen (1.2.4). Enganxa la junta d’escuma al llarg del contorn exterior de la placa per aconseguir una bona estanquitat (1.2.5). Tomba la placa i introdueix-la en el forat (1.2.6). Subjecta-la al moble amb els quatre fixadors que es subministren (1.2.7). No utilitzis materials difícils de treure, com la silicona. 1.3 Connexió a la xarxa elèctrica. La placa es subministra amb cable d’alimentació. • De 5 fils: a) blau fosc, b) blau clar, c) marró, d) vermell, e) verd groc. (1.3.1) • Preparat per a placa de 230V~. (1.3.2) • Preparat per a placa de 220-240V~: consulta taula. (1.3.3) • Potència total: placa 60cm 6,8kW, placa >60cm 7,8kW 220-240V~ Placa de 60 cm Placa >60cm Int. nominal per fases 30 A 34 A • Si el tipus de connexió no és de 220240V~, retira el cable i fes la connexió segons esquemes (1.3.3, 1.3.4). Aquest aparell és conforme a les directives europees 73/23/CEE i 89/336/CEE Recomanació: La instal·lació de la placa l’ha de dur a terme un instal·lador autoritzat, el qual ha de seguir les instruccions i els esquemes del fabricant. 2 Ús Amb vitroceràmica són vàlids els recipients de fang, coure o inoxidable. Els d’alumini no són aconsellables perquè poden produir taques sobre el vidre de la placa. 2.1 Selecció de la zona de cocció. Disposes de diversos focus per col·locar els recipients. Tria el que sigui més adient en funció de la mida del recipient. durant 3 2.2 Com encendre la placa. Prem segons per encendre la placa i els de les diferents zones de cocció s’activaran. 0 Nota: si la funció de seguretat per a nens està activada, per poder seleccionar alguna cosa cal que la desactivis, prement durant 3 segons (2.13). la tecla 2.3 Activació del focus. Activa el focus on has posar el recipient prement la tecla corresponent (2.3.1, (2.4.2) 2.3.2). o prem Nota: si tardes més de 5 segons a seleccionar el focus, la placa s’apagarà automàticament, com a mesura de seguretat. 45 c a t a l à 2.4 Selecció de la potència. Ajusta-la fent lliscar el dit per la barra (2.4.1) o prement (2.4.2, 2.4.3). o FOCUS ESPECIALS 2.5 Focus doble, focus triple. Un cop hagis , i el seleccionat la potència, prem focus doble s’activarà (2.5.1, 2.5.3). Si tornes a prémer (2.5.2) o (2.5.4) s’activarà , el focus triple. Per anul·lar-lo prem ( , , ). 2.6 Focus font. Aquest focus el pots utilitzar de forma circular o de forma conjunta, . Prem per com a focus font activar-lo i torna’l a prémer per desactivar-lo. Recomanació: en els models de focus halògens, la llum és molt intensa i s’aconsella no mirar-hi fixament quan està en funcionament sense el recipient. FUNCIONS DE TEMPS . En connectar la 2.7 Posada a l’hora placa, els dígits del rellotge parpellegen i marquen les (2.7.1). Ajusta l’hora amb les tecles , (2.7.2). Fes la mateixa operació cada cop que es desconnecti o que hi hagi un tall en el subministrament elèctric. Per canviar l’hora prem durant 5 segons (2.7.3). L’hora començarà a la tecla parpellejar i sentiràs un xiulet. Ajusta-la amb les tecles , . 2.8 Selecció de temps. Models abc: Un cop activat un focus i seleccionada la potència, tens 5 segons de (2.8.1). parpelleig per prémer la tecla Selecciona el temps que vulguis prement , (2.8.2). Al cap de cinc segons el temps queda validat i es veu l’hora i un punt lluminós sota la icona del focus temporitzat (2.8.3). Per modificar o veure el temps que resta, prem la icona del focus temporitzat (2.8.4). Per anul·lar la programació prem les tecles , simultàniament (2.8.5). Models dfghkmo: Un cop activat un focus i seleccionada la potència, prem la tecla a sobre del rellotge. Veuràs que apareix a cada focus (2.8.6). Prem i una el del focus que vols temporitzar i parpellejarà (2.8.7). Selecciona el temps amb 00 46 , a sobre del rellotge (2.8.8). Al cap de 5 segons el temps queda validat i es veu en el de forma alternativa la potència i focus temporitzat. Quan hagi transcorregut el temps programat, emetrà un senyal acústic i el parpellejarà. Per anul·lar la temporització prem a sobre de la icona . fins que visualitzis 00 00 Nota: el temporitzador s’apagarà automàticament si tardes més de 10 segons a seleccionar el temps. Models e: Un cop activat un focus i seleccionada la potència, torna a prémer la tecla de selecció del focus que vols . temporitzar, i veuràs que apareix una (2.8.11). Selecciona el temps amb , (2.8.12) i valida-ho tornant a prémer la tecla del focus temporitzat (2.8.13). La potència es visualitzarà amb un punt vermell, que indica que el focus està temporitzat. Un adverteixen senyal acústic i una indicació que ja ha transcorregut el temps programat (2.8.14). Prem qualsevol tecla i el senyal acústic deixarà de sonar. Nota: el temporitzador s’apagarà automàticament si tardes més de 10 segons a seleccionar el temps. Consideracions sobre la temporització: Si el nivell de potència és 9, el temps màxim per temporitzar és de 60 min. Si és diferent, el màxim podrà ser de 99 min. Un cop hagi transcorregut el temps programat, l’alarma sonarà mentre no premis cap tecla. FUNCIONS DE PROGRAMACIÓ 2.9 Escalfament ràpid. Arriba ràpidament a la temperatura màxima per passar, de manera automàtica, a la temperatura de manteniment. Models abc: Activa un focus i fes córrer la i barra fins a la potència màxima. Prem a la pantalla del veuràs que apareix una focus seleccionat (2.9.1). Tens 5 segons per seleccionar el nivell que vulguis. Es recomana que estigui entre els nivells 3 i 6 (2.9.2). Al cap de cinc segons, l’escalfament ràpid queda validat i es visualitza i la potència de forma alternativa. Un cop assolida la temperatura màxima desapareix i hi queda la potència de manteniment. El focus continuarà funcionant de forma normal. Si vols cancel·lar l’escalfament ràpid prem la c a t a l à icona del focus programat i selecciona una nova potència. • No s’ha de fer funcionar els focus sense recipient. Models dfghjklmo: Selecciona un focus i posa’l a la potència màxima prement fins que visualitzis un 9 i un punt (2.9.3). Regula la potència prement . Es recomana seleccionar nivells entre 3 i 6 (2.9.4). Al cap de 5 segons, l’escalfament ràpid queda validat i es visualitza la potència, seguida d’un punt (2.9.5). Quan s’assoleix la temperatura màxima, el punt decimal desapareix i el focus continua funcionant de forma normal. Per cancel·lar la funció, prem la tecla del focus programat i selecciona una nova potència. • La base del recipient ha de ser plana i ha d’estar seca. 2.10 Vitros amb comandaments. Assegura’t que e focus que acciones es correspon amb el focus que vols utilitzar (2.10.1). Gira el comandament en la direcció que vulguis i s’encendrà el pilot de funcionament (2.10.2), que també indica que hi ha calor residual quan s’apaga el focus. En els models amb focus doble o focus font, en girar el comandament cap a l’esquerra es regula una part del focus i en girar-lo cap a la dreta es regula tot el focus (2.10.3). 2.11 Apagar el focus. Selecciona la potència del focus que vols apagar. 0 2.12 Calor residual. Després d’utilitzar la placa, els focus es mantenen calents durant un temps, que varia en funció de la potència o un seleccionada, i es visualitza una punt en els focus que encara estan calents. No toquis els focus. Et podries cremar. Atenció: si es produeix un tall de corrent elèctric, en restablir-se, la indicació no es visualitzarà, encara que la zona de cocció estigui calenta. Tingues-ho en compte. 2.13 Funció de bloqueig. Per evitar manipulacions per part dels nens. Prem continuadament durant 3 segons la tecla i activaràs el bloqueig. Per desbloquejar-ho, repeteix l’operació. Recomanacions: • Evita els cops dels recipients contra el vidre. • Mira que el diàmetre del recipient sigui més gran o bé igual que el focus que utilitzaràs i centra’l sobre el focus de calor. • Procura no moure els recipients perquè podries ratllar el vidre. • Utilitza l’aparell només per a la preparació d’aliments. No utilitzis la placa com a taulell de treball. • No aboquis aigua freda directament sobre la placa quan estigui calenta. Atenció: El funcionament discontinu de les zones de cocció no és una avaria. S’encenen i s’apaguen durant períodes més o menys llargs en funció de la potència seleccionada. 3 Manteniment i neteja • No utilitzis mai un netejador de vapor. • Neteja sovint la superfície de la placa, un cop freda. No utilitzis productes o esponges abrasives. Neteja-la amb un drap humit i agua amb sabó (3.1.1). • Un cop per setmana, neteja-la en profunditat amb productes específics per a vitroceràmiques. Et recomanem VITRO-CLEN per netejar i conservar la vitroceràmica. • Les restes molt enganxades s’eliminen amb el raspador de vidre (3.1.2). • Si per accident es crema sucre, elements ensucrats o plàstic sobre la placa, elimina’ls com més aviat millor amb un raspador, encara en calent. Si no ho fas de seguida hi podrien quedar taques permanents. • Vigila que la fulla del raspador estigui en bon estat. Si està deteriorada canvia-la. • Els recipients d’alumini no són aconsellables perquè poden produir taques sobre el vidre de la placa, a no ser que tinguin el fons amb protecció d’acer inoxidable. 47 c a t a l à 4 • Si la placa està instal·lada a sobre d’un calaix, no hi desis objectes inflamables. Seguretat • El circuit de la xarxa que alimenta la placa ha de tenir un interruptor de tall omnipolar de com a mínim 3 mm de separació entre contactes. • La instal·lació de la placa l’ha de dur a terme un instal·lador autoritzat, el qual ha de seguir les instruccions i els esquemes del fabricant. • La instal·lació ha d’estar dimensionada a la potència màxima que s’indica a la placa de característiques i la presa de corrent amb presa a terra reglamentària. • Si el cable està danyat cal que el servei de postvenda o personal qualificat similar el substitueixi, per tal d’evitar perills. • El focus està equipat amb un limitador de temperatura interior que desconnecta el focus si la placa s’escalfa massa. • Després de cada utilització, desconnecta el focus amb el control. • Si la superfície del vidre s’esquerda o es trenca, desconnecta immediatament l’aparell de la xarxa per evitar un possible xoc elèctric. No utilitzis la placa fins que no hagis canviat el vidre (4.1.1). • En cas de sobreeiximent sobre les tecles de comandament, la placa es para i emet un senyal acústic (4.1.2). • Si prems durant massa temps algun sensor o bé si hi ha algun objecte que activi els sensors, la placa es para i emet un senyal acústic (4.1.3). • No col·loquis recipients amb el cul calent sobre els sensors, ja que et podries cremar en prémer-los (4.1.3). • No deixis que els nens s’acostin a la placa, ja que les superfícies d’escalfament poden escalfar-se molt mentre funcionen. Utilitza el sistema de bloqueig per evitar que puguin jugar amb els comandaments. • Aquest aparell no està pensat perquè l’utilitzin persones amb capacitats reduïdes. • Estigues a prop de la placa quan cuinis plats o aliments amb greix o oli. Un excés de calor pot fer que s’inflamin. 48 5 Medi ambient La placa ha estat dissenyada pensant en la conservació del medi ambient. Respecta el medi ambient. Utilitza les potències adequades per a cada cocció i selecciona recipients de la mida adequada per la quantitat de menjar que hagis de preparar. Quan el cul del recipient i el diàmetre de la zona de cocció són de la mateixa mida, la transmissió de calor és òptima. Quan la cocció hagi finalitzat, deixa el recipient en el mateix lloc per utilitzar la calor residual acumulada. D’aquesta manera estalviaràs energia. Utilitza una tapa sempre que puguis per reduir la pèrdua de calor per evaporació. Gestió de residus d’aparells elèctrics i electrònics. No eliminis els aparells barrejant-los amb residus domèstics generals. Porta la teva placa a un centre especial de recollida. El reciclatge d’electrodomèstics evita conseqüències negatives per a la salut i el medi ambient i permet estalviar energia i recursos. Si vols més informació, posa’t en contacte amb les autoritats locals o amb l’establiment on vas comprar la placa. g a l e g o Manual de instrucións Moi importante: Le integramente este manual antes de utiliza-la placa. Este manual está deseñado de forma que os textos estean relacionados cos debuxos correspondentes. 0 Int. nominal por fases 14 A 16,5 A 380-415V 3N~ Placa de 60 cm Placa >60cm Int. nominal por fases 11 A 13 A 380-415V 2N~ Placa de 60 cm Placa >60cm Int. nominal por fases 16 A 19 A Identificación Identifica o modelo da túa placa (“a”, “b”, “c”, “d”, “e”, “f”, “g”, “h”, “i”, “j”, “k”, “l”, “m”, “n”, “o”) comparando o número e disposición dos focos do teu aparato co das ilustracións. 1 220-240V 3~ Placa de 60 cm Placa >60cm Instalación 1.1 Desembalaxe. Retira tódolos elementos de protección. 1.2 Encaixe no moble. Ten sempre en conta os datos da placa de características (1.2.1) e as medidas do moble no que se vai a encaixa-la placa (1.2.2, 1.2.3). Se non vas a colocalo forno debaixo da placa, debes instalar unha táboa protectora segundo as medidas indicadas (1.2.4). Pega a xunta de espuma ó longo do contorno exterior da placa para lograr unha boa fixación (1.2.5). Dálle a volta á placa e introdúcea no oco (1.2.6). Suxéitaa ó moble cos catro enganches proporcionados (1.2.7). Non utilice materiais non removibles coma a silicona. 1.3 Conexión á rede eléctrica. A placa proporciónase con cable de alimentación. • De 5 fíos: a) azul escuro, b) azul claro, c) marrón, d) vermello, e) verde amarelo. (1.3.1) • Preparado para placa de 230V~. (1.3.2) • Preparado para placa de 220-240V~: consulta táboa. (1.3.3) • Potencia total: 220-240V~ Placa de 60 cm Placa >60cm Placa 60cm 6,8kW, Placa >60cm 7,8kW Int. nominal por fases 30 A 34 A • Se o tipo de conexión é distinto a 220240V~, retira o cable e realiza a conexión segundo os esquemas (1.3.3, 1.3.4). Este aparato é conforme ás directivas europeas 73/23/CEE e 89/336/CEE Recomendación: A instalación da placa débese efectuar por un instalador autorizado, que seguirá as instrucións e esquemas do fabricante. 2 Uso Con vitrocerámica son válidos os recipientes de barro, cobre ou inoxidable. Os de aluminio non son aconsellables porque poden formar manchas sobre o vidro da placa. 2.1 Selección da zona de cocción. Dispós de varios focos para coloca-los recipientes. Elixe o máis axeitado en función do tamaño do recipiente. durante 3 2.2 Acendido da placa. Pulsa segundos para acende-la placa, actívanse os das distintas zonas de cocción. 0 Nota: Para poder acender se a función seguridade nenos está activada, desactívaa (2.13). pulsando durante 3 segundos a tecla 2.3 Activación do foco. Activa o foco onde colocáche-lo recipiente pulsando sobre a tecla correspondente (2.3.1, (2.4.2) 2.3.2). ou pulsa Nota: Se tardas máis de cinco segundos en selecciona-lo foco, a placa apágase automaticamente, coma medida de seguridade. 49 g a l e g o 2.4 Selección da potencia. Axústaa deslizando o dedo pola barra (2.4.1) ou pulsando ou (2.4.2, 2.4.3). sobre o reloxo (2.8.8). Tras cinco segundos, o tempo queda validado e visualizarase de no foco forma alternativa a potencia e temporizado. Transcorrido o tempo emitirá un sinal acústico y escintilará . Para anula-la temporización pulsa sobre a ata visualizar . icona 00 FOCOS ESPECIAIS 2.5 Foco dobre, foco triple. Despois de , e selecciona-la potencia, pulsa accionarase o foco dobre (2.5.1, 2.5.3). Se pulsa de novo (2.5.2) ou (2.5.4) accionarase o foco triple. Para anular, pulsa , ( , , ). 2.6 Foco fonte. Este foco pódelo utilizar de forma circular ou de forma conxunta, . Pulsa para coma foco fonte activalo e púlsao de novo para desactivalo. Recomendación: nos modelos con focos halóxenos, a luz é tan intensa que se aconsella non mirar fixamente cando está en funcionamento sen o recipiente. 00 Nota: O temporizador apagarase automaticamente se tardas máis de 10 segundos en selecciona-lo tempo. Modelos e: Unha vez activado un foco e seleccionada a potencia, pulsa de novo a tecla de selección do foco que se vai . (2.8.11). a temporizar, aparece unha Selecciona o tempo con , (2.8.12) e valídao pulsando de novo a tecla do foco temporizado (2.8.13). A potencia visualizarase cun punto que indica que o foco está temporizado. Un sinal acústico e unha indicación advirten que o tempo concluíu (2.8.14). Pulsa calquera tecla e o sinal acústico desaparecerá. FUNCIÓNS DE TEMPO . Ó conecta-la placa, 2.7 Posta en hora os díxitos do reloxo escintilan e marcan as (2.7.1). Axusta a hora coas teclas , (2.7.2). Realiza a mesma operación cada vez que se desconecte ou haxa un corte de subministro eléctrico. Para cambia-la hora pulsa durante cinco (2.7.3). A hora segundos a tecla empezará a escintilar e oirás un asubío, axústaa coas teclas , . Nota: O temporizador apagarase automaticamente se tardas máis de 10 segundos en seleccionar o tempo. Consideracións sobre a temporización: Se o nivel de potencia é 9, o máximo tempo que se vai a temporizar será de 60 min. Se é distinto, o máximo poderá ser 99 min. Unha vez concluído o tempo, a alarma soará mentres non pulses ningunha tecla. FUNCIÓNS DE PROGRAMACIÓN 2.8 Selección de tempo. Modelos abc: Unha vez activado un foco e seleccionada a potencia, tes cinco segundos mentres escintila para pulsa(2.8.1). Selecciona o tempo la tecla , (2.8.2). Tras necesario pulsando cinco segundos, o tempo queda validado e visualizarase a hora e un punto luminoso baixo a icona do foco temporizado (2.8.3). Para modificar ou ve-lo tempo restante, pulsa sobre a icona do foco temporizado (2.8.4). Para anula-la programación, pulsa as teclas , simultaneamente (2.8.5). Modelos dfghkmo: Unha vez activado un foco e seleccionada a potencia, pulsa a sobre o reloxo. Aparece e tecla en cada foco (2.8.6). Pulsa unha do escintilará foco que se vai a temporizar e (2.8.7). Selecciona o tempo con , 00 50 2.9 Quentamento rápido. Alcanza rapidamente a temperatura máxima para pasar de forma automática á temperatura de mantemento. Modelos abc: Activa un foco e leva a barra e aparece á máxima potencia. Pulsa no display do foco seleccionado unha (2.9.1). Tes cinco segundos para seleccionalo nivel desexado, recoméndase que estea entre os niveis 3 e 6 (2.9.2). Tras cinco segundos, o quentamento rápido queda validado e visualizarase e a potencia de forma alternativa. Alcanzada a temperatura quedando a máxima, desaparece potencia de mantemento. O foco seguirá funcionando de forma convencional. Se desexas cancelar o quentamento rápido pulsa a icona do foco programado e selecciona unha nova potencia. g a l e g o Modelos dfghjklmo: Selecciona un foco e pono á máxima potencia pulsando ata (2.9.3). Regula visualizar un 9 e un punto a potencia pulsando , recoméndanse os niveis 3 a 6 (2.9.4). Tras cinco segundos, o quentamento rápido queda validado e visualizarase a potencia seguida dun punto (2.9.5). Alcanzada a temperatura máxima, o punto decimal desaparece e o foco seguirá funcionando de forma convencional. Para cancela-la función, pulsa a tecla do foco programado e selecciona unha nova potencia. 2.10 Vitros con mandos. Asegúrate de que o foco que vas a accionar corresponde ó foco que queres utilizar (2.10.1). Xira o mando á posición desexada e acenderase o piloto de funcionamento (2.10.2) que tamén sinala a calor residual cando o foco se apaga. Nos modelos con foco dobre ou foco fonte, xirando o mando á esquerda, regúlase unha parte do foco e xirando o mando á dreita, regúlase o foco enteiro (2.10.3). 2.11 Apagado do foco. Selecciona a potencia do foco que desexas apagar. 0 2.12 Calor residual. Despois de utiliza-la placa, os focos mantéñense quentes por un tempo que varía en función da potencia seleccionada ou un punto nos focos e visualízase unha aínda quentes. No toques eses focos, existe risco de queimarse. Atención: se se produce un corte de corrente eléctrica, ó restablecerse de novo, a indicación non se visualizará aínda estando quente a zona de cocción. Ten en conta esta circunstancia. 2.13 Función bloqueo. Para evitar manipulacións por parte dos nenos. Mantén pulsada a tecla durante 3 segundos e activara-lo bloqueo. Para desbloquealo, repite a operación. Recomendacións: • Evita golpes dos recipientes sobre o cristal. • Os recipientes de aluminio non son aconsellables, pois poderían formar manchas sobre o vidro, a non ser que teñan fondo con protección de aceiro inoxidable. • Coida que os diámetros dos recipientes sexan maiores ou iguais ó foco que se vai a utilizar e céntrao sobre o foco de calor. • Procura non move-los recipientes, podería raiarse o vidro. • Utiliza o aparato só para a preparación de alimentos. Non utilíce-la placa coma mesa de traballo. • Non vertas auga fría directamente na placa cando estea quente. Atención: O funcionamento descontinuo das zonas de cocción, non é unha avaría. Funcionan en períodos de acendido e apagado máis ou menos longos en función da potencia desexada. 3 Mantemento e limpeza • Non utilices un limpador de vapor. • Limpa a miúdo a superficie da túa placa cando xa estea fría. Non utilices produtos ou esponxas abrasivas. Limpa cun pano húmido e auga xabonosa (3.1.1). • Unha vez á semana, limpa en profundidade con produtos específicos para vitrocerámicas. Recomendámosche VITRO-CLEN para a limpeza e conservación da túa vitrocerámica. • As sucidades fortemente adheridas elimínanse coa raspa de vidro (3.1.2). • Se por descoido se queima azucre, elementos azucrados ou plástico sobre a placa, elimínaos canto antes cunha raspa aínda en quente. De non facelo, poden quedar manchas permanentes. • Utiliza a coitela da rapa en perfecto estado, substitúea no caso de que presente algún deterioro. • Os focos de calor non deben funcionar sen recipiente. • A base do recipiente debe ser plana e estar seca. 51 g a l e g o 4 • Se a placa está instalada por riba dun caixón, non se deberán gardar obxectos inflamables. Seguridade • O circuíto da rede que alimenta a placa, debe ter un interruptor de corte omnipolar de, polo menos, 3 mm de separación entre contactos. • A instalación da placa débea efectuar un instalador autorizado que seguirá as instrucións e esquemas dos fabricantes. • A instalación debe estar dimensionada á potencia máxima indicada na placa de características e a toma de corrente con toma de terra regramentaria. • Se o cable está danado, debe ser substituído polo seu servizo postventa ou persoal cualificado similar co fin de evitar un perigo. • O foco está equipado cun limitador de temperatura interior que desconecta o foco en caso de que a placa se quente excesivamente. • Despois de cada utilización, desconecta o foco mediante o seu control. • Se a superficie do vidro se fende ou rompe, desconecta de inmediato o aparato da rede para evitar un posible choque eléctrico. Non utilíce-la placa ata cambia-lo vidro (4.1.1). • No caso de desbordamento sobre as teclas de mando, a placa párase e emite un sinal acústico (4.1.2). • Se mantés pulsado algún sensor demasiado tempo ou hai algún obxecto activando os sensores, a placa párase e emite un sinal acústico (4.1.3). • Non coloques recipientes co fondo quente sobre os sensores, pódeste queimar ó pulsalos (4.1.3). • Manter afastados ós nenos pequenos, as superficies de quentamento pódense quentar fortemente durante o seu funcionamento. Utiliza o sistema de bloqueo para evitar que podan xogar cos mandos. • Este aparato non está destinado a ser utilizado por persoas con capacidades reducidas. • Permanece sempre nas inmediacións ó cociñar pratos ou alimentos con graxa ou aceite. A calor excesiva pode facer que se inflamen. 52 5 Medio ambiente A placa foi deseñada pensando na conservación do medio ambiente. Respecta o medio ambiente. Utiliza as potencias adecuadas para cada cocción e selecciona os recipientes de tamaño adecuado ás cantidades de alimento que se vaian a preparar. Cando o fondo do recipiente e o diámetro da zona de cocción teñen o mesmo tamaño, a transmisión de calor é óptima. Ó termina-la cocción, se o desexas, deixa o recipiente no mesmo lugar para utiliza-la calor residual acumulada. Deste xeito, aforrarás enerxía. Utiliza unha tapa sempre que podas para reducila perda de calor por evaporación. Xestión de residuos de aparatos eléctricos e electrónicos. Non elimíne-los aparatos mesturándoos con residuos domésticos xerais. Entrega a túa placa nun centro especial de recollida. O reciclado de electrodomésticos evita consecuencias negativas para a saúde e o medio ambiente y permite aforrar enerxía e recursos. Para máis información, contacta coas autoridades locais ou co establecemento onde adquiríche-la placa. e u s k a r a Erabilera-eskuliburua Oso garrantzitsua: plaka erabili aurretik irakurri osorik eskuliburua hau. Eskuliburu honetako testuak eta marrazkiak erlazionatuta daude. 0 220-240V 3~ Int. Nominala faseka 60 cm-ko plaka 14 A >60 cm-ko plaka 16,5 A Identifikazioa Identifikatu zure plakaren modeloa (“a”, “b”, “c”, “d”, “e”, “f”, “g”, “h”, “i”, “j”, “k”, “l”, “m”, “n”, “o”) foku kopurua eta kokapena irudietan agertzen denarekin alderatuta. 1 Instalazioa 1.1 Enbalajea kentzea. Kendu babes-elementu guztiak. 1.2 Altzarian ahokatzea. Kontuan hartu beti ezaugarri-plakan datozen datuak (1.2.1) eta plaka ahokatuko deneko altzariaren neurriak (1.2.2., 1.2.3). Plakaren azpian ez baduzu laberik jarri behar, ohol babesle bat jarri beharko duzu adierazitako neurrien arabera (1.2.4). Itsatsi aparrezko juntura plakaren inguruan, erabateko estankotasuna lortzeko (1.2.5). Plakari buelta eman, eta sartu altzariaren hutsunean (1.2.6). Altzarira lotu horretarako dituzun lau loturekin (1.2.7). Ez erabili kentzeko gaitzak diren gaiak, esaterako silikona. 1.3 Sare elektrikorako konexioa. Plakarekin batera beti argindar-kablea egongo da. • Kableak bost hari izango ditu: a) urdin iluna, b) urdin argia, c) marroia, d) gorria, e) berde horia. (1.3.1) • 230V~-ko plakarako prestatuta (1.3.2) • 220-240V~-ko plakarako prestatuta: kontsultatu taula (1.3.3) • Potentzia guztira: 60 cm-ko plaka, 6,8 kW; >60 cm-ko plaka, 7,8 kW 220-240V~ Int. Nominala faseka 60 cm-ko plaka 30 A >60 cm-ko plaka 34 A • Konexio mota ez bada 220-240V~, kendu kablea eta konexioa egin eskemei jarraituta (1.3.3, 1.3.4). 380-415V 3N~ Int. Nominala faseka 60 cm-ko plaka 11 A >60 cm-ko plaka 13 A 380-415V 2N~ Int. Nominala faseka 60 cm-ko plaka 16 A >60 cm-ko plaka 19 A Aparatu honek Europako 73/23/CEE eta 89/336/CEE zuzentarauak betetzen ditu. Gomendioa: Plaka baimena duen instalatzaile batek instalatu beharko du, eta instalatzeko fabrikatzailearen instrukzioak eta eskemak jarraitu beharko ditu. 2 Erabilera Bitrozeramikazko foku bero-emaileetan buztinezko ontziak, kobrezkoak edo altzairu herdoilgaitzezkoak erabil daitezke. Aluminiozkoak, berriz, ez dira gomendatzen, plakaren beiraren gainean orbanak sor ditzaketelako. 2.1 Kozinatzeko gunea aukeratzea. Foku bat baino gehiago duzu ontziak gainean jartzeko. Aukeratu komeni zaizuna, erabiliko duzun ontziaren neurria kontuan izanda. tekla 3 segundoz eta 2.2 Plaka piztea. Sakatu plaka piztu egingo da. Egosketa gune guztietan -ak aktibatuko dira. 0 Oharra: aukeratu ahal izateko, haurrentzako segurtasun funtzioa aktibatuta badago, lehenago desaktibatu egin beharko duzu. Horretarako tekla sakatu 3 segundoz (2.13) 2.3 Fokua aktibatzea. Ontzia jarri duzun fokua aktibatu, dagokion tekla sakatuta (2.3.1, 2.3.2). edo sakatu (2.4.2) Oharra: fokua aukeratzeko 5 segundo dituzu. Denbora hori igarotzen bada eta ez baduzu 53 e u s k a r a fokua aukeratu, plaka automatikoki itzaliko da, segurtasun neurri gisa. 2.4 Potentzia aukeratzea. Nahi duzun potentzia aukeratu, atzamarra barratik zehar mugituta (2.4.1) edo edo teklak erabilita (2.4.2, 2.4.3). FOKU BEREZIAK 2.5 Foku bikoitza, Foku hirukoitza. Potentzia , eta foku aukeratu ondoren, sakatu bikoitza aktibatuko da (2.5.1, 2.5.3). Berriro (2.5.2) edo (2.5.4) sakatzen baduzu, foku hirukoitza aktibatuko da. Foku bereziak , indargabetzeko sakatu ( , , ). 2.6 Erretiluentzako fokua. Foku hau modu zirkularrean edo beste batekin batera erabil dezakezu. erretilu-foku gisa . Berriro Foku hau aktibatzeko, sakatu sakatzen baduzu, desaktibatu egingo da. Gomendioa: Foku halogenoak dituzten modeloetan, argia hain da bizia non, fokua aktibatuta dagoenean, gainean ontzirik eduki gabe, fokura zuzenean ez begiratzea gomendatzen den. IRAUPEN-FUNTZIOAK . Plaka konektatzerakoan, 2.7 Ordua jartzea erlojuaren digituak keinuka hasten dira eta ek (2.7.1) markatzen dute. Nahi duzun ordua jartzeko sakatu , teklak (2.7.2). Gauza bera egin erlojua deskonektatu edo argindarra mozten den bakoitzean. tekla 5 segundoz Ordua aldatzeko sakatu (2.7.3.) Ordua keinua hasiko da eta txistu bat entzungo duzu, aukeratu nahi duzun ordua , teklak sakatuta. 2.8 Iraupena aukeratzea abc modeloak: Foku bat aktibatu eta potentzia aukeratu ondoren, 5 segundo dituzu keinuka sakatzeko (2.8.1). Aukeratu nahi ari den , teklak sakatuta (2.8.2). duzun iraupena Bost segundo igarotzen direnean aukeratutako iraupena balidatuko da eta tenporizatutako fokuaren ikonoaren azpian aukeratutako ordua eta puntu argidun bat ikusiko dira (2.8.3) . Iraupena aldatzeko edo gelditzen den denbora ikusteko, sakatu berriro tenporizatutako fokuaren ikonoa (2.8.4). Programazioa bertan behera uzteko, sakatu , teklak batera (2.8.5) dfghkmo modeloak: Foku bat aktibatu eta 54 potentzia aukeratu ondoren, sakatu erloju gaineko tekla. Foku bakoitzean eta bat agertuko dira (2.8.6). Tenporizatu beharreko irudia keinuka fokuaren tekla sakatu eta hasiko da (2.8.7). Aukeratu iraupena erlojuaren gainean dauden , teklak sakatuta (2.8.8). 5 segundoren ondoren, aukeratutako iraupena balidatuko da, eta tenporizatutako fokuan bistaratuko dira txandaka. potentzia eta Denbora igaro ondoren, soinu bat entzungo da, eta . irudia keinuka hasiko da. Tenporizazioa bertan behera uzteko, sakatu ikonoaren gaineko tekla ikusi arte. 00 00 00 Oharra: iraupena aukeratzen 10 segundo baino gehiago ematen baduzu, tenporizadorea automatikoki itzaliko da. e modeloak: Foku bat aktibatu eta potentzia aukeratu ondoren, sakatu berriro tenporizatu . bat beharreko fokua aukeratzeko tekla. agertuko da (2.8.11). Aukeratu iraupena , teklak sakatuta (2.8.12), eta balidatu tenporizatutako fokuaren tekla berriro sakatuz (2.8.13). Aukeratutako potentziarekin batera puntu bat ikusiko da; puntu horrek fokuari iraupen bat ezarri zaiola adieraziko du. Soinu bat entzuteak eta irudia ikusteak adierazi nahi du, denbora bukatu egin dela (2.8.14). Sakatu edozein tekla, eta soinua desagertu egingo da. Oharra: iraupena aukeratzen 10 segundo baino gehiago ematen baduzu, tenporizadorea automatikoki itzaliko da. Tenporizatzerakoan kontuan hartu beharrekoak: Potentzia mailarik handiena 9 bada, tenporizadorearen gehienezko denbora 60 minutukoa izango da. Potentzia maila beste bat bada, berriz, tenporizadorearen iraupena 99 minutukoa izan ahalko da. Denbora bukatu eta gero, alarma joka arituko da beste edozein tekla sakatzen ez duzun arte. PROGRAMAZIO-FUNTZIOAK 2.9 Berotze azkarra. Gehienezko tenperaturara heltzen da berehala eta gero mantentzetenperaturara pasatzen da automatikoki. abc modeloak: Aktibatu foku bat eta barra gehienezko potentziara eraman. Sakatu eta bat agertuko da aukeratutako fokuaren pantailan (2.9.1). 5 segundo dituzu nahi duzun maila aukeratzeko. 3. eta 6. mailen artean egotea gomendatzen da (2.9.2). 5 segundoren ondoren, berotze azkarra balidatuko da, eta irudia eta potentzia ikusiko dira txandaka. Gehienezko tenperatura lortu ondoren, irudia e u s k a r a desagertu eta bakarrik mantentze-potentzia ikusiko da. Fokuak ohiko moduan jarraituko du martxan. Berotze azkarraren funtzioa desaktibatu nahi baduzu, sakatu programatutako fokuaren ikonoa, eta aukeratu berriro beste potentzia bat. • Bero-fokuek ez dute funtzionatu behar gainean ontzirik ez badute. dfghjklmo modeloak: Aukeratu foku bat eta gehienezko potentzian jarri tekla sakatuta, ikusi arte (9 bat eta puntu bat) (2.9.3). Erregulatu potentzia tekla sakatuta. 3. eta 6. mailen artean egotea gomendatzen da (2.9.4). 5 segundoren ondoren berotze azkarra balidatuko da eta potentzia eta puntu bat ikusiko dira (2.9.5). Gehienezko tenperatura lortu ondoren, puntu dezimala desagertu eta fokuak ohiko moduan jarraituko du martxan. Funtzioa bertan behera uzteko, sakatu programatutako fokuaren tekla eta aukeratu beste potentzia bat. • Ziurtatu ontziek erabiliko duzun fokuaren diametroa edo handiagoa dutela, eta ontzia bero fokuaren gainean jartzerakoan, fokuaren erdierdian jarri. 2.10 Bitroak agintedunak. Ziurtatu eragingo duzun fokua erabili nahi duzun bera dela (2.10.1). Agintea nahi duzun aldera biratu, eta funtzionamendu-argia piztuko da (2.10.2). Argi horrek fokua itzali ondoren oraindik bero dagoela ere adierazten du. Foku bikoitza edo erretilu-fokua duten modeloetan, agintea ezkerrerantz biratuta fokuaren zati bat erregulatzen da, eta eskuinerantz biratuta, berriz, foku osoa (2.10.3) 2.11 Fokua itzaltzea. Aukeratu nahi duzun fokutik. 0 potentzia itzali 2.12 Hondar-beroa. Plaka erabili ondoren, fokuek bero jarraitzen dute denbora-tarte batez, aukeratutako potentziaren arabera, eta oraindik bero dauden fokuetan bat edo puntu bat ikusiko da. Ez ukitu foku horiek, erre zaitezkeeta. Oharra: Argindarra mozten bada, berriro datorrenean ez da irudia ikusiko nahiz eta kozinatzeko erabili den aldea oraindik bero egon. Beraz, kontuan izan hori. 2.13 Blokeo-funtzioa. Haurrek plaka erabil ez dezaten, sakatu tekla 3 segundoz, eta horrela blokeoa aktibatuko duzu. Desblokeatzeko, berriro egin gauza bera. Gomendioak: • Ez eman kolperik ontziekin kristalaren gainean. • Aluminiozko ontziak ez dira gomendatzen, beiraren gainean orbanak sor ditzaketelako, ez bada altzairu herdoilgaitzezko babesa dutela azpian. • Ontziaren azpiak laua izan behar du eta siku egon behar du. • Ahal bada ez mugitu ontziak, beiran markak egin daitezke-eta. • Plaka janariak prestatzeko baino ez erabili; inoiz ez lan-mahai bezala. • Ez isuri zuzenean ur hotzik oraindik bero dagoen plakaren gainean. Adi: Kozinatzeko guneen etenkako funtzionamenduak ez du esan nahi matxuratuta daudenik. Aukeratutako potentziaren arabera tarte luzeagoetan edo laburragoetan piztuta edo itzalita izango dira. 3 Mantentzea eta garbitzea • Ez erabili lurrunez garbitzeko inolako makinarik. • Garbitu sarri zure plakaren gainazala, hozten denean. Ez erabili produktu edo esponja urratzailerik.Garbitzeko, erabili zapi umela eta xaboi ura 3.1.1) • Astean behin, plaka erabat garbitu bitrozeramikarako produktu bereziekin. Zure bitrozeramika garbitzeko eta zaintzeko VITROCLEN gomendatzen dizugu. • Gogor itsatsitako zikinkeria kentzeko, erabili beirak garbitzeko errasketa berezi bat 3.1.2) • Deskuiduan, plaka gainean azukrea edo azukrea duen zerbait edo plastikoa erretzen bada, garbitu lehenbailehen, plaka bero dagoen bitartean; bestela, orbanak geldi daitezke betiko. • Errasketaren hortzak egoera onean beharko du; hala ez bada, aldatu. 55 e u s k a r a 4 Segurtasuna • Plakaren sareko zirkuituak argindar-etengailu omnipolar bat izan behar du, eta etengailu horren kontaktuen artean gutxienez 3mm-ko distantzia izan behar da. • Plaka, baimena duen instalatzaile batek instalatu beharko du, instalatzeko fabrikatzailearen instrukzioak eta eskemak jarraituta. • Instalazio elektrikoa ezaugarri-plakan adierazitako gehienezko potentziara egokitu behar da, eta korronte elektrikoaren hargunea arauzko lur-hargunera. • Kablea hondatuta badago, saldu osteko zerbitzuak edo antzeko langile kualifikaturen batek ordeztu behar du, arriskua saihesteko. • Fokuak barruko tenperatura mugatzen duen gailu bat dauka, plaka gehiegi berotzen bada fokua deskonektatzen duena. • Fokua erabili ondoren dagokion aginteaz itzali. • Beirazko gainazala pitzatu edo hausten bada, deskonektatu plaka saretik berehala, gerta daitezkeen txoke elektrikoak ekiditeko. Ez erabili plaka beira aldatu arte (4.1.1). • Janariak gainezka egiten badu eta aginte teklen gainera erortzen bada, plaka gelditu egingo da eta soinu bat entzungo da (4.1.2). • Sentsoreren bati denbora luzez sakatzen badiozu edo objekturen bat dagoelako sentsoreak aktibatuta badaude, plaka gelditu egingo da, eta soinu bat entzungo da (4.1.3). • Ez jarri azpia bero duten ontziak sentsoreen gainean, sentsoreak sakatzerakoan erre zaitezke-eta (4.1.3) • Haur txikiak plakatik urrun egon daitezela, berotzen diren gainazalak asko berotu daitezkeeta plaka martxan dagoenean. Erabili blokeosistema haurrek aginteekin jolastu ez dezaten. • Aparatu hau ez da gaitasunak murriztuta dituzten pertsonek erabiltzeko. • Egon beti plakatik hurbil koipe edo olioa duten jakiak prestatzen ari zarenean. Asko berotzen badira, su har dezakete-eta. 56 • Plaka kaxoi baten gainean instalatuta badago, ez gorde kaxoi horretan su har dezakeen objekturik 5 Ingurumena Plaka ingurumena babesteko diseinatu da. Ingurumena zaintzen du. Erabili beti janari bakoitzari dagokion potentzia, eta ontziak aukeratzerakoan, kontuan izan beti prestatu behar duzun janari kantitatea. Beroa hobekien transmititzen da ontziaren azpia eta egosketa gunearen diametroa neurri berekoak direnean. Kozinatzen bukatzen duzunean, ontzia janaria prestatu duzun fokuan bertan utz dezakezu; horrela, bertan metatutako hondar-beroa erabil dezakezu eta energia aurreztu. Erabili beti tapa tenperatura mantentzeko, lurrunaren bidez beroa galtzen baita. Tresna elektriko eta elektronikoen hondakinen kudeaketa. Ez nahastu aparatuak etxeko ohiko hondakinekin. Utzi zure plaka hondakin bilketarako zentro berezi batean. Etxetresna elektrikoen birziklatzeak osasunerako eta ingurumenerako ondorio kaltegarriak saihesten ditu, eta energia eta baliabideak aurreztea ahalbidetzen du. Informazio gehiago nahi izanez gero, jar zaitez harremanetan herriko agintariekin edo plaka erosi zenuen saltokiarekin. PRODUCT DATA SHEET No. 95004 FEBRUARY 2004 RONSEAL CONTRACTOR QUICK CURE FLOOR SEAL Quick Cure Floor Seal is a pre-catalysed 100% polyurethane seal formulated for the treatment of commercial and domestic wooden floors. Quick Cure Floor Seal exhibits rapid drying, recoat and hardness build up times whilst having excellent scratch, chemical and black heel mark resistance. Quick Cure Floor Seal is part of the Ronseal Contractor range. INTRODUCTION Untreated Floors Ronseal Quick Cure Floor Seal is a single pack, water-borne polyurethane seal formulated for commercial and domestic interior wooden floors. Quick Cure Floor Seal is a pre-catalysed 100% polyurethane formulation that gives rapid drying, recoat and hardness build up. Punch in all nails and fill holes with an appropriate shade of Ronseal Multi-Purpose Woodfiller. Thoroughly sand the floor with a machine sander in the direction of the grain, back to clean, bright wood. Wood block floors should be sanded twice in two directions at right angles to each other. Avoid inhaling dust by wearing a suitable facemask. 120 grade sandpaper should be used for final sanding. Round off any sharp edges. Repair any surface defects with Ronseal MultiPurpose Wood Filler and sand smooth. Quick Cure Floor Seal has excellent scratch, chemical and black heel mark resistance, while being low odour and non-yellowing. Ronseal Quick Cure Floor Seal is available in clear gloss, silk and matt finishes. Ronseal Quick Cure Floor Seal conforms to BS7044 (Part4) 1991. COMPOSITION Ronseal Quick Cure Floor Seal is an aliphatic pre-catalysed polyurethane dispersion based on renewable sources. PROPERTIES Viscosity – Low VOC Content – Medium (8-24.99% w/v) Solubility - Miscible with water Flash Point - >61oC FIELDS OF APPLICATION Ronseal Quick Cure Floor Seal is recommended for use on most interior flooring materials, such as hardwood, strip block and mosaic flooring and softwood boarding, as well as cork, untempered hardboard, chipboard and wood compositions. It may also be used on previously sealed wooden floors after suitable preparation. Allow dust to settle and remove by vacuuming. Wipe over with a ‘sharp’ solvent and allow to dry thoroughly. To colour floors prior to sealing, use Ronseal Floor Dye or Colron Wood Dye available in a range of natural wood shades. Refer to the relevant product data sheets. Previously Varnished Floors Ensure that the surface is clean and free from wax, polish or other contaminants. Thoroughly abrade to form a key using 120 grade sandpaper or wet and dry paper. Avoid inhaling dust by wearing a suitable facemask. Remove dust by vacuuming and wipe over with a ’sharp’ solvent and allow to dry. Varnish in poor condition should be completely removed. Test a small area first for coating adhesion and/or compatibility prior to treating the whole floor. APPLICATION PREPARATION Thoroughly shake container and allow to settle for a few minutes before use. Apply in warm, well ventilated conditions, do not apply below 10oC. Condition Of Substrate Before Treatment Apply as directed (see table below). Ronseal Quick Cure Floor Seal should only be applied to clean, dry substrates free from dust, dirt, wax, maintenance product residue, grease or anything that will inhibit good adhesion. Oily hardwoods and knots should be cleaned with a ‘sharp’ solvent. The use of knotting solution under Quick Cure Floor Seal is not recommended. Use a lamb’s wool or synthetic applicator or roller. Do not thin. Avoid over rigorous application. As Ronseal Quick Cure Floor Seal provides a transparent finish any marks, blemishes or stains will be apparent after treatment. Do not use wire wool for surface preparation. To ensure good coverage use the applicator to spread the seal evenly and smoothly over the floor, taking care to avoid ponding or excessively thick areas of seal. If required the seal may be lightly sanded between coats. Prior to application of the final coat, lightly de-nib with an appropriate grade abrasive paper, remove dust by vacuuming. Always check adhesion prior to application by applying to a small test area. For floors where there is a risk of side-bonding, e.g. end grain floors, softwood plank floors and hardwood floors with under-floor heating, it is recommended that Ronseal Contractor Quick Prime is used for the initial application. Refer to the relevant data sheet. All tools and equipment should be cleaned immediately after use by washing in water and detergent. Remove as much product as possible from tools and equipment before washing. Type of Floor MAINTENANCE Light (Domestic) Use Domestic floors, except kitchens and playrooms Heavy (Office) Use Playrooms, offices, conference rooms, light athletics floors Very Heavy (Sports/Shop) Use Canteens, kitchens, restaurants, dance floors, exhibition halls, shops, corridors, public meeting areas New untreated 2-3 Coats* 3 Coats* 4 Coats* floors, old floors sanded to bare wood, stained floors Pre varnished 1 Coat 1 to 2 Coats 2 Coats floors, floors where old finish has not been removed *Ronseal Contractor Quick Prime may replace the first coat of Quick Cure. It is suggested that entrance matting is specified in all areas where access is possible from outside the building. These should be designed to remove grit, dirt and moisture and be of sufficient size to ensure that several strides must be taken before reaching the wooden floor. The mats must be cleaned, maintained or replaced as part of an ongoing maintenance programme. Commercial Floors Dust/grit should be removed on a daily basis using a vacuum cleaner, scissor mop or other dry cleaning method. A machine based cleaning system using either a scrubber/dryer or a spray buff system is the most suitable method for cleaning large floors or those subject to high traffic levels. It should be noted however that excessive use of very aggressive pads may dull the seal or physically damage the surface. The effectiveness of the cleaning process must be closely monitored in the early stages and adjustments made to the frequency and type of cleaning to ensure that the floor is being adequately maintained. COVERAGE Black heal marks from shoes or other sources occasionally may not be removed by normal cleaning regime. These may be removed by rubbing with a cloth dampened with white spirit. 10-12m2/litre/coat. Domestic Floors Coverage will vary dependent upon the porosity of the substrate. Apply in accordance with the coverage guidelines or performance will be impaired. Domestic floors should be cleaned regularly using dry cleaning methods such as a vacuum cleaner or soft broom. Keep the amount of moisture used on the floor to a minimum by ensuring the cloths and mops are only lightly dampened. COATING STANDARDS REFURBISHMENT Recommended film thickness per coat: Wet: 80-100 microns. Dry: 22-27 microns. Check thickness with a wet film gauge immediately after the application Total dry film thickness: Light use: 50-75 microns. Heavy use: 75 microns. Very heavy use: 100 microns. The above is a desirable practical figure for Ronseal Contractor Quick Cure Floor Seal. DRYING TIME Dry time: 30 minutes. Recoat: 1.5 hours. Light Traffic: 4 hours. 100% Cure: 12 hours. The floor should be examined on a regular basis for signs of wear. Once the surface has worn to an unacceptable level the floor should be cleaned, lightly sanded and vacuumed. 1 to 2 coats of Ronseal Quick Cure Floor Seal should then be applied as appropriate. IMPORTANT NOTES Ronseal Quick Cure Floor Seal is formulated to provide a clear, transparent, non-yellowing finish to wood and will have minimal effect on the colour of the substrate. Always pre-test on a small area first to confirm acceptability. Ronseal Quick Cure Floor Seal is designed to flex with the wood to prevent cracking and peeling. It will not harden softwoods or prevent surface indentations. Certain tropical hardwoods have surface characteristics, which may prevent full absorption of the seal. In general, oil bound woods may prevent adequate adhesion. Washing the surface thoroughly with white spirit, drying thoroughly and pre-testing the varnish on a small area is recommended. Dispose of sanding dust safely and store outside. Times quoted at 20oC. Do not use below 10oC. Insufficient ventilation, excessive humidity, low temperatures and the use of protective coverings (e.g. polythene sheeting) may adversely extend or effect the drying/curing process. Allow 12 hours before heavy traffic. Protect from water and do not cover with carpets or rugs for 24 hours. CLEANING OF TOOLS To prevent iron staining do not use wire wool for surface preparation. Do not apply if the room temperature is below 100C during application and drying or in conditions of high humidity. Do not use on surfaces treated with other types of varnish unless they have aged for at least one month. Do not pour unused seal back into the container after use as it may be contaminated with dirt. Wipe up any spillage as soon as possible. DISPOSAL Some local authorities have special facilities for disposal of waste paints/varnishes. For 8 days after application the use of detergents, polish and other maintenance products should be avoided. Very heavy furniture may mark the floor surface during this time. Do not empty product into drains or watercourses. Remove strong acids/alkalis and paints from the film immediately. Whilst these specifications are based on expert technical knowledge and practical experience, we cannot assume responsibility for any work as the ultimate result depends on factors beyond our direct control. Standard codes of painting practice should be followed. When applying Ronseal Quick Cure Floor Seal to pre-varnished flooring ensure adequate drying and adhesion by pre-testing on a small area before general treatment. LIABILITY INFORMATION AND SERVICE Ronseal Quick Cure Floor Seal cannot prevent movement due to loss of moisture from wooden floor caused by surrounding conditions. New floors should be laid in accordance with the requirements of BS8201:1987 and the manufacturer’s instructions. Care must be taken to ensure the floor is at the correct moisture content (not exceeding 16%) and acclimatised to the surrounding environment. Our Trade Technical Advisory Service will be pleased to offer specific guidance or provide any further information you may require. DATA SHEETS Data sheets on other Ronseal Products are available on request from our Technical Services Department. STORAGE Store in a cool, dry, well ventilated place away from heat and sources of ignition. Carefully reseal partly used containers. Do not store near foodstuffs. Protect from frost. To avoid risk of spillage, always store and transport in a secure and upright position. The shelf life of the product in airtight containers is at least two years. HEALTH AND SAFETY Observe and follow all warnings and instructions for use shown on the pack. Avoid contact with skin and eyes. Keep out of reach of children. In case of contact with eyes, rinse immediately with plenty of water and seek medical advice. After contact with skin, wash immediately with plenty of water. Ronseal Ltd. has been registered to BS EN ISO 9000 1994 (Registered Firm No. FM 1669/1). Wear suitable gloves. Use only in well ventilated areas. Avoid inhalation of dust during preparation by wearing an appropriate facemask. Specific health and safety data sheets are available for the professional user on request. FLAMMABILITY Non-flammable. Flash point above 610C. SUPPLY Ronseal Ltd. operate an Environmental Management System that complies with the requirements of BS 7750:1994, Certificate No. EMS 35924 Ronseal Ltd. has achieved Investors in People certification, (certificate number 59586). ©RONSEAL LTD., Thorncliffe Park, Chapeltown, Sheffield. S35 2YP Obtainable from contract flooring suppliers and builders and decorators merchants. Tel: 0800 587 0555 Fax: 0114 245 5629 E. Mail: [email protected] SIZES Website: www.ronsealcontractor.co.uk Available in a 2.5 & 5 litre containers. Ronseal is a registered trademark of the Sherwin Williams Company. FERUARY 2004. ISSUE 1 Bathroom: Bath. Kaldewei form plus bath 1700 x 700. Bath / Shower mixer: Vado Zoo 130 bath/shower mixer. Shower rail. Bath shower rail kits (1.75m hose) Vado Multi function slide rail kit 600mm slide rail Chrome finish0.5 Bar LP. Shower Screen: Hinged square edge bath screen by Aqua Dart 1500x700mm WC: Wall mounted Vitra Retro with WC Frame-Grohe Rapid SL 0.82m. VitrA Retro WC seat, white. Grohe, Front Access Rapid SL WC concealed cistern 0.82 m, 6/3 l. Grohe, Skate Air WC Wall plate. WHB Set 1: VitrA Retro square 550 x 425 basin, Wall mounted, with half pedestal, white, 1 tap hole. 1 1/4" Tall Bottle Trap. WHB Set 2: VitrA Retro claokroom basin 450 x 380mm basin. Wall mounted, 1 tap hole, with half pedestal. 1 1/4" Tall Bottle Trap. WHB taps: Vado Zoo single lever mono basin mixer with pop-up waste 0.2 bar LP - ZOO-100-FR-C/P. Shower: Shower rail: Shower rail kit (1.5m hose). Vado Multi function slide rail kit 600mm slide rail Chrome Finish0.5 Bar LP. Shower Value: Vado Celsius thermostatic exposed shower valve With H2Eco flow regulator Chrome Finish. Shower Tray: Mira Flight Low Rectangle 1400x760x40mm. Vado abs turbo shower tray waste 50mm. Shower Screen: Merlyn fixed Series 8 Shower Wall. WC: Wall mounted Vitra Retro with WC Frame-Grohe Rapid SL 0.82m. WHB: VitrA Retro claokroom basin 450 x 380mm basin. Wall mounted, 1 tap hole, with half pedestal. 1 1/4" Tall Bottle Trap. WHB taps: Vado Zoo single lever mono basin mixer with pop-up waste 0.2 bar LP - ZOO-100-FR-C/P. Accessories: • Geesa Glass shelf GE-5501-C/P • Geesa Nemox 60cm towel rail GE-6507-60-C/P • Geesa Nemox toilet roll holder GE-6509-C/P • Coat Hooks as per Saxton provided by RB Ironmongery MAINTENANCE GUIDELINES UV Oiled Floors In order to carry out the following procedures you will need a UV Oil Maintenance Kit containing Soap, Wood Cleaner and Maintenance Paste available from Atkinson & Kirby. Routine Maintenance Product: Natural Soap (coverage..1 ltr = 320-400m2 per 1 mopping) Cleaning Type: Regular day to day cleaning. Tools Required: 2 Mop buckets, mop, and a floor cloth. Step 1 Step 2 Step 3 Step 4 Mix 125ml of Natural Soap with 5 litres of lukewarm water. (Working with 2 buckets is recommended, one with soapy water and one with water to rinse the mop). Clean the floor with a minimum amount of water, leave the soapy water on the floor briefly in order to dissolve the dirt. Remove dirty soapy water from the floor with a cloth or a mop that has been well wrung out and then rinse in clean water. Wipe the floor with soapy water using a mop that has been well wrung out in order to leave a protective film of Natural Soap on the floor. Very dirty floors can be cleaned with Wood Cleaner firstly and then Natural Soap. Areas of heavy wear may be maintained or rejuvenated with Maintenance Paste after using the Wood Cleaner. Removing Ingrained Dirt Product: Wood Cleaner (Coverage..1ltr = 200-300m2 per 1 mopping) Cleaning Type: Removes grease, dirt and soap residue. Tools Required: 2 Mop buckets, mop and a floor cloth. Step 1 Step 2 Step 3 Step 4 Mix 150ml of Wood Cleaner with 5 litres of lukewarm water. (Working with 2 buckets is recommended, one with soapy water and one with water to rinse the mop). Leave the solution on the floor for 5 minutes in order to dissolve the dirt. Wipe off the solution and rinse the mop in clean water. Clean the floor using the soap as described under Routine Maintenance. Rejuvenating U V Oiled Floors Product: Maintenance Paste (Coverage: 400ml = 80-120m²) Cleaning Type: Annual cleaning (may be required more regularly on floors subject to heavy traffic). Tools Required: Buffing machine with a white polishing pad, and cotton cloths. NOTE: RISK OF SELF IGNITION. DUE TO THE RISK OF SELF IGNITION IT IS IMPORTANT THAT SANDING DUST AND CLOTHS SOAKED IN OIL ARE SOAKED IN WATER AND DISPOSED OF IN A TIGHTLY CLOSED CONTAINER AFTER USE. Step 1 Step 2 Step 3 Step 4 Clean the floor with 125ml of Wood Cleaner mixed with 5 litres of water. Leave the floor to dry for at least 8 hours. (Ensure the floor is completely dry). Apply thin coat of Maintenance Paste onto 1-2 m² floor area at a time with a white polishing pad or cotton cloth. Use floor buffing machine for distribution of Maintenance Paste for large areas. Make sure the Maintenance Paste is polished uniformly into the wood. Continue buffing until the wood appears saturated and silk-matt. Apply more paste if necessary If a very matt finish is required, buff with cotton pads under polishing pad. Let the surface rest for 4 hours DO NOT EXPOSE THE FLOOR TO WATER FOR 48 HOURS AFTER FINISHING Note: Please read the label on each individual product before use Customer: Urban Splash Site Address: Patten House Longlands Mill Stalybridge No Apart./ Houses on site 57 Job Reference: J 3503 10 Creation Date: 02/03/2010 Appliance Specification List KITCHEN TYPE 1 Make Fagor Fagor Statesman Total Make Unbranded Unbranded Unbranded Total Make Unbranede Capple Pack Price Modle No. FS0500X FVH650R T/C B60RF Colour S/Steel Black White Modle No. CAN52 DK25 Colour Grey n/a n/a Description Single Fan Oven 5 year Warranty 4 Burner Ceramic Hob touch control 5 Year warrenty Built under integrated fridge with ice box A N/A A Energy Rating Price £225.00 £180.00 £233.00 £638.00 Description 600cm Canopy Hood Reducer venting/recirculating kit Plug or Hard wired Hard wired or Plug N/A N/A Price £52.00 £5.00 £17.99 Energy Rating N/A N/A N/A £74.99 Modle No. round sink round drainer Atlanta Colour S/Steel Chrome Description Single Bowl Sink Mono Block Mixer Tap Price N/A N/A £135.00 The Above Prices are Nett & Exclude Vat **VAT Included at the rate appliacable at the time of invoice No main contractors Discount included Accent Kitchens Uk Private Confidential 15/12/2011 Customer: Urban Splash Site Address: Patten House Longlands Mill Stalybridge No Apart./ Houses on site 57 Job Reference: J 3503 10 Creation Date: 02/03/2010 Appliance Specification List KITCHEN TYPE 2 Make Fagor Fagor Fagor Modle No. FSO500X FVH650R FIC-541UK Colour S/Steel Black White Description Single Fan Oven 5 Year Warranty 4 Burner Ceramic Hob touch control 5 Year warranty Integrated Fridge/freezer 5 year warranty A N/A A Energy Rating Price £225.00 £180.00 £365.00 £770.00 Description 600cm Canopy Hood Reducer venting/recirculating kit Plug or Hard wired Hard wired or Plug N/A N/A Price £52.00 £5.00 £17.99 Total Make Unbranded Unbranded Unbranded Total Make Unbranede Capple Pack Price Modle No. CAN52 DK25 Colour Grey n/a n/a Energy Rating N/A N/A N/A £74.99 Modle No. round sink round drainer Atlanta Colour S/Steel Chrome Description Single Bowl Sink Mono Block Mixer Tap Price N/A N/A £135.00 The Above Prices are Nett & Exclude Vat **VAT Included at the rate appliacable at the time of invoice No main contractors Discount included Accent Kitchens Uk Private Confidential 15/12/2011 Customer: Urban Splash Site Address: Patten House Longlands Mill Stalybridge No Apart./ Houses on site 57 Job Reference: J 3503 10 Creation Date: 02/03/2010 Appliance Specification List KITCHEN TYPE 3 Make Fagor Fagor Fagor Modle No. FSO500X FVH650R FIC-541UK Colour S/Steel Black White Description Single Fan Oven 5 Year Warranty 4 Burner Ceramic Hob touch control 5 Year warranty Integrated Fridge/freezer 5 year warranty A N/A A Energy Rating Price £225.00 £180.00 £365.00 £770.00 Description 600cm Canopy Hood Reducer venting/recirculating kit Plug or Hard wired Hard wired or Plug N/A N/A Price £52.00 £5.00 £17.99 Total Make Unbranded Unbranded Unbranded Total Make Unbranede Capple Pack Price Modle No. CAN52 DK25 Colour Grey n/a n/a Energy Rating N/A N/A N/A £74.99 Modle No. round sink round drainer Atlanta Colour S/Steel Chrome Description Single Bowl Sink Mono Block Mixer Tap Price N/A N/A £135.00 The Above Prices are Nett & Exclude Vat **VAT Included at the rate appliacable at the time of invoice No main contractors Discount included Accent Kitchens Uk Private Confidential 15/12/2011