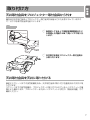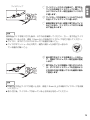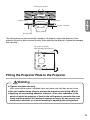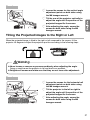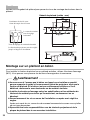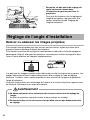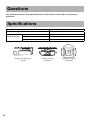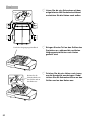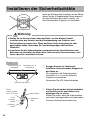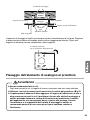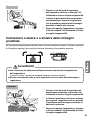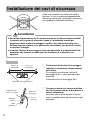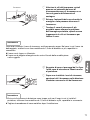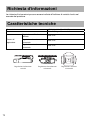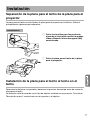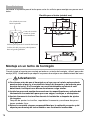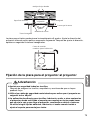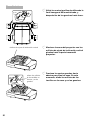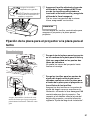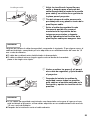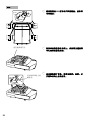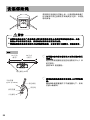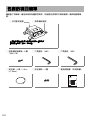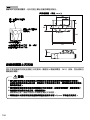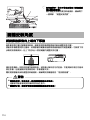
1
ELPMB25
3
17
31
45
59
73
87
101
目次
同梱品一覧 . . . . . . . . . . . . . . . . . . . . . . . . . . . . . . . . . . . . . . . . . . . . . . . . . . . 4
安全にお使いいただくために . . . . . . . . . . . . . . . . . . . . . . . . . . . . . . . . . . . . . . 5
プロジェクター取り付け位置のご注意 . . . . . . . . . . . . . . . . . . . . . . . . . . . . . . . 6
取り付け方 . . . . . . . . . . . . . . . . . . . . . . . . . . . . . . . . . . . . . . . . . . . . . . . . . . . 7
天井取付金具をプロジェクター取付金具から外す . . . . .
天井取付金具を天井に取り付ける . . . . . . . . . . . . . . . . .
取り付け部がコンクリートのとき . . . . . . . . . . . . . . . . .
プロジェクター取付金具をプロジェクターに取り付ける
プロジェクター取付金具を天井取付金具に取り付ける .
.
.
.
.
.
.
.
.
.
.
.
.
.
.
.
.
.
.
.
.
.
.
.
.
.
.
.
.
.
.
.
.
.
.
.
.
.
.
.
.
.
.
.
.
.
.
.
.
.
.
.
.
.
.
.
.
.
.
.
.
.
.
.
.
.
.
.
.
.
.
.
.
.
.
.
.
.
.
.
.
.
.
.
.
.
.
.
.
.
.
.
.
.
.
.
.
.
.
.
.
.
.
.
.
.
. 7
. 7
. 8
. 9
11
設置角度の調整 . . . . . . . . . . . . . . . . . . . . . . . . . . . . . . . . . . . . . . . . . . . . . . .12
投写映像を上または下に移動する . . . . . . . . . . . . . . . . . . . . . . . . . . . . . . . . . . . . . . 12
投写映像が右または左に傾いているとき . . . . . . . . . . . . . . . . . . . . . . . . . . . . . . . . . 13
落下防止ワイヤの取り付け方 . . . . . . . . . . . . . . . . . . . . . . . . . . . . . . . . . . . . .14
お問い合わせ先 . . . . . . . . . . . . . . . . . . . . . . . . . . . . . . . . . . . . . . . . . . . . . . .16
仕様 . . . . . . . . . . . . . . . . . . . . . . . . . . . . . . . . . . . . . . . . . . . . . . . . . . . . . . .16
3
同梱品一覧
下記のチェックリストをご覧になり、同梱品を確認してください。万一、不足や不良があ
りましたら、お手数ですがお買い求めいただいた販売店までご連絡ください。
Y 天井取付金具
Y プロジェクター取付金具
梱包時は仮組みされています。取り付ける際は、天井取付
金具をプロジェクター取付金具から取り外します。
Y プロジェクター取付ネジ
Y M6 六角レンチ
Y M8 六角レンチ
Y ワイヤクリップ(2 個)
Y 取扱説明書(本書)
(4 本:M6 x 16)
Y 落下防止ワイヤ
(2 本:1.5m、Φ1.5mm)
3
17
31
45
59
73
87
101
4
安全にお使いいただくために
お買い上げいただきまして、ありがとうございます。本製品を安全に正しく組み立て、設
置していただくために、本書をよくお読みください。注意事項は必ず守ってください。不
明な点はいつでも解決できるように、この説明書はすぐに見られる場所に大切に保存して
ください。
本書および製品には、製品を安全に正しくお使いいただき、お客様や他の人への危害や財
産への損害を未然に防止するために、絵表示が使われています。その表示と意味は次のと
おりです。内容をよくご理解いただいた上で本文をお読みください。
この表示を無視して誤った取り扱いをすると、人が死亡または重
傷を負う可能性が想定される内容を示しています。
この表示を無視して誤った取り扱いをすると、人が傷害を負う可
能性が想定される内容および物的損害のみの発生が想定される内
容を示しています。
本製品を取り付ける際は、事前にプロジェクターに同梱の『安全にお使いいただくために
/ サポートとサービスのご案内』に記載されている注意事項をよくご覧になり、適切な場
所に設置してください。
v 天吊り設置工事の十分な技術、技能を有する専門業者以外は施工しないでください。
不完全な組み立てや工事の不備は落下による事故やけがの原因となります。
v 強度が不足しているところ、傾いたところには取り付けないでください。
取り付けるところはプロジェクターと本製品を支えるに十分な強度が必要です。取り付
けの前にプロジェクターと本製品の質量を確認し、許容加重計算等を行い、確実に取り
付けてください。
v 設置に際しては、以下のことを守ってください。正しく作業を行わないと落下による事
故やけがの原因となります。
・ 取り付ける箇所の構造、材質を十分に確認し、最適な工法で工事を行ってください。
・ 本製品には指定のプロジェクター以外のものをぶら下げたり、載せたりしないでく
ださい。本製品に取り付け可能なプロジェクターは、カタログ等で確認できます。
・ 設置中や設置後は、無理な力をかけたりぶら下がったりしないでください。
・ ネジは確実に締めてください。また、本製品の取り付け中や取り外し時に不用意に
ネジをゆるめたり取り外さないでください。
・ 本書で指示している場合を除き、本製品の分解・改造は絶対に行わないでください。
v 落下防止のため、同梱のワイヤで落下防止措置を行ってください。
地震や振動による横ゆれ防止のためにもワイヤを取り付けてください。sp.14
5
v プロジェクターの天吊り固定部に、ネジゆるみ止め用接着剤・潤滑剤・油などが付着す
るとケースが割れ、プロジェクターが落下し事故やけがの原因となります。天吊り設置
や本製品の調整に際しては、ネジゆるみ止め用接着剤・潤滑剤・油などを使用しないで
ください。
v 取付設置後は、決してボルト・ビス・ナットを緩めないでください。また、定期的にネ
ジ類の緩みがないことを確認してください。万一緩みがあるときは、確実に締め直して
ください。
v 次のようなときは、本製品を使用せずにお買い上げの販売店、またはエプソンサービス
コールセンターにご相談ください。
・ 設置前や設置時に本製品を落としたり、破損した。
・ 金具に異常や不具合がある。
v 設置する際にプロジェクターの電源コードを強く引っ張ったり、挟み込んだりしないで
ください。
電源ケーブルが破損し、火災・感電の原因となります。電源ケーブルが破損したら(芯
線の露出、断線など)、販売店またはプロジェクターインフォメーションセンターにご
相談ください。
設置作業は、2人以上で行ってください。また、しっかりした足場で作業してくださ
い。
倒れたり、落ちたりしてけがの原因となります。
プロジェクター取り付け位置のご注意
天井取付金具を取り付ける際は、事前にプロジェクターに同梱の『安全にお使いいただく
ために / サポートとサービスのご案内』に記載されている注意事項をご覧になり適切な場
所に設置してください。特に、次の事項にご留意ください。
v プロジェクターのリモコン受光部に蛍光灯や直射日光の強い光が当たる場所を避けて設
置してください。強い光がリモコン受光部に当たると、リモコン操作が正しくできない
ことがあります。
v エアコンなどの吹き出し口から離してください。
v 外部ノイズの影響を少なくするために、コンピューターなどの接続機器と接続するケー
ブルは 20m 以下になるようにプロジェクターを配置することをお薦めします。
v レンズや内部の光学部品に汚れが付着しないように、ホコリや湿気の少ないところに設
置してください。
v お使いのプロジェクターの使用温度範囲を超える場所には設置しないでください。故障
の原因となります。
v 直射日光等が入る部屋では、カーテンを引くと投写画面が見易くなります。
6
取り付け方
天井取付金具をプロジェクター取付金具から外す
梱包時は天井取付金具とプロジェクター取付金具が仮組みされた状態になっていますの
で、以下の手順で各金具を別々にします。
操作
A 仮固定してある上下傾斜角度調整部のネジ
を両側とも同梱の M8 六角レンチで取り外
します。
B 天井取付金具をプロジェクター取付金具か
ら取り外します。
天井取付金具を天井に取り付ける
事前にスクリーンまでの投写距離を決め、天井取付金具の取り付け位置を決めて天井に取
り付けます。
スクリーンまでの投写距離は、プロジェクターに取り付けられているレンズユニットの種
類により異なります。プロジェクターまたはレンズユニットに添付の『取扱説明書』でご
確認ください。
7
操作
下図を参照して、天井にボルトの取付け穴を開けます。
天井設置面寸法図(単位:mm)
160
この切り欠きを
スクリーン側に
向けます。
80
93
80
40
首振り 調整時
の回転中心
14
100
186
首振り調整穴
回転方向で向きの調整
が± 5 度までできます。
251
200.4
取り付け部がコンクリートのとき
コンクリート面に取り付けるためにはアンカーボルト(M12)を 4 本使用します。アン
カーボルトは市販品をお求めください。
v 取り付け部分のコンクリートが本製品とプロジェクターの質量、および横ゆれに
十分耐えられることを事前に確認してください。コンクリートがもろいときや経
時劣化しているときは鉄筋などで確実に補強を行ってください。
v アンカーは資材メーカーが指定する基準や方法に従って、抜けやゆるみ、位置ず
れが生じないように確実に施工してください。
v 取り付け時や角度調整終了後は、ネジを確実に締めてください。
ネジを締め付けた後、増し締めをしてネジの緩みがないことを十分確認してくだ
さい。
v 取り付けの強度不足等による落下事故につきましては、当社は一切責任を負いま
せんのでご了承ください。
8
めねじタイプアンカー
コンクリート
天井面
つりボルト
六角ナット
3 山以上出します
平ワッシャー
六角ナット
スプリング
ワッシャー
天井取付金具は、± 5°の範囲で左右に振ることができます。角度の調整は、4 本のボル
トを仮止めした状態で行います。角度の調整終了後は、必ず六角ナットを締めて確実に固
定してください。
角度調整時の
回転中心
プロジェクター取付金具をプロジェクターに取り付ける
v ネジは確実に締めてください。
ネジを締め付けた後、増し締めをしてネジの緩みがないことを十分確認してくだ
さい。
v 落下防止のため、同梱のワイヤで落下防止措置を行ってください。sp.14
v プロジェクターの天吊り固定部に、ネジゆるみ止め用接着剤・潤滑剤・油などが
付着するとケースが割れ、プロジェクターが落下し事故やけがの原因となります。
天吊り設置や本製品の調整に際しては、ネジゆるみ止め用接着剤・潤滑剤・油な
どを使用しないでください。
9
操作
A 同梱のM6六角レンチでネジを4本ともゆる
めて、フックを 4 つとも外側に引き出しま
す。
上下傾斜角度調整部ネジ穴
B 上下傾斜角度調整部のネジ穴がプロジェク
ターの背面側に来るように、プロジェク
ターのハンドルに乗せます。
ハンドルのネジ
穴とフックのネ
ジ穴を合致させ
ます。
10
C 4 箇所のフックを押し込み、プロジェク
ターのハンドルに引っ掛けます。このとき、
ハンドルのネジ穴とフックのネジ穴を合致
させます。
フックに付属のネジを
締めます。
同梱のネジをネジ穴に
差し込み、締めます。
D 同梱の M6 六角レンチでフックに付属して
いるネジを締めます。同梱のネジをフック
のネジ穴に差し込み六角レンチで締めます。
残りの 3 箇所のフックも同様に、ネジを締
めて固定します。
注意
プロジェクターとプロジェクター取付金具を固
定する際は、必ず同梱のネジを使用してくださ
い。
プロジェクター取付金具を天井取付金具に取り付ける
操作
A プロジェクター取付金具のシャフトを天井
取付金具の溝に引っ掛けて、U 字部にしっ
かりと入るようにセットします。
取り付けが終了するまではプロジェクター
から手を離さないでください。
B 最初に天井取付金具をプロジェクター取付
金具から外したときに取り外した上下傾斜
角度調整部のネジをネジ穴に差し込みます。
同梱の M8 六角レンチで左図の 2 箇所の角
度調整部のネジを締めて固定します。
プロジェクターの角度を調整するときは、
次項の「設置角度の調整」をご覧になり角度
調整を行ってください。
この印の位置でネジを固定すると
ほぼ水平に設置できます。
目安としてお使いください。
11
C 同梱の M8 六角レンチで左図の左右傾斜角
度調整部のネジを両側とも締めて固定しま
す。
プロジェクターの角度を調整するときは、
次項の「設置角度の調整」をご覧になり角度
調整を行ってください。
設置角度の調整
投写映像を上または下に移動する
投写映像がスクリーンに対して上または下に投写されるときは、まずプロジェクターのレ
ンズシフトを使って映像の位置を調整します。
レンズシフトの調整範囲を超えて、さらに上下に投写したいときは、以下の調整を行い
± 5°の範囲でプロジェクターを傾けて映像の位置を調整できます。
プロジェクターを傾けると投写映像が台形にゆがむことがあります。台形にゆがんだ映像
は、台形補正で補正できます。
ただし、傾斜角度が大きくなると、ピントが合いにくくなります。
レンズシフトと台形補正については、プロジェクターに添付の『取扱説明書』をご覧くだ
さい。
v 角度調整時に不用意にネジをゆるめたり取り外さないでください。
プロジェクターが落下して事故の原因となります。
v 調整が終了したらすべてのネジを再度締めて緩みがないことを確認してください。
12
操作
A 同梱の M8 六角レンチで上下傾斜角度調整
部のネジを両側ともゆるめます。
B プロジェクターの後部を上下に動かして、
投写映像がスクリーンに合うように角度を
調整します。
C 角度が調整できたら、M8 六角レンチで両
側のネジをしっかりと締めます。
投写映像が右または左に傾いているとき
投写映像がスクリーンに対して右、または左に傾いているときは、以下の調整を行い
± 5°の範囲でプロジェクターを傾けて映像の位置を調整できます。
v 角度調整時に不用意にネジをゆるめたり取り外さないでください。
プロジェクターが落下して事故の原因となります。
v 調整が終了したらすべてのネジを再度締めて緩みがないことを確認してください。
操作
A 同梱の M8 六角レンチで左右傾斜角度調整
部のネジを両側ともゆるめます。
B プロジェクターを左右に傾けて、投写映像
がスクリーンに合うように角度を調整しま
す。
C 角度が調整できたら、M8 六角レンチで両
側のネジをしっかりと締めます。
13
落下防止ワイヤの取り付け方
天吊り設置後は、プロジェクターの落下と横ゆ
れ防止のために、落下防止の工事を行ってくだ
さい。
落下防止工事は、必ず同梱のワイヤとワイヤク
リップを使い、ワイヤを対角線上に通して行い
ます。
v 取り付け部分のコンクリートが本製品とプロジェクターの質量、および横ゆれに
十分耐えられることを事前に確認してください。コンクリートがもろいときや経
時劣化しているときは鉄筋などで確実に補強を行ってください。
v アンカーは資材メーカーが指定する基準や方法に従って、抜けやゆるみ、位置ず
れが生じないように確実に施工してください。
操作
1m 以内
(推奨)
1m 以内
(推奨)
A 市販のアンカーボルトを対角線上に 2 箇所
取り付けます。
本製品の中心から 1m 以内にアンカーボル
トを取り付けることをお勧めします。
アンカーボルトは M12 をお使いください。
アンカーボルト
(M12)
平ワッシャー
(Φ24 ∼ Φ26 mm)
スプリング
ワッシャー
六角ナット
14
B 落下防止ワイヤの輪をそれぞれ、2 箇所の
アンカー
ボルト
ワイヤ
ロープ
ボルトにかけて確実に固定します。
このとき、ワイヤの輪が平ワッシャーから
外れていないことをしっかり確認してから
六角ナットを締め付けてください。
ワイヤクリップ
C ワイヤクリップのネジを緩めて、落下防止
ワイヤの先端をワイヤクリップに通し、さ
らにプロジェクター取付金具のフックの穴
に通します。
D ワイヤロープの先端をハンドルの下から引
き出してワイヤクリップに通します。
E 映像位置がずれない程度に落下防止ワイヤ
をピンと張り、ワイヤクリップのネジを締
めて仮止めします。
注意
落下防止ワイヤを取り付けた後は、以下の点を確認してください。万一、落下防止ワイヤ
が破損しているときは、線径 1.5mm 以上の市販のワイヤロープを付け直してください。
v ワイヤに、ほつれてバラバラになっている箇所が無いこと。
v ワイヤが平ワッシャーなどの角で、鋭角に曲がった状態で引っ張られ
ている箇所が無いこと。
F 他の落下防止ワイヤも手順の③∼⑤を行っ
て、同様にプロジェクター取付金具に固定
します。
G 落下防止ワイヤが問題なく取り付けられた
ら、すべてのワイヤクリップを左図のよう
に矢印の方向に移動してネジを確実に締め
て固定します。
注意
v 同梱の落下防止ワイヤでは短いときは、線径 1.5mm 以上の市販のワイヤロープをお使
いください。
v 取り付け後、ワイヤロープが余っているときは余分を切ってください。
15
お問い合わせ先
ご不明な点等がありましたら、プロジェクターに同梱の『取扱説明書』に記載されている
問い合わせ先にご連絡ください。
仕様
組み立て外形サイズ
幅 495.6x 高さ 109x 奥行き 384mm
質量
約 13.5kg
調整範囲
上下傾斜角度
0 ∼± 5°
左右傾斜角度
0 ∼± 5°
左右回転角度
0 ∼± 5°
上下傾斜角度
16
左右傾斜角度
左右回転角度
Contents
Included Items List . . . . . . . . . . . . . . . . . . . . . . . . . . . . . . . . . . . . . . . . . . . . . . 18
Safety Instructions . . . . . . . . . . . . . . . . . . . . . . . . . . . . . . . . . . . . . . . . . . . . . . 19
Precautions on Where to Mount the Projector . . . . . . . . . . . . . . . . . . . . . . . . 20
Installation . . . . . . . . . . . . . . . . . . . . . . . . . . . . . . . . . . . . . . . . . . . . . . . . . . . . . 21
Removing the Ceiling Plate from the Projector Plate . . . . . . . . . . . . . . . . . . . . . . . . . . .
Installing the Ceiling Plate to the Ceiling . . . . . . . . . . . . . . . . . . . . . . . . . . . . . . . . . . . .
Mounting to a Concrete Ceiling . . . . . . . . . . . . . . . . . . . . . . . . . . . . . . . . . . . . . . . . . . .
Fitting the Projector Plate to the Projector . . . . . . . . . . . . . . . . . . . . . . . . . . . . . . . . . . .
Fitting the Projector Plate to the Ceiling Plate . . . . . . . . . . . . . . . . . . . . . . . . . . . . . . . .
21
21
22
23
25
Adjusting the Installation Angle . . . . . . . . . . . . . . . . . . . . . . . . . . . . . . . . . . . 26
Moving the Projected Images Higher or Lower . . . . . . . . . . . . . . . . . . . . . . . . . . . . . . . 26
Tilting the Projected Images to the Right or Left . . . . . . . . . . . . . . . . . . . . . . . . . . . . . . 27
Installing the Safety Wires . . . . . . . . . . . . . . . . . . . . . . . . . . . . . . . . . . . . . . . . 28
Inquiries . . . . . . . . . . . . . . . . . . . . . . . . . . . . . . . . . . . . . . . . . . . . . . . . . . . . . . . 30
Specifications . . . . . . . . . . . . . . . . . . . . . . . . . . . . . . . . . . . . . . . . . . . . . . . . . . 30
17
Included Items List
Check the following list to confirm that you have all of the supplied items. If by any chance
there is anything missing or damaged, please contact your dealer.
Y Ceiling plate
Y Projector plate
The ceiling plate and projector plate are preassembled.
Separate them before starting the installation.
Y Projector mounting
screws: 4 pcs. (M6 x 16)
Y Hexagon wrench (M6)
Y Safety wires: 2 pcs. (1.5m, Y Wire clips: 2 pcs.
φ 1.5mm)
Y Hexagon wrench (M8)
Y User's Guide (this manual)
3
17
31
45
59
73
87
101
18
Safety Instructions
Thank you very much for purchasing this product. Read this document carefully to
assemble and install this product safely and correctly. Be sure to follow the safety
precautions. Keep these instructions close to hand to help solve any points you do not
understand.
So that you can use the product safely and correctly, symbols are applied in this guide and
on the product to indicate possible harm to the user or to others and the risk of damage to
property. The indications and their meaning are as follows. Make sure you understand them
properly before reading the guide.
Warning
Caution
This symbol indicates information that, if ignored, could
possibly result in death or personal injury due to incorrect
handling.
This symbol indicates information that, if ignored, could
possibly result in personal injury or physical damage due to
incorrect handling.
Carefully read the warnings in "Safety Instructions/Support and Service Guide" supplied
with your projector before starting the installation to determine a suitable place to install it.
Warning
vThe installation work should be performed only by specialists with the required
technical know-how and ability.
Incomplete assembly or installation could cause the projector and ceiling mount to fall
down and cause injury.
vDo not install the ceiling mount on an inclined or weak surface.
The ceiling must be strong enough to install the projector and ceiling mount. Before
starting the installation, carefully check the weight of the projector and the ceiling mount.
Make sure that the ceiling is strong enough and use the most appropriate methods to
prevent the projector from falling.
vAlways follow the instruction below to install the ceiling mount. If installation work
is not carried out correctly, the projector and ceiling mount could fall down and
cause injury.
• Check the structure and materials of the mounting location and use the most
appropriate construction method.
• Do not hang or mount anything except the specified projector from or on the ceiling
mount. The projectors that can be mounted on this ceiling mount are listed in the
catalogs.
• Do not hang from the ceiling mount or apply excessive force to it during or after
installation.
• Tighten the screws firmly. Also, never loosen or remove any screws carelessly when
mounting or removing the ceiling mount.
• Never disassemble or remodel the ceiling mount unless indicated in this manual.
19
Warning
vInstall the supplied safety wire to prevent the projector from falling.
The safety wire also prevents the projector from swaying during an earthquake or
vibration. sp.28
vApplying a screw-locking adhesive, lubricant, oil or other substance to the points
at which the projector is fixed to the ceiling mount can make the case crack and
the projector fall, leading to damage or injury. Do not use any sort of adhesive,
lubricant, or oil when installing or adjusting the ceiling mount.
vNever loosen any bolts, screws, or nuts after installation. Also check periodically
that no screws have come loose. If you find a loose screw, retighten it firmly.
vDon't use the ceiling mount and refer all repairs to qualified service personnel
under the following conditions:
• The ceiling mount fell off or was broken before or during installation.
• The supplied parts have problems and do not work correctly.
vDo not strongly pull or pinch the projector's power cord during installation.
Contact your dealer if the wires of the power cable become exposed or broken.
Caution
At least two people are needed for the installation. Make sure to provide a sturdy
scaffold for this work.
You may fall or drop the projector and cause injury.
Precautions on Where to Mount the
Projector
Carefully read the warnings in "Safety Instructions / Support and Service Guide" supplied
with your projector before starting the installation to determine a suitable place to install it. In
particular, pay attention to the following items.
vSet the projector up in a location where direct sunlight or strong light from fluorescent
lamps does not shine onto the receiver for the remote control. Strong light shining onto the
receiver for the remote control may interfere with remote control operations.
vInstall the projector so it is away from the air outlet of air conditioners or other similar
devices.
vTo limit the effect of external noise, we recommend that you position the projector so that
the cable connecting it to a computer or other devices is no longer than 20 meters.
vThe projector should be installed in a location that is free of dust and moisture to prevent
the lens and internal optical parts from becoming dirty.
vDo not install the projector in a location beyond its operating temperature range. Doing so
can cause it to malfunction.
vClosing the curtains in a bright room makes the projected image easier to see.
20
Installation
Removing the Ceiling Plate from the Projector Plate
The ceiling plate is fitted to the projector plate at the factory. Use the following procedure to
separate them.
Procedure
A Remove the screws for the vertical tilt
adjustment points on both sides using
the supplied hexagon wrench (M8).
B Remove the ceiling plate from the
projector plate.
Installing the Ceiling Plate to the Ceiling
Determine the distance to the screen and locate the mounting position before mounting the
ceiling plate.
The distance varies according to the type of the lens unit installed on the projector. Refer to
the "User's Guide" supplied with the projector or lens unit.
21
Procedure
Refer to the ceiling template to cut the bolt-mounting holes into the ceiling.
Ceiling template (units: mm)
160
80
Turn the side of this
cutout to the screen.
93
80
40
The center of
rotation when
adjusting
horizontally
14
100
186
Holes for horizontal rotation adjustment
251
The direction of the projector can be
adjusted at up to ±5 degrees by rotating it.
200.4
Mounting to a Concrete Ceiling
When installing the ceiling mount on a concrete ceiling, use 4 anchor bolts (M12). You need
to purchase commercially available anchor bolts.
Warning
vMake sure in advance that the concrete on which this product is installed can
hold the weight and lateral movement of the projector and ceiling mount. If the
concrete is not strong enough or has deteriorated, fortify it with reinforcing
bars or something similar.
vInstall the anchor bolts according to the specifications and methods of the
manufacturer of the materials so they do not come out, become loose, or shift.
vTighten the screws firmly during installation or after adjusting the angles.
After tightening the screws, retighten them firmly and make sure that they are not
loose.
vEpson accepts no responsibility for the projector and the ceiling mount falling
due to inadequate installation.
22
Female type anchors
Concrete
Ceiling surface
Hanger bolts
Hexagon nut
At least 3 threads
Flat washers
Spring washers
Hexagon nut
The ceiling plate can be horizontally rotated at ±5 degrees. Adjust the direction of the
projector using four bolts secured loosely. After adjusting the direction, tighten the hexagon
nuts securely.
The center of rotation
when adjusting the direction
Fitting the Projector Plate to the Projector
Warning
vTighten all screws securely.
After securing the screws, retighten them and make sure that they are not loose.
vUse the supplied safety wires to prevent the projector from falling. sp.28
vApplying a screw-locking adhesive, lubricant, oil or other substance to the
points at which the projector is fixed to the ceiling mount can make the case
crack and the projector fall, leading to damage or injury. Do not use any sort
of adhesive, lubricant, or oil when installing or adjusting the ceiling mount.
23
Procedure
A Loosen the four screws using the
supplied M6 hexagon wrench, and then
pull the hooks outward.
Vertical tilt adjustment hole
B Mount it on the handles of the projector
with the vertical tilt adjustment holes
turned to the rear of the projector.
Align the screw
holes on the handles
and on the hooks.
24
C Press the four hooks inward to attach the
handles. At this time, align the screw
holes on the handles and on the hooks.
Secure the screws attached
to the hooks.
Put the supplied screws through
the screw holes and secure
them.
D Secure the screw attached to the hook
using the M6 hexagon wrench. Put one of
the supplied screws into the screw hole
on the hook and secure it using the
hexagon wrench.
Fix the other three hooks in the same way,
by securing their screws.
Caution
Always use the screws supplied to secure the
projector and the projector plate.
Fitting the Projector Plate to the Ceiling Plate
Procedure
A Put the shaft of the projector plate into
the grooves of the ceiling plate and place
it securely in the horseshoe-shaped
points.
Do not release your hands from the
projector until mounting is complete.
B Put the screws for the vertical angle
Secure the screws at the height of these
marks so that the projector is set up almost
horizontally. Use them as a guide.
adjustment points that were removed
when removing the ceiling plate from the
projector plate in the screw holes.
Secure the two screws in the angle
adjustment points as shown in the left
illustration, using the supplied M8 hexagon
wrench to fix the projector. For details on
adjusting the angle of the projector, see the
next section "Adjusting the installation
angle".
25
C Secure the screws for the horizontal roll
adjustment points as shown in the left
illustration to fix the projector.
For details on adjusting the angle of the
projector, see the next section "Adjusting
the installation angle".
Adjusting the Installation Angle
Moving the Projected Images Higher or Lower
When the images are projected higher or lower compared to the screen, adjust the
projection position using the lens shift of the projector.
When moving the projection position vertically over the adjustable range of the lens shift,
the projection position can be adjusted another 5 degrees in either direction by tilting the
projector according to the following steps.
When tilting the projector, the projected images may be twisted. The images twisted in a
trapezoidal shape can be corrected by using the keystone adjustment. However, the image
goes out of focus as the inclination angle increases.
For details on the lens shift and keystone, see the "User's guide" supplied with the projector.
Warning
vNever loosen or remove any screws needlessly when adjusting the angle.
Doing so could cause the projector to fall and lead to an accident.
vRetighten all screws and make sure that they are not loose after adjustment.
26
Procedure
A Loosen the screws for the vertical angle
adjustment points on both sides using
the M8 hexagon wrench.
B Tilt the rear of the projector vertically to
adjust the angle until the position of the
projected images fits the screen.
C After adjusting the angle, secure the
screws on both sides using the M8
hexagon wrench.
Tilting the Projected Images to the Right or Left
When the projected image is tilted to the right or left compared to the screen, tilt the
projector ±5 degrees to adjust the projection position according to the following steps.
Warning
vNever loosen or remove any screws needlessly when adjusting the angle.
Doing so could cause the projector to fall and lead to an accident.
vRetighten all screws and make sure that they are not loose after adjustment.
Procedure
A Loosen the screws for the horizontal roll
adjustment points on both sides using
the M8 hexagon wrench.
B Tilt the projector to the left or right to
adjust the angle until the position of the
projected images fits the screen.
C After adjusting the angle, secure the
screws on both sides using the M8
hexagon wrench.
27
Installing the Safety Wires
After installing the projector on the ceiling, pass
the 2 wires provided diagonally through the
projector using the wire clips to prevent the
projector from falling.
Warning
vMake sure in advance that the concrete on which this product is installed can
hold the weight and lateral movement of the projector and ceiling mount. If the
concrete is not strong enough or has deteriorated, fortify it with reinforcing
bars or something similar.
vInstall the anchor bolts according to the specifications and methods of the
manufacturer of the materials so they do not come out, become loose, or shift.
Procedure
Within 1m
(recommended)
Within 1m
(recommended)
A Locate two commercially available
anchor bolts diagonally on the ceiling.
We recommend locating the anchor bolts
within 1 meter from the center of the
projector.
Use M12 anchor bolts.
Anchor bolt (M12)
Flat washer
(φ 24 - φ 26mm)
Spring
washer
Hexagon nut
28
B Loop the two safety wires around the two
Anchor bolt
Safety wire
bolts and secure them firmly.
Make sure that the wire loops are under the
flat washers, and then tighten the hexagon
nuts.
Wire clip
C Loosen the screws of the wire clip, and
then pass the end of the safety wire
through the wire clip and a hole on a
hook of the projector plate.
D Pull the end of the wire rope out from
under the handle and pass it through the
wire clip.
E Stretch the safety wire as tight as
possible without causing the position of
the projected image to move, and then
tighten the screws of the wire clip
loosely to secure the wire.
Caution
After installing the safety wire, check the followings. If by any chance the wire is damaged,
replace it with a commercially available wire rope of 1.5 mm or more in diameter.
vThe wire is not frayed or unraveling.
vThe wire is not bent at an acute angle against the edge of the flat washer
or other object.
F Perform steps 3 to 5 again for the other
safety wire and fix it to the projector as
well.
G After installing the safety wires, move all
the wire clips in the direction shown in
the illustration and tighten the screws of
the clips.
Caution
vIf the supplied safety wires are too short for where you are installing the projector, use
commercially available wire ropes of 1.5 mm or more in diameter.
vCut off any extra wire rope after installation.
29
Inquiries
Inquiries can be directed to the contact information given in the manual of the projector.
Specifications
Dimensions
495.6 (W) x 109 (H) x 384 (D) mm
Mass
Approx. 13.5 kg
Vertical tilt adjustment
Adjustable range
Horizontal roll adjustment
0 to ±5°
Horizontal rotation adjustment
0 to ±5°
Vertical tilt
adjustment
30
0 to ±5°
Horizontal roll
adjustment
Horizontal rotation
adjustment
Table des matières
Liste des élément fournis . . . . . . . . . . . . . . . . . . . . . . . . . . . . . . . . . . . . . . . . . 32
Consignes de sécurité . . . . . . . . . . . . . . . . . . . . . . . . . . . . . . . . . . . . . . . . . . . 33
Précautions relatives à l'emplacement de montage du projecteur . . . . . . . 34
Installation . . . . . . . . . . . . . . . . . . . . . . . . . . . . . . . . . . . . . . . . . . . . . . . . . . . . . 35
Retrait de la plaque de plafond de la plaque du projecteur . . . . . . . . . . . . . . . . . . . . . .
Installation de la plaque de plafond au plafond . . . . . . . . . . . . . . . . . . . . . . . . . . . . . . .
Montage sur un plafond en béton . . . . . . . . . . . . . . . . . . . . . . . . . . . . . . . . . . . . . . . . .
Fixation de la plaque du projecteur sur le projecteur . . . . . . . . . . . . . . . . . . . . . . . . . . .
Fixation de la plaque du projecteur sur la plaque du plafond . . . . . . . . . . . . . . . . . . . .
35
35
36
37
39
Réglage de l'angle d'installation . . . . . . . . . . . . . . . . . . . . . . . . . . . . . . . . . . . 40
Relever ou abaisser les images projetées . . . . . . . . . . . . . . . . . . . . . . . . . . . . . . . . . . . 40
Inclinaison des images projetées vers la droite ou vers la gauche . . . . . . . . . . . . . . . . 41
Installation des cordons de sécurité . . . . . . . . . . . . . . . . . . . . . . . . . . . . . . . . 42
Questions. . . . . . . . . . . . . . . . . . . . . . . . . . . . . . . . . . . . . . . . . . . . . . . . . . . . . . 44
Spécifications . . . . . . . . . . . . . . . . . . . . . . . . . . . . . . . . . . . . . . . . . . . . . . . . . . 44
31
Liste des élément fournis
Vérifiez, à l'aide de la liste suivante, que vous disposez bien de tous les éléments fournis. Si
un élément s'avérait manquant ou endommagé, contactez votre revendeur.
Y Plaque de
plafond
Y Plaque de projecteur
La plaque de plafond et la plaque de projecteur sont préassemblées.
Séparez-les avant de commencer l'installation.
Y Vis de montage du
projecteur : 4 (M6 x 16)
Y Clé à six pans (M6)
Y Clé à six pans (M8)
Y Cordons de sécurité : 2
(1,5 m, φ 1,5 mm)
Y Clips de cordon : 2
Y Guide de l’utilisateur
(ce manuel)
3
17
31
45
59
73
87
101
32
Consignes de sécurité
Nous vous remercions vivement de l’achat de ce produit. Lisez attentivement le présent
document afin d'assembler et installer ce produit en toute sécurité et de manière correcte.
Respectez scrupuleusement les consignes de sécurité. Conservez ces instructions à portée
de main pour résoudre les points que vous ne comprenez pas.
Pour une utilisation sûre et correcte de ce produit, des symboles figurent dans ce guide et
sur l'appareil afin d’indiquer un éventuel danger pour l’utilisateur ou d’autres personnes et le
risque de dégâts matériels. Les indications et leur signification sont les suivantes. Assurezvous de bien les comprendre avant de lire le guide.
Avertissement
Mise en garde
Ce symbole indique des informations dont le nonrespect risque d'entraîner des blessures graves, voire
mortelles, en raison d'une manipulation incorrecte.
Ce symbole indique des informations dont le nonrespect risque d'entraîner des dommages corporels
ou matériels, en raison d'une manipulation incorrecte.
Lisez attentivement les mises en garde dans "Consignes de sécurité/Guide d'assistance et
de service" fournies avec votre projecteur avant de commencer l'installation pour
déterminer un emplacement approprié pour l'installer.
Avertissement
vL'installation doit être effectuée par des spécialistes ayant les compétences
techniques et le savoir-faire nécessaires.
Une installation ou un assemblage incomplet risquerait de causer la chute du projecteur
et de la fixation de plafond, et de provoquer des blessures.
vN'installez pas la fixation de plafond sur une surface inclinée ou fragile.
Le plafond doit être suffisamment solide pour y installer le projecteur et la fixation de
plafond. Avant de commencer l'installation, vérifiez soigneusement le poids du projecteur
et de la fixation de plafond. Assurez-vous que le plafond est suffisamment solide et
utilisez les méthodes les plus appropriés pour éviter la chute du projecteur.
vSuivez toujours les instructions ci-dessous pour installer la fixation de plafond. En
cas de mauvaise installation, le projecteur et la fixation de plafond risquent de
chuter et de provoquer des blessures.
• Vérifiez la structure et les matériaux de l'emplacement du montage et utilisez les
méthodes de construction les plus appropriées.
• Ne suspendez pas et ne montez pas autre chose que le projecteur spécifié sur la
fixation de plafond. Les projecteurs pouvant être montés sur cette fixation de plafond
sont répertoriés dans les catalogues.
• Ne vous suspendez pas à la fixation de plafond et ne forcez pas dessus pendant ou
après l'installation.
• Serrez bien les vis. De plus, ne desserrez ou ne retirez jamais des vis négligemment
lors du montage ou du retrait de la fixation de plafond.
• Ne démontez pas la fixation de plafond et n'y apportez pas de modifications à moins
que ce ne soit indiqué dans ce manuel.
33
Avertissement
vInstallez le cordon de sécurité fourni pour éviter toute chute du projecteur.
Le cordon de sécurité permet également d'éviter le balancement du projecteur en cas de
tremblement de terre ou de vibrations. sp.42
vL'application d'une colle pour bloquer les vis ou d'un lubrifiant, d'huile ou autre
substance sur les points où le projecteur est attaché à la fixation de plafond risque
de fissurer le boîtier et de provoquer la chute du projecteur, causant alors des
dommages matériels ou des blessures. N'utilisez aucune sorte d'adhésif, lubrifiant
ou huile lors de l'installation ou du réglage de la fixation de plafond.
vNe desserrez jamais les boulons, vis ou écrous après l'installation. Vérifiez régulièrement
qu'aucune vis ne se desserre. Si l'une d'elles est desserrée, resserrez-la à fond.
vN'utilisez pas la fixation de plafond et confiez toutes les réparations à un
technicien qualifié dans les circonstances suivantes :
• La fixation de plafond a chuté ou s'est brisée pendant ou après l'installation.
• Vous rencontrez des problèmes avec les éléments fournis ou ces derniers ne
fonctionnent pas correctement.
vNe tirez pas fortement ou ne pincez pas le cordon d'alimentation du projecteur au
cours de l'installation.
Contactez votre revendeur si les fils du cordon d'alimentation sont exposés ou rompus.
Mise en garde
Deux personnes au moins sont nécessaires pour l'installation. Munissez-vous d'un
échafaud robuste pour effectuer ce travail.
Sinon, vous risqueriez de tomber ou faire chuter le projecteur et provoquer des blessures.
Précautions relatives à l'emplacement
de montage du projecteur
Lisez attentivement les mises en garde dans "Consignes de sécurité/Guide d'assistance et
de service" fournies avec votre projecteur avant de commencer l'installation pour
déterminer un emplacement approprié pour l'installer. Prêtez notamment attention aux
éléments suivants.
vMettez en place le projecteur à un endroit à l'abri de la lumière directe du soleil ou d'une
lumière vive de lampes fluorescentes pour ne pas qu'elles interfèrent avec le récepteur de
la télécommande. Une lumière vive dirigée vers le récepteur de la télécommande peut
perturber le fonctionnement de cette dernière.
vInstallez le projecteur loin d'une sortie d'air conditionné ou d'autres appareils similaires.
vPour limiter l'effet de parasites, placez de préférence le projecteur de façon à ce que le
câble qui le relie à un ordinateur ou d'autres appareils ne dépasse pas les 20 mètres.
vLe projecteur doit être installé à un endroit à l'abri de la poussière et de l'humidité pour
que l'objectif et les éléments optiques internes ne se salissent pas.
34
vN'installez pas le projecteur dans un endroit qui excède sa plage de température de
fonctionnement. Cela risque de causer des dysfonctionnements.
vFermer les rideaux dans une pièce claire permet de mieux voir l'image projetée.
Installation
Retrait de la plaque de plafond de la plaque du
projecteur
À la sortie de l'usine, la plaque de plafond est fixée sur la plaque du projecteur.. Suivez la
procédure indiquée ci-après pour les séparer.
Procédure
A Retirez les vis de réglage de l'inclinaison
verticale situées des deux côtés à l'aide
de la clé à six pans fournie (M8).
B Retirez la plaque de plafond de la plaque
du projecteur.
Installation de la plaque de plafond au plafond
Déterminez la distance par rapport à l'écran et l'emplacement de montage avant de monter
la plaque de plafond.
La distance dépend du type de l'unité d'objectif installée dans le projecteur. Reportez-vous
au Guide de l'utilisateur fourni avec le projecteur ou l'unité d'objectif.
35
Procédure
Servez-vous du gabarit de plafond pour percer les trous de montage des boulons dans le
plafond.
Gabarit de plafond (unités : mm)
160
80
Positionnez le côté de cette
forme découpée face à l'écran.
93
80
40
Le centre de rotation
lors du réglage
horizontal
14
100
186
Trous du réglage de rotation horizontale
251
La direction du projecteur peut être réglée
jusqu'à ±5 degrés en le tournant.
200,4
Montage sur un plafond en béton
Pour installer la fixation de plafond sur un plafond en béton, utilisez 4 boulons d'ancrage
(M12). Vous pouvez vous procurer les boulons d'ancrage dans le commerce.
Avertissement
vAssurez-vous à l'avance que le béton sur lequel vous installez ce produit
pourra supporter le poids et le mouvement latéral du projecteur ainsi que la
fixation de plafond. Si le béton n'est pas suffisamment solide ou s'il est
détérioré, renforcez-le avec des barres ou du matériel similaire.
vInstallez les boulons d'ancrage selon les spécifications et les méthodes du
fabricant du matériel pour éviter qu'ils ressortent, se desserrent ou se
décalent.
vSerrez fermement les vis au cours de l'installation ou après avoir réglé les
angles.
Après avoir serré les vis, serrez-les de nouveau fermement et assurez-vous qu'elles
ne sont pas desserrées.
vEpson décline toute responsabilité en cas de chute du projecteur et de la
plaque de plafond due à une mauvaise installation.
36
Ancrages de type femelle
Béton
Surface du plafond
Boulons
sans tête
Écrou à six pans
Rondelles
plates
Au moins 3 filetages
Rondelles à ressort
Écrou à six pans
La plaque de plafond peut être tournée horizontalement de ±5 degrés. Réglez la direction
du projecteur à l'aide de quatre boulons partiellement serrés. Après avoir réglé la direction,
serrez les écrous à six pans fermement.
Le centre de la rotation
lors du réglage de la direction
Fixation de la plaque du projecteur sur le projecteur
Avertissement
vSerrez bien toutes les vis.
Après avoir serré les vis, serrez-les de nouveau et assurez-vous qu'elles ne sont
pas desserrées.
vUtilisez les cordons de sécurité fournis pour éviter toute chute du projecteur.
sp.42
vL'application d'une colle pour bloquer les vis ou d'un lubrifiant, d'huile ou
autre substance sur les points où le projecteur est attaché à la fixation de
plafond risque de fissurer le boîtier et de provoquer la chute du projecteur,
causant alors des dommages matériels ou des blessures. N'utilisez aucune
sorte d'adhésif, lubrifiant ou huile lors de l'installation ou du réglage de la
fixation de plafond.
37
Procédure
A Desserrez les quatre vis à l'aide de la clé
à six pans M6 fournie, puis tirez les
crochets vers l'extérieur.
Trou de réglage de l'inclinaison verticale
B Montez-la sur les poignées du projecteur
avec les trous de réglage de l'inclinaison
verticale tournés vers l'arrière du
projecteur.
Alignez les trous
des vis sur les
poignées avec ceux
des crochets.
38
C Poussez les quatre crochets vers
l'intérieur pour les fixer aux poignées. À
ce moment, alignez les trous des vis sur
les poignées avec ceux des crochets.
Serrez les vis fixées aux
crochets.
Insérez les vis fournies dans les
trous des vis et serrez-les.
D Serrez la vis fixée au crochet à l'aide de
la clé à six pans M6. Insérez l'une des vis
fournies dans le trou de vis sur le
crochet et serrez-la à l'aide de la clé à six
pans.
Fixez les trois autres crochets de la même
manière en serrant leurs vis.
Mise en garde
Utilisez exclusivement les vis fournies pour fixer
le projecteur et la plaque du projecteur.
Fixation de la plaque du projecteur sur la plaque du
plafond
Procédure
A Placez la tige de la plaque du projecteur
dans les rainures de la plaque de plafond
et insérez-la fermement dans les
emplacements en forme de fer à cheval.
Ne retirez pas vos mains du projecteur
avant la fin du montage.
B Insérez les vis des points de réglage de
Serrez les vis à la hauteur de ces marques
pour que le projecteur soit positionné
presque horizontalement. Utilisez-les
comme repères.
l'angle vertical qui avaient été retirées
lors du retrait de la plaque de plafond de
la plaque du projecteur dans les trous
des vis.
Serrez les deux vis situées dans les points
de réglage de l'angle comme dans
l'illustration de gauche à l'aide de la clé à six
pans M8 fournie pour fixer le projecteur.
Pour plus d'informations sur le réglage de
l'angle du projecteur, reportez-vous à la
section suivante intitulée "Réglage de
l'angle d'installation".
39
C Serrez les vis des points de réglage du
roulis horizontal comme dans
l'illustration de gauche pour fixer le
projecteur.
Pour plus d'informations sur le réglage de
l'angle du projecteur, reportez-vous à la
section suivante intitulée "Réglage de
l'angle d'installation".
Réglage de l'angle d'installation
Relever ou abaisser les images projetées
Si les images sont projetées plus haut ou plus bas que l'écran, réglez la position de la
projection avec le décalage d'objectif du projecteur.
Pour décaler la position de la projection verticalement au-delà de la limite de réglage du
décalage de l'objectif, effectuez les opérations suivantes pour incliner le projecteur dans
l'une ou l'autre direction de 5 degrés supplémentaires.
Il se peut que les images projetées soient déformées lors de l'inclinaison du projecteur. Les
images déformées de façon trapézoïdale peuvent être corrigées à l'aide du réglage
Keystone. Toutefois, vous risquez de perdre la mise au point de l'image en augmentant
l'angle d'inclinaison.
Pour plus d'informations sur le décalage de l'objectif et la fonction Keystone, reportez-vous
au Guide de l'utilisateur fourni avec le projecteur.
Avertissement
vNe desserrez jamais et ne retirez pas des vis sans raison lors du réglage de
l'angle.
En effet, le projecteur risque de tomber et de provoquer un accident.
vResserrez toutes les vis et assurez-vous qu'elles ne sont pas desserrées suite
au réglage.
40
Procédure
A Desserrez les vis de réglage de l'angle
vertical situées des deux côtés à l'aide
de la clé à six pans M8.
B Inclinez l'arrière du projecteur
verticalement pour régler l'angle jusqu'à
ce que la position des images projetées
corresponde à l'écran.
C Après avoir réglé l'angle, serrez les vis
des deux côtés à l'aide de la clé à six
pans M8.
Inclinaison des images projetées vers la droite ou vers
la gauche
Si l'image projetée est inclinée vers la droite ou vers la gauche par rapport à l'écran, inclinez le
projecteur de ±5 degrés pour régler la position de la projection en effectuant les étapes suivantes.
Avertissement
vNe desserrez jamais et ne retirez pas des vis sans raison lors du réglage de l'angle.
En effet, le projecteur risque de tomber et de provoquer un accident.
vResserrez toutes les vis et assurez-vous qu'elles ne sont pas desserrées suite
au réglage.
Procédure
A Desserrez les vis de réglage du roulis
horizontal situées des deux côtés à l'aide
de la clé à six pans M8.
B Inclinez le projecteur vers la gauche ou
vers la droite pour régler l'angle jusqu'à
ce que la position des images projetées
corresponde à l'écran.
C Après avoir réglé l'angle, serrez les vis
des deux côtés à l'aide de la clé à six
pans M8.
41
Installation des cordons de sécurité
Après avoir installé le projecteur au plafond,
faites passer les 2 cordons fournis en diagonale
à travers le projecteur à l'aide des clips de
cordon pour éviter toute chute du projecteur.
Avertissement
vAssurez-vous à l'avance que le béton sur lequel vous installez ce produit
pourra supporter le poids et le mouvement latéral du projecteur ainsi que la
fixation de plafond. Si le béton n'est pas suffisamment solide ou s'il est
détérioré, renforcez-le avec des barres ou du matériel similaire.
vInstallez les boulons d'ancrage selon les spécifications et les méthodes du
fabricant du matériel pour éviter qu'ils ressortent, se desserrent ou se
décalent.
Procédure
À moins d'1 m
(recommandé)
À moins d'1 m
(recommandé)
A Installez deux boulons d’ancrage vendus
dans le commerce en diagonale sur le
plafond.
Il est recommandé de placer les boulons
d'ancrage à moins d'1 mètre du centre du
projecteur.
Utilisez des boulons d'ancrage M12.
Boulon d'ancrage (M12)
Rondelle plate
(φ 24 - φ 26 mm)
Rondelle à
ressort
Écrou à six
pans
42
B Formez une boucle avec les deux
Boulon d'ancrage
Cordon de
sécurité
cordons de sécurité autour des deux
boulons et serrez-les fermement.
Assurez-vous que les boucles des cordons
se situent sous les rondelles plates, et
serrez ensuite les écrous à six pans.
Clip de cordon
C Desserrez les vis du clip de cordon, et
faites passer l'extrémité du cordon de
sécurité à travers le clip de cordon et à
travers un trou d'un crochet de la plaque
du projecteur.
D Tirez l'extrémité du cordon sous la
poignée et faites-le passer à travers le
clip de cordon.
E Tendez le cordon de sécurité autant que
possible sans déplacer la position de
l'image projetée, puis serrez les vis du
clip de cordon partiellement pour
sécuriser le cordon.
Mise en garde
Vérifiez les points suivants après avoir installé le cordon de sécurité. Si jamais le cordon est
endommagé, remplacez-le par une corde vendue dans le commerce d'un diamètre de
1,5 mm ou plus.
vLe cordon n'est pas usé ou effilé.
vLe cordon n'est pas plié sur un angle tranchant du bord de la rondelle
plate ou d'un autre objet.
F Répétez les étapes 3 à 5 pour l’autre
cordon de sécurité et attachez-le au
projecteur également.
G Une fois les cordons de sécurité
installés, déplacez les clips de cordon
dans la direction indiquée dans
l'illustration et serrez les vis des clips.
Mise en garde
vSi les cordons de sécurité sont trop courts pour l'emplacement que vous avez choisi pour
l'installation du projecteur, procurez-vous des cordes dans le commerce d'un diamètre de
1,5 mm ou plus.
vDécoupez le surplus de corde après l'installation.
43
Questions
Les questions peuvent être adressées aux coordonnées fournies dans le manuel du
projecteur.
Spécifications
Dimensions
495,6 (L) x 109 (H) x 384 (P) mm
Poids
Environ 13,5 kg
Limite de réglage
Réglage de l'inclinaison verticale
0 à ±5°
Réglage du roulis horizontal
0 à ±5°
Réglage de rotation horizontale
0 à ±5°
Réglage de l'inclinaison
verticale
44
Réglage du roulis
horizontal
Réglage de rotation
horizontale
Inhaltsverzeichnis
Liste mitgelieferter Teile . . . . . . . . . . . . . . . . . . . . . . . . . . . . . . . . . . . . . . . . . . 46
Sicherheitsanweisungen . . . . . . . . . . . . . . . . . . . . . . . . . . . . . . . . . . . . . . . . . 47
Vorsichtsmaßregeln zur Wahl des Aufstellungsorts des Projektors . . . . . . 48
Aufstellung. . . . . . . . . . . . . . . . . . . . . . . . . . . . . . . . . . . . . . . . . . . . . . . . . . . . . 49
Entfernen der Deckenplatte von der Projektorplatte . . . . . . . . . . . . . . . . . . . . . . . . . . .
Installieren der Deckenplatte an der Decke . . . . . . . . . . . . . . . . . . . . . . . . . . . . . . . . . .
Montage an einer Betondecke . . . . . . . . . . . . . . . . . . . . . . . . . . . . . . . . . . . . . . . . . . . .
Anbringen der Projektorplatte am Projektor . . . . . . . . . . . . . . . . . . . . . . . . . . . . . . . . . .
Anbringen der Projektorplatte an der Deckenplatte . . . . . . . . . . . . . . . . . . . . . . . . . . . .
49
49
50
51
53
Einstellen des Installationswinkels . . . . . . . . . . . . . . . . . . . . . . . . . . . . . . . . . 54
Höher- und Niedrigerstellen der projizierten Bilder . . . . . . . . . . . . . . . . . . . . . . . . . . . . 54
Neigen der projizierten Bilder nach rechts oder links . . . . . . . . . . . . . . . . . . . . . . . . . . 55
Installieren der Sicherheitsdrähte . . . . . . . . . . . . . . . . . . . . . . . . . . . . . . . . . . 56
Anfragen. . . . . . . . . . . . . . . . . . . . . . . . . . . . . . . . . . . . . . . . . . . . . . . . . . . . . . . 58
Technische Daten . . . . . . . . . . . . . . . . . . . . . . . . . . . . . . . . . . . . . . . . . . . . . . . 58
45
Liste mitgelieferter Teile
Überprüfen Sie die folgende Liste, um sich zu vergewissern, dass alle Teile mitgeliefert
wurden. Wenden Sie sich bitte an Ihren Händler, falls etwas fehlt oder beschädigt ist.
Y Deckenplatte
Y Projektorplatte
Die Deckenplatte und Projektorplatte sind vormontiert.
Trennen Sie sie vor dem Beginn der Installation.
Y Projektormontageschrauben: 4 Stck. (M6 x 16)
Y Sechskantschlüssel (M6)
Y Sechskantschlüssel (M8)
Y Sicherheitsdraht: 2 Stck.
(1,5 m, φ 1,5 mm)
Y Drahtclips: 2 Stck.
Y Bedienungsanleitung
(dieses Handbuch)
3
17
31
45
59
73
87
101
46
Sicherheitsanweisungen
Wir bedanken uns bei Ihnen für den Kauf dieses Produkts. Lesen Sie diese Anleitung
sorgfältig durch, damit Sie dieses Produkt sicher und ordnungsgemäß montieren und
installieren. Beachten Sie die folgenden Sicherheitmaßregeln. Bewahren Sie diese
Anweisung griffbereit auf, um mögliche unklare Punkte schnell klären zu können.
Um eine sichere und ordnungsgemäße Verwendung dieses Produkts zu gewährleisten,
finden sich in dieser Anleitung und am Produkt Symbole, die auf mögliche Gefahren für den
Benutzer oder weitere Personen sowie auf das Risiko von Sachschäden hinweisen. Die
Hinweise und ihre Bedeutung sind wie folgt. Stellen Sie sicher, dass Sie diese genau
verstanden haben, bevor Sie die Bedienungsanleitung lesen.
Warnung
Gefahr
Dieses Symbol verweist auf Informationen, deren
Nichtbeachtung zu tödlichen Verletzungen oder Verletzungen
von Personen wegen unsachgemäßen Gebrauchs führen kann.
Dieses Symbol verweist auf Informationen, die durch falsche
Handhabung zu Personen- oder Sachschäden führen können,
wenn sie nicht beachtet werden.
Lesen Sie sorgfältig die Warnungen in den mit dem Projektor mitgelieferten
"Sicherheitsanweisungen und die Anleitung Support und Service", bevor Sie die Installation
beginnen, um einen geeigneten Aufstellungsort zu wählen.
Warnung
vDie Aufstellungsarbeiten sollten nur von qualifiziertem Fachpersonal mit dem erforderlichen
technischen Know-how und den erforderlichen Fertigkeiten ausgeführt werden.
Unvollständige Montage oder Installation kann Herunterfallen des Projektors und der
Deckenhalterung mit Unfallgefahr verursachen.
vInstallieren Sie die Deckenhalterung nicht an einer geneigten oder schwachen Oberfläche.
Die Decke muss ausreichend stark zur Installation von Projektor und Deckenhalterung sein.
Vor dem Starten der Installation prüfen Sie sorgfältig das Gewicht des Projektors und der
Deckenhalterung. Stellen Sie sicher, dass die Decke ausreichend stark ist, und verwenden
Sie das am besten geeignete Verfahren, um Herunterfallen des Projektors zu vermeiden.
vFolgen Sie immer den untenstehenden Anweisungen zur Installation der
Deckenhalterung. Wenn die Einbauarbeit nicht richtig ausgeführt wird, können der
Projektor und die Deckenhalterung herunterfallen und Verletzungen verursachen.
• Prüfen Sie die Struktur und die Materialien der Anbringungsstelle und verwenden Sie
die am besten geeignete Konstruktionsmethode.
• Hängen oder montieren Sie keine anderen Gegenstände als den vorgeschriebenen
Projektor an der Deckenhalterung an. Die an dieser Deckenhalterung montierbaren
Projektors sind in den Katalogen aufgeführt.
• Während oder nach der Installation nicht an der Deckenhalterung aufhängen oder zu
starke Kraft daran anlegen.
• Ziehen Sie die Schrauben fest an. Lösen oder entfernen Sie außerdem niemals
unachtsam Schrauben beim Anbringen oder Abnehmen der Deckenhalterung.
• Zerlegen oder modifizieren Sie niemals die Deckenhalterung, wenn nicht ausdrücklich
im Handbuch angegeben.
47
Warnung
vBringen Sie den mitgelieferten Sicherheitsdraht an, um den Projektor am
Herunterfallen zu hindern.
Der Sicherheitsdraht verhindert auch Schwingen des Projektors bei Erdbeben oder
Vibrationen. sS.56
vDurch Auftragen von Gewindebindemittel. Schmiermittel, Öl oder andere
Substanzen auf die Stellen, an denen der Projektor an der Deckenhalterung
befestigt ist, können Risse im Gehäuse verursacht werden und Herunterfallen des
Projektors bewirkt werden, wobei die Gefahr von Schäden oder Verletzungen
besteht. Verwenden Sie keine Klebstoffe, Schmiermittel oder Öle beim Anbringen
oder Einstellen der Deckenhalterung.
vLösen Sie nach der Installation keine Steckschrauben, Schrauben oder Muttern.
Prüfen Sie regelmäßig, ob sich keine Schrauben gelöst haben. Falls Sie eine
lockere Schraube finden, ziehen Sie sie fest an.
vIn den folgenden Fällen müssen Sie die Verwendung der Deckenhalterung
beenden und sich an einen qualifizierten Kundendiensttechniker wenden:
• Die Deckenhalterung fiel vor oder während der Installation herunter oder wurde beschädigt.
• Die mitgelieferten Teile haben Probleme und arbeiten nicht richtig.
vZiehen Sie bei der Installation nicht stark am Netzkabel des Projektors oder
klemmen es ein.
Wenden Sie sich an Ihren Händler, wenn die Drähte des Netzkabels freiliegen oder
beschädigt sind.
Gefahr
Mindestens zwei Personen werden für die Installation benötigt. Stellen Sie sicher,
dass ein solides Gerüst für diese Arbeit bereitgestellt wird.
Sie könnten stürzen oder den Projektor fallenlassen, wobei die Gefahr von Verletzungen besteht.
Vorsichtsmaßregeln zur Wahl des
Aufstellungsorts des Projektors
Lesen Sie sorgfältig die Warnungen in den mit dem Projektor mitgelieferten "Sicherheitsanweisungen
und die Anleitung Support und Service", bevor Sie die Installation beginnen, um einen geeigneten
Aufstellungsort zu wählen. Insbesondere achten Sie auf die folgenden Punkte.
vStellen Sie den Projektor so auf, dass kein direktes Sonnenlicht oder starkes Licht von
Leuchtstofflampen auf den Infrarotempfänger der Fernbedienung trifft. Wenn starkes Licht
auf den Infrarotempfänger der Fernbedienung trifft, kann die richtige Funktion der
Fernbedienung beeinträchtigt werden.
vInstallieren Sie den Projektor so, dass er vor dem Luftauslass von Klimageräten oder
ähnlichen Geräten entfernt ist.
vUm die Auswirkung externen Rauschens zu begrenzen, empfehlen wir, den Projektor so
zu positionieren, dass das Anschlusskabel zu einem Computer oder anderen Geräten
nicht länger als 20 Meter ist.
48
vDer Projektor sollte an einem Ort installiert werden, der frei von Staub und Feuchtigkeit
ist, um Verschmutzung der inneren optischen Teile zu vermeiden.
vInstallieren Sie den Projektor nicht an einem Ort, wo die Temperatur außerhalb des
zulässigen Betriebstemperaturbereichs ist. Dadurch können Verformungen verursacht
werden.
vDurch Schließen der Vorhänge in einem hellen Raum wird das projizierte Bild besser
sichtbar.
Aufstellung
Entfernen der Deckenplatte von der Projektorplatte
Die Deckenplatte ist werkseitig an der Projektorplatte angebracht. Der Teile können wie
folgt getrennt werden.
Vorgehen
A Entfernen Sie die Schrauben für die
vertikale Neigungswinkel-Einstellpunkte
an beiden Seiten mit dem mitgelieferten
Sechskantschlüssel (M8).
B Entfernen Sie die Deckenplatte von der
Projektorplatte.
Installieren der Deckenplatte an der Decke
Bestimmen Sie den Abstand zum Bildschirm und legen Sie die Montageposition fest, bevor
Sie die Deckenplatte anbringen.
Der Abstand variiert je nach Typ der am Projektor angebrachten Objektiveinheit. Siehe mit
dem Projektor oder der Objektiveinheit mitgelieferte "Bedienungsanleitung".
49
Vorgehen
Beziehen Sie sich auf die Deckenschablone zum Ausschneiden der Montageöffnungen für
die Steckschrauben in die Decke.
Deckenschablone (Einheiten: mm)
160
80
Drehen Sie die Seite dieses
Ausschnitts zum Bildschirm.
93
80
40
Die Mitte der
Drehung bei der
horizontalen
Einstellung.
14
100
186
Öffnungen für horizontale
Drehungseinstellung
251
Die Richtung des Projektors kann bis zu ±5
Grad durch Drehung angepasst werden.
200,4
Montage an einer Betondecke
Beim Installieren der Deckenhalterung an einer Betondecke verwenden Sie 4
Ankerschrauben (M12). Sie müssen im Fachhandel erhältliche Ankerschrauben besorgen.
Warnung
vStellen Sie im Voraus sicher, dass der Beton, an dem dieses Produkt installiert
wird, das Gewicht und die Querbewegung von Projektor und Deckenhalterung
tragen kann. Wenn der Beton nicht stark genug ist oder geschwächt wurde,
verwenden Sie Verstärkungsträger oder ähnliche Hilfsmittel.
vInstallieren Sie die Ankerschrauben entsprechend den Spezifikationen und
Methoden der Hersteller der Materialien, damit sie nicht herauskommen, sich
lösen oder sich verschieben können.
vZiehen Sie die Schrauben bei der Installation oder nach dem Einstellen der
Winkel sicher fest.
Nach dem Festziehen der Schrauben ziehen Sie diese fest an und stellen sicher,
dass sie nicht locker sind.
vEpson übernimmt keine Verantwortung für Herunterfallen des Projektors
wegen.
50
Weibchen-Anker
Beton
Hängerschrauben
Deckenoberfläche
Sechskantmutter
Flache
Unterlegscheiben
Sechskantmutter
Mindestens 3 Fäden
FederUnterlegscheiben
Die Deckenplatte kann horizontal um ±5 Grad gedreht werden. Stellen Sie die Richtung des
Projektors ein während die vier Steckschrauben locker angezogen sind. Nach dem
Einstellen der Richtung ziehen Sie die Sechskantschrauben fest an.
Mitte der Drehung
beim Einstellen der Richtung
Anbringen der Projektorplatte am Projektor
Warnung
vZiehen Sie alle Schrauben fest an.
Nach dem Sichern der Schrauben ziehen Sie diese erneut fest an und stellen sicher,
dass sie nicht locker sind.
vVerwenden Sie die mitgelieferten Sicherheitsdrähte, um den Projektor am
Herunterfallen zu hindern. sS.56
vDurch Auftragen von Gewindebindemittel. Schmiermittel, Öl oder andere
Substanzen auf die Stellen, an denen der Projektor an der Deckenhalterung
befestigt ist, können Risse im Gehäuse verursacht werden und Herunterfallen
des Projektors bewirkt werden, wobei die Gefahr von Schäden oder
Verletzungen besteht. Verwenden Sie keine Klebstoffe, Schmiermittel oder
Öle beim Anbringen oder Einstellen der Deckenhalterung.
51
Vorgehen
A Lösen Sie die vier Schrauben mit dem
mitgelieferten M6-Sechskantschlüssel
und ziehen Sie die Haken nach außen.
Vertikales Neigungungseinstellloch
B Bringen Sie das Teil an den Griffen des
Projektors an, während die vertikalen
Neigungseinstellöcher nach hinten
gedreht sind.
Richten Sie die
Schraubenlöcher an
den Griffen und an
den Haken aus.
52
C Drücken Sie die vier Haken nach innen,
um die Handgriffe anzubringen. Dabei
richten Sie die Schraubenlöcher an den
Griffen und an den Haken aus.
Sichern Sie die an den Haken
angebrachten Schrauben.
Führen Sie die mitgelieferten
Sbn durch die Schraubenlöcher
und sichern Sie diese.
D Sichern Sie die an dem Haken
angebrachten Schraube mit dem M6Sechskantschlüssel. Setzen Sie eine der
mitgelieferten Schrauben in das
Schraubenloch am Haken und sichern
Sie sie mit dem Sechskantschlüssel.
Befestiten Sie die anderen drei Haken auf
gleiche Weise, indem Sie ihre Schrauben
festziehen.
Gefahr
Verwenden Sie immer die mitgelieferten
Schrauben zur Sicherung des Projektors und
der Projektorplatte.
Anbringen der Projektorplatte an der Deckenplatte
Vorgehen
A Setzen Sie den Schaft der Projektorplatte
in die Nuten an der Deckenplatte und
platzieren Sie sie sicher in den
hufeisenförmigen Punkten.
Nehmen Sie Ihre Hände nicht von dem
Projektor, bevor die Montage
abgeschlossen ist.
B Setzen Sie die Schrauben für die
Sichern Sie die Schrauben an der Höhe
dieser Markierungen, so dass der Projektor
fast horizontal angebracht ist. Verwenden
Sie sie als Führung.
vertikalen Winkeleinstellpunkte, die beim
Abnehmen der Deckenplatte vom
Projektor entfernt wurden, in die
Schraubenlöcher.
Sichern Sie die beiden Schrauben in den
Winkeleinstellpunkten, wie in der Abbildung
links gezeigt mit dem mitgelieferten M8Sechskantschlüssel zur Befestigung des
Projektors. Einzelheiten zur Einstellung des
Projektorwinkels siehe nächsten Abschnitt
"Einstellen des Installationswinkels".
53
C Sichern Sie die Schrauben für
horizontalen Rolleinstellpunkte wie in
der Abbildung links gezeigt zur
Befestigung des Projektors.
Einzelheiten zur Einstellung des
Projektorwinkels siehe nächsten Abschnitt
"Einstellen des Installationswinkels".
Einstellen des Installationswinkels
Höher- und Niedrigerstellen der projizierten Bilder
Wenn die Bilder im Bezug auf die Leinwand zu hoch oder zu niedrig projiziert werden,
stellen Sie die Projektionspsotion mit dem Objektivversatz am Projektor ein.
Wenn die Projektionsposition vertikal über den Einstellbereich des Objektivversatzes
verschoben wird, kann die Position weitere 5 Grad in beide Richtungen durch Neigen des
Projektors in den folgenden Schritten eingestellt werden.
Beim Neigen des Projektors können die projizierten Bilder verzerrt werden. Die in
Trapezform verzerrten Bilder können mit der Trapezverzerrungseinstellung korrigiert
werden. Bei zunehmendem Neigungswinkel kann das BIld aber unscharf werden.
Einzelheiten zu Objektivversatz und Trapezverzerrung siehe Siehe mit dem Projektor
mitgelieferte "Bedienungsanleitung".
Warnung
vLösen Sie beim Einstellen des Winkels keine Schrauben unnötig.
Wenn das geschieht, könnte der Projektor herunterfallen und einen Unfall
verursachen.
vZiehen Sie alle Schrauben nach der Einstellung erneut fest an und stellen
sicher, dass sie nicht locker sind.
54
Vorgehen
A Lösen Sie die Schrauben für die vertikalen
Winkel-Einstellpunkte an beiden Seiten
mit dem Sechskantschlüssel (M8).
B Neigen Sie die Rückseite des Projektors
vertikal zur Winkeleinstellung, bis die
Position der projizierten Bilder der
Leinwand entspricht.
C Lösen Sie die Schrauben für die vertikalen
Winkel-Einstellpunkte an beiden Seiten
mit dem Sechskantschlüssel (M8).
Neigen der projizierten Bilder nach rechts oder links
Wenn das projizierte Bild in Bezug zur Leinwand nach rechts oder links geneigt wird, neigen Sie
den Projektor um ±5 Grad, um die Projektionsposition mit den folgenden Schritten einzustellen.
Warnung
vLösen Sie beim Einstellen des Winkels keine Schrauben unnötig.
Wenn das geschieht, könnte der Projektor herunterfallen und einen Unfall verursachen.
vZiehen Sie alle Schrauben nach der Einstellung erneut fest an und stellen
sicher, dass sie nicht locker sind.
Vorgehen
A Lösen Sie die Schrauben für die
horizontalen Roll-Einstellpunkte an
beiden Seiten mit dem
Sechskantschlüssel (M8).
B Neigen Sie den Projektor nach links oder
rechts zur Winkeleinstellung, bis die
Position der projizierten Bilder der
Leinwand entspricht.
C Lösen Sie die Schrauben für die
vertikalen Winkel-Einstellpunkte an
beiden Seiten mit dem
Sechskantschlüssel (M8).
55
Installieren der Sicherheitsdrähte
Nach der Montage des Projektors an der Decke
führen Sie die 2 mitgelieferten Drähte diagonal
mit den Drahtclips durch den Projektor, um
Herunterfallen des Projektors zu verhindern.
Warnung
vStellen Sie im Voraus sicher, dass der Beton, an dem dieses Produkt
installiert wird, das Gewicht und die Querbewegung von Projektor und
Deckenhalterung tragen kann. Wenn der Beton nicht stark genug ist oder
geschwächt wurde, verwenden Sie Verstärkungsträger oder ähnliche
Hilfsmittel.
vInstallieren Sie die Ankerschrauben entsprechend den Spezifikationen und
Methoden der Hersteller der Materialien, damit sie nicht herauskommen, sich
lösen oder sich verschieben können.
Vorgehen
Innerhalb von 1 m
(empfohlen)
Innerhalb von 1 m
(empfohlen)
A Bringen Sie zwei im Fachhandel
erhältliche Ankerschrauben diagonal an
der Decke an.
Wir empfehlen, die Ankerschrauben
innerhalb von 1 m von der Mitte des
Projektors zu platzieren.
Verwenden Sie M12-Ankerschrauben.
Ankerschraube (M12)
Flache
Unterlegscheibe
(φ 24 - φ 26 mm)
FederUnterlegscheibe
Sechskantmutter
56
B Führen Sie die beiden Sicherheitsdrähte
Ankerschraube
Sicherheitsdraht
als Schleife um die zwei Bolzen und
befestigen Sie sie sicher.
Stellen Sie sicher, dass die Drahtschleifen
unter den Unterlegscheiben sind und ziehen
Sie dann die Sechskantmuttern fest.
Drahtclip
C Lösen Sie die Schrauben des Drahtclips
und führen Sie dann das Ende des
Sicherheitsdrahtes durch den Drahtclip
und ein Loch am Haken der
Projektorplatte.
D Ziehen Sie das Ende des Drahtseils von
unter dem Handgriff heraus und führen
es durch den Drahtclip.
E Strecken Sie den Sicherheitsdraht so
straff wie möglich aus, ohne eine
Verschiebung des projizierten Bildes zu
verursachen, und ziehen Sie dann die
Schrauben des Drahtclips locker fest, um
den Draht zu sichern.
Gefahr
Nach dem Installieren des Sicherheitsdrahtes prüfen Sie folgende Punkte. Falls der Draht
beschädigt ist, ersetzen Sie ihn durch einen handelsübliches Drahtseil mit mindestens
1,5 mm Durchmesser.
vDer Draht ist nicht aufgefasert oder beschädigt.
vDer Draht ist nicht in einem spitzen Winkel gegen die Kante der
Unterlegscheibe oder einen anderen Gegenstand gebogen.
F Führen Sie Schritt 3 bis 5 erneut für den
anderen Sicherheitsdraht aus und
befestigen Sie ihn ebenfalls am
Projektor.
G Nach der Installation der
Sicherheitsdrähte bewegen Sie alle
Drahtclips in der Richtung wie in der
Abbildung gezeigt und ziehen Sie die
Schrauben der Clips fest.
Gefahr
vWenn die mitgelieferten Sicherheitsdrähte zu kurz für Ihren Installationsort des Projektors
sind, verwenden Sie handelsübliche Drahtseile mit mindestens 1,5 mm Durchmesser.
vSchneiden Sie überstehendes Drahtseil nach der Installation ab.
57
Anfragen
Für Anfragen sind unsere Kontaktdaten im Handbuch des Projektors angegeben.
Technische Daten
Abmessungen
495,6 (B) x 109 (H) x 384 (T) mm
Gewicht
Ca. 13,5 kg
Vertikale Neigungungseinstellung 0 bis ±5°
Einstellbereich
Horizontale Roll-Einstellung
0 bis ±5°
Horizontale Drehungseinstellung
0 bis ±5°
Vertikale Neigung
Einstellung
58
Horizontale RollEinstellung
Horizontale
Drehungseinstellung
Indice
Elenco dei componenti in dotazione . . . . . . . . . . . . . . . . . . . . . . . . . . . . . . . . 60
Istruzioni sulla sicurezza . . . . . . . . . . . . . . . . . . . . . . . . . . . . . . . . . . . . . . . . . 61
Precauzioni per la scelta del punto di installazione del proiettore . . . . . . . 62
Installazione. . . . . . . . . . . . . . . . . . . . . . . . . . . . . . . . . . . . . . . . . . . . . . . . . . . . 63
Rimozione dell'elemento di fissaggio al soffitto dall'elemento di sostegno del proiettore
. . . . . . . . . . . . . . . . . . . . . . . . . . . . . . . . . . . . . . . . . . . . . . . . . . . . . . . . . . . . . . . . . . . . 63
Montaggio dell'elemento di fissaggio al soffitto alla struttura portante . . . . . . . . . . . . . 63
Montaggio su un soffitto di cemento armato . . . . . . . . . . . . . . . . . . . . . . . . . . . . . . . . . 64
Fissaggio dell'elemento di sostegno al proiettore . . . . . . . . . . . . . . . . . . . . . . . . . . . . . 65
Fissaggio dell'elemento di sostegno del proiettore all'elemento di fissaggio al soffitto
. . . . . . . . . . . . . . . . . . . . . . . . . . . . . . . . . . . . . . . . . . . . . . . . . . . . . . . . . . . . . . . . . . . . 67
Regolazione dell'angolo di installazione . . . . . . . . . . . . . . . . . . . . . . . . . . . . 68
Spostamento in alto o in basso delle immagini proiettate . . . . . . . . . . . . . . . . . . . . . . . 68
Inclinazione a destra o a sinistra delle immagini proiettate . . . . . . . . . . . . . . . . . . . . . . 69
Installazione dei cavi di sicurezza . . . . . . . . . . . . . . . . . . . . . . . . . . . . . . . . . . 70
Richiesta d'informazioni . . . . . . . . . . . . . . . . . . . . . . . . . . . . . . . . . . . . . . . . . . 72
Caratteristiche tecniche . . . . . . . . . . . . . . . . . . . . . . . . . . . . . . . . . . . . . . . . . . 72
59
Elenco dei componenti in dotazione
Controllare l'elenco seguente per confermare di disporre di tutti i componenti in dotazione.
In caso di componenti mancanti o danneggiati, contattare il rivenditore di zona.
Y Elemento
di fissaggio
al soffitto
Y Elemento di sostegno del
proiettore
L'elemento di fissaggio al soffitto e l'elemento di sostegno del
proiettore sono preassemblati.
Separarli prima di iniziare l'installazione.
Y Viti di montaggio del
Y Chiave a brugola
proiettore: 4 pezzi (M6 x 16)
esagonale (M6)
Y Chiave a brugola
esagonale (M8)
Y Cavi di sicurezza: 2 pezzi Y Fermacavo: 2 pezzi
(1,5 m, φ 1,5 mm)
Y Guida utente
(questo manuale)
3
17
31
45
59
73
87
101
60
Istruzioni sulla sicurezza
Grazie per aver acquistato questo prodotto. Leggere attentamente questo documento per
assemblare e installare il prodotto in maniera sicura e corretta. Accertarsi di seguire le
precauzioni di sicurezza. Tenere queste istruzioni a portata di mano per consultarlo nel
caso non si siano ben compresi alcuni passaggi.
Al fine di utilizzare il prodotto in modo sicuro e corretto, nella guida e sul proiettore sono
riportati simboli che indicano possibili rischi per l'utente o terzi e rischi di danni materiali. Le
indicazioni e il relativo significato sono riportati di seguito. Assicurarsi di comprendere in
modo appropriato tali indicazioni prima di leggere la guida.
Avvertenza
Precauzione
Questo simbolo segnala informazioni che, se ignorate,
possono causare decesso o lesioni personali dovuti a
un uso non corretto.
Questo simbolo segnala informazioni che, se ignorate,
possono causare lesioni personali o danni fisici dovuti
a un uso non corretto.
Leggere attentamente le avvertenze contenute nei documenti "Istruzioni sulla sicurezza/
Guida al supporto tecnico", forniti con il proiettore, prima di iniziare l'installazione per
determinare il luogo adatto in cui installarlo.
Avvertenza
vIl lavoro di installazione deve essere eseguito solo da tecnici in possesso delle
competenze tecniche e delle capacità richieste.
Un assemblaggio o un'installazione eseguite in modo incompleto possono provocare la
caduta del proiettore dal soffitto con conseguente possibilità di lesioni alle persone.
vNon installare la staffa di montaggio a soffitto su una parete debole o inclinata.
Il soffitto deve essere abbastanza robusto per installare il proiettore e la staffa di montaggio
a soffitto. Prima di iniziare l'installazione controllare accuratamente il peso del proiettore e
della staffa di montaggio a soffitto. Accertarsi che il soffitto sia sufficientemente robusto e
utilizzare i metodi più appropriati per prevenire la caduta del proiettore.
vSeguire sempre le istruzioni riportate di seguito per installare la staffa di montaggio
a soffitto. Se l'opera di installazione non viene eseguita correttamente, il proiettore e
la staffa di montaggio a soffitto potrebbero cadere e causare lesioni alle persone.
• Controllare la struttura e i materiali della sede di montaggio e utilizzare la tipologia
edilizia più appropriata.
• Non appendere e non montare nulla alla staffa di montaggio a soffitto o su di essa
oltre al proiettore specificato. I proiettori che è possibile montare su questa staffa di
montaggio a soffitto sono elencati nei cataloghi.
• Non appendersi alla staffa di montaggio a soffitto e non applicare forza eccessiva
durante o dopo l'installazione.
• Le viti devono essere ben serrate. Inoltre, non allentare né rimuovere mai nessuna vite
imprudentemente durante il montaggio o la rimozione della staffa di montaggio a soffitto.
• Non disassemblare né modificare mai la staffa di montaggio a soffitto a meno che non
sia indicato in questo manuale.
61
Avvertenza
vInstallare i cavi di sicurezza forniti per evitare la caduta del proiettore.
I cavi di sicurezza evitano inoltre che il proiettore ondeggi in caso di terremoto o
vibrazione. sp.70
vL'applicazione di adesivo di bloccaggio per viti oppure di lubrificante, di olio o
altre sostanze nei punti in cui il proiettore è fissato alla staffa di montaggio a
soffitto potrebbe causare la rottura dell'involucro del proiettore e la caduta
dell'apparecchio, con conseguenti danni o lesioni alle persone. Durante
l'installazione o la regolazione della staffa di montaggio a soffitto si raccomanda
pertanto di non usare alcun tipo di sostanza, adesiva o lubrificante.
vNon allentare mai bulloni, viti o dadi dopo l'installazione. Inoltre, verificare periodicamente
che si siano viti allentati. In caso di allentamento, serrarli di nuovo saldamente.
vNon utilizzare la staffa di montaggio a parete e consultare personale di assistenza
qualificato nei casi seguenti:
• La staffa di montaggio a soffitto è caduta oppure si è rotta prima o durante l'installazione.
• Le parti in dotazione sono difettose e non funzionano correttamente.
vNon tirare con forza né pizzicare il cavo di alimentazione del proiettore durante
l'installazione.
Rivolgersi al rivenditore se i conduttori del cavo di alimentazione sono esposti o spezzati.
Precauzione
Per l'installazione sono necessarie almeno due persone. Accertarsi di predisporre
un trabattello robusto per il lavoro.
In caso contrario si potrebbe cadere o far cadere il proiettore e provocare lesioni.
Precauzioni per la scelta del punto di
installazione del proiettore
Leggere attentamente le avvertenze contenute nei documenti "Istruzioni sulla sicurezza/Guida
al supporto tecnico", forniti con il proiettore, prima di iniziare l'installazione per determinare il
luogo adatto in cui installarlo. Prestare particolare attenzione ai seguenti elementi.
vCollocare il proiettore in una posizione in cui la luce diretta del sole o luce intensa
proveniente da lampade a fluorescenza non colpiscano il ricevitore del telecomando. Una
luce intensa sul ricevitore del telecomando potrebbe interferire con il corretto
funzionamento del telecomando.
vInstallare il proiettore lontano dalla bocca di uscita dell'aria di condizionatori o apparecchi simili.
vPer limitare l'effetto di interferenze esterne si raccomanda di posizionare il proiettore in modo
che il cavo di collegamento al computer o ad altri dispositivi non sia più lungo di 20 metri.
vIl proiettore deve essere installato in un punto in cui non si accumuli polvere né umidità
affinché l'obiettivo e le altre parti ottiche interne non si sporchino.
vNon installare il proiettore in luoghi la cui temperatura non sia compresa nella gamma
d'uso specificata. In caso contrario potrebbe non funzionare correttamente.
vLa chiusura delle tende negli ambienti luminosi aiuta a rendere le immagini più chiare e visibili.
62
Installazione
Rimozione dell'elemento di fissaggio al soffitto
dall'elemento di sostegno del proiettore
L'elemento di fissaggio al soffitto è montato sull'elemento di sostegno del proiettore in
fabbrica. Utilizzare la seguente procedura per separarli.
Procedura
A Rimuovere le viti dei punti di regolazione
dell'inclinazione verticale su entrambi i
lati, utilizzando la chiave a brugola
esagonale (M8) in dotazione.
B Rimuovere l'elemento di fissaggio al
soffitto dall'elemento di sostegno del
proiettore.
Montaggio dell'elemento di fissaggio al soffitto alla
struttura portante
Determinare la distanza dallo schermo e individuare la posizione di montaggio prima di
installare l'elemento di fissaggio al soffitto.
La distanza varia in base al tipo di unità obiettivo installata nel proiettore. Far riferimento alla
"Guida utente" fornita con il proiettore o con l'unità obiettivo.
63
Procedura
Far riferimento alla mascherina per il soffitto per praticare i fori di montaggio dei bulloni nel
soffitto.
Mascherina per il soffitto (unità: mm)
160
80
Rivolgere il lato con questo
intaglio verso lo schermo.
93
80
40
Centro di rotazione
per la regolazione
orizzontale
14
100
186
Fori per la regolazione della rotazione
orizzontale
251
È possibile regolare la direzione del
proiettore fino a ±5 gradi ruotandolo.
200,4
Montaggio su un soffitto di cemento armato
Per fissare la staffa di montaggio a un soffitto di cemento armato, utilizzare 4 bulloni di
ancoraggio (M12). I bulloni di ancoraggio sono reperibili in commercio.
Avvertenza
vAccertarsi in precedenza che il cemento armato su cui dovrà essere installato
il prodotto sia in grado di sostenere il peso e il movimento laterale del
proiettore e della staffa di montaggio a soffitto. Se il cemento armato non è
sufficientemente robusto o si è deteriorato, consolidarlo con barre di rinforzo
o soluzioni analoghe.
vInstallare i bulloni di ancoraggio in base alle specifiche e ai metodi forniti dal
produttore dei materiali in modo che non fuoriescano, si allentino o si
spostino.
vSerrare bene le viti durante l'installazione o dopo aver regolato le angolazioni
Dopo aver serrato le viti, stringerle di nuovo con decisione e accertarsi che non
siano allentate.
vEpson non accetta alcuna responsabilità in caso di caduta del proiettore e
della staffa di montaggio dovuta a un'installazione precaria.
64
Tasselli di ancoraggio
Cemento
armato
Bulloni di
fissaggio
Superficie del soffitto
Dado esagonale
Almeno tre giri di filettatura
Rondelle
piane
Rondelle elastiche
Dado esagonale
L'elemento di fissaggio al soffitto può essere ruotato orizzontalmente di ±5 gradi. Regolare
la direzione del proiettore utilizzando quattro bulloni leggermente allentati. Dopo aver
regolato la direzione, serrare saldamente i dadi esagonali.
Il centro di rotazione
per la regolazione della direzione
Fissaggio dell'elemento di sostegno al proiettore
Avvertenza
vSerrare saldamente tutte le viti.
Dopo aver serrato le viti, stringerle di nuovo e accertarsi che non siano allentate.
vUtilizzare i cavi di sicurezza forniti per evitare la caduta del proiettore. sp.70
vL'applicazione di adesivo di bloccaggio per viti oppure di lubrificante, di olio o
altre sostanze nei punti in cui il proiettore è fissato alla staffa di montaggio a
soffitto potrebbe causare la rottura dell'involucro del proiettore e la caduta
dell'apparecchio, con conseguenti danni o lesioni alle persone. Durante
l'installazione o la regolazione della staffa di montaggio a soffitto si
raccomanda pertanto di non usare alcun tipo di sostanza, adesiva o
lubrificante.
65
Procedura
A Allentare le quattro viti con la chiave a
brugola esagonale M6 fornita, quindi
tirare i ganci verso l'esterno.
Foro per la regolazione dell'inclinazione verticale
B Montarlo sulle maniglie del proiettore
con i fori per la regolazione
dell'inclinazione verticale rivolti verso il
retro del proiettore.
Allineare i fori per
le viti sulle
maniglie e sui
ganci.
66
C Premere i quattro ganci verso l'interno
per attaccare le maniglie. A questo
punto, allineare i fori per le viti sulle
maniglie e sui ganci.
Fissare le viti collegate ai
ganci.
Infilare le viti in dotazione
attraverso i fori per le viti e
stringerle.
D Stringere la vite collegata al gancio
utilizzando la chiave a brugola esagonale
M6. Infilare una delle viti fornite nel foro
della vite sul gancio e stringerla con la
chiave esagonale.
Fissare gli altri tre ganci allo stesso modo,
stringendo le viti corrispondenti.
Precauzione
Utilizzare sempre le viti in dotazione per fissare il
proiettore e l'elemento di sostegno.
Fissaggio dell'elemento di sostegno del proiettore
all'elemento di fissaggio al soffitto
Procedura
A Inserire la barra dell'elemento di
sostegno nelle guide dell'elemento di
fissaggio a soffitto e collocarlo con
precisione negli incavi a ferro di cavallo.
Sorreggere sempre il proiettore con le mani
fino al completamento del montaggio.
B Infilare nei fori le viti per i punti di
Fissare le viti all'altezza di questi segni in
modo che il proiettore si trovi in posizione
quasi orizzontale. Utilizzarli come guida.
regolazione dell'angolazione verticale,
che erano state rimosse al momento
della rimozione dell'elemento di
fissaggio al soffitto dall'elemento di
sostegno.
Stringere le due viti nei punti di regolazione
dell'angolazione, come indicato nella figura
a sinistra, con la chiave a brugola esagonale
M8 in dotazione per fissare il proiettore. Per
i dettagli sulla regolazione dell'angolazione
del proiettore consultare la sezione
successiva "Regolazione dell'angolo di
installazione".
67
C Stringere le viti per i punti di regolazione
del basculamento orizzontale come
indicato nella figura a sinistra, per
fissare il proiettore.
Per i dettagli sulla regolazione
dell'angolazione del proiettore consultare la
sezione successiva "Regolazione
dell'angolo di installazione".
Regolazione dell'angolo di
installazione
Spostamento in alto o in basso delle immagini
proiettate
Se le immagini vengono proiettate troppo in alto o troppo in basso rispetto allo schermo,
regolare la posizione di proiezione tramite lo spostamento dell'obiettivo del proiettore.
Quando si sposta verticalmente la posizione di proiezione sfruttando l'ambito di regolazione
dello spostamento dell'obiettivo, è possibile regolare la posizione di proiezione di altri 5
gradi in entrambe le direzioni inclinando il proiettore, attenendosi alla procedura seguente.
Quando si inclina il proiettore le immagini proiettate potrebbero apparire distorte. Le
immagini distorte in forma trapezoidale possono essere corrette con la regolazione del
keystone. L'immagine tende tuttavia a risultare sfocata con l'aumentare dell'angolo di
inclinazione.
Per i dettagli sullo spostamento dell'obiettivo e il keystone, vedere la "Guida utente" fornita
con il proiettore.
Avvertenza
vNon rimuovere né allentare inutilmente alcuna vite durante la regolazione
dell'angolazione.
In caso contrario il proiettore potrebbe cadere e causare incidenti.
vSerrare nuovamente tutte le viti e accertarsi che non siano allentate dopo la
regolazione.
68
Procedura
A Allentare le viti dei punti di regolazione
dell'angolazione verticale su entrambi i lati
utilizzando la chiave a brugola esagonale M8.
B Inclinare la parte posteriore del proiettore
verticalmente per regolare l'angolazione,
fino a quando la posizione delle immagini
proiettate si adatta allo schermo.
C Dopo aver regolato l'angolazione, stringere
le viti su entrambi i lati utilizzando la chiave
a brugola esagonale M8.
Inclinazione a destra o a sinistra delle immagini
proiettate
Se l'immagine proiettata appare inclinata a destra o sinistra rispetto allo schermo, inclinare il proiettore
di ±5 gradi per regolare la posizione di proiezione, attenendosi alla procedura seguente.
Avvertenza
vNon rimuovere né allentare inutilmente alcuna vite durante la regolazione
dell'angolazione.
In caso contrario il proiettore potrebbe cadere e causare incidenti.
vSerrare nuovamente tutte le viti e accertarsi che non siano allentate dopo la
regolazione.
Procedura
A Allentare le viti dei punti di regolazione del
basculamento orizzontale su entrambi i lati
utilizzando la chiave a brugola esagonale M8.
B Inclinare il proiettore a sinistra o a destra
per regolare l'angolazione fino a quando
la posizione delle immagini proiettate si
adatta allo schermo.
C Dopo aver regolato l'angolazione, stringere
le viti su entrambi i lati utilizzando la chiave
a brugola esagonale M8.
69
Installazione dei cavi di sicurezza
Dopo aver installato il proiettore sul soffitto,
passare i 2 cavi in dotazione diagonalmente
attraverso il proiettore, utilizzando i fermacavo,
per impedire la caduta del proiettore.
Avvertenza
vAccertarsi in precedenza che il cemento armato su cui dovrà essere installato
il prodotto sia in grado di sostenere il peso e il movimento laterale del
proiettore e della staffa di montaggio a soffitto. Se il cemento armato non è
sufficientemente robusto o si è deteriorato, consolidarlo con barre di rinforzo
o soluzioni analoghe.
vInstallare i bulloni di ancoraggio in base alle specifiche e ai metodi forniti dal
produttore dei materiali in modo che non fuoriescano, si allentino o si
spostino.
Procedura
Entro 1 m
(consigliato)
Entro 1 m
(consigliato)
A Posizionare due bulloni di ancoraggio,
reperibili in commercio; diagonalmente
sul soffitto.
Si consiglia di posizionare i bulloni di
ancoraggio entro 1 metro dal centro del
proiettore.
Utilizzare bulloni di ancoraggio M12.
Bullone di ancoraggio (M12)
Rondella piana
(φ 24 - φ 26 mm)
Rondella
elastica
Dado
esagonale
70
B Formare un'asola con ciascuno dei due
Bullone di
ancoraggio
Cavo di
sicurezza
cavi di sicurezza intorno ai due bulloni e
fissarli saldamente.
Accertarsi che le asole dei cavi si trovino
sotto la rondelle piane, quindi serrare i dadi
esagonali.
Fermacavo
C Allentare le viti del fermacavo, quindi
passare un'estremità del cavo di
sicurezza attraverso il fermacavo e un
foro sul gancio dell'elemento di
sostegno.
D Estrarre l'estremità del cavo da sotto la
maniglia e farla passare attraverso il
fermacavo.
E Tendere il cavo di sicurezza il più
possibile senza alterare la posizione
dell'immagine proiettata, quindi serrare
leggermente le viti sul fermacavo per
fissare il cavo.
Precauzione
Dopo aver installato il cavo di sicurezza, verificare quanto segue. Nel caso in cui il cavo sia
danneggiato, sostituirlo con fune metallica da 1,5 mm di diametro o più, reperibile in
commercio.
vIl cavo non è logoro o sfilacciato.
vIl cavo non è piegato ad angolo acuto contro il bordo della rondella piana
o altro oggetto.
F Eseguire di nuovo i passaggi da 3 a 5 per
l'altro cavo di sicurezza e fissarlo anche
al proiettore.
G Dopo aver installato i cavi di sicurezza,
spostare tutti i fermacavo nella direzione
illustrata e serrare le viti dei fermacavo.
Precauzione
vSe i cavi di sicurezza in dotazione sono troppo corti per il luogo in cui si installa il
proiettore, utilizzare fune metallica da 1,5 mm di diametro o più, reperibile in commercio.
vTagliare le eccedenze di cavo metallico dopo l'installazione.
71
Richiesta d'informazioni
Le richieste di informazioni possono essere inoltrate all'indirizzo di contatto fornito nel
manuale del proiettore.
Caratteristiche tecniche
Dimensioni
495,6 (L) x 109 (H) x 384 (P) mm
Peso
Circa 13,5 kg
Regolazione dell'inclinazione
verticale
Gamma di
Regolazione basculamento
regolazione
orizzontale
Regolazione rotazione
orizzontale
Regolazione inclinazione
verticale
72
Da 0 a ±5°
Da 0 a ±5°
Da 0 a ±5°
Regolazione basculamento
orizzontale
Regolazione rotazione
orizzontale
Contenido
Lista de elementos incluidos . . . . . . . . . . . . . . . . . . . . . . . . . . . . . . . . . . . . . . 74
Instrucciones de seguridad . . . . . . . . . . . . . . . . . . . . . . . . . . . . . . . . . . . . . . . 75
Precauciones sobre dónde montar el proyector . . . . . . . . . . . . . . . . . . . . . . 76
Instalación . . . . . . . . . . . . . . . . . . . . . . . . . . . . . . . . . . . . . . . . . . . . . . . . . . . . . 77
Separación de la placa para el techo de la placa para el proyector . . . . . . . . . . . . . . .
Instalación de la placa para el techo al techo en el techo . . . . . . . . . . . . . . . . . . . . . . .
Montaje en un techo de hormigón . . . . . . . . . . . . . . . . . . . . . . . . . . . . . . . . . . . . . . . . .
Fijación de la placa para el proyector al proyector . . . . . . . . . . . . . . . . . . . . . . . . . . . .
Fijación de la placa para el proyector a la placa para el techo . . . . . . . . . . . . . . . . . . .
77
77
78
79
81
Ajuste del ángulo de instalación . . . . . . . . . . . . . . . . . . . . . . . . . . . . . . . . . . . 82
Movimiento de las imágenes proyectadas a un punto más alto o bajo . . . . . . . . . . . . . 82
Inclinación de las imágenes proyectadas a la derecha o la izquierda . . . . . . . . . . . . . . 83
Instalación de los cables de seguridad. . . . . . . . . . . . . . . . . . . . . . . . . . . . . . 84
Consultas . . . . . . . . . . . . . . . . . . . . . . . . . . . . . . . . . . . . . . . . . . . . . . . . . . . . . . 86
Especificaciones . . . . . . . . . . . . . . . . . . . . . . . . . . . . . . . . . . . . . . . . . . . . . . . . 86
73
Lista de elementos incluidos
Compruebe la siguiente lista para confirmar que dispone de todos los elementos
suministrados. Si faltara alguno de los elementos, o si estuvieran dañados, póngase en
contacto con su distribuidor.
Y Placa para
el techo
Y Placa para el proyector
La placa para el techo y la placa para el proyector están
preensambladas.
Sepárelas antes de iniciar la instalación.
Y Tornillos de montaje del
Y Llave hexagonal (M6)
proyector: 4 piezas (M6 x 16)
Y Llave hexagonal (M8)
Y Cables de seguridad:
Y Presillas para cable:
2 piezas (1,5 m, φ 1,5 mm)
2 piezas
Y Manual de usuario
(este manual)
3
17
31
45
59
73
87
101
74
Instrucciones de seguridad
Muchas gracias por adquirir este producto. Lea este documento cuidadosamente para
ensamblar y utilizar esta unidad correctamente y con seguridad. Siga las precauciones de
seguridad. Mantenga estas instrucciones a mano para ayudarle a solucionar cualquier cosa
que no comprenda.
A fin de que pueda usar el producto de una forma segura y correcta, hemos colocado
símbolos en este manual y en el producto para señalar posibles riesgos de daños para el
usuario u otras personas y materiales. A continuación, se explican las indicaciones y su
significado. Es imprescindible entenderlas antes de leer el manual.
Advertencia
Precaución
Este símbolo muestra una información que, si se ignora,
podría dar lugar a la muerte o a lesiones personales
debido al manejo incorrecto.
Este símbolo muestra una información que, si se ignora,
podría dar lugar a lesiones personales o daños físicos
debido al manejo incorrecto.
Lea cuidadosamente las advertencias de "Instrucciones de seguridad/Manual de asistencia
y mantenimiento".
Advertencia
vEl trabajo de instalación deberá realizarse solamente por especialistas con el de
conocimiento técnico y la habilidad requeridos.
El ensamblaje o la instalación incompletos podrían causar la caída del proyector y el
soporte para montaje en techo y provocar lesiones.
vNo instale el soporte para montaje en techo en una superficie inclinada ni débil.
El techo deberá ser suficientemente resistente como para poder instalar el proyector y el
soporte para montaje en techo. Antes de comenzar la instalación, compruebe
cuidadosamente el peso del proyector y del soporte para montaje en techo. Cerciórese
de que el techo sea suficientemente resistente y utilice los métodos más apropiados para
evitar que se caiga el proyector.
vPara instalar el soporte de montaje en techo, tenga en cuenta las instrucciones
siguientes. Si el trabajo de instalación no se realizase correctamente, el proyector
y el soporte para montaje en techo podrían caerse provocar lesiones.
• Compruebe la estructura y los materiales del lugar de montaje y utilice el método de
construcción apropiado.
• No cuelgue ni monte nada excepto el proyector especificado utilizando el soporte
para montaje en techo. Los proyectores que podrán montarse en este soporte para
montaje en techo se indican en los catálogos.
• No se cuelgue del soporte para montaje en techo ni le aplique fuerza excesiva
durante ni después de la instalación.
• Apriete firmemente los tornillos. Además, no afloje ni quite nunca ningún tornillo
cuando monte o desmonte el soporte de montaje en techo.
• No desensamble ni remodele nunca el soporte para montaje en techo a menos que
se indique lo contrario en este manual.
75
Advertencia
vInstale el cable de seguridad suministrado para evitar que el proyector se caiga del techo.
El cable de seguridad también evita que el proyector se bambolee durante un terremoto
o vibración. sp.84
vLa aplicación de adhesivo para tornillos, lubricante, aceite, u otras sustancias al
proyector donde está fijado al soporte para montaje en techo puede hacer que se
raje la caja y que caiga el proyector, resultando en daños o lesiones. No utilice
ningún tipo de adhesivo, lubricante, ni aceite cuando instale o ajuste el soporte
para montaje en techo.
vNo afloje nunca ningún perno, tornillo, ni tuerca después de la instalación.
Además, compruebe periódicamente que no se haya aflojado ningún tornillo. Si
encuentra cualquier tornillo flojo, reapriételo firmemente.
vNo utilice el soporte para montaje en techo, y solicite todas las reparaciones a
personal de servicio cualificado en las condiciones siguientes:
• El soporte para montaje en techo se cayó o rompió antes o durante la instalación.
• Las piezas suministradas tienen problemas o no trabajan correctamente.
vNo tire excesivamente ni pille el cable de alimentación del proyector durante la instalación.
Si los conductores del cable de alimentación están al descubierto o rotos, póngase en
contacto con su proveedor.
Precaución
Para la instalación se necesitarán dos personas por lo menos. Cerciórese de
utilizar un andamio robusto para este trabajo.
De lo contrario podría caerse o dejar caer el proyector y causar lesiones.
Precauciones sobre dónde montar el
proyector
Lea cuidadosamente las advertencias de "Instrucciones de seguridad/Manual de asistencia
y mantenimiento". En particular, preste atención a los puntos siguientes.
vInstale el proyector en un lugar en el que la luz solar directa o la luz intensa de lámparas
fluorescentes no incida en el receptor para control remoto. La luz intensa incidiendo en el
receptor para control remoto podría interferir en las operaciones de control remoto.
vInstale el proyector de forma que quede alejado de la salida de aire de acondicionadores
de aire o dispositivos similares.
vPara limitar el efecto del ruido externo, le recomendamos que coloque el proyector de
forma que el cable que lo conecta a un ordenador u a otros dispositivos no tengan una
longitud superior a 20 metros.
vEl proyector deberá instalarse en un lugar exento de polvo y humedad para evitar que se
ensucien el objetivo y los componentes ópticos internos.
vNo instale el proyector en un lugar fuera de su margen de temperaturas de operación. Si
lo hiciese, podría provocar su mal funcionamiento.
vSi cierra las cortinas de una sala brillante, las imágenes proyectadas serán más fáciles de ver.
76
Instalación
Separación de la placa para el techo de la placa para el
proyector
La placa para el techo ha sido fijada a la placa para el proyector en la fábrica. Utilice el
procedimiento siguiente para separarlas.
Procedimiento
A Retire los tornillos para los puntos de
ajuste de la inclinación vertical de ambos
lados utilizando la llave hexagonal (M8)
suministrada.
B Retire la placa para el techo de la placa
para el proyector.
Instalación de la placa para el techo al techo en el
techo
Determine la distancia a la pantalla y determine la posición de montaje antes de montar la
placa para el techo.
La distancia varía de acuerdo con el tipo de objetivo instalado en el proyector. Consulte el
"Manual de usuario" suministrado con el proyector o el objetivo.
77
Procedimiento
Refiérase a la plantilla para el techo para cortar los orificios para montaje con pernos en el
techo.
Plantilla para el techo (unidad: mm)
160
80
Gire el lado de este corte
hacia la pantalla.
93
80
40
Centro de rotación
cuando se ajusta
horizontalmente
14
100
186
Orificios para ajuste de la rotación horizontal
251
La dirección del proyector podrá ajustarse
hasta ±5 grados girándolo.
200,4
Montaje en un techo de hormigón
Cuando instale el soporte para montaje en techo en un techo de hormigón, utilice 4 pernos de
anclaje (M12). Usted tendrá que adquirir los pernos de anclaje en un establecimiento del ramo.
Advertencia
vCerciórese antes de que el hormigón en el que vaya a instalar este producto
pueda sujetar el peso y el movimiento lateral del proyector y del soporte para
montaje en techo. Si el hormigón no es suficientemente resistente o está
deteriorado, fortifíquelo con barras de refuerzo o algo similar.
vInstale los pernos de anclaje de acuerdo con las especificaciones y métodos del
fabricante de los materiales para que no se salgan, se aflojes, o se desplacen.
vApriete firmemente los tornillos durante la instalación o después de ajustar
los ángulos.
Después de apretar los tornillos, reapriételos firmemente y cerciórese de que no
hayan quedado flojos.
vEpson no aceptará ninguna responsabilidad por la caída del proyector y del
soporte para montaje en techo debido a una instalación inadecuada.
78
Anclajes de tipo hembra
Hormigón
Pernos de
suspensión
Superficie del techo
Tuerca hexagonal
3 roscas por lo menos
Arandelas
planas
Arandelas de resorte
Tuerca hexagonal
La placa para el techo puede girarse horizontalmente ±5 grados. Ajuste la dirección del
proyector utilizando cuatro pernos asegurados flojamente. Después de ajustar la dirección,
apriete con seguridad la tuercas hexagonales.
Centro de rotación
cuando se ajuste la dirección
Fijación de la placa para el proyector al proyector
Advertencia
vApriete con seguridad todos los tornillos.
Después de asegurar los tornillos, reapriételos y cerciórese de que no hayan
quedado flojos.
vUtilice los cables de seguridad suministrados para evitar que el proyector se
caiga del techo. sp.84
vLa aplicación de adhesivo para tornillos, lubricante, aceite, u otras sustancias
al proyector donde está fijado al soporte para montaje en techo puede hacer
que se raje la caja y que caiga el proyector, resultando en daños o lesiones.
No utilice ningún tipo de adhesivo, lubricante, ni aceite cuando instale o
ajuste el soporte para montaje en techo.
79
Procedimiento
A Afloje los cuatro tornillos de utilizando la
llave hexagonal M6 suministrada, y
después tire de los ganchos hacia fuera.
Orificios de ajuste de inclinación vertical
B Monte en las asas del proyector con los
orificios de ajuste de inclinación vertical
girados hacia la parte trasera del
proyector.
Alinee los orificios
de los tornillos en
las asas y en los
ganchos.
80
C Presione los cuatro ganchos hacia
adentro para fijas las asas. En este
momento, alinee los orificios de los
tornillos en las asas y en los ganchos.
Asegure los tornillos
adjuntados a los ganchos.
Pase los tornillos suministrados
a través de los orificios de los
tornillos y asegúrelos.
D Asegure el tornillo adjuntado al gancho
utilizando la llave hexagonal M6. Pase
uno de los tornillos suministrados a
través del orificio del tornillo y asegúrelo
utilizando la llave hexagonal.
Fije los otros tres ganchos de la misma
forma, asegurando sus tornillos.
Precaución
Utilice siempre los tornillos suministrados para
asegurar el proyector y la placa para el
proyector.
Fijación de la placa para el proyector a la placa para el
techo
Procedimiento
A Ponga el eje de la placa para el proyector
en las ranuras de la placa para el techo y
fíjela con seguridad en los puntos den
forma de herradura.
No suelte las manos del proyector hasta
finalizar el montaje.
B Ponga los tornillos para los puntos de
Asegure los tornillos a la altura de estas
marcas de forma que el proyector quede
prácticamente horizontal. Utilícelas como
guía.
ajuste del ángulo vertical que fueron
retirados cuando se retiró la placa para
el techo de la placa para el proyector en
los orificios de los tornillos.
Asegure los dos tornillos en los puntos de
ajuste del ángulo como se muestra en la
ilustración, utilizando la llave hexagonal M8
suministrada para fijar el proyector. Con
respecto a los detalles sobre el ajuste del
ángulo del proyector, consulte la sección
siguiente "Ajuste del ángulo de instalación".
81
C Asegure los tornillos para los puntos de
ajuste del giro horizontal como se
muestra en la ilustración de la izquierda
para fijar el proyector.
Con respecto a los detalles sobre el ajuste
del ángulo del proyector, consulte la sección
siguiente "Ajuste del ángulo de instalación".
Ajuste del ángulo de instalación
Movimiento de las imágenes proyectadas a un punto
más alto o bajo
Cuando las imágenes se proyecten más altas o más bajas en comparación con la pantalla,
ajuste la posición de proyección utilizando el desplazamiento del objetivo del proyector.
Cuando mueva verticalmente la posición de proyección cobre el margen ajustable del
desplazamiento del objetivo, la posición de proyección podrá ajustarse otros 5 grados en
cualquier sentido inclinando el proyector de acuerdo con los pasos siguientes.
Cuando incline el proyector, las imágenes proyectadas pueden distorsionarse. Las
imágenes distorsionadas en forma trapezoidal podrán corregirse utilizando el ajuste de la
distorsión trapezoidal. Sin embargo, las imágenes se desenfocará a medida que aumente
el ángulo de inclinación.
Con respecto a los detalles sobre el desplazamiento del objetivo y la distorsión trapezoidal,
consulte al "Manual de usuario" suministrado con el proyector.
Advertencia
vNo afloje ni retire nunca ningún tornillo innecesariamente cuando ajuste el
ángulo.
Si lo hiciese, podría hacer que se cayese el proyector, lo que conduciría a un
accedente.
vDespués del ajuste, reapriete todos los tornillos, y cerciórese de que no hayan
quedado flojos.
82
Procedimiento
A Afloje los tornillos para los puntos de
ajuste del ángulo vertical de ambos
lados utilizando la llave hexagonal M8.
B Incline verticalmente la parte posterior
del proyector para ajustar el ángulo
hasta la posición el la que las imágenes
proyectadas se adapten a la pantalla.
C Después de ajustar el ángulo, asegure
los tornillos de ambos lados utilizando la
llave hexagonal M8.
Inclinación de las imágenes proyectadas a la derecha
o la izquierda
Cuando las imágenes proyectadas se inclinen a la derecha o la izquierda en comparación
con la pantalla, incline el proyector ±5 grados para ajustar la posición de proyección de
acuerdo con los pasos siguientes.
Advertencia
vNo afloje ni retire nunca ningún tornillo innecesariamente cuando ajuste el ángulo.
Si lo hiciese, podría hacer que se cayese el proyector, lo que conduciría a un accedente.
vDespués del ajuste, reapriete todos los tornillos, y cerciórese de que no hayan
quedado flojos.
Procedimiento
A Afloje los tornillos para los puntos de
ajuste del giro horizontal de ambos lados
utilizando la llave hexagonal M8.
B Incline el proyector hacia la izquierda o
la derecha para ajustar el ángulo hasta la
posición el la que las imágenes
proyectadas se adapten a la pantalla.
C Después de ajustar el ángulo, asegure
los tornillos de ambos lados utilizando la
llave hexagonal M8.
83
Instalación de los cables de
seguridad
Después de instalar el proyector en el techo,
pase los 2 cables suministrados a través del
proyector utilizando las presillas para cable a fin
de evitar que el proyector se caiga.
Advertencia
vCerciórese antes de que el hormigón en el que vaya a instalar este producto
pueda sujetar el peso y el movimiento lateral del proyector y del soporte para
montaje en techo. Si el hormigón no es suficientemente resistente o está
deteriorado, fortifíquelo con barras de refuerzo o algo similar.
vInstale los pernos de anclaje de acuerdo con las especificaciones y métodos
del fabricante de los materiales para que no se salgan, se aflojes, o se
desplacen.
Procedimiento
Dentro de 1 m
(recomendado)
Dentro de 1 m
(recomendado)
A Fije dos pernos de anclaje adquiridos en
un establecimiento del ramo
diagonalmente en el techo.
Recomendamos situar los pernos de
anclaje dentro de 1 metro del centro del
proyector.
Utilice pernos de anclaje M12.
Perno de anclaje (M12)
Arandela plana
(φ 24 - φ 26 mm)
Arandela de
resorte
Tuerca
hexagonal
84
B Enrolle los dos cables de seguridad
Perno de anclaje
Cable de
seguridad
alrededor de los dos pernos y
asegúrelos firmemente.
Cerciórese de que los bucles de cable
queden debajo de las arandelas planas, y
después apriete las tuercas hexagonales.
Presilla para cable
C Afloje los tornillos de la presilla para
cable, y después pase el extremo del
cable de seguridad a través de la presilla
para cable y un orificio de un gancho de
la placa para el proyector.
D Tire del extremo de cable para sacarlo
por debajo del asa y páselo a través de la
presilla para cable.
E Estire el cable de seguridad lo más
firmemente posible sin causar el
movimiento de la posición de las
imágenes proyectadas, y después
apriete ligeramente los tornillos de la
presilla para cable para asegurar éste.
Precaución
Después de instalar el cable de seguridad, compruebe lo siguiente. Si por alguna causa, el
cable está dañado, reemplácelo por otro adquirido en un establecimiento del ramo de 1,5
mm o más de diámetro.
vEl cable de no deberá estar deshilachado ni desenredado.
vEl cable no deberá estar en ángulo agudo contra el borde de la arandela
plana ni de ningún otro objeto.
F Vuelva a realizar los pasos 3 a 5 para el
otro cable de seguridad, y fíjelo también
al proyector.
G Después de instalar los cables de
seguridad, mueva todas las presillas
para cable en el sentido mostrado en la
ilustración y apriete los tornillos de las
presillas.
Precaución
vSi los cables de seguridad suministrados son demasiado cortos para el lugar en el que
esté instalando el proyector, utilice cables adquiridos en un establecimiento del ramo de
1,5 mm o más de diámetro.
vDespués de la instalación corte el cable sobrante.
85
Consultas
Las consultas podrán dirigirse directamente a la información de contacto que se ofrece en
el manual de instrucciones del proyector.
Especificaciones
Dimensiones
495,6 (An) x 109 (Al) x 384 (Prf) mm
Peso
Aprox. 13,5 kg
Margen ajustable
Ajuste de inclinación vertical
0 a ±5°
Ajuste de giro horizontal
0 a ±5°
Ajuste de rotación horizontal
0 a ±5°
Ajuste de inclinación
vertical
86
Ajuste de giro
horizontal
Ajuste de rotación
horizontal
目录
随附项目列表. . . . . . . . . . . . . . . . . . . . . . . . . . . . . . . . . . . . . . . . . . . . . . . . . . . . 88
安全使用须知. . . . . . . . . . . . . . . . . . . . . . . . . . . . . . . . . . . . . . . . . . . . . . . . . . . . 89
有关投影机安装位置的注意事项 . . . . . . . . . . . . . . . . . . . . . . . . . . . . . . . . . . . . . 90
安装 . . . . . . . . . . . . . . . . . . . . . . . . . . . . . . . . . . . . . . . . . . . . . . . . . . . . . . . . . . . 91
将天花板转接板从投影机转接板上卸下 . . . . . . . . . . . . . . . . . . . . . . . . . . . . . . . . . . . . .
将天花板转接板安装到天花板上 . . . . . . . . . . . . . . . . . . . . . . . . . . . . . . . . . . . . . . . . . .
安装到混凝土天花板上 . . . . . . . . . . . . . . . . . . . . . . . . . . . . . . . . . . . . . . . . . . . . . . . . . .
将投影机转接板固定到投影机上 . . . . . . . . . . . . . . . . . . . . . . . . . . . . . . . . . . . . . . . . . .
将投影机转接板固定到天花板转接板上 . . . . . . . . . . . . . . . . . . . . . . . . . . . . . . . . . . . . .
91
91
92
93
95
调节安装角度. . . . . . . . . . . . . . . . . . . . . . . . . . . . . . . . . . . . . . . . . . . . . . . . . . . . 96
上移或下移投影图像 . . . . . . . . . . . . . . . . . . . . . . . . . . . . . . . . . . . . . . . . . . . . . . . . . . . 96
向左或向右倾斜投影图像 . . . . . . . . . . . . . . . . . . . . . . . . . . . . . . . . . . . . . . . . . . . . . . . . 97
安装保险绳 . . . . . . . . . . . . . . . . . . . . . . . . . . . . . . . . . . . . . . . . . . . . . . . . . . . . . 98
查询 . . . . . . . . . . . . . . . . . . . . . . . . . . . . . . . . . . . . . . . . . . . . . . . . . . . . . . . . . . 100
规格 . . . . . . . . . . . . . . . . . . . . . . . . . . . . . . . . . . . . . . . . . . . . . . . . . . . . . . . . . . 100
87
随附项目列表
请检查以下列表以确认您具有所有随附项目。万一有任何项目丢失或损坏,请与经销商联
系。
Y 天花板转接板
Y 投影机转接板
天花板转接板与投影机转接板预装在一起。
安装前请将其分开。
Y 投影机安装螺丝:4 颗
(M6 x 16)
Y 六角扳手 (M6)
Y 六角扳手 (M8)
Y 保险绳:2 根 (1.5m,
φ 1.5mm)
Y 线夹:2 个
Y 使用说明书
(即本说明书)
3
17
31
45
59
73
87
101
88
安全使用须知
非常感谢您购买本产品。请认真阅读本文档,以便安全、正确地装配本产品。请务必遵守相
关的安全注意事项。请将这些说明书放在容易取阅的地方,以帮助您解答任何疑问。
本说明书内和产品上都使用了符号,指出可能对用户或他人造成的伤害以及财产受损的风
险,以便您能够安全、正确地使用本产品。指示及其含义如下。请确保在阅读本说明书之前
正确理解这些指示。
警告
此符号指示一些信息,若忽视这些信息,则可能由于错误处理而导
致死亡或人身伤害。
小心
此符号指示一些信息,若忽视这些信息,则可能由于错误操作而导
致人身伤害或物品损坏。
安装之前,请仔细阅读投影机随附的 “安全使用须知 / 支持和维修指南”中的警告信息,以
确定适合的安装位置。
警告
v安装工作只能由具备相应技能和知识的专业人员来完成。
装配或安装不当可导致投影机和吊架摔落,从而造成人身伤害。
v请勿将吊架安装到倾斜或不牢固的表面上。
安装投影机和吊架的天花板须足够坚固。安装之前,请仔细核对投影机和吊架的重量。请
确保天花板足够坚固,并采用最佳施工方法以防投影机摔落下来。
v安装吊架时,应始终遵循以下指示进行操作。如果安装不当,投影机和吊架可能会摔落下
来,从而造成人身伤害。
• 检查安装位置的结构和材料,并采用最佳施工方法。
• 请勿在吊架上悬挂或安装除指定的投影机以外的任何物体。可在此吊架上安装的投影
机清单已在名目中列出。
• 安装时或安装后,请勿让人悬吊在上面或对其施加过大的力量。
• 拧紧螺丝。此外,如果是安装或拆卸吊架,切勿在松开或拧下任何螺丝时有疏忽大意。
• 除非在本说明书另有说明,否则切勿拆解或改造吊架。
v请安装随附的保险绳,以防投影机摔落下来。
发生地震或振动时,保险绳还可以防止投影机左右摆动。s 第 98 页
v如果在投影机与吊架的固定点处涂抹粘合剂、润滑油、油或其他物品来防止螺丝松脱,则
投影机外壳可能裂开,从而造成投影机损坏或人身伤害。安装或调节吊架时,请勿使用任
何类型的粘合剂、润滑油或油类。
v安装完毕后,切勿松开任何螺栓、螺丝或螺母。此外,还用定期检查是否有螺丝发生松
动。如果有螺丝松开,请将其重新拧紧。
v如果出现下列情况,请勿使用吊架,并请有资质的维修人员进行维修:
• 吊架在安装前或安装过程中断开或摔落下来。
• 随附的部件有问题,无法正常使用。
89
警告
v安装过程中,请勿用力拉拽或挤压投影机的电源线。
如果电源电缆的导线发生暴露或折断,请与经销商联系。
小心
安装工作至少需要两个人。请务必准备好一个坚固的脚手架。
有时会发生人员掉下或投影机摔落的情况,从而造成人身伤害。
有关投影机安装位置的注意事项
安装之前,请仔细阅读投影机随附的 “安全使用须知 / 支持和维修指南”中的警告信息,以
确定适合的安装位置。尤其要注意以下事项。
v安装投影机的地点应确保直射的阳光或荧光灯的强光不会照射到遥控器的接收器上。如果
有强光照射到遥控器的接收器上,可能会干扰遥控器的正常使用。
v投影机的安装位置应远离空调或其他类似设备的出气口。
v为限制外部噪音所造成的影响,建议在安装投影机时,尽量不要让连接计算机或其他设备
的电缆长度超过 20 米。
v投影机应安装在没有灰尘和湿气的地方,以防将镜头和内部光学元件弄湿。
v请勿在超出其操作温度范围的地方安装投影机,否则可导致故障。
v在明亮的房间内拉上窗帘会更容易看清投影图像。
90
安装
将天花板转接板从投影机转接板上卸下
天花板转接板在出厂时固定在投影机转接板上。通过以下步骤可以将它们分开。
步骤
A 使用随附的六角扳手 (M8),将位于两侧的垂
直倾斜调节点的螺丝拧下来。
B 从投影机转接板上卸下天花板转接板。
将天花板转接板安装到天花板上
在安装天花板转接板之前,先确定到屏幕的距离并将安装位置确定下来。
该距离因投影机上安装的镜头单元的类型而异。请参阅投影机或镜头单元随附的 “使用说明
书”。
91
步骤
参见天花板图样,在上面开出安装螺栓用的孔。
天花板图样 (单位:mm)
160
80
将该切口所在的一侧
转向屏幕。
93
80
40
进行水平调节时的
旋转中心
14
100
186
用于进行水平旋转调节的孔
251
通过旋转,投影机的方向最多可调节 ±5
度。
200.4
安装到混凝土天花板上
在混凝土天花板上安装吊架时,请使用 4 颗锚定螺栓 (M12)。您需要购买市售的锚定螺栓。
警告
v应预先确保安装本产品的混凝土面可以承受投影机及吊架的重量和横向移动。如果
混凝土不够坚固或已变质,请用铁筋或类似的东西进行加固。
v请按照制造商指定的规格和方法安装锚定螺栓,以确保它们不会露出、松脱或移位。
v安装过程中或调节完角度后,请拧紧螺丝。
拧紧螺丝后,请再次用力拧动一下,确保它们不会松脱。
v对因安装不当而造成投影机和吊架摔落的情况, Epson 恕不承担任何责任。
92
凹形锚
混凝土面
天花板表面
吊架螺栓
六角螺母
至少 3 个螺纹
平面垫圈
弹簧垫圈
六角螺母
天花板转接板可以 ±5 度进行水平旋转。通过松动四个螺栓可以调节投影机的方向。调节好
角度后,请将六角螺母拧紧。
旋转中心
调节方向时
将投影机转接板固定到投影机上
警告
v请拧紧所有螺丝。
固定好螺丝后,请再次拧动一下,确保它们不会松脱。
v请使用随附的保险绳,以防投影机摔落下来。s 第 98 页
v如果在投影机与吊架的固定点处涂抹粘合剂、润滑油、油或其他物品来防止螺丝松
脱,则投影机外壳可能裂开,从而造成投影机损坏或人身伤害。安装或调节吊架时,
请勿使用任何类型的粘合剂、润滑油或油类。
93
步骤
A 使用随附的 M6 扳手松开四颗螺丝,然后将
吊钩拉出。
B 将吊钩装到投影机的柄上,并将垂直倾斜调
垂直倾斜调节孔
节孔转向投影机后端。
对齐柄和吊钩上的
螺丝孔。
94
C 向内按压四个吊钩,将柄安装好。此时,对
齐柄和吊钩上的螺丝孔。
固定好安装在吊钩上的
螺丝。
将随附的螺丝放入螺丝
孔中并拧紧。
D 使用 M6 六角扳手固定好安装在吊钩上的螺
丝。将一颗随附的螺丝放入吊钩上的螺丝
孔,并使用六角扳手将其拧紧。
以同样的方式,通过拧紧螺丝,将另外三个
吊钩也固定好。
小心
应始终使用随附的螺丝来固定投影机和投影机转
接板。
将投影机转接板固定到天花板转接板上
步骤
A 将投影机转接板的轴放入天花板转接板的凹
槽中,然后将其稳稳地放到马蹄形的点上。
完成安装之前,不要将手从投影机上挪开。
B 将垂直角度调节点的螺丝 (从投影机转接板
上卸下天花板转接板时取下的)放入螺丝孔
中。
如左图所示,使用随附的 M8 六角扳手将角
度调节点的两颗螺丝拧紧,以便固定投影
机。有关调节投影机角度的详细信息,请参
阅下一部分 “调节安装角度”。
以标记的高度拧紧螺丝,使投影机尽量
保持水平。这些标记可用作参考。
95
C 如左图所示,将水平滚动调节点的螺丝拧
紧,以便固定投影机。
有关调节投影机角度的详细信息,请参阅下
一部分 “调节安装角度”。
调节安装角度
上移或下移投影图像
当图像投影高度比屏幕高或低时,请使用投影机的镜头移位功能调节投影位置。
当投影位置的垂直移动距离超出镜头移位功能的可调节范围时,可按照以下步骤,通过倾斜
投影机来沿任一方向再调节 5 度。
倾斜投影机时,投影图像可能会发生扭曲。扭曲成梯形的图像可利用梯形校正功能进行校
正。但是,随着倾斜角度的增大,图像会变得模糊不清。
有关镜头移位功能和梯形校正功能的详细信息,请参阅投影机随附的 “使用说明书”。
警告
v调节角度时,切勿在毫无必要的情况下松开或卸下任何螺丝。
否则,有可能导致投影机摔落并引起事故。
v调节好后,请重新拧紧所有螺丝并确保它们不会松开。
96
步骤
A 使用 M8 六角扳手松开位于两侧的垂直角度
调节点的螺丝。
B 沿垂直方向倾斜投影机后端以调节角度,直
至投影图像的位置与屏幕相适应。
C 调节好角度后,使用 M8 六角扳手将两侧的
螺丝拧紧。
向左或向右倾斜投影图像
当相对于屏幕向右或向左倾斜投影图像时,请按照以下步骤将投影机倾斜 ±5 度,从而调节
投影位置。
警告
v调节角度时,切勿在毫无必要的情况下松开或卸下任何螺丝。
否则,有可能导致投影机摔落并引起事故。
v调节好后,请重新拧紧所有螺丝并确保它们不会松开。
步骤
A 使用 M8 六角扳手松开位于两侧的水平滚动
调节点的螺丝。
B 向左或向右倾斜投影机以调节角度,直至投
影图像的位置与屏幕相适应。
C 调节好角度后,使用 M8 六角扳手将两侧的
螺丝拧紧。
97
安装保险绳
将投影机安装到天花板上后,让随附的两根绳子
以对角形式穿过投影机并用线夹固 定好,以防投
影机掉落。
警告
v应预先确保安装本产品的混凝土面可以承受投影机及吊架的重量和横向移动。如果
混凝土不够坚固或已变质,请用铁筋或类似的东西进行加固。
v请按照制造商指定的规格和方法安装锚定螺栓,以确保它们不会露出、松脱或移位。
步骤
1m 以内
(推荐)
1m 以内
(推荐)
A 将两颗市售的锚定螺栓以对角形式固定到天
花板上。
建议您将锚定螺栓固定在距投影机中心 1 米
的范围内。
使用 M12 锚定螺栓。
锚定螺栓 (M12)
平面垫圈
(φ 24 - φ 26mm)
B 将两根保险绳拴绕到两颗螺栓上并牢牢固定
锚定螺栓
保险绳
弹簧垫圈
六角螺母
98
好。
确保保险绳的套圈位于平面垫圈之下,然后
拧紧六角螺母。
线夹
C 松开线夹的螺丝,然后让保险绳的末端穿过
线夹及投影机转接板上吊钩的孔。
D 将保险绳的末端从柄下拉出并使其穿过线
夹。
E 将保险绳尽量拉紧,但不要引起投影图像移
动,然后拧动线夹的螺丝 (不要拧紧),从
而将保险绳固定好。
小心
安装好保险绳之后,请检查以下事项。万一保险绳发生任何损坏,请用市售的直径不小于
1.5 mm 的钢丝绳进行替换。
v保险绳没有磨损或开线。
v保险绳未沿平面垫圈或其他物体的边缘呈大角度弯折。
F 对另一根保险绳重复步骤 3 - 5,同样将其固
定到投影机上。
G 安装完保险绳之后,请沿图中所示的方向移
动所有线夹并拧紧线夹上的螺丝。
小心
v如果随附的保险绳相对于投影机的安装位置而言太短,可使用市售的直径不小于 1.5 mm 的
钢丝绳替代。
v安装完成后,请将多余的钢丝绳截掉。
99
查询
相关的查询事宜可接洽投影机说明书中所列的联系人。
规格
外形尺寸
495.6 (宽) x 109 (高) x 384 (长) mm
重量
约 13.5 kg
可调节范围
垂直倾斜调节
0 - ±5°
水平滚动调节
0 - ±5°
水平旋转调节
0 - ±5°
垂直倾斜调节
100
水平滚动调节
水平旋转调节
目錄
包含的項目清單 . . . . . . . . . . . . . . . . . . . . . . . . . . . . . . . . . . . . . . . . . . . . . . . . . 102
安全使用須知. . . . . . . . . . . . . . . . . . . . . . . . . . . . . . . . . . . . . . . . . . . . . . . . . . . 103
投影機安裝位置的注意事項 . . . . . . . . . . . . . . . . . . . . . . . . . . . . . . . . . . . . . . . . 104
安裝 . . . . . . . . . . . . . . . . . . . . . . . . . . . . . . . . . . . . . . . . . . . . . . . . . . . . . . . . . . 105
將天花板安裝板從投影機安裝板上移除 . . . . . . . . . . . . . . . . . . . . . . . . . . . . . . . . . . . .
將天花板安裝板安裝至天花板 . . . . . . . . . . . . . . . . . . . . . . . . . . . . . . . . . . . . . . . . . . .
安裝至混凝土天花板 . . . . . . . . . . . . . . . . . . . . . . . . . . . . . . . . . . . . . . . . . . . . . . . . . .
將投影機安裝板安裝至投影機 . . . . . . . . . . . . . . . . . . . . . . . . . . . . . . . . . . . . . . . . . . .
將投影機安裝板安裝至天花板安裝板 . . . . . . . . . . . . . . . . . . . . . . . . . . . . . . . . . . . . . .
105
105
106
107
109
調整安裝角度. . . . . . . . . . . . . . . . . . . . . . . . . . . . . . . . . . . . . . . . . . . . . . . . . . . 110
將投影的影像向上或向下移動 . . . . . . . . . . . . . . . . . . . . . . . . . . . . . . . . . . . . . . . . . . . 110
將投影的影像向右或向左傾斜 . . . . . . . . . . . . . . . . . . . . . . . . . . . . . . . . . . . . . . . . . . . 111
安裝安全線 . . . . . . . . . . . . . . . . . . . . . . . . . . . . . . . . . . . . . . . . . . . . . . . . . . . . 112
疑問 . . . . . . . . . . . . . . . . . . . . . . . . . . . . . . . . . . . . . . . . . . . . . . . . . . . . . . . . . . 114
規格 . . . . . . . . . . . . . . . . . . . . . . . . . . . . . . . . . . . . . . . . . . . . . . . . . . . . . . . . . . 114
101
包含的項目清單
請檢查下列清單,確定具有所有隨附的物件。如發現任何物件欠缺或損壞,請與經銷商聯
絡。
Y 天花板安裝板
Y 投影機安裝板
天花板安裝板和投影機安裝板已預先組裝完成。
請在開始安裝之前先將其分離。
Y 投影機安裝螺絲:4 顆
(M6 x 16)
Y 六角扳手 (M6)
Y 六角扳手 (M8)
Y 安全線:2 條 (1.5m、
φ 1.5mm)
Y 安全線夾:2 個
Y 使用說明書 (本說明書)
3
17
31
45
59
73
87
101
102
安全使用須知
感謝您購買本產品。請仔細閱讀本文件,以安全正確地組裝及安裝本產品。請務必遵守安全
注意事項。請將這些使用須知置於容易取得的地方,以便需要時可隨時參考。
本說明書中和產品上皆有標示符號,提醒用戶或其他人可能發生的傷害及造成財產損失的風
險,讓您能安全且正確地使用產品。使用須知及其意義說明如下。請務必先正確了解使用須
知,再閱讀說明書。
警告
小心
若忽略此符號的指示資訊,可能導致處理不當,造成人員傷亡。
若忽略此符號的指示資訊,可能導致處理不當,造成人身傷害或受
損。
在開始安裝之前,請先仔細閱讀投影機隨附之 “安全使用須知 / 支援及維修手冊”中的警告
事項,以判斷適合安裝投影機的位置。
警告
v必須由具備相關專業知識及技術之專業人員進行此安裝作業。
組裝或安裝方式錯誤可能會導致投影機和天花板安裝配件掉落,並造成人身傷害。
v請勿將天花板安裝配件安裝在傾斜或表面脆弱的天花板上。
天花板必須夠堅固,才能安裝投影機與天花板安裝配件。開始安裝之前,請先仔細檢查投
影機與天花板安裝配件的重量。請務必確定天花板夠堅固,並使用最適當的方式安裝,以
避免投影機掉落。
v請務必依照以下指示安裝天花板安裝配件。若安裝方式錯誤,可能會導致投影機和天花板
安裝配件掉落,並造成人身傷害。
• 請檢查安裝位置的結構與材料,並使用最適當的方式進行安裝。
• 請勿將指定之投影機以外的任何其他物件懸掛或安裝在天花板安裝配件上。可安裝在
此天花板安裝配件上的投影機皆列示在目錄中。
• 請勿在安裝時或安裝之後,在天花板安裝配件上懸掛任何東西或加諸過重的壓力。
• 請將螺絲鎖緊。在安裝或移除天花板安裝配件時請務必小心,切勿因疏忽而鬆開及移
除螺絲。
• 除非本說明書指示,否則請勿拆解或改製天花板安裝配件。
v請安裝所有隨附的安全線以避免投影機掉落。
安全線亦可避免投影機在發生地震或天花板震動時產生搖晃。s 第 112 頁
v在投影機與天花板安裝配件連接的位置塗上固定螺絲的黏著劑、潤滑劑、潤滑油或其他物
質,可能會造成安裝配件破裂或投影機掉落,而導致損害或受傷。因此安裝或調整天花板
安裝配件時,請勿使用任何類型的黏著劑、潤滑劑或潤滑油。
v請勿在安裝好配件之後鬆開任何螺栓、螺絲或螺帽。請定期檢查螺絲是否鬆脫。若發現螺
絲鬆脫,請立即將其鎖緊。
v在下列情況下,請勿使用天花板安裝配件,並由合格的服務人員執行所有維修工作:
• 安裝之前或安裝時,天花板安裝配件脫落或受損。
• 隨附的零件有問題且無法正常運作。
103
警告
v安裝時請勿強行拉扯或擠壓投影機的電源線。
若電源線中的金屬電線外露或損壞,請與您的經銷商聯絡。
小心
至少需由兩名工作人員進行安裝作業。請務必提供穩固的鷹架以執行安裝作業。
否則您可能會摔落,或投影機可能會掉落,而造成人身傷害。
投影機安裝位置的注意事項
在開始安裝之前,請先仔細閱讀投影機隨附之 “安全使用須知 / 支援及維修手冊”中的警告
事項,以判斷適合安裝投影機的位置。尤其必須特別注意下列事項。
v請將投影機安裝在不會受到陽光直射或螢光燈之強力光線照射到遙控訊號接收器的地方。
若有強光照射在遙控訊號接收器,可能會影響遙控器操作。
v請將投影機安裝在遠離冷氣機或其他裝置之出風口的位置。
v為了避免外接裝置產生雜訊,我們建議您將投影機安裝在和電腦或其他裝置連接時,訊號
線不會超過 20 公尺的地方。
v投影機必須安裝在沒有灰塵或水氣的地方,以避免鏡頭及內部光學零件髒汙。
v請勿將投影機安裝在室溫超出其運作溫度範圍的地方,這樣可能會導致投影機故障。
v若是安裝在明亮的房間中,請關上窗簾,以便可清楚觀看影像。
104
安裝
將天花板安裝板從投影機安裝板上移除
投影機出廠時已經預先將天花板安裝板和投影機安裝板組裝在一起。請透過以下步驟將其分
離。
步驟
A 使用隨附的六角扳手 (M8)將兩端垂直傾
斜調整點上的螺絲移除。
B 將天花板安裝板從投影機安裝板上移除。
將天花板安裝板安裝至天花板
在安裝天花板安裝板之前,請先判斷及決定螢幕與投影機安裝位置的距離。
視投影機中安裝的鏡頭裝置類型不同,適當的安裝距離也會有所差異。請參閱投影機或鏡頭
裝置隨附的 “使用說明書”。
105
步驟
請參閱天花板樣板圖例,在天花板上鑽出正確的螺栓安裝孔。
天花板樣板 (單位:mm)
160
80
請將此圖案的側面對
著螢幕。
93
80
40
調整水平位置時的
旋轉中心
14
100
186
水平旋轉調整孔
251
可透過旋轉投影機的方式,在 ±5 度的
範圍內調整投影機的方向。
200.4
安裝至混凝土天花板
將天花板安裝配件安裝至混凝土天花板時,請使用 4 個錨狀螺栓 (M12)安裝。您必須另行
購買錨狀螺帽。
警告
v請先確定要安裝本產品的混凝土天花板足以支撐投影機和天花板安裝配件的重量,
及其在橫向移動時產生的力量。若混凝土不夠堅固或已老化,請先使用強化棒或類似
物件將其強化。
v請依照錨狀螺栓製造商指定的規格及方式安裝螺栓,以避免螺栓脫落、鬆脫或移動。
v在安裝時或調整好角度之後,將螺絲鎖緊。
鎖緊螺絲之後,請再次將其牢牢鎖緊並確定沒有鬆脫。
v若因安裝方式錯誤導致投影機或天花板安裝配件掉落,Epson 不承擔任何責任。
106
母型錨狀螺栓
混凝土
天花板表面
懸掛螺栓
六角螺帽
至少 3 圈螺紋
平面墊圈
彈簧墊圈
六角螺帽
天花板安裝板可在 ±5 度的範圍內水平旋轉。使用未完全鎖緊的四個螺栓來調整投影機的方
向。調整好方向之後,將六角螺帽鎖緊。
調整方向時的
旋轉中心
將投影機安裝板安裝至投影機
警告
v請將所有螺絲鎖緊。
鎖緊螺絲之後,請再次將其鎖緊並確定沒有鬆脫。
v請使用所有隨附的安全線以避免投影機掉落。s 第 112 頁
v在投影機與天花板安裝配件連接的位置塗上固定螺絲的黏著劑、潤滑劑、潤滑油或
其他物質,可能會造成安裝配件破裂或投影機掉落,而導致損害或受傷。因此安裝或
調整天花板安裝配件時,請勿使用任何類型的黏著劑、潤滑劑或潤滑油。
107
步驟
A 使用隨附的 M6 六角扳手鬆開四顆螺絲,然
後將掛勾向外拉。
B 在將垂直傾斜調整孔轉向投影機後側時,將
垂直傾斜調整孔
其安裝至投影機的把手上。
對準把手和掛勾上
的螺絲孔。
108
C 向內按壓四個掛勾以安裝把手。此時,請將
把手和掛勾上的螺絲孔對準。
將已安裝到掛勾上的螺絲
鎖緊。
將隨附的螺絲穿過螺絲孔
並將其鎖緊。
D 使用 M6 六角扳手將已安裝到掛勾上的螺絲
鎖緊。將其中一顆隨附的螺絲穿過掛勾上的
螺絲孔,用六角扳手將其鎖緊。
以相同方式鎖緊螺絲,以固定其他三個掛
勾。
小心
請務必使用隨附的螺絲來固定投影機和投影機安
裝板。
將投影機安裝板安裝至天花板安裝板
步驟
A 將投影機安裝板的手柄插入天花板安裝板的
溝槽中,並將其穩固地置入馬蹄形的固定
點。
在安裝完成之前,請勿將您的手從投影機上
放開。
B 在天花板安裝板從投影機安裝板上拆下時,
將拆下的垂直角度調整點螺絲插入螺絲孔
中。
如左圖所示,使用隨附的 M8 六角扳手將角
度調整點中的兩顆螺絲鎖緊以固定投影機。
關於調整投影機角度的詳細資訊,請參閱下
一個章節 “調整安裝角度”。
將螺絲固定在這些標誌所在的高度上,
使投影機儘量呈水平狀態。請以此作為
安裝時的參考依據。
109
C 如左圖所示,將水平轉動調整點中的螺絲鎖
緊以固定投影機。
關於調整投影機角度的詳細資訊,請參閱下
一個章節 “調整安裝角度”。
調整安裝角度
將投影的影像向上或向下移動
當影像投影位置比螢幕高或低時,請使用投影機鏡頭移動功能來調整投影位置。
移動投影機垂直投影位置時,若需移動的範圍超過鏡頭移動裝置的可調整範圍,可依照下列
步驟將投影機傾斜,在上下各多出 5 度的範圍內調整投影位置。
傾斜投影機時,投影的影像可能會扭曲。若影像以梯形的方式扭曲,可使用梯形修正功能來
修正影像。但是當傾斜角度增加時,影像便會失焦。
關於鏡頭移動及梯形調整的詳細資訊,請參閱投影機隨附的 “使用說明書”。
警告
v調整角度時,若非必要,請勿鬆開或移除任何螺絲。
這樣做可能會導致投影機掉落而發生意外。
v調整好之後,請將所有螺絲重新鎖緊並確定沒有鬆脫。
110
步驟
A 使用 M8 六角扳手將兩端垂直角度傾斜調整
點上的螺絲鬆開。
B 將投影機後側向垂直方向傾斜以調整角度,
直到影像投影位置與螢幕相符為止。
C 調整好角度之後,請使用 M8 六角扳手將兩
端的螺絲鎖緊。
將投影的影像向右或向左傾斜
當投影的影像向螢幕右側或左側傾斜時,請依照下列步驟,使投影機傾斜 ±5 度以調整投影
位置。
警告
v調整角度時,若非必要,請勿鬆開或移除任何螺絲。
這樣做可能會導致投影機掉落而發生意外。
v調整好之後,請將所有螺絲重新鎖緊並確定沒有鬆脫。
步驟
A 使用 M8 六角扳手將兩端水平轉動調整點上
的螺絲鬆開。
B 將投影機向左或向右轉動以調整角度,直到
影像投影位置與螢幕相符為止。
C 調整好角度之後,請使用 M8 六角扳手將兩
端的螺絲鎖緊。
111
安裝安全線
將投影機安裝至天花板後,使用安全線夾將隨附
的兩條安全線以對角線方式穿過投 影機,以避免
投影機掉落。
警告
v請先確定要安裝本產品的混凝土天花板足以支撐投影機和天花板安裝配件的重量,
及其在橫向移動時產生的力量。若混凝土不夠堅固或已老化,請先使用強化棒或類似
物件將其強化。
v請依照錨狀螺栓製造商指定的規格及方式安裝螺栓,以避免螺栓脫落、鬆脫或移動。
步驟
在 1 公尺範圍內
(建議)
在 1 公尺範圍內
(建議)
A 將另購的兩個錨狀螺栓以對角線方式安裝在
天花板上。
我們建議將錨狀螺栓安裝在距離投影機中心
點 1 公尺的範圍內。
請使用 (M12)錨狀螺栓。
錨狀螺栓 (M12)
平面墊圈
(φ 24 - φ 26mm)
B 將兩條安全線以環繞方式纏繞在錨狀螺栓
錨狀螺栓
安全線
彈簧墊圈
六角螺帽
112
上,然後將其牢牢固定。
請確定安全線纏繞在平面墊圈下方,然後將
六角螺帽鎖緊。
安全線夾
C 鬆開安全線夾的螺絲,然後將安全線的末端
穿過安全線夾及投影機安裝板掛勾上的孔
洞。
D 將安全線的末端從把手下方拉出,並將其穿
過安全線夾。
E 在投影的影像沒有移動的情況下,請盡可能
將安全線拉緊,然後將安全線夾的螺絲稍微
鎖緊以固定安全線。
小心
安裝好安全線後,請檢查下列事項。若安全線受損,請使用市售直徑 1.5 mm 或更粗的安全
線來替代。
v安全線沒有磨損或散開。
v安全線沒有因為嚴重彎曲而接觸到平面墊圈的邊緣或其他物件。
F 重複執行步驟 3 至 5 安裝其他安全線,並將
其固定在投影機上。
G 安裝好安全線後,請將所有的安全線夾依圖
示方向移動,然後鎖緊安全線夾的螺絲。
小心
v若隨附的安全線太短,不適合在您安裝投影機的地方使用,請使用市售直徑 1.5 mm 或更粗
的安全線來替代。
v安裝好後,請將安全線過長的部分剪掉。
113
疑問
若有任何疑問,可透過投影機使用說明書中提供的聯絡資訊與我們聯絡。
規格
尺寸
495.6 (寬) x 109 (高) x 384 (深) mm
重量
約 13.5 公斤
可調整範圍
垂直傾斜調整
0 至 ±5°
水平轉動調整
0 至 ±5°
水平旋轉調整
0 至 ±5°
垂直傾斜調整
114
水平轉動調整
水平旋轉調整
Printed in China
XX.XX-.XA(G04)