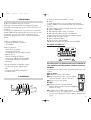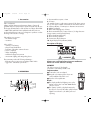
1
NU-709_0204
6/05/04
16:12
Page 1
709
■
■
■
■
■
■
■
■
■
MULTIMETRE DE SECURITE VAT/DDT
SAFETY MULTIMETER
MULTIMETER
VEILIGHEIDSMULTIMETER / SPANNINGZOEKER
MULTÍMETRO DE SEGURIDAD
MULTÍMETRO DE SEGURANÇA VAT/DDT
MULTIMETRO DI SICUREZZA
SIKKERHEDSMULTIMETER
MIERNIK UNIWERSALNY VAT/DDT
Notice d’instructions
Instruction manual
Bedienungsanleitung
Gebruiksaanwijzing
Guia de instrucciones
Istruzioni per l’utilizzo
Manual de instruções
Brugsanvisning
Instrukcja obsługi
NU-709/0204
NU-709_0204
6/05/04
16:12
Page 2
FR SOMMAIRE
1. Présentation
2. Description
3. Autotest
4. Détection de tension Auto AC/DC Polarité
5. Repérage phase/neutre
6. Continuité - Mesure de résistance
7. Rotation des phases
8. Caractéristiques générales
9. Conformité aux normes internationales
10. Garantie
11. Maintenance
GB CONTENTS
1. Presentation
2. Description
3. Selftest
4. Auto AC/DC voltage polarity detection
5. Phase/neutral identification
6. Continuity – Resistance measurement .
7. Phase rotation
8. General characteristics
9. Conformity to international standards
10. Guarantee
11. Maintenance
DE INHALTS
1. Vorstellung
2. Beschreibung
3. Selbsttest
4. AC/DC Spannungserkennung,Polarität
5. Erkennung Phase / Neutralleiter
6. Durchgang - Widerstandsmessung
7. Drehfeldrichtung
8. Allgemeine Daten
9. Einhaltung internationaler Normen
10. Garantie
11. Wartung
2
Page
6
6
7
8
10
10
11
12
13
13
14
Page
16
16
17
18
20
20
21
22
23
23
24
Seite
26
26
27
28
30
30
31
32
32
33
34
NL INHOUDSOPGAVE
1. Inleiding
2. Beschrijving
3. Zelftest
4. Spanningszoeker Auto AC/DC Polariteit
5. Opsporen fase/nulstroom
6. Doorgangstest - Meten van weerstanden
7. Faseverschuiving
8. Algemene kenmerken
9. Gelijkvormigheid met internationale normen
10. Waarborg
11. Onderhoud
ES ÍNDICE
1. Presentación
2. Descripción
3. Autotest
4. Detección de tensión Auto ca/cc Polaridad
5. Identificación fase/neutro
6. Continuidad - Medida de resistencia
7. Rotación de fases
8. Características generales
9. Conformidad a las normas internacionales
10. Garantía
11. Mantenimiento
PO SUMÁRIO
1. Apresentação
2. Descrição
3. Autoteste
4. Detecção de tensão Auto AC/DC Polaridade
5. Identificação fase/neutro
6. Continuidade – Medição da resistência
7. Rotação das fases
8. Características gerais
9. Conformidade às normas internacionais
10. Garantia
11. Manutenção
Pagina
36
36
37
38
40
40
41
42
43
43
44
Pagina
46
46
47
48
50
50
51
52
52
53
53
Página
56
56
57
58
60
60
61
62
63
63
64
3
NU-709_0204
IT
6/05/04
16:12
Page 4
INDICE
Pagina
1. Presentazione
2. Descrizione
3. Autotest
4. Rilevazione di tensione automatica, AC/DC, Polarità
5. Identificazione Fase/Neutro
6. Continuità - Misura di resistenza
7. Rotazione delle fasi
8. Caratteristiche generali
9. Conformità alle norme internazionali
10. Garanzia
11. Manutenzione
DK Indholdsfortegnelse
1. Præsentation
2. Beskrivelse
3. Selvtest
4. Automatisk måling af ac/dc-spænding, polaritet
5. Lokalisering af fase/nul
6. Kontinuitet - Måling af modstand
7. Faseomdrejning
8. Generelle specifikationer
9. Overensstemmelse med internationale normer
10. Garanti
11. Vedligeholdelse
PL SPIS TREŚCI
1. Prezentacja
2. Opis
3. Autotest
4. Pomiar napięcia Auto AC/DC Biegunowość
5. Oznaczanie fazy/punktu zerowego
6. Kontrola ciągłości – Pomiar rezystancji
7. Rotacja faz
8. Parametry techniczne
9. Zgodność z normami międzynarodowymi
10. Gwarancja
11. Konserwacja
4
66
66
67
68
70
70
71
72
72
73
73
Side
76
76
77
78
80
80
81
82
83
83
84
Strona
86
86
87
88
90
90
91
92
93
93
94
FR
Vous venez d’acquérir un multimètre V.A.T./D.D.T. 709 et nous
vous remercions de votre confiance. Ce multimètre est adapté aux
travaux sous tension.
Pour obtenir le meilleur service de votre appareil :
■ lisez attentivement cette notice
■ respectez les précautions d’emploi
Significations du symbole
Attention ! Consultez la notice de fonctionnement avant
d’utiliser l’appareil.
Dans la présente notice, les instructions précédées de ce
symbole, si elles ne sont pas bien respectées ou réalisées,
peuvent occasionner un accident corporel ou endommager
l’appareil et les installations.
PRÉCAUTIONS D'EMPLOI
■ Procédez systématiquement à un autotest avant et après
l'utilisation de votre multimètre.
■ Ce multimètre peut être utilisé dans des installations de catégorie
III, avec des tensions toujours inférieures à 600 V par rapport à
la terre.
■ Les circuits de CAT III sont des circuits d'alimentation d'appareils
de puissance pouvant comporter des surtensions transitoires
importantes. Exemple : alimentation de machines ou appareils
industriels.
■ N'ouvrez jamais la trappe à pile du multimètre avant de l'avoir
déconnecté de toute source électrique.
■ Ne touchez jamais la partie métallique des pointes de touches
pendant un test.
■ Ne procédez jamais à un test de continuité sur un circuit sous
tension. Cependant, en cas de fausse manoeuvre, le multimètre
assure une protection jusqu'à 600 V.
5
NU-709_0204
6/05/04
16:12
Page 6
1. PRÉSENTATION
Le 709 est un multimètre Détecteur de Tension.
L'allumage, la détection AC/DC et le changement de gamme
automatique sont garants d'une sécurité et d'un confort accru pour
l'utilisateur.
La conception et la fabrication de ce produit selon les normes EN
61010-1 600 V CAT III et EN 61243-3 font de ce produit, un outil
professionnel que vous pourrez utiliser aussi bien lors de vos
opérations de diagnostic que lors de vos vérifications d'absence
tension.
Le 709 vous permettra de mesurer :
- des tensions alternatives et continues
- des résistances
Il dispose également :
- du test sonore de continuité
- du repérage phase/neutre
- de l'indication du sens de rotation de phases
(méthode "2 fils")
- d'un rétro-éclairage de l'afficheur
- du blocage de l'afficheur (fonction HOLD).
- d'un dispositif d'allumage et d'extinction
automatique.
Il présente notamment les avantages suivants :
- robustesse mécanique : supporte 2m de
chute.
- pointes de touche IP2X non obligatoires
selon EN 61243-3.
2. DESCRIPTION
6
1. Pointes de touche déconnectables : • 2 mm
2. Garde
La garde antiglissement, sur toute la périphérie de l'appareil,
protège l'utilisateur de tout contact accidentel avec un conducteur
non isolé.
3. Poussoir Autotest / Test de continuité - Mesure de résistance
4. Afficheur 2000 points
5. LED rotation des phases (verte) : sens horaire
6. LED rotation des phases (rouge) : sens antihoraire,
détection de tension lors de la mesure de résistance (Voltest)
7. LED repérage de la phase (rouge)
8. Poussoir rotation des phases
9. Zone de touche : détection Ph/N
10. Poussoir de maintien de l'afficheur numérique (HOLD)
Description de l'afficheur :
3. AUTOTEST
Procédez toujours à un autotest avant et après l'utilisation de
votre multimètre. Ne l'utilisez jamais si l'autotest est incorrect.
AUTOTEST
L'autotest permet de contrôler le bon fonctionnement de la pile et des
cordons.
Mise en œuvre :
■ Branchez les cordons comme indiqué.
■ Amenez la pointe de touche rouge de l’appareil
en contact direct avec celle du cordon noir.
■ Appuyez sur le poussoir autotest.
Résultat :
■ L'afficheur et le rétro-éclairage s'allument,
l'afficheur affiche une valeur inférieure à 0,002 kΩ :
l'autotest est correct.
■ Le symbole "pile" s'affiche temporairement :
l'autotest est correct. Si le symbole "pile" reste allumé plus de 5 s,
vous devez procéder dans les meilleurs délais au changement de
la pile.
7
NU-709_0204
6/05/04
16:12
Page 8
TEST DE LA FONCTION TENSION
Mise en œuvre :
■ Contrôlez le fonctionnement de l'appareil sur une valeur de
tension connue : sur une pile 9 V par exemple et sur une tension
réseau connue.
Résultat :
■ La valeur attendue doit être lue sur l'afficheur.
■ Si l’autotest est incorrect, changez la pile ou procédez à une
réparation.
4. MESURE DE TENSION AUTO AC/DC, POLARITÉ
Procédez toujours à un autotest avant et après l'utilisation de
votre multimètre. Ne l'utilisez jamais si l'autotest est incorrect.
Mise en oeuvre :
■ Placez les deux pointes de touche sur le circuit à contrôler.
Mesure de tension :
■ La présence d'une tension supérieure à 1V AC ou DC sur le
circuit assure l'allumage automatique de l'afficheur et du
rétroéclairage ainsi que l'émission d'un signal sonore par le
buzzer pour chaque changement de gamme.
Caractéristiques et domaine d’utilisation :
• Détection de tension : 1V < U < 690 V
• Fréquence : DC, 50...60 Hz
• Impédance élevée, ne provoque pas la disjonction des disjoncteurs
différentiels.
• Courant de crête maxi à 690 V Is ≤ 3,5 mA
■ Mise en marche automatique pour une tension entre bornes
supérieure à 1V.
■ Reconnaissance automatique du continu et de l'alternatif pour
une tension entre bornes > 1V.
■ Sélection automatique du calibre.
■ Fonction Hold : permet de figer l'afficheur.
■ Arrêt automatique instantanné ou après environ 10 secondes en
fonction HOLD, une fois la mesure déconnectée.
NB 1 : La fonction HOLD n'annule pas l'arrêt automatique.
NB 2 : Appuyer sur la touche Auto ON/OFF pour déclencher
manuellement le démarrage.
8
SPECIFICATIONS TECHNIQUES
Généralités :
Seules les valeurs affectées de tolérances ou les limites annoncées
constituent des valeurs garanties. Les valeurs sans tolérance sont
données à titre indicatif.
Caractéristiques :
La précision typique est de ± [% de la lecture (L) + nombre d'unités
de représentation (digits ou D)] aux conditions de référence.
Nota : n'utilisez jamais l'appareil au-delà des mesures
spécifiées.
Tension continue (Autorange)
Gamme
Plage de mesure
Résolution
Précision typique
2V
20 V
200 V
2000 V
0.2 V à 1.999 V
2 V à 19.99 V
20 V à 199.9 V
200 V à 690 V
0.001 V
0.01 V
0.1 V
1V
1 % ± 2 pts
1,2 % ± 2 pts
1,2 % ± 3 pts
1,2 % ± 3 pts
Protection contre les surcharges : 750 V pendant 20 s
.
Tension alternative (Autorange)
Gamme
Plage de mesure
Fréquence
Résolution
Précision typique
2V
0.5 V à 1.999 V
50 à 60 Hz
0.001 V
2% ± 2 pts
20 V
2 V à 19.99 V
50 à 60 Hz
0.01 V
2% ± 2 pts
200 V
20 V à 199.9 V
50 à 60 Hz
0.1 V
2% ± 2 pts
2000 V
200 V à 690 V
50 à 60 Hz
1V
2% ± 2 pts
Protection contre les surcharges : 750 V pendant 20 s.
■ Conditions d'influence
Grandeur d'influence
Influence sur la mesure
de -10°C à + 18°C
de + 28°C à + 55°C
VDC : 0.2% / 10°C
VAC : 0.5% / 10°C
VDC : 0.75% / 10°C
VAC : 2% / 10°C
Humidité relative
de 20 % à 96 %
Aucune influence
Tension d'alimentation
de 6,5 V à 9,75 V
Aucune influence
9
NU-709_0204
6/05/04
16:12
Page 10
5. REPÉRAGE PHASE/NEUTRE
Procédez toujours à un autotest avant et après
l'utilisation de votre multimètre.
Ne l'utilisez jamais si l’autotest est incorrect.
Test unipolaire “ une main ” :
■ Placez la pointe de touche noire (connectée à la borne COM) sur
le conducteur à tester et un doigt sur la zone de toucher de
repérage Ph/N.
■ En présence de la phase (si U réseau > 127 V~) la LED rouge
“PH” clignote.
NB 1 : L’indication de tension n’est pas significative.
Test bipolaire “ deux mains ” avec mesure de tension:
■ Placez la pointe de touche rouge sur le premier conducteur, la
pointe de touche noire sur le second conducteur à tester et un
doigt sur la zone de touche repérage Ph/N.
■ La LED PH clignote si la pointe de touche noire est raccordée à la
phase.
La valeur de la tension entre bornes est indiquée sur l'afficheur
numérique.
Caractéristiques et domaine d’utilisation :
• Tension > 127 V
Attention : U max par rapport à la terre = 600 V
• Fréquence : 50...60 Hz ± 5%
ATTENTION :
Si la LED PH clignote et que quelques Volts sont affichés, assurezvous du bon contact électrique avec la pointe de touche.
6. CONTRÔLE DE CONTINUITÉ
MESURE DE RÉSISTANCES
■ Appuyez sur le poussoir "Autotest/Test de continuité".
Continuité buzzer
■ Pour une résistance inférieure à environ 600 Ω, le buzzer sonne et
la valeur de la résistance mesurée apparaît sur l'afficheur (en kΩ).
Mesure de résistance
Gamme
Plage de mesure
Résolution
Précision
1.999 kΩ
0.001 kΩ à 1.999 kΩ
0.001 kΩ
1% ± 2pts
Présence de tension accidentelle (>1V AC ou DC) sur le
circuit à contrôler.
■ Dans le cas où l’appareil détecte la présence d’une tension, le
buzzer sonne de manière continue et la LED rouge "Voltest"
s'allume.
Caractéristiques et domaine d’utilisation
■ Protection : jusqu’à 600 V eff (10s)
7. ROTATION DES PHASES
Procédez toujours à un autotest avant et après
l'utilisation de votre multimètre. Ne l'utilisez jamais si
l’autotest est incorrect.
Effectuez toujours un repérage Phase / Neutre avant de
procéder au test de rotation.
■ Vérifiez la présence de phases sur les trois phases à tester d'un
réseau triphasé.
Test de Rotation de Phases :
■ Placez la pointe de touche rouge sur la première phase et la
pointe de touche noire sur la deuxième phase.
■ Appuyez sur le bouton rotation des phases.
Procédez toujours à un autotest avant et après
l'utilisation de votre multimètre.
Ne l'utilisez jamais si l’autotest est incorrect.
Avant de procéder à un test de continuité assurez-vous
que le circuit à contrôler est hors tension.
■ Placez les deux pointes de touche sur le circuit à contrôler. Si
l'afficheur indique un niveau de tension (Led Voltest allumé),
arrêtez le test : le circuit est sous tension.
10
11
NU-709_0204
6/05/04
16:12
Page 12
Résultat :
■ Si l’ordre de rotation des phases est direct, la LED L1 vers L2
s’allume.
■ Si l’ordre de rotation des phases est indirect, la LED L1 vers L3
s’allume.
NB : La détection de tension reste active pendant ce test.
Caractéristiques et domaine d’utilisation :
• Tension : 230 V < U < 690 V
• Fréquence : 50 Hz et 60 Hz (± 5 %)
8. CARACTÉRISTIQUES GÉNÉRALES
Alimentation :
■ 1 pile 9 V 6F22, 6LR61
■ Autonomie :
6000 mesures de 10 secondes (avec pile 9 V alkaline)
3000 mesures de 10 secondes (avec pile 9 V saline 6F22
fournie).
Buzzer :
■ Série de 2 bips pour chaque changement de gamme.
■ Continu pour la continuité.
Durée / Cycles de fonctionnement :
■ 690 VAC : marche illimitée.
Conditions climatiques :
■ Référence : 23°C à ± 3°C
■ Utilisation :
- température : -10°C à + 55°C
- humidité relative : < 96 % HR
- altitude : jusqu’à 2000 m
■ Stockage :
- température : -10°C à +55°C (sans pile)
Dimensions :
163 x 63,6 x 40 mm
Masse :
210 g (pile incluse)
12
9. CONFORMITÉ AUX NORMES INTERNATIONALES
Détecteur de tension (selon 61243-3 - Ed. 10/98 et
NF EN 61010-1 2001 600V CAT III)
Appareil électrique
■ Selon NF EN 61010-1 : 2001
- Degré de pollution : 2
- Catégorie de mesure III pour tension assignée 600 V
■ Appareil selon EN 61243-3
- Classe B
- Type : extérieur
■ Cordons selon NF EN 61010-031 : 2002
- Degré de pollution : 2
- Catégorie de mesure III pour tension assignée 600 V
Chocs électriques
(essai selon CEI 1000-4-5)
■ 6 kV en mode différentiel sur la fonction voltmètre, classe B.
Compatibilité électromagnétique
■ EN 61326-1/A2 : 2001 classe B
Protection mécanique
■ Degré de protection de l’enveloppe
(selon NF EN 60529/A1 : 2000)
- IP 65 pour le boîtier
- IP 20 pour les pointes de touche
NB : Le boîtier est totalement protégé contre la pénétration de
poussières et les jets d’eau.
Malgré cette protection à la pluie, il n’est pas recommandé
d’utiliser le multimètre sous la pluie.
10. GARANTIE
Notre garantie s’exerce, sauf stipulation expresse, pendant 24 mois
après la date de mise à disposition du matériel pour le boîtier et
son électronique.
La robustesse mécanique du boîtier et de son électronique permettent
de garantir son fonctionnement pour une hauteur de chute de 2 m.
Les pointes de touche et la pile ne sont pas concernés par cette
garantie.
13
NU-709_0204
6/05/04
16:12
Page 14
11. MAINTENANCE
Pour la maintenance, utilisez seulement les pièces de rechange qui
ont été spécifiées. Le fabricant ne pourra être tenu pour responsable
de tout accident survenu suite à une réparation effectuée en dehors
de son service après-vente ou des réparateurs agréés.
Remplacement de la pile
Pour votre sécurité, il ne faut jamais ouvrir le multimètre avant de
l’avoir déconnecté de toute source électrique.
■ Enlevez la vis imperdable fixant la trappe à pile et ouvrir la
trappe.
■ Remplacez la pile usagée 9 V
■ Fermez la trappe à pile et revissez la vis au dos du boîtier.
Stockage
Si le mulimètre n’est pas utilisé pendant une durée dépassant 60
jours, enlevez la pile et stockez-la séparément.
Nettoyage
■ L’appareil doit être déconnecté de toute source électrique.
■ Pour nettoyer le boîtier, utilisez un chiffon légèrement imbibé
d’eau savonneuse. Rincez avec un chiffon humide. Ensuite,
séchez rapidement avec un chiffon ou de l’air pulsé.
14
GB
You have just purchased a safety multimeter 709 and we thank
your for your trust. This detector is suitable for live works.
To obtain the best service from your unit:
■ read these instructions with care
■ comply with the user precautions
Meanings of the symbol
Caution! Refer to the operating instructions before using the
device.
In this manual, if the instructions preceded by this symbol are
not correctly complied with or performed, thay may cause
bodily injury or damage to the device and the installations.
Precautions for use
■ Systematically run a SELF-TEST before using your multimeter.
■ This multimeter may be used in category III installations with
voltages that are always less than 600 V compared to ground.
CAT III circuits are power supply circuits that can support major
transient overvoltage. Example : industrial unit or machine power
supply.
■ Never open the multimeter battery compartment cover without first
disconnecting it form any source of electricity.
■ Never touch the metal part of the contact tips during a test.
■ Never perform a continuity test on a live circuit. However, in the
event of a wrong maneuver, the multimeter offers protection up to
600 V.
15
NU-709_0204
6/05/04
16:12
Page 16
1. Presentation
709 is a multimeter.
Lighting, AC/DC detection and automatic change of ranges all
guarantee improved safety and more practical operation for the user.
The design and manufacture of this product according to EN 610101 600V CAT III and EN 61243-3 standards make this product a
professional tool that you may use for diagnostic operations or when
checking for the absence of voltage.
709 enables you to measure:
- AC and DC voltages
- resistances
It also includes:
- continuity sound testing
- phase/neutral identification
- inclination of the phase rotation direction
(« 2-wire » method)
- display backlighting
- maintained voltage measurement
- an automatic lighting and extinguishing device
This instrument provides the following advantages :
- IP2X test probes not necessary according to EN 61243-3.
- rugged tool : withstands up to 2m fall.
2. DESCRIPTION
16
1. Disconnectable test points: • 2mm
2. Tolerance
The antislide tolerance on the entire perimeter of the device protects
the user from any accidental contact with an uninsulated conductor.
3. Selftest pushbutton / Continuity test – Resistance measurement.
4. 2000 point display
5. Phase rotation LED (green): clockwise
6. Phase rotation LED (red): counter-clockwise / Voltage detection
during resistance measurement (Volt-test)
7. Phase identification LED (red)
8. Phase rotation pushbutton
9. Contact area: Ph/N detection
10. Digital display hold pushbutton (HOLD)
Description of display :
3. AUTOTEST
Always run a self-test before using your multimeter.
Never use it if the self-test is wrong.
AUTOTEST
The self-test is a way of checking the
performance of the battery and the cords.
Implementation:
■ Connect the cords as indicated.
■ Bring the red contact tip of the device into
contact with that of the black cord.
■ Press the self test pushbutton.
Result :
■ The display and the backlighting come on, the
display reads a value lower than 0.002 kΩ: the
self test is correct.
■ The “battery” symbol is displayed temporarily:
the self test is correct. If the battery symbol remains
lighted for more than 5 s, the battery will need
replacing.
17
NU-709_0204
6/05/04
16:12
Page 18
VOLTAGE FUNCTION TEST
Implementation:
■ Check the operation of the device on a known voltage value: on
a 9 V battery for instance and for a voltage network that is
known.
Result:
■ The expected value must be read on the display.
■ If the self-test is incorrect, change the battery or proced with
repairs.
4. VOLTAGE MEASUREMENT AUTO AC/DC, POLARITY
Always run a self-test before using your multimeter.
Never use it if the self-test is incorrect.
Implementation:
■ Place the two test probes on the circuit to be tested.
Voltage measurement:
■ The presence of a voltage in excess of 1 V AC or DC on the
circuit ensures the automatic lighting of the display and the backlighting as well as the emission of an audible signal by the
buzzer for each change of ranges.
Characteristics and field of use:
• Voltage detection: 1 V < U < 690 V between phases (600 V with
respect to ground)
• Frequency: DC, 50...60 Hz
• High impedance does not switch the differential circuit breaker.
• Max. current at 690 V: Is ≤ 3.5mA peak
■ Automatic implentation for a voltage between phases in excess
of 1 V.
■ Automatic recognition of DC and and AC for a voltage between
terminals in excess of 1 V.
■ Automatic selection of the range.
■ Hold function: freezes the display.
■ Immediate auto shut-off, on after 10 seconds in HOLD function,
once the measurement has been disconnected
NB 1: The HOLD function does not cancel the auto-off.
TECHNICAL SPECIFICATIONS
General information:
Only the values assigned with tolerances or the announced limits are
representative of guaranteed limits. Values without a tolerance are
for information only.
Characteristics:
Typical accuracy is ± [% of the reading (L) + number of
representation units (digits or D)] under the reference conditions (see
Appendix).
DC voltage (Autorange)
Range
Measurement
Resolution
Typical precision
2V
20 V
200 V
2000 V
0.2 V à 1.999 V
2 V à 19.99 V
20 V à 199.9 V
200 V à 690 V
0.001 V
0.01 V
0.1 V
1V
1 % ± 2 pts
1,2 % ± 2 pts
1,2 % ± 3 pts
1,2 % ± 3 pts
Protection from overloads: 750 Vrms for 20 s.
AC voltage (Autorange)
Range
Measurement
Frequency
Resolution
Typical precision
2V
0.5 V to 1.999 V
50 to 60 Hz
0.001 V
2% ± 2 pts
20 V
2 V to 19.99 V
50 to 60 Hz
0.01 V
2% ± 2 pts
200 V
20 V to 199.9 V
50 to 60 Hz
0.1 V
2% ± 2 pts
2000 V
200 V to 690 V
50 to 60 Hz
1V
2% ± 2 pts
Protection from overloads: 750 Vrms for 20 s.
■ Influencing conditions
Influencing magnitude
from -10°C to +18°C
from +28°C to +55°C
Relative humidity :
from 20% to 96%
Voltage
(power supply) :
from 6.5V to 9.75V
Measurement influence
VDC : 0.2% / 10°C
VAC : 0.5% / 10°C
VDC : 0.75% / 10°C
VAC : 2% / 10°C
No influence
No influence DDT
Continuity influence
Phase identification Identification variation
NB 2: Press the auto ON/OFF key to manually push manually
switch ON
18
19
NU-709_0204
6/05/04
16:12
Page 20
5. PHASE/NEUTRAL IDENTIFICATION
Always run a self-test before using your multimeter.
Never use it if the self-test is wrong.
Buzzer continuity
■ For a resistance inferior to toughly 600 Ω, the buzzer operates
and the measured resistance value appears on the display
(in kΩ).
“Singlehanded” single pole test:
Resistance measurement
■ Place the tip of the black probe (connected to the COM terminal)
on the conductor to be tested and one tip in the identification
zone for Ph/N.
Range
Measurement range
Resolution
Precision
1,999 kΩ
0.001 kΩ to 1.999 kΩ
0.001 kΩ
1% ± 2pts
■ In the presence of the phase (if U network > 127 V~) the red LED
“PH” flashes.
Accidental voltage presence (1V AC or DC) on the circuit
to be tested.
NB 1 : During “single-handed” testing the voltage indication is no
longer significant.
■ If the device detects the presence of a voltage the buzzer sounds
continuously and the red LED «Voltest» comes on.
“Twohanded” two pole test (with voltage measurement):
■ Place the red tip on the first conductor, the black tip on the
second conductor to be tested and a finger on the Ph/N
identification zone.
■ The PH LED flashes if the black tip is connected to the phase.
The voltage value between the terminals is indicated on the
digital display.
Characteristics and field of use:
• U network > 127 V
Warning: U max with respect to ground = 600 V
• Frequency: 50...60 Hz - ± 5%
WARNING:
If the phase LED is blinking and some Volts are displayed, make
certain that the test probe has a good electrical contact.
Characteristics and field of use:
■ Protection : up to 600 V rms (for 10s)
7. PHASE ROTATION
Always run a self-test before using your multimeter.
Never use it if the self-test is incorrect.
■ Check for phase presence on the three phases to be tested for
three phase system.
Phase Rotation Test:
■ Bring the red contact tip of the to the first phase and the black tip
to second phase.
■ Press the phase rotation button.
6. CONTINUITY TESTING
RESISTANCE MEASUREMENT
Always run a self-test before using your multimeter
ultimeter ultimeter.
Never use it if the self-test is wrong.
Before performing a continuity test make sure that the
circuit to be tested is de- deenergized.
■ Place the two test probes on the circuit to be tested. If the display
indicates a voltage level, stop the test: the circuit is energized.
■ Press the self test pushbutton.
20
Result:
■ If the phase rotation order is direct, LED L1 to L2 lights up.
21
NU-709_0204
6/05/04
16:12
Page 22
■ If the phase rotation order is indirect, LED L1 to L3 lights up.
NB : The voltage detection is still active during this test.
Characteristics and field of use:
■ 230V < U < 690V
■ Frequency: 50 Hz and 60 Hz (± 5 %)
8. GENERAL CHARACTERISTICS
Power supply
■ 1 battery 9 V 6F22, 6LR61 or NEDA 1604
■ Battery life:
6000 measurements lasting 10 seconds (with 9 V alkaline
batteries)
3000 measurements lasting 10 seconds(with 9 V saline battery
6F22 as supplied)
Buzzer:
■ Series of 2 beeps for each change of range.
■ 2 kHz continuous for continuity
Duration / Operating cycles:
■ 690 VAC : unlimited operation
Climatic conditions:
■ Reference: 23°C ± 3°C
■ Use:
- temperature: -10°C to + 55°C
- relative humidity: < 96 % RH
- altitude: up to 2000 m
■ Storage:
- temperature: -10°C to 55°C (without battery)
Dimensions / Weight:
163 x 63.6 x 40mm / 210 g (battery included)
9. CONFORMITY WITH INTERNATIONAL STANDARDS.
Voltage detector (as per 61243-3 - Ed.10/98 and
NF EN 61010-1 2001 600 V CAT III)
Electrical safety
■ Device as per NF EN 61010-1 : 2001
- Degree of pollution : 2
- Measurement category III for assigned voltage 600 V
22
■ Device as per NF EN 61243-3:
- Class B
- Type: outdoor
■ Cords as per NF EN 61010-1 : 2002
- Degree of pollution : 2
- Measurement category III for assigned voltage 600 V
Electric shock
(test as per IEC 1000-4-5)
■ 6 kV in differentail mode for function voltmeter class B.
Electromagnetic compatibility
■ EN 61326-1/A2 : 2001 criterion B
Mechanical protection
■ Casing protection degree
(as per NF EN 60529/A1 : 2000)
- IP 65 for casing
- IP 20 for probes
NB : The casing is protected from the penetration of dust and water
jets.
In spite of this protection it is not advisable to use the multimeter
in the rain.
10. GUARANTEE
Our guarantee applies unless stipulated otherwise for 24 months
after the date of equipment provision for the casing and
its electronics.
The mechanical ruggedness of the casing and its electronics enables
us to guarantee its operation for a height of fall of 2 m.
The probes and battery are not concerned by this guarantee.
11. MAINTENANCE
For maintenance, use only the specified spare parts. The
manufacturer cannot be held responsible for any accidents occurring
after a repair carried out outside of his after sales department or of
approved repairers.
Battery replacement
For your safety never open the multimeter before disconnecting it for
any source of electricity.
■ Remove the captive screw attaching the battery compartment
cover and open the cover.
23
NU-709_0204
6/05/04
16:12
Page 24
■ Replace the spent 9 V battery in compliance with the polarity.
■ Close the compartment cover and screw down the screw in the
back of the unit.
Storage:
If the multimeter is not used for more than 60 days, remove the
batteries and store them separately.
Cleaning
■ The device must be disconneted from any source of electricity.
■ To clean it, use a cloth dipped in soapy water.
Rinse with a damp cloth.
Then dry quickly with a cloth or using pulsed air.
DE
Sie haben soeben ein Multimeter 709 erworben, und wir
bedanken uns für Ihr Vertrauen. Dieser Spannungsprüfer ist für
Arbeiten unter Spannung vorgesehen.
Damit die optimale Nutzung des Geräts gewährleistet ist:
■ lesen Sie diese Bedienungsanleitung sorgfältig durch.
■ beachten Sie die Sicherheitshinweise.
Bedeutung des Zeichens
Lesen Sie die Bedienungsanleitung, bevor Sie das Gerät
benutzen.
Werden die Anweisungen in dieser Bedienungsanleitung,
denen dieses Symbol vorangestellt ist, nicht beachtet oder
eingehalten, kann es zu Verletzungen von Menschen oder
Beschädigungen des Geräts oder der Installationen kommen.
SICHERHEITSHINWEISE
■ Führen Sie vor der Benutzung Ihres Multimeters immer einen
Selbsttest durch.
■ Dieses Multimeter kann für Installationen der
Überspannungskategorie III mit Spannungen, die einen Wert von
600 V gegenüber Erde nicht übersteigen, eingesetzt werden. Die
Kategorie III entspricht den strengen Zuverlässigkeitsund
Verfügbarkeitsanforderungen für Dauerbetrieb in festen
Industrieinstallationen.
■ Öffnen Sie unter keinen Umständen das Batteriefach des
Multimeters, bevor Sie nicht sämtliche Stromquellen abgeschaltet
haben.
■ Berühren Sie unter keinen Umständen den metallenen Teil der
rüfspitzen während einer Testphase.
■ Führen Sie niemals eine Durchgangsprüfung an einem unter
Spannung stehenden Kreis durch. Bei falscher Anwendung ist das
Multimeter bis zu einer Spannung von 600 V geschützt.
24
25
NU-709_0204
6/05/04
16:12
Page 26
1. VORSTELLUNG
Beim 709 handelt es sich um ein Sicherheits-Multimeter.
Das Einschalten, die AC/DC Spannungserkennung und die
automatische Bereichswahl garantieren dem Benutzer eine erhöhte
Sicherheit und einen erhöhten Komfort.
Entwicklung und Herstellung dieses Produkts gemäß den Normen EN
61010-1 600V KAT III und EN 61243-3 machen dieses Multimeter
zu einem professionellen Werkzeug, das Sie sowohl bei Ihren
Wartungsarbeiten als auch zur Überprüfung der Spannungsfreiheit
einsetzen können.
3. Taste für Selbsttest / Durchgangsprüfung - Widerstandsmessung
4. Anzeige 2000 Punkte
5. LED für Drehfeldrichtung (grün): im Uhrzeigersinn
6. LED für Drehfeldrichtung (rot): gegen den Uhrzeigersinn /
Spannungserkennung bei der Widerstandsmessung (Volttest)
7. LED für die Phasenermittlung (rot)
8. Taste für die Drehfeldrichtung
9. Tastfeld: Erkennung PH
10. Taste für das Halten der Digitalanzeige (HOLD)
Beschreibung der Anzeige:
Folgende Messungen können Sie mit dem 709 durchführen:
- Wechsel- und Gleichspannungen
- Widerstandsmessung
Weitere Funktionen sind:
- Akustische Durchgangsprüfung
- Erkennung Phase / Neutralleiter
- Anzeige der Drehfeldrichtung (2-Leiter- Verfahren)
- Hintergrundbeleuchtung der Anzeige
- Anzeigespeicherung (Hold)
- Automatisches Ein-und Ausschalten der Beleuchtung
Das Grät bietet besonders die folgenden Vorteile :
- Prüspitzen IP2X (It. EN 61243-3 nicht vorgeschrieben)
- Mechanische Robustheit : übersteht 2m Fallhöhe
2. BESCHREIBUNG
1. Abnehmbare Prüfspitze: • 2mm
2. Schutzring
Dieser um das ganze Gerät herum angebrachte rutschfeste Ring
schützt den Benutzer vor versehentlicher Berührung eines nicht
isolierten Leiters.
26
3. SELBSTTEST
Führen Sie vor der Benutzung Ihres Multimeters immer
einen Selbsttest durch.
Verwenden Sie das Multimeter auf keinen Fall, wenn der
Selbsttest einen Fehler ergeben hat.
Funktionsweise
Mit dem Selbsttest kann die gute Funktionsweise der Batterie und der
Messleitungen kontrolliert werden.
Durchführung:
■ Schließen Sie die Messleitungen wie angegeben
an.
■ Verbinden Sie die rote Prüfspitze des Geräts
direkt mit der Prüfspitze der schwarzen
Messleitung.
■ Drücken Sie die Taste für den Selbsttest.
Ergebnis:
■ Die Anzeige und die Hintergrundbeleuchtung
werden eingeschaltet, die Anzeige zeigt einer wert
unterhalb von 0,002 kΩ an: Der Selbsttest ist in Ordnung.
■ Das «Batterie-symbol» wird kurzzeitig angezeigt:
Der Selbsttest ist in Ordnung. Erscheint das Batterie-Symbol
länger als 5 Sekunden, müssen Sie so schnell wie möglich die
Batterie wechseln.
27
NU-709_0204
6/05/04
16:12
Page 28
TEST DER FUNKTION SPANNUNGSMESSUNG
Funktionsweise:
■ Kontrollieren Sie das Funktionieren des Gerätes an einem
bekannten Spannungswert: beispielsweise an einer 9 V Batterie
und an einer bekannten Netzspannung.
Ergebnis:
■ Der erwartete Wert, muss auf der Anzeige erscheinen.
■ Hat der Selbsttest einen Fehler ergeben, wechseln Sie die Batterie
oder nehmen Sie eine Reparatur vor.
4. AC/DC SPANNUNGSMESSUNG POLARITÄT
TECHNISCHE DATEN
Allgemeines:
Nur die mit Toleranzen angegebenen Werte oder die angegebenen
Grenzwerte sind garantierte Werte. Die ohne Toleranzen
angegebenen Werte dienen nur zur Information.
Technische Daten:
Die typische Genauigkeit liegt bei ± [% der Anzeige (Anz.) + Anzahl
der Darstellungseinheiten ( Digits oder D)] unter Bezugsbedingungen
(vgl. Anlage).
Führen Sie vor der Benutzung Ihres Multimeters immer
einen Selbsttest durch. Verwenden Sie das Multimeter auf
keinen Fall, wenn der Selbsttest einen Fehler ergeben hat.
Funktionsweise:
■ Setzen Sie die beiden Prüfspitzen an den zu prüfenden Kreis.
Spannungsmessung:
■ Das Vorhandensein einer Spannung über 1 V AC oder DC im
Kreis ermöglicht das automatische Einschalten der Anzeige und
der Hinter grundbeleuchtung sowie die Ausgabe eines
akustischen Signals durch den Summer bei jedem
Bereichswechsel
Technische Daten und Betriebsbereich:
• Spannungserkennung: 1 V < U < 690 V zwischen Phasen
• Frequenz : DC, 50...60 Hz
• Hole Impedanz, löst FI-Schutzschalter nich aus
• Max-Spitzenstrom bei 690 V: Is ≤ 3,5 mA Spitzenwert
Gleichspannung (Autorange)
■ Automatisches Einschalten bei einer Spannung zwischen den
Klemmen über 1 V
■ Automatische AC/DC Erkennung bei einer Spannung zwischen
den Klemmen über 1 V
■ Automatische Bereichswahl
■ Im Betriebsbereich
■ Funktion Hold: Anzeigespeicherung
■ Ausschaltung nach ca. 10 Sekunden in der Funktion HOLD,
nachdem die Messung abgebrochen wurde
Hinweis 1: Die Funktion HOLD hebt nicht die automatische
Ausschaltung auf.
Hinweis 2: Betätigen Sie die Taste Auto On/Off, um das
manuelle Einschalten zu ermöglichen.
28
Messbereich
Messspanne0.2
Auflösung
Typische Genauigkeit
2V
20 V
200 V
2000 V
V à 1.999 V
2 V à 19.99 V
20 V à 199.9 V
200 V à 690 V
0.001 V
0.01 V
0.1 V
1V
1 % ± 2 pts
1,2 % ± 2 pts
1,2 % ± 3 pts
1,2 % ± 3 pts
Überlastungsschutz: 750 Vrms (20 s)
Wechselspannung (Autorange)
Messbereich
Messspanne
Frequenz
Auflösung
Typische Genauigkeit
2V
0.5 V bis 1.999 V
50 bis 60 Hz
0.001 V
2% ± 2 pts
20 V
2 V bis 19.99 V
50 bis 60 Hz
0.01 V
2% ± 2 pts
200 V
20 V bis 199.9 V
50 bis 60 Hz
0.1 V
2% ± 2 pts
2000 V
200 V bis 690 V
50 bis 60 Hz
1V
2% ± 2 pts
Überlastungsschutz: 750 Vrms (20 s)
Einflussgröße
von -10°C zu +18°C
von +28°C zu +55°C
Luftfeuchtigkeit
von 20 % bis 96 %
Versorgungsspannung.
von 6,5 V bis 9,75 V
Einfluss auf die Messung
VDC : 0.2% / 10°C
VAC : 0.5% / 10°C
VDC : 0.75% / 10°C
VAC : 2% / 10°C
Kein Einfluss
Kein Einfluss
29
NU-709_0204
6/05/04
16:12
Page 30
5. ERKENNUNG PHASE / NEUTRALLEITER
Führen Sie vor der Benutzung Ihres Multimeters immer
einen Selbsttest durch. Verwenden Sie das Multimeter
auf keinen Fall, wenn der Selbsttest einen Fehler ergeben
hat.
Einpolige Prüfung «mit einer Hand»:
■ Setzen Sie die schwarze Prüfspitze (verbunden mit der Klemme
COM) an den zu prüfenden Leiter und einen Finger auf das
Tastfeld des Zeichens Ph/N.
■ Bei Vorhandensein der Phase (wenn Netzspannung>127V~)
blinkt die rote LED “PH”.
Hinweis 1 : Beim Test «mit einer Hand» ist die Anzeige der
Spannung nicht bedeutsam.
Zweipoliger Test und Spannungsmessung “mit zwei
Händen”:
■ Legen Sie die rote Prüfspitze an den ersten zu prüfenden Leiter,
die schwarze Prüfspitze an den zweiten zu prüfenden Leiter, und
einen Finger auf das Tastfeld des Zeichens Ph/N.
■ Die LED PH blinkt, wenn die schwarze Prüfspitze an die Phase
angeschlossen ist.
Der Wert der Spannung zwischen den Klemmen wird auf der
Digitalanzeige angezeigt.
Technische Daten und Betriebsbereich:
• Netzspannung > 127V
Achtung: U max. gegenüber Erde = 600 V
• Frequenz: 50...60 Hz ± 5%
ACHTUNG :
Wenn die LED PH blinkt und nur einige Volt Spannung angezeigt
werden, prüfen Sie ob die Prüfspitze einwandfreien elektrischen
Kontakt hat.
6. DURCHGANGSPRÜFUNG
WIDERSTANDSMESSUNG
■ Legen Sie die beiden Prüfspitzen an den zu prüfenden Kreis.
Zeigt die Anzeige einen Spannungspegel an, stoppen Sie den
Test: der Kreis steht unter Spannung.
■ Drücken Sie die Taste für den Selbsttest.
Durchgang Summer
■ Bei Widerständen von weniger als ca. 600 Ωertönt ein Signalton
und der Wert des gemessenen Widerstandes erscheint in der
Anzeige (in kΩ).
Widerstandsmessung
Messbereich
Messspanne
Auflösung
Genauigkeit
1,999 kΩ
0.001 kΩ bis 1.999 kΩ
0.001 kΩ
1% ± 2pts
Vorhandensein einer zufälligen Spannung (> 1V AC DC)
in dem zu prüfenden Kreis.
■ Für den Fall, dass das Gerät das Vorhandensein einer Spannung
erkennt, gibt der Summer einen kontinuierlichen Signalton aus
und die rote LED «Volttest» leuchtet.
Technische Daten und Betriebsbereich
■ Schutz: bis 600 V eff (10s)
7. DREHFELDRICHTUNG
Führen Sie vor der Benutzung Ihres Multimeters immer
einen Selbsttest durch.
Verwenden Sie das Multimeter auf keinen Fall, wenn der
Selbsttest einen Fehler ergeben hat.
■ Überprüfen Sie das Vorhandensein der Phasen an den drei zu
prüfenden Leitern.
Überprüfung der Drehfeldrichtung:
■ Legen Sie die rote Prüfspitze an die erste Phase und die schwarze
Prüfspitze an die zweite Phase.
■ Drücken Sie die Taste für die Drehfeldrichtung.
Führen Sie vor der Benutzung Ihres Multimeters immer
einen Selbsttest durch.
Verwenden Sie das Multimeter auf keinen Fall, wenn der
Selbsttest einen Fehler ergeben hat.
Achten Sie vor jeder Durchgangsprüfung immer darauf,
d ass der zu prüfende Kreis spannungsfrei ist.
30
31
NU-709_0204
6/05/04
16:12
Page 32
Ergebnis:
■ bei direkter Drehfeldrichtung, leuchtet die LED L1 nach L2 auf.
■ bei indirekter Drehfeldrichtung, leuchtet die LED L1 nach L3 auf.
Hinweis : Die Spannungserkennung bleibt die Testzeit über aktiv.
Technische Daten und Betriebsbereich:
• 230V < U < 690V
• Frequenz: 50 Hz und 60 Hz (± 5 %)
Elektrische Sicherheit
■ Gehäuse gemäß EN 61010-1: 2001
- Verschmutzungsgrad: 2
- Überspannungskategorie III für zugelassene Spannung 600 V
■ Gehäuse gemäß EN 61243-3
- Klasse B
- Typ: Außen
■ Leitungen gemäß EN 61010-031: 2002
- Verschmutzungsgrad: 2
- Überspannungskategorie III für zugelassene Spannung 600 V
8. ALLGEMEINE DATEN
Stromversorgung:
■ 1 Batterie 9V 6F22, 6LR61 oder NEDA 1604
■ Betriebsdauer:
6000 Messungen von 10 Sekunden (mit 9 V-Alkali-Batterien)
3000 Messungen von 10 Sekunden (mit 9 V Zink-Kohle-Batterie
6F22, mitgeliefert)
Summer:
■ ‘’Bip’’-Tonserie für iede Bereichs-änderung.
■ Durchgehend für die Durchgangsprüfung
Dauer / Betriebszyklen:
■ 690 VAC : unbegrenzter Betrieb Klimatische Bedingungen:
■ Referenz: 23°C ± 3°C
■ Betrieb :
- Temperatur: -10°C bis + 55°C
- Relative Luftfeuchtigkeit: < 96 % r.F.
- Höhe: bis 2000 m
■ Lagerung:
- Temperatur: -10°C bis +55°C (ohne Batterien)
Abmessungen / Gewicht:
163 x 63.6 x 40 mm / 210 g (Batterien inklusive)
9. EINHALTUNG DER INTERNATIONALEN NORMEN
Spannungsprüfer (gemäß 61243-3 - Ausg. 10/98 und
EN 61010-1 2001 600 V CAT III)
32
Stromschlagfestigkeit
(Versuch gemäß IEC 1000-4-5)
■ 6 kV im Differentialmodus der Funktion Spannungsmesser,
Kriterium B.
Elektromagnetische Verträglichkeit
■ EN 61326-1/A2: 2001 Kriterium B
Mechanischer Schutz
■ Schutzart des Gehäuses
(gemäß NF EN 60529/A1 : 2000)
- IP 65 für das Gehäuse
- IP 20 für die Prüfspitzen
Hinweis : Das Gehäuse ist vollständig gegen Staub und
Spritzwasser geschützt.
Trotzdem wird empfohlen, das Gerät nicht im Regen
einzusetzen.
10. GARANTIE
Unsere Garantie erstreckt sich, falls nicht ausdrücklich anders
vereinbart, über VIERUNDZWANZIG Monate nach Kauf des
Geräts auf Gehäuse und Elektronik.
Die Robustheit des Gehäuses und seiner Elektronik erlauben uns zu
garantieren, dass diese bei einem Fall aus einer Höhe von 2 m
keinen Schaden nehmen.
Die Prüfspitzen und die Batterie sind von dieser Garantie
ausgenommen.
33
NU-709_0204
6/05/04
16:12
Page 34
11. WARTUNG
Für die Wartung sind ausschließlich die angegebenen Ersatzteile zu
verwenden. Der Hersteller kann nicht für Unfälle haftbar gemacht
werden, die auf eine Reparatur zurückzuführen sind, die nicht von
seinem Kundendienst oder einem zugelassenen Reparaturservice
durchgeführt wurde.
Batteriewechsel
Öffnen Sie zu Ihrer Sicherheit niemals das Gehäuse des Multimeters,
bevor Sie nicht sämtliche Stromquellen abgeklemmt haben.
■ Lösen Sie die unverlierbare Schraube zur Befestigung des
Batteriefachdeckels und öffnen Sie das Batteriefach.
■ Tauschen Sie die verbrauchte 9V-Batterie.
■ Schließen Sie den Deckel des Batteriefachs und schrauben Sie
die Rückseite des Gehäuses wieder fest.
Lagerung
Wird das Multimeter für einen Zeitraum von mehr als 60 Tagen nicht
benutzt, nehmen Sie die Batterien heraus und lagern Sie diese
getrennt.
Reinigung
■ Das Gerät muss unbedingt von sämtlichen Stromquellen
abgeklemmt werden.
■ Verwenden Sie zur Reinigung des Gehäuses einen Lappen und
etwas Seifenwasser. Wischen Sie mit einem angefeuchteten Tuch
nach. Anschließend das Gerät mit einem Tuch trocknen oder mit
Luft abblasen.
34
NL
U hebt net een multimeter / spanningzoeker 709A
aangeschaft en we danken u voor het in ons product gestelde
vertrouwen. Deze multimeter is geschikt voor werk op
spanningvoerende circuits.
Om uw apparaat optimaal te benutten moet u :
■ deze handleiding aandachtig lezen
■ de voorzorgsmaatregelen in acht nemen
Betekenis van het symbool
Opgelet! Raadpleeg de gebruiksaanwijzing alvorens het
apparaat te gebruiken.
Indien de instructies die in deze gebruiksaanwijzing door dit
symbool voorafgegaan worden niet worden nageleefd of fout
worden uitgevoerd, kan dit leiden tot lichamelijk letsel of
schade aan het apparaat en de installaties.
VOORZORGSMAATREGELEN BIJ GEBRUIK
■ Voer voor en na het gebruik van uw multimeter systematisch een
zelftest uit.
■ Deze multimeter kan worden gebruikt op installaties van
categorie III, waarbij de spanning ten opzichte van de aarde
steeds kleiner dan 600 V blijft.
■ Circuits van CAT III zijn de voedingscircuits van krachtige
apparaten waarin tijdelijk hoge overspanningniveaus kunnen
voorkomen. Bijvoorbeeld: voeding van machines of industriële
apparaten.
■ Open nooit het batterijluikje van de multimeter zolang het
apparaat niet van elke stroombron werd losgekoppeld.
■ Raak tijdens de tests nooit de metalen delen van de voelpunten
aan.
■ Voer nooit een doorgangstest uit op een spanningvoerend circuit.
Bij een eventuele misgreep biedt de multimeter echter
bescherming tot 600 V.
35
NU-709_0204
6/05/04
16:12
Page 36
1. INLEIDING
De 709A is een multimeter en spanningzoeker.
De inschakeling, de wisselstroom- en gelijkstroomdetectie en de
automatische bereiksomschakeling garanderen een hogere veiligheid
en comfort voor de gebruiker.
Het ontwerp en de constructie van dit product in overeenstemming
met de normen EN 61010-1 600 V CAT III en EN 61243-3 maken
van dit product een professioneel werktuig dat u zowel kan
gebruiken voor diagnoses als voor het opsporen van nulspanningen.
De 709 maakt de volgende metingen mogelijk:
- wissel- en gelijkspanning
- weerstanden
Hij beschikt ook over:
- een doorgangstest met geluidssignaal
- de mogelijkheid tot opsporen van fase/nulstroom
- een aanduiding van de faseverschuivingsrichting (methode van de
“2 draden”)
- een verlicht display
- de mogelijkheid om het display te blokkeren (HOLD-functie)
- automatische in- en uitschakeling.
Hij biedt bovendien de volgende voordelen:
- mechanisch weerstandsvermogen: bestand tegen een val van 2m.
- IP2X-voelpunten die volgens EN 61243-3 niet verplicht zijn.
- eenvoudig werken op 2P+A-stekkers met de 709AXX-adapter
(optioneel).
2. BESCHRIJVING
36
1. Afkoppelbare voelpunten: • 2 mm
2. Handgreep
De antisliphandgreep rond het hele apparaat beschermt de gebruiker
tegen elk accidenteel contact met een niet-geïsoleerde geleider.
3. Drukknop Zelftest / Doorgangstest - Weerstandsmeting
4. Display met 2000 punten
5. LED voor faseverschuiving (groen): wijzerzin
6. LED voor faseverschuiving (rood): tegenwijzerzin, spanning
zoeken tijdens weerstandsmetingen (Volttest)
7. LED voor opsporen van fase (rood)
8. Drukknop faseverschuiving
9. Voelzone: opsporen fase/nulstroom
10. Drukknop om het digitale display te blokkeren (HOLD)
Beschrijving van het display:
3. ZELFTEST
Voer voor en na het gebruik van uw multimeter steeds een
zelftest uit. Gebruik het apparaat nooit indien de zelftest geen
correct resultaat geeft.
ZELFTEST
De zelftest laat toe de goede werking van de batterij en de snoeren
te controleren.
Gebruik:
■ Sluit de snoeren aan volgens de instructies.
■ Maak rechtstreeks contact tussen de rode voelpunt van
het apparaat en de voelpunt van het zwarte snoer.
■ Druk op de zelftestknop.
Resultaat:
■ Het display en de displayverlichting worden
ingeschakeld, de diplay geeft een waarde aan lager
dan 0.002 k• : de zelftest is in orde.
■ Het batterijsymbool wordt tijdelijk afgebeeld: de
zelftest is in orde. Indien het batterijsymbool langer
dan 5 seconden blijft branden, moet u de batterij zo snel
mogelijk vervangen.
37
NU-709_0204
6/05/04
16:12
Page 38
TEST VAN DE SPANINGSFUNCTIE
Gebruik:
■ Controleer de werking van het apparaat op een gekende
spanningswaarde: bijvoorbeeld op een batterij van 9V en op een
gekende netstroomspanning.
Resultaat:
■ U moet het verwachte resultaat kunnen aflezen op het display.
■ Indien het zelftestresultaat fout is, moet u de batterij vervangen of
het apparaat herstellen.
4. SPANNINGSMETING AUTO AC/DC POLARITEIT
Voer voor en na het gebruik van uw multimeter steeds een zelftest uit.
Gebruik het apparaat nooit indien de zelftest geen correct resultaat geeft.
Gebruik:
■ Plaats de twee voelpunten op het circuit dat u wil controleren.
Spanningsmeting:
■ De aanwezigheid van een wissel- of gelijkspanning van meer
dan 1V in het circuit veroorzaakt de automatische inschakeling
van het display en een geluidssignaal van de zoemer voor elke
bereiksomschakeling.
Kenmerken en gebruiksomstandigheden:
• Spanningzoeker: 1V < U < 690 V
• Frequentie: wisselstroom, 50...60 Hz
• Hoge impedantie, veroorzaakt geen uitschakeling van de
differentiaalschakelaars.
• Maximale piekstroom op 690V Is ≤ 3,5 mA
■ Automatische inschakeling bij een spanning van meer dan 1V
tussen beide polen
■ Automatische herkenning van gelijk- en wisselstroom bij een
spanning van meer dan 1V tussen beide polen.
■ Automatische selectie van het meetbereik.
■ Holdfunctie : laat toe het display te blokkeren.
■ Stopt automatisch, of na 10 seconden in stand HOLD, na het
onderbreken van de meting.
NB 1 : De HOLD-functie heft de automatische uitschakeling niet op.
NB 2 : Druk op de toets Auto ON/OFF om het toestel handmatig
in te schakelen.
38
TECHNISCHE KENMERKEN
Algemeen:
De waarden met een vermelde tolerantiedrempel of de aangegeven
grenswaarden zijn de enige gewaarborgde waarden. Waarden
zonder tolerantiedrempel worden slechts ter informatie vermeld.
Kenmerken:
De typische nauwkeurigheid bedraagt ±[afleespercentage (A) + aantal
afbeeldeenheden (digits of D)] in de referentieomstandigheden.
Nota : gebruik het apparaat nooit buiten de vermelde
metingen.
Gelijkspanning (Autorange)
Bereik
Meetmarge
200 mV
2V
2V
20 V
20 V
200 V
200 V
2000 V
2000 V
Resolutie
Typische
1 %nauwkeurigheid
± 3 pts
0.1 mV
0.001 V
0.001 V
0.01 V
0.01 V
0.1 V
0.1 V
1V
1V
5 mV tot 199.9 mV
0.2 V à 1.999 V
0.2 V tot 1.999 V
2 V à 19.99 V
2 V tot 19.99 V
20 V à 199.9 V
20 V tot 199.9 V
200 V à 690 V
200 V tot 690 V
1 % ± 2 pts
1,2 % ± 2 pts
1,2 % ± 3 pts
1,2 % ± 3 pts
Bescherming tegen overbelasting : 750 V gedurende 20 s.
Wisselspanning (Autorange)
Bereik
Meetmarge
Frequentie
Resolutie
Typische nauwkeurigheid
2V
0.5 V tot 1.999 V
50 tot 60 Hz
0.001 V
2% ± 2 pts
20 V
2 V tot 19.99 V
50 tot 60 Hz
0.01 V
2% ± 2 pts
200 V
20 V tot 199.9 V
50 tot 60 Hz
0.1 V
2% ± 2 pts
2000 V
200 V tot 690 V
50 totà 60 Hz
1V
2% ± 2 pts
Bescherming tegen overbelasting : 750V gedurende 20 s.
■ Beïnvloedende omstandigheden
Invloedwaarde
van -10°C tot + 18°C
van +28°C tot +55°C
Relatieve vochtigheid
van 20 % tot 96 %
Voedingspanning
van 6,5 V tot 9,75 V
Invloed op de meting
VDC : 0.2% / 10°C
VAC : 0.5% / 10°C
VDC : 0.75% / 10°C
VAC : 2% / 10°C
Geen invloed
Geen invloed
39
NU-709_0204
6/05/04
16:12
Page 40
5. OPSPOREN FASE/NULSTROOM
Voer voor en na het gebruik van uw multimeter steeds
een zelftest uit.
Gebruik het apparaat nooit indien de zelftest geen
correct resultaat geeft.
Unipolaire test “één hand”:
■ Plaats de zwarte voelpunt (aangesloten op de COM-pool) op de
geleider die getest wordt en een vinger op de voelzone voor het
opsporen van fase/nulspanning
■ Indien een fase wordt gedetecteerd (bij U stroomnet > 127 V~)
knippert de rode “PH”-diode.
NB 1 : De weergegeven spanning is zonder betekenis.
Bipolaire “twee handen”-test met spanningsmeting:
■ Plaats de rode voelpunt op de eerste geleider, de zwarte voelpunt
op de tweede geleider die getest wordt en een vinger op de
voelzone voor het opsporen van fase/nulspanning.
■ De PH-diode knippert indien de zwarte voelpunt op de fase werd
aangesloten.
De waarde van de spanning tussen de polen wordt weergegeven
op het digitale display.
Kenmerken en gebruiksomstandigheden:
• Spanning > 127 V
Opgelet: Maximale spanning t.o.v. de aarde = 600 V
• Frequentie: 50...60Hz ± 5%
OPGELET:
Indien de PH-diode knippert en slechts enkele Volts worden afgebeeld moet
u de kwaliteit van het elektrische contact van de voelpunt controleren.
6. DOORGANGSTEST
METING VAN WEERSTANDEN
■ Plaats de twee voelpunten op het circuit dat u wil controleren.
Stop de test indien het display een spanningsniveau (brandende
Volttest-diode) weergeeft: het circuit staat onder spanning
■ Druk op de knop “Zelftest/Doorgangstest”.
Doorgangszoemer
■ Bij een weerstand van minder dan ongeveer 600 Ω zal de
zoemer bellen en de waarde van de gemeten weerstand
verschijnt op het display (in kΩ).
Meten van weerstanden
Bereik
Meetmarge
Resolutie
Nauwkeurigheid
1.999 kΩ
0.001 kΩ tot 1.999 kΩ
0.001 kΩ
1% ± 2pts
Accidentele aanwezigheid van spanning (>1V gelijk- of
wisselstroom) op het te controleren circuit.
■ Indien het apparaat een aanwezige spanning detecteert, zal de
zoemer een ononderbroken geluid maken en de rode “Volttest”diode zal branden.
Kenmerken en gebruiksomstandigheden
■ Bescherming: tot 600 V eff (10 s)
7. FASEVERSCHUIVING
Voer voor en na het gebruik van uw multimeter steeds
een zelftest uit. Gebruik het apparaat nooit indien de
zelftest geen correct resultaat geeft.
Voer steeds een opsporingstest Fase/Nulspanning uit
alvorens over te gaan tot een faseverschuivingstest.
■ Controleer de aanwezigheid van de fase op de drie fasen van
een driefasig stroomnet.
Faseverschuivingstest:
■ Plaats de rode voelpunt op de eerste fase en de zwarte voelpunt
op de tweede fase.
■ Druk op de faseverschuivingsknop.
Voer voor en na het gebruik van uw multimeter steeds
een zelftest uit.
Gebruik het apparaat nooit indien de zelftest geen
correct resultaat geeft.
Controleer dat het circuit niet meer onder spanning staat
alvorens een doorgangstest uit te voeren.
40
41
NU-709_0204
6/05/04
16:12
Page 42
Resultaat:
■ Bij een rechtstreekse faseverschuiving zal de diode L1 naar L2
gaan branden.
■ Bij een onrechtstreekse faseverschuiving zal de diode L1 naar L3
gaan branden.
NB: De spanningsdetectie blijft actief gedurende deze test.
Kenmerken en gebruiksomstandigheden:
• Spanning: 230 V < U < 690 V
• Frequentie: 50 Hz en 60 Hz (± 5 %)
8. ALGEMENE KENMERKEN
Voeding:
■ 1 batterij 9 V 6F22, 6LR61
■ Autonomie:
6 000 metingen van 10 seconden (met alkalinebatterij van 9 V
3 000 metingen van 10 seconden (met bijgeleverde salinebatterij
6F22 van 9 V)
Zoemer:
■ Serie van 2 beeps na wisselen van meetschaal.
■ Ononderbroken toon voor de doorgangstest.
Werkingsduur/cyclus:
■ 690 VAC: onbeperkte werking
Weersomstandigheden:
■ Referentie: 23°C tot ± 3°C
■ Gebruik:
- temperatuur: -10°C tot ± +55°
- relatieve vochtigheid: < 96 % HR
- hoogte: tot 2000 m
■ Opslag:
- temperatuur: -10°C tot +55°C (zonder batterij)
Afmetingen:
163 x 63,6 x 40 mm
Massa:
210 g (batterij inbegrepen)
42
9. GELIJKVORMIGHEID MET INTERNATIONALE NORMEN
Spanningzoeker (volgens 61243-3 - Ed. 10/98 en
NF EN 61010-1 2001 600V CAT III)
Elektrisch apparaat
■ Volgens NF EN 61010-1 : 2001
- Vervuilingsgraad: 2
- Meetcategorie III voor toegewezen spanning 600 V
■ Apparaat volgens EN 61243-3
- Klasse B
- Type: buiten
■ Snoeren volgens NF EN 61010-031: 2002
- Vervuilingsgraad: 2
- Meetcategorie III voor toegewezen spanning 600 V
Elektrische schokken
(test volgens CEI 1000-4-5)
■ 6 kV in differentiaalmodus op voltmeterfunctie, klasse B.
Elektromagnetische compatibiliteit
■ EN 61326-1/A2 : 2001 klasse B
Mechanische bescherming
■ Beschermingsgraad van het omhulsel
(volgens NF EN 60529/A1 : 2000)
- IP 65 voor het kastje
- IP 20 voor de voelpunten
NB : Het kastje is volledig beschermd tegen indringend stof en
waterspatten.
Ondanks deze bescherming tegen neerslag wordt afgeraden
de multimeter in de regen te gebruiken.
10. WAARBORG
Tenzij uitdrukkelijk anders vermeld, geldt onze waarborg voor het
kastje en de elektronische onderdelen gedurende 24 maanden
vanaf de beschikbaarstelling van het materiaal.
Het mechanische weerstandsvermogen van het kastje en de
elektronische onderdelen laten ons toe de werking van het apparaat
te garanderen na een val van maximum 2 meter.
De voelpunten en de batterij worden niet gedekt door deze waarborg.
43
NU-709_0204
6/05/04
16:12
Page 44
11. ONDERHOUD
Gebruik voor onderhoudswerken uitsluitend de vermelde
wisselstukken. De fabrikant kan niet verantwoordelijk worden gesteld
voor ongevallen die voortvloeien uit een herstelling die niet werd
uitgevoerd door zijn naverkoopdienst of door erkende herstellers.
De batterij vervangen
Open de multimeter nooit zolang het apparaat niet van elke
stroombron werd losgekoppeld, uw veiligheid kan daarvan
afhangen.
■ Verwijder de borgschroef die het batterijluikje afsluit en maak het
luikje open.
■ Vervang de versleten batterij van 9 V
■ Sluit het batterijluikje en draai de schroef aan de achterzijde van
het kastje opnieuw vast.
Opslag
Indien de multimeter gedurende meer dan 60 dagen niet zal worden
gebruikt, moet u de batterij verwijderen en apart opbergen.
Reiniging
■ Het apparaat moet van elke stroombron worden losgekoppeld.
■ Gebruik een licht in zeepwater gedrenkte doek om het kastje te
reinigen. Spoel met een vochtige doek. Gebruik daarna een doek
of perslucht om het apparaat snel te drogen.
ES
Usted acaba de adquirir un multímetro
709 y le agradecemos la confianza que nos
ha brindado. Este detector está diseñado para
efectuar trabajos bajo tensión
Para obtener el mejor servicio de su aparato:
■ lea cuidadosamente este manual
■ respete las precauciones de uso
Significados del símbolo
¡Cuidado! Consulte el manual de empleo antes de utilizar el
aparato.
En el presente manual de empleo, las instrucciones
precedidas por este símbolo, si las mismas no se respetan o
realizan correctamente, pueden ocasionar un accidente
corporal o dañar el aparato y las instalaciones.
PRECAUCIONES DE EMPLEO
■ Proceda sistemáticamente a efectuar un AUTO-TEST antes y
después de utilizar su multímetro.
■ Este multímetro se puede utilizar en las instalaciones de categoría
III, con tensiones siempre inferiores a 600V respecto a la tierra.
La categoría III responde a las exigencias de fiabilidad y de
disponibilidad rigurosas que corresponden a los usos
permanentes en las instalaciones fijas industriales.
■ No abra nunca la tapa de las pilas del multímetro, sin haberi
desconectado previamente de toda fuente eléctrica.
■ No toque nunca la parte metálica de las puntas de pruebas
durante una prueba.
■ No proceda nunca a un test de continuidad en un circuito bajo
tensión. Sin embargo, en caso de falsa maniobra, el multímetro
asegura una protección hasta 600 V.
44
45
NU-709_0204
6/05/04
16:12
Page 46
1. PRESENTACIÓN
El 709 es un multímetro de seguridad.
El encendido, la detección ca/cc y el cambio de escalas
automáticas garantizan la seguridad y la comodidad de empleo al
usuario.
El diseño y la fabricación de este producto según las normas EN
61010-1 600V CAT III y EN 61243-3 hacen de este producto una
herramienta profesional que se pueda utilizar tanto durante las
operaciones de diagnóstico como durante las verificaciones de
ausencia de tensión.
El 709 le permite medir:
- las tensiones alternas y continuas
- las resistencias
También dispone de:
- tests sonoro de continuidad
- la identificación fase/neutro
- la indicación del sentido de rotación de fases (método «2 hilos»)
- la retroiluminación del display
- mantenimiento de la medida de tensió en el display
- un dispositivo de encendido y de apagado automático.
Presenta en particular las ventajas siguientes :
- robustez mecánica : soporte 2m de caída.
- puntas de contacto IP2X no obligatorias según EN 61243-3.
2. DESCRIPCIÓN
46
1. Punta de prueba desconectable: • 2mm
2. Protección
La protección antideslizamiento sobre toda la periferia del aparato,
protege al usuario de cualquier contacto accidental con un
conductor no aislado.
3. Botón Autotest / Test de continuidad - Medida de resistencias
4. Display de 2000 puntos
5. LED rotación de las fases (verde): sentido horario
6. LED rotación de las fases (rojo): sentido antihorario/Detección de
Tensión durante la medida de resistencia (Volt-test)
7. LED identificación de la fase (rojo)
8. Botón rotación de las fases
9. Zona de prueba para detección Ph/N
10. Botón de mantenimiento de la lectura en el display digital
(HOLD)
Descripción del display:
3. AUTOTEST
Antes de utilizar su multímetro, siempre realice un autotest.
No utilice nunca el multímetro si el autotest es incorrecto.
AUTOTEST
El autotest permite controlar el funcionamiento correcto de la pila y
los cables.
Aplicación:
■ Conecte los cables como se indica.
■ Ponga en contacto directo las puntas de prueba rojay negra.
■ Pulse el botón pulsador autotest.
Resultado:
■ Se encienden el display y la retroiluminación, el
display da un valor inferior a 0,002 kΩ: el autotest
es correcto.
■ El símbolo «pila» se visualiza temporalmente:
el autotest es correcto. Si el símbolo pila permanece
encendido más de 5 s, usted debe cambiar la pila lo
más rápidamente posible.
47
NU-709_0204
6/05/04
16:12
Page 48
TEST DE LA FUNCIÓN TENSIÓN
Aplicación:
■ Controle el funcionamiento del aparato en un valor de tensión
conocido: por ejemplo, en una pila de 9V y en una tensión de
red conocida.
Resultado:
■ El valor esperado.
■ Si el autotest es incorrecto, cambie la pila o proceda a su
reparación.
ESPECIFICACIONES TÉCNICAS
Generalidades:
Solamente los valores asignados de tolerancias o los límites
anunciados constituyen valores garantizados. Los valores sin
tolerancia están dados a título indicativo.
Características:
La precisión típica es de ± [% de la lectura (L) + número de unidades
de representación (dígitos o D)] en las condiciones de referencia
(véase Anexo).
4. MEDIDA DE TENSION AUTO CA/CC, POLARIDAD
Antes de utilizar su multímetro, siempre realice un autotest.
No utilice nunca el multímetro si el autotest
es incorrecto.
Aplicación:
■ Coloque una de las puntas de prueba en el circuito a controlar.
Medida de tensión:
■ La presencia de una tensión superior a 1V ca o cc en el circuito
asegura el encendido automático del display y de la
retroiluminación, así como la emisión de una señal sonora por el
zumbador para cada cambio de escalas (más de dos bips para
una tensión superior a 50V).
Características y campo de utilización:
• Detección de tensión: 1V < U < 690V
• Frecuencia: cc, 50...60Hz
• Impedancia: Z > 250kΩ
• Corriente máxima a 690 V: Is ≤ 3.5mA pico
■ Encendido automático para una tensión entre terminales
superiores a 1V
■ Reconocimiento automático de tesión continua y alterna para una
tensión entre puntas de prueba superior a 1V
■ Selección automática del calibre
■ Función Hold: permite mantener la lectura.
■ Parada automática tras aproximadamente 10 segondos en
función HOLD, una vez acabada la lectura.
NB 1: La función HOLD no anula la parada automática.
NB 2: Pulse la tecla Auto On/Off para activar manualmente el
encendido..
48
Tensión continua (Autorange)
Escala
Rango de medida
Resolución
Precisión típica
2V
20 V
200 V
2000 V
0.2 V à 1.999 V
2 V à 19.99 V
20 V à 199.9 V
200 V à 690 V
0.001 V
0.01 V
0.1 V
1V
1 % ± 2 pts
1,2 % ± 2 pts
1,2 % ± 3 pts
1,2 % ± 3 pts
Protección contra las sobrecargas: 750Vrms (durante 20 s).
Tensión alterna (Autorange)
Escala
Rango de medida
Fréquence
Resolución
Precisión típica
2V
de 0.5 V a 1.999 V
50 a 60 Hz
0.001 V
2% ± 2 pts
20 V
de 2 V a 19.99 V
50 a 60 Hz
0.01 V
2% ± 2 pts
200 V
de 20 V a 199.9 V
50 a 60 Hz
0.1 V
2% ± 2 pts
2000 V
de 200 V a 690 V
50 à 60 Hz
1V
2% ± 2 pts
Protección contra las sobrecargas: 750Vrms (durante 20 s).
■ Influencia sobre la medida
Magnitud de influencia
de -10°C a +18°C
de +28°C a +55°C
Humedad relativa
de 20 % a 96 %
Tensión de alimentación:
de 6.5 V a 9.75 V
Influencia sobre la medida
VDC : 0.2% / 10°C
VAC : 0.5% / 10°C
VDC : 0.75% / 10°C
VAC : 2% / 10°C
Ninguna influencia
Ninguna influencia
Criterio de aptitud: B
Criterio de aptitud: A
49
NU-709_0204
6/05/04
16:12
Page 50
5. IDENTIFICACIÓN FASE/NEUTRO
Antes de utilizar su multímetro, siempre realice un autotest.
No utilice nunca el multímetro si el autotest es incorrecto.
Test unipolar “una mano”:
■ Sitúe la punta de prueba negra (conectada al terminal COM) en
el conductor que se debe probar y un dedo en la zona de
prueba de identificación Ph/N.
■ En presencia de la fase (si U red > 127V~) el LED rojo “PH”
parpadea.
NB 1 : En test “una mano”, la indicación de tensión no es
significativa.
Test bipolar “dos manos”:
■ Sitúe la punta de prueba roja en el primer conductor, la punta de
prueba negra en el segundo conductor que se debe probar y un
dedo en la zona de prueba identificación Ph/N.
■ El LED PH parpadea si la punta de prueba negra está conectada
a la fase. El valor de la tensión entre terminales se indica en el
display digital.
Características y campo de utilización:
■ U > 127V
Atención : U máx respecto a la tierra = 600V
■ Frecuencia: 50...60Hz ± 5%
ATENCION:
Si la LED Ph parpadea y aparecen algunos Voltios, asegúrese del
correcto contacto eléctrico con la punta de contacto.
Continuidad zumbador
■ Para una resistancia inferior a aproximadamente 600 Ω, el
zumbador suena y en el display aparece el valor de la
resistencia medida (en kΩ).
Medida de resistencia
Escala
Rango de medida
Resolución
Precisión
1.999 kΩ
de 0.001 kΩa 1.999 kΩ
0.001 kΩ
1% ± 2pts
Presencia de tensión accidental en el circuito a controlar.
■ En el caso que el aparato detecta detecte la presencia de una
tensión, el zumbador suena de forma continua y se enciende el
LED rojo «Voltest».
Características y campo de utilización
■ Protección: hasta 600 V eff (10s)
7. ROTACIÓN DE FASES
Antes de utilizar su multímetro, siempre realice un autotest.
No utilice nunca el multímetro si el autotest es incorrecto.
■ Verifique la presencia de tensión en las tres fases a probar.
Test de Rotación de Fases:
■ Sitúe la punta de prueba roja en la primera fase y la punta de
prueba negra en la segunda fase.
■ Pulse el botón rotación de las fases.
6. CONTROL DE CONTINUIDAD
MEDIDA DE RESISTENCIAS
Antes de utilizar su multímetro, siempre realice un
autotest.
No utilice nunca el multímetro si el autotest es incorrecto.
Antes de proceder a un test de continuidad, asegúrese
de que el circuito que se debe controlar está fuera de
tensión.
■ Coloque las dos puntas de prueba en el circuito que se debe
controlar. Si el display indica un nivel de tensión, detenga el test:
el circuito está bajo tensión.
■ Pulse el botón pulsador autotest.
50
Resultado:
■ Si el orden de rotación de las fases es directo, entonces se
enciende el LED L1 hacia L2.
■ Si el orden de rotación de las fases es indirecto, entonces se
enciende el LED L1 hacia L3.
NB : La detección de tensión permanece activa durante este test.
51
NU-709_0204
6/05/04
16:12
Page 52
Características y campo de utilización:
■ 230V < U > 690V
■ Frecuencia: 50 Hz y 60 Hz (± 5 %)
8. CARACTERÍSTICAS GENERALES
Alimentación:
■ 1 pila 9 V 6F22, 6LR61 o NEDA 1604
■ Autonomía:
6000 medidas de 10 segundos (con pilas 9 V alcalinas)
3000 medidas de 10 segundos (con pila 9 V salina 6F22
suministradas)
Zumbador:
■ Serie de 2 bips para cada cambio de gama.
■ Continuo para la continuidad
Duración / Ciclos de funcionamiento:
■ 690 Vca : funcionamiento ilimitada
Condiciones climáticas:
■ Referencia: 23°C ± 3°C
■ Utilización :
- temperatura: de -10°C a +55°C
- humedad relativa: < 96% HR
- altitud: hasta 2000 m
■ Almacenamiento:
- temperatura: de -10°C a +55°C (sin pila)
■ Cables según NF EN 61010-031: 2002
- Grado de contaminación: 2
- Categoría de instalación III para tensión asignada 600 V
Choques eléctricos
(ensayo según CEI 1000-4-5)
■ 6 kV en modo diferencial en la función voltímetro, criterio B.
Compatibilidad electromagnética
■ EN 61326-1/A2: 2001 criterio B
Protección mecánica
■ Grado de protección de la cubierta (según NF EN 60529/A1 :
2000)
- IP 65 para la carcasa
- IP 20 para las puntas de prueba
NB : La carcasa está completamente protegida contra la
penetración de polvos y los chorros de agua.
A pesar de esta protección contra la lluvia, no se recomienda utilizar
el multímetro bajo la lluvia.
10. GARANTÍA
Nuestra garantía se ejerce, salvo estipulación expresa, durante
VEINTICUATRO meses tras la fecha de puesta a disposición del
material para la carcasa y su electrónica.
La solidez mecánica de la carcasa y de su electrónica nos permiten
garantizar su funcionamiento para una altura de caída de 2 m.
Esta garantía no concierne las puntas de prueba y la pila.
Dimensiones / Peso:
163 x 63.6 x 40mm / 210g (pila incluida)
11. MANTENIMIENTO
9. CONFORMIDAD A LAS NORMAS INTERNACIONALES
Detector de tensión (según 61243-3 - Ed. 10/98 y
NF EN 61010-1 2001 600 V CAT III)
Seguridad eléctrica
■ Carcasa según NF EN 61010-1 : 2001
- Grado de contaminación: 2
- Categoría de instalación III para tensión asignada 600 V
■ Carcasa según EN 61243-3
- Clase B
- Tipo: exterior
52
Para el mantenimiento, utilice solamente las piezas de recambio que
se han especificado. El fabricante no se podrá considerar
responsable de cualquier accidente ocurrido de improviso como
resultado a una reparación efectuada fuera de su servicio posventa
o reparadores homologados.
Reemplazo de las pilas
Para su seguridad, nunca abrir el multímetro antes de haberlo
desconectado de toda fuente eléctrica.
■ Retire el tornillo imperdible que fija la lengüeta para pilas y abra
la lengüeta.
53
NU-709_0204
6/05/04
16:12
Page 54
■ Reemplazo la pila usada de 9 V respetando la polaridad.
■ Cierre la lengüeta para pilas y vuelva a atornillar el tornillo
situado en la parte posterior de la caja.
Almacenamiento
Si el multímetro no se utiliza durante un periodo que supere 60 días,
retire las baterías y almacénelas por separado.
Limpieza
■ El aparato debe desconectarse de toda fuente eléctrica.
■ Para limpiar la caja, utilice un paño ligeramente humedecido con
agua jabonosa. Aclare con un paño húmedo. Luego, seque
ápidamente con un paño o aire comprimido.
PO
Agradecemos a confiança que nos mostra ao adquirir um
multímetro V.AT./D.D.T 709A.
Este multímetro é adequado aos trabalhos sob tensão.
Para obter o melhor serviço do seu aparelho:
■ leia atentamente este manual
■ respeite as precauções de utilização
Significado do símbolo
Atenção! Consulte o manual de funcionamento antes de
utilizar este aparelho.
Em caso de inobservância ou de execução incorrecta das
instruções precedidas deste símbolo no presente manual, um
acidente corporal pode se produzir, ou o aparelho e as suas
instalações podem ser danificados.
PRECAUÇÕES DE UTILIZAÇÃO
■ Proceda sistematicamente a um autoteste antes e após a
utilização do multímetro.
■ Este multímetro pode ser utilizado em instalações da categoria III,
com tensões sempre inferiores a 600 V em relação à terra.
■ Os circuitos de CAT III são circuitos de alimentação de aparelhos
de potência, podendo comportar sobretensões transitórias
importantes. Exemplo: alimentação eléctrica de máquinas ou
aparelhos industriais.
■ Nunca abra a tampa do compartimento da pilha do multímetro
antes de o ter desligado de qualquer fonte de electricidade.
■ Nunca toque na parte metálica das pontas de contacto durante
um teste.
■ Nunca proceda a um teste de continuidade sobre um circuito sob
tensão. Todavia, em caso de falsa manobra, o multímetro
assegura uma protecção até 600 V.
54
55
NU-709_0204
6/05/04
16:12
Page 56
1. APRESENTAÇÃO
O 709A é um multímetro Detector de Tensão.
O acendimento, a detecção AC/DC e a mudança de gama
automática são para o utilizador uma garantia de segurança e de
um conforto reforçado.
A concepção e o fabrico deste produto segundo as normas
EN 61010-1 600 V CAT III e EN 61243-3 fazem do mesmo uma
ferramenta profissional, que poderá utilizar tanto para operações de
diagnóstico como na verificação da ausência de tensão.
O 709A permite-lhe medir:
- tensões alternadas e contínuas
- resistências
Oferece também:
- teste sonoro de continuidade
- identificação fase/neutro
- indicação do sentido de rotação das fases
(método " 2 fios ")
- retro-iluminação do visor
- bloqueio do visor (função HOLD)
- dispositivo de acendimento e de extinção automáticos
Apresenta, nomeadamente, as seguintes vantagens:
- robustez mecânica: suporta uma queda de 2 m.
- pontas de contacto IP2X não obrigatórias segundo a
EN 61243-3.
- facilidade de trabalho com tomada de corrente 2P+T, graças ao
adaptador 709AXX (opcional).
2. DESCRIÇÃO
56
1. Pontas de contacto desligáveis : 2 mm
2. Guarda
A guarda anti-deslizamento, em toda a periferia do aparelho,
protege o utilizador contra qualquer contacto acidental com um
condutor não isolado.
3. Tecla Autoteste / Teste de continuidade – Medição de resistência
4. Visor 2000 pontos
5. LED rotação de fases (verde): sentido horário
6. LED rotação de fases (vermelho): sentido anti-horário,
detecção de tensão durante a medição de resistência (Voltest)
7. LED identificação da fase (vermelho)
8. Tecla rotação das fases
9. Zona de contacto: detecção Ph/N
10. Tecla de manutenção do visor digital (HOLD)
Descrição do visor:
3. AUTOTEST
Proceda sistematicamente a um autoteste antes e após a
utilização do multímetro. Nunca o utilize se o resultado do
autoteste for incorrecto.
AUTOTESTE
O autoteste permite controlar o bom funcionamento da pilha e dos
cabos.
Execução:
■ Ligue os cabos como indicado.
■ Coloque a ponta de contacto vermelha do aparelho
em contacto directo com a do cabo preto.
■ Prima a tecla de autoteste.
Resultado:
■ O visor e a retro-iluminação acendem, o visor indica
un valor inferior a 0.002 kΩ: o autoteste está correcto.
■ O símbolo “pilha” aparece temporariamente:o
autoteste está correcto. Se o símbolo “pilha” permanecer aceso
por mais de 5 s, deverá proceder à substituição da pilha o mais
rapidamente possível.
57
NU-709_0204
6/05/04
16:12
Page 58
TESTE DA FUNÇÃO TENSÃO
Execução:
■ Controle o funcionamento do aparelho com um valor de tensão
conhecido: uma pilha de 9 V por exemplo, e com uma tensão de
rede conhecida.
Resultado:
■ O valor previsto deve ser lido no visor.
■ Se o autoteste for incorrecto, substitua a pilha ou proceda a uma
reparação.
4. MEDIÇÃO DE TENSÃO AUTO AC/DC, POLARIDADE
Proceda sistematicamente a um autoteste antes e após a
utilização do multímetro. Nunca o utilize se o resultado do
autoteste for incorrecto.
Execução:
■ Posicione as duas pontas de contacto sobre o circuito a controlar.
Medição da tensão :
■ A presença de uma tensão superior a 1V AC ou DC no circuito
assegura o acendimento automático do visor e da retroiluminação, assim como a emissão de um sinal sonoro pela
buzina a cada mudança de gama.
Características e domínio de utilização:
• Detecção de tensão: 1V < U < 690 V
• Frequência: DC, 50...60 Hz
• Impedância elevada, não provoca a disjunção dos disjuntores diferenciais.
• Corrente de crista máxima a 690 V Is ≤ 3,5 mA
■ Accionamento automático pela presença de uma tensão entre
terminais superior a 1 V.
■ Reconhecimento automático de corrente contínua e alternada
para uma tensão entre terminais > 1 V.
■ Selecção automática do calibre.
■ Função Hold: permite imobilizar o visor.
■ Paragem automática instantânea ou após cerca de 10 segundos
em função HOLD, depois de desligada a medição.
NB 1: A função HOLD não anula a paragem automática.
NB 2: Premir a tecla Auto ON/OFF para activar o arranque
manualmente.
58
ESPECIFICAÇÕES TÉCNICAS
Generalidades:
Apenas os valores afectados de tolerâncias ou os limites anunciados
constituem valores garantidos. Os valores sem tolerância são
apresentados a título indicativo.
Características:
A precisão típica é de ± [% da leitura (L) + número de unidades de
representação (digits ou D)] nas condições de referência.
Nota : Nunca utilizer o aparelho para além das medidas
especificadas.
Tensão contínua (Autorange)
Gama
Faixa de medição
Resolução
Precisão típica
2V
20 V
200 V
2000 V
0.2 V à 1.999 V
2 V à 19.99 V
20 V à 199.9 V
200 V à 690 V
0.001 V
0.01 V
0.1 V
1V
1 % ± 2 pts
1,2 % ± 2 pts
1,2 % ± 3 pts
1,2 % ± 3 pts
Protecção contra sobrecargas: 750 V durante 20s.
Tensão alternada (Autorange)
Gama
Faixa de medição
Frequência
Resolução
Precisão típica
2V
0.5 V a 1.999 V
50 a 60 Hz
0.001 V
2% ± 2 pts
20 V
2 V a 19.99 V
50 a 60 Hz
0.01 V
2% ± 2 pts
200 V
20 V a 199.9 V
50 a 60 Hz
0.1 V
2% ± 2 pts
2000 V
200 V a 690 V
50 a 60 Hz
1V
2% ± 2 pts
Protecção contra sobrecargas: 750 V durante 20s.
■ Condições de influência
Grandeza de influência
de -10°C a + 18°C
de + 28°C a + 55°C
Humidade relativa
de 20 % a 96 %
Tensão de alimentação
de 6,5 V a 9,75 V
Influência sobre a medida
VDC : 0.2% / 10°C
VAC : 0.5% / 10°C
VDC : 0.75% / 10°C
VAC : 2% / 10°C
Nenhuma influência
Nenhuma influência
59
NU-709_0204
6/05/04
16:12
Page 60
5. IDENTIFICAÇÃO FASE/NEUTRO
Proceda sistematicamente a um autoteste antes e após a
utilização do multímetro.
Nunca o utilize se o resultado do autoteste for incorrecto.
Teste unipolar “uma só mão”:
■ Posicione a ponta de contacto preta (ligada ao terminal COM)
sobre o condutor a testar e um dedo sobre a zona de contacto
de identificação Ph/N.
■ Na presença da fase (se U rede > 127V~), o LED vermelho “PH”
torna-se intermitente.
NB 1: A indicação de tensão não é significativa.
Teste bipolar “duas mãos” com medição da tensão:
■ Posicione a ponta de contacto vermelha sobre o primeiro
condutor, a ponta de contacto preta sobre o segundo condutor a
testar e um dedo na zona de contacto de identificação Ph/N.
■ O LED PH torna-se intermitente se a ponta de contacto preta
estiver ligada à fase.
O valor da tensão entre terminais é indicado no visor digital.
Características e domínio de utilização:
• Tensão > 127 V
Atenção: U máx. em relação à terra = 600 V
• Frequência: 50...60 Hz ± 5%
ATENÇÃO:
Se o LED PH ficar intermitente e alguns Volts forem indicados, certifiquese de do bom contacto eléctrico entre a ponta de contacto e o condutor.
■ Prima a tecla “Autoteste/Teste de continuidade”.
Buzina de Continuidade
■ - Para uma resistência inferior a cerca de 600 Ω a buzina soa e
o valor da resistência medida aparece no visor (em kΩ).
Medição da resistência
Gama
Faixa de medição
Resolução
Precisão
1.999 kΩ
0.001 kΩa 1.999 kΩ
0.001 kΩ
1% ± 2pts
Presença de tensão acidental (>1V AC ou DC) no circuito
a controlar.
■ Caso o aparelho detecte a presença de tensão, a buzina soa de
maneira contínua e o LED vermelho “Voltest” acende-se.
Características e domínio de utilização
■ Protecção: até a 600 V ef. (10 s)
7. ROTAÇÃO DAS FASES
Proceda sistematicamente a um autoteste antes e após a
utilização do multímetro. Nunca o utilize se o resultado
do autoteste for incorrecto.
Efectue sempre uma identificação Fase/Neutro antes de
proceder ao teste de rotação.
■ Verifique a presença de fases nas três fases a testar das redes
trifásicas.
Teste de rotação das fases :
■ Posicione a ponta de contacto vermelha sobre a primeira fase e
a ponta de contacto preta sobre a segunda fase.
■ Prima o botão de rotação das fases.
6. CONTROLO DE CONTINUIDADE
MEDIDA DAS RESISTÊNCIAS
Proceda sistematicamente a um autoteste antes e após a
utilização do multímetro.
Nunca o utilize se o resultado do autoteste for incorrecto.
Antes de proceder a um teste de continuidade, certifiquese de que o circuito a controlar esteja fora de tensão.
■ Posicione as duas pontas de contacto sobre o circuito a
controlar. Se o visor indicar um nível de tensão (LED Voltest
aceso), interrompa o teste: o circuito está sob tensão.
60
61
NU-709_0204
6/05/04
16:12
Page 62
Resultado:
■ Se a ordem de rotação das fases for directa, o LED de L1 a L2
acende-se.
■ Se a ordem de rotação das fases for indirecta, o LED de L1 a L3
acende-se.
NB : A detecção de tensão permanece activa durante este teste.
Características e domínio de utilização:
• Tensão: 230V < U < 690V
• Frequência: 50 Hz e 60 Hz (± 5%)
8. CARACTERÍSTICAS GERAIS
Alimentação:
■ 1 pilha 9 V 6F22, 6LR61
■ Autonomia:
6000 medições de 10 segundos (com pilha 9 V alcalina).
3000 medições de 10 segundos (com pilha 9 V salina 6F22,
fornecida).
Buzina:
■ Série de dois bips para cada mudanca de gama.
■ Som contínuo para a continuidade.
Duração / Ciclos de funcionamento:
■ 690 VAC: funcionamento ilimitado.
Condições climáticas:
■ Referência: 23°C a ± 3°C
■ Utilização:
- temperatura: - 10°C a + 55°C
- humidade relativa: < 96 % HR
- altitude: até a 2000 m
■ Armazenamento:
- temperatura: - 10°C a + 55°C (sem pilha)
Dimensões:
163 x 63,6 x 40 mm
Peso:
210 g (com pilha)
62
9. CONFORMIDADE COM AS NORMAS INTERNACIONAIS
Detector de tensão (segundo 61243-3 – Ed. 10/98 e NF EN
61010-1 2001 600V CAT III)
Aparelho eléctrico
■ Segundo NF EN 61010-1 : 2001
- Grau de poluição : 2
- Categoria de medida III para tensão especificada 600 V
■ Aparelho segundo NF 61243-3
- Classe B
- Tipo: exterior
■ Cabos segundo NF EN 61010-031 : 2002
- Grau de poluição : 2
- Categoria de medida III para tensão especificada 600 V
Choques eléctricos
(ensaio segundo CEI 1000-4-5)
■ 6 kV em modo diferencial na função voltímetro, classe B.
Compatibilidade electromagnética
■ EN 61326-1/A2 : 2001 classe B
Protecção mecânica
■ Grau de protecção do invólucro
(segundo NF EN 60529/A1 : 2000)
- IP 65 para a caixa
- IP 20 para as pontas de contacto
NB : A caixa está totalmente protegida contra a penetração de
poeira e jactos de água.
Apesar desta protecção, não recomendamos a utilização do
multímetro sob a chuva.
10. GARANTIA
A nossa garantia aplica-se, salvo estipulação espressa, durante
24 meses a partir da data de entrega do material, no que se
refere à caixa e ao seu equipamento electrónico.
A robustez mecânica da caixa e da sua electrónica permitem
garantir o seu funcionamento para uma altura de queda de 2 m.
As pontas de contacto e a pilha não estão incluídas nesta garantia.
63
NU-709_0204
6/05/04
16:12
Page 64
11. MANUTENÇÃO
Para a manutenção, utilize exclusivamente as peças sobresselentes
que foram especificadas. O fabricante não poderá ser considerado
responsável por qualquer acidente que venha a ocorrer
consequentemente a uma reparação que não tenha sido efectuada
pelo seu próprio serviço pós-venda ou por reparadores autorizados.
Substituição da pilha
Para a sua segurança, o multímetro nunca deverá ser aberto antes
de ter sido devidamente desligado de qualquer fonte de
electricidade.
■ Retire o parafuso imperdível que fixa a tampa do compartimento
da pilha e abra o compartimento.
■ Substititua a pilha 9V usada
■ Feche a tampa do compartimento da pilha e reaperte o parafuso
na parte de trás da caixa.
Armazenamento
Se o multímetro não for utilizado durante um período superior a 60
dias, retire a pilha e guarde-a separadamente
Limpeza
■ O aparelho deve ser desligado de qualquer fonte de
electricidade
■ Para limpar a caixa, utilize um pano ligeiramente molhado com
água e sabão. Repita a operação com um pano húmido. Depois
seque rapidamente a caixa com um pano ou com ar pulsado.
IT
Avete appena acquistato un multimetro 709 e vi ringraziamo per
la preferenza accordataci. Questo tester è indicato per le operazioni
in presenza di tensione.
Come ottenere il meglio dal vostro apparecchio:
■ leggete attentamente il presente manuale
■ rispettate le indicazioni per l’uso
Spiegazione del simbolo
Attenzione! Prima di utilizzare l’apparecchio, leggere
attentamente le istruzioni.
Nel presente manuale il mancato rispetto o l’inadeguata
realizzazione delle istruzioni precedute da questo simbolo
possono provocare lesioni personali o danneggiare
apparecchio e impianti.
PRECAUZIONI PER L’USO
■ Prima di utilizzare il multimetro, effettuare un
TEST DI AUTODIAGNOSTICA.
■ Questo multimetro può essere impiegato su impianti di categoria
III, con tensioni sempre inferiori a 600V rispetto alla messa a
terra. La categoria III risponde ai più severi requisiti di
affidabilità, corrispondente all’utilizzo permanente su impianti
industriali fissi.
■ Non aprire mai il portello di accesso alle pile del multimetro
prima di averlo scollegato da fonti di alimentazione elettrica.
■ Nel corso del test non toccare mai la parte metallica dei puntali
di contatto.
■ Mai procedere ad un test di continuità su un circuito in tensione.
Tuttavia, in caso di manovre errate, il rilevatore assicura una
protezione adeguata fino a 600 V.
64
65
NU-709_0204
6/05/04
16:12
Page 66
1. PRESENTAZIONE
Il 709 è un multimetro di sicurezza.
Le funzioni automatiche di accensione, rilevazione AC/DC e
cambiamento di gamma garantiscono maggiore sicurezza e praticità
per l’utente.
Lo sviluppo e la fabbricazione del prodotto in conformità con le
norme EN 61010-1 600V CAT III e EN 61243-3 lo rendono uno
strumento professionale che potrete utilizzare durante le operazioni
di diagnostica, ma anche nelle verifiche di mancanza di tensione.
Il 709 vi consente di misurare:
- tensioni alternate e continue
- resistenze
Esso dispone anche:
- del test sonoro di continuità
- rilevazione fase/neutro
- indicazione del senso di rotazione delle fasi (metodo a “2 fili”)
- retroilluminazione del display
- memorizzazione della misura di tensione
- dispositivo di accensione e spegnimento automatici.
Esso presenta segnatamente i seguenti pregi :
- punte di contatto IP2X non obbligatorie secondo EN 61243-3.
- robustezza meccanica : sopporta cadute di 2m.
2. DESCRIZIONE
1. Puntale scollegabile: • 2mm
2. Protezione:
La protezione antiscivolo posta lungo il perimetro dell’apparecchio
protegge l’utente da eventuali contatti accidentali con conduttori non
isolati.
66
3. Pulsante Autodiagnostica/Test di continuità – Misurazione delle
resistenze
4. Display 2000 punti
5. LED rotazione delle fasi (verde): senso orario
6. LED rotazione delle fasi (rosso): senso antiorario/Rilevazione di
tensione duranta la misurazione della resistenza (volt test)
7. LED rilevazione della fase (rosso)
8. Pulsante rotazione delle fasi
9. Zona di contatto: Rilevazione Ph/N
10. Pulsante di mantenimento del display numerico (HOLD)
Descrizione del display:
3. AUTODIAGNOSTICA
Procedere sempre ad un autotest prima di utilizzare il
rilevatore.
Non utilizzare mai l’apparecchio se l’autodiagnostica
non è corretta.
AUTOTEST
Il test di autodiagnostica consente di
convalidare lo stato della pila e dei cordoni.
Attivazione:
■ Collegate i cordoni come indicato.
■ Mettete il puntale rosso dell’apparecchio
direttamente a contatto con quello del cordone
nero.
■ Premete sul pulsante autotest.
Risultato:
■ Il Display e la retroilluminazione si accendono, il
display visualizza une valore inferiore a 0.002 kΩ:
l’autotest è corretto.
■ Si accende brevemente il simbolo “pila”:
l’autotest è corretto. Se il simbolo pila resta acceso per più di 5
secondi, sostituire quanto prima la pila.
67
NU-709_0204
6/05/04
16:12
Page 68
TEST DELLA FUNZIONE TENSIONE
Attivazione:
■ Controllate il funzionamento dell’apparecchio su un valore di
tensione a voi noto: ad esempio su una pila da 9 V e su una
tensione di rete che conoscete.
Risultato:
■ Sul display deve essere visualizzato il valore atteso.
■ Se l’autotest non è corretto, sostituite le pile o procedetealla
riparazione.
4. TENSIONE DI MISURA AUTOMATICA, AC/DC, POLARITÀ
Procedere sempre ad un autotest prima di utilizzare il
rilevatore.
Non utilizzare mai l’apparecchio se l’autodiagnostica
non è corretta.
Attivazione:
■ Mettete i due puntali di contatto sul circuito da controllare.
Tensione di misura:
■ La presenza di una tensione superiore a 1 V AC o DC sul circuito
garantisce l’accensione automatica del display e della retro
lluminazione, oltre all’emissione di un segnlae sonoro da parte
del cicalino in concomitanza con i singoli cambiamenti di
gamma.
Caratteristiche e settore di utilizzazione:
• Rilevazione di tensione: 1 V < U < 690 V
• Frequenza: DC, 50...60 Hz
• Impedenza: Z > 250 kΩ
• Corrente massima a 690 V: IS ≤ 3,5mA picco
■ Accensione automatica per una tensione tra morsetti superiore a 1 V.
■ Riconoscimento automatico di corrente continua e alternata a una
tensione tra morsetti superiore a 1 V.
■ Selezione automatica del calibro.
■ Funzione Hold: Consente di bloccare il display.
■ Stop automatico dopo circa 10 secondi nella funzione HOLD,
una volta scollegata la misura
NB 1: La funzione HOLD non annulla lo stop automatico.
SPECIFICHE TECNICHE
Generalità
Solo i valori che comportano tolleranze o i limiti annunciati
costituiscono valori garantiti. I valori senza tolleranze sono forniti a
titolo indicativo.
Caratteristiche
La precisione è di ± [% della lettura (L) + numero di unità di
rappresentazione (digit o D) alle condizioni di riferimento (vedi
Appendice).
Tensione continua (Auto-range)
Gamma
Escursione di misura
Risoluzione
Precisione tipica
2V
20 V
200 V
2000 V
0.2 V à 1.999 V
2 V à 19.99 V
20 V à 199.9 V
200 V à 690 V
0.001 V
0.01 V
0.1 V
1V
1 % ± 2 pts
1,2 % ± 2 pts
1,2 % ± 3 pts
1,2 % ± 3 pts
Protezione dai sovraccarichi: 750 Vrms (per 20 s)
Tensione alternata (Auto-range)
Gamma
Escursione di misura
Frequenza
Risoluzione
Precisione tipica
2V
0.5 V a 1.999 V
50 a 60 Hz
0.001 V
2% ± 2 pts
20 V
2 V a 19.99 V
50 a 60 Hz
0.01 V
2% ± 2 pts
200 V
20 V a 199.9 V
50 a 60 Hz
0.1 V
2% ± 2 pts
2000 V
200 V a 690 V
50 a 60 Hz
1V
2% ± 2 pts
Protezione dai sovraccarichi: 750 Vrms (per 20 s)
■ Influenza sulle misura
Grandezza di influenza
da -10°C a +18°C
da +28°C a +55°C
Umidità relativa
da 20 % a 96 %
Tensione di alimentazione
da 6,5 V a 9,75 V
Influenza sulla misura
VDC : 0.2% / 10°C
VAC : 0.5% / 10°C
VDC : 0.75% / 10°C
VAC : 2% / 10°C
Nessuna influenza
Nessuna influenza in DDT.
Influenza in continuità:
Identificazione fase
Variazione di rilevazione
NB 2 : Premere il tasto Auto On/Off per attivare l’accensione
automatica.
68
69
NU-709_0204
6/05/04
16:12
Page 70
5. IDENTIFICAZIONE FASE/NEUTRO
Procedere sempre ad un autotest prima di utilizzare il
rilevatore.
Non utilizzare mai l’apparecchio se l’autodiagnostica
non è corretta.
Test unipolare “ una mano ”:
■ il puntale nero (collegato al morsetto COM) sul conduttore da
testare e un dito sulla zona di rilevazione Ph/N
■ In presenza della fase (se U rete > 127 V~) il LED rosso “PH”
lampeggia.
NB 1 : Nel test unipolare “ una mano ” l’indicazione di tensione
non è significativa.
Test unipolare “ due mani ”:
■ Posizionate il puntale rosso sul primo conduttore da testare e il
puntale nero sul secondo conduttore. Collocate un dito sul tasto
di rilevazione Ph/N.
■ Il LED PH lampeggia se il puntale nero è collegato alla fase.
Il valore della tensione tra i morsetti è indicato sul display
numerico.
Caratteristiche e settore di utilizzazione
• U rete > 127V
Attenzione: U max in rapporto alla terra = 600 V
• Frequenza: 50...60Hz ± 5%
ATTENZIONE:
Se il LED Ph lampeggia e sono visualizzati alcuni
Volt, accertatevi del corretto contatto elettrico
con la punta di contatto.
6. CONTROLLO DI CONTINUITÀ
MISURA DELLE RESISTENZE
■ Mettete i due puntali di contatto sul circuito da controllare. Se il
display indica la presenza di un livello di tensione, interrompete
il test: il circuito è in tensione.
■ Premete sul pulsante autotest.
Continuità cicalino
■ Per una resistanza inferiore a circa 600Ω, il cicalino suona e il
valore della resistenza misurato appare sul display (in kΩ).
Misura di resistenza
Gamma
1.999 kΩ
Escursione di misura
0.001 kΩa 1.999 kΩ
Risoluzione
Precisione
0.001 kΩ
1% ± 2pts
Presenza di tensione (> 1V AC/DC) accidentale sul
circuito da controllare.
■ Nel caso in cui l’apparecchio rilevi la presenza di tensione, il
cicalino suona in continua e il LED rosso “Voltest” si accende.
Caratteristiche e settore di utilizzazione
■ Protezione: fino a 600 V eff (10s)
7. ROTAZIONE DELLE FASI
Procedere sempre ad un autotest prima di utilizzare il
rilevatore.
Non utilizzare mai l’apparecchio se l’autodiagnostica
non è corretta.
■ Verificate la presenza di fasi sulle tre fasi da testare (sistema
trifase).
Test di Rotazione di fasi:
■ Posizionare il puntale rosso sulla prima fase e il puntale nero
sulla seconda fase.
■ Premete sul pulsante rotazione delle fasi.
Procedere sempre ad un autotest prima di utilizzare il
rilevatore.
Non utilizzare mai l’apparecchio se l’autodiagnostica
non è corretta.
Prima di procedere ad un test di continuità verificare che
il circuito da controllare sia scollegato dalla tensione.
70
71
NU-709_0204
6/05/04
16:12
Page 72
Risultato:
■ Se l’ordine di rotazione delle fasi è diretto, il LED L1 verso L2 si
accende.
■ Se l’ordine di rotazione delle fasi è indiretto, il LED L1 verso l’L3
si accende.
NB : La rilevazione di tensione rimane attiva durante questo test.
Caratteristiche e settore di utilizzazione
• 230V < U < 690V
• Frequenza: 50 Hz e 60 Hz (± 5 %)
8. CARATTERISTICHE GENERALI
Alimentazione:
■ 1 pila 9 V 6LF22, 6LR61 o NEDA 1604
■ Autonomia:
6000 misure di 10 secondi (con pile alcaline da 9 V)
3000 misure di 10 secondi (1 pila 9 V salina 6F22 fornita)
Cicalino:
■ Serie di 2 bip per ogni cambio di gamma.
■ Continua per la continuità
Durata/ Cicli di funzionamento:
■ 690 VAC: accensione illimitata
Condizioni climatiche:
■ Articolo: 23°C ± 3°C
■ Utilizzo :
- temperatura: -10°C a +55°C
- umidità relativa: < 96 % HR.
- Altezza: sino a 2000 m
■ Conservazione:
- temperatura: -10°C a + 55°C (senza pila)
Dimensioni / Massa:
163 x 63.6 x 40 mm / 210 g (pila inclusa)
Sicurezza elettrica
■ Contenitore secondo NF EN 61010-1: 2001
Livello di inquinamento: 2
- Categoria di misura III per tensione 600 V
■ Contenitore secondo NF EN 61243-3:Classe B
- Tipo esterno
■ Cordoni secondo NF EN 61010-031: 2002
- Livello di inquinamento: 2
- Categoria di misura III per tensione 600 V
Shock elettrici
(test secondo IEC 1000-4-5)
■ 6 kV in modalità differenziale sulla funzione voltmetro, criterio B.
Compatibilità elettromagnetica
■ EN 61326-1/A2: 2001 criterio B
Protezione meccanica
■ Grado di protezione dell’involucro
(secondo NF EN 60529/A1 :2000)
- IP 65 per il contenitore
- IP 20 per i puntali di contatto.
NB : a scatola è totalmente protetta contro la penetrazione di
polvere ed i getti d’acqua.
Malgrado questa protezione si sconsiglia di utilizzare il
rilevatore in caso di pioggia.
10. GARANTIE
La nostra garanzia si esercita, salvo stipulazione differente, per
VENTIQUATTRO mesi dopo la data di messa a disposizione del
materiale per quanto riguarda la scatola e la parte elettronica.
La robustezza meccanica della scatola ci permetterà di garantire la
scatola e la parte elettronica per una caduta di altezza di 2 m. I
puntali di contatto e la pila non sono interessati dalla presente
garanzia.
11. MANUTENZIONE
9. CONFORMITÀ ALLE NORME INTERNAZIONALI
Rilevatore di tensione (secondo 61243-3 - Ed. 10/98 e
NF EN 61010-1 2001 600 V CAT III)
72
Per la manutenzione utilizzare esclusivamente i ricambi indicati. Il
costruttore non è responsabile degli incidenti conseguenti a
riparazioni non effettuate dal suo servizio di assistenza o da
riparatori autorizzati.
73
NU-709_0204
6/05/04
16:12
Page 74
Sostituzione delle pile
Per la propria sicurezza, non si deve mai aprire il multimetro prima
di averlo scollegato da qualsiasi fonte elettrica.
■ Togliere la vite vincolata che blocca il portello d’accesso alle pile
ed aprire il portello.
■ Sostituire la pila usata 9 V rispettando la polarità
■ Chiudete il portello d’accesso alle pile e riavvitate la vite sulla
parte posteriore della scatola.
Magazzinaggio
Se il multimetro non viene utilizzato per una durata che supera i 60
giorni, togliere le pile e stoccare separatamente.
Pulizia
■ L’apparecchio deve essere scollegato dalle sorgenti elettriche.
■ Per pulire il contenitore, utilizzare un panno leggermente
umidificato con acqua e spaone.
Sciacquare con un panno umido.
In seguito, asciugare rapidamente con un panno oppure con aria
a pressione.
DK
Du har netop købt et V.A.T./D.D.T.-multimeter model 709A,
og vi takker for den tillid, du har vist os. Dette multimeter er beregnet
til arbejde på strømførende dele.
Følg disse anvisninger for at få fuldt udbytte af apparatet:
■ læs denne brugsanvisning nøje.
■ overhold sikkerhedsanvisningerne for brug.
Symboler
Obs! Læs brugsanvisningen, før du begynder at bruge
apparatet.
Hvis de anvisninger, der er mærket med dette symbol i
brugsanvisningen, ikke overholdes eller udføres, kan det
medføre personskade eller beskadigelse af apparatet og
installationerne.
ANVISNINGER FOR BRUG
■ Udfør altid en selvtest, både før og efter at multimeteret anvendes.
■ Multimeteret kan bruges i installationer, der er klasseret i kategori
III, med spændinger under 600 V i forhold til jord.
■ Kredsløb af kategori III er fødekredsløb til spændingsførende
apparater, der kan indeholde høje forbigående overspændinger.
Eksempel: Strømforsyning af industrimaskiner eller -apparater.
■ Åbn aldrig multimeterets batterilåg, før multimeteret er frakoblet
alle strømkilder.
■ Rør aldrig prøveledningernes metaldele under en test.
■ Udfør aldrig en kontinuitetstest på et kredsløb, der er
spændingsførende. I tilfælde af en forkert handling beskytter
multimeteret dog op til 600 V.
74
75
NU-709_0204
6/05/04
16:12
Page 76
1. PRÆSENTATION
Model 709A er et multimeter af typen med spændingsdetektor.
Funktionerne tænding, detektering af vekselstrøm og jævnstrøm samt
automatisk områdeskift gør apparatet mere brugervenligt og sikkert.
Produktet er designet og fremstillet i henhold til standarderne
EN 61010-1 600 V KAT III og EN 61243-3, og det er således et
professionelt værktøj, der både kan bruges til
diagnosticeringsarbejde og til kontrol af, at spændingen er afbrudt.
Med 709A kan du måle:
- Veksel- og jævnspændinger
- Modstande
Multimeteret giver endvidere mulighed for:
- Kontinuitetslydtest
- Lokalisering af fase/nul
- Angivelse af fasernes omdrejningsretning (metode med "2
ledninger")
- Et baggrundsbelyst display
- Frysning af displayets visning (HOLD-funktion)
- En automatisk tændings- og slukningsanordning
1. Prøveledningerne kan afbrydes: o 2 mm
2. Beskyttelseskant
En skridsikker kant rundt om hele apparatet beskytter brugeren mod
utilsigtet kontakt med en ikke-isoleret leder.
3. Trykknap til selvtest / kontinuitetstest - måling af modstand
4. Display med 2000 punkter
5. Lysdiode for faseomdrejning (grøn): Med uret
6. Lysdiode for faseomdrejning (rød): Mod uret, registrering af
spænding under måling af modstand (Voltest).
7. Lysdiode for lokalisering af fase (rød)
8. Trykknap for faseomdrejning
9. Berøringsområde: Lokalisering af fase/nul
10. Trykknap for frysning af displayets visning (HOLD-funktion)
Beskrivelse af displayet:
3. SELVTEST
Det har blandt andet følgende fordele:
- Mekanisk solidt design: Kan tåle et fald på op til 2 meter.
- De ikke-obligatoriske IP2X-prøveledninger i henhold til
EN 61243-3.
- Nemt at arbejde med på 2P+T-strømstik med 709AXX-adapteren
(tilbehør).
2. BESKRIVELSE
76
Udfør altid en selvtest både før og efter anvendelsen af
multimeteret. Brug aldrig multimeteret, hvis selvtesten er
negativ.
SELVTEST
Selvtesten bruges til at kontrollere, at batteriet og ledningerne
fungerer korrekt..
Sådan gør du:
■ Tilslut ledningerne som vist.
■ Før den røde prøveledning fra apparatet i direkte
kontakt med den sorte prøveledning.
■ Tryk på knappen for selvtest.
Resultat:
■ Displayet og baggrundslyset tænder, og displayet
viser en værdi mindre end 0,002 kΩ. Selvtesten er
korrekt.
■ Symbolet for batteri vises et øjeblik:
Selvtesten er korrekt udført. Hvis symbolet for batteri lyser i mere
end 5 sek., skal batteriet udskiftes hurtigst muligt.
77
NU-709_0204
6/05/04
16:12
Page 78
TEST AF SPÆNDINGSFUNKTIONEN
Sådan gør du:
■ Kontroller apparatets funktionsmåde ved hjælp af en kendt
spændingsværdi, f.eks. et 9 V-batteri, og ved hjælp af en kendt
netspænding.
Resultat:
■ Den forventede værdi skal vises på displayet.
■ Hvis selvtesten ikke er korrekt, skal batteriet udskiftes, eller
apparatet skal repareres.
4. AUTOMATISK MÅLING AF AC/DC-SPÆNDING, POLARITET
Udfør altid en selvtest både før og efter anvendelsen af
multimeteret. Brug aldrig multimeteret, hvis selvtesten er
negativ.
Sådan gør du:
■ Anbring de to prøveledninger på det kredsløb, der skal
kontrolleres.
Måling af spænding:
■ Hvis spændingen er højere end 1 V AC eller DC på kredsløbet,
tænder displayet og baggrundslyset automatisk, og der høres et
lydsignal, hver gang der skiftes område.
Tekniske specifikationer og anvendelsesområder:
• Detektering af spænding: 1 V < U < 690 V
• Frekvens: DC, 50...60 Hz
• Høj impedans, medfører ikke udkobling af fejlstrømsafbrydere.
• Maks. spidsstrøm ved 690 V Is ≤_3,5 mA
■ Automatisk start ved en spænding mellem klemmerne på mere
end 1 V.
■ Automatisk genkendelse af jævnstrøm og vekselstrøm ved en
spænding mellem klemmerne på mere end 1 V.
■ Automatisk valg af nominelt område.
■ Hold-funktion: Fryser displayets visning.
■ Automatisk slukning, enten øjeblikkeligt eller efter ca.10
sekunders aktivitet på HOLD funktionen, når målingen er afbrudt
NB 1 : HOLD-funktionen annullerer ikke automatisk stop.
NB 2 : Tryk på tasten Auto ON/OFF for manuelt at aktivere start.
78
TEKNISKE SPECIFIKATIONER
Generelt:
Kun de værdier, for hvilke der gælder tolerancer eller anførte
grænser, er garanterede værdier. Værdier uden tolerance er kun
anført som eksempler.
Specifikationer:
Den typiske nøjagtighed er på ±[% af aflæsningen (L) + antal
repræsenterede enheder (cifre eller D)], hvor referencebetingelserne
er opfyldt.
Bemærk! Brug aldrig apparatet ud over de anførte
målegrænser.
Jævnspænding (Autorange
Område
Måleområde
Opløsning
Typisk nøjagtighed
2V
20 V
200 V
2000 V
0.2 V à 1.999 V
2 V à 19.99 V
20 V à 199.9 V
200 V à 690 V
0.001 V
0.01 V
0.1 V
1V
1 % ± 2 pts
1,2 % ± 2 pts
1,2 % ± 3 pts
1,2 % ± 3 pts
Beskyttelse mod overspændinger: 750 V i 20 sek.
Vekselspænding (Autorange)
Område
Måleområde
Frekvens
Opløsning
Typisk nøjagtighed
2V
0.5 V til 1.999 V
50 til 60 Hz
0.001 V
2% ± 2 pts
20 V
2 V til 19.99 V
50 til 60 Hz
0.01 V
2% ± 2 pts
200 V
20 V til 199.9 V
50 til 60 Hz
0.1 V
2% ± 2 pts
2000 V
200 V til 690 V
50 til 60 Hz
1V
2% ± 2 pts
Beskyttelse mod overspændinger: 750 V i 20 sek.
■ Funktionspåvirkende størrelser
Funktionspåvirkende størrelser
fra -10°C til +18°C
fra +28°C til +55°C
Relativ fugtighed
fra 20 % til 96 %
Forsyningsspænding
fra 6,5 V til 9,75 V
Indflydelse på målingen
VDC : 0.2% / 10°C
VAC : 0.5% / 10°C
VDC : 0.75% / 10°C
VAC : 2% / 10°C
Ingen indflydelse
Ingen indflydelse
79
NU-709_0204
6/05/04
16:12
Page 80
5. LOKALISERING AF FASE/NUL
■ Tryk på knappen for selvtest/kontinuitetstest.
Udfør altid en selvtest både før og efter anvendelsen af
multimeteret.
Brummer for kontinuitet
■ Ved en modstand på mindre end ca. 600 Ω, aktiveres brummeren,
og den målte modstands værdi vises på displayet (i kΩ).
Brug aldrig multimeteret, hvis selvtesten er negativ.
Måling af modstand
"Enhånds" unipolartest:
■ Anbring den sorte prøveledning (tilsluttet COM-klemmen) på den
leder, der skal prøves, og læg en finger på berøringsområdet til
lokalisering af fase/nul.
■ Når fasen er lokaliseret (hvis ledningsnettets U > 127 V~), blinker
den røde kontrollampe “PH”.
NB 1: Angivelsen af spændingen er ikke betydende.
"Tohånds" bipolærtest med spændingsmåling:
■ Anbring den røde prøveledning på den første leder, anbring den
sorte prøveledning på den anden leder, der skal prøves, og læg
en finger på berøringsområdet til lokalisering af fase/nul.
■ Lysdioden PH blinker, hvis den sorte prøveledning er tilsluttet fase.
Spændingsværdien mellem klemmerne er anført på
digitaldisplayet.
Tekniske specifikationer og anvendelsesområder:
• Spænding > 127 V
Obs! Maks. U i forhold til jord = 600 V
• Frekvens: 50...60 Hz ± 5%
OBS!
Hvis lysdioden PH blinker, og der vises en værdi på et par volt, skal
du kontrollere, at der er god elektrisk kontakt med prøveledningen.
6. KONTROL AF KONTINUITET
MÅLING AF MODSTAND
Område
Måleområde
Opløsning
Målepræcision
1.999 kΩ
0.001 kΩ til 1.999 kΩ
0.001 kΩ
1% ± 2pts
Utilsigtet tilstedeværelse af spænding (>1 V AC eller DC)
på det kredsløb, der skal kontrolleres.
■ Hvis apparatet registrerer, at der er spænding på kredsløbet,
aktiveres brummeren kontinuerligt, og den røde lysdiode "Voltest"
tænder.
Tekniske specifikationer og anvendelsesområder
■ Beskyttelse: Op til 600 V eff (10 sek.)
7. FASEOMDREJNING
Udfør altid en selvtest både før og efter anvendelsen af
multimeteret. Brug aldrig multimeteret, hvis selvtesten er
negativ.
Udfør altid en lokalisering af fase/nul, før du udfører
test af omdrejning.
■ Kontroller, at der er fase på de tre faser, som afprøves i et
trefaset ledningsnet.
Test af faseomdrejning:
■ Anbring den røde prøveledning på den første fase og den sorte
prøveledning på den anden fase.
■ Tryk på knappen for faseomdrejning.
Udfør altid en selvtest både før og efter anvendelsen af
multimeteret.
Brug aldrig multimeteret, hvis selvtesten er negativ.
Før kontinuitetstesten udføres, skal du kontrollere, at det
kredsløb, der skal testes, ikke er spændingsførende.
■ Anbring de to prøveledninger på det kredsløb, der skal
kontrolleres. Hvis displayet viser et spændingsniveau (lysdioden
Voltest er tændt), skal du afbryde testen, idet kredsløbet er
spændingsførende.
80
81
NU-709_0204
6/05/04
16:12
Page 82
Resultat:
■ Hvis rækkefølgen for fasernes omdrejning er direkte, tænder
lysdiode L1 mod L2.
■ Hvis rækkefølgen for fasernes omdrejning er indirekte, tænder
lysdiode L1 mod L3.
NB: Registreringen af spænding forbliver aktiv under testen.
Tekniske specifikationer og anvendelsesområder:
• Spænding: 230 V < U < 690 V
• Frekvens: 50 Hz og 60 Hz (± 5 %)
8. GENERELLE SPECIFIKATIONER
Strømforsyning:
■ 1 stk. 9 V batteri, 6F22, 6LR61
■ Levetid:
6.000 målinger på 10 sekunder (med 9 V alkalisk batteri)
3.000 målinger på 10 sekunder (et 9 V batteri 6F22 medfølger)
Brummer:
■ For hver programændring høres 2 bip.
■ Kontinuerlige biplyde for kontinuitet.
Varighed / driftsperioder:
■ 690 V AC: Ubegrænset drift.
Klimamæssige forhold:
■ Referencebetingelser: 23°C til ± 3°C
■ Anvendelse:
- temperatur: -10°C til +55°C
- relativ fugtighed: < 96 % RH
- højde: Op til 2.000 meter
■ Opbevaring:
- temperatur: -10°C til +55°C (uden batteri)
Mål:
163 x 63,6 x 40 mm
Vægt:
210 g (inklusive batteri)
82
9. OVERENSSTEMMELSE MED
INTERNATIONALE STANDARDER
Spændingsdetektor (iht. 61243-3 - udg. 10/98 og NF EN
61010-1 2001 600 V KAT III))
Elektrisk apparat
■ Iht. NF EN 61010-1: 2001
- Forureningsgrad: 2
- Målekategori III for en mærkespænding på 600 V
■ Apparatet opfylder kravene i EN 61243-3
- Klasse B
- Type: Udendørs
■ Ledninger iht. NF EN 61010-031: 2002
- Forureningsgrad: 2
- Målekategori III for en mærkespænding på 600 V
Elektriske stød
(test i henhold til CEI 1000-4-5)
■ 6 kV i differentialetilstand på voltmeterfunktionen, klasse B.
Elektromagnetisk kompatibilitet
■ EN 61326-1/A2 : 2001 klasse B
Mekanisk beskyttelse
■ Indkapslingens beskyttelsesklasse
(i henhold til NF EN 60529/A1: 2000)
- IP 65 for apparatets hus
- IP 20 for prøveledningerne
NB : Apparatets hus er fuldt beskyttet mod indtrængning af støv og
vandsprøjt.
På trods af denne beskyttelse mod regn anbefales det ikke at
bruge multimeteret i regnvejr.
10. GARANTI
Medmindre andet er angivet, er apparathuset og det elektroniske
udstyr i produktet dækket af garanti i 24 måneder fra den dato, hvor
materiellet stilles til rådighed.
Husets mekanisk solide design og elektronikken gør det muligt at
garantere apparatets drift ved et fald på op til 2 meter.
Prøveledningerne og batteriet er ikke omfattet af denne garanti.
83
NU-709_0204
6/05/04
16:12
Page 84
11. VEDLIGEHOLDELSE
PL
Brug kun de anførte reservedele til vedligeholdelse. Fabrikanten kan
ikke holdes ansvarlig for uheld, der sker som følge af en reparation,
der er udført af andre end fabrikantens servicecenter eller
autoriserede reparatører.
Dziękujemy Państwu za okazane zaufanie i zakup naszego
miernika V.A.T./D.D.T.709A. Miernik ten jest przystosowany
do prac pod napięciem.
Udskiftning af batteriet
Af sikkerhedsmæssige årsager må multimeteret aldrig åbnes, før det
er frakoblet alle strømkilder.
■ Løsn skruen, der holder batterilåget, og åbn låget.
■ Udskift det brugte 9 V batteri.
■ Luk batterilåget, og skru skruen fast bag på batterirummet.
■ należy uważnie przeczytać niniejszą instrukcję obsługi
■ oraz podczas jego użycia przestrzegać podanych środków
Opbevaring
Hvis multimeteret ikke anvendes i mere end 60 dage, skal batteriet
tages ud af apparatet og opbevares særskilt.
Rengøring
■ Apparatet skal være afbrudt alle strømkilder.
■ Brug en klud, der er let fugtet i sæbevand, til at rengøre
apparatets hus. Tør efter med en fugtig klud. Tør derefter
apparatet hurtigt med en klud eller luft.
Aby zapewnić optymalne działanie urządzenia:
ostrożności
Znaczenie tego symbolu
Uwaga! Przed użyciem urządzenia należy przeczytać
instrukcję obsługi.
W niniejszej instrukcji, instrukcje poprzedzone tym
symbolem jeśli nie są prawidĻowo przestrzegane lub
realizowane mogą spowodować uszkodzenie ciała lub
uszkodzenie urządzenia i instalacji.
ŚRODKI OSTROŻNOŚCI
■ Przed i po użyciu miernika należy regularnie wykonać
autotest.
■ Miernika tego można używać dla instalacji kategorii III, dla
napięć poniżej 600 V w stosunku do ziemi.
■ Obwody KAT III są obwodami zasilającymi urządzeń mocy,
w których mogą występować fale wędrowne. Przykład:
zasilanie maszyn lub urządzeń przemysłowych
■ Nie wolno otwierać pokrywy baterii miernika jeśli nie został
odłączony od źródła elektryczności.
■ Podczas testu nie wolno dotykać części metalowej końcówek
dotykowych.
■ Nie wolno wykonywać testu ciągłości na obwodzie pod
napięciem. Jednakże, w razie pomyłki, miernik zapewnia
zabezpieczenie do 600 V.
84
85
NU-709_0204
6/05/04
16:12
Page 86
1. PREZENTACJA
Urządzenie 709A jest miernikiem – detektorem napięcia.
Zapalenie, detekcja AC/DC i automatyczna zmiana zakresu
gwarantują bezpieczeństwo użytkownika i zwiększają komfort
pracy.
Koncepcja i produkcja tego produktu zgodnie z normami EN
61010-1 600 V KAT III i EN 61243-3 sprawiają, że produkt ten
jest profesjonalnym narzędziem, którego możesz używać do
czynności diagnostycznych jak i do weryfikacji braku napięcia
Za pomocą urządzenia 709A możesz mierzyć:
- napięcia prądu zmiennego i stałego
- rezystancje
3. Przycisk Autotest / Test ciągłości – Pomiar rezystancji
4. 2000 punktowy wyświetlacz
5. Dioda LED rotacji faz (zielona): kierunek obrotu zgodny z
kierunkiem obrotu wskazówek zegara
6. Dioda LED rotacji faz (czerwona): kierunek obrotu przeciwny
do kierunku obrotu wskazówek zegara, detekcja napięcia
podczas pomiaru oporu (Woltotest)
7. Dioda LED oznaczania fazy (czerwona)
8. Przycisk rotacji faz
9. Przycisk detekcji Ph/N
10. Przycisk unieruchomienia wyświetlacza cyfrowego (HOLD)
Opis wyświetlacza
Możesz także wykonać:
- test dźwiękowy ciągłości
- oznaczanie fazy/punktu zerowego
- wskazanie kierunku rotacji faz
(metoda „2 przewodowa”)
- podświetlanie wyświetlacza
- blokadę wyświetlacza (funkcja HOLD)
- automatyczne zapalenie i gaszenie.
Zalety:
- wytrzymałość mechaniczna: wytrzymuje upadek z wysokości
2 m.
- końcówki dotykowe IP2X nieobowiązkowe zgodnie z normą
EN 61243-3.
2. OPIS
3. AUTOTEST
Przed użyciem miernika należy zawsze wykonać
autotest. Nie wolno używać urządzenia jeśli autotest jest
nieprawidłowy.
AUTOTEST
Autotest pozwala skontrolować prawidłowe działanie baterii i
przewodów.
Wykonanie:
■ Podłącz przewody w podany sposób.
■ Doprowadź czerwoną końcówkę dotykową urządzenia do
bezpośredniego kontaktu z końcówkę czarnego przewodu.
■ Naciśnij przycisk autotest.
Wynik:
■ Wyświetlacz i podświetlanie zapalają się,
wyświetlacz podaje wartość minimalną
0.002 kΩ: autotest jest prawidłowy.
1. Odłączalne końcówki dotykowe: 2 mm
2. Zabezpieczenie
Zabezpieczenie przeciwpoślizgowe na zewnątrz urządzenia
zabezpiecza użytkownika przed przypadkowym dotknięciem
nieizolowanego przewodu.
86
■ Symbol „baterii” zapala się chwilowo: autotest
jest prawidłowy. Jeśli symbol „baterii” pozostaje
zapalony dłużej niż 5 s, należy jak najszybciej
wymienić baterię.
87
NU-709_0204
6/05/04
16:12
Page 88
TEST FUNKCJI NAPIĘCIA
Wykonanie:
■ Skontroluj funkcjonowanie urządzenia dla znanej wartości
napięcia: na przykład dla baterii 9 V lub dla znanego napięcia
sieci
Wynik:
■ Oczekiwaną wartość należy odczytać na wyświetlaczu.
■ Jeśli autotest jest nieprawidłowy, wymień baterię lub wykonaj
naprawę.
4. POMIAR NAPIĘCIA AUTO AC/DC, BIEGUNOWOŚĆ
Przed i po użyciu miernika zawsze należy wykonać
autotest. Nie wolno używać urządzenia jeśli autotest jest
nieprawidłowy.
Wykonanie:
■ Ustaw dwie końcówki dotykowe na kontrolowanym obwodzie.
Pomiar napięcia:
■ Obecność napięcia powyżej 1 V AC lub DC na obwodzie
powoduje automatyczne zapalenie wyświetlacza i
podświetlania oraz nadanie sygnału dźwiękowego za
pomocą brzęczyka przy każdorazowej zmianie zakresu.
Parametry techniczne i zakresy stosowania:
• Detekcja napięcia: 1 V < U < 690 V
• Częstotliwość: DC, 50...60 Hz
• Impedancja podwyższona, nie powoduje wyłączenia
wyłączników różnicowych.
• Maks. prąd szczytowy przy 690 V Is ≤ 3,5 mA
■ Automatyczne uruchomienie dla napięcia między zaciskami
powyżej 1 V.
■ Automatyczne rozpoznanie prądu stałego i zmiennego dla
napięcia między zaciskami > 1 V.
■ Automatyczny wybór pomiaru.
■ Funkcja Hold: pozwala unieruchomić wynik pomiaru na
wyświetlaczu.
■ Zerowanie automatyczne po up ywie 10 sekund od
dokonania pomiaru (HOLD)
UWAGA 1: Funkcja HOLD nie kasuje zerowania automatycznego.
UWAGA 2: Nacisnąć przycisk Auto ON/OFF aby uruchomić
88
w sposób ręczny
WARUNKI TECHNICZNE
Uwagi ogólne:
Gwarantowanymi wartościami są tylko wartości z podanymi
tolerancjami lub granicami. Wartości bez tolerancji podane są
tylko dla informacji.
Charakterystyki:
Typowa dokładność wynosi Ī [% odczytu (L) + liczba jednostek
(cyfry lub D)] w warunkach odniesienia.
Uwaga: nie wolno używać urządzenia powyżej
wyszczególnionych pomiarów.
Napięcie stałe (Autozakres)
Gama
Zakres pomiaru
2V
20 V
200 V
2000 V
0.2 V à 1.999 V
2 V à 19.99 V
20 V à 199.9 V
200 V à 690 V
Rozdzielczość
0.001 V
0.01 V
0.1 V
1V
Typowa dokładność
1 % ± 2 pts
1,2 % ± 2 pts
1,2 % ± 3 pts
1,2 % ± 3 pts
Zabezpieczenie przed przeciążeniami: 750 V przez 20 s.
Napięcie zmienne (Autozakres)
Typowa
Gama
Zakres pomiaru
Częstotliwość
Rozdzielczość
dokładność
2V
0.5 V do 1.999 V
50 do 60 Hz
0.001 V
2% ± 2 pkt
20 V
2 V do 19.99 V
50 do 60 Hz
0.01 V
2% ± 2 pkt
200 V
20 V do 199.9 V
50 do 60 Hz
0.1 V
2% ± 2 pkt
2000 V
200 V do 690 V
50 do 60 Hz
1V
2% ± 2 pkt
Zabezpieczenie przed przeciążeniami: 750 V przez 20 s.
Wielkość influencji
od -10°C do + 18°C
od + 28°C do + 55°C
Wilgotność względna
od 20 % do 96 %
Napięcie zasilania
Influencja na pomiar
VDC : 0.2% / 10°C
VAC : 0.5% / 10°C
VDC : 0.75% / 10°C
VAC : 2% / 10°C
Żadna
Żadna
od 6,5 V do 9,75 V
89
NU-709_0204
6/05/04
16:12
Page 90
5. OZNACZANIE FAZY/PUNKTU ZEROWEGO
■ Naciśnij przycisk „Autotest/Test ciągłości”.
Ciągłość brzęczyka
Przed i po użyciu miernika należy wykonać autotest.
Nie wolno używać urządzenia jeśli autotest jest
nieprawidłowy.
■ Dla rezystancji poniżej 600 Ω, brzęczyk nadaje sygnał i
Test jednobiegunowy „jednoręczny”
Pomiar rezystancji
■ Ustaw czarną końcówkę dotykową (podłączoną do zacisku
COM) na kontrolowanym przewodzie i palec na przycisku
oznaczania Ph/N.
■ W obecności fazy (jeśli U sieci > 127 V~) czerwona dioda
LED „PH” miga.
Uwaga 1: Wskazanie napięcia nie jest znaczące.
Test dwubiegunowy „dwuręczny” z pomiarem napięcia
■ Ustaw czerwoną końcówkę dotykową na pierwszym
przewodzie, czarną końcówkę dotykową na drugim
przewodzie do kontroli i palec na przycisku oznaczania Ph/N.
■ Dioda LED PH miga jeśli czarna końcówka pomiaru
podłączona jest do fazy.
Wartość napięcia między zaciskami podana jest na
wyświetlaczu cyfrowym.
Charakterystyki i zakres stosowania:
• Napięcie > 127V
Uwaga: U maks. w stosunku do ziemi = 600 V
• Częstotliwość: 50...60Hz Ī 5%
UWAGA:
Jeśli dioda LED PH miga i jeśli tylko kilka woltów jest wyświetlonych,
należy sprawdzić zestyk elektryczny końcówki dotykowej.
6. KONTROLA CIĄGŁOŚCI
POMIAR REZYSTANCJI
zmierzona wartość rezystancji zostaje wyświetlona na
wyświetlaczu (w kΩ).
Gama
Zakres pomiaru
Rozdzielczość
Dokładność
1.999 kΩ
0.001 kΩdo 1.999 kΩ
0.001 kΩ
1% ± 2pkt
Obecność napięcia przypadkowego (>1 V AC lub DC)
na kontrolowanym obwodzie.
■ W przypadku gdy urządzenie wykrywa obecność napięcia,
brzęczyk nadaje ciągły sygnał i zapala się czerwona dioda
LED „Woltotest”.
Charakterystyki i zakres stosowania
■ Zabezpieczenie: do 600 V prądu skutecznego (10 s)
7. ROTACJA FAZ
Przed i po użyciu miernika należy wykonać autotest.
Nie wolno używać urządzenia jeśli autotest jest
nieprawidłowy.
Przed wykonaniem testu rotacji, należy zawsze
wykonać oznaczanie Fazy / Punktu zerowego.
■ Sprawdź obecność faz na trzech fazach testowanej sieci
trójfazowej.
Test Rotacji Faz:
■ Ustaw czerwoną końcówkę dotykową na pierwszej fazie i
czarną końcówkę dotykową na drugiej fazie.
■ Naciśnij przycisk rotacji faz.
Przed i po użyciu miernika należy wykonać autotest.
Nie wolno używać urządzenia jeśli autotest jest
nieprawidłowy.
Przed wykonaniem testu ciągłości, należy upewnić
się, czy kontrolowany obwód nie jest pod napięciem.
■ Ustaw dwie końcówki dotykowe na kontrolowanym
obwodzie. Jeśli na wyświetlaczu zostaje wyświetlony poziom
napięcia (zapalona dioda LED Woltotestu), przerwać
wykonywanie testu: obwód jest pod napięciem.
90
91
NU-709_0204
6/05/04
16:12
Page 92
Wynik:
■ Jeśli kolejność rotacji faz jest prawidłowa, dioda LED L1 do
L2 zapala się
■ Jeśli kolejność rotacji faz jest nieprawidłowa, dioda LED L1
do L3 zapala się.
Uwaga: Detekcja napięcia pozostaje aktywna podczas tego
testu.
Charakterystyki i zakres stosowania
• Napięcie: 230 V < U < 690 V
• Częstotliwość: 50 Hz i 60 Hz (Ī 5%)
9. ZGODNOŚĆ Z NORMAMI MIĘDZYNARODOWYMI
Detektor napięcia (zgodnie z 61243-3 – Ed. 10/98 i NF EN
61010-1 2001 600 V KAT III)
Urządzenie elek
■ Zgodnie z NF EN 61010-1: 2001
- Stopień zanieczyszczenia: 2
- Kategoria pomiaru III dla określonego napięcia 600 V
■ Urządzenie zgodnie z EN 61243-3
- Klasa B
- Typ: zewnętrzny
■ Przewody zgodnie z NF EN 61010-031: 2002
8. PARAMETRY TECHNICZNE
Zasilanie:
■ 1 bateria 9 V 6F22, 6LR61
■ Autonomia działania:
6000 10 sekundowych pomiarów (używając alkalicznej
baterii 9 V)
3000 10 sekundowych pomiarów (używając dostarczonej
baterii 9 V 6F22).
Sygnalizacja dźwiękowa
■ Seria sygnałów przy każdorazowej zmianie zakresu
■ Ciągły dla testu ciągłości.
Okres trwałości /Cykle funkcjonowania:
■ 690 VAC: praca nieograniczona.
Warunki klimatyczne:
■ Temperatura odniesienia: 23°C ± 3°C
■ Zastosowanie:
- temperatura: -10°C do +55°C
- wilgotność względna: < 96% wilgotności względnej
- wysokość: do 2000 m
■ Przechowywanie:
- temperatura: -10°C do +55°C (bez baterii)
Wymiary:
163 x 63,6 x 40 mm
Ciężar:
210 g (z baterią)
92
- Stopień zanieczyszczenia: 2
- Kategoria pomiaru III dla określonego napięcia 600 V
Udary elektryczne
(próba zgodnie z CEI 1000-4-5)
■ 6 kV w trybie różnicowym dla funkcji woltomierza, klasa B.
Kompatybilność elektromagnetyczna
■ EN 61326-1 / A2: 2001 klasa B
Ochrona mechaniczna
■ Stopień ochrony obudowy (zgodnie z NF EN 60529/A1:
2000).
- IP 65 dla obudowy
- IP 20 dla końcówek dotykowych
Uwaga: Obudowa jest całkowicie zabezpieczona przed
przedostaniem się pyłów i wody.
Pomimo zabezpieczenia przed deszczem, nie zalecamy
używać miernika podczas deszczu.
10. GWARANCJA
Nasza gwarancja obejmuje, z zastrzeżeniem wyraźnego
postanowienia, obudowę i podzespo y elektroniczne na okres
24 miesięcy od daty oddania sprzętu do eksploatacji.
Wytrzymałość mechaniczna obudowy podzespo ów
elektronicznych pozwala zagwarantować jego funkcjonowanie
po upadku z wysokości 2 m.
Niniejsza gwarancja nie dotyczy końcówek dotykowych i
baterii.
93
NU-709_0204
6/05/04
16:12
Page 94
11. KONSERWACJA
Do konserwacji należy używać tylko wyszczególnionych części
zamiennych. Producent nie ponosi odpowiedzialności za
wypadek spowodowany w następstwie naprawy nie wykonanej
przez jego serwis po sprzedaży lub wykonanej przez
nieautoryzowane punkty naprawy.
Wymiana baterii
Dla Państwa bezpieczeństwa, nigdy nie wolno otwierać miernika
przed jego odłączeniem od źródła elektryczności.
■ Wyjąć śrubę mocującą pokrywę baterii i otworzyć.
■ Wymienić zużytą baterię 9 V
■ Zamknąć pokrywę baterii i dokręcić śrubę z tyłu obudowy.
Przechowywanie
Jeśli miernik nie jest używany przez okres przekraczający 60
dni, należy wyjąć baterię i przechowywać ją oddzielnie.
Czyszczenie
■ Urządzenie należy odłączyć od źródła elektryczności.
■ Do czyszczenia obudowy, należy używać szmatki zwilżonej
w wodzie z mydłem. Opłukać mokrą szmatką. Następnie,
natychmiast wytrzeć suchą szmatką lub osuszyć za pomocą
powietrza nawiewanego.
BELGIQUE
LUXEMBOURG
FACOM Belgique S.A/NV
Weihoek 4
1930 Zaventem
BELGIQUE
✆ : (02) 714 09 00
fax : (02) 721 24 11
NEDERLAND
FACOM Gereedschappen BV
Kamerlingh Onnesweg 2
Postbus 134
4130 EC Vianen
NEDERLAND
& : (0347) 362 362
fax : (0347) 376 020
DANMARK
FINLAND
ISLAND
NORGE
SVERIGE
FACOM NORDEN A/S
Navervej 16 B
7451 SUNDS
DANMARK
✆ : (45) 97 14 44 55
fax : (45) 97 14 44 66
SINGAPORE
FAR EAST
FACOM TOOLS FAR EAST Pte Ltd
15 Scotts Road
Thong Teck Building # 08.01.02
Singapore 228218
SINGAPORE
✆ : (65) 732 0552
fax : (65) 732 5609
DEUTSCHLAND
FACOM GmbH
Postfach 13 22 06
42049 Wuppertal
Otto-Wels-Straße 9
42111 Wuppertal
DEUTSCHLAND
& : (0202) 270 63 0
fax : (0202) 270 63 50
ESPAÑA
PORTUGAL
FACOM Herramientas, S.L
Poligono industrial de Vallecas
C/.Luis 1° s/n-Nave 95-2a Pl.
28031 Madrid
ESPAÑA
✆ : (0034) 91 778 21 13
fax : (0034) 91 778 27 53
ITALIA
USAG Gruppo FACOM
Via Volta 3
21020 Monvalle(VA)
ITALIA
& : (0332) 790 111
fax : (0332) 790 602
POLSKA
FACOM TOOLS POLSKA SP.ZO.O.
ul.Marconich 9 m.3
02-954 Warszawa
POLSKA
✆ : (0048 22) 642 71 14
Fax : (0048 22) 651 74 69
SUISSE
ÖSTERREICH
MAGYARORSZAG
CESKA REP.
FACOM S.A./AG
12 route Henri-Stéphan
1762 Givisiez/Fribourg
SUISSE
✆ : (4126) 466 42 42
fax : (4126) 466 38 54
UNITED KINGDOM
EIRE
FACOM - UK
Churchbridge Works - Walsall road
CANNOCK - STAFFORDDSHIRE S1 3JR
UNITED KINGDOM
✆ : (01922) 702 150
fax : (01922) 702 152
UNITED STATES
FACOM TOOLS Inc.
3535 West 47th Street
Chicago Illinois 60632
U.S.A.
✆ : (773) 523 1307
fax : (773) 523 2103
FRANCE & INTERNATIONAL
Société FACOM
6-8 rue Gustave Eiffel BP.99
91420 Morangis Cedex
FRANCE
✆ : 01 64 54 45 45
fax : 01 69 09 60 93
http://www.facom.fr
En France, pour tous renseignements techniques sur
94