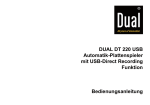
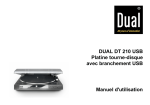
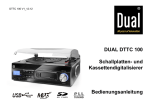
Download DUAL DT 210 USB Automatik-Plattenspieler mit USB
Transcript
DUAL DT 210 USB Automatik-Plattenspieler mit USB-Anschluss Bedienungsanleitung Das Vorwort Diese Bedienungsanleitung hilft Ihnen beim • bestimmungsgemäßen und • sicheren Gebrauch Ihres Plattenspielers DT 210 USB, im folgenden Plattenspieler oder Gerät genannt. Beachten Sie die Audacity-Software auf der CD sowie die Hinweise zur Verwendung des USB-Anschlusses auf S. 13. Die Gestaltungsmerkmale dieser Bedienungsanleitung Verschiedene Elemente der Bedienungsanleitung sind mit festgelegten Gestaltungsmerkmalen versehen. So können sie leicht feststellen, ob es sich um normalen Text, • Aufzählungen oder ! Handlungsschritte handelt. Die Zielgruppe dieser Bedienungsanleitung Die Bedienungsanleitung richtet sich an jede Person, die den Plattenspieler • aufstellt, • bedient, • reinigt • oder entsorgt. Die mitgelieferte Software Audacity® vor der Verbindung und Inbetriebnahme des Gerätes am PC bzw. MAC installieren. Alle Marken- und Produktnamen sind Warenzeichen oder eingetragene www.nbxsoft.com/sound-recorder.php Warenzeichen der jeweiligen Hersteller. 2 Als alternatives Programm dient z.B. der „Free MP3 Sound Recorder“. Download im Internet unter Inhaltsverzeichnis Sicherheit und Aufstellen des Plattenspielers ........... 4 Sicherheit ........................................................................ 4 Aufstellen ........................................................................ 5 Die Beschreibung des Plattenspielers........................ 6 Der Lieferumfang ............................................................ 6 Die besonderen Eigenschaften ....................................... 6 Die Gerätevorderseite ..................................................... 7 Die Geräterückseite ........................................................ 8 Wie Sie den Plattenspieler zum Betrieb vorbereiten . 9 Riemen und Plattenteller................................................. 9 Plattentellerbelag ............................................................ 9 Zentrierpuck .................................................................... 9 Tonarm............................................................................ 9 Anschluss des Plattenspielers .................................. 10 Anschluss an den Verstärker ........................................ 11 Anschluss an den Computer ......................................... 11 Netzanschluss............................................................... 11 Wie Sie den PHONO/LINE-Schalter einstellen ............. 11 Abnehmen/Anbringen der Nadelschutzkappe............... 11 Abspielen einer Schallplatte...................................... 12 Automatischer Start ...................................................... 12 Manueller Start ............................................................. 12 Stop-Taste .................................................................... 12 Bevor Sie den USB-Anschluss herstellen................ 13 Systemvoraussetzungen .............................................. 13 Wie Sie Ihre Musik digitalisieren ............................... 14 Software installieren ..................................................... 14 Plattenspieler anschließen............................................ 14 Software einrichten ....................................................... 14 Musik aufzeichnen und speichern ................................ 15 Wie Sie den Plattenspieler reinigen .......................... 16 Reinigung der Nadel und der Platte ............................. 16 Auswechseln der Nadel ................................................ 16 Wie Sie Fehler beseitigen .......................................... 17 Technische Daten ....................................................... 18 Entsorgungshinweise ................................................ 19 3 Sicherheit und Aufstellen des Plattenspielers Sicherheit und Aufstellen des Plattenspielers • Lesen Sie bitte alle Sicherheitshinweise sorgfältig durch und bewahren Sie diese für spätere Fragen auf. Befolgen Sie immer alle Warnungen und Hinweise in dieser Bedienungsanleitung und auf der Rückseite des Geräts. • • • Sicherheit • • • • • • 4 Das Gerät darf nur an eine Netzspannung von 230 V~, 50 Hz angeschlossen werden. Versuchen Sie niemals, das Gerät mit einer anderen Spannung zu betreiben. Der Netzstecker darf erst angeschlossen werden, nachdem die Installation vorschriftsmäßig beendet ist. Wenn der Netzstecker des Geräts defekt ist bzw. wenn das Gerät sonstige Schäden aufweist, darf es nicht in Betrieb genommen werden. Beim Abziehen des Netzkabels von der Steckdose am Netzstecker ziehen - nicht am Kabel. Um Feuergefahr und die Gefahr eines elektrischen Schlages zu vermeiden, setzen Sie das Gerät weder Regen noch sonstiger Feuchtigkeit aus. Netzstecker nicht mit nassen Händen anfassen, Gefahr eines elektrischen Schlages! • • • • • • • Bei Störungen oder Rauch- und Geruchsbildung aus dem Gehäuse sofort Netzstecker aus der Steckdose ziehen! Ziehen Sie vor Ausbruch eines Gewitters den Netzstecker. Wenn das Gerät längere Zeit nicht benutzt wird, z.B. vor Antritt einer längeren Reise, ziehen Sie den Netzstecker. Ziehen Sie den Netzstecker aus der Steckdose, falls Sie das Gerät über einen längeren Zeitraum nicht benutzen. Ziehen Sie nur am Netzstecker. Verlegen Sie das Netzkabel so, dass niemand darüber stolpern kann. Keine schweren Gegenstände auf das Netzkabel stellen. Stellen Sie sicher, dass das Netzkabel oder der Stecker immer leicht zugänglich sind, so dass Sie das Gerät schnell von der Stromversorgung trennen können! Die Steckdose sollte möglichst nah am Gerät sein. Zur Netzverbindung Netzstecker vollständig in die Steckdose stecken. Verwenden Sie einen geeigneten, leicht zugänglichen Netzanschluss und vermeiden Sie die Verwendung von Mehrfachsteckdosen! Vermeiden Sie den Kontakt des Gerätes mit Wasser oder Feuchtigkeit. Nehmen Sie das Gerät nicht in der Nähe von Badewannen, Swimmingpools oder spritzendem Wasser in Betrieb. Sicherheit und Aufstellen des Plattenspielers • • • • • • • • • Stellen Sie keine Behälter mit Flüssigkeit, z.B. Blumenvasen, auf das Gerät. Diese könnten umfallen, und die auslaufende Flüssigkeit kann zu erheblicher Beschädigung bzw. zum Risiko eines elektrischen Schlages führen. Sollten Fremdkörper oder Flüssigkeit in das Gerät gelangen, ziehen Sie sofort den Netzstecker aus der Steckdose. Lassen Sie das Gerät von qualifiziertem Fachpersonal überprüfen, bevor Sie es wieder in Betrieb nehmen. Andernfalls besteht die Gefahr eines elektrischen Schlags. Öffnen Sie nicht das Gehäuse. Andernfalls besteht die Gefahr eines elektrischen Schlags. Versuchen Sie niemals ein defektes Gerät selbst zu reparieren. Wenden Sie sich immer an eine unserer Kundendienststellen. Öffnen Sie das Gerät auf keinen Fall – dies darf nur der Fachmann. Fremdkörper, z.B. Nadeln, Münzen, etc., dürfen nicht in das Innere des Gerätes fallen. Es dürfen keine offenen Brandquellen, wie z.B. brennende Kerzen auf das Gerät gestellt werden. Lassen Sie Kinder niemals unbeaufsichtigt dieses Gerät benutzen. Überlassen Sie Wartungsarbeiten stets qualifiziertem Fachpersonal. Andernfalls gefährden Sie sich und andere. • Zur Reinigung des Gerätes und der Schallplatten dürfen nur dafür vorgesehene Reinigungsmittel (antistatisch) verwendet werden. Diese sind im Zubehörfachhandel erhältlich. Aufstellen • Der Plattenspieler darf nur auf einer festen horizontalen, vibrationsfreien Fläche aufgestellt werden. • Stellen Sie das Gerät nicht in der Nähe von Wärmequellen wie Heizkörpern auf. Vermeiden Sie direkte Sonneneinstrahlungen und Orte mit außergewöhnlich viel Staub. • Sie dürfen das Gerät nur in waagerechter Position betreiben. • Halten Sie das Gerät von Geräten fern, die starke Magnetfelder erzeugen. • Stellen Sie keine schweren Gegenstände auf das Gerät. • Wenn Sie den Plattenspieler von einer kalten in eine warme Umgebung bringen, kann sich im Inneren des Geräts Feuchtigkeit niederschlagen. Warten Sie in diesem Fall etwa eine Stunde, bevor Sie ihn in Betrieb nehmen. • Verlegen Sie das Netzkabel so, dass niemand darüber stolpern kann. • Zur Netzverbindung Netzstecker vollständig in die Steckdose stecken. 5 Die Beschreibung des Plattenspielers • Verwenden Sie einen geeigneten, leicht zugänglichen Netzanschluss und vermeiden Sie die Verwendung von Mehrfachsteckdosen! • Netzstecker nicht mit nassen Händen anfassen, Gefahr eines elektrischen Schlages! • Bei Störungen oder Rauch- und Geruchsbildung aus dem Gehäuse sofort Netzstecker aus der Steckdose ziehen! • Ziehen Sie vor Ausbruch eines Gewitters den Netzstecker. • Wenn das Gerät längere Zeit nicht benutzt wird, z.B. vor Antritt einer längeren Reise, ziehen Sie den Netzstecker. Die Beschreibung des Plattenspielers Der Lieferumfang Bitte stellen Sie sicher, dass alle nachfolgend aufgeführten Zubehörteile vorhanden sind: • Der Plattenspieler, • Plattenteller mit Antriebsriemen, • Plattentellerbelag, • Abdeckhaube mit 2 Scharnieren, • Adapter für Single-Platten (45 U/min.), • USB-Kabel, • Software-CD, • diese Bedienungsanleitung. Die besonderen Eigenschaften • • • Entnehmen Sie das Gerät und alle Zubehörteile aus der Verpackung. • Heben Sie den Karton und das Verpackungsmaterial auf, um das Gerät bei einem späteren Transport sicher wieder verpacken zu können • 6 Mit diesem Gerät können Sie: Schallplatten für 33- und 45 U/min abspielen. Es bietet voll automatische Bedien-Funktionen. Am Plattenende wird der Tonarm automatisch zurückgeführt. Sie können Ihre Schallplatten über den USB-Anschluss sowie die Audacity-Software auf Ihren PC übertragen und damit digitalisieren. Der Plattenspieler hat einen eingebauten EntzerrerVorverstärker und kann sowohl an einen PhonoEingang als auch an einen Audio-Eingang (AUX-In) angeschlossen werden. Die Beschreibung des Plattenspielers Die Gerätevorderseite 1 Netzkabel 2 Plattenteller 3 Abdeckhaube 4 Cinch-Audio-Kabel (mit Stecker weiß und rot) 5 Plattentellerbelag 6 Tonarm 7 Nadel mit System 8 Wahlhebel Plattengröße (SIZE 30/17) 9 Taste Tonarm-Lift (UP/DOWN) 10 Taste-Stop (STOP) 11 Taste-Start (START) 12 Taste-Drehzahl (SPEED 33/45) 13 USB-Anschluss 7 Die Beschreibung des Plattenspielers Die Geräterückseite 14 15 16 17 14 Cinch-Audio-Kabel (mit Stecker weiß und rot) 15 Schalter PHONO/LINE 16 USB-Anschluss 17 Netzkabel 8 Wie Sie den Plattenspieler zum Betrieb vorbereiten Wie Sie den Plattenspieler zum Betrieb vorbereiten Riemen und Plattenteller Der Antriebsriemen liegt bei Lieferung bereits auf der Riemenlauffläche des Plattentellers 2 auf. Der Riemen ist mit einem Band versehen, mit dem der Riemen auf die Antriebsachse des Motors (Pully) gelegt wird. Den Plattenteller auf die Achse aufsetzen. Den Plattenteller so drehen, bis die Aussparung über dem Antriebsmotor steht. Ziehen Sie den Riemen mittels des oben beschriebenen Bandes von der Lauffläche ab und legen Sie ihn mittig über die Antriebsrolle des Motorpully. Entfernen Sie das Band. Plattentellerbelag Legen Sie nun den Plattentellerbelag 5 mit der richtigen Seite nach oben auf den Plattenteller auf. Zentrierpuck Der Zentrierpuck wird z.B. für Single-Platten ohne Zentrierstern benötigt. Wird der Zentrierpuck gerade nicht gebraucht, können Sie diesen auf die dafür vorgesehene Ablage legen. Tonarm Der Tonarm 6 ist für den Transport mit einem Band gesichert. Entfernen Sie dieses Band vor der ersten Inbetriebnahme. Für einen späteren Transport sollte der Tonarm wieder mit diesem Band befestigt werden, um Schäden durch Erschütterungen zu vermeiden. 9 Anschluss des Plattenspielers Anschluss des Plattenspielers Schalter PHONO/LINE: 1 – auf LINE 2 – auf PHONO 3 – USB-Anschluss an PC 1 3 10 2 Anschluss des Plattenspielers Anschluss an den Verstärker ! Schließen Sie die Cinch-Audiokabel 14 an die LINE/AUX- oder Phono-Buchsen am Verstärker an. Hinweis: Dabei auf den richtigen Anschluss des linken und rechten Kanals achten (rot = rechter Kanal, weiß = linker Kanal). Abnehmen/Anbringen der Nadelschutzkappe ! Vor der Wiedergabe einer Schallplatte muss die Nadelschutzkappe vom Tonabnehmer 7 entfernt werden. Ziehen sie die Kappe nach vorne ab. Anschluss an den Computer ! Verbinden Sie den USB-Anschluss 16 mit einem freien USB-Steckplatz an Ihrem Computer. Beachten Sie die Hinweise auf S. 13. Netzanschluss ! Stecken Sie den Netzstecker in eine Steckdose. Wie Sie den PHONO/LINE-Schalter einstellen ! Es wird empfohlen, die Nadelkappe zum Schutz der Nadel nach der Wiedergabe wieder anzubringen. ! Stellen Sie den PHONO/LINE-Schalter 15 auf PHONO, wenn der Plattenspieler an den PHONOBuchsen angeschlossen ist, ! Stellen Sie den PHONO/LINE-Schalter 15 auf LINE, wenn der Plattenspieler an den LINE-Buchsen angeschlossen ist. 11 Abspielen einer Schallplatte Abspielen einer Schallplatte Automatischer Start ! Platte auflegen. Ggf. bei Singles Zentrierpuck aufsetzen. Mit dem Wahlhebel 8 die entsprechende Plattengröße von 30 oder 17 cm Durchmesser einstellen. Abdeckhaube schließen. Mit der TasteDrehzahl SPEED 12 die Plattentellerdrehzahl 33 oder 45 U/min einstellen. Darauf achten, dass sich die Taste LIFT 9 in Stellung DOWN befindet. ! Taste START 11 drücken. Der Plattenteller beginnt, sich in der voreingestellten Geschwindigkeit zu drehen. Der Tonarm setzt automatisch auf der Schallplatte auf. Die Wiedergabe beginnt. Manueller Start ! Platte auflegen. Mit dem Wahlhebel 8 die entsprechende Plattengröße von 30 oder 17 cm Durchmesser einstellen. Mit der Taste SPEED 12 die Plattentellerdrehzahl 33 oder 45 U/min einstellen. Darauf achten, dass sich die Taste LIFT 9 in Stellung UP befindet. ! Taste START 11 drücken. Der Plattenteller beginnt, sich in der voreingestellten Geschwindigkeit zu drehen. Der Tonarm setzt automatisch auf der Schallplatte auf. Die Wiedergabe beginnt. 12 ! Den Tonarm von der Tonarmstütze nehmen und über die Einlaufrille der Platte schwenken. Der Plattenteller beginnt, sich in der voreingestellten Drehzahl zu drehen. Durch erneutes Drücken der Taste LIFT (DOWN) 9 wird der Tonarm abgesenkt. ! Mit der Taste Lift 9 kann der Tonarm an jeder beliebigen Stelle - auch zur kurzzeitigen Spielunterbrechung - abgehoben werden (Lifthebel in Stellung UP). Der Plattenteller dreht sich weiter. Stop-Taste Am Ende der Schallplatte wird der Tonarm automatisch zur Tonarmstütze zurückgeführt und das Gerät abgeschaltet. Hinweis: Sie können den Plattenspieler auch abschalten, indem Sie die Taste STOP 10 drücken oder die Taste Lift 9 drücken, in Stellung UP bringen und den Tonarm auf die Tonarmstütze zurückführen. Bevor Sie den USB-Anschluss herstellen Bevor Sie den USB-Anschluss herstellen Systemvoraussetzungen Bitte stellen Sie vor dem Anschluss sicher, dass Ihr Computersystem die nachfolgend genannten Voraussetzungen erfüllt: • Intel Pentium oder AMD Athlon, 1GHz oder höher • (oder entsprechenden MAC-Rechner) • USB 1.1 oder USB 2.0-Anschluss (2.0 empfohlen) • Betriebssystem Windows 2000/XP oder aktueller bzw. MAC OSX oder aktueller • Kompatible Soundkarte • Arbeitsspeicher > 512 MB • CD oder DVD-Brenner zur Erstellung von Audio-CDs • Lautsprecher, Maus • 10 MB freien Festplattenspeicher für die SoftwareInstallation • Zusätzlich freien Festplattenspeicher für das Digitalisieren Ihrer Musik Hinweis: • Die mitgelieferte Software Audacity® vor der Verbindung und Inbetriebnahme des Gerätes am PC bzw. MAC installieren. • Die Audacity®-Software ist Freeware. Sehen Sie bitte auf der Homepage nach, ob ein Update verfügbar ist. Unter http://audacity.sourceforge.net steht ggf. eine aktuelle Version bzw. Updates zur Verfügung. • Als alternatives Programm dient z.B. der „Free MP3 Sound Recorder“. Download im Internet unter www.nbxsoft.com/sound-recorder.php. 13 Wie Sie Ihre Musik digitalisieren Wie Sie Ihre Musik digitalisieren Software installieren Starten Sie Ihren Rechner, legen Sie die CD ein und installieren Sie die Audacity-Software. Sehen Sie bitte auf der Homepage nach, ob ein Update verfügbar ist (http://audacity.sourceforge.net) und installieren Sie ggf. das Update. Plattenspieler anschließen Verbinden Sie den USB-Anschluss 15 des Plattenspielers mit einem freien USB-Anschluss an Ihrem Rechner. Verwenden Sie das mitgelieferte USBKabel. Software einrichten 1. Starten Sie die Audacity-Software. 2. Wählen Sie im Menü [Bearbeiten] und [Einstellungen]. Die Software-Einstellungen öffnen sich. 14 3. Klicken Sie auf den Reiter [Audio E/A]: 4. Wählen Sie als Wiedergabegerät Ihre interne Soundkarte aus. 5. Wählen Sie als Aufnahmegerät USB Audio CODEC oder „Microsoft Soundmapper Input“ aus. 6. Wählen Sie Kanäle [Channels] 2 Stereo. 7. Klicken Sie auf [Multiplay], so dass ein Haken davor gesetzt ist. 8. Klicken Sie auf [Software Playthrough], so dass ein Haken davor gesetzt ist. 9. Klicken Sie auf OK. Wie Sie Ihre Musik digitalisieren Musik aufzeichnen und speichern 1. Legen Sie eine Schallplatte auf. Starten Sie die Wiedergabe. 2. Klicken Sie auf die rote Aufnahme-Taste in der Software. 3. Klicken Sie auf die blaue PAUSE-Taste zum vorübergehenden Unterbrechen der Aufnahme. 4. Klicken Sie zum Beenden der Aufzeichnung auf die gelbe STOP-Taste. 5. Klicken Sie auf die grüne PLAY-Taste zur Wiedergabe Ihrer beendeten Aufzeichnung. 6. Klicken Sie auf Datei und wählen Sie „Exportieren als WAV…“, um die Aufnahme auf dem PC zu speichern. 7. Um die Aufnahme als MP3-Datei zu exportieren, müssen Sie vorher den Lame-Encoder installieren. Lesen Sie dazu bitte die Hinweise auf der SoftwareCD. Hinweis: Eine ausführliche Anleitung zur Software Audacity finden Sie auch auf der Software-CD. 15 Wie Sie den Plattenspieler reinigen Wie Sie den Plattenspieler reinigen Stromschlag Um die Gefahr eines elektrischen Schlags zu vermeiden, dürfen Sie das Gerät nicht mit einem nassen Tuch oder unter fließendem Wasser reinigen. ACHTUNG! Sie dürfen keine Scheuerschwämme, Scheuerpulver und Lösungsmittel wie Alkohol oder Benzin verwenden. ! Reinigen Sie das Gehäuse mit einem weichen, mit Wasser angefeuchteten Tuch. Reinigung der Nadel und der Platte Nadel und Platte sollten vor dem Abspielen stets gereinigt werden, um eine vorzeitige Abnutzung zu verhindern. ! Streichen Sie mit einem Reinigungspinsel von hinten nach vorne über die Nadel. ! Zur Reinigung der Platte wischen Sie mit einem Plattentuch leicht schräg über die Platte. 16 Auswechseln der Nadel Die Abtastnadel ist durch den Abspielvorgang natürlichem Verschleiß ausgesetzt. Wir empfehlen daher eine regelmäßige Überprüfung, die bei DiamantAbtastnadeln nach min. 500 Spielstunden erfolgen sollte. Hinweis: Abgenutzte oder beschädigte (abgesplitterte) Abtastnadeln zerstören die Schallplatten. Verwenden Sie bei Ersatzbedarf, wenn möglich, die Original Nadel. ! Ziehen Sie die Abtastnadel schräg nach unten ab. ! Das Einsetzen der Abtastnadel erfolgt in umgekehrter Weise. Wie Sie Fehler beseitigen Wie Sie Fehler beseitigen Wenn das Gerät nicht wie vorgesehen funktioniert, überprüfen Sie es anhand der folgenden Tabellen. Wenn Sie die Störung auch nach den beschriebenen Überprüfungen nicht beheben können, nehmen Sie bitte Kontakt mit dem Hersteller auf. Symptom Schlechte Tonqualität, starke Die Nadel ist verschmutzt Störgeräusche, Tonaussetzer oder abgenutzt. Die Nadel mit einem Pinsel säubern bzw. usw. auswechseln. Die Platte ist verschmutzt oder verstaubt. Die Platte mit einem Plattenreiniger reinigen. Probleme mit dem Gerät Symptom Mögliche Ursache/Abhilfe Der Tonarm überspringt Der Plattenspieler steht nicht Spuren, gleitet über die Platte waagerecht. Den Plattenspieler auf eine oder bewegt sich nicht waagerechte Unterlage stellen. Die Platte ist verschmutzt oder verkratzt. Die Platte mit einem Plattenreiniger reinigen oder eine andere Platte abspielen. Mögliche Ursache/Abhilfe Die Drehzahl stimmt nicht. Die Drehzahl entsprechend der Angabe auf der Platte einstellen. (33 U/min. oder 45 U/min.) Der Ton leiert Der Antriebsriemen ist zu locker und muss gewechselt werden. Der Ton ist zu leise oder laut und verzerrt. Der Plattenspieler ist nicht an den richtigen Eingang angeschlossen. (siehe Seite 11) Keine Aufnahme mit der Recording-Software möglich PC-Systemwiederherstellung durchführen (über „Programme“, „Zubehör“, „Systemprogramme“). 17 Technische Daten Technische Daten Abmessungen (Breite x Höhe x Tiefe): Die Abmessungen sind ungefähre Werte. 350 mm x 95,4 mm x 348 mm Gewicht: (ohne Batterien) 2,75 kg Spannung: 230 V Wechselstrom, 50 Hz Leistungsaufnahme: 3W Umgebungsbedingungen: +5 °C bis +35 °C 45 % bis 85 % relative Luftfeuchte (nicht kondensierend) Abtastnadel: Diamant-Nadel WOW, Flutter < 0.25% WRMS (JIS WTD) bei 331/3 Upm USB-Anschluss 18 Technische Änderungen und Irrtümer vorbehalten. USB 1.1 für WINDOWS, MAC OSX Richtlinien und Normen Dieses Produkt entspricht • der EMV-Richtlinie (89/336/EC) und der • CE-Kennzeichenrichtlinie. Wie Sie den Hersteller erreichen Wie Sie den Hersteller erreichen Wie Sie das Gerät entsorgen DGC GmbH Graf-Zeppelin-Str. 7 D-86899 Landsberg Altgeräte sind kein wertloser Abfall. Durch umweltgerechte Entsorgung können wertvolle Rohstoffe wiedergewonnen werden. Erkundigen Sie sich in Ihrer Stadt- oder Gemeindeverwaltung nach Möglichkeiten einer umwelt- und sachgerechten Entsorgung des Gerätes. Entsorgungshinweise Entsorgung der Verpackung Ihr neues Gerät wurde auf dem Weg zu Ihnen durch die Verpackung geschützt. Alle eingesetzten Materialien sind umweltverträglich und wieder verwertbar. Bitte helfen Sie mit und entsorgen Sie die Verpackung umweltgerecht. Über aktuelle Entsorgungswege informieren Sie sich bei Ihrem Händler oder über Ihre kommunale Entsorgungseinrichtung. Erstickungsgefahr! Verpackung und deren Teile nicht Kindern überlassen. Dieses Gerät ist entsprechend der Richtlinie 2002/96/EG über Elektro- und Elektronik-Altgeräte (WEEE) gekennzeichnet. Dieses Produkt darf am Ende seiner Lebensdauer nicht über den normalen Haushaltsabfall entsorgt werden, sondern muss an einem Sammelpunkt für das Recycling von elektrischen und elektronischen Geräten abgegeben werden. Das Symbol auf dem Produkt, der Gebrauchsanleitung oder der Verpackung weist darauf hin. Die Werkstoffe sind gemäß ihrer Kennzeichnung wiederverwertbar. Mit der Wiederverwendung, der stofflichen Verwertung oder anderen Formen der Verwertung von Altgeräten leisten Sie einen wichtigen Beitrag zum Schutze unserer Umwelt. Lebensgefahr! Bei ausgedienten Geräten Netzstecker ziehen. Netzkabel durchtrennen und mit dem Stecker entfernen. Erstickungsgefahr durch Folien und anderen Verpackungsmaterialien. 19 DUAL DT 210 USB Platine tourne-disque avec branchement USB Manuel d'utilisation Avant-propos Ce manuel d'utilisation vous aide en vue d'une utilisation • conforme aux prescriptions et • sûre Utilisation de votre platine tourne-disque DT 210 USB, nommée ci-après platine tourne-disque ou appareil. Veuillez respecter le logiciel Audacity sur le CD ainsi que les consignes d'utilisation du branchement USB à la page 13. Caractéristiques de présentation de ce manuel d'utilisation Différents éléments de ce manuel présentent des caractéristiques de présentation déterminés. Ainsi, vous pourrez rapidement vous rendre compte s'il s'agit de texte normal, • d'énumérations ou d'étapes de manipulation. Groupe ciblé par ce manuel d'utilisation Le manuel d'utilisation s'adresse à chaque personne qui • installe, • utilise, • nettoie • ou élimine la platine tourne-disque. Tous les noms de marques et de produits cités sont des marques de fabrique ou des marques déposées des fabricants correspondants. 2 Installer le logiciel Audacity® livré avec l'appareil avant de raccorder et de mettre en service l'appareil sur PC et/ou MAC. "Free MP3 Sound Recorder" est p. ex. un programme alternatif. Téléchargement sur Internet sous www.nbxsoft.com/sound-recorder.php. Table des matières Consignes de sécurité et installation de la platine tourne-disque ................................................................ 4 Consignes de sécurité.....................................................4 Installation de l'appareil...................................................5 Description de la platine tourne-disque...................... 6 Volume de livraison .........................................................6 Principales fonctions .......................................................6 Face avant de l'appareil ..................................................7 Face arrière de l'appareil.................................................8 Préparatifs ..................................................................... 9 Courroie et plateau..........................................................9 Revêtement du plateau ...................................................9 Adaptateur de centrage...................................................9 Bras de lecture ................................................................9 Avant de procéder au raccordement USB................ 13 Configuration requise.................................................... 13 Comment numériser votre musique ......................... 14 Installation du logiciel.................................................... 14 Raccorder la platine tourne-disque............................... 14 Configuration du logiciel ............................................... 14 Enregistrement et mémorisation de la musique ........... 15 Nettoyage de la platine tourne-disque...................... 16 Choc électrique............................................................. 16 Nettoyage de l'aiguille et du disque .............................. 16 Changement de l'aiguille .............................................. 16 Comment remédier aux erreurs ................................ 17 Données techniques................................................... 18 Consignes d'élimination ............................................ 19 Raccordement de la platine tourne-disque .............. 10 Raccordement à l'amplificateur .....................................11 Raccordement à l'ordinateur .........................................11 Branchement au secteur ...............................................11 Comment régler l'interrupteur PHONO/LINE ................11 Retirer / Mettre la protection de l'aiguille .......................11 Lecture d'un disque .................................................... 12 Démarrage automatique ...............................................12 Démarrage manuel .......................................................12 Touche STOP ...............................................................12 3 Consignes de sécurité et installation de la platine tourne-disque Consignes de sécurité et installation de la platine tournedisque Veuillez lire consciencieusement toutes les consignes de sécurité et conservez-les au cas où vous vous poseriez des questions ultérieurement. Respectez toujours tous les avertissements et consignes de ce manuel d'utilisation, ainsi que ceux figurant au dos de l'appareil. Consignes de sécurité • • • • • • 4 L'appareil doit uniquement être raccordé à une tension secteur de 230 V~, 50 Hz. N'essayez jamais d'utiliser l'appareil avec une autre tension. La fiche secteur doit seulement être raccordée après la fin de l'installation conforme aux prescriptions. Si la fiche secteur est défectueuse ou si l'appareil présente d'autres dommages, il est interdit de mettre l'appareil en marche. Lors du débranchement du cordon d'alimentation de la prise de courant, tirer sur la fiche d'alimentation et non sur le câble. Afin d'éviter un risque d'incendie et le risque d'un choc électrique, n'exposez pas l'appareil à la pluie ni à toute autre sorte d'humidité. Ne pas toucher la fiche d'alimentation avec les mains mouillées, risque d'électrocution ! • • • • • • • • • • • En cas de dérangements ou de formation de fumée et d'odeurs provenant de l'appareil, retirer immédiatement la fiche d'alimentation de la prise ! Débranchez la fiche secteur si un orage menace. Débranchez la fiche secteur si l'appareil n'est pas utilisé sur une période prolongée, p. ex. avant d'entreprendre un voyage. Débranchez la fiche secteur de la prise de courant si vous n'utilisez pas l'appareil pendant une période prolongée. Tirez uniquement au niveau de la fiche secteur, pas sur le câble. Posez le câble d'alimentation de manière à éviter tous risques de trébuchement. Ne posez pas d'objet lourd sur le câble d'alimentation. Veillez toujours à une bonne accessibilité au câble d'alimentation ou au connecteur, de manière à pouvoir débrancher rapidement l'appareil de l'alimentation électrique ! La prise doit être située le plus près possible de l'appareil. Pour le raccordement au secteur, enfoncer complètement la fiche secteur dans la prise. Utilisez un raccordement secteur approprié et évitez d'utiliser des multiprises ! Evitez le contact de l'appareil avec l'eau ou l'humidité. Ne mettez pas l'appareil en service à proximité de baignoires, de piscines ou autres jets d'eau. Consignes de sécurité et installation de la platine tourne-disque • • • • • • • • • Ne posez pas de récipient contenant des liquides, p. ex. vases à fleurs, sur l'appareil. Ils pourraient se renverser et le liquide qui s'écoule risquerait d'entraîner des dommages considérables ou même un choc électrique. Si des corps étrangers ou du liquide devaient parvenir à l'intérieur de l'appareil, débranchez immédiatement la fiche secteur de la prise de courant. Faites vérifier l'appareil par un spécialiste qualifié avant de le remettre en service. Danger de choc électrique en cas d'ouverture du boîtier. N'ouvrez pas le boîtier. Danger de choc électrique en cas d'ouverture du boîtier. N'essayez jamais de réparer vous-même un appareil défectueux. Adressez-vous toujours à nos points de service après-vente. N'ouvrez en aucun cas l'appareil – seul un spécialiste doit l'ouvrir. Des corps étrangers, p. ex. aiguilles, pièces de monnaie, etc., ne doivent pas tomber à l'intérieur de l'appareil. Ne posez pas de bougies allumées ou autres sources potentielles d'incendie sur l'appareil. Ne laissez jamais des enfants utiliser cet appareil sans surveillance. Faites effectuer les travaux de maintenance uniquement par des spécialistes qualifiés, faute de quoi, vous vous mettriez vous-même ou d'autres personnes en danger. Installation de l'appareil • La platine tourne-disque ne doit être placée que sur une surface horizontale stable, exempte de vibrations. • N'installez pas l'appareil à proximité de sources de chaleur telles que radiateurs. Évitez l'ensoleillement direct et les emplacements exposés à une quantité exceptionnelle de poussières. • Maintenez l'appareil uniquement à l'horizontale. • Éloignez la platine des appareils qui génèrent un fort champ magnétique. • Ne posez pas d'objets lourds sur l'appareil. • De la condensation peut se produire à l'intérieur de l'appareil en le déplaçant d'un lieu froid vers un lieu chaud. Dans ce cas, attendez environ une heure avant de le mettre en service. • Posez le câble réseau de telle sorte que personne ne trébuche dessus. • Pour un raccordement au secteur, enfoncer la fiche secteur complètement dans la prise de courant. • Utilisez un branchement au secteur approprié, facilement accessible et évitez l'utilisation de prises multiples ! • Ne pas toucher la fiche secteur avec les mains humides, risque de décharge électrique ! • En cas d'anomalies ou d'apparition de fumée et d'odeur au niveau du boîtier, retirer immédiatement la fiche secteur de la prise de courant ! 5 Description de la platine tourne-disque • Débrancher la fiche secteur avant un orage. • Si l'appareil n'est pas utilisé pendant une période prolongée, par exemple à la veille d'un voyage prolongé, débranchez la fiche secteur. Description de la platine tournedisque Volume de livraison Retirez l'appareil et tous ses accessoires de l'emballage. Conservez le carton et tous les éléments de l'emballage pour un éventuel transport ultérieur Veuillez vérifier que tous les accessoires mentionnés cidessous sont présents : • La platine tourne-disque, • Plateau avec courroie, • Revêtement du plateau, • Capot doté de 2 charnières, • Adaptateur pour disques 45 tours (45 t./min.), • Câble USB, • CD du logiciel, • le présent manuel d'utilisation. 6 Principales fonctions • • • • • Cet appareil vous permet de lire des disques 33 et 45 tours. Il comporte des fonctions totalement automatiques. À la fin du disque, le bras de lecture est automatiquement ramené sur son support. Vous pouvez transmettre vos disques via le branchement USB ainsi que le logiciel Audacity sur votre PC et ainsi les numériser. La platine tourne-disque est dotée d'un sélecteur de réglage de la sensibilité/préamplificateur intégré ; elle peut ainsi être raccordée à une entrée phono ou audio (AUX-In). Description de la platine tourne-disque Face avant de l'appareil 1 Cordon d'alimentation 2 Plateau 3 Capot 4 Câble audio Cinch (avec fiche blanche et rouge) 5 Tapis 6 Bras de lecture 7 Aiguille de lecture 8 Levier de sélection pour le réglage de la taille des disques (SIZE 30/17) 9 Interrupteur Lift du bras de lecture (UP/DOWN) 10 Touche STOP 11 Touche START 12 Réglage de la vitesse (SPEED 33/45) 13 Port USB 7 Description de la platine tourne-disque Face arrière de l'appareil 14 15 16 14 Câble audio Cinch (avec fiche blanche et rouge) 15 Interrupteur PHONO/LINE 16 Port USB 17 Cordon d'alimentation 8 17 Préparatifs Revêtement du plateau Préparatifs Appliquez maintenant le revêtement 5 avec le bon côté vers le haut sur le plateau. Courroie et plateau Lors de la livraison, la courroie d'entraînement [1] est déjà en place sur la bande de roulement de courroie du plateau 2. La courroie est dotée d'une bande [2], avec laquelle la courroie est posée sur l'axe d'entraînement [3] du moteur (Pully). Poser le plateau sur l'axe. Tournez le plateau de telle manière que l'ouverture se retrouve au-dessus du moteur d'entraînement. Enlevez la courroie au moyen de la bande de roulement décrite ci-dessus et placez-la sur le rouleau d'entraînement moteur Pully. Enlevez la bande. 2 3 Adaptateur de centrage L'adaptateur de centrage est utilisé par exemple pour les disques 45 tours qui ne sont pas munis de support de centrage. Si l'adaptateur de centrage n'est pas utilisé, vous pouvez le placer sur le support prévu à cet effet. Bras de lecture Le bras de lecture 6 est bloqué par une bande pour le transport. Enlevez cette bande avant la première mise en service. Lors de transports ultérieurs, le bras de lecture devra être de nouveau fixé avec cette bande pour éviter des dommages causés par les chocs. 1 9 Raccordement de la platine tourne-disque Raccordement de la platine tourne-disque Interrupteur PHONO/LINE 1 – sur LINE 2 – sur PHONO 3 – Branchement USB sur le PC 1 3 10 2 Raccordement de la platine tourne-disque Raccordement à l'amplificateur Raccordez le câble audio Cinch 14 sur les prises LINE/AUX ou Phono sur l'amplificateur. Remarque : Lors de cette opération, faites attention à raccorder correctement les canaux gauche et droit (rouge = canal droit, blanc = canal gauche). Retirer / Mettre la protection de l'aiguille Avant la lecture d'un disque, la protection de l'aiguille [1] doit être retirée de la tête de lecture 7. Retirez la protection vers l'avant. Raccordement à l'ordinateur Raccordez le branchement USB 16 à un emplacement USB libre sur votre ordinateur. Merci de respecter les consignes de la page 13. Branchement au secteur Enfoncez la fiche secteur dans une prise de courant. Comment régler l'interrupteur PHONO/LINE 2 1 Il est recommandé de remettre en place la protection de l'aiguille après la lecture pour protéger l'aiguille [2]. Réglez l'interrupteur PHONO/LINE 15 sur PHONO quand la platine tourne-disque est raccordée aux prises PHONO. Réglez l'interrupteur PHONO/LINE 15 sur LINE quand la platine tourne-disque est raccordée aux prises LINE. 11 Lecture d'un disque Lecture d'un disque Démarrage automatique Mettez un disque. Le cas échéant, poser l'adaptateur de centrage pour les 45 tours. Réglez, avec le levier de sélection 8, la taille de disque correspondante : 30 ou 17 cm de diamètre. Fermer le capot. Réglez, avec l'interrupteur SPEED 12, la vitesse de rotation du plateau sur 33 ou 45 tr/min. Faites attention à ce que l'interrupteur LIFT 9 se trouve bien en position DOWN. Appuyez sur la touche START 11. Le plateau commence à tourner à la vitesse préréglée. Le bras de lecture se pose automatiquement sur le disque. La lecture démarre. Démarrage manuel Mettez un disque. Réglez, avec le levier de sélection 8, la taille de disque correspondante : 30 ou 17 cm de diamètre. Réglez, avec l'interrupteur SPEED 12, la vitesse de rotation du plateau sur 33 ou 45 tr/min. Faites attention à ce que l'interrupteur LIFT 9 se trouve bien en position UP. Appuyez sur la touche START 11. Le plateau commence à tourner à la vitesse préréglée. Le bras de lecture se pose automatiquement sur le disque. La lecture démarre. 12 Retirez le bras de lecture du support et l'amener audessus des sillons du disque. Le plateau commence à tourner à la vitesse préréglée. Si vous appuyez de nouveau sur l'interrupteur LIFT (DOWN) 9, le bras de lecture s'abaisse. L'interrupteur Lift 9 permet de relever le bras de lecture à n'importe quel endroit du disque, même pour une courte interruption (lève-bras en position UP). Le plateau continue à tourner. Touche STOP À la fin du disque, le bras de lecture est automatiquement ramené sur son support et l'appareil est mis à l'arrêt. Remarque : Vous pouvez également arrêter la platine tourne-disque en appuyant sur le bouton STOP 10 ou en appuyant sur le bouton Lift 9, le placer en position UP et repositionner le bras de lecture sur son support. Avant de procéder au raccordement USB Avant de procéder au raccordement USB Configuration requise Avant le raccordement, assurez-vous que le système de votre ordinateur remplit les conditions préalables cidessous : • Intel Pentium ou AMD Athlon, 1 GHz ou plus • (ou ordinateur MAC correspondant) • Port USB 1.1 ou USB 2.0 (2.0 recommandé) • Système d'exploitation Windows 2000/XP ou une version plus récente, MAC OSX ou une version plus récente • Carte son compatible • Mémoire de travail > à 512 Mo • Graveur de CD ou de DVD pour la réalisation de CD audio • Haut-parleurs, souris • Mémoire disque dur libre de 10 Mo pour l'installation du logiciel • Mémoire disque dur libre supplémentaire pour la numérisation de votre musique Remarque : • Installer le logiciel Audacity® livré avec l'appareil avant de raccorder et de mettre en service l'appareil sur PC et/ou MAC. • Le logiciel Audacity® est un gratuiciel. Vérifiez sur la page d'accueil si une mise à jour est disponible. Le cas échéant, une version actuelle ou des mises à jour sont disponibles sur le site Internet http://audacity.sourceforge.net. • "Free MP3 Sound Recorder" est p. ex. un programme alternatif. Téléchargement sur Internet sous www.nbxsoft.com/sound-recorder.php 13 Comment numériser votre musique Comment numériser votre musique Installation du logiciel Démarrez votre ordinateur, insérez le CD et installez le logiciel Audacity. Veuillez consulter la page d'accueil pour voir si une mise à jour est disponible (http://audacity.sourceforge.net) et installez le cas échéant la mise à jour. Raccorder la platine tourne-disque Raccordez le branchement USB 15 de la platine tournedisque à un emplacement USB libre sur votre ordinateur. Utilisez le câble USB livré avec l'appareil. Configuration du logiciel 1. Démarrez le logiciel Audacity. 2. Sélectionnez dans le menu [Modifier] et [Réglages]. Les réglages du logiciel s'ouvrent. 3. Cliquez sur le taquet [Audio E/A]: 4. Sélectionnez votre carte son interne comme appareil de reproduction. 5. Sélectionnez USB Audio CODEC ou "Microsoft Soundmapper Input“ comme appareil de reproduction. 6. Sélectionnez les canaux [Channels] 2 Stereo. 7. Cliquez sur [Multiplay], de sorte qu'une coche apparaît devant. 8. Cliquez sur [Software Playthrough], de sorte qu'une coche apparaît devant. 9. Cliquez sur OK. 14 Comment numériser votre musique Enregistrement et mémorisation de la musique 1. Mettez un disque. Démarrez la lecture. 2. Cliquez sur la touche d'enregistrement rouge au niveau du logiciel. 3. Cliquez sur la touche bleue PAUSE pour une interruption temporaire de l'enregistrement. 4. Cliquez sur la touche jaune STOP pour arrêter l'enregistrement. 5. Cliquez sur la touche verte PLAY pour lire votre enregistrement. 6. Cliquez sur fichier et sélectionnez "Exporter au format WAV…“ pour sauvegarder l'enregistrement sur le PC. 7. Pour exporter l'enregistrement sous forme de fichier MP3, vous devez au préalable installer le codeur Lame. Lisez pour ce faire les consignes sur le CD du logiciel. Remarque : Vous trouverez également des instructions détaillées sur le logiciel Audacity sur le CD du logiciel. 15 Nettoyage de la platine tourne-disque Nettoyage de la platine tournedisque Choc électrique Afin d'éviter le risque d'un choc électrique, ne lavez pas l'appareil avec un chiffon mouillé ou sous l'eau courante. Attention ! N'utilisez pas d'éponge à gratter, de poudre à récurer ni de solvant tel que l'alcool ou l'essence. Nettoyez le boîtier à l'aide d'un chiffon doux légèrement humide. Nettoyage de l'aiguille et du disque Avant toute lecture, l'aiguille et le disque doivent toujours être nettoyés, pour éviter qu'ils soient usés prématurément. Passez un pinceau sur l'aiguille, de l'arrière vers l'avant. Passez un chiffon de manière légèrement oblique sur le disque. 16 Changement de l'aiguille L'aiguille de lecture subit une usure naturelle à l'usage. Nous vous recommandons donc de contrôler régulièrement son état, au bout de 500 heures de service pour les aiguilles de diamant. Remarque : Les aiguilles de lecture usées ou endommagées (brisées) détruisent les disques. Remplacez l'aiguille uniquement par le même modèle. Tirez l'aiguille de lecture de biais et vers le bas. Pour remonter de l'aiguille de lecture, procédez à la même opération en sens inverse. Comment remédier aux erreurs Comment remédier aux erreurs Si l'appareil ne fonctionne pas comme prévu, faites une vérification à l'aide des tableaux suivants. Si vous ne pouvez pas éliminer le défaut, même après les contrôles décrits, veuillez contacter le fabricant. Problèmes avec l'appareil Problème Cause possible / remède Le bras de lecture saute les pistes, glisse sur le disque ou ne bouge pas La platine tourne-disque n'est pas à l'horizontale. Placez la platine tourne-disque sur une surface horizontale. Le disque est sale ou rayé. Nettoyez le disque avec l'accessoire adéquat ou passez un autre disque. Problème Cause possible / remède Mauvaise qualité du son, nombreux parasites, déraillement du son, etc. L'aiguille est sale ou usée. À l'aide d'un pinceau, nettoyez l'aiguille ou bien changez-la. Le disque est sale ou rayé. Nettoyez le disque avec l'accessoire adéquat. La vitesse n'est pas appropriée. Réglez la vitesse en fonction des données figurant sur le disque. (33 tr/min ou 45 tr/min) Le son est monocorde La courroie est détendue et doit être changée. Le son est trop faible ou trop fort, il est déformé. La platine tourne-disque n'est pas raccordée à la bonne entrée. (voir page 11) Aucun enregistrement possible avec le logiciel Audacity Exécuter la restauration du système du PC (via "Programme“, "Accessoires“, "Programme de systèmes“). 17 Données techniques Données techniques Dimensions (largeur x hauteur x profondeur) : Les dimensions sont des valeurs approximatives. 350 mm x 95,4 mm x 348 mm Poids : (sans piles) 2,75 kg Tension : Courant alternatif 230 V , 50 Hz Puissance absorbée : 3W Conditions ambiantes : +5 °C à +35 °C 45 % à 85 % d'humidité relative (non condensée) Aiguille de lecture : aiguille de diamant Fluctuation de vitesses < 0,25 % WRMS (JIS WTD) pour 331/3 Tpm Port USB 18 Sous réserve de modifications techniques et d'erreurs. USB 1.1 pour WINDOWS, MAC OSX Directives et normes Ce produit est conforme à • la direction "basse tension" (2006/95/EC), • la directive "compatibilité électromagnétique" (2004/108/EC) et la • directive de référence CE). Contacter le fabricant Contacter le fabricant Élimination de l'appareil DGC GmbH Graf-Zeppelin-Str. 7 D-86899 Landsberg Les appareils usagés ne sont pas des déchets sans valeur. Une élimination respectueuse de l'environnement permet de recycler des matières brutes précieuses. Renseignez auprès de l'administration de votre ville ou de votre commune concernant les possibilités d'une élimination réglementaire et respectueuse de l'environnement de l'appareil. Consignes d'élimination Elimination de l'emballage Votre nouvel appareil a été protégé par un emballage lors de son acheminement. Tous les matériaux utilisés sont compatibles avec l'environnement et recyclables. Veuillez apporter votre contribution et éliminez l'emballage de façon respectueuse de l'environnement. Concernant les moyens actuels d'élimination des déchets, informez-vous auprès de votre revendeur ou concernant votre installation de gestion de déchets communale. Danger d'étouffement ! Ne laissez pas l'emballage et ses éléments à des enfants. Danger d'étouffement par les films ou d'autres matériaux d'emballage. Cet appareil est marqué selon la directive 2002/96/CE concernant les appareils électriques et électroniques usagés (WEEE). Ce produit, arrivé en fin de vie, ne doit pas être éliminé par le biais des ordures ménagères ordinaires ; il doit être remis à un point de collecte prévoyant le recyclage d'appareils électriques et électroniques. Le symbole figurant sur le produit, dans le manuel d'utilisation ou sur l'emballage, attire votre attention à cet égard. Les matériaux sont recyclables conformément à leur marquage. Avec la réutilisation, le recyclage des matériaux ou d'autres formes de recyclage d'appareils usagés, vous apportez une contribution importante à la protection de notre environnement. Danger de mort ! Débranchez la fiche secteur sur les appareils qui ne sont plus utilisés. Déconnectez le câble d'alimentation et débranchez-le avec la fiche. 19 DUAL DTJ 210 USB Giradischi automatico con connessione USB Istruzioni d'uso Premessa Questo manuale aiuta a usare in modo sicuro e conforme a quanto prescritto il giradischi DT 210 USB, di seguito indicato come giradischi o apparecchio. Seguire le indicazioni del software Audacity sul CD e le note sull'utilizzo della connessione USB a pag. 13. Destinatari di queste istruzioni d’uso Le istruzioni d'uso sono rivolte a chiunque installano, utilizzano, puliscono o smaltiscono il giradischi. Tutti i nomi dei marchi e dei prodotti sono marchi di fabbrica o marchi registrati dei rispettivi produttori. 2 Caratteristiche grafiche di queste istruzioni d’uso Diversi elementi del manuale sono contrassegnati con simboli particolari. In questo modo risulta facile capire se si tratta di testo normale, elenchi o istruzioni operative. Installare sul PC o sul MAC il software Audacity® fornito insieme, prima del collegamento e della messa in funzione dell'apparecchio. Come programma alternativo si può usare ad es. Free MP3 Sound Recorder. Internet : www.nbxsoft.com/sound-recorder.php Indice Sicurezza e montaggio del giradischi ......................... 4 Sicurezza ........................................................................ 4 Installazione .................................................................... 5 Descrizione del giradischi............................................ 6 Confezione ...................................................................... 6 Caratteristiche particolari ................................................ 6 Lato anteriore dell’apparecchio ....................................... 7 Lato posteriore dell'apparecchio .....................................8 Preparazione del giradischi prima della messa in funzione ......................................................................... 9 Cinghia e piatto giradischi ............................................... 9 Rivestimento del piatto giradischi (base) ........................9 Dischetto di centraggio.................................................... 9 Braccio del pick-up .......................................................... 9 Collegamento del giradischi ...................................... 10 Collegamento all'amplificatore ......................................11 Collegamento al computer ............................................ 11 Collegamento alla rete ..................................................11 Regolazione dell'interruttore PHONO/LINE ..................11 Rimozione/applicazione della calotta protettiva della puntina .......................................................................... 11 Riproduzione di un disco........................................... 12 Avvio automatico .......................................................... 12 Avvio manuale .............................................................. 12 Tasto stop ..................................................................... 12 Prima di creare la connessione USB ........................ 13 Configurazione di sistema ............................................ 13 Digitalizzazione della musica .................................... 14 Installazione software ................................................... 14 Collegare il giradischi.................................................... 14 Inizializzazione del software ......................................... 14 Registrazione e memorizzazione della musica............. 15 Pulizia del giradischi .................................................. 16 Scossa elettrica ............................................................ 16 Pulizia della puntina e del disco.................................... 16 Sostituzione della puntina............................................. 16 Eliminazione delle anomalie .................................... 17 Dati tecnici................................................................... 18 Indicazioni per lo smaltimento .................................. 19 3 Sicurezza e montaggio del giradischi Sicurezza e montaggio del giradischi Leggere attentamente le norme di sicurezza e conservarle per eventuali consultazioni successive. Seguire sempre tutte le avvertenze e istruzioni di questo manuale e riportare sul retro dell'apparecchio. Sicurezza 4 L'apparecchio può solo essere collegato ad una tensione di rete di 230 V~, 50 Hz. Non cercare mai di far funzionare l'apparecchio con un'altra tensione. La spina di alimentazione deve essere collegata solo dopo aver terminato l'installazione a norma. Se la spina di alimentazione dell'apparecchio è guasta o se l'apparecchio presenta altri danni, quest'ultimo non deve essere messo in funzione. Per staccare il cavi di alimentazione dalla presa, tirare afferrando la spina e non il cavo. Per evitare rischi di incendi e il pericolo di scossa elettrica, non esporre l'apparecchio alla pioggia o ad altre fonti di umidità. Non afferrare mai la spina di rete con le mani bagnate: pericolo di scossa elettrica! In caso di anomalie o di formazione di fumo o odori nell'involucro, staccare subito la spina dalla presa. Estrarre la spina prima di un temporale. Qualora l'apparecchio non venga utilizzato per lungo tempo, ad esempio nel caso di un lungo viaggio, estrarre la spina. Staccare la spina dalla presa di corrente, nel caso in cui l’apparecchio non venga utilizzato per lungo tempo. Tirare tenendo soltanto la spina. Posare il cavo di alimentazione in modo da evitare che qualcuno si inciampi. Non posare oggetti pesanti sul cavo di alimentazione. Assicurarsi che il cavo di alimentazione o il connettore siano sempre facilmente accessibili, in modo da poter scollegare velocemente l'apparecchio dall'alimentazione elettrica! La presa deve trovarsi il più possibile vicino all'apparecchio. Per collegare l'apparecchio alla rete elettrica, inserire completamente la spina nella presa. Utilizzare un allacciamento alla rete adatto e facilmente accessibile; non utilizzare prese multiple. Evitare il contatto dell'apparecchio con acqua o umidità. Non mettere in funzione l'apparecchio nelle vicinanze di vasche da bagno, piscine o dove si formano spruzzi d'acqua. Non mettere mai contenitori con liquidi, es. vasi di fiori, sull'apparecchio. Questi potrebbero rovesciarsi, e il liquido fuoriuscito può provocare danni considerevoli o produrre il rischio di scossa elettrica. Sicurezza e montaggio del giradischi Se dovessero penetrare corpi estranei nell'apparecchio, estrarre subito la spina dalla presa. Far controllare l'apparecchio da personale esperto altamente qualificato prima di rimetterlo in funzione. In caso contrario, vi è il rischio di subire una scossa elettrica. Non aprire l'involucro esterno. In caso contrario, vi è il rischio di subire una scossa elettrica. Non cercare mai di riparare da soli un apparecchio difettoso. Rivolgersi sempre a uno dei nostri centri di assistenza clienti. Non aprite l'apparecchio in nessun caso - è consentito solo a un tecnico esperto. Corpi estranei, ad es. aghi, monete, ecc., non devono cadere all'interno dell'apparecchio. Non posare fonti di combustione libere, come ad es. candele accese, sull'apparecchio. Non lasciare mai l'apparecchio incustodito alla portata dei bambini. Fare eseguire i lavori di manutenzione sempre da personale specializzato qualificato. In caso contrario si rischia di mettere in pericolo se stessi e gli altri. Per la pulizia dell'apparecchio e dei dischi, utilizzare esclusivamente detergenti specifici (antistatici) acquistabili presso rivenditori specializzati in accessori. Installazione Installare il giradischi su una superficie orizzontale stabile, priva di vibrazioni. Non collocare l’apparecchio vicino a fonti di calore come radiatori. Evitare i raggi solari diretti e i luoghi eccessivamente polverosi. Durante il funzionamento, l'apparecchio deve trovarsi in posizione orizzontale. Tenere l'apparecchio lontano da altri apparecchi che producono forti campi magnetici. Non posare oggetti pesanti sull'apparecchio. Spostando il giradischi da un ambiente freddo a uno caldo, è probabile che al suo interno possa depositarsi dell'umidità. In tal caso attendere circa un'ora prima di rimetterlo in funzione. Per collegare l'apparecchio alla rete elettrica, inserire completamente la spina nella presa. 5 Descrizione del giradischi Descrizione del giradischi Caratteristiche particolari Confezione Con questo apparecchio è possibile riprodurre dischi da 33 e 45 giri. Estrarre l'apparecchio e tutti gli accessori dall'imballaggio. Dispone di funzioni di comando completamente automatiche. Conservare il cartone e il materiale d'imballaggio per poter reimballare l'apparecchio in modo sicuro in caso di un successivo trasporto. Al completamento del disco, il braccio del pick-up viene automaticamente riportato indietro. Grazie alla connessione USB e al software Audacity è possibile trasferire i dischi sul proprio PC e digitalizzarli. Il giradischi è dotato di un preamplificatoreequalizzatore integrato ed è possibile collegarlo sia a un ingresso phono, sia a un ingresso audio (AUX-In). Accertarsi che siano presenti tutti gli accessori di seguito elencati: il giradischi, il piatto giradischi con cinghia di trazione, base di gomma, il coperchio con 2 cerniere, l'adattatore per dischi da 45 giri, cavo USB, CD software, il presente manuale d'uso. 6 Descrizione del giradischi Lato anteriore dell’apparecchio 1 Cavo di alimentazione 2 Piatto giradischi 3 Coperchio 4 Cavo audio cinch (con spina bianca o rossa) 5 Base di gomma 6 Braccio del pick-up 7 Puntina, con sistema 8 Leva di selezione per la dimensione del disco (SIZE 30/17) 9 Tasto per sollevamento braccio pick-up (UP/DOWN) 10 Tasto Stop (STOP) 11 Tasto Start (START) 12 Tasto numero giri (SPEED 33/45) 13 Collegamento USB 7 Descrizione del giradischi Lato posteriore dell'apparecchio 14 15 16 14 Cavo audio cinch (con spina bianca o rossa) 15 Interruttore PHONO/LINE 16 Collegamento USB 17 Cavo di alimentazione 8 17 Preparazione del giradischi prima della messa in funzione Preparazione del giradischi prima della messa in funzione Cinghia e piatto giradischi Al momento della fornitura, la cinghia di trazione poggia già sulla relativa superficie di scorrimento del piatto giradischi. La cinghia è dotata di un nastro, con il quale la cinghia stessa viene posizionata sull'asse di trazione del motore (puleggia). Poggiare il piatto giradischi sull'asse. Girare il piatto giradischi, fino a posizionare l'incavo sul motore di trazione. Tirare la cinghia 1 tramite il nastro 2 summenzionato fuori dalla superficie di scorrimento e posizionarla in maniera centrata sopra il rullo di trazione della puleggia del motore 3. Rimuovere il nastro 2. Rivestimento del piatto giradischi (base) Posare la base 5 con il lato giusto rivolto verso l'alto sul piatto giradischi. Dischetto di centraggio Il dischetto di centraggio è necessario ad es. per i dischi da 45 giri senza stella di centraggio. Qualora il dischetto di centraggio non venga utilizzato, è possibile riporlo nell'apposito vano. Braccio del pick-up Il braccio del pick-up 6 è assicurato con un nastro per il trasporto. Rimuovere tale nastro prima di mettere in funzione per la prima volta. Per un successivo trasporto, il braccio del giradischi deve essere nuovamente fissato con tale nastro, per evitare danni da scossoni. 9 Collegamento del giradischi Collegamento del giradischi Interruttore PHONO/LINE: 1 – su LINE 2 – su PHONO 3 – connessione USB a PC 1 3 10 2 Collegamento del giradischi Collegamento all'amplificatore Collegare il cavo audio Cinch 14 alle prese LINE/AUX o phono dell'amplificatore. Nota: collegare correttamente il canale sinistro e destro (rosso = canale destro, bianco = canale sinistro). Rimozione/applicazione della calotta protettiva della puntina Prima della riproduzione di un disco, occorre rimuovere la calotta protettiva della puntina dal pickup 7. Estrarre la calotta in avanti. Collegamento al computer Collegare la connessione USB 16 con una porta USB libera del computer. Rispettare le note a pag. 13. Collegamento alla rete Inserire il connettore in una presa elettrica. Regolazione dell'interruttore PHONO/LINE Terminata la riproduzione di dischi, si consiglia di riapplicare la calotta per la protezione della puntina. Posizionare l'interruttore PHONO/LINE 15 su PHONO, qualora il giradischi sia collegato alle prese PHONO. Posizionare l'interruttore PHONO/LINE 15 su LINE, qualora il giradischi sia collegato alle prese LINE. 11 Riproduzione di un disco Riproduzione di un disco Avvio automatico Inserire un disco. Nel caso di un 45 giri, utilizzare eventualmente il dischetto di centraggio. Con la leva di selezione 8 impostare la dimensione corretta del disco, 30 o 17 cm di diametro. Chiudere il coperchio. Con il tasto numero giri SPEED 12 impostare il numero di giri del piatto giradischi (33 o 45 giri/min.). Prestare attenzione che il tasto LIFT 9 si trovi in posizione DOWN. Premere il tasto START 11. Il piatto giradischi inizia a girare alla velocità preimpostata. Il braccio del pick-up si posiziona automaticamente sul disco. La riproduzione viene avviata. Avvio manuale Inserire un disco. Con la leva di selezione 8 impostare la dimensione corretta del disco, 30 o 17 cm di diametro. Con il tasto SPEED 12, impostare il numero di giri del piatto giradischi (33 o 45 giri/min.). Prestare attenzione che il tasto LIFT 9 si trovi in posizione UP. 12 Premere il tasto START 11. Il piatto giradischi inizia a girare alla velocità preimpostata. Il braccio del pick-up si posiziona automaticamente sul disco. La riproduzione viene avviata. Togliere il braccio del pick-up dal relativo supporto e portarlo sopra il punto d'inizio del disco. Il piatto giradischi inizia a girare al numero di giri preimpostato. Premendo nuovamente il tasto LIFT (DOWN) 9 il braccio del pick-up si abbassa. Con il tasto Lift 9 è possibile sollevare il braccio del pick-up in qualsiasi punto desiderato, anche per interrompere brevemente la riproduzione (leva di sollevamento in posizione UP). Il piatto giradischi continua a girare. Tasto stop Alla fine del disco, il braccio del pick-up viene automaticamente riportato al relativo supporto e l'apparecchio si spegne. Nota: Si può anche spegnere il giradischi premendo il tasto STOP 10 e il tasto Lift 9, portando il braccio del pick-up in posizione UP e quindi riportandolo sul relativo supporto. Prima di creare la connessione USB Prima di creare la connessione USB Configurazione di sistema Prima della connessione verificare che il sistema operativo del computer abbia i seguenti requisiti: Intel Pentium o AMD Athlon, 1GHz o superiore (o computer MAC analogo) Connessione USB 1.1 o USB 2.0 (consigliata 2.0) Sistema operativo Windows 2000/XP o superiore oppure MAC OSX o superiore Scheda audio compatibile Memoria di elaborazione > 512 MB Masterizzatore CD o DVD per la creazione di CD audio Casse acustiche, mouse 10 MB di memoria libera su hard disk per l'installazione del software Altra memoria libera sull'hard disk per la digitalizzazione della vostra musica Nota: Installare sul PC o sul MAC il software Audacity® in dotazione, prima del collegamento e della messa in funzione dell'apparecchio. Il software Audacity® è un freeware. Controllare nella homepage se è disponibile un update. In http://audacity.sourceforge.net è presente all'occorrenza una versione recente o un aggiornamento. Come programma alternativo si può usare ad es. Free MP3 Sound Recorder. Internet : www.nbxsoft.com/sound-recorder.php 13 Digitalizzazione della musica Digitalizzazione della musica Installazione software Avviare il proprio computer, inserire il CD e installare il software audacity. Controllate se sulla homepage è disponibile un aggiornamento (http://audacity.sourceforge.net) ed eventualmente installarlo. Collegare il giradischi Collegare la connessione USB 15 del giradischi con una porta USB libera del computer. Usare solo il cavo UBS in dotazione. Inizializzazione del software 1. Avviare il software Audacity. 2. Selezionare nel menu [Modifica] e [Impostazioni]: Si apre una finestra delle impostazioni software. 14 3. Fare clic sulla scheda [Audio E/A]: 4. Selezionare come apparecchio di riproduzione la propria scheda audio interna. 5. Selezionare come apparecchio per la riproduzione USB Audio CODEC oppure "Microsoft Soundmapper Input". 6. Selezionare i canali [Channels] 2 Stereo. 7. Fare clic su [Multiplay], così che compaia un segno di spunta. 8. Fare clic su [Software Playthrough], così che compaia un segno di spunta. 9. Cliccare su OK. Digitalizzazione della musica Registrazione e memorizzazione della musica 1. Posare un disco sul piatto giradischi. Avviare la riproduzione. 2. Cliccare sul tasto rosso di registrazione nel software. 3. Cliccare sul tasto azzurro PAUSE per interrompere provvisoriamente la riproduzione. 4. Per terminare la registrazione, cliccare sul tasto STOP giallo. 5. Per riprodurre la propria registrazione terminata, cliccare sul tasto PLAY verde. 6. Fare clic sul file e selezionare "Esporta come WAV…", per salvare la registrazione sul PC. 7. Per esportare la registrazione come file MP3 è necessario aver installato in precedenza il LameEncoder. Leggere al riguardo le avvertenze sul CD del software. Nota: Una guida dettagliata del software Audacity si trova anche sul CD del software. 15 Pulizia del giradischi Pulizia del giradischi Scossa elettrica Al fine di evitare il pericolo di scossa elettrica, non pulire mai l'apparecchio con un panno umido o con acqua corrente. Attenzione! Non usare spugne abrasive, polvere abrasiva e solventi come alcol o benzina. Pulire l'involucro con un panno morbido, inumidito con acqua. Pulizia della puntina e del disco Puntina e disco devono sempre essere puliti prima dell'esecuzione, al fine di evitare un'usura prematura. Con un pennello da pulizia, passare sulla puntina da dietro in avanti. Per la pulizia del disco passare un panno per dischi in modo leggermente obliquo sul disco stesso. 16 Sostituzione della puntina Il processo di riproduzione comporta la naturale usura della puntina. Consigliamo pertanto una verifica regolare che, nel caso di puntine di riproduzione di diamante, deve essere effettuata dopo min. 500 ore di funzionamento. Nota: Le puntine di lettura usurate o danneggiate (scheggiate) rovinano i dischi. Sostituirle, se possibile, esclusivamente con puntine originali. Estrarre la puntina di riproduzione in modo obliquo verso il basso. L’inserimento della puntina avviene in sequenza inversa. Eliminazione delle anomalie Eliminazione delle anomalie Qualora l'apparecchio non funzioni come previsto, effettuare una verifica utilizzando le seguenti tabelle. Se così facendo non si riesce a eliminare l'anomalia, contattare la casa produttrice. Problemi con l'apparecchio Anomalia Anomalia Possibile causa/rimedio Qualità del suono scadente, forti rumori anomali, intermittenze nel suono, ecc. La puntina è sporca o usurata. Pulire la puntina con un pennello o sostituirla. Il disco è sporco o impolverato. Pulire il disco con un detergente per dischi. Il numero di giri non è esatto. Impostare il numero di giri conformemente all’indicazione presente sul disco. (33 giri/min. o 45 giri/min.) Il suono è alterato. La cinghia di trazione è troppo lasca e deve essere sostituita. Il suono è troppo basso o troppo forte e distorto. Il giradischi non è collegato al giusto ingresso. Possibile causa/rimedio Il braccio del pick-up salta le Il giradischi non è in tracce, scivola sopra il disco o posizione orizzontale. non si muove. Collocare il giradischi su una superficie orizzontale. Il disco è sporco o graffiato. Pulire il disco con un detergente per dischi o riprodurre un altro disco. (vedere pag. 11) Impossibile registrare con il software Audacity Eseguire il ripristino del sistema PC (attraverso "Programmi", "Accessori", "Programmi del sistema"). 17 Dati tecnici Dati tecnici Dimensioni (larghezza x altezza x profondità): Con riserva di modifiche tecniche ed errori. Le dimensioni sono approssimative. 350 mm x 95,4 mm x 348 mm Peso: (senza batterie) 2,75 Kg Tensione: 230 V corrente alternata, 50 Hz Potenza assorbita: 3W Condizioni ambientali: da +5°C a +35°C 45 % - 85 % di umidità relativa dell'aria (che non condensa) Puntina di lettura: Puntina di diamante WOW, flutter < 0.25% WRMS (JIS WTD) a 331/3 Upm Collegamento USB 18 USB 1.1 per WINDOWS, MAC OSX Direttive e norme Questo prodotto è conforme direttiva per la bassa tensione (2006/95/CE), alla direttiva CEM (2004/108/CE) e alla direttiva di marchio CE. Come contattare il produttore Come contattare il produttore DGC GmbH Graf-Zeppelin-Str. 7 D-86899 Landsberg Indicazioni per lo smaltimento Smaltimento dell'imballaggio Durante il trasporto, l'apparecchio nuovo è stato protetto dall'imballaggio. Tutti i materiali usati sono ecologicamente compatibili e riutilizzabili. Contribuite anche voi smaltendo l'imballaggio nel rispetto dell'ambiente. È possibile reperire informazioni sui sistemi di smaltimento presso il rivenditore dell'apparecchio o il centro di smaltimento comunale. Pericolo di soffocamento! Non lasciare l'imballaggio e i relativi componenti alla portata dei bambini. Smaltimento dell'apparecchio I vecchi apparecchi non sono rifiuti privi di valore. Grazie allo smaltimento nel rispetto dell’ambiente, è possibile recuperare materie prime utili. Informarsi presso la propria amministrazione cittadina o comunale circa le opportunità di smaltimento adeguato ed ecologico dell’apparecchio. Questo apparecchio è contrassegnato in conformità alla direttiva 2002/96/CE relativa ai vecchi apparecchi elettrici ed elettronici (WEEE). Una volta terminato il suo ciclo di vita, questo prodotto non deve essere smaltito tra i normali rifiuti domestici, ma deve essere consegnato presso un punto di raccolta per il riciclaggio di apparecchi elettrici ed elettronici. Il simbolo sul prodotto, sul manuale d’uso o sull’imballaggio richiama a tale aspetto. I materiali vanno riciclati in base al proprio simbolo. Con il riutilizzo, il recupero dei materiali o altre forme di riciclaggio di vecchi apparecchi si contribuisce in modo decisivo alla protezione dell'ambiente. Pericolo di morte! Una volta che l’apparecchio è fuori servizio, estrarre la spina della corrente elettrica. Estrarre il cavi di alimentazione e rimuoverlo insieme alla spina. Esiste il pericolo di soffocamento a causa delle pellicole e di altri materiali di imballaggio. 19 DUAL DT 210 USB Automatic record player with USB terminal Operating manual Preface This operating manual outlines proper and safe use of your DT 210 USB record player, referred to below as "record player" or "unit". Take note of the Audacity software on the CD and the instructions for using the USB terminal on p. 14. Target group of this operating manual This operating manual is intended for everyone who sets up, operates, cleans or disposes of the unit. All brand and product names are trademarks or registered trademarks of their respective manufacturer. 2 Layout features of this operating manual Various items in the operating manual are provided with set layout features. This ensures you can easily determine whether you are dealing with normal text, a list or steps to be carried out. Install the supplied Audacity® software on a PC or Mac before connecting and operating the unit. An alternative program, for example, is the "Free MP3 Sound Recorder". You can download it on the Internet at www.nbxsoft.com/sound-recorder.php Contents Important notes for users in the U.K.............................. 4 Mains plug ....................................................................... 4 How to connect a plug..................................................... 4 Safety and setting up the record player...................... 5 Safety .............................................................................. 5 Setup ............................................................................... 6 Description of the record player.................................. 7 Included in delivery ......................................................... 7 Special characteristics .................................................... 7 The front of the unit ......................................................... 8 The rear of the unit .......................................................... 9 How to prepare the record player for operation....... 10 Belt and turntable .......................................................... 10 Turntable mat ................................................................ 10 Spindle adapter ............................................................. 10 Tone arm ....................................................................... 10 Connecting the record player .................................... 11 Connection to the amplifier ...........................................12 Connection to the computer ..........................................12 Mains connection .......................................................... 12 How to set the PHONO/LINE switch .............................12 Removing/attaching the stylus protection cap...............12 Playing a record.......................................................... 13 Automatic start.............................................................. 13 Manual start .................................................................. 13 Stop button ................................................................... 13 Before establishing the USB connection ................. 14 System requirements.................................................... 14 How to digitalise your music ..................................... 15 Installing the software ................................................... 15 Connecting the record player........................................ 15 Setting up the software ................................................. 15 Recording and saving music......................................... 16 How to clean the record player ................................. 17 Electric shock................................................................ 17 Cleaning the stylus and the record ............................... 17 Replacing the stylus...................................................... 17 Troubleshooting ......................................................... 18 Technical specifications ............................................ 19 Disposal instructions ................................................. 20 3 Important notes for users in the U.K. Important notes for users in the U.K. How to connect a plug Mains plug The wires in the mains lead are coloured with the following code: blue = neutral (N), brown = live (L). This apparatus is fitted with an approved 13 Amp plug. To change a fuse in this type of plug proceed as follows: 1. Remove fuse cover and fuse. 2. Fix new fuse which should be a BS1362 3 Amp, A.S.T.A. or BSI approved type. 3. Refit the fuse cover. If the fitted plug is not suitable for your socket outlets, it should be cut off and an appropriate plug fitted in its place. If the mains plug contains a fuse, this should have a value of 3 Amp. If a plug without a fuse is used, the fuse at the distribution board should not be greater than 5 Amp. Note: The severed plug must be disposed of to avoid a possible shock hazard should it be inserted into a 13 Amp socket elsewhere. As these colours may not correspond with the colour markings identifying the terminals in your plug, proceed as follows: Connect the blue wire to the terminal marked N or coloured black. Connect the brown wire to the terminal marked L or coloured red. Do not connect either wire to the earth terminal in the plug, marked E (or e) or coloured green (or green and yellow). Before replacing the plug cover, make certain that the cord grip is clamped over the sheath of the lead - not simply over the two wires. Copyright in the U.K. Recording and playback of material may require consent. See Copyright Act 1956 and The Performer’s Protection Acts 1958 to 1972. 4 Safety and setting up the record player Safety and setting up the record player Please read through all of the safety instructions carefully and keep them for questions that may arise later. Always observe all warnings and instructions in this operating manual and on the rear of the unit. Safety The unit should only be connected to a mains voltage supply of 230 V~, 50 Hz. Never try to operate the unit with a different voltage. The mains plug should only be connected after installation has been completed according to the instructions. If the mains plug of the unit is defective or if the unit shows other damage, it must not be operated. When unplugging the mains cable from the socket pull on the mains plug, not on the cable. In order to avoid fire hazards and the risk of electric shock do not expose the unit to rain or moisture. Do not touch the mains plug with wet hands—risk of electric shock! In the event of malfunctions or smoke and odour coming from the housing remove the mains plug from the socket immediately! Before a thunderstorm breaks, pull the mains plug. If the unit is not going to be used for a prolonged period, e.g. in the event of a long trip, remove the mains plug from the socket. Remove the mains plug from the socket if you do not intend to use the unit for a prolonged period. Only pull on the plug itself. Lay the mains cable in such a way that no one can trip over it. Do not place any heavy objects on the mains cable. Make sure the power cable or plug is always easily accessible so that the unit can be disconnected quickly from the power supply! This socket should be as close to the unit as possible. Fully insert the mains plug into the socket. Use a suitable, easily accessible mains connection and avoid using multiple sockets! Prevent the unit from coming into contact with water or moisture. Do not operate the unit in the vicinity of bathtubs, swimming pools or spraying water. Do not place any containers which contain a liquid on the unit, such as a flower vase. These could fall over and the spilled liquid could lead to severe damage or the risk of electric shock. If any foreign material or liquid enters the unit, remove the plug from the socket immediately. Get the unit 5 Safety and setting up the record player checked by a specialist before starting to use it again. Otherwise you are at risk of receiving an electric shock! Do not open the housing. Otherwise you are at risk of receiving an electric shock! Never attempt to repair a defective unit yourself. Always contact one of our customer service locations. Never open the unit under any circumstances - this should only be undertaken by a specialist. Foreign material, e.g. needles, coins, etc., should not be allowed to enter the unit. No open flames, such as burning candles, are permitted to sit on the unit. Never let children use this unit unattended. Always leave maintenance tasks to a qualified technician. Otherwise you put yourself and others in danger. Use only appropriate cleaning agents (antistatic) to clean the unit and the records. These are available in an accessories store. Setup The record player must be set up only on a sturdy horizontal, vibration-free surface. Do not set up the unit in the vicinity of heat sources, such as radiators. Avoid direct sunlight and excessively dusty places. You should only operate the unit when it is positioned horizontally. 6 Keep the unit away from devices that produce strong magnet fields. Do not place any heavy objects on the unit. If you bring the record player from a cold into a warm environment, moisture may form on the inside of the unit. In this case, wait about an hour before you operate it. Lay the mains cable in such a way that no one can trip over it. Fully insert the mains plug into the socket. Use a suitable, easily accessible mains connection and avoid using multiple sockets! Do not touch the mains plug with wet hands—risk of electric shock! In the event of malfunctions or smoke and odour coming from the housing remove the mains plug from the socket immediately! Before a thunderstorm breaks, pull the mains plug. If the unit is not going to be used for a prolonged period, e.g. in the event of a long trip, remove the mains plug from the socket. Description of the record player Description of the record player Special characteristics Included in delivery Remove the unit and all accessory parts from the packaging. Keep the box and the packing material so that you can repack the unit securely for any later transport. Please ensure that all of the accessory parts in the following list are present: The record player Turntable with drive belt Turntable mat Dust cover with 2 hinges Adapter for single (45 rpm) records USB cable Software CD This operating manual. This unit allows you to: play records for 33 and 45 rpm. It offers fully automated control functions. The tone arm is retracted automatically when the end of a record has been reached. Using the USB terminal and the Audacity software, you can transfer your records to your computer and digitalise them. The record player has an integrated equaliser/preamplifier and can be connected to a phono input as well as an audio input (AUX-In). 7 Description of the record player The front of the unit 1 Mains cable 2 Turntable 3 Dust cover 4 Cinch audio cable (with white and red connectors) 5 Turntable mat 6 Tone arm 7 Stylus with system 8 Record size selector lever (SIZE 30/17) 9 Tone arm lift button (UP/DOWN) 10 Stop button (STOP) 11 Start button (START) 12 Speed button (SPEED 33/45) 13 USB port 8 Description of the record player The rear of the unit 14 15 16 17 14 Cinch audio cable (with white and red connectors) 15 PHONO/LINE switch 16 USB terminal 17 Mains cable 9 How to prepare the record player for operation How to prepare the record player for operation Belt and turntable The drive belt is delivered already seated on the belt contact surface of the turntable 2. The belt is equipped with a clip with which the belt is laid onto the drive axle of the motor (pulley). Set the turntable onto the axle. Turn the turntable until the cut-out stands over the drive motor. Use the clip described above to pull the belt off of the contact surface and lay it centrally over the drive roller of the motor pulley. Remove the clip. 10 Turntable mat Now lay the turntable mat 5 right-side-up onto the turntable. Spindle adapter The spindle adapter is required, for example, for singles without their own plastic spindle adapter. When the spindle adapter is not in use, you can store it in the designated area. Tone arm The tone arm 6 is secured for transport using a clip. Remove this clip before operating the unit for the first time. To transport the unit later, secure the tone arm again using this clip to prevent damage from vibrations. Connecting the record player Connecting the record player PHONO/LINE switch: 1 – to LINE 2 – to PHONO 3 – USB port to computer 1 2 3 11 Connecting the record player Connection to the amplifier Connect the cinch (RCA) audio cable 14 to the LINE/AUX or phono jack on the amplifier. Note: Make sure that you make the correct left and right channel connections (red = right channel, white = left channel). Removing/attaching the stylus protection cap Before playing a record, you must remove the stylus protection cap from the pickup 7. To do so, pull off the cap forwards. Connection to the computer Connect the USB terminal 16 with a free USB port on your computer. Follow the instructions on p. 14. Mains connection Insert the mains plug into a socket. How to set the PHONO/LINE switch Move the PHONO/LINE switch 15 to PHONO if the record player is connected to the PHONO jacks. Move the PHONO/LINE switch 15 to LINE if the record player is connected to the LINE jacks. 12 It is recommended that you put the stylus cap back on after playing a record to protect the stylus. Playing a record Playing a record Automatic start Put on a record. For singles, put on the spindle adapter if necessary. Use the selector lever 8 to set the corresponding record size to 30 or 17 cm in diameter. Close the dust cover. Use the SPEED button 12 to set the turntable speed to 33 or 45 rpm. Ensure that the LIFT button 9 is in the DOWN position. Press the START 11 button. The turntable begins turning at the set speed. The tone arm automatically sets itself onto the record. Playback begins. Manual start Put on a record. Use the selector lever 8 to set the corresponding record size to 30 or 17 cm in diameter. Use the SPEED button 12 to set the turntable speed to 33 or 45 rpm. Ensure that the LIFT button 9 is in the UP position. Press the START 11 button. The turntable begins turning at the set speed. The tone arm automatically sets itself onto the record. Playback begins. Take the tone arm from its support and swivel it over the record's lead-in groove. The turntable begins turning at the set speed. Pressing the LIFT (DOWN) button 9 again lowers the tone arm. Using the lift button 9, the tone arm can be lifted at any point—even to interrupt play temporarily (lift lever in the UP position). The turntable keeps turning. Stop button When the end of the record is reached, the tone arm automatically returns to its support and the unit switches off. Note: You can also switch off the record player by pressing the STOP button 10 or by pressing the Lift button 9, moving it into the UP position and returning the tone arm to its support. 13 Before establishing the USB connection Before establishing the USB connection System requirements Before making the connection, please ensure that the computer system fulfils the following requirements: Intel Pentium or AMD Athlon, 1GHz or higher (or corresponding Mac computer) USB 1.1 or USB 2.0 terminal (2.0 recommended) Operating system: Windows 2000/XP or higher; Mac OSX or higher Compatible sound card Memory: > 512 MB CD or DVD burner for creating audio CDs Loudspeaker, mouse 10 MB of free hard drive space for the software installation Additional free hard drive space for digitalising your music 14 Note: Install the supplied Audacity® software on a PC or Mac before connecting and operating the unit. The Audacity® software is freeware. Please check their website to see if an update is available. Newer versions or updates are available from http://audacity.sourceforge.net as needed. An alternative program, for example, is the "Free MP3 Sound Recorder". Download on the Internet at www.nbxsoft.com/sound-recorder.php. How to digitalise your music How to digitalise your music Installing the software Start your computer, insert the CD and install the Audacity software. Check the website to see if an update is available (http://audacity.sourceforge.net) and if there is, install the update. Connecting the record player Connect the record player's USB terminal 15 with an open USB port on your computer. Use the USB cable provided. Setting up the software 1. Start the Audacity software. 2. In the menu, select [Edit] and [Preferences]. The software settings open. 3. Click the [Audio I/O] tab: 4. Select your internal sound card as the playback device. 5. Select USB Audio CODEC or "Microsoft Soundmapper Input" as the recording device. 6. Select [Channels] 2 (Stereo). 7. Click [Play other tracks while recording new one], so that a tick appears in front of it. 8. Click [Software Playthrough], so that a tick appears in front of it. 9. Click OK. 15 How to digitalise your music Recording and saving music 1. Put on a record. Start the playback. 2. Click the red record button in the software. 3. Click the blue PAUSE button to interrupt the recording temporarily. 4. Click the yellow STOP button to end the recording. 5. Click the green PLAY button to play the completed recording. 6. Click "File" and select "Export As WAV…" to save the recording on the computer. 7. To export the recording as an MP3 file, you need to install the LAME encoder first. To do this, please read the instructions on the software CD. Note: A detailed manual for the Audacity software is also on the software CD. 16 How to clean the record player How to clean the record player Electric shock To avoid the danger of an electric shock, you must not clean the unit with a wet cloth or under running water. CAUTION! Do not use any scrubbing sponges, cleaning powder or solvents such as alcohol and petrol. Clean the housing with a soft cloth moistened with water. Replacing the stylus The stylus is naturally exposed to wear by the playback process. Therefore we recommend regular inspection, which for diamond styluses should take place after at least 500 playing hours. Note: Worn or damaged (splintered) styluses ruin records. When you need to replace a stylus, use the original type if possible. Remove the stylus by pulling diagonally downwards. Insert the stylus by doing the reverse of this. Cleaning the stylus and the record Always clean the stylus and record before playback to prevent premature wear. Use a cleaning brush to wipe from back to front over the stylus. To clean a record, use a record cloth to wipe lightly and diagonally over the record. 17 Troubleshooting Troubleshooting If the unit does not function as intended, perform checks using the following tables. Symptom Possible cause/remedy Poor tone quality, loud static noise, sound dropouts etc. The stylus is dirty or worn. Clean the stylus with a brush or replace it. If the malfunction cannot be fixed even after these checks, please contact the manufacturer. Problems with the unit Symptom The speed is incorrect. Adjust the speed according to the specification on the record. (33 rpm or 45 rpm) The sound drones. The drive belt is too loose and must be changed. Possible cause/remedy The tone arm skips grooves, The record player is not slides over the record or does sitting horizontally. Put the not move record player on a horizontal base support. The record is dirty or scratched. Clean the record with a record cleaner or play a different record. 18 The record is dirty or dusty. Clean the record with a record cleaner. The sound is too quiet or loud The record player is not and distorted. connected to the correct input. (see page 12) It is not possible to record using the recording software Perform a computer system restore (via "Programs", "Accessories", "System Tools"). Technical specifications Technical specifications Dimensions (width x height x depth): 350 mm x 95.4 mm x 348 mm Weight: (without batteries) 2.75 kg Voltage: 230 V AC, 50 Hz Power consumption: 3W Ambient conditions: +5 °C to +35 °C 45 % to 85 % relative humidity (non-condensing) Stylus tip: Diamond stylus Wow, flutter < 0.25% WRMS (JIS WTD) at We reserve the right to make technical modifications and correct errors. The dimensions are approximate values. Directives and standards This product conforms to the Low Voltage Directive (2006/95/EC), der ErP Directive 2009/125/EC, the EMC Directive (2004/108/EC) and the CE Marking Directive. 331/3 rpm USB terminal USB 1.1 for WINDOWS, MAC OSX 19 How to contact the manufacturer How to contact the manufacturer DGC GmbH Graf-Zeppelin-Str. 7 D-86899 Landsberg www.dual.de Disposal instructions Disposing of the packaging Your new unit was protected on its way to you by the packaging. All materials used are environmentally safe and can be recycled. Please help and dispose of the packaging in an environmentally responsible manner. To learn about current disposal methods, contact your dealer or your local disposal facility. Risk of suffocation! Keep the packaging and its parts out of the reach of children. Risk of suffocation from foils and other packing materials. 20 How to dispose of the unit Old units are not worthless garbage. Through environmentally friendly disposal, valuable raw materials can be regained. Inquire at your city or municipal administration about possibilities for disposing of the unit properly and in an environmentally sound manner. This unit is labelled according to 2002/96/EC, the Waste Electrical and Electronic Equipment Directive (WEEE). This product must not be disposed of with normal household waste. Instead it must be deposited at a recycling station for electrical and electronic devices. The symbol on the product, the instructions for use or the packaging indicate this. The materials can be recycled in accordance with their marking. By reusing, recycling or processing old units in another way, you make an important contribution to protecting our environment. Danger to life! Pull out the mains plug of worn-out units. Cut through the mains cable and remove it with the plug.


