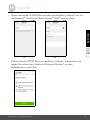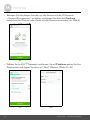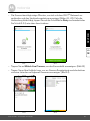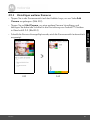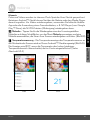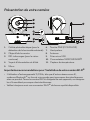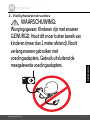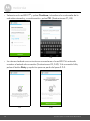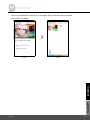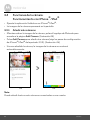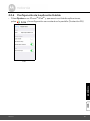
1
USER’S GUIDE
Wi-Fi® Video Baby Monitor Camera
Model: MBP85CONNECT
The features described in this user’s guide are subject to modifications without prior notice.
Welcome...
to your new Motorola Wi-Fi® Video Baby Monitor Camera!
Thank you for purchasing your new Motorola Wi-Fi® Video Baby Monitor
Camera. Now you can view and hear your baby sleep in its room or you can
monitor your older children in their playroom. You can install the Camera only
from your iPhone®/iPad® or devices for Android™ and view the Camera video
from your PC or Notebook, as well as devices for Android™ or iPhone®/iPad®.
Please keep your original dated sales receipt for your records. For warranty
service of your Motorola product, you will need to provide a copy of your dated
sales receipt to confirm warranty status. Registration is not required for warranty
coverage.
For product related questions, please call:
+49 (0) 1805 938 802 in Europe
Email: [email protected]
This User’s Guide has all the information you need to make the most of your
product.
Please read the Safety Instructions on pages 5 - 6 before you install the Unit.
Inside the Box
• 1 x Wi-Fi® Camera Unit
• 1 x Power Adapter
• 1 x Quick Start Guide
• 1 x User Guide
In multi-camera packs, you will find one or more additional Camera Units with
power adapter units.
Overview of your Camera
1
2
8
3
4
5
9
1.
2.
3.
4.
5.
6
10
7
11
Light Sensor (for night mode
detection)
Camera Lens
Infrared LEDs (for night vision)
Power / Status indicator
Microphone
PAIR Button
Speaker
8. Antenna
9. Micro USB socket
10. ON/OFF Switch
11. Temperature Sensor
6.
7.
Important guidelines for installing your Wi-Fi® Camera Unit
• Use of other 2.4 GHz products, such as other wireless networks, Bluetooth®
systems or microwave ovens may cause interference with this product. Keep
the Wi-Fi® Camera Unit away from these types of products, or turn them OFF
if they appear to be causing interference.
• Always ensure that you have a good Wi-Fi® connection available.
Table of contents
1.
2.
3.
Safety Instructions..........................................................................................5
System Requirements.................................................................................. 8
Getting Started - Connecting Devices........................................................ 9
3.1
3.2
Setup............................................................................................................... 9
User Account and Camera Setup on Android™ Devices .......................... 10
3.2.1
3.2.2
3.2.3
3.2.4
3.3
User Account and Camera Setup:
Working with iPhone®/iPad® ...................................................................... 16
3.3.1
3.3.2
3.3.3
3.3.4
4.
Connecting the Camera to Power .............................................................. 22
Camera Functions:
Working with Android™ devices................................................................ 22
4.2.1
4.2.2
4.2.3
4.2.4
4.2.5
4.2.6
4.3
4.4
Add more Cameras ............................................................................. 22
Remove a Camera ............................................................................... 24
Change your Account Information ..................................................... 25
Camera Settings .................................................................................. 26
General Settings .................................................................................. 27
Features of the Hubble Application .................................................... 28
Camera Functions:
Working with iPhone®/iPad® ...................................................................... 32
4.3.1
4.3.2
4.3.3
4.3.4
4.3.5
4.3.6
4.3.7
4
Powering ON and connecting the MBP85CONNECT Camera ....... 16
Download the Hubble for Motorola Monitors App ............................ 16
Run the Hubble for Motorola Monitors on your iPhone®/iPad® ....... 17
Add Camera to your account ............................................................. 18
Camera....................................................................................................... 22
4.1
4.2
5.
6.
7.
8.
Powering ON and connecting the MBP85CONNECT Camera ....... 10
Download the Hubble for Motorola Monitors application ................. 10
Run the Hubble for Motorola Monitors App on Android™ device ... 11
Add Camera to your account ............................................................. 12
Add more Cameras ............................................................................. 32
Remove a Camera ............................................................................... 33
Change your Account Information ..................................................... 34
Camera Settings .................................................................................. 35
General settings .................................................................................. 36
Hubble App Settings ........................................................................... 37
Features of the Hubble App ................................................................ 38
Camera Functions:
Working with PC/Notebook........................................................................ 42
Procedure for Resetting the Camera ........................................................ 43
Help ............................................................................................................ 44
General Information................................................................................... 51
Technical Specifications ............................................................................ 56
Table of contents
ENGLISH
1. Safety Instructions
WARNING:
Strangulation Hazard: Children have
STRANGLED in cords. Keep this cord
out of the reach of children (more than
3ft (1m) away). Never use extension cords
with AC Adapters. Only use the AC
Adapters provided.
Safety Instructions
5
Wi-Fi® CAMERA UNIT SET UP & USE:
● Choose a location for the Wi-Fi® Camera Unit that will provide the
best view of your baby in the cot.
● Place the Wi-Fi® Camera Unit on a flat surface, such as a chest of
drawers, desk, shelf or wall-mount it using the keyhole slot in the
Camera base.
● NEVER place the Wi-Fi® Camera Unit or cords within the cot.
6
Safety Instructions
ENGLISH
WARNING
This Wi-Fi® Camera Unit is compliant with all relevant electromagnetic field
standards and is, when handled as described in the User’s Guide, safe to use.
Therefore, always read the instructions in this User’s Guide carefully before
using the device.
• Adult assembly is required due to small parts. Keep all small parts away from
children.
• This product is not a toy. Do not allow children to play with it.
• This Wi-Fi® Camera Unit is not a substitute for responsible adult supervision.
• Keep this User’s Guide for future reference.
• Do not cover the Wi-Fi® Camera Unit with a towel or blanket.
• Test the Wi-Fi® Camera Unit and its functions, so that you are familiar with it
prior to use.
• Do not use the Wi-Fi® Camera Unit near water.
• Do not place the Wi-Fi® Camera Unit near a heat source.
• Do not touch the plug contacts with sharp or metal objects.
Safety Instructions
7
2. System Requirements
Web Portal
• Windows® 7
• Mac OS® 10.7
• Chrome™ 24
• Internet Explorer® 9
• Safari® 6
• Java™ 7
• Firefox® 18.0
• Adobe® Flash® Player 15.0
Android™ System
• Version 4.2 or above
iPhone®/iPad® iOS
• Version 7.0 or above
High Speed (Wi-Fi®) Internet
• At least 0.6 Mbps upload bandwidth per Camera (you can test your internet
speed on this site: http://www.speedtest.net)
8
System Requirements
ENGLISH
3. Getting Started - Connecting Devices
How does it work?
MBP85
CONNECT
Wi-Fi® Router
View your Camera from any
compatible device remotely
Hubble
Service
When a user tries to access the Camera, our secure server authenticates the
user’s identity and permits access to the Camera.
3.1
Setup
Connect the Camera to the Power Adapter, then plug it into mains power
socket and make sure the Switch is in the ON position. The Camera must be
within range of the Wi-Fi® router with which you want to connect. Make sure the
password of the router is available for entering during the in-app setup process.
Status of LED Indication:
- Pair / Setup state:
LED is red and blue and flashing slowly
- Unconnected state:
LED is red and flashing slowly
- Connected state:
LED is blue and always on
- Ready for connection state: LED is red and flashing slowly
Note: You can only setup via a compatible smartphone or tablet and not via a PC.
Getting Started - Connecting Devices
9
3.2
User Account and Camera Setup on Android™
Devices
What you need
• MBP85CONNECT Camera
• MBP85CONNECT Camera Power Adapter
• Device with Android™ system version 4.2 or above
3.2.1
Powering ON and connecting the MBP85CONNECT
Camera
• Connect the power adapter to mains power socket and insert the plug into
the micro USB socket on the back of the Camera.
• Make sure that the ON/OFF switch is in the ON position.
• The Camera’s Red LED flashes after the Camera has finished booting. When
you hear two beeps, this means the Camera is ready for setup.
3.2.2
Download the Hubble for Motorola Monitors application
• Go to the Google Play™ Store to search for “Hubble for Motorola Monitors”.
• Download the Hubble for Motorola Monitors App from the Google Play™
Store and install it on to your Android™ device.
10
Getting Started - Connecting Devices
ENGLISH
Run the Hubble for Motorola Monitors App on Android™
device
• Ensure your Android™ device is connected to your Wi-Fi® router.
• Run the Hubble for Motorola Monitors App and key in your account
information, select “I agree to the Terms of Use” before you tap on Create.
(Picture A1)
Note: If you already have a Hubble for Motorola Monitors account, please select
Already have a Account? to go to the next step.
A1
Getting Started - Connecting Devices
11
Android™
3.2.3
3.2.4
Add Camera to your account
• Create a new account and Login.
• Tap on Add Camera. (Picture A2)
• Tap on Continue. (Picture A3)
A2
A3
• The setup instructions will appear on the following screen. (Picture A4)
A4
12
Getting Started - Connecting Devices
Android™
• The App will automatically search for and connect to your Camera as shown
in the below pictures (Pictures A5, A6) and the LED on the Camera will flash
green/red.
ENGLISH
• Press and hold the PAIR button for 3 seconds at the side of the
MBP85CONNECT Camera, you will hear a beep tone and a voice saying
“Ready to Pairing” from Camera Unit. Tap on Search for Camera.
A5
Getting Started - Connecting Devices
A6
13
• Select your Wi-Fi® Network and tap Continue, enter the password for the
selected network then tap on OK. (Pictures A7, A8)
A7
A8
• It will take a few minutes for the Camera to connect to the Wi-Fi® network
before showing the connection status (Pictures A9, A10). If connection fails,
please tap on the Retry button and repeat the steps starting from 3.2.4.
A9
14
A10
Getting Started - Connecting Devices
ENGLISH
• Tap on Watch Live Camera to view the Camera video. The Camera's Blue
LED will flash. (Picture A11)
Android™
• Tap on the Hubble logo to go back to the Camera tab for a list of available
Cameras. (Picture A12)
A11
Getting Started - Connecting Devices
A12
15
3.3
User Account and Camera Setup:
Working with iPhone®/iPad®
What you need
• MBP85CONNECT Camera
• MBP85CONNECT Camera Power Adapter
• iPhone®/iPad® with iOS version 7.0 and above
3.3.1
Powering ON and connecting the MBP85CONNECT
Camera
• Connect the MBP85CONNECT adapter to mains power socket, insert the
plug into the micro USB socket at back of the MBP85CONNECT Camera.
• Make sure that the ON/OFF switch is in the ON position.
• The Camera’s red LED begins to flash after the Camera has completed the
booting process. This means the Camera is ready for setup.
3.3.2
Download the Hubble for Motorola Monitors App
• Go to the App Store to search for “Hubble for Motorola Monitors”.
• Download the Hubble for Motorola Monitors App and install it on your
iPhone®/iPad®.
16
Getting Started - Connecting Devices
ENGLISH
Run the Hubble for Motorola Monitors on your iPhone®/
iPad®
• Ensure your iPhone®/iPad® is connected to your Wi-Fi® Router.
• Run the Hubble for Motorola Monitors App and key in your account
information, read through the Terms of Service then select “I agree to the
Terms of Service” before you tap on Create. (Picture i1)
Note: If you already have a Hubble for Motorola Monitors account, please select
Already have a Account? to go to the next step.
i1
Getting Started - Connecting Devices
17
iOS
3.3.3
3.3.4
Add Camera to your account
• Create a new account and Login.
• Tap on Add Camera. (Picture i2)
• Tap on “MBP85CONNECT”. (Picture i3)
MBP85CONNECT
i2
i3
• Follow on-screen instructions to turn on the Bluetooth™ function on your
iPhone®/iPad®.
i4
18
Getting Started - Connecting Devices
iOS
ENGLISH
• Tap on the Home button, then enter the “Settings” menu to turn on the
Bluetooth™ function on your iPhone®/iPad®.
i5
i6
• Press the HOME button to exit the Settings menu and tap on the “Hubble for
Motorola Monitors” App to enter the start-up screen.
i7
Getting Started - Connecting Devices
19
• Follow the steps above to locate the camera with identification number
“CameraHD-xxxxxxxxxx”, then tap on Continue once your iPhone® or iPad®
has connected to the camera. (Picture i8)
i8
• Select your Wi-Fi® Network and tap Continue, enter your password and
then tap Next. (Pictures i9, i10)
i9
20
i10
Getting Started - Connecting Devices
iOS
ENGLISH
• It will take a few minutes for the Camera to connect to the Wi-Fi® network
before showing the connection status (Pictures i11, i12). If connection fails,
please tap on the Retry button and repeat Step 3.3.4 as instructed above.
i11
i12
• Tap on Watch Live Camera to view the Camera video. (Picture i13)
• Tap on the Hubble logo to go back to the Camera tab for a list of available
Cameras. (Picture i14)
i13
Getting Started - Connecting Devices
i14
21
4. Camera
4.1
Connecting the Camera to Power
• Insert the small end of the Power Adapter into the Power Adapter Connector
and plug the Power Adapter into a power socket.
• Slide the ON/OFF switch to ON, the blue Power LED will light up. (Note: To
switch the device off, slide the ON/OFF switch to OFF.)
4.2
Camera Functions:
Working with Android™ devices
• Run the Hubble App on your Android™ device.
• The Camera view appears on the screen.
4.2.1
Add more Cameras
• On Camera view, tap on the Hubble logo to go to the Add Camera page.
(Picture A13)
• Tap on Add Camera to add one more Camera by following steps for
Android™ device setup in section 3.2.4. (Picture A14)
22
Camera
Android™
ENGLISH
• Once the Camera has been added, the Camera view will automatically be
displayed.
A13
Camera
A14
23
4.2.2
Remove a Camera
You can remove a Camera from your account by following these steps:
• Tap the Settings icon
on the Camera list screen/page, then tap on
Camera Details. (Picture A15)
• Select Remove Camera and tap on Yes to delete the unit from the Camera
list. (Picture A16)
A15
24
A16
Camera
Change your Account Information
ENGLISH
4.2.3
You can change the account information using your Android™ device.
• Tap Account on the General page, the Account Settings will appear on
screen. (Picture A17)
Android™
• Tap on Change Password to change your password and follow the
instructions.
• Tap on Log Out to leave the account.
• Tap on Freemium plan, and you will be brought to the Cloud Video
Recording Service. To obtain more information, please visit our website
http://www.hubbleconnected.com.
• Tap on Use to access Remote Connection Setting , use Remote Only by
Selecting Yes.
• Enable Disconnect Alert provides a beep alert when there is a
disconnection. Enable the disconnect Alert by selecting Yes.
• Tap on Send Log to send your Hubble App report to our server via e-mail;
this should be sent if requested by a customer service agent.
A17
Camera
25
4.2.4
Camera Settings
You can change the Camera settings by tapping on the Settings icon
Camera page. (Picture A18)
on the
• Tap on Camera Details to review Camera Name, Change Image, Firmware
version, Model ID and Remove Camera. (Picture A19)
A18
A19
• Tap on Notification Sensitivity to set the sensitivity of sound & motion
detection, and to set an Alert for High/Low temperature. (Picture A20)
A20
26
Camera
General Settings
• Tap Settings on General page.
Android™
• Tap on General Settings to shift the format of Clock (12hr/24hr) & the
Temperature (°C / °F) and activate Notification Sound or Vibration. (Picture
A21)
ENGLISH
4.2.5
A21
A22
• Tap on Do Not Disturb, set the timer to the desired time and select ON, the
Camera will not send any sound or alert to your Android™ device for the
duration of your setting. (Picture A22)
Camera
27
4.2.6
Features of the Hubble Application
Tap on the viewing area and the function icons will appear as shown below.
Two Way Communication – Tap on the Microphone icon to turn on the talk
back function to the Camera, press the circle button once to speak. Toggle
again to listen from the Camera. (Pictures A23, A24)
A23
28
A24
Camera
ENGLISH
Pan and Tilt Function:
Android™
Tap the up and down buttons to tilt, the left and right buttons to pan. (Pictures
A25, A26)
A25
Camera
A26
29
Photo/Video - Take a photo or record a video from your Camera.
Tap the on-screen Video icon to activate the photo/video function. Select the
video record function by selecting the small video icon to the right of the large
blue button, press the large blue button to start recording. The button will turn
red, press again to stop recording. (Pictures A27, A28)
Tap on the small Camera icon
to the right of the large blue button to switch
to Camera mode, press the large blue button to capture photos from Camera
view. (Picture A29)
A27
A28
A29
30
Camera
Temperature Measure – The temperature reading from the temperature
sensor at the back of the Camera will display at your Android™ device CD
screen (Picture A31). The reading will turn RED if the temperature exceeds the
High/Low Temperature range as set in your Account. (see section 4.2.4)
A30
Camera
A31
31
ENGLISH
Android™
Note:
Photos and videos will be stored in the internal flash memory of your device for
Android™, they can be accessed via the Gallery or Media Player. To play
videos, please use the Hubble App or a 3rd party application, such as MX player
(found in the Google Play™ Store), which is able to play MJPG (Motionjpeg)
files.
Melody – To play one of the pre-set 5 melodies, tap on Melody to show the
Melody menu and select one you prefer to play on your Camera. (Picture A30)
4.3
Camera Functions:
Working with iPhone®/iPad®
• Run the Hubble App on your iPhone®/iPad®.
• The Camera view appears on the screen.
4.3.1
Add more Cameras
• Whilst in the Camera view, tap on the Motorola logo to go to the Add Camera
page. (Picture i15)
• Tap on Add Camera to add another Camera (follow steps for iPhone®/iPad®
setup 3.3.4.) (Picture i16)
• Once the Camera has been added, the Camera view will automatically be
displayed.
i15
i16
Note:
You can only add up to 4 Cameras connected to one account.
32
Camera
Remove a Camera
ENGLISH
4.3.2
You can remove a Camera from your Account by following these steps:
• Tap the Settings icon
(Picture i17)
on General page, then tap on Camera Detail.
iOS
• Select Remove Camera and tap on Yes to delete the unit from Camera list.
(Picture i18)
i17
Camera
i18
33
4.3.3
Change your Account Information
You can change your account information using iPhone®/iPad®.
• Tap Account on the General page, the Account settings will appear on
screen. (Picture i19)
• Tap on Change Password to change your password by following the
instructions.
• Tap on Log Out to leave account.
• Tap on Current Plan, and you will be brought to the Cloud Video Recording
Service. To obtain more information, please visit our website
www.hubbleconnected.com/motorola/plans.
• Tap on Send app log to send your Hubble App report to our server via e-mail;
this should be sent if requested by a customer service agent.
i19
34
Camera
Camera Settings
iOS
You can change the Camera settings by tapping on the Settings icon
on the
General page (Picture i20). You can review the Camera Name and Firmware
version (Picture i21) and are allowed to change the Camera name by tapping on
the existing name and following the instructions.
ENGLISH
4.3.4
i20
i21
• Tap on Notification Sensitivity to set the sensitivity of sound & motion
detection, and set an Alert for High/Low temperature. (Picture i22)
i22
Camera
35
4.3.5
General settings
• Tap Settings on the General page. (Picture i23)
• Tap on General Settings to change the format for Clock (12hr/24hr) &
Temperature (°C / °F) and activate Notification Sound or Vibration. (Picture
i24)
i23
i24
• Tap on Do Not Disturb, set the timer to the desired time and select ON, the
Camera will not send any sound or alert to your iPhone®/iPad® for the
duration of your setting. (Picture i25)
i25
36
Camera
Hubble App Settings
ENGLISH
4.3.6
iOS
• Tap on Settings on your iPhone®/iPad®, and a list of applications will appear,
tap on
and the settings will be shown on screen. (Picture i26)
i26
Camera
37
4.3.7
Features of the Hubble App
On Camera view, tap the viewing area and Function Icons will appear as follows.
Two Way Talk – Tap on the microphone icon to turn on the talkback function
to the Camera, press the circle button once to speak. Toggle again to listen from
the Camera. (Pictures i27, i28)
i27
38
i28
Camera
ENGLISH
Pan and Tilt Function:
iOS
Tap the 4 Way Arrow icon to activate the pan/tilt function. Press the up/down
arrows to tilt the Camera up and down, press the left/right arrows to pan the
Camera left and right. (Pictures i29, i30)
i29
Camera
i30
39
Photo Function - Tap the on-screen Camera icon
to activate the photo
capture function. Press the large blue Camera button to take a photograph.
(Picture i31)
i31
Note:
Photos will be stored in the internal flash memory of your iPhone®/iPad®.
40
Camera
i32
Camera
i33
41
ENGLISH
Temperature Measure – The temperature reading from the temperature
sensor at the back of the Camera will display on your iPhone®/iPad® LCD
screen (Picture i33). The readings will turn RED if the temperature exceeds the
High/Low Temperature range as set in your Account. (see section 4.3.5)
iOS
Melody – To play one of the pre-set melodies sound in system, tap on
Melody to show the Melody menu and select the one you prefer to play on your
Camera. (Picture i32)
4.4
Camera Functions:
Working with PC/Notebook
• Go to: http://www.hubbleconnected.com/motorola/login/
• Enter your User Name and Password and then click Login if you have already
created an account.
• Click on the Camera list paired in your account via Android™ device or
iPhone®/iPad®, and the Camera view will appear on screen. You can easily
stay connected with your favourite people, places and pets with live video
streaming.
• You can change the settings by following the Menu instructions on the
website.
42
Camera
Note: If your Camera is moved from one router (e.g. home) to another (e.g.
office) or you have Camera setup issues, then this Camera must be reset. Please
reset the Camera with the following procedure:
1.
2.
3.
4.
Slide the ON/OFF switch to OFF.
Press and hold the PAIR button then slide the ON/OFF switch to ON.
Release the PAIR button when you hear a confirmation beep and wait for
Camera to compete internal reset procedure, the LED indicator will turn
red and flashes slowly when Camera is reset successfully.
You can add your Camera again by following the steps in section 3.2.4 for
Android devices or section 3.3.4 for iOS devices.
Procedure for Resetting the Camera
43
ENGLISH
5. Procedure for Resetting the Camera
6. Help
Noise interference
To avoid background noise or echoes, ensure that there is enough distance
between your device and the Wi-Fi® Camera Unit.
Use of other 2.4 GHz products, such as Bluetooth® systems or microwave
ovens, may cause interference with this product. Keep the Wi-Fi® Camera Unit
at least 1.5m away from these types of products, or turn them off if they appear
to be causing interference.
Lost connection
Check your Wi-Fi® settings. If necessary, reconnect your Wi-Fi®. Ensure the
Wi-Fi ® Camera Unit is switched ON. Wait a few minutes to connect to the Wi-Fi®
network.
If you forgot your password
If you do not remember your password, tap "Forgot Password" and submit
your e-mail address. A new password will be sent to your e-mail address
immediately.
Trouble Shooting
Category
Problem
Description / Error
Solution
Account
I am unable to login
Please check your user name and
even after registration. password.
Account
Please ensure that you have
I receive an error
message saying: "Email registered an account with us. Tap
Create Account to create an account
ID is not registered".
to be able to use the Wi-Fi® Video
Baby Monitor.
44
Help
What do I do if I forget Click on the "Forgot Password" link on
my password?
the website http://
www.hubbleconnected.com/
motorola/login/ OR on your Android™
or iOS application. An email will be sent
to your registered email address.
Account
I am unable to receive a 1.
new password although
I have used the "Forgot
2.
Password" option.
The e-mail might have been sent
to your Junk Mail Folder. Please
check your Junk Mail Folder.
There might be a delay in getting
your e-mail. Please wait a few
minutes and refresh your email
account.
1.
Connectivity I get a message: We
Issues
are having problems
accessing your
Camera. This could be
2.
due to the lack of an
internet connection.
Please wait and try
3.
again later.
Please try again in a few minutes.
This could be because of any
issue with your internet
connection.
If the problem persists, please
restart your Camera to check if
this fixes the problem.
Please restart your Wireless
Router.
Viewing
Camera
When I am in "Remote
Mode", the video stops
after 5 minutes. How
do I view it for longer?
When you are accessing your Camera
via a network different from your
home network (over the internet) your
video time-outs after 5 minutes.
You can click on the Camera again
from the Android™/iOS application
to start streaming again.
If you are accessing from your webbrowser, you can press the Reload
button to start viewing your Camera
video stream again.
Help
45
ENGLISH
Account
Features
The sound alert setting You can adjust Sound Sensitivity to
threshold is not right. trigger notifications under the
Camera Settings menu.
Connectivity My phone application
Issues
displays the following
message: "Unable to
connect to BMS
server".
1.
2.
3.
Check the Wi-Fi ® network
strength.
Check if you are connected to
the internet by starting the
phone browser and going to a
website like www.google.com.
Try again if you successfully
connect to the internet.
Setting Up
While I am adding a
new Camera to my
account, I am not able
to find any Cameras to
add.
If you are trying to add a Camera
which has previously been added into
your account or another account, you
will first have to reset the Camera. This
can be done by pressing and holding
the PAIR button at the bottom of the
Camera for 5 seconds.
General
What are the
supported browsers for
access from my PC/
Mac®?
On PC and Mac , we recommend
using Google Chrome™. However
the following browsers are also
supported:
PC : Internet Explorer 8® and above.
Mac : Safari 6.0®.
46
Help
What is the
significance of LED
flashing?
A flashing LED indicates the following
status:
Slow flashing: 1. Your Camera is in
setup mode. You can add the Camera
to your account in this mode. Out of the
box, the Camera is in Setup mode. To
reset to Setup mode, press and hold the
PAIR button on the bottom of the
Camera untill you hear a beep.
Slow flashing: 2. The Camera is either
connecting to the router or has lost the
link to the router. Please ensure that the
Camera is in the Wi-Fi® signal range.
LED is stable: The Camera is
connected to the Wi-Fi ® network.
Connectivity I am not able to access Please check if the Camera is within
Issues
my Camera.
Wi-Fi ® range. If the LED on your
Camera is flashing slowly, please try to
move the Camera closer to the router
for better Wi-Fi ® connectivity and try
again.
Setting Up
Help
During setup on
devices for Android™
and iOS, I am not able
to find my Camera
during the last step and
the setup fails.
Please reset the Camera to Setup
mode and try again. Press and hold
the PAIR button on the bottom of the
Camera until you hear a beep. Wait
for a minute for the Camera to restart.
The Camera LED, indicates that it is in
setup mode. Now restart the Setup
from your smartphone again.
47
ENGLISH
General
Connectivity Even though I am
Issues
accessing my Camera
from the same Wi-Fi ®
network, I still find my
Camera is shown as
remote. I can only
access it for 5 minutes
at a time.
Please check your wireless router
settings. For example, for Buffalo
brand routers there is an option called
Wireless Isolation. Please disable this
option.
Camera
When I try to view the
Camera, I get a prompt
for Camera firmware
upgrade. What should I
do?
Please upgrade your firmware. This
takes around 5 minutes. We push
upgrades from time to time to
improve Camera features.
General
Minimum requirement:
Which platforms are
supported for
Windows ® 7*
accessing my Camera?
*Java browser plug-in needed
Mac OS ® version 10.7
Chrome™ version 24
Internet Explorer ® version 9
Safari ® version 6
Java™ version 7
Firefox ® version 18.0
Adobe ® Flash ® Player 15.0
Android™ 4.2
iPhone ® /iPad iOS ® version 7.0
General
48
You can tap on the Speaker icon in the
I do not hear sound
when I am accessing a video stream screen to hear audio. By
default, the audio is not ON when you
remote Camera.
are accessing a remote Camera.
Help
What is the meaning of When you are accessing your Camera
from the same wireless network (Home)
"Local Camera" and
in which it is configured, it is a local
"Remote Camera"?
Camera. When you are accessing your
Camera away from your home, it is a
Remote Camera. You may be using 3G,
4G or 4G LTE or a Wi-Fi ® connection
outside of your home.
General
How do I download the Android™:
Application for
- Open the Google Play Store on
Android™ and iOS
your Android™ device
devices?
- Select Search
- Type in "Hubble for Motorola
Monitors"
- The results will show the Hubble
App
- Select to install it
iOS Device:
- Open the App StoreSM
- Select Search
- Type in "Hubble for Motorola
Monitors"
- The results will show the Hubble
App
- Select to install it
Setting up
When the video is cut
off, the application
attempts to reconnect
and this results in lost
sound and choppy
video.
Help
You will need to turn off the auto lock
function on your smart device to
ensure continuous video/audio
feeding.
49
ENGLISH
General
Features
How many users can
access the Camera at
one time?
Connectivity I found interference
issues
caused by my other
webcam devices.
50
If you are accessing in local more, two
users are supported. For more than
two users all streaming will go through
remote server. This allows for
unlimited user access to a single
Camera at one time.
Video streaming performance is
related to internet bandwidth,
especially if you have 2 or more video
streaming devices that are working
through the same router.
Help
ENGLISH
7. General Information
If your product is not working properly....
1.
2.
Read this User's Guide.
Contact Customer Service at:
+49 (0) 1805 938 802 in Europe
Email: [email protected]
Consumer Products and Accessories Limited Warranty
("Warranty")
Thank you for purchasing this Motorola branded product manufactured under
license by Binatone Electronics International Ltd ("BINATONE").
What Does this Warranty Cover?
Subject to the exclusions contained below, BINATONE warrants that this
Motorola branded product ("Product") or certified accessory ("Accessory") sold
for use with this product is manufactured to be free from defects in materials and
workmanship under normal consumer usage for the period outlined below. This
Warranty is your exclusive warranty and is not transferable.
Who is covered?
This Warranty extends only to the first consumer purchaser, and is not transferable.
What will BINATONE do?
BINATONE or its authorized distributor at its option and within a commercially
reasonable time, will at no charge repair or replace any Products or Accessories
that does not conform to this Warranty. We may use functionally equivalent
reconditioned/ refurbished/ pre-owned or new Products, Accessories or parts.
General Information
51
What Other Limitations Are There?
ANY IMPLIED WARRANTIES, INCLUDING WITHOUT LIMITATION THE
IMPLIED WARRANTIES OF MERCHANTABILITY AND FITNESS FOR A
PARTICULAR PURPOSE, SHALL BE LIMITED TO THE DURATION OF THIS
LIMITED WARRANTY, OTHERWISE THE REPAIR OR REPLACEMENT
PROVIDED UNDER THIS EXPRESS LIMITED WARRANTY IS THE EXCLUSIVE
REMEDY OF THE CONSUMER, AND IS PROVIDED IN LIEU OF ALL OTHER
WARRANTIES, EXPRESS OR IMPLIED. IN NO EVENT SHALL MOTOROLA OR
BINATONE BE LIABLE, WHETHER IN CONTRACT OR TORT (INCLUDING
NEGLIGENCE) FOR DAMAGES IN EXCESS OF THE PURCHASE PRICE OF
THE PRODUCT OR ACCESSORY, OR FOR ANY INDIRECT, INCIDENTAL,
SPECIAL OR CONSEQUENTIAL DAMAGES OF ANY KIND, OR LOSS OF
REVENUE OR PROFITS, LOSS OF BUSINESS, LOSS OF INFORMATION OR
OTHER FINANCIAL LOSS ARISING OUT OF OR IN CONNECTION WITH THE
ABILITY OR INABILITY TO USE THE PRODUCTS OR ACCESSORIES TO THE
FULL EXTENT THESE DAMAGES MAY BE DISCLAIMED BY LAW.
Some jurisdictions do not allow the limitation or exclusion of incidental or
consequential damages, or limitation on the length of an implied warranty, so
the above limitations or exclusions may not apply to you. This Warranty gives
you specific legal rights, and you may also have other rights that vary from one
jurisdiction to another.
52
General Information
Length of Coverage
Two (2) years from the date of the
Products, original purchase by the first
consumer purchaser of the product.
Consumer Accessories
Ninety (90) days from the date of the
Accessories, original purchase by the
first consumer purchaser of the
product.
Consumer Products and Accessories The balance of the original warranty or
that are Repaired or Replaced
for Ninety (90) days from the date
returned to the consumer, whichever is
longer.
Exclusions
Normal Wear and Tear. Periodic maintenance, repair and replacement of parts
due to normal wear and tear are excluded from coverage.
Batteries. Only batteries whose fully charged capacity falls below 80% of their
rated capacity and batteries that leak are covered by this Warranty.
Abuse & Misuse. Defects or damage that result from: (a) improper operation,
storage, misuse or abuse, accident or neglect, such as physical damage (cracks,
scratches, etc.) to the surface of the product resulting from misuse; (b) contact
with liquid, water, rain, extreme humidity or heavy perspiration, sand, dirt or the
like, extreme heat, or food; (c) use of the Products or Accessories for
commercial purposes or subjecting the Product or Accessory to abnormal
usage or conditions; or (d) other acts which are not the fault of MOTOROLA or
BINATONE, are excluded from coverage.
Use of Non-Motorola branded Products and Accessories. Defects or damage
that result from the use of Non-Motorola branded or certified Products or
Accessories or other peripheral equipment are excluded from coverage.
Unauthorized Service or Modification. Defects or damages resulting from
service, testing, adjustment, installation, maintenance, alteration, or
modification in any way by someone other than MOTOROLA, BINATONE or its
authorized service centres, are excluded from coverage.
General Information
53
ENGLISH
Products Covered
Consumer Products
Altered Products. Products or Accessories with (a) serial numbers or date
tags that have been removed, altered or obliterated; (b) broken seals or
that show evidence of tampering; (c) mismatched board serial numbers;
or (d) nonconforming or non-Motorola branded housings, or parts, are excluded
from coverage.
Communication Services. Defects, damages, or the failure of Products or
Accessories due to any communication service or signal you may subscribe to
or use with the Products or Accessories is excluded from coverage.
How to Obtain Warranty Service or Other Information?
To obtain service or information, please call:
+49 (0) 1805 938 802 in Europe
Email: [email protected]
You will receive instructions on how to ship the Products or Accessories at your
expense and risk, to a BINATONE Authorized Repair Centre.
To obtain service, you must include: (a) the Product or Accessory; (b) the
original proof of purchase (receipt) which includes the date, place and seller of
the Product; (c) if a warranty card was included in your box, a completed
warranty card showing the serial number of the Product; (d) a written
description of the problem; and, most importantly; (e) your address and
telephone number.
These terms and conditions constitute the complete warranty agreement
between you and BINATONE regarding the Products or Accessories purchased
by you, and supersede any prior agreement or representations, including
representations made in any literature publications or promotional materials
issued by BINATONE or representations made by any agent employee or staff
of BINATONE, that may have been made in connection with the said purchase.
54
General Information
________________________________________
ENGLISH
BINATONE TELECOM PLC
1 Apsley Way London NW2 7HF,United Kingdom.
Tel: +44(0) 20 8955 2700 Fax: +44(0) 20 8344 8877
e-mail: [email protected]
.
EC Declaration of Conformity
We the manufacturer / Importer :
Binatone Telecom Plc
1 Apsley Way London
NW2 7HF, United Kingdom.
Declare under our sole responsibility that the following products
Wi-Fi Video Camera
Type of equipment:
FOCUS85, FOCUS85-B, FOCUS85-S, FOCUS85-W
Model Name:
SCOUT85, MBP85CONNECT
Country of Origin:
Brand:
China
Motorola
complies with the essential protection requirements of R&TTE Directive 1999/5/EC on the
approximation of the laws of the Member States relating to Radio Spectrum Matters, the
Council Directive
/108/EC on the approximation of the laws of the Member States
relating to electromagnetic compatibility (EMC) and the European Community Directive
2006/95/EC relating to Electrical Safety. Directive 2011/65/EC on the restriction of use of
hazardous substances (RoHS) and 2009/125/EC relating to ecodesign requirement for
Energy-Related Products (ErP).
Assessment of compliance of the product with the requirements relating to the essential
requirements according to Article 3 R&TTE was based on Annex III of the Directive
1999/5/EC and the following standard:
Radio Spectrum:
EMC:
Electrical Safety:
RF Safety:
EN300328 V1.8.1:2012
EN301489-17 V2.2.1:2012
EN301489-1 V1.9.2:2011
EN60950-1/A12:2011
EN62311:2010
The product is labelled with the European Approval Marking CE as show. Any Unauthori ed
modification of the product voids this Declaration.
Manufacturer / Importer
(Signature of authori ed person)
London, 30 May , 2014
Karl Heinz Mueller / Chief Technical Officer
General Information
Place & Date
55
8. Technical Specifications
Camera Unit
Wi-Fi ®
802.11 b/g/n
Image sensor
Color CMOS 1M Pixels
Lens
f = 2.5 mm, F = 2.8
IR LED
8 pcs
Power Adapter
Ten Pao International Ltd.
S009GV0500150
Input: 100-240V AC, 50/60Hz, 300mA
Output: 5V DC, 1500mA
56
Technical Specifications
Manufactured, distributed or sold by Binatone Electronics International
LTD., official licensee for this product. MOTOROLA and the Stylized M
logo are trademarks or registered trademarks of Motorola Trademark
Holdings, LLC. and are used under license. Apple logo and Safari are
trademarks of Apple Inc., registered in the U.S. and other countries. App
Store is a service mark of Apple Inc. Google Play, Android, and Chrome
are trademarks of Google Inc. Wi-Fi is a trademark of the Wi-Fi Alliance.
Internet Explorer and Windows are trademarks of the Microsoft group of
companies. Firefox is a registered trademark of the Mozilla Foundation.
Adobe and Flash are either registered trademarks or trademarks of
Adobe Systems Incorporated. Java is a registered trademark of Oracle
and/or its affiliates. All other trademarks are the property of their
respective owners. © 2015 Motorola Mobility LLC. All rights reserved.
EN_EU Version 4.0
Printed in China
BEDIENUNGSANLEITUNG
Wi-Fi®-Video-Baby-Überwachungskamera
Modell: MBP85CONNECT
Die in der Bedienungsanleitung beschriebenen Funktionen können ohne Vorankündigung
geändert werden.
Herzlichen Glückwunsch
zu Ihrer neuen Motorola Wi-Fi®-Video-BabyÜberwachungskamera!
Vielen Dank, dass Sie die neue Motorola Wi-Fi®-Video-BabyÜberwachungskamera gekauft haben. Sie können jetzt Ihr Baby sehen oder
hören, während es in einem anderen Raum schläft, oder Sie können ältere
Kinder im Kinderzimmer beobachten. Sie können die Kamera nur von iPhone®/
iPad®- oder Android™-Geräten aus installieren und das Kamerabild auf Ihrem
PC oder Netzwerk sowie Android™- oder iPhone®/iPad®-Geräten anzeigen.
Bitte bewahren Sie Ihren datierten Original-Verkaufsbeleg bei Ihren Unterlagen
auf. Für den Garantieservice Ihres Motorola-Produkts benötigen Sie eine Kopie
Ihres datierten Verkaufsbelegs als Bestätigung des Garantiestatus. Für
Garantiezwecke ist keine Registrierung erforderlich.
Bei Fragen zum Produkt können Sie unter der folgenden Nummer anrufen:
+49 (0) 1805 938 802 in Europa
E-Mail: [email protected]
Diese Bedienungsanleitung liefert Ihnen alle Informationen, die Sie benötigen,
um das Produkt optimal zu nutzen.
Bitte lesen Sie die Sicherheitshinweise auf Seite 5 - 6 durch, bevor Sie das Gerät
installieren.
Lieferumfang
• 1 Wi-Fi®-Kamera
• 1 Netzteil
• 1 Kurzanleitung
• 1 Bedienungsanleitung
In Paketen mit mehreren Kameras finden Sie ein oder mehrere zusätzliche
Kamerageräte mit Netzteilen.
Übersicht über die Kamera
1
2
8
3
4
5
9
1.
2.
3.
4.
5.
6
10
7
11
Lichtsensor (für die Erkennung im
Nachtmodus)
Kameraobjektiv
IR-LEDs (für die Nachtsicht)
Ein/Aus-/Status-Anzeige
Mikrofon
PAIR-Taste
Lautsprecher
8. Antenne
9. Micro USB-Buchse
10. EIN/AUS-Schalter
11. Temperatursensor
6.
7.
Wichtige Richtlinien für das Installieren Ihrer Wi-Fi®-Kamera
• Die Verwendung anderer 2,4-GHz-Produkte wie drahtlosen Netzwerken,
Bluetooth®-Systeme oder Mikrowellenöfen kann Störungen bei diesem Gerät
verursachen. Stellen Sie die Wi-Fi®-Kamera von solchen Produkten entfernt
auf oder schalten Sie sie aus, wenn sie Störungen verursachen.
• Stellen Sie immer eine gute Wi-Fi®-Verbindung sicher.
Inhaltsverzeichnis
1.
2.
3.
Sicherheitshinweise .......................................................................................... 5
Systemanforderungen....................................................................................... 8
Erste Schritte – Anschließen der Geräte .......................................................... 9
3.1
3.2
3.3
4.
Kamera............................................................................................................. 22
4.1
4.2
4.3
4.4
5.
6.
7.
8.
4
Einrichtung ...........................................................................................................9
Einrichtung eines Benutzerkontos und der Kamera auf Android™-Geräten..10
3.2.1
Einschalten und Verbinden der MBP85CONNECT-Kamera ..........10
3.2.2
Herunterladen der Anwendung „Hubble for Motorola Monitors“ ..10
3.2.3
Ausführen der App „Hubble for Motorola Monitors“ auf einem
Android™-Gerät ..............................................................................11
3.2.4
Hinzufügen der Kamera zu Ihrem Konto ..........................................12
Einrichtung eines Benutzerkontos und der Kamera
Verwendung mit iPhone®/iPad® ......................................................................16
3.3.1
Einschalten und Verbinden der MBP85CONNECT-Kamera ..........16
3.3.2
Herunterladen der App „Hubble for Motorola Monitors“ ...............16
3.3.3
Ausführen von „Hubble for Motorola Monitors“ auf Ihrem
iPhone®/iPad® ..................................................................................17
3.3.4
Hinzufügen der Kamera zu Ihrem Konto ..........................................18
Anschließen der Kamera an den Strom .............................................................22
Kamerafunktionen:
Verwendung mit Android™-Geräten...............................................................22
4.2.1
Hinzufügen weiterer Kameras ..........................................................22
4.2.2
Entfernen einer Kamera ...................................................................24
4.2.3
Ändern Ihrer Kontoinformationen ....................................................25
4.2.4
Kameraeinstellungen ........................................................................26
4.2.5
Allgemeine Einstellungen ................................................................27
4.2.6
Funktionen der Hubble-Anwendung ...............................................28
Kamerafunktionen:
Verwendung mit iPhone®/iPad® ......................................................................32
4.3.1
Hinzufügen weiterer Kameras ..........................................................32
4.3.2
Entfernen einer Kamera ...................................................................33
4.3.3
Ändern Ihrer Kontoinformationen ....................................................34
4.3.4
Kameraeinstellungen ........................................................................35
4.3.5
Allgemeine Einstellungen ................................................................36
4.3.6
Hubble App-Einstellungen ...............................................................37
4.3.7
Funktionen der Hubble-App ............................................................38
Kamerafunktionen:
Betrieb mit PC/Notebook..................................................................................42
Zurücksetzen der Kamera ............................................................................... 43
Hilfe.................................................................................................................. 44
Allgemeine Informationen .............................................................................. 52
Technische Daten............................................................................................ 57
Inhaltsverzeichnis
1. Sicherheitshinweise
WARNUNG:
Sicherheitshinweise
DEUTSCH
Strangulierungsgefahr: Kinder haben sich mit den
Kabeln STRANGULIERT. Dieses Kabel außerhalb
der Reichweite von Kindern aufbewahren
(mindestens 1 m entfernt). Verwenden Sie keine
Verlängerungskabel mit Netzteilen. Verwenden
Sie nur das mitgelieferte Netzteil.
5
EINRICHTUNG UND VERWENDUNG DER Wi-FiKAMERA
● Legen Sie einen Ort für die Wi-Fi®-Kamera fest, der optimale Sicht
auf das Baby in seinem Bett bietet.
● Stellen Sie die Wi-Fi®-Kamera auf eine ebene Fläche, z. B. auf eine
Kommode, einen Schreibtisch oder ein Regal oder montieren Sie sie
mithilfe der Schlüssellochschlitze in der Kamerabasis an einer Wand.
● Legen Sie die Wi-Fi®-Kamera oder die Kabel NIE in das Bett.
6
Sicherheitshinweise
• Aufgrund der kleinen Teile muss das Gerät von einem Erwachsenen
zusammengebaut werden. Halten Sie alle kleinen Teile von Kindern fern.
• Dieses Produkt ist kein Spielzeug. Lassen Sie Kinder nicht mit ihm spielen.
• Die Wi-Fi®-Kamera ist kein Ersatz für die Überwachung durch einen
verantwortlichen Erwachsenen.
• Bewahren Sie diese Bedienungsanleitung zum späteren Nachschlagen auf.
• Decken Sie die Wi-Fi®-Kamera nicht mit einem Handtuch oder einer Decke ab.
• Testen Sie die Wi-Fi®-Kamera und ihre Funktionen,, damit Sie vor dem
Gebrauch damit vertraut sind.
• Verwenden Sie die Wi-Fi®-Kamera nicht in der Nähe von Wasser.
• Stellen Sie die Wi-Fi®-Kamera nicht in der Nähe einer Wärmequelle auf.
• Berühren Sie die Steckerkontakte nicht mit spitzen oder metallenen
Gegenständen.
Sicherheitshinweise
7
DEUTSCH
ACHTUNG!
Die Wi-Fi®-Kamera erfüllt alle relevanten Normen in Bezug auf
elektromagnetische Felder und ihr Gebrauch ist bei Handhabung wie in der
Bedienungsanleitung beschrieben sicher. Daher sollten Sie vor Verwendung
des Geräts immer die Bedienungsanleitung sorgfältig durchlesen.
2. Systemanforderungen
Webportal
• Windows® 7
• Mac OS® 10.7
• Chrome™ 24
• Internet Explorer® 9
• Safari® 6
• Java™ 7
• Firefox® 18.0
• Adobe® Flash® Player 15.0
Android™-System
• Version 4.2 oder höher
iPhone®/iPad® iOS
• Version 7.0 oder höher
High-Speed (Wi-Fi®)-Internet
• Mindestens 0,6 Mbps Bandbreite zum Hochladen pro Kamera (Sie können
Ihre Internetgeschwindigkeit auf der folgenden Website testen:
http://www.speedtest.net)
8
Systemanforderungen
3. Erste Schritte – Anschließen der Geräte
Wie funktioniert es?
Wi-Fi®-Router
DEUTSCH
MBP85
CONNECT
Remote-Anzeige der Kamera
auf jedem kompatiblen Gerät
Hubble
Service
Wenn ein Benutzer versucht, auf die Kamera zuzugreifen, authentifiziert unser
sicherer Server die Identität des Benutzers und erlaubt den Zugriff auf die Kamera.
3.1
Einrichtung
Schließen Sie die Kamera an das Netzteil und dann an eine Netzsteckdose an.
Vergewissern Sie sich, dass der Schalter eingeschaltet ist. Die Kamera muss sich
innerhalb der Reichweite des Wi-Fi®-Routers befinden, mit dem Sie sie
verbinden möchten. Achten Sie darauf, dass Sie das Passwort des Routers
während des Einrichtungsvorgangs in der App zur Hand haben.
Status der LED-Anzeige:
- Abstimm-/Setup-Zustand:
LED ist rot und blau und blinkt langsam
- Nicht verbundener Zustand:
LED ist rot und blinkt langsam
- Verbundener Zustand:
LED ist blau und leuchtet
- Verbindungsbereitschaftszustand: LED ist rot und blinkt langsam
Hinweis: Sie können das Gerät nur über ein kompatibles Smartphone oder Tablet
und nicht über einen PC einrichten.
Erste Schritte – Anschließen der Geräte
9
3.2
Einrichtung eines Benutzerkontos und der Kamera auf
Android™-Geräten
Das benötigen Sie
• MBP85CONNECT-Kamera
• Netzteil der MBP85CONNECT-Kamera
• Gerät mit Android™-System Version 4.2 oder höher
3.2.1
Einschalten und Verbinden der MBP85CONNECT-Kamera
• Schließen Sie das Netzteil an eine Netzsteckdose an und stecken Sie den
Stecker in den Micro USB-Anschluss an der Rückseite der Kamera.
• Vergewissern Sie sich, dass die EIN/AUS-Taste eingeschaltet ist.
• Die rote LED der Kamera blinkt, wenn die Kamera das Booten
abgeschlossen hat. Wenn Sie zwei Pieptöne hören, bedeutet dies, dass die
Kamera für das Einrichten bereit ist.
3.2.2
Herunterladen der Anwendung „Hubble for Motorola
Monitors“
• Gehen Sie zum Google Play™ Store, um nach „Hubble for Motorola
Monitors“ zu suchen.
• Laden Sie die App „Hubble for Motorola Monitors“ vom Google Play™ Store
herunter und installieren Sie sie auf Ihrem Android™-Gerät.
10
Erste Schritte – Anschließen der Geräte
3.2.3
Ausführen der App „Hubble for Motorola Monitors“ auf
einem Android™-Gerät
• Führen Sie die App „Hubble for Motorola Monitors“ aus und geben Sie Ihre
Kontoinformationen ein, wählen Sie „I agree to the Terms of Use“ (Ich bin mit
den Nutzungsbedingungen einverstanden), bevor Sie auf Create tippen.
(Bild A1)
Android™
Hinweis: Wenn Sie bereits ein „Hubble for Motorola Monitors“-Konto haben,
wählen Sie bitte Already have a Account?, um zum nächsten Schritt zu gehen.
DEUTSCH
• Stellen Sie sicher, dass Ihr Android™-Gerät mit Ihrem Wi-Fi®-Router
verbunden ist.
A1
Erste Schritte – Anschließen der Geräte
11
3.2.4
Hinzufügen der Kamera zu Ihrem Konto
• Erstellen Sie ein neues Konto und melden Sie sich an.
• Tippen Sie auf Add Camera. (Bild A2)
• Tippen Sie auf Continue. (Bild A3)
A2
A3
• Die Setup-Anleitung wird auf dem folgenden Bildschirm angezeigt. (Bild A4)
A4
12
Erste Schritte – Anschließen der Geräte
• Halten Sie die Taste PAIR an der Seite der MBP85CONNECT-Kamera drei
Sekunden lang gedrückt. Sie hören einen Piepton und eine Stimme aus der
Kamera, die sagt: „Ready to Pairing“ (Zum Abstimmen bereit). Tippen Sie auf
Search for Camera.
Android™
DEUTSCH
• Die App sucht und verbindet Ihre Kamera automatisch, wie in den folgenden
Bildern zu sehen (Bilder A5, A6), und die LED an der Kamera blinkt grün/rot.
A5
Erste Schritte – Anschließen der Geräte
A6
13
• Wählen Sie Ihr Wi-Fi®-Netzwerk und tippen Sie auf Continue, geben Sie das
Passwort für das ausgewählte Netzwerk ein und tippen Sie dann auf OK.
(Bilder A7, A8)
A7
A8
• Die Kamera benötigt einige Minuten, um sich mit dem Wi-Fi®-Netzwerk zu
verbinden und den Verbindungsstatus anzuzeigen (Bilder A9, A10). Falls die
Verbindung fehlschlägt, tippen Sie auf die Schaltfläche Retry und
wiederholen Sie die Schritte ab 3.2.4.
A9
14
A10
Erste Schritte – Anschließen der Geräte
• Tippen Sie auf Watch Live Camera, um das Kamerabild anzuzeigen. Die
blaue LED der Kamera blinkt. (Bild A11)
Android™
DEUTSCH
• Tippen Sie auf das Hubble-Logo, um zur Kamera-Registerkarte zurückzukehren
und eine Liste der verfügbaren Kameras anzuzeigen. (Bild A12)
A11
Erste Schritte – Anschließen der Geräte
A12
15
3.3
Einrichtung eines Benutzerkontos und der Kamera
Verwendung mit iPhone®/iPad®
Das benötigen Sie
• MBP85CONNECT-Kamera
• Netzteil der MBP85CONNECT-Kamera
• iPhone®/iPad® mit iOS Version 7.0 oder höher
3.3.1
Einschalten und Verbinden der MBP85CONNECT-Kamera
• Schließen Sie das MBP85CONNECT-Netzteil an eine Netzsteckdose an und
stecken Sie den Stecker in den Micro USB-Anschluss an der Rückseite der
MBP85CONNECT-Kamera.
• Vergewissern Sie sich, dass die EIN/AUS-Taste eingeschaltet ist.
• Die rote LED der Kamera beginnt zu blinken, wenn die Kamera das Booten
abgeschlossen hat. Dies bedeutet, dass die Kamera für das Einrichten bereit ist.
3.3.2
Herunterladen der App „Hubble for Motorola Monitors“
• Gehen Sie zum App Store, um „Hubble for Motorola Monitors“ zu suchen.
• Laden Sie die App „Hubble for Motorola Monitors“ herunter und installieren
Sie sie auf Ihren iPhone®/iPad®.
16
Erste Schritte – Anschließen der Geräte
3.3.3
Ausführen von „Hubble for Motorola Monitors“ auf Ihrem
iPhone®/iPad®
• Führen Sie die App „Hubble for Motorola Monitors“ aus und geben Sie Ihre
Kontoinformationen ein. Lesen Sie die Nutzungsbedingungen durch und
wählen Sie „I agree to the Terms of Service“ (Ich bin mit den
Nutzungsbedingungen einverstanden), bevor Sie auf Create tippen. (Bild i1)
iOS
Hinweis: Wenn Sie bereits ein „Hubble for Motorola Monitors“-Konto haben,
wählen Sie bitte Already have a Account?, um zum nächsten Schritt zu gehen.
DEUTSCH
• Stellen Sie sicher, dass Ihr iPhone®/iPad® mit Ihrem Wi-Fi®-Router
verbunden ist.
i1
Erste Schritte – Anschließen der Geräte
17
3.3.4
Hinzufügen der Kamera zu Ihrem Konto
• Erstellen Sie ein neues Konto und melden Sie sich an.
• Tippen Sie auf Add Camera. (Bild i2)
• Tippen Sie auf „MBP85CONNECT“. (Bild i3)
MBP85CONNECT
i2
i3
• Befolgen Sie die Anweisungen auf dem Bildschirm, um die Bluetooth®Funktion auf Ihrem iPhone®/iPad® einzuschalten.
i4
18
Erste Schritte – Anschließen der Geräte
iOS
DEUTSCH
• Tippen Sie auf die HOME-Taste und rufen Sie das Menü „Settings“ auf, um
die Bluetooth®-Funktion auf Ihrem iPhone®/iPad® einzuschalten.
i5
i6
• Drücken Sie die HOME-Taste, um das Menü „Settings“ zu beenden, und
tippen Sie auf die App „Hubble for Motorola Monitors“, um den
Startbildschirm aufzurufen.
i7
Erste Schritte – Anschließen der Geräte
19
• Befolgen Sie die obigen Schritte, um die Kamera mit der ID-Nummer
„CameraHD-xxxxxxxxxx“ zu finden, und tippen Sie dann auf Continue,
sobald sich Ihr iPhone® oder iPad® mit der Kamera verbunden hat. (Bild i8)
i8
• Wählen Sie Ihr Wi-Fi®-Netzwerk und tippen Sie auf Continue, geben Sie Ihre
Passwort ein und tippen Sie dann auf „Next“ (Weiter). (Bilder i9, i10)
i9
20
i10
Erste Schritte – Anschließen der Geräte
iOS
DEUTSCH
• Die Kamera benötigt einige Minuten, um sich mit dem Wi-Fi®-Netzwerk zu
verbinden und den Verbindungsstatus anzuzeigen (Bilder i11, i12). Falls die
Verbindung fehlschlägt, tippen Sie auf die Schaltfläche Retry und wiederholen
Sie Schritt 3.3.4, wie oben beschrieben.
i11
i12
• Tippen Sie auf Watch Live Camera, um das Kamerabild anzuzeigen. (Bild i13)
• Tippen Sie auf das Hubble-Logo, um zur Kamera-Registerkarte zurückzukehren
und eine Liste der verfügbaren Kameras anzuzeigen. (Bild i14)
i13
Erste Schritte – Anschließen der Geräte
i14
21
4. Kamera
4.1
Anschließen der Kamera an den Strom
• Schließen Sie den kleinen Stecker des Netzteils an den Netzteilanschluss an
und schließen Sie das Netzteil an eine Steckdose an.
• Schieben Sie den EIN/AUS-Schalter auf ON. Die blaue Power-LED leuchtet.
(Hinweis: Um das Gerät auszuschalten, schieben Sie den EIN/AUS-Schalter
auf OFF.)
4.2
Kamerafunktionen:
Verwendung mit Android™-Geräten
• Führen Sie die Hubble-App auf Ihrem Android™-Gerät aus.
• Die Kameraansicht wird auf dem Bildschirm angezeigt.
22
Kamera
4.2.1
Hinzufügen weiterer Kameras
• Tippen Sie in der Kameraansicht auf das Hubble-Logo, um zur Seite Add
Camera zu gelangen. (Bild A13)
Android™
• Sobald die Kamera hinzugefügt wurde, wird die Kameraansicht automatisch
angezeigt.
DEUTSCH
• Tippen Sie auf Add Camera, um eine weitere Kamera hinzufügen und
befolgen Sie dabei die Schritte für die Einrichtung von Android™-Geräten
in Abschnitt 3.2.4. (Bild A14)
A13
Kamera
A14
23
4.2.2
Entfernen einer Kamera
Sie können eine Kamera wie folgt von Ihrem Konto entfernen:
• Tippen Sie auf das Einstellungen-Symbol
auf dem Bildschirm/der Seite
mit der Kameraliste und tippen Sie dann auf Camera Details. (Bild A15)
• Wählen Sie Remove Camera und tippen Sie auf Yes, um das Gerät aus der
Kameraliste zu entfernen. (Bild A16)
A15
24
A16
Kamera
4.2.3
Ändern Ihrer Kontoinformationen
Sie können die Kontoinformationen mithilfe Ihres Android™-Geräts ändern.
• Tippen Sie auf Account auf der allgemeinen Seite. Die Kontoeinstellungen
werden auf dem Bildschirm angezeigt. (Bild A17)
• Tippen Sie auf Log Out, um das Konto zu verlassen.
• Tippen Sie auf Freemium-Plan. Sie gelangen zum CloudVideoaufzeichnungsdienst. Um weitere Informationen zu erhalten,
besuchen Sie bitte unsere Website http://www.hubbleconnected.com.
• Tippen Sie auf Use, um die Remote-Verbindungseinstellung aufzurufen. Um
nur die Remote-Verbindung zu verwenden, wählen Sie Yes.
• Enable Disconnect Alert bietet eine Piepton-Warnung, wenn die
Verwendung getrennt ist. Aktivieren Sie die Warnung bei getrennter
Verbindung, indem Sie Yes auswählen.
• Tippen Sie auf Send Log, um den Bericht der Hubble-App per E-Mail an
unseren Server zu senden, wenn Sie von einem Kundendienstvertreter dazu
aufgefordert werden.
A17
Kamera
25
Android™
DEUTSCH
• Tippen Sie auf Change Password, um Ihr Passwort zu ändern. Befolgen Sie
dabei die Anweisungen.
4.2.4
Kameraeinstellungen
Sie können die Kameraeinstellungen ändern, indem Sie auf das EinstellungenSymbol
auf der Kameraseite tippen. (Bild A18)
• Tippen Sie auf Camera Details, um Camera Name, Change Image,
Firmware version und Remove Camera anzuzeigen. (Bild A19)
A18
A19
• Tippen Sie auf Notification Sensitivity, um die Empfindlichkeit der Ton- und
Bewegungserkennung einzustellen und eine Warnung bei hoher/niedriger
Temperatur einzustellen. (Bild A20)
A20
26
Kamera
4.2.5
Allgemeine Einstellungen
• Tippen Sie auf Settings auf der allgemeinen Seite.
Android™
DEUTSCH
• Tippen Sie auf General Settings, um das Format für Clock (12hr/24hr) und
Temperature (°C / °F) umzustellen und Notification Sound oder Vibration
zu aktivieren. (Bild A21)
A21
A22
• Tippen Sie auf Do Not Disturb, stellen Sie den Timer auf die gewünschte Zeit
ein und wählen Sie ON. Die Kamera sendet während der eingestellten Zeit
keine Töne oder Warnungen an Ihr Android™-Gerät. (Bild A22)
Kamera
27
4.2.6
Funktionen der Hubble-Anwendung
Tippen Sie auf den Ansichtsbereich und die Funktionssymbole erscheinen, wie
unten dargestellt.
Zwei-Wege-Kommunikation – Tippen Sie auf das Mikrofonsymbol, um die
Gegensprechfunktion an der Kamera zu aktivieren. Drücken Sie die
kreisförmige Schaltfläche ein Mal, um zu sprechen. Schalten Sie wieder um, um
Ton von der Kamera zu hören. (Bilder A23, A24)
A23
28
A24
Kamera
Schwenk- und Neigefunktion:
A25
Kamera
Android™
DEUTSCH
Tippen Sie auf die Nach oben- und Nach unten-Tasten zum Neigen und die Nach
links- und Nach rechts-Tasten zum Schwenken. (Bilder A25, A26)
A26
29
Foto/Video - Nehmen Sie ein Foto auf oder zeichnen Sie ein Video mit der
Kamera auf.
Tippen Sie auf das Videosymbol auf dem Bildschirm, um die Foto/Videofunktion zu
aktivieren. Wählen Sie die Videoaufzeichnungsfunktion, indem Sie das kleine
Videosymbol rechts von der großen blauen Schaltfläche auswählen. Drücken Sie die
große blaue Schaltfläche, um mit dem Aufzeichnen zu beginnen. Die Schaltfläche
wird rot. Drücken Sie sie erneut, um das Aufzeichnen zu stoppen. (Bilder A27, A28)
Tippen Sie auf das kleine Kamerasymbol
rechts von der großen blauen
Schaltfläche, um zum Kameramodus zu wechseln. Drücken Sie die große blaue
Schaltfläche, um Fotos von der Kameraansicht aufzunehmen. (Bild A29)
A27
A28
A29
30
Kamera
A30
Kamera
A31
31
DEUTSCH
Temperaturmessung – Die Temperaturanzeige des Temperatursensors an
der Rückseite der Kamera wird auf Ihrem Android™-Gerät angezeigt (Bild A31).
Die Anzeige wird ROT, wenn die Temperatur den hohen/niedrigen
Temperaturbereich überschreitet, der im Konto eingestellt sind. (Siehe
Abschnitt 4.2.4)
Android™
Hinweis:
Fotos und Videos werden im internen Flash-Speicher Ihres Geräts gespeichert.
Bei einem Android™-Gerät können Sie über die Galerie oder den Media-Player
darauf zugreifen. Um Videos wiederzugeben, verwenden Sie bitte die HubbleApp oder die Anwendung eines Fremdanbieters, z. B. MX Player (vom Google
Play™ Store), die MJPG-Dateien (Motionjpeg) wiedergeben kann.
Melodie – Tippen Sie für die Wiedergabe einer der 5 voreingestellten
Melodien auf diese Schaltfläche, um das Menü Melody anzuzeigen und eine
Melodie auszuwählen, die Sie an Ihrer Kamera wiedergeben möchten. (Bild A30)
4.3
Kamerafunktionen:
Verwendung mit iPhone®/iPad®
• Führen Sie die Hubble-App auf Ihrem iPhone®/iPad® aus.
• Die Kameraansicht wird auf dem Bildschirm angezeigt.
4.3.1
Hinzufügen weiterer Kameras
• Tippen Sie in der Kameraansicht auf das Motorola-Logo, um zur Seite Add
Camera zu gehen. (Bild i15)
• Tippen Sie auf Add Camera, um eine weitere Kamera hinzuzufügen (befolgen
Sie die Schritte für das iPhone®/iPad®-Setup unter 3.3.4.) (Bild i16)
• Sobald die Kamera hinzugefügt wurde, wird die Kameraansicht automatisch
angezeigt.
i15
i16
Hinweis:
Sie können nur bis zu 4 verbundene Kameras zu einem Konto hinzufügen.
32
Kamera
4.3.2
Entfernen einer Kamera
Sie können eine Kamera wie folgt von Ihrem Konto entfernen:
• Tippen Sie auf das Einstellungen-Symbol
auf der allgemeinen Seite und
tippen Sie dann auf Camera Details. (Bild i17)
iOS
DEUTSCH
• Wählen Sie Remove Camera und tippen Sie auf Yes, um das Gerät aus der
Kameraliste zu entfernen. (Bild i18)
i17
Kamera
i18
33
4.3.3
Ändern Ihrer Kontoinformationen
Sie können die Kontoinformationen mithilfe Ihres iPhone®/iPad® ändern.
• Tippen Sie auf Account auf der allgemeinen Seite. Die Kontoeinstellungen
werden auf dem Bildschirm angezeigt. (Bild i19)
• Tippen Sie auf Change Password, um Ihr Passwort gemäß der Anleitung zu
ändern.
• Tippen Sie auf Log Out, um das Konto zu verlassen.
• Tippen Sie auf Current Plan. Sie gelangen zum CloudVideoaufzeichnungsdienst. Um weitere Informationen zu erhalten, besuchen
Sie bitte unsere Website www.hubbleconnected.com/motorola/plans.
• Tippen Sie auf Send app log, um den Bericht der Hubble-App per E-Mail an
unseren Server zu senden, wenn Sie von einem Kundendienstvertreter dazu
aufgefordert werden.
i19
34
Kamera
4.3.4
Kameraeinstellungen
iOS
DEUTSCH
Sie können die Kameraeinstellungen ändern, indem Sie auf das EinstellungenSymbol
auf der allgemeinen Seite tippen (Bild i20). Sie können Camera
Name und Firmware version (Bild i21) anzeigen und den Kameranamen
ändern, indem Sie auf den vorhandenen Namen tippen und die Anweisungen
befolgen.
i20
i21
• Tippen Sie auf Notification Sensitivity, um die Empfindlichkeit der Ton- und
Bewegungserkennung einzustellen, und stellen Sie die Warnung bei hoher/
niedriger Temperatur ein. (Bild i22)
i22
Kamera
35
4.3.5
Allgemeine Einstellungen
• Tippen Sie auf Settings auf der allgemeinen Seite. (Bild i23)
• Tippen Sie auf General Settings, um das Format für Clock (12hr/24hr) und
Temperature (°C / °F) umzustellen und Benachrichtigungston oder Vibration
zu aktivieren. (Bild i24)
i23
i24
• Tippen Sie auf Do Not Disturb, stellen Sie den Timer auf die gewünschte Zeit
ein und wählen Sie ON. Die Kamera sendet während der eingestellten Zeit
keine Töne oder Warnungen an Ihr iPhone®/iPad®. (Bild i25)
i25
36
Kamera
4.3.6
Hubble App-Einstellungen
iOS
DEUTSCH
• Tippen Sie auf Settings auf Ihrem iPhone®/iPad® und eine Liste der
Anwendungen wird angezeigt. Tippen Sie auf
und die Einstellungen
werden auf dem Bildschirm angezeigt. (Bild i26)
i26
Kamera
37
4.3.7
Funktionen der Hubble-App
Tippen Sie in der Kameraansicht auf den Anzeigebereich. Folgende
Funktionssymbole werden angezeigt:
Zwei-Wege-Kommunikation – Tippen Sie auf das Mikrofonsymbol, um die
Gegensprechfunktion an der Kamera zu aktivieren. Drücken Sie die
kreisförmige Schaltfläche ein Mal, um zu sprechen. Schalten Sie wieder um, um
Ton von der Kamera zu hören. (Bilder i27, i28)
i27
38
i28
Kamera
Schwenk- und Neigefunktion:
iOS
DEUTSCH
Tippen Sie auf das 4-Wege-Pfeilsymbol, um de Schwenk-/Neigefunktion zu
aktivieren. Drücken Sie die Auf/Ab-Pfeile, um die Kamera nach oben und unten
zu neigen, drücken Sie die Rechts/Links-Pfeile zum Schwenken der Kamera
nach links und rechts. (Bilder i29, i30)
i29
Kamera
i30
39
Fotofunktion – Tippen Sie auf das Kamerasymbol auf dem Bildschirm,
um die Fotoaufnahmefunktion zu aktivieren. Drücken Sie die große blaue
Kamerataste, um ein Foto aufzunehmen. (Bild i31)
i31
Hinweis:
Fotos werden im internen Flash-Speicher Ihres iPhone®/iPad® gespeichert.
40
Kamera
iOS
Temperaturmessung – Die Temperaturanzeige des Temperatursensors an
der Rückseite der Kamera wird auf Ihrem iPhone®/iPad® LCDBildschirmangezeigt (Bild i33). Die Anzeige wird ROT, wenn die Temperatur
den hohen/niedrigen Temperaturbereich überschreitet, der im Konto
eingestellt sind. (Siehe Abschnitt 4.3.5)
DEUTSCH
Melodie – Tippen Sie für die Wiedergabe einer der 5 voreingestellten
Melodien im System auf diese Schaltfläche, um das Menü Melody anzuzeigen
und eine Melodie auszuwählen, die Sie an Ihrer Kamera wiedergeben möchten.
(Bild i32)
i32
Kamera
i33
41
4.4
Kamerafunktionen:
Betrieb mit PC/Notebook
• Gehen Sie zu: http://www.hubbleconnected.com/motorola/login/
• Geben Sie Ihren Benutzernamen und Ihr Passwort ein und klicken Sie auf
„Login“, wenn Sie bereits ein Konto erstellt haben.
• Klicken Sie über Ihr Android™-Gerät oder iPhone®/iPad® auf die Liste der
abgestimmten Kameras in Ihrem Konto und die Kamera wird angezeigt. Sie
können ganz einfach über Live-Videostreaming mit Ihren Freunden,
bevorzugten Orten oder geliebten Haustieren in Verbindung bleiben.
• Sie können die Einstellungen ändern, indem Sie die Menüanweisungen auf
der Website befolgen.
42
Kamera
5. Zurücksetzen der Kamera
1.
2.
3.
4.
Schieben Sie den EIN/AUS-Schalter in die Position OFF.
Halten Sie die PAIR-Taste gedrückt und schieben Sie den ON/OFF-Schalter
auf ON.
Lassen Sie die PAIR-Taste los, wenn Sie einen Piepton zur Bestätigung
hören, und warten Sie, bis die Kamera das interne Zurücksetzen
abgeschlossen hat. Die LED-Anzeige leuchtet rot und blinkt langsam, wenn
die Kamera erfolgreich zurückgesetzt wurde.
Sie können Ihre Kamera erneut hinzufügen, indem Sie die Schritte in
Abschnitt 3.2.4 bei einem Android-Gerät oder in Abschnitt 3.3.4 bei einem
iOS-Gerät befolgen.
Zurücksetzen der Kamera
43
DEUTSCH
Hinweis: Wenn Sie mit Ihrer Kamera von einem Router (z. B. zu Hause) zu einem
anderen Router (z. B. im Büro) wechseln möchten oder Probleme beim
Einrichten der Kamera haben, muss die Kamera zurückgesetzt werden. Bitte
setzen Sie die Kamera wie folgt zurück:
6. Hilfe
Störgeräusche
Um Hintergrundgeräusche oder Echos zu verhindern, stellen Sie sicher, dass
der Abstand zwischen Ihrem Gerät und der Wi-Fi®-Kamera groß genug ist.
Die Verwendung anderer 2,4-GHz-Produkte wie Bluetooth®-Systeme oder
Mikrowellenöfen kann Störungen bei diesem Gerät verursachen. Stellen Sie die
Wi-Fi®-Kamera mindestens 1,5 m von solchen Produkten entfernt auf oder
schalten Sie sie aus, wenn sie Störungen verursachen.
Getrennte Verbindung
Prüfen Sie Ihre Wi-Fi®-Einstellungen. Stellen Sie, falls nötig, die Wi-Fi®Verbindung erneut her. Vergewissern Sie sich, dass die Wi-Fi ®-Kamera
eingeschaltet ist. Warten Sie einige Sekunden, bis Sie eine Verbindung zum WiFi®-Netzwerk herstellen.
Wenn Sie Ihr Passwort vergessen haben
Wenn Sie Ihr Passwort nicht mehr wissen, tippen Sie auf „Forgot Password“
und geben Sie Ihre E-Mail-Adresse an. Es wird umgehend ein neues
Passwort an Ihre E-Mail-Adresse gesendet.
Fehlerbehebung
Kategorie
Problembeschreibung/Fehler
Lösung
Konto
Bitte überprüfen Sie Ihren
Ich kann mich auch
nach der Registrierung Benutzernamen und Ihr Passwort.
nicht anmelden.
Konto
Bitte stellen Sie sicher, dass Sie ein
Ich erhalte folgende
Fehlermeldung: „Email Konto bei uns registriert haben. Tippen
Sie auf Create Account, um ein Konto
ID is not registered“.
zu erstellen, damit Sie die Wi-Fi®Video-Baby-Überwachungskamera
verwenden können.
44
Hilfe
Was kann ich tun, wenn Klicken Sie auf der Link „Forgot
ich mein Passwort
Password“ auf der Website http://
vergessen habe?
www.hubbleconnected.com/
motorola/login/ ODER in Ihrer
Android- oder iOS-Anwendung.
Es wird eine E-Mail an Ihre registrierte
E-Mail-Adresse gesendet.
Konto
Ich kann kein neues
Passwort empfangen,
obwohl ich die Option
„Forgot Password“
verwendet habe.
1.
2.
1.
Verbindungs- Ich erhalte die
probleme
Meldung: „We are
having problems
accessing your
Camera. This could be 2.
due to the lack of
internet connection.
Please wait and try
3.
again later.“
Hilfe
DEUTSCH
Konto
Die E-Mail ist möglicherweise in
Ihrem Spamordner gelandet.
Bitte sehen Sie in Ihrem
Spamordner nach.
Der Empfang der E-Mail kann
etwas dauern. Bitte warten Sie
einige Minuten, bevor Sie Ihre
E-Mails erneut abrufen.
Bitte versuchen Sie es in einigen
Minuten erneut. Es könnte ein
Problem mit Ihrer
Internetverbindung vorliegen.
Falls das Problem weiterhin
besteht, starten Sie Ihre Kamera
erneut, um zu prüfen, ob dies das
Problem behebt.
Bitte starten Sie Ihren drahtlosen
Router neu.
45
Anzeigen der Im Remote-Modus
Kamera
stoppt das Video nach
5 Minuten. Wie kann
ich es länger anzeigen?
Beim Zugriff auf Ihre Kamera über ein
anderes Netzwerk als Ihr Heimnetzwerk
(über das Internet) erfolgt ein Timeout
des Videos nach 5 Minuten.
Sie können in der Android™/iOSAnwendung erneut auf die Kamera
klicken, um das Streamen wieder zu
starten.
Wenn Sie von Ihrem Webbrowser aus
zugreifen, können Sie die Schaltfläche
Reload drücken, um die Anzeige Ihres
Kameravideostreams wieder zu
starten.
Funktionen
Der Schwellenwert für Sie können die Tonempfindlichkeit
für das Auslösen von
die Tonwarnung ist
Benachrichtigungen im
nicht richtig.
Kameraeinstellungen-Menü
anpassen.
Verbindungs- Meine
probleme
Telefonanwendung
zeigt die folgende
Meldung an: „Unable
to connect to BMS
server“.
1.
2.
3.
46
Prüfen Sie die Signalstärke des
Wi-Fi ® -Netzwerks.
Prüfen Sie, ob Sie mit dem
Internet verbunden sind, indem
Sie den Telefonbrowser starten
und zu einer Website wie
www.google.com gehen.
Versuchen Sie es erneut, wenn
Sie sich erfolgreich mit dem
Internet verbinden konnten.
Hilfe
Während ich eine neue
Kamera zu meinem
Konto hinzufüge, kann
ich keine Kameras zum
Hinzufügen finden.
Wenn Sie versuchen, eine Kamera
hinzuzufügen, die bereits vorher zu
Ihrem Konto oder einem anderen
Konto hinzugefügt wurde, müssen die
Kamera zuerst zurücksetzen. Halten
Sie dazu die Taste PAIR unten an der
Kamera 5 Sekunden lang gedrückt.
Allgemein
Welche Browser
werden für den Zugriff
von meinem PC/Mac®
unterstützt?
Auf einem PC oder Mac ® empfehlen
wir die Verwendung von Google
Chrome™. Die folgenden Browser
werden jedoch ebenfalls unterstützt:
PC : Internet Explorer ® 9 und höher.
Mac ® : Safari ® 6.0.
Allgemein
Was bedeutet die
blinkende LED?
Eine blinkende LED gibt den
folgenden Status an:
Langsames Blinken: 1. Ihre Kamera
befindet sich im Setup-Modus. In
diesem Modus können Sie die Kamera
zu Ihrem Konto hinzufügen. Im neuen
Zustand befindet sich die Kamera im
Setup-Modus. Um den Setup-Modus
zurückzusetzen, halten Sie die Taste
PAIR unten an der Kamera gedrückt,
bis Sie einen Piepton hören.
Langsames Blinken: 2. Die Kamera
verbindet sich entweder gerade mit
dem Router oder sie hat die
Verbindung zum Router verloren. Bitte
stellen Sie sicher, dass sich die Kamera
innerhalb der Reichweite des Wi-Fi® Signals befindet.
LED leuchtet: Die Kamera ist mit dem
Wi-Fi ® -Netzwerk verbunden.
Hilfe
47
DEUTSCH
Einrichten
Verbindungs- Ich kann auf meine
probleme
Kamera nicht
zugreifen.
Bitte prüfen Sie, ob sich die Kamera
innerhalb der Wi-Fi ® -Reichweite
befindet. Wenn die LED an Ihrer
Kamera langsam blinkt, versuchen
Sie, die Kamera näher zum Router zu
stellen, um eine bessere Wi-Fi ® Verbindung zu erhalten, und
versuchen Sie es erneut.
Einrichten
Beim Einrichten auf
Geräten für Android™
und iOS kann ich
meine Kamera
während des letzten
Schritts nicht finden
und die Einrichtung
schlägt fehl.
Bitte setzen Sie die Kamera in den
Setup-Modus zurück und versuchen
Sie es erneut. Halten Sie die Taste
PAIR-Taste unten an der Kamera
gedrückt, bis Sie einen Piepton hören.
Warten Sie eine Minute, bis die
Kamera neu startet. Die Kamera-LED
gibtan, dass sie sich im Setup-Modus
befindet. Starten Sie jetzt das Setup
von Ihrem Smartphone aus erneut.
Verbindungs- Wenn ich vom Wi-Fi ® probleme
Netzwerk aus auf
meine Kamera
zugreife, wird meine
Kamera immer als
remote angezeigt. Ich
kann nur jeweils 5
Minuten lang darauf
zugreifen.
Bitte prüfen Sie die Einstellungen
Ihres drahtlosen Routers. Bei Routern
der Marke Buffalo gibt es zum Beispiel
eine Option namens „Drahtlose
Isolation“. Bitte deaktivieren Sie diese
Option.
Kamera
Bitte aktualisieren Sie Ihre Firmware.
Dies dauert ca. 5 Minuten. Wir
veröffentlichen von Zeit zu Zeit
Upgrades, um die Kamerafunktionen
zu verbessern.
48
Wenn ich versuche, die
Kamera anzuzeigen,
erhalte ich die
Aufforderung, ein
Firmware-Upgrade der
Kamera durchzuführen.
Was soll ich tun?
Hilfe
Allgemein
Mindestanforderung:
Welche Plattformen
werden für den Zugriff Windows ® 7*
auf meine Kamera
*Java-Browser-Plugin erforderlich
unterstützt?
Mac OS ® Version 10.7
Chrome™ Version 24
DEUTSCH
Internet Explorer ® Version 9
Safari ® Version 6
Java™ Version 7
Firefox ® Version 18.0
Adobe ® Flash ® Player 15.0
Android™ 4.2
iPhone ® /iPad ® iOS Version 7.0
Sie können auf das LautsprecherSymbol im Videostream-Bildschirm
tippen, um Ton zu hören. Der Ton ist
standardmäßig eingeschaltet, wenn
Sie auf eine Remote-Kamera
zugreifen.
Allgemein
Ich höre keinen Ton,
wenn ich auf eine
Remote-Kamera
zugreife.
Allgemein
Was bedeutet „Lokale Wenn Sie auf Ihre Kamera vom selben
drahtlosen (Heim-)Netzwerk aus
Kamera“ und
zugreifen, in dem sie konfiguriert
„Remote-Kamera“?
wurde, ist sie eine lokale Kamera. Wenn
Sie auf Ihre Kamera von einem anderen
Ort als zu Hause zugreifen, ist es eine
Remote-Kamera. Sie können 3G, 4G
oder 4G LTE oder eine Wi-Fi® Verbindung außerhalb Ihres Zuhauses
verwenden.
Hilfe
49
Allgemein
Wie lade ich die
Anwendung für
Android™- und iOSGeräte herunter?
Android™:
- Öffnen Sie den Google Play Store
auf Ihrem Android™-Gerät
- Wählen Sie „Suche“
- Geben Sie „Hubble for Motorola
Monitors“ ein.
- In den Ergebnissen wird die
Hubble App angezeigt.
- Installieren Sie sie.
iOS-Gerät:
- Öffnen Sie den App StoreSM
- Wählen Sie „Suche“
- Geben Sie „Hubble for Motorola
Monitors“ ein
- In den Ergebnissen wird die
Hubble App angezeigt
- Installieren Sie sie
Einrichten
Wenn das Video
stoppt, versucht die
Anwendung, sich
erneut zu verbinden.
Dies führt zu fehlendem
Ton und einem
unterbrochenen Bild.
Sie müssen die automatische
Sperrfunktion Ihres intelligenten
Geräts ausschalten, um einen
kontinuierlichen Video/Audio-Feed
sicherzustellen.
Funktionen
Wenn Sie im lokalen Modus
Wie viele Benutzer
können gleichzeitig auf zugreifen, werden zwei Benutzer
die Kamera zugreifen? unterstützt. Für mehr als zwei
Benutzer geht das gesamte Streaming
über den Remote-Server. Dies
ermöglicht unbegrenzten
Benutzerzugriff auf eine einzelne
Kamera gleichzeitig.
50
Hilfe
Die Videostreamingleistung ist mit
der Internetbandbreite verbunden,
insbesondere, wenn Sie 2 oder mehr
Videostreaminggeräte haben, die
über denselben Router funktionieren.
DEUTSCH
Verbindungs- Meine anderen
probleme
Webkamerageräte
verursachen
Störungen.
Hilfe
51
7. Allgemeine Informationen
Wenn Ihr Produkt nicht richtig funktioniert ...
1.
2.
Lesen Sie diese Bedienungsanleitung durch.
Wenden Sie sich an den Kundendienst unter:
+49 (0) 1805 938 802 in Europa
E-Mail: [email protected]
Eingeschränkte Garantie für Konsumgüter und Zubehör
(„Garantie“)
Vielen Dank, dass Sie dieses Produkt der Marke Motorola gekauft haben, das
von Binatone Electronics International Ldt („BINATONE“) unter Lizenz gefertigt
wird.
Was deckt diese Garantie ab?
Vorbehaltlich der unten angegebenen Ausschlüsse garantiert BINATONE, dass
dieses von ihm gefertigte Produkt der Marke Motorola („Produkt“) oder
zugelassenes Zubehör („Zubehör“), das für die Verwendung mit diesem
Produkt verkauft wird, bei normaler Nutzung durch den Verbraucher für den
unten angegebenen Zeitraum frei von Material- und Fertigungsfehlern ist. Diese
Garantie ist Ihre ausschließliche Garantie und nicht übertragbar.
Was ist abgedeckt?
Diese Garantie erstreckt sich nur auf den Erstkäufer und ist nicht übertragbar.
Was wird BINATONE tun?
BINATONE oder sein autorisierter Händler wird nach eigener Wahl und
innerhalb kommerziell angemessener Zeit alle Produkte und Zubehörteile, die
dieser Garantie unterliegen, kostenlos reparieren oder ersetzen. Wir können
funktionell gleichwertige aufgearbeitete/überholte/gebrauchte oder neue
Produkte, Zubehörteile oder Teile verwenden.
52
Allgemeine Informationen
ALLE STILLSCHWEIGENDEN GARANTIEN, EINSCHLIESSLICH U. A. DIE
STILLSCHWEIGENDEN GARANTIEN DER MARKTGÄNGIGKEIT UND DER
EIGNUNG FÜR EINEN BESTIMMTEN ZWECK, SIND AUF DIE DAUER DIESER
EINGESCHRÄNKTEN GARANTIE BESCHRÄNKT. ANSONSTEN IST DIE
REPARATUR ODER DER AUSTAUSCH, DIE UNTER DIESER
AUSDRÜCKLICHEN EINGESCHRÄNKTEN GARANTIE ERFOLGEN, DER
AUSSCHLIESSLICHE RECHTSBEHELF DES VERBAUCHERS UND ES
WERDEN DADURCH ALLE ANDEREN GARANTIEN, OB AUSDRÜCKLICH
ODER STILLSCHWEIGEND, ERSETZT. MOTOROLA ODER BINATONE
ÜBERNEHMEN IN KEINEM FALL EINE HAFTUNG, WEDER AUFGRUND EINES
VERTRAGS ODER WEGEN UNERLAUBTER HANDLUNG (EINSCHLIESSLICH
FAHRLÄSSIGKEIT), FÜR SCHÄDEN, DIE DEN KAUFPREIS DES PRODUKTS
ODER ZUBEHÖRS ÜBERSTEIGEN, ODER FÜR INDIREKTE, BESONDERE,
NEBEN- ODER FOLGESCHÄDEN JEGLICHER ART ODER UMSATZ- ODER
GEWINNVERLUST, ENTGANGENE GESCHÄFTE, VERLORENE
INFORMATIONEN ODER ANDERE FINANZIELLE VERLUSTE, DIE SICH AUS
ODER IN VERBINDUNG MIT DER FÄHIGKEIT ODER UNFÄHIGKEIT
ERGEBEN, DIE PRODUKTE ODER ZUBEHÖRTEILE IN VOLLEM UMFANG ZU
NUTZEN, VORAUSGESETZT, SOLCHE SCHÄDEN KÖNNEN LAUT GESETZ
AUSGESCHLOSSEN WERDEN.
Manche Länder erlauben die Beschränkung oder den Ausschluss von Nebenoder Folgeschäden oder eine Einschränkung der Dauer einer
stillschweigenden Garantie nicht, daher kann es sein, dass die obigen
Beschränkungen für Sie nicht gelten. Diese Garantie räumt Ihnen spezifische
Rechte ein, die sich von Land zu Land unterscheiden können. Darüber hinaus
können Sie weitere Rechte haben.
Allgemeine Informationen
53
DEUTSCH
Welche weiteren Einschränkungen gelten?
Abgedeckte Produkte
Konsumgüter
Zubehör
Konsumgüter und Zubehörteile,
die repariert oder ersetzt wurden
Dauer der Garantie
Zwei (2) Jahre ab dem ursprünglichen
Kaufdatum der Produkte durch den
Erstkäufer.
Neunzig (90) Tage ab dem
ursprünglichen Kaufdatum der
Zubehörteile durch den Erstkäufer.
Restdauer der ursprünglichen Garantie
oder neunzig (90) Tage ab dem Tag der
Rückgabe an den Verbraucher (es gilt der
jeweils längere Zeitraum).
Ausschlüsse
Normaler Verschleiß. Regelmäßige Wartung, Reparatur und Austausch von Teilen
aufgrund des normalen Verschleißes sind von dieser Garantie ausgenommen.
Batterien. Nur Batterien, deren Kapazität im vollständig aufgeladenen Zustand
unter 80 % der Nennkapazität fällt, und Batterien, die auslaufen, sind von dieser
Garantie abgedeckt.
Missbräuchliche Verwendung. Defekte oder Schäden, die aus Folgendem
resultieren: (a) falscher Betrieb, falsche Aufbewahrung, missbräuchliche
Verwendung, Unfall oder Fahrlässigkeit, zum Beispiel physikalische Schäden
(Risse, Kratzer usw.) an der Oberfläche des Produkts, die aus missbräuchlicher
Verwendung resultieren, (b) Kontakt mit Flüssigkeit, Wasser, Regen, extremer
Feuchtigkeit oder starkem Schwitzen, Sand, Schmutz oder ähnlichem, extremer
Hitze oder Lebensmitteln, (c) Verwendung der Produkte oder Zubehörteile für
gewerbliche Zwecke oder unsachgemäße Verwendung oder Aussetzen des
Produkts oder der Zubehörteile anormaler Bedingungen, oder (d) andere
Handlungen, die nicht der Fehler von MOTOROLA oder BINATONE sind, sind
von der Garantie ausgeschlossen.
Verwendung von Produkten und Zubehörteilen, die nicht von Motorola
stammen. Defekte oder Schäden, die aus der Verwendung von Produkten oder
Zubehörteilen, die nicht von Motorola stammen oder von Motorola zugelassen sind,
oder anderer Peripheriegeräte stammen, sind von der Garantie ausgeschlossen.
54
Allgemeine Informationen
Wie erhalten Sie Garantieservice oder andere Informationen?
Um Service oder Informationen zu erhalten, rufen Sie bitte unter folgender
Nummer an:
+49 (0) 1805 938 802 in Europa
E-Mail: [email protected]
Sie erhalten Anweisungen dazu, wie Sie die Produkte oder Zubehörteile auf eigene
Kosten und Gefahr an das autorisierte Servicecenter von BINATONE senden.
Um Service zu erhalten, müssen Sie Folgendes beifügen: (a) das Produkt oder
Zubehör, (b) den Original-Kaufnachweis (Beleg) mit Angabe von Datum, Ort
und Verkäufer des Produkts, (c) falls eine Garantiekarte in Ihrem Karton
enthalten war, eine ausgefüllte Garantiekarte mit Angabe der Seriennummer
des Produkts (d) eine schriftliche Beschreibung des Problems und, was am
wichtigsten ist, (e) Ihre Adresse und Telefonnummer.
Diese Allgemeinen Geschäftsbedingungen stellen die gesamte
Garantievereinbarung zwischen Ihnen und BINATONE in Bezug auf die von
Ihnen gekauften Produkte und Zubehörteile dar und ersetzen alle früheren
Vereinbarungen oder Erklärungen, einschließlich Erklärungen in Publikationen
oder Werbematerialien, die von BINATONE ausgegeben werden, oder
Erklärungen durch einen Vertreter oder Mitarbeiter von BINATONE, die
möglicherweise in Verbindung mit besagtem Kauf erfolgt sind.
Allgemeine Informationen
55
DEUTSCH
Nicht autorisierte Reparatur oder Modifizierung. Defekte oder Schäden, die aus
Service, Tests, Einstellung, Installation, Wartung, Änderung oder Modifizierung in
irgendeiner Weise durch andere als MOTOROLA, BINATONE oder deren
autorisierte Servicecenter resultieren, sind von der Garantie ausgeschlossen.
Geänderte Produkte. Produkte oder Zubehörteile mit (a) Seriennummern oder
Datums- schildern, die entfernt, geändert oder unleserlich gemacht wurden, (b)
gebrochenen Siegeln oder solchen, die Zeichen von Manipulation aufweisen, (c)
nicht übereinstimmenden Platinenseriennummern, oder (d) nicht konformen
oder nicht von Motorola stammenden Gehäusen oder Teilen sind von der
Garantie ausgeschlossen.
Kommunikationsdienste. Defekte, Schäden oder der Ausfall von Produkten
oder Zubehörteilen aufgrund von Kommunikationsdiensten oder -signalen, die
Sie abonniert haben oder mit den Produkten oder Zubehörteilen verwenden,
sind von der Garantie ausgeschlossen.
BINATONE TELECOM PLC
1 Apsley Way London NW2 7HF,United Kingdom.
Tel: +44(0) 20 8955 2700 Fax: +44(0) 20 8344 8877
e-mail: [email protected]
________________________________________
.
EC Declaration of Conformity
We the manufacturer / Importer :
Binatone Telecom Plc
1 Apsley Way London
NW2 7HF, United Kingdom.
Declare under our sole responsibility that the following products
Wi-Fi Video Camera
Type of equipment:
FOCUS85, FOCUS85-B, FOCUS85-S, FOCUS85-W
Model Name:
SCOUT85, MBP85CONNECT
Country of Origin:
Brand:
China
Motorola
complies with the essential protection requirements of R&TTE Directive 1999/5/EC on the
approximation of the laws of the Member States relating to Radio Spectrum Matters, the
Council Directive
/108/EC on the approximation of the laws of the Member States
relating to electromagnetic compatibility (EMC) and the European Community Directive
2006/95/EC relating to Electrical Safety. Directive 2011/65/EC on the restriction of use of
hazardous substances (RoHS) and 2009/125/EC relating to ecodesign requirement for
Energy-Related Products (ErP).
Assessment of compliance of the product with the requirements relating to the essential
requirements according to Article 3 R&TTE was based on Annex III of the Directive
1999/5/EC and the following standard:
Radio Spectrum:
EMC:
Electrical Safety:
RF Safety:
EN300328 V1.8.1:2012
EN301489-17 V2.2.1:2012
EN301489-1 V1.9.2:2011
EN60950-1/A12:2011
EN62311:2010
The product is labelled with the European Approval Marking CE as show. Any Unauthori ed
modification of the product voids this Declaration.
Manufacturer / Importer
(Signature of authori ed person)
London, 30 May , 2014
Karl Heinz Mueller / Chief Technical Officer
56
Place & Date
Allgemeine Informationen
8. Technische Daten
Wi-Fi ®
802.11 b/g/n
Bildsensor
Farbe CMOS 1 Mio. Pixel
Objektiv
f = 2,5 mm, F = 2,8
IR-LED
8 Stck.
Netzteil:
Ten Pao International Ltd.
DEUTSCH
Kamera
S009GV0500150
Eingang: 100 - 240 V AC, 50/60 Hz, 300 mA
Ausgang: 5 V DC, 1500 mA
Technische Daten
57
Gefertigt, vertrieben oder verkauft durch Binatone Electronics International LTD.,
dem offiziellen Lizenznehmer für dieses Produkte. MOTOROLA und das Stylized
M Logo sind Marken oder eingetragene Marken von Motorola Trademark
Holdings, LLC. und werden unter Lizenz verwendet. Das Apple-Logo und Safari
sind Marken von Apple Inc., eingetragen in den USA und in anderen Ländern.
App Store ist eine Dienstleistungsmarke von Apple Inc. Android und Chrome
sind Marken von Google Inc. Wi-Fi ist eine Marke der Wi-Fi Alliance. Internet
Explorer und Windows sind Marken der Microsoft-Unternehmensgruppe. Firefox
ist eine eingetragene Marke der Mozilla Foundation. Adobe und Flash sind
eingetragene Marken oder Marken von Adobe Systems Incorporated. Java ist
eine eingetragene Marke von Oracle und/oder verbundenen Unternehmen. Alle
anderen Marken sind das Eigentum ihrer jeweiligen Inhaber. © 2015 Motorola
Mobility LLC. Alle Rechte vorbehalten.
DE_EU Version 2.0
Gedruckt in China
GUIDE DE L'UTILISATEUR
Caméra Wi-Fi® pour moniteur vidéo pour bébé
Modèle : MBP85CONNECT
Les caractéristiques décrites dans ce guide de l'urilisateur peuvent être modifiées sans préavis.
Bienvenue...
dans l'univers de votre nouvelle caméra Wi-Fi® Motorola pour
moniteur vidéo pour bébé !
Nous vous remercions d'avoir choisi cette nouvelle caméra Wi-Fi® Motorola
pour moniteur vidéo pour bébé. Vous pouvez maintenant voir et entendre votre
bébé dormant dans sa chambre, ou surveiller vos enfants plus âgés dans leur
salle de jeux. Vous ne pouvez configurer la caméra que depuis votre iPhone®/
iPad® ou un appareil Android™. Vous pouvez visionner les images filmées par
la caméra sur votre PC ou votre ordinateur portable, de même que sur un
appareil Android™ ou sur un iPhone®/iPad®.
Veuillez conserver votre facture originale datée. Une copie de cette facture sera
exigée pour bénéficier de la garantie de votre produit Motorola. Aucun
enregistrement n’est nécessaire pour bénéficier de la garantie.
Pour toute question relative au produit, veuillez vous adresser à notre service
clientèle :
+49 (0) 1805 938 802 en Europe
Courriel : [email protected]
Ce Guide de l’utilisateur contient toutes les informations dont vous avez besoin
pour profiter au mieux de votre produit.
Veuillez lire les consignes de sécurité en pages 5 et 6 avant d’installer l'appareil.
Contenu de la boîte
• Caméra Wi-Fi®
• Adaptateur secteur
• Guide de démarrage rapide
• Guide de l’utilisateur
Dans les packs multi-caméras, vous trouverez une ou plusieurs caméras
supplémentaires avec leurs adaptateurs secteur.
Présentation de votre caméra
1
2
8
3
4
5
9
1.
2.
3.
4.
5.
6
10
7
11
Cellule photoélectrique (pour la
détection de la luminosité ambiante)
Objectif de la caméra
DEL infrarouges (pour la vision
nocturne)
Voyant d’alimentation et d’état
Micro
Touche PAIR (COUPLAGE)
Haut-parleur
8. Antenne
9. Prise micro USB
10. Commutateur MARCHE/ARRÊT
11. Capteur de température
6.
7.
Importantes recommandations pour l’installation de votre caméra Wi-Fi®
• L’utilisation d’autres appareils 2,4 GHz, tels que d’autres réseaux sans fil,
systèmes Bluetooth® ou fours à microondes peut provoquer des interférences
avec ce produit. Tenez la caméra Wi-Fi® éloignée de ces appareils, ou éteignezles s’ils semblent provoquer des interférences.
• Veillez à toujours avoir une connexion Wi-Fi® de bonne qualité disponible.
Table des matières
1.
2.
3.
Consignes de sécurité....................................................................................... 5
Configuration requise ....................................................................................... 8
Pour commencer - Connexion des appareils ................................................... 9
3.1
3.2
3.3
4.
Caméra ............................................................................................................ 22
4.1
4.2
4.3
4.4
5.
6.
7.
8.
4
Installation.............................................................................................................9
Compte d’utilisateur et configuration de la caméra avec un appareil
Android™ ..........................................................................................................10
3.2.1
Alimentation et connexion de la caméra MBP85CONNECT .........10
3.2.2
Téléchargement de l’application Hubble for Motorola Monitors ...10
3.2.3
Utilisation de l'application Hubble for Motorola Monitors App sur
votre appareil Android™ .................................................................11
3.2.4
Ajout de la caméra à votre compte ..................................................12
Compte d’utilisateur et configuration de la caméra :
Avec un iPhone®/iPad®.....................................................................................16
3.3.1
Alimentation et connexion de la caméra MBP85CONNECT .........16
3.3.2
Téléchargement de l’application Hubble for Motorola Monitors ...16
3.3.3
Utilisation de l'application Hubble for Motorola Monitors sur
votre iPhone®/iPad® ........................................................................17
3.3.4
Ajout de la caméra à votre compte ..................................................18
Alimentation électrique de la caméra ...............................................................22
Fonctions de la caméra :
Avec un appareil Android™..............................................................................22
4.2.1
Ajouter d'autres caméras ..................................................................22
4.2.2
Supprimer une caméra .....................................................................24
4.2.3
Modifier les informations de votre compte .....................................25
4.2.4
Réglages de la caméra .....................................................................26
4.2.5
Paramètres généraux ........................................................................27
4.2.6
Fonctionnalités de l'application Hubble ..........................................28
Fonctions de la caméra :
Avec un iPhone®/iPad®.....................................................................................32
4.3.1
Ajouter d'autres caméras ..................................................................32
4.3.2
Supprimer une caméra .....................................................................33
4.3.3
Modifier les informations de votre compte .....................................34
4.3.4
Réglages de la caméra .....................................................................35
4.3.5
Paramètres généraux ........................................................................36
4.3.6
Paramètres de l'application Hubble .................................................37
4.3.7
Fonctionnalités de l'application Hubble ..........................................38
Fonctions de la caméra :
Avec un PC ou ordinateur portable...................................................................42
Procédure de réinitialisation de la caméra ..................................................... 43
Aide.................................................................................................................. 44
Informations générales.................................................................................... 51
Caractéristiques techniques........................................................................... 56
Table des matières
1. Consignes de sécurité
Consignes de sécurité
FRANÇAIS
AVERTISSEMENT :
Danger d’étranglement: des enfants se sont
accidentellement ÉTRANGLÉS avec les cordons.
Tenez ce cordon hors de portée des enfants (à plus
d'un mètre). N’utilisez jamais de prolongateurs
avec les adaptateurs secteur. Utilisez uniquement
les adaptateurs secteur fournis.
5
INSTALLATION ET CONFIGURATION DE LA CAMÉRA
Wi-Fi® :
● Choisissez pour la camé Wi-Fi® un emplacement qui offrira la
meilleure vue de votre bébé dans son berceau.
● Posez la caméra Wi-Fi® sur une surface plane telle qu’une commode,
un bureau ou une étagère, ou bien fixez-la au mur au moyen de
l’œillet situé dans le socle.
● Ne mettez JAMAIS la caméra Wi-Fi® ou les cordons dans le berceau.
6
Consignes de sécurité
• La présence de petites pièces exige que le montage soit effectué par un
adulte. Tenez toutes les petites pièces hors de portée des enfants.
• Ce produit n’est pas un jouet. Ne laissez pas les enfants jouer avec.
• Cette caméra Wi-Fi® ne peut en aucun cas remplacer la surveillance d’un
adulte responsable.
• Conservez ce Guide de l'utilisateur pour pouvoir le consulter ultérieurement.
• Ne couvrez pas la caméra Wi-Fi® d'une serviette ou d'une couverture.
• Essayez la caméra Wi-Fi® et toutes ses fonctions, afin de vous familiariser
avec l'appareil avant de l'utiliser.
• N’utilisez pas la caméra Wi-Fi® à proximité de l'eau.
• Ne placez pas la caméra Wi-Fi® près d'une source de chaleur.
• Ne touchez pas les contacts des prises avec des objets pointus ou métalliques.
Consignes de sécurité
7
FRANÇAIS
AVERTISSEMENT
Cette caméra Wi-Fi® est conforme à toutes les normes pertinentes relatives aux
champs électromagnétiques et ne présente aucun danger si elle est utilisée
conformément aux instructions contenues dans le Guide de l’utilisateur. Par
conséquent, lisez attentivement ce Guide de l'utilisateur avant d’utiliser l’appareil.
2. Configuration requise
Systèmes d'exploitation et navigateurs
• Windows® 7
• Mac OS® 10.7
• Chrome™ 24
• Internet Explorer® 9
• Safari® 6
• Java™ 7
• Firefox® 18.0
• Adobe® Flash® Player 15.0
Android™ System
• 4.2 ou version ultérieure
iOS pour iPhone®/iPad®
• 7.0 ou version ultérieure
Internet haut débit (Wi-Fi®)
• Bande passante de téléchargement ≥ 0,6 Mbps par caméra (vous pouvez
tester la vitesse de votre connexion sur le site : http://www.speedtest.net)
8
Configuration requise
3. Pour commencer - Connexion des appareils
Comment cela fonctionne-t-il ?
MBP85
CONNECT
Routeur Wi-Fi®
Visionnez à distance les images de
votre caméra sur n’importe quel
appareil compatible
Lorsqu'un utilisateur tente d'accéder à la caméra, notre serveur sécurisé vérifie
son identité et lui permet d'accéder à la caméra.
3.1
Installation
Insérez la fiche micro USB de l’adaptateur secteur dans la prise micro USB à
l’arrière de la caméra et branchez l’adaptateur à une prise de courant adéquate.
Si cette dernière comporte un interrupteur, veillez à ce que celui-ci soit sur ON
(MARCHE). La caméra doit être à la portée du routeur Wi-Fi® auquel vous
voulez la connecter. Assurez-vous d’avoir le mot de passe du routeur pour
l’entrer dans le programme de configuration.
État du voyant DEL :
- Couplage/Configuration : la DEL clignote doucement en rouge et bleu
- Non connecté :
la DEL clignote doucement en rouge
- Connecté :
la DEL est bleue et fixe
- Prêt pour la connexion :
la DEL clignote doucement en rouge
Remarque : vous ne pouvez effectuer la configuration que depuis un smartphone
ou une tablette compatible, pas depuis un PC.
Pour commencer - Connexion des appareils
9
FRANÇAIS
Service
Hubble
3.2
Compte d’utilisateur et configuration de la caméra
avec un appareil Android™
Ce qu’il vous faut
• Caméra MBP85CONNECT
• Adaptateur secteur de la caméra MBP85CONNECT
• Appareil avec Android™ 4.2 ou plus récent
3.2.1
Alimentation et connexion de la caméra MBP85CONNECT
• Insérez la fiche micro USB de l’adaptateur secteur dans la prise micro USB à
l’arrière de la caméra et branchez l’adaptateur à une prise de courant
adéquate. Si cette dernière comporte un interrupteur, veillez à ce que celuici soit sur ON (MARCHE).
• Vérifiez que le commutateur ON/OFF (MARCHE/ARRÊT) est sur ON
(MARCHE).
• La DEL rouge de la caméra clignote lorsque celle-ci a fini de démarrer.
Lorsque la caméra est prête à être configurée, vous entendez deux bips.
3.2.2
Téléchargement de l’application Hubble for Motorola
Monitors
• Allez sur Google Play™ Store pour chercher l'application « Hubble for
Motorola Monitors ».
• Téléchargez l'application Hubble for Motorola Monitors sur Google Play™
Store et installez-la sur votre appareil Android™
10
Pour commencer - Connexion des appareils
3.2.3
Utilisation de l'application Hubble for Motorola Monitors sur
votre appareil Android™
• Vérifiez que votre appareil Android™ est connecté à votre routeur Wi-Fi®.
• Démarrez l'application Hubble for Motorola Monitors, entrez les informations
de votre compe, lisez les conditions générales d'utilisation, puis sélectionnez
« I agree to the Terms of Use » (J'accepte les conditions d'utilisation) avant de
taper sur Create (Créer). (Image A1)
Android™
FRANÇAIS
Remarque : si vous avez un compte Hubble for Motorola Monitors, sélectionnez
« Already have an Account? » (Vous avez déjà un compte ?) pour passer à l'étape
suivante.
A1
Pour commencer - Connexion des appareils
11
3.2.4
Ajout de la caméra à votre compte
• Créez un nouveau compte et connectez-vous.
• Tapez sur Add Camera. (Image A2)
• Tapez sur Continue. (Image A3)
A2
A3
• Les instructions de configuration s’affichent sur l’écran suivant. (Image A4)
A4
12
Pour commencer - Connexion des appareils
• Maintenez la touche PAIR située sous la caméra enfoncée pendant 3 secondes;
vous entendez un bip, puis l'annonce vocale « Ready for pairing ». Tapez sur
Search for Camera.
A5
Pour commencer - Connexion des appareils
Android™
FRANÇAIS
• L’application cherche et se connecte automatiquement à votre caméra,
comme le montrent les (Images A5 et A6) ci-dessous, et la DEL de la caméra
clignote en vert et rouge.
A6
13
• Sélectionnez votre réseau Wi-Fi®, tapez sur Continue, puis saisissez le mot
de passe du réseau sélectionné et tapez sur OK. (Images A7 et A8)
A7
A8
®
• La connexion de la caméra au réseau Wi-Fi demande quelques minutes,
puis l'état de la connexion s'affiche (Images A9 et A10). Si la connexion
échoue, tapez sur Retry et recommencez à partir de l'étape 3.2.4.
A9
14
A10
Pour commencer - Connexion des appareils
• Tapez sur Watch Live Camera pour visionner les images filmées par la
caméra. La DEL de la caméra clignote en bleu. (Image A11)
FRANÇAIS
• Tapez sur le logo Hubble pour revenir à la liste des caméras disponibles.
(Image A12)
A12
Android™
A11
Pour commencer - Connexion des appareils
15
3.3
Compte d’utilisateur et configuration de la caméra :
Avec un iPhone®/iPad®
Ce qu’il vous faut
• Caméra MBP85CONNECT
• Adaptateur secteur de la caméra MBP85CONNECT
• iPhone®/iPad® avec iOS 7.0 ou version ultérieure
3.3.1
Alimentation et connexion de la caméra MBP85CONNECT
• Insérez la fiche micro USB de l’adaptateur secteur dans la prise micro USB à
l’arrière de la caméra et branchez l’adaptateur à une prise de courant
adéquate. Si cette dernière comporte un interrupteur, veillez à ce que celuici soit sur ON (MARCHE).
• Vérifiez que le commutateur ON/OFF (MARCHE/ARRÊT) est sur ON
(MARCHE).
• La DEL rouge de la caméra clignote lorsque celle-ci a fini de démarrer.
Lorsque la caméra est prête à être configurée, vous entendez deux bips.
3.3.2
Téléchargement de l’application Hubble for Motorola
Monitors
• Allez sur l'App Store et cherchez « Hubble for Motorola Monitors ».
• Téléchargez l’application Hubble for Motorola Monitors et installez-la sur
votre iPhone®/iPad®.
16
Pour commencer - Connexion des appareils
3.3.3
Utilisation de l'application Hubble for Motorola Monitors sur
votre iPhone®/iPad®
• Vérifiez que votre iPhone®/iPad® est connecté à votre routeur Wi-Fi®.
• Démarrez l'application Hubble for Motorola Monitors, entrez les informations
de votre compe, lisez les conditions générales d'utilisation, puis sélectionnez
« I agree to the Terms of Use » avant de taper sur Create. (Image i1)
iOS
FRANÇAIS
Remarque : si vous avez un compte Hubble for Motorola Monitors, sélectionnez
« Already have an Account? » pour passer à l'étape suivante.
i1
Pour commencer - Connexion des appareils
17
3.3.4
Ajout de la caméra à votre compte
• Créez un nouveau compte et connectez-vous.
• Tapez sur Add Camera. (Image i2)
• Tapez sur « MBP85CONNECT ». (Image i3)
MBP85CONNECT
i2
i3
• Suivez les instructions affichées à l'écran pour activer la fonction Bluetooth®
de votre iPhone®/iPad®.
i4
18
Pour commencer - Connexion des appareils
i6
• Appuyez sur HOME (ACCUEIL) pour sortir du menu des réglages, puis
tapez sur l'application « Hubble for Motorola Monitors » pour afficher l'écran
d'accueil.
i7
Pour commencer - Connexion des appareils
19
iOS
i5
FRANÇAIS
• Tapez sur la touche Home (Accueil), puis ouvrez le menu « Settings »
(Réglages) pour activer la fonction Bluetooth® de votre iPhone®/iPad®.
• Suivez les étapes ci-dessus pour localiser la caméra dont l'identifiant est «
CameraHD-xxxxxxxxxx », puis tapez sur Continue lorsque votre iPhone® ou
iPad® s'est connecté à la caméra. (Image i8)
i8
• Sélectionnez votre réseau Wi-Fi®, tapez sur Continue, entrez votre mot de
passe, puis tapez sur Next. (Images i9 et i10)
i9
20
i10
Pour commencer - Connexion des appareils
FRANÇAIS
• La connexion de la caméra au réseau Wi-Fi® demande quelques minutes,
puis l'état de la connexion s'affiche (Images i11 et i12). Si la connexion
échoue, tapez sur Retry et recommencez à partir de l'étape 3.3.4 ci-dessus.
iOS
i11
i12
• Tapez sur Watch Live Camera pour visionner les images filmées par la
caméra. (Image i13)
• Tapez sur le logo Hubble pour revenir à la liste des caméras disponibles.
(Image i14)
i13
Pour commencer - Connexion des appareils
i14
21
4. Caméra
4.1
Alimentation électrique de la caméra
• Insérez la fiche micro USB de l’adaptateur secteur dans la prise micro USB à
l’arrière de la caméra et branchez l’adaptateur à une prise de courant
adéquate. Si cette dernière comporte un interrupteur, veillez à ce que celuici soit sur ON (MARCHE).
• Faites glisser le commutateur ON/OFF (MARCHE/ARRÊT) sur ON
(MARCHE) : la DEL bleue d’alimentation s’allume. (Remarque : pour
éteindre la caméra, placez le commutateur ON/OFF (MARCHE/ARRÊT) sur
OFF (ARRÊT).
4.2
Fonctions de la caméra :
Avec un appareil Android™
• Démarrez l'application Hubble sur votre appareil Android™.
• L’écran de visionnage vidéo s’ouvre.
4.2.1
Ajouter d'autres caméras
• Dans cet écran, tapez sur le logo Hubble pour aller à la page Add Camera.
(Image A13)
• Tapez sur Add Camera pour ajouter une caméra en suivant les étapes de
configuration pour les appareils Android™ dans la section 3.2.4. (Image A14)
22
Caméra
A14
Android™
A13
FRANÇAIS
• Les images filmées par la caméra qui vient d’être ajoutée s’affichent
automatiquement.
Caméra
23
4.2.2
Supprimer une caméra
Vous pouvez supprimer une caméra de votre compte comme suit :
• Tapez sur l'icône des réglages
dans la page de la liste des caméras, puis
tapez sur Camera Details. (Image A15)
• Sélectionnez Remove Camera, puis sur Yes pour supprimer la caméra de la
liste. (Image A16)
A15
24
A16
Caméra
4.2.3
Modifier les informations de votre compte
Vous pouvez modifier les informations de votre compte depuis votre appareil
Android™.
• Tapez sur Account dans la page d'accueil : les détails du compte s'affichent.
(Image A17)
• Tapez sur Change Password pour changer votre mot de passe en suivant les
instructions.
• Tapez sur Log Out pour vous déconnecter de votre compte.
• Tapez sur Freemium pour accéder au service d'enregistrement vidéo sur le
nuage. Pour plus de détails, visitez notre site http://www.hubbleconnected.com.
• Enable Disconnect Alert vous alerte par un bip lorsque la caméra est
déconnectée. Activez cette alerte en sélectionnant Yes.
• Tapez sur Send Log pour envoyer par courriel un rapport de l’application
Hubble for Motorola Monitors à notre serveur lorsqu'un agent du service à la
clientèle vous en fait la demande.
A17
Caméra
25
Android™
FRANÇAIS
• Tapez sur Use pour accéder à Remote Connection Setting (Configuration
connexion à distance), et sélectionnez Yes pour activer Use Remote Only
(Utiliser seulement à distance).
4.2.4
Réglages de la caméra
Vous pouvez modifier les réglages de la caméra en tapant sur l'icône des
réglages
dans la page de visionnage. (Image A18)
• Tapez sur Camera Details pour accéder à Camera Name, Change Image,
Firmware version, Model ID et Remove Camera. (Image A19)
A18
A19
• Tapez sur Notification Sensitivity pour régler la sensibilité de détection des
sons et des mouvements, et régler l'alerte de température trop élevée ou
trop basse. (Image A20)
A20
26
Caméra
4.2.5
Paramètres généraux
• Tapez sur Settings dans la page d'accueil.
FRANÇAIS
• Tapez sur General Settings pour choisir le format d'affichage de Clock (12
h/24 h), l'unité de Temperature (°C / °F), et activer Notification Sound ou
Vibration. (Image A21)
A22
Android™
A21
• Tapez sur Do Not Disturb, choisissez une durée et sélectionnez ON. La
caméra n'émettra aucun bip et n'enverra aucune alerte à votre appareil
Android™ pendant la période choisie. (Image A22)
Caméra
27
4.2.6
Fonctionnalités de l'application Hubble
Tapez sur la zone de visionnage pour afficher les icône suivantes :
Two Way Talk – Tapez sur l'icône du micro pour activer la fonction.
Appuyez une fois sur la touche ronde pour parler. Appuyez de nouveau pour
entendre le son capté par la caméra. (Images A23 et A24)
A23
28
A24
Caméra
Balayage et inclinaison :
A26
Android™
A25
FRANÇAIS
Tapez sur les touche haut/bas pour incliner la caméra vers le haut ou le bas et sur
les touches gauche/droite pour balayer de gauche à droite. (Images A25 et A26)
Caméra
29
Photo/Video - Prenez une photo ou enregistrez une vidéo avec votre caméra.
Tapez sur l'icône de la caméra pour activer la fonction photo/vidéo
Sélectionnez l'enregistrement vidéo en tapant sur la petite icône de la vidéo à
droite de la grande touche bleue, puis appuyez sur cette dernière pour
démarrer l'enregistrement. La touche devient rouge ; appuyez de nouveau pour
arrêter l'enregistrement. (Images A27 et A28)
Tapez sur la petite icône de l'appareil photo
à droite de la grande touche
bleue pour passer en mode appareil photo et tapez sur la grande touche bleue
pour prendre une photo. (Image A29)
A27
A28
A29
30
Caméra
Remarque :
Les photos et les vidéos sont stockées dans la mémoire flash interne de votre
appareil Android™ ; vous pouvez les visionner dans la galerie ou à l’aide du
lecteur multimédia. Pour visionner les vidéos, utilisez l’application « Hubble for
Motorola Monitors » ou une application tierce capable de prendre en charge le
format MJPG (Motion-jpeg), telle que MX Player de Google Play™ Store.
Melody – Pour jouer l’une des 5 mélodies préenregistrées, tapez sur Melody
pour afficher le menu Melody et sélectionner votre mélodie favorite qui sera
jouée via la caméra. (Image A30)
Android™
FRANÇAIS
Temperature – La température mesurée par le capteur situé au dos de la
caméra s'affiche sur votre appareil Android™ (Image A31). La valeur s'affiche en
rouge lorsque la température sort de la limite maximale ou minimale que vous
avez définie dans votre compte. (Voir section 4.2.4)
A30
Caméra
A31
31
4.3
Fonctions de la caméra :
Avec un iPhone®/iPad®
• Démarrez l'application Hubble sur votre iPhone®/iPad®.
• L’écran de visionnage vidéo s’ouvre.
4.3.1
Ajouter d'autres caméras
• Dans cet écran , tapez sur le logo Motorola pour aller à la page Add Camera.
(Image i15)
• Tapez sur Add Camera pour ajouter d'autres caméras en suivant les étapes
de configuration pour iPhone®/iPad® dans la section 3.3.4. (Image i16)
• Les images filmées par la caméra qui vient d’être ajoutée s’affichent
automatiquement.
i15
i16
Remarque :
Vous ne pouvez connecter que 4 caméras à un compte.
32
Caméra
4.3.2
Supprimer une caméra
Vous pouvez supprimer une caméra de votre compte comme suit :
• Tapez sur l'icône des réglages
Camera Details. (Image i17)
dans la page d'accueil, puis tapez sur
i17
Caméra
iOS
FRANÇAIS
• Sélectionnez Remove Camera, puis tapez sur Yes pour supprimer la caméra
de la liste. (Image i18)
i18
33
4.3.3
Modifier les informations de votre compte
Vous pouvez modifier les informations de votre compte à partir de votre
iPhone®/iPad®.
• Tapez sur Account dans la page d'accueil : les détails du compte s'affichent.
(Image i19)
• Tapez sur Change Password pour changer votre mot de passe en suivant les
instructions.
• Tapez sur Log Out pour vous déconnecter de votre compte.
• Tapez sur Current Plan pour accéder au service d'enregistrement vidéo sur
le nuage. Pour plus de détails, visitez notre site www.hubbleconnected.com/
motorola/plans.
• Tapez sur Send Log pour envoyer par courriel un rapport de l’application
Hubble for Motorola Monitors à notre serveur lorsqu'un agent du service à la
clientèle vous en fait la demande.
i19
34
Caméra
4.3.4
Réglages de la caméra
i21
• Tapez sur Notification Sensitivity pour régler la sensibilité de détection des
sons et des mouvements, et régler l'alerte de température trop élevée ou
trop basse. (Image i22)
i22
Caméra
35
iOS
i20
FRANÇAIS
Vous pouvez modifier les réglages de la caméra en tapant sur l’icône des
réglages
dans la page d'accueil (Image i20). Vous pouvez accéder à
Camera Name et Firmware version (Image i21), et changer le nom de la
caméra en tapant sur le nom existant et en suivant les instructions.
4.3.5
Paramètres généraux
• Tapez sur Settings dans la page d'accueil. (Image i23)
• Tapez sur General Settings pour choisir le format d'affichage de Clock
(12 h/24 h), l'unité de Temperature (°C / °F), et activer Notification Sound
ou Vibration. (Image i24)
i23
i24
• Tapez sur Do Not Disturb, choisissez une durée et sélectionnez ON
(ACTIVER). La caméra n'émettra aucun bip et n'enverra aucune alerte à
votre iPhone®/iPad® pendant la période choisie. (Image i25)
i25
36
Caméra
4.3.6
Paramètres de l'application Hubble
FRANÇAIS
• Tapez sur Settings sur votre iPhone®/iPad®; une liste d'applications s'affiche ;
tapez sur
et les paramètres s'affichent à l'écran. (Image i26)
iOS
i26
Caméra
37
4.3.7
Fonctionnalités de l'application Hubble
Tapez sur la zone de visionnage pour afficher les icônes suivantes :
Two Way Talk – Tapez sur l'icône du micro pour activer la fonction. Appuyez
une fois sur la touche ronde de la caméra pour parler. Appuyez de nouveau pour
entendre le son capté par la caméra. (Images i27 et i28)
i27
38
i28
Caméra
Balayage et inclinaison :
FRANÇAIS
Tapez sur l'icône aux 4 flèches pour activer la fonction de balayage et
d'inclinaison. Appuyez sur les flèches haut/bas pour incliner la caméra vers le
haut ou le bas, et sur les flèches droite/gauche pour faire pivoter la caméra vers
la droite ou la gauche. (Images i29 et i30)
Caméra
i30
iOS
i29
39
Appareil photo - Tapez sur l'icône de l'appareil photo
pour activer la
fonction. Appuyez sur la grande touche bleue pour prendre une photo. (Image
i31)
i31
Remarque :
Les photos sont stockées dans la mémoire flash interne de votre iPhone®/
iPad®.
40
Caméra
Melody – Pour jouer l’une des 5 mélodies préenregistrées, tapez sur Melody
pour afficher le menu Melody et sélectionner votre mélodie favorite qui sera
jouée via la caméra. (Image i32)
i32
Caméra
iOS
FRANÇAIS
Temperature – La température mesurée par le capteur situé au dos de la
caméra s'affiche sur votre iPhone®/iPad® (Image i33). La valeur s'affiche en
rouge lorsque la température sort de la limite maximale ou minimale que vous
avez définie dans votre compte. (Voir section 4.3.5)
i33
41
4.4
Fonctions de la caméra :
Avec un PC ou ordinateur portable
• Rendez-vous sur : http://www.hubbleconnected.com/motorola/login/
• Entrez votre nom d’utilisateur et votre mot de passe, puis cliquez sur Login si
vous avez déjà créé un compte.
• Cliquez sur la caméra couplée à votre compte à l’aide de votre appareil
Android™ ou de votre iPhone®/iPad® pour ouvrir l'écran de visionnage.
Vous pouvez facilement rester en contact avec vos proches et vos lieux et
animaux familiers favoris grâce au streaming vidéo en direct.
• Sur le site Web, vous pouvez également modifier les réglages en suivant les
instructions du menu.
42
Caméra
5. Procédure de réinitialisation de la
caméra
1.
2.
3.
4.
Faites glisser le commutateur ON/OFF (MARCHE/ARRÊT) sur OFF
(ARRÊT).
Maintenez la touche PAIR (COUPLAGE) enfoncée et faites glisser le
commutateur ON/OFF (MARCHE/ARRÊT) sur ON (MARCHE).
Relâchez la touche PAIR (COUPLAGE) lorsque vous entendez un bip de
confirmation et attendez la fin de la procédure de réinitialisation. Lorsque la
caméra est réinitialisée, la DEL rouge clignote doucement.
Ajoutez de nouveau votre caméra en suivant les étapes de la section 3.2.4
pour les appareils Android™ ou de la section 3.3.4 pour les appareils iOS.
Procédure de réinitialisation de la caméra
43
FRANÇAIS
Remarque : si vous déplacez votre caméra d’un routeur à un autre (par exemple
de chez vous à votre bureau), ou que vous rencontrez des difficultés pour
configurer la caméra, celle-ci doit être réinitialisée. Réinitialisez la caméra de la
façon suivante :
6. Aide
Interférences sonores
Pour éviter les bruits de fond ou l’écho, veillez à ce qu’il y ait une distance
suffisante entre votre appareil et la caméra Wi-Fi®.
L’utilisation d’autres appareils 2.4 GHz tels que les systèmes Bluetooth® ou les
fours à microondes peut causer des interférences avec ce produit. Tenez la
caméra Wi-Fi® éloignée d’au moins 1,5 mètres de tels appareils, ou éteignez-les
s’ils semblent provoquer des interférences.
Perte de connexion
Vérifiez vos paramètres Wi-Fi®. Reconnectez votre Wi-Fi® si nécessaire. Vérifiez
que la caméra Wi-Fi® est allumée. Attendez quelques minutes pour établir la
connexion avec votre réseau Wi-Fi.
Si vous avez oublié votre mot de passe
Si vous avez oublié votre mot de passe, tapez sur « Forgot Password » et
entrez votre adresse de courriel. Un nouveau mot de passe sera
immédiatement envoyé à cette adresse.
Dépannage
Catégorie
Description du
problème ou de
l'erreur
Solution
Compte
Je ne peux pas me
connecter, même
après avoir créé mon
compte.
Vérifiez votre nom d'utilisateur et
votre mot de passe.
Compte
Je reçois le message
d'erreur suivant : «
Email ID is not
registered ».
Vérifiez que vous avez bien un
compte chez nous. Tapez sur Create
Account pour créer un compte qui
vous permettra d'utiliser la caméra
Wi-Fi®.
44
Aide
Que faire si j'ai oublié
mon mot de passe ?
Cliquez sur le lien « Forgot Password »
sur la page http://
www.hubbleconnected.com/
motorola/login/ OU dans votre
application pour Android™ ou iOS. Un
courriel sera envoyé à votre adresse.
Compte
1.
Je ne reçois pas de
nouveau mot de passe
bien que j'aie cliqué sur
2.
« Forgot Password ».
Problèmes de Je reçois le message 1.
connectivité suivant : We are having
problems accessing
your Camera. This
2.
could be due to the
lack of an internet
3.
connection. Please
wait and try again later.
Visionnage
En « Mode distant », la
vidéo s'arrête au bout
de 5 minutes.
Comment puis-je la
visionner plus
longtemps ?
Le message se trouve peutêtredans votre dossier spam.
Vérifiez votre dossier spam
Il peut y avoir un retard dans la
réception de votre courriel.
Attendez quelques minutes et
réactualisez votre boîte de
réception.
Attendez quelques minutes, puis
réessayez. Cela pourrait être dû à
un problème avec votre
connexion Internet.
Si le problème persiste, essayez
de redémarrer votre caméra .
Redémarrez votre routeur sans fil.
Lorsque vous accédez à votre caméra
via un réseau différent de votre réseau
domestique (via Internet) votre vidéo
s’arrête au bout de 5 minutes.
Cliquez de nouveau sur la caméra
dans votre application Android™/
iOS pour redémarrer le streaming.
Si vous accédez à la caméra depuis
votre navigateur, cliquez sur Reload
pour redémarrer le streaming de
votre caméra.
Aide
45
FRANÇAIS
Compte
Fonctions
Le seuil d’alerte sonore Réglez la sensibilité de notification
est incorrect
dans le menu des réglages de la
caméra.
Problèmes de L'application de mon
connectivité téléphone affiche le
message suivant : «
Unable to connect to
BMS server ».
1.
2.
3.
Vérifiez la puissance du signal WiFi®.
Vérifiez si vous êtes connecté à
Internet en démarrant le
navigateur de votre téléphone et
en allant sur un site Web connu
tel que www.google.com.
Essayez de nouveau si vous avez
réussi à vous connecter à
Internet.
Installation
Lorsque je veux ajouter
une nouvelle caméra à
mon compte, je n'en
trouve aucune.
Si vous essayez d'ajouter une caméra
qui avait déjà été ajoutée à votre
compte ou à un autre compte, vous
devez d’abord réinitialiser cette
caméra. Pour cela, maintenez la
touche PAIR (COUPLAGE) située
sous la caméra enfoncée pendant 5
secondes.
Général
Quels sont les
navigateurs pris en
charge pour accéder à
ma caméra depuis mon
PC/Mac®?
Sur PC et Mac® , nous
recommandons Google Chrome™.
Cependant, les navigateurs suivants
sont également pris en charge :
PC : Internet Explorer® 9 ou version
ultérieure. Mac® : Safari® 6.0.
46
Aide
Général
Que signifie la DEL
clignotante ?
La DEL clignote pour indiquer les
états suivants :
Clignotement lent : 2. La caméra est en
train de se connecter au routeur, ou a
perdu sa liaison avec celui-ci. Vérifiez
que la caméra est à la portée du signal
Wi-Fi ® .
DEL fixe : La caméra est connectée au
réseau Wi-Fi ® .
Problèmes de Je ne peux pas
Vérifiez que la caméra est à la portée
connectivité accéder à ma caméra. du signal Wi-Fi®. Si la DEL de votre
caméra clignote lentement, essayez
de rapprocher la caméra du routeur
pour une meilleure réception du
signal Wi-Fi®, puis réessayez.
Aide
47
FRANÇAIS
Clignotement lent : 1. Votre caméra est
en mode de configuration. Dans ce
mode, vous pouvez ajouter la caméra à
votre compte . Lorsque vous la sortez
de la boîte, la caméra est en mode de
configuration. Maintenez la touche
PAIR (COUPLAGE) située sous la
caméra enfoncée jusqu'à ce que vous
entendiez un bip.
Pendant la dernière
étape de la
configuration pour un
appareil Android™ ou
iOS, je ne trouve pas
ma caméra et la
configuration échoue.
Réinitialisez la caméra et réessayez.
Maintenez la touche PAIR
(COUPLAGE) située sous la caméra
enfoncée jusqu'à ce que vous
entendiez un bip. Attendez une
minute que la caméra redémarre.
Lorsque la DEL clignote, la caméra est
en mode de configuration.
Redémarrez alors la procédure de
configuration sur votre Smartphone.
Problèmes de Bien que j’accède à ma
connectivité caméra depuis le
même réseau Wi-Fi®,
elle apparaît toujours
comme distante. Je ne
peux y accéder que
pendant 5 minutes à la
fois.
Vérifiez les paramètres de votre
routeur sans fil. Par exemple, les
routeurs de marque Buffalo disposent
d’une option appelée Wireless
Isolation (Isolation sans fil). Désactivez
cette option.
Caméra
Mettez le microprogramme à jour.
Cela demande environ 5 minutes.
Nous proposons des mises à jour de
temps à autre afin d’améliorer les
fonctionnalités de la caméra.
Installation
48
Lorsque j’essaye
d’utiliser la caméra, je
suis invité à mettre le
microprogramme à
jour. Que dois-je faire ?
Aide
Général
Quelles plateformes
sont prises en charge
pour accéder à ma
caméra ?
Configuration minimale :
Windows ® 7 avec plugin Java pour
navigateur
Mac OS ® 10.7
Chrome™ 24
Internet Explorer ® 9
Safari ® 6
Java™ 7
Firefox ® 18.0
Android™ 4.2
iOS 7.0 pour iPhone ® /iPad ®
Général
Je n’entends pas le son Tapez sur l’icône du haut-parleur dans
lorsque j’accède à une l’écran de visionnage pour activer
l’audio. Par défaut, l’audio est
caméra distante.
DÉSACTIVÉ lorsque vous accédez à
une caméra distante.
Général
Que signifie « caméra
locale » et « caméra
distante » ?
Aide
Lorsque vous accédez à votre caméra
depuis le réseau sans fil (chez vous)
avec lequel elle a été configurée, c’est
une caméra locale. Lorsque vous
accédez à votre caméra loin de chez
vous, c’est une caméra distante. Vous
pouvez utiliser une connexion 3G, 4G,
4G LTE ou Wi-Fi ® loin de chez vous.
49
FRANÇAIS
Adobe ® Flash ® Player 15.0
Général
Comment télécharger Android™ :
l'applicationpour les
- Allez sur Google Play Store sur
appareils Android™ et
votre appareil Android™
iOS ?
- Sélectionnez Search (Chercher)
- Entrez « Hubble for Motorola
Monitors »
- Le résultat sera l'application Hubble
- Sélectionnez-la pour l’installer
iOS :
- Ouvrez l'App StoreSM
- Sélectionnez Search (Chercher)
- Entrez « Hubble for Motorola
Monitors »
- Le résultat sera l'application Hubble
- Sélectionnez-la pour l’installer
Installation
Lorsque la vidéo est
coupée, l'application
tente de se reconnecter,
le son est perdu et la
vidéo est saccadée.
Vous devez désactiver la fonction de
verrouillage automatique de votre
appareil intelligent pour que le
streaming audio/vidéo ne soit pas
interrompu.
Fonctions
Combien d’utilisateurs
peuvent accéder
simultanément à une
caméra ?
En mode local, deux utilisateurs
peuvent accéder à une caméra. Audelà de deux utilisateurs, le streaming
passe par un serveur distant. Cela
permet à un nombre illimité
d’utilisateurs d’accéder
simultanément à une seule caméra.
Problèmes de Mes autres webcams
connectivité provoquent des
interférences.
50
L’efficacité du streaming vidéo est
liée à la bande passante Internet,
surtout si vous avez deux ou plusieurs
dispositifs de streaming vidéo
connectés au même routeur.
Aide
7. Informations générales
Si votre produit ne fonctionne pas correctement…
1.
2.
Lisez ce Guide de l'utilisateur ou le guide de démarrage rapide.
Adressez-vous à notre service clientèle :
+49 (0) 1805 938 802 en Europe
Courriel : [email protected]
Nous vous remercions d'avoir choisi ce produit de marque Motorola fabriqué
sous licence par Binatone Electronics International LTD (« BINATONE »).
Que couvre la présente Garantie ?
Sous réserve des exclusions ci-dessous, la société BINATONE garantit que ce
produit (« Produit ») de marque Motorola ou cet accessoire certifié et vendu
pour être utilisé avec le Produit (« Accessoire ») fabriqué par BINATONE est
exempt de défauts de matériaux et de fabrication, sous réserve d’une utilisation
normale pendant la période stipulée ci-dessous. La présente Garantie est votre
unique garantie et n’est pas transférable.
Qui est couvert par la présente Garantie ?
La présente Garantie couvre uniquement le premier acheteur du Produit et n’est
pas transférable.
Que fera BINATONE ?
BINATONE ou son distributeur agréé réparera ou remplacera gratuitement, à sa
discrétion et pendant une période commercialement raisonnable, tout Produit
ou Accessoire qui ne serait pas conforme à la présente Garantie. Nous pourrons
utiliser des Produits, Accessoires ou pièces remis à neuf, d’occasion ou neufs,
dont les fonctionnalités sont équivalentes.
Informations générales
51
FRANÇAIS
Garantie limitée pour les produits et accessoires grand public
(« Garantie »)
Quelle sont les autres limites de la Garantie ?
TOUTE GARANTIE IMPLICITE, Y COMPRIS, SANS S’Y LIMITER, LES
GARANTIES IMPLICITES DE QUALITÉ MARCHANDE ET D'ADAPTATION À
UN USAGE PARTICULIER, SERA LIMITÉE À LA DURÉE DE LA PRÉSENTE
GARANTIE, SINON LA RÉPARATION OU LE REMPLACEMENT FOURNIS EN
VERTU DE LA PRÉSENTE GARANTIE LIMITÉE CONSTITUERONT LE SEUL
RECOURS DU CONSOMMATEUR ET SERONT OFFERTS EN LIEU ET PLACE
DE TOUTE AUTRE GARANTIE EXPLICITE OU IMPLICITE. EN AUCUN CAS
MOTOROLA OU BINATONE NE POURRONT ÊTRE TENUS RESPONSABLES,
QUE CE SOIT PAR CONTRAT OU DÉLIT CIVIL (Y COMPRIS NÉGLIGENCE),
DE TOUT DOMMAGE AU-DELÀ DU PRIX D’ACHAT DU PRODUIT OU
ACCESSOIRE, OU DE DOMMAGES INDIRECTS, ACCESSOIRES,
PARTICULIERS OU CONSÉCUTIFS, OU DE TOUTE AUTRE PERTE DE
REVENUS OU BÉNÉFICES, PERTE D'INFORMATION OU AUTRES PERTES
FINANCIÈRES DÉCOULANT DE OU EN RELATION AVEC LA CAPACITÉ OU
L'INCAPACITÉ D'UTILISER LES PRODUITS OU LES ACCESSOIRES. CES
INDEMNISATIONS PEUVENT NE PAS ÊTRE RECONNUES PAR LA LOI.
Certaines juridictions n'autorisant pas l'exclusion ou la limitation des dommages
indirects ou consécutifs, ou la limitation de la durée d'une garantie implicite, il
est possible que les limitations ou exclusions susmentionnées ne vous
concernent pas. La présente Garantie vous accorde des droits légaux
spécifiques et vous pouvez aussi bénéficier d’autres droits différents d’une
juridiction à une autre.
52
Informations générales
Produits garantis
Produits grand public
Accessoires grand public
Produits et accessoires grand
public réparés ou remplacés
Durée de garantie
Un (2) an à compter de la date d’achat du
produit par le premier acheteur de celui-ci.
Quatre-vingt-dix (90) jours à compter de
la date d’achat de l’accessoire par le
premier acheteur de celui-ci.
La durée la plus longue entre la durée
restante de la garantie originale et
quatre-vingt-dix (90) jours à compter de
la date de renvoi au client.
Usure normale. L'entretien périodique, la réparation et le remplacement des
pièces suite à une usure normale sont exclus de la présente Garantie.
Piles. Seules les piles dont la pleine capacité est inférieure à 80% de la capacité
nominale et les piles défectueuses sont couvertes par la présente Garantie.
Mauvais traitements et mauvais usage. Défectuosités ou dommages résultant
: (a) de l’utilisation et du stockage inappropriés, de l’usage anormal ou abusif,
des accidents ou négligences tels que dégâts matériels (fissures, rayures, etc.) à
la surface du produit suite à une mauvaise utilisation ; (b) d’un contact avec un
liquide, l’eau, la pluie, une humidité excessive ou une forte transpiration, le
sable, la saleté ou similaire, une chaleur excessive ou la nourriture ; (c) de
l’utilisation du produit ou des accessoires à des fins commerciales ou de nature
à soumettre le produit ou les accessoire à un usage ou à des conditions
anormales ; ou (d) de tout autre acte étranger à MOTOROLA ou à BINATONE,
ne sont pas couverts par la présente Garantie.
Utilisation de Produits ou Accessoires de marques autres que Motorola. Les
défauts ou dommages résultant de l'utilisation de Produits, d’Accessoires ou
périphériques de marques autres que Motorola, ou non approuvés par
Motorola, ne sont pas couverts par la présente Garantie.
Entretien ou modifications non autorisés. Les défauts ou dommages résultant de
réparations, essais, réglages, installation, entretien, transformation ou modification,
effectués par des tiers autres que MOTOROLA, BINATONE ou leurs centres de
service après-vente agréés, ne sont pas couverts par la présente garantie.
Informations générales
53
FRANÇAIS
Exclusions
Produits altérés. Les Produits ou Accessoires dont (a) les plaques signalétiques
a été enlevée, altérée ou effacée ; (b) les scellés sont cassés ou
présentent des signes évidents de manipulation ; (c) les numéros de série des
cartes ne correspondent pas ;
ou (d) les boîtiers ou certaines pièces ne sont pas conformes ou sont d’une
marque autre que Motorola, ne sont pas couverts par la présente Garantie.
Services de communications. Les défauts, dommages ou défaillances des
Produits ou Accessoires causés par tout service ou signal de communication
auquel vous êtes abonné, ou que vous utilisez avec les Produits ou Accessoires,
ne sont pas couverts par la présente Garantie.
Comment faire pour faire réparer votre appareil sous garantie ou
obtenir d’autres informations ?
Pour faire réparer votre appareil sous garantie ou obtenir d’autres informations,
veuillez vous adresser à notre service clientèle :
+49 (0) 1805 938 802 en Europe
Courriel : [email protected]
Vous recevrez des instructions sur la façon d'expédier les Produits ou
Accessoires à un centre de réparation agréé BINATONE, à vos frais et risques.
Pour faire réparer votre Produit ou Accessoire sous garantie, vous devrez
fournir : (a) le produit ou l’accessoire ; (b) la facture originale portant la date et le
lieu de l’achat, ainsi que le nom du fournisseur ; (c) si une carte de garantie se
trouvait dans l’emballage, cette dernière remplie portant le numéro de série du
produit ; (d) une description écrite du problème et, le plus important, (e) votre
adresse et votre numéro de téléphone.
Ces conditions générales constituent l'accord intégral de garantie entre vous et
BINATONE concernant les Produits ou Accessoires achetés par vous, et
remplacent tout accord ou déclaration antérieurs, y compris les déclarations
faites dans n’importe quelle publication ou matériel promotionnel émis par
BINATONE, ou les déclarations faites dans le cadre dudit achat par un agent ou
employé de BINATONE.
54
Informations générales
BINATONE TELECOM PLC
1 Apsley Way London NW2 7HF,United Kingdom.
Tel: +44(0) 20 8955 2700 Fax: +44(0) 20 8344 8877
e-mail: [email protected]
________________________________________
.
EC Declaration of Conformity
We the manufacturer / Importer :
Binatone Telecom Plc
1 Apsley Way London
NW2 7HF, United Kingdom.
Declare under our sole responsibility that the following products
Wi-Fi Video Camera
Type of equipment:
FOCUS85, FOCUS85-B, FOCUS85-S, FOCUS85-W
Model Name:
SCOUT85, MBP85CONNECT
China
Motorola
FRANÇAIS
Country of Origin:
Brand:
complies with the essential protection requirements of R&TTE Directive 1999/5/EC on the
approximation of the laws of the Member States relating to Radio Spectrum Matters, the
Council Directive
/108/EC on the approximation of the laws of the Member States
relating to electromagnetic compatibility (EMC) and the European Community Directive
2006/95/EC relating to Electrical Safety. Directive 2011/65/EC on the restriction of use of
hazardous substances (RoHS) and 2009/125/EC relating to ecodesign requirement for
Energy-Related Products (ErP).
Assessment of compliance of the product with the requirements relating to the essential
requirements according to Article 3 R&TTE was based on Annex III of the Directive
1999/5/EC and the following standard:
Radio Spectrum:
EMC:
Electrical Safety:
RF Safety:
EN300328 V1.8.1:2012
EN301489-17 V2.2.1:2012
EN301489-1 V1.9.2:2011
EN60950-1/A12:2011
EN62311:2010
The product is labelled with the European Approval Marking CE as show. Any Unauthori ed
modification of the product voids this Declaration.
Manufacturer / Importer
(Signature of authori ed person)
London, 30 May , 2014
Karl Heinz Mueller / Chief Technical Officer
Informations générales
Place & Date
55
8. Caractéristiques techniques
Caméra
Wi-Fi ®
802.11 b/g/n
Capteur d’images
CMOS couleur 1 Mégapixels
Objectif
f = 2.5 mm, F = 2.8
DEL IR
8
Adaptateur secteur
Ten Pao International Ltd.
S009GV0500150
Entrée : 100-240 V CA, 50/60 Hz, 300 mA
Sortie : 5 V CC, 1500 mA
56
Caractéristiques techniques
Fabriqué, distribué ou vendu par Binatone Electronics International LTD., détenteur
officiel de la licence pour ce produit. MOTOROLA et le logo M stylisé sont des
marques déposées ou brevetées de Motorola Trademark Holdings, LLC. et sont
utilisés sous licence. Le logo Apple et Safari sont des marques commerciales
d’Apple Inc., déposées aux États-Unis et dans d’autres pays. App Store est une
marque de service d'Apple Inc. Google Play, Android et Chrome sont des marques
commerciales de Google Inc. Wi-Fi est une marque commerciale de Wi-Fi Alliance.
Internet Explorer et Windows sont des marques commerciales du groupe
Microsoft. Firefox est une marque déposée de la Mozilla Foundation. Adobe et Flash
sont soit des marques déposées, soit des marques commerciales d'Adobe Systems
Incorporated. Java est une marque déposée d’Oracle et/ou de ses filiales. Toutes
les autres marques commerciales sont la propriété à leurs détenteurs respectifs.
© 2015 Motorola Mobility LLC. Tous droits réservés.
FR_EU Version 2.0
Imprimé en Chine
GEBRUIKERSHANDLEIDING
Wi-Fi® Video Baby Monitor Camera
Model: MBP85CONNECT
De functies beschreven in deze handleiding zijn onderhevig aan wijzigingen zonder voorafgaande
kennisgeving.
Welkom...
Dit is uw nieuwe Motorola Wi-Fi® Video Baby Monitor
Camera!
Dank u voor de aankoop van uw nieuwe Motorola Wi-Fi® Video Baby Monitor
Camera. Met dit apparaat kunt u uw baby in een andere kamer in het oog
houden of u kunt op uw oudere kinderen letten als ze in een andere kamer
spelen. U kunt de Camera App alleen met uw iPhone®/iPad® of andere
Android™ apparaten installeren en de videostream van de Camera op uw PC
of Notebook, andere Android™ apparaten of iPhone®/iPad® bekijken.
Bewaar uw originele aankoopbewijs voor uw administratie. Voor service onder
garantie van uw Motorola-product, moet u een kopie van uw gedateerde
aankoopbon overleggen om aanspraak te maken op garantie. Registratie is niet
vereist voor de garantie.
Voor vragen over het product kunt u bellen naar:
+49 (0) 1805 938 802 in Europa
Email: [email protected]
Deze gebruikershandleiding bevat alle informatie die u nodig hebt om optimaal
van uw product te profiteren.
Lees de Veiligheidsvoorschriften op pagina's 5 - 6 voordat u het apparaat
installeert.
Inhoudsverpakking
• 1 x Wi-Fi® Camera
• 1 x voedingsadapter
• 1 x Snelstartgids
• 1 x Gebruikershandleiding
In uitvoeringen met meerdere camera’s vindt u meerdere camera’s en
voedingsadapters.
Overzicht van uw Camera
1
2
8
3
4
5
9
1.
2.
3.
4.
5.
6
10
7
11
Lichtsensor (voor nachtmodus
detectie)
Cameralens
Infrarode LEDs (voor nachtzicht)
Voeding/status-indicator
Microfoon
KOPPELING-toets
Luidspreker
8. Antenne
9. Micro USB-aansluiting
10. AAN/UIT-schakelaar
11. Temperatuursensor
6.
7.
Belangrijke richtlijnen voor het installeren van uw Wi-Fi® Camera
• Gebruik van andere 2.4 GHz-producten, zoals andere draadloze netwerken,
Bluetooth® systemen of magnetrons kunnen interferentie met dit product
kunnen veroorzaken. Houd de Wi-Fi® Camera uit de buurt van deze types
producten, of schakel ze uit als ze interferentie lijken te veroorzaken.
• Zorg altijd dat er een goede Wi-Fi® verbinding beschikbaar is.
Inhoud
1.
2.
3.
Veiligheidsinstructies........................................................................................ 5
Systeemeisen..................................................................................................... 8
Aan de slag - Apparaten aansluiten ................................................................... 9
3.1
3.2
3.3
4.
Camera ............................................................................................................ 22
4.1
4.2
4.3
4.4
5.
6.
7.
8.
4
Instellen.................................................................................................................9
Gebruikersaccount en Camera-instelling op Android™ apparaten ...............10
3.2.1
De MBP85CONNECT Camera inschakelen een aansluiten ...........10
3.2.2
Download de Hubble for Motorola Monitors applicatie .................10
3.2.3
Activeer de Hubble for Motorola Monitors App op uw Android™
apparaat ............................................................................................11
3.2.4
Een Camera aan uw account toevoegen ........................................12
Gebruikersaccount en Camera-instelling:
Gebruik met iPhone®/iPad® ............................................................................ 16
3.3.1
De MBP85CONNECT Camera inschakelen een aansluiten ...........16
3.3.2
Download de Hubble for Motorola Monitors App ...........................16
3.3.3
Activeer de Hubble for Motorola Monitors op uw iPhone®/
iPad® .................................................................................................17
3.3.4
Een Camera aan uw account toevoegen ........................................18
De Camera op voeding aansluiten....................................................................22
Camera-functies:
Gebruik met Android™ apparaten...................................................................22
4.2.1
Meer Camera's toevoegen ..............................................................22
4.2.2
Een Camera verwijderen .................................................................24
4.2.3
Uw Accountgegevens veranderen ..................................................25
4.2.4
Camera-instellingen .........................................................................26
4.2.5
Algemene instellingen ......................................................................27
4.2.6
Functies van de Hubble Applicatie ..................................................28
Camera-functies:
Gebruik met iPhone®/iPad®................................................................................................................. 32
4.3.1
Meer Camera's toevoegen ..............................................................32
4.3.2
Een Camera verwijderen .................................................................33
4.3.3
Uw Accountgegevens veranderen ..................................................34
4.3.4
Camera-instellingen .........................................................................35
4.3.5
Algemene instellingen ......................................................................36
4.3.6
Hubble App instellingen ...................................................................37
4.3.7
Functies van de Hubble Applicatie ..................................................38
Camera-functies:
Gebruik met een PC/Notebook........................................................................42
Procedure voor het resetten van de Camera ................................................. 43
Hulp.................................................................................................................. 44
Algemene informatie....................................................................................... 52
Technische gegevens ..................................................................................... 57
Inhoud
1. Veiligheidsinstructies
WAARSCHUWING:
Veiligheidsinstructies
NEDERLANDS
Wurgingsgevaar: Kinderen zijn met snoeren
GEWURGD. Houd dit snoer buiten bereik van
kinderen (meer dan 1 meter afstand). Nooit
verlengsnoeren gebruiken met
voedingsadapters. Gebruik uitsluitend de
meegeleverde voedingsadapters.
5
De Wi-Fi® CAMERA OPSTELLEN EN GEBRUIKEN:
● Kies een plaats voor de Wi-Fi® Camera die goed zicht geeft op de
baby in de wieg.
● Plaats de Wi-Fi® Camera op een vlakke ondergrond, zoals een
commode, bureau, plank of monteer het toestel aan de muur met
gebruik van de opening aan de onderkant van de Camera.
● Plaats de Wi-Fi® Camera of de snoeren NOOIT in de wieg.
6
Veiligheidsinstructies
WAARSCHUWING
Deze Wi-Fi® Camera is compatibel met alle relevante elektromagnetisch
normen en is, mits behandeld volgens de Gebruikershandleiding, veilig in
gebruik. Lees de aanwijzingen in de Gebruikershandleiding aandachtig door
alvorens het apparaat te gebruiken.
Veiligheidsinstructies
NEDERLANDS
• Montage moet door de aanwezigheid van kleine onderdelen door een
volwassene worden uitgevoerd. Houd alle kleine onderdelen uit de buurt
van kinderen.
• Dit product is geen speelgoed. Voorkom dat kinderen er mee spelen.
• Deze Wi-Fi® Camera is geen vervanging voor verantwoordelijk toezicht
door volwassenen.
• Bewaar deze Gebruikershandleiding om later te kunnen raadplegen.
• De Wi-Fi® Camera niet afdekken met een handdoek of deken.
• Test de Wi-Fi® Camera en alle functies zodat u bekend met het apparaat
voordat u het in gebruik neemt.
• Gebruik de Wi-Fi® Camera niet in de buurt van water.
• De Wi-Fi® Camera niet installeren in de buurt van een warmtebron.
• De contactpunten niet met scherpe of metalen voorwerpen aanraken.
7
2. Systeemeisen
Webportal
• Windows® 7
• Mac OS® 10.7
• Chrome™ 24
• Internet Explorer® 9
• Safari® 6
• Java™ 7
• Firefox® 18.0
• Adobe® Flash® Player 15.0
Android™ Systeem
• Versie 4.2 of hoger
iPhone®/iPad® iOS
• Versie 7.0 of hoger
Breedband (Wi-Fi®) Internet
• Ten minste 0,6 Mbps upload-bandbreedte per Camera (u kunt uw
internetsnelheid testen op deze site: http://www.speedtest.net)
8
Systeemeisen
3. Aan de slag - Apparaten aansluiten
Hoe werkt het?
MBP85
CONNECT
Wi-Fi® Router
Het beeld van uw Camera vanaf
een compatibel apparaat extern
weergeven
Hubble
Service
Wanneer een gebruiker probeert toegang te krijgen tot de Camera, verifieert
onze beveiligde server de identiteit van de gebruiker en geeft toegang tot de
Camera.
Instellen
Sluit de Camera aan op de Voedingsadapter en sluit deze aan op een geschikt
stopcontact. Zet de schakelaar op de stand AAN. De Camera moet binnen bereik
zijn van de Wi-Fi® router waarmee u verbinding wilt maken. Houd het wachtwoord
van de router bij de hand tijdens het installatieproces van de in-app.
Status van LED-indicator:
- Koppelen / Instellingstatus: De LED is rood en blauw en knippert langzaam
- Niet aangesloten status:
De LED is rood en knippert langzaam
- Aangesloten status:
LED is blauw en is constant aan
- Klaar voor aansluitingstatus: LED is rood en knippert langzaam
Opmerking: U kunt de instelling alleen uitvoeren met een compatibele
smartphone of tablet en niet via een PC.
Aan de slag - Apparaten aansluiten
9
NEDERLANDS
3.1
3.2
Gebruikersaccount en Camera-instelling op Android™
apparaten
Wat u nodig hebt
• MBP85CONNECT Camera
• MBP85CONNECT Camera voedingsadapter
• Apparaat met Android™ systeem versie 4.2 of hoger
3.2.1
De MBP85CONNECT Camera inschakelen een aansluiten
• Sluit de voedingsadapter aan op een stopcontact en steek de stekker in de
micro USB-aansluiting aan op de achterzijde van de Camera.
• Zorg ervoor dat de AAN/UIT-schakelaar op AAN staat.
• De rode LED van de Camera knippert nadat het opstarten van de Camera is
voltooid. Wanneer u twee 'pieptonen' hoort, is de Camera klaar voor installatie.
3.2.2
Download de Hubble for Motorola Monitors applicatie
• Ga naar de Google Play™ Store en zoek naar “Hubble for Motorola Monitors”.
• Download de Hubble for Motorola Monitors applicatie van de Google Play™
Store en installeer het op uw Android™ apparaat.
10
Aan de slag - Apparaten aansluiten
3.2.3
Activeer de Hubble for Motorola Monitors App op uw
Android™ apparaat
• Zorg ervoor dat uw Android™ apparaat is aangesloten op uw Wi-Fi® router.
• Activeer de Hubble for Motorola Monitors applicatie en voer de
accountinformatie in. Selecteer “I agree to the Terms of Use” en tik op
Create. (Afbeelding A1)
NEDERLANDS
Opmerking: Als u al over een Hubble for Motorola Monitors account beschikt,
selecteer dan Already have a Account? om naar de volgende stap te gaan.
Android™
A1
Aan de slag - Apparaten aansluiten
11
3.2.4
Een Camera aan uw account toevoegen
• Een nieuwe account aanmaken en inloggen.
• Tik op Add Camera. (Afbeelding A2)
• Tik op Continue. (Afbeelding A3)
A2
A3
• De installatie-instructies verschijnen op het scherm. (Afbeelding A4)
A4
12
Aan de slag - Apparaten aansluiten
• De KOPPELING toets aan de zijkant van de MBP85CONNECT Camera 3
seconden ingedrukt houden. U hoort een pieptoon en een stem die zegt
“Ready to Pairing” van de Camera. Tik op Search for Camera.
A6
Android™
A5
NEDERLANDS
• De App zoekt automatisch naar verbinding met uw Camera zoals getoond
de onderstaande afbeeldingen (Afbeeldingen A5, A6) en de LED op de
Camera knippert groen/rood.
Aan de slag - Apparaten aansluiten
13
• Selecteer Wi-Fi® Network en tik op Continue. Het wachtwoord voor het
geselecteerde network invoeren en op OK tikken. (Afbeeldingen A7, A8)
A7
A8
• Het duurt een paar minuten voor de Camera verbinden maakt met het WiFi® netwerk voordat de verbindingsstatus wordt getoond (Afbeeldingen A9,
A10). Als de aansluiting mislukt, op Retry drukken en de stappen in 3.2.4
herhalen.
A9
14
A10
Aan de slag - Apparaten aansluiten
• Tik op Watch Live Camera om het beeld van de Camera te bekijken. De
blauwe LED van de Camera knippert. (Afbeelding A11)
• Tik op het Hubble-logo om terug te gaan naar het tabblad Camera voor een
lijst met beschikbare Camera's. (Afbeelding A12)
A12
Android™
NEDERLANDS
A11
Aan de slag - Apparaten aansluiten
15
3.3
Gebruikersaccount en Camera-instelling:
Gebruik met iPhone®/iPad®
Wat u nodig hebt
• MBP85CONNECT Camera
• MBP85CONNECT Camera voedingsadapter
• iPhone®/iPad® met iOS versie 7.0 of hoger
3.3.1
De MBP85CONNECT Camera inschakelen een aansluiten
• De MBP85CONNECT adapter op een geschikt stopcontact aansluiten.
Steek de stekker in de microUSB-ingang aan de achterkant van de
MBP85CONNECTCamera.
• Zorg ervoor dat de AAN/UIT-schakelaar op AAN staat.
• De rode LED van de Camera gaat knipperen nadat het opstarten van de
Camera is voltooid. Dit geeft aan dat de Camera klaar is om ingesteld te
worden.
3.3.2
Download de Hubble for Motorola Monitors App
• Ga naar de App Store en zoek naar de "Hubble for Motorola Monitors” app.
• Download de Hubble for Motorola Monitors App en instelleer deze op uw
iPhone®/iPad®.
16
Aan de slag - Apparaten aansluiten
3.3.3
Activeer de Hubble for Motorola Monitors op uw iPhone®/
iPad®
• Zorg ervoor dat uw iPhone®/iPad® is aangesloten op uw Wi-Fi® Router.
• Activeer de Hubble for Motorola Monitors applicatie en voer de gegevens
voor uw Hubble for Motorola Monitors account in. Lees de Terms of Service
en selecteer “I agree to the Terms of Service” voordat u op Create tikt.
(Afbeelding i1)
NEDERLANDS
Opmerking: Als u al over een Hubble for Motorola Monitors account beschikt,
selecteer dan Already have a Account? om naar de volgende stap te gaan.
iOS
i1
Aan de slag - Apparaten aansluiten
17
3.3.4
Een Camera aan uw account toevoegen
• Een nieuwe account aanmaken en inloggen.
• Tik op Add Camera. (Afbeelding i2)
• Tik op “MBP85CONNECT”. (Afbeelding i3)
MBP85CONNECT
i2
i3
• Volg de aanwijzingen op het scherm volgen om de Bluetooth® - functie op
uw iPhone®/iPad®.
i4
18
Aan de slag - Apparaten aansluiten
• Tik op de Home-toets en op het “Instellen"-menu om de Bluetooth® functie
op uw iPhone®/iPad® te openen.
i5
i6
iOS
NEDERLANDS
• Druk op de HOME-toets om het Instellingen-menu te verlaten en tik op
"Hubble for Motorola Monitors" applicatie op het opstartscherm te openen.
i7
Aan de slag - Apparaten aansluiten
19
• Volg de bovenstaande stappen om de camera te zoeken met
identificatienummer “CameraHD-xxxxxxxxxx”, en tik op Continue wanneer
uw iPhone® of iPad® verbinding heeft met de camera. (Afbeelding i8)
i8
• Selecteer uw Wi-Fi® Netwerk en tik op Continue, uw wachtvoor invoeren en
op Next tikken. (Afbeeldingen i9, i10)
i9
20
i10
Aan de slag - Apparaten aansluiten
i11
i12
• Tik op Watch Live Camera om het beeld van de Camera te bekijken.
(Afbeelding i13)
iOS
• Tik op het Hubble-logo om terug te gaan naar het tabblad Camera voor een
lijst met beschikbare Camera's. (Afbeelding i14)
NEDERLANDS
• Het duurt een paar minuten voor de Camera verbinden maakt met het Wi-Fi®
netwerk voordat de verbindingsstatus wordt getoond (Afbeeldingen i11, i12).
Als de aansluiting mislukt, op Retry drukken en de stappen in 3.3.4 herhalen.
i13
Aan de slag - Apparaten aansluiten
i14
21
4. Camera
4.1
De Camera op voeding aansluiten
• De kleine stekker van de voedingsadapter aansluiten op de
voedingsaansluiting van de voedingsadapter en de stekker van de
voedingsadapter aansluiten op een geschikt stopcontact.
• Schuif de AAN/UIT- schakelaar op AAN. De blauwe LED van de voeding gaat
branden. (Opmerking: Schuif de AAN/UIT-schakelaar naar UIT om het
apparaat uit te schakelen.)
4.2
Camera-functies:
Gebruik met Android™ apparaten
• Activeer de Hubble App op uw Android™ apparaat.
• Het camerabeeld verschijnt op het scherm.
4.2.1
Meer Camera's toevoegen
• Tik op het Hubble-logo en ga naar de pagina Add Camera om het
camerabeeld te zien. (Afbeelding A13)
• Tik op Add Camera en volg de stappen in Android™ apparaat instellen om
een Camera toe te voegen 3.2.4. (Afbeelding A14)
22
Camera
• Zodra de Camera is toegevoegd, zal het camerabeeld automatisch worden
getoond.
A14
Android™
NEDERLANDS
A13
Camera
23
4.2.2
Een Camera verwijderen
Verwijder een Camera van uw account door onderstaande stappen uit te voeren:
• Tik op het Instellingen-pictogram
Camera Details. (Afbeelding A15)
op de pagina General, en tik dan op
• Selecteer Remove Camera en tik op Yes om een toestel van de Cameralijst
te verwijderen. (Afbeelding A16)
A15
24
A16
Camera
4.2.3
Uw Accountgegevens veranderen
U kunt uw accountgegevens veranderen met behulp van uw Android™ apparaat.
• Tik op Account op de pagina General. De Account-instellingen verschijnen
op het scherm. (Afbeelding A17)
• Tik op Change Password om uw wachtwoord te veranderen door de
aanwijzingen te volgen.
• Tik op Log Out om het account te verlaten.
• Tik op Freemium plan. U gaat vervolgens naar de Cloud Video Recording
Service. Ga voor bijzonderheden naar onze website
http://www.hubbleconnected.com.
• Tik op Use voor toegang tot Remote Connection Setting. Gebruik Remote
Only door Yes te selecteren.
• Enable Disconnect Alert zorgt voor een geluidsalarm als de verbinding is
verbroken. Alarm bij verbroken verbinding inschakelen door Yes te selecteren.
Android™
NEDERLANDS
• Tik op Send Log om uw Hubble App report via e-mail naar onze server te
sturen. Dit moet worden verzonden op verzoek van onze klantenservice.
A17
Camera
25
4.2.4
Camera-instellingen
U kunt de Camera-instellingen veranderen door op het Instellingen pictogram
op de Camera-pagina te tikken. (Afbeelding A18)
• Tik op Camera Details voor de Camera Name, Change Image, Firmware
version, Model ID en Remove Camera. (Afbeelding A19)
A18
A19
• Tik op Notification Sensitivity om de gevoeligheid van geluid &
bewegingmotie in te stellen, en voor het instellen van Alarm voor Hoge/Lage
temperatuur. (Afbeelding A20)
A20
26
Camera
4.2.5
Algemene instellingen
• Tik op Settings op de General-pagina.
A21
A22
Android™
• Tik op Do Not Disturb, zet de timer op de gewenste tijd en selecteer ON. De
Camera stuurt geen geluid of alarm naar uw Android™ apparaat tijdens de
ingestelde tijd. (Afbeelding A22)
NEDERLANDS
• Tik op de General Settings om de aanduiding van de Clock (12uur/24uur) &
de Temperature (°C / °F) te selecteren en om Notification Sound of
Vibration te activeren. (Afbeelding A21)
Camera
27
4.2.6
Functies van de Hubble Applicatie
Tik op het weergaveveld. De functiepictogrammen verschijnen zoals hieronder
getoond.
Two Way Communication – Tik op het Microfoon-pictogram om de talk
back functie op de Camera te activeren. Druk op de ronde toets om te spreken.
Nogmaals indrukken om vanaf de Camera te luisteren. (Afbeeldingen A23, A24)
A23
28
A24
Camera
Zwenk- en kantel-functie:
Tik op de hoger/lager-toetsen om te kantelen, en op de links/rechts-toetsen om
te zwenken. (Afbeeldingen A25, A26)
A26
Android™
NEDERLANDS
A25
Camera
29
Foto/Video - Neem een foto of maak een video-opname met uw Camera.
Tik op het Video-pictogram op het scherm om de foto/video-functie te
activeren. Selecteer de video-opnamefunctie met het kleine video-pictogram
recht van de grote blauwe toets. Druk op de toets op de opname te starten. De
toets wordt rood. Opnieuw indrukken op het opnemen te stoppen.
(Afbeeldingen A27, A28)
Tik op het kleine Camera-pictogram
rechts van de grote blauwe toets om de
Cameramodus in te schakelen. Druk op de grote blauwe toets om foto's te
maken met de Camera. (Afbeelding A29)
A27
A28
A29
30
Camera
Opmerking:
Foto's en video's worden opgeslagen in het interne flashgeheugen uw
Android™ apparaat. Ze kunnen bekeken worden via de Gallery of de Media
Player. Gebruik voor het afspelen van video's de Hubble app of een 3rd party
applicatie zoals de MX player (te vinden in de Google Play™ Store), die instaat
is MJPG (Motionjpeg) bestanden weer te geven.
Melodie – Om een van de 5 beschikbare melodieën af te spelen, drukt u op
Melody om het Melody menu te openen. Selecteer een van de gewenste
melodieën voor weergave op uw Camera. (Afbeelding A30)
A30
Camera
Android™
NEDERLANDS
Temperatuurmeting – De temperatuurmetingen van de temperatuursensor
aan de achterkant van de Camera wordt weergegeven op het scherm van uw
Android™ apparaat (Afbeelding A31). De aanduiding wordt ROOD als de
temperatuur hoger/lager is dan de temperatuur die is ingesteld in uw Account.
(zie deel 4.2.4)
A31
31
4.3
Camera-functies:
Gebruik met iPhone®/iPad®
• Activeer de Hubble App op uw iPhone®/iPad®.
• Het camerabeeld verschijnt op het scherm.
4.3.1
Meer Camera's toevoegen
• Tik in de Camera-weergave op het Motorola-logo en ga naar de pagina Add
Camera. (Afbeelding i15)
• Tik op Add Camera om een Camera toe te voegen (volg de stappen in 3.3.4
voor het instellen van iPhone®/iPad®. (Afbeelding i16)
• Zodra de Camera is toegevoegd, wordt het camerabeeld automatisch
getoond.
i15
i16
Opmerking:
U kunt maximaal 4 camera's aansluiten op één account.
32
Camera
4.3.2
Een Camera verwijderen
U kunt een Camera van uw Account verwijderen door deze stappen te volgen:
• Tik op het Instellingen-pictogram
Camera Detail. (Afbeelding i17)
op de General-pagina en tik dan op
i18
iOS
i17
NEDERLANDS
• Selecteer Remove Camera en tik op Yes om het toestel van de Cameralijst
te verwijderen. (Afbeelding i18)
Camera
33
4.3.3
Uw Accountgegevens veranderen
U kunt uw account-gegevens veranderen met uw iPhone®/iPad®.
• Tik op Account op de General-pagina. De Account-instellingen verschijnen
op het scherm. (Afbeelding i19)
• Tik op Change Password om uw wachtwoord te veranderen door de
aanwijzingen op te volgen.
• Tik op Log Out om het account te verlaten.
• Tik op Current Plan. U gaat vervolgens naar de Cloud Video Recording
Service. Ga voor meer informatie naar onze website
www.hubbleconnected.com/motorola/plans.
• Tik op Send app log om uw Hubble App report via e-mail naar onze server te
sturen. Dit moet worden verzonden op verzoek van onze klantenservice.
i19
34
Camera
4.3.4
Camera-instellingen
U kunt uw Camera-instellingen veranderen door op het Settings pictogram
op de General-pagina te tikken (Afbeelding i20). U kunt de Camera Name en
Firmware version controleren (Afbeelding i21) en de naam van de Camera
veranderen door op de bestaande naam te tikken en de instructies te volgen.
i21
iOS
NEDERLANDS
i20
• Tik op Notification Sensitivity om de gevoeligheid van geluid &
bewegingmotie in te stellen, en voor het instellen van Alarm voor Hoge/Lage
temperatuur. (Afbeelding i22)
i22
Camera
35
4.3.5
Algemene instellingen
• Tik op Settings op de General-pagina. (Afbeelding i23)
• Tik op General Settings om de aanduiding van de Clock (12uur/24uur) & de
Temperature (°C / °F) te selecteren en om Notification Sound of Vibration
te activeren. (Afbeelding i24)
i23
i24
• Tik op Do Not Disturb, zet de timer op de gewenste tijd en selecteer ON. De
Camera stuurt geen geluid of alarm naar uw iPhone®/iPad® apparaat tijdens
de ingestelde tijd. (Afbeelding i25)
i25
36
Camera
4.3.6
Hubble App instellingen
• Tik op Settings op uw iPhone®/iPad®. een lijst met applicaties verschijnt. Tik
op
en de instellingen worden getoond. (Afbeelding i26)
iOS
NEDERLANDS
i26
Camera
37
4.3.7
Functies van de Hubble Applicatie
Tik in de Camera-weergave op het scherm. De volgende functiepictogrammen
verschijnen:
Two Way Talk – Tik op het microfoon-pictogram om de talk back functie op
de Camera te activeren. Druk op de ronde toets om te spreken. Nogmaals
indrukken om vanaf de Camera te luisteren. (Afbeeldingen i27, i28)
i27
38
i28
Camera
Zwenk- en kantel-functie:
Tik op het 4-weg pijl pictogram om de zwenk/kantel-functie te activeren. Druk op
de hoger/lager pijlen om de Camera hoger of lager te kantelen. Druk op de linker/
rechter pijlen om de Camera links of rechts te zwenken. (Afbeeldingen i29, i30)
i30
iOS
NEDERLANDS
i29
Camera
39
Foto-functie - Tik op het Camera-pictogram op het scherm
om de fotoopname functie te activeren. Druk op de grote blauwe Camera-toets om een
foto te nemen. (Afbeelding i13)
i31
Opmerking:
Foto's worden opgeslagen in het interne flashgeheugen van uw iPhone®/iPad®.
40
Camera
Melodie – Om een van de beschikbare melodieën af te spelen, drukt u op
Melody om het Melody menu te openen. Selecteer een van de gewenste
melodieën voor weergave op uw Camera. (Afbeelding i32)
i33
iOS
i32
NEDERLANDS
Temperatuurmeting – De temperatuurmeting van de temperatuursensor
op de achterkant van de Camera verschijnt op het scherm van uw iPhone®/
iPad® (Afbeelding i33). De aanduiding wordt ROOD als de temperatuur hoger/
lager is dan de temperatuur die is ingesteld in uw Account. (zie deel 4.3.5)
Camera
41
4.4
Camera-functies:
Gebruik met een PC/Notebook
• Ga naar: http://www.hubbleconnected.com/motorola/login/
• Voer uw gebruikersnaam en wachtwoord in en klik vervolgens op Login als u
al een account hebt gemaakt.
• Klik op de Cameralijst gekoppeld in uw account via uw Android™-apparaat
of iPhone®/iPad®. De cameraweergave verschijnt op het scherm. U kunt
eenvoudig verbonden blijven met uw vrienden, plaatsen en huisdieren met
live videostreaming.
• U kunt de instellingen wijzigen door de onderstaande Menu-instructies op te
volgen.
42
Camera
5. Procedure voor het resetten van de
Camera
Opmerking: Als uw Camera is verplaatst van de ene router (bijvoorbeeld thuis)
naar de andere (bijvoorbeeld op kantoor), of wanneer u problemen hebt bij de
installatie van de Camera, dan moet de Camera opnieuw worden ingesteld. De
Camera resetten door onderstaande procedure te volgen:
1.
2.
3.
NEDERLANDS
4.
Schuif de AAN/UIT-schakelaar naar de stand UIT.
De KOPPELING-toets ingedrukt houden en AAN/UIT-schakelaar naar AAN
verschuiven.
De KOPPELING-toets loslaten wanneer u een bevestigingstoon hoort.
Wacht totdat de Camera de interne reset heeft voltooid. De LED-indicator
wordt rood en gaat langzaam knipperen wanneer het resetten van de
Camera is voltooid.
U kunt uw Camera opnieuw toevoegen door de stappen te volgen in deel
3.2.4 voor Android-apparaten op deel 3.3.4 voor iOS-apparaten.
Procedure voor het resetten van de Camera
43
6. Hulp
Ruisinterferentie
Om achtergrondgeluid of echo's te voorkomen, ervoor zorgen dat er
voldoende afstand is tussen uw apparaat en de Wi-Fi® Camera.
Gebruik van andere 2.4GHz-producten, zoals Bluetooth® systemen of
magnetrons kunnen interferentie met dit product kunnen veroorzaken. Houd
de Wi-Fi® Camera uit de buurt van deze types producten, of schakel ze uit als
ze interferentie lijken te veroorzaken.
Verbroken verbinding
Controleer uw Wi-Fi® instellingen. Uw Wi-Fi® indien nodig opnieuw aansluiten
Zorg ervoor dat de Wi-Fi ® Camera op AAN staat. Wacht een paar minuten om te
verbinden te maken met het Wi-Fi® netwerk.
Als u uw wachtwoord vergeet
Als u uw wachtwoord vergeet, op "Forgot Password" en uw e-mailadres
versturen. Een nieuw wachtwoord zal onmiddellijk naar uw e-mailadres
worden verzonden.
Problemen oplossen
Categorie
Probleem
Beschrijving / Storing
Oplossing
Controleer uw gebruikersnaam en
wachtwoord.
Account
In kan niet inloggen,
ook niet na het
aanmelden.
Account
Zorg ervoor dat u een account bij ons
Ik krijg de de
foutmelding: "Email ID hebt aangemaakt. Tik op Create
Account om een account aan te
is not registered".
maken zodat u de Wi-Fi® Video Baby
Monitor.
44
Hulp
Wat moet ik doen als ik Klik op de koppeling "Forgot
mijn wachtwoord
Password" op de website http://
www.hubbleconnected.com/
vergeet?
motorola/login/ OF op uw Android™
of iOS applicatie. Een e-mail zal
worden verzonden naar uw
geregistreerde e-mailadres.
Account
Ik kan geen nieuw
1.
wachtwoord
ontvangen hoewel ik de
"Forgot Password"
2.
optie heb gebruikt.
De e-mail kan in de spammap zijn
terecht gekomen. Controleer uw
spammap.
Er kan vertraging zijn in het
ontvangst van uw e-mail. Wacht
een paar minuten en controleer
uw e-mail opnieuw.
Problemen
met
aansluiting
Ik krijg de melding: We 1.
are having problems
accessing your Camera.
Dit kan veroorzaakt
worden door
2.
problemen met de
internetverbinding. Een
moment wachten en
later opnieuw proberen. 3.
Probeer het over een paar
minuten opnieuw. De oorzaak
kan een probleem zijn met uw
internetverbinding.
Als het probleem aanhoudt, de
Camera opnieuw starten om te
controleren of dit het probleem
verhelpt.
Uw Wireless Router opnieuw
starten.
Weergave
Camera
Als ik de "Remote
Mode" gebruik, stopt
de video na 5 minuten.
Hoe kan ik de video
langer bekijken?
Hulp
NEDERLANDS
Account
Bij toegang tot uw Camera via een
ander netwerk dan uw eigen
thuisnetwerk (via het internet) stopt
de video na 5 minuten.
U kunt weer op de klikken vanaf de
Android™/iOS applicatie op het
streaming opnieuw te starten.
Als u de Camera via uw webbrowser
benadert, kunt u op de Reload toets
drukken om de stream van de
Camera opnieuw te starten.
45
U kunt de geluidsgevoeligheid
instellen om meldingen te ontvangen
in het Camera-instellingen menu.
Functies
De instellingslimiet
voor het geluidsalarm
is onjuist.
Problemen
met
aansluiting
Mijn telefoonapplicatie 1.
toont de volgende
2.
melding: "Unable to
connect to BMS server".
3.
Controleer de sterkte van het
Wi-Fi ® network .
Controleer of u aangesloten ben
op het internet door de browser
van de telefoon te starten en een
website zoals www.google.com
te bezoeken.
Probeer het opnieuw als u
verbinding heeft kunnen maken
met het internet.
Instellen
Terwijl ik een nieuwe
Camera toevoeg aan
mijn account, kan ik
geen Camera vinden
om toe te voegen.
Als u probeer een Camera toe te
voegen die eerder werd oegevoegd
aan uw account of een ander account,
moet u de camera eerst resetten. De
camera resetten door de
KOPPELING-toets aan de onderkant
van de Camera 5 seconden ingedrukt
houden.
Algemeen
Welke browsers
worden ondersteund
voor toegang vanaf
mijn PC/Mac®?
Op de PC en Mac®, adviseren wij
gebruik van Google Chrome. Echter,
de onderstaande browsers worden
ook ondersteund:
PC : Internet Explorer® 9 en hoger.
Mac® : Safari® 6.0.
46
Hulp
Algemeen
Wat betekent een
knipperende LED?
Een knipperende LED geeft de
volgende status aan:
Langzaam knipperend: 1. Uw Camera
is in de instellingsmodus. U kunt de
Camera in deze modus aan uw account
toevoegen. Bij aankoop staat de
Camera in de instellingsmodus. Om de
instellingsmodus te resetten, de
KOPPELING toets aan de onderkant
van de Camera ingedrukt houden
totdat u een pieptoon hoort.
LED brandt continu: De Camera is
verbonden met het Wi-Fi ® netwerk.
Problemen
met
aansluiting
Hulp
Ik heb geen toegang
tot mijn Camera.
Controleer of the Camera binnen het
bereik van Wi-Fi ® is. Als de LED op uw
Camera langzaam knippert, probeer
om de Camera dichter bij de router te
plaatsen voor een betere Wi-Fi ®
verbinding en probeer het opnieuw.
47
NEDERLANDS
Langzaam knipperend: 2. De Camera
maakt verbinding met de router of
heeft de verbinding met de router
verloren. Controleer of de Camera
binnen het bereik van het Wi-Fi ®
signaal is.
Instellen
Tijdens het instellen
van het apparaat voor
Android™ en iOS, kan
ik mijn Camera niet
vinden tijdens de
laatste stap en het
instellen mislukt.
De Camera resetten naar de
Instellingsmodus en opnieuw
proberen. De KOPPELING toets aan
de onderkant van de Camera
ingedrukt houden totdat u een
piepgeluid hoort. Wacht een moment
totdat de Camera opnieuw start. De
Camera LED geeft aan de
instellingsmodus is ingeschakeld. De
instellingensmodus nu opnieuw
starten vanaf uw smartphone again.
Problemen
met
aansluiting
Ik kan mijn Camera
benaderen van
hetzelfde Wi-Fi ®
netwerk, maar de
Camera wordt
getoond als zijnde
remote. Ik krijg per
keer maar 5 minuten
toegang tot de
Camera.
Controleer de instellingen van uw
draadloze router. Bijvoorbeeld, voor
routers van het merk Buffalo is er een
optie genaamd Wireless Isolation.
Deze optie uitschakelen.
Camera
Wanneer ik probeer
om het beeld van de
Camera te bekijken,
zie ik een melding dat
ik de firmware van de
Camera moet
opwaarderen. Wat
moet ik doen?
U moet de firmware bijwerken. Dit
neemt ongeveer 5 minuten in beslag.
Wij stellen van tijd tot tijd upgrades
beschikbaar om de functies van de
Camera te verbeteren.
48
Hulp
Algemeen
Welke platforms
worden ondersteund
voor toegang tot mijn
Camera?
Minimale eisen:
Windows ® 7*
*Java browser plug-in vereist
Mac OS ® versie 10.7
Chrome™ versie 24
Internet Explorer ® versie 9
Safari ® versie 6
Java™ versie 7
Firefox ® versie 18.0
Adobe ® Flash ® Player 15.0
Android™ 4.2
Ik hoor geen geluid
wanneer ik de Camera
op afstand (remote)
benader.
Tik op het Luidspreker pictogram op
het videoscherm om geluid te horen.
Het geluid is standaard uitgeschakeld
wanneer u de Camera op afstand
benadert.
Algemeen
Wat betekent "Local
Camera" en "Remote
Camera"?
Wanneer u de Camera vanaf hetzelfde
draadloze netwerk (Home) benaderd
waarin het is geconfigureerd, is het
een "local" Camera. Wanneer u de
Camera vanaf een andere lokatie
benadert, is het een "Remote"
Camera. U kunt vanaf andere lokaties
gebruik maken van 3G, 4G of 4G LTE
of een Wi-Fi ® verbinding .
Hulp
49
NEDERLANDS
iPhone ® /iPad ® iOS versie 7.0
Algemeen
Android™:
- Open de Google Play Store op uw
Android™ apparaat
- Selecteer Zoeken
- "Hubble for Motorola Monitors"
invoeren
- De resultaten worden getoond in
de Hubble App
- Selecteren om te installeren
iOS apparaat:
- Open de App StoreSM
- Selecteer Zoeken
- "Hubble for Motorola Monitors
invoeren"
- De resultaten worden getoond in
de Hubble App
- Selecteren om te installeren
Algemeen
Hoe kan ik de the
Applicatie voor
Android™ en iOS
apparaten
downloaden?
Instellen
U moet de auto lock-functie op uw
Wanneer de video is
onderbroken, probeert slimme apparaat uitschakelen voor
de applicatie opnieuw video/audio-invoer.
verbinding te maken
en dit resulteert in
verlies van geluid en
schokkerig video.
Functies
Als u de camera lokaal benadert,
Hoeveel gebruikers
worden twee gebruikers
kunnen de Camera
gelijktijdig benaderen? ondersteund. Bij meer dan twee
gebruikers gaat de stream via de
externe server. Dit biedt voor
onbeperkte gelijktijdige
gebruikerstoegang tot een Camera.
50
Hulp
Ik ondervind storing
veroorzaakt door mijn
andere webcamapparaten.
De prestaties van videostreaming is
gerelateerd aan internetbandbreedte,
vooral als u 2 of meer videostreaming
apparaten gebruikt die via de dezelfde
router werken.
NEDERLANDS
Problemen
met
aansluiting
Hulp
51
7. Algemene informatie
Als het toestel niet goed functioneert...
1.
2.
Lees deze Gebruikershandleiding.
Neem contact op met Klantenondersteuning op
+49 (0) 1805 938 802 in Europa
Email: [email protected]
Beperkte garantie voor consumentenproduct en accessoires
("Garantie")
Dank u voor de aankoop van dit onder Motorola-product, dat onder licentie is
vervaardigd door Binatone Electronics International Ltd ("BINATONE").
Wat wordt gedekt door deze garantie?
BINATONE garandeert onder voorbehoud van het navolgende dat dit product,
verkocht onder de merknaam van Motorola ("Product"), of de gecertificeerde
accessoire ("Accessoire") verkocht voor gebruik met dit product, geen
defecten zal vertonen in materialen en productie bij consumentgebruik
gedurende de hieronder beschreven periode. Deze Garantie is uw exclusieve
garantie en is niet overdraagbaar.
Wie is gedekt?
Deze Garantie is uw exclusieve garantie en is niet overdraagbaar.
Wat zal BINATONE doen?
BINATONE of zijn geautoriseerde distributeur zal naar eigen goeddunken en
binnen een zakelijk redelijke termijn, elk product of accessoire die niet voldoet
aan deze garantie repareren of vervangen. Wij kunnen functioneel equivalente
soortgelijke / gereviseerde / gebruikte of nieuwe producten, accessoires of
onderdelen gebruiken.
52
Algemene informatie
Welke andere beperkingen zijn van toepassing?
In sommige rechtsgebieden is de beperking of uitsluiting van incidentele of
gevolgschade, of beperking van de duur van een impliciete garantie niet
toegestaan, zodat de bovenstaande beperkingen en uitsluitingen mogelijk niet
op u van toepassing zijn. Deze Garantie geeft u specifieke wettelijke rechten,
en u kunt ook andere rechten hebben die af kunnen wijken in verschillende
jurisdictie.
Algemene informatie
53
NEDERLANDS
ENIGE IMPLICIETE GARANTIES, INCLUSIEF ZONDER BEPERKING DE
IMPLICIETE GARANTIES VAN VERKOOPBAARHEID EN GESCHIKTHEID
VOOR EEN BEPAALD DOEL, WORDT BEPERKT TOT DE DUUR VAN DEZE
BEPERKTE GARANTIE. ANDERS IS DE REPARATIE OF VERVANGING ONDER
DEZE BEPERKTE GARANTIE DE EXCLUSIEVE VERHAALSMOGELIJKHEDEN
VAN DE CONSUMENT, EN WORDT VERLEEND EN IN PLAATS VAN ALLE
ANDERE GARANTIES, EXPLICIET OF IMPLICIET. IN GEEN GEVAL IS
MOTOROLA OF BINATONE AANSPRAKELIJK OP BASIS VAN
ONRECHTMATIGE DAAD OF ANDERSZINS (INCLUSIEF NALATIGHEID)
VOOR SCHADE BOVEN DE AANKOOPPRIJS VAN HET PRODUCT OF
ACCESSOIRE, OF VOOR ENIGE INDIRECTE, INCIDENTELE, SPECIALE OF
SUBSTANTIELE SCHADE VAN WELKE AARD DAN OOK, OF VERLIES VAN
INKOMSTEN OF WINST, VERLIES VAN ZAKEN, VERLIES VAN INFORMATIE
OF ANDERE FINANCIËLE SCHADE DIE VOORTVLOEIT UIT OF IN VERBAND
STAAT MET HET VERMOGEN OF ONVERMOGEN DE PRODUCTEN OF
ACCESSOIRES TE GEBRUIKEN VOOR ZOVER DEZE SCHADE WETTELIJK
KAN WORDEN AFGEWEZEN.
Gedekte producten
Consumentenproducten
Consumentenaccessoires
Consumentenproducten en
accessoires die worden
gerepareerd of vervangen
Duur van de dekking
Twee (2) jaar vanaf de datum waarop de
Producten oorspronkelijk werden gekocht
door de eerste koper van het product.
Negentig (90) dagen vanaf de datum
waarop de accessoires oorspronkelijk
werden gekocht door de eerste koper van
het product.
Het saldo van de oorspronkelijke garantie
of gedurende negentig (90) dagen vanaf
de retourdatum naar de consument,
afhankelijk van welke langer is.
Uitsluitingen
Normale slijtage. Periodiek onderhoud, reparatie of vervanging van
onderdelen als gevolg van normale slijtage worden niet gedekt.
Batterijen. Alleen batterijen die onder 80% van hun nominale vermogen vallen
als ze volledig zijn opgeladen en lekkende batterijen vallen onder deze garantie.
Incorrect gebruik. Defecten of schade die voortvloeien uit: (a) onjuiste
bediening of verkeerde opslag, misbruik, ongeval of verwaarlozing zoals fysieke
schade (barsten, krassen, enz.) op de buitenkant van het product als gevolg van
verkeerd gebruik; (b) contact met vloeistof, water, regen, extreme vochtigheid
of overmatige transpiratie, zand, vuil en dergelijke, extreme hitte, of voedsel, (c)
gebruik van producten of accessoires voor commerciële doeleinden of het
blootstellen van het product of accessoire aan abnormaal gebruik of
omstandigheden, of (d) andere handelingen die niet de schuld zijn van
MOTOROLA of BINATONE, vallen niet onder de dekking.
Gebruik van niet-Motorola producten en accessoires. Defecten of schade als
gevolg van gebruik van producten of accessoires of andere randapparatuur die
niet van het merk Motorola of door Motorola zijn gecertificeerd, vallen niet
onder dekking.
54
Algemene informatie
Niet-geautoriseerde service of wijziging. Defecten of schade als gevolg van
service, testen, afstelling, installatie, onderhoud, wijziging of modificaties op
welke wijze dan ook door iemand die niet geautoriseerd is door MOTOROLA,
BINATONE of haar geautoriseerde servicecenters, vallen niet onder de dekking.
Gemodificeerde producten. Producten of accessoires met (a) serienummers
of datums tags die zijn verwijderd, gewijzigd of vernietigd; (b) gebroken zegels
of aanwijzingen tonen van wijzigingen; (c) niet-overeenkomende serienummer
van het board; of (d) niet-standaard of niet-Motorola gemerkte behuizingen, of
onderdelen, zijn uitgesloten van dekking.
Communicatiediensten. Defecten, schade, of het storing van producten of
accessoires als gevolg van communicatiediensten of signaal waarop u bent
geabonneerd of gebruikt met de producten of accessoires vallen niet onder de
dekking.
Hoe krijgt u garantieservice of andere informatie?
Voor service of informatie kunt u bellen naar:
Email: [email protected]
U krijgt instructies over hoe u de producten of accessoires op eigen rekening en
eigen risico kunt versturen naar een geautoriseerd servicecenter van BINATONE.
Voor het verkrijgen van service, moet u het volgende overleggen: (a) het
product of de accessoire, (b) het oorspronkelijke aankoopbewijs (rekening) met
datum, plaats en verkoper van het Product; (c) indien een garantiekaart is
bijgesloten in de doos, een ingevulde garantiekaart met het volgnummer van
het Product; (d) een schriftelijke beschrijving van het probleem, en, het
belangrijkste; (e) uw adres en telefoonnummer.
Deze voorwaarden vormen de volledige garantie-overeenkomst tussen u en
BINATONE ten aanzien van de producten of accessoires gekocht door u, en
vervangen eventuele eerdere overeenkomst of verklaringen, met inbegrip van
verklaringen in publicaties of promotiemateriaal uitgegeven door BINATONE of
verklaringen die door een vertegenwoordiger of medewerker van BINATONE
mogelijk gemaakt zijn in verband met de genoemde aankoop.
Algemene informatie
55
NEDERLANDS
+49 (0) 1805 938 802 in Europa
BINATONE TELECOM PLC
1 Apsley Way London NW2 7HF,United Kingdom.
Tel: +44(0) 20 8955 2700 Fax: +44(0) 20 8344 8877
e-mail: [email protected]
________________________________________
.
EC Declaration of Conformity
We the manufacturer / Importer :
Binatone Telecom Plc
1 Apsley Way London
NW2 7HF, United Kingdom.
Declare under our sole responsibility that the following products
Wi-Fi Video Camera
Type of equipment:
FOCUS85, FOCUS85-B, FOCUS85-S, FOCUS85-W
Model Name:
SCOUT85, MBP85CONNECT
Country of Origin:
Brand:
China
Motorola
complies with the essential protection requirements of R&TTE Directive 1999/5/EC on the
approximation of the laws of the Member States relating to Radio Spectrum Matters, the
Council Directive
/108/EC on the approximation of the laws of the Member States
relating to electromagnetic compatibility (EMC) and the European Community Directive
2006/95/EC relating to Electrical Safety. Directive 2011/65/EC on the restriction of use of
hazardous substances (RoHS) and 2009/125/EC relating to ecodesign requirement for
Energy-Related Products (ErP).
Assessment of compliance of the product with the requirements relating to the essential
requirements according to Article 3 R&TTE was based on Annex III of the Directive
1999/5/EC and the following standard:
Radio Spectrum:
EMC:
Electrical Safety:
RF Safety:
EN300328 V1.8.1:2012
EN301489-17 V2.2.1:2012
EN301489-1 V1.9.2:2011
EN60950-1/A12:2011
EN62311:2010
The product is labelled with the European Approval Marking CE as show. Any Unauthori ed
modification of the product voids this Declaration.
Manufacturer / Importer
(Signature of authori ed person)
London, 30 May , 2014
Karl Heinz Mueller / Chief Technical Officer
56
Place & Date
Algemene informatie
8. Technische gegevens
Camera
Wi-Fi ®
802.11 b/g/n
Beeldsensor
Color CMOS 1M Pixels
Lens
f = 2.5 mm, F = 2.8
IR LED
8 stuks
Voedingsadapter
Ten Pao International Ltd.
S009GV0500150
Input: 100-240V AC, 50/60Hz, 300mA
NEDERLANDS
Output: 5V DC, 1500mA
Technische gegevens
57
Gefabriceerd, gedistribueerd of verkocht door Binatone Electronics International
LTD., officieel licentiehouder voor dit product. MOTOROLA en het gestileerde
M-logo zijn handelsmerken of geregistreerde handelsmerken van Motorola
Trademarks Holdings, LLC. en worden onder licentie gebruikt. Het Apple-logo en
Safari zijn handelsmerken van Apple Inc., geregistreerd in de VS en andere landen.
App Store is een servicemerk van Apple Inc. Google Play, Android, en Chrome zijn
handelsmerken van Google Inc. Wi-Fi is een handelsmerk van de Wi-Fi Alliance.
Internet Explorer en Window zijn handelsmerken van de Microsoft bedrijvengroep.
Firefox is een geregistreerd handelsmerk van de Mozilla Foundation. Adobe en
Flash zijn handelsmerken of geregistreerde handelsmerken van Adobe Systems
Incorporated. Java is een geregistreerd handelsmerk van Oracle en/of haar
gelieerde ondernemingen. Alle andere handelsmerken zijn het eigendom van hun
respectieve eigenaars. © 2015 Motorola Mobility LLC. Alle rechten voorbehouden.
NL_EU Version 2.0
Gedrukt in China
MANUAL DE USUARIO
Cámara para vigilabebés con vídeo Wi-Fi®
Modelo: MBP85CONNECT
Las funciones descritas en este manual de usuario están sujetas a modificaciones sin previo aviso.
Bienvenido...
¡a su nueva cámara para vigilabebés con vídeo Wi-Fi®
Motorola!
Le agradecemos la compra de su nueva cámara para vigilabebés con vídeo WiFi® Motorola. Ahora podrá ver y escuchar a su bebé mientras duerme en otra
habitación, o podrá supervisar a sus hijos mientras juegan. Puede instalar la
cámara solo desde su iPhone®/iPad® o dispositivos con Android™, y ver el
vídeo de la cámara desde ordenadores portátiles o de sobremesa, así como
desde dispositivos Android™ o iPhone®/iPad®.
Conserve el comprobante de compra original (con fecha). Para poder disfrutar
de la garantía de su producto Motorola tendrá que facilitar una copia de su
comprobante de compra (con fecha) para confirmar el estado de la garantía.
Para disfrutar de la garantía no es necesario registrarse.
Si tiene algún tipo de pregunta relacionada con el producto, llame al número de
teléfono:
+49 (0) 1805 938 802 desde Europa
Correo electrónico: [email protected]
Este Manual de usuario contiene toda la información que necesita para sacar el
máximo partido posible a su producto.
Antes de instalar la unidad, lea las Instrucciones de seguridad de las páginas 5-6.
Contenido de la caja
• 1 unidad de cámara Wi-Fi®
• 1 adaptador de corriente
• 1 Guía de inicio rápido
• 1 Manual de usuario
En los packs con varias cámaras encontrará una o más unidades de cámara
adicionales con adaptadores de corriente.
Descripción general de la cámara
1
2
8
3
4
5
9
1.
2.
3.
4.
6
10
7
11
Sensor luminoso (para la
detección del modo nocturno)
Lente de la cámara
LED de infrarrojos (para visión
nocturna)
Indicador de encendido/estado
Micrófono
Botón PAIR
7. Altavoz
8. Antena
9. Toma micro USB
10. Interruptor ON/OFF
5.
6.
Directrices importantes para la instalación de la unidad de cámara WiFi®
• El uso de otros productos en la banda de 2,4 GHz, como otras redes
inalámbricas, sistemas Bluetooth® y hornos microondas podría provocar
interferencias con este producto. Mantenga la unidad de cámara Wi-Fi®
alejada de estos tipos de productos, o apáguelos si parecen estar provocando
interferencias.
Índice
1.
2.
3.
Instrucciones de Seguridad .............................................................................. 5
Requisitos del sistema....................................................................................... 8
Primeros pasos: conexión de los dispositivos .................................................. 9
3.1
3.2
3.3
4.
Cámara ............................................................................................................ 22
4.1
4.2
4.3
4.4
5.
6.
7.
8.
4
Configuración ......................................................................................................9
Cuenta de usuario y configuración de la cámara en dispositivos
Android™ ..........................................................................................................10
3.2.1
Encendido y conexión de la cámara MBP85CONNECT ................10
3.2.2
Descargue la aplicación Hubble for Motorola Monitors .................10
3.2.3
Ejecute la aplicación Hubble for Motorola Monitors en el
dispositivo Android™ ......................................................................11
3.2.4
Añada la cámara a su cuenta ............................................................12
Cuenta de usuario y configuración de la cámara:
Funcionamiento con iPhone®/iPad® ................................................................16
3.3.1
Encendido y conexión de la cámara MBP85CONNECT ................16
3.3.2
Descargue la aplicación Hubble for Motorola Monitors .................16
3.3.3
Ejecute la aplicación Hubble for Motorola Monitors en su
iPhone®/iPad® ..................................................................................17
3.3.4
Añada la cámara a su cuenta ............................................................18
Conexión de la cámara a la alimentación..........................................................22
Funciones de la cámara:
Funcionamiento con dispositivos Android™ ...................................................22
4.2.1
Añadir más cámaras ..........................................................................22
4.2.2
Eliminar una cámara .........................................................................24
4.2.3
Modificación de la información de la cuenta ...................................25
4.2.4
Configuración de la cámara .............................................................26
4.2.5
Configuración general .....................................................................27
4.2.6
Funciones de la aplicación Hubble ..................................................28
Funciones de la cámara:
Funcionamiento con iPhone®/iPad® ................................................................32
4.3.1
Añadir más cámaras ..........................................................................32
4.3.2
Eliminar una cámara .........................................................................33
4.3.3
Modificación de la información de la cuenta ...................................34
4.3.4
Configuración de la cámara .............................................................35
4.3.5
Ajustes generales ..............................................................................36
4.3.6
Configuración de la aplicación Hubble ...........................................37
4.3.7
Funciones de la aplicación Hubble ..................................................38
Funciones de la cámara:
Funcionamiento con un ordenador de sobremesa/portátil.............................42
Procedimiento de restablecimiento de la cámara ......................................... 43
Ayuda ............................................................................................................... 44
Información general ........................................................................................ 52
Especificaciones técnicas............................................................................... 57
Índice
1. Instrucciones de Seguridad
ADVERTENCIA:
ESPAÑOL
Riesgo de estrangulamiento: Los niños pueden
ESTRANGULARSE con los cables. Mantenga
este cable fuera del alcance de los niños (a más
de 1 m (3 pies) de distancia). No utilice nunca
alargaderas con los adaptadores de corriente
de CA. Utilice únicamente los adaptadores de
corriente de CA proporcionados.
Instrucciones de Seguridad
5
CONFIGURACIÓN Y USO DE LA UNIDAD DE CÁMARA
Wi-Fi®:
● Coloque la unidad de cámara Wi-Fi® en la ubicación que
proporcione la mejor vista posible de su bebé en la cuna.
● Coloque la unidad de cámara Wi-Fi® sobre una superficie plana,
como una cajonera, una estantería, un vestidor o montándola en la
pared utilizando la ranura con orificio de la base de la cámara.
● No coloque NUNCA la unidad de cámara Wi-Fi® ni los cables dentro
de la cuna.
6
Instrucciones de Seguridad
ADVERTENCIA
Esta unidad de cámara Wi-Fi® cumple con todos los estándares relevantes
relacionados con campos electromagnéticos y es, siempre que se utilice tal y
como se describe en el Manual de usuario, segura de utilizar. Por lo tanto, lea
siempre atentamente las instrucciones de este Manual de usuario antes de
utilizar el dispositivo.
ESPAÑOL
• El dispositivo contiene piezas pequeñas y, por ello, es necesario que un
adulto lo monte. Mantenga todas las piezas pequeñas fuera del alcance de
los niños.
• Este producto no es un juguete. No deje que los niños jueguen con él.
• Esta unidad de cámara Wi-Fi® no sustituye la supervisión responsable por
parte de un adulto.
• Conserve este Manual de usuario para futuras consultas.
• No cubra la unidad de cámara Wi-Fi® con una toalla ni con una manta.
• Pruebe la unidad de cámara Wi-Fi® y todas sus funciones para familiarizarse
con ella antes de usarla por primera vez.
• No utilice la unidad de cámara Wi-Fi® cerca del agua.
• No coloque la unidad de cámara Wi-Fi® cerca de una fuente de calor.
• No toque los contactos de conexión con objetos afilados ni metálicos.
Instrucciones de Seguridad
7
2. Requisitos del sistema
Portal web
• Windows® 7
• Mac OS® 10.7
• Chrome™ 24
• Internet Explorer® 9
• Safari® 6
• Java™ 7
• Firefox® 18.0
• Adobe® Flash® Player 15.0
Sistema operativo Android™
• Versión 4.2 o superior
iOS en iPhone®/iPad®
• Versión 7.0 o superior
Internet de alta velocidad (Wi-Fi®)
• Al menos 0,6 Mbps de ancho de banda de subida por cámara (puede probar
la velocidad de su conexión a Internet en http://www.speedtest.net)
8
Requisitos del sistema
3. Primeros pasos: conexión de los dispositivos
¿Cómo funciona?
MBP85
CONEXIÓ
Router Wi-Fi®
Vea la cámara de forma
remota desde cualquier
dispositivo compatible
Hubble
Servicio
Cuando un usuario intenta acceder a la cámara, nuestro servidor seguro
autentica la identidad del usuario y le permite acceder a la cámara.
3.1
Configuración
Conecte la cámara al adaptador de corriente y, a continuación, enchúfelo a una
toma de corriente eléctrica y asegúrese de que el interruptor principal se
encuentre en la posición de encendido. La cámara debe encontrarse dentro del
alcance del router Wi-Fi® al que desee conectarse. Asegúrese de que la
contraseña del router esté disponible para introducirla durante el proceso de
configuración dentro de la aplicación.
Estado de la indicación LED:
El LED parpadea de color rojo y azul
lentamente
- Estado desconectado:
El LED parpadea lentamente de color rojo
- Estado conectado:
El LED permanece encendido de forma fija de
color azul
ESPAÑOL
- Estado de emparejado/
configuración:
- Estado listo para conexión: El LED parpadea lentamente de color rojo
Nota: Solo puede realizar la configuración desde un smartphone o tableta
compatible, y no desde un PC.
Primeros pasos: conexión de los dispositivos
9
3.2
Cuenta de usuario y configuración de la cámara en
dispositivos Android™
Qué necesita
• Cámara MBP85CONNECT
• Adaptador de corriente de la cámara MBP85CONNECT
• Dispositivo con sistema operativo Android™ versión 4.2 o superior
3.2.1
Encendido y conexión de la cámara MBP85CONNECT
• Conecte el adaptador de corriente a una toma de corriente eléctrica e
inserte el conector en la toma micro USB de la parte trasera de la cámara.
• Asegúrese de que el interruptor ON/OFF se encuentre en la posición ON.
• El LED rojo de la cámara parpadea una vez completado el proceso de
arranque de la cámara. Cuando escuche dos tonos, la cámara está lista para
el proceso de configuración.
3.2.2
Descargue la aplicación Hubble for Motorola Monitors
• Diríjase a Google Play™ Store para buscar “Hubble for Motorola Monitors”.
• Descargue la aplicación Hubble for Motorola Monitors de Google Play™
Store e instálela en su dispositivo Android™.
10
Primeros pasos: conexión de los dispositivos
3.2.3
Ejecute la aplicación Hubble for Motorola Monitors en el
dispositivo Android™
• Asegúrese de que el dispositivo Android™ esté conectado a su router Wi-Fi®.
• Ejecute la aplicación Hubble for Motorola Monitors e introduzca la información
de su cuenta, seleccione “I agree to the Terms of Use” y pulse Create.
(Ilustración A1)
Nota: Si ya tiene una cuenta de Hubble for Motorola Monitors, seleccione
Already have a Account? para ir al siguiente paso.
Android™
ESPAÑOL
A1
Primeros pasos: conexión de los dispositivos
11
3.2.4
Añada la cámara a su cuenta
• Cree una cuenta nueva e inicie sesión.
• Pulse Add Camera. (Ilustración A2)
• Pulse Continue. (Ilustración A3)
A2
A3
• Aparecerán las instrucciones de configuración en la siguiente pantalla.
(Ilustración A4)
A4
12
Primeros pasos: conexión de los dispositivos
• Mantenga pulsado el botón PAIR durante tres segundos en el lateral de la
cámara MBP85CONNECT. Escuchará un pitido y una voz que dice “Ready
to Pairing” desde la unidad de cámara. Pulse Search for Camera.
• La aplicación buscará y conectará la cámara automáticamente, como se
muestra en las siguientes ilustraciones (Ilustraciones A5 y A6) y el LED de la
cámara parpadeará en color verde/rojo.
A6
Android™
ESPAÑOL
A5
Primeros pasos: conexión de los dispositivos
13
• Seleccione la red Wi-Fi® y pulse Continue, introduzca la contraseña de la
red seleccionada y, a continuación, pulse OK. (Ilustraciones A7, A8)
A7
A8
• La cámara tardará unos minutos en conectarse a la red Wi-Fi® antes de
mostrar el estado de conexión (Ilustraciones A9, A10). Si la conexión falla,
pulse el botón Retry y repita los pasos a partir del paso 3.2.4.
A9
14
A10
Primeros pasos: conexión de los dispositivos
• Pulse Watch Live Camera para ver el vídeo de la cámara. El LED azul de la
cámara parpadeará. (Ilustración A11)
• Pulse el logotipo de Hubble para volver a la ficha Camera y consultar la lista
de cámaras disponibles. (Ilustración A12)
A12
Android™
ESPAÑOL
A11
Primeros pasos: conexión de los dispositivos
15
3.3
Cuenta de usuario y configuración de la cámara:
Funcionamiento con iPhone®/iPad®
Qué necesita
• Cámara MBP85CONNECT
• Adaptador de corriente de la cámara MBP85CONNECT
• iPhone®/iPad® con iOS versión 7.0 o superior
3.3.1
Encendido y conexión de la cámara MBP85CONNECT
• Conecte el adaptador MBP85CONNECT a una toma de corriente eléctrica,
introduzca la clavija en la toma micro USB situada en la parte trasera de la
cámara MBP85CONNECT .
• Asegúrese de que el interruptor ON/OFF se encuentre en la posición ON.
• El LED rojo de la cámara comienza a parpadear cuando la ccámara termina
de iniciarse. Esto indica que la cámara está lista para su configuración.
3.3.2
Descargue la aplicación Hubble for Motorola Monitors
• Diríjase a la App Store para buscar “Hubble for Motorola Monitors”.
• Descargue la aplicación Hubble for Motorola Monitors e instálela en su
iPhone®/iPad®.
16
Primeros pasos: conexión de los dispositivos
3.3.3
Ejecute la aplicación Hubble for Motorola Monitors en su
iPhone®/iPad®
• Asegúrese de que su iPhone®/iPad® se encuentre conectado a su router Wi-Fi®.
• Ejecute la aplicación Hubble for Motorola Monitors e introduzca la
información de su cuenta de Hubble for Motorola Monitors, lea los Términos
del servicio, seleccione “I agree to the Terms of Service” para después pulsar
Create. (Ilustración i1)
Nota: Si ya tiene una cuenta de Hubble for Motorola Monitors, seleccione
Already have a Account? para ir al siguiente paso.
iOS
ESPAÑOL
i1
Primeros pasos: conexión de los dispositivos
17
3.3.4
Añada la cámara a su cuenta
• Cree una cuenta nueva e inicie sesión.
• Pulse Add Camera. (Ilustración i2)
• Pulse “MBP85CONNECT”. (Ilustración i3)
MBP85CONNECT
i2
i3
• Siga las instrucciones que aparecerán en la pantalla para activar la función
Bluetooth® en su iPhone®/iPad®.
i4
18
Primeros pasos: conexión de los dispositivos
• Pulse el botón Inicio y acceda al menú “Ajustes” para activar la función
Bluetooth® de su iPhone®/iPad®.
i5
i6
ESPAÑOL
• Pulse el botón Inicio para salir del menú Ajustes, y pulse la aplicación
“Hubble for Motorola Monitors” para acceder a la pantalla de inicio.
Primeros pasos: conexión de los dispositivos
iOS
i7
19
• Siga los pasos anteriores para localizar la cámara que tiene el número de
identificación “CameraHD-xxxxxxxxxx”, luego pulse Continue una vez que
su iPhone® o iPad® se hayan conectado a la cámara. (Ilustración i8)
i8
• Seleccione su red Wi-Fi® y pulse Continue, introduzca su contraseña y pulse
Next. (Ilustraciones i9, i10)
i9
20
i10
Primeros pasos: conexión de los dispositivos
• La cámara tardará unos minutos en conectarse a la red Wi-Fi® antes de mostrar
el estado de conexión (Ilustraciones i11, i12). Si la conexión falla, pulse el botón
Retry y repita las instrucciones anteriores.
i11
i12
• Pulse Watch Live Camera para ver el vídeo de la cámara. (Ilustración i13)
iOS
ESPAÑOL
• Pulse el logotipo de Hubble para volver a la ficha Camera y consultar la lista
de cámaras disponibles. (Ilustración i14)
i13
Primeros pasos: conexión de los dispositivos
i14
21
4. Cámara
4.1
Conexión de la cámara a la alimentación
• Inserte el extremo pequeño del adaptador de corriente al conector del
adaptador de corriente, y enchufe el adaptador de corriente en una toma
eléctrica.
• Deslice el interruptor ON/OFF hasta la posición ON, y el LED de
alimentación azul se iluminará. (Nota: Para apagar el dispositivo, deslice el
interruptor ON/OFF hasta la posición OFF).
4.2
Funciones de la cámara:
Funcionamiento con dispositivos Android™
• Ejecute la aplicación Hubble en su dispositivo Android™.
• La imagen de la cámara aparecerá en la pantalla.
4.2.1
Añadir más cámaras
• En la imagen de la cámara, pulse el logotipo de Hubble para ir a la página
Add Camera. (Ilustración A13)
• Pulse Add Camera para añadir más cámaras siguiendo los pasos de
configuración de dispositivos Android™ del apartado 3.2.4. (Ilustración A14)
22
Cámara
• Una vez añadida la cámara, la imagen de la cámara se mostrará
automáticamente.
A14
Android™
ESPAÑOL
A13
Cámara
23
4.2.2
Eliminar una cámara
Puede eliminar una cámara de su cuenta siguiendo los pasos indicados a
continuación:
• Pulse el icono Settings
en la página o pantalla Camera list screen/page, y
pulse Camera Details. (Ilustración A15)
• Seleccione Remove Camera y pulse Yes para eliminar la unidad de la lista de
cámaras. (Ilustración A16)
A15
24
A16
Cámara
4.2.3
Modificación de la información de la cuenta
Puede cambiar la información de la cuenta desde un dispositivo Android™.
• Pulse Account en la página General y aparecerá la pantalla Account Settings.
(Ilustración A17)
• Pulse Change Password para cambiar su contraseña y siga las instrucciones.
• Pulse Log Out para salir de la cuenta.
• Pulse Freemium Plan y se le trasladará al Servicio de grabación de vídeo en
la nube. Para obtener más información, visite nuestro sitio web
http://www.hubbleconnected.com.
• Pulse Use para acceder a Remote Connection Setting, utilice Remote Only
seleccionando la opción Yes.
• Enable Disconnect Alert emite un tono acústico cuando se produce una
desconexión. Habilite la alerta de desconexión seleccionando Yes.
ESPAÑOL
• Pulse Send Log para enviar un informe de la aplicación Hubble a nuestro
servidor de correo electrónico. Debe enviarla únicamente si se lo solicita un
agente de atención al cliente.
Android™
A17
Cámara
25
4.2.4
Configuración de la cámara
Puede modificar los ajustes de la cámara pulsando el icono Settings
en la
página de la cámara. (Ilustración A18)
• Pulse Camera Details para revisar las opciones Camera Name, Change
Image, Firmware version, Model ID y Remove Camera. (Ilustración A19)
A18
A19
• Pulse Notification Sensitivity para definir la sensibilidad de la detección del
sonido y el movimiento, y defina la alerta de temperatura alta o baja.
(Ilustración A20)
A20
26
Cámara
4.2.5
Configuración general
• Pulse Settings en la página General.
• Pulse General Settings para cambiar el formato de las opciones Clock
(12hr/24hr) y Temperature (°C/°F) y para activar el Notification Sound o
Vibration. (Ilustración A21)
A21
A22
Android™
ESPAÑOL
• Pulse Do Not Disturb, ajuste el temporizador al tiempo que desee, y
seleccione ON; la cámara no enviará ningún sonido o alerta a su dispositivo
Android™ durante el tiempo establecido en el ajuste. (Ilustración A22)
Cámara
27
4.2.6
Funciones de la aplicación Hubble
Pulse el área de visualización y aparecerán los siguientes iconos de función.
Comunicación bidireccional: pulse el icono del micrófono para activar la
función de comunicación en la cámara, pulse el botón circular una vez para
hablar. Pulse de nuevo para escuchar desde la cámara. (Ilustraciones A23, A24)
A23
28
A24
Cámara
Función de desplazamiento e inclinación:
Pulse los botones arriba y abajo para inclinar la cámara, y los botones izquierda
y derecha para desplazarla. (Ilustraciones A25, A26)
A26
Android™
ESPAÑOL
A25
Cámara
29
Photo/Video: haga una foto o grabe un vídeo desde su cámara.
Pulse el icono de vídeo de la pantalla para activar la función de foto/vídeo. Elija
la función de grabación de vídeo seleccionando el icono de vídeo pequeño
situado a la derecha del botón de color azul grande, y pulse el botón de color
azul grande para iniciar la grabación. El botón se volverá de color rojo, púlselo
de nuevo para detener la grabación. (Ilustraciones A27, A28)
Pulse el icono de cámara pequeño
que aparece a la derecha del botón azul
grande para cambiar al modo Camera, y pulse el botón azul grande para
capturar fotos desde la vista de cámara. (Ilustración A29)
A27
A28
A29
30
Cámara
Nota:
Las fotos y los vídeos se almacenarán en la memoria flash interna de su
dispositivo Android™, y podrá acceder a ellos desde la Galería o el
Reproductor multimedia. Para reproducir vídeos, use la aplicación Hubble o
una aplicación de un tercero, como MX player (disponible en Google Play™),
capaz dereproducir archivos MJPG (Motionjpeg).
Melody: si desea reproducir una de las cinco melodías preajustadas, pulse
Melody para mostrar el menú Melody y seleccionar la que desee reproducir en
su cámara. (Ilustración A30)
A31
Android™
A30
ESPAÑOL
Temperature Measure: la lectura de temperatura captada con el sensor de
temperatura de la parte trasera de la cámara se mostrará en la pantalla de su
dispositivo Android™ (Ilustración A31). La lectura se mostrará de color rojo si la
temperatura supera el intervalo de temperatura alta/baja definido en la cuenta
(consulte el apartado 4.2.4).
Cámara
31
4.3
Funciones de la cámara:
Funcionamiento con iPhone®/iPad®
• Ejecute la aplicación Hubble en su iPhone®/iPad®.
• La imagen de la cámara aparecerá en la pantalla.
4.3.1
Añadir más cámaras
• Mientras está en la imagen de la cámara, pulse el logotipo de Motorola para
acceder a la página Add Camera. (Ilustración i15)
• Pulse Add Camera para añadir otra cámara (siga los pasos de configuración
de iPhone®/iPad® del apartado 3.3.4). (Ilustración i16)
• Una vez añadida la cámara, la imagen de la cámara se mostrará
automáticamente.
i15
i16
Nota:
Puede añadir hasta cuatro cámaras conectadas a una cuenta.
32
Cámara
4.3.2
Eliminar una cámara
Puede eliminar una cámara de su cuenta siguiendo los pasos indicados a
continuación:
• Pulse el icono Settings
Detail. (Ilustración i17)
en la página General, y luego pulse Camera
• Seleccione Remove Camera y pulse en Yes para eliminar la unidad de la lista
de cámaras. (Ilustración i18)
i18
iOS
ESPAÑOL
i17
Cámara
33
4.3.3
Modificación de la información de la cuenta
Puede modificar la información de la cuenta desde su iPhone®/iPad®.
• Pulse Account en la página General y aparecerá Account Settings en la
pantalla. (Ilustración i19)
• Pulse Change Password para cambiar su contraseña siguiendo las
instrucciones.
• Pulse Log Out para salir de la cuenta.
• Pulse Current Plan y se le trasladará al Servicio de grabación de vídeo en la
nube. Si desea obtener más información, visite nuestro sitio web
www.hubbleconnected.com/motorola/plans.
• Pulse Send app log para enviar un informe de la aplicación Hubble a nuestro
servidor de correo electrónico. Debe enviarla únicamente si se lo solicita un
agente de atención al cliente.
i19
34
Cámara
4.3.4
Configuración de la cámara
Puede modificar los ajustes de la cámara pulsando el icono Settings
de la
página General (Ilustración i20). Puede consultar las opciones Camera Name y
Firmware version (Ilustración i21)y cambiar el nombre de la cámara pulsando el
nombre existente y siguiendo las instrucciones.
i20
i21
iOS
ESPAÑOL
• Pulse Notification Sensitivity para definir la sensibilidad de la detección del
sonido y el movimiento, y defina la alerta de temperatura alta o baja.
(Ilustración i22)
i22
Cámara
35
4.3.5
Ajustes generales
• Pulse Settings en la página General. (Ilustración i23)
• Pulse General Settings para cambiar el formato de las opciones Clock
(12hr/24hr) y Temperature (°C / °F) y para activar el Notification Sound o
Vibration. (Ilustración i24)
i23
i24
• Pulse Do Not Disturb, ajuste el temporizador al tiempo que desee, y
seleccione ON; la cámara no enviará ningún sonido o alerta a su dispositivo
iPhone®/iPad® durante el tiempo establecido en el ajuste. (Ilustración i25)
i25
36
Cámara
4.3.6
Configuración de la aplicación Hubble
• Pulse Ajustes en su iPhone®/iPad® y aparecerá una lista de aplicaciones,
pulse
y la configuración se mostrará en la pantalla. (Ilustración i26)
iOS
ESPAÑOL
i26
Cámara
37
4.3.7
Funciones de la aplicación Hubble
Mientras está en la vista Camera, pulse el área de visualización y aparecerán los
siguientes iconos de función.
Comunicación bidireccional: pulse el icono del micrófono para activar la
función de comunicación en la cámara, pulse el botón circular una vez para
hablar. Pulse de nuevo para escuchar desde la cámara. (Ilustraciones i27, i28)
i27
38
i28
Cámara
Función de desplazamiento e inclinación:
Pulse el icono de flecha en cuatro direcciones para activar la función de
desplazamiento e inclinación. Pulse las flechas arriba/abajo para inclinar la
cámara hacia arriba y hacia abajo, pulse las flechas izquierda/derecha para
desplazar la cámara a izquierda y derecha. (Ilustraciones i29, i30)
i30
iOS
ESPAÑOL
i29
Cámara
39
Función foto - pulse el icono Camera de la pantalla
para activar la
función de captura de foto. Pulse el botón Camera de color azul grande para
hacer una foto. (Ilustración i31)
i31
Nota:
Las fotos se almacenarán en la memoria flash interna de su iPhone®/iPad®.
40
Cámara
Melody: si desea reproducir una de las cinco melodías preajustadas en el
sistema, pulse Melody para mostrar el menú Melody y seleccionar la que desee
reproducir en su cámara. (Ilustración i32)
Temperature Measure: la lectura de temperatura captada con el sensor de
temperatura de la parte trasera de la cámara se mostrará en la pantalla LCD de
su iPhone®/iPad® (Ilustración i33). Las lecturas se mostrarán de color rojo si la
temperatura supera el rango de temperatura alta/baja definido en la cuenta.
(consulte el apartado 4.3.5).
i33
iOS
ESPAÑOL
i32
Cámara
41
4.4
Funciones de la cámara:
Funcionamiento con un ordenador de sobremesa/portátil
• Vaya a: http://www.hubbleconnected.com/motorola/login/
• Introduzca su nombre de usuario y su contraseña y haga clic en Login, si ya
ha creado una cuenta.
• Haga clic en la lista de cámaras emparejadas con su cuenta desde un
dispositivo Android™ o iPhone®/iPad®, y la imagen de la cámara aparecerá
en la pantalla. Podrá mantenerse conectado con las personas que desee y
vigilar los lugares y las mascotas que quiera gracias a la transmisión de vídeo.
• Puede cambiar la configuración siguiendo las instrucciones del menú que
aparecen en el sitio web.
42
Cámara
5. Procedimiento de restablecimiento de la
cámara
Nota: Si la cámara se mueve de un router (p. ej. el de casa) a otro router (p. ej. el
de la oficina), o tiene problemas de configuración de la cámara, la cámara
deberá restaurarse. Restaure la cámara realizando el siguiente procedimiento:
1.
2.
3.
ESPAÑOL
4.
Deslice el interruptor ON/OFF hasta la posición OFF.
Mantenga pulsado el botón PAIR y, a continuación, deslice el interruptor
ON/OFF hasta la posición ON.
Suelte el botón PAIR cuando escuche un tono de confirmación, y espere a
que la cámara complete el procedimiento de restauración interno. El
indicador LED se ilumina en color rojo y parpadea lentamente cuando la
cámara se ha restaurado correctamente.
Puede añadir su cámara de nuevo siguiendo los pasos del apartado 3.2.4
para dispositivos Android o el apartado 3.3.4 para dispositivos iOS.
Procedimiento de restablecimiento de la cámara
43
6. Ayuda
Interferencia de ruido
Con el fin de evitar ruidos o ecos de fondo, asegúrese de que haya distancia
suficiente entre su dispositivo y la unidad de cámara Wi-Fi®.
El uso de otros productos en la banda de 2,4 GHz, como sistemas Bluetooth® y
hornos microondas, podría provocar interferencias con este producto.
Mantenga la unidad de cámara Wi-Fi® a una distancia mínima de 1,5 m de estos
tipos de productos, o apáguelos si parecen estar provocando interferencias.
Pérdida de conexión
Compruebe la configuración de su conexión Wi-Fi®. En caso de ser necesario,
conecte de nuevo a su conexión Wi-Fi®. Asegúrese de que la unidad
de cámara Wi-Fi® se encuentre encendida. Espere unos minutos antes de
conectarse a la red Wi-Fi®.
Si olvida la contraseña
Si no recuerda su contraseña, pulse "Forgot Password" e introduzca su
dirección de correo electrónico. Se enviará inmediatamente a su dirección
de correo electrónico una contraseña nueva.
Resolución de problemas
Categoría
Problema
Descripción/Error
Solución
Cuenta
No puedo iniciar sesión Compruebe su nombre de usuario y
ni siquiera después de contraseña.
registrarme.
Cuenta
Me aparece un
mensaje de error que
dice: "Email ID is not
registered".
44
Asegúrese de que ha registrado una
cuenta en el servicio. Pulse Create
Account para crear una cuenta y
poder usar el vigilabebés con vídeo
Wi-Fi®.
Ayuda
Cuenta
¿Qué puedo hacer si
olvido mi contraseña?
Cuenta
1.
No puedo recibir una
nueva contraseña a
pesar de haber usado la
opción "Forgot
2.
Password"
Puede que el correo electrónico
se encuentre en la carpeta de
correo no deseado. Revise la
carpeta de correo no deseado.
Puede que la recepción del
correo electrónico se retrase.
Espere unos minutos y actualice
su cuenta de correo electrónico.
1.
Inténtelo en unos minutos. Esto
podría deberse a algún tipo de
problema con su conexión a
Internet.
Si el problema persiste, reinicie la
cámara para comprobar si se
resuelve el problema.
Reinicie su router inalámbrico.
2.
3.
ESPAÑOL
Problemas de Me aparece el
conectividad mensaje: We are
having problems
accessing your
camera. Este mensaje
podría aparecer
debido a la falta de
conexión a Internet.
Espere e inténtelo de
nuevo más tarde.
Haga clic en el vínculo "Forgot
Password" del sitio web http://
www.hubbleconnected.com/
motorola/login/ O en la aplicación para
Android™ o iOS. Se enviará un correo
electrónico a la dirección de correo
que hubiera registrado.
Ayuda
45
Visualización Cuando estoy en el
de la cámara "Remote Mode", el
vídeo se detiene a los 5
minutos. ¿Cómo
puedo verlo durante
más tiempo?
Cuando accede a su cámara desde
una red diferente desde su red
doméstica (a través de Internet), el
vídeo deja de mostrarse a los cinco
minutos.
Puede hacer clic en la cámara de
nuevo desde la aplicación para
Android™/iOS para iniciar la
transmisión otra vez.
Si accede desde su navegador web,
puede pulsar el botón Reload para
comenzar a ver de nuevo la
transmisión de vídeo de la cámara.
Funciones
El umbral de ajuste de Puede ajustar la sensibilidad del
la alerta de sonido no sonido para activar las notificaciones
en el menú Camera Settings.
es correcto.
Problemas de La aplicación de mi
conectividad teléfono muestra el
siguiente mensaje:
"Unable to connect to
BMS server".
1.
2.
3.
Configuración Cuando añado una
cámara nueva a mi
cuenta, no puedo
encontrar ninguna
cámara que añadir.
46
Compruebe la intensidad de la
red Wi-Fi ® .
Compruebe si está conectado a
Internet abriendo el navegador
del teléfono y accediendo a un
sitio web como
www.google.com.
Si puede conectarse a Internet
sin problemas, inténtelo de
nuevo.
Si está intentando añadir una cámara
que ya se ha añadido a su cuenta o a
otra cuenta, primero tendrá que
restaurar la cámara. La restauración
puede hacerse manteniendo pulsado
el botón EMPAREJAR situado en la
parte inferior de la cámara durante
cinco segundos.
Ayuda
General
¿Cuáles son los
navegadores
compatibles para
acceder desde mi PC/
Mac®?
En PC y Mac ® , recomendamos usar
Google Chrome™. Sin embargo,
también es posible usar los siguientes
navegadores:
PC: Internet Explorer ® 9 y superior.
Mac ® : Safari ® .
General
¿Qué significa el
parpadeo del LED?
Un LED parpadeante indica el
siguiente estado:
Parpadeo lento: 1. La cámara se
encuentra en el modo de
configuración. Puede añadir la cámara
a su cuenta en este modo. Al sacar la
cámara de la caja, está activado el
modo de configuración. Para
restaurarla al modo de Configuración,
mantenga pulsado el botón PAIR de la
parte inferior de la cámara hasta que
escuche un tono acústico.
El LED está encendido de forma fija: La
cámara está conectada a la red Wi-Fi ® .
Problemas de No puedo acceder a mi Compruebe si la cámara se encuentra
conectividad cámara.
dentro del alcance de la red Wi-Fi® .
Si el LED de la cámara parpadea
lentamente, intente acercar la cámara al
router para que la conectividad Wi-Fi ®
sea mejor, e inténtelo de nuevo.
Ayuda
47
ESPAÑOL
Parpadeo lento: 2. La cámara se está
conectando al router o ha perdido la
conexión con el router. Asegúrese de
que la cámara se encuentra dentro del
rango de la señal Wi-Fi® .
Configuración Durante la
configuración desde
un dispositivo
Android™ o iOS,
durante el último paso
no puedo encontrar mi
cámara y el proceso de
configuración falla.
Active de nuevo el modo de
configuración en la cámara e inténtelo
de nuevo. Mantenga pulsado el botón
PAIR situado en la parte inferior de la
cámara, hasta que escuche un tono
acústico. Espere un minuto a que la
cámara se reinicie. El LED de la
cámara, indica que esta se encuentra
en el modo de configuración. Inicie el
procedimiento de configuración
desde el smartphone de nuevo.
Problemas de A pesar de que estoy
conectividad accediendo a mi
cámara desde la misma
red Wi-Fi ® , mi cámara
se sigue mostrando
como cámara remota.
Solo puedo acceder a
la cámara durante
cinco minutos.
Compruebe la configuración de su
router inalámbrico. En los routers de
la marca Buffalo, por ejemplo, hay una
opción llamada Wireless Isolation.
Deshabilite esta opción.
Cámara
Actualice el firmware. Este proceso
lleva unos cinco minutos. Cada cierto
tiempo enviamos actualizaciones,
destinadas a mejorar las funciones de
la cámara.
48
Cuando intento ver la
imagen de la cámara
me aparece un
mensaje de
actualización del
firmware de la cámara.
¿Qué debo hacer?
Ayuda
General
Requisitos mínimos:
¿Qué plataformas
permiten acceder a mi Windows ® 7*
cámara?
*Se necesita el complemento de
navegador Java
Mac OS ® versión 10.7
Chrome™ versión 24
Internet Explorer ® versión 9
Safari ® versión 6
Java™ versión 7
Firefox ® versión 18.0
Adobe ® Flash ® Player 15.0
Android™ 4.2
iPhone ® /iPad iOS ® versión 7.0
No escucho sonido
cuando accedo a una
cámara remota.
General
Cuando accede a su cámara desde la
¿Qué significan los
términos "cámara local misma red inalámbrica (cada) en la
" y "cámara remota"? que está configurada, esta es una
cámara local. Cuando accede a su
cámara desde fuera de casa, se trata
de una cámara remota. Puede estar
utilizando una conexión 3G, 4G o 4G
LTE, o Wi-Fi ® , desde fuera de casa.
Ayuda
49
ESPAÑOL
Puede pulsar el icono del altavoz de la
pantalla de la transmisión de vídeo
para escuchar el audio. De forma
predeterminad, el, audio no está
activado cuando accede a una
cámara remota.
General
General
Android™:
¿Cómo puedo
descargar la aplicación - Abra Google Play en su dispositivo
para dispositivos
Android™.
Android™ y iOS?
- Seleccione Buscar
- Escriba "Hubble for Motorola
Monitors"
- En los resultados se mostrará la
aplicación Hubble
- Selecciónela para instalarla.
Dispositivo iOS:
- Abra la App StoreSM
- Seleccione Buscar
- Escriba "Hubble for Motorola
Monitors"
- En los resultados se mostrará la
aplicación Hubble
- Seleccione la aplicación para
instalarla
Colocación
Cuando el vídeo se
corta, la aplicación
intenta conectar de
nuevo, y esto provoca
la pérdida del sonido e
interrupciones del
vídeo.
Tendrá que desactivar la función de
bloqueo automático de su dispositivo
inteligente para garantizar una
transmisión de vídeo/audio continua.
Funciones
¿Cuantos usuarios
pueden acceder a la
cámara al mismo
tiempo?
Si está accediendo en modo local, se
admiten dos usuarios. Para más de
dos usuarios, toda la transmisión se
realizará a través del servidor remoto.
Esto permite acceso a usuarios
ilimitados simultáneos a una misma
cámara.
50
Ayuda
El rendimiento de la transmisión de
vídeo está relacionado con el ancho de
banda, especialmente si tiene dos o
más dispositivos de transmisión
funcionando a través del mismo router.
ESPAÑOL
Problemas de Sufro interferencias
conectividad provocadas por mis
otras webcam.
Ayuda
51
7. Información general
Si su producto no está funcionando correctamente...
1.
2.
Lea este Manual de usuario.
Póngase en contacto con el servicio de atención al cliente:
+49 (0) 1805 938 802 desde Europa
Correo electrónico: [email protected]
Garantía limitada para productos y accesorios de consumo
("Garantía")
Le agradecemos la compra de este producto marca Motorola, fabricado bajo
licencia por Binatone Electronics International Ltd ("BINATONE").
¿Qué cubre esta garantía?
Sujeto a las exclusiones presentes a continuación, BINATONE garantiza que
este producto (el "Producto") o accesorio certificado (el "Accesorio") de marca
Motorola vendido con este producto ha sido fabricado libre de fallos en
materiales y en la mano de obra con un uso de consumo normal durante el
periodo especificado a continuación. Esta Garantía es su única garantía, y no
puede transferirse.
¿Quién recibe esta cobertura?
Esta Garantía cubre únicamente al primer comprador, y no es transferible.
¿Qué hará BINATONE?
BINATONE o su distribuidor autorizado, según elija y dentro de un tiempo
comercialmente razonable, reparará o sustituirá de forma gratuita todos
aquellos Productos o Accesorios que no sean conformes a esta Garantía.
Podríamos utilizar productos, accesorios o piezas reacondicionadas o usadas
funcionalmente equivalentes.
52
Información general
¿Qué otras limitaciones existen?
TODA GARANTÍA IMPLÍCITA, INCLUIDAS A TÍTULO ENUNCIATIVO PERO
NO LIMITATIVO LAS GARANTÍAS IMPLÍCITAS DE COMERCIABILIDAD E
IDONEIDAD PARA UN FIN DETERMINADO, ESTARÁN LIMITADAS A LA
DURACIÓN DE ESTA GARANTÍA LIMITADA. DE LO CONTRARIO, LA
REPARACIÓN O SUSTITUCIÓN OFRECIDA EN VIRTUD DE ESTA GARANTÍA
LIMITADA EXPLÍCITA ES EL ÚNICO REMEDIO AL QUE TENDRÁ ACCESO EL
CONSUMIDOR, Y SE PROPORCIONA EN LUGAR DEL RESTO DE
GARANTÍAS, TANTO EXPRESAS COMO IMPLÍCITAS. BAJO NINGUNA
CIRCUNSTANCIA MOTOROLA NI BINATONE SERÁN RESPONSABLES, NI
POR CONTRATO NI POR AGRAVIO (INCLUIDA NEGLIGENCIA) DE DAÑOS
SUPERIORES AL PRECIO DE COMPRA DEL PRODUCTO O ACCESORIO EN
CUESTIÓN, NI DE NINGÚN DAÑO INDIRECTO, ACCIDENTAL, ESPECIAL O
RESULTANTE, PÉRDIDA DE BENEFICIO O DE INGRESOS, PÉRDIDA DE
NEGOCIO, PÉRDIDA DE INFORMACIÓN NI DE NINGUNA OTRA PÉRDIDA
FINANCIERA DERIVADA DE O RELACIONADA CON LA POSIBILIDAD O
IMPOSIBILIDAD DE UTILIZAR LOS PRODUCTOS O ACCESORIOS EN LA
MEDIDA QUE LO PERMITA LA LEY.
ESPAÑOL
Algunas jurisdicciones no permiten la limitación o la exclusión de daños
accidentales o resultantes, ni la limitación sobre la duración de una garantía
implícita, por lo que las limitaciones o exclusiones anteriormente mencionadas
podrían no aplicarse a su caso. Esta Garantía le otorga derechos legales
concretos, y también podría disponer de otros derechos que podrían variar
según la jurisdicción.
Información general
53
Productos cubiertos
Productos de consumo
Accesorios de consumo
Productos y accesorios de
consumo que se reparan o
sustituyen
Duración de la cobertura
Dos (2) años a partir de la fecha de compra
inicial del producto por el primer
comprador usuario del producto.
Noventa (90) días a partir de la fecha de
compra inicial del accesorio por el primer
usuario del producto.
El balance de la garantía original o durante
noventa (90) días a partir de la fecha de
devolución del producto al usuario, el
periodo que sea mayor.
Exclusiones
Desgaste normal. Esta garantía no cubre las labores de mantenimiento
periódicas, la reparación ni la sustitución de piezas debido al desgaste de uso
normal.
Baterías. Esta Garantía únicamente cubre aquellas baterías cuya capacidad
totalmente cargada sea inferior al 80 % de su capacidad nominal, así como
aquellas baterías que presenten fugas.
Uso abusivo e inadecuado. Los defectos o daños derivados de: (a) una
utilización o conservación incorrectas, uso incorrecto o indebido, accidentes o
negligencias, como por ejemplo daños físicos (roturas, arañazos, etc.) en la
superficie del producto derivados de un uso incorrecto; (b) contacto con
líquidos, agua, lluvia, humedad extrema o sudoración excesiva, arena, suciedad
o elementos similares, calor extremo o alimentos; (c) uso de los productos o los
accesorios para fines comerciales o que sometan al producto o al accesorio a un
uso o condiciones anómalas; u (d) otros actos que no puedan achacarse a
MOTOROLA ni a BINATONE, están excluidos de la cobertura.
Uso de Productos y Accesorios de marcas que no sean Motorola. Esta garantía
no cubre aquellos defectos o daños derivados del uso de Productos, Accesorios
o cualquier equipamiento periférico que no sean de la marca Motorola o no
estén certificados por ella.
54
Información general
Servicio o modificación no autorizada. Los defectos o daños derivados de
mantenimiento, pruebas, ajustes, instalación, mantenimiento, alteración o
modificación de cualquier otra forma por cualquier entidad que no sea
MOTOROLA, BINATONE o sus centros de servicio autorizados, están excluidos
de la cobertura de la garantía.
Productos modificados. Productos o Accesorios con (a) etiquetas de número
de serie o fecha que se hayan eliminado, modificado o borrado; (b) precintos
rotos o que muestren evidencias de modificación; (c) números de serie en placa
que no coincidan; o (d) las carcasas o piezas no conformes o que no sean de
marca Motorola están excluidas de la cobertura.
Servicios de comunicación. Los defectos, daños o los fallos de Productos o
Accesorios derivados de servicios o señales de comunicación a los que puede
suscribirse o con los que puede utilizar los Productos o accesorios no están
cubiertos por esta garantía.
¿Cómo obtener servicio de garantía u otro tipo de información?
Para obtener servicio o información, llame al número de teléfono:
+49 (0) 1805 938 802 desde Europa
Recibirá instrucciones sobre cómo enviar los Productos o Accesorios bajo su
cuenta y riesgo a un Centro de reparaciones autorizado de BINATONE.
Para obtener servicio, debe incluir: (a) el Producto o Accesorio defectuoso; (b)
el comprobante de prueba original (el recibo), que incluya la fecha, lugar y
vendedor del Producto; (c) si la caja del producto incluía una tarjeta de garantía,
la tarjeta de garantía rellenada con el número de serie del Producto; (d) una
descripción por escrito del problema y, lo que es más importante; (e) su
dirección y número de teléfono.
Estos términos y condiciones representan el contrato de garantía completo
entre usted y BINATONE ELECTRONICS en relación a los Productos o
Accesorios que ha comprado, y sustituyen a todo contrato o representación
anterior, incluyendo las representaciones que aparecen en publicaciones o
materiales promocionales emitidos por BINATONE o las afirmaciones realizadas
por un agente, empleado o miembro del personal de BINATONE que pudiera
haber estado relacionado con la compra en cuestión.
Información general
55
ESPAÑOL
Correo electrónico: [email protected]
BINATONE TELECOM PLC
1 Apsley Way London NW2 7HF,United Kingdom.
Tel: +44(0) 20 8955 2700 Fax: +44(0) 20 8344 8877
e-mail: [email protected]
________________________________________
.
EC Declaration of Conformity
We the manufacturer / Importer :
Binatone Telecom Plc
1 Apsley Way London
NW2 7HF, United Kingdom.
Declare under our sole responsibility that the following products
Wi-Fi Video Camera
Type of equipment:
FOCUS85, FOCUS85-B, FOCUS85-S, FOCUS85-W
Model Name:
SCOUT85, MBP85CONNECT
Country of Origin:
Brand:
China
Motorola
complies with the essential protection requirements of R&TTE Directive 1999/5/EC on the
approximation of the laws of the Member States relating to Radio Spectrum Matters, the
Council Directive
/108/EC on the approximation of the laws of the Member States
relating to electromagnetic compatibility (EMC) and the European Community Directive
2006/95/EC relating to Electrical Safety. Directive 2011/65/EC on the restriction of use of
hazardous substances (RoHS) and 2009/125/EC relating to ecodesign requirement for
Energy-Related Products (ErP).
Assessment of compliance of the product with the requirements relating to the essential
requirements according to Article 3 R&TTE was based on Annex III of the Directive
1999/5/EC and the following standard:
Radio Spectrum:
EMC:
Electrical Safety:
RF Safety:
EN300328 V1.8.1:2012
EN301489-17 V2.2.1:2012
EN301489-1 V1.9.2:2011
EN60950-1/A12:2011
EN62311:2010
The product is labelled with the European Approval Marking CE as show. Any Unauthori ed
modification of the product voids this Declaration.
Manufacturer / Importer
(Signature of authori ed person)
London, 30 May , 2014
Karl Heinz Mueller / Chief Technical Officer
56
Place & Date
Información general
8. Especificaciones técnicas
Unidad de cámara
Wi-Fi ®
802.11 b/g/n
Sensor de imagen
CMOS a color de 1 megapíxel
Lente
f = 2,5 mm, F = 2.8
LED de infrarrojos
8 unidades
Adaptador de corriente
Ten Pao International Ltd.
S009GV0500150
Entrada: 100-240 V de CA, 50/60 Hz, 300 mA
ESPAÑOL
Salida: 5 V de CC, 1500 mA
Especificaciones técnicas
57
Fabricado, distribuido o comercializado por Binatone Electronics International LTD.,
licenciatario oficial de este producto. MOTOROLA y el logotipo de la M estilizada son
marcas comerciales o marcas comerciales registradas de Motorola Trademark
Holdings, LLC. y se utilizan bajo licencia. El logotipo de Apple y Safari son marcas
comerciales de Apple Inc. registradas en los Estados Unidos y en otros países. App
Store es una marca de servicio de Apple Inc., Google Play, Android y Chrome son
marcas comerciales de Google Inc. Wi-Fi es una marca comercial de la Wi-Fi Alliance.
Internet Explorer y Windows son marcas comerciales del grupo de empresas
Microsoft. Firefox es una marca comercial registrada de Mozilla Foundation. Adobe y
Flash son marcas comerciales o marcas comerciales registradas de Adobe Systems
Incorporated. Java es una marca comercial registrada de Oracle o sus empresas
filiales. El resto de marcas comerciales son propiedad de sus respectivos propietarios.
© 2015 Motorola Mobility LLC. Todos los derechos reservados.
ES_EU Version 2.0
Impreso en China