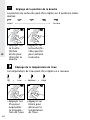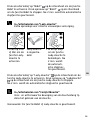
1
Leben im Bad Living bathrooms Duravit AG P.O. Box 240 Werderstr. 36 78132 Hornberg Germany Phone +49 78 33 70 0 Fax +49 78 33 70 289 [email protected] www.duravit.com Affix the enclosed product label with serial number in this area. Collez l‘étiquette de produit ci-jointe avec le numéro de série dans ce champ. Plak het bijgevoegde product-etiket met het serienummer in dit veld. Pegue la etiqueta de producto suministrada con el número de serie en esta casilla. Incollare in questo spazio l‘etichetta del prodotto in dotazione con il numero di serie. Best.-Nr. 56979/15.05.3.1 · We reserve the right to make technical improvements and enhance the appearance of the products shown. Kleben Sie das beiliegende Produkt-Etikett mit der Seriennummer in dieses Feld. SensoWash® Slim Bedienungsanleitung Dusch-WC-Aufsatz Operating instructions Shower toilet unit Notice d’utilisation Abattant WC douche Gebruikshandleiding Douche-WC-opzetstuk Manual de instrucciones Accesorio para el WC con ducha Istruzioni d’uso Set per WC con doccetta 1. 3. 2. H G F E D A C B 1 2 3 4 5 6 7 8 www.sensowash.com Inhalt 1. Kurzübersicht...................................................................... 2 1.1Sitzeinheit.................................................................... 2 1.2Fernbedienung ............................................................ 2 2.Symbolbeschreibung............................................................ 2 3. Zur Ihrer Sicherheit.............................................................. 3 3.1 Bestimmungsgemäßer Gebrauch.................................. 3 3.2Sicherheitshinweise..................................................... 3 4. Grundlagen zur Bedienung................................................... 6 4.1Fernbedienung............................................................. 6 4.2Status-LEDs.................................................................. 7 5. Erste Inbetriebnahme.......................................................... 7 Fernbedienung.................................................................7 Stromversorgung.............................................................7 SensoWash® anschalten...................................................7 6.Bedienung............................................................................ 8 6.1 An- / Ausschalten von SensoWash®............................... 8 6.2Duschfunktionen.......................................................... 8 „Gesäßdusche“ aktivieren / deaktivieren.........................8 „Ladydusche“ aktivieren / deaktivieren............................9 „Komfortdusche“ aktivieren / deaktivieren......................9 Duschstrahlintensität einstellen.....................................10 Duschstabposition einstellen..........................................11 Wassertemperatur einstellen.........................................11 6.3Einstellungen............................................................. 12 Nachtlicht einstellen.......................................................12 Signalton aktivieren / deaktivieren................................13 Fernbedienung sperren/entsperren...............................13 7. Reinigung und Pflege......................................................... 15 7.1 Sitz und Deckel........................................................... 15 7.2 Duschstab und -kopf................................................... 15 Manuelles Reinigen von Duschstab und -kopf................15 Selbstreinigung von Duschstab und -kopf......................16 7.3Fernbedienung........................................................... 16 7.4 Längerer Nichtgebrauch............................................. 17 8.Entsorgung......................................................................... 17 9. Hilfe im Problemfall........................................................... 18 10.Technische Daten................................................................ 24 DE 1 1. Kurzübersicht DE 1.1 Sitzeinheit 1.2 Fernbedienung A Power B Status-LED C Gesäßdusche D Umgebungslichtsensor E Ladydusche F Infrarotempfänger G Nachtlicht H Absenkautomatik 1 Infrarotsender 2 Gesäßdusche 3 Ladydusche 4 Komfortdusche 5 Duschstabposition 6 Wassertemperatur 7 Stopp 8 Batteriefach 2. Symbolbeschreibung Warnung Vorsicht ACHTUNG > Beschreibt eine gefährliche Situation, welche zu Tod oder bleibenden Schäden führen kann, wenn sie nicht vermieden wird. Beschreibt eine gefährliche Situation, welche zu leichten oder mittelschweren Verletzungen führen kann, wenn sie nicht vermieden wird. Beschreibt Schäden, welche nicht die Person betreffen. Hier finden Sie einen Tipp. Hier werden Sie zu einer Handlung aufgefordert. Hier werden Sie auf ein akustisches Signal hingewiesen. Hier werden Sie auf eine zeitgesteuerte Automatikfunktion hingewiesen. 2 3. Zur Ihrer Sicherheit Damit Sie viele Jahre Freude an Ihrem SensoWash® haben, lesen Sie bitte diese Bedienungsanleitung, insbesondere die Sicherheitshinweise, aufmerksam durch. Bewahren Sie die Bedienungsanleitung sorgfältig auf und geben Sie sie gegebenenfalls an den neuen Besitzer weiter. Diese Bedienungsanleitung entspricht dem technischen Stand des Geräts zum Zeitpunkt der Drucklegung. Duravit behält sich das Recht vor, im Sinne der Weiterentwicklung Änderungen vorzubehalten. DE 3.1 Bestimmungsgemäßer Gebrauch SensoWash® Slim ist ein Aufsatz-Dusch-WC mit Sprühvorrichtung und für die Gesäß- und Intimreinigung bestimmt. Es kann auch jederzeit als normaler WC-Sitz benutzt werden. Der Gebrauch ist ausschließlich auf geschlossene Räume beschränkt. Jede andere Verwendung gilt als nicht bestimmungsgemäß. Duravit übernimmt keine Haftung für Folgen nicht bestimmungsgemäßen Gebrauchs. 3.2 Sicherheitshinweise Lesen und befolgen Sie die nachfolgenden Sicherheitshinweise! Anforderungen an den Nutzer •Kinder und Personen, denen es an Wissen oder Erfahrung im Umgang mit dem Gerät mangelt, oder die in ihren körperlichen, sensorischen oder geistigen Fähigkeiten eingeschränkt sind, dürfen das Gerät nur nach Unterweisung bezüglich des sicheren Gebrauches des Gerätes oder unter Aufsicht benutzen. •Stellen Sie sicher, dass Kinder nicht mit SensoWash® spielen. Warnung Gesundheitsschäden! Dieses Gerät muss ordnungsgemäß geerdet sein. >>Beachten Sie die Montageanleitung. 3 DE Verwenden Sie das Gerät nur bei voller Funktionsfähigkeit •Achten Sie darauf, dass das Stromkabel nicht beschädigt ist. •Das Stromkabel darf nicht eingeklemmt oder gequetscht werden. •Halten Sie das Stromkabel von heißen Oberflächen und scharfen Kanten fern. •Benutzen Sie das Produkt NICHT, wenn es nicht ordnungsgemäß funktioniert. Unterbrechen Sie sofort die Stromversorgung. Schließen Sie das Absperrventil, um die Wasserversorgung zu unterbrechen. Kontaktieren Sie [email protected]. Vermeiden Sie Produktschäden oder Fehlfunktionen durch unsachgemäßen Gebrauch. Risiko von Gesundheitsschäden und möglicher Vorsicht Produktschaden. >>Versorgen Sie das Gerät mit kaltem Trinkwasser aus der Hauptwasserleitung. >>KEIN Abwasser, Grauwasser, Brauchwasser, Meerwasser oder anderes, nicht oder nur mäßig aufbereitetes Wasser an schließen. •Wird SensoWash® von einem kalten in einen warmen Ort gebracht, kann Kondensfeuchtigkeit entstehen. Lassen Sie das Gerät einige Stunden ausgeschaltet. •Montieren Sie SensoWash® NICHT in frostgefährdeten Räumen. Die Raumtemperatur sollte minimal 4 °C betragen. •Stellen oder legen Sie KEINE offenen Feuerquellen, Kerzen, Zigaretten, o. Ä. auf SensoWash®. •Setzen Sie SensoWash® NICHT direkter Wassereinwirkung oder direkter Sonneneinstrahlung aus. •Steigen oder stehen Sie NICHT auf das Produkt. •Stellen Sie KEINE schweren Gegenstände auf den Deckel. •Verschmutzen, bespritzen oder verstopfen Sie den Duschstab NICHT mutwillig. 4 Reparaturen dürfen nur durch eine entsprechende Fachkraft vorgenommen werden. •Nehmen Sie KEINE Veränderungen, Manipulationen, Zusatz installationen oder Reparaturversuche am SensoWash® vor. •Reparaturen dürfen nur von qualifizierten Elektroinstallateuren oder Technikern durchgeführt werden. •Unsachgemäße Reparaturen können zu Unfällen, Schäden und Betriebsstörungen führen. •Verwenden Sie KEIN Zubehör, das nicht von Duravit empfohlen wird. DE Hinweise zum Gebrauch von Batterien Vorsicht Gesundheitsschäden! >>Vermeiden Sie wenn Batteriesäure ausgelaufen ist den Kontakt mit Haut, Augen und Schleimhäuten. >>Spülen Sie bei Kontakt mit der Säure die betroffenen Stellen mit viel klarem Wasser und suchen Sie umgehend einen Arzt auf. •Bewahren Sie Batterien für Kleinkinder unerreichbar auf. Batterien können beim Verschlucken lebensgefährlich sein. Wurde eine Batterie verschluckt, nehmen Sie sofort ärztliche Hilfe in Anspruch. •Batterien dürfen nicht geladen, mit anderen Mitteln reaktiviert, auseinandergenommen, ins Feuer geworfen oder kurzge schlossen werden. •Nehmen Sie verbrauchte Batterien immer sofort aus der Fernbedienung. Diese können auslaufen und somit Schäden verursachen. •Legen Sie keine neuen und alten Batterien zusammen in die Fernbedienung ein. •Reinigen Sie Batterie und Kontakte vor dem Einlegen der Batterie. Beachten Sie die richtige Polarität. •Entfernen Sie die Batterien, wenn Sie die Fernbedienung für längere Zeit nicht benutzen. •Setzen Sie Batterien keinen extremen Bedingungen aus: Legen Sie sie nicht auf heißen Oberflächen ab und setzen Sie sie nicht 5 direkter Sonneneinstrahlung aus. Es besteht sonst erhöhte Auslaufgefahr. DE 4. Grundlagen zur Bedienung 4.1 Fernbedienung Die Bedienung von SensoWash® erfolgt über die Fernbedienung. Auch die Einstellungen werden über die Fernbedienung vorgenommen. Um eine Funktion anzuschalten, drücken Sie die jeweilige Taste auf der Fernbedienung. Die Taste leuchtet kurz hell auf. Um eine Duschfunktion auszuschalten, „Stopp“ 7 auf der Fern bedienung drücken. Sollte die Fernbedienung nicht verfügbar oder die Batterien leer sein, können die Grundfunktionen auch über das seitliche Bedienfeld an- und ausgeschaltet werden. >>Drücken Sie auf die Verriegelung am „Batteriefach“ 8 , um es zu öffnen. >>Setzen Sie zwei Lithium-Batterien (CR2032) mit dem + nach oben ein. >>Schließen Sie das „Batteriefach“ 8 . 6 4.2 Status-LEDs Rot leuchtend: Grün leuchtend: Grün blinkend: Orange blinkend: Rot blinkend: SensoWash® befindet sich im „Standby-Modus“. Keine Funktion kann verwendet werden. SensoWash® befindet sich im „Betriebsmodus“. Alle Funktionen können verwendet werden. SensoWash® befindet sich im Prozess der„Initialisierung“. Nur die Taste „Power“ A an der Sitzeinheit kann verwendet werden. SensoWash® befindet sich im „Entleerungsmodus“. Fehlfunktion. Unterbrechen Sie die Stromversorgung und fahren Sie mit Kapitel 9 fort. DE 5. Erste Inbetriebnahme Fernbedienung >>Drücken Sie auf die Verriegelung am „Batteriefach“ 8 , um es zu öffnen. >>Entfernen Sie die Sicherheitsfolie am Batteriefach. >>Schließen Sie das „Batteriefach“ 8 . Stromversorgung >>Schließen Sie das Gerät an die Haupstromversorgung an. S ensoWash® startet die „Initialisierung“ für ca. 15 Sekunden, nachdem die Stromversorgung angeschlossen wurde. In dieser Zeit blinkt die „Status-LED“ B grün und nur die Taste „Power“ A an der Sitzeinheit kann verwendet werden. Alle anderen Funktionen sind nicht verfügbar. SensoWash® anschalten Voraussetzung: SensoWash® befindet sich im „Standby-Modus“, und die „Status-LED“ B leuchtet rot. >>Drücken Sie die Taste „Power“ D an der Sitzeinheit. SensoWash® ist nun angeschaltet. Die „Status-LED“ B leuchtet grün. Alle Funktionen können verwendet werden. 7 6. Bedienung DE 6.1 An- / Ausschalten von SensoWash® >>Drücken Sie die Taste „Power“ A an der Sitzeinheit, um SensoWash® anzuschalten. Die grün leuchtende Status-LED weist auf den „Betriebsmodus“ hin. Drücken Sie die Taste „Power“ A an der Sitzeinheit erneut, um SensoWash® auszuschalten. Die rot leuchtende Status-LED weist auf den „Standby-Modus“ hin. 6.2 Duschfunktionen SensoWash® führt eine automatische Selbstreinigung, des eingefahrenen Duschstabs, vor und nach jedem Duschvorgang durch. Die Duschfunktionen werden nach 2 Minuten automatisch beendet oder sofort nach Betätigung der Taste „Stopp“ 7 . „Gesäßdusche“ aktivieren / deaktivieren Angenehme und sichere Reinigung des Gesäßes. 1 >>Drücken Sie die Plusoder MinusTaste, um die Gesäßdusche zu aktivieren. 8 2 Die Gesäß dusche ist aktiviert. 3 >>Drücken Sie „Stopp“, um die Gesäßdusche zu beenden. Anderenfalls stoppt sie nach 2 Minuten automatisch. Alternativ können Sie die Taste „Gesäßdusche“ C an der Sitzeinheit drücken, um die Gesäßdusche zu aktivieren. Drücken Sie erneut die Taste „Gesäßdusche“ C an der Sitzeinheit, um die Gesäßdusche zu stoppen. Anderenfalls stoppt sie nach 2 Minuten automatisch. DE „Ladydusche“ aktivieren / deaktivieren Zusätzlicher Duschkopf für die weibliche Intimpflege. 1 >>Drücken Sie die Plusoder MinusTaste, um die Ladydusche zu aktivieren. 2 Die Ladydusche ist aktiviert. 3 >>Drücken Sie „Stopp“, um die Lady dusche zu beenden. Anderenfalls stoppt sie nach 2 Minuten automatisch. Alternativ können Sie die Taste „Ladydusche“ E an der Sitzeinheit drücken, um die Ladydusche zu aktivieren. Drücken Sie erneut die Taste „Ladydusche“ E an der Sitzeinheit, um die Ladydusche zu stoppen. Anderenfalls stoppt sie nach 2 Minuten automatisch. „Komfortdusche“ aktivieren / deaktivieren Vorwärts- und Rückwärtsbewegung des Duschstabs während des Duschvorgangs. Voraussetzung: Die Funktion Gesäß- oder Ladydusche ist aktiviert. 9 1 2 3 DE >>Drücken Sie die PlusTaste, um die Komfortdusche zu aktivieren. Die Komfortdusche ist aktiviert. >>Drücken Sie die Minus-Taste, um die Komfortdusche zu beenden. Die zuvor eingestellte Funktion (Gesäß- oder Ladydusche) ist noch aktiv. Nach 2 Minuten stoppt sie auto matisch. Duschstrahlintensität einstellen Die Duschstrahlintensität lässt sich in 3 Stufen individuell regulieren: Niedrig >Mittel> Hoch Voraussetzung: Die Funktion Gesäß- oder Ladydusche ist aktiviert, und das Symbol leuchtet entsprechend auf. 1 2 >>Drücken Sie >>Drücken Sie die Plusdie MinusTaste, um die Taste, um die DuschstrahlDuschstrahlintensität zu intensität zu erhöhen. senken. Gehen Sie bei der Funktion „Ladydusche“ 3 entsprechend vor. 10 Duschstabposition einstellen Der Duschstab lässt sich auf 5 Positionen individuell einstellen: DE Vorn <––––––––––––––––––––––––––––––––> Hinten 1 2 >>Drücken Sie >>Drücken Sie die Taste die Taste „rechter „linker Pfeil“, Pfeil“, um die um die PoPosition nach sition nach vorne zu hinten zu verändern. verändern. Wassertemperatur einstellen Die Wassertemperatur lässt sich in 4 Stufen individuell einstellen: Aus>Niedrig> Mittel > Hoch 11 1 2 DE >>Drücken Sie die PlusTaste, um die Wassertemperatur zu erhöhen. >>Drücken Sie die MinusTaste, um die Wassertemperatur zu senken. 6.3 Einstellungen Nachtlicht einstellen Beleuchtetes Innenbecken zur Orientierung bei Nacht. Das Nachtlicht lässt sich in 3 Modi individuell einstellen: Ein > Auto > Aus D rücken Sie die Tastenkombination „Stopp“ und „Ladydusche Minus“, um die Einstellung für das Nachtlicht auszuwählen: 1 >>Drücken und halten Sie die Taste „Stopp“. 12 2 >>Drücken Sie die Taste „Ladydusche - Minus“. Signalton aktivieren / deaktivieren Als Hinweis auf einen Befehl. Ein>Aus DE D rücken Sie die Tastenkombination „Stopp“ und „Ladydusche Plus“, um den Signalton zu aktivieren / deaktivieren: 1 2 >>Drücken und halten Sie die Taste „Stopp“. >>Drücken Sie die Taste „Ladydusche - Plus“. K urzer Signalton: Ein Längerer Signalton: Aus Fernbedienung sperren/entsperren Sperrfunktion über die Fernbedienung. Wenn diese Funktion aktiviert wurde, kann keine andere Funktion genutzt werden. D rücken Sie innerhalb von 5 Sekunden die Tastenkombination „Stopp“, „Duschstabposition - linker Pfeil“, „Duschstabposition - rechter Pfeil“, „Temperatur - Minus“, „Temperatur - Plus“, um die Fernbedienung zu sperren. Wenn Sie die Fernbedienung wieder entsperren möchten, nutzen Sie dieselbe Tastenkombination. 13 1 2 3 4 DE >>Drücken und halten Sie die Taste „Stopp“. >>Drücken Sie die Taste „Duschstabposition linker Pfeil“. >>Drücken Sie >>Drücken Sie die Taste die Taste „Temperatur „Duschstab- Minus“. position rechter Pfeil“. 5 >>Drücken Sie die Taste „Temperatur - Plus“. D ie Symbole für Duschstabposition und Temperatur blinken dreimal auf: Gesperrt Die Symbole für Duschstabposition und Temperatur blinken einmal auf: Entsperrt 14 7. Reinigung und Pflege 7.1 Sitz und Deckel Sitz und Deckel können zur Reinigung mit einem Handgriff abgenommen werden (siehe Abbildung auf der Ausklappseite). ACHTUNG DE Gelbe Verfärbungen oder Ablösung der Oberflächenbeschichtung durch falsche Reiniger! >>Verwenden Sie keine scheuernden, chlor- oder säurehaltigen Reinigungsmittel. >>Verwenden Sie nur Reinigungsmittel und -geräte, die für den Anwendungsbereich bestimmt sind. >>Befolgen Sie die Gebrauchsanweisung der Reinigungsmittelhersteller. >>Mischen Sie niemals Reinigungsmittel. Für die tägliche Reinigung eignet sich eine milde Seifenlösung. Reinigen Sie die Sitzeinheit regelmäßig bzw. sofort, wenn diese verschmutzt ist. Sichtbarer Schmutz entsteht durch zu lange Reinigungsintervalle, was zu harten Verschmutzungen führen kann. >>Reinigen Sie WC-Sitz und Deckel mit warmem Wasser und einem Reinigungsmittel. >>Wischen Sie nebelfeucht nach. >>Lassen Sie den WC-Sitz hochgeklappt, solange sich stärkere Reinigungsmittel im WC befinden. 7.2 Duschstab und -kopf Manuelles Reinigen von Duschstab und -kopf Reinigen Sie den Duschstab und -kopf regelmäßig oder immer dann, wenn sie verschmutzt sind. Eine Anleitung zum Abnehmen des Duschkopfs zur Reinigung können Sie der Abbildung auf der Ausklappseite entnehmen. 15 1 2 3 4 DE >>Drücken und halten Sie die Taste „Stopp“. >>Drücken Sie die Taste „Gesäßdusche - Plus“. >>Reinigen >>Drücken Sie Sie die Düse auf „Stopp“, mit einem um die Tuch, einem Reinigung Schwamm zu beenden. oder einer Anderenfalls Bürste und stoppt sie einem milden nach 2 MinuReinigungsten automamittel. tisch. Selbstreinigung von Duschstab und -kopf Duschstab und -kopf reinigen sich selbsttätig. 1 2 >>Drücken und halten Sie die Taste „Stopp“. >>Drücken Sie die Taste „Komfort dusche Plus“. 3 >>Drücken Sie auf „Stopp“, um die Reinigung zu beenden. Anderenfalls stoppt sie nach 90 Sekunden automatisch. D er Duschstab und -kopf reinigen sich vor und nach jeder Anwendung selbsttätig. 7.3 Fernbedienung >>Reinigen Sie die Fernbedienung und die Wandhalterung mit einem weichen, feuchten Tuch. 16 7.4 Längerer Nichtgebrauch Wenn Sie SensoWash® für zwei Wochen oder länger nicht verwenden, entleeren Sie das Gerät. Voraussetzung: SensoWash® befindet sich im „Betriebsmodus“ und die „Status-LED“ B leuchtet grün. >>Unterbrechen Sie die Wasserversorgung. >>Drücken und halten Sie die Taste „Power“ A an der Sitzeinheit. >>Drücken Sie anschließend (innerhalb von 2 Sekunden) die Taste Gesäßdusche“ C an der Sitzeinheit länger als 10 Sekunden. Ein Signalton ertönt. >>Lassen Sie die Tasten innerhalb von 5 Sekunden wieder los. Ein Signalton ertönt. SensoWash® beginnt jetzt mit der „Entleerung”. Die „Status-LED“ B blinkt orange. Nach Beendigung des Entleerungsvorgangs (ca. 1 Minute) geht das Produkt automatisch in den „Standby-Modus“ über. Die „Status-LED“ B leuchtet rot. >>Unterbrechen Sie die Stromversorgung. >>Entnehmen Sie die Batterien aus der Fernbedienung. DE 8. Entsorgung Das Symbol mit der durchgestrichenen Mülltonne weist auf eine separate Entsorgung als Elektro- und Elektronik-Altgerät (WEEE) hin. Elektro- und Elektronik-Altgeräte können gefährliche Substanzen enthalten. Entsorgen Sie dieses Gerät nicht im Restmüll. Führen Sie es einer speziellen Sammelstelle zum Recycling von Elektro- und Elektronik-Altgeräten (WEEE) zu. Damit helfen Sie, Rohstoffe zu erhalten und die Umwelt zu schützen. Weitere Informationen erhalten Sie von Ihrem Händler oder von den für Sie zuständigen Behörden. Verbrauchte Batterien müssen sachgerecht entsorgt werden. Zu diesem Zweck stehen im Batterie vertreibenden Handel und in kommunalen Sammelstellen entsprechend gekennzeichnete Behälter zur Batterie-Entsorgung bereit. 17 DE Kinder dürfen nicht mit Kunststofftüten oder Verpackungsmaterial spielen, da eine Verletzungs- oder Erstickungsgefahr besteht. Lagern Sie solche Materialien an einem sicheren Ort oder entsorgen Sie sie auf umweltfreundliche Art und Weise. Bewahren Sie die Verpackung nach Möglichkeit bis zum Ablauf der Garantiezeit auf. 9. Hilfe im Problemfall Empfehlungen: Gehen Sie bei einer Störung zunächst wie folgt vor: >>Trennen Sie das Gerät am Sicherungskasten von der Stromversorgung, warten Sie 3 Stunden und stellen Sie anschließend wieder die Verbindung zur Stromversorgung her. Falls Ihr Gerät immer noch nicht ordnungsgemäß funktioniert, nachdem Sie den nachfolgenden Anweisungen gefolgt sind, kontaktieren Sie [email protected]. Halten Sie Artikel- und Seriennummer bereit. Diese können Sie dem Etikett auf der Rückseite der Bedienungsanleitung entnehmen. 18 Problem Mögliche Ursache Lösung Kap. Anzeigeleuchten und Alarmfunktion Fehlfunktion. Die „StatusLED“ B an der Einheit blinkt im Abstand von 3 Sekunden einmal rot auf. >>Schalten Sie SensoWash® aus. >>Schalten Sie SensoWash® wieder ein. Wenn das Blinken anhält: >>Unterbrechen Sie die Stromversorgung. >>Stellen Sie die Stromversorgung nach 30 Sekunden wieder her. Die „StatusFehlfunktion. LED“ B an der Einheit blinkt im Abstand von 3 Sekunden dreimal rot auf. >>Kontaktieren Sie [email protected] Die „StatusFehlfunktion. LED“ B an der Einheit blinkt im Abstand von 3 Sekunden viermal rot auf. >>Schalten Sie 6.2 „Wassertemperatur“ 6 aus. >>Aktivieren Sie eine beliebige Duschfunktion. Ein anhaltender Signalton ertönt. Fehlfunktion. DE >>Unterbrechen Sie die Stromversorgung. >>Stellen Sie die Stromversorgung nach 30 Sekunden wieder her. 19 Problem Mögliche Ursache Lösung Kap. Funktion allgemein DE SensoWash® funktioniert nicht. SensoWash® ist nicht eingeschaltet. (Die „StatusLED“ B leuchtet nicht.) >>Stellen Sie die Stromversorgung her. SensoWash® befindet sich im Standby-Modus. (Die „Status-LED“ B leuchtet rot.) >>Schalten Sie das Gerät in den „Betriebsmodus“. Ein Wasserleck Fehlfunktion. liegt vor. 6.1 >>Schließen Sie das Hauptventil für die Wasserzufuhr. >>Unterbrechen Sie die Stromversorgung. >>Rufen Sie den Installateur. Fernbedienung Die Batterien sind Die Symbole auf der Fernbe- fast leer. dienung blinken im Betrieb auf. (Sie sind nicht nur beleuchtet.) 20 >>Wechseln Sie die Batterien. 4.1 Problem Mögliche Ursache Lösung Kap. Die Fernbedienung funktioniert nicht. Es sind keine Batterien eingelegt. >>Legen Sie Batterien 4.1 ein. Die Batterien sind leer. >>Wechseln Sie die Batterien. 4.1 Die Batterien sind falsch gepolt. >>Setzen Sie die Batterien in der richtigen Richtung ein. 4.1 Die Fernbedie>>Entsperren Sie die nung ist gesperrt Fernbedienung. („Duschstabposition“ 5 und „Wassertemperatur“ 6 blinken dreimal auf). 6.3 DE Die Fernbedienung >>Kontaktieren Sie ist defekt. Ihren Installateur. Gesäßdusche/Ladydusche Das Umschalten zwischen Gesäß- und Lady dusche dauert zu lange. Während des Um- Dies ist normal. schaltens zwischen Gesäßdusche und Ladydusche fährt der Duschstab zurück und fährt dann nach erfolgter Selbstreinigung wieder vor. 21 Problem DE Mögliche Ursache Lösung Kap. Die Duschstrahlin- >>Stellen Sie die Die Dusch6.2 „Duschstrahlintenstrahlintensität tensität wurde auf sität“ 2 und/oder ist zu schwach. „Niedrig“ eingestellt. 3 auf „Mittel“ oder „Hoch“. Der Wasserversor- >>Kontaktieren Sie Ihren Installateur. gungsschlauch ist abgeknickt. Die Wassertemperatur ist nicht warm genug. >>Stellen Sie die Die Wassertem6.2 „Wassertemperatur“ peratur wurde auf „Aus“ oder „Nied6 auf „Mittel“ oder rig“ eingestellt. „Hoch“. Dies ist normal. Die Funktion Der Wasserstrahl aus dem stoppt nach 2 Minuten automatisch. Duschstab stoppt plötzlich. Aus dem Duschstab kommt kein Wasserstrahl. Der Duschkopf ist verstopft. >>Reinigen Sie den Duschkopf. 7.2 Dies ist normal. >>Stellen Sie das Nachtlicht in den Modus „Auto“ oder „Ein“. 6.3 Nachtlichtfunktion Das Nachtlicht leuchtet nicht. Das Nachtlicht wurde auf „Aus“ eingestellt. Das Nachtlicht ist Dies ist normal. im „Auto-Modus“, und das Umgebungslicht leuchtet hell. 22 Problem Mögliche Ursache Lösung Das Nachtlicht leuchtet dauernd. Das Nachtlicht wurde auf „Ein“ eingestellt. Dies ist normal. >>Stellen Sie das Nachtlicht in den Modus „Auto“ oder „Aus“. Kap. 6.3 DE Das Nachtlicht ist Dies ist normal. im „Auto-Modus“, und das Umgebungslicht leuchtet schwach. Die Scheibe am Umgebungslichtsensor ist verschmutzt. >>Reinigen Sie die Scheibe auf dem „Umgebungslichtsensor“ D . Manuelle Reinigungsfunktion des Duschstabs Der Duschstab fährt automatisch zurück. Dies ist normal. Die Funktion stoppt nach 2 Minuten automatisch. Automatische Selbstreinigung Wasser tropft aus dem eingefahrenen Duschstab. Dies ist normal. Der Duschstab wird vor und nach der Benutzung automatisch gereinigt. 23 10.Technische Daten DE Artikelnummer 611.00 00 2 00 4300 Nennspannung Frequenz Nominale Leistungsaufnahme Leistungsaufnahme im Standby-Modus Max. Stromaufnahme 220 – 240 V 50/60 Hz 1050 W Temperaturbereich •Betriebstemperatur •Wassertemperatur < 0,5 W 6,8 A 4 – 40 °C 32 – 40 °C Eingangswasserdruck0,07 – 0,75 MPa (0,7 – 7,5 bar) Wasserverbrauch im Duschbetrieb 0,35 – 0,60 l/min SchutzklasseIP X4 Schutz gegen allseitiges Spritzwasser Integrierte Sicherungseinrichtung EN13077 - Typ AB Gewährleistung 24 Unsere Garantiebestimmun- gen finden Sie in unseren Allgemeinen Geschäftsbe- dienungen (AGBs) unter www.pro.duravit.com/gtc. Contents 1. Brief overview............................................................. 26 1.1 Toilet unit............................................................ 26 1.2 Remote control ................................................... 26 2. Description of Symbols................................................ 26 3. For your safety............................................................ 27 3.1 Normal Use.......................................................... 27 3.2 Safety instructions............................................... 27 4. Basics of operation...................................................... 29 4.1 Remote control.................................................... 29 4.2 Status LEDs.......................................................... 30 5. Initial operation........................................................... 30 Remote control....................................................... 30 Power supply.......................................................... 31 Switch SensoWash® on............................................ 31 6.Operating.................................................................... 31 6.1 Switching the SensoWash® on / off....................... 31 6.2 Shower functions................................................. 31 Activating / deactivating “Rearwash”...................... 32 Activating / deactivating “Ladywash”...................... 32 Activating / deactivating “Comfortwash”................. 33 Adjusting the water spray intensity......................... 33 Adjusting the spray wand position.......................... 34 Adjusting the water temperature............................ 34 6.3Settings............................................................... 35 Adjusting the night light......................................... 35 Activating / deactivating the confirmation tone...... 35 Lock / unlock the remote control............................ 36 7.Cleaning and Care........................................................ 37 7.1 Seat and lid......................................................... 37 7.2 Spray wand and nozzle........................................ 37 Manual cleaning of the spray wand and nozzle....... 37 Self-cleaning of the spray wand and nozzle............ 38 7.3 Remote control.................................................... 38 7.4 Prolonged disuse................................................. 39 8.Disposal....................................................................... 39 9. Troubleshooting support............................................. 40 10.Technical Data............................................................. 45 EN 25 1. Brief overview 1.1 Toilet unit EN A B C D E F G H 1.2 Remote control Power Status LED Rearwash Ambient light sensor Ladywash Infrared receiver Night light Soft closing mechanism 1 2 3 4 5 6 7 8 Infrared transmitter Rearwash Ladywash Comfortwash Spray wand position Water temperature Stop Battery Compartment 2. Description of Symbols Warning Indicates a hazardous situation which, if not avoided, could result in death or serious injury. caution Indicates a hazardous situation which, if not avoided, could result in minor or moderate injury. NOTICE Hints and tips are provided here. > 26 Is used to address practices not related to physical injury. This is a prompt requesting your input. Acoustic signal. Timed automatic function. 3. For your safety To ensure that you will enjoy your SensoWash®, read these operating instructions carefully, particularly the safety instructions. Keep the operating instructions in a safe place and in the case of a change in ownership, ensure they are given to the new owner. These operating instructions correspond to the device’s state of technology at the time of printing. Duravit reserves the right to make changes in terms of further development. EN 3.1 Normal Use SensoWash® Slim is a shower toilet seat with spray attachment for rearwash and ladywash cleansing functions. It can be used as a normal toilet at any time. Its use is limited exclusively to enclosed spaces. Any other usage will be deemed as not corresponding with normal usage. Duravit undertakes no liability for abnormal usage. 3.2 Safety instructions Read and observe the following safety instructions carefully! Requirements for the user •Children and persons with insufficient knowledge or experience in handling the device, or who have limited physical, sensory or mental capabilities, may only use the device following proper instruction or when supervised. •Make sure that children cannot play with the SensoWash®. Warning Health damage! The product must be grounded. >>Compare with the mounting instructions. Only use the device when it is fully functional •Make sure that the power cord is not damaged. •The power cord must not become jammed or pinched. 27 •Keep the power cord away from hot surfaces and sharp edges. •Do NOT use the product if it is not working properly. Disconnect from the power supply immediately. Close the stop valve to interrupt the water supply. Contact [email protected]. Avoid malfunctions and damage to the product as a result of improper use. caution EN Health damage and potential product damage! >>Supply the device with cold drinking water from the main water system. >>Do NOT connect any waste water, grey water, industrial water, sea water or other untreated or semi-treated water. •If the SensoWash® is moved from a cold location to a warm location, condensation may form. Leave the unit switched off for a few hours. •Do NOT install the SensoWash® in rooms where there is a danger of frost. The room temperature must not be less than 4°C. •Do NOT place open fire sources, candles, cigarettes, or similar, on the SensoWash®. •Do NOT expose the SensoWash® directly to water or sunlight. •Do NOT climb on or stand on the product. •Do NOT place any heavy objects on the lid. •Do NOT deliberately soil, spray or block the spray wand. Repairs must only be carried out by a person with the necessary expertise. •Do NOT carry out modifications, tamper with, install additional equipment or attempt to repair the SensoWash®. •Repairs must be carried out by qualified electricians or technicians. •Improperly performed repairs can lead to accidents, damage and malfunctions. •Do NOT use attachments not recommended by Duravit. 28 Use of batteries caution Health damage! >>Avoid contact with skin, eyes and mucous membranes if battery acid has leaked. >>In case of contact with the acid, flush the affected areas with large amounts of clean water and consult a doctor immediately. •Keep batteries out of the reach of small children. Batteries can be life-threatening if swallowed. If a battery has been swallowed, call for medical assistance immediately. •Batteries may not be recharged, reactivated by other means, dismantled, exposed to fire or short-circuited. •Always remove empty batteries from the remote control immediately. They may leak and cause damage. •Do not insert new and old batteries together in the remote control. •Clean the battery and contacts before inserting the battery. Note the proper polarity. •Remove the batteries if you do not use the remote control for an extended period. •Do not expose the batteries to extreme conditions: avoid contact with hot surfaces or direct sunlight. Otherwise there is a risk of leakage. EN 4. Basics of operation 4.1 Remote control SensoWash® is operated via the remote control. Settings are altered via the remote control as well. Press the respective button on the remote control to switch on a function. The button lights up white briefly. To switch off a shower function, press “Stop” 7 on the remote control. 29 If the remote control is not available or the batteries are empty, then basic functions can also be switched on or off from the side control buttons. >>Press the lock of the “Battery Compartment” 8 to open it. >>Insert two lithium batteries (CR2032) with + facing upwards. >>Close the “Battery Compartment” 8 . EN 4.2 Status LEDs Red illuminated: SensoWash® is in the „Standby mode“, all functions cannot be used. Green illumina- SensoWash® is in the „On mode“, all functions can be used. ted: Green flashing: SensoWash® is in the „Initialization“ process, only „Power“ A on the seat unit can work. Orange flashing: SensoWash® is in the „Internal drainage mode“. Red flashing: Malfunction. Disconnect main power supply and proceed with chapter 9. 5. Initial operation Remote control >>Press the lock of the “Battery Compartment” 8 to open it. >>Remove the foil safety tag in the battery compartment. >>Close the “Battery Compartment” 8 . 30 Power supply >>Connect the main power supply. SensoWash® will start “Initialization” for about 15 seconds when it is connected to the power supply. During this time the “Status LED” B flashes green and only “Power” A on the seat unit can work, all other operations will not work. Switch SensoWash® on Requirement: SensoWash® is in the “Standby mode”, the “Status LED” B is red illuminated. >>Press “Power” D on the seat unit. SensoWash® is now switched on. The “Status LED” B is green illuminated. All functions can be used. EN 6. Operating 6.1 Switching the SensoWash® on / off >>Press “Power” A on the seat unit to switch on SensoWash®. A green Status LED indicates “On mode”. >>Press “Power” A on the seat unit again to switch off SensoWash®. A red Status LED indicates “Standby mode”. 6.2 Shower functions ensoWash® automatically cleans the retracted spray wand S before and after washing functions are used. The shower functions terminate automatically after 2 minutes or immediately when “Stop” 7 is pressed. 31 Activating / deactivating “Rearwash” Gentle and safe rear cleansing. 1 EN 2 >>Press Plus or Minus to activate Rearwash. Rearwash is active. 3 >>Press Stop to end Rearwash or after 2 min. auto stop. Alternatively press “Rearwash” C on the seat unit to activate Rearwash. Press “Rearwash” C on the seat unit again to stop Rearwash or after 2 min. auto stop. Activating / deactivating “Ladywash” Additional nozzle outlet for female intimate care. 1 >>Press Plus or Minus to activate Ladywash. 2 Ladywash is active. 3 >>Press Stop to end Ladywash or after 2 min. auto stop. Alternatively press “Ladywash” E on the seat unit to activate Ladywash. Press “Ladywash” E on the seat unit again to stop Ladywash or after 2 min. auto stop. 32 Activating / deactivating “Comfortwash” Forward and backward movement of spray wand during use of shower. Requirement: Rearwash or Ladywash function is activated. 1 2 3 EN >>Press Plus Comfortwash to activate is active. Comfortwash. >>Press Minus to stop Comfortwash. The function (Rear- or Ladywash) that was previously set is still active. After 2 min. auto stop. Adjusting the water spray intensity The water spray intensity can be set individually in 3 steps: Low>Medium> High Requirement: Rearwash or Ladywash function is activated and the icon illuminated. 1 >>Press Plus to increase the Rearwash intensity. 2 >>Press Minus to decrease the Rearwash intensity. 33 Same action for “Ladywash” 3 . Adjusting the spray wand position The spray wand position can be set individually to 5 different positions: Front <––––––––––––––––––––––––––––––––––––––> Rear EN 1 2 >>Press Right arrow to retract the spray wand. >>Press Left arrow to extract the spray wand. Adjusting the water temperature The water temperature can be individually adjusted in 4 levels: Off > Low >Medium> High 1 2 >>Press Plus >>Press Minus to increase to decrease the water the water temperature. temperature. 34 6.3 Settings Adjusting the night light Illuminated inner bowl for night mode orientation. The night light can be set individually in 3 modes: On > Auto > Off P ress button combination Stop and Ladywash Minus to cycle through the night light settings: 1 2 >>Press and hold Stop. EN >>Press Ladywash Minus. Activating / deactivating the confirmation tone To indicate any command. On >Off ress button combination Stop and Ladywash Plus to cycle P through the confirmation tone settings: 1 >>Press and hold Stop. 2 >>Press Ladywash Plus. 35 hort confirmation tone: On S Longer confirmation tone:Off Lock / unlock the remote control Blocking function via remote control. No function can be used while this function is activated. ress within 5 sec. the button combination Stop, Spray wand P position Left arrow, Spray wand position Rigth arrow, Temperature Minus, Temperature Plus to lock the remote control. To unlock the remote control use the same button combination. EN 1 2 >>Press and hold Stop. 3 4 >>Press Tempe>>Press Spray >>Press Spray wand position wand position rature Minus. Left arrow. Right arrow. 5 >>Press Temperature Plus. pray wand position and Temperature icons flash three times: S Locked Spray wand position and Temperature icons flash one time:Unlocked 36 7. Cleaning and Care 7.1 Seat and lid For cleaning purpose seat and lid can be easily removed onehanded (see picture on foldout page). NOTICE Yellow discolouration or paint delamination due to incorrect cleaner! >>Do not use abrasive cleaning agents or cleaning agents containing chlorine or acid. >>Only use cleaning agents and equipment which is intended for this area of application. >>Follow the instructions of the cleaning agent manufacturer. >>Never mix cleaners. A mild soap solution is suitable for daily cleaning. EN Clean the seat unit regularly, or immediately if it is soiled. If the cleaning is not carried out regularly enough, soiling may become visible which can lead to stubborn dirt. >>Clean the toilet seat and lid with warm water and a cleaning agent. >>Wipe slightly damp afterwards. >>Leave the toilet seat up while the toilet contains powerful cleaning agent. 7.2 Spray wand and nozzle Manual cleaning of the spray wand and nozzle Clean the spray wand and nozzle regularly, or immediately if they are soiled. See picture on fold out page if you want to detach the spray nozzle for cleaning. 37 1 2 >>Press and hold Stop. >>Press Rearwash Plus. EN 3 4 >>Clean the >>Press Stop nozzle with a to end the cloth, sponge cleaning or or brush and after 2 min. mild cleaning auto stop. agent. Self-cleaning of the spray wand and nozzle Spray wand and nozzle are cleaned automatically. 1 2 >>Press and hold Stop. 3 >>Press >>Press stop to Comfortwash end cleaning Plus. or after 90 sec. auto stop. pray wand and nozzle are cleaned automatically before and S after each use. 7.3 Remote control >>Clean the remote control and wall holder with a soft, damp cloth. 38 7.4 Prolonged disuse If you do not use SensoWash® for two weeks or above, drain the water inside the product. Requirement: SensoWash® is in “On” mode, the “Status LED” B is green illuminated. >>Disconnect the water supply. >>Press “Power” A on the seat unit and keep it pressed. >>Now (within 2 seconds) press “Rearwash” C on the seat unit for more than 10 seconds. A confirmation tone is audible. >>Within 5 seconds release the buttons. A confirmation tone is audible. SensoWash® will start the “internal drainage”. The “Status LED” B flashes orange. After the drainage is finished (approx. 1 minute) the product will enter “Standby mode” automatically. The “Status LED” B is red illuminated. >>Switch off the power supply. >>Remove the batteries from the remote control. EN 8. Disposal The crossed-out wheeled bin logo requires the separate collection of waste electric and electronic equipment (WEEE). Electric and electronic equipment may contain dangerous and hazardous substances. Do not dispose of this appliance as unsorted municipal waste. Return it to a designated collection point for the recycling of WEEE. By doing so, you will help to conserve resources and protect the environment. Contact your retailer or local authorities for more information. Used batteries must be disposed of properly. For this purpose, appropriately labelled containers for disposal of batteries are provided in shops where batteries are sold and at community collection points. 39 Children must not play with plastic bags and packaging material, due to possible injury or danger of suffocation. Store such material safely or dispose of it in an environmentally-friendly manner. If possible, keep the packaging until the warranty period expires. 9. Troubleshooting support EN Recommendation: Initial general action in case of a malfunction >>Disconnect the unit from the mains at the fuse box for at least 3 hours and then reconnect it again. If your unit does still not work properly after following the instructions mentioned below, contact [email protected]. Have the article and serial number ready. These can be found on the nameplate on the back of the operating instructions. Problem Potential cause SolutionCh. Indicator lamps and alarm function 40 Malfunction. The “Status LED” B on the unit flashes red once each 3 seconds. >>Switch off SensoWash®. >>Switch on SensoWash® again. If flashing does not stop: >>Cut off power supply. >>After 30 sec. connect it again. The “Status Malfunction. LED” B on the unit flashes red three times each 3 seconds. >>Contact [email protected] Problem Potential cause SolutionCh. Malfunction. The “Status LED” B on the unit flashes red four times each 3 seconds. >>Turn off “Water 6.2 temperature” 6 . >>Activate any shower function. Malfunction. A continuous confirmation tone is audible. >>Cut off the power supply. >>After 30 sec. connect it again. EN General function SensoWash® is not working. A water leak exists. SensoWash® is not switched on. (“Status LED” B is not illuminated) >>Switch on the main power supply. SensoWash® is in Standby mode. (“Status LED” B is red illuminated) >>Switch to “On mode”. Malfunction. >>Close the main valve for the water supply. >>Disconnect the power supply. >>Call the installer. 6.1 41 Problem Potential cause SolutionCh. Remote control Icons on remote The batteries are low. control flash during operation. (instead of beeing illuminated) EN The remote control does not work. >>Change the batteries. 4.1 No batteries are inserted. >>Insert batteries. 4.1 The batteries are flat. >>Change the batteries. 4.1 The battery connec- >>Insert the batteries 4.1 tions are reversed. the correct way. The remote control >>Unlock the is locked (“Spray remote control. wand position” 5 and “Water temperature” 6 flash three times). The remote control >>Contact your is defective. installer. Rearwash / Ladywash Switching between the Rearwash and Ladywash takes too long. 42 This is normal. When switching between Rearwash and Ladywash, the spray wand moves back then forward again after self-cleaning is complete. 6.3 Problem Potential cause SolutionCh. The water spray intensity is too weak. The water spray intensity has been set to Low. >>Adjust the “Water spray intensity” 2 and/or 3 to Medium or High. The water supply hose has buckled. >>Contact your installer. The water tem- The water tempera- >>Adjust the “Water perature is not ture has been set to temperature” 6 to warm enough. Off or Low. Medium or High. The function auThe water spray from the tomatically stops after 2 minutes. spray wand suddenly stops. This is normal. A jet of water is The spray nozzle is clogged. not emerging from the spray wand. >>Clean the spray nozzle. 6.2 6.2 EN 7.2 Night light function The night light does not come on. The night light has been set to Off mode. 6.3 This is normal. >>Set the night light to Auto or On mode. This is normal. The night light is in Auto mode and the ambient light is bright. 43 Problem Potential cause SolutionCh. The night light stays on continuously. The night light has been set to On mode. 6.3 This is normal. >>Set the night light to Auto or Off mode. This is normal. The night light is in Auto mode and the ambient light is dim. The ambient light sensor window is not clean. EN >>Clean the “Ambient light sensor” D window. Manual cleaning function of the spray wand This is normal. The spray wand The function autoretracts auto- matically stops after 2 minutes. matically. Automatic self-cleaning Water is dripping out of the retracted spray wand. The spray wand is cleaned automatically before and after washing. This is normal. 10.Technical Data 44 Article number 611.00 00 2 00 4300 Rated voltage Frequency Nominal power consumption Standby power consumption Maximum current 220 - 240 V 50/60 Hz 1050 W < 0.5 W 6.8 A Temperature range •Operating temperature •Water temperature 4 - 40 °C 32 - 40 °C Incoming water pressure0.07 - 0.75 MPa (0.7 - 7.5 bar) Water consumption in spray mode 0.35 - 0.60 l/min Protection degreeIP X4 Protection against water spray from all sides Integrated safety device EN13077 - type AB Warranty EN Our warranty terms can be found in our General Terms and Conditions (GTC) at www.pro.duravit.com/gtc. 45 Sommaire FR 46 1. Bref aperçu........................................................................ 47 1.1Toilette.......................................................................47 1.2Télécommande ........................................................... 47 2. Description des symboles................................................... 47 3. Pour votre sécurité............................................................48 3.1Utilisation normale..................................................... 48 3.2 Instructions de sécurité.............................................. 48 4.Opérations de base............................................................. 51 4.1Télécommande........................................................... 51 4.2 LED d'état...................................................................51 5. Mise en service................................................................... 52 Télécommande...............................................................52 Alimentation électrique..................................................52 Activation du SensoWash®..............................................52 6.Utilisation..........................................................................53 6.1 Mise sous/hors tension du SensoWash®......................53 6.2 Fonctions de la douche............................................... 53 Activation/désactivation de la « Douche rectale »..........53 Activation/désactivation de la « Douche féminine ».......54 Activation/désactivation de la « Douche confort ».........54 Réglage de l'intensité de pulvérisation d'eau.................55 Réglage de la position de la douche...............................56 Réglage de la température de l'eau...............................56 6.3Réglages....................................................................57 Réglage de l'éclairage de nuit........................................57 Activation/désactivation du bip de confirmation.............57 Verrouiller / déverrouiller la télécommande..................58 7. Nettoyage et entretien....................................................... 59 7.1 Lunette et abattant.................................................... 59 7.2 Douche et buse........................................................... 60 Nettoyage manuel de la douche et de la buse................60 Auto-nettoyage de la douche et de la buse.....................61 7.3Télécommande........................................................... 62 7.4 Non utilisation prolongée........................................... 62 8. Mise au rebut..................................................................... 62 9. Aide au dépannage............................................................. 63 10.Données techniques........................................................... 69 1. Bref aperçu 1.1 Toilette 1.2 Télécommande A Puissance B LED d'état C Douche rectale D Capteur d'éclairage 1 Transmetteur à infrarouge 2 Douche rectale 3 Douche féminine 4 Douche confort 5 Position de la douche 6 Température de l'eau 7 Arrêt 8 Logement des piles biant am- E Douche féminine F Récepteur infrarouge G Éclairage de nuit H Mécanisme de fermeture en douceur 2. Description des symboles Avertissement Attention AVIS > FR Indique une situation dangereuse qui, si elle n'est pas évitée, peut occasionner la mort ou de sérieuses blessures. Indique une situation dangereuse qui, si elle n'est pas évitée, peut occasionner des blessures mineures ou modérées. Est utilisé pour mettre en avant des pratiques qui ne sont pas en lien avec des blessures. Vous trouverez ici des astuces. Requiert rapidement votre intervention. Signal acoustique. Fonction automatique temporisée. 47 3. Pour votre sécurité Pour garantir que vous profiterez de votre SensoWash®, lire soigneusement ces instructions d'utilisation, et plus particulièrement les instructions de sécurité. Conserver les instructions d'utilisation dans un lieu sûr, et en cas de changement de propriétaire, assurez-vous de bien les transmettre au nouveau propriétaire. Ces instructions d'utilisation correspondent à l'état technologique du dispositif au moment de l'impression. Duravit se réserve le droit d'effectuer des changements en vue de développements futurs. 3.1 Utilisation normale FR SensoWash® Slim est un siège de WC avec douche avec un dispositif de pulvérisation pour les fonctions de douche rectale et féminine. Il peut être utilisé comme une toilette normale à tout moment. Son utilisation est limitée aux espaces clos. Tout autre usage est considéré comme ne correspondant pas à un usage normal. Duravit n'assume aucune responsabilité pour un usage non conforme. 3.2 Instructions de sécurité Lire et respecter scrupuleusement les instructions de sécurité suivantes ! Exigences envers l'utilisateur •Les enfants et les personnes ayant une connaissance ou une expérience insuffisantes de la manipulation du système, ou ayant des capacités physiques, sensorielles ou mentales limitées, ne peuvent utiliser le dispositif qu'en suivant correctement les instructions ou sous la supervision d'une autre personne. •Assurez-vous que les enfants ne puissent pas jouer avec le SensoWash®. 48 Avertissement Risques pour la santé ! Le produit doit être mis à la terre. >>Comparer avec les instructions de montage. N'utiliser le dispositif que lorsqu'il est parfaitement fonctionnel •Assurez-vous que le câble de puissance n'est pas endommagé. •Le câble de puissance ne doit être ni coincé ni pincé. •Maintenir le câble de puissance éloigné des surfaces chaudes et bords acérés. •NE PAS utiliser le produit s'il ne fonctionne pas correctement. Débrancher immédiatement. Fermer la vanne d'arrêt pour arrêter l'arrivée d'eau. Contacter [email protected]. Éviter tout dysfonctionnement ou tout endommagement du produit résultant d'un défaut d'utilisation. Attention Risques pour la santé et endommage ment potentiel du produit ! FR >>Alimenter le dispositif en eau courante froide du réseau d'eau courante. >>NE PAS relier aux eaux usées, aux eaux ménagères, industrielles, à l'eau de mer ou à toute autre eau non traitée ou semitraitée. •Si le SensoWash® est déplacé d'un endroit froid vers un endroit chaud, de la condensation risque de se former. Laisser le système hors tension pendant quelques heures. •Ne PAS installer le SensoWash® dans des locaux présentant un risque de gel. La température du local ne doit pas être inférieure à 4 °C. •Ne PAS placer de sources de feu ouvertes, comme des bougies, des cigarettes, ou autres, sur le SensoWash®. •Ne PAS exposer directement le SensoWash® à l'eau ou aux rayons solaires. •Ne PAS monter ni se tenir sur le produit. •Ne PAS placer d'objets lourds sur le couvercle. •NE PAS souiller, pulvériser ou bloquer délibérément la douche. 49 Les réparations doivent être effectuées par une personne ayant l'expérience nécessaire. •NE PAS effectuer de modifications, manipuler, installer des équipements supplémentaires ou tenter de réparer le SensoWash®. •Les travaux de réparation doivent être effectués par des électriciens ou des techniciens qualifiés. •Des réparations mal effectuées peuvent occasionner des accidents, des dommages ou des dysfonctionnements. •Ne PAS utiliser d'accessoires non recommandés par Duravit. Utilisation de piles Attention FR Risques pour la santé ! >>Éviter le contact avec la peau, les yeux et les muqueuses lorsque de l'acide s'est écoulé des piles. >>En cas de contact avec l'acide, rincer les zones affectées avec une grande quantité d'eau propre et consulter immédiatement un médecin. •Maintenir les piles hors de portée des petits enfants. Les piles représentent un danger de mort lorsqu'elles sont avalées. Si une pile a été avalée, demander immédiatement l'assistance d'un médecin. •Les piles ne doivent pas être rechargées, réactivées par tout autre moyen, démontées, exposées au feu ou court-circuitées. •Toujours ôter immédiatement les piles usagées de la télécommande. Elles pourraient fuir et provoquer un dommage. •Ne pas insérer des piles neuves et des piles usagées ensemble dans la télécommande. •Nettoyer la pile et ses contacts avant de l'insérer. Tenir compte de la polarité. •Ôter les piles lorsque la télécommande n'est pas utilisée pendant une longue période. •Ne pas exposer les piles à des conditions extrêmes : éviter le contact avec les surfaces chaudes et les rayons directs du soleil. Dans le cas contraire, celles-ci risqueraient de fuir. 50 4. Opérations de base 4.1 Télécommande Le SensoWash® est commandé à partir de la télécommande. Les réglages sont également modifiés à partir de la télécommande. Appuyer sur la touche correspondante de la télécommande pour activer une fonction. La touche s'allume brièvement en blanc. Pour arrêter la fonction de la douche, appuyer sur la touche « Arrêt » 7 de la télécommande. Si la télécommande n'est pas disponible ou les piles sont épuisées, les fonctions de base peuvent également être activées ou désactivées à partir des touches de contrôle latérales. >>Appuyer sur le verrou du « compartiment des piles » 8 pour l'ouvrir. >>Insérer deux piles au lithium (CR2032) avec + vers le haut. >>Fermer le « compartiment à piles » 8 . FR 4.2 LED d'état Rouge : Verte : Clignotement vert : Le SensoWash® est en « Mode Standby », toutes les fonctions ne peuvent pas être utilisées. Le SensoWash® est en « Mode actif », toutes les fonctions peuvent être utilisées. Le SensoWash® est en phase « Initialisation », seule la touche « Puissance » A de la lunette peut fonctionner. 51 Clignotement orange : Clignotement rouge : Le SensoWash® est en « Mode d'évacuation interne ». Dysfonctionnement. Couper l'alimentation principale et continuer avec le chapitre 9. 5. Mise en service Télécommande >>Appuyer sur le verrou du « compartiment des piles » 8 pour l'ouvrir. >>Enlever l'étiquette de sécurité qui se trouve sur le compartiment à piles. >>Fermer le « compartiment à piles » 8 . FR Alimentation électrique >>Relier alimentation électrique principale. L e SensoWash® lance une « initialisation » pendant environ 15 secondes lorsqu'il est relié à l'alimentation électrique. Pendant ce temps, la « LED d'état » B clignote en vert et seule la touche « Puissance » A de la lunette fonctionne, toutes les autres opérations ne fonctionnent pas. Activation du SensoWash® Exigence : Le SensoWash® est en « Mode Standby », la « LED d'état » B est rouge. >>Appuyer sur la touche « Puissance » D de la lunette. Le SensoWash® est alors sous tension. La « LED d'état » B brille en vert. Toutes les fonctions peuvent être utilisées. 52 6. Utilisation 6.1 Mise sous/hors tension du SensoWash® >>Appuyer sur la touche « Puissance » A de la lunette pour activer le SensoWash®. La LED d'état verte indique « Mode actif ». >>Appuyer à nouveau sur la touche « Puissance » A de la lunette pour arrêter le SensoWash®. La LED d'état rouge indique « Mode Standby ». 6.2 Fonctions de la douche L e SensoWash® nettoie automatiquement la douche rétractée avant et après l'utilisation des fonctions de lavage. Les fonctions de douche s'arrêtent automatiquement au bout de 2 minutes ou immédiatement si le bouton « Arrêt » 7 est activé. FR Activation/désactivation de la « Douche rectale » Douche rectale douce et sécurisée. 1 >>Appuyer sur Plus ou Moins pour activer la douche rectale. 2 3 La douche rec- >>Appuyer sur Arrêt pour terminer la tale est active. douche rectale. Elle s'arrête automatiquement au bout de 2 min. Presser alternativement « Douche rectale » C sur la lunette pour activer la douche rectale. Appuyer à nouveau sur la touche « Douche rectale » C sur la lunette pour arrêter la douche rectale. Elle s'arrête automatiquement au bout de 2 minutes. 53 Activation/désactivation de la « Douche féminine » Buse supplémentaire pour les soins intimes féminins. 1 2 >>Appuyer La douche sur Plus ou féminine est Moins pour active. activer la douche féminine. FR 3 >>Appuyer sur Arrêt pour terminer la douche féminine. Elle s'arrête automatiquement au bout de 2 min. Presser alternativement « Douche féminine » E sur la lunette pour activer la douche féminine. Appuyer à nouveau sur la touche « Douche féminine » E sur la lunette pour arrêter la douche féminine. Elle s'arrête automatiquement au bout de 2 minutes. Activation/désactivation de la « Douche confort » Mouvement avant et arrière de la douche pendant son utilisation. Exigence : La douche rectale ou féminine est activée. 54 1 2 >>Appuyer sur Plus pour activer la douche confort. La douche confort est active. 3 >>Appuyer sur Moins pour arrêter la douche confort. Les fonctions sont désactivées, la fonction (douche rectale ou douche féminine) préalablement définie est toujours active. Elle s'arrête automatiquement au bout de 2 min. Réglage de l'intensité de pulvérisation d'eau L'intensité de pulvérisation d'eau peut être réglée en 3 étapes: FR Low>Medium > High Exigence : La fonction de douche rectale ou féminine est activée et le symbole est illuminé. 1 2 >>Appuyer sur Plus pour augmenter l'intensité de la douche rectale. >>Appuyer sur Moins pour diminuer l'intensité de la douche rectale. Même action pour la « douche féminine » 3 . 55 Réglage de la position de la douche La position de la douche peut être réglée sur 5 positions individuelles: Avant <–––––––––––––––––––––––––––––> 1 FR Arrière 2 >>Appuyer sur la touche fléchée droite pour rétracter la douche. >>Appuyer sur la touche fléchée gauche pour extraire la douche. Réglage de la température de l'eau La température de l'eau peut être réglée en 4 niveaux: Off>Low> Medium> High 1 2 >>Appuyer sur >>Appuyer sur Plus pour Moins pour augmenter diminuer la la températempérature ture de l'eau. de l'eau. 56 6.3 Réglages Réglage de l'éclairage de nuit Intérieur de la cuvette éclairé pour l'orientation de nuit. L'éclairage de nuit peut être réglé en 3 modes: On > Auto > Off A ppuyer sur la combinaison de touches Arrêt et Douche féminine Moins pour faire défiler les paramètres de l'éclairage de nuit : 1 2 FR >>Appuyer sur la touche Arrêt et la maintenir enfoncée. >>Appuyer sur Douche féminine Moins. Activation/désactivation du bip de confirmation Pour signaler toutes les commandes. On >Off ppuyer sur la combinaison de touches Arrêt et Douche féminine A Plus pour faire défiler les paramètres du bip de confirmation : 57 1 2 >>Appuyer sur la touche Arrêt et la maintenir enfoncée. >>Appuyer sur Douche féminine Plus. B ip de confirmation bref : On Bip de confirmation long : Off FR Verrouiller / déverrouiller la télécommande Fonction de blocage via la télécommande. Aucune fonction ne peut être utilisée si cette fonction est activée. A ppuyer pendant 5 sec. sur la combinaison de touches Arrêt, touche fléchée gauche de position de la douche, touche fléchée droite de position de la douche, température Moins, Température Plus pour verrouiller la télécommande. Utiliser la même combinaison de touches pour déverrouiller la télécommande. 58 1 2 >>Appuyer sur la touche Arrêt et la maintenir enfoncée. 3 4 >>Appuyer sur >>Appuyer sur >>Appuyer sur Température la touche fléla touche fléchée droite de Moins. chée gauche de position de position de la douche. la douche. 5 >>Appuyer sur Température Plus. FR L es symboles de position de la douche et de la température clignotent trois fois : Verrouillé Les symboles de position de la douche et de la température clignotent une fois : Déverrouillé 7. Nettoyage et entretien 7.1 Lunette et abattant Pour le nettoyage, la lunette et l'abattant peuvent être facilement retirés d'une main (voir l'image sur la page à déplier). 59 AVIS Décoloration jaune due à un mauvais détergent ! >>Ne pas utiliser de détergent abrasif ou de produits de nettoyage contenant du chlore ou des acides. >>N'utiliser que des produits de nettoyage et des équipements prévus pour ce type d'application. >>Suivre les instructions du fabricant de détergent. >>Ne jamais mélanger les détergents. Une solution savonneuse douce convient pour le nettoyage quotidien. FR Nettoyer la lunette régulièrement ou immédiatement après qu'elle ait été salie. Si le nettoyage n'a pas lieu assez régulièrement, les salissures peuvent devenir visibles et tenaces. >>Nettoyer la lunette à l'eau chaude et avec un détergent. >>Essuyer ensuite l'humidité. >>Relever la lunette lorsque les toilettes contiennent un détergent puissant. 7.2 Douche et buse Nettoyage manuel de la douche et de la buse Nettoyer la douche et la buse régulièrement ou immédiatement après qu'elles aient été salies. Voir l'image sur la page à déplier si vous souhaitez détacher la buse pour le nettoyage. 60 1 2 >>Appuyer sur la touche Arrêt et la maintenir enfoncée. >>Appuyer sur Douche rectale Plus. 3 4 >>Nettoyer la >>Appuyer sur buse à l'aide Arrêt pour d'un chifterminer le fon, d'une nettoyage. éponge ou Il s'arrête d'une brosse automatiet d'un déquement tergent doux. au bout de 2 min. Auto-nettoyage de la douche et de la buse La douche et la buse sont nettoyées automatiquement. 1 2 >>Appuyer sur la touche Arrêt et la maintenir enfoncée. >>Appuyer sur Douche confort Plus. FR 3 >>Appuyer sur Arrêt pour terminer le nettoyage. Il s'arrête automatiquement au bout de 90 sec. L a douche et la buse sont automatiquement nettoyées avant et après chaque utilisation. 61 7.3 Télécommande >>Nettoyer la télécommande et le support mural à l'aide d'un chiffon humide doux. 7.4 Non utilisation prolongée FR Si vous n'utilisez pas le SensoWash® pendant deux semaines ou plus, évacuer l'eau dans le produit. Exigence : Le SensoWash® est en mode « Actif », la « LED d'état » B est verte. >>Déconnecter l'alimentation en eau. >>Appuyer sur la touche « Puissance » A de la lunette et la maintenir enfoncée. >>Ensuite (dans les 2 secondes), appuyer sur « Douche rectale » C sur la lunette pendant plus de 10 secondes. Un bip de confirmation retentit. >>En l'espace de 5 secondes, relâcher les boutons. Un bip de confirmation retentit. Le SensoWash® démarre une « évacuation interne ». La « LED d'état » B clignote en orange. Lorsque l'évacuation est terminée (env. 1 minute), le produit se met automatiquement en « Mode Standby ». La « LED d'état » B est rouge. >>Fermer l'alimentation électrique. >>Ôter les piles de la télécommande. 8. Mise au rebut Le symbole représentant une poubelle sur roues barrée d'une croix signifie une élimination séparée des déchets électriques et électroniques (WEEE). Les déchets électriques et électroniques peuvent contenir des substances dangereuses et nocives. Ne pas éliminer ce dispositif sous forme de déchets municipaux non triés. Le renvoyer dans un point de collecte agréé pour le recyclage WEEE. De cette façon, vous 62 aiderez à préserver les ressources et à protéger l'environnement. Contactez votre fournisseur ou les autorités locales pour plus d'informations. Les piles usées doivent être correctement mises au rebut. Pour ce faire, des containers sont à disposition dans les magasins vendant des piles et aux points de collecte communautaires. Les enfants ne doivent pas jouer avec des sacs en plastique et le matériau d'emballage en raison des blessures possibles ou du risque d'étouffement. Stocker de tels matériaux en sécurité ou éliminez-les d'une manière respectueuse de l'environnement. Si possible, garder l'emballage jusqu'à expiration de la période de garantie. 9. Aide au dépannage FR Recommandation : Première action en cas de dysfonctionnement >>Déconnecter l'appareil de l'alimentation électrique dans la boîte à fusibles pendant au moins 3 heures puis le reconnecter. Si l'appareil ne fonctionne pas correctement alors que vous avez suivi les instructions ci-dessous, contacter [email protected]. Tenir le numéro d'appareil et le numéro de série prêts. Ceux-ci se trouvent sur la plaque signalétique à l'arrière des instructions d'utilisation. 63 Problème Cause potentielle Solution Ch. Voyants et fonctionnement de l'alarme Dysfonctionnement. >>Mettre le La « LED SensoWash® hors d'état » B sur la lunette tension. clignote en >>Réactiver le rouge toutes les SensoWash®. 3 secondes. Si le clignotement ne s'arrête pas : >>Couper l'alimentation électrique. >>La rebrancher au bout de 30 secondes. FR La « LED Dysfonctionnement. >>Contacter d'état » B sur [email protected] la lunette clignote en rouge trois fois toutes les 3 secondes. La « LED d'état » B sur la lunette clignote en rouge quatre fois toutes les 3 secondes. Dysfonctionnement. >>Désactiver 6.2 « Température de l'eau » 6 . >>Active toutes les fonctions de douche. Dysfonctionnement. >>Couper l'alimentaUn bip de tion électrique. confirmation >>La rebrancher au continu retentit. bout de 30 secondes. 64 Problème Cause potentielle Solution Ch. Fonctionnement général >>Mettre sous tension. Le SensoWash® Le SensoWash® ne fonctionne n'est pas sous pas. tension. (La « LED d'état » B ne brille pas) Le SensoWash® est en mode standby. (La « LED d'état » B est rouge) >>Régler sur « Actif ». 6.1 Présence d'une Dysfonctionnement. >>Fermer la vanne fuite d'eau. principale de l'alimentation en eau. >>Couper l'alimentation électrique. >>Appeler l'installateur. FR Télécommande Les piles sont Les symboles sur la télécom- faibles. mande clignotent durant le fonctionnement. (au lieu de briller en continu) >>Remplacer les piles. 4.1 65 Problème Cause potentielle Solution Ch. Absence de piles. >>Insérer des piles. 4.1 La télécommande ne fonc- Les piles sont vides. >>Remplacer les piles. 4.1 tionne pas. 4.1 Les connexions des >>Réinstaller piles sont inversées. correctement les piles. La télécommande >>Déverrouiller la est verrouillée télécommande. (« Position de la douche » 5 et « Température de l'eau » 6 clignotent trois fois). La télécommande est défectueuse. FR 6.3 >>Contacter votre installateur. Douche rectale/Douche féminine Le passage de la douche rectale à la douche féminine est trop long. Lorsque l'on passe Ceci est normal. de la douche rectale à la douche féminine, la douche recule puis avance de nouveau lorsque l'auto-nettoyage est terminé. L'intensité de pulvérisation d'eau est trop faible. L'intensité de pulvé- >>Régler l'intensité de 6.2 pulvérisation d'eau risation d'eau a été réglée sur Low. 2 et/ou 3 sur Medium ou High. Le tuyau d'alimentation en eau est plié. 66 >>Contacter votre installateur. Problème Cause potentielle Solution Ch. L'eau n'est pas assez chaude. La température de l'eau a été réglée sur Off ou Low. >>Régler la « température de l'eau » 6 sur Medium ou High. 6.2 La fonction s'arrête Ceci est normal. La pulvérisation d'eau de la automatiquement douche s'arrête après 2 minutes. brutalement. Aucun jet d'eau La buse est colmatée. ne sort de la douche. >>Nettoyer la buse. 7.2 Fonctionnement de l'éclairage de nuit L'éclairage de nuit ne s'allume pas. 6.3 L'éclairage de nuit a Ceci est normal. été réglé sur Off. >>Placer l'éclairage de nuit en mode Auto ou On. FR L'éclairage de nuit Ceci est normal. est en mode Auto avec une forte luminosité ambiante. 67 Problème Cause potentielle L'éclairage de L'éclairage de nuit nuit est allumé a été réglé sur On. en continu. Solution 6.3 Ceci est normal. >>Placer l'éclairage de nuit en mode Auto ou Off. L'éclairage de nuit Ceci est normal. est en mode Auto avec une faible luminosité ambiante. La fenêtre du capteur de lumière ambiante n'est pas propre. FR >>Nettoyer la fenêtre du « capteur de lumière ambiante » D. Fonction de nettoyage manuel de la douche La douche se rétracte automatiquement. La fonction s'arrête Ceci est normal. automatiquement après 2 minutes. Auto-nettoyage automatique De l'eau goutte La douche est net- Ceci est normal. toyée automatiquede la douche ment avant et après rétractée. le lavage. 68 Ch. 10.Données techniques Numéro d'article 611.00 00 2 00 4300 Tension nominale Fréquence Consommation électrique nominale Consommation électrique en veille Intensité maximale 220 - 240 V 50/60 Hz 1050 W < 0,5 W 6,8 A Plage de températures •Température de service •Température de l'eau 4 - 40 °C 32 - 40 °C Pression d'eau en entrée0,07 - 0,75 MPa (0,7 - 7,5 bar) Consommation d'eau en mode pulvérisation 0,35 - 0,60 l/min FR Degré de protectionIP X4 Protection contre les pulvérisations d'eau de tous côtés Dispositif de sécurité intégré EN13077 - type AB Conditions de garantie Vous trouverez nos conditions de garantie dans nos conditions générales de vente (CGV) sur www.pro.duravit.com/gtc. 69 Inhoudsopgave NL 70 1. Kort overzicht.................................................................... 72 1.1Ziteenheid..................................................................72 1.2Afstandsbediening ..................................................... 72 2. Beschrijving van de symbolen............................................ 72 3. Voor uw veiligheid.............................................................. 73 3.1 Normaal gebruik........................................................ 73 3.2Veiligheidsvoorschriften............................................. 73 4. Grondbeginselen van de bediening..................................... 76 4.1Afstandsbediening...................................................... 76 4.2 Kleuren van de status-LED......................................... 76 5. Eerste gebruik................................................................... 77 Afstandsbediening..........................................................77 Netspanning...................................................................77 Schakel de SensoWash® in.............................................77 6.Gebruik..............................................................................78 6.1 In-/uitschakelen van de SensoWash®..........................78 6.2Douchefuncties........................................................... 78 In-/uitschakelen van "Bidet"..........................................78 In-/uitschakelen van "Lady-douche"..............................79 In-/uitschakelen van "Comfortdouche"..........................79 De kracht van de waterstraal instellen...........................80 De douchestangpositie instellen.....................................81 De watertemperatuur instellen......................................81 6.3Instellingen................................................................ 82 De nachtverlichting instellen..........................................82 In-/uitschakelen van de bevestigingstoon......................82 Ver-/ontgrendelen van de afstandsbediening.................83 7. Reinigen en onderhoud...................................................... 84 7.1 Zitting en deksel......................................................... 84 7.2 Douchestang en sproeikop.......................................... 85 Handmatig reinigen van de douchestang en de sproeikop........................................................................85 Zelfreiniging van de douchestang en de sproeikop.........86 7.3Afstandsbediening...................................................... 87 7.4 Langere tijd buiten gebruik........................................ 87 8.Afvoeren............................................................................ 87 9. Hulp bij problemen............................................................. 88 10.Technische gegevens.......................................................... 94 NL 71 1. Kort overzicht 1.1 Ziteenheid 1.2 Afstandsbediening A Power B Status-LED C Bidet D Omgevingslichtsensor E Lady-douche F Infraroodontvanger G Nachtverlichting H Zachtsluitend mechanisme 1 Infraroodzender 2 Bidet 3 Lady-douche 4 Comfortdouche 5 Douchestangpositie 6 Watertemperatuur 7 Stop 8 Batterijenvak 2. Beschrijving van de symbolen Waarschuwing Voorzichtig NL LET OP Geeft een gevaarlijke situatie aan. Wordt deze niet vermeden, kan dat ernstig of fataal letsel veroorzaken. Geeft een gevaarlijke situatie aan. Wordt deze niet vermeden, kan dat licht tot halfzwaar letsel veroorzaken. Wordt gebruik om naar handelingen te verwijzen die niet gerelateerd zijn aan fysiek letsel. Hier vindt u hints en tips. >Hier wordt u verzocht een handeling uit te voeren. 72 Akoestisch signaal. Tijdgeschakelde automatische functie. 3. Voor uw veiligheid Om vele jaren plezier van uw SensoWash® te hebben, verzoeken wij u deze gebruikshandleiding, met name de veiligheidsvoorschriften, zorgvuldig door te lezen. Bewaar de gebruikshandleiding altijd zorgvuldig en geef deze eventueel door aan de nieuwe eigenaar. Deze gebruikshandleiding komt op het moment van drukken overeen met de technologische stand van het apparaat. Duravit behoudt zich het recht voor om wijzigingen aan te brengen als gevolg van verdere ontwikkelingen. 3.1 Normaal gebruik SensoWash® Slim is een douche-WC-zitting met sproeierstang voor bidet- en lady-douche-reinigingsfuncties. Hij kan ook altijd als een normale toiletzitting worden gebruikt. Het gebruik is uitsluitend bedoeld voor afgesloten ruimtes. Elk ander gebruik wordt gezien als niet conform de bedoeling. Duravit is niet aansprakelijk voor gevolgen van onbedoeld gebruik. 3.2 Veiligheidsvoorschriften Lees de onderstaande veiligheidsvoorschriften zorgvuldig door en volg deze op! NL Informatie voor de gebruiker •Kinderen en personen met gebrekkige kennis en ervaring met de omgang met het apparaat of met beperkte lichamelijke, sensorische of mentale vaardigheden mogen het apparaat alleen na instructie over het veilige gebruik van het apparaat of onder toezicht gebruiken. •Zorg dat kinderen niet met de SensoWash® spelen. Waarschuwing Schade aan de gezondheid! Het product moet worden geaard. >>Raadpleeg de montage-instructies. 73 Gebruik het apparaat uitsluitend wanneer het volledig functioneel is •Zorg ervoor dat de voedingskabel niet beschadigd is. •De voedingskabel mag niet ingeklemd of afgeklemd worden. •Houd de voedingskabel weg van hete oppervlakken en scherpe randen. •Gebruik het product NIET als het niet goed werkt. Verbreek onmiddellijk de netspanning. Sluit de kogelstopkraan om de watertoevoer te onderbreken. Neem contact op via [email protected]. Voorkom beschadiging van het product of storingen door verkeerd gebruik. Schade aan de gezondheid en mogelijke Voorzichtig schade aan het product! NL >>Sluit het apparaat aan op de koudwaterleiding van het waterleidingnet. >>NIET aansluiten op afvalwater, grijswater, industrieel water, zeewater of ander onbehandeld of half-behandeld water. •Wanneer de SensoWash® vanuit een koude omgeving naar een warme omgeving wordt verplaatst, kan er condens ontstaan. Laat het apparaat enkele uren uitgeschakeld staan. •Installeer de SensoWash® NIET in ruimten waarin vorstgevaar bestaat. De omgevingstemperatuur moet minimaal 4 °C zijn. •Plaats of leg GEEN open vuurbronnen, kaarsen, sigaretten e.d. op de SensoWash®. •Stel de SensoWash® NIET rechtstreeks bloot aan water of zonlicht. •Stap NIET op en ga niet op het product staan. •Plaats GEEN zware voorwerpen op het deksel. •Vervuil, bespuit of verstop de douchestang NIET moedwillig. Reparaties mogen alleen door een vakbekwame persoon worden uitgevoerd. •De SensoWash® mag NIET worden gewijzigd, gemanipuleerd, worden uitgebreid met extra voorzieningen of worden gerepareerd. 74 •Reparaties moeten worden uitgevoerd door gekwalificeerde elektromonteurs of monteurs. •Onjuist uitgevoerde reparaties kunnen resulteren in ongevallen, schade en storingen. •Gebruik geen accessoires die niet door Duravit worden aanbevolen. Gebruik van batterijen Voorzichtig Schade aan de gezondheid! >>Als batterijzuur is weggelekt, moet u contact met de huid, ogen en slijmvliezen voorkomen. >>Spoel bij contact met het zuur de betreffende plaatsen met veel schoon water af en raadpleeg onmiddellijk een arts. •Houd batterijen uit de buurt van kleine kinderen. Batterijen kunnen bij inslikken levensgevaarlijk zijn. Raadpleeg onmiddellijk een arts als een batterij werd ingeslikt. •Batterijen mogen niet worden opgeladen, met andere middelen worden gereactiveerd, uit elkaar worden genomen, in brand worden gestoken of worden kortgesloten. •Neem lege batterijen altijd onmiddellijk uit de afstandsbediening. Lege batterijen kunnen gaan lekken en schade veroorzaken. •Plaats geen nieuwe en oude batterijen samen in de afstandsbediening. •Reinig de batterij en de contacten voordat u de batterij plaatst. Let op de juiste polariteit. •Verwijder de batterijen wanneer u de afstandsbediening langere tijd niet gebruikt. •Stel batterijen niet bloot aan extreme omstandigheden: leg ze niet op hete oppervlakken en stel ze niet aan direct zonlicht bloot. Anders bestaat het risico van lekkage. NL 75 4. Grondbeginselen van de bediening 4.1 Afstandsbediening De SensoWash® wordt bediend via de afstandsbediening. Ook de instellingen worden gewijzigd via de afstandsbediening. Druk op de betreffende toets van de afstandsbediening om een functie in te schakelen. De toets licht even wit op. Om een douchefunctie uit te schakelen, drukt u op "Stop" 7 op de afstandsbediening. Wanneer de afstandsbediening niet beschikbaar is of wanneer de batterijen leeg zijn, kunnen de basisfuncties ook worden in- en uitgeschakeld met de bedieningstoetsen aan de zijkant. >>Druk op de vergrendeling van het batterijenvak 8 om dit te openen. >>Breng twee lithiumbatterijen (CR2032) aan met de + zijde omhoog. >>Sluit het batterijenvak 8 . NL 4.2 Kleuren van de status-LED Rood verlicht: Groen verlicht: Groen knipperend: 76 De stand "Stand-by" van de SensoWash® is actief, de functies zijn niet beschikbaar. De stand "Aan" van de SensoWash® is actief, alle functies zijn beschikbaar. SensoWash® bevindt zich in het "initialisatieproces", alleen "Power" A bij de ziteenheid werkt. Oranje knipperend: Rood knipperend: SensoWash® bevindt zich in de "interne afvoermodus". Storing. Verbreek de netspanning en ga verder met hoofdstuk 9. 5. Eerste gebruik Afstandsbediening >>Druk op de vergrendeling van het batterijenvak 8 om dit te openen. >>Verwijder de beveiligingsstrip uit het batterijenvak. >>Sluit het batterijenvak 8 . Netspanning >>Sluit het apparaat aan op de netspanning. SensoWash® start "Initialisatie" gedurende ongeveer 15 seconden wanneer hij op de netspanning wordt aangesloten. Gedurende deze tijd knippert de LED "Status" B groen en alleen "Power" A bij de ziteenheid werkt, alle andere bedieningsfuncties werken niet. Schakel de SensoWash® in Voorwaarde: De SensoWash® bevindt zich in de stand "Stand-by", de LED "Status" B is rood verlicht. >>Druk op "Power" D op de ziteenheid. SensoWash® is nu ingeschakeld. De LED "Status" B is groen verlicht. Alle functies zijn beschikbaar. NL 77 6. Gebruik 6.1 In-/uitschakelen van de SensoWash® >>Druk op "Power" A op de ziteenheid om de SensoWash® in te schakelen. Een groen verlichte status-LED geeft de stand "Aan" weer. >>Druk opnieuw op "Power" A op de ziteenheid om de SensoWash® uit te schakelen. Een rood verlichte status-LED geeft de stand "Stand-by" weer. 6.2 Douchefuncties ensoWash® reinigt automatisch de ingetrokken douchestang S voor en nadat de wasfuncties zijn gebruikt. De douchefuncties worden automatisch na 2 minuten beëindigd of onmiddellijk wanneer op "Stop" 7 wordt gedrukt. In-/uitschakelen van "Bidet" Voorzichtige en veilige bidetfunctie. NL 1 >>Druk op Plus of Min om de functie Bidet te activeren. 78 2 Bidet is ingeschakeld. 3 >>Druk op Stop om de functie Bidet te beëindigen. Na 2 min. wordt de automatische stopfunctie geactiveerd. Druk als alternatief op "Bidet" C op de ziteenheid om de functie Bidet te activeren. Druk opnieuw op "Bidet" C op de ziteenheid om de functie Bidet te stoppen. Na 2 min. wordt de automatische stopfunctie geactiveerd. In-/uitschakelen van "Lady-douche" Extra sproeikop voor intieme vrouwelijke verzorging. 1 >>Druk op Plus of Min om de functie Ladydouche te activeren. 2 Lady-douche is ingeschakeld. 3 >>Druk op Stop om de functie Lady-douche te beëindigen. Na 2 min. wordt de automatische stopfunctie geactiveerd. Druk als alternatief op "Lady-douche" E op de ziteenheid om de functie Lady-douche te activeren. Druk opnieuw op "Ladydouche" E op de ziteenheid om de functie Lady-douche te stoppen. Na 2 min. wordt de automatische stopfunctie geactiveerd. NL In-/uitschakelen van "Comfortdouche" Voor- en achterwaartse beweging van de douchestang tijdens het gebruik van de douche. Voorwaarde: De functie Bidet of Lady-douche is geactiveerd. 79 1 2 >>Druk op Plus Comfortdouom de Com- che is ingefortdouche in schakeld. te schakelen. 3 >>Druk op Min om de Comfortdouche uit te schakelen. De functie (Bidet of Lady-douche) die voorheen was ingesteld, is nog steeds ingeschakeld. Na 2 min. wordt de automatische stopfunctie geactiveerd. De kracht van de waterstraal instellen De kracht van de waterstraal kan afzonderlijk in 3 standen worden ingesteld: Laag > Midden > Hoog NL Voorwaarde: De functie Bidet of Lady-douche is geactiveerd en het pictogram is verlicht. 1 >>Druk op Plus om de kracht van de waterstraal te verhogen. 80 2 >>Druk op Min om de kracht van de waterstraal te verlagen. Dezelfde handelingen voor "Lady-douche" 3 . De douchestangpositie instellen De positie van de douchestang kan afzonderlijk in 5 standen worden ingesteld: Voorzijde <–––––––––––––––––––-----–––> 1 Achterzijde 2 >>Druk op de rechterpijl om de douchestang uit te schuiven. >>Druk op de linkerpijl om de douchestang in te schuiven. De watertemperatuur instellen NL De watertemperatuur kan afzonderlijk worden ingesteld op 4 standen: Uit>Laag>Midden> Hoog 81 1 >>Druk op Plus om de watertemperatuur te verhogen. 2 >>Druk op Min om de watertemperatuur te verlagen. 6.3 Instellingen De nachtverlichting instellen Verlichte binnenpot ter oriëntatie 's nachts. De nachtverlichting kan worden ingesteld in 3 standen: Aan > Auto >Uit ruk op de toetsencombinatie "Stop" en "Lady-douche - Min", D om door de instellingen van de nachtverlichting te bewegen: NL 1 >>Houd Stop ingedrukt. 2 >>Druk op "Lady-douche - Min". In-/uitschakelen van de bevestigingstoon Om een willekeurige opdracht te signaleren. Aan> Uit 82 ruk op de toetsencombinatie Stop en Ladydouche plus om door D de instellingen van de bevestigingstoon te bewegen: 1 >>Houd Stop ingedrukt. 2 >>Druk op "Lady-douche - Plus". Korte bevestigingstoon: Lange bevestigingstoon: Aan Uit Ver-/ontgrendelen van de afstandsbediening Blokkeerfunctie via afstandsbediening. Wanneer deze functie ingeschakeld is, kan er geen functie worden gebruikt. ruk binnen 5 sec. op de toetsencombinatie Stop, Linkerpijl D douchestangpositie, Rechterpijl douchestangpositie, Temperatuur min, Temperatuur plus om de afstandsbediening te vergrendelen. Gebruik dezelfde toetsencombinatie om de afstandsbediening te ontgrendelen. NL 83 1 >>Houd Stop ingedrukt. 2 3 4 >>Druk op >>Druk op de >>Druk op de Temperatuur linkerpijl rechterpijl min. douchestangdouchestangpositie. positie. 5 >>Druk op Temperatuur plus. NL e pictogrammen voor douchestangpositie en temperatuur D knipperen drie keer: Vergrendeld De pictogrammen voor douchestangpositie en temperatuur knipperen een keer: Ontgrendeld 7. Reinigen en onderhoud 7.1 Zitting en deksel Ten behoeve van de reiniging kunnen zitting en deksel gemakkelijk met een hand worden verwijderd (zie afbeelding op de uitvouwpagina). 84 LET OP Gele verkleuring of afbladderende verf gevolg van verkeerd reinigingsmiddel! als >>Gebruik geen schurende, chloor- of zuurhoudende reinigingsmiddelen. >>Gebruik alleen reinigingsmiddelen en -apparaten die voor het toepassingsgebied zijn bedoeld. >>Volg de gebruiksaanwijzing van de fabrikant van het reinigingsmiddel. >>Meng nooit reinigingsmiddelen. Een mild zeepsopje is geschikt voor dagelijkse reiniging. Reinig de ziteenheid regelmatig of onmiddellijk na vervuiling. Zichtbare vervuiling ontstaat door te lange reinigingsintervallen, wat tot hardnekkige afzettingen kan leiden. >>Reinig de wc-zitting en -deksel met warm water en een reinigingsmiddel. >>Met een droge doek nawrijven. >>Laat de wc-zitting omhoog staan als het toilet wordt gereinigd met een krachtig reinigingsmiddel. 7.2 Douchestang en sproeikop Handmatig reinigen van de douchestang en de sproeikop Reinig de douchestang en de sproeikop regelmatig of onmiddellijk bij vervuiling. Zie de afbeelding op de uitvouwpagina wanneer u de sproeikop voor reiniging wilt demonteren. NL 85 1 >>Houd Stop ingedrukt. 2 >>Druk op "Bidet - Plus". 3 >>Reinig de sproeikop met een doek, spons of borstel en een mild reinigingsmiddel. 4 >>Druk op Stop om de reiniging te beëindigen. Na 2 min. wordt de automatische stopfunctie geactiveerd. Zelfreiniging van de douchestang en de sproeikop Douchestang en sproeikop worden automatisch gereinigd. 1 2 3 NL >>Houd Stop ingedrukt. >>Druk op "Comfortdouche Plus". >>Druk op Stop om de reiniging te beëindigen. Na 90 sec. wordt de automatische stopfunctie geactiveerd. ouchestang en sproeikop worden automatisch voor en na het D gebruik gereinigd. 86 7.3 Afstandsbediening >>Reinig de afstandsbediening en de wandhouder met een zachte, vochtige doek. 7.4 Langere tijd buiten gebruik Wanneer u de SensoWash® gedurende twee weken of langer niet gebruikt, moet het water in het apparaat worden afgetapt. Voorwaarde: De SensoWash® moet zich in de stand "Aan" bevinden, de LED "Status" B is groen verlicht. >>Sluit de watertoevoer af. >>Druk op "Power" A op de ziteenheid en houd deze ingedrukt. >>Druk nu (binnen 2 seconden) op "Bidet" C op de ziteenheid gedurende meer dan 10 seconden. Er klinkt een bevestigingstoon. >>Laat binnen 5 seconden de toetsen los. Er klinkt een bevestigingstoon. SensoWash® start met de "interne afvoer". De LED "Status" B knippert oranje. Nadat het afvoeren is voltooid (ca. 1 minuut), schakelt het product automatisch over naar de stand "Stand-by". De LED "Status" B is rood verlicht. >>Schakel de netspanning uit. >>Neem de batterijen uit de afstandsbediening. NL 8. Afvoeren Het logo met de doorgekruiste kliko geeft aan dat elektrische en elektronische apparatuur volgens de AEEA-regeling moet worden afgevoerd. Elektrische en elektronische apparatuur kan gevaarlijke en schadelijke stoffen bevatten. Voer dit apparaat dus niet af via het ongesorteerde huisvuil. Lever het in bij een erkend inzamelpunt voor recycling volgens de AEEA-regeling. Daarmee helpt u grondstoffen te besparen en het milieu te beschermen. Voor meer informatie neemt u contact op met uw leverancier of de plaatselijke instanties. 87 Lege batterijen moeten op de juiste wijze worden afgevoerd. Hiervoor vindt u in winkels waar batterijen worden verkocht en bij gemeentelijke inzamelpunten containers met de desbetreffende opschrift. Kinderen mogen niet met plastic zakken en verpakkingsmateriaal spelen, vanwege mogelijk letsel of verstikkingsgevaar. Berg dergelijke materialen op een veilige manier op of voer ze op een milieuvriendelijke manier af. Waar mogelijk bewaart u het verpakkingsmateriaal tot de garantieperiode is verstreken. 9. Hulp bij problemen Aanbeveling: Eerste algemene handeling in geval van een storing >>Koppel het apparaat bij de zekeringkast los van het lichtnet gedurende minimaal 3 uur en sluit hem dan opnieuw aan. NL 88 Wanneer uw apparaat na het volgen van de onderstaande instructies nog niet correct functioneert, neemt u contact op met [email protected]. Houd het artikel- en serienummer bij de hand. Deze vindt u op het typeplaatje op de achterzijde van de gebruikshandleiding. Probleem Mogelijke oorzaak Oplossing Hfdst. Displaylampjes en alarmfunctie De LED "Status" Storing. B op de ziteenheid geeft elke 3 seconden een rood knippersignaal. >>Schakel de SensoWash® uit. >>Schakel de SensoWash® weer in. Wanneer het knipperen niet stopt: >>Verbreek de netspanning. >>Sluit het apparaat na 30 sec. opnieuw aan. De LED "Status" Storing. B op de ziteenheid geeft elke 3 seconden drie rode knippersignalen. >>Neem contact op via [email protected] De LED "Status" Storing. B op de ziteenheid geeft elke 3 seconden vier rode knippersignalen. >>Schakel "Water 6.2 temperatuur" 6 uit. >>Schakel een willekeurige douchefunctie in. Storing. Er klinkt een continue bevestigingstoon. >>Verbreek de netspanning. >>Sluit het apparaat na 30 sec. opnieuw aan. NL 89 Probleem Mogelijke oorzaak Oplossing Hfdst. Algemene werking SensoWash® werkt niet. >>Schakel de netSensoWash® is spanning in. niet ingeschakeld. (De LED "Status" B brandt niet) SensoWash® be>>Schakel de stand vindt zich in de "Aan" in. stand "Stand-by". (De LED "Status" B is rood verlicht) Er is lekkage. NL 90 Storing. 6.1 >>Sluit de hoofdkraan van de watertoevoer. >>Verbreek de netspanning. >>Schakel een installateur in. Afstandsbediening Pictogrammen De batterijen op de afstands- zijn uitgeput. bediening knipperen tijdens de bediening. (in plaats van continu verlicht) >>Vervang de batterijen. 4.1 Probleem Mogelijke oorzaak Oplossing Hfdst. >>Plaats batterijen. 4.1 De batterijen zijn leeg. >>Vervang de batterijen. 4.1 De batterijen zijn verkeerd om geplaatst. >>Plaats de batterijen op de juiste wijze. 4.1 De afstandsbe- Er zijn geen diening werkt batterijen geplaatst. niet. De afstandsbedie- >>Ontgrendel de 6.3 ning is vergrendeld afstandsbediening. (de pictogrammen "Douchestangpositie" 5 en "Watertemperatuur" 6 knipperen driemaal). De afstandsbediening is defect. >>Neem contact op met uw installateur. Bidet/Lady-douche Het omschakelen tussen de functies Bidet en Lady-douche duurt te lang. NL Dat is normaal. Wanneer tussen de functies Bidet en Lady-douche wordt geschakeld, beweegt de douchestang naar achteren en vervolgens weer naar voren nadat de zelfreiniging is voltooid. 91 Probleem Mogelijke oorzaak De kracht van de waterstraal is te zwak. >>Stel de kracht van 6.2 De kracht van de waterstraal is inge- de waterstraal steld op "Laag". 2 en/of 3 in op "Midden" of "Hoog". De watertoevoerslang is geknikt. De temperatuur De temperatuur van het water is van het water is ingesteld op "Uit" te laag. of "Laag". NL Oplossing Hfdst. >>Neem contact op met uw installateur. >>Stel de "Water 6.2 temperatuur" 6 in op "Midden" of "Hoog". De waterstraal van de douchestang stopt plotseling. De functie stopt automatisch na 2 minuten. Dat is normaal. Er komt geen waterstraal uit de douchestang. De sproeikop is verstopt. >>Reinig de sproeikop. 7.2 Nachtverlichtingsfunctie De nachtverlichting brandt niet. 6.3 De nachtverlichting Dat is normaal. >>Zet de nachtverstaat in de stand lichting "Uit". in de stand "Auto" of "Aan". De nachtverlichting Dat is normaal. bevindt zich in de stand "Auto" en er is voldoende omgevingslicht. 92 Probleem Mogelijke oorzaak Oplossing Hfdst. De nachtverlichting blijft continu ingeschakeld. 6.3 De nachtverlichting Dat is normaal. >>Zet de nachtverstaat in de lichting stand "Aan". in de stand "Auto" of "Uit". De nachtverlichting Dat is normaal. bevindt zich in de stand "Auto" en er is onvoldoende omgevingslicht. Het venster van de >>Reinig het venomgevingslichtsen- ster van de "omgevingslicht sor is vuil. sensor" D . Handmatig reinigen van de douchestang De douchestang De functie stopt wordt automa- automatisch na tisch naar bin- 2 minuten. nen geschoven. Dat is normaal. NL Automatische zelfreiniging Er druppelt water uit de ingeschoven douchestang. Dat is normaal. De douchestang wordt voor en na een douchefunctie automatisch gereinigd. 93 10.Technische gegevens Artikelnummer 611.00 00 2 00 4300 Nominale spanning Frequentie Nominaal opgenomen vermogen Opgenomen vermogen tijdens stand-by Max. stroomsterkte 220 - 240 V 50/60 Hz 1050 W Temperatuurbereik •Bedrijfstemperatuur •Watertemperatuur < 0,5 W 6,8 A 4 - 40 °C 32 - 40 °C Ingangswaterdruk0,07 - 0,75 MPa (0,7 - 7,5 bar) Waterverbruik bij het douchen 0,35 - 0,60 l/min NL 94 BeschermingsgraadIP X4 Bescherming tegen spatwater aan alle zijden Geïntegreerd beveiligingstoestel EN13077 - type AB Garantiebepalingen Onze garantiebepalingen zijn te vinden in onze Alge mene Voorwaarden op www.pro.duravit.com/gtc. Contenido 1. Vista general breve............................................................ 96 1.1Inodoro.......................................................................96 1.2 Mando a distancia ...................................................... 96 2. Descripción de símbolos..................................................... 96 3. Advertencias de seguridad................................................. 97 3.1Uso normal.................................................................97 3.2 Instrucciones de seguridad......................................... 97 4. Aspectos básicos de operación.........................................100 4.1 Mando a distancia.....................................................100 4.2 LED de estado...........................................................100 5.Operación inicial...............................................................101 Mando a distancia....................................................... 101 Fuente de alimentación............................................... 101 Interruptor SensoWash® encendido............................. 101 6.Operación.........................................................................102 6.1 Encender/apagar el SensoWash®..............................102 6.2 Funciones de lavado.................................................102 Activar/desactivar el "Lavado general"....................... 102 Activar/desactivar el "Lavado femenino".................... 103 Activar/desactivar el "Lavado confort"........................ 103 Ajustar la intensidad del chorro de agua..................... 104 Ajustar la posición del caño de lavado......................... 105 Ajustar la temperatura del agua................................. 105 6.3Ajustes.....................................................................106 Ajustar la luz nocturna................................................ 106 Activar/desactivar el sonido de confirmación.............. 106 Bloquear/desbloquear el mando a distancia............... 107 7. Limpieza y cuidado...........................................................108 7.1 El asiento y la tapa...................................................108 7.2Caño de lavado y jets................................................109 Limpieza manual del caño de lavado y de los jets....... 109 Limpieza automática del caño de lavado y de los jets. 110 7.3 Mando a distancia.....................................................110 7.4 Si no se usa de forma prolongada.............................110 8.Eliminación......................................................................111 9. Asistencia para la resolución de problemas......................112 10.Datos técnicos..................................................................117 ES 95 1. Vista general breve 1.1 Inodoro 1.2 Mando a distancia A Power B LED de estado C Lavado general D Sensor de luz ambiente E Lavado femenino F Receptor infrarrojo G Luz nocturna H Mecanismo de cierre suave 1 Transmisor infrarrojo 2 Lavado general 3 Lavado femenino 4 Lavado confort 5 Posición del caño de lavado 6 Temperatura del agua 7 Parada 8 Compartimento de las pilas 2. Descripción de símbolos Advertencia Atención AVISO ES 96 Indica una situación peligrosa que, si no se evita, puede producir la muerte o lesiones graves. Indica una situación peligrosa que, si no se evita, puede producir lesiones de gravedad media o leve. Se utiliza para referirse a prácticas no relacionadas con lesiones físicas. Aquí se ofrecen consejos. >Aquí se le solicitará que realice una operación. Señal acústica. Función automática temporizada. 3. Advertencias de seguridad Para asegurar que disfrute de su SensoWash® lea estas instrucciones de funcionamiento con cuidado, especialmente las instrucciones de seguridad. Mantenga las instrucciones de funcionamiento en un lugar seguro y en caso de que se transfiera la propiedad, asegúrese de que el nuevo propietario reciba las instrucciones. Estas instrucciones de funcionamiento corresponden al estado tecnológico del dispositivo en el momento de la impresión. Duravit se reserva el derecho a realizar cambios para seguir desarrollando el dispositivo. 3.1 Uso normal SensoWash® Slim es un asiento para inodoro con un accesorio de pulverización para el lavado general y para el lavado femenino. Se puede usar como un aseo normal en cualquier momento. Su uso está limitado exclusivamente a espacios cerrados. Cualquier otro uso se considerará como no conforme al uso normal. Duravit no asume ninguna responsabilidad por cualquier uso que no sea normal. 3.2 Instrucciones de seguridad ¡Lea y observe las siguientes instrucciones de seguridad con cuidado! Requerimientos para el usuario •Los niños y las personas con un conocimiento o experiencia insuficientes en el manejo del dispositivo, o que tengan capacidades físicas, sensoriales o mentales limitadas, solo podrán utilizar el dispositivo siguiendo una instrucción adecuada o bajo supervisión. •Asegúrese de que los niños no jueguen con el SensoWash®. ES 97 Advertencia ¡Daño para la salud! El producto tiene que estar puesto a tierra. >>Por favor, consulte las instrucciones de montaje. Utilice el dispositivo solo cuando sea plenamente operativo •Asegúrese de que el cable de alimentación no esté dañado. •El cable de alimentación no puede quedar atascado ni apretado. •Mantenga el cable de alimentación lejos de superficies calientes y de bordes afilados. •NO use el producto si no funciona de forma adecuada. Desconéctelo de inmediato de la fuente de alimentación. Cierre la llave de paso para interrumpir el suministro de agua. Póngase en contacto con [email protected]. Evite fallos de funcionamiento y daños en el producto como consecuencia de un uso inadecuado. Atención ES 98 ¡Daño para la salud y daños potenciales para el producto! >>Alimente el dispositivo con agua del sistema de agua de red. >>NO conecte aguas residuales, aguas grises, aguas industriales, agua de mar u otras aguas no tratadas o semi-tratadas. •Si el SensoWash® se mueve de un emplazamiento frío a un emplazamiento caliente, puede aparecer condensación. Deje la unidad desconectada durante unas horas. •NO instale el SensoWash® en habitaciones en las que existe el riesgo de heladas. La temperatura ambiente no puede ser inferior a 4 °C. •NO coloque fuentes abiertas de fuego, velas, cigarrillos o similares en el SensoWash®. •NO exponga el SensoWash® directamente al agua o a la luz del sol. •NO suba ni se ponga de pie sobre el producto. •NO coloque objetos pesados en la tapa. •NO ensucie, pulverice ni bloquee deliberadamente el caño de lavado. Las reparaciones solo pueden ser realizadas por personas del Servicio Técnico de Duravit. •NO realice modificaciones, ni manipule, ni instale equipamiento adicional ni intente reparar el SensoWash®. •Las reparaciones solo pueden ser realizadas por electricistas o técnicos cualificados. •Las reparaciones realizadas de forma incorrecta pueden causar, accidentes, daños o funcionamientos defectuosos. •NO use accesorios que no hayan sido recomendados por Duravit. Uso de las pilas Atención ¡Daño para la salud! >>Evite el contacto con la piel, los ojos y las membranas mucosas si sale ácido de las pilas. >>En caso de contacto con el ácido, lave las zonas afectadas con abundante agua limpia y consulte a un médico inmediatamente. •Mantenga las pilas fuera del alcance de los niños. Las pilas pueden ser mortales si se tragan. Si se ha tragado una pila acuda a un medico inmediatamente. •Las pilas no se pueden recargar ni reactivar por otros medios, y tampoco se pueden desmantelar, ni exponerse al fuego ni cortocircuitarse. •Quite siempre de inmediato las pilas usadas del mando a distancia. Puede que se salga ácido de las pilas y causar daños. •No inserte pilas nuevas y viejas en el mando a distancia. •Limpie la pila y los contactos antes de insertar la pila. Observe la polaridad correcta. •Quite las pilas si no desea usar el mando a distancia durante un período prolongado. •No exponga las pilas a condiciones extremas: evite el contacto con superficies calientes o la exposición directa a la luz del sol. De lo contrario, cabe el riesgo de que se salga ácido de las pilas. ES 99 4. Aspectos básicos de operación 4.1 Mando a distancia SensoWash® se controla a través del mando a distancia. Los ajustes también se pueden modificar a través del mando a distancia. Pulse el botón correspondiente en el mando a distancia para pasar a una función. El botón se encenderá brevemente. Para apagar una función de lavado pulse "Stop" 7 en el mando a distancia. Si el mando a distancia no está disponible o las pilas están gastadas, entonces las funciones básicas también se pueden activar o desactivar con los botones laterales de control. >>Pulse el bloqueo del "Compartimento de las pilas" 8 para abrirlo. >>Introduzca dos pilas de litio (CR2032) con + dando hacia arriba. >>Cierre el "Compartimento de las pilas" 8 . 4.2 LED de estado ES 100 Encendido en rojo: Encendido en verde: Parpadeando en verde: SensoWash® está en el "Modo standby", no se puede usar ninguna función. SensoWash® está en el "Modo activo", se pueden usar todas las funciones. SensoWash® se encuentra en el proceso de "Inicialización", solo puede funcionar "Power" A en el asiento. Parpadeando en naranja: Parpadeando en rojo: SensoWash® se encuentra en el "Modo de drenaje interno". Funcionamiento defectuoso. Desconecte la fuente de alimentación principal y continúe con el capítulo 9. 5. Operación inicial Mando a distancia >>Pulse el bloqueo del "Compartimento de las pilas" 8 para abrirlo. >>Quite la etiqueta laminada de seguridad en el compartimento de las pilas. >>Cierre el "Compartimento de las pilas" 8 . Fuente de alimentación >>Conecte la fuente de alimentación principal de energía. S ensoWash® realizará una "Inicialización" durante 15 segundos cuando esté conectado a la fuente de alimentación. Durante este tiempo el "LED de estado" B parpadeará en verde y solo funcionará "Power" A en el asiento, el resto de las funciones no se podrán utilizar. Interruptor SensoWash® encendido Requisito: SensoWash® está en el "Modo standby", el "LED de estado" B se ha encendido en rojo. >>Pulse "Power" D en el asiento. SensoWash® ahora está encendido. El "LED de estado" B se ha encendido en verde. Se pueden usar todas las funciones. ES 101 6. Operación 6.1 Encender/apagar el SensoWash® >>Pulse "Power" A en el asiento para encender el SensoWash®. Un LED de estado verde indica el "Modo activo". Pulse de nuevo "Power" A en el asiento para apagar el SensoWash®. Un LED de estado rojo indica el "Modo standby". 6.2 Funciones de lavado S ensoWash® limpia automáticamente el caño de lavado recogido y después de que se hayan usado las funciones de lavado. Las funciones de la ducha terminan automáticamente después de 2 minutos o de forma inmediata cuando se pulsa "Stop" 7 . Activar/desactivar el "Lavado general" Lavado suave y seguro de las partes íntimas. 1 ES >>Pulse "Más" o "Menos" para activar el lavado general. 2 El lavado general está activo. 3 >>Pulse "Stop" para terminar el lavado general o se detendrá automáticamente después de 2 min. También puede pulsar "Lavado general" C en el asiento para activar el lavado general. Pulse "Lavado general" C en el asiento para detener el lavado general o se detendrá automáticamente después de 2 min. 102 Activar/desactivar el "Lavado femenino" Salida adicional de los jets para el cuidado íntimo femenino. 1 >>Pulse "Más" o "Menos" para activar el lavado femenino. 2 El lavado femenino está activo. 3 >>Pulse "Stop" para terminar el lavado femenino o se detendrá automáticamente después de 2 min. También puede pulsar "Lavado femenino" E en el asiento para activar el lavado femenino. Pulse "Lavado femenino" E en el asiento para detener el lavado femenino o se detendrá automáticamente después de 2 min. Activar/desactivar el "Lavado confort" Movimiento hacia delante y hacia atrás del caño de lavado durante su aplicación. Requisito: Se ha activado la función de lavado general o lavado femenino. ES 103 1 2 >>Pulse "Más" para activar el lavado confort. El lavado confort está activo. 3 >>Pulse "Menos" para detener el lavado confort. La función (lavado general o lavado femenino) que se había puesto anteriormente sigue activa. Se detendrá automáticamente después de 2 min. Ajustar la intensidad del chorro de agua La intensidad del agua pulverizada se puede ajustar de forma individual en 3 pasos: Baja>Media > Alta Requisito: Se ha activado la función de lavado general o de lavado femenino y el símbolo se ha iluminado. 1 ES 2 >>Pulse "Más" para aumentar la intensidad del lavado general. >>Pulse "Menos" para reducir la intensidad del lavado general. La misma acción para el "Lavado femenino" 3 . 104 Ajustar la posición del caño de lavado La posición del caño de lavado se puede ajustar de forma individual en 5 posiciones diferentes: Delante <––––––––––––––––––-------–––––> D etrás 1 2 >>Pulse la flecha derecha para recoger el caño de lavado. >>Pulse la flecha izquierda para sacar el caño de lavado. Ajustar la temperatura del agua La temperatura del agua se puede ajustar de forma individual en 4 niveles: Desactivada>Baja >Media> Alta ES 105 1 2 >>Pulse "Más" para aumentar la temperatura del agua. >>Pulse "Menos" para reducir la temperatura del agua. 6.3 Ajustes Ajustar la luz nocturna Interior de la taza iluminado para poder orientarse durante la noche. La luz nocturna se puede ajustar de forma individual en 3 modos: Activada > Automática > Desactivada P ulse la combinación de botones "Stop" y "Lavado femenino menos" para recorrer los ajustes de la luz nocturna: 1 ES >>Pulse "Stop" y manténgalo pulsado. 2 >>Pulse "Lavado femenino menos". Activar/desactivar el sonido de confirmación Para indicar cualquier comando. Activada> 106 Desactivado P ulse la combinación de botones Stop y "Lavado femenino más" para recorrer los ajustes del sonido de confirmación: 1 2 >>Pulse "Stop" y manténgalo pulsado. >>Pulse "Lavado femenino más". S onido de confirmación breve: Sonido de confirmación más largo: Activado Desactivado Bloquear/desbloquear el mando a distancia Función de bloqueo con el mando a distancia. No se puede usar ninguna función cuando se ha activado esta función. P ulse dentro de 5 segundos la combinación de botones "Stop", "Posición del caño de lavado flecha izquierda", "Posición del caño de lavado flecha derecha", "Temperatura menos" y "Temperatura más" para bloquear el mando a distancia. Use la misma combinación de botones para desbloquear el mando a distancia. ES 107 1 2 >>Pulse "Stop" y manténgalo pulsado. 5 3 4 >>Pulse "Tem>>Pulse "Posi>>Pulse "Posiperatura ción del caño ción del caño menos". de lavado flede lavado flecha derecha". cha izquierda". >>Pulse "Temperatura más". L os símbolos de posición del caño de lavado y de temperatura parpadean tres veces: Bloqueado Los símbolos de posición del caño de lavado y de temperatura parpadean una vez: No bloqueado 7. Limpieza y cuidado 7.1 El asiento y la tapa ES La tapa y el asiento se pueden quitar con facilidad con una mano para limpiarlos (véase la imagen en la página desplegable). AVISO ¡Decoloración amarilla o eliminación de la pintura si se usa un limpiador incorrecto! >>No use productos de limpieza abrasivos ni productos de limpieza que contengan cloro o ácido. >>Utilice solo agentes y equipos de limpieza que se hayan destinado para esta área de aplicación. 108 >>Siga las instrucciones del fabricante del producto de limpieza. >>Nunca mezcle limpiadores. Una solución jabonosa suave es adecuada para la limpieza diaria. Limpie el asiento con regularidad o inmediatamente si está sucio. Si la limpieza no se lleva a cabo con suficiente regularidad, la suciedad puede llegar a ser visible, lo que puede conducir a una suciedad persistente. >>Limpie el asiento y la tapa con agua tibia y un producto de limpieza. >>Séquelos dejándolos ligeramente húmedos después. >>Deje la tapa del inodoro subida mientras el inodoro contenga el producto fuerte de limpieza. 7.2 Caño de lavado y jets Limpieza manual del caño de lavado y de los jets Limpie el caño de lavado y los jets con regularidad o de forma inmediata si están sucios. Véase la imagen en la página desplegable si desea soltar los jets para lavarlos. 1 >>Pulse "Stop" y manténgalo pulsado. 2 >>Pulse "Lavado general más". 3 4 >>Limpie los >>Pulse "Stop" jets con un para terpaño, una esminar la ponja suave limpieza o o un cepillo y se detendrá con un limautomátipiador suave. camente después de 2 min. ES 109 Limpieza automática del caño de lavado y de los jets El caño de lavado y los jets se limpian automáticamente. 1 2 >>Pulse "Stop" y manténgalo pulsado. >>Pulse "Lavado confort más". 3 >>Pulse "Stop" para terminar la limpieza o se detendrá automáticamente después de 90 segundos. E l caño de lavado y los jets se limpian automáticamente antes y después del uso. 7.3 Mando a distancia >>Limpie el mando a distancia y el soporte de pared con un paño suave y húmedo. 7.4 Si no se usa de forma prolongada ES 110 Si no va a usar el SensoWash® durante dos semanas o más, drene el agua que hay dentro del producto. Requisito: SensoWash® está en el "Modo activo", el "LED de estado" B se ha encendido en rojo. >>Desconecte el suministro de agua. >>Pulse "Power" A en el asiento y manténgalo pulsado. >>Ahora (dentro de 2 segundos) pulse "Lavado general" C en el asiento durante más de 10 segundos. Se oirá un sonido de confirmación. >>Suelte los botones a los 5 segundos. Se oirá un sonido de confirmación. SensoWash® iniciará el "Drenaje interno". El "LED de estado" B parpadea en naranja. Una vez que el drenaje haya acabado (aprox. 1 minuto) el producto iniciará el "Modo standby" automáticamente. El "LED de estado" B se ha encendido en rojo. >>Apague la fuente de alimentación. >>Quite las pilas del mando a distancia. 8. Eliminación El logo que representa un contenedor tachado requiere la recogida por separado de aparatos eléctricos y electrónicos (residuos de aparatos eléctricos y electrónicos, del inglés WEEE). Los aparatos eléctricos y electrónicos pueden contener sustancias peligrosas. No se deshaga de este aparato en la basura doméstica sin clasificar. Llévelo a un punto de recogida designado para el reciclaje de residuos de aparatos eléctricos y electrónicos. Al hacerlo, estará ayudando a conservar los recursos y a proteger el medio ambiente. Póngase en contacto con su proveedor o con las autoridades locales para recibir más información al respecto. Hay que eliminar las pilas usadas de manera correcta. Para este propósito, se facilitan contenedores etiquetados de forma adecuada para eliminar las pilas en las tiendas donde se venden pilas y en los puntos de recogida de la comunidad. Los niños no pueden jugar con bolsas de plástico ni material de embalaje debido al riesgo de sufrir lesiones o al peligro de asfixia. Guarde este material de forma segura o deshágase del mismo de manera respetuosa con el medio ambiente. Si es posible, conserve el embalaje hasta que haya expirado el período de garantía. ES 111 9. Asistencia para la resolución de problemas Recomendación: Acción general inicial en caso de funcionamiento defectuoso >>Desconecte la unidad del suministro de energía en la caja de fusibles durante como mínimo 3 horas y luego vuélvala a conectar. Si su unidad aún no funciona correctamente después de seguir las instrucciones que se mencionan a continuación, póngase en contacto con [email protected]. Tenga a mano el número de artículo y el número de serie. Estos se pueden encontrar en la placa de identificación en la parte trasera de las instrucciones de funcionamiento. Problema Causa potencial Solución Lámparas de indicación y función de alarma ES 112 Funcionamiento El "LED de estado" B de la defectuoso. unidad parpadea en rojo una vez cada 3 segundos. >>Apague el SensoWash®. >>Vuelva a encender el SensoWash®. Si no deja de parpadear: >>Corte la fuente de alimentación. >>Vuélvala a conectar después de 30 segundos. El "LED de Funcionamiento estado" B de la defectuoso. unidad parpadea en rojo tres veces cada 3 segundos. >>Póngase en contacto con [email protected] Cap. Problema Causa potencial Solución Cap. Funcionamiento El "LED de estado" B de la defectuoso. unidad parpadea en rojo cuatro veces cada 3 segundos. >>Desactive "Temperatura del agua" 6 . >>Active cualquier función de lavado. 6.2 Se oirá un soni- Funcionamiento do continuo de defectuoso. confirmación. >>Corte la fuente de alimentación. >>Vuélvala a conectar después de 30 segundos. Funcionamiento general SensoWash® no SensoWash® no está >>Conecte la fuente de funciona. encendido. (El "LED alimentación principal. de estado" B no se ha encendido) El SensoWash® está >>Póngalo en el en modo standby. "Modo activo". (El "LED de estado" B está encendido en rojo) Hay una fuga de agua. Funcionamiento defectuoso. >>Cierre la válvula principal del suministro de agua. >>Desconecte la fuente de alimentación. >>Llame al instalador. 6.1 ES 113 Problema Causa potencial Solución Cap. Mando a distancia Quedan pocas pilas. >>Cambie las pilas. Los símbolos del mando a distancia parpadean durante el funcionamiento. (En vez de estar encendidos) El mando a distancia no funciona. No se han insertado >>Inserte pilas. pilas. 4.1 No quedan pilas. 4.1 >>Cambie las pilas. Se han invertido las >>Inserte las pilas de forma correcta. polaridades de las pilas. 4.1 El mando a distan- >>Desbloquee el cia está bloqueado mando a distancia. ("Posición del caño de lavado" 5 y "Temperatura del agua" 6 parpadean tres veces). 6.3 El mando a distan- >>Contacte con su cia está estropeado. instalador. ES 114 4.1 Problema Causa potencial Solución Cap. Lavado general/lavado femenino Se tarda demasiado en cambiar entre el lavado general y el lavado femenino. Esto es normal. Cuando cambie entre el lavado general y el lavado femenino, el caño de lavado se mueve hacia atrás y de nuevo hacia delante una vez que se haya completado la limpieza automática. La intensidad del chorro de agua es demasiado débil. La intensidad del chorro de agua se ha configurado en "Baja". >>Ajuste la "Intensidad 6.2 del chorro de agua" 2 y/o 3 a "Media" o "Alta". >>Contacte con su El tubo flexible de instalador. suministro de agua se ha deformado. La temperatura del agua no es lo suficientemente caliente. La temperatura del >>Ajuste la "Tempera- 6.2 tura del agua" 6 a agua está configurada en "Desactiva- "Media" o "Alta". da" o en "Baja". El chorro de agua del caño de lavado se detiene automáticamente. La función se detiene automáticamente después de 2 minutos. Esto es normal. No sale el cho- Los jets están obtu- >>Limpie los jets. rro de agua del rados. caño de lavado. ES 7.2 115 Problema Causa potencial Solución Cap. Función de luz nocturna 6.3 La luz nocturna La luz nocturna se Esto es normal. no se enciende. ha configurado en >>Ponga la luz nocel modo "Desactiva- turna en el modo "Auto" o "Activado". do". La luz nocturna está Esto es normal. en el modo "Auto" y la luz ambiente es clara. La luz nocturna permanece encendida de forma continua. Esto es normal. La luz nocturna >>Ponga la luz nocse ha configurado en el modo "Activa- turna en el modo "Auto" o "Desactido". vado". La luz nocturna está Esto es normal. en el modo "Auto" y la luz ambiente es oscura. La ventana del sen- >>Limpie la ventana sor de luz ambiente del sensor de luz ambiente D . no está limpia. Función de limpieza manual del caño de lavado ES 116 El caño de lavado se recoge automáticamente. La función se detiene automáticamente después de 2 minutos. Esto es normal. 6.3 Problema Causa potencial Solución Cap. Limpieza automática Esto es normal. Gotea agua del El caño de lavado caño de lavado se limpia automáticamente antes y recogido. después del lavado. 10.Datos técnicos Número de artículo 611.00 00 2 00 4300 Tensión nominal Frecuencia Consumo nominal de energía Consumo de energía en reposo Corriente máxima 220 - 240 V 50/60 Hz 1050 W < 0,5 W 6,8 A Rango de temperatura •Temperatura de funcionamiento •Temperatura del agua 4 - 40 °C 32 - 40 °C Presión del agua entrante0,07 - 0,75 MPa (0,7 - 7,5 bar) Consumo del agua en el modo de pulverización 0,35 - 0,60 l/min Grado de protecciónIP X4 Protección contra el chorro de agua por todos los lados Dispositivo de seguridad integrado EN13077 - Tipo AB Disposiciones de garantía ES Encontrará nuestras disposiciones de garantía en nuestras condiciones comerciales generales (AGB) en www.pro.duravit.com/gtc. 117 Sommario IT 118 1. Breve panoramica............................................................119 1.1Sedile.......................................................................119 1.2Telecomando ............................................................119 2.Legenda...........................................................................119 3. Per la vostra sicurezza.....................................................120 3.1Utilizzo appropriato..................................................120 3.2 Indicazioni di sicurezza.............................................120 4. Nozioni di base sul funzionamento...................................123 4.1Telecomando............................................................123 4.2 Spia LED...................................................................123 5. Messa in funzione.............................................................124 Telecomando............................................................... 124 Alimentazione elettrica............................................... 124 Accensione di SensoWash®.......................................... 124 6.Funzionamento.................................................................125 6.1 Accensione/spegnimento di SensoWash®..................125 6.2 Funzioni della doccetta.............................................125 Attivazione/disattivazione della "Doccetta posteriore".125 Attivazione/disattivazione della "Doccetta Lady"......... 126 Attivazione/disattivazione della "Doccetta comfort".... 126 Regolazione dell'intensità del getto della doccetta...... 127 Regolazione della posizione della testina della doccetta....................................................................... 128 Regolazione della temperatura dell'acqua.................. 128 6.3Impostazioni.............................................................129 Regolazione della luce notturna.................................. 129 Attivazione/disattivazione del segnale acustico........... 129 Blocco/sblocco del telecomando.................................. 130 7. Pulizia e cura...................................................................131 7.1 Sedile e coperchio....................................................131 7.2 Testina e ugello........................................................132 Pulizia manuale della testina e dell'ugello.................. 132 Pulizia automatica della testina e dell'ugello.............. 133 7.3Telecomando............................................................133 7.4 Periodi di inutilizzo prolungato.................................134 8.Smaltimento.....................................................................134 9. Assistenza in caso di problemi..........................................135 10.Dati tecnici.......................................................................141 1. Breve panoramica 1.1 Sedile 1.2 Telecomando A Power B Spia LED C Doccetta posteriore D Sensore luce ambientale E Doccetta Lady F Ricevitore infrarossi G Luce notturna H Chiusura ammortizzata 1 Trasmettitore infrarossi 2 Doccetta posteriore 3 Doccetta Lady 4 Doccetta comfort Posizione della testina 5 della doccetta 6 Temperatura dell'acqua 7 Stop 8 Vano batterie 2. Legenda Avvertenza Attenzione AVVISO Indica una situazione pericolosa che, se non evitata, potrebbe provocare la morte o gravi lesioni. Indica una situazione pericolosa che, se non evitata, potrebbe provocare lesioni di minore o moderata entità. Si riferisce a possibili danni alle cose. Fornisce consigli e suggerimenti. > Invita ad eseguire un'operazione. Segnale acustico. Funzione automatica temporizzata. IT 119 3. Per la vostra sicurezza Per poter sfruttare al meglio SensoWash® e garantirne la massima durata, si consiglia di leggere attentamente le presenti istruzioni d'uso ed in particolare le indicazioni di sicurezza. Conservare con cura le istruzioni d'uso e consegnarle all'eventuale successivo proprietario. Le presenti istruzioni d'uso corrispondono allo stato della tecnica relativa all'apparecchio al momento della stampa. Duravit si riserva il diritto di apportare modifiche in caso di un'evoluzione del prodotto. 3.1 Utilizzo appropriato SensoWash® Slim è un sedile elettronico per WC con funzione bidet integrata, pensato per la pulizia delle parti intime. Può essere utilizzato in qualsiasi momento come normale sedile per WC. L'utilizzo è limitato esclusivamente ad ambienti chiusi. Ogni utilizzo di altra natura è da considerarsi non conforme. Duravit declina ogni responsabilità per qualsiasi conseguenza derivante da un utilizzo improprio del prodotto. 3.2 Indicazioni di sicurezza Leggere attentamente e rispettare le seguenti indicazioni di sicurezza! Requisiti per l'utente •I bambini e le persone che non conoscono o non sanno utilizzare il dispositivo, oppure con ridotte capacità fisiche, sensoriali o mentali, possono utilizzare il prodotto solo dopo essere state istruite sull'uso sicuro dello stesso o se sorvegliate. •Assicurarsi che i bambini non giochino con SensoWash®. Avvertenza Pericolo di danni per la salute! IT 120 Il prodotto deve essere munito di messa a terra. >>Consultare le istruzioni per il montaggio. Utilizzare l'apparecchio solo se in piena funzionalità •Assicurarsi che il cavo di alimentazione non sia danneggiato. •Il cavo di alimentazione non deve rimanere bloccato o essere schiacciato. •Tenere lontano il cavo di alimentazione da superfici calde e spigoli taglienti. •NON utilizzare il prodotto se non funziona correttamente. Scollegarlo subito dall'alimentazione elettrica. Chiudere la valvola di arresto per interrompere l'alimentazione dell'acqua. Contattare [email protected]. Evitare danni al prodotto o anomalie di funzionamento dovuti ad un uso scorretto. Pericolo di danni per la salute e potenziale Attenzione danneggiamento del prodotto. >>Alimentare l'apparecchio con acqua potabile fredda proveniente dall'impianto idraulico principale. >>NON collegare acque reflue, acque grigie, acqua industriale, acqua di mare o altra acqua non trattata o semi-trattata. •In caso di trasporto di SensoWash® da un ambiente freddo ad uno caldo, può formarsi umidità da condensa. Lasciare spento l'apparecchio per alcune ore. •NON installare SensoWash® in ambienti a rischio di gelo. La temperatura ambiente non deve scendere al di sotto di 4 °C. •NON collocare fonti di fiamme libere, candele, sigarette, o simili su SensoWash®. •NON esporre SensoWash® direttamente all'acqua o alla luce del sole. •NON salire o stare in piedi sul prodotto. •NON collocare oggetti pesanti sul coperchio. •NON sporcare, spruzzare o intasare volontariamente la testina. Le riparazioni possono essere effettuate solo da un tecnico specializzato. •NON eseguire modifiche, manipolazioni, installazioni aggiuntive o tentativi di riparazione sul SensoWash®. IT 121 •Le riparazioni possono essere effettuate solo da elettricisti o tecnici specializzati. •Le riparazioni scorrette possono causare infortuni, danni e malfunzionamenti. •NON utilizzare accessori non consigliati da Duravit. Indicazioni sull'uso Attenzione Pericolo di danni per la salute! >>Qualora sia fuoriuscito del liquido, evitarne il contatto con la pelle, gli occhi e le mucose. >>In caso di contatto con il liquido delle batterie, lavare i punti interessati con abbondante acqua pulita e contattare subito un medico. •Tenere le batterie lontano dalla portata dei bambini piccoli. In caso di ingestione le batterie possono comportare pericolo di morte. Se è stata ingerita una batteria, contattare subito un medico. •Le batterie non devono essere caricate, riattivate con altri mezzi, smontate, gettate nel fuoco o cortocircuitate. •Estrarre immediatamente le batterie esauste dal telecomando. Possono perdere liquido e provocare così danni. •Non inserire contemporaneamente batterie nuove e vecchie nel telecomando. •Pulire la batteria e i contatti prima di inserirla. Prestare attenzione alla corretta polarità. •Qualora non si utilizzi il telecomando per un periodo prolungato, rimuovere le batterie. •Non esporre le batterie a condizioni estreme: non posizionarle su superfici calde e non esporle alla luce diretta del sole. In caso contrario il pericolo di fuoriuscita di liquido è maggiore. IT 122 4. Nozioni di base sul funzionamento 4.1 Telecomando SensoWash® viene comandato mediante il telecomando, che permette inoltre di modificare le impostazioni. Per attivare una funzione, premere il tasto del telecomando relativo alla funzione desiderata. Il tasto si illumina brevemente. Per disattivare una funzione doccetta, premere "Stop" 7 sul telecomando. Se il telecomando non è disponibile o se le batterie sono scariche, è possibile attivare o disattivare le funzioni di base attraverso l'unità di comando posta lateralmente sul sedile. >>Premere sulla chiusura del "Vano batterie" 8 per aprirlo. >>Inserire due batterie al litio (CR2032) con il + rivolto in alto. >>Chiudere il "Vano batterie" 8 . 4.2 Spia LED Luce rossa fissa: SensoWash® è "Modalità standby", non è possibile utilizzare alcuna funzione. Luce verde fissa: SensoWash® è "Modalità On", è possibile utilizzare tutte le funzioni. Luce verde SensoWash® è in fase di "Inizializzazione", solo il tasto "Power" A sul sedile è funzionante. lampeggiante: Luce arancione SensoWash® è in "Modalità di svuotamento". lampeggiante: IT 123 Luce rossa lampeggiante: Malfunzionamento. Staccare il collegamento alla rete elettrica e passare al capitolo 9. 5. Messa in funzione Telecomando >>Premere sulla chiusura del "Vano batterie" 8 per aprirlo. >>Rimuovere la linguetta di protezione dal vano batterie. >>Chiudere il "Vano batterie" 8 . Alimentazione elettrica >>Collegare l'apparecchio alla rete elettrica. U na volta collegato all'alimentazione elettrica, SensoWash® avvia la procedura di "Inizializzazione" per circa 15 secondi. In questa fase la spia "LED" B lampeggia in verde e solo il tasto "Power" A sul sedile è funzionante; tutte le altre funzioni non sono disponibili. Accensione di SensoWash® Requisito: SensoWash® deve essere in "Modalità standby", e la "spia LED" B di colore rosso fisso. >>Premere il tasto "Power" D sul sedile. Ora SensoWash® è acceso. La "spia LED" B è verde fissa. Tutte le funzioni sono utilizzabili. IT 124 6. Funzionamento 6.1 Accensione/spegnimento di SensoWash® >>Premere il tasto "Power" A sul sedile per accendere SensoWash®. La spia LED verde indica la "Modalità On". Premere nuovamente "Power" A sul sedile per spegnere SensoWash®. La spia LED rossa indica la "Modalità standby". 6.2 Funzioni della doccetta S ensoWash® effettua una pulizia automatica della testina prima e dopo ogni utilizzo. Le funzioni della doccetta si interrompono automaticamente dopo 2 minuti o quando viene premuto il tasto "Stop" 7 . Attivazione/disattivazione della "Doccetta posteriore" Pulizia delicata e sicura delle parti intime posteriori. 1 >>Premere i tasti Più o Meno per attivare la Doccetta posteriore. 2 La Doccetta posteriore è attivata. 3 >>Premere il tasto "Stop" per fermare la Doccetta posteriore o attendere l'arresto automatico dopo 2 min. In alternativa, premere il tasto "Doccetta posteriore" C sul sedile per attivare la Doccetta posteriore. Premere nuovamente il tasto "Doccetta posteriore" C sul sedile per fermare la Doccetta posteriore o attendere 2 min. per l'arresto automatico. IT 125 Attivazione/disattivazione della "Doccetta Lady" Testina aggiuntiva per la pulizia delle parti intime femminili. 1 >>Premere i tasti Più o Meno per attivare la Doccetta Lady. 2 La Doccetta Lady è attivata. 3 >>Premere il tasto "Stop" per fermare la Doccetta Lady o attendere l'arresto automatico dopo 2 min. In alternativa, premere "Doccetta Lady" E sul sedile per attivare la Doccetta Lady. Premere nuovamente "Doccetta Lady" E sul sedile per fermare la Doccetta Lady o attendere 2 min. per l'arresto automatico. Attivazione/disattivazione della "Doccetta comfort" Movimento in avanti e indietro della testina durante l'uso della doccetta. Requisito: è stata attivata la funzione Doccetta posteriore o Doccetta Lady. IT 126 1 3 2 >>Premere il tasto "Più" per attivare la Doccetta comfort. La Doccetta comfort è attivata. >>Premere il tasto "Meno" per fermare la Doccetta comfort. La funzione impostata in precedenza (Doccetta posteriore o Lady) è ancora attiva. L'arresto automatico avviene dopo 2 min. Regolazione dell'intensità del getto della doccetta L'intensità del getto della doccetta può essere impostata a scelta su 3 livelli diversi: Bassa>Media > Alta Requisito: è stata attivata la funzione Doccetta posteriore o Doccetta Lady e il simbolo è acceso. 1 2 >>Premere il tasto "Più" per aumentare l'intensità del getto doccetta. >>Premere il tasto "Meno" per abbassare l'intensità del getto doccetta. S eguire lo stesso procedimento per la funzione "Doccetta Lady" 3 . IT 127 Regolazione della posizione della testina della doccetta La posizione della testina può essere impostata a scelta su 5 livelli diversi: Avanti <––––––––––––––––––––––––––-–––> Indietro 1 2 >>Premere il tasto "Freccia destra" per muovere la testina in avanti. >>Premere il tasto "Freccia sinistra" per far arretrare la testina. Regolazione della temperatura dell'acqua La temperatura dell'acqua può essere impostata a scelta su 4 livelli diversi: Off>Bassa >Media> Alta IT 128 1 2 >>Premere il tasto "Più" per aumentare la temperatura dell'acqua. >>Premere il tasto "Meno" per abbassare la temperatura dell'acqua. 6.3 Impostazioni Regolazione della luce notturna Illuminazione dell'interno del vaso per orientarsi al buio. La luce notturna può essere impostata a scelta su 3 modalità: On > Auto > Off P remere in successione i tasti "Stop" e "Doccetta Lady - Meno" per selezionare la modalità della luce notturna: 1 >>Premere e tenere premuto il tasto "Stop". 2 >>Premere il tasto "Doccetta Lady Meno". Attivazione/disattivazione del segnale acustico Segnala l'attivazione di un comando. On >Off IT 129 P remere in successione i tasti "Stop" e "Doccetta Lady - Più" per selezionare le diverse impostazioni del segnale acustico: 1 2 >>Premere e tenere premuto il tasto "Stop". >>Premere il tasto "Doccetta Lady Più". S egnale acustico breve: Segnale acustico lungo: On Off Blocco/sblocco del telecomando Funzione di blocco tramite telecomando. Non è possibile utilizzare alcuna funzione quando questa funzione è attiva. P remere in successione entro 5 sec. i tasti "Stop", "Posizione testina - Freccia sinistra", "Posizione testina - Freccia destra", "Temperatura - Meno", "Temperatura - Più" per bloccare il telecomando. Per sbloccare il telecomando utilizzare la stessa combinazione di tasti. IT 130 1 2 >>Premere e tenere premuto il tasto "Stop". 3 4 >>Premere il ta- >>Premere il ta- >>Premere il sto "Posizione sto "Posizione tasto "Temtestina - Frec- testina - Frec- peratura Meno". cia destra". cia sinistra". 5 >>Premere il tasto "Temperatura Più". I simboli di Posizione testina e Temperatura lampeggiano tre volte: Bloccato I simboli di Posizione testina e Temperatura lampeggiano una volta:Sbloccato 7. Pulizia e cura 7.1 Sedile e coperchio Coperchio e sedile possono essere facilmente e rapidamente rimossi per una pulizia approfondita (vedere la figura nella pagina ripiegata). IT 131 AVVISO Macchie giallastre dovute all'utilizzo di de tergenti inadatti. >>Non utilizzare detergenti abrasivi, contenenti cloro o acidi. >>Utilizzare solo detergenti e apparecchi per la pulizia adatti. >>Rispettare le istruzioni d'uso del produttore del detergente. >>Non mescolare i detergenti. Per la pulizia quotidiana si consiglia una soluzione saponata delicata. Pulire il sedile con regolarità o ogniqualvolta è sporco. Lo sporco visibile si crea quando gli intervalli di pulizia sono troppo lunghi, con conseguente formazione di sporco ostinato. >>Pulire il sedile e il coperchio con regolarità utilizzando acqua calda e detergente. >>Asciugare la superficie. >>Lasciare sollevato il sedile finché all'interno del vaso è presente un qualsiasi detergente aggressivo. 7.2 Testina e ugello Pulizia manuale della testina e dell'ugello Pulire la testina e l'ugello regolarmente o ogniqualvolta sono sporchi. Vedere la figura nella pagina ripiegata per le istruzioni di smontaggio dell'ugello per la pulizia. IT 132 1 2 >>Premere e tenere premuto il tasto "Stop". >>Premere il tasto "Doccetta posteriore - Più". 3 4 >>Pulire la te>>Premere il stina con un tasto "Stop" panno, una per fermare spugna o una la pulizia o spazzola ed attendere un detergenl'arresto te delicato. automatico dopo 2 min. Pulizia automatica della testina e dell'ugello Testina e ugello si puliscono automaticamente. 1 2 >>Premere e tenere premuto il tasto "Stop". 3 >>Premere il >>Premere il tasto "Doctasto "Stop" cetta comfort per fermare la - Più". pulizia o attendere l'arresto automatico dopo 90 sec. T estina e ugello vengono puliti automaticamente prima e dopo ogni utilizzo. 7.3 Telecomando >>Pulire il telecomando e il relativo supporto con un panno morbido inumidito. IT 133 7.4 Periodi di inutilizzo prolungato Se non si utilizza SensoWash® per due o più settimane, è necessario svuotare l'apparecchio. Requisito: SensoWash® deve essere in modalità "On", la luce del "LED di accensione" B è verde fissa. >>Interrompere l'alimentazione dell'acqua. >>Premere e tenere premuto il tasto "Power" A sul sedile. >>Premere immediatamente (entro 2 secondi) il tasto "Doccetta posteriore" C sul sedile per più di 10 secondi. Viene emesso un segnale acustico. >>Rilasciare i tasti entro 5 secondi. Viene emesso un segnale acustico. SensoWash® avvia lo "svuotamento". La "spia LED" B è arancione lampeggiante. Una volta concluso il processo di svuotamento (circa 1 minuto), il prodotto passa automaticamente in "Modalità standby". La "spia LED" B è rossa fissa. >>Interrompere l'alimentazione di corrente elettrica. >>Estrarre le batterie dal telecomando. 8. Smaltimento Il simbolo del contenitore di spazzatura su ruote barrato indica l'obbligo di raccolta separata dei rifiuti da apparecchiature elettriche ed elettroniche (RAEE). Le apparecchiature elettriche ed elettroniche possono contenere sostanze pericolose e nocive. Non smaltire l'apparecchio nei rifiuti domestici. Consegnarlo ad un punto di raccolta per il riciclo dei RAEE. In tal modo, si contribuisce alla conservazione delle risorse e alla tutela dell'ambiente. Per ulteriori informazioni rivolgersi al proprio rivenditore o alle autorità locali competenti. IT 134 Le batterie esauste devono essere smaltite in modo corretto. Presso alcuni esercenti e nei centri di raccolta comunali sono a disposizione appositi contenitori per lo smaltimento delle batterie. I bambini non devono giocare con sacchetti di plastica e materiali di imballaggio, a causa della possibilità di lesioni o del pericolo di soffocamento. Conservare tali materiali in modo sicuro o smaltirli nel rispetto dell'ambiente. Se possibile, conservare l'imballo per tutta la durata della garanzia. 9. Assistenza in caso di problemi Consiglio: Procedura iniziale generale in caso di malfunzionamento >>Scollegare l'apparecchio dalla rete elettrica in corrispondenza della scatola fusibili per almeno 3 ore, quindi ricollegarlo. Nel caso in cui l'apparecchio non funzioni dopo aver seguito le istruzioni riportate di seguito, contattare [email protected]. Tenere a portata di mano il codice articolo e il numero di serie. Questi possono essere letti sull'etichetta presente sul retro delle istruzioni d'uso. Problema Possibile causa Soluzione Cap. Spie luminose e funzione allarme La "spia LED" Malfunzionamento. >>Spegnere SensoWash®. B sul sedile lampeggia in >>Riaccendere rosso una volta SensoWash®. ogni 3 secondi. Se la spia non smette di lampeggiare: >>Interrompere l'alimentazione elettrica. >>Ripristinarla dopo 30 sec. IT 135 Problema Possibile causa Soluzione Cap. Malfunzionamento. >>Contattare La "spia LED" [email protected] B sul sedile lampeggia in rosso tre volte ogni 3 secondi. Malfunzionamento. >>Spegnere "Tempe- 6.2 La "spia LED" ratura dell'acqua" sul sedile B lampeggia in 6. rosso quattro >>Attivare una funvolte ogni 3 sezione doccetta a condi. piacere. Malfunzionamento. >>Interrompere l'aViene emesso limentazione eletun segnale acutrica. stico continuo. >>Ripristinarla dopo 30 sec. Funzione generale SensoWash® non funziona. IT 136 SensoWash® non è acceso. (La "spia LED" B è spenta) >>Attivare l'alimentazione elettrica. SensoWash® è in modalità Standby. (La "spia LED" B è rossa fissa) >>Passare alla "Modalità On". 6.1 Problema Possibile causa Soluzione Cap. È presente una Malfunzionamento. >>Chiudere la valvola principale di aliperdita d'acmentazione dell'acqua. qua. >>Interrompere l'alimentazione elettrica. >>Telefonare all'installatore. Telecomando Le batterie sono I simboli sul quasi scariche. telecomando lampeggiano durante il funzionamento. (anziché essere fisse). >>Sostituire le batte- 4.1 rie. IT 137 Problema Possibile causa Soluzione Cap. Il telecomando non funziona. Le batterie non sono inserite. >>Inserire le batterie. 4.1 Le batterie sono scariche. >>Sostituire le batterie. 4.1 Le batterie sono in- >>Collocare le batte- 4.1 serite con la polari- rie nella posizione corretta. tà non corretta. Il telecomando è >>Sbloccare il bloccato ("Posizione telecomando. testina" 5 e "Temperatura dell'acqua" 6 lampeggiano tre volte). Il telecomando è difettoso. 6.3 >>Contattare l'installatore. Doccetta posteriore/Doccetta Lady IT 138 La commutazione tra doccetta posteriore e Lady impiega troppo tempo. Durante la commu- Questo è normale. tazione tra doccetta posteriore e Lady la testina si ritrae e fuoriesce al termine della pulizia automatica. L'intensità del getto della doccetta è troppo debole. L'intensità del getto >>Impostare "Inten- 6.2 sità del getto della della doccetta è doccetta" 2 e/o 3 stata impostata su "Bassa". su "Media" o "Alta". Il tubo flessibile di alimentazione dell'acqua è piegato. >>Contattare l'installatore. Problema Possibile causa Soluzione La temperatura dell'acqua non è abbastanza elevata. >>Impostare la La temperatura >>"Temperatura dell'acqua è stata impostata su "Off" o dell'acqua" 6 su "Bassa". "Media" o "Alta". Il getto d'acqua dalla testina si arresta all'improvviso. La funzione viene interrotta automaticamente dopo 2 minuti. Questo è normale. Dalla testina non fuoriesce alcun getto d'acqua. L'ugello è intasato. >>Pulire l'ugello. Cap. 6.2 7.2 Funzione Luce notturna La luce nottur- La luce notturna è stata impostata su na non si ac"Off". cende. 6.3 Questo è normale. >>Impostare la luce notturna su "Auto" o "On". La luce notturna è Questo è normale. impostata su "Auto" e la luce nella stanza è sufficiente. IT 139 Problema Possibile causa Soluzione La luce notturna rimane accesa. La luce notturna è stata impostata su "On". 6.3 Questo è normale. >>Impostare la luce notturna su "Auto" o "Off". La luce notturna è Questo è normale. impostata su "Auto" e la luce nella stanza è scarsa. Il vetro del sensore luce ambientale è sporco. >>Pulire il vetro del "Sensore luce ambientale" D . Funzione di pulizia manuale della testina La testina si ritrae automaticamente. La funzione viene interrotta automaticamente dopo 2 minuti. Questo è normale. Pulizia automatica L'acqua gocciola dalla testina retratta nel suo alloggiamento. IT 140 Questo è normale. La testina viene pulita automaticamente prima e dopo ogni utilizzo. Cap. 10.Dati tecnici Codice articolo 611.00 00 2 00 4300 Tensione nominale Frequenza Max. potenza assorbita Potenza assorbita in mod. standby Corrente massima assorbita 220 - 240 V 50/60 Hz 1050 W < 0,5 W 6,8 A Range di temperatura •Temperatura di esercizio •Temperatura dell'acqua 4 - 40 °C 32 - 40 °C Pressione dell'acqua in ingresso0,07 - 0,75 MPa (0,7 - 7,5 bar) Consumo d'acqua della doccetta 0,35 - 0,60 l/min Classe di protezioneIP X4 Protezione da spruzzi d'acqua provenienti da ogni direzione Dispositivo di sicurezza integrato EN13077 - tipo AB Condizioni di garanzia Le Condizioni di garanzia si trovano all’interno delle Condizioni generali di vendi- ta sul sito www.pro.duravit.com/gtc. IT 141