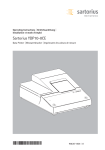
1
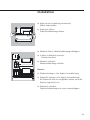
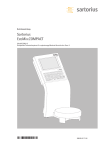
Operating Instructions | Betriebsanleitung | Mode d’emploi
Sartorius YDP10BT-0CE
Data Printer with Bluetooth® Radio Interface for wireless communication
Messwertdrucker mit Bluetooth®-Funkschnittstelle für drahtlose Kommunikation
Imprimante avec interface radio Bluetooth® pour une communication sans fil
98647-004-33
English – page 3
In cases involving questions of interpretation,
the German-language version shall prevail.
Deutsch – Seite 21
Im Auslegungsfall ist die deutsche Sprache
maßgeblich.
Français – page 39
En cas de questions concernant l’interprétation,
la version en langue allemande fera autorité.
2
Information for the User
About these Installation
Instructions
t Please read these operating instructions
carefully before putting the equipment
into operation for the first time.
t Read the operating instructions carefully and take note.
t These operating instructions constitute
a part of the product.
Keep these operating instructions in
a safe and easily accessible place.
t If these instructions are lost, please
contact Sartorius for a replacement or
download the latest manual from our
website www.sartorius.com.
Bluetooth® Adapter
Legal Terms and Conditions
Bluetooth® is a registered and protected
trademark owned by the Bluetooth®
Special Interest Group (Bluetooth® SIG,
Inc.), headquartered in Bellevue,
Washington, USA. The trademark and
logo for Bluetooth® wireless technology
are the property of Bluetooth SIG Inc.
The use of this trademark by Sartorius
is under license.
All other brands and trade names are
the property of their respective owners.
Warning/Danger Symbols
Warning/Danger Symbols Used in these
Instructions:
of electrical shock Potential
2 Danger
danger of physical injury or death
of potential physical injury,
3 Warning
health risk or risk of property damage
information
h Useful
and tips
Notes for use in legal
metrology
Explanation of Symbols
The following symbols are used in these
instructions:
t Indicates a required action
y Describes what happens after you have
performed a particular step
1. Perform steps in the given order
2.
– Indicates an item in a list
3
Contents
User Information . . . . . . . . . . . . . . . 3
Contents . . . . . . . . . . . . . . . . . . . . . 4
Safety Precautions . . . . . . . . . . . . . 5
Equipment Supplied . . . . . . . . . . . . 6
Installation . . . . . . . . . . . . . . . . . . . 7
Power Connection . . . . . . . . . . . . . . 8
Activating the Radio Connection. . . . 9
Maintenance . . . . . . . . . . . . . . . . . . 13
Changing the Paper Roll . . . . . . . . . . 13
Changing the Ink Ribbon . . . . . . . . . 15
Charging the
Rechargeable Batteries . . . . . . . . . . . 16
Changing the
Rechargeable Batteries . . . . . . . . . . . 16
Cleaning the Printer . . . . . . . . . . . . . 18
Accessories . . . . . . . . . . . . . . . . . . . 18
Technical Data. . . . . . . . . . . . . . . . . 18
Operation . . . . . . . . . . . . . . . . . . . . 11
Optical LED Display . . . . . . . . . . . . . 11
Electromagnetic Compatibility . . . . 19
Disposal . . . . . . . . . . . . . . . . . . . . . . 19
Error Messages . . . . . . . . . . . . . . . . 12
Test cerificate . . . . . . . . . . . . . . . . . 20
Declaration of Conformity. . . . . . . . 57
4
Safety Precautions
The data printer with radio interface
for wireless communication is compliant
with the directives and standards for
operation of electrical equipment,
electromagnetic compatibility, and the
stipulated safety requirements. Improper
use or handling, however, can result in
damage and/or injury.
Danger of electrical shock!
Personnel must have read the operating
instructions, especially the safety
instructions. The operator must supplement these warnings and safety precautions if necessary and brief operating
personnel accordingly. The requirements
pertaining to applicable installation regulations must be followed when using
electrical equipment in systems and
environmental conditions with increased
safety requirements. Relevant laws, standards, regulations, guidelines and environmental protection laws valid in your
country must be observed. Any installation work or printer operation that does
not conform to the instructions will
result in forfeiture of all claims under
the manufacturer's warranty.
not operate the printer if the
2 Do
housing is damaged; make sure that
not switch on the equipment
2 Do
if the AC adapter or power cord are
damaged. If the printer, the AC
adapter or cable are damaged,
disconnect the equipment from the
power supply and secure it so that
it cannot be turned on.
the housing is firmly closed so as to
prevent any liquids from getting into
the printer.
Only use a lightly-moistened cloth
to clean the printer.
on Installation: Modifications
2 Note
to the device and the connection of
power supply units not supplied by
Sartorius are the sole responsibility
of the operator! Information on operational quality is available upon
request from Sartorius. You should
only use peripherals and options
supplied by Sartorius.
Hazards at the place of installation and
during retrofitting.
use the following type of
3 Only
rechargeable battery (do not use ordinary batteries): Nickel metal hybrid,
type AA order no. 69Y03136.
Avoid total discharge of accumulators
as otherwise maximum charge capacity is reduced. Used accumulators
must be disposed of as hazardous
waste
the serrated paper tear-off
3 Caution:
edge is sharp – direct contact can
cause injury!
5
Equipment Supplied
The equipment supplied includes the following:
Name:
– Printer YDP10BT-0CE
– Power supply unit (country-specific – see accessories)
– Paper roll
– 4 rechargeable batteries
– Ink ribbon
6
Installation
t Remove accumulators from packing.
Accumulators are discharged.
t Open the paper compartment.
Lift paper compartment cover.
LF
CN
N/ N
STAT
DA TE
t Open the accumulator compartment. Open accumulat
or compartment cover.
t Place 4 rechargeable batteries in accumulator
compartment:
Pay attention to correct polarity.
t Close accumulator compartment:
Close the accumulator compartment cover.
Note:
y Insert ink ribbon –
see Maintenance section Instandhaltung.
y Insert paper roll –
see Maintenance section Instandhaltung.
The paper roll can only be engaged when the printer
is switched on.
t Close the paper compartment:
Fold down the paper compartment cover.
7
t Connect the power supply unit
to the printer and plug in the jack plug.
Power Connection
t Plug the power supply unit into the mains supply.
the safety instructions.
3 Observe
Make sure that the voltage rating printed on this unit
is identical to your local line voltage. If the voltage
specified on the label or the plug design of the power
supply do not match the rating or standard you use,
please contact your Sartorius office or dealer. Use
only original Sartorius power supply units. The use of
cables from other manufacturers, even if these units
have a registered approval rating from a national
testing laboratory, requires the consent of a qualified
electrician.
8
y The LED on the printer is green.
The printer advances the paper roll.
y Charging of the rechargeable batteries commences.
The printer batteries are fully charged after 28 hours
y If the LED flashes red, the batteries are not charged.
If the red light flashes and fails to go out after 3 hours:
replace the rechargeable batteries.
accumulators are hazardous waste
h Used
(not household waste):
Dispose of accumulators as hazardous waste
in accordance with the Waste Management Act
operate the printer when the rechargeable
3 Only
batteries are installed and the power supply unit
is connected.
Activating the Radio Connection
A virtual, fixed connection is established between the
scale and the printer.
Radio signals are only exchanged between the scale
and the printer when the relevant identifier matches.
Adjust the settings on the scale for Bluetooth data
transmission – please consult the operating instructions
for the scale in question.
LF
CN
N/ N
STAT
DA TE
Switch the printer to ready-to-receive mode:
t Simultaneously hold down the P (Line feed) and
G (Print) keys for approx. 10 seconds.
9
y The LED flashes blue (for approx. 2 minutes):
the printer is visible to other Bluetooth devices.
LF
CN
N/ N
STAT
DA TE
t Activate the search command on the scale (Search).
The radio connection is established.
y If the printer is detected an acknowledgement appears
on the scale display.
y The LED on the printer stops flashing and turns blue:
the search was successful and printer detection is
complete.
The printer can now receive and print data.
scale does not detect the printer, the LED on
h Ifthetheprinter
flashes
red-blue. The radio connection is inactive.
The radio connection has to be re-established:
t Press the P key on the printer, the LED is
now green again.
Now restart the search (see above).
10
Operation
2 keys are provided to operate the printer:
1) P key (Line feed).
Press the Line feed key to advance the paper by one
blank line.
2
1
2) G key (Print).
Print measured value manually.
Optical LED display
LED
Message
LED is green
The printer is ready-to-receive; the Bluetooth radio link is inactive.
LED is blue
The printer is ready-to-receive; the Bluetooth radio link is active.
LED flashes blue
The printer is visible to the Bluetooth network and can be integrated.
The Bluetooth radio link can be activated.
LED flashes
red and blue
The printer was not integrated into the Bluetooth network within
2 minutes.
The Bluetooth radio link is inactive.
LED is red
The printer is not ready-to-print; there is an error (see: Error Messages).
Information regarding the radio link as a printout:
-Ring:
Establish radio link (call).
-Connect:
Radio link established.
-No Carrier: Signal no longer available.
The radio link has disconnected.
11
Error Messages
LED
Message
LED flashes
red and blue
The printer was not integrated
Press any desired key on the printer.
into the Bluetooth network within
2 minutes. The Bluetooth radio link
is inactive.
LED is red
The printer is not ready-to-print;
there is an error (device fault,
parity error or transmission error).
Press any desired key on the printer.
LED is still red
Rechargeable batteries were not
inserted or are defective. Change
rechargeable batteries
(see Maintenance section).
Accumulator charge too low
Charging of rechargeable batteries
commences (see the “Maintenance"
section).
LED flashes red
12
Remedy
Maintenance
Changing the Paper Roll
A paper roll with the following propertiesis required
for operation (refer also to Accessories section):
–
–
–
–
–
Standard paper roll
Wood-free 60 g paper
Width: 57.5 ± 0.5 mm
Diameter: max. 65 mm
Open minor diameter: min. 8 mm
y Open the paper compartment. Lift the paper compartment cover.
LF
CN
N/ N
STAT
DA TE
t Release the roll holders on both sides of the roll core
by pulling in the outward direction.
t Remove the old roll core.
t Place the new paper roll on a flat surface.
y Place the roll with the paper feed on the underside and
facing towards you.
t Grip the paper roll between the thumb and index finger
of one hand and hold it vertically above the roll compartment.
t With the other hand, feed the paper into the inlet slot
underneath the ink ribbon.
t Pass the paper through the ink ribbon cassette:
With the printer switched on, repeatedly press or hold
down the G key
y The paper is drawn into the ink ribbon cassette and fed
upwards.
13
t Adjust the paper roll: Hold the paper roll so that the roll
holders can be pushed into the paper roll core opening.
t Release the roll holders on both sides.
t Close the paper compartment:
Fold down the paper compartment cover.
LF
14
CN
N/ N
STAT
DA TE
Changing the Ink Ribbon
A black ink ribbon type ERC-22 B is required
for operation (refer also to Accessories section).
t Open the paper compartment:
Lift the paper compartment cover.
t Remove the paper from the ink ribbon cassette:
Turn back the paper roll.
t From above, press down on the right side of the ink
ribbon.
y The left side of the ink ribbon lifts up.
t Remove the ink ribbon.
t Insert the new ink ribbon from above.
y The ink ribbon engages.
t Tighten the ink ribbon if necessary: Turn the winding
core on the left side of the ink ribbon in the direction
of the arrow.
t Feed in the paper: See “Changing the paper roll".
t Close the paper compartment: Fold down the paper
compartment cover.
15
Charging the Rechargeable Batteries
t The LED flashes red: Charge the rechargeable batteries.
Plug the jack plug into the printer and the power cord
into the mains supply.
y Rechargeable batteries are charged.
y The printer batteries are fully charged after 28 hours.
y If the LED is still flashing red after 3 hours: Change
the rechargeable batteries.
total discharge of rechargeable batteries
3 Avoid
as otherwise maximum charge capacity is reduced.
Only use standard nickel metal hybrid type AA
rechargeable batteries (see also “Accessories”).
Sartorius Order No.: 69Y03136
Changing the Rechargeable Batteries
t Open the paper compartment: Lift the paper
compartment cover.
LF
16
CN
N/ N
STAT
DA TE
t Open the accumulator compartment. Remove accumulator compartment cover, remove 4 rechargeable
batteries.
accumulators are hazardous waste
h Used
(not household waste):
Dispose of rechargeable batteries as hazardous waste
in accordance with the Waste Management Act.
t Place 4 new rechargeable batteries in the accumulator
compartment:
Pay attention to correct polarity.
t Close accumulator compartment: Fold down the
rechargeable battery compartment cover.
t Close the paper compartment: Fold down the paper
compartment cover.
LF
CN
N/ N
STAT
DA TE
17
Accessories
Cleaning the Printer
liquid must get into the printer.
3 No
Do not use aggressive cleaning agents
(solvents etc.).
t Disconnect from the supply voltage:
Disconnect the power supply unit from
the mains supply.
Release the jack plug on the rear side of
the printer.
t Clean the printer with a cloth lightly
moistened with soap solution.
Description
Order no.
Paper rolls (pack of 5)
6906937
Ink ribbon, type ERC-22 B 6906918
Mains power supply unit
for standard:
Europe
Great Britain
USA
Australia
South Africa
6971412
6971414
6971413
6971411
6971410
Set of rechargeable
batteries (4 x nickel metal
hybrid type AA)
69Y03136
t Wipe the printer with a soft, dry cloth.
Technical Data
18
Length
230 mm
Width
158 mm
Height:
80 mm
Weight
(excluding rechargeable
batteries and paper roll)
Approx. 800 g
Operating temperature
0 to +40°C
Storage temperature
–40 to +70°C
Electromagnetic compatibility
The device complies with the following
EC Directives and European Standards:
2004/108/EEC »Electromagnetic Compatibility (EMC)«
Associated European Standards:
Interference emission in accordance
with product standard EN 61326-1:
Class B (residential area)
Immunity to interference in accordance
with product standard EN 61326-1:
industrial area
Note:
Modifications to the device, along with
the connection of cables or equipment not
supplied by Sartorius, are the responsibility
of the operator and are to be inspected
(and rectified, if necessary) by the operat
or accordingly.
Information on operational quality is
available on request from Sartorius (in line
with the abovementioned norms pertaining
to immunity). 2006/95/EEC »Electrical
equipment designed for use within certain
voltage limits«
Disposal
The packaging is to be taken to
a local waste disposal site if no
longer required. The packaging
comprises of environmentallyfriendly materials that can be
used as secondary raw materials.
The device, including accessories and batteries, is not to be thrown into the household waste. EU legislation in Member
States requires electrical and electronic
equipment to be collected separately from
unsorted municipal waste so that it may be
recycled. In Germany and several other
countries, Sartorius itself assumes responsibility for the return and conformant
disposal of its electronic and electrical
products. These products may not be
placed with household waste or brought
to collection centers run by local public
disposal operations – not even by small
commercial operators. For disposal in
Germany and in the other member nations
of the European Economic Area (EEA),
please contact our local service technicians
or our Service Center in Göttingen:
Sartorius Service Center,
Weender Landstrasse 94-108,
37075 Göttingen, Germany
In countries that are not members of the
European Economic Area (EEA) or where
no Sartorius subsidiaries or dealerships are
located, please contact your local authorities or a commercial disposal operator.
Remove the batteries and hand them in to
a collection point prior to disposal/scrapping of the device. Sartorius, its affiliates,
subsidiaries, dealers and distributors will
not take back equipment contaminated
with hazardous materials (ABC contamination) - either for repair or disposal. Please
refer to our web site (www.sartorius.com)
or contact the Sartorius Service Department for more detailed information
regarding repair service addresses or the
disposal of your device.
19
20
Benutzerhinweise
Zu dieser
Installationsanleitung
t Diese Betriebssanleitung aufmerksam
und vollständig lesen, bevor das Gerät
zum ersten Mal in Betrieb genommen
wird.
t Die Betriebssanleitung aufmerksam
lesen und beachten.
t Die Betriebssanleitung ist ein Teil des
Produktes.
Die Betriebssanleitung gut erreichbar
und sicher aufbewahren.
t Bei Verlust der Anleitung Ersatz anfordern oder die aktuelle Anleitung von der
Sartorius Website www.sartorius.com
herunter laden.
Bluetooth® Adapter
Rechtliche Hinweise
Bluetooth® ist ein eingetragener und
geschützter Name der Bluetooth® Special
Interest Group (Bluetooth® SIG, Inc.) mit
Hauptsitz in Bellevue, Washington, USA.
Die Wortmarke und die Logos sind
Eigentum der Bluetooth® SIG, Inc., und
die Verwendung derartiger Marken
durch die Sartorius ist lizensiert. Andere
Marken und Markennamen gehören
ihrem jeweiligen Eigentümer.
Warnzeichen/Gefahrensymbole
Warn- und Gefahrensymbole in dieser
Anleitung:
durch Stromschlag
2 Gefahr
Körperschaden oder Tod als Folge
vor einem möglichen
3 Warnung
Körperschaden, Gesundheitsrisiko
oder Gefahr von Sachschäden
für nützliche Informationen
h Hinweis
und Tipps
Hinweise für den eichpflichtigen
Verkehr
Zeichenerklärung
Folgende Symbole werden in dieser
Anleitung verwendet:
t steht vor Handlungsanweisungen
y beschreibt, was nach einer ausgeführten
Handlung geschieht
1. Handlungen in einer bestimmten
Reihenfolge ausführen
2.
– steht vor einem Aufzählungspunkt
21
Inhalt
Benutzerhinweise . . . . . . . . . . . . . . 21
Inhalt . . . . . . . . . . . . . . . . . . . . . . . 22
Sicherheitshinweise. . . . . . . . . . . . . 23
Instandhaltung . . . . . . . . . . . . . . . . 31
Papierrolle wechseln . . . . . . . . . . . . . 31
Farbband wechseln. . . . . . . . . . . . . . 33
Akkus laden . . . . . . . . . . . . . . . . . . . 34
Akkus wechseln . . . . . . . . . . . . . . . . 34
Drucker reinigen. . . . . . . . . . . . . . . . 36
Lieferumfang . . . . . . . . . . . . . . . . . 24
Zubehör. . . . . . . . . . . . . . . . . . . . . . 36
Installation . . . . . . . . . . . . . . . . . . . 25
Netzanschluss . . . . . . . . . . . . . . . . . 26
Funkverbindung aktivieren . . . . . . . . 27
Technische Daten . . . . . . . . . . . . . . 36
Betrieb . . . . . . . . . . . . . . . . . . . . . . 29
Optische LED-Anzeige . . . . . . . . . . . 29
Elektromagnetische
Verträglichkeit . . . . . . . . . . . . . . . . 37
Entsorgung . . . . . . . . . . . . . . . . . . . 37
Fehlermeldungen. . . . . . . . . . . . . . . 30
Prüfschein . . . . . . . . . . . . . . . . . . . . 38
Konformitätserklärung . . . . . . . . . . 57
22
Sicherheitshinweise
Der Messwertdrucker mit Funkschnittstelle für drahtlose Kommunikation
entspricht den Richtlinien und Normen
für elektrische Betriebsmittel, elektromagnetische Verträglichkeit und den
vorgeschriebenen Sicherheitsbestimmungen. Ein unsachgemäßer Gebrauch
kann jedoch zu Schäden an Personen
und Sachen führen.
Das Personal muss die Betriebsanleitung, besonders die Sicherheitshinweise
gelesen haben. Diese Sicherheitshinweise muss der Betreiber ggf. ergänzen.
Das Bedienpersonal ist entsprechend
einzuweisen. Bei Verwendung elektrischer Betriebsmittel in Anlagen und
Umgebungsbedingungen mit erhöhten
Sicherheitsanforderungen sind die
Auflagen gemäß den zutreffenden
Errichtungsbestimmungen zu beachten.
Relevante Gesetze, Normen, Verordnungen, Richtlinien und der Umweltschutz
des jeweiligen Landes sind zu befolgen
und einzuhalten.
Bei unsachgemäßer Installation oder
Betrieb des Druckers entfällt die
Gewährleistung.
Gefahr durch Stromschlag!
Gerät nur einschalten, wenn das
2 Das
Netzgerät und das Netzkabel unbeschädigt sind. Bei Beschädigung des
Druckers, Netzgerätes oder Kabels
den Drucker ausser Betrieb nehmen
und das Gerät gegen Wiedereinschalten sichern.
Drucker nur betreiben, wenn das
2 Den
Gehäuse fest geschlossen und unbeschädigt ist, so dass keine keine Flüssigkeiten in den Drucker gelangen.
Nur ein leicht angefeuchtetes Reinigungstuch verwenden.
Modifikationen
2 Installationshinweis:
des Gerätes, sowie der Anschluss von
nicht von Sartorius gelieferten Netzgeräten unterliegen der alleinigen
Verantwortung des Betreibers!
Sartorius stellt auf Anfrage Angaben
zur Betriebsqualität zur Verfügung.
Nur Zubehör und Optionen von
Sartorius verwenden!
Gefahr am Aufstellort
und bei Umbau des Gerätes!
darf nur folgender Akkutyp
3 Es
(keine Batterien) verwendet werden:
Nickel-Metall-Hybrid, Typ AA Best.Nr. 69Y03136.
Tiefentladung der Akkus vermeiden,
da sonst die maximale Ladekapazität
sinkt. Verbrauchte Akkus müssen als
Sondermüll entsorgt werden.
die gezahnte Papierabriss3 Vorsicht,
kante ist scharf, bei direkter Berührung besteht Verletzungsgefahr!
23
Lieferumfang
Folgende Einzelteile werden mitgeliefert:
Bezeichnung:
– Drucker YDP10BT-0CE
– Netzgerät (Länderspezifisch, siehe unter Zubehör)
– Papierrolle
– 4 Akkus
– Farbband
24
Installation
t Akkus aus der Verpackung entnehmen).
(Akkus sind entladen
t Papierfach öffnen:
Papierfachabdeckung anheben.
LF
CN
N/ N
STAT
DA TE
t Akkufach öffnen: Akkufachabdeckung aufklappen.
t 4 Akkus in Akkufach einsetzen:
Polarität beachten!
t Akkufach schließen:
Akkufachabdeckung schließen.
Hinweis:
y Farbband einlegen, siehe Kapitel: Instandhaltung.
y Papierrolle einlegen, siehe Kapitel: Instandhaltung.
Die Papierrolle kann erst eingefädelt werden, wenn der
Drucker eingeschaltet ist!
t Papierfach schließen:
Papierfachabdeckung nach vorne herunterklappen.
25
t Netzgerät an den Drucker anschließen, Klinkenstecker
einstecken.
Netzanschluss
t Netzgerät in die Steckdose einstecken.
beachten!
3 Sicherheitshinweise
Der aufgedruckte Spannungswert muss mit der
örtlichen Spannung übereinstimmen. Sollte die angegebene Netzspannung oder die Steckerausführung
des Netzsteckers nicht der bei Ihnen verwendeten
Norm entsprechen, bitte die nächste SartoriusVertretung oder Ihren Lieferanten verständigen.
Nur Original-Netzgeräte von Sartorius verwenden!
Die Verwendung anderer Fabrikate, auch mit den
Zulassungszeichen einer Prüfanstalt, bedarf der
Zustimmung einer Elektrofachkraft.
26
y Die LED am Drucker leuchtet grün auf.
Der Drucker führt einen Papiervorschub aus.
y Die Akkus werden aufgeladen.
Nach 28 Stunden sind die Akkus im Drucker aufgeladen.
y Wenn die LED rot blinkt , sind die Akkus nicht geladen!
Falls die LED rot blinkt und nach spätestens 3 Stunden
nicht erlischt:
Akkus wechseln.
Akkus sind Sondermüll (kein Hausmüll):
h Verbrauchte
Akkus gemäß Abfallwirtschaftsgesetz als Sondermüll
speziell entsorgen
Drucker nur mit eingelegten Akkus
3 Den
und angeschossenem Netzgerät betreiben!
Funkverbindung aktivieren
Zwischen Waage und Drucker entsteht eine virtuelle,
feste Verbindung. Funksignale werden zwischen Waage
und Drucker nur ausgetauscht, wenn die entsprechende
Kennung übereinstimmt. Die Setup-Einstellungen für
den Bluetooth-Datenausgang an der Waage vornehmen, siehe in der jeweiligen Bedienungsanleitung der
Waage.
LF
CN
N/ N
STAT
DA TE
Den Drucker empfangsbereit schalten:
t Die P_Taste (Leerzeile) und G_Taste (Print)
gleichzeitig ca. 10 Sekunden gedrückt halten.
27
y Die LED blinkt blau (ca. 2 Minuten lang),
der Drucker ist für andere Bluetooth-Geräte sichtbar.
LF
CN
N/ N
STAT
DA TE
t An der Waage den Suchbefehl auslösen (Suche)
Die Funkverbindung wird aufgebaut.
y Ist der Drucker erkannt, erscheint eine Empfangsbestätigung im Display der Waage.
y Die LED am Drucker hört auf zu blinken und leuchtet
blau, die Suche war erfolgreich, die Druckererkennung
ist beendet.
Druckdaten können jetzt von dem Drucker empfangen
und ausgedruckt werden.
der Drucker von der Waage nicht erkannt, blinkt
h Wird
die LED am Drucker rot-blau. Die Funkverbindung ist
inaktiv!
Die Funkverbindung muß neu aufgebaut werden:
t Die P_Taste am Drucker drücken, die LED
leuchtet wieder grün.
Jetzt die Suche neu starten (siehe oben).
28
Betrieb
Für den Betrieb des Druckers stehen 2 Tasten zur
Verfügung:
1) P _Taste (Leerzeile). Leerzeile drucken;
Papiervorschub um 1 Zeile
1
2
2) G _Taste (Print). Messwert manuell ausdrucken.
Optische LED-Anzeige
LED
Meldung
LED leuchtet grün
Der Drucker ist druckbereit, die Bluetooth-Funkstrecke ist inaktiv.
LED leuchtet blau
Der Drucker ist druckbereit, die Bluetooth-Funkstrecke ist aktiv.
LED blinkt blau
Der Drucker ist für das Bluetooth-Netz sichtbar und kann eingebunden
werden.
Die Bluetooth-Funkstrecke kann aktiviert werden.
LED blinkt
rot und blau
Der Drucker wurde innerhalb von 2 Minuten nicht in das
Bluetooth-Netz eingebunden. Die Bluetooth-Funkstrecke ist inaktiv.
LED leuchtet rot
Der Drucker ist nicht druckbereit, ein Fehler ist aufgetreten
(siehe: Fehlermeldungen).
Informationen zur Funkverbindung als Ausdruck:
-Ring:
Funkverbindung herstellen (anklingeln).
-Connect:
Funkverbindung vorhanden.
-No Carrier: Kein Signal mehr vorhanden.
Die Funkverbindung ist wieder getrennt.
29
Fehlermeldungen
LED
Meldung
Abhilfe
LED blinkt
rot und blau
Der Drucker wurde innerhalb von
2 Minuten nicht in das BluetoothNetz eingebunden.
Die Bluetooth-Funkstrecke ist inaktiv.
Eine beliebige Taste am Drucker
drücken.
LED leuchtet rot Der Drucker ist nicht druckbereit,
ein Fehler ist aufgetreten
(Gerätefehler, Parityfehler oder
Übertragungsfehler).
LED blinkt rot
30
Eine beliebige Taste am Drucker
drücken.
Die LED bleibt rot
Die Akkus sind nicht eingelegt
oder defekt. Akkus wechseln
(siehe Kapitel Instandhaltung).
Akkuladung ist zu gering
Akkus aufladen
(siehe Kapitel Instandhaltung).
Instandhaltung
Papierrolle wechseln
Für den Betrieb wird eine Papierrolle mit folgenden
Eigenschaften benötigt (siehe auch Kapitel Zubehör):
–
–
–
–
–
Standard-Papierrolle
Holzfreies 60 g Papier
Breite: 57,5 ± 0,5 mm
Durchmesser: max. 65 mm
Offener Kerndurchmesser: min. 8 mm
y Papierfach öffnen: Papierfachabdeckung anheben.
LF
CN
N/ N
STAT
DA TE
t Rollenhalterungen an beiden Seiten des Rollenkerns
nach außen ziehen.
t Den alten Rollenkern entnehmen.
t Neue Papierrolle flach auf eine Fläche legen.
y Papieranfang der Rolle muss sich unten befinden und
auf Ihren Körper zeigen.
t Papierrolle mit einer Hand zwischen Daumen und
Zeigefinger senkrecht über dem Rollenfach halten.
t Papieranfang mit der anderen Hand in den Einführschlitz unter dem Farbband einführen.
t Papier durch die Farbbandkassette transportieren:
Bei eingeschaltetem Drucker Taste G mehrfach
drücken oder gedrückt halten.
y Papier wird in die Farbbandkassette eingezogen und
nach oben ausgeführt.
31
t Papierrolle einrichten: Papierrolle so halten, dass die
Rollenhalterungen in die Kernöffnung der Papierrolle
zusammengeschoben werden können.
t Rollenhalterungen an beiden Seiten loslassen.
t Papierfach schließen:
Papierfachabdeckung nach vorne herunterklappen.
LF
32
CN
N/ N
STAT
DA TE
Farbband wechseln
Für den Betrieb wird ein schwarzes Farbband vom
Typ ERC-22 B benötigt, (siehe auch Kapitel Zubehör).
t Papierfach öffnen: Papierfachabdeckung anheben.
t Papier aus Farbbandkassette entfernen:
Papierrolle zurückdrehen.
t Von oben auf die rechte Seite des Farbbandes drücken.
y Die Linke Seite des Farbbandes hebt sich.
t Farbband entnehmen
t Neues Farbband von oben einsetzen
y Farbband rastet ein.
t Ggf. Farbband straff ziehen: Aufwickelkern auf der
linken Seite des Farbbandes in Pfeilrichtung drehen.
t Papier einfädeln: siehe Papierrrolle wechseln.
t Papierfach schließen:
Papierfachabdeckung nach vorne herunterklappen.
33
Akkus laden
t Die LED blinkt rot: Akkus aufladen.
Klinkenstecker am Drucker einstecken und Netzstecker
in die Steckdose einstecken.
y Akkus werden aufgeladen.
y Nach 28 Stunden sind die Akkus im Drucker
aufgeladen.
y Falls die LED nach spätestens 3 Stunden immer noch rot
blinkt: Akkus wechseln.
der Akkus vermeiden, da sonst die
3 Tiefentladung
maximale Ladekapazität sinkt.
Nur Standard Mignon Akkus vom Typ Nickel-MetallHybrid Typ AA verwenden (siehe auch »Zubehör«).
Sartorius Best.-Nr.: 69Y03136
Akkus wechseln
t Papierfach öffnen: Papierfachabdeckung anheben.
LF
34
CN
N/ N
STAT
DA TE
t Akkufach öffnen: Akkufachabdeckung abnehmen,
4 Akkus entnehmen.
Akkus sind Sondermüll (kein Hausmüll):
h Verbrauchte
Akkus gemäß Abfallwirtschaftsgesetz als Sondermüll
speziell entsorgen!
t 4 neue Akkus in Akkufach einsetzen:
Polarität beachten!
t Akkufach schließen:
Akkufachabdeckung nach vorne herunterklappen.
t Papierfach schließen:
Papierfachabdeckung nach vorne herunterklappen.
LF
CN
N/ N
STAT
DA TE
35
Zubehör
Drucker reinigen
darf keine Flüssigkeit in den Dru3 Es
cker gelangen.
Keine aggressiven Reinigungsmittel
(Lösungsmittel o. ä.) verwenden.
t Spannungsversorgung trennen:
Netzgerät aus der Steckdose ziehen.
Klinkenstecker an der Rückseite des
Druckers lösen.
t Drucker mit in Seifenlauge leicht angefeuchtetem Tuch reinigen.
Bezeichnung
Papierrolle (5er Pack)
Farbband, Typ ERC-22 B
Best.-Nr.
6906937
6906918
Steckernetzgerät
für Norm:
Europa
Großbritannien
USA
Australien
Südafrika
6971412
6971414
6971413
6971411
6971410
Akkusatz
(4- Nickel-Metall-Hydrid
Typ AA)
69Y03136
t Drucker mit weichem Tuch abtrocknen.
Technische Daten
36
Länge
230 mm
Breite
158 mm
Höhe
80 mm
Gewicht
(ohne Akkus, Papierrolle)
ca. 800 g
Betriebstemperatur
0 bis +40°C
Lagertemperatur
–40 bis +70°C
Elektromagnetische Verträglichkeit
Das Gerät erfüllt die Anforderungen der
Richtlinien des Rates der Europäischen
Union:
2004/108/EG »Elektromagnetische
Verträglichkeit (EMV)«
Zugehörige Europäische Normen:
Störaussendung nach Produktnorm
EN 61326-1: Kl.B (Wohnbereich)
Störfestigkeit nach Produktnorm
EN 61326-1: (Industriebereich)
Hinweis:
Modifikationen der Geräte sowie der
Anschluss von nicht von Sartorius gelieferten Kabeln oder Geräten unterliegen der
Verantwortung des Betreibers und sind von
diesem entsprechend zu prüfen und falls
erforderlich zu korrigieren.
Sartorius stellt auf Anfrage Angaben zur
Betriebsqualität zur Verfügung (gemäß den
o.g. Normen zur Störfestigkeit).
2006/95/EG »Elektrische Betriebsmittel
zur Verwendung innerhalb bestimmter
Spannungsgrenzen«
Entsorgung
Wird die Verpackung nicht mehr
benötigt, ist diese der örtlichen
Müllentsorgung zuzuführen.
Die Verpackung besteht aus
umweltfreundlichen Materialien,
die als Sekundärrohstoffe.dienen können. Das Gerät inklusive Zubehör
und Batterien gehört nicht in den Hausmüll. Die EU-Gesetzgebung fordert in ihren
Mitgliedsstaaten, elektrische und elektronische Geräte vom unsortierten Siedlungsabfall getrennt zu erfassen, um sie anschließend wiederzuverwerten. In Deutschland
und einigen anderen Ländern führt die
Sartorius die Rücknahme und gesetzeskonforme Entsorgung ihrer elektrischen
und elektronischen Produkte selbst durch.
Diese Produkte dürfen nicht – auch nicht
von Kleingewerbetreibenden – in den
Hausmüll oder an Sammelstellen der örtlichen öffentlichen Entsorgungsbetriebe
abgegeben werden. Hinsichtlich der Entsorgung wenden Sie sich daher in Deutschland wie auch in den Mitgliedsstaaten des
Europäischen Wirtschaftsraumes bitte an
unsere Service- Mitarbeiter vor Ort oder an
unsere Service-Zentrale in Göttingen:
Sartorius Servicezentrum,
Weender Landstrasse 94-108,
37075 Göttingen
In Ländern, die keine Mitglieder des
EuropäischenWirtschaftsraumes sind oder
in denen es keine Sartorius-Filialen gibt,
sprechen Sie bitte die örtlichen Behörden
oder Ihr Entsorgungsunternehmen an.
Vor der Entsorgung bzw. Verschrottung
des Gerätes sollten die Batterien entfernt
werden und einer Sammelstelle übergeben
werden. Mit gefährlichen Stoffen kontaminierte Geräte (ABC-Kontamination) werden
weder zur Reparatur noch zur Entsorgung
zurückgenommen. Ausführliche Informationen mit Service-Adressen zur Reparaturannahme oder Entsorgung Ihres Gerätes
können Sie auf unserer Internetseite
(www.sartorius.com) finden oder über den
Sartorius Service anfordern.
37
38
Informations utilisateur
À propos de cette notice
d’installation
t Veuillez lire attentivement l’intégralité
de ce mode d’emploi avant de mettre
l’appareil en service.
t Lisez attentivement le mode d’emploi et
respectez les instructions qu’il contient.
t Le mode d’emploi fait partie du produit
livré.
Il doit être conservé dans un lieu sûr et
facile d’accès.
t Si vous perdez la notice, demandez-en
un autre exemplaire ou téléchargez la
notice actualisée sur le site Internet de
Sartorius www.sartorius.com.
Adaptateur Bluetooth®
Mentions légales
Bluetooth® est une marque déposée et
protégée de Bluetooth® Special Interest
Group (Bluetooth® SIG, Inc.) dont le
siège est à Bellevue, Washington, USA.
La marque et les logos sont la propriété
de Bluetooth® SIG, Inc., et Sartorius
utilise ces marques sous licence.
Les autres marques et noms de produits
appartiennent à leur propriétaire
respectif.
Avertissements/Symboles de danger
Symboles d’avertissement et de danger
de la notice :
de décharge électrique
2 GRisque
pouvant entraîner des blessures ou la
mort
en garde contre le risque de
3 Mise
blessures, dangers pour
santé ou risques de dommages
h lamatériels
Conseils et informations utiles
Remarques concernant l’utilisation en
métrologie légale
Signification des symboles
Les symboles suivants sont utilisés dans
ce mode d’emploi :
t indique une action qu’il est conseillé
d’effectuer
y décrit les effets de l’action que vous
venez d’effectuer
1. effectuer des actions dans un ordre
défini
2.
– apparaît devant une énumération
39
Table des matières
Informations utilisateur . . . . . . . . . 39
Table des matières. . . . . . . . . . . . . . 40
Consignes de sécurité . . . . . . . . . . . 41
Entretien . . . . . . . . . . . . . . . . . . . . . 49
Changement du rouleau de papier . . 49
Changement du ruban encreur . . . . . 51
Chargement des accus . . . . . . . . . . . 52
Changement des accus . . . . . . . . . . . 52
Nettoyage de l’imprimante . . . . . . . . 54
Contenu de la livraison . . . . . . . . . . 42
Accessoires . . . . . . . . . . . . . . . . . . . 54
Installation . . . . . . . . . . . . . . . . . . . 43
Raccordement au secteur . . . . . . . . . 44
Activation de la liaison
radioélectrique . . . . . . . . . . . . . . . . . 45
40
Caractéristiques techniques . . . . . . 54
Compatibilité électromagnétique . . 55
Recyclage. . . . . . . . . . . . . . . . . . . . . 55
Fonctionnement . . . . . . . . . . . . . . . 47
Voyant LED optique . . . . . . . . . . . . . 47
Certificat d’essai . . . . . . . . . . . . . . . 56
Messages d’erreur . . . . . . . . . . . . . . 48
Déclaration de conformité . . . . . . . 57
Consignes de sécurité
L’imprimante avec interface radio pour
une communication sans fil répond aux
directives et aux normes relatives aux
matériels électriques, à la compatibilité
électromagnétique et aux règles de
sécurité prescrites.
Une utilisation non conforme peut toutefois s’avérer dangereuse et entraîner
des blessures et des dommages.
Risque de décharge électrique !
Le personnel doit avoir lu la notice
d’installation et tout particulièrement
les consignes de sécurité. Les consignes
de sécurité doivent, le cas échéant, être
complétées par l’exploitant de l’appareil.
Si c’est le cas, les utilisateurs de l’appareil devront en être informés. En cas
d’utilisation de matériel électrique dans
des installations et des conditions
d’environnement exigeant des mesures
de sécurité accrues, vous devez respecter les instructions conformément aux
consignes d’installation correspondantes. Veuillez respecter et appliquer
les lois, normes, réglementations, directives et les mesures de protection de
l’environnement en vigueur dans votre
pays. Toute installation ou utilisation
non conforme de l’imprimante annule la
garantie.
l’imprimante que si le
2 N’utilisez
boîtier est parfaitement fermé et n’est
mettez l’appareil sous tension que
2 Ne
si le bloc d’alimentation et le câble
secteur ne sont pas endommagés.
Si l’imprimante, le bloc d’alimentation ou le câble est endommagé,
mettez l’imprimante hors service et
assurez-vous qu’elle ne sera pas remise sous tension.
pas endommagé afin d’éviter que du
liquide ne pénètre dans l’imprimante.
Utilisez uniquement un chiffon de
nettoyage légèrement humidifié.
concernant l’installation :
2 Remarque
la modification de l’appareil et
la connexion de blocs d’alimentation
non fournis par Sartorius engagent
la seule responsabilité de l’utilisateur.
Sur simple demande, Sartorius met
à disposition une documentation
concernant les caractéristiques de
fonctionnement minimales des appareils. Utilisez exclusivement les accessoires et options de Sartorius.
Danger sur le lieu d’installation
et lors de la modification de l’appareil !
uniquement les types
3 Utilisez
d’accumulateurs rechargeables
suivants (pas de batteries) :
nickel-métal hybride, type AA référence 69Y03136. Evitez une décharge
profonde des accus sinon la capacité
de charge maximale diminue. Les
accus usagés doivent être recyclés en
tant qu’ordures spéciales.
: vous risquez de vous bles3 Attention
ser si vous touchez le bord denté servant à couper le papier.
41
Contenu de la livraison
Les éléments suivants sont fournis :
Désignation :
– Imprimante YDP10BT-0CE
– Bloc d’alimentation (spécifique au pays, voir sous «
Accessoires »)
– Rouleau de papier
– 4 accus
– Ruban encreur
42
Installation
t Sortez les 4 accus de leur emballage.
Les accus sont déchargés.
t Soulevez le cache du compartiment du rouleau de
papier.
LF
CN
N/ N
STAT
DA TE
t Pour ouvrir le compartiment à accus, relevez le cache
vers l’arrière.
t Insérez les 4 accus dans le compartiment à accus.
Respectez la polarité !
t Fermez le compartiment à accus en rabattant le cache
vers l’avant.
Remarque :
y Pour mettre en place le ruban encreur, voir le chapitre
« Entretien ».
y Pour mettre en place le rouleau de papier, voir le
chapitre « Entretien ».
Le rouleau de papier ne peut être inséré que si
l’imprimante est sous tension.
t Fermez le compartiment du rouleau de papier en
rabattant le cache vers l’avant.
43
t Connectez le bloc d’alimentation à l’imprimante,
raccordez la fiche jack.
Raccordement au secteur
t Branchez le bloc d’alimentation à la prise de courant.
les consignes de sécurité !
3 Respectez
La valeur de tension figurant sur l’appareil doit obligatoirement correspondre à la tension locale. Si la tension indiquée ou le modèle de la prise du bloc d’alimentation ne correspondent pas à la norme que vous
utilisez, veuillez avertir votre représentant Sartorius
ou votre revendeur. Utilisez uniquement des blocs
d’alimentation Sartorius d’origine ! L’utilisation d’un
bloc d’alimentation d’une autre marque, même s’il
porte les marques d’homologation d’un organisme de
contrôle, doit être approuvée par un électricien.
44
y Le voyant de l’imprimante est vert.
L’imprimante fait avancer le papier.
y Les accus sont en train de se charger.
Les accus placés dans l’imprimante sont chargés au
bout de 28 heures.
y Le voyant clignote en rouge si les accus ne sont pas
chargés.
Si le voyant ne s’est toujours pas éteint au bout de
3 heures, changez les accus.
accus usagés sont des ordures spéciales
h Les
(pas des ordures ménagères) :
ils doivent être traités en conformité avec la loi sur
les ordures spéciales.
l’imprimante uniquement si les accus sont en
3 Utilisez
place et si le bloc d’alimentation est connecté.
Activation de la liaison radioélectrique
LF
CN
N/ N
STAT
DA TE
Une liaison virtuelle fixe est créée entre la balance
et l’imprimante.
La balance et l’imprimante n’échangent des signaux
radioélectriques que si les identifications correspondent
entre elles. Pour régler le setup de la balance pour la
sortie de données Bluetooth, reportez-vous au mode
d’emploi correspondant de la balance.
Pour activer l’imprimante pour la réception :
t Appuyez en même temps sur la touche P (interligne)
et sur la touche G (impression) pendant environ 10
sec.
45
y Le voyant clignote en bleu (pendant env. 2 minutes) ;
l’imprimante est visible pour d’autres appareils
Bluetooth.
LF
CN
N/ N
STAT
DA TE
t Déclenchez la commande de recherche sur la balance
(recherche).
La liaison radioélectrique est établie.
y Si l’imprimante est reconnue, une confirmation de
réception apparaît sur l’écran de la balance.
y Le voyant de l’imprimante arrête de clignoter et reste
bleu ;
la recherche a réussi et la reconnaissance de l’imprimante est terminée.
L’imprimante peut désormais recevoir et imprimer des
données d’impression.
balance ne reconnaît pas l’imprimante, le voyant
h Sidelal’imprimante
clignote en rouge et bleu. La liaison
radioélectrique est inactive !
La liaison doit être à nouveau établie :
t Appuyez sur la touche P de l’imprimante ;
le voyant redevient vert. Redémarrez la recherche
(voir ci-dessus).
46
Fonctionnement
Pour faire fonctionner l’imprimante, vous disposez
de 2 touches :
2
1
1) Touche P.
Impression d’un interligne ; avance du papier d’une
ligne.
2) Touche G (impression).
Impression manuelle de la valeur mesurée.
Voyant LED optique
Voyant
Message
Le voyant est vert
L’imprimante est prête à imprimer ; la liaison radioélectrique Bluetooth
est inactive.
Le voyant est bleu
L’imprimante est prête à imprimer ; la liaison radioélectrique Bluetooth
est active.
Le voyant clignote
en bleu
L’imprimante est visible pour le réseau Bluetooth et peut être reliée.
La liaison radioélectrique Bluetooth peut être activée.
Le voyant clignote
en rouge et bleu
L’imprimante n’a pas été connectée au réseau Bluetooth en l’espace
de 2 minutes.
La liaison radioélectrique Bluetooth est inactive.
Le voyant est rouge L’imprimante n’est pas prête à imprimer ; une erreur s’est produite
(voir : « Messages d’erreur »).
Informations imprimées sur la liaison radioélectrique :
-Ring:
Etablir la liaison radioélectrique (sonner).
-Connect:
Liaison radioélectrique établi.
-No Carrier: Plus de signal.
La liaison radioélectrique est à nouveau interrompue.
47
Messages d’erreur
Voyant
Message
Remède
Le voyant clignote
en rouge et bleu
L’imprimante n’a pas été
connectée au réseau Bluetooth
en l’espace de 2 minutes.
La liaison radio Bluetooth
est inactive.
Appuyer sur une touche
de l’imprimante au choix.
Le voyant est rouge
L’imprimante n’est pas prête
à imprimer ; une erreur s’est
produite (erreur de l’appareil,
de parité ou de transmission).
Appuyer sur une touche
de l’imprimante au choix.
Le voyant reste rouge.
Les accus ne sont pas dans
l’imprimante ou sont défectueux.
Changer les accus
(voir chapitre « Entretien »).
Les accus ne sont
pas assez chargés.
Charger les accus
(voir chapitre « Entretien »).
Le voyant clignote
48
Entretien
Changement du rouleau de papier
Pour le fonctionnement, il faut utiliser un rouleau
de papier ayant les caractéristiques suivantes
(voir également le chapitre « Accessoires ») :
–
–
–
–
–
Rouleau de papier standard
Papier de 60 g sans bois
Largeur : 57,5 ± 0,5 mm
Diamètre : 65 mm max.
Diamètre de la bobine : 8 mm min.
y Pour ouvrir le compartiment du rouleau de papier,
soulevez le cache.
LF
CN
N/ N
STAT
DA TE
t Tirez vers l’extérieur les fixations du rouleau qui se
trouvent sur les deux côtés de la bobine du rouleau.
t Enlevez l’ancienne bobine.
t Placez un nouveau rouleau de papier sur une surface
plane.
y Le début du rouleau de papier doit se trouver en
dessous et vous faire face.
t Tenez le nouveau rouleau de papier d’une main entre
le pouce et l’index à la verticale au-dessus du compartiment du rouleau de papier.
t De l’autre main, introduisez le papier dans la fente
située sous le ruban encreur.
t Pour faire avancer le papier à travers la cassette du
ruban encreur, appuyez plusieurs fois sur la touche
G ou maintenez-la enfoncée lorsque l’imprimante
est sous tension.
y Le papier est introduit dans la cassette du ruban
encreur et ressort vers le haut.
49
t Pour mettre le rouleau de papier en place, tenez-le de
telle sorte que les fixations puissent être enfoncées dans
l’ouverture de la bobine du rouleau de papier.
t Lâchez les fixations du rouleau des deux côtés.
t Pour fermer le compartiment du rouleau de papier,
rabattez le cache vers l’avant.
LF
50
CN
N/ N
STAT
DA TE
Changement du ruban encreur
Pour faire fonctionner l’imprimante, il faut utiliser un
ruban encreur noir de type ERC-22 (voir également le
chapitre « Accessoires »).
t Soulevez le cache du compartiment du rouleau de
papier.
t Pour enlever le papier de la cassette du ruban encreur,
tournez le rouleau dans le sens opposé à l’avance.
t Appuyez sur le côté supérieur droit du ruban encreur.
y Le côté gauche du ruban encreur se soulève.
t Retirez le ruban encreur.
t Insérez un nouveau ruban encreur en l’introduisant
par le haut.
y Le ruban encreur s’enclenche.
t Le cas échéant, tournez dans le sens de la flèche la
bobine se trouvant sur le côté gauche du ruban encreur
pour tendre le ruban encreur.
t Insérez le papier : voir « Changement du rouleau de
papier ».
t Fermez le compartiment du rouleau de papier en
rabattant le cache vers l’avant.
51
Chargement des accus
t Le voyant clignote en rouge : chargez les accus.
Raccordez la fiche jack à l’imprimante et branchez
le bloc d’alimentation à la prise de courant.
y Les accus se chargent.
y Les accus de l’imprimante sont chargés au bout
de 28 heures.
y Si le voyant clignote toujours en rouge au bout
de 3 heures, changez les accus.
une décharge profonde des accus sinon la
3 Evitez
capacité de charge maximale diminue.
Utilisez uniquement des accus standard Mignon
de type nickel-métal hybride AA (voir également
« Accessoires »).
Référence Sartorius : 69Y03136
Changement des accus
t Soulevez le cache du compartiment du rouleau de
papier.
LF
52
CN
N/ N
STAT
DA TE
t Pour ouvrir le compartiment à accus, enlevez le cache ;
retirez les 4 accus.
accus usagés sont des ordures spéciales
h Les
(pas des ordures ménagères) :
ils doivent être traités en conformité avec la loi sur
les ordures spéciales.
t Insérez 4 nouveaux accus dans le compartiment à accus
en respectant la polarité.
t Fermez le compartiment à accus en rabattant le cache
vers l’avant.
t Fermez le compartiment du rouleau de papier en
rabattant le cache vers l’avant.
LF
CN
N/ N
STAT
DA TE
53
Accessoires
Nettoyage de l’imprimante
3
Veillez à ce qu’aucun liquide ne
pénètre dans l’imprimante.
N’utilisez pas de produits de nettoyage corrosifs (solvants ou produits
similaires).
t Coupez l’alimentation :
débranchez le bloc d’alimentation
de la prise de courant.
Enlevez la fiche jack de l’arrière
de l’imprimante.
t Nettoyez l’imprimante avec un chiffon
humecté d’eau savonneuse.
t Essuyez l’imprimante avec un chiffon
doux.
54
Désignation
Rouleau de papier
(paquet de 5)
Ruban encreur,
type ERC-22 B
Bloc d’alimentation
pour normes :
6971412
Grande-Bretagne
USA
Australie
Afrique du Sud
Jeu d’accus
(4 nickel-métal hydride,
type AA)
Référence
6906937
6906918
Europe
6971414
6971413
6971411
6971410
69Y03136
Caractéristiques
techniques
Longueur
230 mm
Largeur
158 mm
Hauteur
80 mm
Poids
(sans accus, ni rouleau
de papier)
env. 800 g
Température
de fonctionnement
0 à +40°C
Température de stockage
–40 à +70°C
Compatibilité électromagnétique
L’appareil répond aux exigences des directives du Conseil de l’Union européenne :
2004/108/ CE « Compatibilité électromagnétique (CEM) »
Normes européennes applicables :
Emissions parasites selon la norme de
produits EN 61326-1 :
Classe B (environnement résidentiel)
Immunité à ces émissions selon la norme
de produits EN 61326-1 :
environnement industriel
Recyclage
Si l’emballage n’est plus nécessaire, le recycler en observant
les consignes locales en vigueur.
L’emballage est composé de
matériaux écologiques qui
peuvent servir de matières
secondaires. L’appareil et ses accessoires et
piles ne doivent pas être éliminés avec les
déchets ménagers. La législation européenne
exige de ses Etats membres qu’ils éliminent
les appareils électriques et électroniques
à part des déchets urbains non triés afin de
les réutiliser. En Allemagne et dans d’autres
pays, Sartorius se charge de la reprise
et de l’élimination conforme des appareils
électriques et électroniques. Ces produits
ne doivent pas être éliminés avec les
déchets ménagers ou remis aux centres de
tri locaux, même par les petites entreprises.
En ce qui concerne l’élimination des
déchets en Allemagne tout comme dans les
États membres de l’Espace Économique
Européen, veuillez vous adresser à nos
collaborateurs locaux ou à notre centrale
de service à Goettingen :
Remarque :
Les modifications apportées aux appareils
et le raccordement de câbles ou d’appareils
non livrés par Sartorius relèvent de la seule
responsabilité de l’exploitant et doivent
être contrôlés par ce dernier ; si nécessaire,
ils doivent être corrigés.
Sur simple demande, Sartorius met à
disposition une documentation concernant
les caractéristiques de fonctionnement
minimales des appareils (conformément
aux normes concernant la définition de
l’immunité aux émissions parasites ci-dessus mentionnées). 2006/95/CE « Matériel
électrique destiné à être employé dans
certaines limites de tension »
Sartorius Servicezentrum,
Weender Landstrasse 94-108,
37075 Goettingen, Allemagne
Dans les pays qui ne font pas partie de
l’Union européenne ou ne possèdent pas de
filiale Sartorius, adressez-vous aux autorités
locales ou aux entreprises de recyclage.
Avant d’éliminer l’appareil, retirez les piles
et remettez-les à un centre de tri.
Les appareils contaminés par des substances dangereuses (contaminations NBC)
ne sont pas repris pour être réparés ou
éliminés. Vous trouverez des informations
complètes, notamment les adresses des
SAV chargés de la réparation et de l’élimination de votre appareil, sur notre site
Internet (www.sartorius.com).
Vous pouvez également adresser vos
questions au SAV Sartorius.
55
56
57
58
59
Sartorius Weighing Technology GmbH
Weender Landstrasse 94–108
37075 Goettingen, Germany
Phone +49.551.308.0
Fax
+49.551.308.3289
www.sartorius-mechatronics.com
Copyright by Sartorius, Goettingen,
Germany.
All rights reserved. No part of this
publication may be reprinted or
translated in any form or by any
means without the prior written
permission of Sartorius.
The status of the information,
specifications and illustrations
in this manual is indicated
by the date given below.
Sartorius reserves the right to make
changes to the technology, features,
specifications and design of the
equipment without notice.
Status:
July 2011,
Sartorius Weighing Technology GmbH,
Goettingen, Germany
W_YDP10_Bluetooth
Publication No.: WYD6135-t11073