1
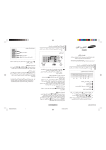
Instruction Manual
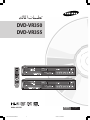
DVD-VR350
DVD-VR355
AK68-01375B
English
01375B-VR350,355-UMG,XSG-ENG.ind1 1
2007-04-02 오후 4:57:10
Getting Started
Getting Started
Warning
TO REDUCE THE RISK OF ELECTRIC SHOCK, DO
NOT REMOVE THE COVER (OR BACK).
NO USER-SERVICEABLE PARTS ARE INSIDE. REFER
SERVICING TO QUALIFIED SERVICE PERSONNEL.
This symbol indicates “dangerous voltage”
inside the product that presents a risk of
electric shock or personal injury.
This symbol indicates important instructions
accompanying the product.
Do not install this equipment in a confined space such
as a bookcase or similar unit.
WARNING : To prevent damage which may result in fire
or electric shock hazard, do not expose this
appliance to rain or moisture.
CAUTION : DVD RECORDER & VCR USES AN
INVISIBLE LASER BEAM WHICH CAN
CAUSE HAZARDOUS RADIATION
EXPOSURE IF DIRECTED.
BE SURE TO OPERATE RECORDER
CORRECTLY AS INSTRUCTED.
CAUTION
THIS PRODUCT UTILIZES A LASER.
USE OF CONTROLS OR ADJUSTMENTS OR
PERFORMANCE OF PROCEDURES OTHER THAN
THOSE SPECIFIED HEREIN MAY RESULT IN
HAZARDOUS RADIATION EXPOSURE.
DO NOT OPEN COVERS AND DO NOT REPAIR
YOURSELF. REFER SERVICING TO QUALIFIED
PERSONNEL.
CAUTION
• Apparatus shall not be exposed to dripping or splashing
and no objects filled with liqulds, such as vases, shall
be placed on the apparatus.
• The Mains plug is used as a disconnect device and
shall stay readily operable at any time.
IMPORTANT NOTE
The mains lead on this equipment is supplied with a
moulded plug incorporating a fuse. The value of the
fuse is indicated on the pin face of the plug. If it requires
replacing, a fuse approved to BS1362 of the same rating
must be used. Never use the plug with the fuse cover
omitted if the cover is detachable.
If a replacement fuse cover is required, it must be of the
same colour as the pin face of the plug. Replacement
covers are available from your dealer. If the fitted plug
is not suitable for the power points in your house or the
cable is not long enough to reach a power point, you
should obtain a suitable safety approved extension lead
or consult your dealer for assistance.
However, if there is no alternative to cutting off the plug,
remove the fuse and then safely dispose of the plug. Do
not connect the plug to a mains socket, as there is a risk
of shock hazard from the bared flexible cord.
To disconnect the apparatus from the mains, the plug
must be pulled out from the mains socket, therefore the
mains plug shall be readily operable.
The product unit accompanying this user manual is
licensed under certain intellectual property rights of
certain third parties. This license is limited to private noncommercial use by end-user consumers for licensed
contents. No rights are granted for commercial use.
The license does not cover any product unit other than
this product unit and the license does not extend to any
unlicensed product unit or process conforming to ISO/IEC
11172-3 or ISO/IEC 13818-3 used or sold in combination
with this product unit. The license only covers the use
of this product unit to encode and/or decode audio files
conforming to the ISO/IEC 11172-3 or ISO/IEC 13818-3.
No rights are granted under this license for product
features or functions that do not conform to the ISO/IEC
11172-3 or ISO/IEC 13818-3.
English - 2
01375B-VR350,355-UMG,XSG-ENG.ind2 2
2007-04-02 오후 4:57:22
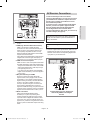
▌ Important Safety Instructions
▌ Maintenance of Cabinet
Read these operating instructions carefully before using the
unit. Follow all the safety instructions listed below.
Keep these operating instructions handy for future reference.
For safety reasons, be sure to disconnect the AC power
cord from the AC outlet.
• Do not use benzene, thinner, or other solvents for cleaning.
• Wipe the cabinet with a soft cloth.
1) Read these instructions.
2) Keep these instructions.
3) Heed all warnings.
4) Follow all instructions.
5) Do not use this apparatus near water.
6) Clean only with dry cloth.
7) Do not block any ventilation openings, Install in
accordance with the manufacturer’s instructions.
8) Do not install near any heat sources such as radiators,
heat registers, stoves, or other apparatus (including
amplifiers) that produce heat.
9) Do not defeat the safety purpose of the polarized or
grounding- type plug. A polarized plug has two blades
with one wider than the other. A grounding type plug
has two blades and a third grounding prong. The wide
blade or the third prong are provided for your safety. if
the provided plug does not fit into your outlet, consult
an electrician for replacement of the obsolete outlet.
10) Protect the power cord from being walked on or
pinched particularly at plugs, convenience receptacles,
and the point where they exit from the apparatus.
11) Only use attachments/accessories specified by the
manufacturer.
12) Use only with the cart, stand, tripod, bracket, or table
specified by the manufacturer, or sold with the apparatus.
When a cart is used, use caution when moving the cart/
apparatus combination to avoid injury from tip-over.
13) Unplug this apparatus during lightning storms or
when unused for long periods of time.
14) Refer all servicing to qualified service personnel.
Servicing is required when the apparatus has been
damaged in any way, such as power-supply cord or
plug is damaged, liquid has been spilled or objects
have fallen into the apparatus, the apparatus has
been exposed to rain or moisture, does not operate
normally, or has been dropped.
▌ Handling Cautions
• Before connecting other components to this recorder,
be sure to turn them all off.
• Do not move the recorder while a disc is being played,
or the disc may be scratched or broken, and the
recorder’s internal parts may be damaged.
• Do not put a flower vase filled with water or any small
metal objects on the recorder.
• Be careful not to put your hand into the disc tray.
• Do not place anything other than the disc in the disc tray.
• Exterior interference such as lightning and static
electricity can affect normal operation of this recorder.
If this occurs, turn the DVD Recorder & VCR off and
on again with the /I button, or disconnect and then
reconnect the AC power cord to the AC power outlet.
The recorder will operate normally.
• Be sure to remove the disc and turn off the recorder
after use.
• Disconnect the AC power cord from the AC outlet when you
don’t intend to use the recorder for long periods of time.
Getting Started
• Clean the disc by wiping in a straight line from the inside
to the outside of the disc.
Precaution
▌ Disc Handling
• Use discs with regular shapes.
If an irregular disc (a disc with
a special shape) is used, this
DVD Recorder & VCR may be
damaged.
Holding discs
• Avoid touching the surface of a disc
where recording is performed.
DVD-RAM, DVD±RW and DVD±R
• Clean with an optional DVD-RAM
/PD disc cleaner. Do not use
cleaners or cloths for CDs to clean
DVD-RAM/DVD±RW/DVD±R discs.
DVD-Video, Audio CD
• Wipe off dirt or contamination on the disc with a soft cloth.
Cautions on handling discs
• Do not write on the printed side with a ball-point pen or
pencil.
• Do not use record cleaning sprays or antistatic. Also, do
not use volatile chemicals, such as benzene or thinner.
• Do not apply labels or stickers to discs. (Do not use
discs fixed with exposed tape adhesive or leftover
peeled-off stickers.)
• Do not use scratch-proof protectors or covers.
• Do not use discs printed with label printers available on
the market.
• Do not load warped or cracked discs.
▌ Disc Storage
Be careful not to harm the disc because the data on
these discs is highly vulnerable to the environment.
• Do not keep under direct sunlight.
• Keep in a cool ventilated area.
• Store vertically.
• Keep in a clean protection jacket.
• If you move your DVD Recorder & VCR suddenly from a
cold place to a warm place, condensation may generate
on the operating parts and lens and cause abnormal
disc playback. In this case, do not connect the plug to
the power outlet and wait for two hours. Then insert the
disc and try to play again.
English - 3
01375B-VR350,355-UMG,XSG-ENG.ind3 3
2007-04-02 오후 4:57:24
Getting Started
• DVD-RAM/DVD±RW/DVD±R discs that contain JPEG
files can be played back.
▌ Disc Specifications
● DVD-VR350
This unit allows you to record and playback high quality
digital images on a DVD-RAM/DVD-RW/DVD-R disc.
You can record and edit digital video on DVD-RAM/
DVD-RW/DVD-R discs as if they were VCR tapes.
(DVD+RW/DVD+R discs can be played, but cannot be
recorded.)
● DVD-VR355
This unit allows you to record and playback high quality
digital video on DVD-RAM/DVD±RW/DVD±R discs.
You can record and edit digital video on DVD-RAM/
DVD±RW/DVD±R discs as if they were VCR tapes.
DVD-Video
• A digital versatile disc (DVD) can contain up to
135-minutes of images, 8 audio languages and 32
subtitle languages.
It is equipped with MPEG-2 picture compression and
Dolby 3D surround, allowing you to enjoy vivid and clear
theatre quality images in the comfort of your own home.
• When switching from the first layer to the second layer
of a double-layered DVD Video disc, there may be
momentary distortion in the image and sound.
This is not a malfunction of the unit.
• Once a DVD±R/DVD-RW(V) recorded is finalised, it is
playable in a standard DVD player.
Video CD
• Only CD-R disks made in the VCD format (ver 1.1 or 2.0)
can be played back.
• The moving pictures for PCs can be played back only
provided that they are recorded in VCD format in the
CD-Recording program.
• Please contact the CD-R maker for the inquiries related
to discs.
Audio CD
• An audio disc on which 44.1kHz PCM Audio is recorded.
• Plays CD-DA format audio CD-R and CD-RW discs.
This unit may not be able to play some CD-R or CD-RW
discs due to the condition of the recording.
CD-R/-RW
MP3 CD-R/-RW
• Only CD-R discs with MP3 files recorded with ISO9660
or JOLIET format can be played back
• Only MP3 files with the “mp3” or “MP3” extension can
be used.
• For MP3 files recorded with a VBR (Variable Bit Rates),
from 32 Kbps to 320 Kbps, the sound may cut in out.
• Playable bitrate range is from 56Kbps to 320Kbps.
• The unit can handle a maximum of 1000 files and folders.
• DVD-RAM/DVD±RW/DVD±R discs that contain MP3
files can be played back.
JPEG CD-R/-RW
• Only JPEG files with the “.jpg”, “.JPG” extension can be used.
• The unit can handle a maximum of 1000 files and folders.
• Maximum size of progressive JPEG is 3M pixels.
• MOTION JPEG is not supported.
Using CD-R/-RW
• Use a 700MB (80 minutes) CD-RW/-R disc.
If possible, do not use a 800MB (90 minutes) or above
disc, as the disc may not play back.
• If the CD-RW/-R disc was not recorded as a closed
session, you may experience a delay in the early playback time, and all recorded files may not play.
• Some CD-RW/-R discs may not be playable with this
unit, depending on the device which was used to burn
them. For contents recorded on CD-RW/-R media
from CDs for your personal use, playability may vary
depending on contents and discs.
Using MPEG4 disc
• Disc : CD-R/-RW, DVD-RAM, DVD±R/DVD±RW
• MPEG4 File with following extensions can be played :
.avi, .divx, .AVI, .DIVX
• MPEG4 Codec Format : DivX 3.11 DivX 4.x DivX 5.x
DivX-Pro Xvid
• Motion Compensation : QPEL, GMC
• four CC : MPG4, mpg4, DIV3, divX3, DIVX, divX, DX50,
MP43, mp43, XVID, xvid
• Available Audio Format : “MP3”, “MPEG1 Audio Layer2”,
“LPCM”, “AC3”, “DTS”, “MS ADPCM”
• Supported subtitle file formats: .smi, .srt, .sub, .psb, .txt, .ass
DVD±R Disc Playback and Recording
• Once a DVD±R recorded is finalised, it is playable in a
standard DVD player.
• You can record onto the available space on the disc and
perform editing functions such as giving titles to discs and
programmes and erasing programmes before finalising.
• When programming is erased from a DVD±R, that
space does not become available. Once an area on a
DVD±R is recorded on, that area is no longer available
for recording, whether the recording is erased or not.
• It takes about 30 seconds for the unit to complete recording
management information after recording finishes.
• This product optimizes the DVD±R for each recording.
Optimizing is carried out when you start recording after
inserting the disc or turning on the unit. Recording onto
the disc may become impossible if optimizing is carried
out too many times.
• Playback may be impossible in some cases due to the
condition of recording.
• This unit can play back DVD±R discs recorded and
finalised with a Samsung DVD video recorder. It may
not be able to play some DVD±R discs depending on
the disc and the condition of the recording.
DVD-RW Disc Playback and Recording
• Recording and playback can be performed on DVD-RW
discs in both V and VR Modes.
• Once a DVD-RW recorded in VR Mode is finalised, you
cannot perform additional recording.
• Once a DVD-RW recorded in V Mode is finalised, it
becomes DVD-Video.
• In both modes, playback can be performed before and
after finalisation, but additional recording, deleting and
editing can not be performed after finalisation.
• If you want to record the disc in VR Mode and then record
in V Mode, be sure to execute Format. Be careful when
executing Format because all the recorded data may be lost.
English - 4
01375B-VR350,355-UMG,XSG-ENG.ind4 4
2007-04-02 오후 4:57:25
Protection
• DVD-RW(VR mode)
- This is a format that is used for recording data on
a DVD-RW disc. You can repeat recording, editing,
deleting, partial deletion, creation of playlist, and etc.
- A disc that is recorded in this mode may not be played
by existing DVD players.
• DVD-RW(V mode)
- This is a format that is used for recording data on a
DVD- RW or DVD-R disc. The disc can be played by an
existing DVD player once it has been finalised.
- If a disc that has been recorded in V mode by a different
manufacturer’s recorder but has not been finalised it cannot
be played or additionally be recorded by this recorder.
✻ DVD-RAM/DVD±RW/DVD±R discs that are
incompatible with the DVD-VIDEO format can not be
played with this product.
DVD+RW Disc Playback and Recording
• With DVD+RW discs, there is no difference between
DVD-Video format(Video mode) and DVD-Video
Recording format (VR mode).
• You can make your own chapters on DVD+RWs and
edit them using the Chapter Edit menu.
• Finalising is generally unnecessary when using a
DVD+RW disc.
DVD-RAM Disc Playback and Recording
• For cartridge type DVD-RAM discs, remove the
cartridge and use the disc only.
• Ensure that the recording mode is set to VR mode.
Otherwise, this product will not be able to play the
recording.
• You cannot play a DVD-RAM in most DVD players due
to compatibility issues.
• Only DVD-RAM standard Version 2.0 discs can be
played in this unit.
• DVD-RAM recorded on this unit may not work with other
DVD Players. To determine compatibility with these DVDRAM discs, refer to the user’s manual for the player.
• Programme-protected: See page 65 “Locking a Title”
• Disc-protected: See page 74 “Disc Protection”
✻ For more information on DVD recording compatibility,
consult your DVD-RAM/DVD±RW/DVD±R
manufacturer.
✻ Use of poor quality DVD-RAM/DVD±RW/DVD±R discs
may cause following unexpected problems including,
without limitation, recording failure, loss of recorded or
edited materials or damage to the recorder.
Getting Started
• For an unused disc, a message that asks whether to
initialise a disc or not.
If you select "Yes", disc will be formatted in VR mode.
Do not use the following discs!
• LD, CD-G, CD-I, CD-ROM, DVD-ROM discs should not
be used in this product.
[Note]
Disc types that can be played : CD/CD-RW/-R/MP3/
JPEG/VCD/DVD-Video/DVD-RAM/DVD±RW/DVD±R.
However, if your DVD-RW/-R disc was recorded with
another device, it can be played only if it was recorded
and finalised in V mode.
• Some commercial discs and DVD discs purchased
outside your region may not be playable with this
product. When these discs are played, either “No
Disc.” or “The disc cannot be played. Please check the
regional code of the disc.” will be displayed.
• If your DVD-RAM/DVD±RW/DVD±R disc is an illegal
copy or is not in DVD video format, it may also not be
playable.
Disc compatibility
• A 8X speed DVD+RW or greater disc can be played, but
maximum recording speed is 4x.
• Not all brands of discs will be compatible with this unit.
COPY PROTECTION
• Many DVD discs are encoded with copy protection.
Because of this, you should only connect your DVD
Recorder & VCR directly to your TV, not to a VCR.
Connecting to a VCR results in a distorted picture
from copy-protected DVD discs.
• This product incorporates copyright protection
technology that is protected by methods claims of
certain U.S. patents and other intellectual property
rights owned by Macrovision Corporation and other
rights owners. Use of this copyright protection
technology must be authorized by Macrovision
Corporation, and is intended for home and other
limited viewing uses only unless otherwise authorized
by Macrovision Corporation. Reverse engineering or
disassembly is prohibited.
• It is permissible to record television programmes, film,
video tapes and other material only in the event that
third party copyrights and other rights are not violated.
English - 5
01375B-VR350,355-UMG,XSG-ENG.ind5 5
2007-04-02 오후 4:57:27
Getting Started
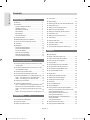
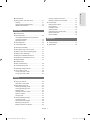
Contents
Getting Started
■ Auto Setup.............................................................. 22
■ Manual Setup ......................................................... 23
■ Warning .................................................................. 2
■ Selecting the RF OUT Sound Mode (B/G-D/K) ...... 23
■ Precaution .............................................................. 3
Important Safety Instructions.................................. 3
Handling Cautions .................................................. 3
Maintenance of Cabinet ......................................... 3
Disc Handling ......................................................... 3
Disc Storage ........................................................... 3
Disc Specifications ................................................. 4
■ VIDEO Output CH .................................................. 24
■ General Features ................................................... 8
■ Before Reading the User’s Manual ........................ 9
■ How to use the DVD Recorder & VCR ................... 9
■ Unpacking .............................................................. 10
■ Description ............................................................. 12
Front Panel (DVD-VR350)...................................... 12
Front Panel (DVD-VR355)...................................... 12
Front Panel Display ................................................ 13
Rear Panel (DVD-VR350) ...................................... 13
Rear Panel (DVD-VR355) ...................................... 14
Tour of the Remote Control .................................... 15
■ Setting Up the Language Options .......................... 24
■ Setting Up the Audio Options ................................. 25
■ Setting Up the Display (Video) Options .................. 26
■ Progressive scan .................................................... 27
■ Setting Up the Parental Control.............................. 29
■ VCR Setting............................................................ 30
■ DVD EP Mode Time ............................................... 31
■ Automatic Chapter Creator..................................... 31
■ Quick Recording ..................................................... 32
■ Anynet+(HDMI-CEC) (DVD-VR355 only) ............... 32
Playback
DVD Playback
■ Region code (DVD-Video only) .............................. 34
■ Logos of Discs that can be played ......................... 34
Connecting & Setting Up
■ Disc types that can be played ................................ 34
■ Connecting DVD Recorder & VCR to the TV using
the RF Cable ......................................................... 16
■ Connecting DVD Recorder & VCR to the TV using
the Audio/Video Cable ........................................... 16
■ Playing a Disc......................................................... 35
■ Using the Disc Menu and Title Menu...................... 36
■ Using the Search & Skip Functions ........................ 36
■ Slow Motion Play/Step Motion Play........................ 37
■ Connecting the S-Video Cable ............................... 17
■ Using the ANYKEY button ...................................... 38
■ Connecting the Component Video Cable ............... 17
■ Repeat Play ............................................................ 39
■ Connecting HDMI/DVI to a TV (DVD-VR355 only) .. 18
Case 1 : Connecting to a TV with HDMI Jack ........ 18
Case 2 : Connecting to a TV with DVI Jack ........... 18
■ Selecting the Subtitle Language............................. 39
■ AV Receiver Connections....................................... 19
■ Zooming-In ............................................................. 40
■ Connecting External Devices ................................. 20
Case1 : Connecting a VCR, Set-Top Box(STB) or DVD
Recorder & VCR to the AUDIO/VIDEO AV 1 IN jacks .... 20
Case 2 : Connecting a Camcorder to the AV 2 IN
jacks ....................................................................... 20
Case 3 : Connecting a DV Device to the DV IN jack .. 20
■ Using the Bookmarks ............................................. 41
■ Selecting the Audio language ................................. 40
■ Changing the Camera Angle .................................. 40
■ Using the Markers .................................................. 42
■ On-Screen Menu Navigation .................................. 21
■ Playing back an Audio CD (CD-DA)/MP3............... 43
Buttons on the Remote Control used for Audio
CD(CD-DA)/MP3 playback ..................................... 43
Playing back an Audio CD (CD-DA) ....................... 43
Playing back an MP3 Disc...................................... 44
Repeat Playback of an Audio/MP3 Disc ................. 44
Play Option Mode ................................................... 45
To Programme Tracks ............................................ 45
■ Plug & Auto Setup .................................................. 21
■ Playing back a Picture Disc .................................... 45
■ Setting the Date and Time ...................................... 22
■ Playing back an MPEG4 Disc ................................ 46
System Setup
21
English - 6
01375B-VR350,355-UMG,XSG-ENG.ind6 6
2007-04-02 오후 4:57:28
■ Playing back a VHS Tape (VCR) ............................ 47
Tracking .................................................................. 47
Special VCR Playback Features ............................ 47
Variable Search System ......................................... 48
Recording
DVD Recording
■ Disc Manager ......................................................... 73
Editing the Disc Name ............................................ 73
Disc Protection ....................................................... 73
Formatting a Disc ................................................... 74
Finalising a Disc ..................................................... 74
Unfinalising a Disc (V/VR mode) ............................ 75
Delete All Title Lists ................................................ 76
Edit Compatible ...................................................... 76
■ Recordable discs .................................................... 49
Compatibility between Samsung and Other
Company’s Recorder.............................................. 49
Recording Formats ................................................. 50
Reference
■ Recording Mode ..................................................... 50
■ Troubleshooting...................................................... 77
■ Unrecordable video ................................................ 51
■ Specifications ......................................................... 80
Getting Started
Copying a Playlist to the VCR ................................ 72
Deleting a Playlist from the Playlist ........................ 72
VCR Playback
■ Recording immediately ........................................... 52
■ Recording through a DV Input jack ........................ 53
■ Making a One Touch Recording (OTR) .................. 53
■ Making a Timer Recording ..................................... 54
■ Editing the Scheduled Record List ......................... 56
■ Deleting the Scheduled Record List ....................... 56
■ EZ REC MODE ...................................................... 57
VCR Recording
■ Basic VCR Recording............................................. 58
■ Check Remaining Time .......................................... 59
■ Special Recording Features ................................... 59
■ Copy to DVD or VCR.............................................. 60
To copy from DVD to VCR...................................... 60
To copy from VCR to DVD...................................... 61
Editing
■ Playing the Title List ............................................... 62
Recording on Free space ....................................... 63
■ Basic Editing (Title List) .......................................... 63
Renaming (Labeling) a Title ................................... 63
Locking (Protecting) a Title ..................................... 64
Deleting a Title........................................................ 64
Deleting a Section of a Title.................................... 65
Editing a Chapter.................................................... 65
Dividing a Title ...................................................... 67
■ Advanced Editing (Playlist)..................................... 68
Creating a Playlist .................................................. 68
Playing Titles in the Playlist ................................... 69
Renaming a Playlist Title ........................................ 69
Editing a Scene for the Playlist............................... 69
English - 7
01375B-VR350,355-UMG,XSG-ENG.ind7 7
2007-04-02 오후 4:57:29
Getting Started
A variety of functions with easy-to-use user interface
General Features
● DVD-VR350
This unit allows you to record and playback high quality
digital images on a DVD-RAM/DVD-RW/DVD-R disc.
You can record and edit digital video on DVD-RAM/
DVD-RW/DVD-R discs as if they were VCR tapes.
(DVD+RW/DVD+R discs can be played, but cannot be
recorded.)
● DVD-VR355
This unit allows you to record and playback high quality
digital video on DVD-RAM/DVD±RW/DVD±R discs.
You can record and edit digital video on DVD-RAM/
DVD±RW/DVD±R discs as if they were VCR tapes.
High quality digital audio and video recording and
playback
Integrated menu system and messaging functionality
allow you to perform the desired operations easily and
conveniently. With a DVD-RAM/DVD-RW(VR mode) disc,
you can edit recorded images, create playlist, and edit
images in specific sequence according to your needs.
MPEG4 playback
This DVD Recorder & VCR can play MPEG4 formats
within an avi file.
DivX Certification
DivX, DivX Certified, and associated logos
are trademarks of DivXNetworks Inc, and
are used under licence.
HDMI (High Definition Multimedia Interface)
You can record up to approximately 16-hours of video on
a double side 9.4 GB DVD-RAM disc,up to 15-hours on a
dual-layer 8.5GB DVD±R disc, and up to 8-hours on a 4.7
GB DVD-RAM/DVD±RW/DVD±R disc, depending on the
recording mode.
HDMI reduces picture noise by allowing a pure digital
video/audio signal path from the DVD Recorder & VCR to
your TV. (DVD-VR355 only)
Creating DVD video titles using DVD±RW/DVD±R discs
EZ REC MODE
With the DVD-VR350,VR355 you can create your own
DVD video titles on 4.7 GB DVD±RW/DVD±R discs.
This function allows you Initialise and Finalise a disc
automatically. (See page 58)
A Variety of Recording Options
Select an appropriate recording mode between XP, SP,
LP and EP to meet your recording needs. (See page 50)
• XP mode - High quality, about 1 hour
• SP mode - Standard quality, about 2 hours
• LP mode - Low quality, about 4 hours
• EP mode - Lower quality, about 6 or 8 hours
- The dual layer DVD±Rs have approximately double the
capacity of single layer DVD±Rs. (See page 34.)
Copying digital camcorder content using DV input jack
Record DV Device onto DVD-RAM/DVD±RW/DVD±R
discs or video tape using the DV input jack (IEEE13944pin). (See page 53)
High quality progressive scan
Progressive scanning provides high resolution and flicker
free images. The 10-bit 54-MHz DAC, 2D Y/C Separating
circuitry and Time Base Corrector processor technology
provide you with the highest image playback and
recording quality. (See page 18)
English - 8
01375B-VR350,355-UMG,XSG-ENG.ind8 8
2007-04-02 오후 4:57:30
©2007 Samsung Electronics Co.
All rights reserved; No part or whole of this user’s
manual may be reproduced or copied without the prior
written permission of Samsung Electronics Co.
Make sure to check the following terms before
reading the user’s manual.
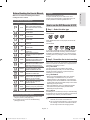
Icons that will be used in manual
Icon
Term
DVD
Definition
This involves a function available
DVD or DVD-RW(V)/DVD±R
discs that have been recorded
and finalised.
VCD
This involves a function available
in VCD discs.
RAM
This involves a function available
in DVD-RAM.
-RW
This involves a function available
in DVD-RW.
-R
This involves a function available
in DVD-R.
+RW
This involves a function available
in DVD+RW.
+R
This involves a function available
in DVD+R.
CD
JPEG
MP3
MPEG4
VHS
Caution
NOTE
Copyright
This involves a function
available in a data CD (CD-R or
CD-RW).
This involves a function
available in CD-R/-RW or DVDRAM/DVD±RW/DVD±R discs.
This involves a function
available in CD-R/-RW or DVDRAM/DVD±RW/DVD±R discs.
This involves a function available
in a data CD-R/-RW or DVDRAM/DVD±RW/DVD±R discs.
This involves a function
available in VIDEO Tape.
This involves a case where a
function does not operate or
settings may be canceled.
This involves tips or instructions
on the page that help each
function operate.
One-Touch
button
A function that can be operated
button by using only one button.
ANYKEY
button
A function that can be operated
by using ANYKEY button.
About the use of this user’s manual
Getting Started
Before Reading the User’s Manual
How to use the DVD Recorder & VCR
▌ Step 1 : Select the disc type
Please check available disc type before recording.
● DVD-VR350
(DVD+RW/DVD+R discs can be played, but cannot be
recorded.)
● DVD-VR355
If you want to repeatedly record on the same disc or you
want to edit the disc after recording, select a rewritable
DVD±RW or DVD-RAM type disc. If you want to save a
recording without any changes, choose a non-rewritable
DVD±R.
▌ Step 2 : Format the disc to start recording
Unlike a VCR, the recorder automatically starts formatting
when an unused disc is inserted. This is required for the
preparation of recording on a disc.
Using a DVD-RAM
This type of disc can be formatted in DVD-Video
Recording format (VR mode). You can edit recorded
images and create a playlist in a specific sequence
according to your requirements.
Using a DVD±RW/+R
• When an unused DVD±RW/+R disc is first inserted,
the message “Uninitialised Disc. Do you want to
initialise this disc?” will be displayed. If you select Yes,
initialising will be start. DVD-RW disc can be formatted
in either DVD-Video format (Video mode) or DVD-Video
Recording format (VR mode)
• With DVD+RW discs, there is no difference between
DVD-Video format (Video mode) and DVD-Video
Recording format (VR mode).
Using a DVD-R
Formatting disc is unnecessary and only V mode Recording
is supported. You can play this type of disc on various DVD
components only when they have been finalised.
1) Be sure to be familiar with Safety Instructions before
using this product. (See pages 2~5)
2) If a problem occurs, check the Troubleshooting.
(See pages 78~80)
■ You can only use either the VR or V mode on a
DVD-RW, but not both at the same time.
■ You can format a DVD-RW to V or VR mode using
disc manager. It should be noted that the data of
the disc may be lost when changing formats.
English - 9
01375B-VR350,355-UMG,XSG-ENG.ind9 9
2007-04-02 오후 4:57:31
Getting Started
Unpacking
▌ Step 3 : Recording
There are two different recording methods: Direct
Recording and Timer Recording. Timer recording is
classified as a Date : Once, Daily or Weekly.
Recording mode : XP (high quality mode), SP (standard
quality mode), LP (long recording mode), and EP
(extended mode).
▌ Step 4 : Playing
You can select the title you want to play in a displayed
menu and then immediately start playback.
A DVD consists of sections called titles, and sub sections
called chapters.
During recording, a title is created between two points
where you start and stop recording.
Chapters will be created automatically when you finalise
recording on DVD-RW/-R discs in V mode.
You can make your own chapters on DVD+RWs and edit
them using the Chapter Edit menu.
The chapter’s length (interval between chapters) varies
according to the recording mode.
▌ Accessories
• Audio/Video Cable
• RF Cable for TV Control
• HDMI Cable(DVD-VR355 only)
• Remote control.
• Batteries for Remote Control (AAA Size)
• User’s Manual
• Quick Guide
▌ Preparing the Remote Control
Install Batteries in the Remote Control
• Open the battery cover on the back of the remote
control.
• Insert two AAA batteries. Make sure that the polarities
(+ and -) are aligned correctly.
• Replace the battery cover.
▌ Step 5 : Editing a recorded disc
Editing on discs is easier than conventional video tapes.
The recorder supports many different edit functions,
possible only with DVDs. With a simple and easy edit
menu, you can operate various edit functions, such as
delete, copy, rename, lock, etc., on a recorded title.
Creating a playlist (DVD-RAM/-RW in VR mode)
With this recorder, you can create a new playlist on the
same disc and edit it without the change of the original
recording.
▌ Step 6 : Finalising & Playing on other DVD components
To play your DVD on other DVD components, finalising
may be necessary. First, finish all editing and recording
operations, then finalise the disc.
If the remote control does not operate properly:
• Check the polarity +/- of the batteries (Dry-Cell)
• Check if the batteries are drained.
• Check if the remote sensor is blocked by obstacles.
• Check if there is any fluorescent lighting nearby.
Dispose of batteries according to local environmental
regulations. Do not put them in the household trash.
When using a DVD-RW disc in VR Mode
Although finalising is generally unnecessary when playing
the disc on a VR Mode compatible component, a finalised
disc should be used for playback.
When using a DVD-RW disc in V mode
The disc should be finalised first to enable playback
on anything other than this recorder. No more editing
or recording can be made on the disc once it has been
finalised.
When using a DVD±R disc
You should finalise the disc to play it on a component
other than this recorder. You cannot edit or record on the
disc once it has been finalised.
■ You can finalise discs automatically using EZ
REC MODE. (see page 58)
English - 10
01375B-VR350,355-UMG,XSG-ENG.ind10 10
2007-04-02 오후 4:57:34
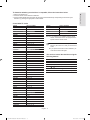
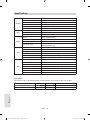
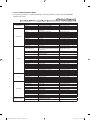
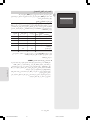
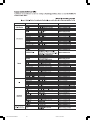
To determine whether your television is compatible, follow the instructions below.
Getting Started
1. Switch your television on.
2. Point the remote control towards the television.
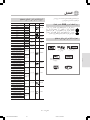
3. Press and hold the TV button and enter the two-figure code simultaneously corresponding to the brand of your
television, by pressing the appropriate number buttons.
Controllable TV Codes
BRAND
SAMSUNG
AKAI
BANG & OLUFSEN
BLAUPUNKT
BRANDT
BRIONVEGA
CGE
CONTINENTAL EDISON
FERGUSON
FINLUX
FISHER
FORMENTI
GRUNDIG
HITACHI
IMPERIAL
JVC
LG
LOEWE
LOEWE OPTA
METZ
MITSUBISHI
MIVAR
NOKIA
NORDMENDE
PANASONIC
PHILIPS
PHONOLA
PIONEER
RADIOLA
RADIOMARELLI
REX
SABA
SALORA
SANYO
SCHNEIDER
SELECO
SHARP
SIEMENS
SINGER
SINUDYNE
SONY
TELEAVA
TELEFUNKEN
THOMSON
SELECT NUMBER
TV +01, +02, +03, +04, +05, +06, +35
TV +12
TV +22
TV +09
TV +14
TV +22
TV +21
TV +24
TV +14
TV +02, +17, +21
TV +12
TV +22
TV +09, +17, +21
TV +11, +13, +14, +24
TV +21
TV +32
TV +02, +30
TV +02
TV +02, +22
TV +22
TV +02, +16
TV +21, +29
TV +23
TV +13, +14, +22, +24
TV +08, +23, +24, +25, +26, +27
TV +02, +20, +22
TV +02, +20, +22
TV +14, +23
TV +02, +20
TV +22
TV +23
TV +13, +14, +22, +23, +24
TV +23
TV +12, +16
TV +02
TV +23
TV +10, +16, +31
TV +09
TV +22
TV +22
TV +15, +16
TV +14
TV +14, +24, +28
TV +13, +14, +24
BRAND
THOMSON ASIA
TOSHIBA
WEGA
YOKO
SELECT NUMBER
TV +33, +34
TV +07, +16, +17, +18, +19, +21
TV +22
TV +02
Result: If your television is compatible with the remote
control, it will switch off. It is now programmed to
operate with the remote control.
■ If several codes are indicated for your television
brand, try each one in turn until you find one that
works.
■ If you replace the remote control’s batteries, you
must set the brand code again.
You can then control the television using the
following buttons.
Button
Function
STANDBY/ON
Used to switch the television on and off.
INPUT SEL.
Used to select an external source.
TV VOL (+ or -)
Used to adjust the volume of the television.
PROG (
Used to select the desired Programme.
or
)
TV MUTE
Used to toggle the sound on and off.
0~9
Used to input number directly.
English - 11
01375B-VR350,355-UMG,XSG-ENG.ind11 11
2007-04-02 오후 4:57:35
Getting Started
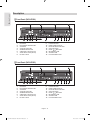
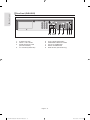
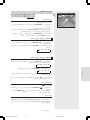
Description
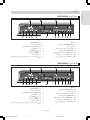
▌ Front Panel (DVD-VR350)
1
5
1.
2.
3.
4.
5.
6.
7.
8.
6
7
2
8
9
3
10
DVD DECK
DVD OPEN/CLOSE BUTTON
VCR DECK
VCR EJECT BUTTON
STANDBY/ON BUTTON
VIDEO INPUT JACK (AV2 IN)
AUDIO INPUT JACK (AV2 IN)
DV INPUT JACK
9.
10.
11.
12.
13.
14.
15.
16.
11
4
12
13
14
15
16
P.SCAN BUTTON
FRONT PANEL DISPLAY
DVD/VCR SELECT BUTTON
COPY BUTTONS
PROG / BUTTONS
RECORD BUTTON
STOP BUTTON
PLAY/PAUSE BUTTON
▌ Front Panel (DVD-VR355)
1
5
1.
2.
3.
4.
5.
6.
7.
8.
6
7
2
8
DVD DECK
DVD OPEN/CLOSE BUTTON
VCR DECK
VCR EJECT BUTTON
STANDBY/ON BUTTON
VIDEO INPUT JACK (AV2 IN)
AUDIO INPUT JACK (AV2 IN)
DV INPUT JACK
9
3
10
9.
10.
11.
12.
13.
14.
15.
16.
11
4
12
13
14
15
16
P.SCAN BUTTON
FRONT PANEL DISPLAY
DVD/VCR SELECT BUTTON
COPY BUTTONS
PROG / BUTTONS
RECORD BUTTON
STOP BUTTON
PLAY/PAUSE BUTTON
English - 12
01375B-VR350,355-UMG,XSG-ENG.ind12 12
2007-04-02 오후 4:57:37
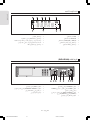
1
2
7
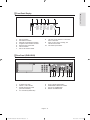
1.
2.
3.
4.
5.
6.
7.
DVD is activated.
DVD-RAM is activated.
DVD(±)R or DVD(±)RW is activated.
Progressive Scan mode is activated.
Record function is activated.
VCR is activated.
DVD or CD media is loaded.
3
4
5
6
8
9
8.
Getting Started
▌ Front Panel Display
10
The time, counter position or current deck
status is indicated.
When you set a Timer recording, this
indicator is illuminated.
VHS Video tape is loaded.
9.
10.
▌ Rear Panel (DVD-VR350)
1
1.
2.
3.
4.
S-VIDEO OUT JACK
AUDIO L, R OUT JACKS
DIGITAL AUDIO OUT JACK
(OPTICAL/COAXIAL)
AV 1 IN JACKS (Video/Audio)
5.
6.
7.
8.
2
3
4
5
6
7
8
AV OUT JACKS (Video/Audio)
COMPONENT VIDEO OUT JACKS
OUT TO TV CONNECTOR
AERIAL IN CONNECTOR
English - 13
01375B-VR350,355-UMG,XSG-ENG.ind13 13
2007-04-02 오후 4:57:39
Getting Started
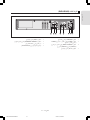
▌ Rear Panel (DVD-VR355)
9
1.
2.
3.
4.
S-VIDEO OUT JACK
AUDIO L, R OUT JACKS
DIGITAL AUDIO OUT JACK
(OPTICAL/COAXIAL)
AV 1 IN JACKS (Video/Audio)
5.
6.
7.
8.
9.
1
2
3
4
5
6
7
8
AV OUT JACKS (Video/Audio)
COMPONENT VIDEO OUT JACKS
OUT TO TV CONNECTOR
AERIAL IN CONNECTOR
HDMI OUTPUT (DVD-VR355 only)
English - 14
01375B-VR350,355-UMG,XSG-ENG.ind14 14
2007-04-02 오후 4:57:41
Your DVD Recorder & VCR remote control will work with Samsung televisions and compatible brands.
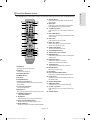
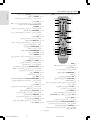
14. ANYKEY Button
Press this to view the status of the disc that is
being played.
15. REC Button
Press this to make a recording on DVD-RAM/
DVD±RW/±R discs and VHS Video tape.
Getting Started
▌ Tour of the Remote Control
16. TO DVD copy Button
Press this when you copy from the VCR to the
DVD.
17. REC SPEED Button
Press this to set the desired recording time and
picture quality.
18. VCR Button
Press this when you use a VCR.
19. INPUT SEL. Button
Select input signal in external input mode
(Tuner, AV1, AV2 or DV input).
20. OPEN/CLOSE Button
To open and close the disc tray.
21. TV STANDBY/ON Button
22. TV/VCR Button (Not available)
23. MARKER Button
Press this to bookmark or mark a position while
playing a disc.
24. PROG/TRK Button
Press this to select a TV channel
/Press this to remove the white line.
25. TV MUTE Button
This operates as sound mute (TV mode).
1. DVD Button
Press this when you use a DVD.
26. RETURN Button
Returns to previous menu.
2. TV Button
Press this to operate TV.
27. EXIT Button
28. PLAY LIST/TITLE MENU Button
Press this to enter the Edit playlist/Title menu.
3. STANDBY/ON Button
4. NUMBER Button
29. AUDIO Button
Use this to access various audio functions on a
disc (DVD mode).
5. IPC Button
6. F.ADV/SKIP Button
7. Playback-related Buttons
Forward/Rewind, Search, Skip, Stop, Play/Still,
REC PAUSE
30. EZ REC MODE Button
8. TV VOL (Volume) Button
TV volume adjustment
32. TO VCR copy Button
Press this when you copy from the DVD to the
VCR.
9. MENU Button
Brings up the DVD Recorder & VCR’s setup menu.
31. TIMER REC Button
Press this when you use Timer Recording.
33. CANCEL Button
10. OK/DIRECTION Buttons
(▲/▼/◄/► Buttons)
11. INFO Button
This will display current setting or disc status.
12. TITLE LIST/DISC MENU Button
Press this to enter the Title List/Disc menu.
13. SUBTITLE Button
Press this to switch the DVD’s subtitle language.
English - 15
01375B-VR350,355-UMG,XSG-ENG.ind15 15
2007-04-02 오후 4:57:42
Connecting & Setting Up
Connecting & Setting Up
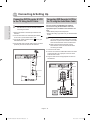
Connecting DVD Recorder & VCR
to the TV using the RF Cable
You can connect your DVD Recorder & VCR to
the television using the Audio/Video cable if the
appropriate input is available on the television. You
thus:
• Obtain better quality sound and pictures
• Simplify the setting up procedure of your DVD Recorder
& VCR
■ Make sure that both the television and the
DVD Recorder & VCR are switched off before
connecting the cables.
1. Remove the aerial or network input cable from the
television.
2. Connect this cable to the 75Ω aerial jack marked
on the rear of your DVD Recorder & VCR.
3. Plug the RF Cable supplied into the
DVD Recorder & VCR.
Connecting DVD Recorder & VCR to
the TV using the Audio/Video Cable
■ Regardless of the type of connection chosen,
you must always connect the RF Cable supplied.
Otherwise, no picture will be visible on the screen
when the DVD Recorder & VCR is switched off.
jack on your
4. Plug the other end of the RF Cable into the connector
previously used for the aerial on the television.
■ Make sure that both the television and the
DVD Recorder & VCR are switched off before
connecting the cables.
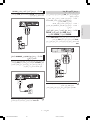
1. Connect the RF Cable.
2. Connect one end of the Audio/Video cable to the Video
output and Audio L, R output jack on the rear of the
DVD Recorder & VCR.
To RF IN
3. Plug the other end into the appropriate connector on
the television.
Aerial
Aerial cable
To RF OUT
TV
RF Cable
ANT
To ANT INPUT
RF cable
ANT IN
English - 16
01375B-VR350,355-UMG,XSG-ENG.ind16 16
2007-04-02 오후 4:57:44
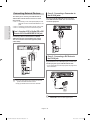
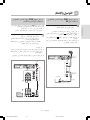
Connecting the S-Video Cable
You will enjoy high quality images. S-Video seperates
the picture element into black and white(Y) and
colour(C) signals to present clearer images than
composite video output mode.
2. Plug the other end of the S-Video cable into the
appropriate input connector on the television.
3. Connect one end of the audio cable supplied into the
AUDIO output jacks on the rear of the DVD Recorder
& VCR.
• Take care to respect the colour coding of the up and
down channels.
4. Plug the other end of the audio cables into the
appropriate input connectors on the television.
You will enjoy high quality accurate colour reproduction
images. Component video seperates the picture
element into black and white(Y), blue(PB), red(PR)
signals to present most clear and clean images.
1. Connect Component video cables between the
COMPONENT VIDEO OUT jacks on the rear of the
DVD Recorder & VCR and COMPONENT VIDEO IN
jacks on the rear of the TV.
2. Connect audio cables between the audio output jacks
on the rear of the DVD Recorder & VCR and AUDIO
IN jacks on the rear of the TV.
• Take care to respect the colour coding of the up and
down channels.
• Press the input selector on your TV remote control
until the Component signal from the DVD Recorder &
VCR appears on your TV screen.
white
S-Video cable
(not supplied)
Connecting & Setting Up
1. Connect one end of the S-Video cable into the
S-VIDEO output jack on the rear of the DVD Recorder
& VCR.
Connecting the Component
Video Cable
white
red
red
white
Component
cable
(not supplied)
red
COMPONENT INPUT
white
red
English - 17
01375B-VR350,355-UMG,XSG-ENG.ind17 17
2007-04-02 오후 4:57:46
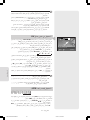
▌ Progressive Scan
Connecting HDMI/DVI to a TV
(DVD-VR355 only)
Connecting & Setting Up
Your TV must support progressive scan input to
allow to watch progressive scan component video
out. (See page 27)
If your TV has a HDMI/DVI input, connect the HDMI/
DVI cable to the TV. You will enjoy the best quality
images and sounds.
▌ Case 1 : Connecting to a TV with HDMI
Jack
• For more information about Progressive setting, refer to
the page 27.
• Make sure that the colour coded connections match.
That is, the Y, PB and PR component output jacks of
your DVD Recorder & VCR should be connected to the
exact corresponding component input jacks on your TV.
Otherwise, red or blue images will be displayed on the
TV screen.
• Consumers should note that not all high definition
television sets are fully compatible with this product
and may cause artifacts to be displayed in the picture.
In case of progressive scan picture problems, it is
recommended that you switch the connection to the
standard definition output.
If there are questions regarding your Samsung TV set’
s compatibility with this DVD Recorder & VCR, please
contact our customer service centre.
■ See your TV User’s Manual to find out if your TV
supports Progressive Scan.
If Progressive Scan is supported, follow the TV
User’s instructions regarding Progressive Scan
settings in the TV’s menu system.
■ Depending on your TV, the method of connection
may differ from the illustration above.
■ What is “Progressive Scan”?
Progressive scan has twice as many scanning
lines as the interlace output method has.
Progressive scanning method can provide better
and clearer picture quality.
■ You must connect the DVD Recorder & VCR to
the component(s) before using the Progressive
Scan feature.
• Using the HDMI cable, connect the HDMI OUT jack on
the rear of the DVD Recorder & VCR to the HDMI IN
jack of your TV.
• Press the input selector on your TV remote control
until the HDMI signal from the DVD Recorder & VCR
appears on your TV screen.
HDMI cable
(not supplied)
▌ Case 2 : Connecting to a TV with DVI Jack
• Using the DVI Adapter Cable, connect the HDMI OUT
jack on the rear of the DVD Recorder & VCR to the DVI
IN jack of your TV.
• Using the audio cables, connect the AUDIO (red and
white) OUT jacks on the rear of the DVD Recorder &
VCR to the AUDIO (red and white) IN jacks of your TV.
Turn on the DVD Recorder & VCR and TV.
• Press the input selector on your TV remote control until
the DVI signal from the DVD Recorder & VCR appears
on your TV screen.
■ The Component jacks will not output video
resolutions above 576p.
To view 720p and 1080i, connect the DVD
Recorder & VCR to your TV with the HDMI cable.
With HDMI connected, press the P.SCAN button
to alternate between all available resolutions.
(See page 29) (DVD-VR355 only)
■ To watch through the HDMI output, set the
digital audio output to PCM. (See page 26)
■ Depending on the HDMI device (TV/HDMI Receiver)
you use, audio may not be supported. If TV does
not support Dolby digital/DTS, Audio output is not
available when you set Digital output as Bitstream
or select DTS On in Audio setup menu. In this case,
set the digital audio output to PCM or DTS off.
■ If you connect the HDMI cable between Samsung
TV, you can operate easily DVD Recorder & VCR
using the TV remote control.(This is only available
with Samsung TVs that support Anynet+(HDMICEC).) (See pages 32~33)
■ Please check the
logo (If your TV has an
logo, then it supports Anynet+ function.)
English - 18
01375B-VR350,355-UMG,XSG-ENG.ind18 18
2007-04-02 오후 4:57:49
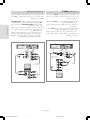
AV Receiver Connections
red
white
Manufactured under licence from Dolby Laboratories.
“Dolby” and the double-D symbol are trademarks of
Dolby Laboratories.
■ To change HDMI output resolution, see pages
27~28.
■ HDMI (High Definition Multimedia Interface)
HDMI is an interface to enable the digital
transmission of video and audio data with just a
single connector. Since HDMI is based on DVI,
it is completely compatible with DVI. The only
difference between HDMI and DVI is that HDMI
supports multi-channel audio.
Using HDMI, the DVD Recorder & VCR transmits
a digital video and audio signal and displays a
vivid picture on a TV having an HDMI input jack.
Connecting & Setting Up
DVI adapter cable
(not supplied)
To take full advantage of the movie theatre
experience that DVD offers, you may want to connect
your DVD Recorder & VCR to a complete Surround
Sound system, including an A/V Receiver and six
Surround Sound speakers.
If your A/V receiver is equipped with a Dolby Digital
Decoder, you have the option to bypass the DVD
Recorder & VCR’s built-in Dolby Digital Decoder.
Use the Digital Audio Out connection below.
To enjoy Dolby digital or DTS sound, you must set up
the audio settings. (See page 25)
“DTS” and “DTS Digital Out” are trademarks of DTS,
Inc.
1. Connect a Digital Audio optical/coaxial cables from the
Digital Audio Out jacks on the rear panel of the DVD
Recorder & VCR to their corresponding Digital Audio
Input jacks on your A/V Receiver:
■ HDMI connection description
HDMI connector - Both uncompressed video data
and digital audio data (LPCM or Bit Stream data).
- Though the DVD Recorder & VCR uses a HDMI
cable, the DVD Recorder & VCR outputs only a
pure digital signal to the TV.
- If TV does not support HDCP (High-bandwidth
Digital Content Protection), snow noise appears
on the screen.
■ Why does Samsung use HDMI?
Analog TVs require an analog video/audio
signal. However, when playing a DVD, the data
transmitted to a TV is digital. Therefore either a
digital-to-analog converter (in the DVD Recorder
& VCR) or an analog-to-digital converter (in
the TV) is required. During this conversion, the
picture quality is degraded due to noise and
signal loss. HDMI technology is superior because
it requires no D/A conversion and is a pure digital
signal from the DVD Recorder & VCR to your TV.
■ What is the HDCP?
HDCP (High-bandwidth Digital Content
Protection) is a system for protecting DVD
content outputted via HDMI from being copied.
It provides a secure digital link between a video
source (PC, DVD, etc) and a display device (TV,
projector, etc). Content is encrypted at the source
device to prevent unauthorized copies from being
made.
or
Rear(L)
Rear(R)
Front(R)
Front(L)
Subwoofer Centre
To Digital Audio Input of an A/V Receiver
with a Dolby, MPEG2 or DTS Digital
Decoder
English - 19
01375B-VR350,355-UMG,XSG-ENG.ind19 19
2007-04-02 오후 4:57:51
Connecting & Setting Up
Connecting External Devices
▌ Case 2 : Connecting a Camcorder to
the AV 2 IN jacks
This allows you to connect your DVD Recorder &
VCR to other external devices and view or record
their outputs.
• Case 1 : Connecting a VCR, Set-Top Box(STB) or DVD
Recorder & VCR to the AUDIO/VIDEO AV 1 IN
jacks.
• Case 2 : Connecting a Camcorder to the AV 2 IN in jacks.
• Case 3 : Connecting a DV Device to the DV IN jack
You can use the AV 2 IN jacks on the front panel
of the DVD Recorder & VCR. You can record from
connected equipment.
▌ Case1 : Connecting a VCR, Set-Top Box(STB) or DVD
Recorder & VCR to the AUDIO/VIDEO AV 1 IN jacks
Connecting a VCR or external device to AUDIO/
VIDEO AV 1 IN jacks of the DVD Recorder & VCR.
You can record from connected equipment (VCR,
STB or DVD).
▌ Case 3 : Connecting a DV Device to
the DV IN jack
If your DV Device has a DV output jack, connect it to
the DV input jack of your DVD Recorder & VCR.
• If your camcorder has a DV output jack, see page 53 for
more information.
■ You can also use the AV 2 IN jacks on the front
panel of the DVD Recorder & VCR.
■ Copy protected content cannot be recorded.
■ If the input is not selected automatically, use
INPUT SEL. button to select proper input.
English - 20
01375B-VR350,355-UMG,XSG-ENG.ind20 20
2007-04-02 오후 4:57:54
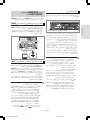
System Setup
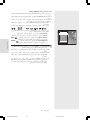
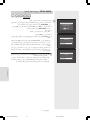
On-Screen Menu Navigation
DVD-Recorder
Setup
No Disc
Programme System
Setup
►
Clock Set
►
Language
►
Audio
►
Video
►
Parental Control
►
Install
►
MOVE
OK
RETURN
EXIT
The on-screen menus allow you to enable or disable various
functions on your DVD Recorder & VCR.
Press the MENU button to open the on-screen menu and then use
the following buttons to navigate through the on screen menus.
1. ▲▼, ◄► Buttons
Press these buttons on the remote control to move the selection bar
▲▼, ◄► to cycle through the menu options.
2. OK Button
Press this button on the remote control to confirm any new settings.
4. EXIT Button
Press this button to exit the on-screen menu.
System Setup
3. RETURN Button
Press this button on the remote control to return to the previous menu
screen displayed or to exit the on-screen menu.
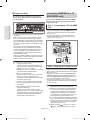
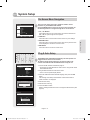
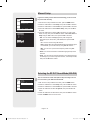
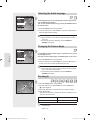
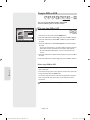
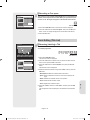
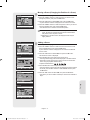
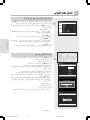
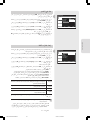
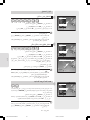
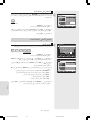
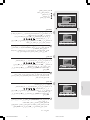
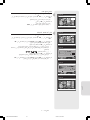
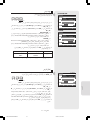
Plug & Auto Setup
The DVD Recorder & VCR will automatically set itself up when it is
plugged into the mains for the first time.
TV stations will be stored in memory. The process takes a few
minutes. The DVD Recorder & VCR will then be ready for use.
DVD-Recorder
Auto Setup
No Disc
Language Set
MOVE
English
Français
Deutsch
Español
Italiano
Nederlands
Русский
OK
RETURN
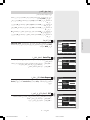
1. Connect the RF cable as indicated on page 16.
• Connecting Your DVD Recorder & VCR to the TV using the RF Cable
and Audio/Video cable.
2. Plug the DVD Recorder & VCR into the mains.
• “Auto” in the front panel display flickers.
3. Press the ▲▼ buttons select desired language, then press the OK
button.
The message “Auto Setup will be started. Check antenna and TV
cable connection.” is displayed.
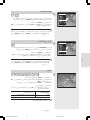
4. Start the auto setup.
Auto Channel Memory
50%
5. Start the auto scanning.
6. Check the date and time.
Refer to “Setting the Date and Time” to change the date and time. (See
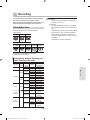
page 22)
Stop
DVD-Recorder
Auto Setup
No Disc
Date
JAN
Time
01
2007
12
00
MON
MOVE
OK
RETURN
English - 21
01375B-VR350,355-UMG,XSG-ENG.ind21 21
2007-04-02 오후 4:57:57
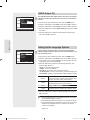
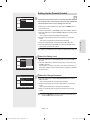
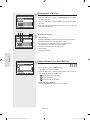
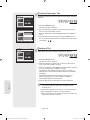
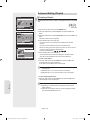
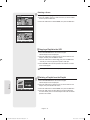
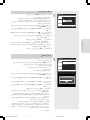
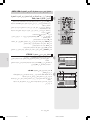
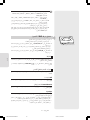
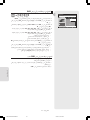
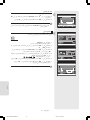
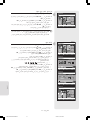
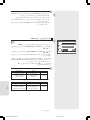
Setting the Date and Time
DVD-Recorder
Clock Set
No Disc
Programme
Setup
Date
JAN
Time
01
2007
12
00
MON
MOVE
OK
RETURN
EXIT
Your DVD Recorder & VCR contains a 24-hour clock and calendar
used to:
• Automatically stop a programme recording
• Preset your DVD Recorder & VCR to record a programme automatically
• You must set the date and time when you purchase the DVD Recorder
& VCR.
• Do not forget to reset the time when you change clocks from winter to
summer time and vice versa.
1. With the unit in Stop mode/No Disc mode, press the MENU button.
2. Press the ▲▼ buttons to select Setup, then press the OK or ► button.
3. Press the ▲▼ buttons to select Clock Set, then press the OK or ► button.
4. Press the ◄► buttons to select the hour, minutes, day, month and year.
• The selected item is highlighted.
System Setup
5. Press the ▲▼ buttons to increase or decrease the value.
• The day of the week is displayed automatically.
• You can hold the ▲▼ buttons down to scroll more quickly through
the values.
6. Press the OK button, then the date and time will be saved. If you don’t
press the OK button, it will not be saved.
7. Press the EXIT button to exit the menu.
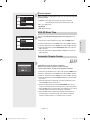
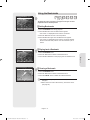
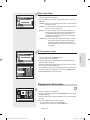
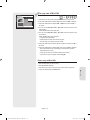
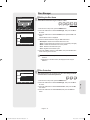
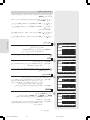
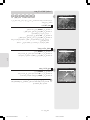
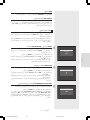
Auto Setup
DVD-Recorder
Install
No Disc
Programme
Auto Setup
►
Setup
Manual Setup
►
TV System : G
►
VIDEO Output CH : CH 36
►
MOVE
OK
RETURN
EXIT
Auto Channel Memory
50%
Stop
You do not need to preset the stations if you have already set them
automatically (See Plug & Auto Setup on page 21).
Your DVD Recorder & VCR contains a built-in tuner used to receive
television broadcasts.
You must preset the stations received through the tuner.
This can be done by:
• Plug & Auto Setup (See page 21)
• Auto Setup
• Manual Setup (See page 23)
1. With the unit in Stop mode/No Disc mode, press the MENU button.
2. Press the ▲▼ buttons to select Setup, then press the OK or ► button.
3. Press the ▲▼ buttons to select Install, then press the OK or ► button.
4. Press the ▲▼ buttons to select Auto Setup, then press the OK or ► button.
The message “Your data will be lost. Press [OK] to continue, [MENU] to exit.”
is displayed.
5. Press the OK button to start the auto scanning.
• The first frequency band is scanned and the station found first is
displayed and stored.
The DVD Recorder & VCR then searches for the second station and so on.
• When the automatic scanning procedure has finished, the DVD
Recorder & VCR switches automatically to programme 1.
• The number of stations automatically stored by the DVD Recorder &
VCR depends on the number of stations that it has found.
6. If you wish to cancel the auto scanning before the end, press the OK button.
• Once the auto scanning procedure has finished, some stations may
have been stored more than once; select the stations with the best
reception and delete the ones no longer required.
English - 22
01375B-VR350,355-UMG,XSG-ENG.ind22 22
2007-04-02 오후 4:57:59
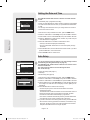
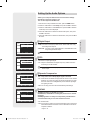
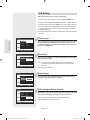
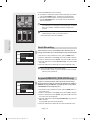
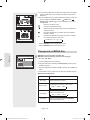
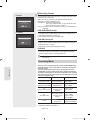
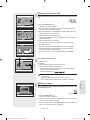
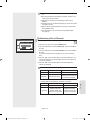
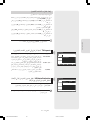
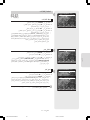
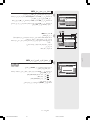
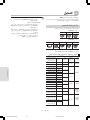
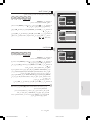
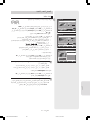
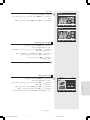
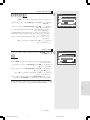
Manual Setup
DVD-Recorder
Install
No Disc
Programme
Auto Setup
►
Setup
Manual Setup
►
TV System : G
►
VIDEO Output CH : CH 36
►
If you have already set the stations automatically, you do not need
to preset them manually.
1. With the unit in Stop mode/No Disc mode, press the MENU button.
2. Press the ▲▼ buttons to select Setup, then press the OK or ► button.
3. Press the ▲▼ buttons to select Install, then press the OK or ► button.
MOVE
OK
RETURN
EXIT
5. Press the ▲▼ buttons to select a PR (programme) you wish to edit,
delete, or swap, then press the OK or ► button. Select Edit, Delete or
Swap using the ▲▼ buttons, then press the OK or ► button.
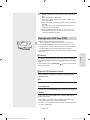
Manual Setup
PR
01
CH
◄
---
►
Name
----
MFT
--- I ---
• Edit : You can add or edit PR(programme). After change PR
informations (CH, Name, MFT), select Done, then press the OK
button.
Done
OK
- CH : Tune the channel using ◄► buttons.
- Name : Display station name automatically detected in broadcasting signal.
If not detected, you can edit name by using ▲▼◄► buttons.
- MFT : You can tune up the channel frequency better using ◄►
buttons.
System Setup
MOVE
4. Press the ▲▼ buttons to select Manual Setup, then press the OK or
► button.
• Delete : the channel information of selected PR(programme) will be
removed.
• Swap : You can swap the channel information of two PR(programme).
For example, if you wish to swap PR2 and PR5, select swap at PR2,
then press the OK button at PR5.
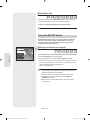
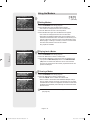
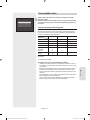
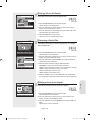
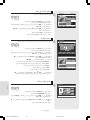
Selecting the RF OUT Sound Mode (B/G-D/K)
DVD-Recorder
Install
No Disc
Programme
Auto Setup
Setup
Manual Setup
TV System
You can choose the sound mode (B/G or D/K) according to the TV
set connected to your DVD Recorder & VCR.
►
►
:G
VIDEO Output CH : CH 36
►
►
1. With the unit in Stop mode/No Disc mode, press the MENU button.
2. Press the ▲▼ buttons to select Setup, then press the OK or ► button.
3. Press the ▲▼ buttons to select Install, then press the OK or ► button.
MOVE
OK
RETURN
EXIT
4. Press the ▲▼ button to select TV System, then press the OK or ►
button.
5. Press the ▲▼ button to select G or K, then press the OK or ► button.
6. Press the MENU button to exit the menu.
English - 23
01375B-VR350,355-UMG,XSG-ENG.ind23 23
2007-04-02 오후 4:58:01
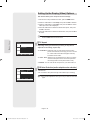
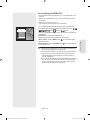
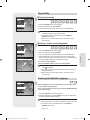
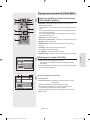
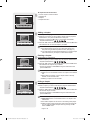
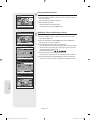
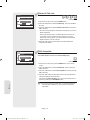
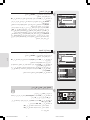
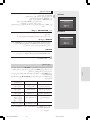
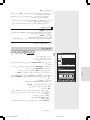
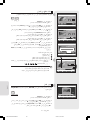
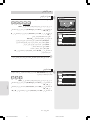
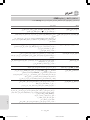
VIDEO Output CH
DVD-Recorder
Install
No Disc
Programme
Auto Setup
Setup
Manual Setup
►
TV System
VIDEO Output CH
MOVE
OK
π
▲
CH 35
: CH
K 36
CH 37
: CH 36
CH 38
CH 39
CH 40
CH 41
Your DVD Recorder & VCR output channel may need to be changed
if the pictures suffer from interference or if your TV cannot find the
pictures.
►
►
►
1. With the unit in Stop mode/No Disc mode, press the MENU button.
2. Press the ▲▼ buttons to select Setup, then press the OK or ► button.
†▼
3. Press the ▲▼ buttons to select Install, then press the OK or ► button.
RETURN
EXIT
4. Press the ▲▼ buttons to select VIDEO Output CH, then press the OK
or ► button.
System Setup
5. Press the ▲▼ buttons to select the desired VIDEO output channel,
then press the OK or ► button.
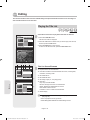
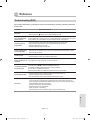
Setting Up the Language Options
DVD-Recorder
Language
No Disc
Programme
Audio
Setup
Subtitle
Disc Menu
On-Screen Menu
DivX Subtitle
Original
English
Français
Deutsch
Español
: Italiano
Western
Nederlands
Korean
MOVE
OK
RETURN
▲
If you set audio, subtitle, disc menu, on-screen menu and DivX
subtitle language in advance, they will come up automatically every
time you watch a movie.
1. With the unit in Stop mode/No Disc mode, press the MENU button.
2. Press the ▲▼ buttons to select Setup, then press the OK or ► button.
▼
EXIT
3. Press the ▲▼ buttons to select Language, then press the OK or ► button.
Language setup menu will be displayed.
4. Press the ▲▼ buttons to select the desired language option, then
press the OK or ► button.
• Audio : For the disc audio language.
• Subtitle : For the disc subtitles.
• Disc Menu : For the disc menu contained on the disc.
• On-Screen Menu : For the on-screen menu of your DVD Recorder & VCR.
• DivX Subtitle : Selecting a supported DivX subtitle language by region.
Western
Afrikaans, Basque, Catalan, Danish, Dutch, English, Faeroese,
Finnish, French, German, Icelandic, Indonesian, Italian, Malay,
Norwegian, Portuguese, Spanish, Swahili, Swedish
Central
English, Albanian, Croatian, Czech, Hungarian, Polish,
Romanian, Serbian (Latin), Slovak, Slovenian
Greek
English, Greek
Cyrillic
English, Azeri, Belarusian, Bulgarian, Kazakh,
Macedonian, Russian, Serbian, Tatar, Ukrainian, Uzbek
5. Press the ▲▼ buttons to select the desired language, then press the
OK or ► button.
■ If the selected language is not recorded on the disc, the original
pre-recorded language is selected.
■ The selected language will only appear if it is supported on the disc.
■ If the subtitle language is displayed in broken fonts, change DivX
Subtitle to the appropriate region. If it still does not work, the
format is not supported.
English - 24
01375B-VR350,355-UMG,XSG-ENG.ind24 24
2007-04-02 오후 4:58:02
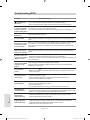
Setting Up the Audio Options
Allows you to setup the audio device and sound status settings
depending on the audio system in use.
You can also adjust the NICAM mode.
1. With the unit in Stop mode/No Disc mode, press the MENU button.
2. Press the ▲▼ buttons to select Setup, then press the OK or ► button.
3. Press the ▲▼ buttons to select Audio, then press the OK or ► button.
Audio setup menu will be displayed.
4. Press the ▲▼ buttons to select the desired audio option, then press
the OK or ► button.
5. Press the ▲▼ buttons to select the desired item, then press the OK or
► button.
Audio
▌ Digital Output
No Disc
Programme
Digital Output
Setup
DTS
: PCM
►
: Off
►
Dynamic Compression : On
►
NICAM
►
MOVE
OK
: On
RETURN
DVD-Recorder
EXIT
Audio
• PCM : Converts to PCM (2CH) 48kHz audio. Select PCM when using
the Analog Audio Outputs.
• Bitstream : Converts to Dolby Digital Bitstream. Select Bitstream when
using the Digital Audio Output.
System Setup
DVD-Recorder
■ Be sure to select the correct Digital Output or no audio will be heard.
▌ DTS
No Disc
Programme
Digital Output
: PCM
►
Setup
DTS
: Off
►
Dynamic Compression : On
►
NICAM
►
MOVE
OK
: On
RETURN
DVD-Recorder
EXIT
Audio
• Off : Doesn’t output digital signal.
• On : Outputs DTS Bitstream via digital output only. Select DTS when
connecting to a DTS Decoder.
■ When DTS soundtrack is played, sound is not output from Analog
Audio Output.
▌ Dynamic Compression
No Disc
Programme
Digital Output
: PCM
►
Setup
DTS
: Off
►
Dynamic Compression : On
►
NICAM
►
MOVE
OK
: On
RETURN
DVD-Recorder
EXIT
Audio
This is only active when a Dolby Digital signal is detected.
• On : When Movie soundtracks are played at low volume or from smaller
speakers, the system can apply appropriate compression to make
low-level content more intelligible and prevent dramatic passages
from getting too loud.
• Off : You can enjoy the movie with the standard Dynamic Range.
▌ NICAM
No Disc
Programme
Digital Output
: PCM
►
Setup
DTS
: Off
►
Dynamic Compression : On
►
NICAM
►
MOVE
OK
: On
RETURN
EXIT
NICAM programmes are divided into 3 types.
NICAM Stereo, NICAM Mono and Bilingual (transmission in another
language).
NICAM programmes are always accompanied by astandard mono
sound broadcast and you can select the desired sound.
• On : NICAM mode
• Off : Only set at this position to record the standard mono sound during
a NICAM broadcast if the stereo sound is distorted due to inferior
reception conditions.
English - 25
01375B-VR350,355-UMG,XSG-ENG.ind25 25
2007-04-02 오후 4:58:04
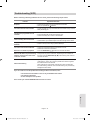
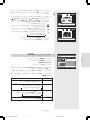
Setting Up the Display (Video) Options
This function allows you to setup the TV screen settings.
1. With the unit in Stop mode/No Disc mode, press the MENU button.
2. Press the ▲▼ buttons to select Setup, then press the OK or ► button.
3. Press the ▲▼ buttons to select Video, then press the OK or ► button.
Video option menu will be displayed.
4. Press the ▲▼ buttons to select the desired video option, then press
the OK or ► button.
5. Press the ▲▼ buttons to select the desired item, then press the OK or
► button.
System Setup
■ Press the RETURN or ◄ button to return to the previous menu.
Press the EXIT button to exit the menu.
DVD-Recorder
Video
▌ TV Aspect
No Disc
Programme
TV Aspect
: 16:9 Wide
►
Setup
3D Noise Reduction
: Off
►
DivX(R) Registration
MOVE
OK
►
RETURN
EXIT
Depending on the type of television you have, you may want to
adjust the screen setting. (aspect ratio)
• 4:3 Letter Box : Select this when you want to see all the 16:9 ratio
picture from the DVD, even though you have a TV with
a 4:3 ratio screen. Black bars will appear at the top
and bottom of the screen.
• 4:3 Pan - Scan : Select this for conventional size TV when you want to
see the central portion of the 16:9 screen. (Extreme
left and right side of movie picture will be cut off.)
• 16:9 Wide : You can view the full 16:9 picture on your wide-screen TV.
DVD-Recorder
Video
▌ 3D Noise Reduction (motion adaptive noise reduction)
No Disc
Programme
TV Aspect
: 16:9 Wide
►
Setup
3D Noise Reduction
: Off
►
DivX(R) Registration
►
• Off : Normal
• On : Provides a clear picture through noise reduction (for recording).
■ This function depends on disc type. It may not work for some disc
types.
MOVE
OK
RETURN
EXIT
English - 26
01375B-VR350,355-UMG,XSG-ENG.ind26 26
2007-04-02 오후 4:58:07
Progressive scan
If the TV supports Progressive Scan, press the P.SCAN button on
the front of the DVD Recorder & VCR to enjoy.
Setting up the Progressive scan
1. In Stop mode, press the P.SCAN button on the front of the DVD
Recorder & VCR.
The message “Press [Yes] to confirm Progressive scan mode.
Otherwise, press [No].” will appear.
2. Press the ◄► buttons to select Yes, and then press the OK button.
3. Set your TV to Progressive input (using the TV remote control.)
■ Progressive setting is only available when the DVD recorder is in
stop mode.
1. In Stop mode, press the P.SCAN button on the front of the DVD
Recorder & VCR.
The message “Press [Yes] to confirm Interlace scan mode. Otherwise,
press [No].” will appear.
2. Press the ◄► buttons to select Yes, and then press the OK button.
System Setup
Canceling the Progressive scan
3. Set your TV to Interlace input (using the TV remote control.)
▌ HDMI/DVI Resolution (DVD-VR355 only)
DVD-Recorder
Video
No Disc
Programme
TV Aspect
: 16:9 Wide
►
Setup
3D Noise Reduction
: Off
►
HDMI/DVI Resolution
:576P
DivX(R) Registration 720P
√
1080i
This setting is used when the unit is connected by HDMI or DVI with
Display devices (TV, projector, etc).
• 576P : 720 x 576
• 720P : 1280 x 720
• 1080i : 1920 x 1080
MOVE
OK
RETURN
EXIT
Output selection (DVD-VR355 only)
• Connect the DVD Recorder & VCR to your TV via HDMI or DVI. Set
your TV's input to HDMI or DVI.
• Press the P.SCAN button while the unit is in Stop mode to select the
output resolution.
- If your TV is connected the HDMI or DVI cable, the output resolution
mode changes in the following sequence each time you press the
P.SCAN button:
→ 576p → 720p → 1080i
- If your TV is connected the AV or component cables(without HDMI/
DVI cable), the output resolution mode toggles 576p/576i in turn.
• HDMI/DVI cable does not support 576i. Video with 576i resolution can only
be viewed through the analog outputs (Composite/S-Video/Component).
English - 27
01375B-VR350,355-UMG,XSG-ENG.ind27 27
2007-04-02 오후 4:58:09
System Setup
■ Even if HDMI/DVI cable is connected to your TV, the AV
connection outputs only 576i and the component connection
outputs only 576p irrespective of the on-screen display.
■ Progressive scan automatically activates when HDMI is
connected. (Please make sure PS is indicated on the front
panel of the DVD Recorder & VCR.)
■ There will be no HDMI video and audio outputs unless
progressive scan function is activated.
■ Consult your TV User’s Manual to find out if your TV supports
Progressive Scan.
If Progressive Scan is supported, follow the TV User’s Manual
regarding Progressive Scan settings in the TV’s menu system.
■ If Video Output is set incorrectly, the screen may be blocked.
■ The resolutions available for HDMI/DVI output depend on the
connected TV or projector. For details, see the user’s manual of
your TV or projector.
■ When the resolution is changed it may take a few seconds for a
normal image to appear.
■ If you set the HDMI output resolution 720p or 1080i, HDMI output
provides better picture quality.
DVD-Recorder
Video
No Disc
Programme
Setup
TV Aspect
: 16:9 Wide
Video On Demand
3DDivX(R)
Noise Reduction
: Off
►
►
Your Output
registration code: Component
is :
Video
XXXXXXXX
To learn more, visit www.divx.com/vod
►
▌ DivX(R) Registration
Please use the Registration code to register this DVD Recorder with
the DivX(R) Video On Demand format.
To learn more, visit www.divx.com/vod
Done
MOVE
OK
RETURN
EXIT
English - 28
01375B-VR350,355-UMG,XSG-ENG.ind28 28
2007-04-02 오후 4:58:10
Setting Up the Parental Control
DVD-Recorder
Parental Control
No Disc
Programme
Password
:Off
Off
√
On
Setup
MOVE
OK
RETURN
EXIT
The Parental Control function works in conjunction with DVDs that have
been assigned a rating - which helps you control the types of DVDs that
your family watches. There are up to 8 rating levels on a disc.
1. With the unit in Stop mode/No Disc mode, press the MENU button on
the remote control.
2. Press the ▲▼ buttons to select Setup, then press the OK or ► button.
3. Press the ▲▼ buttons to select Parental Control, then press the OK
or ► button.
• The ‘Create the password’ message will be displayed.
4. Enter the 4-digit password using the 0 to 9 buttons on the remote
control.
• The ‘Confirm the password’ message will be displayed.
■ Refer to Troubleshooting if you forgot your password. (See page 78)
DVD-Recorder
Parental Control
System Setup
5. Enter your password again, and then press the OK or ► button.
6. Press the ▲▼ buttons to select On, then press the OK or ► button.
The Parental Control screen appears.
▌ About the Rating Level
No Disc
Programme
Password
√
Setup
Rating Level
√
:On
Level 8 Adults
: Level
Level 71 Kids
Level 6
Change Password Level 5
Level 4
Level 3
Level 2
Level 1 Kids
MOVE
OK
RETURN
DVD-Recorder
√
EXIT
Parental Control
1. Press the ▲▼ buttons to select Rating Level, then press the OK or
► button.
2. Press the ▲▼ buttons to select the rating level you want, then press
the OK or ► button.
For example, if you select up to Level 6, discs that contain Level 7, 8
will not play. A larger number indicates that the programme is intended
for adult use only.
▌ About the Change Password
No Disc
Programme
Password
: On
►
Setup
Rating Level
: Level 1 Kids
►
Change Password
MOVE
OK
RETURN
►
EXIT
1. Press the ▲▼ buttons to select Change Password, then press the
OK or ► button.
• The ‘Enter the password.’ message will be displayed.
2. Enter the 4-digit password using the number buttons on the remote
control.
• The ‘Confirm the password.’ message will be displayed.
3. Enter your password again using the 0 to 9 buttons on the remote
control.
■ Press the RETURN or ◄ button to return to the previous menu.
Press the EXIT button to exit the menu.
English - 29
01375B-VR350,355-UMG,XSG-ENG.ind29 29
2007-04-02 오후 4:58:12
VCR Setting
This function allows you to setup the VCR setting.
1. With the unit in Stop mode/No Disc mode, press the MENU button.
2. Press the ▲▼ buttons to select Setup, then press the OK or ► button.
3. Press the ▲▼ buttons to select System, then press the OK or ► button.
4. Press the ▲▼ buttons to select VCR, then press the OK or ► button.
5. Press the ▲▼ buttons to select the desired VCR option, then press
the OK or ► button.
6. Press the ▲▼ buttons to select the desired item, then press the OK or
► button.
DVD-Recorder
System
▌ Tape Length
System Setup
No Disc
Programme
Tape Length
:E180
E180
√
Setup
Auto Play
:E240
On
√
Auto Repeat
:E280
Off
√
IPC
:E300
On
►
Colour System
: Automatic
MOVE
OK
RETURN
DVD-Recorder
►
This information is usually printed on the tape box. The menu cycles
through: E180, E240, E280, E300. Once the type of cassette is set,
the VCR can display the amount of time remaining on the tape when
you press the INFO button.
EXIT
System
▌ Auto Play
No Disc
Programme
Tape Length
: E180
►
Setup
Auto Play
:Off
On
√
:On
Off
√
Auto Repeat
IPC
: On
►
Colour System
: Automatic
►
MOVE
OK
RETURN
EXIT
If you want your videotapes to play automatically when you insert
them, turn on Auto Play.
• On - The VCR will automatically begin playing a video tape when it
is inserted, as long as the safety tab of the cassette has been
removed.
• Off - Auto play is disabled.
DVD-Recorder
System
▌ Auto Repeat
No Disc
Programme
Tape Length
: E180
►
Setup
Auto Play
: On
►
Auto Repeat
:Off
Off
√
IPC
:On
On
√
Colour System
: Automatic
MOVE
OK
RETURN
DVD-Recorder
It sets the VCR to play a tape repeatedly (unless a tape control is
activated : Stop, Fast Forward or Rewind).
►
EXIT
System
▌ IPC (Intelligent Picture Control)
No Disc
Programme
Tape Length
: E180
►
Setup
Auto Play
: On
►
Auto Repeat
: Off
►
IPC
Off
On
√
Colour System
On
Automatic
√
The intelligent Picture Control Feature allows you to adjust the sharpness
of the image automatically, according to your own preferences.
• On - the sharpness of the image is adjusted automatically.
• Off - To adjust the sharpness manually
MOVE
OK
RETURN
EXIT
English - 30
01375B-VR350,355-UMG,XSG-ENG.ind30 30
2007-04-02 오후 4:58:14
▌ Colour System
DVD-Recorder
System
No Disc
Programme
Tape Length
Setup
: E180
►
Auto Play
: On
►
Auto Repeat
: Off
►
IPC
: Automatic
On
√
Colour System
: PAL
Automatic
√
MESECAM
OK
• Automatic : When playing back a tape, the system standard is
automatically selected by the DVD Recorder & VCR.
• PAL : PAL video system
B/W
MOVE
Before recording or playing back a tape, you can select the required
system standard.
RETURN
EXIT
• MESECAM
• B/W : Black and White.
DVD EP Mode Time
DVD-Recorder
System
No Disc
Programme
VCR
Setup
Hours
DVD EP Mode Time : 6AV1
√
Hours
: 8Off
√
You can set the EP (Extended Play) mode’s time setting to 6 or 8
hours.
►
Quick Recording : Off
►
1. With the unit in Stop mode/No Disc mode, press the MENU button.
2. Press the ▲▼ buttons to select Setup, then press the OK or ► button.
3. Press the ▲▼ buttons to select System, then press the OK or ► button.
MOVE
OK
RETURN
EXIT
4. Press the ▲▼ buttons to select DVD EP Mode Time, then press the
OK or ► button.
5. Press the ▲▼ buttons to select 6 Hours or 8 Hours, then press the
OK or ► button.
System Setup
Chapter Creator
Automatic Chapter Creator
(V mode)
Do you want to create the chapter menu
after this recording?
Yes
A DVD-Video consists of ‘Titles’ and ‘Chapters’.
When you record one programme, it makes one Title.
If you use this function, the Title will be divided into Chapters.
No
1. With a disc inserted and the unit in Stop mode, press the MENU button.
2. Press the ▲▼ buttons to select Setup, then press the OK or ► button.
3. Press the ▲▼ buttons to select System, then press the OK or ► button.
4. Press the ▲▼ buttons to select Chapter Creator, then press the OK
or ► button.
5. Press the ▲▼ buttons to select On, then press the OK or ► button.
Press the EXIT button to exit the menu.
6. Set the recording speed by pressing the REC SPEED button on the
remote control (See page 50 for more information on recording speeds).
7. Press the REC button to start recording. The message “Do you want to
create the chapter menu after this recording?” is displayed.
8. Press the ◄► buttons to select Yes and press the OK button and
recording begins. In XP and SP mode, you must record at least 5
minutes to create a chapter. In LP and EP mode, 15 minutes.
English - 31
01375B-VR350,355-UMG,XSG-ENG.ind31 31
2007-04-02 오후 4:58:16
9. Press the STOP button to stop recording.
10. To display the created titles, finalise the disc (See page 75) and then
press the TITLE MENU button. The title menu will be displayed.
1/1
JAN/01/2007
09:41 PR1
JAN/01/2007
09:45 PR1
JAN/01/2007
09:50 PR1
JAN/01/2007
12:00 PR1
JAN/01/2007
12:30 PR1
JAN/01/2007
12:40 PR1
Previous
Top
11. To display the created chapters, select the desired Title and then
press the DISC MENU button. The chapter menu for the selected
Title will be displayed.
■ On DVD-RW discs, additional chapters and titles can be added
to a finalised disc by unfinalising and recording again. On DVD-R
discs, once finalised, no additional chapters or titles can be
recorded.
Next
CHAPTER
1/1
1
2
3
■ The Automatic Chapter Creator function does not work during
Timer Recording or when you turn the power off.
■ The DVD-R disc cannot be unfinalised.
Top
Next
System Setup
Previous
Quick Recording
DVD-Recorder
System
No Disc
Programme
VCR
Setup
DVD EP Mode Time : 6 Hours
►
Chapter Creator
: Off
►
Quick Recording
: Off
On
√
If this function is set to on, the DVD Recorder & VCR will power on
quickly, which enables you to immediatedly record a desired channel.
►
On
1. With the unit in Stop mode/No Disc mode, press the MENU button.
2. Press the ▲▼ buttons to select Setup, then press the OK or ► button.
3. Press the ▲▼ buttons to select System, then press the OK or ► button.
MOVE
OK
RETURN
4. Press the ▲▼ buttons to select Quick Recording, then press the OK
or ► button.
EXIT
5. Press the ▲▼ buttons to select On, then press the OK or ► button.
■ The Quick Recording is set to Off as default.
■ If this function is set to on, power consumption will be increased
when the unit is powered off.
Anynet+(HDMI-CEC) (DVD-VR355 only)
DVD-Recorder
System
No Disc
Programme
VCR
Setup
DVD EP Mode Time : 6 Hours
►
Chapter Creator
: Off
►
Quick Recording
: Off
►
Off
Anynet+(HDMI-CEC)Off
►
►
On
MOVE
OK
RETURN
EXIT
Anynet+ is a function that can be used to operate the recorder using a
Samsung TV remote control, by connecting the DVD Recorder & VCR to a
SAMSUNG TV using an HDMI Cable. (see page 20) (This is only available
with SAMSUNG TVs that support Anynet+.)
1. With the unit in Stop mode/No Disc mode, press the MENU button on
the remote control.
2. Press the ▲▼ buttons to select Setup, then press the OK or ► button.
3. Press the ▲▼ buttons to select System, then press the OK or ► button.
The system menu will be displayed.
4. Press the ▲▼ buttons to select Anynet+(HDMI-CEC), then press the
OK or ► button.
Anynet+(HDMI-CEC) items will be displayed.
5. Press the ▲▼ buttons to select On, then press the OK or ► button.
English - 32
01375B-VR350,355-UMG,XSG-ENG.ind32 32
2007-04-02 오후 4:58:18
For using Anynet+(HDMI-CEC)
1. Connect DVD Recorder & VCR to the TV by using HDMI cable. (See
page 20)
2. Set the Anynet+(HDMI-CEC) to “On” on your DVD Recorder & VCR.
(see above)
3. Set the Anynet+ function on your TV.
(See the TV instruction manual for more information.)
• You can operate the DVD Recorder & VCR by using TV remote control.
(TV buttons that can be used to control the DVD Recorder & VCR :
DVDR
View TV
Z
Select Device
Z
Record
Z
Menu on Device
Z
Device Operation
Z
Receiver
Z
: Off
Setup
Move
Exit
,
,
,
,
and
,
buttons,
~
,
,
button)
• When you press Anynet+ button on the TV remote control, the OSD to the
left will appear.
- Select Device : Use this option to select device.
- Record : Use this option to start recording or stop recording.
Z
Ok
TV Menu
■ By pressing the PLAY button of the recorder while watching TV,
the TV screen will change to the play screen.
System Setup
- Menu on Device : Same as MENU button ( ) on the DVD Recorder &
VCR remote control.
- Device Operation : Same as ANYKEY button ( ) on the DVD Recorder
& VCR remote control.
■ If you play a DVD when the TV power is off, the TV will power On.
■ If you turn the TV off, the DVD Recorder & VCR will power off
automatically.(When the DVD recorder & VCR is recording, it
can't be powered off.)
■ If you change the HDMI to other sources(Composite, Component,
RF... etc) in TV while playing the DVD disc, the DVD Recorder
& VCR will stop playing. The DVD Recorder & VCR may keep
playing certain discs based on their content.
English - 33
01375B-VR350,355-UMG,XSG-ENG.ind33 33
2007-04-02 오후 4:58:28
Playback
This section introduces basic functions of playback
by disc type.
Disc
Types
Read the following information before playing a disc.
MP3
MPEG4
Region code (DVD-Video only)
Disc Logo Recorded
Disc Shape Max. Playing Time
content content
Single sided(5”)
MP3 Audio
Single sided(3.5”)
MPEG4 Movie
Single sided(5”)
Single sided(3.5”)
1hr (XP: Excellent Quality)
Both the DVD Recorder & VCR and the discs
are coded by region. These regional codes
must match in order for the disc to play. If the
codes do not match, the disc will not play. The
Region Number for this DVD Recorder & VCR
is described on the rear panel of the DVD
Recorder & VCR.
Logos of Discs that can be played
Single sided(5”) 2 hrs (SP: Standard Quality)
(4.7GB)
4 hrs (LP: Long Playback)
DVD-RAM
6 or 8 hrs (EP:Extended)
VIDEO
AUDIO
2 hrs (XP: Excellent Quality)
Double sided(5”) 4 hrs (SP: Standard Quality)
(9.4GB)
8 hrs (LP: Long Playback)
12 or 16 hrs (EP:Extended)
DVD-RW
VIDEO
AUDIO
5” (4.7GB)
1hr (XP: Excellent Quality)
2 hrs (SP: Standard Quality)
4 hrs (LP: Long Playback)
6 or 8 hrs (EP:Extended)
Playback
Dolby Digital
DTS
Single
Layer(5”)
(4.7GB)
Digital Audio
DVD-R
Stereo
VIDEO
AUDIO
1hr (XP: Excellent Quality)
2 hrs (SP: Standard Quality)
4 hrs (LP: Long Playback)
6 or 8 hrs (EP:Extended)
2 hrs (XP: Excellent Quality)
Dual Layer(5”) 4 hrs (SP: Standard Quality)
(8.5GB)
8 hrs (LP: Long Playback)
PAL broadcast system
in U.K, France,
Germany, etc.
11 or 15 hrs (EP:Extended)
1hr (XP: Excellent Quality)
DVD+RW
VIDEO
AUDIO
5” (4.7GB)
2 hrs (SP: Standard Quality)
4 hrs (LP: Long Playback)
6 or 8 hrs (EP:Extended)
DivX
1hr (XP: Excellent Quality)
MP3
Single Layer(5”) 2 hrs (SP: Standard Quality)
(4.7GB)
4 hrs (LP: Long Playback)
DVD+R
Disc types that can be played
Disc
Types
Disc Logo Recorded
Disc Shape Max. Playing Time
content content
Single sided(5”)
240 min.
DVDVIDEO
VIDEO Double sided(5”)
AUDIO Single sided(3.5”)
480 min.
Double sided(3.5”)
160 min.
VCD
VIDEO Single sided(5”)
AUDIO Single sided(3.5”)
74 min.
Single sided(5”)
74 min.
Single sided(3.5”)
20 min.
Single sided(5”)
-
Single sided(3.5”)
-
AUDIO-CD
JPEG
AUDIO
JPEG Image
VIDEO
AUDIO
6 or 8 hrs (EP:Extended)
2 hrs (XP: Excellent Quality)
Dual Layer(5”) 4 hrs (SP: Standard Quality)
(8.5GB)
8 hrs (LP: Long Playback)
11 or 15 hrs (EP:Extended)
80 min.
20 min.
English - 34
01375B-VR350,355-UMG,XSG-ENG.ind34 34
2007-04-02 오후 4:58:33
▌ Discs that cannot be played
● DVD-Video with a region number other than “2” or “ALL”
● 3.9 GB DVD-R Disc for Authoring.
● A DVD±R/DVD-RW(V) disc which has been recorded and not finalised
in a different manufacturer’s recorder.
● DVD-ROM/PD/MV-Disc, etc
● CVD/CD-ROM/CDV/CD-G/CD-I
■ This DVD Recorder & VCR can only operate with discs that are
compatible with DVD-RAM Standard Version 2.0.
■ Playback and/or recording may not work for some types of discs,
or when specific operations, such as angle change and aspect
ratio adjustment, are being performed. Information about the discs
is written in detail on the box. Please refer to this if necessary.
■ Do not allow the disc to become dirty or scratched, fingerprints,
dirt, dust, scratches or deposits of cigarette smoke on the
recording surface may make it impossible to use the disc for
recording.
■ DVD-RAM/±RW/±R discs may not be able to play on some DVD
players, depending on the player, disc and the condition of the
recording.
■ Discs with NTSC programmes recorded on them can be played
but cannot be recorded using this product.
Playing a Disc
Playback
1. Press the OPEN/CLOSE button.
2. Place a disc gently into the tray with the disc’s label facing up.
3. Press OPEN/CLOSE button to close the disc tray.
• Your DVD Recorder & VCR closes the disc tray and plays the disc
automatically.
• The recorder does not play discs automatically after being powered
on initially.
• When the recorder is powered on and a disc is in the tray, the unit will
be activated and wait in stop status. Press the PLAY button to start
playback.
4. Press the STOP button to stop playback.
■ When you stop playing a disc, the DVD Recorder & VCR
remembers where you stopped, When you press the PLAY
button again, it will pick up where you left off. (unless the disc
is removed or the DVD Recorder & VCR is unplugged, or if you
press the STOP button twice.)
■ Do not move your DVD Recorder & VCR while playing, as this
may cause damage to the disc.
■ Make sure to press the OPEN/CLOSE button to open or close
the disc tray.
■ Do not push the disc tray while it is being opened or closed, as
this may cause a product malfunction.
■ Do not place foreign materials on or in the disc tray.
■ Some functions may perform differently or be disabled depending
on the disc type. If this occurs, refer to the instructions written on
the disc case.
■ Be especially careful that children’s fingers are not caught
between the disc tray and the tray chassis when it closes.
■ After turning power on, it will take a few seconds until the DVD
Recorder & VCR operates.
English - 35
01375B-VR350,355-UMG,XSG-ENG.ind35 35
2007-04-02 오후 4:58:35
Using the Disc Menu and Title Menu
Some discs contain a dedicated menu system that allows you to
select special functions for title, chapters, audio track, subtitles,
film previews, information on characters, etc.
▌ For DVD-VIDEO disc
Disc Menu : Press the DISC MENU button to enter the disc menu of the disc.
• Move to the setup menu related to playback operation.
• You can select audio language and subtitle etc. provided
by the disc.
• When playing a VCD2.0, you can choose Menu On or
Menu Off by using the DISC MENU button.
Title Menu : Press the TITLE MENU button to move to the title menu of the disc.
• Use this button if the disc contains more than one title.
Some discs may not support the title menu.
Playback
▌ For DVD-RAM/DVD±RW/DVD±R disc
Title List
Press the TITLE LIST button to display title list.
The Title List is simply a list of titles on a disc. If a title cannot be played again.
Playlist (DVD-RAM/-RW(VR))
Press the PLAY LIST button to display playlist.
A playlist is a custom-made list of titles.
When one playlist is played, only the titles withn the playlist will play and then
stop. Even if that playlist is deleted, the original recording will not be deleted.
Using the Search & Skip Functions
▌ Searching through a Chapter or Track
During playback, press the SEARCH ◄◄ or ►► button on the remote
control. Each time you press the SEARCH button, the playback speed
will change as follows.
►► Fast 1/◄◄ Fast 1
DVD-VIDEO/DVD-RAM/
►► Fast 3/◄◄ Fast 3
DVD±RW/DVD±R
►► Fast 5/◄◄ Fast 5
MPEG4
Fast 1
AUDIO CD (CD-DA)
X2
VCD
Fast 1
Fast 2
X4
►► Fast 2/◄◄ Fast 2
►► Fast 4/◄◄ Fast 4
►► Fast 6/◄◄ Fast 6
Fast 3
X8
Fast 2
Fast 3
• You can scan the programme in reverse order. To return to normal
speed playback, press the ►ll button.
English - 36
01375B-VR350,355-UMG,XSG-ENG.ind36 36
2007-04-02 오후 4:58:36
■ No sound is heard during Scan (Search) mode, except CDs (CDDA). (You can hear the sound during forward search (Fast 1) in
disc.)
No sound is heard during scanning in all MPEG4 and VCD
modes. Depending on the disc type, the sound quality may lower
during Fast 1 mode.
▌ Skipping Chapters or Tracks
During playback, press the l◄◄ or ►►l button on the remote control.
• If you press the l◄◄ button
If you press the l◄◄ button, it moves to the beginning of the chapter,
track or marker (DVD-RAM/-RW(VR mode)).
Pressing the button once again within 3 seconds returns to the
beginning of the previous chapter, track or marker (DVD-RAM/-RW(VR
mode)).
• If you press the ►►l button
If you press the ►►l button, it moves to the next chapter, track or
marker (DVD-RAM/-RW(VR mode)).
▌ Skipping ahead 30 seconds
Playback
In play mode, press F.ADV/SKIP button to skip ahead exactly 30
seconds.
Slow Motion Play/Step Motion Play
▌ Slow Motion Play
During Still mode, press the SEARCH ◄◄ or ►► button on the remote
control for more than 1 second.
• Each time you press the ►► button :
l► Slow 1 l► Slow 2 l► Slow 3
• Each time you press the ◄◄ button :
◄l Slow 1 ◄l Slow 2 ◄l Slow 3
To return to normal speed playback, press the ►ll button.
■ Slow motion can play only in the forward direction on MPEG4
and VCD discs.
English - 37
01375B-VR350,355-UMG,XSG-ENG.ind37 37
2007-04-02 오후 4:58:38
▌ Step Motion Play
During Still mode, press the F.ADV/SKIP button on the remote control.
• Each time the button is pressed, a new frame will appear.
To return to normal speed playback, press the ►ll button.
■ No sound is heard during STEP or SLOW mode.
Using the ANYKEY button
The ANYKEY functions allows you to easily search for a desired
scene by accessing title, chapter, track and time. You can also
change the subtitle and audio settings and set some features
including Repeat, Angle and Zoom.
▌ Moving to a desired scene directly
DVD-VIDEO
Title
1/2
Chapter 1/28
Time
00:00:11
Subtitle ENG
Audio ENG
D 5.1CH
Playback
Repeat Off
Angle 1/1
Zoom Off
MOVE
CHANGE
• If you want to move to a certain title, chapter or time, use this function.
1. Press the ANYKEY button during playback.
2. Press the ▲▼ buttons to select a Title, a Chapter or a Time.
3. Press the ◄► buttons or number (0~9) buttons to select the desired scene.
(In case of searching a time, enter the time in the sequence of hours,
minutes, seconds using the number buttons.)
Then, press the OK button.
■ This may not work for some discs. When an audio CD (CDDA) or an MP3 disc is inserted, according to the disc type, the
information display may not be appear.
■ The Time Search function does not operate on some discs.
■ To make the sub-menu disappear, press the ANYKEY or
RETURN button again.
■ When VCD2.0 is in Menu Off mode only, this function works.
(see page 36)
English - 38
01375B-VR350,355-UMG,XSG-ENG.ind38 38
2007-04-02 오후 4:58:39
Repeat Play
▌ Playing Repeatedly
DVD-VIDEO
Title
1/2
Chapter 1/28
Time
00:00:27
Subtitle ENG
Audio ENG
D 5.1CH
Repeat Off
1. Press the ANYKEY button during playback.
Angle 1/1
Zoom Off
2. Press the ▲▼ buttons to select Repeat.
MOVE
CHANGE
3. Select repeat mode using ◄► button, then press the OK button.
■ DVD-RAM/-RW(VR mode), unfinalised DVD-RW(V mode) and
unfinalised DVD±R do not repeat a chapter.
■ To make the sub-menu disappear, press the ANYKEY or
RETURN button again.
■ When VCD2.0 is in Menu Off mode only, this function works.
(see page 36)
▌ Playing a Certain section Repeatedly
DVD-VIDEO
Title
1/2
Chapter 1/28
Time
00:00:52
Subtitle ENG
Audio ENG
D 5.1CH
Repeat Off
1. Press the ANYKEY button during playback.
Angle 1/1
Zoom Off
2. Press the ▲▼ buttons to select Repeat.
MOVE
CHANGE
A-B
4. Press the OK button at the point where you want the repeat play to
start (A) and press it again at the point where you want the repeat play
to stop (B). Repeat playback of the A-B section starts.
- To return to normal playback Press the CANCEL button to return to normal playback.
Playback
Repeat A-B
3. Press the ◄► button to select the A-B, then press the OK button.
■ If you set point (B) before five seconds has lapsed, the prohibition
mark ( ) will appear.
■ Audio CDs (CD-DA), MP3 and MPEG4 discs do not support the
Repeat A-B function.
■ When VCD2.0 is in Menu Off mode only, this function works.
(see page 36)
Selecting the Subtitle Language
DVD-VIDEO
Title
1/2
Chapter 1/28
Time
00:00:57
Subtitle ENG
Audio ENG
D 5.1CH
Repeat Off
Angle 1/1
Zoom Off
MOVE
Subtitle languages may not work depending on the disc type. This
is only available during playback.
You can also operate this function by pressing the SUBTITLE button
on the remote control.
CHANGE
1. Press the ANYKEY button during playback.
2. Press the ▲▼ buttons to select Subtitle, then press the ◄► buttons
to select the desired subtitle language.
■ The subtitle display may be different depending on the disc type.
■ Some discs allow you to select the language for the disc menu only.
■ To make the sub--menu disappear,press the ANYKEY or
RETURN button again.
English - 39
01375B-VR350,355-UMG,XSG-ENG.ind39 39
2007-04-02 오후 4:58:41
Selecting the Audio language
DVD-VIDEO
Title
1/2
Chapter 1/28
Time
00:01:03
Subtitle ENG
Audio ENG
D 5.1CH
Repeat Off
Angle 1/1
Zoom Off
MOVE
Audio languages may not work depending on the disc type. This is
only available during playback.
You can also operate this function by pressing the AUDIO button on
the remote control.
CHANGE
1. Press the ANYKEY button during playback.
2. Press the ▲▼ buttons to select Audio, then press the ◄► buttons to
select the desired audio language.
■ Audio languages may be different because they are disc-specific.
■ Some discs allow you to select the audio language for the disc
menu only.
■ To make the sub-menu disappear, press the ANYKEY or
RETURN button again.
Changing the Camera Angle
DVD-VIDEO
Title
1/2
Chapter 1/28
Time
00:01:01
Playback
Subtitle ENG
Audio ENG
D 5.1CH
Repeat Off
Angle 1/3
Zoom Off
MOVE
CHANGE
If a DVD-VIDEO contains multiple angles of a particular scene, you can
use the Angle function.
If the disc contains multiple angles, the ANGLE appears on the screen.
1. Press the ANYKEY button during playback.
2. Press the ▲▼ buttons to select Angle, then press the ◄► buttons or
number (0~9) buttons to select the desired angle scene.
■ This function is disc-dependent, and may not work all DVDs.
■ This function does not work when a DVD has not been recorded
with a multi-camera angle system.
■ To make the sub-menu disappear, press the ANYKEY or
RETURN button again.
Zooming-In
1. Press the ANYKEY button during playback.
2. Press the ▲▼ buttons to select Zoom, then press the OK button.
( ) will be displayed.
3. Press ▲▼, ◄► buttons to move to the area you want to enlarge.
4. Press the OK button.
• Each time the OK button is pressed, the picture is enlarged up to 4X
(four times the normal size). :
DVD-VIDEO/DVD-RAM/DVD±RW/DVD±R
normal size → X2 → X4 → X2 → normal size
VCD
normal size → X2 → normal size
■ When VCD2.0 is in Menu Off mode only, this function works.
(see page 36)
English - 40
01375B-VR350,355-UMG,XSG-ENG.ind40 40
2007-04-02 오후 4:58:44
Using the Bookmarks
Bookmark
1 2 - - - - - - - --
(V mode)
Set marks at scenes you want to see again so that you can start
playback from the marked position.
▌ Setting Bookmarks
MOVE
PLAY
CLEAR
RETURN
1. Press the MARKER button during playback.
2. Press the OK button when the desired scene appears.
• The number 1 is displayed and the scene is memorized.
3. Press the ◄► button to move to the next position.
4. Press the OK button again when the desired scene appears.
• The number 2 is displayed and the scene is memorized. Repeat
above to bookmark other positions. You can bookmark up to 10
scenes.
Bookmark
1 2 - - - - - - - --
▌ Playing back a Bookmark
1. Press the MARKER button.
2. Press the ◄► buttons to select a bookmarked scene.
MOVE
Bookmark
PLAY
CLEAR
RETURN
1 2 - 4 5 - - - --
Playback
3. Press the OK or ►ll button to start playing from the selected scene.
▌ Clearing a Bookmark
1. Press the MARKER button.
2. Press the ◄► buttons to select a bookmarked scene.
3. Press the CANCEL button to delete the selected bookmark.
MOVE
OK
RETURN
■ When the disc tray is opened and then closed, bookmarks will
disappear.
■ When VCD2.0 is in Menu Off mode only, this function works.
(see page 36)
English - 41
01375B-VR350,355-UMG,XSG-ENG.ind41 41
2007-04-02 오후 4:58:47
Using the Markers
Marker
01 02 - - - - - - - -- N : 2
(VR mode)
▌ Setting Markers
1. Press the MARKER button during playback.
MOVE
PLAY
CLEAR
RETURN
2. Press the OK button when the desired scene appears.
• The number 01 is displayed and the scene is memorized.
3. Press the ◄► button to move to the next position.
4. Press the OK button again when the desired scene appears.
• The number 02 is displayed and the scene is memorized.
• DVD-RAM or DVD-RW(VR Mode) discs have the Marker function
instead of the Bookmark function. The Marker function allows you to
mark up to 99 scenes. Since the scenes may be displayed as many
different pages, numbering is necessary. If a disc in use is encoded
with disc Protect, Markers cannot be set or delete.
Only playback is available.
Marker
01 02 - - - - - - - -- N : 2
▌ Playing back a Marker
Playback
1. Press the MARKER button during playback.
2. Press the ◄► buttons to select a marked scene.
MOVE
Marker
PLAY
CLEAR
RETURN
01 02 03 04 05 06 07 08 09 10 N : 10
3. Press the OK or ►ll button to start playing from the selected scene.
• If you press the NEXT SKIP (►►l) button or the PREVIOUS SKIP
(l◄◄) button in marker mode, When the next or current marked
point plays for shorter than three seconds, playback starts from the
previous marked point.
▌ Clearing a Marker
1. Press the MARKER button during playback.
Marker
MOVE
01 02 03 04 05 06 07 08 09
PLAY
CLEAR
N:9
RETURN
2. Press the ◄► buttons to select a marked scene.
Press the CANCEL button to delete the selected mark.
• When a marker is cleared while DVD-RAM/DVD-RW(VR mode) is
playing, marker numbers will change. For example, if the 7th marker
is cleared after ten markers are registered, the marker numbers after
the eighth will automatically move ahead by one and the 8th marker
becomes the 7th.
■ When VCD2.0 is in Menu Off mode only, this function works.
(see page 36)
English - 42
01375B-VR350,355-UMG,XSG-ENG.ind42 42
2007-04-02 오후 4:58:50
Playing back an Audio CD (CD-DA)/MP3
1
2
3
3
4
6
▌ Buttons on the Remote Control used for Audio
CD(CD-DA)/MP3 playback
1. l◄◄ button : Returns to the beginning of the current track when
pressed during playback.
If pressed again, your DVD recorder moves to and plays the previous
track.
If you press this button within three seconds after playback starts, the
previous track will be played.
If you press this button after three seconds, the current track will be
replayed from the beginning.
5
7
8
7
2. ►►l button : Plays the next track.
3. Press the (◄◄ /►►) buttons : Fast Play (X2, X4, X8) (Audio CD only)
9
4. button : Stops a track (song).
5. RETURN button : Moves to the folder to which the current song
belongs.
6. ►ll button : Plays a track (song) or Still playback.
7. ▲▼ button : Selects a track (song).
8. ►, OK button : Plays the selected track (song).
9. ANYKEY button : To display the play mode window. (Repeat or Play Option).
▌ Playing back an Audio CD (CD-DA)
Music List
TRACK 1
01/15
No.
002
003
004
005
006
007
► 0:00:15
TRACK 1
CDDA
PLAY MODE
d
Title
TRACK 1
TRACK 2
TRACK 3
TRACK 4
TRACK 5
TRACK 6
TRACK 7
MOVE
RETURN
OK
1. Insert an audio CD (CD-DA) into the disc tray.
• The audio CD menu appears and the tracks (songs) are played
automatically.
Length
0:03:50
0:04:00
0:03:49
0:03:47
0:04:29
0:03:44
0:03:44
2. Press the ▲▼ buttons to select the track (song) to start playback from,
and then press the OK button.
EXIT
f
c
CD
Playback
CD
Audio CD (CD-DA) Screen Elements
Music List
TRACK 1
01/15
No.
► 0:00:15
TRACK 1
CDDA
PLAY MODE
002
003
004
005
006
007
MOVE
Title
TRACK 1
TRACK 2
TRACK 3
TRACK 4
TRACK 5
TRACK 6
TRACK 7
OK
Length
0:03:50
0:04:00
0:03:49
0:03:47
0:04:29
0:03:44
0:03:44
RETURN
EXIT
e
1. Play mode icon.
2. Current track (song) : Displays the number of the track currently
being played.
g
3. Displays the current play index and total track number.
h
4. This shows the operating state of a disc and a playback time
corresponding to a portion that is currently played.
5. Displays the track list (song list) and the playing time of each track.
6. Button display
English - 43
01375B-VR350,355-UMG,XSG-ENG.ind43 43
2007-04-02 오후 4:58:52
▌ Playing back an MP3 Disc
MP3
Music List
1. Insert an MP3 Disc into the disc tray.
01/11
SONG01
No.
SONG01
3.5MB
01/26/2007
002
003
004
005
006
PLAY MODE
MOVE
► 0:00:06
MP3
2. Press the ▲▼ buttons to select the Disc Navigation, and then press
the OK or ► button.
Title
ROOT
SONG01
SONG02
SONG03
SONG04
SONG05
SONG06
3. Press the ▲▼ buttons to select the Music, and then press the OK or
► button.
RETURN
OK
4. Press the ▲▼ buttons to select the track (song) you want to hear, and
then press the OK button.
EXIT
d fi
c
MP3
MP3 Screen Elements
Music List
SONG01
No.
SONG01
3.5MB
01/26/2007
002
003
004
005
006
PLAY MODE
MOVE
► 0:00:06
MP3
e
01/11
Title
g
RETURN
OK
1. Play mode icon.
2. Current track (song) : Displays the name of the track being played.
ROOT
SONG01
SONG02
SONG03
SONG04
SONG05
SONG06
EXIT
h
3. Displays the current play index and total file number.
4. This shows the operating state of a disc and a playback time
corresponding to a portion that is currently played.
5. Displays the mp3 file and folder list (song list).
6. Button display.
Playback
7. MP3 file information
CD
Music List
TRACK 1
No.
► 0:00:01
TRACK 1
CDDA
PLAY MODE
▌ Repeat Playback of an Audio/MP3 Disc
01/15
Title
Length
001 MODE
TRACK 1
PLAY
002
TRACK 2
Repeat : Off
003
TRACK 3
Play Option
: Normal
004
TRACK 4
005
TRACK 5
006
TRACK 6
007
TRACK 7
MOVE
OK
0:03:50
0:04:00
0:03:49
0:03:47
0:04:29
0:03:44
0:03:44
RETURN
EXIT
1. During playback, press the ANYKEY button.
The Repeat mode will be highlighted.
2. Press the ◄► buttons to select the desired repeat mode you want to
play repeatedly, then press the OK button.
•
Repeat Track (CD (CD-DA)/MP3)
•
Repeat Folder (MP3)
•
Repeat Disc (CD (CD-DA)/MP3)
- To return to normal playback Press the CANCEL button to return to normal playback.
English - 44
01375B-VR350,355-UMG,XSG-ENG.ind44 44
2007-04-02 오후 4:58:54
▌ Play Option Mode
CD
Music List
01/15
TRACK 1
No.
II 0:00:01
TRACK 1
CDDA
PLAY MODE
Title
Length
001 MODE
TRACK 1
PLAY
002
TRACK 2
Repeat : Off
003
TRACK 3
Play Option
:
Normal
004
TRACK 4
005
TRACK 5
006
TRACK 6
007
TRACK 7
MOVE
0:03:50
0:04:00
0:03:49
0:03:47
0:04:29
0:03:44
0:03:44
RETURN
OK
EXIT
1. In the still mode, press the ANYKEY button.
The Play option will be highlighted.
2. Press the ◄► buttons to select a desired Play option, then press the
OK button.
• Normal : Tracks on a disc are played in the order in which they were
recorded on the disc.
• Playlist : The Playlist playback option allows you to select the order
in which you want tracks to play.
• Intro [ I ] : The first 10 seconds of each track will be played.If you
want to listen to the music that you have selected, press
the OK button or ►ll button. The play option will be
changed to Normal Play. When Intro Play is completed,
Normal Play is performed.
• Random [ R ] : The Random option plays a disc’s tracks in random
order. After a random list is generated and played
completely, another random list is generated and
played. Random Play continues until the play option
is changed.
CD
Music List
TRACK 1
No.
Title
001 MODE
TRACK 1
PLAY
TRACK 1
CDDA
PLAY MODE
002
TRACK 2
Repeat : Off
003
TRACK 3
Play Option
: Normal
004
TRACK 4
005
TRACK 5
006
TRACK 6
007
TRACK 7
MOVE
Length
You can register a maximum 30 tracks in the playlist.
0:03:50
0:04:00
0:03:49
0:03:47
0:04:29
0:03:44
0:03:44
1. In the still mode, press the ANYKEY button.
The Play option will be highlighted.
RETURN
OK
CD
EXIT
Playlist
04/15
CDDA
TRACK 1
001
TRACK 1
CDDA
TRACK 2
002
TRACK 2
CDDA
TRACK 3
003
TRACK 3
CDDA
TRACK 4
004
TRACK 4
CDDA
TRACK 5
CDDA
TRACK 6
CDDA
TRACK 7
CDDA
2. Press the ◄► buttons to select Playlist, then press the OK button.
Playlist screen is displayed.
Playback
II 0:00:01
▌ To Programme Tracks
01/15
3. Press the ▲▼ buttons to select tracks in the order in which you want
them to play, then press the OK button.
If you playlisted a wrong track, press the ► buttons, then press the ▲
▼ buttons to select the wrong track, then press the CANCEL button.
4. Press the PLAY button to play the playlist.
TRACK 8
PLAY MODE
MOVE
EXIT
OK
Playing back a Picture Disc
JPEG
Photo List
JPEG01
01/10
1. Insert a JPEG Disc into the disc tray.
ROOT
JPEG01
JPEG04
JPEG05
Slide Show
MOVE
JPEG02
JPEG03
JPEG06
OK
JPEG07
RETURN
EXIT
2. Press the ▲▼ buttons to select the Disc Navigation, and then press
the OK or ► button.
3. Press the ▲▼ buttons to select the Photo, and then press the OK or
► button.
4. Press the ▲▼◄► buttons to select a picture.
• To see the next 8 pictures, press the ►►l button.
• To see the previous 8 pictures, press the l◄◄ button.
English - 45
01375B-VR350,355-UMG,XSG-ENG.ind45 45
2007-04-02 오후 4:58:57
5-1. If you press the ►ll button, the Slide Show Speed screen will appear.
Press the ◄► buttons to set the slide show speed, then press the
OK button.
DVD-RW(VR)
5-2. Press the OK button with a picture selected in the Album screen and
select a display mode (Album screen (
), Slide show (
),
) or Zoom (
)) using the ◄► buttons, then press
Rotation (
the OK button.
Slide Show Speed
Slow
Normal
Fast
JPEG01
MOVE
PHOTO
OK
RETURN
: Returns to the Album screen.
: The unit enters slide show mode.
Before the slide show begins the picture interval (Slide show
speed) must be set.
DVD-RW(VR)
: Each time the OK button is pressed, the picture rotates 90
degrees clockwise.
: Each time the OK button is pressed, the picture is enlarged
up to 4X(four times the normal size).
JPEG01
MOVE
PHOTO
OK
RETURN
→ normal size → 2X → 4X → 2X
• Press the ANYKEY button to display the menu bar.
• Press the RETURN button to clear the menu bar.
Playing back an MPEG4 Disc
Playback
CD
DivX List
DIVX01
00/01
No.
001
Title
Size
ROOT
movie_1
MPEG4 files contain the audio and video data.
MPEG4 files with the following extensions can be played.
- .avi, .divx, .AVI, .DIVX
1. Insert an MPEG4 Disc into the disc tray.
MPEG4
ROOT
MOVE
2. Press the ▲▼ buttons to select the Disc Navigation, and then press
the OK or ► button.
OK
RETURN
EXIT
3. Press the ▲▼ buttons to select the DivX, and then press the OK or ►
button.
4. Press the ▲▼ buttons to select the avi file, then press the OK or ► button.
MPEG4 Function Description
Function
Skip Scene
Search Scene
Slow Motion
Step Motion
Description
During play, press the I◄◄ or ►►I button, it moves
forward or backward 5 minutes.
During play, press the SEARCH (◄◄ or ►►) button
and press again to search at a faster speed.
→ Fast 1 → Fast 2 → Fast 3
In still or step mode, press the SEARCH (►►)
button on the remote control.
→ Slow 1 → Slow 2 → Slow 3
In the still or play mode, press the F.ADV/SKIP
button on the remote control.
English - 46
01375B-VR350,355-UMG,XSG-ENG.ind46 46
2007-04-02 오후 4:59:00
■ This unit can play the following video compression formats
MPEG4 Codec format : DivX 3.11 DivX 4.x DivX 5.x DivX-Pro
Xvid
Motion Compensation : QPEL, GMC
Audio format : “MP3”, “MPEG1 Audio Layer2”, “LPCM”, “AC3”,
“DTS”, “MS ADPCM”
■ Some MPEG4 files created on a personal computer may not be
play back.
That is why Codec Type, Version and Higher resolution over
specification is not supported.
■ Supported subtitle file formats: .smi, .srt, .sub, .psb, .txt, .ass
(The subtitle file should have exactly the same name as the
corresponding MPEG4 file name)
Playing back a VHS Tape (VCR)
1. Insert a standard VHS tape into the VCR deck.
• When a videotape is inserted, power will turn on automatically.
2. Press the ►II (PLAY/STILL) button on the remote control or on the
front panel of the unit. The videotape will begin to play automatically if
the Record Safety Tab is removed and Auto Play is turned on.
3. Press the (STOP) button on the remote control or on the front panel
of the unit.
▌ Tracking
During playback, press the PROG/TRK (
lines from the picture.
/
Playback
The Tracking adjustment removes the white lines that sometimes
appear during playback because of slight differences in recording
decks.
) buttons to remove white
▌ Special VCR Playback Features
While a videotape is playing, you can enjoy a variety of special
playback features.
Still
In Play mode, press ►II (PLAY/STILL) button to still a single frame.
Frame Advance
In the Still mode, press F.ADV/SKIP button to advance to the next frame.
Fps/Rps
In Play mode, press Forward (►►) button or Rewind (◄◄) button to
Fps/Rps at two speeds:
• Picture Search - Press and release repeatedly to advance the tape
forward or backword at 2,3,5,7 times normal speed.
• Jet Search - Press and hold to advance the tape forward or backward
at 7 times normal speed.
English - 47
01375B-VR350,355-UMG,XSG-ENG.ind47 47
2007-04-02 오후 4:59:03
Skip
In Play mode, press F.ADV/SKIP button to cue ahead exactly 30
seconds. Press F.ADV/SKIP button repeatedly up to 4 times to cue
ahead 2 minutes.
Slow motion
In Still mode, press ►► button for slow motion. Press the ►► button
repeatedly to play slow motion speed at 1/10, 1/7, 1/5 times. Press the
PLAY button twice to resume normal viewing.
▌ Variable Search System
Each time you record a cassette on this DVD Recorder & VCR,
an index is automatically marked on the tape when recording is
started.The Search function allows you to fast-forward or rewind to
a specific index and start playback from that point.
• This DVD Recorder & VCR uses a standard indexing system (VISS). As
a result, it will recognize any indexes marked by other VCRs using the
same system and vice versa.
Go To [0:00:00] Stop
Playback
Go To [0:00:00]
◄◄
00:00:49
Use this feature when you want to search for the 0:00:00 counter
position on a cassette.
1. Press the CANCEL button at the point on the tape where you want to
set the counter to 0:00:00.
2. While a cassette is stopped, press the ANYKEY button.
3. Press the ▲▼ buttons to select Go To [0:00:00], then press the OK
button. The VCR will rewind or fast forward, searching for the 0:00:00
counter position, and then automatically stop at that position.
End Search
End Search
►►
Use this feature when you want to search for a blank position to
record a programme on a cassette.
00:00:13
1. While a cassette is stopped, press the ANYKEY button.
2. Press the ▲▼ buttons to select End Search, then press the OK
button. The VCR will fast forward, searching for a blank position, and
then automatically stop at that position. If the VCR reaches the end of
the tape during end search, the tape will be ejected.
Forward/Reverse Intro Scan
Scan and Play
►►
Use scan and play when you don’t know exactly where a programme
is located on a cassette tape.
00:01:49
1. While a cassette is stopped, press the ANYKEY button.
2. Press the ▲▼ buttons to select Forward Intro Scan or Reverse Intro
Scan, then press the OK button. When an Index mark is found the
DVD Recorder & VCR will playback the tape for 5 seconds, after which
it will continue searching for the next Index mark.
English - 48
01375B-VR350,355-UMG,XSG-ENG.ind48 48
2007-04-02 오후 4:59:04
Recording
This section shows various DVD recording methods.
This unit can record on various types of discs.
Before recording, read the following instructions and
select the disc type according to your preference.
■ Unfinalise
- This allows additional recording on a DVD-RW
disc originally recorded on the DVD Recorder &
VCR
Recordable discs
This recorder can record on the following discs.
- A DVD-RW disc that has been recorded by DAO
(Disc At Once) in a PC cannot be unfinalised.
● DVD-VR350
DVD-RAM DVD-RW
■ Finalise
- This closes the DVD-RW/±R so no additional
recording can be done.
- A DVD-RW disc that has been recorded in V
mode on a different make of recorder cannot be
unfinalised.
DVD-R
- A DVD±R disc cannot be unfinalised.
● DVD-VR355
DVD-RAM DVD-RW
DVD-R
DVD+RW
DVD+R
• DVD±RWs and DVD-RAMs are rewritable.
• DVD±Rs are non-rewritable.
▌ Compatibility between Samsung and
Other Company’s Recorder
Disc Types
Recording
format
DVD-RAM
VR Mode
DVD-R
DVD+RW
(DVD-VR355 only)
Samsung
Other Company
X
X
finalised
Samsung
not finalised
VR Mode
finalised
Other Company
not finalised
finalised
Samsung
not finalised
V Mode
finalised
Other Company
not finalised
finalised
Samsung
not finalised
V Mode
finalised
Other Company
not finalised
Additional Recording
in Samsung Recorder
Recordable
Recordable
Not recordable
Recordable
Not recordable
Recordable
Not recordable
Recordable
Not recordable
Not recordable
Not recordable
Recordable
Not recordable
Not recordable
Samsung
X
Not recordable in
some cases
Other Company
X
Not recordable in
some cases
finalised
Not recordable
not finalised
Not recordable in
some cases
finalised
Not recordable
not finalised
Not recordable in
some cases
-
Samsung
DVD+R
(DVD-VR355 only)
Finalising
Other Company
Recording
DVD-RW
Recording
Device
English - 49
01375B-VR350,355-UMG,XSG-ENG.ind49 49
2007-04-02 오후 4:59:06
▌ Recording Formats
DVD-RAM
Unformatted Disc
Do you want to format this disc?
Yes
No
Since available functions differ depending on the disc type, select a disc
that best fits your preferences.
When you insert an unused disc, the following message appears.
DVD-RAM : Use after formatting the disc.
DVD±RW/+R : Use after initialising the disc.
When using a DVD-RW disc, you can change the mode.
Refer to Formatting a Disc on page 75.
DVD-R : Formatting a disc is unnecessary and only V mode Recording is
supported.
DVD-RAM/-RW(VR mode)
DVD±RW/+R
• This mode involves multiple editing functions (such as deletion of the
whole title, partial deletion of a title, etc.).
• Various editing options using a created Playlist.
Uninitialised Disc
Do you want to initialise this disc?
Yes
No
DVD-RW(V mode)/-R
• Chapters will be created automatically when you finalise recording on
DVD-RW/-R discs in V mode.
• Simple editing (erasing titles/changing title name).
DVD+RW
• You can also make your own chapters on DVD+RWs and edit them
using the Chapter Edit menu. (see pages 66 to 68)
■ You can initialise discs automatically using EZ REC MODE
(see page 58).
Recording
Recording Mode
Select one of four recording modes by pressing the REC SPEED button
repeatedly while the unit is in Stop mode for the desired recording time
and picture quality.
In general, picture quality improves as the recording time decreases.
In AUTO Mode, the most suitable record mode is adjusted automatically,
according to remaining time on the disc and length of the timer recording.
This function selects one mode from XP, SP, LP and EP mode and is used
in timer recording mode only.
Recording Times Data Rates
Mode
Characteristic
XP
(high quality mode)
Select when the video
quality is important.
Approx. 1 hour
about 8 Mbps
SP
(standard quality mode)
Select to record in
standard quality.
Approx. 2 hours
about 4 Mbps
LP
(long recording mode)
Select when a long
recording time is
required.
Approx. 4 hours
about 2 Mbps
EP
(extended mode)
Select when a long
recording time is
required.
Approx. 6 hours/
about 1,2 Mbps
Approx. 8 hours/
about 0,8 Mbps
AUTO
for timer recording only Approx 1 to 8 hours
see page 55.
Approx 0,8 to 8 Mbps
• The dual layer DVD±Rs have approximately double the capacity of
single layer DVD±Rs. (See page 34.)
English - 50
01375B-VR350,355-UMG,XSG-ENG.ind50 50
2007-04-02 오후 4:59:08
Unrecordable video
You cannot record copy protected movie.
Pictures with copy protection cannot be recorded on this DVD
Recorder & VCR.
When the DVD Recorder & VCR receives a copy guard signal while
recording, recording stops and the following message appears on
the screen.
Concerning Copy Control Signals
TV broadcasts that contain copy control signals may have one of the
following three signal types, Copy-Free, Copy-Once and Copy-Never.
If you want to record a copy-once type programme, use DVD-RW with
CPRM in VR Mode and DVD-RAM discs.
Signal type
Media
DVD-RAM (Ver.2.0)
Copy-Free
Copy-Once
Copy-Never
O
O*
-
DVD+RW
O
-
-
DVD+R
O
-
-
DVD-RW (Ver.1.1)
O
-
-
DVD-RW (Ver.1.1)
with CPRM
VR mode
O
O*
-
DVD-R
O
-
-
Once Copy Once has been recorded, additional recording cannot be
performed.
* Compatible with CPRM.
Content Protection for Recordable Media (CPRM)
Recording
CPRM is a mechanism that ties a recording to the media on which it
is recorded. It is supported by some DVD recorders, but not by many
DVD players.
Each blank recordable DVD has a unique 64-bit media ID etched in
the BCA. When protected content is recorded onto the disc, it can
be encrypted with a 56-bit C2 (Cryptomeria) cipher derived from the
media ID.
During playback, the ID is read from the BCA and used to generate a
key to decrypt the contents of the disc.
If the contents of the disc are copied to other media, the ID will be
absent or wrong and the data will not be decryptable.
English - 51
01375B-VR350,355-UMG,XSG-ENG.ind51 51
2007-04-02 오후 4:59:10
Recording immediately
RAM
VR
XP
PR 7
Available Time 00:28
DVD-VR355 only
Before you start
1. Check the antenna cable is connected.
2. Press the OPEN/CLOSE button and place a recordeble disc on the
disc tray.
3. Check the remaining time on the disc.
DVD-RAM/DVD±RW/+R discs should be formatted or initialised in advance
before beginning recording. Most new discs are sold unformatted. Make
sure to format your unformatted discs before recording.
4. Press the OPEN/CLOSE button to close the disc tray.
Wait until LOAD disappears from the front panel display.
▌ Recording the current programme you are watching
1. Press the PROG/TRK ( /
station you want to record.
) buttons or number buttons to select the
2. Press the REC SPEED button repeatedly, to select the recording
speed (quality).
→ SP → LP → EP → XP
3. Press the REC button.
▌ Recording from external equipment you are watching
1. Power on your DVD Recorder & VCR and switch to AV mode by
pressing the INPUT SEL. button on the remote control. The front panel
display changes in the following sequence.
Recording
→ PR → AV1 → AV2 → DV
2. Press the REC SPEED button repeatedly to select the recording speed
(quality).
→ SP → LP → EP → XP
3. When your DVD Recorder & VCR is in the Stop mode, set the
operation mode of your external devices to play mode.
4. Press the REC button on your DVD Recorder & VCR when the image
from which you want to start recording is displayed.
To pause recording
Press the PLAY/PAUSE (
● Press the PLAY/PAUSE (
) button to pause a recording in progress.
) button again to resume recording.
● You can switch channels by pressing the PROG/TRK (
while recording pauses.
/
) buttons
To stop recording
Press the STOP button to stop a recording in progress.
● When using DVD-RAM/DVD±RW/DVD±R discs, the message
“Updating the disc information. Please wait for a moment.” is
displayed.
English - 52
01375B-VR350,355-UMG,XSG-ENG.ind52 52
2007-04-02 오후 4:59:11
■ You can not change the recording mode and the programme
while recording.
■ Recording will stop automatically if there is no free space left for
recording.
■ Up to 99 titles can be recorded onto a DVD-RAM/-RW/-R disc,
and up to 48 titles onto a DVD+RW/+R disc.
■ If the power interrupted due to power failure or other reasons, the
title being recorded will not be saved onto the disc.
■ Recording will stop automatically if a copy protected image is
selected.
■ Do not use DVD-R authoring discs with this unit.
■ Also refer to the user manual for your External Devices when
recording from external equipment using the Audio/Video cable.
Recording through a DV Input jack
You may control the Camcorder using the IEEE1394 (DV) interface.
Follow these directions to record onto a disc or tape from a
camcorder that has a DV output jack.
DV
The DV device is connected.
MOVE
OK
RETURN
1. Connect the DV output jack of your camcorder to the DV input jack on
the front of your DVD Recorder & VCR using a DV cable.
2. Power on your DVD Recorder & VCR and switch to DV mode by
pressing the INPUT SEL. button on the remote control.
3. Press the REC SPEED button repeatedly to select the recording speed
(quality).
→ SP → LP → EP → XP
■ Some camcorders may not work with your DVD Recorder & VCR
even if they have a DV output jack.
■ Also refer to the user manual for your camcorder when recording
through a DV jack.
■ To display playback related icons on the screen, press any
direction button on the remote control.
Recording
4. If the input is set to DV, a playback/record menu that enables
camcorder control appears on the top of the screen.
5. Select the Play icon on the upper part of the screen to playback the
camcorder and find the starting position to copy.
6. To start recording, Press the ◄► buttons to select REC (z) icon in the
top side of the screen, then press the OK button.
You can press the REC button on the remote control to start recording.
7. Press the STOP button on your DVD Recorder & VCR when the
recording is finished.
Making a One Touch Recording (OTR)
DVD-VR355 only
One-Touch Recording (OTR) allows you to add recording time in preset
minute increments up to 9 hours by pressing the REC button repeatedly.
1. Press the PROG/TRK ( / ) buttons or number buttons to select the
station to record.
If you want to record through a connected external component, press
the INPUT SEL. button to select an appropriate external input (AV1,
AV2 or DV input).
English - 53
01375B-VR350,355-UMG,XSG-ENG.ind53 53
2007-04-02 오후 4:59:13
2. Press the REC button.
3. While in Record mode, press the REC button again to activate OneTouch Recording (OTR).
• Record length 0:30 appears on the On-Screen Display and the DVD
Recorder & VCR will record for exactly 30 minutes.
4. Continue pressing REC to add recording time in preset minute
increments up to 9 hours.
• The DVD Recorder & VCR stops recording automatically when the
time has elapsed.
▌ To stop recording
Press the STOP (■) button.
The message “Press STOP button once more to cancel Timer Record” is
displayed.
Press the STOP (■) button again.
The message “Updating the disc Information. Please wait for a moment”
is displayed.
■ The timer counter decreases by the minute from 9:00 to 0:00,
then the DVD Recorder & VCR stops recording.
Making a Timer Recording
DVD-Recorder
Title List
Scheduled Record List
►
1. Check the antenna cable is connected.
2. Check the remaining time of the disc.
Playlist
Disc Manager
3. Check the date and time are correct.
Programme
Setup
Copy
MOVE
Recording
DVD-VR355 only
Programme
DVD-RAM(VR)
OK
RETURN
DVD-Recorder
EXIT
Scheduled Record List
DVD-RAM(VR)
Current Time 12:00
No. To Source Day Start End Speed Edit
No. 01
To
Source
DVD
PR 01
Day
Start
End
Speed
01 SUN
12:00
14:00
SP
Available Time
00:48 SP
MOVE
OK
Make sure the Clock (Setup-Clock Set) must be set before you
proceed with a timer recording.
(See page 22 )
1. Press the OPEN/CLOSE button, and place a recordable disc on the
disc tray.
2. Press the OPEN/CLOSE button to close the disc tray.
Wait until LOAD disappears from the front panel display.
3. With the unit in Stop mode, press the MENU button.
RETURN
EXIT
4. Press the ▲▼ buttons to select Programme, then press the OK or ► button.
You can go to this step directly by pressing the TIMER REC button.
5. Press the OK or ► button twice.
• The Timer Recording screen is displayed.
6. Fill in the items using the ▲▼◄► buttons.
◄►: Moves to the previous/next item,
▲▼: Sets a value.
• To : Select the media to record DVD or VCR.
• Source : The video input source (AV1 or AV2), or the broadcasting
channel you want to make a timer recording from.
• Day : Set the recording day.
Daily, MO-SA, MO-FR, W-SA, ...W-SU,
01MON, ...31WED
• Start/End Time : Start and end time of the timer recording.
English - 54
01375B-VR350,355-UMG,XSG-ENG.ind54 54
2007-04-02 오후 4:59:15
Recording Speed (DVD)
AUTO : Select when you want to set video quality automatically. In
AUTO Mode, the most suitable record mode is adjusted automatically,
according to remaining time on the disc and length of the timer
recording. This function selects one mode from XP, SP, LP and EP
mode and is used in timer recording mode only.
XP (high quality) : Select when audio and video qualities are important.
(Approx. 1 hour)
SP (standard quality) : Select to record in standard quality. (Approx. 2 hours)
LP (low quality) : Select when a long recording time is required.
(Approx. 4 hours)
EP (extended mode) : Select when a longer recording time is required.
(Approx.6 hours at 1.2Mbps or Approx. 8 hours at 0.8 Mbps.)
- The dual layer DVD±Rs have approximately double the capacity of
single layer DVD±Rs. (See page 34.)
Recording Speed (VCR)
AUTO : Select when you want to set video quality automatically. It
depends on remaining time on the VCR tape.
SP : Standard Play, for best picture quality.
LP : Long Play, for maximum recording time (3 times SP).
■ When you are recording in EP mode on a DVD-RW(V mode)/-R
disc, it may not record for the full 6 or 8 hours because the unit
uses the VBR (Variable Bit Rate) ENCODING system.
For example, if you record a programme with a lot of action, it
uses a higher bit rate which in turn consumes more disc memory.
7. Press the OK button.
If the timer settings overlap
The first programme has priority. After recording of the first programme
is complete, the second programme starts being recorded.
To return to the previous menu
Press the RETURN button if you don't want to set a timer recording.
8. Turn the power off to finish the timer recording.
•
will blink if disc or tape is not inserted.
•
will appear on the front panel. It means that a timer recording is
registered.
Recording
To exit without saving the current setting
Press the EXIT or RETURN button.
■ The timer recording time may differ from the set time depending
on disc status and overall timer recording status (for example,
recording times overlapping, or when the previous recording ends
within 3 minutes before the start time of the next recording.)
English - 55
01375B-VR350,355-UMG,XSG-ENG.ind55 55
2007-04-02 오후 4:59:17
Editing the Scheduled Record List
DVD-Recorder
Scheduled Record List
DVD-RAM(VR)
Current Time 12:00
DVD-VR355 only
No. To Source Day Start End Speed Edit
No. 01
To
Source
Day
Start
End
Speed
DVD
PR 01
01 SUN
12:00
14:00
SP
Available Time
00:48 SP
MOVE
OK
Follow these directions to edit the timer record list.
1. With the unit in Stop mode, press the MENU button.
RETURN
EXIT
2. Press the ▲▼ buttons to select Programme, then press the OK or ►
button.
3. Press the OK button.
4. Press the ▲▼ buttons to select the number of the scheduled record
list you want to edit, then press the OK or ► button.
• The Edit and Delete items are displayed.
5. Press the ▲▼ buttons to select Edit, then press the OK or ► button.
• The Timer Recording screen is displayed. Edit the items you want
to modify. See the Timer Recording section for more information on
Timer Recording Input items.(See pages 54~55)
6. Press the OK button to confirm the edited setting.
7. Press the EXIT button after finishing the operation.
The menu screen will disappear.
Deleting the Scheduled Record List
DVD-Recorder
Scheduled Record List
DVD-RAM(VR)
Current Time 12:00
DVD-VR355 only
No. To Source Day Start End Speed Edit
01
02
03
DVD
DVD
Daily No.01
12:00 14:00 SP
Daily 15:00 16:00 SP
:
:‘No.01’?
Do you want to delete
PR 01
PR 02
Recording
Yes
MOVE
OK
Off
Off
√
►
►
►
1. With the unit in Stop mode, press the MENU button.
No
RETURN
Follow these directions to delete a title from the timer record list.
EXIT
2. Press the ▲▼ buttons to select Programme, then press the OK or ►
button.
3. Press the OK button.
4. Press the ▲▼ buttons to select the number of the scheduled record
list you want to delete, and then press the OK button.
• The Edit and Delete items are displayed.
5. Press the ▲▼ buttons to select Delete, then press the OK or ► button.
• You will be prompted with the delete confirm message such as (“Do
you want to delete No.01?”).
6. Press the ◄ ► buttons to select Yes, then press the OK button.
• The selected title will be deleted from the list.
7. Press the EXIT button after finishing the operation.
The menu screen will disappear.
■ You can not delete programmes that are currently being
recorded.
English - 56
01375B-VR350,355-UMG,XSG-ENG.ind56 56
2007-04-02 오후 4:59:18
EZ REC MODE
DVD-VR355 only
This function allows you Initialise and Finalise a disc automatically.
Press “On” to confirm EZ REC mode.
Otherwise press “Off”
Yes
1. With the unit in Stop mode/No Disc mode, press the EZ REC MODE
button on the remote control.
2. Press the ◄ ► buttons to select On, and then press the OK button.
The EZ REC MODE is set up.
No
3. Insert a disc.
If the disc is new, it will initialise automatically.
4. Press the REC button.
5. EZ REC MODE will Automatically Finalise the disc under the following
conditions.
Disc Initialise (DVD-V)
Now, initialising..
50%
Disc Finalise
Processing..
- When you press the OPEN/CLOSE button on your DVD Recorder &
VCR after recording on at least 30% of the disc. The tray will open after
the disc has been finalised.
- When the disc is full, it will finalise automatically and the DVD Recorder
& VCR will remain in stop mode.
- When you make a timer recording and it occupies at least 30% of the
disc, the disc will finalise automatically and the DVD Recorder & VCR
will power off. Please note that auto finalisation will not work if the
DVD Recorder & VCR has more than one Timer Recording set in the
Scheduled Record List.
50%
■ If you insert a new DVD-RW disc, it will be formatted in V mode
after auto initialising.
■ If you select off, you must initialise (see page 50) and finalise the
disc manually in the Disc Manager menu.(see page 75)
■ The length of Recording is different according to recording mode.
(see page 50)
Recording
English - 57
01375B-VR350,355-UMG,XSG-ENG.ind57 57
2007-04-02 오후 4:59:20
Basic VCR Recording
Before starting
1. Check TV channel and Antenna connections.
2. Check the remaining time on the tape.
You can record a TV show in progress by inserting a blank tape
and pressing the z (REC) button. You can even add time in preset
increments up to 9 hours by pressing the z (REC) button repeatedly.
■ Be sure your videotape has a Record Safety Tab. If the tab is
missing, you can cover the opening with a small piece of tape.
■ Warning: Do not cover this opening unless you are sure you want
to record over the tape.
1. Insert a blank VHS tape into the VCR deck.
• Make sure the tape is long enough to record the entire programme.
2. Press the Number buttons or the PROG/TRK ( / ) buttons to select
the desired channel.
Press the INPUT SEL. button to select AV1, AV2 or DV input if
recording from an external device connected to the input jacks of the
recorder.
3. Press the REC SPEED button on the remote control to set the Record
Speed to one of the following options:
• SP – Standard Play, for best picture quality.
• LP – Long Play, for maximum recording time (3 times SP).
■ The selected Record Speed will appear on the front panel display
and on-screen display.
Recording
Maximum Recording Time - SP vs. LP
Tape Length
SP (Standard Play)
LP (Long Play)
E180
Approx. 3 hrs
Approx. 6 hrs
E240
Approx. 4 hrs
Approx. 8 hrs
E280
Approx. 4 hrs 40 mins
Approx. 9 hrs 20 mins
E300
Approx. 5 hrs
Approx. 10 hrs
■ When you watch or record on the VCR during DVD Recording,
some function buttons may not operate.
The message “This function is not available.” will be displayed.
4. Press the z (REC) button on the remote control or front panel.
For options while recording is in progress, see “Special Recording
Features”.
To pause recording
Press the PLAY/PAUSE (
● Press the PLAY/PAUSE (
) button to pause a recording in progress.
) button again to resume recording.
● You can switch channels by pressing the PROG/TRK (
while recording pauses.
/
) buttons
To stop recording
Press the STOP button to stop a recording in progress.
English - 58
01375B-VR350,355-UMG,XSG-ENG.ind58 58
2007-04-02 오후 4:59:21
Check Remaining Time
RAM
STOP
00:00:00
SP
Rem 00:48
PR 1
JAN 01 2007 MON
VCR
STOP
00:00:00
SP
Rem 01:21
PR 1
12 : 00
1. Press INFO button on the remote control.
The following information will be displayed.
(Current deck status, recording speed, remaining time, input channel,
current time.)
Special Recording Features
While a recording is in progress, you can watch a different media,
or add recording time in preset increments.
1. Watch a different media during recording
You can watch a DVD during VCR recording or watch a Video tape
during DVD recording.
• During VCR recording, insert a DVD in the DVD deck. The output will
automatically change to the DVD and start playback.
• During DVD recording, insert a Video tape in the VCR deck. The
output will automatically change to the VCR and start playback. (Only
if tape is missing the safety tab)
2. Add Recording Time
Refer to the One-Touch Recording (OTR).
(See page 53)
3. Recording DVD and VCR at the same time
You can record DVD and VCR at the same time, but both modes must
be set up to record separately.
• Press the DVD/VCR button to set the unit to DVD or VCR mode.
• Choose input mode PR, AV1, AV2 or DV for DVD or VCR.
• Choose REC SPEED mode for DVD or VCR.
• Press REC button for DVD or VCR.
■ You cannot record different channels at the same time.
Recording
■ When the DVD Recorder & VCR is connected to your TV using
the S-Video or component video cable, the playback screen on
the video tape will not display during DVD recording.
■ The DVD and VCR cannot start recording at the exact same time.
You must set one to start recording, then the other.
English - 59
01375B-VR350,355-UMG,XSG-ENG.ind59 59
2007-04-02 오후 4:59:23
Copy to DVD or VCR
DVD-VR355 only
You can copy from the DVD to VCR or VCR to DVD.
Check the remaining time on the tape and disc.
DVD-RAM(VR)
Edit Copylist
JAN/01/2007
▌ To copy from DVD to VCR
1/1
No.
Title
Length Edit
01 JAN/01/2007 12:0
Play00:00:11 √
Rename
(VR mode)
Edit Scene
JAN/01/2007 12:00
Copy
1 Scene
Delete
1. With the unit in Stop mode, press the MENU button.
JAN/01/2007 12:00
MOVE
2. Press the ▲▼ buttons to select Copy, then press the OK or ► button.
OK
RETURN
EXIT
3. Press the ▲▼ buttons to select DVD --> VCR, then press the OK or
► button.
4. Press the ▲▼ buttons to select Edit Copylist, then press the OK or
► button.
• To copy from “Edit Copylist”, you need to make a copylist in advance.
• Select “New Copylist” and create the new playlist. (See page 69)
• On DVD-RW(V)/DVD+RW/±R disc, you can only use Direct copy
function.
5. Press the ▲▼ buttons to select desired copylist, then press the OK or
► button.
6. Press the ▲▼ buttons to select Copy, then press the OK or ► button.
Direct copy DVD to VCR
Recording
• Insert a DVD disc you want to copy.
• Insert a VHS tape.
• Press the VCR copy button on front panel or remote control. (TO VCR)
• To stop recording, press the STOP button.
• You can also copy from DivX to VCR when the desired DivX is played
back. If the DivX disc has various files, only the selected file will be
played back.
■ Copy function is not allowed in progressive scan mode.
English - 60
01375B-VR350,355-UMG,XSG-ENG.ind60 60
2007-04-02 오후 4:59:25
▌ To copy from VCR to DVD
VCR - -> DVD
DVD-Recorder
DVD-RAM(VR)
No.
01
02
Start
End
Edit
00:02:20 Play
00:03:22 √
√
--:--:-- Copy
--:--:-Delete
STOP
Copy All
MOVE
1. With the unit in Stop mode, press the MENU button in stop mode.
2. Press the ▲▼ buttons to select Copy, then press the OK or ► button.
00:03:42
OK
RETURN
EXIT
3. Press the ▲▼ buttons to select VCR --> DVD, then press the OK or
► button.
4. You can use the ►II, I◄◄ or ►►I, ◄◄ or ►► buttons to search for the
Start position.
Press the OK button at the start point.
5. You can use the ►II, I◄◄ or ►►I, ◄◄ or ►► buttons to search for the
end position.
Press the OK button at the end point.
• A copylist will be generated.
Repeat the above steps to create the copylist.
• In VCR mode, the copylist cannot be saved.
6. Press the ▲▼ buttons to select desired copylist, then press the OK or
► button.
7. Press the ▲▼ buttons to select Copy, then press the OK or ► button.
• The VCR will fast forward, searching for a start position and then
automatically start a copy.
• It may not be match up with Start and End point exactly.
• If you want to copy all copylists, select Copy All.
Direct copy VCR to DVD
• Insert the VHS tape you want to copy.
• Insert Recordable DVD disc.
• Press DVD copy button on front panel or remote control. (TO DVD)
Recording
• To stop recording press the STOP button.
English - 61
01375B-VR350,355-UMG,XSG-ENG.ind61 61
2007-04-02 오후 4:59:27
Editing
This section introduces basic functions of DVD editing and explains both edit functions for the recording on a
disc and edit functions for the entire disc.
Playing the Title List
DVD-VR355 only
Title List
DVD-RAM(VR)
JAN/01/2007
3/4
No.
Title
JAN/01/2007
Edit
XP
Protection
MOVE
c
1. Press the TITLE LIST button.
The Title List screen is displayed.
Length Edit
01 JAN/01/2007 12:00 00:00:11 ►
02 JAN/01/2007 12:30 00:00:09 ►
Play
03 JAN/01/2007 01:30 00:01:36 √
Rename
04 JAN/01/2007 01:3000:00:11 √
Delete
JAN/01/2007 01:00 PR1
OK
VR
RAM
Follow these instructions to play back a title from the Title List.
►
RETURN
2. Press the ▲▼ buttons to select a title you want to play from Title List,
and then press the PLAY button.
3. Press the STOP button to stop playing.
To return to the title list screen, press the TITLE LIST button.
EXIT
XP
d e f
g
Title List Screen Elements
Title List
DVD-RAM(VR)
JAN/01/2007
3/4
No.
Title
JAN/01/2007 01:00 PR1
c Playback screen for recorded titles
d Information window for the selected title: Title name, recording date,
Length Edit
01 JAN/01/2007 12:00 00:00:11
02 JAN/01/2007 12:30 00:00:09
03 JAN/01/2007 01:00 00:01:36
04 JAN/01/2007 01:30 00:00:11
►
►
►
lock status, recording mode
►
JAN/01/2007
XP
MOVE
OK
RETURN
EXIT
Title List
DVD-RAM(VR)
3/4
JAN/01/2007
Editing
No.
Title
Length Edit
01 JAN/01/2007 12:00 00:00:11
02 JAN/01/2007 12:30 00:00:09
Play
03 JAN/01/2007 01:00 00:01:36
Rename
04 JAN/01/2007 01:30 00:00:11
Delete
JAN/01/2007 01:00 PR1
JAN/01/2007
►
►
√
√
Edit
XP
MOVE
i
Protection
OK
RETURN
EXIT
h
e
f
g
h
Recorded title No.
Recorded title name
Recording Length (i.e., the playing time)
Edit menu
Play: Plays the selected title.
Rename: Changes the name of a selected title.
Delete: Deletes the selected title from the list.
Edit: Deletes a section of title.
Protection: Locks or unlocks the selected title.
i Button display
■ By pressing the ANYKEY button, you can play desired title.
(see page 38)
■ This may depend on the type of disc.
■ DVD-RW(V)/DVD+RW/±R has limited editing function.
English - 62
01375B-VR350,355-UMG,XSG-ENG.ind62 62
2007-04-02 오후 4:59:29
▌ Recording on Free space
DVD+RW
Title List
Free Space
5/7
No.
Title
Length Edit
01 APR/19/2007 12:00 00:00:21 ►
02 APR/19/2007
03 APR/20/2007
04 APR/20/2007
05 Free Space
06 APR/21/2007
07 Free Space
Free Space
PR 10
SP
MOVE
OK
12:30 00:00:03 ►
12:00 00:00:15 ►
12:30 00:00:16 ►
00:00:15 √
Recording
12:30 00:08:16 ►
03:40:27 ►
RETURN
This function is only available with DVD+RW discs. If existing titles are
deleted, new free space will be created. When you operate free space
function, on-air TV images will appear on the left side of the title list.
DVD-VR355 only
EXIT
1. Press the TITLE LIST button. The Title List screen is displayed.
2. Press the ▲▼ button to select Free Space, then press the OK or ►
button. On-air TV images will appear on the left side of the title list.
3. Press the OK button.
Basic Editing (Title List)
DVD-Recorder
▌ Renaming (Labeling) a Title
Rename
DVD-RAM(VR)
Follow these instructions to rename a title list, i.e., to edit the title of
a recorded programme.
Sports(A1)
Save
Back Space
MOVE
Space
OK
Delete
RETURN
Clear
Title List
DVD-RAM(VR)
3/4
Sports(A1)
No.
Title
Length Edit
01 JAN/01/2007 12:00 00:00:11
02 JAN/01/2007 12:30 00:00:09
03 Sports(A1)
00:01:36
04 JAN/01/2007 01:30 00:00:11
Sports(A1)
►
►
►
►
JAN/01/2007
XP
MOVE
OK
RETURN
DVD-VR355 only
EXIT
EXIT
1. Press the TITLE LIST button.
The Title List screen is displayed.
2. Press the ▲▼ buttons to select a title you want to rename from the
Title List, then press the OK or ► button.
3. Press the ▲▼ buttons to select Rename, then press the OK or ►
button.
The Rename screen is displayed.
4. Select the desired characters using the ▲▼◄ ► buttons, press the
OK button.
• Back Space: Deletes the character before the cursor.
• Space: Enters a blank and moves the cursor one forward (to the
right).
• Delete: Deletes the character at the cursor position.
• Clear: Deletes all the character inputs.
• Save: Registers the character inputs.
Editing
5. Press the ▲▼◄ ► buttons to select Save, and then press the OK
button.
The changed title name is displayed in the title field of the selected
title.
English - 63
01375B-VR350,355-UMG,XSG-ENG.ind63 63
2007-04-02 오후 4:59:32
▌ Locking (Protecting) a Title
DVD-RAM(VR)
Title List
3/4
JAN/01/2007
Follow these instructions to lock a title to protect it from accidental
deletion.
Title Protection :
JAN/01/2007 01:00 PR1
On
JAN/01/2007
Off
DVD-VR355 only
XP
MOVE
OK
RETURN
EXIT
Title List
DVD-RAM(VR)
JAN/01/2007
3/4
No.
Title
Length Edit
01 JAN/01/2007 12:00 00:00:11
02 JAN/01/2007 12:30 00:00:09
03 JAN/01/2007 01:00 00:01:36
04 JAN/01/2007 01:30 00:00:11
JAN/01/2007 01:00 PR1
►
►
►
►
JAN/01/2007
XP
MOVE
OK
RETURN
EXIT
DVD-RAM(VR)
Title List
JAN/01/2007
1. Press the TITLE LIST button.
The Title List screen is displayed.
2. Press the ▲▼ buttons to select a title you want to rename from the
Title List, then press the OK or ► button.
3. Press the ▲▼ buttons to select Protection, then press the OK or ►
button.
4. Press the ◄ ► buttons to select On, then press the OK button. The
key icon on the information window for the selected title changes to the
locked status. ( → )
▌ Deleting a Title
3/4
Follow these instructions to delete a title from the Title List.
Do you want to delete?
(Related playlists
may be deleted.)
JAN/01/2007 01:00 PR1
Yes
JAN/01/2007
No
DVD-VR355 only
XP
MOVE
OK
RETURN
EXIT
1. Press the TITLE LIST button.
The Title List screen is displayed.
2. Press the ▲▼ buttons to select a title you want to rename from the
Title List, then press the OK or ► button.
3. Press the ▲▼ buttons to select Delete, then press the OK or ► button.
You will be prompted with a confirmation message.
DVD-RAM(VR), DVD-RW(VR mode): Since Playlist is present, the
message ‘Do you want to delete? (Related playlists may be deleted.)’
is displayed.
DVD-RW(Video mode),DVD+RW, DVD±R: Since Playlist is not
present, the message ‘Do you want to delete?’ is displayed.
• The message depends on the type of disc.
Editing
4. Press the ◄ ► buttons to select Yes, then press the OK button.
■ You cannot delete a protected title.
If you want to delete a protected title, select Off in the Title
Protection menu.
■ Once a title is deleted from the Title List, it cannot be recovered.
■ Once DVD-RW/±R is finalised, it cannot be deleted.
■ With DVD±R, titles are only deleted from the menu, however, the
Title remains physically on the disc.
English - 64
01375B-VR350,355-UMG,XSG-ENG.ind64 64
2007-04-02 오후 4:59:34
▌ Deleting a Section of a Title
DVD-RAM(VR)
Edit Title List
Follow these instructions to delete a section of a title from the Title
List.
Title List No. 03
Start
End
00:00:02
00:00:00
Start
(VR mode)
00:00:02
►
End
Delete
MOVE
OK
1. Press the TITLE LIST button.
The Title List screen is displayed.
Return
RETURN
EXIT
2. Press the ▲▼ buttons to select a title you want to rename from the
Title List, then press the OK or ► button.
Edit Title List
DVD-RAM(VR)
3. Press the ▲▼ buttons to select Edit, then press the OK or ► button.
The Edit Title List screen is displayed.
Title List No. 03
Start
End
00:00:02
4. Press the OK button at the starting point.
The image and starting point time are displayed in the section deletion
starting point window.
00:00:15
00:00:15
Start
End
Delete
MOVE
OK
Return
RETURN
EXIT
5. Press the OK button at the end point.
The image and end point time is displayed in the Section deletion
ending point window.
Edit Title List
DVD-RAM(VR)
Title List No. 03
Start
End
6. Press the ◄ ► buttons to select Delete, then press the OK button.
7. Press the ◄ ► buttons to select Yes, then press the OK button.
The selected section has been deleted.
To return to the Title List, press the ◄ ► buttons to select Return.
Do you want to delete?
(Deleted part will not be restored.)
00:00:05
00:00:10
Yes
Start
End
No
00:00:15
Delete
MOVE
OK
Return
RETURN
EXIT
c
DVD-RAM(VR)
Edit Title List Screen Elements
Edit Title List
Title List No. 03
Start
End
00:00:02
00:00:00
00:00:02
►
Start
End
MOVE
Delete
OK
Return
RETURN
EXIT
e
f
d
c Playback bar
d Playtime
e Section deletion starting point window and time
f Section deletion end point window and time
• Select the start and end points of the section you want to delete
using the playback related buttons.
• Playback related buttons: (
,
,
,
,
)
■ The length of the section to be deleted must be at least 5
seconds long.
■ End point cannot be marked earlier than start point.
■ The section cannot be deleted when it includes a still picture.
DVD+RW
Chapter Edit
▌ Editing a Chapter
Editing
You can make your own chapters on DVD+RWs and edit them using
the Chapter Edit menu.
Chapter : 1/1 Show
00:00:00
►
Add
MOVE
Delete
Hidden
OK
Delete All
RETURN
Return
EXIT
DVD-VR355 only
1. Press the TITLE LIST button.
The Title List screen is displayed.
2. Press the ▲▼ buttons to select a title containing a chapter you want
to edit, then press the OK or ► button.
3. Press the ▲▼ buttons to select Chapter Edit, then press the OK or ►
button. The Chapter Edit screen is displayed.
English - 65
01375B-VR350,355-UMG,XSG-ENG.ind65 65
2007-04-02 오후 4:59:37
Chapter Edit Screen Elements
DVD+RW
Chapter : 1/1 Show
00:00:00
►
Add
1. Current chapter number and status
2. Playback bar
3. Playtime
4. Chapter Edit menu
Chapter Edit
Delete
MOVE
Hidden
OK
Delete All
Return
RETURN
c
e
f
EXIT
d
DVD+RW
Chapter Edit
Adding a chapter
Follow steps 1 to 3 in page 66
Chapter : 1/2 Show
00:10:10
►
Add
Delete
MOVE
Hidden
OK
Delete All
RETURN
Return
EXIT
4. Select the point where you want to add a chpater using the playback
related buttons, then press the OK button at that point.
Each time you press the OK button, a new chapter will be added.
, ,
, ).
• Playback related buttons: ( ,
5. Press the ◄ ► buttons to select Return, and then press the OK button.
The edited title will now have the chapter you added.
■ You can make up to 99 chapters in a title and 254 chapters in a disc.
■ The edited chapters are shown on existing DVD players only
after performing the Edit Compatible function. (See page 77)
■ If you add a chapter, the title is divided at that point; If you add a chapter
onto a title that has only one chapter, it creates another chapter.
DVD+RW
Chapter Edit
Deleting a chapter
Follow steps 1 to 3 in page 66
Chapter : 2/3 Show
00:15:00
►
Add
Delete
MOVE
Hidden
OK
Delete All
RETURN
Return
EXIT
4. Select a chapter you want to delete using the playback related buttons.
• Playback related buttons: ( ,
, ,
, ).
5. Press the ◄ ► buttons to select Delete, and then press the OK button.
The edited title has chapters as you deleted.
• To finish the operation, select Return using the ◄ ► buttons then
press the OK button.
■ First chapter can't be deleted.
■ Delete menu is not available if there is one chapter in the selected
tilte.
■ When deleting a chapter, only the chapter marker is actually
deleted, not the recorded video.
■ Deleting a chapter can't be canceled.
DVD+RW
Chapter Edit
Hiding a chapter
Editing
Follow steps 1 to 3 in page 66
Chapter : 2/4 Hidden
00:15:00
►
Add
MOVE
Delete
Hidden
OK
Delete All
RETURN
Return
EXIT
4. Select a chapter you want to hide using the playback related buttons.
• Playback related buttons: ( ,
, ,
, ).
5. Press the ◄ ► buttons to select Hidden, and then press the OK button.
The selected chapter is hidden.
• To finish the operation, select Return using the ◄ ► buttons then
press the OK button.
■ If there is only one chapter, it can’t be hidden.
■ Hidden/Show menu is not avaiable if there is no chapter in the
selected title.
■ The hidden chapters are not shown on the existing DVD players.
■ Hidden chapters will be played when playing back the entire title.
You can make the hidden chapter shown by pressing the OK
button at Show menu.
English - 66
01375B-VR350,355-UMG,XSG-ENG.ind66 66
2007-04-02 오후 4:59:43
Deleting all chapters
DVD+RW
Chapter Edit
Follow steps 1 to 3 in page 66
4. Press the ◄ ► buttons to select Delete All, and then press the OK button.
5. Press the ◄ ► buttons to select Yes, and then press the OK button.
Do you want to delete all chapter marks?
No
Yes
►
Add
Delete
MOVE
Hidden
OK
Delete All
RETURN
DVD+RW
00:00:00
Return
EXIT
Divide Title
Title List No. 03
Start
End
00:00:00
■ When deleting a chapter, only the chapter marker is actually
deleted, not the recorded video.
■ Delete All menu is not avaiable if there is one chapter in the
selected title.
▌ Dividing a Title
Follow these instructions to divide a long title into several titles.
00:00:00
00:00:00
►
Point
Divide
MOVE
OK
RETURN
EXIT
Divide Title
DVD+RW
Title List No. 03
Start
End
00:00:00
Divide
MOVE
00:19:25
00:19:25
►
Point
Return
OK
RETURN
DVD+RW
EXIT
Divide Title
Title List No. 03
Start
End
Do you want to divide the title?
(Once divided, titles cannot be merged back.)
00:00:00
No
Yes
√
00:019:25
Point
Divide
MOVE
DVD-VR355 only
Return
1. Press the TITLE LIST button.
The Title List screen is displayed.
2. Press the ▲▼ buttons to select a title you want to divide from the Title
List, then press the OK or ► button.
3. Press the ▲▼ buttons to select Divide Title, then press the OK or ►
button. The Divide Title screen is displayed.
4. Select the point you want to divide using the playback related buttons,
then press the OK button.
• Playback related buttons: ( ,
, ,
, ).
5. Press the ◄ ► buttons to select Divide, then press the OK button.
6. Press the ◄ ► buttons to select Yes, then press the OK button.
The selected title has been divided into two titles.
■ The length of the section to be deleted must be at least 5 seconds
long.
Return
OK
RETURN
EXIT
Editing
English - 67
01375B-VR350,355-UMG,XSG-ENG.ind67 67
2007-04-02 오후 4:59:49
Advanced Editing (Playlist)
DVD-Recorder
Make Scene
▌ Creating a Playlist
DVD-RAM(VR)
Follow these instructions to create a new playlist title from a recorded
title.
Scene No. 001
Start
End
Title List : 1/7
00:00:02
Start
00:00:00
00:00:02
►
End
MOVE
Make
OK
DVD-Recorder
EXIT
Make Scene
DVD-RAM(VR)
Scene No. 001
Start
End
Title List : 1/7
00:00:02
ІІ
Start
End
MOVE
Make
OK
RETURN
DVD-RAM(VR)
1. With the unit in Stop mode, press the MENU button.
2. Press the ▲▼ buttons to select Playlist, then press the OK or ►
button.
3. Press the ▲▼ buttons to select New Playlist, then press the OK or ►
button.
The Make Scene screen is displayed.
00:00:08
00:00:08
Return
EXIT
Edit Playlist
JAN/01/2007
1/1
No.
Title
Length Edit
01 JAN/01/2007 12:00 00:00:06 ►
4. Press the OK button at the start point.
• The image and time at the start point are displayed on the Start
window.
• The yellow-coloured selection bar moves to the End item.
• Select the starting point of the section from which you want to create a
new scene using the playback related buttons.
• Playback related buttons: ( ,
, ,
, )
5. Press the OK button at the end point.
• The image and end point time are displayed in the End window.
• The yellow-coloured selection bar moves to the Make icon.
JAN/01/2007 12:00
1 Scene
JAN/01/2007 12:00
MOVE
(VR mode)
Return
RETURN
OK
RETURN
EXIT
- To make a new playlist 6. Press the ◄ ► buttons to select Make, then press the OK button.
A new Make Scene screen is displayed.
A new Scene will be added to the current Playlist.
■ You can check and see all the scenes on Edit Playlist screen.
(See page 70)
■ Repeat steps 1~6 if you want to make a new playlist.
■ Repeat steps 4~6 if you want to make scenes of the playlist.
- To return to Edit Playlist menu 7. Press the ◄ ► buttons to select Return, then press the OK button.
The Edit Playlist screen is displayed.
Editing
■ You can create up to 99 playlist titles.
■ Depending on the kind of disc, the displayed screen may be
slightly different.
■ A disc that is recorded on this unit cannot be displayed playlist
menu if EZ REC MODE set to "On".
English - 68
01375B-VR350,355-UMG,XSG-ENG.ind68 68
2007-04-02 오후 4:59:54
▌ Playing Titles in the Playlist
DVD-RAM(VR)
Edit Playlist
JAN/01/2007
3/3
No.
Title
Follow these instructions to play the playlist titles.
Length Edit
01 JAN/01/2007 12:00 00:00:03 ►
02 JAN/01/2007 12:30 00:00:25 ►
Play
03 JAN/01/2007 12:0 00:00:05 √
Rename
Edit Scene
JAN/01/2007 12:00
1 Scene
JAN/01/2007 12:00
Copy
Delete
MOVE
OK
RETURN
EXIT
(VR mode)
1. Press the PLAY LIST button with the disc stopped.
The Edit Playlist screen is displayed.
2. Press the ▲▼ buttons to select the title you want to play from the
Playlist, then press the OK or ► button.
3. Press the ▲▼ buttons to select Play, then press the OK or ► button.
The playlist titles will be played back.
4. Press the STOP button to stop playing.
The screen returns to the Edit Playlist screen.
DVD-Recorder
▌ Renaming a Playlist Title
Rename
DVD-RAM(VR)
Follow these instructions to rename a playlist Title, i.e. to edit the
title of a playlist title.
Dolphin
Save
Back Space
MOVE
Space
Delete
OK
(VR mode)
Clear
RETURN
EXIT
DVD-RAM(VR)
Edit Playlist
Dolphin
3/3
No.
Title
Length Edit
01 JAN/01/2007 12:00 00:00:03 ►
02 JAN/01/2007 12:30 00:00:25 ►
03 Dolphin
00:00:05 ►
Dolphin
1 Scene
JAN/01/2007 12:00
MOVE
OK
RETURN
EXIT
1. Press the PLAY LIST button with the disc stopped.
The Edit Playlist screen is displayed.
2. Press the ▲▼ buttons to select the title you want to rename from the
Playlist, then press the OK or ► button.
3. Press the ▲▼ buttons to select Rename, then press the OK button.
The Rename screen is displayed.
4. Enter the desired characters using the ▲▼◄ ► buttons.
• Back Space : Deletes the character before the cursor.
• Space : Enters a blank and moves the cursor one forward (to the right).
• Delete : Deletes the character at the cursor position.
• Clear : Deletes all the character inputs.
• Save : Registers the character inputs.
5. Press the ▲▼◄ ► buttons to select Save, then press the OK button.
The changed title is displayed in the title field of the selected playlist title.
DVD-Recorder
Edit Scene
Playlist No. 3
Play
▌ Editing a Scene for the Playlist
Editing
DVD-RAM(VR)
Scene No.
1/7
Follow these instructions to edit scenes for a playlist.
Modify
01 00:00:03
02 00:00:42
03 00:00:04
04 00:00:03
05 00:00:11
06 00:00:04
OK
RETURN
Move
(VR mode)
Add
MOVE
Delete
EXIT
1. Press the PLAY LIST button with the disc stopped.
The Edit Playlist screen is displayed.
2. Press the ▲▼ buttons to select the title you want to edit from the
Playlist, and then press the OK or ► button.
3. Press the ▲▼ buttons to select Edit Scene, then press the OK or ►
button.
The Edit Scene screen is displayed.
English - 69
01375B-VR350,355-UMG,XSG-ENG.ind69 69
2007-04-02 오후 4:59:58
Playing a Selected Scene
DVD-Recorder
Edit Scene
DVD-RAM(VR)
Scene No.
2/7
Playlist No. 3
Play
Modify
01 00:00:03
02 00:00:42
03 00:00:04
04 00:00:03
05 00:00:11
06 00:00:04
OK
RETURN
Move
Add
MOVE
Delete
EXIT
DVD-Recorder
Edit Scene
DVD-RAM(VR)
Scene No.
2/7
Playlist No. 3
Play
Modify
01 00:00:03
02 00:00:42
03 00:00:04
04 00:00:03
05 00:00:11
06 00:00:04
OK
RETURN
Move
Add
MOVE
DVD-Recorder
Delete
EXIT
Modify Scene
DVD-RAM(VR)
Scene No. 002
Start
End
Title List : 1/7
00:00:04
00:00:00
00:00:04
►
Start
End
Change
MOVE
OK
Cancel
RETURN
DVD-Recorder
EXIT
Follow steps 1 to 3 on page 70.
4. Press the ▲▼◄ ► buttons to select the scene you want to play, then
press the OK button.
The playlist title to be played is selected.
5. Press the OK button again.
The selected scene will be played back.
• To stop scene play, press the STOP button.
Modifying a Scene (Replacing a Scene)
Follow steps 1 to 3 on page 70.
4. Press the ▲▼◄ ► buttons to select the scene you want to modify,
then press the OK button.
5. Press the ▲▼ buttons to select Modify, then press the OK button.
The Modify Scene screen is displayed.
6. Press the OK button at the start point of the scene.
• The image and starting point time are displayed on the Start window.
• Select the starting or ending point of the section you want to modify
using the playback related buttons.
• Playback related buttons: ( ,
, ,
, )
7. Press the OK button at the end point of the scene.
• The image and ending point time are displayed in the End window.
8. Press the ◄► buttons to select Change, then press the OK button.
• The scene you want to modify is changed with the selected section.
Modify Scene
DVD-RAM(VR)
Scene No. 002
Start
End
Title List : 1/7
00:00:04
00:00:07
00:00:07
ІІ
Start
End
Change
MOVE
OK
Cancel
RETURN
EXIT
DVD-Recorder
Edit Scene
DVD-RAM(VR)
Scene No.
2/7
Playlist No. 3
Play
Modify
01 00:00:03
02 00:00:03
03 00:00:04
04 00:00:03
05 00:00:11
06 00:00:04
OK
RETURN
Move
Editing
Add
MOVE
Delete
EXIT
English - 70
01375B-VR350,355-UMG,XSG-ENG.ind70 70
2007-04-02 오후 5:00:02
Moving a Scene (Changing the Position of a Scene)
DVD-Recorder
Edit Scene
DVD-RAM(VR)
Scene No.
2/7
Playlist No. 3
Play
Modify
01 00:00:03
02 00:00:42
03 00:00:04
Move
Add
04 00:00:03
05 00:00:11
06 00:00:04
OK
RETURN
MOVE
Delete
EXIT
Follow steps 1 to 3 on page 70.
4. Press the ▲▼◄ ► buttons to select the scene you want to move
(change the position), then press the OK button.
5. Press the ▲▼ buttons to select Move, then press the OK button.
• A yellow selection window is displayed on the scene to be moved.
6. Press the ▲▼◄ ► buttons to select the position to which you want to
move the selected scene, then select the OK button.
• The selected scene is moved to the selected position.
■ You cannot move the selected scene to the position of the next
scene, because the selected scene should be inserted before
that position, which requires no action.
■ Depending on the kind of disc, the displayed screen may be
slightly different.
DVD-Recorder
Edit Scene
DVD-RAM(VR)
Scene No.
2/7
Playlist No. 3
Play
Modify
01 00:00:03
02 00:00:42
03 00:00:04
04 00:00:04
05 00:00:11
06 00:00:04
OK
RETURN
Move
Add
MOVE
Delete
EXIT
DVD-Recorder
Add Scene
DVD-RAM(VR)
Scene No. 002
Start
End
Title List : 1/7
00:00:04
00:00:00
00:00:04
►
Start
End
Add
MOVE
OK
Cancel
RETURN
EXIT
DVD-Recorder
Add Scene
DVD-RAM(VR)
Scene No. 002
Start
End
Title List : 1/7
00:00:04
Adding a Scene
Follow steps 1 to 3 on page 70.
4. Press the ▲▼◄ ► buttons to select the scene that will have a new
scene inserted before it, then press the OK button.
A yellow selection window is displayed on the scene to be added as
the new scene.
5. Press the ▲▼ buttons to select Add, then press the OK button.
The Add Scene screen is displayed.
6. Press the OK button at the starting point of the scene.
• The image and starting point time are displayed in the Start window.
• Select the end point of the section where you want to add the new
scene using the playback related buttons.
• Playback related buttons: ( ,
, ,
, )
7. Press the OK button at the end point of the scene.
• The image and time of the end point are displayed in the End window
• To cancel, press the ◄ ► buttons to select Cancel and then press
the OK button.
8. Press the ◄ ► buttons to select Add, then press the OK button.
• The section you want to add is inserted prior to the scene selected in
step 4.
00:00:07
00:00:07
ІІ
Start
End
Add
MOVE
MOVE
OK
OK
Cancel
RETURN
RETURN
Editing
DVD-Recorder
EXIT
Edit Scene
DVD-RAM(VR)
Scene No.
2/8
Playlist No. 3
Play
Modify
01 00:00:03
02 00:00:03
03 00:00:42
04 00:00:04
05 00:00:03
06 00:00:11
OK
RETURN
Move
Add
MOVE
Delete
EXIT
English - 71
01375B-VR350,355-UMG,XSG-ENG.ind71 71
2007-04-02 오후 5:00:09
Deleting a Scene
DVD-Recorder
Edit Scene
DVD-RAM(VR)
Scene No.
2/8
Playlist No. 3
Play
Modify
01 00:00:03
02 00:00:03
03 00:00:42
Move
Follow steps 1 to 3 on page 70.
4. Press the ▲▼◄ ► buttons to select the scene you want to delete,
and then press the OK button.
5. Press the ▲▼ buttons to select Delete, then press the OK button.
Add
04 00:00:04
05 00:00:03
06 00:00:11
OK
RETURN
MOVE
Delete
EXIT
DVD-Recorder
Edit Scene
DVD-RAM(VR)
Scene No.
2/7
Playlist No. 3
Play
Modify
01 00:00:03
02 00:00:03
03 00:00:42
04 00:00:04
05 00:00:03
06 00:00:11
OK
RETURN
Move
Add
MOVE
Delete
EXIT
▌ Copying a Playlist to the VCR
1. Press the PLAY LIST button with the disc stopped.
The Edit Playlist screen is displayed.
2. Press the ▲▼ buttons to select the title you want to edit from the
Playlist, and then press the OK or ► button.
3. Press the ▲▼ buttons to select Copy, then press the OK button.
• The title you choose is played and copied to VCR tape.
4. Press the EXIT button after the operation has finished. The menu
screen will disappear.
■ Copy function is not allowed in progressive scan mode.
DVD-RAM(VR)
Edit Playlist
▌ Deleting a Playlist from the Playlist
Dolphin
Editing
Do you want to delete?
Dolphin
Yes
2 Scene
2. Press the ▲▼ buttons to select the title you want to edit from the
Playlist, then press the OK or ► button.
No
JAN/01/2007 01:00
MOVE
OK
RETURN
1. Press the PLAY LIST button with the disc stopped.
The Edit Playlist screen is displayed.
EXIT
3. Press the ▲▼ buttons to select Delete, then press the OK button.
4. Press the ◄ ► buttons to select Yes, then press the OK button.
You automatically return to the Edit Playlist screen after the delete
operation has finished.
English - 72
01375B-VR350,355-UMG,XSG-ENG.ind72 72
2007-04-02 오후 5:00:16
Disc Manager
DVD-Recorder
▌ Editing the Disc Name
Rename
DVD-RAM(VR)
Follow these instructions to give a name to a disc.
Disc
DVD-VR355 only
Save
Back Space
MOVE
Space
OK
Delete
Clear
RETURN
DVD-Recorder
EXIT
Disc Manager
DVD-RAM(VR)
Title List
Disc Name
: Disc
►
Playlist
Disc Protection
: Not Protected
►
Disc Manager
Disc Format
►
Delete All Title Lists
►
Programme
Setup
Copy
MOVE
OK
RETURN
EXIT
1. With the unit in Stop mode, press the MENU button.
2. Press the ▲▼ buttons to select Disc Manager, then press the OK or
► button.
3. Press the ▲▼ buttons to select Disc Name, then press the OK or ►
button.
The Edit Name screen is displayed.
4. Enter the desired characters using the ▲▼◄ ► buttons.
• Back Space : Deletes the character before the cursor.
• Space : Enters a blank and moves the cursor one forward (to the right).
• Delete : Deletes the character at the cursor position.
• Clear : Deletes all the character inputs.
• Save : Registers the character inputs.
5. Press the ▲▼◄ ► buttons to select Save, then press the OK button.
A disc name is given to the disc.
■ To edit the disc name, you need to clear disc protection in
advance.
■ Depending on the kind of disc, the displayed screen may be
different.
DVD-Recorder
Disc Manager
▌ Disc Protection
DVD-RAM(VR)
Title List
Disc Name
:
►
Playlist
Disc Protection
: Protected
►
Disc Manager
Disc Format
►
Delete All Title Lists
►
Disc Protect allows you to protect your discs from being formatted
or deleted due to unintended operations.
Programme
Setup
1. With the unit in Stop mode, press the MENU button.
Copy
MOVE
OK
RETURN
EXIT
3. Press the ▲▼ buttons to select Disc Protection, then press the OK
or ► button.
Editing
2. Press the ▲▼ buttons to select Disc Manager, then press the OK or
► button.
4. Press the ▲▼ button to select Protected, then press the OK or ►
button.
English - 73
01375B-VR350,355-UMG,XSG-ENG.ind73 73
2007-04-02 오후 5:00:21
▌ Formatting a Disc
• DVD-RAM/+RW
DVD-Recorder
Disc Manager
DVD-RAM(VR)
Title List
Disc Name
:
►
Playlist
Disc Protection
: Not Protected
►
Disc Manager
Disc Format
: DVD-VR
you want to format disc?
DiscDoFinalise
Use these instructions to format a disc.
The Disc Protection should be cleared.
►
►
DVD-VR355 only
Programme
Yes
Setup
No
1. With the unit in Stop mode, press the MENU button.
Copy
MOVE
OK
RETURN
EXIT
• DVD-RW
DVD-Recorder
Disc Manager
DVD-RW(VR)
Title List
Disc Name
:
►
Playlist
Disc Protection
: Not Protected
►
Disc Format
: DVD-VR
Disc ManagerChoose the recording format for DVD-RW.
Disc Finalise
Programme Delete All Title Lists
DVD-VR
Setup
►
►
►
DVD-V
Copy
MOVE
OK
RETURN
EXIT
2. Press the ▲▼ buttons to select Disc Manager, then press the OK or
► button.
3. Press the ▲▼ buttons to select Disc Format, then press the OK or ►
button.
DVD-RAM/+RW
• You will be prompted with the confirmation message ‘Do you want to
format disc?’
• You will be prompted with the confirmation message ‘All data will be
deleted. Do you want to continue.’
DVD-RW
• You will be prompted with the confirmation message ‘Choose the
recording format for DVD-RW.’
• You will be prompted with the confirmation message ‘All data will be
deleted. Do you want to continue?’
4. Press the ◄ ► buttons to select Yes, then press the OK button.
The disc is formatted.
DISC
DVD-VR mode
DVD-V mode
DVD-RAM
DVD-RW
DVD-RW
DVD-R
DVD-VR and DVD-V mode are defined according to their recording
format.
DVD-Recorder
Disc Manager
▌ Finalising a Disc
DVD-RW(VR)
Title List
Disc Name
:
►
Playlist
Disc Protection
: Not Protected
►
Disc Manager
Disc Format
: DVD-VR
Do you want to finalise disc?
Disc Finalise
►
Delete All Title Lists
Yes
►
Programme
Setup
After you record titles onto a DVD-RW/±R disc with your DVD recorder, it
needs to be finalised before it can be played back on external devices.
►
No
Copy
OK
RETURN
Editing
MOVE
DVD-VR355 only
EXIT
1. With the unit in Stop mode, press the MENU button.
2. Press the ▲▼ buttons to select Disc Manager, then press the OK or
► button.
3. Press the ▲▼ button to select Disc Finalise, then press the OK or ►
button.
You will be prompted with the message ‘Do you want to finalise disc?’
4. Press the ◄ ► buttons to select Yes, then press the OK button. You
will be prompted again with the message “Disc will be finalised. Do you
want to continue?”
5. Press the ◄ ► buttons to select Yes, then press the OK button. The
disc is finalised.
English - 74
01375B-VR350,355-UMG,XSG-ENG.ind74 74
2007-04-02 오후 5:00:23
■ Once a disc is finalised, you cannot delete titles from the record
list.
■ After being finalised, the DVD-RW(V mode)/±R operates in the
same manner as a DVD-Video.
■ Depending on the disc type, the displayed screen may be
different.
■ Finalising time may be different depending on the amount of data
recorded on the disc.
■ Data on the disc will be damaged if the recorder is powered off
during finalise process.
■ You can finalise the disc automatically using EZ REC MODE
(see page 58).
DVD-Recorder
Disc Manager
▌ Unfinalising a Disc (V/VR mode)
DVD-RW(VR:F)
Title List
Disc Name
:
►
Playlist
Disc Format
: DVD-VR
►
Disc Manager
Disc Unfinalise
Do you want to unfinalise disc?
►
Programme
Setup
Yes
Copy
MOVE
OK
RETURN
1. With the unit in Stop mode, press the MENU button.
2. Press the ▲▼ buttons to select Disc Manager, then press the OK or
► button.
No
EXIT
3. Press the ▲▼ button to select Disc Unfinalise, then press the OK or
► button.
You will be prompted with the message ‘Do you want to unfinalise
disc?’.
4. Press the ◄ ► buttons to select Yes, then press the OK button. You
will be prompted again with the message “Disc will be unfinalised. Do
you want to continue?”
5. Press the ◄ ► buttons to select Yes, then press the OK button.
The disc is unfinalised.
■ A DVD-RW can be finalised or unfinalised in V mode.
Finalise
Unfinalise
Mark
DVD-Video(RW)
DVD-RW(V)
Operation
Same as DVD-Video
Additional recording, protection
and deletion are possible.
■ A DVD-RW can be finalised or unfinalised in VR mode.
Unfinalise
Mark
DVD-RW(VR:F)
DVD-RW(VR mode)
Operation
Additional recording,
deletion, editing, and
protection are impossible.
Additional recording,
deletion, editing, and
protection are possible.
Editing
Finalise
English - 75
01375B-VR350,355-UMG,XSG-ENG.ind75 75
2007-04-02 오후 5:00:25
▌ Delete All Title Lists
DVD-Recorder
Disc Manager
DVD-RAM(VR)
Title List
Disc Name
:
►
Playlist
Disc Protection
: Not Protected
►
Disc Manager
Disc Format
: DVD-VR
Do you
want to delete all title lists?
Disc
Finalise
Programme
Setup
►
Delete All Title Lists
Yes
No
OK
1. With the unit in Stop mode, press the MENU button.
2. Press the ▲▼ buttons to select Disc Manager, then press the OK or
► button.
Copy
MOVE
DVD-VR355 only
►
RETURN
EXIT
3. Press the ▲▼ buttons to select Delete All Title Lists, then press the
OK or ► button.
• You will be prompted with the confirmation message ‘Do you want to
delete all title lists?’.
• When Protected Title exists : The Delete All Title List function will
not operate. If there is a title containing a still picture, however,
that function will not operate. If you want to delete a protected title,
disable Protect for it on the Lock item.
4. Press the ◄ ► buttons to select Yes, then press the OK button.
All title lists are deleted.
DVD-Recorder
Disc Manager
▌ Edit Compatible
DVD+RW
Title List
Disc Name :
►
Disc Manager
Disc Format
►
Edit
Compatible
Do you
want
to execute Edit Compatible?
Programme
This may take more than an hour
depending on the configuration.
Setup
Copy
MOVE
Yes
OK
►
For DVD+RW discs, this function needs to be performed in order to
view edited chapters or titles on a standard DVD player.
No
RETURN
DVD-VR355 only
EXIT
1. With the unit in Stop mode, press the MENU button on the remote
control.
2. Press the ▲▼ buttons to select Disc Manager, and then press the
OK or ► button.
3. Press the ▲▼ buttons to select Edit Compatible, and then press the
OK or ► button.
4. Press the ◄ ► buttons to select Yes, and then press the OK button.
The Edit Compatible process will start.
Editing
After performing Edit Compatible, you can move to the title menu of
the disc by pressing the TITLE MENU button.
■ If you don’t performing Chapter Edit, you will be prompted with
the confirmation message “You do not need to execute Edit
Compatible.”
English - 76
01375B-VR350,355-UMG,XSG-ENG.ind76 76
2007-04-02 오후 5:00:27
Reference
Troubleshooting (DVD)
If your product malfunctions, go through the check points below before contacting a Samsung authorized
service centre.
Problem
No power.
Explanation/Solution
• Check whether the power cord is securely plugged into the power outlet.
• Did you press the /I button of your DVD Recorder & VCR.
The input is displayed The DVD Recorder & VCR requires some time to initialise after it is turned on.
for a while when the
If 'Quick Recording' function is set to on, the DVD Recorder & VCR will power on quickly,
power turns on.
which enables you to immediately record a desired channel. (see page 33)
Cannot record TV
programmes.
• Check whether the power cord is securely plugged into the power outlet.
• Did you set the DVD Recorder & VCR programme settings correctly?
• Check the free space on your disc.
• Check the antenna cable is connected.
Timer recording does
not work properly.
• Check the recording time, end time and current time settings again.
• Recording will be canceled if the power is interrupted due to a power failure or other
reason during recording.
Cannot record.
• Check whether the disc is formatted. This product can record on formatted discs only.
• Check whether your disc has a sufficient free space.
I pressed the REC
button but there is no
response.
If a programme is copy protected, you cannot record it.
I forgot the password
for parental lock.
Press the PROG ( / ) buttons of your DVD Recorder & VCR at the same time when
the power is on, and then press the STANDBY/ON button.
All settings including password will revert to factory settings.
Do not use it if not absolutely required.
(Note that this function is available only when there is no disc inserted.)
Cannot play the disc.
• Check whether the disc is inserted correctly with the label facing up.
• Check the regional code of your DVD disc.
• This DVD Recorder & VCR cannot playback some types of disc.
No sound.
• Are you watching a programme in slow or skip mode?
If you are playing a programme at a speed other than normal speed, sound is not
output. (except for forward search Playback (Fast 1) and you cannot also hear during
scanning MPEG4 and VCD in all mode.)
• Check the connections and initial settings.
• Check whether the disc is damaged.
Clean up the disc, if necessary.
• Check whether the disc is inserted correctly with the label facing up.
Reference
English - 77
01375B-VR350,355-UMG,XSG-ENG.ind77 77
2007-04-02 오후 5:00:29
Troubleshooting (DVD)
Problem
icon appears on
the screen.
Explanation/Solution
You cannot use the operation or function due to one of the following reasons:
(1) Your DVD disc does not support the feature (for example, angles)
(2) You’ve requested a title, chapter, or scan time that is out of the correct range.
Play mode settings
are different from the The disc does not support all the selected functions.
In this case, some settings you configure on the Setting menu may not work properly.
settings configured
with the Setting menu.
Cannot change the
aspect ratio.
Aspect ratio is fixed for DVD disc.
No audio output.
Check whether you selected correct digital output options in the Audio Output Options
menu.
Did you move your DVD Recorder & VCR suddenly from a cold place to a warm place?
No video or audio output.
In this case, do not connect the plug to the power outlet and wait for two hours.
The disc tray is ejected
Then insert the disc and try to play again.It will work properly when condensation has
after 2 to 5 seconds.
evaporated.
Angle operation
Angle operation is available only when the disc contains images captured at different
does not work during
angles.
playback of a DVD disc.
Reference
• Check whether there is damage or foreign materials on your disc.
The disc revolves, but
• Some discs with bad manufacturing quality may not be played back.
no image or bad quality
• If the scene changes from dark to bright suddenly, the screen may jitter temporarily, but
images are output.
it is not a defect.
Desired audio
language and subtitle
language are not
played.
Audio languages and subtitle languages are disc-specific.
Only the sound and subtitle languages contained on a DVD disc are available and
displayed on the disc menu.
No progressive
output.
• Check whether PS is displayed on front panel.
• Make sure to change the component video output using the Progressive button when
the disc is stopped.
The remote control
doesn’t work.
• Point the remote control at the remote control sensor on your DVD Recorder & VCR.
Operate within distance. (15ft)
Remove obstacles between your DVD Recorder & VCR and remote control.
• Check whether the batteries are depleted.
Other problems
• Read the table of contents and then find and read the sections describing your
problem, and follow the directions given.
• Turn the unit off and on.
• If your problem still persists, contact your nearest Samsung service centre.
No HDMI output.
(DVD-VR355 only)
• Check the Video output is HDMI enabled.
• Check the connection between the TV and the HDMI jack of the DVD Recorder & VCR.
• See if your TV supports this 576p/720p/1080i DVD Recorder & VCR.
Abnormal HDMI
output screen.
(DVD-VR355 only)
• If snow noise appears on the screen, it means that TV does not support HDCP
(High-bandwidth Digital Content Protection).
HDMI output Jitter
(DVD-VR355 only)
• Check your TV system setup correctly.
• Screen Jitter may occur when the frame rate is converted from 50Hz to 60Hz for
720p/1080i HDMI (High Definition Multimedia Interface) Output.
• Please refer to the user’s manual of your TV.
English - 78
01375B-VR350,355-UMG,XSG-ENG.ind78 78
2007-04-02 오후 5:00:30
Troubleshooting (VCR)
Before contacting a Samsung authorized service centre, perform the following simple checks.
Problem
Explanation/Solution
No power
• Check that the power plug is connected to a wall outlet.
• Have you pressed the /I button?
You cannot insert a video cassette
• A video cassette can only be inserted with the window side up and the
safety tab facing you.
The television programme was not
recorded
• Check the DVD Recorder & VCR antenna connections.
• Is the DVD Recorder & VCR tuner properly set?
• Check if the safety tab is intact on the cassette.
Timer recording was unsuccessful
• Re-check the recording start/stop time settings and the current time
• Check whether you inserted a tape which has enough time to record
No playback picture or the picture is
distorted
• Check to see if you are using a prerecorded tape.
You cannot see normal broadcasts
Noise bars or streaks on playback
• Check the tuner/external setting. It should be on tuner.
• Check the TV antenna connections.
• Press the PROG/TRK ( / ) buttons to minimize this effect.
When the ►II button is pressed during • A still picture may have “noise bars”, depending on the condition of
playback, the still picture has severe
the tape. Press the PROG/TRK ( / ) buttons during slow motion to
“noise bar” streaks
minimize this effect.
Video Head Cleaning
• If poor pictures appear on a variety of cassettes, the video heads may
need cleaning. This is not a common problem and unless it appears,
the heads should not be cleaned.
When cleaning the video heads, read all instructions provided with
the head cleaning cassette. Incorrect head cleaning can permanently
damage the video heads.
If you are unable to solve the problem after reading the above instructions, note:
• The model and serial number on the rear of your DVD Recorder & VCR
• The warranty information
• A clear description of the problem
Then contact your nearest SAMSUNG authorized service centre.
Reference
English - 79
01375B-VR350,355-UMG,XSG-ENG.ind79 79
2007-04-02 오후 5:00:31
Specifications
General
Input
Output
VCR
DVD
Power requirements
AC110 - 240V, 50/60Hz
Power consumption
30 Watts
Weight
4.8 Kg
Dimensions
430(W) x 321(D) x 79(H)
Operating temp.
+5°C to +35°C
Other conditions
Keep level when operating. Less than 75% operating humidity
Video input (Rear)
RCA jack : 1.0Vp-p(unbalanced) 75Ω
Audio input (Rear)
RCA jack : -8dBm, 47Kohm unbalanced
Front input
RCA jack, DV
RF out
UHF 21-69 (Initial CH36)
Audio (DVD, VCR)
RCA jack, Audio L/R
Audio (DVD only)
Digital audio out OPTICAL COAXIAL
Video (DVD, VCR)
RCA jack, S-Video Out, Component out, HDMI (576p, 720p,
1080i) (DVD-VR355 only)
Tape format
VHS type video tape
Colour system
PAL
Tuning system
B/G, D/K
Video S/N
Above 43dB (standard recording)
Resolution
Above 240 lines (standard recording)
Audio S/N
Above 68dB (Hi-Fi), 39dB (Mono)
Audio frequency characteristics
20Hz-20KHz (Hi-Fi)
Picture Compression format
MPEG-II
Audio Compression format
Dolby AC-3 256kbps
Recording Quality
XP (8 Mbps), SP (4 Mbps), LP (2 Mbps), EP (1.2/0.8 Mbps)
Video S/N
Ratio Min. 50dB at standard recording
Audio S/N
Ratio Min. 75dB
Audio frequency characteristics
20 Hz ~ 20 KHz
Audio Output
For DVD discs, audio signals recorded at 96kHz sampling frequency are converted into and output at 48kHz.
DVD
VCD
AUDIO CD (CD-DA)
48 / 96KHz
44.1KHz
44.1KHz
Digital Audio Output
48KHz
44.1KHz
44.1KHz
Reference
Disc Type
Analog Audio Output
English - 80
01375B-VR350,355-UMG,XSG-ENG.ind80 80
2007-04-02 오후 5:00:33
Contact SAMSUNG WORLD WIDE
If you have any questions or comments relating to Samsung products, please contact the SAMSUNG
customer care centre.
Region
North America
Country
CANADA
MEXICO
U.S.A
ARGENTINE
BRAZIL
Latin America
CHILE
COSTA RICA
ECUADOR
EL SALVADOR
GUATEMALA
JAMAICA
PANAMA
PUERTO RICO
REP. DOMINICA
TRINIDAD & TOBAGO
VENEZUELA
COLOMBIA
BELGIUM
CZECH REPUBLIC
DENMARK
FINLAND
FRANCE
Europe
CIS
GERMANY
HUNGARY
ITALIA
LUXEMBURG
NETHERLANDS
NORWAY
POLAND
PORTUGAL
SLOVAKIA
SPAIN
SWEDEN
U.K
Republic of Ireland
Switzerland
RUSSIA
KAZAHSTAN
UZBEKISTAN
UKRAINE
LITHUANIA
LATVIA
ESTONIA
AUSTRALIA
CHINA
HONG KONG
INDIA
Asia Pacific
INDONESIA
JAPAN
MALAYSIA
PHILIPPINES
SINGAPORE
THAILAND
TAIWAN
VIETNAM
SOUTH AFRICA
Middle East & Africa
U.A.E
01375B-VR350,355-UMG,XSG-ENG.ind81 81
Customer Care Center
1-800-SAMSUNG (7267864)
01-800-SAMSUNG (7267864)
1-800-SAMSUNG (7267864)
0800-333-3733
0800-124-421
4004-0000
800-726-7864 (SAMSUNG)
0-800-507-7267
1-800-10-7267
800-6225
1-800-299-0013
1-800-234-7267
800-7267
1-800-682-3180
1-800-751-2676
1-800-7267-864
0-800-100-5303
01-8000112112
02 201 2418
844 000 844
Distributor pro Českou republiku :Samsung
Zrt., česka organizační složka Vyskočilova 4,
14000 Praha 4
70 70 19 70
030-6227 515
3260 SAMSUNG or
08 25 08 65 65 (€ 0,15/Min)
01805 - 121213 (€ 0,14/Min)
06-80-SAMSUNG (7267864)
800-SAMSUNG (7267864)
0032 (0)2 201 24 18
0900 20 200 88 (€ 0,10/Min)
815-56 480
0 801 801 881
80 8 200 128
0800-SAMSUNG (726786)
902 10 11 30
0771-400 200
0870 SAMSUNG (7267864)
0818 717 100
0800-7267864
8-800-200-0400
8-800-080-1188
8-800-120-0400
8-800-502-0000
8-800-77777
800-7267
800-7267
1300 362 603
800-810-5858, 010-6475 1880
3698 - 4698
3030 8282
1800 110011
0800-112-8888
0120-327-527
1800-88-9999
1800-10-SAMSUNG (7267864)
1800-SAMSUNG (7267864)
1800-29-3232
02-689-3232
0800-329-999
1 800 588 889
0860 7267864 (SAMSUNG)
800SAMSUNG (7267864)
8000-4726
Web Site
www.samsung.com/ca
www.samsung.com/mx
www.samsung.com
www.samsung.com/ar
www.samsung.com/br
www.samsung.com/cl
www.samsung.com/latin
www.samsung.com/latin
www.samsung.com/latin
www.samsung.com/latin
www.samsung.com/latin
www.samsung.com/latin
www.samsung.com/latin
www.samsung.com/latin
www.samsung.com/latin
www.samsung.com/latin
www.samsung.com.co
www.samsung.com/be
www.samsung.com/cz
www.samsung.com/dk
www.samsung.com/fi
www.samsung.com/fr
www.samsung.de
www.samsung.com/hu
www.samsung.com/it
www.samsung.lu
www.samsung.com/nl
www.samsung.com/no
www.samsung.com/pl
www.samsung.com/pt
www.samsung.com/sk
www.samsung.com/es
www.samsung.com/se
www.samsung.com/uk
www.samsung.com/uk
www.samsung.com/ch
www.samsung.ru
www.samsung.kz
www.samsung.uz
www.samsung.com/ur
www.samsung.lt
www.samsung.com/lv/index.htm
www.samsung.ee
www.samsung.com/au
www.samsung.com.cn
www.samsung.com/hk
www.samsung.com/in
www.samsung.com/id
www.samsung.com/jp
www.samsung.com/my
www.samsung.com/ph
www.samsung.com/sg
www.samsung.com/th
www.samsung.com/tw
www.samsung.com/vn
www.samsung.com/za
www.samsung.com/mea
2007-04-02 오후 5:00:34
English
01375B-VR350,355-UMG,XSG-ENG.ind82 82
AK68-01375B
2007-04-02 오후 5:00:35
pU*« ULOKFð
DVD-VR350
DVD-VR355
AK68-01375B
DVD-VR350-01375B-IB-ar
English
1
2007.4.2, 3:49 PM
WOÐdF«
tO³Mð
Í√ l{Ë ÂbŽ V−¹Ë ¨–«–d« Ë√ ¡U*« «dDI “UN'« i¹dFð ÂbŽ V−¹
Æ“UN'« vKŽ ¨—u¼e« WO½P qz«uÝ vKŽ Íu²% WO½¬
wÐdN?J« —UO²?« qBH “U?N− w?Ozd« —U?O²« fÐU?
«b²Ý« r?²¹
X
Ë Í√ w qOGA²K «e
Î ¼Uł tKFł wG³M¹Ë
d¹c%
¡e'« Ë√® ¡UDG« pHð ô ¨WOÐdNJ« UbBK ÷d
^ F²« dÞU qOKI²
Æ©“UN'« s wHK)«
ÆÂb??²?*« q?³?
s? «b?²?Ýö? W?(U ¡Ï«e?ł√ “U?N?'« q?š«bÐ b?łu?ð ô
ÆW½UOB« ‰ULŽ√ qJÐ ÂUOIK 5K¼R*« W½UOB« wHþu0 W½UF²Ýô« vłd¹Ô
w²«Ë Z²M*« w ¢wUF« wÐdNJ« —UO²« dÞU¢ v≈ ed« «c¼ dOA¹
WLN UEŠö
w³?U
f³?I v?KŽ “UN?'« «cN?Ð ’U)« wÐd?NJ« —U?O²?« pKÝ q?L²?A¹
ÊuMÝ tłË vKŽ dNBM*UÐ WU)« WLOI« dNEð ÆdNBM vKŽ Íu²×¹
«b??²?Ý« V?−??O? ¨d?N?B?M??*« «c?¼ ‰«b?³?²??Ý« d?_« V?K?D?ð «–≈ Æf??³?I?*«
V?M?& ƉbF?*« f?HM?ÐË w?ÝUO?I?« BS 1362 dN?BM?L?‡ o?ÐU?D d?N?BM?
ÆpHK ö
Î ÐU
¡UDG« ÊU «–≈ ¨dNBM*« ¡UDž Ÿe½ ¡UMŁ√ f³I*« «b²Ý«
UIÔÐUD ÊuJ¹ Ê√ V−O ¨dNBM*« ¡UDž ‰«b³²Ý« Í—ËdC« s ÊU «–≈
Æf³I*« ÊuMÝ tłË Êu fHM
f³I*« ÊU «–≈ ÆbL²F*« qOu« s WK¹b³« WODž_« vKŽ ‰uB(« pMJ1
qÐUJ« ÊU Ë√ ‰eM*UÐ …œułu*« wÐdNJ« —UO²« cUM* rzö dOž X³¦*Ô«
pKÝ vKŽ ‰uB(« V−O ¨wÐdNJ« cHM*« v≈ qB¹ ô YO×Ð «d
Î OB
bL²F*« qOu« …—UA²Ý« Ë√ WOM_« WOŠUM« s VÝUMË bL²F wŽd
ÆW“ö« …bŽU*« vKŽ ‰uB×K
dNBM*« p V−O ¨f³I*« lD
dOž dš¬ q¹bÐ œułË ÂbŽ WUŠ w U√
—U?O??ð c?šQ?0 f??³?I?*« q??u?ð ô ÆW?M??¬ W?I?¹d?D??Ð f?³?I??*« ëd??²??Ý« r?Ł
s WOÐdNJ« WbB« dD) ÷dF²« v≈ p– ÍœR¹ b
YOŠ ªwOz—
ÆvDG*« dOž Êd*« pK«
f³?I*« ëdš≈ V−¹ ¨w?Ozd« ¡UÐd?NJ« cH?M s “UN'« q?BH
e??¼U?ł ¡U??Ðd?N??J??K? w???O??zd??« f?³??I?*« q??F??−?¹ U??2 ¨c??H?M??*« «c?¼ s??
ÆqOGA²K
W¹dJ WOJK ‚uIŠ Vłu0 WBšd «c¼ Âb²*« qObÐ WId*« Z²M*« …bŠË
ÆÈdš√ WMOF ·«dÞ_ UN²OJK q?I½ sJ1 WMOF
q??³?
s?? Í—U?−??²?« d?O??ž ’U?)« «b???²??Ýô« v?K??Ž h?O??šd?²??« «c?¼ d??B?×??M?¹
W?ŠuM?2 ‚u?I?Š W?¹√ b?łu?ð ô ÆW?B?šd?*« U?¹u?²?;U?Ð o?K?F?²?¹ U?L?O? ªp?K?N?²??*«
ÆÍ—U?−²« «b²Ýö
q??L?A?¹ ôË Ác??¼ Z?²?M??*« …b?ŠË ·ö??Ð Z??²?M? …b??ŠË W?¹√ h?O??šd?²?« w?D??G?¹ ô
dO¹UF l WIÐUD² WOKLŽ Ë√ WBšd dOž Z²M …bŠË W¹√ pc hOšd²«
Z²M*« …bŠË l UNFOÐ Ë√ UN«b²Ý« r²¹ ISO/IEC 13818-3 Ë√ ISO/IEC 11172-3
p? Ë√ØË d?O?H?Að w? Ác?¼ Z?²?M?*« …bŠË «b??²?Ý« h?Ošd?²?« s?L?C²?¹ ÆÁc?¼
ISO/IEC 13818-Ë√ ISO/IEC 11172-3 dO¹UF l WIÐUD²*« uB« UHK …dHý
oÐUD²ð ô w²« Z²M*« nzUþË Ë√ «eO* ‚uIŠ Í√ hOšd²« «c¼ `M1 ôË Æ3
ÆISO/IEC 13818-3Ë√ ISO/IEC 11172-3 dO¹UF? l
tO³Mð
UbBK ÷dF²« dDš
`²Hð ô WOÐdNJ«
WÐUù« Ë√ WOÐd?NJ« WbB« d?ÞU< Âb²?*« ÷dFðÔ
ÆWOBA«
«cN?Ð W?Id?*« W?L?N*« U?L?OK?F?²« v?≈ e?d« «c?¼ d?OA?¹
ÆZ²M*«
Ë√ V²J?« W½«eš q¦ ¨W?IO{ WŠU w? “UN'« «c¼ VO?dð ‰ËU% ô
ÆWNÐUA …bŠË W¹√
÷dF²« Ë√ oz«dŠ »uA½ v≈ ÍœRð b
w²« —«d{_« VM−² ∫
ÆWÐuÞd« Ë√ —UDú “UN'« «c¼ ÷dFð ô ,WOÐdNJ« UbBK
dOž —eO WFý√ u¹bOH« “UNłË DVD q− s q Âb²¹
w —U?C« ŸUF?ýû ÷dF?²« w? V³?²ð Ê√ U?NMJ?1 WO?zd
Ær'« u×½ UNNOłuð WUŠ
2
∫tO³Mð
U?IÎË W?×?O?×? W?I?¹d?D?Ð q?−??*« q?O?GA?ð s? b?Q?²?« v?łd?¹
ÆULOKF²K
tO³Mð
Æ—eOK« WFý√ Z²M*« «c¼ Âb²¹
«¡«dłSÐ ÂUOI« Ë√ j³C« …eNł√ Ë√ rJײ« …eNł√ «b²Ý« ÍœR¹ b
Æ—UC« ŸUFýù« dÞU< ÷dF²« v≈ qOb« «cNÐ …œ—«u« pK² WHU
wHþu0 W½UF?²Ýô« vłd¹Ô ÆpHMÐ UNŠö≈ Ë√ W?ODž_« `² ‰ËU% ô
ÆW½UOB« ‰ULŽ√ qJÐ ÂUOIK 5K¼R*« W½UOB«
≤ ≠ WOÐdF«
DVD-VR350-01375B-IB-ar
d¹c%
2007.4.2, 3:49 PM
اﻟﺒﺪء ﺑﺎﻟﺘﺸﻐﻴﻞ
اﻟﺒﺪء ﺑﺎﻟﺘﺸﻐﻴﻞ
اﻟﺒﺪء ﺑﺎﻟﺘﺸﻐﻴﻞ
Æ«b²Ýô« bFÐ q−*« qOGAð ·UI¹≈Ë ’dI« ëdš≈ s bQð •
W³žd« ÂbŽ bMŽ œœd²*« —UO²« cHM sŽ œœd²*« —UO²« pKÝ qB« •
ÆWK¹uÞ «d²H q−*« «b²Ý« w
wK?š«b?« ¡e?'« s? r?O?I?²?? j?š q?J?ý w? `?*U?Ð ’d?I?« n?E?½ •
ÆtM wł—U)« ¡e'« v≈ ’dIUÐ
WLN*« ÊU_« «œUý—≈
lOLł l³ð« Æ…bŠu« «b²Ý« q³
«bÎOł qOGA²« «œUý—≈ …¡«d
vłd¹
q?N?¹ YO?×?Ð qO?G?A²?« «œU?ý—SÐ k?H?²Š« ÆW?OU?²?« ÊU_« «œU?ý—≈
Æq³I²*« w lłdL UN«b²Ý«Ë UNO≈ ‰uu«
wł—U)« ¡UDG« W½UO
—U?O²?« cH?M s?Ž œœd²?*« —UO?²« p?KÝ q?B s? bQ?ð ¨ÊU_« ÷«d?ž_
Æœœd²*«
W?O??K??L?Ž w?? Èd??š_« U?³??¹c??*« Ë√ d?M??²??« Ë√ s?¹e??M??³?« Âb????²???ð ô •
ÆnOEM²«
ÆWLŽU½ ‘UL
WFDIÐ wł—U)« ¡UDG« `« •
’dI« l qUF²«
ÆWLE²M*« ‰UJ?ý_« «– ’«d
_« Âb²Ý« •
r??E??²??M?? d??O??ž ’d??
«b????²??Ý« W??U??Š w??
÷dF²¹ bI ¨©’Uš qJý Ë– ’d
® qJA«
ÆnK²K u¹bOH« “UNłË DVD q−
’«d_UÐ „Uù«
l{u YOŠ ’dI« `DÝ f* VM& •
ÆqO−²«
DVD±R Ë DVD±RW ¨DVD-RAM ’«d√
DVD-RAM/ ’«d
√ nEM «b²ÝUÐ nOEM²UÐ r
•
‘ULI« lD?
Ë√ UHEM?*« Âb²ð ô ÆÍ—U?O²š« PD
DVD- ’«d
√ nOEM² WÞuGC*« ’«d
_UÐ WU)«
Æ RAM/DVD±RW/DVD±R
WÞuGC*« WOðuB« ’«d_«Ë u¹bO≠DVD ’«d√
ÆWLŽU½ ‘UL
WFDIÐ ’dI« vKŽ …œułu*« UŁuK*« Ë√ WÐdð_« `« •
’«d_« l qUF²« UNO³Mð
Æ’U— rKIÐ Ë√ ·Uł d³Š rKIÐ Ÿu³D*« V½U'« vKŽ V²Jð ô
¡UÐdNJK …œUC*« œ«u*« Ë√ ö−*« nOEMð UýUý— Âb²ð ô
q¦ ¨…d¹UD²*« WOzUOLOJ« œ«u*« UC
Î ¹√ Âb²ð ô ÆWOJOðU²Ýô«
ÆdM²« Ë√ s¹eM³«
’«d
_« Âb²?ð ô® Æ’«d
_« vKŽ U?IBK Ë√ U
UD?Ð lCð ô
W?K?ÐU?
W?OI?³?²? U?IB?K? Ë√ W?uA?J? W?Þd?ý√ oB? œ«u?0 W?²³?¦?*«
©ÆlKK
Æ‘bK …œUC*« WODž_« Ë√ WO
«u« œ«u*« Âb²ð ô
…du²*« U
UD³« UFÐUÞ WDÝ«uÐ WŽu³D*« ’«d
_« Âb²ð ô
Æ‚u« w
Æ…—uJ*« Ë√ W¼uA*« ’«d
_« vKŽ ö
Î LŠ lCð ô
UÞUO²Šô«
•
•
•
•
•
•
Æ«œUý—ù« √d
« ©±
Æ«œUý—ù« ÁcNÐ kH²Š« ©≤
Æ«d¹cײ« qJ t³²½« ©≥
Æ«œUý—ù« q l³ð« ©¥
ÆÁUO*« s »dIUÐ “UN'« «c¼ «b²Ý« VM& ©μ
Æ“UN'« nOEMð bMŽ WUł ‘UL
WFD
Âb²Ý« ©∂
UIÎË VOd?²« WOKLF?Ð r
Ë W¹uN²« U×?² s Wײ W?¹√ oKGð ô ©∑
ÆlOMB²« WNł «œUý—ù
…e??N?ł√ q?¦? ¨…—«d?×??K? —œU?B? W?¹√ —«u?−??Ð “U?N?'« V?O?d??ð V?M?& ©∏
…eNł√ W¹√ Ë√ b
«u*« Ë√ Í—«d(« qO−²« …eNł√ ¨Í—«d(« ŸUFýù«
UN?M Y?F³?M¹ Ë√ UN?MŽ Z?²M?¹ ©uB?« «d³?J p?– w U?0® Èdš√
Æ…—«dŠ
Ë√ V?D?I?²??*« f?³?I?LK? W?³??M?U?Ð ÊU?_« q?U?Ž q¼U?& Âb?Ž V?−?¹ ©π
Êu?J??¹ ¨5?K?B?½ s?? V?D?I?²???*« f?³?I?*« Êu??J?²?¹ Æw?{—_« f??³?I?*«
5KB½ vKŽ qL²AO w{—_« f³I*« U√ Ædšü« s lÝË√ UL¼bŠ√
“—U³?« ·d?D« Ë√ d?O³?J« q?B?M« Ê√ k?Šö¹ Æw?{—√ “—UÐ ·d?ÞË
œËe*« f?³I*« V?ÝUM²?¹ r «–≈Ë Æp²ö?Ý ÊULC? “UN'« l? œËe
wM?HÐ W½UF²Ýô« vłd¹ ¨p¹b wÐdNJ« —UO²?« cHM l “UN'« l
Æ.bI« cHM*« ‰«b³²Ýô ¡UÐdNJ«
Ê√ Ë√ «b?
_« ÁQD?ð Ê√ s? wÐd?N?J« —U?O?²« q?ÐU? W¹U?L?Š vŽ«d?¹ ©±∞
tłËdš cH?M bMŽË ¨f³I?*« wdÞ bMŽ W?Uš jGCK ÷d?F²¹
Æ“UN'« s
UN?ðœbŠ w²« dOž UI×K Ë√ UId W¹√ «b²Ý« ÂbŽ vłd¹ ©±±
ÆlOMB²« WNł
n—√ Ë√ b{UM ¨rz«uI« WOŁöŁ öUŠ W¹√ «b²Ý« ÂbŽ vłd¹ ©±≤
U?Nðœb?Š w?²« ÊËœ ö?−?FÐ q?U?Š ‰UL?F?²Ý« b?M?Ž p–Ë W?O?½bF?
¨ö−FÐ qUŠ «b²Ý« bMŽ Æ“UN'« l …œËe*« Ë√ lOMB²« WNł
W¹√ ÀËb?Š VM?−² “U?N'« t?OKŽË q?U(« q?I½ bM?Ž —c(« v?Ž«d¹
ÆqU(« WU≈ W−O²½ UÐU≈
Ë√ W¹bŽ— WHUŽ ÀËbŠ WUŠ w wÐdNJ« —UO²« —bB qB« ©±≥
ÆWÌK¹uÞ …Ìd²H ‰ULF²Ý« ÊËœ “UN'« ¡UIÐ bMŽ
ÆW½UOB« ‰ULŽ√ qJÐ ÂUOIK 5K¼R W½UO wOMHÐ sF²Ý« ©±¥
¨—
Ì d{ Í_ “U?N'« ÷dF?ð WUŠ w W?½UOB?« ‰ULŽQ?Ð ÂUOI« Âe?K¹
qzUÝ »UJ½« Ë√ f³I*« Ë√ ¡UÐdNJ« qÐU w nKð ÀËbŠ q¦
t{dFð bMŽ Ë√ tKš«œ W³¹dž ¡UOý√ Ë√ ÂUł√ Ÿu
Ë Ë√ “UN'« w
dOž …—uBÐ “UN'« qOGAð WUŠ w Ë√ WÐuÞdK Ë√ —UD_« ÁUO*
ÆtÞuIÝ bMŽ Ë√ WOFO³Þ
’«d_« s¹eð
Ác¼ v?KŽ …œułu*« U½UO³« Ê≈ YOŠ ¨’«d
_U?Ð —dC« ‚U(≈ VM&
ÆWDO;« W¾O³K WOUŽ WOÝUŠ Wł—œ «– ’«d
_«
ÆdýU³*« fLA« ¡uC ÷dF²¹ l{u w ’«d
_UÐ kH²% ô •
ÆW¹uN²« bOłË œ—UÐ l{u w ’«d
_UÐ kH²Š« •
ÆUOÎÝ√— ’«d
_« s¹e²Ð r
•
ÆWHOE½ W¹ULŠ W³KŽ w ’«d
_UÐ kH²Š« •
ÊU?J? s? TłU?H? u×?½ v?KŽ u?¹b?OH?« “U?NłË DVD q?−?? qI?½ W?UŠ w? •
WÝbF«Ë qOGA²« ¡«e?ł√ vKŽ UH¦J*« ÊuJ²ð bI ¨T«œ dš¬ v≈ œ—UÐ
dE²½«Ë ’dI« Ãdš√ ¨p– ÀbŠ «–≈ ÆwFO³Þ dOž qOGAð tMŽ Z²M¹ U2
qOGAð …œUŽ≈ w ŸËdA« q³
q−*« qOGAð ¡UMŁ√ 5²ŽUÝ Ë√ WŽUÝ …b*
wÐdNJ« —UO²« cšQ0 f³I*« qOuð ÂbŽ V−¹ ¨WU(« Ác¼ w Æ’dI«
ÆÈdš√ …d qO?GA²« ‰ËUŠË ’dI« qšœ√ rŁ Æ5²?ŽUÝ …b* —UE²½ô«Ë
UNO³M²« l qUF²«
·UI¹≈ - b
t½√ s q−*« «cNÐ Èdš_« U½uJ*« qOuð q³
bQð
ÆUF
Î OLł UNKOGAð
’dI« p– ÷dF¹ bI ¨’«d
_« bŠ√ qOGAð ¡UMŁ√ q−*« „d% ô
w WOKš«b« ¡«eł_« nKð ‰UL²Š« vKŽ …ÎËöŽ ¨dJ« Ë√ ‘b)« v≈
Æq−*«
vKŽ …dOG WO½bF ÂUł√ W¹√ Ë√ ¡U*UÐ «¡ÎuK2 —u¼“ ¡U½≈ lCð ô
Æq−*«
Æ’«d
_« ל w bO« l{Ë VM&
Æ’«d
_« ל w ’dI« ·öÐ dš¬ ¡wý Í√ l{Ë VM&
¡U?Ðd?NJ?«Ë W?¹b?Žd?« n«u?F?« q?¦? ¨WO?ł—U?)« q?«u?F?« dŁR?ð b?
¨p– ÀËbŠ W?UŠ w Æq−?LK? wFO³?D« ¡«œ_« vKŽ W?OJOðU?²Ýô«
«b²ÝUÐ tKOGAð bŽ√ rŁ u¹bOH« “UNłË DVD q− qOGAð n
Ë√
c?H?M?0 t?K?O?u?ð b??Ž√ r?Ł œœd?²?*« —U?O?²?« p?K??Ý q?B?« Ë√
/ I —e?«
ÆwFO³Þ qJAÐ q−*« qLF¹ ·uÝ Æœœd²*« —UO²«
≥ ≠ WOÐdF«
DVD-VR350-01375B-IB-ar
3
2007.4.2, 3:49 PM
•
•
•
•
•
•
WÐU²JK? WKÐUI«ØUNO?KŽ WÐU²J« …œUŽù WK?ÐUI« WÞuGC*« ’«d?_« «b²Ý«
UNOKŽ
’«d_« UH«u
MPEG4 ’d «b²Ý«
WÐU²JK qÐUI«ØtOKŽ WÐU²J« …œUŽù qÐUI« ◊uGC*« ’dI« ’dI«
DVD±RW/DVD±R ¨DVD-RAM ¨DVD-RW/-R Ë tOKŽ
.AVIË .divx Ë .avi ∫WOU²« «œ«b²ô« Í– MPEG4 nK qOGAð sJ1
.DIVX Ë
DivX 5.x Ë DivX 4.x Ë DivX 3.11 ∫ MPEG4 Codec oOMð
DivX-Pro Xvid
QPEL, GMC ∫ Wd(« i¹uFð
¨DX50 ¨divX ¨DIVX ¨divX3 ¨DIV3 ¨mpg4 ¨MPG4 ∫ s ‰UJý√ WFЗ√
xvid ¨XVID ¨mp43 ¨MP43
Ë ¢MPEG1 Audio Layer2¢ Ë ¢MP3¢ ∫ÕU²?*« uB« U?HK o?O?Mð
¢MS ADPCM¢ Ë ¢DTS¢ Ë ¢AC3¢ Ë ¢LPCM¢ Ë ¢WMA¢
∫W??u?? Žb??*« W?? ýU?? A??K?? W?? ³??ŠU?? B??*« W?? L?? łd??²?? « U?? H??K?? U??I?? O?? ??M?? ð
.ass Ë .txt Ë .psb Ë .sub Ë .srt Ë .smi
•
•
•
•
•
•
•
DVD±R ’«d√ qO−ðË qOGAð
’«d
√ qGA w tKOGAð sJ1 ¨q−
Ò DVD±R ’d
‰UH
≈ œd−0Ë
ÆÍœUŽ DVD
≠DVD ’«d
√ v≈ u¹bOH« l{Ë w WK−*« DVD±R ’«d
√ ‰uײð
ÆUNzUN½≈ —u u¹bO
nzUþË ¡«dł≈Ë ’dI« w WŠU?²*« WŠU*« vKŽ qO−?²« pMJ1
Z«d?³« `?Ë Z«d?³«Ë ’«d?
ú ¡U?LÝ√ 5O?Fð q?¦ ¨d?¹d×?²«
Æ¡UN½ù« q³
ô t²?ŠU?? ÊS ¨DVD±R ’d?
v?K?Ž œułu?*« Z?U?½d³?« `?? bM?Ž
’d
s WMOF WŠU vKŽ qO−²« ¡UN½≈ œd−0Ë ÆWŠU² `³Bð
` - ¡«uÝ UNOKŽ qO−²K WŠU² WŠU*« Ác¼ ÊuJð ô ¨DVD±R
Æt× r²¹ r Â√ qO−²« «c¼
Uu?K?F? qO?−?ð ‰U?L?J?²Ýô W?O?½UŁ ≥∞ w?«u?Š …bŠu?« ‚d?G?²?ð
ÆqO−²« ‰UL²« bFÐ …—«œù«
«d s? …d q? w DVD±R ’«d?
√ ¡«œ√ s Z?²M?*« «c¼ s?×?¹Ô
ÆqO−²«
qOGAð Ë√ ’dI« ‰Ušœ≈ bFÐ qO−²« ¡bÐ bMŽ 5ײ« «c¼ r²¹
WO?KL?Ž ¡«dł≈ W?UŠ w? ’d?I« v?KŽ q?O−?²?« —cF?²¹ b?
Æ…bŠu?«
Æ«d …bF 5ײ«
ÆqO−²« WUŠ W−O²½ ôU(« iFÐ w qOGA²« …œUŽ≈ —cF²ð b
- w?²??«Ë W?K?−???*« DVD±R ’«d??
√ q?O??G?A?ð …b??Šu?« Ác??¼ ÊU?J??S?Ð
—cF²¹ ô b
Ë ÆSamsung s u¹bO≠DVD q− WDÝ«uÐ U¼ƒUN½≈
’dI« WUŠ oË p–Ë DVD±-R ’«d
√ iFÐ qOGAð “UN'« vKŽ
ÆqO−²« WUŠË
DVD-VR350 ’d
•
…œu?'« W?I??zU? W?O?L??
— —u? q?O?−???ð W?O?½U?J??≈ …b?Šu?« Ác?¼ `??O?²?ð
qO−?ð pMJ1 ÆDVD-RAM/DVD-RW/DVD-R ’d
v?KŽ UNKO?GAðË
DVD-RAM/DVD-RW/DVD-R ’«d
√ vKŽ tK¹bFðË wL
d« u¹bOH«
DVD+RW/DVD+R ’«d
√ qOGAð sJ1® Æu¹bO WÞdý√ X½U u UL
©ÆUNKO−ð sJ1 ô sJË
DVD-VR355 ’d
•
…œu?'« o?zU?? w?L?
— u?¹b??O? q?O?−???ð W?O?½U?J??≈ …b?Šu?« Ác?¼ `??O?²?ð
qO−ð pMJ1 ÆDVD-RAM/DVD±RW/DVD±R ’«d
√ vKŽ tKOGAðË
DVD-RAM/DVD±RW/DVD±R’«d
√ vKŽ tK¹bFðË wL
d« u¹bOH«
.u¹bO WÞdý√ X½U u UL
u¹bO≠DVD ’«d√
U? vK?Ž ©DVD® nzUþu?« œbF²? wL?
d« ’dI?« qL²?A¹ Ê√ s?J1 •
UGK« s ≥≤Ë WOFLÝ UG ∏Ë —uB« s WIO
œ ±≥μ v≈ qB¹
dŁRË MPEG-2 —uB« jG{ ÂUEMÐ œËe u¼Ë ÆWýUAK W³ŠUB*«
w? —uBÐ ŸU?²L?²Ýô« p `?O²?¹ U u¼Ë Dolby 3D r?:« u?B«
ÆWOeM*« WŠ«d« q³Ý qþ w Õd*« Õu{ËË …œuł
w WO½U¦« WI³D« v≈ vË_« WI³D« s q¹uײ« bMŽ Àb×¹ b
•
w?? X?
R?*« Áu?A?²?« s? Ÿu??½ W?I?³?D?« ÃËœe? u??¹b?O?≠DVD ’d?
ÆuB« Ë√ …—uB«
Æ“UN'UÐ qDŽ ÀËbŠ v≈ p– dOA¹ ô
w tKOGAð sJ1 ¨q−
Ò DVD±R/DVD-RW(V) ’d
‰UH
≈ œd−0Ë •
ÆÍœUŽ DVD ’«d
√ qGA
◊uGC*« u¹bOH« ’d
oOM²Ð UNOKŽ WÐU²JK WKÐUI« WÞuGC*« ’«d
_« qOGAð jI sJ1 •
Æ©≤[∞ Ë√ ±[± —«bù«® VCD
WUŠ w? jI dðuO?³LJU?Ð WU)« Wd?ײ*« —uB?« qOGA?ð sJ1 •
ÆWÞuGC*« ’«d
_« qO−ð ZU½dÐ w VCD oOM²Ð UNKO−ð
U?NOK?Ž WÐU²?JK W?KÐUI?« WÞu?GC*« ’«d?
_« lMÒB?0
Ô ‰UBðô« v?łd¹Ô •
Æ’«d
_« sŽ ÂöF²Ýö
•
•
•
•
◊uGC*« wðuB« ’dI«
ÆPCM eðd¼uKO ¥¥\± qO−ð r²¹ YOŠ wðu ’d
sŽ …—U³Ž •
WÞuGC*« ’«d
_«Ë CD-DA oOM?²« «– uB« UHK qGA¹ •
t?? ? ? ł«u?? ? ?ð b?? ? ?
ÆUNOKŽ WÐU²JK WKÐUI«Ë UNOKŽ WÐU²J« …œUŽù WKÐUI«
WÐU²JK WKÐUI« WÞuGC*« ’«d
_« qOGAð w UÐuF …bŠu« Ác¼
ÆqO−²« WUŠ W−O²½ UNOKŽ WÐU²J« …œUŽù WKÐUI« Ë√ UNOKŽ
UNOKŽ WÐU²JK WKÐUI«ØUNOKŽ WÐU²J« …œUŽù WKÐUI« WÞuGC*« ’«d_«
WKL;« UNOKŽ WÐU²JK WKÐUI«ØUNOKŽ WÐU²J« …œUŽù WKÐUI« WÞuGC*« ’«d_«
MP3 UHK0
•
•
•
•
•
UN?OKŽ WÐU²JK? WKÐUI« WÞuGC?*« ’«d
_« qOGAð …œUŽ≈ j?I sJ1
ÆJOLIETË√ ISO9660 oOM²Ð UNKO−ð - MP3 UHK0 WKL;«Ë
Æ¢MP3¢ Ë√ ¢MP3¢ œ«b²ô« «– MP3 UHK «b²Ý« sJ1
VBR «b?²?ÝU?Ð U?N?K?O?−?ð - w?²?« MP3 U?H?K? u? l?DI?²?¹ b?
≥≤∞ v≈ W?O½U?ŁØX¹U?ÐuKO? ≥≤ s ¨©…d?OG?² X?Ð «bŠË ôb?F®
ÆWO½UŁØX¹UÐuKO
≥≤∞ v?≈ μ∂ 5?Ð q??O?G??A?²?K?? q?ÐU??I?« X??³?« «b?ŠË ‰b??F? ÕË«d??²?¹
ÆWO½UŁØX¹UÐuKO
ÆvB
√ b× bK−Ë nK ±∞∞∞ œbŽ W'UF …bŠu« lOD²ð
vKŽ Íu²% w²« DVD-RAM/DVD±RW/DVD±R ’«d
√ qOGAð sJ1
ÆMP3 oOM²Ð UHK
UNKO−ðË DVD-RW ’«d√ qOGAð
WKL;« UNOKŽ WÐU²JK WKÐUI«ØUNOKŽ WÐU²J« …œUŽù WKÐUI« WÞuGC*« ’«d_«
JPEG UHK0
s q w DVD-RW ’«d
√ vKŽ qOGA²«Ë qO−²« ¡«dł≈ sJ1 •
ÆVR l{u«Ë V l{u«
DVD-RW ’d??
¡U??N??½≈ œd?−??0 w??U??{≈ q?O??−????ð Í√ ¡«d?ł≈ s??J??1 ô •
ÆVR l{u« w q−*«
≠DVD ’«d
√ v≈ V l?{u« w WK−*« DVD-RW ’«d
√ ‰uײð •
ÆUNzUN½≈ œd−0 u¹bO
ÆjI ¢¢JPGÆË ¢jpgÆ¢ œ«b²ô« «– JPEG UHK «b²Ý« sJ1
ÆvB
√ b× bK−Ë nK ±∞∞∞ œbŽ W'UF …bŠu« lOD²ð
ÆqJÐU−O ≥ u¼ ÍbŽUB²« JPEG nK r−( vB
_« b(«
ÆWuŽb dOž Wd(UÐ WU)« JPEG UHK
vKŽ Íu²% w²« DVD-RAM/DVD±RW/DVD±R ’«d
√ qOGAð sJ1
ÆJPEG oOM²Ð UHK
¥ ≠ WOÐdF«
DVD-VR350-01375B-IB-ar
4
2007.4.2, 3:49 PM
•
•
•
•
•
•
•
•
•
•
•
اﻟﺒﺪء ﺑﺎﻟﺘﺸﻐﻴﻞ
WÐU?²JK? ö
Î ÐU?
ØtOK?Ž WÐU?²J« …œU?Žù ö
Î ÐU?
UÞ
Î uG?C U
Î d?
Âb?²Ý« •
Æ©WIO
œ ∏∞® X¹UÐU−O ∑∞∞ WFÐ tOKŽ
Ë√ ©WIO
œ π∞® X¹UÐU−O ∏∞∞ t²FÝ U
Î d
≠ sJ√ Ê≈ ≠ Âb²ð ô
Æ’dI« qLF¹ ô bI ¨p– sŽ b¹e¹ U
ØtOKŽ WÐU²J« …œUŽù qÐUI« ◊
Î uGC*« ’dI« qO−ð ÂbŽ WUŠ w •
s“ w? «d
Î šQ?ð tł«uð b?I ¨W?IKG? W?Kł w t?OK?Ž WÐU?²JK? qÐU?I«
U?H?K?*« l?O?L?ł q?L?Ž Âb?Ž ‰U?L?²?Š« v?≈ W?U?{ùU?Ð d?J?³?*« q?O?G?A?²?«
ÆWK−*«
ØUNOKŽ WÐU²J« …œUŽù WKÐUI« WÞuGC*« ’«d
_« iFÐ qLFð ô b
•
Âb²*« “UN'« VŠ p–Ë ¨…bŠu« Ác¼ l UNOKŽ WÐU²JK WKÐUI«
Æ’«d
_« Ác¼ ‚dŠ w
WKÐU
WÞuGC ’«d
√ jOÝË vKŽ WK−*« U¹u²×LK W³MUÐ
WÞu?G?C? ’«d
√ s? U?NO?K?Ž W?ÐU²?J?K W?K?ÐU?
ØUN?O?KŽ W?ÐU?²?J« …œU?Žù
q?O?GA?²?« WO?½U?J≈ n?K?²?ð b?
¨w?B?A?« «b?²?Ýö W?B?B?
Æ’«d
_«Ë U¹u²;« VŠ
اﻟﺒﺪء ﺑﺎﻟﺘﺸﻐﻴﻞ
W¹UL(«
¢rÝ« qH
¢ ∂μ W×HB« dE½« ∫ZU½d³« W¹ULŠ •
¢’dI« W¹ULŠ¢ ∑¥ W×HB« dE½« ∫’dI« W¹ULŠ •
d?? O?? ž DVD-RAM/DVD±RW/DVD±R ’«d?? ?
√ q?? O?? ?G?? A?? ð s?? ?J?? 1 ô
ÆZ²M*« «c¼ «b²ÝUÐ u¹bO≠DVD oOMð l WI«u²*«
…—UA²Ý« pOKŽ ¨DVD qO−ð o«uð ‰uŠ UuKF*« s b¹e*
ÆDVD-RAM/DVD±RW/DVD±R ’«d
√ lOMBð WNł
W¾¹œ— DVD-RAM/DVD±RW/DVD±R ’«d
√ «b²Ý« V³¹ b
¨dB
tłË ÊËœ ¨p– w U0 WF
u² dOž öJA ÀËbŠ …œu'«
Æq−*« nKð Ë√ WbF*« Ë√ WK−*« œ«u*« bI Ë√ qO−²« qA
t½√ dOž ¨ÁbFÐË ¡UN½ù« q³
qOGA²« ¡«dł≈ sJ1 ¨5F{u« ö w •
b?FÐ d¹d?ײ«Ë `?*«Ë w?U{ù« qO?−²?« UOK?LŽ ¡«dł≈ s?J1 ô
Æ¡UN½ù«
w qO−²« rŁ VR l{u« w ’dI« qO−ð w Vždð XM «–≈ •
ÆW¾ON²« ¡«dł≈ s bQ²« pOKF ¨V l{u«
XM «–≈ ULŽ ‰«RK WUÝ— dNEð ¨Âb²*« dOž ’dIK W³MUÐ
Æô Â√ ’dI« W¾ONð w Vždð
ÆVR l{Ë w ’dI« W¾ONð r²¹ ¨“©rF½® Yes“ œbŠ «–≈
©VR l{u«® DVD-RW ’«d√ •
°WOU²« ’«d_« Âb²ð ô
CD-I Ë CD-G Ë LD ∫Z??²?M?*« «c??¼ w? W?O??U?²?« ’«d??
_« Âb??²???ð ô •
DVD- WÞuGC*« u¹bOH« ’«d
√Ë DVD-ROM WÞuGC*« ’«d
_«Ë
ÆROM
[WEŠö]
Ø VCDØ JPEGØ-R/MP3ØCD-RWØCD ∫UNKOGAð sJ1 w²« ’«d
_« Ÿ«u½√
ÆDVD±RØDVD±RWØDVD-RAMØDVD-Video
«b²ÝUÐ tKO−ð - Íc« DVD-RW/-R ’d
qOGAð sJ1 ¨p– rž—Ë
ÆV l{u« w tzUN½≈Ë tKO−ð WUŠ w dš¬ “UNł
U¼ƒ«dý - w²« DVD ’«d
√Ë W¹—U−?²« ’«d
_« iFÐ ÊuJð b
•
«c?¼ WD?Ý«u?Ð qO?G?A?²K? W?KÐU?
d?O?ž pÐ W?U?)« WI?D?M?*« ×Uš s?
ô¢® ¢No DiscÆ¢ W?U?Ýd« d?N?E?ð ¨’«d
_« Ác?¼ q?OG?A?ð bM?Ž ÆZ?²M?*«
oIײ« vłd¹¢® ¢Please check the regional code.¢ Ë√ ©¢’d
błu¹
ÆWýUA« vKŽ ©¢WIDM*« e— s
Ë√ WO½u½U
dOž W½ DVD-RAM/DVD±RW/DVD±R ’d
ÊU «–≈ •
ÆUC
Î ¹√ tKOGAð sJ1 ô bI ¨DVD u¹bOH« oOMð Âb²¹ ô t½√
’dI« o«uð
d?¦?√ Ë√ ·U?F?{√ 8X W?Žd??Ð q?L?F?¹ DVD+RW ’d
q?O?G?A?ð s?J?1 •
Æ·UF{√ 4X w¼ qO−²K ÈuBI« WŽd« sJË
Æ…bŠu« Ác¼ l WI«u² ’«d
_« Ÿ«u½√ lOLł XO •
ÆDVD-RW ’«d
√ vKŽ U½UO³« qO−² oOM²« «c¼ Âb²¹ ≠
wze?'« `?*«Ë `*«Ë d?¹dײ?«Ë qO?−²?« WOK?LŽ —«d?Jð pM?J1
Æa≈ ¨qOGA²« WLzU
¡UA½≈Ë
«b???²??ÝU?Ð l??{u?« «c??¼ w? q??−???*« ’d?I??« q?O??G?A??ð —c?F??²?¹ b??
≠
ÆWOU(« DVD öGA
©V l{u«® DVD-RW ’«d√ •
Ë√ DVD-RW ’d
vKŽ U½UO³« qO−² oOM²« «c¼ Âb²¹ ≠
DVD ’«d
√ öGA bŠ√ «b²ÝUÐ ’dI« qOGAð sJ1Ë ÆDVD-R
Æ’dI« ¡UN½≈ —u WOU(«
q− WDÝ«uÐ tKO−ð - b
V l{u« w q−*« ’dI« ÊU «–≈ ≠
—cF²¹ bI? ¨ÁƒUN½≈ r²¹ r t½√ dO?ž Èdš√ lOMBð WNł v?≈ wL²M¹
Æq−*« «c¼ WDÝ«uÐ tOKŽ wU{ù« qO−²« ¡«dł≈ Ë√ tKOGAð
tKO−ðË DVD+RW ’d qOGAð
DVD- oO?M?ð 5Ð ·ö?²š« b?łu¹ ô ¨DVD+RW ’«d?
√ «b?²ÝU?Ð •
l{Ë® DVD-Video qO−²« oOMðË ©©u¹bO® Video l{Ë® Video
Æ©©u¹bOH« qO−ð® VR
UNK¹bFðË DVD+RW ’«d
√ vKŽ pÐ WU)« ‰uBH« ¡UA½≈ pMJ1 •
Æ©qBH« q¹bFð® Chapter Edit WLzUI« «b²ÝUÐ
’d
«b²Ý« bMŽ W¹—Ëd{ dOž ‰UH
ù« WOKLŽ ÊuJð WUŽ WHBÐË •
ÆDVD+RW
DVD-RAM ’«d√ qOGAð
Æ©u¹bOH« qO−ð® VR l?{u« vKŽ qO−²« l{Ë j³{ s bQð
ÆqO−²« qOGAð s Z²M*« «c¼ sJL²¹ sK ¨ô≈Ë
DVD ’«d
√ öGA rEF w DVD-RAM ’d
qOGAð pMJ1 ô
Æo«u²UÐ oKF²ð UŽu{u V³Ð
WýuÞd)« Ãdš√ ¨WýuÞd)« Ÿu½ s DVD-RAM ’«d
_ W³MUÐ
ÆjI ’dI« Âb²Ý«Ë
w? jI? ≤\∞ —«bù« W?OÝU?OI?« DVD-RAM ’«d?
√ qO?GA?ð sJ?1
Æ…bŠu« Ác¼
ö?GA? l? …bŠu?« Ác?NÐ q?−
Ò ?*« DVD-RAM ’d?I« q?L?F¹ ô b?
¨pKð DVD-RAM ’«d
√ l o«u²« b¹bײ ÆÈdš_« DVD ’«d
√
ÆqGA*UÐ ’U)« Âb²*« qOœ v≈ Ÿułd« vłd¹Ô
aM« b{ W¹UL(«
b{ W¹UL(« WOMIð «b²ÝUÐ DVD ’«d
√ s b¹bF« dOHAð - •
u¹bOH« “UNłË DVD q− qOuð pOKŽ wG³M¹ ¨pcË ÆaM«
Æu¹bOH« “UN−Ð fOË …ÎdýU³ Êu¹eHOK²UÐ jI
s? W¼u?A …—u? —u?Nþ v?≈ u¹b?OH?« “UN?−Ð q?Ou?²« ÍœR?¹
ÆaM« b{ WOL;« DVD ’«d
√
Vłu0 WOL;« aM« b{ W¹UL(« WOMIð vKŽ Z²M*« «c¼ qL²A¹ •
«¡«d³Ð WU)« VOUÝ_« ÈËUŽœ
WO?JK?*« ‚u?IŠ v?≈ WU?{ùU?Ð …b×?²*« U?¹ôu?« w U?Ž«d²?šô«
MacroVision CorporationW??d?ý U??N?J??K??²?9 w??²?« Èd??š_« W?¹d??J?H??«
Æ‚uI(« wJU s U¼dOžË
s «c¼ aM« W¹ULŠ WOMIð «b²Ý« œUL²Ž« wG³M¹
Wdý q³Ó
WOeM*« …b¼UA*« ÷«dž_ hB u¼Ë MacroVision Corporation
…b?L²?F?*« Èdš_« ôU?(« «b?Ž UL?O? ¨…œËb;« Èd?š_« …b?¼UA?*«Ë
ÆMacroVision Corporation Wdý WDÝ«uÐ
ÆpOJHð Ë√ WOJŽ WÝbM¼ UOKLŽ W¹√ ¡«dł≈ dE×¹
u¹bO?H«Ë Âö_«Ë Êu¹e?HOK?²« Z«d?Ð WÞdý√ q?O−?²Ð `L?¹ •
d?A??M??«Ë l?³??D??« ‚u?I??Š „U??N?²??½« Âb??Ž W?U??Š w?? Èd?š_« œ«u??*«Ë
Ædšü« ·dDUÐ WU)« Èdš_« ‚uI(«Ë
μ ≠ WOÐdF«
DVD-VR350-01375B-IB-ar
5
2007.4.2, 3:49 PM
•
•
•
•
•
U¹u²;«
qOGA²UÐ ¡b³«
≤≤ ÆÆÆÆÆÆÆÆÆÆÆÆÆÆÆÆÆÆÆÆÆÆÆÆÆÆÆÆÆÆÆÆÆÆÆÆÆÆÆÆÆÆÆÆÆÆÆÆÆÆÆÆÆÆÆÆ wzUIK²« œ«bŽù«
≤≥ ÆÆÆÆÆÆÆÆÆÆÆÆÆÆÆÆÆÆÆÆÆÆÆÆÆÆÆÆÆÆÆÆÆÆÆÆÆÆÆÆÆÆÆÆÆÆÆÆÆÆÆÆÆÆÆÆÆÆ ÍËbO« œ«bŽù«
≤ ÆÆÆÆÆÆÆÆÆÆÆÆÆÆÆÆÆÆÆÆÆÆÆÆÆÆÆÆÆÆÆÆÆÆÆÆÆÆÆÆÆÆÆÆÆÆÆÆÆÆÆÆÆÆÆÆÆÆÆÆÆÆÆÆÆÆÆÆÆÆÆ d¹c%
≤≥ ÆÆÆÆÆÆÆÆÆÆÆÆÆÆÆÆÆÆÆ ©B/G-D/K Ãdš® RF OUT u l{Ë b¹b%
≥ ÆÆÆÆÆÆÆÆÆÆÆÆÆÆÆÆÆÆÆÆÆÆÆÆÆÆÆÆÆÆÆÆÆÆÆÆÆÆÆÆÆÆÆÆÆÆÆÆÆÆÆÆÆÆÆÆÆÆÆÆÆÆÆ UÞUO²Šô«
≤¥ ÆÆÆÆÆÆÆÆÆÆÆÆÆÆÆÆÆÆÆÆÆÆÆÆÆÆÆÆÆÆÆÆÆÆÆÆÆÆÆÆÆÆÆÆÆÆÆÆÆÆÆÆ u¹bOH« Ãdš …UM
≥ ÆÆÆÆÆÆÆÆÆÆÆÆÆÆÆÆÆÆÆÆÆÆÆÆÆÆÆÆÆÆÆÆÆÆÆÆÆÆÆÆÆÆÆÆÆÆÆÆÆ WLN*« ÊU_« «œUý—≈
≥ ÆÆÆÆÆÆÆÆÆÆÆÆÆÆÆÆÆÆÆÆÆÆÆÆÆÆÆÆÆÆÆÆÆÆÆÆÆÆÆÆÆÆÆÆÆÆÆÆ UNO³M²« l qUF²«
≤¥ ÆÆÆÆÆÆÆÆÆÆÆÆÆÆÆÆÆÆÆÆÆÆÆÆÆÆÆÆÆÆÆÆÆÆÆÆÆÆÆÆÆÆÆÆÆÆÆÆÆÆ WGK« «—UOš œ«bŽ≈
≥ ÆÆÆÆÆÆÆÆÆÆÆÆÆÆÆÆÆÆÆÆÆÆÆÆÆÆÆÆÆÆÆÆÆÆÆÆÆÆÆÆÆÆÆÆÆÆÆÆ wł—U)« ¡UDG« W½UO
≤μ ÆÆÆÆÆÆÆÆÆÆÆÆÆÆÆÆÆÆÆÆÆÆÆÆÆÆÆÆÆÆÆÆÆÆÆÆÆÆÆÆÆÆÆÆÆÆ uB« «—UOš œ«bŽ≈
≥ ÆÆÆÆÆÆÆÆÆÆÆÆÆÆÆÆÆÆÆÆÆÆÆÆÆÆÆÆÆÆÆÆÆÆÆÆÆÆÆÆÆÆÆÆÆÆÆÆÆÆÆÆÆ ’dI« l qUF²«
≤∂ ÆÆÆÆÆÆÆÆÆÆÆÆÆÆÆÆÆÆÆÆÆÆÆÆÆÆÆÆÆÆÆÆ ©u¹bOH«® WýUA« «—UOš œ«bŽ≈
≥ ÆÆÆÆÆÆÆÆÆÆÆÆÆÆÆÆÆÆÆÆÆÆÆÆÆÆÆÆÆÆÆÆÆÆÆÆÆÆÆÆÆÆÆÆÆÆÆÆÆÆÆÆÆÆÆÆÆ ’«d
_« s¹eð
≤∑ ÆÆÆÆÆÆÆÆÆÆÆÆÆÆÆÆÆÆÆÆÆÆÆÆÆÆÆÆÆÆÆÆÆÆÆÆÆÆÆÆÆÆÆÆÆÆÆÆÆÆÆ ÂbI²*« ÷«dF²Ýô«
¥ ÆÆÆÆÆÆÆÆÆÆÆÆÆÆÆÆÆÆÆÆÆÆÆÆÆÆÆÆÆÆÆÆÆÆÆÆÆÆÆÆÆÆÆÆÆÆÆÆÆÆÆÆÆ ’«d
_« UH«u
≤π ÆÆÆÆÆÆÆÆÆÆÆÆÆÆÆÆÆÆÆÆÆÆÆÆÆÆÆÆÆÆÆÆÆÆÆÆÆÆÆÆÆÆÆÆÆÆÆÆÆÆ ÍuÐ_« rJײ« œ«bŽ≈
∂ ÆÆÆÆÆÆÆÆÆÆÆÆÆÆÆÆÆÆÆÆÆÆÆÆÆÆÆÆÆÆÆÆÆÆÆÆÆÆÆÆÆÆÆÆÆÆÆÆÆÆÆÆÆÆÆÆÆÆÆÆÆÆÆÆÆÆÆ U¹u²;«
≥∞ ÆÆÆÆÆÆÆÆÆÆÆÆÆÆÆÆÆÆÆÆÆÆÆÆÆÆÆÆÆÆÆÆÆÆÆÆÆÆÆÆÆÆÆÆÆÆÆÆÆÆÆ u¹bOH« “UNł œ«bŽ≈
∏ ÆÆÆÆÆÆÆÆÆÆÆÆÆÆÆÆÆÆÆÆÆÆÆÆÆÆÆÆÆÆÆÆÆÆÆÆÆÆÆÆÆÆÆÆÆÆÆÆÆÆÆÆÆÆÆÆÆÆÆ WUF« «eO*«
≥± ÆÆÆÆÆÆÆÆÆÆÆÆÆÆÆÆÆÆÆÆÆÆÆÆÆÆÆÆÆÆÆÆÆÆÆÆÆÆÆÆÆÆÆÆÆÆÆÆÆÆÆÆ DVD EP l{Ë X
Ë
π ÆÆÆÆÆÆÆÆÆÆÆÆÆÆÆÆÆÆÆÆÆÆÆÆÆÆÆÆÆÆÆÆÆÆÆÆÆÆÆÆÆÆÆÆ Âb²*« qOœ …¡«d
q³
≥± ÆÆÆÆÆÆÆÆÆÆÆÆÆÆÆÆÆÆÆÆÆÆÆÆÆÆÆÆÆÆÆÆÆÆÆÆÆÆÆÆÆÆÆ wzUIK²« ‰uBH« TAM
π ÆÆÆÆÆÆÆÆÆÆÆÆÆÆÆÆÆ u¹bOH« “UNłË DVD q− «b²Ý« WI¹dÞ
≥≤ ÆÆÆÆÆÆÆÆÆÆÆÆÆÆÆÆÆÆÆÆÆÆÆÆÆÆÆÆÆÆÆÆÆÆÆÆÆÆÆÆÆÆÆÆÆÆÆÆÆÆÆÆÆ l¹d« qO−²«
±∞ ÆÆÆÆÆÆÆÆÆÆÆÆÆÆÆÆÆÆÆÆÆÆÆÆÆÆÆÆÆÆÆÆÆÆÆÆÆÆÆÆÆÆÆÆÆÆÆÆÆÆÆÆÆ …bŠu« ëd²Ý«
≥≤ ÆÆÆÆÆÆÆÆÆÆÆÆÆÆ ©jI DVD-VR355 “«dÞ® Anynet+(HDMI-CEC)
±≤ ÆÆÆÆÆÆÆÆÆÆÆÆÆÆÆÆÆÆÆÆÆÆÆÆÆÆÆÆÆÆÆÆÆÆÆÆÆÆÆÆÆÆÆÆÆÆÆÆÆÆÆÆÆÆÆÆÆÆÆÆÆÆÆÆÆÆÆ nu«
±≤ ÆÆÆÆÆÆÆÆÆÆÆÆÆÆÆÆÆÆÆÆÆÆÆÆÆÆÆÆÆÆÆÆÆÆÆÆ ©DVD-VR350® WOU_« WŠuK«
qOGA²«
±≤ ÆÆÆÆÆÆÆÆÆÆÆÆÆÆÆÆÆÆÆÆÆÆÆÆÆÆÆÆÆÆÆÆÆÆÆÆ ©DVD-VR355® WOU_« WŠuK«
±≥ ÆÆÆÆÆÆÆÆÆÆÆÆÆÆÆÆÆÆÆÆÆÆÆÆÆÆÆÆÆÆÆÆÆÆÆÆÆÆÆÆÆÆÆÆÆÆÆ WOU_« WŠuK« WýUý
DVD “UNł qOGAð
≥¥ ÆÆÆÆÆÆÆÆÆÆÆÆÆÆÆÆÆÆÆÆÆÆÆÆ ©jI u¹bO≠DVD ’d
® WIDM*« e—
±≥ ÆÆÆÆÆÆÆÆÆÆÆÆÆÆÆÆÆÆÆÆÆÆÆÆÆÆÆÆÆÆÆÆÆÆÆÆÆÆ ©DVD-VR350® WOHK)« WŠuK«
±¥ ÆÆÆÆÆÆÆÆÆÆÆÆÆÆÆÆÆÆÆÆÆÆÆÆÆÆÆÆÆÆÆÆÆÆÆÆÆÆ ©DVD-VR355® WOHK)« WŠuK«
±μ ÆÆÆÆÆÆÆÆÆÆÆÆÆÆÆÆÆÆÆÆÆÆÆÆÆÆÆÆÆÆ bFÐÔ sŽ rJײ« “UNł vKŽ ·dF²«
≥¥ ÆÆÆÆÆÆÆÆÆÆÆÆÆÆÆÆÆÆÆÆÆÆÆÆÆ UNKOGAð sJ1 w²« ’«d
_« «—UFý
≥¥ ÆÆÆÆÆÆÆÆÆÆÆÆÆÆÆÆÆÆÆÆÆÆÆÆÆÆ UNKOGAð sJ1 ô w²« ’«d
_« Ÿ«u½√
œ«bŽù«Ë qOu²«
≥μ ÆÆÆÆÆÆÆÆÆÆÆÆÆÆÆÆÆÆÆÆÆÆÆÆÆÆÆÆÆÆÆÆÆÆÆÆÆÆÆÆÆÆÆÆÆÆÆÆÆÆÆÆÆÆÆÆÆ ’dI« qOGAð
≥∂ ÆÆÆÆÆÆÆÆÆÆÆÆÆÆÆÆÆÆÆÆ ¡ULÝ_« WLzU
Ë ’«d
_« WLzU
«b²Ý«
Êu¹eHOK²UÐ u¹bOH« “UNłË DVD q− qOuð
≥∂ ÆÆÆÆÆÆÆÆÆÆÆÆÆÆÆÆÆÆÆÆÆÆÆÆÆÆ wD²«Ë Y׳« w²HOþË Â«b²Ý«
±∂ ÆÆÆÆÆÆÆÆÆÆÆÆÆÆÆÆÆÆÆÆÆÆÆÆÆÆÆÆÆÆÆÆÆÆÆÆÆÆÆÆÆÆÆÆÆÆÆÆÆÆÆÆ RF qÐU «b²ÝUÐ
≥∑ ÆÆÆÆÆÆÆÆÆÆÆÆÆÆÆÆÆÆÆÆÆÆÆÆÆÆ XÐU¦« qOGA²« Ø ¡wD³« qOGA²«
Êu¹eHOK²UÐ u¹bOH« “UNłË DVD q− qOuð
≥∏ ÆÆÆÆÆÆÆÆÆÆÆÆÆÆÆÆÆÆÆÆÆÆÆÆÆÆÆÆ ©ÕU²H Í√® ANYKEY —e« «b²Ý«
±∂ ÆÆÆÆÆÆÆÆÆÆÆÆÆÆÆÆÆÆÆÆÆÆÆÆÆÆÆÆÆÆÆ u¹bOH«ØuB« qÐU «b²ÝUÐ
≥π ÆÆÆÆÆÆÆÆÆÆÆÆÆÆÆÆÆÆÆÆÆÆÆÆÆÆÆÆÆÆÆÆÆÆÆÆÆÆÆÆÆÆÆÆÆÆÆÆÆÆÆÆÆÆÆÆ qOGA²« —«dJð
±∑ ÆÆÆÆÆÆÆÆÆÆÆÆÆÆÆÆÆÆÆÆÆÆÆÆÆÆÆÆÆÆÆÆÆÆÆÆÆÆÆÆÆÆÆÆÆÆÆÆ S-Video qÐU qOuð
≥π ÆÆÆÆÆÆÆÆÆÆÆÆÆÆÆÆÆÆÆÆÆÆÆÆÆÆÆÆÆÆÆÆÆÆÆÆÆ W³ŠUB*« WLłd²« WG b¹b%
±∑ ÆÆÆÆÆÆÆÆÆÆÆÆÆÆÆÆÆÆÆÆÆÆÆÆÆÆÆÆÆÆÆÆÆÆÆÆÆÆÆÆÆ “UN'« u¹bO qÐU qOuð
¥∞ ÆÆÆÆÆÆÆÆÆÆÆÆÆÆÆÆÆÆÆÆÆÆÆÆÆÆÆÆÆÆÆÆÆÆÆÆÆÆÆÆÆÆÆÆÆÆÆÆÆÆÆÆ uB« WG b¹b%
±∏ ÆÆÆÆÆÆÆ ©jI DVD-VR355 ® Êu¹eHOK²UÐ HDMI/DVI qOuð
¥∞ ÆÆÆÆÆÆÆÆÆÆÆÆÆÆÆÆÆÆÆÆÆÆÆÆÆÆÆÆÆÆÆÆÆÆÆÆÆÆÆÆÆÆÆÆÆÆÆ «dOUJ« W¹Ë«“ dOOGð
f Ð U Â « b ² Ý U Ð Ê u ¹ e H O K² U Ð q O u ² « ∫ ± W U ( «
¥∞ ÆÆÆÆÆÆÆÆÆÆÆÆÆÆÆÆÆÆÆÆÆÆÆÆÆÆÆÆÆÆÆÆÆÆÆÆÆÆÆÆÆÆÆÆÆÆÆÆÆÆÆÆÆÆÆÆÆÆÆÆÆÆÆÆÆÆÆ dO³J²«
±∏ ÆÆÆÆÆÆÆÆÆÆÆÆÆÆÆÆÆÆÆÆÆÆÆÆÆÆÆÆÆÆÆÆÆÆÆÆÆÆÆÆÆÆÆÆÆÆÆÆÆÆÆÆÆÆÆÆÆÆÆÆÆÆÆÆÆÆÆÆÆÆ HDMI
±∏ ÆÆ DVI fÐU
«b²ÝUÐ Êu¹eHOK²UÐ qOu²« ∫≤ WU(«
¥± ÆÆÆÆÆÆÆÆÆÆÆÆÆÆÆÆÆÆÆÆÆÆÆÆÆÆÆÆÆÆÆÆÆÆÆÆÆÆ WOFłd*« UöF« «b²Ý«
±π ÆÆÆÆÆÆÆÆÆÆÆÆÆÆÆÆÆÆÆÆÆÆÆÆÆÆÆ u¹bOH«ØuB« q³I² öOuð
¥≤ ÆÆÆÆÆÆÆÆÆÆÆÆÆÆÆÆÆÆÆÆÆÆÆÆÆÆÆÆÆÆÆÆÆÆÆÆÆÆÆÆÆÆÆÆÆÆÆÆÆÆÆÆ UöF« «b²Ý«
©DA≠◊uGC*« ’dI«® ◊uGC u ’d
qOGAð
≤∞ ÆÆÆÆÆÆÆÆÆÆÆÆÆÆÆÆÆÆÆÆÆÆÆÆÆÆÆÆÆÆÆÆÆÆÆÆÆÆÆÆÆÆ WOł—U)« …eNł_« qOuð
¥≥ ÆÆÆÆÆÆÆÆÆÆÆÆÆÆÆÆÆÆÆÆÆÆÆÆÆÆÆÆÆÆÆÆÆÆÆÆÆÆÆÆÆÆÆÆÆÆÆÆÆÆÆÆÆÆÆÆÆÆÆÆÆÆÆÆÆÆÆÆÆÆ MP3Ø
Í u K F « “ UN ' « ‚ Ë b M Ë √ u ¹ b O H « “ U N ł q O u ð ∫ ± W U ( «
’d
qOGA² bFÐÔ sŽ rJײ« …bŠË —«—“√ Âb²ðÔ
≤∞ ÆÆÆÆÆÆÆÆÆÆÆÆÆÆÆÆÆÆÆÆÆÆÆÆÆÆÆÆÆÆÆÆÆÆÆÆÆ ©u¹bOH«® VIDEO Ë ©uB«®
¥≥ ÆÆÆÆÆÆÆÆÆÆÆÆ MP3Ø©DA≠◊uGC*« ’dI«® ◊uGC*« uB«
¥≥ ÆÆÆÆÆÆÆÆÆÆÆÆÆÆÆÆÆÆÆÆÆÆÆ ©CD-DA® ◊uGC wðu ’d
qOGAð
AV1 IN AUDIO fÐUI0 u¹bOH« “UNłË DVD q−Ë√
≤∞ ÆÆÆÆÆÆÆ AV 2 IN fÐUI0 u¹bOH« «dOU qOuð± ∫≤ WU(«
qšb® DV INPUT f³I0 DV“UNł qOuð ∫≥ WU(«
¥¥ ÆÆÆÆÆÆÆÆÆÆÆÆÆÆÆÆÆÆÆÆÆÆÆÆÆÆÆÆÆÆÆÆÆÆ MP3 vKŽ Íu²×¹ ’d
qOGAð
¥¥ ÆÆÆÆÆÆÆÆÆÆÆÆÆÆÆÆÆÆÆÆ MP3 ’d
ØwðuB« ’dI« qOGAð —d
≤∞ ÆÆÆÆÆÆÆÆÆÆÆÆÆÆÆÆÆÆÆÆÆÆÆÆÆÆÆÆÆÆÆÆÆÆÆÆÆÆÆÆÆÆÆÆÆÆÆÆÆÆÆÆÆÆ ©wL
d« u¹bOH«
¥μ ÆÆÆÆÆÆÆÆÆÆÆÆÆÆÆÆÆÆÆÆÆÆÆÆÆÆÆÆÆÆÆÆÆÆÆÆÆÆÆÆÆÆÆÆÆÆÆÆÆ qOGA²« —UOš l{Ë
¥μ ÆÆÆÆÆÆÆÆÆÆÆÆÆÆÆÆÆÆÆÆÆÆÆÆÆÆÆÆÆÆÆÆÆÆÆÆÆÆÆÆÆÆÆÆÆÆÆÆ WK−*« œ«u*« W−dÐ
rz«uI« ÂUE½ œ«bŽ≈
¥μ ÆÆÆÆÆÆÆÆÆÆÆÆÆÆÆÆÆÆÆÆÆÆÆÆÆÆÆÆÆÆÆÆÆ —u vKŽ Íu²×¹ ’d
qOGAð
¥∂ ÆÆÆÆÆÆÆÆÆÆÆÆÆÆÆÆÆÆÆÆÆÆÆÆÆÆÆÆÆÆ MPEG4 vKŽ Íu²×¹ ’d
qOGAð
≤± ÆÆÆÆÆÆÆÆÆÆÆÆÆÆ WýUA« vKŽ dNEð w²« rz«uI« ‰öš qIM²«
≤± ÆÆÆÆÆÆÆÆÆÆÆÆÆÆÆÆÆÆÆÆÆÆÆÆÆÆÆÆÆÆÆÆÆÆÆÆÆÆÆÆ qOu²«Ë wzUIK²« œ«bŽù«
∂ ≠ WOÐdF«
DVD-VR350-01375B-IB-ar
6
2007.4.2, 3:49 PM
اﻟﺒﺪء ﺑﺎﻟﺘﺸﻐﻴﻞ
≤≤ ÆÆÆÆÆÆÆÆÆÆÆÆÆÆÆÆÆÆÆÆÆÆÆÆÆÆÆÆÆÆÆÆÆÆÆÆÆÆÆÆÆÆÆÆÆÆ X
u«Ë a¹—U²« j³{
اﻟﺒﺪء ﺑﺎﻟﺘﺸﻐﻴﻞ
∑≤ ÆÆÆÆÆÆÆÆÆÆÆÆÆÆÆÆÆÆÆÆÆÆÆÆÆÆÆÆÆÆÆÆÆÆÆÆÆÆÆÆÆÆÆÆÆÆÆ WLzU
s WLzU
·cŠ
u¹ bO H « “ UNł q OG A ð
∑≥ ÆÆÆÆÆÆÆÆÆÆÆÆÆÆÆÆÆÆÆÆÆÆÆÆÆÆÆÆÆÆÆÆÆÆÆÆÆÆÆÆÆÆÆÆÆÆÆÆÆÆÆÆÆÆÆÆÆÆ ’«d
_« d¹b
≥∑ ÆÆÆÆÆÆÆÆÆÆÆÆÆÆÆÆÆÆÆÆÆÆÆÆÆÆÆÆÆÆÆÆÆÆÆÆÆ ©u¹bOH«® VHS j¹dý qOGAð
∑≥ ÆÆÆÆÆÆÆÆÆÆÆÆÆÆÆÆÆÆÆÆÆÆÆÆÆÆÆÆÆÆÆÆÆÆÆÆÆÆÆÆÆÆÆÆÆÆÆÆÆÆÆÆ ’dI« rÝ« q¹bFð
≥∑ ÆÆÆÆÆÆÆÆÆÆÆÆÆÆÆÆÆÆÆÆÆÆÆÆÆÆÆÆÆÆÆÆÆÆÆÆÆÆÆÆÆÆÆÆÆÆÆÆÆÆÆÆÆÆÆÆÆÆÆÆÆÆÆÆÆÆÆÆ WFÐU²*«
∑≥ ÆÆÆÆÆÆÆÆÆÆÆÆÆÆÆÆÆÆÆÆÆÆÆÆÆÆÆÆÆÆÆÆÆÆÆÆÆÆÆÆÆÆÆÆÆÆÆÆÆÆÆÆÆÆÆÆÆÆ ’dI« W¹ULŠ
≥∑ ÆÆÆÆÆÆÆÆÆÆÆÆÆÆÆÆÆÆÆÆÆÆÆÆÆÆÆÆÆÆÆÆÆÆ u¹bOH« qOGA²Ð WUš «eO
∑¥ ÆÆÆÆÆÆÆÆÆÆÆÆÆÆÆÆÆÆÆÆÆÆÆÆÆÆÆÆÆÆÆÆÆÆÆÆÆÆÆÆÆÆÆÆÆÆÆÆÆÆÆÆÆÆÆÆÆÆÆÆÆ ’d
W¾ONð
¥∏ ÆÆÆÆÆÆÆÆÆÆÆÆÆÆÆÆÆÆÆÆÆÆÆÆÆÆÆÆÆÆÆÆÆÆÆÆÆÆÆÆÆÆÆÆÆÆÆÆÆ ŸuM²*« Y׳« ÂUE½
∑¥ ÆÆÆÆÆÆÆÆÆÆÆÆÆÆÆÆÆÆÆÆÆÆÆÆÆÆÆÆÆÆÆÆÆÆÆÆÆÆÆÆÆÆÆÆÆÆÆÆÆÆÆÆÆÆÆÆÆÆÆ ’dI« ‰UH
≈
∑μ ÆÆÆÆÆÆÆÆÆÆÆÆÆÆÆÆÆÆÆÆÆÆÆÆÆÆÆÆÆÆÆÆÆ ©V/VR l{Ë® ’dI« ‰UH
≈ ¡UG≈
qO−²«
∑∂ ÆÆÆÆÆÆÆÆÆÆÆÆÆÆÆÆÆÆÆÆÆÆÆÆÆÆÆÆÆÆÆÆÆÆÆÆÆÆÆÆÆÆÆ ¡ULÝ_« rz«u
WU ·cŠ
∑∂ ÆÆÆÆÆÆÆÆÆÆÆÆÆÆÆÆÆÆÆÆÆÆÆÆÆÆÆÆÆÆÆÆÆÆÆÆÆÆÆÆÆÆÆÆÆÆÆÆÆÆÆÆÆ o«u²*« d¹dײ«
DVD qO−ð
¥π ÆÆÆÆÆÆÆÆÆÆÆÆÆÆÆÆÆÆÆÆÆÆÆÆÆÆÆÆÆÆÆÆÆÆÆÆÆÆÆÆÆ qO−²K WKÐUI« ’«d
_«
lłd*«
¥π ÆÆÆÆÆ Èdš_« WdA« “UNłË !uUÝ “UNł 5Ð o«u²«
μ∞ ÆÆÆÆÆÆÆÆÆÆÆÆÆÆÆÆÆÆÆÆÆÆÆÆÆÆÆÆÆÆÆÆÆÆÆÆÆÆÆÆÆÆÆÆÆÆÆÆÆÆ qO−²« UIOMð
∑∑ ÆÆÆÆÆÆÆÆÆÆÆÆÆÆÆÆÆÆÆÆÆÆÆÆÆÆÆÆÆÆÆÆÆÆÆÆÆ UNŠö≈Ë ¡UDš_« ·UAJ²Ý«
μ∞ ÆÆÆÆÆÆÆÆÆÆÆÆÆÆÆÆÆÆÆÆÆÆÆÆÆÆÆÆÆÆÆÆÆÆÆÆÆÆÆÆÆÆÆÆÆÆÆÆÆÆÆÆÆÆÆÆÆ qO−²« l{Ë
∏∞ ÆÆÆÆÆÆÆÆÆÆÆÆÆÆÆÆÆÆÆÆÆÆÆÆÆÆÆÆÆÆÆÆÆÆÆÆÆÆÆÆÆÆÆÆÆÆÆÆÆÆÆÆÆÆÆÆÆÆÆÆÆÆÆ UH«u*«
μ± ÆÆÆÆÆÆÆÆÆÆÆÆÆÆÆÆÆÆÆÆÆÆÆÆÆÆÆÆÆÆÆÆÆÆÆÆÆ qO−²K qÐUI« dOž u¹bOH
μ≤ ÆÆÆÆÆÆÆÆÆÆÆÆÆÆÆÆÆÆÆÆÆÆÆÆÆÆÆÆÆÆÆÆÆÆÆÆÆÆÆÆÆÆÆÆÆÆÆÆÆÆÆÆÆ qOGA²« ¡bÐ q³
μ≥ ÆÆÆÆÆÆÆÆÆÆÆÆÆÆÆÆÆÆÆÆÆÆÆÆÆÆÆÆÆÆÆÆÆÆÆ DV qšb f³I s qO−²«
μ≥ ÆÆÆÆÆÆÆÆÆÆÆÆÆÆÆÆÆÆÆÆÆÆÆÆÆÆÆÆÆÆÆÆÆÆÆÆ ©OTR® …bŠ«Ë tLKÐ qO−²«
μ¥ ÆÆÆÆÆÆÆÆÆÆÆÆÆÆÆÆÆÆÆÆÆÆÆÆÆÆÆÆÆÆÆÆÆÆÆÆÆÆÆÆÆÆÆÆÆÆÆÆÆÆÆÆÆÆ X
u0 qO−²«
μ∂ ÆÆÆÆÆÆÆÆÆÆÆÆÆÆÆÆÆÆÆÆÆÆÆÆÆÆÆÆÆÆÆÆÆÆÆ ‰Ëb:« qO−²« WLzU
q¹bFð
μ∂ ÆÆÆÆÆÆÆÆÆÆÆÆÆÆÆÆÆÆÆÆÆÆÆÆÆÆÆÆÆÆÆÆÆÆÆÆ ‰Ëb:« qO−²« WLzU
·cŠ
μ∑ ÆÆÆÆÆÆÆÆÆÆÆÆÆÆÆÆÆÆÆÆÆÆÆÆ ©qN« qO−²« l{Ë® EZ REC MODE
u ¹b O H « “ UN ł q O − ð
μ∏ ÆÆÆÆÆÆÆÆÆÆÆÆÆÆÆÆÆÆÆÆÆÆÆÆÆÆÆÆÆ u¹bOHK WOÝUÝ_« qO−²« WOKLŽ
μπ ÆÆÆÆÆÆÆÆÆÆÆÆÆÆÆÆÆÆÆÆÆÆÆÆÆÆÆÆÆÆÆÆÆÆÆÆÆÆÆÆÆÆÆÆÆÆÆÆ wI³²*« X
u« h×
μπ ÆÆÆÆÆÆÆÆÆÆÆÆÆÆÆÆÆÆÆÆÆÆÆÆÆÆÆÆÆÆÆÆÆÆÆÆÆÆÆÆÆÆÆ qO−²UÐ WUš «eO
∂∞ ÆÆÆÆÆÆÆÆÆÆÆÆÆÆÆÆÆÆÆÆÆÆ u¹bO j¹dý Ë√ DVD ’d
vKŽ aM«
∂∞ ÆÆÆÆÆÆÆÆÆÆÆÆÆÆÆÆÆÆÆÆÆ u¹bO j¹dý vKŽ DVD ’d
s aM«
∂± ÆÆÆÆÆÆÆÆÆÆÆÆÆÆÆÆÆÆÆÆÆÆ DVD ’d
v≈ u¹bO j¹dý s aM«
q¹bF²«
∂≤ ÆÆÆÆÆÆÆÆÆÆÆÆÆÆÆÆÆÆÆÆÆÆÆÆÆÆÆÆÆÆÆÆÆÆÆÆÆÆÆÆÆÆÆÆÆÆÆ ¡ULÝ_« WLzU
qOGAð
∂≥ ÆÆÆÆÆÆÆÆÆÆÆÆÆÆÆÆÆÆÆÆÆÆÆÆÆÆÆÆÆÆÆÆÆÆÆÆÆÆ Wž—U WŠU vKŽ qO−²«
∂≥ ÆÆÆÆÆÆÆÆÆÆÆÆÆÆÆÆÆÆÆÆÆÆÆÆÆÆÆÆÆÆ ©¡ULÝ_« WLzU
® wÝUÝ_« q¹bF²«
∂≥ ÆÆÆÆÆÆÆÆÆÆÆÆÆÆÆÆÆÆÆÆÆÆÆÆÆÆÆÆÆÆÆÆÆÆÆÆÆÆÆÆÆÆÆÆÆÆÆÆÆÆÆÆÆÆÆÆÆ ¡ULÝ_« WOLð
∂¥ ÆÆÆÆÆÆÆÆÆÆÆÆÆÆÆÆÆÆÆÆÆÆÆÆÆÆÆÆÆÆÆÆÆÆÆÆÆÆÆÆÆÆÆÆÆÆÆÆÆ ¡ULÝ_« ©W¹ULŠ® qH
∂¥ ÆÆÆÆÆÆÆÆÆÆÆÆÆÆÆÆÆÆÆÆÆÆÆÆÆÆÆÆÆÆÆÆÆÆÆÆÆÆÆÆÆÆÆÆÆÆÆÆÆÆÆÆÆÆÆÆÆÆÆ ¡ULÝ_« ·cŠ
∂μ ÆÆÆÆÆÆÆÆÆÆÆÆÆÆÆÆÆÆÆÆÆÆÆÆÆÆÆÆÆÆÆÆÆÆÆÆÆÆÆÆÆÆÆÆ Ê«uMF« s lDI ·cŠ
∂μ ÆÆÆÆÆÆÆÆÆÆÆÆÆÆÆÆÆÆÆÆÆÆÆÆÆÆÆÆÆÆÆÆÆÆÆÆÆÆÆÆÆÆÆÆÆÆÆÆÆÆÆÆÆÆÆÆÆÆÆÆÆ qB d¹d%
∂∑ ÆÆÆÆÆÆÆÆÆÆÆÆÆÆÆÆÆÆÆÆÆÆÆÆÆÆÆÆÆÆÆÆÆÆÆÆÆÆÆÆÆÆÆÆÆÆÆÆÆÆÆÆÆÆÆÆÆÆÆ Ê«uMŽ rOIð
∂∏ ÆÆÆÆÆÆÆÆÆÆÆÆÆÆÆÆÆÆÆÆÆÆÆÆÆÆÆÆÆÆÆÆÆÆÆÆÆÆÆÆÆÆÆÆÆ ©WLzU
® ÂbI²*« q¹bF²«
∂∏ ÆÆÆÆÆÆÆÆÆÆÆÆÆÆÆÆÆÆÆÆÆÆÆÆÆÆÆÆÆÆÆÆÆÆÆÆÆÆÆÆÆÆÆÆÆÆÆÆÆÆÆÆÆÆÆÆÆÆÆÆÆ WLzU
¡UA½≈
∂π ÆÆÆÆÆÆÆÆÆÆÆÆÆÆÆÆÆÆÆÆÆÆÆÆÆÆÆÆÆÆÆÆÆÆÆÆÆÆÆÆÆÆ WLzU
w ¡ULÝ_« qOGAð
∂π ÆÆÆÆÆÆÆÆÆÆÆÆÆÆÆÆÆÆÆÆÆÆÆÆÆÆÆÆÆÆÆÆÆÆÆÆÆÆÆÆÆÆÆÆÆÆÆÆÆÆÆÆÆ WLzU
rÝ« WOLð
∂π ÆÆÆÆÆÆÆÆÆÆÆÆÆÆÆÆÆÆÆÆÆÆÆÆÆÆÆÆÆÆÆÆÆÆÆÆÆÆÆÆÆÆÆÆÆÆ WLzU
s bNA q¹bFð
∑≤ ÆÆÆÆÆÆÆÆÆÆÆÆÆÆÆÆÆÆÆÆÆÆÆÆÆÆÆÆÆÆÆÆÆÆÆÆ u¹bOH« “UNł v≈ WLzU
a½
∑ ≠ WOÐdF«
DVD-VR350-01375B-IB-ar
7
2007.4.2, 3:49 PM
«b²Ýô« WKNÝ Âb² WNł«Ë l nzUþu« s WŽuM² WŽuL−
MPEG4 qOGAð
MPEG4oOMð «– UHK*« qOGAð «c¼ DVD u¹bOË q− lOD²¹
Æavi nK qš«œ
DivX œUL²Ž«
UöŽ w¼ UNÐ WD³ðd*« «—UFA«Ë DivX ¨DivX
r²¹Ë ¨ DivXNetworks IncWdA W¹—U&
ÆhOšdð Vłu0 UN«b²Ý«
WUF« «eO*«
DVD-VR350 ’d
•
…œu?'« W?I??zU? W?O?L??
— —u? q?O?−???ð W?O?½U?J??≈ …b?Šu?« Ác?¼ `??O?²?ð
qO−?ð pMJ1 ÆDVD-RAM/DVD-RW/DVD-R ’d
v?KŽ UNKO?GAðË
DVD-RAM/DVD-RW/DVD-R ’«d
√ vKŽ tK¹bFðË wL
d« u¹bOH«
DVD+RW/DVD+R ’«d
√ qOGAð sJ1® Æu¹bO WÞdý√ X½U u UL
©ÆUNKO−ð sJ1 ô sJË
DVD-VR355 ’d
•
…œu?'« o?zU?? w?L?
— u?¹b??O? q?O?−???ð W?O?½U?J??≈ …b?Šu?« Ác?¼ `??O?²?ð
q??O??−????ð s?? J??1 ÆRAM/DVD±RW/DVD±R ’«d??
√ v??K??Ž t??K?? O??G??A??ðË
DVD-RAM/DVD±RW/DVD±R ’«d
√ vKŽ tK¹bFðË wL
d« u¹bOH«
.u¹bO WÞdý√ X½U u UL
©Õu{u« WOUŽ …œbF²*« jzUÝu« WNł«Ë® HDMI
—U œułuÐ ÕUL« o¹dÞ sŽ …—uB« g¹uAð qOKI²Ð HDMI ÂuIð
v?≈ DVD u¹bO?Ë q−? s «¡ÎUI?½ d¦√ W?OL
— u?Øu¹bO? …—Uý≈
©jI DVD-VR355® ÆÊu¹eHOK²«
©qN« qO−²« l{Ë® EZ REC MODE
W×?HB« dE½«® ÆU?O
Î zUIK?ð ’dI« ‰UH?
≈ Ë√ ¡bÐ WHO?þu« Ác¼ p `?O²ð
©μ∏
…œu'« wOUŽ wLd« u¹bOH«Ë uB« qOGAðË qO−ð
’d?
vK?Ž u?¹bO?H« s? WŽU?Ý ±∂ w?«uŠ v?≈ qB?¹ U? qO?−?ð sJ?1
W?ŽU?Ý ±μ v?≈ q?B?¹ UË X?¹U?ÐU?−?O?ł π[¥ W?F?Ý 5?N?łË Í– DVD-RAM
v≈ qB¹ UË X¹UÐU−Oł ∏[μ WFÝ WI³D« ÃËœe DVD±R ’d
vKŽ
¥[∑ W?? ? ? ?F?? ? ? Ý DVD-RAM/DVD±RW/DVD±R ’d?? ? ? ?
v?? ? ? K?? ? ? Ž U?? ? ? ?ŽU?? ? ? Ý ∏
ÆqO−²« l{u UIÎË p–Ë ¨X¹UÐU−Oł
DVD-RW/-R ’«d√ «b²ÝUÐ u¹bO≠DVD ¡ULÝ√ ¡UA½≈
u¹bO≠DVD ¡ULÝ√ ¡UA½≈ VR355 ¨DVD-VR350 “UNł «b²ÝUÐ pMJ1
ÆX¹UÐU−Oł ¥[∑ WFÝ DVD±RW/DVD±R ’«d
_« vKŽ pÐ WUš
qO−²« «—UOš s WŽuM² WŽuL−
U³KD²0 ¡Uu?K EP ¨LP ¨SP ¨XP 5Ð s U³ÎÝUM qO−?ð l{Ë d²š«
©μ∞ W×HB« dE½«® ÆpÐ WU)« qO−²«
WŽUÝ ± w«uŠ ¨WOUŽ …œuł ≠ XP l{u« •
WŽUÝ ≤ w«uŠ ¨WOÝUO
…œuł ≠ SP l{u« •
UŽUÝ ¥ w«uŠ ¨WCHM …œuł ≠ LP l{u« •
UŽUÝ ∏ Ë√ ∂ w«uŠ ¨WCHM …œuł ≠ EP l{u« •
DVD±R ’«d
√ WFÝ nFCÐ WI³D« WłËœe DVD±R ’«d
√ eOL²ð ≠
©Æ≥¥ W×HB« dE½«® ÆU³Î¹dIð WI³D« W¹œUŠ√
u¹bOH« qšb® DV input f³I0 «b²ÝUÐ WOLd« u¹bOH« «dOU Èu²× a½
©wLd«
DVD-RAM/DVD±RW/ ’«d?
√ v?≈ DVD “U??N?ł s? q??O?−???²?« p?M??J?1
u¹bOH« qšb® DV INPUT f³I «b²ÝUÐ u¹bO j¹dý Ë√ DVD±R
©μ≥ W×HB« dE½«® Æ©IEEE1394-4pin® ©wL
d«
Wb« wUŽ ÍbŽUB²« Y׳«
ÆiOË Í√ s WOUšË W
b« WOUŽ —u ÍbŽUB²« Y׳« sŽ Z²M¹
eðd¼U−O μ¥Ë XÐ ±∞ WFÝ ÍdþUMð v≈ wL
d« ‰u;« p du¹ UL
`×B*« ZUF*« WOMIðË 2D Y/C WKUH« WO½Ëd²Jù« dz«Ëb« WŽuL−Ë
ÆqO?−?²«Ë q?O?GA?²« w? W?MJ?2 …œuł W?ł—œ vK?Ž√ w?Me?« ”UÝú?
©±∏ W×HB« dE½«®
∏ ≠ WOÐdF«
DVD-VR350-01375B-IB-ar
8
2007.4.2, 3:49 PM
اﻟﺒﺪء ﺑﺎﻟﺘﺸﻐﻴﻞ
¡«œ√ WO½UJ≈ qzUÝd« UbšË qUJ²*« rz«uI« ÂUE½ WHOþË p `O²ð
DVD- ’d
l? pM?J1 ÆV?ÝUM q?JA?ÐË WuN?Ð W?ÐuK?D*« UO?KL?F«
W??L?zU??
¡U?A?½≈Ë W??K?−???*« —u??B?« d??¹d?% ©VR l??{u?«® RAM/DVD-RW
ÆpðUłUO²Š« oË 5F qK²Ð —uB« d¹d%Ë qOGA²«
اﻟﺒﺪء ﺑﺎﻟﺘﺸﻐﻴﻞ
dAM«Ë l³D« ‚uIŠ
Âb²*« qOœ …¡«d q³
ÆSamsung Electronics Co WdA 2007 ÂUF ©
s ¡eł a½ Ë√ ¡UA½≈ …œUŽ≈ “u& ô t½√ Í√ ªWþuH?× ‚uI(« lOLł
w?ÐU² `?¹dBð v?KŽ ‰uB?(« ÊËœ qUJ?UÐ qO?b« Ë√ Âb?²*« q?Oœ
Æ Samsung Electronics Co Wdý s o³
u¹bOH« “UNłË DVD q− «b²Ý« WI¹dÞ
ÆÂb²*« qOœ …¡«d
q³
WOðü« dUMF« WFł«d s bQð
qOb« w Wb²*« “ud«
n¹dF²«
DVD ’«d
√ w WŠU² WHOþË sLC²¹ p–Ë
UNKO−ð - w²« DVD-RW(V)/DVD±R Ë√
`KDB*«
W½uI¹_«
DVD
ÆUNUH
≈Ë
’dI« Ÿu½ —UO²š« ∫± …uD)«
w WŠU²*« nzUþu« ÈbŠ≈ p– sLC²¹
ÆqO−²« q³
ÕU²*« ’dI« Ÿu½ s oIײ« vłd¹Ô
ÆVCD WÞuGC*« u¹bOH« ’«d
√
DVD-VR350 ’d
•
w WŠU²*« nzUþu« ÈbŠ≈ p– sLC²¹
ÆDVD-RAM
w WŠU²*« nzUþu« ÈbŠ≈ p– sLC²¹
ÆDVD-RW
VCD
RAM
-RW
©ÆUNKO−ð sJ1 ô sJË DVD+RW/DVD+R ’«d
√ qOGAð sJ1®
w WŠU²*« nzUþu« ÈbŠ≈ p– sLC²¹
DVD-VR355 ’d
•
ÆDVD-R
’d
w WŠU² WHOþË p– sLC²¹
ÆDVD+RW
—dJ² q?JAÐ ’dI« fH?½ vKŽ qO−?²« ¡«dł≈ w Vžd?ð XM «–≈
bFÐ ’dI« U?¹u²× vKŽ d¹d% UOKLŽ ¡«d?ł≈ w Vždð XM Ë√
…œUŽù q?ÐU?I« DVD±RW Ë√ DVD-RAM ’d?I« Ÿu?½ d²?šU ¨q?O−?²?«
«dOOGð W¹√ ¡«dł≈ ÊËœ qO−ð w Vždð XM «–≈ U√ ÆtOKŽ WÐU²J«
ÆtOKŽ WÐU²J« …œUŽù qÐUI« dOž DVD±R ’d
d²šU ¨tOKŽ WIŠô
’d
w WŠU² WHOþË p– sLC²¹
ÆDVD+R
w WŠU²*« nzUþu« ÈbŠ≈ p– sLC²¹
’d
® U½UOÐ vKŽ qL²A¹ ◊uGC ’d
’d
Ë√ tOKŽ WÐU²JK qÐU
◊uGC
Æ©tOKŽ WÐU²J« …œUŽù qÐU
◊uGC
-R
+RW
+R
CD
qO−²« ¡b³ ’dI« W¾ONð ∫≤ …uD)«
’«d
√ w WŠU²*« WHOþu« «c¼ sLC²¹
UOÎzUIKð W¾ON²« WOKLŽ √b³¹ t½≈ YOŠ ªu¹bOH« “UNł sŽ q−*« nK²¹
W?¹—Ëd{ W?O?KL?Ž w¼Ë Æq?³
s? Âb?²?*« d?Ož ’d?I« ‰U?šœ≈ œd−?0
Æ’dI« vKŽ qO−²« ¡«dłù œ«bŽû
ÆDVD-RAM/DVD±RW/DVD±R Ë√ CD-R/-RW
’«d
√ w WŠU²*« WHOþu« «c¼ sLC²¹
ÆDVD-RAM/DVD±RW/DVD±R Ë√ CD-R/-RW
DVD-RAM
’d «b²Ý«
l{Ë® DVD-Video qO−ð oOM²Ð ’«d
_« s ŸuM« «c¼ W¾ONð sJ1
q¹bFð pMJ1 Æ©©u¹bOH« qO−ð® VR
ÆpðU³KD² VŠ 5F qK²Ð qOGAð WLzU
¡UA½≈Ë WK−
Ò *« —uB«
DVD±RW/+R
’«d
√ w WŠU²*« WHOþu« «c¼ sLC²¹
DVD-RAM/DVD±RW/ Ë√ CD-RW/-R U½UO³«
MP3
MPEG4
ÆDVD±R
w WŠU²*« nzUþu« ÈbŠ≈ p– sLC²¹
Æu¹bOH« j¹dý
’d «b²Ý«
dNEð ·uÝ ¨…d ‰Ë_ Âb² dOž DVD±RW/+R ’d
‰Ušœ≈ bMŽ •
¢Uninitialised Disc. Do you want to initialise this disc?¢ W?? ? U?? ? ?Ýd?? ? «
œbŠ «–≈ Æ©ø’dI« «c?¼ bÐ w Vžd?ð q¼ ÆÁƒbÐ r²¹ r? ’dI«®
oOM²Ð DVD-RW ’d
W¾ONð sJ1 Æ¡b³« WOKLŽ √b³² ¨©rF½® Yes
DVD-Video qO−²« oOMð Ë√ ©©u¹bO® Video l{Ë® DVD-Video
Æ©©u¹bOH« qO−ð® VR l{Ë®
JPEG
qLFð ô YOŠ WUš WUŠ p– sLC²¹
¡UG≈ Àb×¹ YOŠ Ë√ WMOF WHOþË
Æ«œ«bŽù«
U×OLK²« Ë√ ULOKF²« iFÐ p– sLC²¹
q qLŽ w bŽUð w²« W×HBUÐ WU)«
ÆÆnzUþu« s WHOþË
DVD- oO?M?ð 5Ð ·ö?²š« b?łu¹ ô ¨DVD+RW ’«d?
√ «b?²ÝU?Ð •
l{Ë® DVD-Video qO−²« oOMðË ©©u¹bO® Video l{Ë® Video
Æ©©u¹bOH« qO−ð® VR
tO³Mð
WEŠö
UNKOGAð sJ1 w²« nzUþu« ÈbŠ≈
WLKÐ —“
ÆjI bŠ«Ë —“ «b²ÝUÐ
One-Touch
UNKOGAð sJ1 w²« nzUþu« ÈbŠ≈
DVD-R ’«d√ «b²Ý«
VHS
ÆANYKEY —e« «b²ÝUÐ
—e«
ANYKEY
ÆjI? ©u¹b?OH?«® V qO?−?²« l?{Ë r?Žœ r²?¹ Ë ’dI?« W¾?ON?ð ÂeK?¹ ô
DVD U½uJ «b²ÝUÐ ’«d
_« s ŸuM« «c¼ qOGAð pc pMJ1Ë
Æ’«d
_« Ác¼ ¡UN½≈ WUŠ w ¨WHK²<«
Âb²*« qOœ «b²Ý« ‰uŠ
v?KŽ jI? u¹bO?H« l{Ë Ë√ VR l?{u« U≈ «b?²Ý« pM?J1
fH½ w ULNOK «b²Ý« pMJ1 ô t½√ Í√ ¨DVD-RW ’d
ÆX
u«
q?? O??−????ð® VR l??{u??« w?? DVD-RW ’d??
W??¾??O??N??ð p?? M??J??1
Ê√ k?Šô Æ’d?I« d?¹b «b??²ÝU?Ð ©u¹b?O?® V Ë√ ©u¹b?OH?«
d??O?O??G??ð b?M??Ž l?O??C??ð b?
’d??I??« v?K??Ž …œu??łu?*« U??½U??O?³??«
ÆoOM²«
ÆZ²M*« «b²Ý« q³
«bÎOł ÊU_« «œUý—≈ vKŽ ·dF²« s bQð ©±
©μ v≈ ≤ s U×HB« dE½«®
ÆUNŠö≈Ë ¡UD?š_« ·UAJ²Ý« r
dE½« ¨WKJ?A ÀËbŠ WUŠ w ©≤
©∏∞ v≈ ∑∏ s U×HB« dE½«®
π ≠ WOÐdF«
DVD-VR350-01375B-IB-ar
9
2007.4.2, 3:49 PM
qO−²« ∫≥ …uD)«
…bŠu« ëd²Ý«
u¹bOH«ØuB« qÐU •
Êu¹eHOK²« w rJײUÐ ’U)« RF qÐU •
©jI DVD-VR355® HDMI qÐU •
bFÐÔ sŽ rJײ« “UNł •
©AAA r−×Ю bFÐÔ sŽ rJײ« “UN−Ð WU)« U¹—UD³« •
Âb²*« qOœ •
l¹d« lłd*« •
bFÐÔ sŽ rJײ« “UNł eON&
bFÐÔ sŽ rJײ« “UNł w U¹—UD³« VOdð
s?Ž rJײ?« “UNł s w?HK)« ¡e'U?Ð œułu*« W¹—U?D³« ¡UD?ž `²« •
ÆbFÐÔ
qOGA²« ∫¥ …uD)«
¨UOÎUŠ W{ËdF WLzU
w tKOGAð w Vždð Íc« rÝô« —UO²š« pMJ1
Æ…ÎdýU³ qOGA²« √bЫ rŁ
qL% WOŽd Èdš√ ÂU
√Ë ¡ULÝ√ UNOKŽ oKD¹ ÂU
√ s DVD ÊuJ²¹
ƉuBH« rÝ«
qO−²« ¡bÐ l{u YOŠ 5²DI½ 5Ð rÝ« ¡UA½≈ r²¹ ¨qO−²« ¡UMŁ√
ÆtUI¹≈Ë
DVD-RW/ ’«d
√ vKŽ qO−²« ¡UN½≈ bMŽ UOÎzUIKð ‰uBH« ¡UA½≈ r²¹
ÆV l{u« w -R
U?N?K?¹bF?ðË DVD+RW ’«d?
√ v?K?Ž p?Ð W?U?)« ‰u?B?H?« ¡U?A?½≈ p?M?J?1
Æ©qBH« q¹bFð® Chapter Edit WLzUI« «b²ÝUÐ
l?{Ë V??Š ©‰u?B??H?« 5?Ð w?M?e?« q?U?H?«® q?B?H??« ‰u?Þ n?K?²??¹
ÆqO−²«
W?³?łu?*«® »U?D?
_« …«–U?×? s? b?Q?ð AAA r?−?×?Ð 5?²?¹—U?D?Ð q?šœ√ •
Æ`O× qJAÐ ©W³U«Ë
ÆW¹—UD³« ¡UDž l{Ë bŽ√ •
q− ’d d¹d% ∫μ …uD)«
U¹u²×? d¹d% s qNÝ√ ’«d
_« U¹u²× d¹d% WO?KLŽ d³²Fð
d¹dײ« nzUþË s b¹bF« q−*« rŽb¹ ÆW¹bOKI²« u¹bOH« WÞdý√
ÆDVD ’«d
√ l jI WŠU²*« WHK²<«
d¹dײ« nzUþË qOGAð WKNÝË WDOÐ d¹d% WLzU
«b²ÝUÐ pMJ1
w? p– d?OžË qH?I«Ë WO?L?²« …œUŽ≈Ë a?M«Ë ·c?(« q¦? ¨WHK?²<«
Æq−*« rÝô«
©VR l{u« w DVD-RW® qOGAð WLzU ¡UA½≈
fH½ vKŽ …b¹bł qOGAð WLzU
¡UA½≈ q−*« «c¼ «b²ÝUÐ lOD²ð
ÆwK_« qO−²« dOOGð ÊËœ WLzUI« Ác¼ d¹d%Ë ’dI«
Èdš_« DVD U½uJ vKŽ qOGA²«Ë ¡UN½ù« ∫∂ …uD)«
∫`O× qJAÐ bFÐÔ sŽ rJײ« “UNł qLF¹ r «–≈
©WU'« W¹—UD³«® W³U«Ë W³łu*« U¹—UD³« WO³D
s oI% •
s? Êu??J?¹ b?
¨Èd??š_« DVD U?½u?J? b??Š√ v?K?Ž DVD ’d??
q?O?G?A??²?
Î Ë√ r
Æ¡UN½ù« ¡«dł≈ Í—ËdC«
d¹dײ« UOKLŽ lOLł s ¡UN²½ôUÐ ô
Æ’dI« ¡UN½SÐ r
rŁ ¨qO−²«Ë
ÆWž—U XO U¹—UD³« Ê√ bQð •
VR l{u« w DVD-RW ’d «b²Ý« bMŽ
ÆbFÐÔ sŽ rJײ« “UNł dFA² ÂU√ oz«uŽ œułË ÂbŽ s oI% •
w ’dI« qOGAð bMŽ Í—Ëd{ dOž ÂUŽ tłuÐ ’«d
_« ¡UN½≈ Ê√ rž—
ÁƒUN½≈ - ’d
«b²Ý« V−¹ ¨VR l{u« l WI«u²*« U½uJ*« bŠ√
ÆqOGA²« ¡«dłù
Æ—ËU− l{u w XMÝ—uK …¡U{≈ œułË ÂbŽ s oI% •
U¹—UD³« mCð ô ÆWOK;« W¾O³« `z«uK UIÎË U¹—UD³« s hKð
ÆWOeM*« U¹UHM« WKÝ w
V l{u« w DVD-RW ’«d√ «b²Ý« bMŽ
dš¬ “UN?ł Í√ vKŽ qO?GA²« WO?KLŽ 5J?L² ô
Î Ë√ ’dI?« ¡UN½≈ wG?³M¹
Èd?š√ qO−ð Ë√ d¹d?% WOKLŽ W¹√ ¡«d?ł≈ pMJ1 ô Æq−?*« «c¼ dOž
ÆtzUN½≈ œd−0 ’dI« vKŽ
DVD±R ’«d√ «b²Ý« bMŽ
·öÐ d?š¬ ÊuJ v?KŽ tK?OGA?ð s sJL?²ð w ’d?I« ¡UN?½≈ wG³?M¹
ÆtzUN½≈ œd−0 tKO−ð Ë√ ’dI« «c¼ d¹d% pMJ1 ô Æq−*« «c¼
l{Ë® EZ REC MODE «b²ÝUÐ UOÎzUIKð ’dI« ‰UH
≈ pMJ1
©μ∏ W×HB« dE½«® Æ©qN« qO−²«
±∞ ≠ WOÐdF«
DVD-VR350-01375B-IB-ar
10
2007.4.2, 3:49 PM
اﻟﺒﺪء ﺑﺎﻟﺘﺸﻐﻴﻞ
UI×K*«
q?O−²?«Ë dýU³*« q?O−²?« ∫qO−?²K ÊU²?HK²? ÊU²I¹d?Þ błuð
qO−²« l{Ë ∫ a¹—U²« W¾ X% X
u*« qO−²« ×bM¹ ÆX
u*«
©WOUF« …œu'« l{Ë® XP ∫wŽu³Ý_« Ë√ wuO« qO−²« Ë√ …bŠ«Ë …d*
l{u«® EPË ©q¹uD« qO−²« l{Ë® LPË ©WOÝUOI« …œu'« l{Ë® SPË
Æ©b²L*«
ÆÁU½œ√ WMO³*« ULOKF²« l³ð« ¨bFÐÔ sŽ rJײ« “UNł l pÐ ’U)« Êu¹eHOK²« “UNł o«uð Èb b¹bײ
اﻟﺒﺪء ﺑﺎﻟﺘﺸﻐﻴﻞ
ÆÊu¹eHOK²« “UNł qOGA²Ð r
Ʊ
ÆÊu¹eHOK²« “UNł u×½ bFÐ sŽ rJײ« “UNł tłË Æ≤
vKŽ jGCUÐ pÐ ’U)« Êu¹eHOK²« “«dÞ l oÐUD²¹ Íc«Ë 5L
— s ÊuJ*« ed« qšœ√Ë ©Êu¹eHOKð® TV —e« vKŽ —«dL²Ýô« l jG{« Æ≥
ÆW³ÝUM*« ÂU
—_« —«—“√
UNO rJײK WKÐUI« U½u¹eHK²« “u—
œbŽ »U²½«
„—U
œbŽ »U²½«
TV +01, +02, +03, +04, +05, +06, +35
„—U
SAMSUNG
TV +33, +34
THOMSON ASIA
TV +07, +16, +17, +18, +19, +21
TOSHIBA
TV +12
AKAI
TV +22
WEGA
TV +22
BANG & OLUFSEN
TV +02
YOKO
TV +09
BLAUPUNKT
sŽ r?J?×?²« “U?N?ł l? UI?
Î «u?² Êu?¹e?H?OK?²?« “U?Nł ÊU? «–≈ ∫W−O²M«
Êu¹eHOK²« W−dÐ Êü« X9 ÆtKOGA?ð ·UI¹≈ r²O ¨bFÐ
ÆbFÐ sŽ rJײ« “UNł l qLFK
pOKF ¨Êu¹eHOK²« “«dDÐ ’Uš e— s d¦√ „UM¼ ÊU «–≈
qBð v²Š w«u²« vKŽ “ud« Ác¼ s e— q «b²Ý«
Æ`O×B« ed« v≈
wG³MO ¨bFÐ sŽ rJײ« “UNł U¹—UDÐ ‰«b³²ÝUÐ XL
«–≈
ÆÈdš√ …Îd “«dD« e— j³{ pOKŽ
BRANDT
TV +22
BRIONVEGA
TV +21
CGE
TV +24 CONTINENTAL EDISON
TV +14
FERGUSON
TV +02, +17, +21
FINLUX
TV +12
FISHER
TV +22
FORMENTI
TV +09, +17, +21
GRUNDIG
TV +11, +13, +14, +24
HITACHI
TV +21
IMPERIAL
TV +32
JVC
ÆWOU²« —«—“_« «b²ÝUÐ Êu¹eHOK²« “UNł w rJײ« p– bFÐ pMJ1
—e«
TV +02, +30
LG
TV STANDBY/ON
TV +02
LOEWE
TV +02, +22
LOEWE OPTA
WHOþu«
ÆtKOGAð ·UI¹≈Ë Êu¹eHOK²« qOGA²
TV +14
©qOGAðØ—UE²½«®
TV +22
METZ
TV +02, +16
MITSUBISHI
INPUT SEL.
Æwł—Uš —bB b¹bײ
©qšb*« b¹b%®
ÆÊu¹eHOK²« u Èu² j³C
©≠ Ë√ ´® TV VOL
(uB« Èu²LD³{®
ZU½d³« b¹bײ UN«b²Ý« r²¹
Æ»uKD*«
©
Ë√
® PROG
(—U*«ØZU½d³«®
TV +21, +29
MIVAR
TV +23
NOKIA
TV +13, +14, +22, +24
NORDMENDE
TV +08, +23, +24, +25, +26, +27
PANASONIC
TV +02, +20, +22
PHILIPS
PHONOLA
·UI¹≈Ë uB« qOGAð 5Ð q¹b³²K
TV MUTE
TV +02, +20, +22
ÆtKOGAð
(uB« r²)
TV +14, +23
PIONEER
Æ…ÎdýU³ ÂU
—_« ‰Ušœù
0~9
TV +02, +20
RADIOLA
TV +22
RADIOMARELLI
TV +23
REX
TV +13, +14, +22, +23, +24
SABA
TV +23
SALORA
TV +12, +16
SANYO
TV +02
SCHNEIDER
TV +23
SELECO
TV +10, +16, +31
SHARP
TV +09
SIEMENS
11
SINGER
SINUDYNE
TV +15, +16
SONY
TV +14
TELEAVA
TV +14, +24, +28
TELEFUNKEN
TV +13, +14, +24
THOMSON
±± ≠ WOÐdF«
DVD-VR350-01375B-IB-ar
TV +22
TV +22
2007.4.2, 3:49 PM
nu«
اﻟﺒﺪء ﺑﺎﻟﺘﺸﻐﻴﻞ
(DVD-VR350) WOU_« WŠuK«
©P.SCAN® P.SCAN —e«
Æπ
DVD …bŠË
Ʊ
WOU_« WŠuK« WýUý
Ʊ∞
©‚öž≈Ø`²® DVD OPEN/CLOSE —e«
Æ≤
©u¹bOH«ØDVD —UO²š«® DVD/VCR —e« Ʊ±
u¹bOH« “UNł …bŠË
Æ≥
©a½® COPY Ê«—e« Ʊ≤
u¹bOH« “UN−Ð ’U)« ©Ã«dš≈® EJECT —e«
Æ¥
Ê«—e« Ʊ≥
©qOGAðØ—UE²½«® STANDBY/ON —e«
Æμ
©qO−ð® RECORD —e« Ʊ¥
©AV2 IN® ©u¹bOH« qšb® VIDEO INPUT f³I
Æ∂
©·UI¹≈® STOP —e« Ʊμ
©AV2 IN® ©uB«® AUDIO qšb fÐUI
Æ∑
©wL
d« u¹bOH« qšb® DV INPUT f³I
Æ∏
©ÂbIð® PROG
/
w?D?ðØl¹d?Ý .bI?ðË wD?ðØl?Ołd?ðË XO?³¦?ðØqO?GA?ð —«—“√ Ʊ∂
Æn
uðË
(DVD-VR355) WOU_« WŠuK«
Æπ
DVD …bŠË
Ʊ
Ʊ∞
©‚öž≈Ø`²® DVD OPEN/CLOSE —e«
Æ≤
©u¹bOH«ØDVD —UO²š«® DVD/VCR —e« Ʊ±
u¹bOH« “UNł …bŠË
Æ≥
©a½® COPY Ê«—e« Ʊ≤
u¹bOH« “UN−Ð ’U)« ©Ã«dš≈® EJECT —e«
Æ¥
Ê«—e« Ʊ≥
©qOGAðØ—UE²½«® STANDBY/ON —e«
Æμ
©qO−ð® RECORD —e« Ʊ¥
©AV2 IN® ©u¹bOH« qšb® VIDEO INPUT f³I
Æ∂
©·UI¹≈® STOP —e« Ʊμ
©AV2 IN® ©uB«® AUDIO qšb fÐUI
Æ∑
©wL
d« u¹bOH« qšb® DV INPUT f³I
Æ∏
©P.SCAN® P.SCAN —e«
WOU_« WŠuK« WýUý
©ÂbIð® PROG
/
w?D?ðØl¹d?Ý .bI?ðË wD?ðØl?Ołd?ðË XO?³¦?ðØqO?GA?ð —«—“√ Ʊ∂
Æn
uðË
±≤ ≠ WOÐdF«
DVD-VR350-01375B-IB-ar
12
2007.4.2, 3:49 PM
اﻟﺒﺪء ﺑﺎﻟﺘﺸﻐﻴﻞ
WOU_« WŠuK« WýUý
Æu¹bOH« qOGAð -
Æ∂
.qOGA²« bO
DVD
Ʊ
Æ◊uGC ’d
Ë√ DVD jzUÝË qOL% -
Æ∑
.qOGA²« bO
DVD-RAM
Æ≤
ÆWOU(« …bŠu« WUŠ Ë√ œ«bF« l{u Ë√ X
u« b¹b% -
Æ∏
.qOGA²« bO
DVD(±)RW Ë√ DVD(±)R
Æ≥
ÆdýR*« «c¼ ¡wC¹ ¨X
u*« qO−²« b¹b% bMŽ
Æπ
ÆÍbŽUB²« Y׳« l{Ë qOGAð -
Æ¥
ÆVHS u¹bO j¹dý qOL% - Ʊ∞
ÆqO−²« WHOþË qOGAð -
Æμ
(DVD-VR350) WOHK)« WŠuK«
©u¹bOØu® AV OUT fÐUI
Æμ
©u¹bOH« Ãd® S-VIDEO OUT f³I
Ʊ
©“UN'« u¹bO Ãd® COMPONENT VIDEO OUT fÐUI
Æ∂
Æ∑
AUDIO RË ©d¹_« uB« Ãd® AUDIO L f³I
©s1_« uB« Ãd®
Æ≤
Êu¹eHOK²« WKË v≈ ×U)« s
wz«uN« ‰Ušœ≈ qu
Æ∏
©wL
d« uB« Ãdš® DIGITAL AUDIO OUT f³I
©Í—u×® COAXIALØ©ÍdBЮ OPTICAL®
Æ≥
©u¹bOØu® AV 1 IN fÐUI
Æ¥
±≥ ≠ WOÐdF«
DVD-VR350-01375B-IB-ar
13
2007.4.2, 3:49 PM
(DVD-VR355) WOHK)« WŠuK«
اﻟﺒﺪء ﺑﺎﻟﺘﺸﻐﻴﻞ
©u¹bOØu® AV OUT fÐUI
Æμ
©u¹bOH« Ãd® S-VIDEO OUT f³I
Ʊ
©“UN'« u¹bO Ãd® COMPONENT VIDEO OUT fÐUI
Æ∂
Æ∑
AUDIO RË ©d¹_« uB« Ãd® AUDIO L f³I
©s1_« uB« Ãd®
Æ≤
Êu¹eHOK²« WKË v≈ ×U)« s
©jI DVD-VR355® wz«uN« ‰Ušœ≈ qu
Æ∏
©wL
d« uB« Ãdš® DIGITAL AUDIO OUT f³I
©Í—u×® COAXIALØ©ÍdBЮ OPTICAL®
Æ≥
©u¹bOØu® AV 1 IN fÐUI
Æ¥
±¥ ≠ WOÐdF«
DVD-VR350-01375B-IB-ar
14
2007.4.2, 3:49 PM
اﻟﺒﺪء ﺑﺎﻟﺘﺸﻐﻴﻞ
bFÐÔ sŽ rJײ« “UNł vKŽ ·dF²«
ÆWI«u²*« U—U*«Ë Samsung Êu¹eHOKð …eNł√ l qLFð Ê√ u¹bOH« qO−ð “UNłË DVD ’«d√ q−0 WU)« bFÐ sŽ rJײ« …bŠË ÊUJSÐ ÊuJ¹
©ÕU²H Í√® ANYKEY —e« Ʊ¥
ÆqOGA²« bO
’dI« WUŠ ÷dF —e« «c¼ vKŽ jG{«
±
≤
±∏
±π
≤∞
≥
≤±
©qO−ð® REC —e« Ʊμ
DVD- ’«d
√ vKŽ qO−²« WOKLŽ ¡«dłù —e« «c¼ vKŽ jG{«
ÆVHS u¹bOH« j¹dýË RAM/DVD±RW/DVD±R
¥
v≈ TO DVD —e« Ʊ∂
ÆDVD “UNł v≈ u¹bOH« s aM« bMŽ —e« «c¼ vKŽ jG{«
©qO−²« WŽdÝ® REC SPEED —e« Ʊ∑
…œu?łË »uK?D*« q?O?−?²« X?
Ë b?¹b×?² —e?« «c?¼ vK?Ž jG?{«
Æ…—uB«
©u¹bOH«® VCR —e« Ʊ∏
μ
∂
∑
≤≤
≤≥
∏
≤¥
≤μ
π
≤∂
Æu¹bOH« «b²Ý« bMŽ —e« «c¼ vKŽ jG{«
©qšb*« b¹b%® INPUT SEL. —e« Ʊπ
Ë AV1 Ë√ n«u*«® wł—U)« qšb*« l{Ë w qšb*« …—Uý≈ œbŠ
©©wL
d« u¹bOH«® DV qšb Ë√AV2
±∞
©‚öž≈Ø`²® OPEN/CLOSE —e« Æ≤∞
Æt
öž≈Ë ’«d
_« ל `²H
©qOGAðØ—UE²½«®TV STANDBY/ON —e« Æ≤±
©od dOž® TV/VCR —e« Æ≤≤
©WöŽ® MARKER —e« Æ≤≥
±±
≤∑
±≤
±≥
±¥
±μ
±∂
±∑
≤∏
≤π
≥∞
≥±
≥≤
≥≥
l{u vKŽ WöŽ Ë√ WOFłd WöŽ l{u —e« «c¼ vKŽ jG{«
Æ’dI« qOGAð ¡UMŁ√ 5F
©—U*«®TRKØ©ZU½d³«®PROG —e« Æ≤¥
ØÊu¹eHOKð …UM
b¹bײ —e« «c¼ vKŽ jG{«
ÆiOÐ_« j)« W«“ù —e« «c¼ vKŽ jG{«
DVD
ÆDVD “UNł «b²Ý« bMŽ —e« «c¼ vKŽ jG{«
©Êu¹eHOK²« u r²ØuB«® AUDIO/TV MUTE —e« Æ≤μ
©Êu¹eHOK²«® TV —e« Æ≤∞
ÆWHK²<« uB« nzUþË v≈ qBð w —e« «c¼ vKŽ jG{«
Æ©TV l{u«® uB« r² q¦ —e« «c¼ qLF¹
ÆÊu¹eHOK²« qOGA² —e« «c¼ vKŽ jG{«
©qOGAðØ—UE²½«® STANDBY/ON —e«
ÂU—_« —«—“√
©…—uB« w wc« rJײ«® IPC —e«
©wDðØÂU_« v≈ .bIð® F.ADV/SKIP —e«
qOGA²UÐ WIKF² —«—“√
©Ÿuł—® RETURN —e« Æ≤∂
ÆWIÐU« WLzUI« v≈ …œuFK
©ÃËdš® EXIT —e« Æ≤∑
©¡ULÝ_« WLzUØqOGA²« WLzU® PLAY LIST/TITLE MENU —e« Æ≤∏
Ød¹dײUÐ WU)« qOGA²« WLzU
‰Ušœù —e« «c¼ vKŽ jG{«
Æ¡ULÝ_« WLzU
©u® AUDIO —e« Æ≤π
— e « Æ ±
Æ≥
Æ¥
Æμ
Æ∂
Æ∑
·UI¹≈ ¨XO³¦ðØqOGAðË n
uðË wDðË Y×ÐË lOłdðØ.bIð
U²Î
R qO−²«
©Êu¹eHOK²« u Èu²® TV VOL —e« Æ∏
…œułu*« …œbF²*« uB« nzUþË v≈ ‰uuK —e« «c¼ Âb²Ý«
Æ©DVD l{Ë® ’«d
_« bŠ√ vKŽ
Êu¹eHOK²« u Èu² j³{
©qN« qO−²« l{Ë® EZ REC MODE —e« Æ≥∞
©WLzUI«® MENU —e« Æπ
ÆWýUA« vKŽ dNEð w²« …—uB« dO³Jð vKŽ qLF¹
Æu¹bOH« “UNłË DVD q− œ«bŽ≈ WLzU
÷dF¹
©Xu*« qO−²«® TIMER REC —e« Æ≥±
©… / † / / —«—“√® ÁU&ô« —«—“√Ø©o«u® OK —e« Ʊ∞
©UuKF® INFO —e« Ʊ±
ÆX
u «b²ÝUÐ qO−²« bMŽ —e« «c¼ vKŽ jG{«
©u¹bOH« “UNł v≈® TO VCR —e« Æ≥≤
Æ’dI« WUŠ Ë√ wU(« œ«bŽù« —e« «c¼ ÷dF¹
Æu¹bOH« “UNł v≈ DVD s aM« bMŽ —e« «c¼ vKŽ jG{«
©’«d_« WLzUØ¡ULÝ_« WLzU® TITLE LIST/DISC MENU —e« Ʊ≤
©¡UG≈® CANCEL —e« Æ≥≥
Æ’«d
_« WLzU
Ø¡ULÝ_« WLzU
‰Ušœù —e« «c¼ vKŽ jG{«
©WýUAK W³ŠUB*« WLłd²«® SUBTITLE —e« Ʊ≥
WýU?A?K W?³ŠU?B?*« WL?łd²?« W?G d?O?OG?² —e?« «c?¼ vK?Ž jG?{«
ÆDVD “UN−Ð WU)«
±μ ≠ WOÐdF«
DVD-VR350-01375B-IB-ar
15
2007.4.2, 3:49 PM
اﻟﺘﻮﺻﻴﻞ واﻹﻋﺪاد
Êu¹eHOK²UÐ u¹bOH« “UNłË DVD q− qOuð
u¹bOH«ØuB« qÐU «b²ÝUÐ
DVD q−?Ë Êu?¹eH?OK²?« s q? qO?GA?ð ·UI?¹≈ s b?Qð
ÆöÐUJ« qOuð q³
u¹bOH« “UNłË
qC√ …œuł «– —uË u vKŽ ‰uB(« •
Æu¹bOH« “UNłË DVD q− ’U)« œ«bŽù« ¡«dł≈ qONð •
ÆÊu¹eHOK²« s WJ³A« qšb qÐU Ë√ wz«uN« Ãdš√ Ʊ
fÐUIÐ qÐUJ?« «c¼ q Æ≤
¡e'UÐ WöFÐ e?OL*« ÂË√ ∑μ wz«uN?«
Æu¹bOH« “UNłË DVD q− s wHK)«
pOKŽ V−¹ ¨U¼b¹b% - w²« WKu« Ÿu½ sŽ dEM« ·dBÐ
Æ“UN'« l œËe*« RF qÐU qOuð UL
Î z«œ
“U?N??łË DVD q?−???0
q?OG?Að ·U?I?¹≈ bM?Ž WýU?A?« vK?Ž —u W?¹√ d?NE?ð sK? ô≈Ë
Æu¹bOH« “UNłË DVD q−
f??ÐU?I??Ð “U?N??'« l? œËe??*« RF q?ÐU?? q? Æ≥
Æu¹bOH«
q?³??
Í– s? Âb???²???*« q?u?*U??Ð RF q?ÐU? s?? d?šü« ·d?D??« q? Æ¥
ÆÊu¹eHOK²UÐ ’U)« wz«uNK
DVD q−? Ë Êu¹eHO?K²« s q? qOGA?ð ·UI¹≈ s b?Qð
ÆöÐUJ« qOuð q³
u¹bOH« “UNłË
ÆRF qÐU q Ʊ
f³?I0Ë u¹bOH« Ãd0 u?¹bOH«ØuB« qÐU w?dÞ ÈbŠ≈ q Æ≤
DVD q−?? s? w?H?K?)« ¡e?'U?Ð s?1_« Ë√ d?¹_« u?B?« Ãd??
Æu¹bOH« “UNłË
ÆÊu¹eHOK²« w VÝUM*« qu*UÐ qÐUJ« s w½U¦« ·dD« q Æ≥
qšb v≈
RF qÐU
wz«uN«
qÐU
wz«uN«
Ãd v≈
RF qÐU
Êu¹eHOK²«
RF qÐU
iOÐ√ dLŠ√
≤
wz«uN« qšb v≈
±
RF qÐU
≥
Êu¹eHK²«
ANT IN
±∂ ≠ WOÐdF«
DVD-VR350-01375B-IB-ar
16
2007.4.2, 3:49 PM
اﻟﺘﻮﺻﻴﻞ واﻹﻋﺪاد
ØuB« qÐU «b²ÝUÐ Êu¹eHOK²UÐ u¹bOH« “UNłË DVD q− qOuð pMJ1
∫pMJ1 pcÐË ÆÊu¹eHOK²UÐ UŠÎU² VÝUM*« qšb*« ÊU «–≈ ¨u¹bOH«
Êu¹eHOK²UÐ u¹bOH« “UNłË DVD q− qOuð
RF qÐU «b²ÝUÐ
S-Video qÐU qOuð
“UN'« u¹bO qÐU qOuð
اﻟﺘﻮﺻﻴﻞ واﻹﻋﺪاد
vKŽ “UN'« u¹bO qLF¹ ÆWIOb«Ë WOUF« …œu'« «– Ê«u_« —uBÐ l²L²ð ·uÝ
dL?Š_«Ë ©PB® ‚—“_«Ë ©Y® iOÐ_«Ë œuÝ_« «—U?ý≈ v≈ …—uB« d?BMŽ rO?Ið
Æ—uB« `{Ë√Ë vI½√ ÷dF ©PR®
dB?MŽ rO?Ið v?KŽ S-Video qÐU? qLF?¹ Æ…œu'« WO?UŽ —uB?UÐ l²?L²?ð ·uÝ
UΊu{Ë d¦√ —u ÷dF ©C® Ê«u_«Ë ©Y® iOÐ_«Ë œuÝ_« «—Uý≈ v≈ …—uB«
ÆVd*« u¹bOH« Ãd l{Ë s
COMPONENT VIDEO fÐUI 5Ð “UN'« u¹bO öÐU qOu²Ð r
Ʊ
“UNłË DVD q− s wHK)« ¡e'UÐ ©“UN'« u¹bO Ãd® OUT
©“U?N'« u¹b?O q?šb® COMPONENT VIDEO IN fÐU?IË u?¹bO?H«
ÆÊu¹eHOK²« s wHK)« ¡e'UÐ
wHK)« ¡e'UÐ S-VIDEO Ãd f³I0 S-Video qÐU wdÞ bŠ√ q Ʊ
Æu¹bOH« “UNłË DVD q− s
wH?K)« ¡e'« w uB« ëd?š≈ fÐUI 5Ð uB?« öÐU q Æ≤
w? u?B?« q?šœ fÐU?I?Ë u?¹bO?H?« q?O?−?ð “U?N?łË DVD q−??*
ÆÊu¹eHOK²K wHK)« ¡e'«
ÆWOKH«Ë W¹uKF« «uMIK Ê«u_« eOdð «d²Šô ÁU³²½ô« V−¹ •
’U??)« b?F??ÐÔ s?Ž r??J?×??²??« “U?N??ł w? q??šb??« œb?×?? v?K??Ž j?G??{« •
DVD q− sŽ …—œUB« ÊuJ*« …—Uý≈ dNEð v²Š Êu¹eHOK²UÐ
ÆÊu¹eHOK²« WýUý vKŽ u¹bOH« qO−ð “UNłË
©u?B?«® AUDIO Ãd?? f?ÐU?I?0 u?B?« q?ÐU? w?d?Þ b?Š√ q? Æ≥
Æu¹bOH« “UNłË DVD q− s wHK)« ¡e'UÐ
ÆWOKH«Ë W¹uKF« «uMIK Ê«u_« eOdð «d²Šô ÁU³²½ô« V−¹ •
œułu*« VÝUM*« qšb*« qu0 S-Video qÐU s dšü« ·dD« q Æ≤
ÆÊu¹eHOK²« w
W³ÝU?M*« q?šb*« ö?u0 uB?« öÐU? s d?šü« ·dD?« q Æ¥
ÆÊu¹eHOK²« w …œułu*«
±
iOÐ√
iOÐ√
S-Video qÐU
©od dOž®
dLŠ√
dLŠ√
iOÐ√
ÊuJ*« qÐU
©od dOž®
Êu¹eHK²«
dLŠ√
≤
COMPONENT INPUT
iOÐ√
Êu¹eHK²«
dLŠ√
±∑ ≠ WOÐdF«
DVD-VR350-01375B-IB-ar
17
2007.4.2, 3:49 PM
¥
≥
Êu¹eHOK²UÐ HDMI/DVI qOuð
©jI DVD-VR355®
HDMI/DVI qÐU? qOu²Ð rI ¨HDMI/DVI q?šbÐ «ÎœËe Êu¹eHO?K²« ÊU «–≈
ÍbŽUB²« Y׳«
w? ÍbŽU?B²?« Y×?³« q?šb p?Ð ’U)« Êu?¹eH?OK?²« r?Žb¹ Ê√ V?−¹
dE½«® Æ“UN'« u¹bOH ÍbŽUB²« Y׳« Ãd vKŽ ŸöÞôUÐ p `L¹
©≤∑ W×HB«
Æ‚öÞù« vKŽ …œuł qCQÐ Ê«eOL²¹ uË —uBÐ l²L²²ÝË ÆÊu¹eHOK²UÐ
HDMI fÐU «b²ÝUÐ Êu¹eHOK²UÐ qOu²« ∫± WU(«
Æ≤∑ W×HB« dE½« ¨ÍbŽUB²« œ«bŽù« ‰uŠ UuKF*« s b¹e* •
fÐUI qOuð V−¹ Í√ Æ UOνu …eOL*« öOu²« oÐUDð s bQð •
fÐUI0 u¹bOH« “UNłË DVD q−0 WU)« PR ¨PBË Y “UN'« Ãd
÷dŽ r²OÝ ô≈Ë ÆÊu¹eHOK²« w j³CUÐ WIÐUD²*« “UN'« qšb
ÆÊu¹eHOK²« vKŽ ¡U
—e« Ë√ ¡«dL(« —uB«
«– Êu?¹eH?OK²?« …eN?ł√ lO?Lł fO? ÊuJ?KN²?*« k?Šö¹ Ê√ V?−¹ •
ÍœR¹ b
U2 ¨Z²M*« «c¼ l qUJUÐ UIΫu² WOUF« Õu{u« Wł—œ
öJA ÀËbŠ WUŠ w Æ…—uB« sL{ ¡UOý_« iFÐ ÷dŽ v≈
v?≈ W?K?u?« q?IM?Ð v?u?¹ ¨Íb?ŽU?B?²?« Y?×?³U?Ð W?U?)« …—u?B?«
ÆwÝUOI« Õu{u« Ãd
HDMI qÐU
©od dOž®
Êu?¹eH?OK?ð “U?Nł o?«u²?Ð o?KF?²?ð «—U?H²?Ý« W?¹√ p¹b? X½U? «–≈
ed0 ‰U?Bðô« ¡Ułd?Ð ¨u¹bO?H« “UN?łË DVD q−? l Samsung
Æ¡öLF« Wbš
Êu¹eHK²«
DVI fÐU «b²ÝUÐ Êu¹eHOK²UÐ qOu²« ∫≤ WU(«
HDMI OUT f??ÐU??
q?O??u??²??Ð r??
¨ DVI T?¹U??N?? q??ÐU?? «b???²??ÝU??Ð •
DVDu¹b?OË q?− s? wHK?)« V½U?'« w œułu?*« ©HDMI Ãdš®
Æp¹b Êu¹eHOK²UÐ ©DVI qšœ® DVI IN fÐUIÐ
AUDIO OUT fЫu?
qO?u?ð pM?J?1 ¨uB?« ö?ÐU «b??²ÝU?Ð •
w?H?K)« V?½U?'« w …œu?łu*« ©¡«d?L?(«Ë ¡UC?O?³«® ©u?B« Ãd?š®
©u?B??« Ãd??š® AUDIO OUT f?Ыu??I??Ð DVD u?¹b??O?Ë q??−??? s??
DVD u¹bOË q− qGý Æp¹b Êu¹eHOK²UÐ ©¡«dL(«Ë ¡UCO³«®
ÆÊu¹eHOK²« Ë
“U?N−?Ð ’U)« bF?ÐÔ sŽ r?Jײ?« “UNł w? qšb?« œb× v?KŽ j?G{« •
u¹b?O?Ë q−? s?Ž …—œU?B« DVI …—U?ý≈ d?NE?ð v?²Š Êu?¹eH?O?K²?«
ÆÊu¹eHOK²« WýUý vKŽ DVD
wL
d« uB« Ãdš j³{« ¨HDMI Ãdš ‰öš s …b¼UALK
©≤∂ W×HB« v≈ lł—«® ÆPCM vKŽ
Âb??²??*« HDMI “U?N?' UF?
Î ³?ð p?–Ë u?B?« r?Žœ r?²?¹ ô b?
Dolby rŽb¹ ô Êu¹eHOK²« ÊU «–≈ Æ©TV/HDMI ‰U³I²Ý« “UNł®
uB« Ãdš j³{ bMŽ uB« Ãdš du²¹ ô ¨digital/DTS
w ©DTS qOGAð® DTS On b¹b% Ë√ X³« «bŠË obð vKŽ
uB« Ãdš j³{« ¨WU(« Ác¼ wË ÆuB« œ«bŽ≈ WLzU
Æ©DTS ·UI¹≈) DTS off Ë√ PCM vKŽ wL
d«
U? «–≈ œb% w? Êu¹eH?OK?²UÐ ’U?)« Âb?²*« q?Oœ d?E½«
Æô Â√ ÍbŽUB²« Y׳« rŽb¹ Êu¹eHOK²« ÊU
ŸU³ð« p?OKF ¨ÍbŽUB²« Y?׳« rŽb¹ Êu¹eHO?K²« ÊU «–≈
Y×?³« «œ«b?ŽSÐ W?U)« Êu?¹eH?OK?²« Âb?²? «œU?ý—≈
ÆÊu¹eHOK²« rz«u
ÂUE½ w …œułu*« ÍbŽUB²«
p–Ë ¨ÁöŽ√ `{u*« ÕdA« sŽ qOu²« WI¹dÞ nK²ð b
ÆÂb²*« Êu¹eHOK²« oË
ÍbŽUB²« Y׳UÐ n¹dF²«
nF{ —«bI0 Y×Ð ◊uDš vKŽ ÍbŽUB²« Y׳« qL²A¹
WI¹dÞ duð Ê√ sJ1 ÆZb« Ãd WI¹dÞ tOKŽ qL²Að U
`{Ë√Ë qC√ …œuł Èu² «– …—u ÍbŽUB²« Y׳«
©U½uJ*«® ÊuJ*UÐ u¹bOH« “UNłË DVD q− qOuð V−¹
ÆÍbŽUB²« Y׳« …eO «b²Ý« q³
“ËU?−²ð W
b?Ð u¹bO?H« ëdšSÐ U?½uJ*« fÐU?I `L?ð s
Æ576p
DVDu¹bOË q− qOu²Ð r
¨1080iË 720p W
bÐ ÷dFK
Æ HDMI qÐU «b²ÝUÐ Êu¹eHOK²« “UN−Ð
P.SCAN —e??« v?? K?? Ž j?? G??{« r?? Ł ¨HDMI q?? ÐU?? q?? O?? u?? ²??Ð r?? W??
b??« U?ł—œ W??U?? 5??Ð q?¹b??³??²??K? ©Z??«d??³??« ÷«d?F??²??Ý«®
©jI DVD-VR355 ®©≤π W×HB« dE½«® Æ…du²*«
u¹bOË q−0 Samsung Êu¹eHOKð “UNł qOuð WUŠ w
q− qOGAð WuNÐ pMJ1 ¨HDMI qÐU «b²ÝUÐ DVD
W??U?)« b??F??ÐÔ s?Ž r??J??×?²??« …b??ŠË «b???²?ÝU??Ð DVD u??¹b?O??Ë
Êu??¹e?H??O?K??ð …e?N??ł√ l? j??I? p??– d?«u??²?¹® ÆÊu??¹e?H??O?K??²?U??Ð
d?E½«® ©ÆAnynet+(HDMI-CEC) W?HO?þË rŽb?ð w²?« Samsung
Æ©≥≥ v≈ ≥≤ s U×HB«
Êu¹eHOK²« ÊU «–≈®
—UFA« œułË s oIײ« ¡UłdÐ
Æ©Anynet+ WHOþË rŽb¹ uN ¨
—UFA« qL×¹
±∏ ≠ WOÐdF«
DVD-VR350-01375B-IB-ar
18
2007.4.2, 3:49 PM
اﻟﺘﻮﺻﻴﻞ واﻹﻋﺪاد
© HDMIÃd??š® HDMI OUT f?ÐU??
q??O??u?²?? ¨HDMI q??ÐU?? Âb???²??Ý« •
HDMI fÐUIÐ DVD u¹bOË q− s wHK)« V½U'« w œułu*«
Æp¹b Êu¹eHOK²« “UN−Ð ©HDMI qšœ® IN
Êu¹eHOK²UÐ ’U)« bFÐÔ sŽ rJײ« “UN−Ð qšb« œb× vKŽ jG{« •
v?K?Ž DVD u¹b?O?Ë q?−?? s?Ž …—œU?B?« HDMI …—U?ý≈ d?N?E?ð v?²?Š
Æp¹b Êu¹eHOK²« WýUý
اﻟﺘﻮﺻﻴﻞ واﻹﻋﺪاد
u¹bOH«ØuB« q³I² öOuð
“UN?ł UN?×O²?¹ w²?«Ë UL?MO?«Ë Õd?*« …œu−?Ð ÷dF?« …eO s? WU?²« …œU?H²?Ýö
r−? u ÂUEM?Ð u¹bOH?« “UNłË DVD q?− qO?uð v≈ ÃU²?% b ¨DVD
ÊU? «–≈ ÆWL?− U?ŽUL?Ý XÝË u¹b?OH?«ØuB?« q³I?²? vKŽ q?L²?A q?U
p du²O ¨wLd« w³Ëœ …dHA« p —œuJ?¹bÐ «ÎœËe u¹bOH«ØuB« q³I²
…d?HA?« p —œuJ?¹œ w s?LC*« u?¹bO?H« “U?NłË DVD q−? s?Ž wK?²« —U?Oš
uB« Ãdš® Digital Audio Out f³I qOuð WI¹dÞ Âb²Ý« ÆwLd« w³Ëœ
Æ Á U ½ œ √ W × {u * « © w L d «
wG?³M?¹ ¨©DTS® wLd?« wŠd?*« uB?« Ë√ wLd?« w³Ëœ U?¹«e s? …œUH²?Ýö
© ≤ μ W × H B « d E ½ « ® Æ u B « « œ« b Ž ≈ j ³ { p O K Ž
DVI T¹UN qÐU
©od dOž®
dLŠ√
ÆDolby Laboratories s hOšdð Vłu0 lOMB²« Dolby W?? ?d?? ?A?? ÊU?? ?²?? ¹—U?? ?& ÊU?? ?²?? ö?? ?Ž ÃËœe?? *« D e?? ?—Ë“Dolby“
Laboratories.
iOÐ√
Êu¹eHK²«
ÆDTS WdA ÊU²¹—U& ÊU²öŽ“DTS Digital Out“ Ë“DTS“
Æ≤∏≠≤∑ W×HB« v≈ lł—« ¨HDMI Ãdš W
œ dOOG²
©Õu{u« WOUŽ …œbF²*« jzUÝu« WNł«Ë® HDMI
uB« Ãdš fÐUI0 WU)« W¹—u;«ØWOzuC« öÐUJ« bŠ√ q Ʊ
qšœ fÐUI0 u¹bOH« “UNłË DVD q−* WOHK)« WŠuKUÐ wL
d«
Æu¹bOH«ØuB« q³I² w UNF WIÐUD²*« wL
d« uB«
HDMI WKË nË
W??O??L?
— u?? U??½U??O??Ð s?Ž …—U??³??Ž U??L??¼ö? HDMI - q??u??
o?b?ð U?½U??O?Ð Ë√ LPCM® W?Þu?G??C? d?O?ž u??¹b?O? U?½U??O?ÐË
Æ©X³« «bŠË
¨HDMI qÐU Âb²¹ DVD u¹bOË q− Ê√ s rždUÐË ≠
v??≈ j?? I?? W?? O?? I??½ W?? O?? L??
— …—U?? ý≈ ëd??šS?? Ð Âu?? I??¹ t?? ½√ ô≈
ÆÊu¹eHOK²«
wUŽ Èu²;« W¹ULŠ HDCP (rŽb¹ ô Êu¹eHOK²« ÊU «–≈Ë ≠
ÆWýUA« vKŽ ÊuK« iOÐ√ g¹uAð dNE¹ ¨©‚UDM«
Ë√
©d¹√® L wHKš
U?½U?O?³?? w?L?
d?« q?I?M?U?Ð `?L???ð W?N?ł«Ë s?Ž …—U?³?Ž HDMI
Ê≈ Y?O?Š ÆjI? b?Š«Ë qu? «b?²?ÝUÐ u?B?«Ë u¹b?OH?«
·ö²šô«Ë ÆDVI l U
Î U9 WI«u² wN ¨ DVIvKŽ bL²FðHDMI
s?? u??B?« r??Žb??¹ HDMI Ê√ u?¼ DVI Ë HDMI 5??Ð b??O?Šu??«
q−? lOD²?¹ ¨HDMI WNł«Ë «b?²ÝUÐ Æ…œbF²? «uM
—u ÷d?ŽË w?L?
d« u?¹b?O?H« «—U?ý≈ q?I?½ DVD u¹b?O?Ë
ÆHDMI qšb fÐUIÐ œËe*« Êu¹eHOK²« vKŽ WOŠ
©s1√® R wHKš
©d¹√® L wU√
©s1√® R wU√
jÝË√
«u_« d³J
wŽdH« WCHM*«
øHDMI WOMIð Samsung Wdý Âb²ð «–U*
uØu¹bO …—Uý≈ W¹dþUM²« Êu¹eHOK²« …eNł√ VKD²ð
’«d?
√ bŠ√ q?OG?Að b?MF? ¨p– s? ržd?« vK?ŽË ÆW¹d?þUM?ð
ÊuJð Êu¹e?HOK²« v?≈ UNKI½ r?²¹ w²« U½UO?³« ÊS ¨DVD
«—Uý≈ ‰u× Â«b²Ý« d_« VKD²¹ «cNË ÆWOL
— U½UOÐ
‰u?× Ë√ ©DVD u?¹b?OË q?−? w® W?¹d?þUM?ð v≈ W?OL?
—
«c¼ ¡UMŁ√Ë Æ©Êu¹eHOK²« w® WOL
— v≈ W¹dþUMð «—Uý≈
b?I?Ë ‘u?A?²?K W?−?O?²?½ —u?B« …œu?ł i?H??M?ð ¨q¹u?×?²?«
V?K?D²?ð ô U?N?½_ U?
Î b?I?ð d?¦?√ HDMI W?O?M?I?ð d?³?²?F?ð Æ…—U?ýù«
s?? W?O?I?½ W?O??L?
— …—U?ý≈ d?³?²??F?ðË Íd?þU?M?ðØw?L??
— q?¹u?%
Æp¹b Êu¹eHOK²« “UNł v≈ DVD u¹bOË q−
Digital Audio Input wLd« uB« ‰Ušœ≈ cHM v≈
øHDCPu¼ U
DTS wLd« …dHA« p “UNł Ë√ MPEG2 Ë√ Dolby l
sŽ …—U³Ž ©‚UDM?« wUŽ wL
d« Èu²?;« W¹ULŠ® HDCP Ê≈
d³Ž UNł«dš≈ r²¹ w²« DVD U¹u²× W¹UL( Âb²¹ ÂUE½
UOÎL
— ô
Î UBð« ÂUEM« «c¼ du¹Ë ÆUN½ r²¹ ô YO×ÐHDMI
©p– v?≈ UË DVD Ë√ d?ðuO³?LJ?«® u¹bO? —bB? 5Ð U?M
Î ¬
r²¹Ë Æ©p– v≈ UË ÷dF« W¬Ë Êu¹eHOK²«® ÷dF« “UNłË
a??½Ô qL?Ž lM?* —bB?*« “UN?'« w? œułu?*« Èu²?;« dO?HA?ð
ÆWBšd dOž
±π ≠ WOÐdF«
DVD-VR350-01375B-IB-ar
19
2007.4.2, 3:49 PM
AV 2 IN
fÐUI0 u¹bOH« «dOU qOuð± ∫≤ WU(«
Æu¹bOH« “UNłË DVD q−* W?OU_« WŠuKUÐ AV 2 IN fÐUI «b?²Ý« pMJ1
Æqu*Ô« “UN'« s qO−²« pMJ1
WOł—U)« …eNł_« qOuð
÷dŽË Èdš√ WOł—Uš …eNłQÐ u¹bOH« “UNłË DVD q− qOu²Ð «c¼ p `L¹
ÆUNKO−ðË ULNðUłd
Ë√ Íu?K?F??« “U?N?'« ‚Ëb?M? Ë√ u?¹b?O?H?« “U??N?ł q?O?u?ð ∫ ± WU(«
AV1 IN AUDIO f?ÐU??I?0 u?¹b?O?H?« “U?N??łË DVD q?−??
Æ©u¹bOH«® VIDEOË ©uB«®
•
•
•
ÍuK?F« “UN?'« ‚ËbM? Ë√ u¹bO?H« “UN?ł qO?uð ∫± WU(«
AV1 IN fÐUI0 u¹bOH« “UNłË DVD q−Ë√
©u¹bOH«® VIDEO Ë ©uB«® AUDIO
©u?B?«® AUDIO AV1 IN f?ÐU?I?0 w?ł—U?š “U?N?ł Ë√ u¹b?O?H?« “U?N?ł q?O?u?ð
Æu¹bOH« “UNłË DVD q− “UN−Ð …œułu*« ©u¹bOH«® VIDEOË
“UNł Ë√ ÍuKF« “UN'« ‚ËbM Ë√ u¹bOH« “UNł® qu*Ô« “UN'« s qO−²« pMJ1
Æ©DVD
qšb® DV INPUT f³I0 DV “UNł qOuð ∫≥ WU(«
©wLd« u¹bOH«
t K O u ² Ð r ¨w L d « u ¹ b O H « “U N − Ð w L — u ¹ b O “ U N ł à d f ³ I œu ł Ë W U Š w Æu¹bOH« “UNłË DVD q−0 ’U)« ©wLd« u¹bOH« qšb® ©DV INPUT® f³I0
¨u¹bOH« «dOUJÐ wL
— u¹bO “UNł Ãd f³I œułË WUŠ w •
ÆUuKF*« s b¹eLK μ≥ W×HB« dE½«
W?O?U?_« W?Šu?K?UÐ AV 2 IN f?ÐU?I? «b??²?Ý« U?C
Î ¹√ p?M?J?1
Æu¹bOH« “UNłË DVD q−*
ÆdAM«Ë l³D« ‚uIŠ Vłu0 wL;« Íu²;« qO−ð dE×¹
—e?« Âb?²?Ý« ¨w?
Ì zUI?K?ð q?
Ì JA?Ð q?šb?*« b¹b?% Âb?Ž W?UŠ w?
Æ`O×B« qšb*« b¹bײ p–Ë ¢qšb*« b¹b%¢ INPUT SELÆ
≤∞ ≠ WOÐdF«
DVD-VR350-01375B-IB-ar
20
2007.4.2, 3:49 PM
اﻟﺘﻮﺻﻴﻞ واﻹﻋﺪاد
ÆAV 2 IN fÐUI0 u¹bOH« «dOU qOuð ∫ ≤ WU(«
u??¹b?O?H?« q?šb?® DV INPUT f?³?I?0 DV “U??N?ł q?O?u?ð ∫ ≥ WU(«
Æ©wL
d«
إﻋﺪاد ﻧﻈﺎم اﻟﻘﻮاﺋﻢ
WýUA« vKŽ dNEð w²« rz«uI« ‰öš qIM²«
“UNłË DVD q− w UNKODFð Ë√ …œbF² nzUþË 5JL²Ð WýUA« vKŽ dNEð w²« rz«uI« p `Lð
ÆUNMOÐ ULO qIM²«Ë WýUA« vKŽ dNEð w²« rz«uI« `²H WOU²« —«—“_« Âb²Ý« Æu¹bOH«
5Ð qIM²K WOU²« —«—“_« Âb?²Ý« rŁ ¨WýUA« «—UOš WLzU `²H ©W?LzU® MENU —e« vKŽ jG{«
Æ W ý UA « « — UO š r z « u / Ë … / † —«—“_« Ʊ
Ë … / † b¹b×?²« j¹d?ý p¹d×?² bF?ÐÔ sŽ rJ?ײ« “U?N−Ð —«—“_« Ác?¼ vKŽ j?G{«
ÆWLzUI« «—UOš ‰öš /
DVD-Recorder
Setup
No Disc
Programme System
Clock Set
Setup
Language
Audio
Video
Parental Control
Install
MOVE
OK
RETURN
EXIT
إﻋﺪاد ﻧﻈﺎم اﻟﻘﻮاﺋﻢ
©o«u® OK —e« Æ≤
Æ…b¹bł «œ«bŽ≈ W¹√ bOQ² bFÐÔ sŽ rJײ« “UN−Ð —e« «c¼ vKŽ jG{«
©Ÿuł—® RETURN —e« Æ≥
W?L?zU?I« W?ýU?ý v?≈ Ÿułd?K? bF?ÐÔ s?Ž r?J×?²?« …bŠu?Ð œu?łu?*« —e« «c?¼ v?K?Ž jG?{«
ÆWýUA« «—UOš WLzU
s ÃËdK Ë√ UN{dŽ r²¹ w²« WIÐU«
©ÃËdš® EXIT —e« Æ¥
ÆWýUA« vKŽ dNEð w²« ©WLzU
® MENU s ÃËdK —e« «c¼ vKŽ jG{«
qOu²«Ë wzUIK²« œ«bŽù«
Æ…d ‰Ë_ wÐdNJ« —UO²« cšQ0 tKOuð œd−0 UOÎzUIKð tH½ œ«bŽSÐ u¹bOH« “UNłË DVD q− ÂuI¹
Æ … d « c « w Ê u ¹ e H O K ² « U D × s ¹ e ð r ² ¹
ÆWKOK ozUœ WOKLF« Ác¼ ‚dG²ðË
Æ«b²Ýö «Îe¼Uł U¼bFÐ u¹bOH« “UNłË DVD q− `³B¹
Ʊ∂ W×HB« w W×{u*« WI¹dDUÐ RF qÐU qOu²Ð r
Ʊ
qÐUË ©wJKÝô œœdð® RF qÐU «b?²ÝUÐ Êu¹eHOK²UÐ DVD u¹bO?Ë q− qOuð •
u¹bOH«ØuB«
DVD-Recorder
Auto Setup
No Disc
Language Set
English
FranÁais
Deutsch
EspaÒol
Italiano
Nederlands
ÆwÐdNJ« —UO²« cšQ0 u¹bOH« “UNłË DVD q− qOu²Ð r
Æ≤
ÆWOU_« ÷dF« WŠu WýUý vKŽ ©¢wzUIK𢮠¢Auto¢ WUÝd« iuð •
Ë√ … —e« v?KŽ jG{« Æ≥
Æ©o«u® OK —e« vKŽ
Auto Setup will be started. Check antenna and TV cable¢ W?? ?U?? ?Ýd?? ?« ÷d?? ?Ž r?? ?²?? ?O?? ?Ý
Êu?¹e??H?O?K?²?« q?ÐU? q?O?u?ð s? o?I?% Æw?zU??I?K?²?« œ«b?Žù« √b?³?¹ ·u?Ý) ¢connection.
Æ©wz«uN«Ë
jG{« rŁ WÐuKD?*« WGK« —UO²šô b?¹bײ« j¹dý „dŠË ¨
MOVE
OK
RETURN
Auto Channel Memory
50%
ÆwzUIK²« œ«bŽù« √bЫ Æ¥
Stop
ÆwzUIK²« `*« √bЫ Æμ
ÆX
u«Ë a¹—U²« s oI% Æ∂
©≤≤ W×HB« dE½«® ÆX
u«Ë a¹—U²« dOOG² ¢X
u«Ë a¹—U²« j³{¢ v≈ lł—«
DVD-Recorder
Auto Setup
No Disc
Date
JAN
Time
01
2007
12
MON
MOVE
≤± ≠ WOÐdF«
DVD-VR350-01375B-IB-ar
21
2007.4.2, 3:49 PM
OK
RETURN
00
Xu«Ë a¹—U²« j³{
∫wðü« w u¹bOH« “UNłË DVD q−0 .uI²«Ë WŽU« Âb²ð
ZU½dÐ qO−² wzUIK²« ·UI¹ù«
UOÎzUIKð ZU½dÐ qO−² u¹bOH« “UNłË DVD q−* o³*« j³C«
u¹bOH« “UNłË DVD q− ¡«dý bMŽ X
u«Ë a¹—U²« j³{ V−¹
v≈ Íu?²?A?« X?O
u?²?« s? X?O
u?²?« d?OO?G?ð b?M?Ž X
u?« j?³?{ …œU?Ž≈ vK?Ž ’d?Š«
ÆfJF«Ë wHOB« XO
u²«
•
•
•
•
jG{« ¨©’d
błu¹ ô® No Disc l{u«Ø©·UI?¹≈® Stop l{u« w …bŠu« œułË l Ʊ
Æ©WLzU
® MENU —e« vKŽ
DVD-Recorder
Clock Set
No Disc
Programme
Setup
Date
JAN
Time
01
2007
12
00
MON
MOVE
OK
RETURN
EXIT
vKŽ Ë√ ©o«u® OK vKŽ jG{« rŁ ¨©œ«bŽ≈® Setup b¹bײ † … s¹—e« vKŽ jG{« Æ≤
Æ —e«
OK v??K?Ž j?G?{« r?Ł ¨©W?ŽU???« j?³?{® Clock Set b?¹b??×?²? † … s?¹—e?« v?K??Ž j?G?{« Æ≥
Æ —e« vKŽË√ ©o«u®
ÆWM«Ë dNA«Ë ÂuO«Ë ozU
b«Ë WŽU« b¹bײ s¹—e« vKŽ jG{« Æ¥
Æœb;« dBMF« qOKEð r²¹ •
إﻋﺪاد ﻧﻈﺎم اﻟﻘﻮاﺋﻢ
ÆUNCHš Ë√ WLOI« …œU¹e † … s¹—e« vKŽ jG{« Æμ
ÆŸu³Ý_« Âu¹ ÷dŽ UO
Î zUIKð r²¹ •
ÆrOI« ‰öš d³√ WŽdÐ qIM²K † … s¹—e« vKŽ —«dL²Ýô« l jGC« pMJ1 •
jGC« ÂbŽ WUŠ w ÆX
u«Ë a¹—U²« rO
kHŠ r²O ¨©o«u® OK —e« vKŽ jG{« Æ∂
ÆkH(« r²¹ s ¨©o«u® OK —e« vKŽ
ÆWLzUI« s ÃËdK ©ÃËdš® EXIT —e« vKŽ jG{« Æ∑
wzUIK²« œ«bŽù«
w?zUIK²?« œ«bŽù«¢ dE½«® q?FHUÐ U?OÎzUIK?ð UND³?{ WUŠ w U?D×LK? o³ j?³{ ¡«dł≈ v≈ ÃU?²% ô
Æ © ≤± W × H B « ¢ q O G A ² « Ë q O u ² « Ë
Æw½u¹eHOK²« Y³« ‰U³I²Ý« w Âb²¹ sLC n«u vKŽ u¹bOH« “UNłË DVD q− qL²A¹
Æ n « u * « ‰ ö š s U N U ³ I ² Ý « r ² ¹ w ² « U D × L K o ³ j ³ { ¡ « d ł≈ V − ¹
∫wðü« ‰öš s pcÐ ÂUOI« sJ0
©≤± W×HB« dE½«® qOu²«Ë wzUIK²« œ«bŽù« •
wzUIK²« œ«bŽù« •
©≤≥ W×HB« dE½«® ÍËbO« œ«bŽù« •
DVD-Recorder
Install
No Disc
Programme
Auto Setup
Setup
Manual Setup
TV System : G
VIDEO Output CH : CH 36
MOVE
OK
RETURN
EXIT
jG?{« ¨©’d
błu?¹ ô® No Discl{u«Ø©·UI?¹≈® Stop l{u« w? …bŠu« œu?łË l Ʊ
Æ©WLzU
® MENU —e« vKŽ
vKŽ Ë√ ©o«u® OK vKŽ jG{« rŁ ¨©œ«bŽ≈® Setup bOײ † … s¹—e« vKŽ jG{« Æ≤
Æ —e«
Auto Channel Memory
50%
Ë√ ©o?«u® OK v?KŽ jG?{« rŁ ¨©XO?³¦ð® Install b?¹bײ? † … s¹—e?« vKŽ j?G{« Æ≥
Æ —e« vKŽ
Stop
Ë√ ©o«u® OK vKŽ jG{« rŁ ¨©œ«bŽ≈® Auto Setup bOײ † … s¹—e« vKŽ jG{« Æ¥
Æ —e« vKŽ
ÆwzUIK²« Y׳« ¡b³ ©o«u® OK —e« vKŽ jG{« Æμ
—u?¦F?« r²?¹ w²?« vË_« W?D;« ÷d?Ž r?²¹Ë ‰Ë_« œœd?²« ‚U?D½ ÷«d?F²?Ý« r²?¹ •
ÆUNEHŠË UNOKŽ
Æa≈ ¨WOU²« WD;« sŽ Y׳« w u¹bOH« “UNłË DVD q− dL²¹ rŁ
v?≈ UO?
Î zU?IK?ð u¹b?O?H« “U?NłË DVD q?−? q?I²?M¹ ¨w?zU?IK?²« Y?׳?« ¡U?N²?½« bM?Ž •
Ʊ ZU½d³«
u¹bOH« “UNłË DVD q− WDÝ«uÐ UOÎzUIKð UNEHŠ r²¹ w²« UD;« œbŽ bL²F¹ •
ÆUNOKŽ —u¦F« - w²« UD;« œbŽ vKŽ
ÆtUL²« q³
wzUIK²« Y׳« ¡UGù ©o«u® OK —e« vKŽ jG{« Æ∂
Ë√ WHOF{ …—Uýù« X½U «–≈ ÆY³« …—Uý≈ s UOÎzUIKð a¹—U²«Ë X
u« j³{ r²¹ •
¨wzUIK²« Y׳« ¡UN²½« œd−0 ÆUOÎzUIKð a¹—U²«Ë X
u« j³{ r²¹ ô b
¨WýuA
‰U?³?I²?Ýô« «– U?D?;« œbŠ «c? ¨…d? s? d?¦√ U?D?;« i?FÐ s?¹e??ð r²?¹ b?
ÆUNO≈ WłU×Ð bFð r w²« ·cŠ«Ë qC_«
≤≤ ≠ WOÐdF«
DVD-VR350-01375B-IB-ar
22
2007.4.2, 3:49 PM
ÍËbO« œ«bŽù«
Æo³ qJAÐ U¹ÎËb¹ UND³C ÃU²% sK ¨UOÎzUIKð UD;« j³CÐ qFHUÐ XL «–≈Ë
DVD-Recorder
Install
No Disc
jG{« ¨©’d
błu?¹ ô® No Disc l{u«Ø©·UI¹≈® Stop l{u« w …b?Šu« œułË l Ʊ
Æ©WLzU
® MENU —e« vKŽ
Programme
Auto Setup
Setup
Manual Setup
TV System : G
vKŽ Ë√ ©o«u® OK vKŽ jG{« rŁ ¨©œ«bŽ≈® Setup b¹bײ
Ë√ ©o?«u® OK v?KŽ jG?{« rŁ ¨©X?O³?¦ð® Install b¹b?ײ? † … s¹—e« v?KŽ j?G{« Æ≥
Æ —e« vKŽ
OK v?KŽ jG{« r?Ł ¨©ÍËb¹ œ«bŽ≈® Manual Setup b?¹bײ † … s?¹—e« vKŽ j?G{« Æ¥
Æ —e« vKŽ Ë√ ©o«u®
إﻋﺪاد ﻧﻈﺎم اﻟﻘﻮاﺋﻢ
VIDEO Output CH : CH 36
s¹—e« vKŽ jG{« Æ≤
Æ —e«
rŁ ¨tK¹b³ð Ë√ tcŠ Ë√ tK¹bF𠜫d*« ©ZU½d³«® PR b¹bײ † … s¹—e« vKŽ jG{« Æμ
Ë√ ©·cŠ® Delete Ë√ ©q?¹b?F?ð® Edit œb?Š Æ —e?« Ë√ ©o?«u?® OK —e« v?K?Ž j?G?{«
Æ —e« Ë√ ©o«u® OK —e« vKŽ jG{« rŁ ¨† … s¹—e« «b²ÝUÐ ©q¹b³ð® Swap
U??u?K?F? d?O?O?G??ð b?F?Ð Æt?K?¹b?F?ð Ë√ ©Z??U?½d?³?«® PR W?U?{≈ p?M?J??1 ∫©q?¹b?F?ð® Edit •
OK—e« vKŽ jG{« rŁ ¨©-® Done œbŠ ¨©MFT¨©rÝô«® Name ¨©…UM
® CH® ZU½d³«
.©o«u®
Æ s¹—e« «b²ÝUÐ …UMI« j³{« ∫ ©…UM
® CH ÆY³« …—Uý≈ w UO
Î zUIKð tUA²« r²¹ Íc« WD;« rÝ« ÷dF ∫ ©rÝô«® Name Æ
—«—“_« «b²ÝUÐ rÝô« q¹bFð pMJLO ¨UNUA²« r²¹ r «–≈
Æ s¹—e« «b²ÝUÐ qC√ …—uBÐ …UMI« œœdð j³{ pMJ1 : MFT .œb;« ZU½d³UÐ WU)« …UMI« UuKF ` r²OÝ ∫©·cŠ® Delete
MOVE
OK
RETURN
EXIT
Manual Setup
PR
01
CH
---
Name
----
MFT
--- I --Done
MOVE
OK
•
vK?Ž Æ5−?U½d³?Ð WU?)« …UM?I« Uu?KF? 5Ð q¹b?³²?« pMJ?1 ∫©q¹b?³ð® Swap •
jG{« rŁ ¨PR2 bMŽ q¹b³²« œb× ¨PR5Ë PR2 5Ð q¹b³²« œ—√ «–≈ ¨‰U¦*« qO³Ý
ÆPR5 bMŽ ©o«u® OK —e« vKŽ
©B/G-D/K Ãdš® RF OUT u l{Ë b¹b%
ÆDVD u¹bOË q−0 qu*« Êu¹eHOK²« “UN' UFγð ©B/G-D/K® uB« l{Ë —UO²š« sJ1
DVD-Recorder
Install
No Disc
jG{« ¨©’d
błu?¹ ô® No Disc l{u«Ø©·UI¹≈® Stop l{u« w …b?Šu« œułË l Ʊ
Æ©WLzUI«® MENU —e« vKŽ
Programme
Auto Setup
Setup
Manual Setup
TV System
vKŽ Ë√ ©o«u® OK vKŽ jG{« rŁ ¨©œ«bŽ≈® Setup b¹bײ † … s¹—e« vKŽ jG{« Æ≤
Æ —e«
Ë√ ©o?«u® OK v?KŽ jG?{« rŁ ¨©X?O³?¦ð® Install b¹b?ײ? † … s¹—e« v?KŽ j?G{« Æ≥
Æ —e« vKŽ
OK vKŽ jG{« rŁ ©Êu¹eHOK²« ÂUE½® TV System b¹bײ
MOVE
Ë√ … —e« vKŽ jG{« Æ¥
—e« Ë√ ©o«u®
Æ —e« vKŽ Ë√ ©o«u® OK vKŽ jG{« rŁ ¨K Ë√ G b¹bײ † … s¹—e« vKŽ jG{« Æμ
ÆWLzUI« s ÃËdK ©WLzUI«® MENU —e« vKŽ jG{« Æ∂
≤≥ ≠ WOÐdF«
DVD-VR350-01375B-IB-ar
23
:G
VIDEO Output CH : CH 36
2007.4.2, 3:49 PM
OK
RETURN
EXIT
u¹bOH« Ãdš …UM
—cF²¹ Ë√ g¹uA²K ÷dF²ð —uB« X½U «–≈ u¹bOH« “UNłË DVD q− Ãdš …UM dOOGð v≈ ÃU²% b
Æ—uB« vKŽ —u¦F« Êu¹eHOK²« vKŽ
jG{« ¨©’d
błu¹ ô® No Disc l{u«Ø©·UI?¹≈® Stop l{u« w …bŠu« œułË l Ʊ
Æ©WLzUI«® MENU —e« vKŽ
DVD-Recorder
Install
No Disc
Programme
Auto Setup
Setup
Manual Setup
VIDEO Output CH
vKŽ Ë√ ©o«u® OK vKŽ jG{« rŁ ¨©œ«bŽ≈® Setup b¹bײ † … s¹—e« vKŽ jG{« Æ≤
Æ —e«
Ë√ ©o?«u® OK v?KŽ jG?{« rŁ ¨©XO?³¦ð® Install b?¹bײ? † … s¹—e?« vKŽ j?G{« Æ≥
Æ —e« vKŽ
CH 35
TV System
MOVE
OK
: CH
K 36
CH 37
: CH 36
CH 38
CH 39
CH 40
CH 41
RETURN
EXIT
jG{« rŁ ¨©u¹bOH« Ãdš …UM
® VIDEO Output CH b¹bײ † … s¹—e« vKŽ jG{« Æ¥
Æ —e« vKŽ Ë√ ©o«u® OK vKŽ
OK v?KŽ jG?{« rŁ ¨W?ÐuK?D*« u?¹bO?H« Ãdš …U?M
b?¹b×?² † … s?¹—e« v?KŽ j?G{« Æμ
Æ —e« vKŽ Ë√ ©o«u®
إﻋﺪاد ﻧﻈﺎم اﻟﻘﻮاﺋﻢ
WGK« «—UOš œ«bŽ≈
WýU?A« vKŽ d?NEð w²« W?LzUI«Ë ’«d_« W?LzUË WýUA?K W³ŠUB?*« WLłd²?«Ë uB« j³{ W?UŠ w
ÆUÎLKO UNO b¼UAð …d q w dUMF« Ác¼ dNEð ¨UIγ UN²GË
jG{« ¨©’d
błu¹ ô® No Disc l{u«Ø©·UI?¹≈® Stop l{u« w …bŠu« œułË l Ʊ
Æ©WLzUI«® MENU —e« vKŽ
DVD-Recorder
Programme
Audio
Setup
Subtitle
Disc Menu
On-Screen Menu
vKŽ Ë√ ©o«u® OK vKŽ jG{« rŁ ¨©œ«bŽ≈® Setup b¹bײ † … s¹—e« vKŽ jG{« Æ≤
Æ —e«
Ë√ ©o«u® OK vKŽ jG{« rŁ ¨©WGK«® Language b¹bײ † … s¹—e« vKŽ jG{« Æ≥
Æ —e« vKŽ
ÆWGK« œ«bŽ≈ WLzU
dNEð
DivX Subtitle
Western
English, Albanian, Croatian, Czech, Hungarian, Polish, Romanian, Serbian
(Latin), Slovak, Slovenian
Central
English, Greek
Greek
English, Azeri, Belarusian, Bulgarian, Kazakh, Macedonian, Russian, Serbian,
Tatar, Ukrainian, Uzbek
Cyrillic
MOVE
vKŽ Ë√ ©o«u® OK vKŽ jG{« rŁ ¨WÐuKD*« WGK« b¹bײ † … s¹—e« vKŽ jG{« Æμ
Æ —e«
W?O?K?_« WG?K?« b¹b?% r?²¹ ¨’d?I?« vK?Ž W?K−??
Ô dO?ž …œb?;« WG?K?« X½U? «–≈
ÆUIγ WK−*«
Æ’dI« vKŽ WuŽb*« UGK« s …bŠ«Ë X½U «–≈ jI …œb;« WGK« dNEð
VŠ DivX WLłdð dOOG²Ð r
¨W
dH² ·Ëd×Ð WLłd²« WG —uNþ WUŠ w
ÆÂuŽb dOž oOM²« Ê√ wMF¹ «cN ¨«c¼ `−M¹ r «–≈Ë ÆW³ÝUM*« WIDM*«
≤¥ ≠ WOÐdF«
DVD-VR350-01375B-IB-ar
24
Original
English
FranÁais
Deutsch
EspaÒol
: Italiano
Western
Nederlands
Korean
Ë√ ©o«u® OK vKŽ jG{« rŁ ¨»uKD*« WGK« —UOš b¹bײ † … s¹—e« vKŽ jG{« Æ¥
Æ —e« vKŽ
Æ’dIK WOFL« WGK« b¹bײ ∫©uB«® Audio •
Æ’dIK W³ŠUB*« WLłd²« b¹bײ ∫©WýUAK W³ŠUB*« WLłd²«® Subtitle •
Æ’dI« UNOKŽ qL²A¹ w²« ’«d
_« WLzUI ∫©’«d
_« WLzU
® Disc Menu •
vKŽ d?NEð w?²« WL?zUIK? ∫©WýUA?« vKŽ dN?Eð w²?« WLzU?I«® On-Screen Menu •
Æu¹bOH« “UNłË DVD q−0 WU)« WýUA«
ÆWIDM*« VŠ WLŽb DivX WLłdð WG b¹b% ∫©WLłdð® DivX Subtitle •
Afrikaans, Basque, Catalan, Danish, Dutch, English, Faeroese, Finnish, French,
German, Icelandic, Indonesian, Italian, Malay, Norwegian, Portuguese,
Spanish, Swahili, Swedish
Language
No Disc
2007.4.2, 3:49 PM
OK
RETURN
EXIT
uB« «—UOš œ«bŽ≈
ÆÂb²*« uB« ÂUE½ oË uB« WUŠ «œ«bŽ≈Ë uB« “UNł œ«bŽSÐ uB« «œ«bŽ≈ p `Lð
Î ¹ √ sJ 1
.NICAM l{Ë j³{ UC
jG{« ¨©’d
błu?¹ ô® No Disc l{u«Ø©·UI¹≈® Stop l{u« w …b?Šu« œułË l Ʊ
Æ©WLzUI«® MENU —e« vKŽ
vKŽ Ë√ ©o«u® OK vKŽ jG{« rŁ ¨©œ«bŽ≈® Setup b¹bײ † … s¹—e« vKŽ jG{« Æ≤
Æ —e«
Ë√ ©o?«u® OK vK?Ž jG{« r?Ł ¨©uB«® Audio b?¹b×?² † … s¹—e?« vKŽ j?G{« Æ≥
Æ —e« vKŽ
ÆuB« œ«bŽ≈ WLzU
dNEð
©o«u® OK vKŽ jG{« rŁ ¨»uKD*« uB« —UOš b¹bײ † … s¹—e« vKŽ jG{« Æ¥
Æ —e« vKŽ Ë√
إﻋﺪاد ﻧﻈﺎم اﻟﻘﻮاﺋﻢ
Ë√ ©o«u® OK v?KŽ jG{« rŁ ¨»u?KD*« dBM?F« b¹b×?² † … s¹—e« vK?Ž jG{« Æμ
Æ —e«
wLd« Ãd)«
bM?Ž PCM œbŠ Æeðd?¼uKO? ¥∏ PCM (2CH) u v?≈ q¹u×?²UÐ Âu?I¹
ÆÍdþUMð u Ãdš «b²Ý«
∫ PCM
ÆDolby Digital Bitstream v≈ q¹uײUÐ ÂuI¹ ∫ Bitstream
DVD-Recorder
•
Audio
No Disc
Programme
Digital Output
: PCM
Setup
DTS
: Off
Dynamic Compression : On
•
NICAM
: On
ÆwL
— u Ãdš «b²Ý« bMŽ Bitstream œbŠ
Æu Í√ ŸULÝ r²¹ sK ô≈Ë `O×B« wL
d« Ãd)« b¹b% s bQð
MOVE
OK
RETURN
EXIT
DTS
DVD-Recorder
∫ ©·UI¹≈® Off
•
qOuð bMŽ DTS œbŠ ÆjI wL
d« Ãd)« d³Ž DTS Bitstream ëdš≈ ∫ ©qOGAð® On
ÆDTS ÂUEM …dHA« p —œuJ¹œ
•
ÆWOL
— …—Uý≈ ëdš≈
Audio
No Disc
Programme
Digital Output
: PCM
Setup
DTS
: Off
Dynamic Compression : On
NICAM
: On
Ãdš s uB« Ãd¹ ô ¨DTS ÂU?EMÐ WK−*« W?OðuB« œ«u*« qOG?Að bMŽ
ÆÍdþUM²« uB«
MOVE
OK
RETURN
EXIT
ÍuO(« jGC«
DVD-Recorder
ÆwL
d« w³Ëœ Ÿu½ s …—Uý≈ vKŽ —u¦F« bMŽ jI UD
Î A½ ÊuJ¹
s? Ë√ iH??M? u? Èu?²??0 r?K?O?H? W?O?ðu œ«u? q?O?G?A?ð b?M?Ž ∫ ©qOGAð® On
qF' VÝUM*« jGC« ÂUEM« Âb²¹ b
¨…dOG u «d³J
‰uË s b×KË UŠ
Î u{Ë d¦√ iHM*« uB« Èu² Í– Èu²;«
ÆW¹UGK ‰UŽ Èu²* W¾łUH*« «dIH« u Èu²
•
∫ ©·UI¹≈® Off
•
ÆwÝUOI« ÍuO(« ‚UDM« «b²ÝUÐ rKOHUÐ l²L²« pMJ1
Audio
No Disc
Programme
Digital Output
: PCM
Setup
DTS
: Off
Dynamic Compression : On
NICAM
MOVE
OK
: On
RETURN
EXIT
NICAM
ÆŸ«u½√ WŁöŁ v≈ NICAM Z«dÐ rOIð Æ©Èdš√ WGKÐ Y³«® WGK« wzUMŁ NICAM Ë WGK« ÍœUŠ√ NICAM Ë u¹d²Ý« NICAM
Æ»uKD*« uB« b¹b% pMJ1Ë wÝUO ÍœUŠ√ wðu YÐ NICAM Z«dÐ VŠUB¹ U UÎLz«œ
NICAM l{Ë ∫ ©qOGAð® On
•
∫ ©·UI¹≈® Off
•
wÝUOI« WGK« ÍœUŠ√ uB« qO−² l{u« «c¼ vKŽ jI j³{«
·Ëd?þ W−?O²?½ UF?
Î DI?²? u¹d?²Ýô« u? ÊU «–≈ NICAM Y?Ð ¡UM?Ł√
ÆW¾¹œd« ‰U³I²Ýô«
DVD-Recorder
Programme
Digital Output
: PCM
Setup
DTS
: Off
Dynamic Compression : On
NICAM
MOVE
≤μ ≠ WOÐdF«
DVD-VR350-01375B-IB-ar
25
Audio
No Disc
2007.4.2, 3:49 PM
OK
: On
RETURN
EXIT
©u¹bOH«® WýUA« «—UOš œ«bŽ≈
ÆÊu¹eHOK²« WýUý «œ«bŽ≈ j³CÐ WHOþu« Ác¼ `Lð
jG{« ¨©’d
błu¹ ô® No Disc l{u«Ø©·UI?¹≈® Stop l{u« w …bŠu« œułË l Ʊ
Æ©WLzUI«® MENU —e« vKŽ
vKŽ Ë√ ©o«u® OK vKŽ jG{« rŁ ¨©œ«bŽ≈® Setup b¹bײ † … s¹—e« vKŽ jG{« Æ≤
Æ —e«
Ë√ ©o«u® OK v?KŽ jG{« r?Ł ¨©u¹bOH?«® Video b¹bײ? † … s¹—e« vK?Ž jG{« Æ≥
Æ —e« vKŽ
Æu¹bOH« «—UOš WLzU
dNEð
©o«u® OK vKŽ jG{« rŁ ¨»uKD*« u¹bOH« —UOš b¹bײ † … s¹—e« vKŽ jG{« Æ¥
Æ —e« vKŽ Ë√
Ë√ ©o«u® OK vKŽ jG{« rŁ ¨»u?KD*« dBMF« b¹bײ † … s?¹—e« vKŽ jG{« Æμ
Æ —e« vKŽ
إﻋﺪاد ﻧﻈﺎم اﻟﻘﻮاﺋﻢ
ÆWIÐU« W?LzUI« v?≈ ŸułdK —e« v?KŽ Ë√ ©Ÿuł—® RETURN vK?Ž jG{«
ÆWLzUI« s ÃËdK ©ÃËdš® EXIT —e« vKŽ jG{«
©Êu¹eHOK²UÐ WU)« ÷dF« v≈ ŸUHð—ô« W³½® TV Aspects
DVD-Recorder
©÷dF« v≈ ŸUHð—ô« W³½® Ætb²ð Íc« Êu¹eHOK²« ŸuM UIÎË WýUA« œ«bŽ≈ j³{ w Vždð b
WýUý vKŽ DVD ’d?
…b¼UA w W³žd« bM?Ž —UO)« «c¼ œbŠ ∫ 4:3 Letter Box
W?³?½ X½U? «–≈ v²?Š ¨π∫±∂ v¼ U?NÐ ÷d?F« v?≈ ŸUH?ð—ô« W³?½
¡«œuÝ ◊d
Ô dNEð Æ≥∫¥ w¼ Êu¹eHOK²« w ÷dF« v≈ ŸUHð—ô«
Ó ý
ÆWýUA« s wKH«Ë ÍuKF« ¡e'« w
•
b?MŽ Êu?¹e?H?OK?²?K? ÍbO?K?I?ð r?−Š v?K?Ž ‰u?B×?K? —U?O)« «c?¼ œb?Š
ŸUHð—ô« W³½ w²« WýUA« s jÝË_« ¡e'« …b¼UA w W³žd«
sŽ s1_«Ë d¹_« V½U'« qB? r²¹® Æπ∫±∂ w¼ UNÐ ÷dF« v≈
©rKOH« …—u
∫ 4:3 Pan - Scan
•
vKŽ WÎKU π∫±∂ ÷dŽ v≈ ŸUHð—« W³MÐ …—uB« ÷dŽ pMJ1
Æ…dO³J« Êu¹eHOK²« WýUý
∫ 16:9 Wide
Programme
TV Aspect
: 16:9 Wide
Setup
3D Noise Reduction
: Off
DivX(R) Registration
MOVE
OK
DVD-Recorder
∫ ©·UI¹≈® Off
•
•
Video
Programme
TV Aspect
: 16:9 Wide
Setup
3D Noise Reduction
: Off
DivX(R) Registration
MOVE
iF?Ð l? WH?Oþu?« Ác¼ q?L?Fð ô b?
Æ’dI?« Ÿu?½ vK?Ž WH?Oþu?« Ác?¼ bL?²F?ð
Æ’«d
_« Ÿ«u½√
≤∂ ≠ WOÐdF«
26
EXIT
No Disc
Æ©qO−²K® g¹uA²« qOKIð ‰öš s vI½√ …—u du¹ ∫ ©qOGAð® On
DVD-VR350-01375B-IB-ar
RETURN
•
©œUFÐ_« wŁöŁ g¹uA²« Èu² qOKIð® 3D Noise Reduction
©Wd(« l o«u²*« g¹uA²« qOKIð®
ÍœUŽ
Video
No Disc
2007.4.2, 3:49 PM
OK
RETURN
EXIT
ÂbI²*« ÷«dF²Ýô«
©ÍbŽUBð `® P.SCAN —e« vKŽ jG{U ¨ÍbŽUB²« Y׳« rŽb¹ pÐ ’U)« Êu¹eHOK²« ÊU «–≈
Æu¹bOH« “UNłË DVD q−* wU_« ¡e'UÐ
ÍbŽUB²« Y׳« œ«bŽ≈
V½U'« w œułu*« ©Z«d³« ÷«dF²Ý«® P.SCAN —e« vKŽ jG{« ¨n
u²« l{Ë w Ʊ
ÆDVDu¹bOË q− s wU_«
Press [Yes] to confirm Progressive scan mode. Otherwise, press¢ WUÝd« dNEð ·uÝ
vK?Ž jG{U ¨ô≈Ë ÆÂbI?²*« ÷«dF²Ýô« l{Ë v?KŽ bOQ²?K ›rF½¤ vK?Ž jG{«® ¢Æ›[No
Æ©Æ›ô¤
Æ©o«u® OK —e« vKŽ jG{« rŁ ¨©rF½® Yes —e« b¹bײ —«—“_« vKŽ jG{« Æ≤
sŽ rJײ« “UNł «b²ÝUЮ ÂbI²*« ‰Ušœù« vKŽ p¹b Êu¹eHOK²« “UNł j³CÐ r
Æ≤
©ÆÊu¹eHOK²UÐ ’U)« bFÐÔ
إﻋﺪاد ﻧﻈﺎم اﻟﻘﻮاﺋﻢ
w u¹bOH« “UNłË DVD q−? ÊuJ¹ UbMŽ jI ÍbŽUB?²« œ«bŽù« du²¹
Æ·UI¹ù« l{Ë
ÍbŽUB²« Y׳« ¡UG≈
V½U'« w œułu*« ©Z«d³« ÷«dF²Ý«® P.SCAN —e« vKŽ jG{« ¨n
u²« l{Ë w Ʊ
ÆDVDu¹bOË q− s wU_«
Press [Yes] to confirm Interlace scan mode.” Otherwise, press¢ WUÝd« dNEð ·uÝ
vKŽ jG{U ¨ô≈Ë Æqš«b²*« ÷«dF²Ýô« l{Ë vKŽ bOQ²K ›rF½¤ vKŽ jG{«® ¢Æ›[No
Æ©Æ›ô¤
Æ©o«u® OK —e« vKŽ jG{« rŁ ¨©rF½® Yes —e« b¹bײ —«—“_« vKŽ jG{« Æ≤
sŽ r?Jײ« “U?Nł «b?²ÝUЮ qš«b?²*« ‰Ušœù« vK?Ž p¹b Êu?¹eHOK?²« “UNł j?³{« Æ≤
©ÆÊu¹eHOK²UÐ ’U)« bFÐÔ
©jI DVD-VR355®HDMI/DVI Wœ
DVD-Recorder
Video
No Disc
©p– v≈ UË ÷dF« W¬Ë Êu¹eHOK²«® ÷dF« …eNł√ bŠQÐ …bŠu« qOuð bMŽ œ«bŽù« «c¼ «b²Ý« r²¹
ÆDVI Ë√ HDMI «b²ÝUÐ
Programme
TV Aspect
: 16:9 Wide
Setup
3D Noise Reduction
: Off
HDMI/DVI Resolution
:576P
720 x 576 ∫ 576P •
DivX(R) Registration 720P
1080i
1280 x 720 ∫ 720P •
1920 x 1080 ∫ 1080i •
MOVE
©jI DVD-VR336® Ãd)« b¹b%
qšœ j?³{« ÆDVI Ë√ HDMI ‰öš s Êu?¹eHOK?²UÐ DVD u¹b?OË q−? qOu²?Ð r
•
ÆDVI Ë√ HDMIvKŽ Êu¹eHOK²«
n
u²« l{Ë w …bŠu« ÊuJð UbMŽ ©Z«d³« ÷«dF²Ý«® P.SCAN —e« vKŽ jG{« •
ÆHDMI Ãdš W
œ b¹bײ
d?O?G?²?ð Ãd?)« W
œ l?{Ë ÊS? ¨HDMIË√ DVI …—U?ý≈ q?ÐU?J?Ð ö?
Î u? “UH?K?²?« ÊU? «–≈ ÷«dF?²?Ý«® P.SCAN —e« v?KŽ j?GC?« UN?O r?²¹ …d? q w? wU?²« V?Oðd?²U?Ð
∫©Z«d³«
1080i← 720p ← 576p ←
ÊËbЮ wł—U?)« ÊuJ?*« Ë√ ÊuJ?*Ô« u¹bO?H« ö?ÐUJ?Ð jI ö?
Î u n?ðUN?« ÊU «–≈
ÆVOðd²UÐ 576p/576i 5Ð ‰b³¹Ô Ãd)« W
œ l{Ë ÊS ¨©HDMI/DVI qÐU
-
m?K³?ð w²« u?¹bO?H« lÞU?I …b?¼UA s?J1 ô Æ576i W?
b« Èu²? r?Žbð ô HDMI/DVI •
(Composite/S-Video/Component) W¹dþUM²« ëdšù« cUM ‰öš s ô≈ 576i UN²
œ
≤∑ ≠ WOÐdF«
DVD-VR350-01375B-IB-ar
27
2007.4.2, 3:49 PM
OK
RETURN
EXIT
Êu?J*Ô« u¹bOH?« ‰UBð« Ãd¹Ô ¨“U?HK²UÐ ö?
Î u HDMI/DVI qÐU ÊU u? v²Š
dEM« iG?Ð jI 576p W
œ wł—U)« ÊuJ*« ‰UBð« Ãd?¹ÔË jI 576i W
b«
ÆWýUA« d«Ë√ sŽ
b?Q²« v?łd¹® ÆHDMI qO?uð b?MŽ UO?
Î zUIK?ð ÂbI²?*« ÷«dF²?Ýô« jO?AMð r?²¹
q?− s? WOU?_« WŠuK?« w …œułu?*« PS v≈ …—U?ýù« X9 b
t?½√ s
©ÆDVD u¹bOË
W??H??O??þË j??O??A??M?ð r??²??¹ r?? U?? HDMI u??¹b??O?? Ë√ u?? Ãd??š „U?M??¼ Êu??J??¹ s??
ÆÂbI²*« ÷«dF²Ýô«
ÊU? «–≈ U? W?d?F??* p?¹b? Êu?¹e?H?O??K?²?« Âb??²??? q?O?œ v?≈ Ÿu?łd?U??Ð p?O?K?Ž
Æô Â√ ÂbI²*« ÷«dF²Ýô« rŽb¹ Êu¹eHOK²«
Âb² qOœ ULOKFð l³ðU ¨ÂbI²*« ÷«dF²Ýô« rŽb¹ Êu¹eHOK²« ÊU «–≈Ë
ÂU?E??½ W?L?zU?
w? Âb?I?²??*« ÷«d?F?²?Ýô« «œ«b?ŽS?Ð o?K?F??²?¹ U?L?O? Êu?¹e?H??O?K?²?«
ÆÊu¹eHOK²«
ÆWýUA« dNEð ô bI ¨W×O× dOž WI¹dDÐ u¹bOH« Ãdš j³{ WUŠ w
÷dF« W¬ Ë√ Êu¹eHOK²« vKŽ HDMI/DVI Ãd) …du²*« W
b« Uł—œ bL²Fð
’U)« Âb²*« qOœ v≈ Ÿułd« vłd¹ ¨qOUH²« vKŽ ŸöÞö ÆWb²*«
Æp¹b ÷dF« W¬ Ë√ Êu¹eHOK²« “UN−Ð
إﻋﺪاد ﻧﻈﺎم اﻟﻘﻮاﺋﻢ
—u?B« —u?N?E W?KO?K?
w½«u?Ł d?_« VK?D²?¹ b?I ¨W?
b« Èu?²? d?O?OG?ð bM?Ž
ÆW¹œUF«
…œuł HDMI Ãd?š d?u¹ ¨1080i Ë√ 720p v?K?Ž HDMI Ãd?š W
œ j?³?{ W?UŠ w?
Æ—uBK qC√
DivX(R) qO−ð
DVD-Recorder
ÆDivX(R) Video On Demand oOM²Ð DVD q− qO−²Ð ÂUOIK qO−²« e— «b²Ý« vłd¹
Æwww.divx.com/vod w½Ëd²Jù« UMFu …—U¹“ vłd¹ ¨UuKF*« s b¹e*« vKŽ ‰uB×K
Video
No Disc
Programme
Setup
TV Aspect
: 16:9 Wide
Video On Demand
3DDivX(R)
Noise Reduction
: Off
Your Output
registration code: Component
is :
Video
XXXXXXXX
To learn more, visit www.divx.com/vod
Done
MOVE
≤∏ ≠ WOÐdF«
DVD-VR350-01375B-IB-ar
28
2007.4.2, 3:49 PM
OK
RETURN
EXIT
ÍuÐ_« rJײ« œ«bŽ≈
DVD-Recorder
rJײ« vKŽ „bŽU¹ U u¼Ë ¨UN ‰bF b¹b% - w²« DVD ’«d√ l ÍuÐ_« rJײ« WHOþË qLFð
ÆpðdÝ√ U¼b¼UAð w²« DVD ’«d√ Ÿ«u½√ w
Æ ’ d I K r O O I ð U ¹ u ² ∏ v ≈ q B ¹ U b ł u ¹
Parental Control
No Disc
Programme
Password
:Off
Off
On
Setup
jG{« ¨©’d
błu?¹ ô® No Disc l{u«Ø©·UI¹≈® Stop l{u« w …b?Šu« œułË l Ʊ
ÆbFÐÔ sŽ rJײ« “UN−Ð ©WLzUI«® MENU —e« vKŽ
vKŽ Ë√ ©o«u® OK vKŽ jG{« rŁ ¨©œ«bŽ≈® Setup b¹bײ † … s¹—e« vKŽ jG{« Æ≤
Æ —e«
MOVE
OK
RETURN
EXIT
vKŽ jG{« rŁ ¨©ÍuÐ_« rJײ«® Parental Control b¹bײ † … s¹—e« vKŽ jG{« Æ≥
Æ —e« vKŽ Ë√ ©o«u® OK
Æ¢—Ëd*« WLK bOQð¢ ßCreate the passwordß WUÝd« dNEð •
إﻋﺪاد ﻧﻈﺎم اﻟﻘﻮاﺋﻢ
rJײ« “UN−Ð π v≈ ∞ s —«—“_« «b²ÝUÐ ÂU
—√ ¥ s W½uJ*« —Ëd*« WLK qšœ√ Æ¥
ÆbFÐÔ sŽ
Æ¢—Ëd*« WLK bOQð¢ ßConfirm the passwordß WUÝd« dNEð •
Æ —e« vKŽ Ë√ ©o«u® OK vKŽ jG{« rŁ ¨—Ëd*« WLK ‰Ušœ≈ bŽ√ Æμ
vK?Ž Ë√ ©o«u® OK vKŽ jG{« rŁ ¨©q?OGAð® On b¹bײ † … s¹—e?« vKŽ jG{« Æ∂
Æ —e«
Æ©ÍuÐ_« rJײ«® Parental Control WýUA« dNEð
Æ¢UN?Šö≈Ë ¡U?Dš_« ·U?AJ?²Ý«¢ v?≈ lł—« ¨—Ëd?*« WL?KJ? p½U?O?½ WU?Š w
©∑∏ W×HB« dE½«®
‰bF*« Èu² ‰uŠ
DVD-Recorder
Parental Control
No Disc
OK vKŽ jG{« rŁ ¨©‰bF*« Èu²® Rating Level b¹bײ † … s¹—e« vKŽ jG{« Ʊ
Æ —e« vKŽ Ë√ ©o«u®
©o«u® OK vKŽ jG{« rŁ ¨»uKD*« ‰bF*« Èu² b¹bײ † … s¹—e« vKŽ jG{« Æ≤
Æ —e« vKŽ Ë√
q?OG?A?ð r²?¹ s ¨U?¹u?²? ∂ v≈ q?B?¹ U œ«b?Ž≈ w X?³?ž— «–≈ ¨‰U¦?*« q?O³?Ý vK?Ž
Z?U?½d³?« Ê√ v?≈ d?³_« r?
d?« d?OA?¹ ÆU?¹u?²? ∏Ë ∑ v?K?Ž qL?²?A?¹ Íc« ’d?I?«
ÆjI —U³J« «b²Ýô hB
Programme
Password
Setup
Rating Level
:On
Level 8 Adults
: Level
Level 71 Kids
Level 6
Change Password Level 5
Level 4
Level 3
Level 2
Level 1 Kids
MOVE
OK
RETURN
EXIT
—Ëd*« WLK dOOGð ‰uŠ
DVD-Recorder
jG{« rŁ ¨©—Ëd*« WLK dOOGð® Change Password b¹bײ † … —«—“_« vKŽ jG{« Ʊ
Æ —e« Ë√ ©o«u® OK vKŽ
Æ¢—Ëd*« WLK bOQð¢ ßEnter the passwordß WUÝd« dNEð •
Parental Control
No Disc
Programme
Password
: On
Setup
Rating Level
: Level 1 Kids
Change Password
“U?N?ł w? …œułu?*« —«—“_« «b??²?ÝU?Ð ÂU?
—√ W?F?З√ s? W?½u?J*« —Ëd?*« W?L?K? q?šœ√ Æ≤
ÆbFÐÔ sŽ rJײ«
Æ¢—Ëd*« WLK bOQð¢ ßConfirm the passwordß WUÝd« dNEð •
sŽ rJײ« “UN−Ð π v≈ ∞ s —«—“_« «b²ÝUÐ Èdš√ …d —Ëd*« WLK ‰Ušœ≈ bŽ√ Æ≥
ÆbFÐÔ
MOVE
jG{« ÆWIÐU« WLzUI« v≈ ŸułdK —e« Ë√ ©Ÿuł—® RETURN vKŽ jG{«
ÆWLzUI« s ÃËdK ©ÃËdš® EXIT —e« vKŽ
≤π ≠ WOÐdF«
DVD-VR350-01375B-IB-ar
29
2007.4.2, 3:49 PM
OK
RETURN
EXIT
u¹bOH« “UNł œ«bŽ≈
Æu¹bOH« œ«bŽ≈ j³{ WHOþu« Ác¼ `O²ð
jG{« ¨©’d
błu¹ ô® No Disc l{u«Ø©·UI?¹≈® Stop l{u« w …bŠu« œułË l Ʊ
Æ©WLzUI«® MENU —e« vKŽ
vKŽ Ë√ ©o«u® OK vKŽ jG{« rŁ ¨©œ«bŽ≈® Setup b¹bײ † … s¹—e« vKŽ jG{« Æ≤
Æ —e«
Ë√ ©o«u® OK vKŽ jG{« r?Ł ¨©ÂUEM«® System b¹bײ † … s¹—e?« vKŽ jG{« Æ≥
Æ —e« vKŽ
©o«u® OK vKŽ jG{« rŁ ¨©u¹bOH« “UNł® VCR b¹bײ † … s¹—e« vKŽ jG{« Æ¥
Æ —e« Ë√
OK vK?Ž jG{« rŁ ¨»u?KD*« u¹bO?H« “UNł —U?Oš b¹bײ? † … s¹—e« vK?Ž jG{« Æμ
Æ —e« Ë√ ©o«u®
Ë√ ©o«u® OK vKŽ jG{« rŁ ¨»uK?D*« dBMF« b¹bÚײ † … s?¹—e« vKŽ jG{« Æ∂
Æ —e«
j¹dA« ‰uÞ
DVD-Recorder
System
إﻋﺪاد ﻧﻈﺎم اﻟﻘﻮاﺋﻢ
No Disc
E280Ë E240Ë E180 ∫‰öš WLzUI« qI²Mð Æj¹dA« W³KŽ vKŽ WŽu³D UuKF*« Ác¼ wðQð U …ÎœUŽ
jGC« bMŽ j¹dA« s wI³²*« ¡e'« u¹bOH« “UNł ÷dF¹ Ê√ sJ1 ¨j¹dA« Ÿu½ j³{ œd−0 ÆE300Ë
Æ©UuKF® INFO —e« vKŽ
Programme
Tape Length
:E180
E180
Setup
Auto Play
:E240
On
Auto Repeat
:E280
Off
IPC
:E300
On
Colour System
: Automatic
MOVE
©wzUIKð qOGAð® Auto Play
OK
RETURN
DVD-Recorder
EXIT
System
No Disc
j?OA?M²Ð r?I ¨UN?Ušœ≈ b?MŽ wzU?IKð q?JA?Ð pÐ WU?)« u¹bO?H« j?z«dý qL?Fð Ê√ w V?ždð X?M «–≈Ë
ÆwzUIK²« qOGA²«
¨tUšœ≈ œd−0 u¹bOH« j¹dý qOGAð w UOÎzUIKð u¹bOH« “UNł √b³¹ ∫ ©qOGAð® On
Æj¹dAUÐ ’U)« ÊU_« j¹dý Ÿe½ - U*UÞ p–Ë
•
∫ ©·UI¹≈® Off
•
ÆwzUIK²« qOGA²« qODFð r²¹
Programme
Tape Length
Setup
Auto Play
:Off
On
:On
Off
IPC
: On
Colour System
: Automatic
MOVE
©wzUIKð —«dJð® Auto Repeat
: E180
Auto Repeat
OK
RETURN
DVD-Recorder
EXIT
System
No Disc
ÊU? «–≈ ô≈® —dJ² q?JAÐ u¹b?OH« j¹dý q?OGA²?Ð ÂuI¹ YO?×Ð u¹bOH?« “UNł j³?CÐ —UO)« «c?¼ ÂuI¹
Rewind Ë√ ©l?¹d?Ý .b?I?ð® Fast Forward Ë√ ©·U?I?¹≈® Stop ∫ U?D?
Î A?½ j¹d?A?« w? r?J?×?²?«
Æ © lO ł d ð ®
Programme
Tape Length
: E180
Setup
Auto Play
: On
Auto Repeat
:On
On
Colour System
: Automatic
MOVE
©—uB« w wc« rJײ«® IPC
:Off
Off
IPC
OK
RETURN
DVD-Recorder
EXIT
System
No Disc
ÆWOBA« pðöOCHð oË ¨UOÎzUIKð —uB« Õu{Ë j³CÐ —uB« w wc« rJײ« …eO p `LÝ
ÆUOÎzUIKð —uB« Õu{Ë j³{ r²¹ ∫ ©qOGAð® On
•
∫ ©·UI¹≈® Off
•
U¹ÎËb¹ …—uB« Õu{Ë j³C
Programme
Tape Length
: E180
Setup
Auto Play
: On
Auto Repeat
: Off
IPC
Off
On
Colour System
On
Automatic
MOVE
≥∞ ≠ WOÐdF«
DVD-VR350-01375B-IB-ar
30
2007.4.2, 3:49 PM
OK
RETURN
EXIT
©Ê«u_« ÂUE½® Colur System
Æ » u K D * « Â U E M « ” U O I b ¹ b % p M J 1 ¨ t K O G A ð Ë √ j ¹ d ý q O − ð q ³ o¹dÞ sŽ UOÎzUIKð ”UOI*« b¹b% r²¹ ¨j¹dý qOGAð bMŽ ∫ ©wzUIKð® Automatic •
Æu¹bOH« “UNłË DVD q−
DVD-Recorder
System
No Disc
Programme
Tape Length
: E180
Setup
Auto Play
: On
Auto Repeat
: Off
IPC
: Automatic
On
: PAL
Automatic
PAL ÂUEMÐ u¹bO “UNł ∫ PAL •
Colour System
MESECAM •
MESECAM
ÆœuÝ√Ë iOÐ√ ∫ B/W •
B/W
MOVE
OK
RETURN
EXIT
DVD EP l{Ë XË
DVD-Recorder
إﻋﺪاد ﻧﻈﺎم اﻟﻘﻮاﺋﻢ
ÆUŽUÝ ∏ Ë√ ∂ vKŽ ©WK¹uÞ …b* qOGA²«® EP l{Ë …b œ«bŽ≈ j³{ pMJ1
jG{« ¨©’d
błu?¹ ô® No Disc l{u«Ø©·UI¹≈® Stop l{u« w …b?Šu« œułË l Ʊ
Æ©WLzUI«® MENU —e« vKŽ
Programme
VCR
Setup
Hours
DVD EP Mode Time : 6AV1
Chapter Creator
Hours
: 8Off
Quick Recording : Off
—e« Ë√ ©o«u® OK vKŽ jG{« rŁ ¨©œ«bŽ≈® Setup b¹bײ † … s¹—e« vKŽ jG{« Æ≤
Æ
Ë√ ©o«u?® OK vKŽ jG?{« rŁ ¨©ÂUEM?«® System b¹b×?² † … —«—“_« vKŽ j?G{« Æ≥
Æ —e«
System
No Disc
MOVE
OK
RETURN
…b?* DVD qOGAð l{Ë …b® DVD EP Mode Time b¹bײ † … s?¹—e« vKŽ jG{« Æ¥
Æ —e« Ë√ ©o«u® OK vKŽ jG{« rŁ ¨©WK¹uÞ
r?Ł ¨©UŽU?Ý ∏® 8 Hours Ë√ ©U?ŽU?Ý ∂® 6 Hours b¹b?×?²? † … s¹—e?« v?K?Ž jG?{« Æμ
Æ —e« Ë√ ©o«u® OK vKŽ jG{«
wzUIK²« ‰uBH« TAM
©V l{u«®
Æ¢‰uB¢Ë ¢¡ULÝ√¢ s u¹bO≠DVD ’d ÊuJ²¹
Æ b Š « Ë r Ý « ¡ U A ½ SÐ Â u I ¹ t ½ S ¨ b Š « Ë Z U ½ d Ð q O − ² Ð Â u I ð U b M Ž
ƉuB v≈ rÝô« rOIð r²¹ ¨WHOþu« Ác¼ «b²Ý« WUŠ w
Do you want to create the chapter menu
after this recording?
Yes
Æ©WLzUI«® MENU —e« vKŽ jG{« ©·UI¹≈® Stop l{u« w …bŠu« œułË l Ʊ
—e« Ë√ ©o«u® OK vKŽ jG{« rŁ ¨©œ«bŽ≈® Setup b¹bײ † … s¹—e« vKŽ jG{« Æ≤
Æ
Ë√ ©o«u® OK v?KŽ jG{« r?Ł ¨©ÂUEM«® System b?¹bײ † … s?¹—e« vKŽ j?G{« Æ≥
Æ —e«
vKŽ jG{« rŁ ¨©‰uBH« TAM® Chapter Creator b¹bײ † … s¹—e« vKŽ jG{« Æ¥
Æ —e« Ë√ ©o«u® OK
—e« Ë√ ©o«u® OK vKŽ jG{« rŁ ¨©qOGAð® On b¹bײ † … s¹—e« vKŽ jG{« Æμ
ÆWLzUI« s ÃËdK ©ÃËdš® EXIT —e« vKŽ jG{« Æ
©qO−²« WŽdÝ® REC SPEED—e« vKŽ jGC« o¹dÞ sŽ qO−²« WŽdÝ b¹bײРr
Æ∂
‰u?Š Uu?K?F*« s? b?¹eL?K? μπ W×?HB?« d?E½«® b?F?ÐÔ sŽ r?J?ײ?« “UN?ł w? œułu?*«
Æ©qO−²« UŽdÝ
Do you want to¢W?U?Ýd?« dN?E?ð Æq?O−??²?« ¡b³? ©q?O?−?ð® REC —e?« v?KŽ j?G?{« Æ∑
‰uBH« WLzU
¡UA½≈ w Vždð q¼® ¢create the chapter menu after this recording?
Æ©øqO−²« «c¼ bFÐ
√b?³?¹Ë ©o?«u?® OK v?K??Ž j?G?{« r?Ł ¨©r?F?½® Yes b??¹b?×?²? s?¹—e?« v??K?Ž j?G?{« Æ∏
ÆqB ¡UA½ù q
_« vKŽ ozU
œ μ …b* qO−²« V−¹ ¨SP ¨XP l{u« w ÆqO−²«
ÆWIO
œ ±μ qO−²« …bL ¨EP ¨LP l{Ë w U√
≥± ≠ WOÐdF«
DVD-VR350-01375B-IB-ar
31
2007.4.2, 3:50 PM
No
EXIT
ÆqOGA²« ·UI¹ù ©·UI¹≈® STOP —e« vKŽ jG{« Æπ
1/1
jG{« rŁ ©∑μ W?×HB« dE½«® ’d?I« ¡UN½SÐ r
¨U?¼ƒUA½≈ - w²« ¡UL?Ý_« ÷dF Ʊ∞
Æ¡ULÝ_« WLzU
dNEð Æ©¡ULÝ_« WLzU
® TITLE MENU —e« vKŽ
DISC —e?« vK?Ž j?G{« r?Ł »u?KD?*« rÝô« œb?Š ¨U?¼ƒUA?½≈ - w²?« ‰u?BH?« ÷dF? Ʊ±
Æœb;« rÝôUÐ WU)« ‰uBH« WLzU
dNEð Æ©’«d
_« WLzU
® MENU
¡ULÝ√Ë ‰uB WU{≈ sJ1 ¨UNOKŽ WÐU²J« …œUŽù WKÐUI« DVD-RW ’«d
√ w
w? ÆqO?−²?« …œUŽ≈Ë ¡U?N½ù« ¡UG?≈ o¹d?Þ sŽ p?–Ë ¨ÁƒUN½≈ - Íc?« ’dI?K
qO−ð sJ1 ô ¨’«d
_« Ác¼ ¡UN½≈ œd−0 ¨UNOKŽ WÐU²JK WKÐUI« DVD-R ’«d
√
ÆUNOKŽ WOU{≈ ¡ULÝ√ Ë√ ‰uB
JAN/01/2007
09:41 PR1
JAN/01/2007
09:45 PR1
JAN/01/2007
09:50 PR1
JAN/01/2007
12:00 PR1
JAN/01/2007
12:30 PR1
JAN/01/2007
12:40 PR1
Previous
Top
Next
CHAPTER
·UI¹≈ bMŽ Ë√ X
u*« qO−ð ¡UMŁ√ wzUIK²« ‰uBH« TAM WHOþË qLFð ô
ÆqOGA²«
1/1
1
2
3
ÆtOKŽ WÐU²JK qÐUI« DVD ’d
¡UN½≈ ¡UG≈ sJ1 ô
Previous
Top
Next
DVD-Recorder
p `O²¹ U2 ¨WŽdÐ DVD u¹bOË q− qOGAð r²¹ ¨qOGA²« l{Ë vKŽ WHOþu« Ác¼ j³{ WUŠ w
ÆWŽdÐ WÐuKD*« …UMI« qO−ð WO½UJ≈
System
No Disc
Programme
VCR
Setup
DVD EP Mode Time : 6 Hours
MENU—e??« v?K?Ž j?G?{« ¨’d?
b?łu?¹ ôØn??
u?²?« l?{Ë w? …b?Šu?« Êu?J??ð U?b?M?Ž Ʊ
Æ©WLzUI«®
Chapter Creator
: Off
Quick Recording
: Off
On
On
Ë√ ©o«u® OK —e« vKŽ jG{« rŁ ¨©œ«bŽù«® Setup b¹bײ † … —«—“_« vKŽ jG{« Æ≤
Æ —e«
©o«u® OK —e« vKŽ jG{« rŁ ¨©ÂUEM«® System b¹bײ † … —«—“_« vKŽ jG{« Æ≥
Æ —e« Ë√
MOVE
OK
RETURN
EXIT
jG?{« rŁ ¨©l¹d« q?O−²«® Quick Recording b?¹bײ † … —«—“_« vK?Ž jG{« Æ¥
Æ —e« Ë√ ©o«u® OK —e« vKŽ
Ë√ ©o?«u® OK —e« vKŽ j?G{« rŁ ¨©qOGA?ð® On b¹bײ † … —«—“_« vK?Ž jG{« Æμ
Æ —e«
·U??I?¹≈® Off v??K??Ž ©l?¹d???« q??O?−????²?«® Quick Recording W??H?O??þË j?³??{ r?²??¹
ÆUO
Î {«d²« ©qOGA²«
·UI¹≈ bMŽ W
UD« „öN²Ý« b¹e¹ ¨qOGA²« vKŽ WHOþu« Ác¼ j³{ WUŠ w
Æ…bŠu« qOGAð
©jI DVD-VR355 “«dÞ® Anynet+(HDMI-CEC)
bF?ÐÔ sŽ rJײ« …b?ŠË «b²ÝUÐ q−?*« qOGA²? UN«b²Ý« s?J1 WHOþË sŽ …—U?³Ž w¼ Anynet+
«b²ÝUÐ SAMSUNG Êu¹eHOK²Ð DVD u¹bOË q− qOu²Ð p–Ë Samsung Êu¹eHOK²Ð WU)«
WHOþË rŽbð w²« SAMSUNG Êu¹eHOKð …eNł√ l jI «c¼ du²¹Ë® ©≤∞ W×HB« dE½« HDMI. (qÐU
©Anynet+.
DVD-Recorder
System
No Disc
Programme
VCR
Setup
DVD EP Mode Time : 6 Hours
Chapter Creator
: Off
Quick Recording
: Off
Off
Anynet+(HDMI-CEC)Off
On
MOVE
vK?Ž jG?{« ¨©’d
b?łu¹ ôØ·U?I¹ù«® Stop/No Disc l?{Ë w …b?Šu« Êu?Jð U?bM?Ž Ʊ
ÆbFÐÔ sŽ rJײ« …bŠuÐ ©WLzU
® MENU —e«
Ë√ ©o«u® OK —e« vKŽ jG{« rŁ ©œ«bŽ≈® Setup b¹bײ
s¹—e« vKŽ jG{« Æ≤
Æ —e«
Ë√ ©o«u® OK —e« vKŽ jG{« rŁ ©ÂUE½® System b¹bײ
s¹—e« vKŽ jG{« Æ≥
Æ —e«
ÆÂUEM« WLzU
÷dŽ r²OÝ
OK —e?« v?K?Ž j?G?{« r?Ł ¨Anynet+(HDMI-CEC) b¹b?×?²?
s?¹—e?« vK?Ž j?G?{« Æ¥
Æ —e« Ë√ ©o«u®
ÆAnynet+(HDMI-CEC) dUMŽ ÷dŽ r²OÝ
Ë√ ©o«u® OK —e« v?KŽ jG{« rŁ ©qOGAð® On b¹bײ?
s¹—e« vKŽ jG{« Æμ
Æ —e«
≥≤ ≠ WOÐdF«
DVD-VR350-01375B-IB-ar
32
2007.4.2, 3:50 PM
OK
RETURN
EXIT
إﻋﺪاد ﻧﻈﺎم اﻟﻘﻮاﺋﻢ
l¹d« qO−²«
Anynet+(HDMI-CEC)
WHOþË Â«b²Ýô W³MUÐ
W×HB« dE½«® ÆHDMI qÐU «b²ÝUÐ Êu¹eHOK²UÐ DVD u¹bOË q− qOu²Ð r
Ʊ
©≤∞
dE½«® ÆDVD u¹bOË q−0 ©qOGAð® ¢On¢ vKŽ Anynet+(HDMI-CEC) WHOþË j³{« Æ≤
©ÁöŽ√
’U)« «œUý—ù« qOœ dE½«® ÆÊu¹eHOK²« “UN−Ð …œułu*« Anynet+ WHOþË j³{« Æ≥
©ÆUuKF*« s b¹e*« vKŽ ‰uB×K Êu¹eHOK²UÐ
WU?)« b?F?ÐÔ sŽ r?J?×?²« …b?ŠË «b??²ÝU?Ð DVD u?¹b?OË q?−?? qO?G?A?ð pM?J?1 •
ÆÊu¹eHOK²UÐ
∫u?¹bO?H« “U?NłË DVD q?−? w r?J×?²K? Êu¹e?HO?K²?« `O?ðUH? «b?²Ý« s?J1®
©
~
—“Ë
Ë
s¹e« Ë
Ë
Ë
Ë
Ë
Ë
Ë
—«—“√
¨Êu?¹eH?O?K²?U?Ð WU?)« b?FÐÔ s?Ž r?J×?²?« …bŠu?Ð Anynet+ —e« v?K?Ž jG?C?« bM?Ž •
Æd¹_« V½U'UÐ WýUA« «—UOš dNE²Ý
-
View TV
Z
Select Device
Z
.qO−²« ·UI¹≈ Ë√ qO−²« ¡b³ —UO)« «c¼ Âb²Ý« ∫ ©qO−ð® Record
-
Record
Z
Menu on Device
Z
Device Operation
Z
Receiver
Z
MENU ©
إﻋﺪاد ﻧﻈﺎم اﻟﻘﻮاﺋﻢ
DVDR
.“UNł b¹bײ —UO)« «c¼ Âb²Ý« ∫ ©“UNł b¹b%® Select Device
ANYKEY ©
® —e« W?H?OþË f?HM?Ð ÂuI?ð : ©“U?N'U?Ð WL?zUI?«® Menu on Device
ÆDVD u¹bOË q−0 WU)« bFÐÔ sŽ rJײ« …bŠuÐ ©WLzU
®
-
® —e« WHOþË fHMÐ ÂuI¹ : ©“UN'« qOGAð® Device Operation
ÆDVD u¹bOË q−0 WU)« bFÐÔ sŽ rJײ« …bŠuÐ ©ÕU²H Í√®
-
: Off
Z
Setup
Ok
Move
Exit
©Êu¹eHOK²« WLzU
®TV Menu
¨Êu¹eHOK²« …b¼UA ¡UMŁ√ q−*UÐ œułu*« ©qOGAð® PLAY —e« vKŽ jGCUÐ
ÆqOGA²« WýUý v≈ Êu¹eHOK²« WýUý dOOGð r²OÝ
qOGAð r²?OÝ ¨Êu¹eHOK²« qOGAð ·UI¹≈ ¡UMŁ√ DVD ’d
qOGAð WUŠ w
ÆÊu¹eHOK²«
u¹bOË q− qOGAð ·UI?¹≈ r²O ¨Êu¹eHOK²« qOG?Að ·UI¹SÐ XL
«–≈
·UI?¹≈ s?J?1 ô ¨qO?−??²U?Ð DVD u?¹b?OË q?−? ÂU?O?
¡U?MŁ√® ÆU?O?
Î zU?IK?ð DVD
©ÆtKOGAð
UËÆÆÆwJKÝô œœdð Ë√ “UNł Ë√ ÊuJ® Èdš√ —œUB v≈ HDMI dOOGð WUŠ w
DVD q−? n
u²?OÝ ¨DVD ’d
qO?GAð ¡UM?Ł√ Êu¹eHO?K²« w ©p?– v≈
w u¹b?OH« “U?NłË DVD q−? dL²?¹ U0— Æq?OGA?²« sŽ u¹b?OH« “U?NłË
ÆÈu²;« VŠ WMOF ’«d
√ qOGAð
≥≥ ≠ WOÐdF«
DVD-VR350-01375B-IB-ar
33
2007.4.2, 3:50 PM
اﻟﺘﺸﻐﻴﻞ
Æ’dI« Ÿu½ VŠ WOÝUÝ_« qOGA²« nzUþu qBH« «c¼ ÂbI¹
Æ’dI« qOGAð q³ WOU²« UuKF*« √d«
UNKOGAð sJ1 ô w²« ’«d_« Ÿ«u½√
ozU?
bUÐ se« Ë√ q?OGA²K s?“ vB
√
WIO
œ≤¥∞
©jI u¹bO≠DVD ’d® WIDM*« e—
’dI« qJý q?−*« Èu²;« ’dI« —UFý ’«d?
_« Ÿ«u½√
©¢μ® b?Š«Ë tłË
WIO
œ¥∏∞
©¢μ®ÊUNłË
WIO
œ∏∞
©¢μ[≥® b?Š«Ë tłË
WIO
œ±∂∞
©¢μ[≥® ÊU?NłË
…—uË u
DVD+VIDEO
…—uË u
VCD
AUDIO-CD
WIO
œ∑¥
©¢μ® b?Š«Ë tłË
WIO
œ≤∞
©¢μ[≥® b?Š«Ë tłË
WIO
œ∑¥
©¢μ® b?Š«Ë tłË
©¢μ[≥® b?Š«Ë tłË
…—u
WIO
œ≤∞
≠
©¢μ® b?Š«Ë tłË
oOM²Ð …—u
≠
©¢μ[≥® b?Š«Ë tłË
JPEG
o?OM²Ð u
≠
©¢μ® b?Š«Ë tłË
≠
©¢μ[≥® b?Š«Ë tłË
MP3
≠
©¢μ® b?Š«Ë tłË
o?OM²Ð rKO
≠
©¢μ[≥® b?Š«Ë tłË
MPEG4
V??Š e?
Ì d?Ð u¹b?O?H?« “U?N?łË DVD q−?? s? q?
Ì eO?O?9 r?²?¹ v?²?Š Ác¼ o?ÞU?M?*« “u?— o?ÐU?D?²?ð Ê√ V?−?¹Ë ÆW?I?D?M?*«
q?O?G?A?ð r?²?¹ s?K? ,“u?d?« o?ÐU?D?²?ð r? «–≈ Æ’d?I?« q?O?G?A?ð
u?¹b?O?H?« “UN?łË DVD q?−??0 ’U?)« W?I?DM?*« r?
— Æ’d?I?«
Æu¹bOH« “UNłË DVD q−* WOHK)« WŠuK« vKŽ 5³
UNKOGAð sJ1 w²« ’«d_« «—UFý
JPEG
MP3
MPEG4
©…“U²L*« …œu?'« ∫XP®WŽUݱ
©WOÝUOI« …œu?'« ∫SP®WŽUÝ≤
©¢μ® b?Š«Ë tłË
©WK¹uÞ …b* qOGA?²« ∫LP®WŽUÝ¥
©X¹U?ÐU−Oł ¥[∑®
©WK?¹uÞ …b* qOGA?²« ∫EP® WŽUÝ∏ Ë√ ∂
wL
d« uB«
…—uË u
wŠd*« uB«
wL
d«
wL
d« w³Ëœ
DVD-RAM
©…“U²L*« …œu?'« ∫XP®WŽUÝ≤
©WOÝUOI« …œu?'« ∫SP®WŽUÝ¥
©¢μ®ÊUNłË
©WK¹uÞ …b* qOGA?²« ∫LP®WŽUÝ∏
©X¹U?ÐU−Oł π[¥®
©…“U²L*« …œu?'« ∫XP®WŽUݱ
©WOÝUOI« …œu?'« ∫SP®WŽUÝ≤
¢μ
©WK¹uÞ …b* qOGA?²« ∫LP®WŽUÝ¥
©X¹U?ÚÐU−Oł ¥[∑®
…—uË u
u¹d²Ý«
DVD-RW
©WK?¹uÞ …b* qOGA?²« ∫EP®WŽUÝ∏ Ë√ ∂
©…“U²L*« …œu?'« ∫XP®WŽUݱ
©WOÝUOI« …œu?'« ∫SP®WŽUÝ≤
©¢μ® …bŠ«Ë W?I³Þ
©WK¹uÞ …b* qOGA?²« ∫LP®WŽUÝ¥
©X¹U?ÚÐU−Oł ¥[∑®
MP3
©WK?¹uÞ …b* qOGA?²« ∫EP®WŽUÝ∏ Ë√ ∂
©…“U²L*« …œu?'« ∫XP®WŽUÝ≤
©WOÝUOI« …œu?'« ∫SP®WŽUÝ¥
©¢μ® WłËœe W?I³Þ
©WK¹uÞ …b* qOGA?²« ∫LP®WŽUÝ∏
©X¹U?ÐU−Oł ∏[μ®
…—uË u
DVD-R
…—uË u
DVD+RW
…—uË u
DVD+R
©WK?¹uÞ …b* qOGA?²« ∫EP®WŽUݱμ Ë√ ±±
©…“U²L*« …œu?'« ∫XP®WŽUݱ
©WOÝUOI« …œu?'« ∫SP®WŽUÝ≤
¢μ
©WK¹uÞ …b* qOGA?²« ∫LP®WŽUÝ¥
©X¹U?ÚÐU−Oł ¥[∑®
©WK?¹uÞ …b* qOGA?²« ∫EP®WŽUÝ∏ Ë√ ∂
©…“U²L*« …œu?'« ∫XP®WŽUݱ
©WOÝUOI« …œu?'« ∫SP®WŽUÝ≤
©¢μ® …bŠ«Ë W?I³Þ
©WK¹uÞ …b* qOGA?²« ∫LP®WŽUÝ¥
©X¹U?ÚÐU−Oł ¥[∑®
©WK?¹uÞ …b* qOGA?²« ∫EP®WŽUÝ∏ Ë√ ∂
©…“U²L*« …œu?'« ∫XP®WŽUÝ≤
©WOÝUOI« …œu?'« ∫SP®WŽUÝ¥
©¢μ® WłËœe W?I³Þ
©WK¹uÞ …b* qOGA?²« ∫LP®WŽUÝ∏
©X¹U?ÐU−Oł ∏[μ®
©WK?¹uÞ …b* qOGA?²« ∫EP®WŽUݱμ Ë√ ±±
≥¥ ≠ WOÐdF«
DVD-VR350-01375B-IB-ar
34
2007.4.2, 3:50 PM
DivX
اﻟﻌﺮض
WJKL*« w PAL YÐ ÂUE½
UO½U*√Ë U½dË …bײ*«
ÆU¼dOžË
©WK?¹uÞ …b* qOGA?²« ∫EP®WŽUݱ∂ Ë√ ±≤
UNKOGAð sJ1 ô w²« ’«d_«
©qJ«® ¢ALL¢ Ë√ ¢2¢ dOž tÐ ’U)« WIDM*« r
— Íc« u¹bO≠DVD ’d
•
ÆnOQ²K X¹UÐU−Oł ≥[π DVD-R ’d
•
WNł ÃU²½≈ s q− w tUH
≈ r²¹ rË tKO−ð - Íc« DVD±R/DVD-RW(V) ’d
•
ÆWHK² lOMBð
U¼dOžË DVD-ROM/DVD+RW/PD/MV ’d
•
CD-IØCD-GØCDVØCD-ROMØCVDØu¹bO≠CD •
DVD- l WI?«u²*« ’«d?
_« qOG?Að jI? u¹bOH?« “UNłË DVD q?−* s?J1
Æ≤[∞ —«bù« RAM Standard
UO?KLŽ ¡«dł≈ bMŽ Ë√ ¨’«d
_« Ÿ«u½√ iFÐ qO−ð Ë√ØË qOGAð r²¹ ô b
UuK?F Æ÷dF?« v≈ ŸUHð—ô« W?³½ j³?{ Ë√ W¹Ë«e« d?OOGð q?¦ ¨WMO?F
UuKF*« pK² Ÿułd« ¡UłdÐ ÆW³KF« vKŽ qOBH²UÐ WÐu²J ’«d
_« ‰uŠ
…—ËdC« bMŽ
WÐdð_«Ë l?ÐU_« ULB?Ð Ê√ kŠôË ‘«bš_« s ’dI?« WUE½ vK?Ž kUŠ
’«d?
_« v?KŽ q?O−??²« q?F?−¹ b?
dzU?−?« ÊU?šœ U¹U?I?ÐË ‘b)«Ë —U?³G?«Ë
ÆsJ2 dOž
p–Ë ¨DVD öGA iFÐ w DVD-RAM/±RW/±R ’«d
√ qOGAð sJ1 ô b
ÆqO−²« WUŠË ’dI«Ë qGA*« VŠ
U?NK?O?−?ð sJ?1 ô s?JË NTSC Z?«d?Ð UN?OK?Ž W?K−?
Ò ?*« ’«d
_« q?OG?A?ð sJ?1
ÆZ²M*« «c¼ «b²ÝUÐ
’dI« qOGAð
اﻟﻌﺮض
Æ©‚öž≈Ø`²® OPEN/CLOSE —e« vKŽ jG{« Ʊ
’dI« oBK ÁU&« ÊuJ¹ Ê√ …UŽ«d l ’«d
_« ל w o
Ì dÐ ’«d
_« bŠ√ l{ Æ≤
ÆvKŽ_
Æ’«d
_« ל ‚öžù ©‚öž≈Ø`²® OPEN/CLOSE —e« vKŽ jG{« Æ≥
Æ’dI« qOGAð w UOÎzUIKð √b³¹Ë ’«d
_« ל u¹bOH« “UNłË DVD q− oKG¹Ô •
ÆwË_« qOGA²« …b wN²Mð v²Š UOÎzUIKð ’«d
_« qOGA²Ð q−*« ÂuI¹ ô •
qEðË …bŠu« jOAMð r²¹ ¨’«d
_« ל w ’d
œułË l q−*« qOGAð bMŽ •
Æ·UI¹ù« WUŠ w
Æ’dI« qOGAð ¡b³ ©qOGAð® PLAY —e« vKŽ jG{«
ÆqOGA²« ·UI¹ù ©·UI¹≈® STOP —e« vKŽ jG{« Æ¥
bMŽË ÆpH
uð ÊUJ u¹bOH« “UNł DVD q− dc²¹ ¨’d
qOGAð ·UI¹≈ bMŽ
Æn
uð YOŠ s qOGA²« √b³¹ ¨Èdš√ …d ©qOGAð® PLAY —e« vKŽ jGC«
Ë√ ¨u?¹b?OH?« “UN?łË DVD q−? f?ÐU?
qB? Ë√ ’dI?« ëdš≈ W?UŠ w? ô≈
oO³?D²K WKÐU
W?HOþu« Ác¼ Æ©©·UI¹≈® STOP —e?« vKŽ 5ðd jG?C« bMŽ
WÞuGC*« WOFL« ’«d
_« Ë√ DVD ËDVD-RAM/-RW/-R ’«d
QÐ oKF²¹ ULO
Æ©CD-DA®
p– v?KŽ Vðd?²¹ bI? ¨qOG?A²« ¡U?MŁ√ u¹bO?H« “UN?łË DVD q−? „d% ô
Æ’dI« nKð
’«d
_« ל ‚öžù ©‚ö?ž≈Ø`²® OPEN/CLOSE —e« vKŽ jGC« s bQð
Ætײ Ë√
À«bŠ≈ v≈ «c¼ ÍœR¹ bI ¨UIÎKG Ë√ UŠ
Î u²H t½u ¡UMŁ√ ’«d
_« ל lbð ô
ÆZ²M*« w qDŽ
ÆtKš«œ Ë√ ’«d
_« ל vKŽ W³¹dž œ«u lCð ô
Ÿu½ VŠ UNK?ODFð r²¹ b
Ë√ nK²? qJAÐ nzUþu« iF?Ð ¡«dł≈ r²¹ b
Æ’«d
_« W³KŽ vKŽ WÐu²J*« «œUý—ù« v≈ lł—« ¨p– ÀËbŠ WUŠ w Æ’dI«
b?MŽ ×b« qJO¼Ë ’«d?
_« ל 5Ð ‰UHÞ_« lÐU?√ dA×Mð ô√ UB?
Î ¹dŠ s
Æ‚öžù«
q?OG?Að r?²¹ v?²Š Ê«u?Ł lC?Ð d_« ‚d?G?²?¹ ¨wÐd?NJ?« —UO?²« q?Ou?ð bF?Ð
Æu¹bOH« “UNłË DVD q−
≥μ ≠ WOÐdF«
DVD-VR350-01375B-IB-ar
35
2007.4.2, 3:50 PM
¡ULÝ_« WLzUË ’«d_« WLzU «b²Ý«
œ«u*«Ë ‰uBH«Ë rÝö WUš nzUþË b¹bײРp `L¹ hB rz«u ÂUE½ vKŽ ’«d_« iFÐ Íu²%
Æ Á d O ž Ë U O B A « ‰ u Š U u K F * « Ë Â ö _ « W M ¹ U F Ë W ý U A K W ³ Š U B *« W L ł d ² « Ë W K − * « W O ð u B «
DVD-VIDEO ’dI W³MUÐ
©’«d_« WLzU®Disc Menu
Æ’dIUÐ WU)« ’«d
_« WLzU
v≈ ‰ušbK DISC MENU —e« vKŽ jG{«
ÆqOGA²« WOKLFÐ WU)« œ«bŽù« WLzU
v≈ qI²½« •
Æ’dI« Ádu¹ U2 ÁdOžË WýUAK W³ŠUB*« WLłd²«Ë uB« WG b¹b% pMJ1 •
«b?²ÝU?Ð UN?KO?GA?ð ·UI?¹≈ Ë√ WL?zUI?« qO?GA?ð —UO?²š« p?MJ?1 VCD2.0 qO?GA?ð bM?Ž •
ÆDISC MENU —“
©s¹ËUMF« WLzU®Title Menu
W?U?)« ¡UL?Ý_« W?LzU?
v?≈ ‰UI?²?½ö ©¡U?L?Ý_« WL?zU?
® TITLE MENU —e« v?K?Ž jG?{«
Æ’dIUÐ
i?F??Ð r?Žb?ð ô b?
Ær?Ý« s? d??¦?√ v?K?Ž Íu?²?×??¹ ’d?I?« ÊU? «–≈ —e?« «c?¼ Âb???²?Ý« •
Æ¡ULÝ_« WLzU
WHOþË ’«d
_«
DVD-RAM/DVD±RW/DVD±R ’dI W³MUÐ
اﻟﻌﺮض
∫©¡ULÝ_« WLzU® Title List
Æs¹ËUMFUÐ WLzU
÷dF ©s¹ËUMF« WLzU
® TITLE LIST —e« vKŽ jG{«
bŠ√ vKŽ …œułu*« s¹ËUMFUÐ WLzU
sŽ …—U³Ž WÞU³Ð w¼ ©s¹ËUMF« WLzU
® Title List
.Èdš√ …Îd s¹ËUMF« bŠ√ qOGAð ÂbŽ WUŠ w ¨’«d
_«
∫©DVD-RAM/-RW(V)®©qOGA²« WLzU® Playlist
ÆqOGA²« WLzU
÷dF ©qOGA²« WLzU
® PLAY LIST —e« vKŽ jG{«
ÆWBB s¹ËUMŽ WLzU
sŽ …—U³Ž w¼ qOGA²« WLzU
Ë
WLzU
w …œułu*« s¹ËUMF« qOGAð jI r²OÝ ¨qOGA²« rz«u
ÈbŠ≈ qOGAð bMŽ
ÆwK_« qO−²« ·cŠ r²¹ sK ¨qOGA²« WLzU
·cŠ - «–≈ v²Š Æn
u²ð rŁ ¨qOGA²«
wD²«Ë Y׳« w²HOþË Â«b²Ý«
WK− …œU Ë√ qB w Y׳«
q w ÆbFÐ sŽ rJײ« “UNł w SEARCH Ë√ —e« vKŽ jG{« ¨qOGA²« ¡UMŁ√
ÆwK¹ UL qOGA²« WŽdÝ dOG²ð ¨©Y×Ю SEARCH —e« vKŽ UNO jGCð …d
Fast 1/ Fast 1 → Fast 2/ Fast 2 →
HDD/DVD-VIDEO/DVD-RAM
Fast 3/ Fast 3 → Fast 4/ Fast 4 →
DVD±RW/ DVD±R
Fast 5/ Fast 5 → Fast 6/ Fast 6 →
Fast 1 → Fast 2 → Fast 3
MPEG4
→ X2 → X4 → X8
AUDIO CD(CD-DA)
Fast 1 → Fast 2 → Fast 3
VCD
WŽd?UÐ qO?GA²?« v≈ …œuF?K Æw?JŽ VO?ðd²Ð Z?U½d³?« w Y×?Ð ¡«dł≈ pM?J1 •
Æll —e« vKŽ jG{« ¨W¹œUF«
≥∂ ≠ WOÐdF«
DVD-VR350-01375B-IB-ar
36
2007.4.2, 3:50 PM
’«d
_« «u√ «bŽ ULO ¨Scan (Search) l{u« qOGAð ¡UMŁ√ u Í√ lLð s
w ©± WŽd«® ÂUú Y׳« ¡UMŁ√ uB« ŸULÝ pMJ1®Æ©CD-DA® WÞuGC*«
MPEG4 ŸU{Ë√ WU w wzuC« `*« WOKLŽ ¡UMŁ√ u Í√ lL¹Ô ô Æ©’dI«
ÆVCD Ë
Ÿu?M U?F
ÓÎ ³ð p?–Ë ¨©± WŽd?«® Fast 1 l{Ë ¡U?MŁ√ q?
√ uB« …œu?ł ÊuJ?ð b
Æ’dI«
WK−*« œ«u*« Ë√ ‰uBH« wDð
ÆbFÐ sŽ rJײ« “UNł w l Ë√ l —e« vKŽ jG{« ¨qOGA²« ¡UMŁ√
l
—e« vKŽ jGC« WUŠ w •
eOOL²« Ë√ WK−*« …œU*« Ë√ qBH« W¹«b³ qI²M¹ ·u ¨l —e« vKŽ XDG{ «–≈
Æ©©VR l{u«® DVD-RAM/-RW®
Ë√ qBH« W¹«bÐ v≈ …œuF« v≈ ¨Ê
Ì «uŁ ≥ ‰öš Èdš√ …d l —e« vKŽ jGC« ÍœR¹
ÆoÐU« ©©VR l{u«® DVD-RAM/-RW® eOOL²« Ë√ WK−*« …œU*«
l
— e « vK Ž j G C « W U Š w •
DVD-® eOOL²« Ë√ WK−*« …œU*« Ë√ qBHK qI²Mð ·u ¨l —e« vKŽ XDG{ «–≈
ÆwU²« ©©VR l{u«® RAM/-RW
WO½UŁ ≥∞ wDð
اﻟﻌﺮض
Æj³CUÐ WO½UŁ ≥∞ wD² F.ADV/SKIP —e« vKŽ jG{« ¨qOGA²« l{Ë w
XÐU¦« qOGA²« Ø ¡wD³« qOGA²«
¡wD³« qOGA²«
rJײ« “UNł w —e« Ë√ SEARCH Y×Ð —e« vKŽ jG{« ¨ÊuJ« l{Ë ¡UMŁ√
ÆWO½UŁ sŽ b¹eð …b* bFÐÔ sŽ
∫ —e« vKŽ UNO jGCð …d q w •
≥ ¡wDÐ
← ≤ ¡wDÐ
← ± ¡wDÐ
∫ —e« vKŽ UNO jGCð …d q w •
≥ ¡wDÐ ← ≤¡wDÐ ← ± ¡wDÐ
Æll —e« vKŽ jG{« ¨W¹œUF« WŽdUÐ qOGA²« v≈ …œuFK
¡wD³?« qO?GA?²« …eO? qL?Fð s ¨VCD ◊u?GC? u¹b?O ’d
q?OG?Að b?MŽ
ÆVCD Ë MPEG4 wJF«
≥∑ ≠ WOÐdF«
DVD-VR350-01375B-IB-ar
37
2007.4.2, 3:50 PM
¡wD³« qOGA²«
“UN?ł w ©w?D?²«Ø—U?Þù« .bI?ð® F.ADV/SKIP —e« v?KŽ j?G{« ¨Êu?J?« l{Ë ¡U?MŁ√
ÆbFÐÔ sŽ rJײ«
Æb¹bł —UÞ≈ dNE¹ ¨—e« vKŽ jGC« UNO r²¹ …d q w •
Æll —e« vKŽ jG{« ¨W¹œUF« WŽdUÐ qOGA²« v≈ …œuFK
ÆSLOW Ë√ STEP l{u« w u Í√ lL¹Ô ô
©ÕU²H Í√® ANYKEY —e« «b²Ý«
v≈ ‰uu« o¹dÞ sŽ »uKD bNA sŽ WuNÐ Y׳UÐ ©ÕU²H Í√® ANYKEY nzUþË p `Lð
Î ¹√ pMJ1 ÆXu«Ë WK−*« …œU*«Ë qBH«Ë rÝô«
«œ«bŽ≈Ë WýUAK W³ŠUB*« WLłd²« «œ«bŽ≈ dOOGð UC
ØdO³?Jð® ZoomË ©W¹Ë«e«® AngleË ©—«d?Jð® Repeat p– w U?0 «eO*« i?FÐ j³{Ë u?B«
Æ©dOGBð
…ÎdýU³ »uKD*« bNA*« v≈ ‰UI²½ô«
DVD-VIDEO
Title
1/2
Chapter 1/28
Time
Æ W HO þ u « Á c ¼  b ² Ý U ¨ t M O F Ð X Ë Ë √ q B Ë √ Ê « u M Ž v ≈ ‰U I² ½ ô « œ — √ « – ≈ •
00:00:11
Subtitle ENG
Audio ENG
D 5.1CH
Repeat Off
MOVE
CHANGE
Æ»uKD*« bNA*« b¹bײ ©π v≈ ∞ s® r
— Ë√ s¹—e« vKŽ jG{« Æ≥
w½«u¦« rŁ ozU
b« rŁ UŽU« qK²UÐ X
u« qšœ√ ¨X
Ë sŽ Y׳« WUŠ w®
©ÆÂU
—_« `OðUH «b²ÝUÐ
Æ©o«u® OK —e« vKŽ p– bFÐ jG{«
◊uGC u ’d
‰Ušœ≈ bMŽ Æ’«d
_« iFÐ l WHOþu« Ác¼ qLFð ô b
ÆUuKF*« ÷dŽ dNE¹ ô b
¨’dI« ŸuM UIÎË ¨MP3 ’d
Ë√ ©CD-DA®
Æ’«d
_« iFÐ w ©X
uUÐ Y׳«® Time Search WHOþË qLFð ô
©Ÿuł—® RETURN Ë√ ©ÕU?²H? Í√® ANYKEY —e?« vK?Ž jG?{« ¨W?ýUA?« ¡UH?šù
ÆÈdš√ …d
·UI?¹≈® Menu Off l?{Ë w? VCD 2.0 ÊuJ?¹ U?b?MŽ j?I? W?HO?þu?« Ác?¼ qL?F?ð
©≥∂ W×HB« dE½«® Æ©WLzUI«
≥∏ ≠ WOÐdF«
DVD-VR350-01375B-IB-ar
38
2007.4.2, 3:50 PM
اﻟﻌﺮض
ÆqOGA²« ¡UMŁ√ ©ÕU²H Í√® ANYKEY —e« vKŽ jG{« Ʊ
Æ©X
Ë® Time Ë√ ©qB® Chapter Ë√ ©Ê«uMŽ® Title b¹bײ † … s¹—e« vKŽ jG{« Æ≤
Angle 1/1
Zoom Off
qOGA²« —«dJð
…—dJ² …—uBÐ qOGA²«
DVD-VIDEO
Title
1/2
Chapter 1/28
Time
00:00:27
Subtitle ENG
Audio ENG
ÆqOGA²« ¡UMŁ√ ©ÕU²H Í√® ANYKEY —e« vKŽ jG{« Ʊ
Æ©—«dJð® Repeat b¹bײ † … s¹—e« vKŽ jG{« Æ≤
D 5.1CH
Repeat Off
Angle 1/1
Zoom Off
MOVE
CHANGE
Æ©o«u® OK —e« vKŽ jG{« ¨ —e« «b²ÝUÐ —«dJ²« l{Ë œbŠ Æ≥
DVD±R Ë qHI*« dOž ©V l{u«® DVD-RW Ë ©VR l{u«® DVD-RAM/-RW —dJ¹ ô
Æö
Î B qHI*« dOž
©Ÿuł—® RETURN Ë√ ©ÕU?²?H Í√® ANYKEY —e?« v?KŽ j?G?{« ¨WýU?A?« ¡UH?šù
ÆÈdš√ …d
·UI?¹≈® Menu Off l?{Ë w? VCD 2.0 Êu?J¹ U?b?M?Ž j?I W?H?O?þu?« Ác?¼ qL?F?ð
©≥∂ W×HB« dE½«® Æ©WLzUI«
—dJ² qJAÐ œb× lDI qOGAð
DVD-VIDEO
Title
1/2
Chapter 1/28
Time
00:00:52
Subtitle ENG
Audio ENG
ÆqOGA²« ¡UMŁ√ ©ÕU²H Í√® ANYKEY —e« vKŽ jG{« Ʊ
Æ©—«dJð® Repeat b¹bײ † … s¹—e« vKŽ jG{« Æ≤
D 5.1CH
Repeat Off
Angle 1/1
Zoom Off
MOVE
CHANGE
اﻟﻌﺮض
Æ©o«u® OK —e« vKŽ jG{« rŁ ¨A-B b¹bײ —e« vKŽ jG{« Æ≥
©A® qOGA²« —«dJð ¡bÐ w Vždð YOŠ WDIM« bMŽ ©o«u® OK —e« vKŽ jG{« Æ¥
Æ©B® —dJ²*« qOGA²« ·UI¹≈ w Vždð YOŠ WDIM« bMŽ Èdš√ …Îd tOKŽ jG{«Ë
ÆA-B lDI*« qOGAð —«dJð √b³¹
Repeat A-B
A-B
≠ ÍœUF« qOGA²« v≈ …œuFK ≠
ÆÍœUF« l{u« v≈ …œuFK ©`® CANCEL —e« vKŽ jG{«
dE(« W?öŽ dN?Eð ·u ¨Ê
Ì «u?Ł μ —Ëd q³?
©B® WDI?M« 5O?F²Ð X?L
«–≈
Æ© ®
MPEG4 Ë MP3 ’«d??
√Ë ©CD-DA® W?? O??ðu??B?? « W??Þu??G?? C??*« ’«d??
_« r?? Žb??ð ô
Æ©A-B —«dJð® Repeat A-B WHOþu«
·UI?¹≈® Menu Off l?{Ë w? VCD 2.0 Êu?J¹ U?b?M?Ž j?I W?H?O?þu?« Ác?¼ qL?F?ð
©≥∂ W×H dE½«® Æ©WLzUI«
W³ŠUB*« WLłd²« WG b¹b%
DVD-VIDEO
Title
1/2
Chapter 1/28
Time
¡U?MŁ√ UŠÎU?² p– ÊuJ?¹ Æ’dI« Ÿu?½ VŠ p–Ë W?ýUAK? W³ŠUB?*« WLłd²?« UG i?FÐ qLF?ð ô b
©W³ŠUB*« WLłd²«® SUBTITLE —e« vKŽ jGCUÐ WHOþu« Ác¼ qOGAð UC
Î ¹√ p½UJSÐ ÆjI qOGA²«
ÆbFÔÐ sŽ rJײ« …bŠuÐ
00:00:57
Subtitle ENG
Audio ENG
D 5.1CH
Repeat Off
Angle 1/1
Zoom Off
MOVE
CHANGE
ÆqOGA²« ¡UMŁ√ ©ÕU²H Í√® ANYKEY —e« vKŽ jG{« Ʊ
jG{« rŁ ¨©WýUAK W³ŠUB*« WL?łd²«® Subtitle b¹bײ † … s¹—e« vKŽ jG{« Æ≤
ÆWÐuKD*« WýUAK W³ŠUB*« WLłd²« WG b¹bײ s¹—e« vKŽ
Æ’«d
_UÐ WUš XO UN½_ uB« UG nK²ð b
ÆjI ’«d
_« WLzUIÐ WU)« uB« WG b¹bײР’«d
_« iFÐ p `Lð
©Ÿuł—® RETURN Ë√ ©ÕU?²?H Í√® ANYKEY —e?« v?KŽ j?G?{« ¨WýU?A?« ¡UH?šù
ÆÈdš√ …d
≥π ≠ WOÐdF«
DVD-VR350-01375B-IB-ar
39
2007.4.2, 3:50 PM
uB« WG b¹b%
DVD-VIDEO
Title
1/2
Chapter 1/28
Time
ÆjI qOGA²« ¡UMŁ√ UŠÎU² p– ÊuJ¹ Æ’dI« Ÿu½ VŠ p–Ë uB« UG iFÐ qLFð ô b
Î ¹√ pMJ1
ÆbFÔÐ sŽ rJײ« …bŠuÐ ©u® AUDIO —e« vKŽ jGCUÐ WHOþu« Ác¼ qOGAð UC
ÆqOGA²« ¡UMŁ√ ANYKEY —e« vKŽ jG{« Ʊ
s?¹—e?« v??K?Ž j?G?{« r?Ł ¨©u?B?«® Audio b?¹b?×?²? † … s?¹—e?« v?K?Ž j?G?{« Æ≤
00:01:03
Subtitle ENG
Audio ENG
D 5.1CH
Repeat Off
Angle 1/1
Zoom Off
MOVE
CHANGE
ÆWÐuKD*« uB« WG b¹bײ
Æ’«d
_UÐ WUš XO UN½_ uB« UG nK²ð b
ÆjI ’«d
_« WLzUIÐ WU)« uB« WG b¹bײР’«d
_« iFÐ p `Lð
©Ÿuł—® RETURN Ë√ ©ÕU?²H? Í√® ANYKEY —e?« vK?Ž jG?{« ¨W?ýUA?« ¡UH?šù
ÆÈdš√ …d
«dOUJ« W¹Ë«“ dOOGð
DVD-VIDEO
Title
1/2
Chapter 1/28
Time
ÆW¹Ë«e« WHOþË Â«b²Ý« pMJ1 ¨5F bNA* …œbF² U¹«Ë“ vKŽ Íu²×¹ DVD-VIDEO ’d ÊU «–≈
ÆWýUA« vKŽ ©W¹Ë«“® ANGLE dNEð ·u ¨…œbF² U¹«Ë“ vKŽ Íu²×¹ ’dI« ÊU «–≈
00:01:01
Subtitle ENG
Audio ENG
D 5.1CH
Repeat Off
Angle 1/3
Zoom Off
ÆqOGA²« ¡UMŁ√ ANYKEY —e« vKŽ jG{« Ʊ
MOVE
CHANGE
Ë√ s?¹—e?« vK?Ž j?G?{« r?Ł ¨©W?¹Ë«“® Angle b¹b?×?²? † … s?¹—e?« vK?Ž j?G?{« Æ≤
Æ»uKD*« W¹Ë«e« bNA b¹bײ ©π v≈ ∞ s® r
—_« `OðUH
اﻟﻌﺮض
ÆDVD ’«d
√ q l qLFð ô b
Ë ¨’dI« vKŽ WHOþu« Ác¼ bL²Fð
Æ«dOUJ« œbF² U¹«Ë“ ÂUEMÐ DVD qO−ð r²¹ r «–≈ WHOþu« Ác¼ qLFð ô
©Ÿuł—® RETURN Ë√ ©ÕU?²H? Í√® ANYKEY —e?« vK?Ž jG?{« ¨W?ýUA?« ¡UH?šù
ÆÈdš√ …d
dO³J²«
ÆqOGA²« ¡UMŁ√ ©ÕU²H Í√® ANYKEY —e« vKŽ jG{« Ʊ
OK —e« vKŽ j?G{« rŁ ¨©dOG?BðØdO³?Jð® Zoom b¹bײ? † … s¹—e« vK?Ž jG{« Æ≤
Æ© ® ÷dŽ r²OÝ Æ©o«u®
ÆU¼dO³Jð w Vždð w²« WIDMLK ‰UI²½ö ¨† … —«—“_« vKŽ jG{« Æ≥
Æ©o«u® OK —e« vKŽ jG{« Æ¥
WFЗ√® ¥x v≈ …—uB« dO³Jð r²¹ ¨©o«u® OK —e« vKŽ jGC« r²¹ …d q l •
ÆwFO³D« r−(« ·UF{√
¥ ™ ← ≤™ ← ÍœUF« r−(«
ÍœUF« r−(« ← ≤ ™ ←
DVD-VIDEO/DVD-RAM/
DVD±RW/DVD±R
ÍœUF« r−(« ← ≤™ ← ÍœUF« r−(«
VCD
·UI?¹≈® Menu Off l?{Ë w? VCD 2.0 ÊuJ?¹ U?b?MŽ j?I? W?HO?þu?« Ác?¼ qL?F?ð
©≥∂ W×HB« dE½«® Æ©WLzUI«
¥∞ ≠ WOÐdF«
DVD-VR350-01375B-IB-ar
40
2007.4.2, 3:50 PM
WOFłd*« UöF« «b²Ý«
1 2 - - - - - - - --
Bookmark
©V l{u«®
¡bÐ s? sJL?²ð Y?O×?Ð Èdš√ Î…d U?N²?¹ƒ— w V?ždð w²?« b¼U?A*« bM?Ž WO?Fłd?*« UöF?« 5O?F²?Ð r
Æœb;« lu*« s qOGA²«
UöF« 5OFð
MOVE
PLAY
CLEAR
RETURN
ÆqOGA²« ¡UMŁ√ ©eOO9® MARKER —e« vKŽ jG{« Ʊ
Æ»uKD*« bNA*« —uNþ bMŽ ©o«u® OK —e« vKŽ jG{« Æ≤
ÆbNA*« kHŠ r²¹Ë ± r
d« ÷dŽ r²¹ •
ÆwU²« l{u« v≈ ‰UI²½ö —e« vKŽ jG{« Æ≥
Æ»uKD*« bNA*« —uNþ bMŽ Èdš√ …Îd ©o«u® OK —e« vKŽ jG{« Æ¥
WOFłd WöŽ l{u WIÐU« «uD)« —d ÆbNA*« kHŠ r²¹Ë ≤ r
d« ÷dŽ r²¹ •
ÆÈdš√ l{«u bMŽ
Æb¼UA ±∞ v≈ qB¹ b¼UA*« s œbF WOFłd UöŽ l{Ë pMJ1
WOFłd WöŽ qOGAð
Æ©eOO9® MARKER —e« vKŽ jG{« Ʊ
1 2 - - - - - - - --
Bookmark
ÆWOFłd WöŽ vKŽ Íu²×¹ bNA b¹bײ s¹—e« vKŽ jG{« Æ≤
اﻟﻌﺮض
Æœb;« bNA*« s qOGA²« ¡b³ ll Ë√ ©o«u® OK —e« vKŽ jG{« Æ≥
MOVE
PLAY
CLEAR
RETURN
WOFłd WöŽ `
Bookmark
1 2 - 4 5 - - - --
Æ©eOO9® MARKER —e« vKŽ jG{ Ʊ
ÆWOFłd WöŽ vKŽ Íu²×¹ bNA b¹bײ s¹—e« vKŽ jG{« Æ≤
Æ…œb;« WOFłd*« WöF« ·c( ©`® CANCEL —e« vKŽ jG{« Æ≥
ÆUöF« wH²ð ¨tIKž rŁ ’«d
_« ל `² bMŽ
·UI?¹≈® Menu Off l?{Ë w? VCD 2.0 Êu?J¹ U?b?M?Ž j?I W?H?O?þu?« Ác?¼ qL?F?ð
©≥∂ W×HB« dE½«® Æ©WLzUI«
MOVE
¥± ≠ WOÐdF«
DVD-VR350-01375B-IB-ar
41
2007.4.2, 3:50 PM
OK
RETURN
UöF« «b²Ý«
01 02 - - - - - - - -- N : 2
Marker
©VR l{u«®
UöF« j³{
ÆqOGA²« ¡UMŁ√ ©eOO9® MARKER —e« vKŽ jG{ Ʊ
Æ»uKD*« bNA*« —uNþ bMŽ ©o«u® OK —e« vKŽ jG{« Æ≤
ÆbNA*« kHŠ r²¹Ë ∞± r
d« ÷dŽ r²¹ •
MOVE
PLAY
CLEAR
RETURN
ÆwU²« l{u*« v≈ ‰UI²½ö —e« vKŽ jG{« Æ≥
Æ»uKD*« bNA*« —uNþ bMŽ Èdš√ …Îd ©o«u® OK —e« vKŽ jG{« Æ¥
ÆbNA*« kHŠ r²¹Ë ∞≤ r
d« ÷dŽ r²¹ •
©eOO9® Marker WHOþu« vKŽ ©VR l{u«® DVD-RW Ë√ DVD-RAM ’«d
√ Íu²% •
©eOO9® Marker WHOþu« p `Lð Æ©WOFłd WöŽ® Bookmark WHOþu« s ô
Î bÐ
pc?Ë ¨WHK?²? U×H? …bF? b¼UA?*« ÷dŽ r?²¹ b
Æ«b?
Î NA? ππ v²Š b?¹b×?²Ð
W¹ULŠ® disc Protect ‡Ð t«b²Ý« —Uł ’d
dOHAð - «–≈ ÆU¹Î—Ëd{ rO
d²« bF¹
ÆtcŠ Ë√ eOOL²« 5OFð s sJL²ð sK ¨©’dI«
ÆÕU²*« u¼ jI qOGA²« ÊuJ¹
eOO9 qOGAð
01 02 - - - - - - - -- N : 2
Marker
ÆqOGA²« ¡UMŁ√ ©eOO9® MARKER —e« vKŽ jG{« Ʊ
ÆeO2 bNA b¹bײ s¹—e« vKŽ jG{« Æ≤
MOVE
PLAY
CLEAR
RETURN
eOO9 `
Marker
01 02 03 04 05 06 07 08 09 10 N : 10
Marker
01 02 03 04 05 06 07 08 09
ÆqOGA²« ¡UMŁ√ ©eOO9® MARKER —e« vKŽ jG{« Ʊ
ÆeO2 bNA b¹bײ s¹—e« vKŽ jG{« Æ≤
Æœb;« eOOL²« `* ©`® CANCEL —e« vKŽ jG{«
dOOGð r²¹ ·u ¨©VR l{u«® DVD-RAM/DVD-RW qOGAð ¡UMŁ√ eOO9 ` bMŽ •
qO?−?ð b?FÐ l?ÐU?« e?O?OL?²?« `? - «–≈ ¨‰U¦?*« q?O³?Ý v?KŽË Æe?OO?L?²« ÂU?
—√
—«bI0 sU¦« bFÐ eOOL²« ÂU
—√ …œU¹“ UOÎzUIKð r²¹ ·u ¨eOO9 UöŽ …dAŽ
ÆlÐU« eOOL²« u¼ sU¦« eOOL²« `³B¹ ·uÝË bŠ«Ë
N:9
·UI?¹≈® Menu Off l?{Ë w? VCD 2.0 ÊuJ?¹ U?b?MŽ j?I? W?HO?þu?« Ác?¼ qL?F?ð
©≥∂ W×HB« dE½«® Æ©WLzUI«
MOVE
PLAY
¥≤ ≠ WOÐdF«
DVD-VR350-01375B-IB-ar
42
2007.4.2, 3:50 PM
CLEAR
RETURN
اﻟﻌﺮض
Æœb;« bNA*« s qOGA²« ¡b³ ll Ë√ ©o«u® OK —e« vKŽ jG{« Æ≥
—e?? « Ë√ ©w??U??²?? « w??D???? ²??«® NEXT SKIP (l ) —e??« v?? K??Ž j??G?? C??U??Ð X?? L??
«–≈ •
qOGA²« √b³¹ ·u ¨eOOL²« l{Ë w ©oÐU« wD²«® PREVIOUS SKIP (l)
…d²H WOU(« Ë√ WOU²« …eOL*« WDIM« qOGAð bMŽ WIÐU« …eOL*« WDIM« s
ÆÊ
Ì «uŁ ÀöŁ s q
√
MP3Ø©DA≠◊uGC*« ’dI«® ◊uGC u ’d qOGAð
◊uGC*« uB« ’d qOGA² bFÐÔ sŽ rJײ« …bŠË —«—“√ Âb²ðÔ
MP3Ø©DA≠◊uGC*« ’dI«®
ÆqOGA²« ¡UMŁ√ tOKŽ jGC« bMŽ WOU(« WK−*« …œU*« W¹«bÐ v≈ œuF¹ : l
—e« Ʊ
WK?−*« …œULK DVD q−? qI²M¹ ·u? ¨Èdš√ …Îd —e« «c¼ vK?Ž jGC« - «–≈
ÆUNKGA¹Ë WIÐU«
q?OG?Að r?²¹ ·u? ¨qO?GA?²« ¡b?Ð bF?Ð Ê«uŁ ÀöŁ ‰ö?š —e« «c?¼ vK?Ž XD?G{ «–≈
ÆWIÐU« WK−*« …œU*«
WK?−*« …œU?*« qOG?Að …œUŽ≈ r?²ð ·u? ¨Ê
Ì «uŁ Àö?Ł bFÐ —e?« «c¼ v?KŽ XD?G{ «–≈
ÆW¹«b³« s WOU(«
ÆWOU²« WK−*« …œU*« qGA¹ : l —e« Æ≤
uB« ’d
® ©∏™\¥™\≤™® ©l¹dÝ qOGAð® Fast Play ∫©/® —«—“_« vKŽ jG{« Æ≥
©jI ◊uGC*«
.©WOMž√® WK− …œU n
u¹ ∫
—e« Æ¥
ÆtKOGAð —Uł ¡e' oÐUD*« qOGA²« X
ËË ’dI« qOGAð WUŠ `{u¹ ∫ RETUR —e« Æμ
.qOGA²« n
u¹ Ë√ ©WOMž√® WK− …œU qGA¹ ∫ ll —e« Æ∂
.©WOMž√® WK− …œU œb×¹ ∫ † … —e« Æ∑
Æ…œb;« ©WOMž_«® WK−*« …œU*« qGA¹ ∫©o«u® OK —e« ¨ Æ∏
qOGA²« Ë√ —«dJ²« —UOš® ÆqOGA²« l{Ë …cU½ ÷dF ∫©ÕU²H Í√® ANYKEY —e« Æπ
©CD-DA® ◊uGC wðu ’d qOGAð
CD
Music List
01/15
اﻟﻌﺮض
TRACK 1
No.
Æ’«d
_« ל w ©CD-DA® UÞ
Î uGC UO
Î d
qšœ√ Ʊ
Î ðu U
©w?½Už_«® W?K−?*« œ«u?*« q?OG?Að r?²¹Ë w?ðuB?« ◊uG?C?*« ’dI?« WL?zU
d?NE?ð •
ÆUOÎzUIKð
TRACK 1
CDDA
PLAY MODE
©CD-DA® ◊uGC*« wðuB« ’dI« WýUý dUMŽ
qOGA²« l{Ë e— Ʊ
ÆUOÎUŠ UNKOGAð r²¹ w²« WK−*« …œU*« r
— ÷dF ∫©WOMž√® WOU(« WK−*« …œU*« Æ≤
MOVE
Length
0:03:50
0:04:00
0:03:49
0:03:47
0:04:29
0:03:44
0:03:44
RETURN
OK
CD
EXIT
Music List
TRACK 1
01/15
No.
ÆWK−*« œ«u*« œbŽ wULł≈Ë wU(« qOGA²« ”dN ÷dF Æ≥
tKO?GAð r²¹ Íc« ¡e−?K VÝUM*« qO?GA²« X
ËË ’dI?« qOGAð WU?Š «c¼ `{u¹ Æ¥
ÆUÎOUŠ
ÆWK− …œU qJ qOGA²« X
ËË ©w½Už_« WLzU
® WK−*« œ«u*« WLzU
÷dF Æμ
002
003
004
005
006
007
0:00:15
q?O?GA?²?« √b?³O?Ý w?²?« ©WO?M?ž_«® W?K−??*« …œU?*« b¹b?×?²? † … s¹—e?« v?K?Ž jG?{« Æ≤
Æ©o«u® OK —e« vKŽ jG{« rŁ ¨U¼bMŽ
Title
TRACK 1
TRACK 2
TRACK 3
TRACK 4
TRACK 5
TRACK 6
TRACK 7
0:00:15
TRACK 1
CDDA
002
003
004
005
006
007
Title
TRACK 1
TRACK 2
TRACK 3
TRACK 4
TRACK 5
TRACK 6
TRACK 7
Length
0:03:50
0:04:00
0:03:49
0:03:47
0:04:29
0:03:44
0:03:44
—e« ÷dŽ Æ∂
PLAY MODE
¥≥ ≠ WOÐdF«
DVD-VR350-01375B-IB-ar
43
2007.4.2, 3:50 PM
MOVE
OK
RETURN
EXIT
MP3 vKŽ Íu²×¹ ’d qOGAð
Æ’«d
_« ל w MP3 vKŽ Íu²×¹ UÞ
Î uGC U
Î d
qšœ√ Ʊ
MP3
Music List
01/11
SONG01
jG{« r?Ł ¨©’dI« ÷«dF?²Ý«® Disc Navigation b¹bײ? † … s¹—e« vK?Ž jG{« Æ≤
Æ5ðd —e« vKŽ Ë√ ©o«u® OK vKŽ
No.
Æ Ë√ ©o«u® OK —e« vKŽ jG{« rŁ ¨Music b¹bײ † … s¹—e« vKŽ jG{« Æ≥
SONG01
3.5MB
01/26/2007
002
003
004
005
006
PLAY MODE
MOVE
0:00:06
ŸUL²Ýô« w Vždð w²« ©WOMž_«® WK−*« …œU*« b¹bײ † … s¹—e« vKŽ jG{« Æ¥
Æ©o«u® OK —e« vKŽ jG{« rŁ ¨UNO≈
MP3
Title
ROOT
SONG01
SONG02
SONG03
SONG04
SONG05
SONG06
RETURN
OK
EXIT
MP3 WýUý dUMŽ
ÆUO
Î UŠ UNKOGAð r²¹ w²« WK−*« …œU*« rÝ« ÷dF ∫©WOMž√®
qOGA²« l{Ë e— Ʊ
WOU(« WK−*« …œU*« Æ≤
MP3
Music List
SONG01
01/11
No.
ÆUHK*« œbŽ wULł≈Ë wU(« qOGA²« ”dN ÷dF Æ≥
Æ©w½Už_« WLzU
® «bK:« WLzU
Ë mp3 nK ÷dF Æμ
SONG01
3.5MB
01/26/2007
002
003
004
005
006
PLAY MODE
MOVE
0:00:06
tKOG?Að r²¹ Íc« ¡e−K V?ÝUM*« qOGA²« X?
ËË ’dI« qOGAð WU?Š «c¼ `{u¹ Æ¥
ÆUÎOUŠ
MP3
Æ—e« ÷dŽ Æ∂
Title
ROOT
SONG01
SONG02
SONG03
SONG04
SONG05
SONG06
RETURN
OK
EXIT
ÆMP3 nK UuKF Æ∑
اﻟﻌﺮض
MP3 ’dØwðuB« ’dI« qOGAð —d
CD
Music List
TRACK 1
01/15
No.
Æ©ÕU²H Í√® ANYKEY —e« vKŽ jG{« qOGA²« ¡UMŁ√ Ʊ
Æ—«dJ²« l{Ë qOKEð r²OÝ
jG{« rŁ ¨tKOG?Að —«dJð »uKD*« —«dJ?²« l{Ë b¹bײ —«—“_« v?KŽ jG{« Æ≤
Æ©o«u® OK —e« vKŽ
©MP3Ø(CD-DA) CD® WK−*« …œU*« —«dJð
•
(MP3) bK:« —«dJð
•
©MP3Ø(CD-DA) CD® ’d
—«dJð
•
0:00:01
TRACK 1
CDDA
PLAY MODE
≠ ÍœUF« qOGA²« v≈ …œuFK ≠
ÆÍœUF« l{u« v≈ …œuFK ©`® CANCEL —e« vKŽ jG{«
¥¥ ≠ WOÐdF«
DVD-VR350-01375B-IB-ar
44
2007.4.2, 3:50 PM
Title
Length
001 MODE
TRACK 1
PLAY
002
TRACK 2
Repeat : Off
003
TRACK 3
Play Option
: Normal
004
TRACK 4
005
TRACK 5
006
TRACK 6
007
TRACK 7
MOVE
OK
0:03:50
0:04:00
0:03:49
0:03:47
0:04:29
0:03:44
0:03:44
RETURN
EXIT
qOGA²« —UOš l{Ë
Æ©ÕU²H Í√® ANYKEY —e« vKŽ jG{« ¨n
u²« ¡UMŁ√ Ʊ
ÆqOGA²« —UOš qOKEð r²OÝ
OK —e« vKŽ jG{« rŁ »uKD ©qOGAð® Play —UOš b¹bײ s¹—e« vKŽ jG{« Æ≤
Æ©o«u®
V?O?ðd²?Ð ’d?I?« v?K?Ž błu?ð w?²?« W?K?−?*« œ«u?*« q?O?G?Að r?²?¹ ∫©ÍœU?Ž® Normal •
.tOKŽ UNKO−ð
©q?O?G?A²?« W?L?zU?
® PlaylistqO?G?A?ð —U?Oš p? `?L??¹ ∫©qO?G?A?²?« WL?zU?
® Playlist •
.WK−*« œ«u*« qOGAð VOðdð b¹bײÐ
XM «–≈ ÆWK− …œU q s Ê
Ì «uŁ ±∞ ‰Ë√ qOGAð r²¹ ·uÝ ∫[ I ] ©WbI® Intro •
Ë√ OK —e« vKŽ jG{« ¨U¼b¹bײРXL
w²« vIOÝu*« v≈ ŸUL²Ýô« w Vždð
bMŽ Æ©ÍœUŽ qOGAð® Normal Play v≈ qOGA²« —UOš dOOGð r²¹ ·uÝ ll —e«
Æ©ÍœUŽ qOGAð® Normal Play ¡«dł≈ r²¹ ¨©WbI*« qOGAð® Intro Play ‰UL²«
v?KŽ W?K−?*« œ«u?*« ©wz«u?A?Ž® Random —UO?)« qG?A¹ ∫[ R ] ©w?z«uA?Ž® Random •
r²?¹ ¨qU?JUÐ U?NK?OGA?ðË WO?z«uA?Ž WLzU?
¡UA?½≈ bFÐ Æw?z«uA?Ž VOðd?²Ð ’d?I«
©wz«uAŽ qOGAð® Random Play dL²¹. UNKOGAðË Èdš√ WOz«uAŽ WLzU
¡UA½≈
ÆqOGA²« —UOš dOG²¹ v²Š
CD
Music List
01/15
TRACK 1
No.
Title
Length
001 MODE
TRACK 1
PLAY
002
TRACK 2
Repeat : Off
003
TRACK 3
Play Option
: Normal
004
TRACK 4
005
TRACK 5
006
TRACK 6
007
TRACK 7
II 0:00:01
TRACK 1
CDDA
PLAY MODE
MOVE
OK
0:03:50
0:04:00
0:03:49
0:03:47
0:04:29
0:03:44
0:03:44
RETURN
EXIT
WK−*« œ«u*« W−dÐ
CD
Music List
TRACK 1
ÆqOGA²« WLzU w WK− …œU ≥∞ vB√ b×Ð qO−ð pMJ1
01/15
No.
اﻟﻌﺮض
Æ©ÕU²H Í√® ANYKEY —e« vKŽ jG{« ¨n
u²« ¡UMŁ√ Ʊ
ÆqOGA²« —UOš qOKEð r²OÝ
OK —e« vKŽ jG{« rŁ ¨©qOGA²« WLzU
® Playlist —UO²šô s¹—e« vKŽ jG{« Æ≤
Æ©o«u®
Æ©qOGA²« WLzU
® Playlist WýUý ÷dŽ r²¹
ÆqOGA²« WLzU
qOGA² ©qOGAð® PLAY —e« vKŽ jG{« Æ¥
Length
001 MODE
TRACK 1
PLAY
002
TRACK 2
Repeat : Off
003
TRACK 3
Play Option
: Normal
004
TRACK 4
005
TRACK 5
006
TRACK 6
007
TRACK 7
II 0:00:01
TRACK 1
CDDA
PLAY MODE
rŁ ¨U?NKO?GA²? »uKD?*« VOðd?²UÐ W?K−?*« œ«u*« —UO?²šô † … s¹—e?« vKŽ j?G{« Æ≥
Æ©o«u® OK —e« vKŽ jG{«
r?Ł ¨? —e« vKŽ j?G{« ¨qOG?A²« WL?zUIÐ W×?O× dO?ž WK−
Ò ? …œU l{Ë WU?Š w
—e« vKŽ jG{« rŁ ¨W×O×B« dOž WKÒ−*« …œU*« b¹bײ † … s¹—e« vKŽ jG{«
Æ©¡UG≈® CANCEL
Title
MOVE
OK
0:03:50
0:04:00
0:03:49
0:03:47
0:04:29
0:03:44
0:03:44
RETURN
CD
EXIT
Playlist
04/15
CDDA
TRACK 1
001
TRACK 1
CDDA
TRACK 2
002
TRACK 2
CDDA
TRACK 3
003
TRACK 3
CDDA
TRACK 4
004
TRACK 4
CDDA
TRACK 5
CDDA
TRACK 6
CDDA
TRACK 7
CDDA
TRACK 8
PLAY MODE
MOVE
EXIT
OK
—u vKŽ Íu²×¹ ’d qOGAð
JPEG
Photo List
JPEG01
01/10
Æ’«d
_« ל w JPEG ’d
qšœ√ Ʊ
jG{« r?Ł ¨©’dI« ÷«d?F²Ý«® Disc Navigation b¹b?ײ † … s?¹—e« vKŽ j?G{« Æ≤
Æ5ðd —e« vKŽ Ë√ ©o«u® OK vKŽ
—e« v?KŽ jG{« rŁ ¨©WO«džuðu …—u® Photo b¹bײ? † … s¹—e« vKŽ jG{« Æ≥
Æ Ë√ ©o«u® OK
ROOT
JPEG01
JPEG02
JPEG03
JPEG04
JPEG05
JPEG06
JPEG07
Slide Show
Æ…—u b¹bײ
—«—“_« vKŽ jG{« Æ¥
Æl —e« vKŽ jG{« ¨WOU²« W²« —uB« …b¼UA* •
Æl —e« vKŽ jG{« ¨WIÐU« W²« —uB« …b¼UA* •
¥μ ≠ WOÐdF«
DVD-VR350-01375B-IB-ar
45
2007.4.2, 3:50 PM
MOVE
OK
RETURN
EXIT
Æ©`z«dA« ÷dŽ® Slide show WýUý dNEð ·u ¨ll —e« vKŽ XDG{ «–≈
OK —e« vKŽ jG{« rŁ ¨`z«dA« ÷dŽ WŽdÝ b¹bײ s¹—e« vKŽ jG{«
Æ©o«u®
r?Ł ÆÂu?³_« W?ýU?ý w? —u?B?« Èb?Š≈ b?¹b?% b?M?Ž ©o?«u® OK —e?« v?K?Ž j?G?{«
© ® Slide show Ë√ © Âu?³_« W?ýU?ý®© ® Album screen ÷dF?« l?{Ë d²?š«
©©dOGB²«ØdO³J²«® © ® Zoom Ë√ ©© ® d¹Ëb²«® Rotation Ë√ ©`z«dA« ÷dŽ®
Æ©o«u® OK —e« vKŽ jG{« rŁ ¨ —«—“_« «b²ÝUÐ
μ≠±
DVD-RW(VR)
μ≠≤
Slide Show Speed
Slow
Normal
Fast
JPEG01
Æ©Âu³√® Album WýUA« v≈ œuF¹ ∫
—uB« ÷dF wMe« qUH« j³{ r²¹ Ê√ V−¹ `z«dA« ÷dŽ ¡bÐ q³
∫
Æ©`z«dA« ÷dŽ WŽdÝ®
—«bI0 …—uB« d¹Ëbð r²¹ ¨©o«u® OK —e« vKŽ UNO jGCð …d q w ∫
.WŽU« »—UIŽ ÁU&« w Wł—œ π∞
…—uB« dO³Jð r²¹ ¨©o«u® OK —e« vKŽ jGC« UNO r²¹ …d q w ∫
.ÍœUF« r−(« ·UF{√ WFЗ√ v²Š
≤™ ← ¥™ ← ≤™ ← ©ÍœUŽ® Normal ←
MOVE
PHOTO
OK
RETURN
OK
RETURN
DVD-RW(VR)
Ærz«uI« j¹dý ÷dF ©ÕU²H Í√® ANYKEY —e« vKŽ jG{« •
Ærz«uI« j¹dý `* ©…œuŽ® RETURN —e« vKŽ jG{« •
MPEG4 vKŽ Íu²×¹ ’d qOGAð
JPEG01
MOVE
PHOTO
CD
DivX List
DIVX01
00/01
No.
001
Size
اﻟﻌﺮض
Æu¹bOH«Ë uB« U½UOÐ s¹e² MPEG4 nK «b²Ý« r²¹
ÆWOU²« «œ«b²ô« Í– MPEG4 nK qOGAð sJ1
DIVX ¨AVI ¨.divx ¨.avi -
Title
ROOT
movie_1
MPEG4
ROOT
Æ’«d
_« ל w MPEG4 ’d
qšœ√ Ʊ
jG{« r?Ł ¨©’dI« ÷«dF?²Ý«® Disc Navigation b¹bײ? † … s¹—e« vK?Ž jG{« Æ≤
Æ5ðd —e« vKŽ Ë√ ©o«u® OK vKŽ
MOVE
Æ Ë√ ©o«u® OK —e« vKŽ jG{« rŁ ¨DivX b¹bײ † … s¹—e« vKŽ jG{« Æ≥
Æ Ë√ ©o«u® OK —e« vKŽ jG{« rŁ ¨avi nK*« b¹bײ † … s¹—e« vKŽ jG{« Æ¥
MPEG4 WHOþË nË
nu«
WHOþu«
¨l Ë√ l —e« vKŽ jG{« ¨qOGA²« ¡UMŁ√
ÆozU
œ μ —«bI0 nKK Ë√ ÂUú qI²Mð ·uÝË
bNA wDð
© Ë√ ® ©Y×ЮSEARCH —e« vKŽ jG{« ¨qOGA²« ¡UMŁ√
ÆvKŽ√ WŽdÐ Y׳K Èdš√ …Îd jG{«Ë
bNA sŽ Y׳«
≥WŽd« ← ≤WŽd« ←±WŽd«←
jG{« ¨wKŠd*« qOGA²« l{Ë Ë√ X
R*« ·UI¹ù« l{Ë w
ÆbFÐ sŽ rJײ« “UNł w ©Y×Ю SEARCH () —e« vKŽ
W¾OD³« Wd(«
≥ ¡wDÐ ← ≤ ¡wDÐ ←± ¡wDÐ ←
—“ vKŽ jG{« ¨qOGA²« l{Ë Ë√ XO³¦²« l{Ë w
ÆbFÐ sŽ rJײ« “UN−Ð F.ADV/SKIP
—UÞ≈ qOGAð
—UÞSÐ
¥∂ ≠ WOÐdF«
DVD-VR350-01375B-IB-ar
46
2007.4.2, 3:50 PM
OK
RETURN
EXIT
WOU²« u¹bOH« jG{ UIOMð qOGAð …bŠu« ÁcN sJ1
DivX-Pro Xvid Ë DivX 5.x Ë DivX 4.x Ë DivX 3.11 ∫ MPEG4 Codec oO?Mð
GMCË QPEL ∫«b?Ž ULO
¢DTS¢Ë ¢AC3¢Ë ¢LPCM¢Ë ¢MPEG1 Audio Layer2¢Ë ¢MP3¢ ∫u??B?« o??O???M??ð
¢MS ADPCM¢Ë
“UNł v?KŽ U¼ƒU?A½≈ r²?¹ w²« MPEG4 U?HK iF?Ð qOG?Að s s?JL²?ð ô b
ÆwBý dðuO³L
©—«b≈® VersionË ©…dHA« p Ÿu½® Codec Type rŽœ ÂbŽ ¡«—Ë V³« u¼ «c¼Ë
ÆUH«u*« s vKŽ√ s¹U³ð Èu²Ë
.psbË .subË .srtË .smi ∫WuŽb*« WýUAK W³ŠUB*« WLłd²« UHK UIOMð
rÝô oÐUD rÝ« WýUAK W³ŠUB*« WLłd²« nK* ÊuJ¹ Ê√ V−¹® .assË .txtË
©dþUM*« MPEG4 nK
©u¹bOH«® VHS j¹dý qOGAð
Æu¹bOH« Wײ w UOÎÝUO
u¹bO j¹dý qšœ√ Ʊ
ÆUOÎzUIKð qOGA²« r²OÝ ¨u¹bO j¹dý ‰Ušœ≈ bFÐ •
WOU_« WŠuK« w Ë√ bFÐ sŽ rJײ« “UNł w (PLAY/STILL) ll —e« vKŽ jG{« Æ≤
Æ…bŠu« s
«–≈Ë qO−²« ÊU√ j¹dý W«“≈ X9 «–≈ UOÎzUIKð u¹bOH« j¹dý qOGAð √b³¹ ·uÝ
Æ©wzUIKð qOGAð® Auto Play qOGAð WOU_« WŠuK« w Ë√ bFÐ sŽ rJײ« “UNł w ©·UI¹≈® ©STOP®
WK−*« U¹u²;« W¹ULŠ …œ«bÝ
—e« vKŽ jG{« Æ≥
Æ…bŠu« s
اﻟﻌﺮض
WFÐU²*«
·ö²šô« V?³?Ð qOG?A²« ¡U?MŁ√ U?Ë_« iFÐ w? dN?Eð w²?« ¡UCO?³« ◊u?D)« WF?ÐU²*« j?³{ q?¹e¹
Æ q O − ² « U × ² w j O ³ «
s? ¡U?C?O?³?« ◊u?D?)« W?«“ù PROG/TRK ( / ) s?¹—e« v?K?Ž j?G?{« ¨q?O?G?A?²?« ¡U?M?Ł√
Æ…—uB«
u¹bOH« qOGA²Ð WUš «eO
q?OGA?²« «e?O s W?ŽuL?−0 ŸU²?L²?Ýô« pMJ?1 ¨u¹b?OH« j?z«dý b?Š√ qOG?Að ¡U?MŁ√
ÆWU)«
©XO³¦ð® Still
XO³¦² ©XO³¦ð Ø qOGAð® (PLAY/STILL) ll —e« vKŽ jG{« ¨©qOGAð® Play l{u« w
ÆbŠ«Ë —UÞ≈
©—UÞù« .bIð® Frame Advance
v≈ Âb?I²K? ©wD?²«Ø—UÞù« .b?Ið® F.ADV/SKIP —e« vK?Ž jG{« ¨Êu?J« l?{Ë w
ÆwU²« —UÞù«
Fps/Rps
Rewind ( ) Ë√ ©.b?I?ð® Forward () —e?« v??K?Ž j?G?{« ¨©q??O?G?A?ð® Play l??{u?« w?
∫5²ŽdÐ Fps/ps b¹bײ ©lOłdð®
.b?I² —d?J² qJ?AÐ Á—dŠË —e?« «c¼ vKŽ j?G{« ≠ ©—uB« Y?×Ю Picture Search •
.W¹œUF« WŽd« ·UF{√ ∑Ë μË ≥Ë ≤ —«bI0 nKK Ë√ ÂUú j¹dA«
ÂUú j¹dA« .bI² —«dL²Ýô« l —e« «c¼ vKŽ jG{« ≠ ©l¹dÝ Y×Ю Jet search •
.W¹œUF« WŽd« ·UF{√ ∑ —«bI0 nKK Ë√
¥∑ ≠ WOÐdF«
DVD-VR350-01375B-IB-ar
47
2007.4.2, 3:50 PM
©wDð® Skip
Æj?³C?UÐ W?O?½UŁ ≥∞ “ËU?−?² F.ADV/SKIP —e?« v?KŽ j?G?{« ¨©qO?GA?ð® Play l?{u« w?
Æ5²IO
œ “ËU−² «d ¥ v²Š —dJ² qJAÐ F.ADV/SKIP —e« vKŽ jG{«
©¡wD³« qOGA²«® Slow motion
vKŽ jG?{« ÆW¾OD³« Wd(UÐ qO?GA²K —e« vKŽ jG{« ¨©Êu?J«® Still l{Ë w
μر Ë√ ∑ر Ë√ ±∞ر —«b?I?0 W¾?OD?³?« Wd?(« W?ŽdÝ q?O?GA?²? —dJ?² q?J?AÐ —e?«
©qO?GAð® PLAY —e?« vKŽ j?G{« ÆÍœU?F« qO?GA²?« WŽd?Ý s ≥∞ر v≈ μر s? Æ…d
ÆÍœUF« ÷dF« ·UM¾²Ýô 5ðd
ŸuM²*« Y׳« ÂUE½
j¹dA« vKŽ ”dN eOO9 UOÎzUIKð r²¹ ¨«c¼ u¹bOH« “UNłË DVD q− vKŽ j¹dý q−ð …d q w
œb× ”dNH lO?łdð Ë√ l¹dÝ .bI²?Ð ÂUOIUÐ ©Y×?Ю Search WHOþË p `L?ð ÆqO−²?« ¡bÐ bMŽ
ÆWDIM« Ác¼ s qOGA²« ¡bÐË
W−?O²½Ë Æ©VISS® U?OÎÝU?O
WÝd?N ÂU?E½ «c¼ u?¹bO?H« q−?Ë DVD q?− Âb?²?¹ •
f?H½ «b??²?ÝUÐ d?š¬ u?¹bO? “U?N?ł Í√ U¼e?O?1 ”—U?N Í√ v?K?Ž ·d?F²?¹ u?N? ¨pc?
ÆfJF«Ë ¨ÂUEM«
©·UI¹≈® Stop [0:00:00] ©v≈ »U¼–® Go To
Æj¹dý vKŽ 0:00:00 œ«bF« l{u sŽ Y׳« w Vždð XM «–≈ …eO*« Ác¼ Âb²Ý«
j³?{ w V?ždð YO?Š j¹dA?« w W?DIM?« bMŽ ©`?® CANCEL —e?« vKŽ j?G{« Ʊ
Æ0:00:00 vKŽ œ«bF«
Go To [0:00:00]
00:00:49
Æ©ÕU²H Í√® ANYKEY —e« vKŽ jG{« ¨j¹dA« ·UI¹≈ ¡UMŁ√ Æ≤
اﻟﻌﺮض
j?G{« rŁ ¨©[0:00:00] v?≈ »U¼–® Go To [0:00:00] b¹b×?² † … s¹—e?« vKŽ j?G{« Æ≥
Æ©o«u® OK —e« vKŽ
¨0:00:00 œ«bF« l{u sŽ Y׳K p–Ë ¨t1bIð Ë√ u¹bOH« j¹dý lOłdð r²¹ ·uÝ
Æl{u*« p– bMŽ UO
Î zUIKð n
u²« r²¹ rŁ
©W¹UNM« sŽ Y׳«® End Search
Æj¹dý vKŽ ZU½dÐ qO−² ⁄—U l{u sŽ Y׳« w Vždð UbMŽ …eO*« Ác¼ Âb²Ý«
Æ©ÕU²H Í√® ANYKEY —e« vKŽ jG{« ¨j¹dA« n
uð ¡UMŁ√ Ʊ
End Search
vKŽ jG{« rŁ ¨©W¹UNM« sŽ Y׳«® End Search b¹bײ † … s¹—e« vKŽ jG{« Æ≤
Æ©o«u® OK —e«
UO
Î zU?IK?ð n
u?²« rŁ ¨‰U?š l{u? sŽ Y×?³«Ë ¨U?F
Î ¹dÝ u?¹bO?H« j?¹dý .bI?ð r²?OÝ
Æl{u*« p– bMŽ
ëdš≈ r²O ¨W¹UNM« sŽ Y׳« ¡UMŁ√ j¹dA« W¹UN½ v≈ u¹bOH« j¹dý qË «–≈
Æj¹dA«
00:00:13
©wzb³*« Y׳« lOłdðØ.bIð® Forward/Reverse Intro Scan
ÆXOÝUJ« j¹dý vKŽ ZU½d³« błu¹ s¹√ «bιb% ·dFð sJð r «–≈ qOGA²«Ë Y׳« Âb²Ý«
Æ©ÕU²H Í√® ANYKEY —e« vKŽ jG{« ¨j¹dA« ·UI¹≈ ¡UMŁ√ Ʊ
Scan and Play
Ë√ ©w?zb³?*« Y?׳?« .b?Ið® Forward Intro Scan b?¹b?ײ? † … s?¹—e« v?K?Ž jG?{« Æ≤
bMŽ Æ©o?«u® OK —e« vKŽ jG{« rŁ ¨©wzb³*« Y׳« fJŽ® Reverse Intro Scan
qOGA²Ð u¹bOH« q−Ë DVD q− ÂuI¹ ·uÝ ¨©”dN® Index WöŽ vKŽ —u¦F«
©”dN® Index WöŽ sŽ Y׳« w dL²¹ ·uÝ p– bFÐË ¨Ê
Ì «uŁ μ …b* j¹dA«
ÆWOU²«
00:01:49
¥∏ ≠ WOÐdF«
DVD-VR350-01375B-IB-ar
48
2007.4.2, 3:50 PM
اﻟﺘﺴﺠﻴﻞ
©‰UH
≈® Finalise
Í√ ¡«dł≈ sJ1 ô YO×Ð DVD-RW/±R WHOþu« Ác¼ oKGð ≠
ÆwU{≈ qO−ð
ÆDVD qO−² WŽuM² UÎdÞ ¡e'« «c¼ `{u¹
√d« ¨qO−²« q³ Æ’«d_« s WHK² Ÿ«u½√ vKŽ qO−²« …bŠu« Ác¼ lOD²ð
ÆpðöOCH² UIÎË ’dI« Ÿu½ œbŠË WOU²« ULOKF²«
©¡UN½ù« ¡UG≈® Unfinalise
’d
vKŽ w?U{≈ qO?−ð ¡«dłS?Ð WHO?þu« Ác¼ `L?ð ≠
DVD q?−? v?K?Ž q?_« w t?K?O?−?ð - Íc?« DVD-RW
u¹bOH« q−Ë
t??K??O??−????ð - Íc??« DVD-RW ’d??
¡U?? N??½≈ ¡U??G??≈ s??J??1 ô ≠
v??K??Ž ©…d??*« w?? b?? Š«Ë ’d??
® DAO W??I??¹d??Þ Â«b???? ²??ÝU??Ð
ÆdðuO³L
V l{u?« w tKO−?ð - DVD-RW ’d
¡UN½≈ ¡UG?≈ sJ1 ô ≠
ÆÈdš√ Wdý lOMBð s q− w ©u¹bO®
ÆDVD±R ’d
‰UH
≈ ¡UG≈ sJ1 ô ≠
qO−²K WKÐUI« ’«d_«
ÆWOU²« ’«d
_« vKŽ qO−²« q−*« «cN sJ1
DVD-VR350 ’d
•
DVD-R
DVD-RW
DVD-RAM
DVD-VR355 ’d
•
DVD+R
DVD+RW
DVD-R
DVD-RW
DVD-RAM
ÆÈdš√ …d UNOKŽ aM« sJ1 DVD-RAMsË DVD-RWs ’«d
√ Ê≈ •
ÆUNOKŽ WÐU²J« …œUŽù WKÐU
dOž DVD-Rs ’«d
√ •
Èdš_« WdA« “UNłË !uUÝ “UNł 5Ð o«u²«
wU{ù« qO−²«
qO−²« “UNł w
!uUÝ s
ÂU9ù«
…«œ√
qO−²«
qO−²K qÐU
™
!uUÝ
qO−²K qÐU
™
Èdš√ Wdý
qO−²K qÐU
dOž
ÂU9≈
!uUÝ
qO−²K qÐU
ÂU9≈ ÂbŽ
rOLBð
qO−²«
اﻟﺘﺴﺠﻴﻼﻟﺘﺴﺠﻴﻞ
VR l{Ë
qO−²K qÐU
dOž
ÂU9≈
qO−²K qÐU
ÂU9≈ ÂbŽ
qO−²K qÐU
dOž
ÂU9≈
qO−²K qÐU
ÂU9≈ ÂbŽ
qO−²K qÐU
dOž
ÂU9≈
Ÿ«u½√
’dI«
DVD-RAM
Èdš√ Wdý
DVD-RW
!uUÝ
V l{Ë
Èdš√ Wdý
qO−²K qÐU
dOž ÂU9≈ ÂbŽ
qO−²K qÐU
dOž
ÂU9≈
qO−²K qÐU
ÂU9≈ ÂbŽ
qO−²K qÐU
dOž
ÂU9≈
!uUÝ
V l{Ë
DVD-R
Èdš√ Wdý
qO−²K qÐU
dOž ÂU9≈ ÂbŽ
q?O−?²?K q?ÐU
d?Ož
ôU(« iFÐ w
™
!uUÝ
q?O−?²?K q?ÐU
d?Ož
ôU(« iFÐ w
™
Èdš√ Wdý
qO−²K qÐU
dOž
ÂU9≈
!uUÝ
≠
©jI
q?O−?²?K q?ÐU
d?Ož ÂU9≈ ÂbŽ
ôU(« iFÐ w
VR l{Ë
qO−²K qÐU
dOž
ÂU9≈
Èdš√ Wdý
q?O−?²?K q?ÐU
d?Ož ÂU9≈ ÂbŽ
ôU(« iFÐ w
¥π ≠ WOÐdF«
DVD-VR350-01375B-IB-ar
49
2007.4.2, 3:50 PM
DVD+RW
DVD-VR355®
DVD+R
DVD-VR355®
©jI
qO−²« UIOMð
l? V?ÝU?M?²¹ ’d?
—U?O?²?šU?Ð r?
«c?Ë ¨’d?I« Ÿu?½ V??Š W?ŠU?²?*« n?zU?þu« n?K?²??ð
Æq¦_« tłu« vKŽ pðöOCHð
ÆWOU²« WUÝd« dNEð ¨Âb² dOž ’d
‰Ušœ≈ bMŽ
Æ’dI« W¾ONð bFР«b²Ýô« : DVD-RAM ’d
Æ’dI« ¡bÐ bFР«b²Ýô« : DVD±RW/±R ’d
Æl{u« dOOGð pMJ1 ¨DVD-RW ’d
«b²Ý« bMŽ
Æ∑μ W×HBUÐ ¢’d
W¾ONð¢ rI« v≈ lł—«
DVD-RAM
Unformatted Disc
Do you want to format this disc?
©u¹b?O® V l{u« w? qO−?²« rŽœ r²?¹Ë W¹—Ëd{ dO?ž ’d
W¾O?Nð ∫ DVD-R ’d
.jI
Yes
No
©VR l{Ë® -RWØDVD-RAM ’«d√
s ¡eł ·cŠË tKLQÐ rÝ« ·cŠ q¦® …œbF² d¹d% nzUþË l{u« «c¼ sLC²¹ •
Æ©a≈ ¨rÝô«
DVD±RW/+R
ÆU¼ƒUA½≈ - ©qOGAð WLzU
® Playlist «b²ÝUÐ …œbF² d¹d% «—UOš •
-RØ©V l{Ë® DVD-RW
Uninitialised Disc
Do you want to initialise this disc?
l{u« w DVD-RW/-R ’«d
√ vKŽ qO−²« ¡UN½≈ bMŽ UOÎzUIKð ‰uBH« ¡UA½≈ r²OÝ •
Æ©qOGAð® On vKŽ ©‰uBH« TAM® Chapter Creator 5OFð l ©u¹bO® V
Yes
No
Æ©Ê«uMF« rÝ« dOOGð Ø ¡ULÝ_« `® jO³« d¹dײ« •
DVD+RW
«b²?ÝUÐ UNK¹bFðË DVD+RW ’«d
√ vKŽ pÐ WU)« ‰uBH?« ¡UA½≈ UC
Î ¹√ pMJ1 •
©∂∏ v≈ ∂∂ s U×HB« dE½«® Æ©qBH« q¹bFð® Chapter Edit WLzUI«
©qN« qO−²« l{Ë® EZ REC MODE «b²ÝUÐ UOÎzUIKð ’dI« W¾ONð sJ1
Æ©μ∏ W×HB« dE½«®
qO−²« l{Ë
qO−²« X
Ë
U½UO³« Wł—œ
hzUB)«
اﻟﺘﺴﺠﻴﻞ
—dJ² qJAÐ ©qO−²« WŽdÝ® REC SPEED —e« vKŽ jGCUÐ WFЗ_« qO−²« ŸU{Ë√ bŠ√ œbŠ
Æ5ÐuKD*« …—uB« …œułË qO−²« XË v≈ ‰uuK ©·UI¹≈® Stop l{u« w …bŠu« œułË ¡UMŁ√
ÆqO−²« XË ÷UH½« l ÂUŽ tłuÐ —uB« …œuł sײð
’dI« vKŽ wI³²*« XuK UIÎË UÎOzUIKð qO−²K l{Ë V½√ j³{ r²¹ ¨©wzUIKð® AUTO l{u« w
ÆXu*UÐ qO−²« ‰uÞË
l{u« «c¼ «b²Ý« sJ1Ë EP ¨LP ¨SP ¨XP ŸU{Ë_« s jI bŠ«Ë l{Ë —UO²š« WHOþu« Ác¼ duð
ÆXu*UÐ qO−²K
l{u«
XP
WŽUÝ ± w«uŠ
Mbps ∏ w«uŠ
WOŽu½ Ê√ bMŽ Ád²š«
ÆWLN …—uB«
©WOŽuM« wUŽ l{Ë®
5²ŽUÝ w«uŠ
Mbps ¥ w«uŠ
qO−²K d²š«
W¹œUF« WOŽuMUÐ
©WOŽuM« wł–u/ l{Ë®
SP
UŽUÝ ¥ w«uŠ
Mbps ≤ w«uŠ
q¹uDð …—Ëd{ bMŽ Ád²š«
LP
qO−²« X
Ë
©wK¹uD²« qO−²« l{Ë®
ØUŽUÝ ∂ w«uŠ
Mbps ±[≤ w«uŠ
ØUŽUÝ ∏ w«uŠ
Mbps ∞[∏ w«uŠ
q¹uDð …—Ëd{ bMŽ Ád²š«
d¦_« qO−²« X
Ë
WIO
œ ∏ v« ± w«uŠ
Mbps ∏ ≠ ∞[∏ w«uŠ
X
R*UÐ qO−²K
Æμμ W×H lł«— jI
EP
©Íb¹bL²« l{u«®
AUTO
WI³D« W¹œUŠ√ DVD±R ’«d
√ WFÝ nFCÐ WI³D« WłËœe DVD±R ’«d
√ eOL²ð •
©Æ≥¥ W×HB« dE½«® ÆU³Î¹dIð
μ∞ ≠ WOÐdF«
DVD-VR350-01375B-IB-ar
50
2007.4.2, 3:50 PM
qO−²K qÐUI« dOž u¹bOH
Æ«c¼ u¹bOH« q−Ë DVD q− vKŽ aM« b{ WOL;« —uB« qO−ð sJ1 ô
qO−²« nu²¹ ¨qO−²« ¡UMŁ√ aM« b{ W¹ULŠ …—Uý≈ u¹bOH« q−Ë DVD q− rK²¹ UbMŽ
Æ W ý UA « v K Ž W O U² « W U Ý d « d N E ð Ë
You cannot record copy protected movie.
aM« w rJײ« «—Uý≈ ‰uŠ
Ÿ«u½√ bŠ√ a?M« w r?Jײ« «—U?ý≈ vKŽ Íu²?×¹ Íc« w½u?¹eHOK?²« Y³« Êu?J¹ b
Copy-Ë ©…bŠ«Ë …d a½® Copy- OnceË ©dŠ a½® Copy-Free WOU²« WŁö¦« «—Uýù«
…d t½ r²¹ Íc« ŸuM« s ZU½dÐ qO−ð w Vždð XM «–≈ Æ©aM« ÂbŽ® Never
©u¹bOH« qO−ð® VR l{Ë w CPRM WOUÐ l²L²¹ DVD-RW ’d
Âb²ÝU ¨…bŠ«Ë
ÆDVD-RAM ’«d
√Ë
WKOÝu«
…d aM«
w½U:« aM«
…—Uýù« Ÿu½
WŽuM2 aM«
-
O*
O
©≤[∞ W½® DVD-RAM
-
-
O
DVD+RW
-
-
O
DVD+R
-
-
O
©±[± W½® DVD-RW
-
O*
O
©±[± W½® DVD-RW
CPRM l
u¹bOH« l{Ë
-
-
O
DVD-R
ÆÈdš√ qO−ð UOKLŽ ¡«dł≈ sJ1 ô ¨©…bŠ«Ë …d a½® Copy Once qO−ð œd−0
ÆCPRM l WI«u² ÊuJð * WöF« ÁcNÐ …eOL*« ¡«eł_«
ÆCPRM l o«u² *
©CPRM® qO−²K WKÐUI« jzUÝuK Èu²;« W¹ULŠ
Wu?Žb? WO?ü« Ác?¼Ë ÆUN?O?KŽ q?−?*« j?zU?ÝuU?Ð q?O−?²?« j?Ðdð W?O?¬ CPRM q¦?9
ÆDVD öGA s b¹bF« WDÝ«uÐ fO sJË ¨DVD ö− iFÐ WDÝ«uÐ
اﻟﺘﺴﺠﻴﻼﻟﺘﺴﺠﻴﻞ
w t?×O{uð r²¹ b¹d XÐ ∂¥ jzUÝË ·dF qO−²?K qÐU
⁄—U DVD qJ ÊuJ¹
C2 XÐ μ∂ …d?H?AÐ Ád?O?HA?ð s?J1 ¨’d?I?« vK?Ž w?L×? Èu?²×? q?O−??ð bM?Ž ÆBCA
ÆjzUÝu« ·dF s UNö²Ý« r²¹ ©Cryptomeria®
pH? ÕU²H? ¡UA½≈ w? t«b?²Ý« r²?¹Ë BCA s ·dF?*« …¡«d
r²?ð ¨qOG?A²« ¡U?MŁ√
Æ’dI« Èu²× dOHAð
d?O?ž Ë√ U?³?
Î zU?ž Êu?J?O?Ý ·d?F*« ÊS? ¨Èd?š√ j?zU?Ýu? ’d?I?« U?¹u²?×? a??½ - «–≈
ÆU½UO³« dOHAð p s sJL²ð sË `O×
μ± ≠ WOÐdF«
DVD-VR350-01375B-IB-ar
51
2007.4.2, 3:50 PM
qOGA²« ¡bÐ q³
RAM
VR
XP
PR 7
Available Time 00:28
jI DVD-VR355
qOGA²« ¡bÐ q³
Æwz«uN« qÐU qOuð s bQð Ʊ
ל w q?O−²?K ö
Î ÐU
U?
Î d
l{ r?Ł ¨©oKžØ`²?® OPEN/CLOSE —e« vKŽ j?G{« Æ≥
Æ’«d
_«
Æ’dI« vKŽ wI³²*« X
u« s bQð Æ≥
w?? ¡b??³??« q??³??
U??I?
Î ?³???? U??¼ƒb??Ð Ë√ DVD-RAM/DVD±RW/+R ’«d??
√ W?? ¾??O??N??ð V??−??¹
ÆqO−²« q³
…QON*« dOž ’«d
_« W¾ONð s bQð ÆqO−²«
v?²?Š d?E?²½« Æ’«d?
_« ל ‚ö?žù ©‚ö?ž≈ Ø `?²?® OPEN/CLOSE —e?« vK?Ž j?G?{« Æ¥
ÆWOU_« ÷dF« WŠu WýUý s ©qOL%® LOAD WLK wH²ð
Áb¼UAð wł—Uš “UNł s qO−²«
Vždð w²« W?D;« b¹bײ ÂU
—_« —«—“√ Ë√ PROG/TRK ( / ) s¹—e« vKŽ jG{« Ʊ
ÆUNKO−ð w
©…œu??ł® W??Žd?Ý —U??O??²??šô ©q?O??−????²?« W??Žd??Ý® REC SPEED —e??« v?K??Ž j??G??C?« —d?? Æ≤
ÆqO−²«
XP ← EP ← LP ← SP ←
ÆREC —e« vKŽ jG{« Æ≥
Áb¼UAð wł—Uš “UNł s qO−²«
‰öš s ‰U?šœù« l{Ë v≈ q?I²½« rŁ u?¹bOH?«Ë DVD q−* w?zUÐdN?J« —UO²?« q Ʊ
WŠuK« ÷d?F²Ý ÆbFÐÔ s?Ž rJײ?« …bŠË w œułu?*« INPUT SEL. —e« vKŽ j?GC«
ÆwU²« qK²« VŠ «dOOG²« WOU_«
DV ← AV2 ← AV1 ← PR ←
ÆqO−²« ©…œuł® WŽdÝ —UO²šô REC SPEED —e« vKŽ jGC« —d Æ≤
XP ← EP ← LP ← SP ←
اﻟﺘﺴﺠﻴﻞ
wł—U)« “UN'« qOGAð j³{« ¨·UI¹ù« l{Ë w u¹bOH«Ë DVD q− ÊuJ¹ UbMŽ Æ≥
Æ÷dF« l{Ë vKŽ
w?²« …—u?B?« dN?Eð U?b?MŽ u?¹bO?H?«Ë DVD q−? v?KŽ s? REC —e?« vK?Ž jG?{« Æ¥
ÆqO−²« WOKLŽ UNÐ √b³ð Ê√ b¹dð
U²ÎR qO−²« ·UI¹ù
bO
qO−ð WOKLŽ ·UI¹ù ©X
R ·UI¹≈ØqOGAð® PLAY/PAUSE ©
® —e« vKŽ jG{«
ÆU²Î
R qOGA²«
·UM¾²Ýô Èdš√ …Îd? ©X
R ·UI¹≈ØqOGAð® PLAY/PAUSE © ® —e?« vKŽ jG{« •
ÆqO−²«
«d² ¡UMŁ√ PROG/TRK ( / ) s¹—e« vKŽ jGCUÐ «uMI« 5Ð q¹b³²« p½UJSÐ •
ÆU²Î
R qO−²« ·UI¹≈
qO−²« ·UI¹ù
ÆqOGA²« bO
qO−ð WOKLŽ ·UI¹ù ©·UI¹≈® STOP —e« vKŽ jG{«
Updating the¢ W?UÝd« d?NE?ð ¨DVD-RAM/DVD±RW/DVD±R ’«d
√ «b?²Ý« b?MŽ •
vłd¹Ô Æ’dI« U?uKF Y?¹b% —
Ì Uł®¢disc information. Please wait for a moment.
Æ©ÆW¼d³ —UE²½ô«
μ≤ ≠ WOÐdF«
DVD-VR350-01375B-IB-ar
52
2007.4.2, 3:50 PM
ÆqO−²« ¡UMŁ√ qO−²« ZU½dÐË l{Ë dOOGð pMJ1 ô
W?O?I?³²? W?O?U?š WŠU?? „U?M?¼ sJ?ð r? «–≈ U?OÎzU?I?K?ð q?O−??²?« n?
u²?¹ ·u?Ý
ÆqO−²K
qB¹ UË DVD-RAM/-RW/-R ’d
vKŽ U½Î«uMŽ ππ v≈ qB¹ U qO−ð sJ1
ÆDVD+RW/+R ’d
vKŽ U½Î«uMŽ ¥∏ v≈
kHŠ r²¹ sK ¨dš¬ V³Ý Í_ Ë√ tŽUDI½« V³Ð wÐdNJ« —UO²« qB - «–≈
Æ’dI« vKŽ tKO−ð Í—U'« rÝô«
ÆaM« b{ WOL× …—u b¹b% - «–≈ UOÎzUIKð qO−²« n
u²¹ ·uÝ
Æ…bŠu« Ác¼ l DVD-R nOQð ’«d
√ Âb²ð ô
b?M?Ž W?O?ł—U?)« …e?N?ł_U??Ð W?U?)« Âb??²??*« W?œ√ v?≈ Ÿu?łd?« v?łd?¹Ô ¨p?c?
Æscart qÐU Ë√ u¹bOH«ØuB« qÐU «b²ÝUÐ wł—Uš “UNł s qO−²«
DV qšb f³I s qO−²«
DV
qO−²K «œUý—ù« Ác¼ l³ð« ÆIEEE 1394 (DV) cHM*« «b²ÝUÐ u¹bOH« «dOU w rJײ« lOD²ð
ÆDV Ãdš f³I vKŽ WKL²A*« u¹bOH« «dOU …—u WÞdý_« Ë√ ’«d_« bŠ√ vKŽ
s wU_« ¡e'« vKŽ DV qšœ f³I0 u¹bOH« «dOUJÐ œułu*« DV Ãdš f³I q Ʊ
ÆDV qÐU «b²ÝUÐ u¹bOH«Ë DVD q−
‰öš s DV l{u« v≈ qI²½« rŁ u¹bOH«Ë DVD q− v≈ wzUÐdNJ« —UO²« q Æ≤
ÆbFÐÔ sŽ rJײ« …bŠË w œułu*« INPUT SEL. —e« vKŽ jGC«
The DV device is connected.
MOVE
ÆqO−²« ©…œuł® WŽdÝ —UO²šô REC SPEED —e« vKŽ jGC« —d Æ≥
XP ← EP ← LP ← SP ←
ØqOGAð WLzU
WýUA« vKŽ√ w dNEð ·u ¨DV vKŽ ‰Ušœù« l{Ë j³CÐ XL
«–≈ Æ¥
Æu¹bOH« «dOU w rJײ« `O²ð qO−ð
u?¹bO?H« «dO?U qO?GA²? WýU?A« s Íu?KF« ¡e?'« s ©qO?GA?ð® Play ed« d?²š« Æμ
ÆUNM aM« b¹dð w²« W¹«b³« WDI½ sŽ Y׳«Ë
اﻟﺘﺴﺠﻴﻼﻟﺘﺴﺠﻴﻞ
w? © ® ©qO?−?ð® REC ed« b?¹b×?² s?¹—e« v?KŽ jG?{« ¨qO?−?²« ¡b?³Ë Æ∂
Æ©o«u® OK vKŽ jG{« rŁ ¨WýUA« s ÍuKF« ¡e'«
¡b?³? b?F?ÐÔ s?Ž r?J?×?²?« “U?N?ł w? œu?łu?*« ©q?O−??ð® REC —e?« v?K?Ž j?G?C?« p?M?J?1
ÆqO−²«
W?O?K?L?Ž s?? ¡U?N?²?½ô« b?M?Ž u??¹b?O?H?«Ë DVD q?−??? v?K?Ž s? STOP —e?« v?K??Ž j?G?{« Æ∑
ÆqO−²«
l? v?²?Š u??¹b?O?H?«Ë DVD q?−??? l? u?¹b??O?H?« «d?O?U?? i?F?Ð q?L??F?ð ô b?
ÆDV Ãdš f³I vKŽ UNUL²ý«
s qO?−²?« bMŽ u¹b?OH« «d?OUJ?Ð od*« Âb?²*« q?Oœ v≈ pc? lł—«
ÆDV f³I ‰öš
—«—“√ s? Í√ v?KŽ j?G{« ¨W?ýU?A« v?KŽ q?OG?A?²U?Ð WI?K?F²?*« “ud?« ÷dF?
ÆbFÐ sŽ rJײ« “UNł w …œułu*« U¼U&ô«
©OTR® …bŠ«Ë tLKÐ qO−²«
jI DVD-VR355
UIÓγ UND³{ - w²« «œU¹eK UFγð qO−²« XË WU{≈ (OTR) …bŠ«Ë WLKÐ qO−²« WOUš `O²ð
Æ©qO−ð® REC—e« vKŽ —dJ²*« jGCUÐ UŽUÝ π v²Š WIObK
b¹d?ð w²?« WD?;« —UO?²šô ÂU?
—_« —«—“√ Ë√ PROG/TRK ( / ) s¹—e?« vK?Ž jG?{« Ʊ
ÆUNM qO−²«
INPUT—e« vKŽ jG{U ¨“UN'UÐ qB² wł—Uš ÊuJ s qO−²« b¹dð XM «–≈
Æ©DV input Ë√ AV 2 Ë√ AV1® VÝUM*« wł—U)« qšb« l{Ë —UO²šô SEL.
μ≥ ≠ WOÐdF«
DVD-VR350-01375B-IB-ar
53
2007.4.2, 3:50 PM
OK
RETURN
ÆREC —e« vKŽ jG{« Æ≤
jOAM² Èdš√ …d REC —e« vKŽ jG{« ¨©qO−²«® Record l{Ë w “UN'« ULMOÐË Æ≥
Æ…bŠ«Ë WLKÐ qO−²« WHOþË
DVD q?−?? ÂuI?O?ÝË ÷d?F« W?ýU?ý vK?Ž ≥∞ ∫ ∞ q?O?−?²?« …b ‰u?Þ d?N?EO?Ý •
ÆWIOœ ≥∞ …b* qO−²UÐ u¹bOH«Ë
«œU¹eK UF
Î ³?ð qO−²« X?Ë WU{ù ©qO−ð) REC —e?« vKŽ jGC« w? dL²Ý« Æ¥
ÆUŽUÝ π v²Š WIObK UIÓγ UND³{ - w²«
Æ…œb;« …b*« ¡UN²½« bMŽ UOÎzUIKð qO−²« sŽ u¹bOH«Ë DVD q− nu²OÝ •
qO−²« ·UI¹ù
ÆSTOP ( ) —e« vKŽ jG{«
vK?Ž jG?{«® ¢Press STOP button once more to cancel Timer Record¢ W?UÝd?« dN?E²?Ý
Æ©Xu*« qO−²« ¡UGù Èdš√ …— STOP —e«
ÆSTOP ( ) —e« vKŽ jG{«
ÆUpdating the disc information.¢ WUÝd« dNE²Ý
Æ©öOK —UE²½ô« vłd¹ Æ’dI« UuKF Y¹b% —Uł® Please wait for a moment¢
q− nu²OÝ rŁ ¨∞∫∞∞ v≈ π∫∞∞ s WIOœ ‰bF0 Xu« œ«bŽ iHMOÝ
ÆqO−²« sŽ u¹bOH«Ë DVD
Xu0 qO−²«
DVD-Recorder
jI DVD-VR355
Programme
DVD-RAM(VR)
Æwz«uN« qÐU qOuð s bQð Ʊ
Title List
Scheduled Record List
Playlist
Æ’dI« s wI³²*« Xu« s bQð Æ≤
Disc Manager
ÆXu«Ë a¹—U²« W× s bQð Æ≥
dE½«® ÆXu*U?Ð qO−?²« WOK?LŽ w ŸËdA?« q³ ©Setup-Clock Set® WŽU?« j³{ v?KŽ ’dŠ«
© ≤ ≤ W × H B «
Programme
Setup
Copy
MOVE
OK
RETURN
EXIT
Æ’«d_« ל w tOKŽ qO−²« sJ1 U
Î d l{ rŁ ¨OPEN/CLOSE —e« vKŽ jG{« Ʊ
Æ’«d_« ל ‚öžù OPEN/CLOSE —e« vKŽ jG{« Æ≤
ÆWOU_« ÷dF« WŠu s ©qOL%® LOAD WLK wH²ð v²Š dE²½«
Æ©o«u® OK vKŽ jG{« rŁ ¨©ZU½d³«® Programme b¹bײ † … s¹—e« vKŽ jG{« Æ¥
qO−²«® TIMER REC —e« vKŽ jGCUÐ …dýU³ …uD)« Ác¼ v≈ ‰UI²½ô« pMJ1
Æ©Xu*UÐ
Æ©o«u® OK —e« vKŽ jG{« Æμ
Æ©Xu0 qO−²«® Timer Recording WýUA« dNE²Ý •
Æ
DVD-RAM(VR)
Current Time 12:00
No. To Source Day Start End Speed Edit
No. 01
To
Source
Day
Start
End
Speed
DVD
PR 01
01 SUN
12:00
14:00
SP
Available Time
00:48 SP
MOVE
OK
s¹—e« «b²ÝUÐ dUMF« rO qšœ√ Æ∂
¨wU²«ØoÐU« dBMF« v≈ ‰UI²½ö ∫
.WLO 5OF² ∫
.u¹bOH« Ë√ DVD wLd« u¹bOH« qO−² Âb²*« jOÝu« —UO²šô ∫©v≈® To •
qO−²« b¹dð w²« Y³« …UM Ë√ ¨© AV 2Ë√ AV 1 ® u¹bOH« qšœ —bB ∫ Source •
.Xu*UÐ UNM
ÆqO−²« Âu¹ 5OF² ∫©Âu¹® Day •
¨...W-SU ¨W-SA ¨MO-FR ¨MO-SA ¨.Daily
31WED... ¨01MON
.Xu*UÐ qO−²« ¡UN½≈Ë W¹«bÐ XË ∫©W¹UNM«ØW¹«b³« XË® Start/End Time •
μ¥ ≠ WOÐdF«
DVD-VR350-01375B-IB-ar
54
2007.4.2, 5:47 PM
RETURN
EXIT
اﻟﺘﺴﺠﻴﻞ
ÆMENU —e« vKŽ jG{« ¨qLF« sŽ nu²« l{Ë w …bŠu« ULMOÐË Æ≥
Scheduled Record List
DVD-Recorder
©DVD® qO−²« WŽdÝ
j³?{ r²¹ ¨ AUTO l{u?« w ÆUO
Î zU?IKð u¹b?OH« …œuł j?³{ b¹dð v?² œbŠ ∫ AUTO
qO−?²?« ‰uÞË ’dI?« vK?Ž wI³?²*« X?
uK U?IÎË U?OÎzU?IKð q?O−?²K? l{Ë V?½√
EP¨LP ¨SP ¨XP ŸU??{Ë_« s? j?I? b?Š«Ë l?{Ë —U?O??²?š« W?H?O?þu?« Ác?¼ d?u??ð ÆX?
u?*U?Ð
.X
u*UÐ qO−²K l{u« «c¼ «b²Ý« sJ1Ë
Wł—œ vKŽ …—uB«Ë uB« …œuł ÊuJð UbMŽ l{u« «c¼ d²š« ∫ ©WOUŽ …œuł® XP
©U³Î¹dIð …bŠ«Ë WŽUÝ® ÆWOL¼_« s …dO³
©U³Î¹dIð ÊU²ŽUÝ® ÆWOÝUO
…œu−Ð qO−²K l{u« «c¼ d²š« ∫ ©WOÝUO
…œuł® SP
WO?M“ …d²H? qO−?²« v≈ ÃU?²% Ub?MŽ l{u« «c?¼ d²š« ∫ ©W?CHM? …œuł® LP
)U³Î¹dIð UŽUÝ ¥® ÆWK¹uÞ
…d²?H q?O−?²« v?≈ ÃU²% U?bMŽ l?{u« «c?¼ d²š« ∫ ©b?²L?*« qO−?²?« l{Ë® EP
U?³?
Î ¹dI?ð UŽU?Ý ∏ Ë√ W?O½U?ŁØXÐ U?−O? ±[≤ ‰b?F0 U?³Î¹d?I?ð UŽU?Ý ∂® ƉuÞ√ W?OM?“
©WO½UŁØXÐ U−O ∞[∏ ‰bF0
WI³D« W¹œUŠ√ DVD±R ’«d
√ WFÝ nFCÐ WI³D« WłËœe DVD±R ’«d
√ eOL²ð ≠
©Æ≥¥ W×HB« dE½«® ÆU³
Î ¹dIð
©u¹bOH«® qO−²« WŽdÝ
X
u« vKŽ l{u« «c¼ bL²F?¹ ÆUO
Î zUIKð u¹bOH« …œuł j³{ b¹dð v² œbŠ ∫ AUTO
.u¹bOH« j¹dý s wI³²*«
.…—uBK …œuł vKŽ√ vKŽ ‰uB×K wÝUO
qOGAð ∫ SP
l{u« w X
u« ·UF{√ ≥® ÕU² X
Ë ‰uÞ_ qO−²K ¨WK¹uÞ …d²H qOGAð ∫ LP
Æ©SP
’d?
Ë√ ©u¹b?OH« l?{Ë® DVD-RW ’d
v?KŽ EP l{u?« s q?O−?²« b?MŽ
“UN'« Ê_ q?UJU?Ð WO½UL?¦« Ë√ W²?« UŽU?« qO−?ð r²¹ ô b?I ¨DVD-R
¨‰U¦*« qO³Ý vKŽ Æ©dOG² XÐ ‰bF0 dOHA²«® VBR ENCODING ÂUE½ Âb²¹
Âb?²?¹ ·u?? ¨Wd?(« s d?O?¦J?« v?KŽ q?L?²A?¹ Z?U½d?Ð q−??ð XM? «–≈
Æ’dI« vKŽ WŠU*« s b¹e*« pKN²OÝ wU²UÐË X³K vKŽ√ ô
Î bF “UN'«
Æ©o«u® OK —e« vKŽ jG{« Æ∑
Xu*« «œ«bŽ≈ qš«bð WUŠ w
WO?KL?Ž √b?³ð ¨‰Ë_« Z?U?½d³?« qO?−?ð ‰U?L?²« b?FÐ ÆW?¹u?Ë_« ‰Ë_« ZU?½d?³K? ÊuJ?¹
Æw½U¦« ZU½d³« qO−ð
wU(« œ«bŽù« kHŠ ÊËbÐ ÃËd)«
اﻟﺘﺴﺠﻴﻼﻟﺘﺴﺠﻴﻞ
ÆRETURN —e« Ë√ EXIT —e« vKŽ jG{«
WIÐU« WLzUI« v≈ Ÿułd«
ÆqO−²« X
u j³{ b¹dð ô XM «–≈ RETURN —e« vKŽ jG{«
ÆqO−²« X
u ¡UN½ù “UN'« qOGAð n
Ë√ Æ∏
.“UN'« w j¹dý Ë√ ’d
œułË ÂbŽ WUŠ w —e« «c¼ iuOÝ
•
X
u s¹eð v≈ ed« «c¼ dOA¹ ÆWOU_« WŠuK« w ed« «c¼ dNEOÝ
•
.ZU½d³« qO−ð
WU(«Ë ’dI« WU( UF
Î ³ð œb;« se« sŽ qO−²« X
u s“ nK²¹ b
bMŽ Ë√ ¨qO−²« U
Ë√ ÷—UF𠨉U¦*« qO³Ý vKŽ® qO−²« X
u* WOKJ«
©ÆwU²« qO−²« W¹«bÐ s ozU
œ ≥ q³
WIÐU« qO−²« WOKLŽ ¡UN²½«
μμ ≠ WOÐdF«
DVD-VR350-01375B-IB-ar
55
2007.4.2, 3:50 PM
‰Ëb:« qO−²« WLzU q¹bFð
Scheduled Record List
DVD-Recorder
DVD-RAM(VR)
Current Time 12:00
No. To Source Day Start End Speed Edit
jI DVD-VR355
No. 01
To
Source
Day
Start
End
Speed
DVD
PR 01
01 SUN
12:00
14:00
SP
Æq−*« XOuð WLzU q¹bF² «œUý—ù« Ác¼ l³ð«
ÆMENU —e« vKŽ jG{« ¨qLF« sŽ nu²« l{Ë w …bŠu« ULMOÐË Æ±
Available Time
00:48 SP
MOVE
OK
Æ©o«u® OK vKŽ jG{« rŁ ¨©ZU½d³«® Programme b¹bײ † … s¹—e« vKŽ jG{« Æ≤
RETURN
EXIT
Æ©o«u® OK —e« vKŽ jG{« Æ≥
rŁ UNK¹bFð b¹dð w²« ‰Ëb:« qO−²« WLzU r— b¹bײ † … s¹—e« vKŽ jG{« Æ¥
Æ —e« Ë√ ©o«u® OK —e« vKŽ jG{«
ÆWýUA« vKŽ ©·cŠ® DeleteË ©q¹bFð® Edit Ê«dBMF« dNEOÝ •
vKŽ Ë√ ©o«u® OK vKŽ jG{« rŁ ¨©q¹bFð® Edit —UO²šô † … s¹—e« vKŽ jG{« Æμ
Æ —e«
b¹dð w²« dUMF« ‰bŽ Æ©Xu0 qO−²?«® Timer Recording WýUA« dNE²Ý •
ö?šb? ‰u?Š Uu?K?F?*« s b?¹e?* ©X?u0 q?O?−?²?«® r??I« l?ł«— ÆU?¼d?OO?G?ð
©μμ ≠ μ¥ W×HB« dE½«® ÆXu0 qO−²«
ÆtK¹bFð bFÐ œ«bŽù« —UO²š« bOQ² ©o«u® OK —e« vKŽ jG{« Æ∂
ÆWOKLF« ¡UN²½« bFÐ ©ÃËdš® EXIT —e« vKŽ jG{« Æ∑
ÆWLzUI« WýUý wH²²Ý
‰Ëb:« qO−²« WLzU ·cŠ
DVD-Recorder
Scheduled Record List
DVD-RAM(VR)
Current Time 12:00
No. To Source Day Start End Speed Edit
01
02
03
jI DVD-VR355
DVD
DVD
Yes
ÆMENU —e« vKŽ jG{« ¨qLF« sŽ nu²« l{Ë w …bŠu« ULMOÐË Æ±
MOVE
rŁ UNcŠ b¹dð w²« WËb:« qO−²« WLzU r— b¹bײ † … s¹—e« vKŽ jG{« Æ¥
Æ©o«u® OK —e« vKŽ jG{«
ÆWýUA« vKŽ ©·cŠ® DeleteË ©q¹bFð® Edit Ê«dBMF« dNEOÝ •
vKŽ Ë√ ©o«u® OK vKŽ jG{« rŁ ©·cŠ® Delete b¹bײ † … s¹—e« vKŽ jG{« Æμ
Æ —e«
¢Do you want to delete No. 01?¢ q¦ WUÝdÐ ·c(« w W³žd« bOQ²Ð VUD²ÔÝ •
Æ©μμ ≠ μ¥ r— ·cŠ b¹dð q¼®
Æ©o«u® OK —e« vKŽ jG{« rŁ ©rF½® Yes —UO²šô s¹—e« vKŽ jG{« Æ∂
ÆWLzUI« s œb;« Ê«uMF« ·cŠ r²OÝ •
ÆWOKLF« s ¡UN²½ô« bFÐ ©ÃËdš® EXIT —e« vKŽ jG{« Æ∑
ÆWLzUI« WýUý wH²²Ý
ÆUOÎUŠ UNKO−ð r²¹ w²« Z«d³« ·cŠ pMJ1 ô
μ∂ ≠ WOÐdF«
56
14:00
16:00
SP
SP
Off
Off
OK
No
RETURN
EXIT
اﻟﺘﺴﺠﻴﻞ
Æ©o«u® OK —e« vKŽ jG{« Æ≥
DVD-VR350-01375B-IB-ar
Daily No.01
12:00
Daily 15:00
:
:ëNo.01í?
Do you want to delete
Æq−*« XOuð WLzU s ¡ULÝ_« bŠ√ ·c( «œUý—ù« Ác¼ l³ð«
©o«u® OK vKŽ jG{« rŁ ¨©ZU½d³«® Programme b¹bײ † … s¹—e« vKŽ jG{« Æ≤
Æ —e« vKŽ Ë√
PR 01
PR 02
2007.4.2, 5:47 PM
©qN« qO−²« l{Ë® EZ REC MODE
jI DVD-VR355
ÆUOÎzUIKð ’«d_« bŠ√ ‰UH≈ Ë√ ¡bÐ WHOþu« Ác¼ p `O²ð
v?KŽ j?G{« ¨©’d?
błu?¹ ôØ·UI?¹ù«® Stop/No Disc l?{Ë w …b?Šu« Êu?Jð U?bM?Ž Ʊ
ÆbFÐÔ sŽ rJײ« …bŠuÐ ©qN« qO−²« l{Ë® EZ REC MODE —e«
Æ©o«u® OK —e« vKŽ jG{« rŁ ¨©qOGAð® On b¹bײ s¹—e« vKŽ jG{« Æ≤
Press ìOnî to confirm EZ REC mode.
Otherwise press ìOffî
Æ©qN« qO−²« l{Ë® EZ REC MODE œ«bŽ≈ r²¹
Yes
No
ÆU
Î d
qšœ√ Æ≥
ÆUOÎzUIKð ÁƒbÐ r²O ¨«bιbł ’dI« ÊU «–≈
Æ©qO−ð® REC —e« vKŽ jG{« Æ¥
·ËdE« qþ w UOÎzUIKð ’dI« ‰UH
SÐ ©qN« qO−²« l{Ë® EZ REC MODE ÂuI¹ Æμ
ÆWOU²«
Disc Initialise (DVD-V)
Now, initialising..
qO−²« bFÐ DVD u¹bOË q−0 ©oKžØ`²® OPEN/CLOSE —e« vKŽ jGC« bMŽ ≠
Æ’dI« ‰UH
≈ ÂU9≈ bFР×b« `² r²OÝ ¨’dI« WŠU s q
_« vKŽ •≥∞ W³MÐ
50%
l?{Ë w DVD u?¹b?OË q?−? q?EO?ÝË U?OÎzU?I?Kð t?U?H
≈ r?²?OÝ ¨’d?I« ¡ö?²?« bM?Ž ≠
Æ·UI¹ù«
q
_« v?KŽ ’d?I« W?ŠU s? •≥∞ vK?Ž X
u?*« qO−?ð «b?²?ÝUÐ qO?−?²« b?MŽ ≠
·UI¹≈ r²¹ rŁ ¨UOÎzUIKð ’dI« ‰UH
≈ r²O ¨X
u*« «b²ÝUÐ qO−²« WLzU
ÊËbÐ
Æq−*« qOGAð
Disc Finalise
qO?−?ð® V l{Ë w? t²?¾O?Nð r?²²? ¨b?¹bł DVD-RW ’d?
‰Ušœ≈ W?UŠ w?
ÆWOzUIK²« ¡b³« bFÐ ©u¹bOH«
Processing..
50%
’d?I« ©μ∞ W×?HB?« dE?½«® ¡bÐ p?OKŽ V?−¹ ¨·U?I¹ù« l?{Ë b¹b?% WU?Š w
©∑μ W×HB« dE½«® Æ©’dI« d¹b® Disc Manager WLzUI« w U¹ÎËb¹ tUH
≈Ë
اﻟﺘﺴﺠﻴﻼﻟﺘﺴﺠﻴﻞ
©μ∞ W×HB« dE½«® ÆqO−²« l{u UIÎË qO−²« …b nK²ð
μ∑ ≠ WOÐdF«
DVD-VR350-01375B-IB-ar
57
2007.4.2, 3:50 PM
u¹bOHK WOÝUÝ_« qO−²« WOKLŽ
¡b³« q³
ÆÊu¹eHOK²« «uM
Ë wz«uN« öOuð h׫ Ʊ
Æj¹dA« vKŽ wI³²*« X
u« s bQð Æ≤
UL Æ (REC) —e« vKŽ jGC« rŁ ⁄—U j¹dý ‰Ušœ≈ ‰öš s w½u¹eHOKð ZU½dÐ qO−ð lOD²ð
—e« vKŽ …d s d¦√ jGCUÐ UŽUÝ π v²Š UIÓγ UND³{ - w²« «œU¹eK UFγð XË WU{≈ pMJ1
Æ (REC)
«c?¼ ÊU «–≈Ë ÆqO?−²« ÊU?√ j¹dý v?KŽ u¹b?OH« j?¹dý ‰UL?²ý« s b?Qð
Æoô j¹dý s …dOG WFDIÐ WײH« WODGð sJ1 ¨œułu dOž j¹dA«
qO?−?²« w? p²?³ž— s? «bÎQ?² X?M «–≈ ô≈ W?ײ?H« Ác?¼ wD?Gð ô ∫d?¹c%
Æj¹dA« vKŽ
Æu¹bOH« Wײ w UΞ—U u¹bO j¹dý qšœ√ Ʊ
ÆqUJUÐ ZU½d³« qO−² wHJ¹ j¹dA« Ê√ s bQð •
©WK−*« œ«u*«ØZ«d³«® PROG/TRK ( / ) —«—“√ Ë√ ÂU
—_« —«—“√ vKŽ jG{«
ÆWÐuKD*« …UMI« b¹bײ
“UN?ł s q?−ð X?M «–≈ DV Ë√ AV2 Ë√ AV1 —UO?²šô INPUT SEL. —e?« vKŽ j?G{« Æ≤
ÆVOðd²« vKŽ wHK)« Ë√ wU_« ¡e'UÐ qB² wł—Uš
WŽdÝ® Record Speed j³C bFÐÔ sŽ rJײ« …bŠË s REC SPEED —e« vKŽ jG{« Æ≥
∫WOU²« «—UO)« bŠ√ vKŽ ©qO−²«
.…—uBK …œuł vKŽ√ vKŽ ‰uB×K wÝUO
qOGAð ∫ SP •
w? X
u« ·U?F{√ ≥® ÕU²? X
Ë ‰uÞ_ q?O−?²K? ¨WK¹u?Þ …d²H? qOG?Að ∫ LP •
Æ©SP l{u«
WýU?ý v?K?ŽË WO?U?_« ÷dF?« W?Šu? vK?Ž …œb?;« q?O−??²?« WŽd?Ý d?N?E²?Ý
Æ÷dF«
LP qÐUI SP ≠ qO−²K XË vB√
©wÝUOI« qOGA²«® SP
j¹dA« ‰uÞ
U³Î¹dIð UŽUÝ ∂
U³Î¹dIð UŽUÝ ≥
E180
U³Î¹dIð UŽUÝ ∏
U³Î¹dIð UŽUÝ ¥
E240
U³
Î ¹dIð WIO
œ ≤∞Ë UŽUÝ π
U³Î¹dIð WIO
œ ¥∞Ë UŽUÝ ¥
E280
U³
Î ¹dIð UŽUÝ ±∞
U³Î¹dIð UŽUÝ μ
E300
اﻟﺘﺴﺠﻴﻞ
©q¹uD« qOGA²«® LP
¡UM?Ł√ u?¹bO?H?« qO?−?ð Ë√ …b?¼U?A? bM?Ž n?zUþu?« —«—“√ i?FÐ q?L?Fð ô b?
ÆDVD qO−ð
Æ©WŠU² dOž WHOþu«® ¢The function is not aVailable¢ WUÝd« dNE²Ý
ÆWOU_« WŠuK« s Ë√ bFÐÔ sŽ rJ% …bŠË s (REC) —e« vKŽ jG{« Æ¥
Æ¢qO−²UÐ WUš «eO¢ dE½« ¨qO−²« ¡UMŁ√ WŠU²*« «—UO)« WdF*
U²ÎR qO−²« ·UI¹ù
bO
qO−ð WOKLŽ ·UI¹ù ©X
R ·UI¹≈ØqOGAð® PLAY/PAUSE ©
® —e« vKŽ jG{«
ÆU²Î
R qOGA²«
·UM¾²Ýô Èdš√ …Îd? ©X
R ·UI¹≈ØqOGAð® PLAY/PAUSE © ® —e?« vKŽ jG{« •
ÆqO−²«
«d² ¡UMŁ√ PROG/TRK ( / ) s¹—e« vKŽ jGCUÐ «uMI« 5Ð q¹b³²« p½UJSÐ •
ÆU²Î
R qO−²« ·UI¹≈
qO−²« ·UI¹ù
ÆqOGA²« bO
qO−ð WOKLŽ ·UI¹ù ©·UI¹≈® STOP —e« vKŽ jG{«
μ∏ ≠ WOÐdF«
DVD-VR350-01375B-IB-ar
58
2007.4.2, 3:50 PM
wI³²*« Xu« h×
ÆbFÐÔ sŽ rJײ« …bŠË w œułu*« INFO —e« vKŽ jG{« Ʊ
ÆWOU²« UuKF*« dNE²Ý
X?
u« ¨qšb« …UM
¨wI?³²*« X
u« ¨qO?−²« WŽdÝ ¨u¹b?OH« j¹dý W×?² WUŠ®
©ÆwU(«
RAM
STOP
00:00:00
SP
Rem 00:48
PR 1
JAN 01 2007 MON
qO−²UÐ WUš «eO
W?I³? «œU¹eK? UFγð q?O−?ð XË WU?{≈ Ë√ ¨WHK?² jzU?ÝË …b¼UA? pMJ?1 ¨qO−?²« r²?¹ ULM?OÐ
Æ j ³ C «
qO−²« ¡UMŁ√ dš¬ jOÝË …b¼UA Ʊ
¡U?M?Ł√ u?¹b?O? j?¹d?ý …b¼U?A? Ë√ u?¹b?O?H?« qO?−??ð ¡U?M?Ł√ DVD Âö?√ …b?¼UA? s?J?1
ÆDVD qO−ð
dOG²?²Ý Æt hB?<« ×b« w DVD ’«d
√ bŠ√ q?šœ√ ¨u¹bOH?« qO−?ð ¡UMŁ√ •
ÆDVD ’d
qOGAð √b³¹Ë UOÎzUIKð WýUA« vKŽ W{ËdF*« Ułd<«
dOG²²Ý Æt WBB<« WײH« w u¹bO j¹dý qšœ√ ¨DVD ’d
qO−ð ¡UMŁ√ •
«–≈ U WUŠ w® Æu¹bOH« qOGAð √b³¹Ë UO
Î zUIKð WýUA« vKŽ W{ËdF*« Ułd<«
©W¹UL(« j¹dý vKŽ qL²A¹ ô j¹dA« ÊU
qO−²« s“ …œU¹“ Æ≤
Æ¢…bŠ«Ë tLKÐ qO−²«¢ rI« v≈ lł—«
©μ≥ W×HB« dE½«®
Xu« fH½ w u¹bOË DVD qO−ð Æ≥
ULND³{ V−¹ 5F{u« ö sJ ¨X
u« fH½ w u¹bOH«Ë DVD qO−ð lOD²ð
Æ…bŠ vKŽ q qO−²K
Æu¹bOH« l{Ë Ë√ DVD l{Ë vKŽ “UN'« j³C DVD/VCR —e« vKŽ jG{« •
Æu¹bOH« Ë√ DVD qO−² DV Ë√ AV 2 Ë√ AV 1 Ë√ PR ‰Ušœù« l{Ë d²š« •
ÆDVD Ë√ u¹bOHK W³MUÐ ©qO−²« WŽdÝ® REC SPEED l{Ë d²š« •
اﻟﺘﺴﺠﻴﻼﻟﺘﺴﺠﻴﻞ
ÆDVD Ë√ u¹bOHK W³MUÐ REC —e« vKŽ jG{« •
q?ÐU? «b?²?ÝU?Ð Êu¹e?H?OK?²?U?Ð qB?²? u¹b?O?H«Ë DVD q?−?? ÊuJ?¹ U?bM?Ž
u¹bOH« j¹dý U¹u²× ÷dF« WýUý dNEð sK ¨component Ë√ S-Video
ÆDVD qO−ð ¡UMŁ√
ÆX
u« fH½ w WHK² «uM
s qO−²« sJ1 ô
5F{u« bŠ√ j³{ V−¹ ÆWE×K« fH½ w u¹bOH«Ë DVD qO−ð ¡bÐ sJ1 ô
Ædšü« l{u« tOK¹ rŁ qO−²« w ¡b³K
μπ ≠ WOÐdF«
DVD-VR350-01375B-IB-ar
59
2007.4.2, 3:50 PM
VCR
STOP
00:00:00
SP
Rem 01:21
PR 1
12 : 00
u¹bO j¹dý Ë√ DVD ’d vKŽ aM«
jI DVD-VR355
WdF?* h׫ ÆDVD ’d vKŽ u?¹bO j¹dý s? Ë√ u¹bO j¹dý v?KŽ DVD ’d s aM?« sJ1
Æ ’ d I « Ë j ¹ d A « v K Ž w I ³ ² *« X u «
u¹bO j¹dý vKŽ DVD ’d s aM«
DVD-RAM(VR)
Edit Copylist
JAN/01/2007
1/1
No.
Title
Length Edit
01 JAN/01/2007 12:0
Play00:00:11
©VR l{u«®
Rename
Edit Scene
ÆMENU —e« vKŽ jG{« ¨qLF« sŽ n
u²« l{Ë w …bŠu« ULMOРƱ
v?KŽ Ë√ ©o«u?® OK vKŽ j?G{« rŁ ©a?½® Copy b¹b×?² † … s¹—e?« vKŽ j?G{« Æ≤
Æ —e«
JAN/01/2007 12:00
Copy
1 Scene
Delete
JAN/01/2007 12:00
MOVE
OK
RETURN
EXIT
vKŽ jG{« rŁ ¨©u¹bO v≈ DVD s® DVD—>VCR b¹bײ † … s¹—e« vKŽ jG{« Æ≥
Æ —e« vKŽ Ë√ ©o«u® OK
j?G?{« rŁ ¨©a??M« W?L?zU
q?¹b?Fð® Edit Copylist —U?O²?šô † … s?¹—e« v?K?Ž jG?{« Æ¥
Æ —e« vKŽ Ë√ ©o«u® OK vKŽ
rOLBð v≈ ÃU?²% ¨©aM« WLzU
q?¹bFð® “Edit Copylist” s aM« s s?JL²K •
ÆUIγ a½ WLzU
Æ…b¹b?'« q?O?GA?²?« W?L?zU
¡U?A?½S?Ð r?
Ë ©…b¹b?ł a??½ W?LzU?
) “New Copylist” œb?Š •
©∂π W×HB« v≈ lł—«®
DVD-RW(V)/DVD+RW/ ’d
vKŽ ¨dýU³*« aM« WHOþË Â«b²Ý« jI pMJ1 •
ƱR
OK vK?Ž j?G{« r?Ł U?¼b¹d?ð w?²« a??M« W?L?zU
—U?O²?šô † … s?¹—e« v?K?Ž jG?{« Æμ
Æ —e« vKŽ Ë√ ©o«u®
v?KŽ Ë√ ©o«u?® OK vKŽ j?G{« rŁ ©a?½® Copy b¹b×?² † … s¹—e?« vKŽ j?G{« Æ∂
Æ —e«
…dýU³ u¹bO j¹dý v≈ DVD ’d s aM«
اﻟﺘﺴﺠﻴﻞ
Æt½ b¹dð Íc« DVD ’d
qšœ√ •
Æu¹bOH« j¹dý qšœ√ •
vK?Ž® ÆbFÐÔ sŽ rJ?ײ« …bŠË s? Ë√ WOU_« WŠu?K« s VCR copy —e« vK?Ž jG{« •
©u¹bOH« j¹dý
ÆSTOP —e« vKŽ jG{« ¨qO−²« ·UI¹ù •
DivX o?O??M?ð q?O?GA?ð W?U?Š w? u?¹bO?H?« v?≈ DivX o?O??Mð s? a??M?« p?MJ?1 U?L? •
÷d?Ž r?²?¹ ·u? ¨U?H?K?*« s? b?¹b?F« v?K?Ž q?L?²?A?¹ DivX ’d?
ÊU «–≈ Æ»u?K?D?*«
ÆjI œb;« nK*«
v?≈ DVD w?L
— u?¹bO? ’d?
s a?½® DVD TO VCR COPY W?H?OþË q?LF?ð ô
ÆÍbŽUB²« Y׳« l{Ë w ©u¹bOH«
∂∞ ≠ WOÐdF«
DVD-VR350-01375B-IB-ar
60
2007.4.2, 3:51 PM
DVD ’d v≈ u¹bO j¹dý s aM«
VCR - -> DVD
DVD-Recorder
DVD-RAM(VR)
No.
01
02
ÆMENU —e« vKŽ jG{« ¨©qLF« sŽ n
u²«® Stop l{Ë w …bŠu« ULMOРƱ
v?KŽ Ë√ ©o«u?® OK vK?Ž jG{« r?Ł ©a½® Copy b?¹bײ? † … s¹—e?« vKŽ j?G{« Æ≤
Æ —e«
vKŽ jG{« rŁ ©DVD v≈ u¹bO s® VCR—>DVD b¹bײ † … s¹—e« vKŽ jG{« Æ≥
Æ —e« vKŽ Ë√ ©o«u® OK
Delete
STOP
Copy All
MOVE
ÆW¹UNM« l{u sŽ Y׳K Ë√ ¨ l Ë√ l Ë√ ll —«—“_« «b²Ý« sJ1 Æμ
ÆW¹UNM« WDI½ bMŽ ©o«u® OK —e« vKŽ jG{«
ÆUHK*« a½ WLzU
¡UA½≈ r²OÝ •
ÆaM« WLzU
¡UA½ù WIÐU« «uD)« —d
ÆaM« WLzU
kHŠ sJ1 ô ¨u¹bOH« l{Ë w •
OK v?K?Ž j?G?{« r?Ł U?¼b¹d?ð w?²?« a??M?« W?L?zU?
—U?O?²šô † … s?¹—e?« v?K?Ž j?G?{« Æ∂
Æ —e« vKŽ Ë√ ©o«u®
v?KŽ Ë√ ©o«u?® OK vK?Ž jG{« r?Ł ©a½® Copy b?¹bײ? † … s¹—e?« vKŽ j?G{« Æ∑
Æ —e«
ÆUOÎzUIKð aM« WOKLŽ √b³ð rŁ W¹«b³« WDI½ sŽ Y׳K u¹bOH« j¹dý .bIð r²OÝ •
Æs¹œb;« 5F{u*« sŽ öOK
W¹UNM«Ë W¹«b³« WDI½ ·ö²š« qL²×¹ •
Æ©qJ« a½® Copy All d²šU ¨rz«uI« lOLł a½ œ—√ «–≈ •
…dýU³ DVD ’d v≈ u¹bO j¹dý s aM«
Æt½ b¹dð Íc« u¹bOH« j¹dý qšœ√ •
ÆtOKŽ aM« sJ1 DDV ’d
qšœ√ •
vK?Ž® ÆbFÐÔ sŽ rJײ« …bŠË s? Ë√ WOU_« WŠuK« s DVD copy —e?« vKŽ jG{« •
©DVD ’d
اﻟﺘﺴﺠﻴﻼﻟﺘﺴﺠﻴﻞ
ÆSTOP —e« vKŽ jG{« ¨qO−²« ·UI¹ù •
∂± ≠ WOÐdF«
61
End
Edit
00:03:22
Play
--:--:-Copy
00:03:42
ÆW¹«b³« l{u sŽ Y׳K Ë√ ¨ l Ë√ l Ë√ ll —«—“_« «b²Ý« sJ1 Æ¥
ÆW¹«b³« WDI½ bMŽ ©o«u® OK —e« vKŽ jG{«
DVD-VR350-01375B-IB-ar
Start
00:02:20
--:--:--
2007.4.2, 3:51 PM
OK
RETURN
EXIT
اﻟﺘﻌﺪﻳﻞ
ÆqJ ’dIK q¹bF²« nzUþËË ’dI« vKŽ qO−²UÐ WU)« q¹bF²« nzUþu Õdý l DVD ’«d_ WOÝUÝ_« q¹bF²« nzUþË rI« «c¼ ÂbI¹
¡ULÝ_« WLzU qOGAð
jI DVD-VR355
Æs¹ËUMF« WLzU s s¹ËUMF« bŠ√ qOGA² ULOKF²« Ác¼ l³ð«
JAN/01/2007
3/4
No.
rŁ ¨s?¹ËU?MF?« W?LzU?
s t?K?OG?A𠜫d?*« Ê«u?MF?« b¹b?×?² † … s?¹—e?« vK?Ž jG?{« Æ≤
Æ©qOGAð® PLAY —e« vKŽ jG{«
Length Edit
Title
01 JAN/01/2007 12:00 00:00:11
02 JAN/01/2007 12:30 00:00:09
Play
03 JAN/01/2007 01:30 00:01:36
Rename
04 JAN/01/2007 01:3000:00:11
Delete
JAN/01/2007 01:00 PR1
Æ÷dF« ·UI¹ù STOP —e« vKŽ jG{« Æ≥
ÆTITLE LIST —e« vKŽ jG{« ¨¡ULÝ_« WLzU
WýUý v≈ ŸułdK
JAN/01/2007
Edit
XP
Protection
MOVE
RAM
¡ULÝ_« WLzU WýUý dUMŽ
Title List
DVD-RAM(VR)
ÆTITLE LIST —e« vKŽ jG{« Ʊ
Æ©¡ULÝ_« WLzU
® Title List WýUA« dNE²Ý
OK
RETURN
EXIT
XP
VR
Title List
DVD-RAM(VR)
JAN/01/2007
3/4
No.
ÆWK−*« ¡ULÝ_« ÷dŽ WýUý
Length Edit
01 JAN/01/2007 12:00 00:00:11
02 JAN/01/2007 12:30 00:00:09
03 JAN/01/2007 01:00 00:01:36
04 JAN/01/2007 01:30 00:00:11
¨qHI« WUŠ ¨qO−²« a¹—Uð ¨Ê«uMF« rÝ« ∫sLC²ð œb;« Ê«uMFK UuKF*« WýUý
qO−²« l{Ë
JAN/01/2007 01:00 PR1
q−*« Ê«uMF« r
—
Title
JAN/01/2007
XP
q−*« Ê«uMF« rÝ«
MOVE
OK
RETURN
EXIT
©÷dF« s“ ¨‰U¦*« qO³Ý vKŽ® qO−²« ‰uÞ
©q¹bFð® Edit WLzU
Title List
DVD-RAM(VR)
.œb;« Ê«uMF« ÷dF¹ ∫©÷dŽ® Play
JAN/01/2007
3/4
No.
—«—“_« ÷dŽ WýUý
JAN/01/2007 01:00 PR1
JAN/01/2007
Edit
XP
MOVE
Protection
OK
Æ»u?KD*« Ê«u?MF« q?OGA?ð pMJ?1 ¨©ÕU²H? Í√® ANYKEY —e« vK?Ž jGC?UÐ
©≥∏ W×HB« dE½«®
Æ’dI« Ÿu½ vKŽ «c¼ bL²F¹ b
DVD-RW(V)/DVD+RW/ ’«d
_ W?³?MU?Ð WK?OK?
Ë …œËb×? q¹b?F²?« nzU?þË
Æ-R ’«d
√Ë ©u¹bOH« l{Ë® ±R
∂≤ ≠ WOÐdF«
DVD-VR350-01375B-IB-ar
62
Length Edit
01 JAN/01/2007 12:00 00:00:11
02 JAN/01/2007 12:30 00:00:09
Play
03 JAN/01/2007 01:00 00:01:36
Rename
04 JAN/01/2007 01:30 00:00:11
Delete
.WLzUI« s œb;« Ê«uMF« ·c×¹ ∫©·cŠ® Delete
.Ê«uMF« s UF
Î DI ·c×¹ ∫©q¹bFð® Edit
.t W¹UL(« ¡UG≈ Ë√ œb;« Ê«uMF« W¹UL( ∫©W¹UL(«® Protection
Title
2007.4.2, 3:51 PM
RETURN
EXIT
اﻟﺘﻌﺪﻳﻞ
.…œb;« s¹ËUMF« bŠ√ rÝ« dOOG² ∫©WOLð® Rename
Wž—U WŠU vKŽ qO−²«
WŠU ¡UA½≈ r²¹ ¨WOU(« s¹ËUMF« ·cŠ WUŠ w ÆDVD+RW ’«d√ vKŽ jI WHOþu« Ác¼ d«u²ð
d¹_« V½U'« vKŽ …dýU³*« Êu¹eHOK²« —u dNEð ¨Wž—UH« WŠU*« WHOþË qOGAð bMŽ Æ …b¹bł Wž—U
Æs¹ËUMF« WLzU s
DVD+RW
Title List
Free Space
5/7
No.
01 APR/19/2007
02 APR/19/2007
03 APR/20/2007
04 APR/20/2007
05 Free Space
06 APR/21/2007
07 Free Space
Free Space
PR 10
jI DVD-VR355
SP
ÆTITLE LIST —e« vKŽ jG{« Ʊ
Æ©¡ULÝ_« WLzU
® Title List WýUA« dNE²Ý
MOVE
OK
Length Edit
Title
12:00
12:30
12:00
12:30
00:00:21
00:00:03
00:00:15
00:00:16
00:00:15
Recording
12:30 00:08:16
03:40:27
RETURN
EXIT
Ë√ —e« vKŽ jG{« rŁ ¨©Wž—U WŠU® Free Space b¹bײ † … —e« vKŽ jG{« Æ≤
Æs¹ËUMF« WLzUI d¹_« ¡e'« w …dýU³*« Êu¹eHOK²« —u dNE²Ý Æ©o«u® OK
Æ©o«u® OK —e« vKŽ jG{« Æ≥
©¡ULÝ_« WLzU® wÝUÝ_« q¹bF²«
¡ULÝ_« WOLð
DVD-Recorder
Rename
DVD-RAM(VR)
ÆWK−*« Z«d³« bŠ√ rÝ« q¹bF² ¨‰U¦*« qO³Ý vKŽ ¨s¹ËUMŽ WLzU WOL² «œUý—ù« Ác¼ l³ð«
Sports(A1)
jI DVD-VR355
Save
ÆTITLE LIST —e« vKŽ jG{« Ʊ
Æ©¡ULÝ_« WLzU
® Title List WýUA« dNE²Ý
Title List s U?N?K?O?GA?ð b?¹d?ð w?²« ¡U?L?Ý_« b?Š√ —U?O²?šô † … s?¹—e?« v?KŽ j?G?{« Æ≤
Æ —e« vKŽ Ë√ ©o«u® OK —e« vKŽ jG{« rŁ ©¡ULÝ_« WLzU
®
Back Space
MOVE
Space
OK
ÆdýR*« q³
œułu*« ·d(« ·c×Ð ÂuI¹ ∫©nKK WU® Back Space •
3/4
No.
Length Edit
01 JAN/01/2007 12:00 00:00:11
02 JAN/01/2007 12:30 00:00:09
03 Sports(A1)
00:01:36
04 JAN/01/2007 01:30 00:00:11
XP
MOVE
.dýR*« —«u−Ð œułu*« ·d(« ·c×¹ ∫©·cŠ® Delete •
.ôUšœù« WU ·c×¹ ∫©`® Clear •
.WOBM« ôUšœù« q−¹ ∫©kHŠ® Save •
اﻟﺘﻌﺪﻳﻞ
Æ©o«u® OK —e« vKŽ jG{« rŁ ©kHŠ® Save —UO²šô
—«—“_« vKŽ jG{« Æμ
Æœb;« Ê«uMF« qIŠ w ÁdOOGð bFÐ Ê«uMF« rÝ« dNEOÝ
∂≥ ≠ WOÐdF«
63
Title
JAN/01/2007
Æ©5LO« WOŠU½® ÂUú dýR*« „d×¹Ë WU qšb¹ ∫©WU® Space •
DVD-VR350-01375B-IB-ar
EXIT
Sports(A1)
Sports(A1)
s?¹—e« «b??²ÝU?Ð U¼b?¹dð w?²« ·d?Š_« d²?š« Æ¥
Æ©o«u®
Clear
Title List
DVD-RAM(VR)
Ë√ ©o«u® OK vKŽ jG{« rŁ ¨©WOLð® Rename —UO²šô † … s¹—e« vKŽ jG{« Æ≥
Æ —e« vKŽ
Æ©WOLð® Rename WýUA« dNE²Ý
OK —e?« vK?Ž jG?{« rŁ ¨
Delete
RETURN
2007.4.2, 3:51 PM
OK
RETURN
EXIT
¡ULÝ_« ©W¹ULŠ® qH
DVD-RAM(VR)
Title List
ÆœuBI*« dOž ·c(« s t²¹UL( ¡ULÝ_« bŠ√ qHI «œUý—ù« Ác¼ l³ð«
3/4
JAN/01/2007
Title Protection :
jI DVD-VR355
ÆTITLE LIST —e« vKŽ jG{« Ʊ
Æ©¡ULÝ_« WLzU
® Title List WýUA« dNE²Ý
©¡ULÝ_« WLzU
® Title List s t²¹ULŠ b¹dð Ê«uMŽ —UO²šô † … s¹—e« vKŽ jG{« Æ≤
Æ —e« vKŽ Ë√ ©o«u® OK —e« vKŽ jG{« rŁ
JAN/01/2007 01:00 PR1
On
JAN/01/2007
Off
XP
MOVE
OK
RETURN
EXIT
DVD-RAM(VR)
©o?«u® OK vKŽ jG{« rŁ ¨©W?¹ULŠ® Protection —UO²šô † … s¹—e« v?KŽ jG{« Æ≥
Æ —e« vKŽ Ë√
Æ©o?«u?® OK —e?« v?K?Ž j?G?{« r?Ł ©5?J?9® On —U?O?²?šô s?¹—e?« v?K?Ž j?G?{« Æ¥
dNE?O œb;« Ê«u?MFU?Ð WU)« U?uKF?*« WýUý w œu?łu*« ÕU²?H*« e— d?OG²?OÝ
©
←
® ÆqHI« WU×Ð
Title List
3/4
JAN/01/2007
No.
Title
Length Edit
01 JAN/01/2007 12:00 00:00:11
02 JAN/01/2007 12:30 00:00:09
03 JAN/01/2007 01:00 00:01:36
04 JAN/01/2007 01:30 00:00:11
JAN/01/2007 01:00 PR1
JAN/01/2007
XP
MOVE
OK
RETURN
EXIT
¡ULÝ_« ·cŠ
Æ©¡ULÝ_« WLzU® Title List s Ê«uMŽ ·c( «œUý—ù« Ác¼ l³ð«
Title List
DVD-RAM(VR)
3/4
JAN/01/2007
Do you want to delete?
(Related playlists
may be deleted.)
jI DVD-VR355
JAN/01/2007 01:00 PR1
ÆTITLE LIST —e« vKŽ jG{« Ʊ
Æ©¡ULÝ_« WLzU
® Title List WýUA« dNE²Ý
JAN/01/2007
rŁ ©¡ULÝ_« WLzU
® Title List s tcŠ b¹dð Ê«uMŽ —UO²šô † … s¹—e« vKŽ jG{« Æ≤
Æ —e« vKŽ Ë√ ©o«u® OK —e« vKŽ jG{«
MOVE
Yes
No
XP
OK
RETURN
EXIT
vKŽ Ë√ ©o«u® OK vKŽ jG{« rŁ ©·cŠ® Delete b¹bײ † … s¹—e« vKŽ jG{« Æ≥
Æ —e«
Æ·c(« w p²³ž— bOQ²Ð p³UDð WUÝ— p dNE²Ý
·u ¨qO?GA²« WL?zU
œułu «d
Î E?½ ∫©VR l{Ë® DVD-RW ¨DVD-RAM(VR) ’«d
√
Vždð q¼ ¢(Related playlists may be deleted.) Do you want to delete?¢ WUÝd« dNEð
Æ©[bM³« «cNÐ WU)« qOGA²« rz«u
·cŠ r²¹ b
¤ ø·c(« w
œu?łu?? «d?
Î ?E?½ DVD-R: ’«d??
√ ¨ DVD±R ¨DVD+RW ¨©©u?¹b??O? ® Videol??{Ë®DVD-RW
w? V?ždð q?¼® ¢Do you want to delete?¢ W?UÝd?« d?NE?ð ·u?? ¨qO?G?A²?« W?LzU?
Æ©ø·c(« ¡«dł≈
Æ’dI« Ÿu½ vKŽ WUÝd« bL²Fð •
Æ©o«u® OK —e« vKŽ jG{« rŁ ©rF½® Yes —UO²šô s¹—e« vKŽ jG{« Æ¥
اﻟﺘﻌﺪﻳﻞ
ÆwL;« Ê«uMF« ·cŠ sJ1 ô
Title W?L??zU?
s? ©q?O?D??F?ð® Off d?²?šU? ¨W??O?L?;« ¡U?L??Ý_« b?Š√ ·c?Š œ—√ «–≈
Æ©¡ULÝ_« W¹ULŠ® Protection
Æ©¡ULÝ_« WLzU
® Title List s tcŠ œd−0 Ê«uMF« …œUF²Ý« sJ1 s
ÆtOKŽ s ·c(« sJ1 s ¨DVD-RW/±R ’d
©qH
® ¡UN½≈ œd−0
¡ULÝ_« sJ ¨jI WLzUI« s ¡ULÝ_« ·cŠ r²OÝ ¨DVD±R ’«d
_ W³MUÐ
Æ’dI« vKŽ UOÎKF …œułu qE²Ý
∂¥ ≠ WOÐdF«
DVD-VR350-01375B-IB-ar
64
2007.4.2, 3:51 PM
Ê«uMF« s lDI ·cŠ
DVD-RAM(VR)
Edit Title List
Æs¹ËUMF« WLzU
s s¹ËUMF« b?Š√ s ¡eł ·c( ULOKF²« Ác¼ l³ð«
Title List No. 03
Start
End
©VR l{u«®
00:00:02
ÆTITLE LIST —e« vKŽ jG{« Ʊ
Æ©¡ULÝ_« WLzU
® Title List WýUA« dNE²Ý
00:00:02
Start
rŁ ©¡ULÝ_« WLzU
® Title List s tcŠ b¹dð Ê«uMŽ —UO²šô † … s¹—e« vKŽ jG{« Æ≤
Æ —e« vKŽ Ë√ ©o«u® OK —e« vKŽ jG{«
vKŽ Ë√ ©o?«u® OK vKŽ jG{« rŁ ¨©q¹bFð® Edit —UO²šô † … s¹—e« vKŽ jG{« Æ≥
Æ —e«
Æ©¡ULÝ_« WLzU
q¹bFð® Edit Title List WýUA« dNE²Ý
End
Delete
MOVE
OK
Return
RETURN
Æ©o«u® OK —e« vKŽ jG{« rŁ ©·cŠ® Delete —UO²šô s¹—e« vKŽ jG{« Æ∂
Title List No. 03
Start
End
00:00:02
Delete
End
MOVE
OK
Return
RETURN
EXIT
Edit Title List
DVD-RAM(VR)
Title List No. 03
Start
End
Do you want to delete?
(Deleted part will not be restored.)
00:00:05
00:00:10
Yes
qOGA²« j¹dý
qOGA²« X
Ë
lDI*« ·cŠ W¹«bÐ WDI½ —UÞ≈Ë X
Ë
lDI*« ·cŠ W¹UN½ WDI½ —UÞ≈Ë X
Ë
WU)« —«—“_« «b²ÝUÐ tcŠ b¹dð Íc« lDILK W¹UNM«Ë W¹«b³« w²DI½ œbŠ •
ÆqOGA²UÐ
©
¨
¨
¨
¨ ® ∫qOGA²UÐ WUš —«—“√ •
00:00:15
00:00:15
Start
Æ©o«u® OK —e« vKŽ jG{« rŁ ©rF½® Yes —UO²šô s¹—e« vKŽ jG{« Æ∑
Æœb;« lDI*« ·cŠ r²OÝ
Return b?¹b?×?²? s?¹—e?« v?K?Ž j?G?{« ¨©¡U?LÝ_« W?L?zU?
® Title List v?≈ Ÿu?łd?K?
Æ©Ÿuł—®
¡ULÝ_« WLzU q¹bFð WýUý dUMŽ
EXIT
Edit Title List
DVD-RAM(VR)
ÆW¹«b³« WDI½ bMŽ ©o«u® OK —e« vKŽ jG{« Æ¥
ÆlDI*« ·cŠ W¹«bÐ WDI½ —UÞ≈ w W¹«b³« WDI½ X
ËË …—uB« dNE²Ý
ÆW¹UNM« WDI½ bMŽ ©o«u® OK —e« vKŽ jG{« Æμ
ÆlDI*« ·cŠ W¹UN½ WDI½ —UÞ≈ w W¹UNM« WDI½ X
ËË …—uB« dNE²Ý
00:00:00
Start
End
No
ª
00:00:15
Delete
MOVE
OK
Return
RETURN
DVD-RAM(VR)
EXIT
Edit Title List
Title List No. 03
Start
End
00:00:02
00:00:00
00:00:02
ÆÊ«uŁ μ sŽ ·Ëc;« lDI*« ‰uÞ qI¹ ô√ V−¹
ÆW¹«b³« WDI½ q³
W¹UNM« WDI½ b¹b% sJ1 ô
ÆW²ÐUŁ …—u vKŽ qL²A¹ ÊU «–≈ lDI*« ·cŠ sJ1 ô
اﻟﺘﻌﺪﻳﻞ
qB d¹d%
Start
End
MOVE
Delete
OK
Return
RETURN
DVD+RW
EXIT
Chapter Edit
Chapter Edit WLzUI« «b²ÝUÐ UNK¹bFðË DVD+RW ’«d√ vKŽ pÐ WU)« ‰uBH« ¡UA½≈ pMJ1
Æ © q B H « q ¹ bF ð ®
Chapter : 1/1 Show
00:00:00
Add
jI DVD-VR355
ÆTITLE LIST —e« vKŽ jG{« Ʊ
Æ©¡ULÝ_« WLzU
® Title List WýUA« dNE²Ý
Delete
MOVE
w? b¹dð qB v?KŽ Íu²×¹ Íc« ©Ê«u?MF«® title b¹b×?² † … s¹—e« vK?Ž jG{« Æ≤
Æ —“ Ë√ ©o«u® OK —“ vKŽ jG{« rŁ ¨Ád¹d%
—e« vKŽ jG{« rŁ ¨©qB d¹d%® Chapter Edit b¹bײ † … s¹—e« vKŽ jG{« Æ≥
ÆqB d¹d% WýUý dNEð Æ —e« Ë√ ©o«u® OK
∂μ ≠ WOÐdF«
DVD-VR350-01375B-IB-ar
65
2007.4.2, 3:51 PM
Hidden
OK
Delete All
RETURN
Return
EXIT
qBH« d¹d% WýUý dUMŽ
t²UŠË wU(« qBH« r
—
qOGA²« j¹dý
qOGA²« X
Ë
qBH« d¹d% WLzU
DVD+RW
Chapter Edit
Chapter : 1/1 Show
00:00:00
Add
Delete
MOVE
Hidden
OK
Return
Delete All
RETURN
EXIT
qB WU{≈
∂∂ W×HB« w ≥ v≈ ± s «uD)« l³ð«
Chapter Edit
DVD+RW
rŁ ¨WD³ðd*« qOGA²« —«—“√ «b²ÝUÐ qB WU{≈ U¼bMŽ b¹dð w²« WDIM« œbŠ Æ¥
ÆWDIM« Ác¼ bMŽ ©o«u® OK —e« vKŽ jG{«
Æb¹bł qB WU{≈ r²ð ©o«u® OK —e« vKŽ jGC« UNO r²¹ …d q w
©
¨
¨
¨
¨ ® ∫ qOGA²UÐ WD³ðd*« —«—“_« •
Æ©o«u® OK —e« vKŽ jG{« rŁ ¨©Ÿuł—® Return b¹bײ s¹—e« vKŽ jG{« Æμ
Æt²H{√ Íc« qBH« Êü« —d;« Ê«uMF« sLC²OÝ
Chapter : 1/2 Show
00:10:10
Add
Delete
MOVE
Hidden
OK
Delete All
RETURN
Return
EXIT
Æ’dI« w ö
Î B ≤μ¥Ë Ê«uMF« w ö
Î B ππ v≈ qB¹ U WU{≈ lOD²ð
d¹dײ« WHOþË ¡«œ√ bFÐ jI WOU(« DVD öGA w …—d;« ‰uBH« dNEð
©∑∑ W×HB« dE½«® Æo«u²*«
WU{≈ WUŠ w ªWD?IM« Ác¼ w Ê«uMF« rOIð r²¹ ¨q?B WU{≈ WUŠ w
Ædš¬ qB ¡UA½≈ r²¹ ¨«bΊ«Ë ö
Î B sLC²¹ Ê«uMF« v≈ qB
qB ·cŠ
DVD+RW
Chapter Edit
∂∂ W×HB« w ≥ v≈ ± s «uD)« l³ð«
ÆqOGA²UÐ WD³ðd*« —«—“_« «b²ÝUÐ tcŠ w Vždð Íc« qBH« œbŠ Æ¥
©
¨
¨
¨
¨ ® ∫ qOGA²UÐ WD³ðd*« —«—“_« •
Æ©o«u® OK —e« vKŽ jG{« rŁ ¨©·cŠ® Delete b¹bײ —“ vKŽ jG{« Æμ
ÆUN²cŠ UL ‰uB vKŽ —d;« Ê«uMF« Íu²×¹
—e« vKŽ jG{« rŁ s¹—e« «b²ÝUÐ ©Ÿuł—® Return œbŠ ¨WOKLF« ¡UN½ù •
Æ©o«u® OK
Chapter : 2/3 Show
00:15:00
Add
Delete
MOVE
Hidden
OK
Delete All
RETURN
Return
EXIT
ƉË_« qBH« ·cŠ sJ1 ô
Æœb;« Ê«uMF« w bŠ«Ë qB œułË WUŠ w ·c(« WLzU
d«u²ð ô
Æq−*« u¹bOH« fOË ¨qFHUÐ jI qBH« œb× ·cŠ r²¹ ¨qB ·cŠ bMŽ
ÆqB ·cŠ ¡UG≈ sJ1 ô
qB ¡UHš≈
DVD+RW
Chapter Edit
∂∂ W×HB« w ≥ v≈ ± s «uD)« l³ð«
اﻟﺘﻌﺪﻳﻞ
ÆqOGA²UÐ WD³ðd*« —«—“_« «b²ÝUÐ tcŠ w Vždð Íc« qBH« œbŠ Æ¥
©
¨
¨
¨
¨ ® ∫ qOGA²UÐ WD³ðd*« —«—“_« •
Æ©o«u® OK —e« vKŽ jG{« rŁ ¨©wH® Hidden b¹bײ ££ s¹—e« vKŽ jG{« Æμ
ÆUOÎH œb;« qBH« ÊuJ¹
—e« vKŽ jG{« rŁ s¹—e« «b²ÝUÐ ©Ÿuł—® Return œbŠ ¨WOKLF« ¡UN½ù •
Æ©o«u® OK
Chapter : 2/4 Hidden
00:15:00
Add
Delete
MOVE
ÆUOÎH ÊuJ¹ Ê√ sJ1 ô ¨bŠ«Ë qB œułË WUŠ w
‰uB? œułË Âb?Ž WU?Š w ©d¼U?þØwH?® Hidden/Show W?LzU?
d«u?²ð ô
Æœb;« Ê«uMF« w
ÆWOU(« DVD öGA w WOH<« ‰uBH« dNEð ô
—UNþ≈ lOD²ð ÆqUJ« Ê«uMF« qOGAð bMŽ WOH<« ‰uBH« qOGAð r²OÝ
Æ©—UNþ≈® Show WLzU
w ©o«u® OK —e« vKŽ jGCUÐ wH<« qBH«
∂∂ ≠ WOÐdF«
DVD-VR350-01375B-IB-ar
66
2007.4.2, 3:51 PM
Hidden
OK
Delete All
RETURN
Return
EXIT
‰uBH« q ·cŠ
∂∂ W×HB« w ≥ v≈ ± s «uD)« l³ð«
DVD+RW
Chapter Edit
OK —e« vKŽ j?G{« rŁ ¨©q?J« ·cŠ® Delete All b¹b?ײ s?¹—e« vKŽ j?G{« Æ¥
Æ©o«u®
Æ©o«u® OK —e« vKŽ jG{« rŁ ©rF½® Yes b¹bײ s¹—e« vKŽ jG{« Æμ
Do you want to delete all chapter marks?
Chapter : 1/1 Show
No
Yes
Æq−*« u¹bOH« fOË ¨qFHUÐ jI qBH« œb× ·cŠ r²¹ ¨qB ·cŠ bMŽ
w? b??Š«Ë q?B?? œu?łË W??U?Š w?? ©q?J??« ·c?Š ® Delete All W??L?zU??
d?«u??²?ð ô
Æœb;« Ê«uMF«
Ê«uMŽ rOIð
Add
Delete
MOVE
Hidden
OK
Delete All
RETURN
DVD+RW
00:00:00
Return
EXIT
Divide Title
Æs¹ËUMŽ …bŽ v≈ q¹uÞ Ê«uMŽ rOI² WOU²« «œUý—ù« l³ð«
Title List No. 03
Start
End
00:00:00
jI DVD-VR355
00:00:00
00:00:00
ÆTITLE LIST —e« vKŽ jG{« Ʊ
Æ©¡ULÝ_« WLzU
® Title List WýUA« dNE²Ý
s¹—e« vKŽ jG{« Æ≤
rŁ ¨s¹ËUMF« WLzU
s tLOIð w Vždð Ê«uMŽ b¹bײ
Æ —“ Ë√ OK vKŽ jG{«
Point
Divide
MOVE
Return
OK
Æ©o«u® OK —e« vKŽ jG{« rŁ ¨©rOIð® Divide b¹bײ s¹—e« vKŽ jG{« Æμ
Æ©o«u® OK —e« vKŽ jG{« rŁ ¨©rF½® Yes b¹bײ s¹—e« vKŽ jG{« Æ∂
Æ5½«uMŽ v≈ œb;« Ê«uMF« rOIð -
EXIT
Divide Title
DVD+RW
—e« vKŽ jG{« rŁ ¨©Ê«uMŽ rOIð® Divide Title b¹bײ
s¹—e« vKŽ jG{« Æ≥
ÆÊ«uMŽ rOIð WLzU
WýUý dNEð Æ —e« Ë√ ©o«u® OK
jG{« r?Ł ¨qOG?A²U?Ð WD³?ðd*« —«—“√ «b?²ÝUÐ U?NLO?Ið b¹d?ð w²« W?DIM?« œbŠ Æ¥
ÆWDIM« Ác¼ bMŽ ©o«u® OK —e« vKŽ
©
¨
¨
¨
¨ ® ∫ qOGA²UÐ WD³ðd*« —«—“_« •
RETURN
Title List No. 03
Start
End
00:00:00
00:19:25
00:19:25
Point
Divide
MOVE
Return
OK
RETURN
DVD+RW
EXIT
Divide Title
Title List No. 03
Start
End
ÆÊ
Ì «uŁ μ sŽ tcŠ »uKD*« ¡e'« …b qIð ô√ V−¹
Do you want to divide the title?
(Once divided, titles cannot be merged back.)
00:00:00
00:00:00
No
Yes
00:019:25
Point
Divide
اﻟﺘﻌﺪﻳﻞ
MOVE
∂∑ ≠ WOÐdF«
DVD-VR350-01375B-IB-ar
67
2007.4.2, 3:51 PM
Return
OK
RETURN
EXIT
©WLzU® ÂbI²*« q¹bF²«
WLzU ¡UA½≈
Æq− ÌrÝ« s b¹bł WLzU rÝ« ¡UA½ù «œUý—ù« Ác¼ l³ð«
DVD-Recorder
Make Scene
DVD-RAM(VR)
Scene No. 001
Start
End
©VR l{u«®
ÆMENU —e« vKŽ jG{« ¨©·UI¹≈® Stop l{u« w …bŠu« œułË l Ʊ
ÆOK Ë√ —e« vKŽ jG{« rŁ ¨©WLzU
® Playlist —UO²šô † … s¹—e« vKŽ jG{« Æ≤
—e« vKŽ jG{« rŁ ¨©…b¹bł WLzU
® New Playlist —UO²šô † … s¹—e« vKŽ jG{« Æ≥
ÆOK Ë√
Æ©bNA ¡UA½≈® Make Scene WýUA« dNEð
ÆW¹«b³« WDI½ v≈ ‰uu« bMŽ OK —e« vKŽ jG{« Æ¥
Æ©W¹«b³«® Start —UÞ≈ w W¹«b³« WDI½ bMŽ X
u«Ë …—uB« dNEð •
Æ©W¹UN½® End dBMF« v≈ dH_« —UO²šô« j¹dý qI²M¹ •
«b?²?ÝUÐ U?¼b?MŽ b?¹b?ł bN?A? ¡UA?½≈ w? Vžd?ð w?²« l?DI?*« W?¹«bÐ W?D?I½ œb?Š •
ÆqOGA²UÐ WKB²*« —«—“_«
©
¨
¨
¨
¨ ® ∫qOGA²UÐ WUš —«—“√ •
ÆW¹UNM« WDI½ v≈ ‰uu« bMŽ OK —e« vKŽ jG{« Æμ
Æ©W¹UN½® End —UÞù« w W¹UNM« WDI½ X
ËË …—uB« ÷dŽ r²¹ •
Æ©¡UA½≈® Make ed« v≈ dH_« —UO²šô« j¹dý qI²M¹ •
Title List : 1/7
00:00:02
00:00:02
Start
End
MOVE
Make
OK
Return
RETURN
DVD-Recorder
EXIT
Make Scene
DVD-RAM(VR)
Scene No. 001
Start
End
Title List : 1/7
00:00:02
00:00:08
00:00:08
Start
End
MOVE
Return
Make
OK
RETURN
DVD-RAM(VR)
EXIT
Edit Playlist
JAN/01/2007
1/1
No.
Title
Length Edit
01 JAN/01/2007 12:00 00:00:06
≠ …b¹bł WLzU ¡UA½ù ≠
ÆOK —e« vKŽ jG{« rŁ ¨©¡UA½≈® Make —UO²šô s¹—e« vKŽ jG{« Æ∂
Æ…b¹bł ©bNA ¡UA½≈® Make Scene WýUý ÷dŽ r²¹
ÆWOU(« WLzUI b¹bł bNA WU{≈ r²ð ·uÝ
00:00:00
JAN/01/2007 12:00
1 Scene
JAN/01/2007 12:00
MOVE
OK
RETURN
EXIT
Æ©WL?zU
q?¹b?Fð® Edit Playlist W?ýU?ý vK?Ž b?¼UA?*« W?U W?¹ƒ—Ë WF?ł«d? sJ?1
©∑∞ W×H dE½«®
Æ…b¹bł WLzU
¡UA½≈ w Vždð XM «–≈ ∂ v≈ ± s «uD)« —d
ÆWLzU
w b¼UA ¡UA½≈ w Vždð XM «–≈ ∂ v≈ ¥ s «uD)« —d
≠ ©WLzU q¹bFð® Edit Playlist WLzUI …œuFK ≠
ÆOK —e« vKŽ jG{« rŁ ¨©…œuŽ® Return —UO²šô s¹—e« vKŽ jG{« Æ∑
Æ©WLzU
q¹bFð® Edit Playlist WýUý dNEð
ÆWLzU
rÝ« ππ v²Š ¡UA½≈ sJ1
Æ’dI« ŸuM UIÎË p–Ë ¨W{ËdF*« WýUA« w nOHÞ ·ö²š« „UM¼ ÊuJ¹ b
j³{ WUŠ w qOGA²« WLzU
w …bŠu« ÁcNÐ q−
Ò ’d
÷dŽ sJ1 ô
Æ©qOGAð® ¢On¢ vKŽ ©qN« qO−²« l{Ë® EZ REC MODE
اﻟﺘﻌﺪﻳﻞ
∂∏ ≠ WOÐdF«
DVD-VR350-01375B-IB-ar
68
2007.4.2, 3:51 PM
WLzU w ¡ULÝ_« qOGAð
ÆWLzU ¡ULÝ√ qOGA² WOU²« «œUý—ù« l³ð«
DVD-RAM(VR)
Edit Playlist
JAN/01/2007
3/3
No.
¨©WLzU
® Playlist s tKOGAð w Vždð Íc« rÝô« b¹bײ † … s¹—e« vKŽ jG{« Æ≤
ÆOK Ë√ —e« vKŽ jG{« rŁ
Length Edit
01 JAN/01/2007 12:00 00:00:03
02 JAN/01/2007 12:30 00:00:25
Play
03 JAN/01/2007 12:0 00:00:05
Rename
©VR l{u«®
Æ’dI« qOGAð ·UI¹≈ bFÐ PLAY LIST —e« vKŽ jG{« Ʊ
Æ©WLzU
q¹bFð® Edit Playlist WýUý dNEð
Title
Edit Scene
JAN/01/2007 12:00
1 Scene
JAN/01/2007 12:00
Copy
Delete
MOVE
OK
RETURN
EXIT
ÆOK Ë√ —e« vKŽ jG{« rŁ ¨©qOGAð® Play —UO²šô † … s¹—e« vKŽ jG{« Æ≥
ÆWLzU
¡ULÝ√ qOGAð r²¹
ÆqOGA²« ·UI¹ù STOP —e« vKŽ jG{« Æ¥
Æ©WLzU
q¹bFð® Edit Playlist WýUý b¹bł s dNEð
WLzU rÝ« WOLð
DVD-Recorder
ÆWLzU ¡ULÝ√ bŠ√ q¹bF𠨉U¦*« qO³Ý vKŽ ¨WLzU s rÝ« WOL² «œUý—ù« Ác¼ l³ð«
Rename
DVD-RAM(VR)
Dolphin
©VR l{u«®
Æ’dI« qOGAð ·UI¹≈ bFÐ PLAY LIST —e« vKŽ jG{« Ʊ
Æ©WLzU
q¹bFð® Edit Playlist WýUý dNEð
Playlist s t?²OL?ð …œUŽ≈ w? Vžd?ð Íc« rÝô« b?¹bײ? † … s¹—e?« vKŽ j?G{« Æ≤
ÆOK Ë√ —e« vKŽ jG{« rŁ ¨©WLzU
®
ÆOK —e« vKŽ jG{« rŁ ¨©WOLð® Rename —UO²šô † … s¹—e« vKŽ jG{« Æ≥
Æ©WOLð® Rename WýUý dNEð
Save
Back Space
MOVE
Space
Delete
OK
Edit Playlist
Dolphin
3/3
.dýR*« —«u−Ð œułu*« ·d(« ·c×¹ ∫©·cŠ® Delete •
.ôUšœù« WU ·c×¹ ∫©`® Clear •
Title
Length Edit
01 JAN/01/2007 12:00 00:00:03
02 JAN/01/2007 12:30 00:00:25
03 Dolphin
00:00:05
—«—“√ «b²ÝUÐ WÐuKD*« “ud« qšœ√ Æ¥
ÆdýR*« q³
œułu*« ·d(« ·c×Ð ÂuI¹ ∫©nKK WU® Back Space •
Æ©5LO« WOŠU½® ÂUú dýR*« „d×¹Ë WU qšb¹ ∫©WU® Space •
EXIT
DVD-RAM(VR)
No.
Æ
Clear
RETURN
Dolphin
1 Scene
JAN/01/2007 12:00
MOVE
OK
RETURN
EXIT
.WOBM« ôUšœù« q−¹ ∫©kHŠ® Save •
ÆOK —e« vKŽ jG{« rŁ ¨©kHŠ® Save —UO²šô
—«—“_« vKŽ jG{« Æμ
Æ…œb;« WLzU
rÝUÐ ’U)« rÝô« qIŠ w ÁdOOGð - Íc« rÝô« ÷dŽ r²¹
WLzU s bNA q¹bFð
Æ W L z U b ¼ U A q ¹ b F ² « œ U ý — ù « Ác ¼ l ³ ð «
DVD-Recorder
Edit Scene
اﻟﺘﻌﺪﻳﻞ
DVD-RAM(VR)
Scene No.
1/7
Playlist No. 3
Play
Modify
©VR l{u«®
01 00:00:03
02 00:00:42
03 00:00:04
04 00:00:03
05 00:00:11
06 00:00:04
OK
RETURN
Æ’dI« qOGAð ·UI¹≈ bFÐ PLAY LIST —e« vKŽ jG{« Ʊ
Æ©WLzU
q¹bFð® Edit Playlist WýUý dNEð
¨©WLzU
® Playlist s tK¹bFð w Vždð Íc« rÝô« —UO²šô † … s¹—e« vKŽ jG{« Æ≤
ÆOK Ë√ —e« vKŽ jG{« rŁ
Add
MOVE
—e« vKŽ jG{« rŁ ¨©bNA q¹bFð® Edit scene —UO²šô † … s¹—e« vKŽ jG{« Æ≥
ÆOK Ë√
Æ©bNA q¹bFð® Edit scene WýUý dNEð
∂π ≠ WOÐdF«
DVD-VR350-01375B-IB-ar
69
Move
2007.4.2, 3:51 PM
Delete
EXIT
œb× bNA qOGAð
Æ∑∞ W×H? ≥ v≈ ± s «uD)« l³ð« ¨œ«bŽùU?Ð ÂUOIK
—e« vKŽ jG{« rŁ ¨tKOGAð b¹dð Íc« bNA*« —UO²šô
—«—“_« vKŽ jG{« Æ¥
ÆOK
ÆUNKOGAð r²OÝ w²« WLzU
rÝ« b¹b% r²¹
ÆÈdš√ …Îd OK —e« vKŽ jG{« Æμ
Æœb;« bNA*« qOGAð r²¹ ·uÝ
ÆSTOP —e« vKŽ jG{« ¨bNA*« qOGAð ·UI¹ù •
DVD-Recorder
Edit Scene
DVD-RAM(VR)
Scene No.
2/7
Playlist No. 3
Play
Modify
01 00:00:03
02 00:00:42
03 00:00:04
04 00:00:03
05 00:00:11
06 00:00:04
OK
RETURN
Add
MOVE
©t«b³²Ý«® b¼UA*« bŠ√ dOOGð
Move
Delete
EXIT
DVD-Recorder
Edit Scene
DVD-RAM(VR)
Æ∑∞ W×H? ≥ v≈ ± s «uD)« l³ð« ¨œ«bŽùU?Ð ÂUOIK
—e« vKŽ jG{« rŁ ÁdOOGð b¹dð Íc« bNA*« —UO²šô
—«—“_« vKŽ jG{« Æ¥
ÆOK
ÆOK —e« vKŽ jG{« rŁ ¨©dOOGð® Modify —UO²šô † … s¹—e« vKŽ jG{« Æμ
Æ©bNA dOOGð® Modify Scene WýUý dNEð
ÆbNA*« W¹«bÐ WDI½ bMŽ OK —e« vKŽ jG{« Æ∂
Æ©W¹«bЮ Start —UÞù« w W¹«b³« WDI½ X
ËË …—uB« ÷dŽ r²¹ •
WKB²*« —«—“_« «b²ÝUÐ ÁdOOGð w Vždð w²« lDI*« W¹UN½ Ë√ W¹«bÐ WDI½ œbŠ •
qOGA²UÐ
©
¨
¨
¨
¨ ® ∫qOGA²UÐ WUš —«—“√ •
Scene No.
Playlist No. 3
Play
Modify
01 00:00:03
02 00:00:42
03 00:00:04
04 00:00:03
05 00:00:11
06 00:00:04
OK
RETURN
Move
Add
MOVE
DVD-Recorder
Delete
EXIT
Modify Scene
DVD-RAM(VR)
Scene No. 002
Start
End
ÆbNA*« W¹UN½ WDI½ bMŽ OK —e« vKŽ jG{« Æ∑
Æ©W¹UN½® End —UÞù« w W¹UNM« WDI½ X
ËË …—uB« ÷dŽ r²¹ •
ÆOK —e« vKŽ jG{« rŁ ¨©dOOGð® Change —UO²šô s¹—e« vKŽ jG{« Æ∏
ÆÁdOOGð w Vždð Íc« lDI*« q× œb;« bNA*« q×¹ •
2/7
Title List : 1/7
00:00:04
00:00:00
00:00:04
Start
End
Change
MOVE
OK
Cancel
RETURN
DVD-Recorder
EXIT
Modify Scene
DVD-RAM(VR)
Scene No. 002
Start
End
Title List : 1/7
00:00:04
00:00:07
00:00:07
Start
End
Change
MOVE
OK
Cancel
RETURN
EXIT
DVD-Recorder
Edit Scene
DVD-RAM(VR)
Scene No.
2/7
Playlist No. 3
Play
Modify
01 00:00:03
02 00:00:03
03 00:00:04
04 00:00:03
05 00:00:11
06 00:00:04
OK
RETURN
Move
Add
∑∞ ≠ WOÐdF«
DVD-VR350-01375B-IB-ar
70
2007.4.2, 3:51 PM
EXIT
اﻟﺘﻌﺪﻳﻞ
MOVE
Delete
©bNA lu dOOGð® bNA qI½
Æ∑∞ W×H? ≥ v≈ ± s «uD)« l³ð« ¨œ«bŽùU?Ð ÂUOIK
DVD-Recorder
Edit Scene
DVD-RAM(VR)
rŁ ¨©t?F
u? dO?OG?ð® tK?I½ b?¹dð Íc?« bN?A*« —U?O²?šô
Scene No.
2/7
Playlist No. 3
Play
—«—“_« vK?Ž jG?{« Æ¥
ÆOK —e« vKŽ jG{«
Modify
01 00:00:03
02 00:00:42
03 00:00:04
04 00:00:03
05 00:00:11
06 00:00:04
OK
RETURN
ÆOK —e« vKŽ jG{« rŁ ¨©qI½® Move —UO²šô † … s¹—e« vKŽ jG{« Æμ
ÆtKI½ œ«d*« bNA*« w dH√ —UO²š« —UÞ≈ dNE¹ •
¨tO≈ œb;« bNA*« qI½ w Vždð Íc« l
u*« —UO²šô
—«—“_« vKŽ jG{« Æ∂
ÆOK —e« œbŠ rŁ
Æœb;« l{u*« v≈ œb;« bNA*« qI½ r²¹ •
Move
Add
MOVE
Delete
EXIT
V?−¹ œb;« bN?A*« Ê_ ¨wU²« b?NA*« l{u? v≈ œb;« bN?A*« qI½ s?J1 s
Æ¡«dł≈ Í√ VKD²¹ ô U2 ¨l{u*« «c¼ q³
tł«—œ≈
Æ’dI« ŸuM UIÎË p–Ë ¨W{ËdF*« WýUA« w nOHÞ ·ö²š« „UM¼ ÊuJ¹ b
bNA WU{≈
Æ∑∞ W×H? ≥ v≈ ± s «uD)« l³ð« ¨œ«bŽùU?Ð ÂUOIK
b?¹b?ł bN?A? ë—œ≈ w? V?ždð Íc?« b?N?A?*« —UO?²?šô
—«—“_« v?KŽ j?G?{« Æ¥
ÆOK —e« vKŽ jG{« rŁ ¨tK³
Æb¹bł bNAL t²U{≈ œ«d*« bNA*« w dH√ —UO²š« —UÞ≈ dNE¹
ÆOK —e« vKŽ jG{« rŁ ¨©WU{≈® Add —UO²šô † … s¹—e« vKŽ jG{« Æμ
Æ©bNA WU{≈® Add Scene WýUý dNEð
ÆbNA*« W¹«bÐ WDI½ bMŽ OK —e« vKŽ jG{« Æ∂
Æ©W¹«bЮ Start —UÞù« w W¹«b³« WDI½ X
ËË …—uB« ÷dŽ r²¹ •
—«—“_« «b²ÝUÐ b¹b'« bNA*« WU{≈ w Vždð YOŠ lDI*« W¹UN½ WDI½ œbŠ •
ÆqOGA²UÐ WKB²*«
©
¨
¨
¨
¨ ® ∫qOGA²UÐ WUš —«—“√ •
ÆbNA*« W¹UN½ WDI½ bMŽ OK —e« vKŽ jG{« Æ∑
Æ©W¹UN½® End —UÞù« w W¹UNM« WDI½ X
ËË …—uB« ÷dŽ r²¹ •
ÆOK —e« vKŽ jG{« rŁ ¨¡UGù« —UO²šô s¹—e« vKŽ jG{« ª¡«dłù« ¡UGù •
ÆOK —e« vKŽ jG{« rŁ ¨©WU{≈® Add —UO²šô s¹—e« vKŽ jG{« Æ∏
Æ…uD)« w œb;« bNA*« q³
t²U{≈ w Vždð Íc« rI« ë—œ≈ r²¹ •
DVD-Recorder
Edit Scene
DVD-RAM(VR)
Scene No.
2/7
Playlist No. 3
Play
Modify
01 00:00:03
02 00:00:42
03 00:00:04
04 00:00:04
05 00:00:11
06 00:00:04
OK
RETURN
Move
Add
MOVE
Delete
EXIT
DVD-Recorder
Add Scene
DVD-RAM(VR)
Scene No. 002
Start
End
Title List : 1/7
00:00:04
00:00:00
00:00:04
Start
End
Add
MOVE
OK
Cancel
RETURN
EXIT
DVD-Recorder
Add Scene
DVD-RAM(VR)
Scene No. 002
Start
End
Title List : 1/7
00:00:04
00:00:07
00:00:07
Start
End
Add
اﻟﺘﻌﺪﻳﻞ
MOVE
MOVE
OK
OK
Cancel
RETURN
RETURN
DVD-Recorder
EXIT
Edit Scene
DVD-RAM(VR)
Scene No.
2/8
Playlist No. 3
Play
Modify
01 00:00:03
02 00:00:03
03 00:00:42
04 00:00:04
05 00:00:03
06 00:00:11
OK
RETURN
Move
Add
MOVE
∑± ≠ WOÐdF«
DVD-VR350-01375B-IB-ar
71
2007.4.2, 3:51 PM
Delete
EXIT
bNA ·cŠ
DVD-Recorder
Æ∑∞ W×H ≥ v≈ ± s «uD)« l³ð« ¨œ«bŽùUÐ ÂUOIK
—e« vK?Ž jG?{« rŁ ¨tc?Š b¹dð Íc?« bNA?*« —UO²?šô
Scene No.
—«—“√ vKŽ j?G{« Æ¥
ÆOK
Edit Scene
DVD-RAM(VR)
2/8
Playlist No. 3
Play
Modify
01 00:00:03
02 00:00:03
03 00:00:42
04 00:00:04
05 00:00:03
06 00:00:11
OK
RETURN
ÆOK —e« vKŽ jG{« rŁ ¨©·cŠ® Delete —UO²šô † … s¹—e« vKŽ jG{« Æμ
Move
Add
MOVE
Delete
EXIT
DVD-Recorder
Edit Scene
DVD-RAM(VR)
Scene No.
2/7
Playlist No. 3
Play
Modify
01 00:00:03
02 00:00:03
03 00:00:42
04 00:00:04
05 00:00:03
06 00:00:11
OK
RETURN
Move
Add
MOVE
Delete
EXIT
u¹bOH« “UNł v≈ WLzU a½
Æ’dI« qOGAð ·UI¹≈ bFÐ PLAY LIST —e« vKŽ jG{« Ʊ
Æ©WLzU
q¹bFð® Edit Playlist WýUý dNEð
¨©WLzU
® Playlist s tK¹bFð w Vždð Íc« rÝô« b¹bײ † … s¹—e« vKŽ jG{« Æ≤
ÆOK Ë√ —e« vKŽ jG{« rŁ
ÆOK —e« vKŽ jG{« rŁ ¨©a½® Copy —UO²šô † … s¹—e« vKŽ jG{« Æ≥
Æu¹bO j¹dý vKŽ t½Ë tðd²š« Íc« rÝô« qOGAð r²¹ •
ÆWOKLF« ¡UN½≈ bFÐ ©ÃËdš® EXIT —e« vKŽ jG{« Æ¥
ÆWLzUI« WýUý wH²ð
ÆÂbI²*« ÷«dF²Ýô« l{Ë w aM« WHOþË Â«b²ÝUÐ ÕuL dOž
WLzU s WLzU ·cŠ
Æ’dI« qOGAð ·UI¹≈ bFÐ PLAY LIST —e« vKŽ jG{« Ʊ
Æ©WLzU
q¹bFð® Edit Playlist WýUý dNEð
¨©WLzU
® Playlist s tK¹bFð w Vždð Íc« rÝô« b¹bײ † … s¹—e« vKŽ jG{« Æ≤
ÆOK Ë√ —e« vKŽ jG{« rŁ
Edit Playlist
Dolphin
Do you want to delete?
Dolphin
Yes
2 Scene
No
اﻟﺘﻌﺪﻳﻞ
ÆOK —e« vKŽ jG{« rŁ ¨©·cŠ® Delete —UO²šô † … s¹—e« vKŽ jG{« Æ≥
DVD-RAM(VR)
JAN/01/2007 01:00
ÆOK —e« vKŽ jG{« rŁ ¨©rF½® Yes —UO²šô s¹—e« vKŽ jG{« Æ¥
Æ·c(« WOKLŽ ¡UN²½« bFÐ ©WLzU
q¹bFð® Edit Playlist WýUA UOÎzUIKð lłdð ·uÝ
MOVE
∑≤ ≠ WOÐdF«
DVD-VR350-01375B-IB-ar
72
2007.4.2, 3:51 PM
OK
RETURN
EXIT
’«d_« d¹b
’dI« rÝ« q¹bFð
DVD-Recorder
Rename
DVD-RAM(VR)
Æ’«d_« bŠ√ WOL² «œUý—ù« Ác¼ l³ð«
Disc
jI DVD-VR355
Save
ÆMENU —e« vKŽ jG{« ¨©·UI¹≈® Stop l{u« w …bŠu« œułË l Ʊ
v?K?Ž j?G?{« r?Ł ©’«d?
_« d?¹b?® Disc Manager —U?O?²?šô † … s¹—e?« v?K?Ž j?G?{« Æ≤
ÆOK Ë√ —e«
—e« vKŽ jG{« rŁ ¨©’dI« rÝ«® Disc Name —UO²šô † … s¹—e« vKŽ jG{« Æ≥
ÆOK Ë√
©rÝô« q¹bFð® Edit Name WýUý dNEð
Æ
Back Space
MOVE
Delete
Clear
RETURN
EXIT
Disc Manager
DVD-RAM(VR)
Title List
Disc Name
: Disc
Playlist
Disc Protection
: Not Protected
Disc Format
Delete All Title Lists
Programme
ÆdýR*« q³
œułu*« ·d(« ·c×Ð ÂuI¹ ∫©nKK WU® Back Space •
Setup
Æ©5LO« WOŠU½® ÂUú dýR*« „d×¹Ë WU qšb¹ ∫©WU® Space •
Copy
.dýR*« —«u−Ð œułu*« ·d(« ·c×¹ ∫©·cŠ® Delete •
OK
DVD-Recorder
Disc Manager
Í—“ «b²ÝUÐ WÐuKD*« “ud« qšœ√ Æ¥
Space
MOVE
OK
RETURN
EXIT
.ôUšœù« WU ·c×¹ ∫©`® Clear •
.WOBM« ôUšœù« q−¹ ∫©kHŠ® Save •
ÆOK —e« vKŽ jG{« rŁ ¨©kHŠ® Save —UO²šô
—«—“_« vKŽ jG{« Æμ
Æ’dI« WOLð r²ð
ÆUIγ ’dI« W¹ULŠ ` v≈ ÃU²% ¨’dI« rÝ« q¹bF²
Æ’dI« ŸuM UIÎË p–Ë ¨W{ËdF*« WýUA« w nOHÞ ·ö²š« „UM¼ ÊuJ¹ b
’dI« W¹ULŠ
Ë√ W¾ON²« UOKLŽ s ’«d_« W¹ULŠ WO½UJ≈ ©’dI« W¹ULŠ® Disc Protection WHOþË p `O²ð
Æ…œuBI*« dOž UOKLF« V³Ð ·c(«
DVD-Recorder
Disc Manager
DVD-RAM(VR)
Title List
Disc Name
:
Playlist
Disc Protection
: Protected
Disc Manager
Disc Format
Delete All Title Lists
Programme
ÆMENU —e« vKŽ jG{« ¨©·UI¹≈® Stop l{u« w …bŠu« œułË l Ʊ
اﻟﺘﻌﺪﻳﻞ
v?K?Ž j?G?{« r?Ł ©’«d?
_« d?¹b?® Disc Manager —U?O?²?šô † … s¹—e?« v?K?Ž j?G?{« Æ≤
ÆOK Ë√ —e«
Setup
Copy
MOVE
vKŽ jG?{« rŁ ¨©’dI« W?¹ULŠ® Disc Protection —UO²?šô † … s¹—e« vK?Ž jG{« Æ≥
ÆOK Ë√ —e«
ÆOK Ë√ —e« vKŽ jG{« rŁ ¨©wL×® Protected —UO²šô † … —e« vKŽ jG{« Æ¥
∑≥ ≠ WOÐdF«
DVD-VR350-01375B-IB-ar
73
2007.4.2, 3:51 PM
OK
RETURN
EXIT
’d W¾ONð
ï DVD-RAM/+RW
Æ’«d_« bŠ√ W¾ON² «œUý—ù« Ác¼ Âb²Ý«
Æ p c ’d I « W ¹ U LŠ ¡ U G ≈ V − ¹ U L DVD-Recorder
Disc Manager
DVD-RAM(VR)
jI DVD-VR355
ÆMENU —e« vKŽ jG{« ¨©·UI¹≈® Stop l{u« w …bŠu« œułË l Ʊ
v?K?Ž j?G?{« r?Ł ©’«d?
_« d¹b?® Disc Manager —U?O?²?šô † … s?¹—e?« vK?Ž j?G?{« Æ≤
ÆOK Ë√ —e«
—e« vKŽ jG{« rŁ ¨©’dI« W¾ONð® Disc Format —UO²šô † … s¹—e« vKŽ jG{« Æ≥
ÆOK Ë√
DVD-RAM/+RW ’d
Æ©ø’dI« W¾ONð b¹dð q¼® ¢Do you want to format disc?¢ bOQ²« WUÝ— dNE²Ý •
r²OÝ® ¢ÆAll data will be deleted. Do you want to continue¢ bOQ²« WUÝ— dNE²Ý •
Æ©ø—«dL²Ýô« b¹dð q¼ ÆU½UO³« WU ·cŠ
DVD-RW ’d
Choose the recording format for DVD-¢ b?OQ?²« W?UÝ— ‰ö?š s? pM? VK?DO?
Ô Ý •
Æ©ÆDVD-RW ’«d
QÐ ’U)« qO−²« oOMð d²š«® ¢ÆRW
r²OÝ® ¢ÆAll data will be deleted. Do you want to continue¢ bOQ²« WUÝ— dNE²Ý •
Æ©ø—«dL²Ýô« b¹dð q¼ ÆU½UO³« WU ·cŠ
Title List
Disc Name
:
Playlist
Disc Protection
: Not Protected
Disc Manager
Disc Format
: DVD-VR
you want to format disc?
DiscDoFinalise
Programme
Yes
Setup
No
Copy
MOVE
OK
RETURN
EXIT
DVD-RW
DVD-Recorder
Disc Manager
DVD-RW(VR)
Title List
Disc Name
:
Playlist
Disc Protection
: Not Protected
Disc Format
: DVD-VR
Disc ManagerChoose the recording format for DVD-RW.
Disc Finalise
Programme Delete All Title Lists
DVD-VR
Setup
DVD-V
Copy
MOVE
OK
RETURN
EXIT
Æ©o«u® OK —e« vKŽ jG{« rŁ ¨©rF½® Yes b¹bײ —«—“_« vKŽ jG{« Æ¥
Æ’dI« W¾ONð X9
DVD-V l{Ë
DVD-VR l{Ë
DVD-RW
DVD-RAM
DVD-R
DVD-RW
’dI«
ÆUNKO−ð oOM² UIÎË DVD-V l{Ë DVD-VR l{Ë vKŽ ·dF²« r²¹
’dI« ‰UH≈
q− WDÝ«uÐ DVD-RW/±R ’d vKŽ ¡ULÝ_« qO−ð bFÐ
ÆWOł—Uš …eNł√ vKŽ tKOGAð WO½UJ≈ q³ ÎôË√ tUH≈ 5F²¹ ¨DVD ’«d√
DVD-Recorder
Title List
Disc Name
:
Playlist
Disc Protection
: Not Protected
Disc Manager
Disc Format
: DVD-VR
Do you want to finalise disc?
Disc Finalise
Programme
jI DVD-VR355
Setup
ÆMENU —e« vKŽ jG{« ¨©·UI¹≈® Stop l{u« w …bŠu« œułË l Ʊ
Delete All Title Lists
Yes
MOVE
—e« vKŽ jG{« rŁ ¨©’dI« ‰UH
≈® Disc Finalise —UO²šô † … —e« vKŽ jG{« Æ≥
ÆOK Ë√
¢Do you want to finalise disc?¢ b?OQ?²« W?UÝ— ‰ö?š s „—U?Oš b?OQ?ð pM? VK?D¹
Æ©ø’dI« ‰UH
≈ w Vždð q¼®
VKDOÔÝ Æ©o«u® OK —e« vKŽ jG{« rŁ ¨©rF½® Yes b¹bײ s¹—e« vKŽ jG{« Æ¥
¢Disc will be finalised. Do you want to continue?¢ WUÝd« ‰öš s Èdš√ …Îd pM
Æ©ø—«dL²Ýô« b¹dð q¼ Æ’dI« ‰UH
≈ r²OÝ®
‰U?H?
≈ r?²¹ ÆOK —e?« v?K?Ž j?G{« r?Ł ¨©r?F?½® Yes —U?O²?šô s?¹—e?« v?KŽ j?G?{« Æμ
Æ’dI«
∑¥ ≠ WOÐdF«
DVD-VR350-01375B-IB-ar
74
No
Copy
OK
RETURN
EXIT
اﻟﺘﻌﺪﻳﻞ
v?K?Ž j?G?{« r?Ł ©’«d?
_« d¹b?® Disc Manager —U?O?²?šô † … s?¹—e?« vK?Ž j?G?{« Æ≤
ÆOK Ë√ —e«
Disc Manager
DVD-RW(VR)
2007.4.2, 3:51 PM
ÆqO−²« WLzU
s ¡ULÝ_« ·cŠ sJ1 s ’dI« ‰UH
≈ œd−0
ÆDVD-Video WI¹dÞ fHMÐ tUH
≈ bFÐ ©V l{u«® DVD-RW/±R ’dI« qLF¹
Æ’dI« Ÿu½ VŠ UN{dŽ r²¹ w²« WýUA« nK²ð b
Æ’dI« vKŽ WK−*« U½UO³« —b
VŠ ‰UH
ù« X
Ë nK²¹ b
q−?*« qOGA?ð ·UI¹≈ - «–≈ ’dI« v?KŽ błuð w²« U?½UO³« nK?²ð ·uÝ
ƉUH
ù« WOKLŽ ¡UMŁ√
©qN« qO−²« l{Ë® EZ REC MODE «b²ÝUÐ UOÎzUIKð ’dI« ‰UH
≈ sJ1
Æ©μ∏ W×HB« dE½«®
©VRØV l{Ë® ’dI« ‰UH≈ ¡UG≈
DVD-Recorder
Disc Manager
DVD-RW(VR:F)
ÆMENU —e« vKŽ jG{« ¨©·UI¹≈® Stop l{u« w …bŠu« œułË l Ʊ
v?K?Ž j?G?{« r?Ł ©’«d?
_« d?¹b?® Disc Manager —U?O?²?šô † … s¹—e?« v?K?Ž j?G?{« Æ≤
ÆOK Ë√ —e«
vKŽ jG{« rŁ ¨©’dI« ‰UH
≈ ¡UG≈® Disc Unfinalise —UO²šô † … —e« vKŽ jG{« Æ≥
ÆOK Ë√ —e«
¡U?G?≈ w?? V?žd?ð q??¼® ¢Do you want to unfinalise disc?¢ b?O?Q??²?« W?U??Ý— p? d?N??E?ð
Æ©ø’dI« ‰UH
≈
Title List
Disc Name
:
Playlist
Disc Format
: DVD-VR
Disc Manager
Disc Unfinalise
Do you want to unfinalise disc?
Programme
Setup
MOVE
VKDO
Ô Ý Æ©o«u® OK —e« vKŽ jG{« rŁ ¨©rF½® Yes b¹bײ s¹—e« vKŽ jG{« Æ¥
¢Disc will be unfinalised. Do you want to continue?¢ WUÝd« ‰öš s Èdš√ …Îd pM
Æ©ø—«dL²Ýô« b¹dð q¼ Æ’dI« ‰UH
≈ ¡UG≈ r²¹ s®
ÆOK —e« vKŽ jG{« rŁ ¨©rF½® Yes —UO²šô s¹—e« vKŽ jG{« Æμ
Æ’dI« ‰UH
≈ ¡UG≈ pcÐ r²¹
ÆV l{Ë w UNUH
≈ ¡UG≈ Ë√ DVD-RW ‰UH
≈ sJ1
‰UH
ù« ¡UG≈
©V l{Ë® DVD-RW
s b¹e*« ¡«dł≈ sJ1
qO−²« UOKLŽ
Æ·c(«Ë W¹UL(«Ë
‰UH
ù«
DVD-Video (RW)
WöF«
WI¹dD« fH½
’«d
√ l WF³²*«
qOGA²«
DVD-Video
اﻟﺘﻌﺪﻳﻞ
ÆVR l{Ë w UNUH
≈ ¡UG≈ Ë√ DVD-RW ’«d
√ ‰UH
≈ sJ1
‰UH
ù« ¡UG≈
©V l{Ë® DVD-RW
s b¹e*« ¡«dł≈ sJ1
qO−²« UOKLŽ
ÆW¹UL(«Ë q¹bF²«Ë ·c(«Ë
‰UH
ù«
DVD-RW (VR:F)
WöF«
b¹e*« ¡«dł≈ —cF²¹
·c(«Ë qO−²« s
ÆW¹UL(«Ë q¹bF²«Ë
qOGA²«
∑μ ≠ WOÐdF«
DVD-VR350-01375B-IB-ar
75
Yes
No
Copy
2007.4.2, 3:51 PM
OK
RETURN
EXIT
¡ULÝ_« rz«u WU ·cŠ
DVD-Recorder
Disc Manager
DVD-RAM(VR)
jI DVD-VR355
ÆMENU —e« vKŽ jG{« ¨©·UI¹≈® Stop l{u« w …bŠu« œułË l Ʊ
Title List
Disc Name
:
Playlist
Disc Protection
: Not Protected
Disc Manager
Disc Format
: DVD-VR
Do you
want to delete all title lists?
Disc
Finalise
Programme
v?K?Ž j?G?{« r?Ł ©’«d?
_« d¹b?® Disc Manager —U?O?²?šô † … s?¹—e?« vK?Ž j?G?{« Æ≤
ÆOK Ë√ —e«
¨©¡ULÝ_« rz«u
WU ·cŠ® Delete All Title Lists —UO²šô † … s¹—e« vKŽ jG{« Æ≥
ÆOK Ë√ —e« vKŽ jG{« rŁ
Vžd?ð q¼® ¢Do you want to delete all title lists?¢ ·c(« b?OQ?ð WUÝ— p? dN?Eð •
Æ©ø¡ULÝ_« rz«u
WU ·cŠ w
·cŠ® Delete All Title List WHOþu« qOGAð r²¹ s ∫WOL× ¡ULÝ√ bł«uð WUŠ w •
r²¹ sK ¨W²ÐUŁ …—u vKŽ Íu²×¹ rÝ« „UM¼ ÊU «–≈ sJË Æ©¡ULÝ_« rz«u
WU
ÆWHOþu« qOGAð
dBMF« s ©W¹ULŠ® Protect WHOþË qODF²Ð pOKF ¨wL× rÝ« ·cŠ œ—√ «–≈
Æ©5Qð® Lock
Setup
Delete All Title Lists
Yes
No
Copy
MOVE
OK
RETURN
EXIT
ÆOK —e« vKŽ jG{« rŁ ¨©rF½® Yes —UO²šô s¹—e« vKŽ jG{« Æμ
Æ¡ULÝ_« rz«u
WU ·cŠ r²¹
o«u²*« d¹dײ«
U¼d¹d% - w²?« s¹ËUMF« Ë√ ‰uBH?« ÷dF WHOþu« ÁcN?Ð ÂUOI« V−¹ ¨DVD+RW ’«d_ W³?MUÐ
ÆwÝUO DVD qGA vKŽ
DVD-Recorder
Disc Manager
DVD+RW
Title List
Disc Name :
Disc Manager
Disc Format
Edit
Compatible
Do you
want
to execute Edit Compatible?
Programme
This may take more than an hour
depending on the configuration.
Setup
jI DVD-VR355
Copy
©W?L?zU?I?«® MENU —e?« vK?Ž j?G?{« ¨©·U?I?¹ù«® Stop l{Ë w? …b?Šu?« Êu?J?ð Ub?M?Ž Ʊ
ÆbFÐ sŽ rJײ« …bŠuÐ
MOVE
Yes
OK
No
RETURN
EXIT
—e« vKŽ jG{« rŁ ¨©’dI« …—«œ≈® Disc Manager b¹bײ † … s¹—e« vKŽ jG{« Æ≤
Æ —e« Ë√ ©o«u® OK
jG{« r?Ł ¨©o«u²*« d¹dײ«® Edit Compatible b¹bײ † … s?¹—e« vKŽ jG{« Æ≥
Æ —e« Ë√ ©o«u® OK —e« vKŽ
Æ©o«u® OK —e« vKŽ jG{« rŁ ©rF½® Yes b¹bײ s¹—e« vKŽ jG{« Æ¥
Æo«u²*« d¹dײ« WOKLŽ √b³ð
WLzU
v≈ ‰UI²½ô« pMJ1 ¨©o«u²*« d¹dײ«® Edit Compatible WHOþË ¡«dł≈ bFÐ
Æ©s¹ËUMF« WLzU
® TITLE MENU —e« vKŽ jGCUÐ ’dIUÐ WU)« s¹ËUMF«
You do¢ bOQ?²« WU?Ý— dNE?²Ý ¨qB? d¹d% W?HOþu?Ð ÂUOI?« ÂbŽ WU?Š w
©Æo«u²*« d¹dײ« cOHMð b¹dð q¼® ¢Ænot need to execute Edit Compatible
اﻟﺘﻌﺪﻳﻞ
∑∂ ≠ WOÐdF«
DVD-VR350-01375B-IB-ar
76
2007.4.2, 3:51 PM
اﳌﺮﺟﻊ
©DVD®UNŠö≈Ë ¡UDš_« ·UAJ²Ý«
Æ…bL²F*« Samsung W½UO e«d bŠQÐ ‰UBðô« q³ WOU²« h×H« ◊UI½ √dU ¨“UN'UÐ qDŽ Ë√ —uB ÀbŠ «–≈
q(«ØdOH²«
WKJA*«
ÆwÐdNJ« —UO²« f³I0 wÐdNJ« —UO²« pKÝ qOuð ÂUJŠ≈ s bQð •
Æ“UN'UÐ wÐdN —UOð błu¹ ô
Æu¹bOH« “UNłË DVD q− s
/I —e« vKŽ XDG{ q¼ •
—UO²UÐ tKOuð bFÐ qLF« ¡b³ X
u« iFÐ v≈ u¹bOH« “UNłË DVD q− ÃU²×¹
ÆwÐdNJ« —UO²UÐ qOu²« bMŽ …d²H ‰Ušœù« dNE¹
ÆwÐdNJ«
r²¹ ¨qOGA²« l{Ë vKŽ ©l¹d« qO−²«® ¢Quick Recording¢ WHOþË j³{ WUŠ w
dE½«® ÆWŽdÐ WÐuKD*« …UMI« qO−ð s pMJ1 U2 ¨WŽdÐ DVD q−Ë u¹bOH« qOGAð
©≥≥ W×HB«
wÐdNJ« —UO²« f³I0 wÐdNJ« —UO²« pKÝ qOuð ÂUJŠ≈ s bQð •
ÆÊu¹eHOK²« Z«dÐ qO−ð s sJL²« ÂbŽ
ø`O×B« tłu« vKŽ u¹bOH« “UNłË DVD q−* Z«d³« «œ«bŽ≈ j³CÐ XL
q¼ •
Æ’d
vKŽ …d(« WŠU*« s oI% •
Æwz«uN« qÐU qOuð s bQð •
ÆÈdš√ …d wU(« X
u«Ë W¹UNM« X
ËË qO−²« s“ «œ«bŽ≈ h׫ •
ÆV−¹ UL qLF¹ ô Xu*UÐ qO−²«
¡UMŁ√ dš¬ V³Ý Í_ Ë√ —UO²« ŸUDI½« V³Ð wÐdNJ« —UO²« qB - «–≈ qO−²« ¡UG≈ r²¹ •
ÆqO−²«
v?K?Ž q?O?−??²?« Z?²M?*« «c?N? s?J?1 Æô Â√ t?²?¾?O?N?ð X?9 b?
’d?I« ÊU? «–≈ U? W?d?F?* h?×?« •
ÆjI UN²¾ONð X9 w²« ’«d
_«
ÆqO−²« ¡«dł≈ —cFð
Æ ’d
vKŽ WOU …dŠ WŠU œułË s bQð •
ÆtKO−ð sJ1 sK ¨aM« b{ UOÎL× Z«d³« bŠ√ ÊU «–≈
r²¹ Íc« X
u« w DVD u¹bOË q− w …œułu*« PROG (
ÆWÐU−²Ý« błuð ô sJ REC —e« XDG{
/ ) —«—“√ vKŽ jG{«
ÆÍuÐ_« qHI« —Ëd WLK XO½
Æ©qOGA²«Øœ«bF²Ýô«® STANDBY/ON —e« vKŽ jG{« rŁ ¨qOGA²« tO
ÆWO{«d²ô« lMB*« «œ«bŽ≈ v≈ —Ëd*« WLK p– w U0 «œ«bŽù« WU 5OFð …œUŽ≈ r²ð
Æpc ÈuB
…—Ëd{ „UM¼ X½U «–≈ ô≈ WHOþu« Ác¼ Âb²ð ô
Ʃ×bUÐ ’d
œułË ÂbŽ bMŽ jI UN«b²Ý« ÕU²¹ WOU)« Ác¼ Ê√ kŠô®
ÆvKŽ_ oBK*« ÊuJ¹ YO×Ð `O× qJAÐ ’dI« ‰Ušœ≈ - b
t½√ s bQð •
Æ’dI« qOGAð s sJL²« ÂbŽ
ÆDVD ’dIÐ ’U)« WIDM*« e— lł«— •
Æ’«d
_« Ÿ«u½√ iFÐ qOGAð «c¼ u¹bOH« q−Ë DVD “UN' sJ1 ô •
øwD²« l{Ë Ë√ W¾OD³« Wd(« l{Ë w Z«d³« bŠ√ b¼UAð q¼ •
Æu błu¹ ô
WŽd??« d?Ož Èd?š√ W?Žd?Ð Z?«d?³« b?Š√ q?O?GA?²?Ð Âu?Ið X?M? «–≈ u?B« ŸU?L?Ý s?J1 s?
Y׳« ¡UMŁ√ u ŸULÝ pc pMJ1 ô ¨©± l¹dÝ® ÂUú Y׳« qOGAð «bŽ ULO® ÆW¹œUF«
©ÆŸU{Ë_« WU w VCD Ë MPEG4 sŽ
ÆWOË_« «œ«bŽù«Ë öOu²« s oI% •
اﳌﺮاﺟﻊ
Æô Â√ UHÎUð ’dI« ÊU «–≈ U2 oI% •
Æd_« VKDð «–≈ ’dI« nE½
ÆvKŽ_ oBK*« ÊuJ¹ YO×Ð `O× qJAÐ ’dI« ‰Ušœ≈ - b
t½√ s bQð •
∑∑ ≠ WOÐdF«
DVD-VR350-01375B-IB-ar
77
2007.4.2, 3:51 PM
©DVD® UNŠö≈Ë ¡UDš_« ·UAJ²Ý«
q(«ØdOH²«
WKJA*«
∫WOU²« »U³Ý_« bŠ_ WHOþu« Ë√ WOKLF« «b²Ý« sJ1 s
©U¹«Ëe« ¨‰U¦*« qO³Ý vKŽ® …eO*« Ác¼ DVD ’d
rŽb¹ ô ©±®
Æ`O×B« ‚UDM« ×Uš qB Ë√ rÝ« Ë√ wzu{ ` X
Ë VKDÐ XL
©≤®
Æ…œb;« nzUþu« WU rŽb¹ ô ’dI«
UL ©j³{® Setting WLzUI« s UND³CÐ XL
w²« «œ«bŽù« iFÐ qLFð s ¨WU(« Ác¼ w
ÆV−¹
ÆWýUA« vKŽ
ed« dNE¹
«œ«bŽù« sŽ WHK² qOGA²« l{Ë «œ«bŽ≈
Æ©j³{®Setting WLzUI« «b²ÝUÐ UND³{ - w²«
ÆDVD ’dI W³MUÐ W²ÐUŁ ŸUHð—ô« ‰bF WLO
Æ÷dF« v≈ ŸUHð—ô« ‰bF dOOGð s sJL²« ÂbŽ
«—UOš® Audio Output Options WLzU
s `O×B« wL
d« Ãd<« «—UOš b¹b% s bQð
Æ©uB« Ãd
Æ“UN'« s —œU u błu¹ ô
øT«œ ÊUJ v≈ œ—UÐ ÊUJ s TłUH qJAÐ u¹bOH« “UNłË DVD q− XdŠ q¼
—«dL²Ý« l 5²ŽUÝ v≈ WŽUÝ 5Ð U dE²½«Ë ’«d
_« ëdšSÐ rI ¨pc l{u« ÊU «–≈
qLFOÝ ÆÈdš√ …d tKOGAð ‰ËUŠ rŁ ’dI« qšœ√ ¨p– bFÐË ¨wÐdNJ« —UO²UÐ “UN'« qOuð
ÆnO¦J²« d³ð bMŽ V−¹ UL “UN'«
ÆWHK² U¹«Ë“ s UNÞUI²« - —u vKŽ qL²A¹ ’dI« ÊU «–≈ jI U¹«Ëe« WHOþË du²ð
Æ’dI« vKŽ WO½bF ÂUł√ Ë√ nKð „UM¼ ÊU «–≈ U W¹ƒd h׫ •
ÆUNFOMBð …œuł w WCHM*« ’«d
_« iFÐ qOGAð r²¹ ô b
•
»«dD{« Àb×¹ bI ¨…Q− lÞUÝ dš¬ v≈ …¡U{ù« iHM bNA s ‰uײ« - «–≈ •
Æ“UN'« w qKš œułu fO «c¼ sJ ¨WýUAK X
R
Æ’dI« vKŽ bL²Fð w²« nzUþu« s WýUAK W³ŠUB*« WLłd²«Ë uB« UG
’«d?
√ qO?GA?ð WU?Š w ô≈ u?B«Ë WýU?AK? W³?ŠUB?*« WL?łd²?« UG? «b?²Ý« ÕU?²¹ ô
Æ’«d
_« WLzU
w dNEð czbMŽ ¨DVD
Æ“UN'« sŽ —bB¹ u Ë√ u¹bO Ãd błu¹ ô
ÆÊ«uŁ μ v≈ ≤ bFÐ ’«d_« ל ëdš≈ r²¹
ÆDVD ’d qOGAð ¡UMŁ√ qLFð ô U¹«Ëe« WHOþË
—u dNEð Ë√ …—u dNEð ô sJ ¨—Ëb¹ ’dI«
Æ…œu'« WCHM
W³ŠUB*« WLłd²« WGË uB« WG qOGAð r²¹ ô
ÆWÐužd*« WýUAK
ÆWOU_« WŠuK« vKŽ PS ÷dŽ s oIײð •
Æ’dI« ·UI¹≈ bMŽ P.SCAN —e« «b²ÝUÐ u¹bOH« Ãd dOOGð s bQð •
ÆÍbŽUBð ëdš≈ błu¹ ô
DVD q− w bFÐÔ sŽ rJײ« “UNł dFA² v≈ bFÐÔ sŽ rJײ« “UNł tłË •
©U
Î b
±μ® ÆW³ÝUM WU s tb²ÝUð Æu¹bOH« “UNłË
“UNłË WNł s u¹bOH« “UNłË DVD q− 5Ð …œułu*« oz«uF« W«“≈ vKŽ ’dŠ«
ÆÈdš√ WNł s bFÐÔ sŽ rJײ«
ÆU¹—UD³« s×ý œUH½ ÂbŽ s bQð •
ÆqLF¹ ô bFÐÔ sŽ rJײ« “UNł
l³ð« rŁ ¨p²KJA nBð w²« ¡«eł_« √d
«Ë sŽ Y×Ы rŁ U¹u²;« ‰Ëbł √d
« •
ÆWId*« «œUý—ù«
ÆUNKOGAð bŽ√ rŁ …bŠu« qOGAð t½« •
ÆSamsung W½UO ed »d
QÐ qBðU ¨WKJA*« dL²Ý« «–≈ •
Èdš√ öJA
ÆHDMI rŽbÐ q?LF¹ u¹bOH« Ãdš Ê√ s bQð •
ÆDVD u¹bOË q− w HDMI fÐU
Ë Êu¹eHO?K²« 5Ð …œułu*« WKu« h׫ •
rŽbÐ qLF¹ Íc« DVD u¹bOË q− r?Žb¹ p¹b Êu¹eHOK²« “UNł Ê√ bQð •
Æ1080iØ720pØ576p
HDMI Ãdš błu¹ ô
©jI DVD-VR355®
ô Êu¹eHOK²« Ê√ wMF¹ «cN ¨WýUA« vKŽ ÊuK« iOÐ√ g¹uAð —uNþ WUŠ w •
Æ©‚UDM« wUŽ Èu²;« W¹ULŠ® HDCP rŽb¹
WOFO³Þ dOž Ëb³ð HDMI Ãdš WýUý
ÆW×O× WI¹dDÐ qLF¹ Êu¹eHOK²« ÂUE½ œ«bŽ≈ Ê√ bQð •
HDMI Ãd) W³MUÐ eðd¼ ∂∞ v≈ eðd¼ μ∞ s —UÞù« ‰bF q¹u?% bMŽ WýUA« e²Nð b
•
Æ1080iØ720p W
œ Èu²0 qLF¹ Íc« ©Õu{u« WO?UŽ …œbF²*« jzUÝu« WNł«Ë®
ÆÊu¹eHOK²UÐ ’U)« Âb²*« qOœ WFł«d vłd¹ •
HDMI Ãdš “«e²¼«
©jI DVD-VR355®
©jI DVD-VR355®
اﳌﺮاﺟﻊ
∑∏ ≠ WOÐdF«
DVD-VR350-01375B-IB-ar
78
2007.4.2, 3:51 PM
©u¹bOH«® UNŠö≈Ë ¡UDš_« ·UAJ²Ý«
Æ…bL²F*« Samsung W½UO e«d bŠQÐ ‰UBðô« q³ WOU²« WDO³« h×H« UOKLŽ cH½
q(«ØdOH²«
WKJA*«
ÆjzU(UÐ wÐdNJ« —UO²« cHM0 —UO²« fÐU
qOuð s bQð •
ÆwÐdN —UOð błu¹ ô
Æ
/I —e« vKŽ XDG{ q¼ •
Æ„u×½ W¹UL(« ÊUË vKŽ_ —UÞù« V½Uł ÊU «–≈ ô≈ u¹bOH« j¹dý ‰Ušœ≈ sJ1 s •
u¹bO j¹dý ‰Ušœ≈ sJ1 ô
Æu¹bOH« “UNłË DVD q− wz«u¼ öOuð h׫ •
Êu¹eHOK²« ZU½dÐ qO−ð r²¹ r
øV−¹ UL u¹bOH« “UNłË DVD q−0 «uMI« n«u j³{ - q¼ •
Æj¹dAUÐ ’U)« W¹UL(« ÊU WöÝ s bQð •
ÆwU(« X
u«Ë W¹UNM«ØW¹«b³« X
Ë «œ«bŽ≈ h× bŽ√ •
X
u*UÐ qO−²« WOKLŽ XKA
qO−²K wHJ¹ X
Ë tÐ j¹dý ‰Ušœ≈ s bQð •
Æô Â√ q³
s tKO−ð o³Ý UD
Î ¹dý Âb²ð XM «–≈ U WdF* oI% •
…—uB« Ë√ ¨W{ËdF …—u błuð ô
W¼uA W{ËdF*«
Æn«u*« vKŽ œ«bŽù« «c¼ j³{ V−¹ Æwł—UšØn«u œ«bŽ≈ h׫ •
W¹œUF« «uMI« …b¼UA sJ1 ô
ÆÊu¹eHOK²« wz«u¼ öOuð h׫ •
¡UMŁ√ WFDI² ◊uDš Ë√ WÞdý√ —uNþ
ÆdOŁQ²« «c¼ s b×K PROG/TRK ( / ) s¹—e« vKŽ jG{« •
qOGA²«
Æj¹dA« WU( UF
Î ³ð WFDI² ◊uDšË WÞdý√ vKŽ W²ÐU¦« …—uB« qL²Að b
•
ÆdOŁQ²« «c¼ s b×K W¾OD³« Wd(« l{Ë ¡UMŁ√ PROG/TRK ( / ) s¹—e« vKŽ jG{«
bMŽ …dO¦ WFDI² ◊uDšË WÞdý√
vKŽ W²ÐU¦« …—uB« qL²Að ·uÝ
ÆqOGA²« ¡UMŁ√ ll —e« vKŽ jGC«
nOEM² ÃU²?% U0d ¨jz«dA« s WŽuL−? qOGAð bMŽ W¾OÝ …œu?−Ð —uB« dNþ «–≈ •
nOEMð v≈ uŽb¹ U „UM¼ fOK ¨dNEð r «–≈Ë ¨WFzUý WKJA XO Ác¼ Æu¹bOH« ”˃—
Ɣ˃d«
u¹bOH« ”√— nOEMð
nOEMð Æ”√d« nOEMð j¹dAÐ WId*« «œUý—ù« WU √d
« ¨u¹bOH« ”˃— nOEMð bMŽ
Æu¹bOH« ”˃dÐ WLz«œ «—
ÎÓ «d{√ Àb×¹ b
W¾ÞUš WI¹dDÐ ”√d«
∫wK¹ U s¹Ëb²Ð rI ¨WIÐU« «œUý—ù« …¡«d bFÐ WKJA*« qŠ s sJL²ð r «–≈
u¹bOH« “UNłË DVD q− s wHK)« ¡e'« w qK*« rd«Ë “«dD« •
ÊULC« UuKF •
WKJALK `{«Ë nË •
اﳌﺮاﺟﻊ
ÆbL²F Samsung W½UO ed »dQÐ qBð« rŁ
∑π ≠ WOÐdF«
DVD-VR350-01375B-IB-ar
79
2007.4.2, 3:51 PM
UH«u*«
eðdO¼ ∂∞Øμ∞ ¨Xu ≤¥∞ ≠ ±±∞ s œœd² —UOð
wÐdNJ« —UO²« U³KD²
«Ë ≥∞
WOÐdNJ« W
UD« „öN²Ý«
«dł uKO ¥[∏
Ê“u«
©ŸUHð—ô«® ∑π ™ ©‰uD«® ≥≤± ™ ©÷dF«® ¥≥∞
œUFÐ_«
W¹u¾ ≥μ´ v≈ W¹u¾ μ´ s
qOGA²« …—«dŠ Wł—œ
qOGA²« ¡UMŁ√ •∑μ s q
√ WÐuÞd« ÆqOGA²« bMŽ u
Ì ² l{Ë w “UN'UÐ ÿUH²Šô«
Èdš√ ·Ëdþ
ÂË√ ∑μ ©Ê“«u² dOž® RCA: Vp-p ±[∞∫ RCA f³I
©wHKš® u¹bOH« qšb
Ê“«u² dOž ÂË√ uKO ¥∑ ¨RCA: dBm ∏≠ ∫ RCA f³I
©wHKš® uB« qšb
DV ¨RCA f³I
wU_« qšb*«
©…UM
≥∂ wzb³® ∂π ≠ ≤± UHF
RF Ãdš
s1√Ød¹√ u ¨RCA f³I
©u¹bOH« “UNłË DVD “UN'® uB«
©©Í—u×® COAXIALË ©wzu{® OPTICAL® wL
d« uB« Ãd
©jI DVD® uB«
©1080i Ë 720p Ë 576p® HDMI ¨Component ÃdšË S-Video ¨RCA f³I
©jI DVD-VR355®
©u¹bOH« “UNłË DVD “UN−Ю u¹bOH«
VHS ŸuM« s u¹bO j¹dý
j¹dA« oOMð
©‰UЮ PAL
Ê«u_« ÂUE½
…bMK¹“uO½ “«dÞ D/KË B/G
n«u*« ÂUE½
©wÝUOI« qO−²«® q³O¹œ ¥≥ s vKŽ√
u¹bOHK ¡U{uC« Èu²
©wÝUOI« qO−²«® jš ≤¥∞ s d¦√
uBK ¡U{uC« Èu²
©©ÍœUŠ√® Mono® q³O¹œ ≥𠨩Hi-Fi® q³O¹œ ∂∏ s vKŽ√ uBK ¡U{uC« Èu²
W
b«
©Hi-Fi l{Ë® eðdO¼ uKO ≤∞ v≈ eðdO¼ ≤∞ s
uB« œœdð ULÝ
MPEG-II
—uB« jG{ oOMð
WO½U¦«ØXÐ uKO ≤μ∂ Dolby AC-3
uB« jG{ oOMð
¨©WO½UŁØXÐ U−O ≤® LP ¨©WO½UŁØXÐ U−O ¥® SP ¨©WO½UŁØXÐ U−O ∏® XP
qO−²« …œuł
ÂUŽ
‰Ušœù«
ëdšù«
u¹bOH« “UNł
DVD
©WO½U¦«ØXÐ U−O ∞[∏ر[≤® EP
wÝUOI« qO−²« ¡UMŁ√ q³O¹œ μ∞ ‰bFLK v½œ√ bŠ
u¹bOHK ¡U{uC« Èu²
q³O¹œ ∑μ ‰bFLK v½œ√ bŠ
uBK ¡U{uC« Èu²
eðdO¼ uKO ≤∞ v≈ eðdO¼ ≤∞ s
uB« œœdð ULÝ
uB« Ãdš
ÆeðdO¼ uKO ¥∏ WŽdÐ UNł«dš≈Ë eðdO¼ uKO π∂ œœdð WŽdÐ WK−*« WOFL« «—Uýù« q¹u% r²¹ ¨DVD ’«d
_ W³MUÐ
©CD-DA® wðuB« ’dI«
VCD
DVD
’dI« Ÿu½
eðdO¼ uKO ¥¥[±
eðdO¼ uKO ¥¥[±
eðdO¼ uKO π∂ Ø ¥∏
ÍdþUM²« uB« Ãdš
eðdO¼ uKO ¥¥[±
eðdO¼ uKO ¥¥[±
eðdO¼ uKO ¥∏
wL
d« uB« Ãdš
اﳌﺮاﺟﻊ
∏∞ ≠ WOÐdF«
DVD-VR350-01375B-IB-ar
80
2007.4.2, 3:51 PM
DVD-VR350-01375B-IB-ar
81
2007.4.2, 3:51 PM
English
AK68-01375B
DVD-VR350-01375B-IB-ar
82
2007.4.2, 3:51 PM
WOÐdF«