1
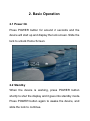
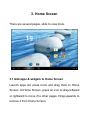
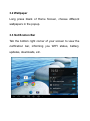
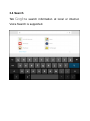
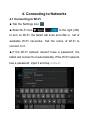
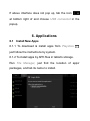
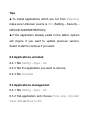
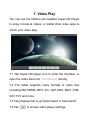
SERIOUX SURYA FUN SMO10DC
User Manual
NOTICE
☞ No striking from any hard object.
☞ Stop using in thunderstorm weather.
☞ Keep away from electric or magnetic field.
☞ Don't stain the device by chemicals.
☞ No disassembly to the device.
☞ Keep away from high temperature, freezing, dusty or
moist environment.
☞ Lower sound suggested, to keep away from hurting
your ears and making noise.
☞ Do not leave the device inside a car with all windows
closed.
☞ Do not flash firmware privately without professional
guidance. The manufacturer is not responsible for
breakdown of the device caused by user's private
firmware flashing.
1. Main functions Overview
●
Wireless network exploring via WIFI, etc.
●
Google Jelly Bean Android OS.
●
All-directional G-Sensor games supported.
●
Different applications (.apk) supported.
●
Various of audios supported.
●
Super-HD videos supported.
●
Pictures browsing with zooming and slide-show.
●
E-book reading with bookmark function.
●
Photographing and Video recording
●
Built-in voice recorder.
●
Built-in multiple languages.
●
High-speed USB connection with PC.
●
External Micro-SD card supported.
●
Optional function: HDMI Out, Bluetooth, etc.
2. Basic Operation
2.1 Power On
Press POWER button for around 2 seconds and the
device will start up and display the lock screen. Slide the
lock to unlock Home Screen.
2.2 Standby
When the device is working, press POWER button
shortly to shut the display and it goes into standby mode.
Press POWER button again to awake the device, and
slide the lock to continue.
2.3 Power Off
Press POWER button for around 2 second and choose
OK in the popup.
2.4 Reset
If the device is halted or crashed, and can not be turned
off by POWER button, users can use RESET function.
2.5 Recharging
When the device can not be turned on normally or shut
down automatically, it may need to be recharged.
Please use the correct charger as the manufacturer
guides.
2.6 Home Screen
Tab
to go to Home Screen.
2.7 Back Button
Tab
to go to the previous page.
2.8 Recent Task
Tab
to view recent tasks. Tap the task frame to
open it, or long press it to remove from list.
2.9 Menu
Tab
to view options.
2.10 Screen Capture
Tab
to capture screenshot.
2.11 Applications
Tab
to launch apps list. Slide to view all applications
and widgets.
3. Home Screen
There are several pages, slide to view more.
3.1 Add apps & widgets to Home Screen
Launch apps list, press icons and drag them to Home
Screen. At Home Screen, press an icon to drag leftward
or rightward to move it to other pages. Drag upwards to
remove it from Home Screen.
3.2 Wallpaper
Long press blank of Home Screen, choose different
wallpapers in the popup.
3.3 Notification Bar
Tab the bottom right corner of your screen to view the
notification bar, informing you WIFI status, battery,
updates, downloads, etc.
3.4 Search
Tab
to search information at local or internet.
Voice Search is supported.
4. Connecting to Networks
4.1 Connecting to Wi-Fi
●
Tab the Settings Icon
●
Slide Wi-Fi icon
to the right (ON)
to turn on Wi-Fi, the tablet will scan and offer a list of
available Wi-Fi net-works. Tab the name of Wi-Fi to
connect to it.
●
If the Wi-Fi network doesn't have a password, the
tablet will connect to it automatically. If the Wi-Fi network
has a password, input it and tap connect.
●
Slide Wi-Fi icon
to the left to
turn off Wi-Fi.
4.2 Network access via 3G
●
Turn off WIFI, and access More –Mobile networks.
●
Make sure Data enabled is ON.
●
Connect 3G Dongle.
●
Tab Network operators, and search networks.
●
You can select mobile networks automatically.
4.3 Other Networks
●
Ethernet
●
VPN
●
Please notice: Availability and network speed depend
on the User's network, and 3G network fees apply.
5. USB Connection
The tablet can be connected to Window computers via a
USB cable, and then you can transfer music, videos,
pictures and other file in both directions. Operations are
as follows,
●
Use a USB cable to connect the tablet with PC.
●
Tab Turn on USB storage to read storage of the
tablet from PC. Now you can copy files back and forth.
●
Tab Turn off USB storage to disconnect from PC, and
remove the USB cable.
If above interface does not pop up, tab the icon
at bottom right of and choose USB connected in the
popup.
6. Applications
6.1 Install New Apps
6.1.1 To download & install apps from Playstore
,
just follow the instructions by system.
6.1.2 To install apps by APK files in tablet’s storage.
Run File Manager, just find the location of apps'
packages, and tab its name to install.
Tips
●
To install applications which are not from Playstore,
make sure Unknown source is ON. (Setting – Security –
DEVICE ADMINISTRATION)
●
If the application already exists in the tablet, system
will inquire if you want to update previous version.
Select Install to continue if you want.
6.2 Applications uninstall
6.2.1 Tab Setting – Apps – All.
6.2.2 Tab the application you want to remove.
6.2.3 Tab Uninstall.
6.3 Applications management.
6.2.1 Tab Setting – Apps – All.
6.3.2 Tab application and choose Force stop, Uninstall,
Clear data or Move to SD.
7. Video Play
You can use the tablet's pre-installed Super-HD Player
to enjoy movies & videos, or install other video apps to
enrich your video play.
7.1 Tab Super-HD player icon to enter the interface, or
open the video files from File Manager directly.
7.2 The tablet supports many formats of video files
including RM, RMVB, MP4, AVI, 3GP, MKV, MOV, VOB,
DAT, FLV and more.
7.3 Tab progress bar to go fast-forward or fast-rewind.
7.4 Tab
to access video player settings.
8. Music Play
You can use the tablet's pre-installed Music Player to
enjoy music, or install other audio apps.
8.1 Tab the Music player icon
to enter the music
player interface, or open from File Manager directly.
8.2 The device supports the following formats of audio
files: MP3, WMA, MP2, OGG, AAC, FLAC, APE, 3GP,
WAV, and more.
8.3 Tab the progress bar to go fast-forward, fast-rewind.
8.4 If there is no audio in the play list, system will
automatically load the audio files from the storage of
tablet.
9. Camera
Tab the icon
to access camera function.
9.1 Photos Mode
9.1.1 Click Blue Circle
9.1.2 Click
to take pictures.
to access photographing options.
9.1.3 Click the thumbnail picture to view saved pictures.
9.1.4 Click
to switch to video recording mode.
9.2 Video Recording Mode
9.2.1 Click Red Circle
to start video recording, click
it again to stop and save the video.
9.2.2 Click
to access photographing options.
9.2.3 Click the thumbnail picture to view saved videos.
9.2.4 Click
to switch to photos mode.
10. System Settings
Tab Setting icon
to enter system settings, including
Wireless & networks, Sound, Display, Storage, Battery,
Apps, Location, Security, Language/input, Backup/reset,
Accounts, Date/time, Accessibility, Developer options
and About tablet.
10.1 Wireless & Networks
See item 4. Connecting to Networks
10.2 Sound
You can set volumes, ringtone & notification and system
sounds.
10.3 Display
Options: Brightness, Wallpaper, Auto sleep time, Font
size, etc.
10.4 Storage
An overview of internal storage and external SD card.
10.5 Battery
An overview of battery information.
10.6 Apps
See item 6. Applications
10.7 Location
10.8 Security
Options:
Screen
security,
Passwords,
Device
administration and Credential storage.
Tips: If you want to install applications beyond Playstore,
please turn on Unknown sources.
10.9 Language & input
You can change the language of system, and choose
keyboard in-puts by default.
Tips: If you have installed an input application,
remember to turn on it in this setting.
10.10 Backup & reset
Options: Backup & Restore, Factory data reset and
Recovery Mode.
10.11 Accounts
You can manage all accounts recorded in the tablet.
10.12 Date & time
Options: Time & Date settings, time zone and format
settings.
10.13 Accessibility
Options:
Large
text,
Auto-rotate
screen,
Speak
passwords, Touch & hold delay etc.
10.14 Developer options
Options: Desktop backup password, Stay awake, HDCP
checking, Protect SD card, USB debugging, Allow mock
locations, etc.
10.15 About Tablet
A view of tablet information (model, system, firmware
version, etc)
10.16 Optional function: HDMI Out
For tablet with HDMI port, just connect it by HDMI cable
directly.
11. FAQ
Q: I don’t read a foreign language, how can I change
it back to English?
●
Find setting icon
●
Choose icon
and access Settings.
to enter language&input setting, the
first option is language setting.
Q: How can I change input?
●
Access Setting – Language&input, and set default
input.
Q: Why do some applications disappear from the
tablet?
Some applications may be installed in external
Micro-SD card, if you fetch out your Micro-SD card from
the tablet, you will not see these apps.
Q: There are many popups of system error, what can
I do?
●
Restart the tablet by POWER button, or by RESET.
●
If you have restarted the tablet and there are still error
popups, you can check active applications to see if
there is any unknown application, remove it if any.
● There
may be virus in the device, please install
security apps and protect your tablet.
●
Contact with the supplier for further help.
12. About Firmware
Firmware contained in the tablets provides the control
program for the device, and it is offered by the original
manufacturer. Flashing firmware (refer to rebuilding
firmware into the device) is the final solution to serious
system problems. For common breakdown you can just
restart the device, or run factory reset. If system crashes
appear continuously even you have run factory reset,
you can flash firmware under professional guidance.
The firmware preloaded in the device is a stable version
for the tablet, please do not flash it with other versions of
firmware unless absolute necessity. We DO NOT
suggest any private firmware flashing without guidance
of the original manufacturer, who is not responsible for
any possible breakdown of the tablet caused by user's
private firmware flashing.