1
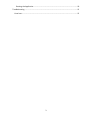
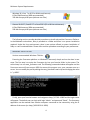
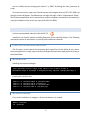
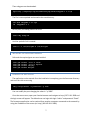
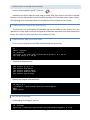
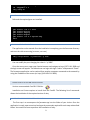
Molecular Forecaster Inc.
Forecaster 1.2 – Server Installation Guide
13 June 2014
CONTENTS
Windows................................................................................................................................. 4
Linux ....................................................................................................................................... 4
Installation Procedures .............................................................................................................. 4
Windows Installation.............................................................................................................. 4
Linux portable Installation ..................................................................................................... 5
Extracting the Forecaster application ................................................................................ 5
Extracting the Ruby Portable Application .......................................................................... 5
Running the Application ..................................................................................................... 5
Linux Ubuntu System Installation .......................................................................................... 6
Extracting the Forecaster application ................................................................................ 6
Installing Ruby .................................................................................................................... 6
Installing Rubygems ........................................................................................................... 6
Installing the necessary libraries ........................................................................................ 7
Running the Application ..................................................................................................... 7
Linux Centos 5 System Installation ........................................................................................ 8
Extracting the Forecaster application ................................................................................ 8
Downloading and Installing Ruby ....................................................................................... 8
Installing Rubygems ........................................................................................................... 8
Installing the necessary libraries ........................................................................................ 9
Running the Application ..................................................................................................... 9
Linux Centos 6 System Installation ........................................................................................ 9
Extracting the Forecaster application ................................................................................ 9
Installing Ruby .................................................................................................................. 10
Installing Rubygems ......................................................................................................... 10
Installing the necessary libraries ...................................................................................... 10
2
Running the Application ................................................................................................... 10
Troubleshooting ....................................................................................................................... 12
Linux host ............................................................................................................................. 12
3
Minimum System Requirements
WINDOWS
Windows XP, Vista, 7 or 8 (32 or 64 bits architecture)
6 Gb of RAM memory (8Gb recommended)
350 Mb of empty disk space (without user files)
LINUX
Ubuntu 10.04 LTS, CentOS 5.7 or CentOS 6.2 (32 or 64 bits architecture)
6 Gb of RAM memory (8Gb recommended)
500 Mb of empty disk space (without user files)
INSTALLATION PROCEDURES
The following sections provide detailed procedures to install ruby and the FORECASTER Platform.
In the Windows environment, Ruby is provided as a folder and there is no system installation
required. Under the Linux environment, there is two options offered: a system installation of
Ruby or a self-contained folder. Please refer to either procedure according to your preferences.
WINDOWS INSTALLATION
Version recommended: Windows 7 64-bits
Executing the Forecaster platform on Windows is extremely simple and can be done in two
steps. The first step is to unzip the Forecaster.zip into your favorite folder in the system. The
second step is to run start_forecaster.cmd. The following command window will appear and the
FORECASTER server will start on port 3000. As soon as this program runs, your computer acts as a
server. You can modify the port by editing the start_forecaster.cmd script and changing the value
in “-p 3000”.
Finally, open your favorite browser and navigate to http://127.0.0.1:3000 and the login screen
will appear. The default user can login with login “admin” and password “fitted”. The forecaster
application can be reached from another computer connected to the network by using the IP
address of the server (ex: http://168.192.0.11:3000).
4
LINUX PORTABLE INSTALLATION
Version recommended: Linux 64-bits
Installation on Linux without any system installation is possible using the rubyportable
package. The location of the rubyportable folder needs to be /opt/rubyportable or configured
using the setup.sh script (see below). The following commands need to be executed in a terminal.
EXTRACTING THE FORECASTER APPLICATION
The first step is to uncompress the forecaster.tgz (tar gzip file) into the folder of your choice.
Once the application is ready, open a terminal and type the commands required for each step as
described below.
EXTRACTING THE RUBY PORTABLE APPLICATION
The first step is to uncompress the rubyportable.tgz file to the /opt/ folder (root required).
$
#
#
#
sudo su
cd /opt/
tar xvf rubyportable.tgz
exit
Alternatively, if you don’t have root permission to the /opt folder, you can run the script
setup.sh to configure the ruby portable files according to your actual path (root not required).
$ tar xvf rubyportable.tgz
$ sh setup.sh
$ cp start_forecaster.sh <path to your FORECASTER installation/gui-revXXXX >
Once you execute the setup.sh script, it will generate a startup script (start_forecaster.sh) that
has to be copied in your FORECASTER installation.
RUNNING THE APPLICATION
The application can be started. Once the installation is complete, go to the forecaster directory
and start the rails server using
$ sh start_forecaster.sh
5
You can modify the port changing the value in “-p 3000” by editing the start_forecaster.sh
script.
Once the server starts, open your favorite browser and navigate to http://127.0.0.1:3000 and
the login screen will appear. The default user can login with login “admin” and password “fitted”.
The forecaster application can be reached from another computer connected to the network by
using the IP address of the server (ex: http://168.192.0.11:3000).
LINUX UBUNTU SYSTEM INSTALLATION
Version recommended: Ubuntu 64-bits 10.04 LTS
Installation on Ubuntu requires installing Ruby and all the required libraries. The following
commands need to be executed in a terminal (sudo credentials required).
EXTRACTING THE FORECASTER APPLICATION
The first step is to uncompress the forecaster.tgz (tar gzip file) into the folder of your choice.
Once the application is ready, open a terminal and type the commands required for each step as
described below.
INSTALLING RUBY
Installing the required packages:
$ sudo aptitude install ruby1.8-dev ruby1.8 ri1.8 rdoc1.8 irb1.8
libreadline-ruby1.8 libruby1.8 libopenssl-ruby sqlite3 libsqlite3-ruby1.8
Creating the symbolic links:
$
$
$
$
sudo
sudo
sudo
sudo
ln
ln
ln
ln
-s
-s
-s
-s
/usr/bin/ruby1.8 /usr/bin/ruby
/usr/bin/ri1.8 /usr/bin/ri
/usr/bin/rdoc1.8 /usr/bin/rdoc
/usr/bin/irb1.8 /usr/bin/irb
INSTALLING RUBYGEMS
Prior to the installation of rubygems, the sources directory is created:
$ mkdir ~/sources
$ cd ~/sources
6
Then rubygems are downloaded:
$ wget http://rubyforge.org/frs/download.php/55066/rubygems-1.3.2.tgz
The file is next unpacked and moved to the new directory:
$ tar xzvf rubygems-1.3.1.tgz
$ cd rubygems-1.3.1
At this point, the setup process can start:
$ sudo ruby setup.rb
And the symbolic link is created:
$ sudo ln -s /usr/bin/gem1.8 /usr/bin/gem
INSTALLING THE NECESSARY LIBRARIES
Rails and the required gems are next installed:
$
$
$
$
sudo
sudo
sudo
sudo
gem
gem
gem
gem
install
install
install
install
–v=2.1.0 rails
–v=0.8.1 hpricot
rubyzip
mongrel
RUNNING THE APPLICATION
The application can be started. Once the installation is complete, go to the forecaster directory
and start the rails server using
$ ruby script/server –e production –p 3000
You can modify the port changing the value in “-p 3000”.
Once the server starts, open your favorite browser and navigate to http://127.0.0.1:3000 and
the login screen will appear. The default user can login with login “admin” and password “fitted”.
The forecaster application can be reached from another computer connected to the network by
using the IP address of the server (ex: http://168.192.0.11:3000).
7
LINUX CENTOS 5 SYSTEM INSTALLATION
Version recommended: CentOS 5.7 64-bits
Installation on Centos requires some steps to install Ruby from sources and all the required
libraries since the ruby version from the CentOS repository is 1.8.5 and we need a newer version.
The following list of commands allows the installation of the required version of ruby.
EXTRACTING THE FORECASTER APPLICATION
The first step is to uncompress the forecaster.tgz into the folder of your choice. Once the
application is ready, open a terminal and type the commands required for each step as described
below. You need to be root to perform the installation of ruby.
DOWNLOADING AND INSTALLING RUBY
First, as root, create the source folder and download the source files:
$
#
#
#
#
su –
mkdir ~/sources
cd ~/sources
wget http://ftp.ruby-lang.org/pub/ruby/1.8/ruby-1.8.7.tar.gz
tar xvfz ruby-1.8.7.tar.gz
Installing the dependencies:
#
#
#
#
#
yum
yum
yum
yum
yum
install
install
install
install
install
gcc gcc-c++
zlib-devel
openssl-devel
readline-devel
sqlite-devel
Building the program and installation:
#
#
#
#
cd ruby-1.8.7
./configure --with-openssl-dir=/usr/lib64/openssl
make
make install
INSTALLING RUBYGEMS
Downloading the rubygems sources:
# cd ~/sources
# wget http://rubyforge.org/frs/download.php/69365/rubygems-1.3.6.tgz
8
# tar xzvf rubygems-1.3.6.tgz
# cd rubygems-1.3.6
# ruby setup.rb
INSTALLING THE NECESSARY LIBRARIES
Rails and the required gems are installed:
#
#
#
#
#
#
gem install
gem install
gem install
gem install
gem install
exit
–v=2.1.0 rails
hpricot
rubyzip
mongrel
-v=1.2.4 sqlite3-ruby
RUNNING THE APPLICATION
The application can be started. Once the installation is complete, go to the forecaster directory
and start the rails server using (as a user, not root)
$ ruby script/server –e production –p 3000
You can modify the port changing the value in “-p 3000”.
Once the server starts, open your favorite browser and navigate to http://127.0.0.1:3000 and
the login screen will appear. The default user can login with login “admin” and password “fitted”.
The forecaster application can be reached from another computer connected to the network by
using the IP address of the server (ex: http://168.192.0.11:3000).
LINUX CENTOS 6 SYSTEM INSTALLATION
Version recommended: CentOS 6.2 64-bits
Installation on Centos requires to install from the CentOS. The following list of commands
allows the installation of the required version of ruby.
EXTRACTING THE FORECASTER APPLICATION
The first step is to uncompress the forecaster.tgz into the folder of your choice. Once the
application is ready, open a terminal and type the commands required for each step as described
below. You need to be root to perform the installation of ruby.
9
INSTALLING RUBY
First, as root, install ruby:
# yum install ruby ruby-devel
Installing the dependencies:
#
#
#
#
#
yum
yum
yum
yum
yum
install
install
install
install
install
gcc gcc-c++
zlib-devel
openssl-devel
readline-devel
sqlite-devel
INSTALLING RUBYGEMS
Installing rubygems:
# yum install rubygems
INSTALLING THE NECESSARY LIBRARIES
Rails and the required gems are installed:
#
#
#
#
#
#
gem install
gem install
gem install
gem install
gem install
exit
–v=2.1.0 rails
hpricot
rubyzip
mongrel
sqlite3
RUNNING THE APPLICATION
The application can be started. Once the installation is complete, go to the forecaster directory
and start the rails server using
$ ruby script/server –e production –p 3000
You can modify the port changing the value in “-p 3000”.
Once the server starts, open your favorite browser and navigate to http://127.0.0.1:3000 and
the login screen will appear. The default user can login with login “admin” and password “fitted”.
10
The forecaster application can be reached from another computer connected to the network by
using the IP address of the server (ex: http://168.192.0.11:3000).
11
TROUBLESHOOTING
LINUX HOST
1. Ruby runs at >90% CPU all the time. To correct this issue, simply reset the date by
executing the following command (as root or sudo):
# date –s `date`
12