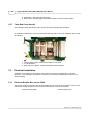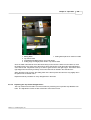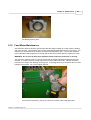
1
PH260 4-Head
Planer/Moulder
UserManual
<VERSION 2.0>
Copyright 2003 Logosol, Inc.
Logosol PH260 4-Head Planer/Moulder
User Manual
Read this Manual Before Using the Machine
<VERSION 2.0>
Logosol PH260 4-Head Planer/Moulder
© 2006 Logosol,Inc.© 2006 Logosol,Inc.
All rights reserved. No parts of this work may be reproduced in any form or by any means - graphic, electronic, or
mechanical, including photocopying, recording, taping, or information storage and retrieval systems - without the
written permission of the publisher.
Products that are referred to in this document may be either trademarks and/or registered trademarks of the
respective owners. The publisher and the author make no claim to these trademarks.
W hile every precaution has been taken in the preparation of this document, the publisher and the author assume no
responsibility for errors or omissions, or for damages resulting from the use of information contained in this document
or from the use of programs and source code that may accompany it. In no event shall the publisher and the author be
liable for any loss of profit or any other commercial damage caused or alleged to have been caused directly or
indirectly by this document.
Printed:September 2006 in Madison, MS
Publisher
Logosol, Inc.
Managing Editor
Marti
n Hall
Charli
e Gri
ffi
n
Technical Editors
Marti
n Hall
Production
PH260 UserManaul 2006
I
Logosol PH260 4 Head Planer/Moulder User Manual
Table of Contents
Foreword
0
Part I Chapter 1: Introduction
5
................................................................................................................................... 5
1 W elcom e to Logosol
2 How to Use this
Guide
...................................................................................................................................
5
................................................................................................................................... 6
3 Standard Conventions
4 Getting Help ................................................................................................................................... 6
5 W arranty
................................................................................................................................... 7
Part II Chapter 2: Getting Started
1 Overview
9
................................................................................................................................... 9
...................................................................................................................................
9
2 Space Requirem
ents
3 Chip Collection
...................................................................................................................................
System Requirem ents
9
4 Electrical Requirem
ents
...................................................................................................................................
10
5 Safety Rules................................................................................................................................... 11
................................................................................................................................... 12
6 Tools Needed
7 Glossary
................................................................................................................................... 12
PH260 Term s.......................................................................................................................................................... 12
13
W oodworking..........................................................................................................................................................
Term s
Part III Chapter 3: Installation
1 Overview
16
................................................................................................................................... 16
2 Unpacking ................................................................................................................................... 16
16
Rem oving the..........................................................................................................................................................
Packing Crate
Assem bling the
Feeding Motor
..........................................................................................................................................................
18
Rem oving Parts
..........................................................................................................................................................
Box
18
.......................................................................................................................................................... 19
Parts Box Contents
.......................................................................................................................................................... 19
Assem bling Lid
..........................................................................................................................................................
20
Installing Control
Panel
Table Bed Crank
..........................................................................................................................................................
Handle
21
3 Electrical Installation
................................................................................................................................... 21
..........................................................................................................................................................
21
Electrical Breaker
Box on the PH260
..........................................................................................................................................................
22
Checking Rotation
Direction
480 Volt Operation
.......................................................................................................................................................... 23
..........................................................................................................................................................
23
Electric Schem
atic
Part IV Chapter 4: Operation
27
1 Overview
................................................................................................................................... 27
2 Safety
................................................................................................................................... 27
3 Control Panel
Operation
...................................................................................................................................
27
4 Starting the Machine
................................................................................................................................... 28
© 2006 Logosol, Inc.
Contents
II
5 Stopping the...................................................................................................................................
Machine
28
...................................................................................................................................
28
6 Setting Up For
4 Sided Planing
29
Bottom Cutter..........................................................................................................................................................
Setup
Safety ......................................................................................................................................................... 29
Tools Needed
......................................................................................................................................................... 30
Bottom Cutter
Design
.........................................................................................................................................................
30
.........................................................................................................................................................
31
Leveling Straight
Planer Knife in Bottom Cutter Head
33
Replacing.........................................................................................................................................................
Bottom Cutter Straight Planer Knives
Adj
usting .........................................................................................................................................................
Takeoff of Bottom Cutter
34
.......................................................................................................................................................... 36
Top Cutter Setup
Safety ......................................................................................................................................................... 36
......................................................................................................................................................... 36
Tools Needed
Top Cutter.........................................................................................................................................................
Design
36
Leveling the
Straight Planer Knife
.........................................................................................................................................................
37
Replacing.........................................................................................................................................................
the Top Cutter Straight Knives
38
39
Adj
usting .........................................................................................................................................................
Cutting Depth
Side Cutter Knife
Setup
..........................................................................................................................................................
40
Safety ......................................................................................................................................................... 41
Tools Needed
......................................................................................................................................................... 41
.........................................................................................................................................................
41
Side Cutter
Design
Removing.........................................................................................................................................................
Right Side Cutter
42
Removing.........................................................................................................................................................
Left Side Cutter
43
.........................................................................................................................................................
44
Setting Side
Cutter Knife Height
.........................................................................................................................................................
45
Side Cutter
Spacers
Raising the
.........................................................................................................................................................
Cutter Head
45
46
Lowering .........................................................................................................................................................
the Cutter Head
Cutter Head
Direction
.........................................................................................................................................................
46
Placing the
Cutter Head in Position
.........................................................................................................................................................
47
.........................................................................................................................................................
47
Locking the
Cutter Head in Position
.........................................................................................................................................................
48
Side Cutter
Fence Setup
Setting the
.........................................................................................................................................................
First Side Cutter Fence
48
.........................................................................................................................................................
50
Setting the
Second Side Cutter Fence - Step One
Setting the
.........................................................................................................................................................
Moveable Side Cutter Head
52
Checking .........................................................................................................................................................
for Rotation of Cutter Head
54
.........................................................................................................................................................
54
Setting the
pressure roller
.........................................................................................................................................................
55
Setting the
location of the infeed pressure rollers
Running the first
test board
..........................................................................................................................................................
55
Safety ......................................................................................................................................................... 56
.........................................................................................................................................................
56
Turning on
the machine
Stopping the
.........................................................................................................................................................
machine
57
..........................................................................................................................................................
57
Setting the Feeding
Rate
Completing the
Setup
..........................................................................................................................................................
57
Setting the Second
Right Side Fence
..........................................................................................................................................................
58
Running Material
..........................................................................................................................................................
Through the Machine
59
.........................................................................................................................................................
59
Feeding the
Machine
...................................................................................................................................
59
7 Setting Up for
4 Sided Moulding
.......................................................................................................................................................... 60
Safety
Moulding Knives
.......................................................................................................................................................... 60
.........................................................................................................................................................
61
Side Cutter
Moulding Knives
Anatomy of a Side
Cutter Moulding Knife
.........................................................................................................................................
61
Removing Knives
from Side Cutter Head
.........................................................................................................................................
62
Inserting Moulding
.........................................................................................................................................
Knives in Side Cutter Head
63
.........................................................................................................................................
64
Setting Cutting Head
Height for Moulding Knives
© 2006 Logosol, Inc.
II
III
Logosol PH260 4 Head Planer/Moulder User Manual
Horizontal.........................................................................................................................................................
Cutter Moulding Knives
64
Anatomy of a Top
Cutter Moulding Knife
.........................................................................................................................................
64
.........................................................................................................................................
65
Inserting Moulding
Knives into Horizontal Cutters
.........................................................................................................................................
67
Inserting Moulding
Knives into Bottom Cutter Head
Shortcut to Setting
up Horizontal Cutter Knives
.........................................................................................................................................
68
.........................................................................................................................................
69
Inserting Long Moulding
Knives in the Top Head
Part V Chapter 5: Maintenance
73
1 Overview
................................................................................................................................... 73
2 Safety
................................................................................................................................... 73
3 Cleaning the...................................................................................................................................
Machine
73
Cleaning the Feed
Rollers
..........................................................................................................................................................
73
...................................................................................................................................
73
4 Lubricating the
Machine
5 Replacing Belts
................................................................................................................................... 74
6 Adjusting Feed
Roller Pressure
...................................................................................................................................
76
................................................................................................................................... 77
7 Sharpening Knives
8 Removing Side
Cutter Spindle
...................................................................................................................................
78
9 Replacing Under
Cutter Bearings
...................................................................................................................................
80
................................................................................................................................... 84
10 Feed Motor Maintenance
11 Troubleshooting
...................................................................................................................................
Guide
85
Part VI Chapter 6: Planing Tips
1 Overview
88
................................................................................................................................... 88
2 Sizing Stock................................................................................................................................... 88
...................................................................................................................................
88
3 Planing Narrow
Stock
...................................................................................................................................
89
4 Planing stock
thicker than 2 Inches
5 Tongue & Groove
................................................................................................................................... 90
6 Planing Wood
...................................................................................................................................
With a lot of Pitch
90
...................................................................................................................................
91
7 Using 300mm
knives in top and bottom heads
8 Adjusting Feed
Speed
...................................................................................................................................
91
Part VII Parts Listing
93
Part VIII Installing Phase Converter
97
Index
99
© 2006 Logosol, Inc.
Part
I
5
Logosol PH260 4 Head Planer/Moulder User Manual
1
Chapter 1: Introduction
1.1
Welcome to Logosol
Welcome to Logosol! Thank you for purchasing our PH260 4 Head Planer/Moulder. This manual
details the operation of the PH260 4-Head Planer/Moulder by Logosol. The PH260 is manufactured in
Sweden. There is a small manual included in the machine. This manual will include some of the
information found in the small manual and will also include much more detailed information about the
operation of the planer.
This planer provides the ability to do 4-sided planing in one pass at an economical price. The PH260 is
designed with simplicity in mind. The position of the cutter heads, the manual setting of the fences, the
location of the motors are all designed to make maintenance and operation as minimal and as simple
as possible. This machine will accomplish much of what other, more expensive planers will do, but at
a reduced cost. This manual details the techniques and maintenance procedures that will allow you to
produce with this planer what would normally take a much more expensive investment in machinery.
At Logosol, we stand ready to assist you with the operation of this planer. Via our Toll-Free number,
you can reach the help you need with this planer. Do not hesitate to call for assistance when you need
it.
1.2
How to Use this Guide
This guide is designed for all types of operators. This allows you to read as much as or as little as you
need. This manual is organized in the following chapters:
Introduction
Getting Started
Provides information for selecting the space for your Planer, material handling and waste
handling considerations, electrical requirements, tools needed, and safety Considerations.
Installation
Installing the planer is a big operation. Use this section to guide you through the unpacking, and
installation of this machine.
Operation
Operation of the Planer, Setting up of knives, Adjusting side fences, installation of knives, step
by step instructions.
Maintenance
Cleaning the machine, lubricating, replacing belts, replacing shear pins, and troubleshooting are
in this section. Find help when encountering problems with the machine or with the result on the
wood. This guide helps you isolate the problem before having to call for help.
Planing Tips
Tips on extending knife life, running certain types of wood, wood handling tips, chip waste
handling.
Appendix
Accessories
Parts Listing
A complete listing of all the parts for the PH260, where they fit in the machine, with pictures of
parts and order numbers for replacements.
Version 1.0 © 2006 Logosol, Inc.
Chapter 1: Introduction
6
Index
The advanced operator of this machine, i.e. someone that is experienced with planers, can quickly
move to the information needed in this manual without reading through alot of pages. Advanced
users should find the topics needed via the Table of Contents or the Index.
All operators should read ALL SAFETY information about the operation of this planer.
In our effort to cover all information about this machine, you may find similar information in several
locations in this manual. Also, some operators may not need to read some of the simpler
procedures that are detailed in this manual.
1.3
Standard Conventions
Notes, cautions, and warnings are used like this:
Notes contain helpful hints and other important information that will help you get better use from your
PH260.
Cautions provide information about procedures which, if not observed, could result in damage to the
PH260 or other equipment.
Warnings mean failure to follow specific procedures and practices may result in personal injury.
1.4
Getting Help
If
you need assistance with your PH260, you can contact Logosol, Inc.
Or you can email us at:
info@ logosolusa.com
Or you can visit us online at:
www.logosol.com
You can contact us by mail at:
Logosol, Inc.
P.O. Box 660
Madison, MS 39130
Telephone to Office in Madison:
601-856-1889
FAX in Madison, MS:
601-856-9535
Shipping Address:
Logosol, Inc.
116 Solleftea Drive
Madison, MS 39110
Version 1.0 © 2006 Logosol, Inc.
7
1.5
Logosol PH260 4 Head Planer/Moulder User Manual
Warranty
Two Year Parts Warranty
The Logosol PH260 4 Head Planer/Moulder has a two year Parts warranty on all parts with the
exception of belts, knives and rubber feed rollers. Logosol, Inc. warrants to the original consumer that
this product is free from defects in material and workmanship for a period of TWO YEARS. If a part
fails due to manufacture defect or workmanship during the first two years of ownership, Logosol, Inc.
will send a replacement part directly to the owner. This warranty is in effect from the date of the
invoice.
Return of Defective Parts
Some parts may be requested by Logosol, Inc. to be returned for inspection. Logosol, Inc. will instruct
the owner of the PH260 when this is necessary. Logosol, Inc. will bear the cost of this shipping.
What is not Covered
Defects due directly or indirectly to misuse or abuse, negligence or accidents, normal wear and tear,
repair or alterations unknown to Logosol, Inc., or to a lack of maintenance are not covered by this
warranty. The labor costs to replace parts are not covered under this warranty. Logosol, Inc. shall not
be responsible for any incidental or consequential damages.
Legal Rights
This warranty gives you specific legal rights, however, you may also have other rights, which vary from
state to state.
No other express warranty applies
This Two Year Parts Warranty is the sole and exclusive warranty for the Logosol PH260. No
employee, agent, or distributor, or other person is authorized to alter this warranty or make any other
warranty on behalf of Logosol, Inc.
How to get warranty service
Call our TOLL FREE Number for warranty service. 1-877-LOGOSOL (1 -877-564-6765) Or call our
office directly at 601-856-1889.
DATE OF PURCHASE:________________________________________
SERIAL NUMBER:____________________________________________
Version 1.0 © 2006 Logosol, Inc.
Part
II
9
Logosol PH260 4 Head Planer/Moulder User Manual
2
Chapter 2: Getting Started
2.1
Overview
This chapter provides information about unpacking, designing space, handling material and waste.
The operator is encouraged to read over this material before installing this machine. Observe the
safety rules in the section labeled: Safety Rules. Always use caution when operating or setting this
machine.
2.2
Space Requirements
This machine should be located in a dry work area, with adequate room for access to all sides of the
planer and with plenty of space for the handling of the material that will be run through the planer.
Especially critical is locating the planer so that the longest piece of material that you plan to run through
the machine has plenty of room to enter and exit the machine without bumping into something.
The footprint of this machine is 43"X 35". The machine can remain on the pallet that it is shipped on
for its permanent base for operation. Or you can remove the machine from the pallet by removing the
4 wood screws holding the machine to the pallet. The machine should be bolted down to some base to
prevent any "walking"of the machine during operation.
The machine can also be mounted on 4 casters for ease of moving around the shop area. If the
machine is to be used intermittently, that is, there will be long periods when it is sitting idle, you may
want to utilize these casters to make the movement of this machine easier. Keep in mind that you will
have to have power cables and chip collection hoses that will allow for this movement. Or the machine
may be disconnected and then moved.
The planer is 95% protected against corrosion, meaning it can stand in cold spaces. However, in such
cases it will require extra maintenance in the form of lubrication for non-rustproof parts.
– Place the planer on a firm, even floor, bolting it down through the holes in the frame.
– Hang the cable in the ceiling or protect it in some other way. Never step on the cable.
– Connect the four chip hoses, securing them with hose clamps at both the planer and the fan.
– Make sure the lighting is very good, placing a strong light directly over the machine.
2.3
Chip Collection System Requirements
This machine will put out a lot of chips. The PH260 has 4 chip collection ports, one located at each
cutter head. A good vacuum or chip collection system should be matched up with this machine.
Depending on the type of planing you will be doing, you should size your collection system accordingly.
For most type of planing activities with dimensional lumber, the Logosol Chip Extractor should handle
the job. This chip extractor is rated at 2400 CFM and operates on 220 Volt, 3-phase. This chip
extractor has 4 collection ports that will hook directly to the PH260 via 4"flex hose.
If you will be planing 4"thick material or wide planks, you might need a more powerful system, or two
chip collectors, each for two ports on the PH260. Or the PH260 can be hooked into a more powerful
vacuum system that you might already have in place in your shop. Performance of the machine is
dependent on having a good vacuum system operating with the PH260.
Another consideration is the handling of the chips. Most installations blow these chips into trailers
outside the building, or into piles where they can be loaded onto trailers for hauling away. Some urban
locations may not allow the venting of chips outside, and a more confined chip collection system may
be necessary. Be sure and check your local codes before designing your chip collection system.
Also, if blowing the chips outside of a building, keep in mind that a chip collector can empty a building
Version 1.0 © 2006 Logosol, Inc.
Chapter 2: Getting Started
10
of its heated or cooled air, so if you are operating this machine in a climate-controlled building, the
chips will need to be blown into a container inside the building. Also, some type of filter will need to be
designed into the system in order to prevent excess dust from reducing the quality of the air inside the
building.
Chips can be sold to certain types of industry if they happen to be located in your area. Sometimes
poultry operations have a need for chips as bedding material and also other types of livestock farms.
Design access to your chip collection bin or bins so that they can be easily emptied. Also, try to
calculate the amount of space needed for the collection area of your chip bin.
Locating the chip extractor close to the planer, or at least locate it so that the turning on of the chip
collector is convenient to the operation of the planer. Another factor to remember is that the chip
extractor or vacuum system can be loud, so be sure to locate it in a location away from the operator.
When locating the chip extractor, remember it is easier to pull the chips than to push them. You will
also encounter less vacuum the longer the piping is to the planer, due to resistance in the flex hose.
We recommend using flex hose that is smooth on the inside so you will have less resistance to chips
traveling through the hose.
2.4
Electrical Requirements
The PH260 3-phase unit electrical specifications are as follows:
220 Volt, 3-phase, 60 HZ
12.4 KW
Supply needed: 220 Volt, 3-phase, 50 Amps
The PH260, single phase 220 Volt Specs:
220 Volt, single phase, 60 HZ
9 KW
Supply needed: 220 Volt, single phase, 50 Amps
The type of machine that you have received will be noted on the Serial Number sticker on the rear of
the machine. This sticker is located above the electrical box that is mounted on the rear of the
machine.
NOTE: The PH260 should be ordered for the type of electrical supply you have in your shop. Consult
with your electrician to determine the right supply for you. Also note that performance of the
PH260 varies with the type of electrical supply you are using. The performance specs for the
single phase will be below that of the 3-phase units.
Version 1.0 © 2006 Logosol, Inc.
11
Logosol PH260 4 Head Planer/Moulder User Manual
WARNING: Wiring of this unit should be accomplished by a licensed electrician. Your electrician can
call Logosol, Inc. at 1-877-LOGOSOL to discuss installation. Attempting to install electricity to this
machine can result in serious injury or even death.
2.5
Safety Rules
The planer can cause serious injury if used wrong. For that reason you should always use the machine
carefully, avoiding distractions.
Always stand to one side of the machine as a faulty setting could cause a board to be thrown out.
The machine is made to be used as a panel planer. Only feed one board into the machine at a time.
Make sure the machine is set up so that the feed rollers will grab the board. Do not feed boards that
are tapered to such an extent that the feed rollers are in danger of loosing hold.
Never put your hands or any tools on or under the table while the machine is running.
Turn the Electrical Supply Circuit Breaker off or make certain the power to the machine is off:
– before opening the cover to replace a knife, adjusting cutter contact, clean or carry out any other
step above the table. Do not lift the cover before the cutters have stopped completely.
– before replacing belts or carrying out any other service or cleaning.
– before moving the machine.
Turn the electrical supply off if the machine is to be left unmonitored.
Never put your hands or any tools into the chip outlets unless you are sure that the current is off and
the cutters have stopped spinning.
All persons except the operator should stand at least 8 m (8.5 yds) from the machine while it is
running.
Do not wear loose clothing, scarves and the like which can get caught in the moving parts.
Make sure the light is good where the machine stands. Never use the machine under poor lighting
conditions.
Never use the machine while under the influence of alcohol or other drugs.
Keep the work place clean. Leave nothing on the floor that you can trip on.
Do not step on the electric cable. For greatest safety, the cable should be suspended from the ceiling.
Never climb on the machine.
The machine may not be modified or rebuilt. Use only original spare parts sent from Logosol. After
service, the machine must be returned to its original condition.
The machine main power feed should be fitted with an accidental ground circuit breaker.
Before starting the machine:
– Check that all handles, bolts, nuts, guides, chip outlets, cutters and knives, protective covers and
the like are tightly fastened.
– Check that all cutters can rotate freely and that there are no tools or loose parts left in the machine.
– Check that the cover is completely closed and that all chip outlet hoses are connected.
Version 1.0 © 2006 Logosol, Inc.
Chapter 2: Getting Started
12
For your own safety, read all safety precautions carefully and do not start the machine before you have
understood all of them. Do not allow persons who have not read the safety instructions to operate the
machine.
Use approved hearing protection and safety glasses. Even short exposure to high-frequency sounds
can damage your hearing.
Always wear gloves when you work with the knives, as there is a danger of cutting yourself.
Rotating tools: do not insert fingers past the protective plates or into the chip outlets.
2.6
Tools Needed
The following tools are needed to perform setup on the planer:
30 mm wrench
10 mm wrench
4 mm allen wrench
6 mm allen wrench
13 mm wrench
30-50 cm ruler
(supplied)
(supplied)
(supplied)
Several tools are supplied with the planer as noted above:
30mm wrench for removing the side cutter locking nuts
10 mm narrow wrench for tightening and loosening chip breaker locking bolts
4 mm allen wrench for adjusting planer knives in heads
2.7
Glossary
Several terms are used throughout this manual that are unique to working with wood and working with
this machine. This glossary will help define some of the terms used in this manual.
2.7.1
PH260 Terms
Cast Iron Table - The flat cast iron portion of the table on which the material rests as it passes through
the machine. This table is raised and lowered to determine the finished thickness of the material
planed in the machine.
Collection Port - A point on the machine where chips are collected and pulled from the machine via a
suction system. A 4" round port which a 4" flexible hose attaches to for the purpose of removing chips
from the machine.
Chip Extractor - A machine that provides suction to the machine for the purpose of removing chips
caused by planing a piece of wood.
Cutter Head - A rotating piece in which knives are placed for the purpose of removing material from
the workpiece.
Fence - A support piece on the machine which is used to guide and support the workpiece as it is
moving through the machine.
Infeed - The end of the machine in which material to be planed is placed to enter the machine.
Version 1.0 © 2006 Logosol, Inc.
13
Logosol PH260 4 Head Planer/Moulder User Manual
Leading End - The end of a workpiece which is pushed into the machine first.
Outfeed - The end of the machine in which the material exits the machine.
Planing - Removing material from a workpiece in order to make it flat and smooth.
Stock - Material that is being planed or moulded with the machine.
Workpiece - The material on which the work is being performed.
Wedge - A wedge shaped piece of material that is used to hold a moulding or planer knife in a cutter
head.
2.7.2
Woodworking Terms
Air dried – Lumber seasoned by exposure to the atmosphere, in the open or under cover,
without artificialheat.Lumber dried this way shoul
d be stacked and stickered so air can
evenl
y fl
ow between the boards.Air dried l
umber reaches equil
ibrium at around 12%
moisture content.
Board foot– The basic unit ofmeasurement for l
umber.One board foot is equalto a
one–inch board, twel
ve inches in width and one foot in l
ength.A ten foot l
ong, twel
ve inch
wide, and one inch thickpiece oflumber woul
d contain ten board feet.
Bow -A deviation from a straight l
ine (a curve al
ongthe face ofthe piece ofl
umber)from
end to end ofa piece, measured at the point ofgreatest deviation.
Check– A l
engthwise separation ofwood, normal
l
y occurringacross or through the rings of
annualgrowth and usual
l
y the resul
t ofseasoning.Cl
assified for the purpose ofgradingas
surface check, smal
l
, medium, or large;end check;and through check.Surface checkoccurs
on the surface ofthe piece, end checkoccurs on and end, and through checkextends from one
surface through the piece to the opposite surface.
Cl
ear – 1.Free or practical
l
y free ofal
lbl
emishes, characteristics, or defects.2.A sel
ect grade
ofl
umber.
Cup-A distortion ofa board in which there is a deviation from a straight l
ine across the
width ofthe board.
E.
E.– eased edge.A part ofthe pl
aningor surfacingoperation in which the edges of
dimension and many other products are sl
ightl
y rounded to reduce spl
intering.Lumber ofone
and two inch nominalthickness may be rounded to a radius ofno more than 1/
16and 1/
8inch
respectivel
y
Grain– A generalterm referringto the arrangement, appearance, and direction ofwood
fibers.Amongthe many types ofgrain are fine, coarse, straight, curl
y, open, fl
at, vertical
, and
spiral
.
Kil
ndried – Lumber that has been seasoned in a kil
n to a predetermined moisture content.
Version 1.0 © 2006 Logosol, Inc.
Chapter 2: Getting Started
14
Knot – A branch or limb embedded in a tree and cut through in the process of manufacturing.
M oisture content – The weight of the water in wood, expressed as the percentage of the
weight of the wood.
M oulding- A wood strip having a curved or proj
ecting surface used for decorative purposes.
Pitch - The accumulation of resin in wood. Also referred to as sap.
Raised Grain - A roughened condition of the surface of dressed lumber in which the hard
latewood is raised above the softer earlywood but not torn loose from it.
Rough lumber – Lumber which has not been dressed or surfaced but has been sawn, edged,
and trimmed.
S1S1E – Surfaced one side and one edge.
S1S2E – Surfaced one side and two edges.
S2E – Surfaced two edges.
S2S1E – Surfaced two sides and one edge.
S2S– Surfaced two sides.
S4S– Surfaced four sides.
Seasoning- The process of drying lumber either naturally, or in a kiln, to a moisture content
appropriate for the conditions and purposes for which it is to be used.
Shavings– A very thin slice of wood that is produced when planing lumber and timbers.
Shiplap – 1. Lumber that has been worked to make a lapped, or rabbeted j
oint on each edge
so that pieces may be fitted together snugly for increased strength and stability.
Surfaced – Refers to lumber that has been dressed by a planing machine for the purpose of
attaining smoothness of surface and uniformity of size. Surfacing may be done on one side or
edge, or all sides.
Twist - W arping in which one corner of a piece twists out of the plane of the other three.
W arp - Any deviation from a true or plane surface. W arp includes bow, crook, cup and twist,
and any combination of these.
Version 1.0 © 2006 Logosol, Inc.
Part
III
Chapter 3: Installation
3
Chapter 3: Installation
3.1
Overview
16
This chapter provides a guideline to placing your PH260 into service in your facility. Use this section to
help with unpacking and installation of this machine properly. Be sure and observe all safety
procedures.
3.2
Unpacking
The PH260 comes packaged in a plywood packing crate designed to handle travel over long distances
with minimum damage to the planer. Please note the condition of this crate when you receive the
planer at your location. If you notice any damage to this crate please note this to the driver of the
delivery vehicle which brought the planer to you.
This packing crate also has attached on top of it two 4'Bed Extension Tables.
3.2.1
Removing the Packing Crate
This carton is fastened to a Pallet via connection tabs located at the bottom of the carton.
To open this crate, bend the metal tabs straight around the bottom of the crate.
1. Bend tab downward
Version 1.0 © 2006 Logosol, Inc.
17
Logosol PH260 4 Head Planer/Moulder User Manual
Once all of these tabs are straightened, use a crow bar to force the top of the packing
carton upward. Then lift the top off of the base and set aside. The top to the planer will be
bolted to the inside of the carton so be careful as you lift the carton free from the planer that
you do not scratch the surface of the planer.
Here are the parts that are taped in the machine at the time of shipping:
1.
2.
3.
4.
Original User Manual
Top Chip Reflector Plate
2 Bottom Shim Plates
PH260 Parts Box
Take these parts out of the machine by removing the tape that is holding them.
The crate is removed by unbending the tabs at the bottom of the packing container.
Once all of these tabs are straightened, the top of the crate can be pulled off. Be careful when
removing this crate as the lid of the machine is packed on one side of the crate as shown below.
Version 1.0 © 2006 Logosol, Inc.
Chapter 3: Installation
18
2. The lid is attached to the crate via 2 bolts. An 8mm wrench and a 4mm Allen wrench is
needed to remove these bolts.
3.2.2
Assembling the Feeding Motor
The Feed Motor on the PH260 hangs on the front side of the machine and has to be free to move as
the planer feeding rollers adjust to varying sized boards that are fed through the machine. Therefore,
to prevent damage in shipment, this motor is not mounted to the planer.
Assemble the feedmotor unit to the feed roller shaft. Make sure that the key way in the wormgear is
lining up with the drive key on the feed roller shaft, and the rocker arm slides in to the slotted hole in
the planer frame. Tighten the allen bolt.
3.2.3
Removing Parts Box
The PH260 comes with a parts box that is secured between the movable side cutter head and the
second right side fence.
1. Parts Box Location in Planer
2. Shipping block that needs to be removed.
The parts box for the PH260 should be removed from the planer. You should be able to pull the box
upwards out of the planer. Then inside the box is a crank handle for cranking the planer bed up and
Version 1.0 © 2006 Logosol, Inc.
19
Logosol PH260 4 Head Planer/Moulder User Manual
down. Use this handle to move the planer bed upwards and release the pressure on the shipping
blocks.
3.2.4
Parts Box Contents
The parts box, which is found in the center of the planer when shipped, should be removed and the
contents should be as ffollows:
3.2.5
Assembling Lid
The lid must be assembled on the machine unless the machine is shipped in an oversized container.
(If your machine was shipped with the lid already installed, disregard these instructions.)
Remove the lid from the packing container as noted in previous pages. Before attaching
the lid via the two hinges and screws supplied in the hinges, change the lid rest support that
is shipped in an inverted position on the back of the planer. Do this by removing the allen
head bolt holding this support on the case of the machine.
1. Lid Rest Support is shipped in this direction.
2. Change the direction the Lid Rest Support is facing to where it is pointing upwards.
Version 1.0 © 2006 Logosol, Inc.
Chapter 3: Installation
20
Attach the chip deflector to the lid with the two bolts that are in the chip deflector. The chip deflctor is
located in the top of the planer taped to the feed rollers.
Note: The cover must be in place before operating the planer. The cover locking mechanism engages
a safety swith. the planer cannot operate without switch engaged.
3.2.6
Installing Control Panel
The Electrical Control Panel is packed inside the planer when shipped. It should be attached to the
infeed side of the planer after the planer is unpacked from its shipping crate. Two bolts can be found
in the parts box shipped inside the machine that are used to attach the planer control panel to the
machine.
1. Start Button for bottom cutter
2. Start Button for right side cutter
3. Start Button for left side cutter
4. Start Button for top cutter
5. Start Button for Feeding Rollers
6. Power Indication LIght - If this light is on, this means power is being supplied to the
machine.
7. Emergency stop button - When this button is depressed, all motors stop and CANNOT
BE RESTARTED until this button is PULLED OUT.
Version 1.0 © 2006 Logosol, Inc.
21
Logosol PH260 4 Head Planer/Moulder User Manual
8. Stop Button - this button stops all motors
9. Row of motor indicator lights - these lights indicate if motor has been started
3.2.7
Table Bed Crank Handle
The Table Bed Crank Handle is found in the parts box that is shipped with the planer.
To install this handle place on the top of the yellow indexing plate so it can be rotated to raise or lower
the machine.
1. Yellow Indexing Plate - Place Crank Handle on top of this.
1 - 4 Infeed Rollers
5. Out Feed end of planer - Rubber Feed Roller under this plate.
3.3
Electrical Installation
Installation of the electrical connections to the machine should be accomplished by a licensed
electrician. The following is information for this person to use when installing this machine to your
electrical supply.
3.3.1
Electrical Breaker Box on the PH260
The electric supply is routed into the electrical breaker box on the back of the PH260. This box cover
is fitted with 16 amp breakers, and a bus bar that devides the power to each breker.
3-Phase electrical Box
1-Phase electrical box
Version 1.0 © 2006 Logosol, Inc.
Chapter 3: Installation
22
1. Electric 16 Amp Breakers
2. Buss Bar attached to rear of breakers distribute power to the breakers
3. Attach the Voltage leads to connections under the Bus Bar in the first Breakers on the
right side of box.
Route the wires in through the access hole on the side of the box and leave enough wire for routing the
voltage supply lines to the breakers located in the cover as shown above. Also, route the ground wire
to the green ground bar found in the Electric Breaker Box.
3.3.2
Checking Rotation Direction
After making power connections, replace the breaker box cover and turn on the source breaker. The
control power indicator light on the control console should light, indicating the unit's readiness for
operation.
Start the feeding motor on the planer and check for correct rotation direction.
WARNING: DO NOT START CUTTER MOTORS BEFORE ROTATION DIRECTION IS CHECKED!
1. Feeding Motor Start Button
All motors will be either rotating the right direction or the wrong direction.
The following picture denotes the direction all heads and feeding rollers should turn on the PH260:
If the direction is wrong, turn off the feeding motor by depressing the red stop button, switch off the
Version 1.0 © 2006 Logosol, Inc.
23
Logosol PH260 4 Head Planer/Moulder User Manual
supply breaker, and reverse two of the three supply voltage leads, either at the breaker or at the
planer.
1.
2.
3.
4.
Rotation of Bottom Cutter.
Rotation of Top Cutter.
Rotation of Feeding Rollers.
Direction of Wood Through the Machine.
Turn power back on and check rotation direction again.
The correct rotation direction will also need to be checked for the chip extractor. If it is rotating
backwards, follow the same procedure to correct.
3.3.3
480 Volt Operation
The planer motors cannot operate at 480 Volts. In order to use this machine on 480 Volt systems a
Step-Down Transformer should be installed to bring the voltage down to 240 Volts. The following
transformer or one with similar specifications is recommended:
ACME 480 Volt to 240 Volt, 30 KVA
Part # T-3-53342-3S
A licensed electrician should perform this installation.
3.3.4
Electric Schematic
Electric Schematic for the PH260 1-Phase. Provide this to an electrician if
needed for troubleshooting or installation purposes.
Version 1.0 © 2006 Logosol, Inc.
Chapter 3: Installation
Version 1.0 © 2006 Logosol, Inc.
24
25
Logosol PH260 4 Head Planer/Moulder User Manual
Version 1.0 © 2006 Logosol, Inc.
Part
IV
27
Logosol PH260 4 Head Planer/Moulder User Manual
4
Chapter 4: Operation
4.1
Overview
This chapter provides guidelines and help for the safe operation of the PH260. Use this chapter as a
reference point for the setting of knives, starting and stopping the machine and for the setting of
moulding knives in the machine.
4.2
Safety
Always follow the safety rules outlined in the sections on safety in this manual.
Do not operate this machine without first reading and understanding the proper use of this machine.
Warning! Before adjusting the knives on this machine always turn off the electrical circuit
supplying power to the machine.
Always wear gloves when working with knives in the machine.
When work is completed always check for tools used in the operation and remove from the
machine before closing the lid.
Always check for free rotation of cutter heads before closing the lid.
4.3
Control Panel Operation
The PH260 is started and stopped via the control panel located at the infeed end of the machine. The
top right light on the control panel will light up when power is being supplied to the machine. The
bottom row of buttons start each motor independently of the others. Start only the motors you will be
using when you are certain the machine is set up and clear of any tools or loose items.
1. Start Button for bottom cutter
2. Start Button for right side cutter
3. Start Button for left side cutter
4. Start Button for top cutter
5. Start Button for Feeding Rollers
6. Power Indication LIght - If this light is on, this means power is being supplied to the
machine.
Version 1.0 © 2006 Logosol, Inc.
Chapter 4: Operation
28
7. Emergency stop button - When this button is depressed, all motors stop and CANNOT
BE RESTARTED by the control panel start buttons until this button is PULLED OUT.
8. Stop Button - this button stops all motors
9. Row of motor indicator lights - these lights indicate if motor has been started
4.4
Starting the Machine
Close the lid and make sure the Emergency Stop Button is not pressed in.
The best way to insure that it is in the correct position is to depress the Emergency Stop Button in and
then pull it out until you here a click.
The lid must be securely fastened down for the PH260 can be operated.
1. Direction Stop Button must be pulled out.
Always make sure all tools used in the setup of the machine are removed from the machine before
starting any of the motors. Also, always check for rotation of all cutter heads before closing the lid and
starting the machine. Each cutter head should move freely and not impact any fences before starting.
Always wear gloves when handling the cutter heads.
4.5
Stopping the Machine
Use the top left red button to stop the machine. This stops all motors at once. The motors can be
restarted again after this stop button is pressed. If you need to stop quickly the machine, you can
press the big red button until you hear it click. Once this button is pressed, the machine cannot be
restarted until this button is pulled out again.
4.6
Setting Up For 4 Sided Planing
Since this machine can accomplish a variety of tasks, we will take the most common tasks one at a
time in order to provide instructions as specific as possible to the task the operator is trying to
accomplish with the planer.
One of the most common jobs on the PH260 is to plane a board on 4 sides(S4S). Once the machine
Version 1.0 © 2006 Logosol, Inc.
29
Logosol PH260 4 Head Planer/Moulder User Manual
is setup correctly, this enables the operator to send a piece of rough lumber through the machine and
have a board planed on all 4 sides exit the outfeed end of the machine.
4.6.1
Bottom Cutter Setup
The Bottom Cutter or Under Cutter is located under the planer table at the infeed end of the machine.
This cutter head comes shipped with two straight planer knives installed in the head. It is
recommended that you check these knives to insure that they are set properly before planing with the
machine.
(View from top of the machine with the lid opened - Infeed is from Left to Right)
1. Bottom Cutter Head Location - Cutter #1
2. Stationary Side Cutter - Cutter #2
3. Moveable Side Cutter - Cutter #3
4. Top Cutter - Cutter #4
4.6.1.1
Safety
Warning! Before adjusting the knives on this machine always turn off the electrical circuit
supplying power to the machine.
Always wear gloves when working with knives in the machine.
When work is completed always check for tools used in the operation and remove from the
machine before closing the lid.
Always check for free rotation of cutter heads before closing the lid.
Version 1.0 © 2006 Logosol, Inc.
Chapter 4: Operation
4.6.1.2
30
Tools Needed
To perform this operation you will need the following tools:
1.
2.
3.
4.
4.6.1.3
10 mm open end wrench (supplied with Planer)
4 mm allen head wrench
small carpenter's square
Gloves
Bottom Cutter Design
The bottom cutter head has the following specs:
Diameter: 2 7/8" (72mm)
Width: 11 13/16" (300mm)
Rotation Speed: 7000 rpm
4 - slots for planer knives
Planing Depth: 0 - 3/32" (0-4mm)
This head is shipped with straight planer knives installed in two of the knife slots. The head can be
fitted with 2 additional straight planer knives, or with moulding knives in the two empty slots.
Version 1.0 © 2006 Logosol, Inc.
31
4.6.1.4
Logosol PH260 4 Head Planer/Moulder User Manual
Leveling Straight Planer Knife in Bottom Cutter Head
The Bottom Cutter Head Straight Planing Knives should be adjusted so they lie level with and parallel
to the cutter table.
NOTE: Turn off electrical circuit supplying the machine before adjusting knives.
Take care to adjust these knives to the cast iron table. Do not put a straight edge through the machine
across the nylon inserts to adjust these knives. Use the following procedure to set these knives
accurately:
Place the base of the square across the corner of the cast iron table bed as shown below.
1. Base of square
2. Corner of Cast Iron Table
Rotate the head so that the edge of the planer knife is directly under the square. If the knife
is too high in the head, the square base will be pushed out of position. If it is too low, it will
not move at all. The objective is to get the square base to move slightly when the knife
edge passes beneath it. You should see the square base move only slightly-about 1/16 1/8" in either direction, with maximum movement about 1/4 of an inch when the knife
passes below it.
1. Rotate the head as shown above.
2. Square Base.
Version 1.0 © 2006 Logosol, Inc.
Chapter 4: Operation
32
In order to raise and lower the knife, the knife chip breaker lock bolts should be loosened
slightly. Then the knife can be raised or lowered using a 4 mm allen head wrench
(supplied).
1.
2.
A.
B.
C.
D.
4 mm allen wrench inserted into adjusting screw.
10mm open end wrench used to loosen chip breaker lock bolts.
Direction to turn the allen wrench to raise the knife blade.
Direction to turn the allen wrench to lower the knife blade.
Direction to move the wrench to tighten the chip breaker in head.
Direction to move the wrench to loosen the chip breaker in head.
– Insert the 10 mm wrench in the track between the chip breaker (D) and the cutter. Loosen the lock
bolts (D) which hold the knives.
– Knife height is set by either adjusting the knife up(A) or down(B) using the two recessed adjustment
screws (5 mm allen head) next to the cutter track. The knife sides have a recess for the adjustment
screw heads. The knives should extend 1 mm in order to fit against Logosol profile knives.
Check the knife level in the head by rotating the head to see if the knife blade moves the square base
slightly. Adjust one side until correct, then adjust the other side in similar fashion.
1. Rotating the head.
2. Square base across table on the side with the stationary side cutter.
Note: Adjusting the second side will make the first side adjusted a little off. Check the level of both
sides of the knife again. Keep adjusting until the square base moves only slightly when the head is
rotated beneath it.
Version 1.0 © 2006 Logosol, Inc.
33
Logosol PH260 4 Head Planer/Moulder User Manual
Once one knife is adjusted correctly so that the square base moves only slightly when the head is
rotated so that the knife is moved back and forth beneath it, tighten the Chip Breaker Lock Bolts.
Note: Tighten the bolts together. Make a turn on one bolt and move to the next. Keep repeating until
all the bolts are very tight in the head.
Rotate the head so that the next knife can be set in the same way. Repeat this procedure until all
straight knives in the head are level with the cast iron table.
WARNING: Be sure all knives are secure in the head and that ALL Chip Breaker Lock Bolts are
very tight before using the machine! Rotate the head completely to make sure it does not
impact with anything when rotating.
WARNING: Check to be sure all parts and wrenches used to set the Bottom knives have been
removed from the machine before closing the lid of the machine!
4.6.1.5
Replacing Bottom Cutter Straight Planer Knives
The bottom cutter knives are taken out of the machine by loosening the Bottom Cutter Chip Breaker
Lock bolts as outlined above. The adjustment screws are also loosened to remove the knives.
1. Knife Height Adjusting Screw
The knives are fitted in the bottom cutter head as shown:
NOTE: Always put the leading edge of the knife against the chip breaker. This is true for both straight
planing knives and moulding knives in both the horizontal cutter heads (Top and Bottom) and the side
cutter heads.
Bottom Cutter Head Detail (Note, this head has been removed from the planer to show
detail)
1. Straight Planer knife. NOTE: Leading edge of knife against the Chip Breaker
Version 1.0 © 2006 Logosol, Inc.
Chapter 4: Operation
2.
3.
4.
5.
6.
34
Knife height adjusting screw - use 4 mm allen wrench to raise and lower
Bevel Edge of the knife.
Chip Breaker Lock Bolts.
Rotation cutter head turns to plane wood.
Chip Breaker with locking bolts
Part Number for Replacement Logosol PH260 Bottom Cutter HSS Knives: 7000-002-8300
1. Adjusting Screw Slot
Part Number for Replacement Logosol PH260 Bottom Cutter CARBIDE Knives: 7000-003-8300
4.6.1.6
Adjusting Takeoff of Bottom Cutter
The cutting depth of the Bottom cutter is set by adding or removing takeoff adjusting plates in the cast
iron planer table in front of the knife.
There are three takeoff adjusting plates available:
1. 2 mm thick with conical holes(A.)
2. 1 mm thick with conical holes(A.)
3. 1 mm thick with round holes.(B.)
The adjusting plates are held in place by carriage screws. Use the 5mm allen head wrench to remove
these screws and add or replace plates.
Version 1.0 © 2006 Logosol, Inc.
35
Logosol PH260 4 Head Planer/Moulder User Manual
1. Takeoff Adjustment Plate ( Spacer Plate)
A. Slide into position in this direction.
1.
2.
3.
A.
B.
Takeoff Adjusting Plate Mounting Holes
4 mm Allen Head Wrench
Allen Head Carraige Bolt
Tighten Bolt
Loosen Bolt
The machine is supplied with the 2 mm spacer fitted, as this is the basic setting. (NOTE: Later
machines will have a 2 mm spacer plate with a curved lip on it, rather than a flat plate as noted in this
manual.)
1. Cast Iron Table
2. 2 mm Spacer Plate
A. Top of Cast Iron Table and amount of takeoff of bottom cutter (2mm)
To remove:
-
4 mm, use no spacer.
3 mm, use the 1 mm spacer with conical holes.
2 mm, use the 2 mm spacer.
1 mm, use the 1 mm spacer with round holes + the 2 mm spacer.
0 mm, use the 1 mm spacer with conical holes + the 1 mm spacer with round holes +
the 2 mm spacer.
All Three Plates installed - Level with the Cast Iron Table - No Takeoff with the bottom
cutter
Version 1.0 © 2006 Logosol, Inc.
Chapter 4: Operation
4.6.2
Top Cutter Setup
4.6.2.1
Safety
36
Warning! Before adjusting the knives on this machine always turn off the electrical circuit
supplying power to the machine.
Always wear gloves when working with knives in the machine.
When work is completed always check for tools used in the operation and remove from the
machine before closing the lid.
Always check for free rotation of cutter heads before closing the lid.
4.6.2.2
Tools Needed
To perform this operation you will need the following tools:
1.
2.
3.
4.
4.6.2.3
10 mm open end wrench (supplied with Planer)
4 mm allen head wrench (supplied with Planer)
Planer Knife Setting Block (supplied with Planer)
Gloves
Top Cutter Design
The top cutter head has the following specs:
Diameter: 2 7/8" (72mm)
Width: 16 1/4" (410mm)
Rotation Speed: 7000 rpm
4 - slots for planer knives
Planing Depth: Max 5/16" (8mm)
Moulding Depth: Max. 3/8" (10mm)
This head is shipped with straight planer knives installed in two of the knife slots. The head can be
fitted with 2 additional straight planer knives, or with moulding knives in the two empty slots.
Version 1.0 © 2006 Logosol, Inc.
37
4.6.2.4
Logosol PH260 4 Head Planer/Moulder User Manual
Leveling the Straight Planer Knife
The Top Cutter knives are adjusted in a similar way to the Bottom Cutter knives. However, there is an
aluminum knife setting block that is supplied with the machine for the purpose of setting the Top Cutter
Knives. This setting block can be found in the parts box that is shipped with the machine.
To level the top cutter loosen the lock bolts in the chip breaker slightly and then place the setting block
over one of the adjustment screws in the top head. Adjust the knife up or down until the knife just
barely touches the underside of the block.
1.
2.
3.
4.
A.
B.
Setting Block sitting across Planer Knife.
4 mm Allen Wrench
Planer Knife
Chip Breaker Lock Bolts
Direction to turn Allen Wrench to Raise knife in head.
Direction to turn Allen Wrench to Lower knife in head.
The knives can be set in this fashion, using this block.
An alternative method is to set one side of the knife using this block and then rotate the
head so that the knife just set is down and move the table bed to where the block, when
sitting on its legs is just touching the knife. When you rotate the head, the block should just
barely move, similar to the method used to set the under cutter.
Version 1.0 © 2006 Logosol, Inc.
Chapter 4: Operation
1.
2.
3.
4.
38
Setting Block
1. Setting Block placed on Cast Iron Table
Top Cutter Head
Last Metal Feed Roller before Top Cutter Head
Cutting edge of straight planer knife in Top Cutter Head
Once the table is elevated to where this block barely moves when the knife is moved above it, move
the setting block to the other end of the head to where the block is under the knife height adjustment
screw in the head. Adjust this screw up or down to get the knife to the right height. The knife is at the
right height when the block just barely moves when the knife is rotated in the head above it.
When the knife is set correctly, the setting block in the above picture should move only slightly when
the planer knife is rotated over it.
Repeat the above procedure for every straight knife in the head.
4.6.2.5
Replacing the Top Cutter Straight Knives
The Top cutter knives are taken out of the machine by loosening the Top Cutter Chip Breaker Lock
bolts. The adjustment screws are also loosened to remove the knives.
Version 1.0 © 2006 Logosol, Inc.
39
Logosol PH260 4 Head Planer/Moulder User Manual
1. Straight Planer knife.
1.
2.
3.
4.
5.
6.
Knife Height Adjusting Screw.
Knife height adjusting screw.
Bevel Edge of the knife.
Chip Breaker Lock Bolts.
Rotation cutter head turns to plane wood.
Chip Breaker with locking bolts.
NOTE: Always put the leading edge of the knife against the chip breaker. This is true for both straight
planing knives and moulding knives in both the horizontal cutter heads (Top and Bottom) and the side
cutter heads.
1. Adjusting Screw Slot
4.6.2.6
Adjusting Cutting Depth
The cutting depth of the top cutter is adjusted by turning the top crank handle that raises and lowers
the cast iron table in the planer. The scale on the front of the machine indicates the thickness of the
finished material.
Version 1.0 © 2006 Logosol, Inc.
Chapter 4: Operation
40
1. Thickness of Finished Board Scale.
The depth of cut is determined by how thick the rough board is before it enters the planer, less the
amount of takeoff from the bottom cutter, less the amount of the thickness of the finished board.
Here is a typical example:
Rough Lumber Thickness = 1 1/16 "
Takeoff of Bottom Cutter = 1/16"
Resulting Thickness
= 7/8"
Top Cutter Head removes = 1/8"
A similar example in Metric:
Rough Lumber Thickness = 26 mm
Takeoff of Bottom Cutter = 2 mm
Resulting Thickness
= 21 mm
Top Cutter Head removes = 3 mm
4.6.3
Side Cutter Knife Setup
Version 1.0 © 2006 Logosol, Inc.
41
4.6.3.1
Logosol PH260 4 Head Planer/Moulder User Manual
Safety
Warning! Before adjusting the knives on this machine always turn off the electrical circuit
supplying power to the machine.
Always wear gloves when working with knives in the machine.
When work is completed always check for tools used in the operation and remove from the
machine before closing the lid.
Always check for free rotation of cutter heads before closing the lid.
4.6.3.2
Tools Needed
To perform this operation you will need the following tools:
1.
2.
3.
4.
4.6.3.3
12 mm open end wrench
30 mm open end wrench (supplied with Planer)
4 mm allen head wrench
Gloves
Side Cutter Design
The side cutters have the following specs:
Spindle Axle: Diameter 30 mm
Cutting Height: Maximum 3 15/16" (100 mm)
Rotation Speed: 7000 rpm
Cutting Depth: Maximum 1 3/32" (28 mm)
The Side Cutter Heads Shipped with the machine Specs:
Type: TB90
Diameter: Body 3 1/2" (90 mm)
Height: Body 1 9/16" (40 mm)
Planer Knives: HSS (High Speed Steel)
Knives: Width 1 33/32" (50 mm)
Anatomy of a Side Cutter Head:
Version 1.0 © 2006 Logosol, Inc.
Chapter 4: Operation
1.
2.
3.
4.
A.
4.6.3.4
TB90 Side Cutter Head
Chip Breaker or "Wedge"
Side Cutter Knives in Head
Face of knife
Direction of Cut
Removing Right Side Cutter
Location of the Right Side Cutter(Stationary Side Cutter or Cutter # 2 on panel)
(View from top of the machine with the lid opened - Infeed is from Left to Right)
1. Bottom Cutter Head Location - Cutter #1
2. Stationary Side Cutter - Cutter #2
3. Moveable Side Cutter - Cutter #3
4. Top Cutter - Cutter #4
To remove the Right Side Cutter Head, use the 30 mm open end wrench and a large adjustable
wrench to loosen the nut on the top of the shaft.
Version 1.0 © 2006 Logosol, Inc.
42
43
Logosol PH260 4 Head Planer/Moulder User Manual
RULE OF THUMB: Remember - Each side cutter loosens in the direction the cutter turns. Turn the
wrench in the direction the side cutter turns when running.
The nut is then removed from the shaft threads,
from the shaft - Be sure and
and the spacers above the head are also removed.
these heads. Knives are
Then the head can be lifted
wear gloves when working with
sharp!
4.6.3.5
Removing Left Side Cutter
Location of the Left Side Cutter(Moveable Side Cutter or Cutter # 3 on panel)
Version 1.0 © 2006 Logosol, Inc.
Chapter 4: Operation
44
(View from top of the machine with the lid opened - Infeed is from Left to Right)
1. Bottom Cutter Head Location - Cutter #1
2. Stationary Side Cutter - Cutter #2
3. Moveable Side Cutter - Cutter #3
4. Top Cutter - Cutter #4
To remove the Left Side Cutter Head, use the 30 mm open end wrench and a large adjustable wrench
to loosen the nut on the top of the shaft.
Notice that this nut turns the opposite way from the other side cutter.
RULE OF THUMB: Remember - Each side cutter loosens in the direction the cutter turns. Turn the
wrench in the direction the side cutter turns when running.
4.6.3.6
Setting Side Cutter Knife Height
With this machine is shipped a package of shims or thickness spacers for the side cutter heads.
There are shims of various thicknesses in this package. These shims should be in the parts box found
inside the planer upon unpacking.
Version 1.0 © 2006 Logosol, Inc.
45
Logosol PH260 4 Head Planer/Moulder User Manual
These shims are used to raise the head up and down on the cutter shaft. This allows for precise
setting of the head and it will not move from this setting once these shims are placed and the cutter
head is locked in place. Also, this provides the ability to go back to this setting if you record the shims
that are used in the setup.
For straight planing we are just insuring that the knife is impacting the full side of the board.
4.6.3.7
Side Cutter Spacers
Here are the various sized spacers available for this machine:
40 mm Spacer
20 mm Spacer
10 mm Spacer
5 mm Spacer
Set of Spacers (0.1 - 2.0mm)
To Reorder spacers use part Number:
7502-001-0038
7502-001-0042
7502-001-0044
7502-001-0046
7502-001-0230
4.6.3.8
40 mm Spacer
20 mm Spacer
10 mm Spacer
5 mm Spacer
Set of Spacers (0.1 - 2.0mm)
Raising the Cutter Head
To raise the cutter head for either side, remove the cutter head and determine the amount of shims to
place under the cutter head to acheive the correct height of the head.
Version 1.0 © 2006 Logosol, Inc.
Chapter 4: Operation
46
You may have to try several combinations of shims in order to acheive the correct height for
the side cutter knives.
4.6.3.9
Lowering the Cutter Head
To lower the cutter head remove the head from the shaft and then remove the appropriate shims to
lower the head in the machine.
You may have to try several different combinations of shims to acheive the correct height for the head.
Check the level with a straight edge as shown below.
1. Straight Edge
2. Straight Knife Edge
A. Knife edge should be below the level of the Cast Iron Table.
4.6.3.10 Cutter Head Direction
It is important that the cutter heads are replaced back in the machine in the correct direction. Please
refer to the pictures below to confirm the cutter heads are re-installed properly.
Version 1.0 © 2006 Logosol, Inc.
47
Logosol PH260 4 Head Planer/Moulder User Manual
1. Rotation direction of the Left Side Cutter.
2. Rotation direction of the right Side Cutter.
3. Path of wood through the machine.
RULE OF THUMB: The leading edge of the knife should always turn into the wood. Make sure this
knife is cutting into the wood when the head is rotating.
4.6.3.11 Placing the Cutter Head in Position
Replace the cutter heads back on the shaft as shown. Make sure the cutter head slides all the way
down the shaft and sits on the shims at the bottom of the shaft.
4.6.3.12 Locking the Cutter Head in Position
The large spacer rings should be placed above the head. Enough spacers should be placed so that
the last spacer is above the beginning of the thread at the top of the shaft.
Version 1.0 © 2006 Logosol, Inc.
Chapter 4: Operation
48
Warning: If this is not done properly the cutter head could spin on the shaft and cause
scarring on the shaft. Also, if the spacers are not above the first of the thread, the nut will be
caused to spin into the shaft and be very hard to loosen the next time the head is changed.
The top nut should then be replaced on the top of the shaft using the two wrenches as shown.
1. 12 mm wrench
2. 30 mm wrench
A. Direction to turn wrenches to tighten nut on moveable side cutter
B.. Direction cutter head will turn when running.
4.6.3.13 Side Cutter Fence Setup
The Right Side Cutter has two fences. We refer to them as the First Side Cutter Fence,
and the Second Side Cutter Fence. They are both attached in similar fashion to the cast
iron table.
4.6.3.14 Setting the First Side Cutter Fence
Now that the knives are at the right height, we must set the side cutter fence for the takeoff of the right
side of the board. This is done with the first side cutter fence. Here is the location of this fence in the
machine:
Version 1.0 © 2006 Logosol, Inc.
49
Logosol PH260 4 Head Planer/Moulder User Manual
(View is from the top of the planer with the lid opened)
1. First Side Cutter Fence
2. Hold Down clamps for First Side Cutter Fence
3. Second Side Cutter Fence
4. Hold Down Clamps for Second Side Cutter Fence
To set this fence, loosen the 13 mm bolts on the fence brackets and slide the fence to the right
distance for the straight knives.
1.
2.
3.
4.
A.
B.
First Right Side Fence
13 mm Wrench
Side Fence Mounting Bracket
13 mm Bolt
Loosen Bolt
Tighten Bolt
It is recommended that you take about 1/8" off this side, though you can take more or less as needed
for the lumber you are milling. Always remember, the less you take off, the better the resulting cut will
be.
A. Amount of Takeoff on Right Side
B. Direction of Wood Through Machine
Version 1.0 © 2006 Logosol, Inc.
Chapter 4: Operation
50
1. TB90 Side Cutter Head
Lay a straight edge or straight piece of wood up against the fence and where it is in contact with the
knife at its cutting point into the wood that will be moving through the machine along the fence.
Move the fence in or out until you can see the right depth of cut you want to take off of this
side of the board. About 1/8" is usually a good amount. Once you have determined the
amount of takeoff that this cutter will make, check the fence for being square with the case.
Once this fence is in the right position, tighten the bolts in the fence mounting bracket. Then loosen
the bolts that hold the fence to the mounting brackets and slide the fence toward the cutter head so
that it is about 1/8" away from the knife as it turns.
1. Second Right Side Cutter Fence
2. First Right Side Cutter Fence
3. Bottom Cutter Head
A. Distance knife should clear fence (1/8")
This distance is set by loosening the bolts inside the fence and sliding the fence lengthways toward or
away from the side cutter. When you get the correct distance from the cutter head knives, tighten this
fence securely in place.
This will provide support for the wood and help the finish you will acheive from your planing, the closer
you have this fence to the knife. However, be sure and not get this too close, and make sure you
tighten the fence bolts securely so the fence will not move into the knives. Check the rotation of the
knives before closing the machine lid.
4.6.3.15 Setting the Second Side Cutter Fence - Step One
The second side fence is set back away from the path of the wood initially so that the wood can travel
through the machine straight and then stopped. This second side cutter fence is then brought up to
the wood and bolted into place firmly against the wood as it travels through the machine.
Version 1.0 © 2006 Logosol, Inc.
51
Logosol PH260 4 Head Planer/Moulder User Manual
Here is the location of the second side cutter fence:
(View is from the top of the planer with the lid opened)
1. First Side Cutter Fence
2. Hold Down clamps for First Side Cutter Fence
3. Second Side Cutter Fence
4. Hold Down Clamps for Second Side Cutter Fence
1.
2.
3.
4.
5.
6.
7.
A.
B.
Second Right Side Cutter Fence
Fence Hold Down Bracket
TB90 Cutter Head
Top Cutter Head
13 mm Wrench
13 mm bolt
Tighten Bolt
Loosen Bolt
Loosen the bolts holding the fence in place and slide the fence back towards the case. Tighten the
Version 1.0 © 2006 Logosol, Inc.
Chapter 4: Operation
52
bolts firmly to lock the fence in place. Check the front of the fence and insure that the side cutter head,
when rotated, does not impact the fence. Loosen the bolts holding this fence onto the mounting
brackets and slide until the head can freely move and there is some space, about 1/4" between the
knives and the fence.
1.
2.
3.
A.
B.
C.
First Right Side Cutter Fence Setting
Second Right Side Cutter Fence
Second Right Side Cutter Hold-Down Bracket
Move the fence back in this direction past the line of first fence setting.
Hold Down Bracket Lock Bolts.
Insure the cutting head does not impact the fence.
This will allow the wood to travel through the machine past the first side cutter. We will set this side
cutter again, after we run a short test board into the machine and shut the machine down with the
board in the machine. Before we do that, we must set the moveable side cutter for this test board.
4.6.3.16 Setting the Moveable Side Cutter Head
The moveable side cutter head is located here:
(View from top of the machine with the lid opened - Infeed is from Left to Right)
1. Bottom Cutter Head Location - Cutter #1
2. Stationary Side Cutter - Cutter #2
Version 1.0 © 2006 Logosol, Inc.
53
Logosol PH260 4 Head Planer/Moulder User Manual
3. Moveable Side Cutter - Cutter #3
4. Top Cutter - Cutter #4
This side cutter can be moved by turning a crank on the front side of the machine.
Before being able to move this side cutter head, check to make sure the moveable side cutter locking
bolt is loosened. Here is the location of this locking bolt:
1. Locking Bolt Lever
A. Turn this direction to Loosen.
B. Turn this direction to Tighten.
Once this bolt has been loosened, move the side cutter in or out to the desired location to cut the left
side of the board you will be sending through the machine. This initial setting will only be close to the
end result desired, as for now we are mainly setting the second right side fence. Once this second
right side fence is set, then you will measure more accurately to acheive the width you desire.
1. Reach in under the Cast Iron Table Bed to loosen this bolt at the outfeed end of the
planer.
Version 1.0 © 2006 Logosol, Inc.
Chapter 4: Operation
54
4.6.3.17 Checking for Rotation of Cutter Head
Be sure and check rotation of the cutter head before closing the lid and using the machine.
1. Cutter Rotation Direction. Make sure the cutter will turn completely around without
hitting anything.
2. Right Side Cutter Direction. Make sure the cutter head will turn completely around
without hitting anything.
3. Direction of Wood through machine.
4.6.3.18 Setting the pressure roller
The Moveable Side Cutter has a pressure roller located just past it.
The pressure roller just past the Moveable Side Cutter should be set to around 1/8" less than the board
width.
1.
2.
3.
4.
5.
A.
Pressure Roller
Second Right Side Fence
Top Cutter Head
Side Cutter Head
Direction of Board Running through Machine.
1/8" Inset of Pressure Roller
In other words, it should extend 1/8" past the largest radius of the side cutter as shown.
Version 1.0 © 2006 Logosol, Inc.
55
Logosol PH260 4 Head Planer/Moulder User Manual
Adjust this pressure roller by loosening the nut with a 13 mm wrench and moving it to the proper
location and then tightening it in place.
4.6.3.19 Setting the location of the infeed pressure rollers
The infeed pressure rollers are mounted on an aluminum L bracket that is attached to the Moveable
Side Cutter and moves with the Side Cutter. It fits into a groove just in front of the side cutter and can
be moved in or out as needed. This bracket allows for varying width boards to be fed into the machine.
Where this bracket is placed also determines the widest board the machine will accept.
1.
2.
3.
4.
5.
6.
A.
B.
C.
4.6.4
Infeed Pressure Roller L Bracket Hold-Down Bolt
4 mm Allen Head Wrench
L-Bracket
Moveable Side Cutter Head
Right Side Cutter
Second Right Side Infeed Fence
Turn this direction to Tighten
Turn this direction to LOOSEN
Slide this bracket in or out as necessary.
Running the first test board
Version 1.0 © 2006 Logosol, Inc.
Chapter 4: Operation
4.6.4.1
56
Safety
Check for tools used in the operation and remove from the machine before closing the lid.
Always check for free rotation of cutter heads before closing the lid.
4.6.4.2
Turning on the machine
Select a board that is about 3' in length and uniform in dimension for the first run of the machine. In
order to set the second right side cutter fence this board should be stopped before it runs completely
through the machine. The board should be stopped just in front of the pressure roller located just after
the left side cutter.
Turn the machine on using the start buttons located on the control panel to start the cutter heads one
at a time. Start the feeding motor last. Each light above the start buttons should light up as the motors
are started.
Before you put the first board through the machine, slow the speed of the feeding rollers down using
the knob on the right front side of the machine that is on the feeding motor assembly. Turn the knob
until you see the rollers slow down to their lowest speed.
Place the board on the infeed side of the table against the fence. Slide the board in the machine with
the right side firmly against the fence until you feel the feeding rollers begin to pull the board through
the machine.
1.
2.
3.
A.
B.
Wood board to be planed.
First Right Side Cutter Fence
Infeed Pressure Roller
Make sure wood has contact with the fence.
Direction board should be put into the machine.
Version 1.0 © 2006 Logosol, Inc.
57
4.6.4.3
Logosol PH260 4 Head Planer/Moulder User Manual
Stopping the machine
Watch the board move through the machine through the window on top of the lid. Stop the machine
with the stop button when the board gets just past the left side cutter and before it impacts the pressure
roller next to the left side cutter.
4.6.5
Setting the Feeding Rate
The feeding rate of the machine is variable from 11 to 52 feet per minute. This rate is adjusted by the
feeding rate control knob located on the side of the feeding motor assembly.
It is best to start off at the slowest speed when setting up the machine. Once all the fences and knives
are set properly, then begin to increase the feeding rate using this knob.
NOTE: Do not turn this knob unless the feeding motor is on!
This is a planetary gear assembly and should only be adjusted when the machine is running. Turning
the knob clockwise increases the speed. Turning the knob counter-clockwise decreases the speed.
Increase the speed until you begin to notice chatter marks on the finished board. Back off the speed
until the surface is smooth and the board is easily going through the machine. The best speed at
which to run will vary depending on the type of wood, the type of moulding knives you have in the
machine and the moisture content of the material. Over time, you will get a feel for the best speed at
which to run your jobs.
4.6.6
Completing the Setup
Version 1.0 © 2006 Logosol, Inc.
Chapter 4: Operation
4.6.7
58
Setting the Second Right Side Fence
Once this board is stopped in the machine, the second right side cutter fence can be moved into
position.
1.
2.
3.
4.
5.
6.
A.
B.
Board stopped in machine.
Second Right Side Fence
Pressure Roller
Moveable Side Cutter Head
Right Side Cutter Head
In-Feed Pressure Rollers Arm
Point at which to stop Wood in Machine - before it hits the pressure roller.
Wood traveling through the machine.
Open the machine, and loosen the bolts holding the right side fence in place. Slide this fence firmly
against the finished side of the wood in the machine. Make sure this fence is in contact with the wood
down its complete length.Tighten the fence in position.
1.
2.
3.
4.
Second Right Side Fence
Right Side Cutter Head
Moveable Side Cutter Head
Wood stopped in machine
Version 1.0 © 2006 Logosol, Inc.
59
Logosol PH260 4 Head Planer/Moulder User Manual
5. Top Cutter Head
A. Direction of Wood Through Machine
B. Make Sure Right Side Fence is against side of wood
Then check the length of the fence, loosening the bolts holding the front of the fence to the mounting
brackets if needed to slide the fence to the right position. Be sure and check rotation of the right cutter
head before setting.
4.6.8
Running Material Through the Machine
Once the first test boards are complete and you are satisfied with the setup, you can begin running
material through the machine.
4.6.8.1
Feeding the Machine
Make sure you have enough room for clearance for the material that you will be putting through the
machine, both on the infeed and outfeed areas. The area should be clear of loose items on the floor,
so there is little risk of tripping when handling long material. The paths to the infeed and outfeed ends
of the machine should be clear.
Material should be placed close to the infeed end of the machine for quick feeding into the machine
and a stacking area should be prepared at the outfeed end.
Once the machine is started and boards are fed into the machine, it is recommended to keep the
material going through the machine one board after another, with the two boards touching. This will
reduce snipe at the ends of the boards and movement of the boards as they exit the machine.
Place the straightest edge of the material against the right side fence. Make sure it is fed into the
machine with the edge against the first right side fence. Material that is fed into the machine at an
angle will most likely not straighten up in the machine and may cause problems with fences.
4.7
Setting Up for 4 Sided Moulding
The PH260 is more than a 4-sided Planer. It can also do 4-sided Moulding. To accomplish moulding
on four sides we use moulding knives in the heads of the PH260.
Setting up the machine to do four sided moulding is a similar operation to setting up for four sided
planing. The difference is that we will now be putting moulding knives into the side heads and adding
moulding knives in the bottom and top heads.
Version 1.0 © 2006 Logosol, Inc.
Chapter 4: Operation
4.7.1
60
Safety
Warning! Before adjusting the knives on this machine always turn off the electrical circuit
supplying power to the machine.
Always wear gloves when working with knives in the machine.
When work is completed always check for tools used in the operation and remove from the
machine before closing the lid.
Always check for free rotation of cutter heads before closing the lid.
4.7.2
Moulding Knives
Moulding knives are knives that have a pattern cut into them instead of being a straight edge knife.
Adding these knives allows us to do such patterns as Tongue and Groove, Paneling, and door and
crown mouldings.
Here is a pattern that uses the straight knives on top and bottom along with two different moulding
knives in the top head, and different moulding knives in the side heads to make a beaded V-Groove
paneling board.
Version 1.0 © 2006 Logosol, Inc.
61
Logosol PH260 4 Head Planer/Moulder User Manual
Moulding knives by Logosol are made of High Speed Steel. They come in various patterns and are
listed in the back of this manual. You can also have custom knives made for this machine. A guide for
designing custom knives can also be found in the appendix of this manual.
4.7.2.1
Side Cutter Moulding Knives
The Moulding Knives for the TB90 Side Cutter Heads are similar to the straight knives, but have a
profile or pattern on the sharp edge.
1.
2.
3.
4.
A.
TB90 Side Cutter Head
Chip Breaker or "Wedge"
Side Cutter Knives in Head
Face of knife
Direction of Cut
4.7.2.1.1 Anatomy of a Side Cutter Moulding Knife
Side moulding knives are similar to top moulding knives as they have two holes in the base of the knife
that index the knife into the head.
Side Moulding Knives are different from top and bottom cutting head knives in that they can be much
longer in length and can have a rounded base, whereas a moulding knife for the top or bottom cutter
heads must have a flat base.
A much deeper profile can be cut on the side cutter knives than on the top or bottom cutter head
knives.
Version 1.0 © 2006 Logosol, Inc.
Chapter 4: Operation
62
4.7.2.1.2 Removing Knives from Side Cutter Head
Take the Side Cutter Heads out of the machine as outlined under Removing Right Side Cutter
Section. 42
Use a 4 mm Allen Head Wrench to loosen the set screw holding the knife in place in the Head as
shown below:
1.
2.
3.
4.
A.
Allen Head Set Screw
4 mm Allen Head Wrench
Chip Breaker Wedge
Knife
Direction to turn screw to loosen
1.
2.
3.
4.
5.
Allen Head Screw loosened in head
4 mm Allen Head Wrench
Chip Breaker Wedge
Knife
Dowel pins screws
Version 1.0 © 2006 Logosol, Inc.
63
Logosol PH260 4 Head Planer/Moulder User Manual
4.7.2.1.3 Inserting Moulding Knives in Side Cutter Head
The moulding knives for the side cutter head are inserted into the TB90 Cutter Head similarly to the
straight knives that are removed.
These knives are indexed into the head via two dowel pin holes in the base of the knife.
NOTE: The knife can be inserted into the head BACKWARDS! Always be sure the leading edge of
the knife, or the Face of the knife is against the chip breaker as shown in the pictures below.
1.
2.
3.
4.
5.
4 mm Allen Head Wrench
TB90 Cutter Head
Side Moulding Knife
Mounting Dowels in TB90 Cutter Head
Mounting Dowel Holes in knife
1.
2.
3.
A.
TB90 Side Cutter Head
Chip Breaker
Moulding Knife
Direction of rotation of head in machine
Version 1.0 © 2006 Logosol, Inc.
Chapter 4: Operation
64
4.7.2.1.4 Setting Cutting Head Height for Moulding Knives
Once the knives are in the head, be sure and tighten the allen screws very tightly with the allen head
wrench. The heads can then be placed back into the machine. Raise and lower the heads using the
supplied shims until they are in the correct position as outlined in the section Raising the Cutter
Head 45 .
Setting the side cutter head heights is more critical with moulding knives in the heads. In the case of
tongue and groove, this can be more complicated as you are trying to set the knife to hit not only in the
center of the board, but also match up with the other side. It is best to measure as outlined in the
section Raising the Cutter Head 45 and then to run a short piece of material (3 feet) through the
machine. Cut the piece into short pieces and place together to see how the boards match up. Shim
up or down the appropriate head until the pieces match up. This may take several trials.
4.7.2.2
Horizontal Cutter Moulding Knives
The top cutter head has four slots for knives. The machine comes with two straight planing knives
installed. In the other two slots you can add moulding knives of various size and patterns.
The moulding knives are held in place by "gibs" or "chip breakers" or "clamps". They are refered to by
various names in different parts of the country. The knives are fitted onto the dowel pins in the gib and
then fitted into the slot to the desired position and then tightened into the head using the 10 mm wrench
that is supplied with the planer.
The head is indexed with lines to assist with the lining up of these knives in the head.
Setup is similar to the setting up for four sided planing with the exception that the moulding knife
should also be lined up in the head.
4.7.2.2.1 Anatomy of a Top Cutter Moulding Knife
The top moulding knives are similar to side cutter moulding knives. They mount on a chip breaker or
multiple chip breakers, depending on the knife length. Here is a sample planer knife configuration for
a Beaded V-Groove Paneling:
Version 1.0 © 2006 Logosol, Inc.
65
Logosol PH260 4 Head Planer/Moulder User Manual
Moulding knives for the top head have to be placed on a chip breaker or Gib, in order to be held
securely in the head.
1. Chip Breaker for Horizontal Cutter Head (Gib)
2. Moulding knife for Horizontal Cutter Head - Face of moulding knife is against the chip
breaker.
3. Mounting Pins in Gib
4. Mounting Holes in knife
5. Lock Bolt in Chip Breaker
4.7.2.2.2 Inserting Moulding Knives into Horizontal Cutters
To put the moulding knife in the top head, put the knife and chip breaker together and slid into slot in
head.
Version 1.0 © 2006 Logosol, Inc.
Chapter 4: Operation
1. Moulding Knife in Chip Breaker
2. Top cutter Head
A. Slot in head for inserting profile knives
1. Indexing Marks on Top Cutter Head
2. Chip Breaker with Knife on pins inserted into Slot
A. Slot for inserting moulding knives into head.
1. Top Cutter Head
2. Knife on Chip Breaker
Version 1.0 © 2006 Logosol, Inc.
66
67
Logosol PH260 4 Head Planer/Moulder User Manual
A. Direction to slide knife into position
1.
2.
3.
4.
5.
A.
B.
C.
D.
Top Cutter Head
Center Bead Profile Knife in Chip Breaker in Slot in Head.
10 mm Open End Wrench
Straight Planing knife in Top Cutter Head
Index Marks on Top Cutter Head - these are used to align pairs of knives in head.
Direction to turn wrench to loosen Chip Breaker in Head
Direction to turn wrench to tighten Chip Breaker in Head
Indexing marks that are used to count off to position of knife in head.
Point on the knife that we are using to line up with Index mark on head.
Slide the chip breaker with the knife over to the desired position in the head. Use the indexing marks
to line up the knives. The index marks are especially helpful to line up the second moulding knife
inserted in the groove on the opposite side of the head with the first moulding knife.
NOTE: Always use pairs of moulding knives in the head. These pairs should be on opposite
sides of the head. Always keep pairs together when storing knives.
4.7.2.2.3 Inserting Moulding Knives into Bottom Cutter Head
Profile knives fit in the bottom Cutter Head in a similar fashion to the top Cutter Head. However,
please note that the cast iron table fits close to the bottom cutter head, but has slots before and after
the head. These slots allow the ability to position longer back relief knives into the head for the
removal of grooves in the underside of the wood. Also, notice that if you are not using these longer
knives in the bottom cutter head, the takeoff adjustment plate before the bottom cutter head can be
turned so that it covers these grooves, providing a better result on the wood. This provides better
support for the wood as it is being planed. If you are using longer knives that need these grooves,
then reverse this plate by removing the four screws that hold the plate in and turn it around so that
these slots are open for the knife. Refer to the section: Adjusting Takeoff of Bottom Cutter 34 for
more information on making this change.
Version 1.0 © 2006 Logosol, Inc.
Chapter 4: Operation
1.
2.
3.
A.
Bottom Cutter Head
Knife on Chip Breaker
First Right Side Fence
Direction to slide knife into position.
1.
2.
3.
4.
5.
A.
B.
Bottom Cutter Head
Knife on Chip Breaker
10 mm Open End Wrench
First Right Side Fence
Left Fence L-Bracket
Direction to turn bolt to tighten Chip Breaker in Head
Direction to turn bolt to loosen Chip Breaker in Head
68
The knives are positioned in the head in a similar fashion to the top cutter head moulding knive. Use
the indexing marks to line up the knives.
4.7.2.2.4 Shortcut to Setting up Horizontal Cutter Knives
One way to speed the setup of the top moulding knives is if you have a finished piece of moulding you
are setting up again. You can position that piece of moulding in the machine and then rotate the head
and slide the knife into position on top of that moulding. This makes it easy to re-setup the machine.
Version 1.0 © 2006 Logosol, Inc.
69
Logosol PH260 4 Head Planer/Moulder User Manual
4.7.2.2.5 Inserting Long Moulding Knives in the Top Head
To insert long moulding knives in the top cutter head,such as knives for crown mouldings,use two
Gibs. For the longest moulding knives,it might be necessaryto remove one ofthe pins on the chip
breaker or gib. These dowel pins are removable. Use a pair ofpliers to loosen the pin and then
unscrew the pin and remove from the gib.
1. Dowel Pin Screws
2. Chip Breaker (Gib)
Place the knife with the leading edge against the chip breaker on the remaining pin and place the chip
breaker in the slot and slide into the head.
1. Chip Breaker
2. Long Moulding Knife
3. Top Cutter Head
Version 1.0 © 2006 Logosol, Inc.
Chapter 4: Operation
1.
2.
3.
A.
Chip Breaker
Long Moulding Knife
Top Cutter Head
Direction to slide knife into slot in cutter head.
1.
2.
3.
4.
A.
Chip Breaker
Long Moulding Knife
Top Cutter Head
Second Chip Breaker -Moulding knife mounted on both pins
Drop knife with second chip breaker into slot in head.
Version 1.0 © 2006 Logosol, Inc.
70
71
Logosol PH260 4 Head Planer/Moulder User Manual
1.
2.
3.
4.
5.
A.
B.
Chip Breaker
Long Moulding Knife
Top Cutter Head
Second Chip Breaker - Moulding knife mounted on both pins
10 mm W rench (supplied)
Tighten Chip Breaker Lock Bolt.
Loosen Chip Breaker Lock Bolt.
Use the indexmarks on the head to line up the pair of knives in the head as you would for smaller
moulding knives.
W arning! Be sure and securely tighten ALL Lock Bolts and rem ove all tools before closing the
lid and starting the m achine.
Version 1.0 © 2006 Logosol, Inc.
Part
V
73
Logosol PH260 4 Head Planer/Moulder User Manual
5
Chapter 5: Maintenance
5.1
Overview
The planer will operate best if kept in good condition. Proper setup, alignment, and lubrication are
essential to the successful operation of the machine. Also, all knives must be kept sharp to ensure the
quality of cut and efficiency of operation. Dulled knives will put additional stress on the machine.
5.2
Safety
Keep the work area free of tools and scraps of material.
Disconnect the machine from the Electrical Source before Servicing the Machine.
Insure that all tools and materials used to service the machine are removed from the machine
and that all heads rotate freely before re-starting the machine.
5.3
Cleaning the Machine
The machine should be kept clean of excess chips and any buildup of resin.
This machine generates alot of chips, especially if planing stock that is above 2"in thickness. When
planing big stock, periodic cleaning of the machine is a must. Open the lid and vacuum out or blow out
the excess chips that might be built up on the cast iron table.
Also, periodicaly check for build up of chips in the base of the machine. Remove the plates at each
end of the machine and blow or vacuum the excess chips from underneath the machine.
5.3.1
Cleaning the Feed Rollers
If planing material with high resin content, this pitch may build up on the metal feed rollers. Clean
these rollers periodically with a wire brush, and with some liquid to loosen the pitch, such as kerosene,
diesel, or WD-40. Spray the rollers down with a lubricant, to help prevent buildup of pitch after
cleaning. Use a silicone spray for this purpose.
Note: If selling your shavings for livestock purposes, this may limit the type of cleaning fluid you can
use for this purpose.
5.4
Lubricating the Machine
Keep the machine lubricated with a silicone spray. Spray the threaded rods that raise and lower the
table. Also spray inside the machine in general, especially the exposed rods that the moveable side
cutter moves over. This will prevent rust from forming on these exposed metal surfaces.
Version 1.0 © 2006 Logosol, Inc.
Chapter 5: Maintenance
74
The feed chains, which are located under the cover on the right side of the machine, need to be kept
clean of chips and lubricated occasionally. Spray these with a lubrication spray or put a small amount
of transmission fluid on these chains to lubricate.
Spray the chain that raises and lowers the cast iron table with a lubricant. Spray exposed areas of the
chain and raise and lower the table and spray again until all of the chain has been lubricated.
5.5
Replacing Belts
Belts can wear out over time and with use of the machine. Replace these belts as needed. Belts
should be kept tight. If you are hearing a squeal when starting the motors of the machine, check the
tightness of the belt that is squealing. The belts should not squeal when starting up.
To replace or adj
ust the belts remove the necessary covers.
Removing cover for the top cutter belt.
For the bottom and top cutter belts, the motor pivots on a metal tube that runs across the machine.
There is a bolt going through this tube at the ends that when tightened prevents this tube from turning.
It may be necessary to loosen these bolts in order to tighten or loosen the belt.
Version 1.0 © 2006 Logosol, Inc.
75
Logosol PH260 4 Head Planer/Moulder User Manual
These motors can also be adjusted by loosening the hold down bolts and sliding the motor in or out to
tighten or loosen. For the bottom cutter, there are 3 bolts holding it in place that must be loosened in
order to adjust the motor.
The side cutter head belts are tightened via a bolt in the top of the motor assembly underneath the cast
iron table. Gain access to the moveable side cutter head belt tighten bolt through the opening in the
cast iron table.
The stationary side cutter belt can be accessed via the plate on the right side of the machine.
Version 1.0 © 2006 Logosol, Inc.
Chapter 5: Maintenance
76
Loosen these four bolts to gain access to this belt. The side cutter motors are held in place via 4 allen
head bolts.
Loosen these bolts and then tighten the belt via the bolt on top of the motor bracket.
Logosol Part Number: 7500-007-1004 Set of Belts for PH260
5.6
Adjusting Feed Roller Pressure
The PH260 has 5 feed rollers pulling material through the machine. 4 of these are metal feed rollers
and the last one has a rubber coating so the surface will not be marked when the material exits the
machine.
The pressure these feed rollers apply on the board can be adjusted. This can be accomplished by
turning the nuts on the bottom of the Feed Roller Bushing Assembly located just under each end of the
feed rollers.
Version 1.0 © 2006 Logosol, Inc.
77
Logosol PH260 4 Head Planer/Moulder User Manual
1.
2.
3.
4.
5.
Feed Roller Bushing
Feed Roller Bushing Housing
Metal Feed Roller
Feed Roller Pressure Adjustment Nut
Apply drop of oil here
Make sure the pressure is the same on both ends of the feed roller, and they can move up min. 1/2"
Oil the bushings at the end of the feed roller occassionally.
The rubber feed roller should also put adequate pressure on the stock. Remember that this roller
should be set for the height of the finished material, not the rough wood thickness.
Notice the flap at the bottom of each of the bushings of the Feed Rollers. This flap is there to keep
chips from getting caught under the bottom of the bushings in the feed roller bushing housing. As the
feed rollers move up and down from different thicknesses of material, chips can get caught below
these bushings and over time build up. Eventually, this buildup will prevent the feed rollers from
dropping back down and will prevent the feed rollers from being able to put much pressure on the
material passing through the machine. Check this area occasionally and clean any chips that might
get lodged there.
5.7
Sharpening Knives
The condition of the knives will affect the quality and precision of the cut. Observe the quality of the cut
from the planer to check the condition of the knives. Dull knives will tear, not cut the wood fibers,
producing a fuzzy appearance on the wood. A raised ridge can occur when dull knives impact wood of
varying density.
On planer knives and moulding knives, it is possible to bring the knives back to a sharp condition by
sharpening the face of the knife. Running a diamond stone against the face will bring knives back to a
sharp condition. This can be done about 3 times before the knives will need to be resharpened by a
sharpening machine.
Note: If the knife has been nicked then the knife will have to be re-sharpened to remove the nick.
If a raised ridge occurs on the length of the workpiece, the knives have been nicked. These knives will
Version 1.0 © 2006 Logosol, Inc.
Chapter 5: Maintenance
78
need to be resharpened to remove the nick.
Knives that are not sharp will heat up when cutting. If you see blackened edges on moulding knives,
these knives are not sharp and are trying to cut material in a dulled condition. Continuing to use these
knives will cause excessive wear on the machine and will further degrade the knives themselves.
Remove these knives and sharpen.
5.8
Removing Side Cutter Spindle
To accomplish wide planing with the top cutter only, the side spindles can be removed to give
maximum width planing. Also, to replace bearings in the side cutter assemblies, the side cutter
spindles will have to be removed.
Remove the cutter head.
Remove the plate at the base of the spindle by removing the two allen head screws holding
it to the cast iron table.
Version 1.0 © 2006 Logosol, Inc.
79
Logosol PH260 4 Head Planer/Moulder User Manual
Use the two rectangular plates that came with the planer along with the spindle nut and
some spacers to pull the spindle up and out of the bearing seats in the cast iron table.
Once the spindle is loosened, pull straight up on the shaft to remove completely from the
cast iron table.
To replace the bearings, use a bearing puller if necessary to remove the bearings from the
spindle shaft. First remove the pulley at the bottom of the shaft, then the bearings.
Replace the bearings and re-install the spindle in the cast iron table. Be sure and coat the
bearings with grease before puttting them back into the planer.
Version 1.0 © 2006 Logosol, Inc.
Chapter 5: Maintenance
5.9
80
Replacing Under Cutter Bearings
To Replace the Under Cutter Bearings the under cutter head must be removed from the machine.
Warning: Before starting this procedure,insure that all power has been disconnected from the
machine!
Remove the Under Cutter Belt Cover Plate.
Loosen the bolts going through the tube the motor is mounted on.
Version 1.0 © 2006 Logosol, Inc.
81
Logosol PH260 4 Head Planer/Moulder User Manual
Lift up the motor and remove the belt.
Remove the bolts holding the under cutter motor mount to the cast iron table.
Drop this motor down to the floor of the planer.
Remove the bolts holding the under cutter chip collector assembly in place and remove this
Version 1.0 © 2006 Logosol, Inc.
Chapter 5: Maintenance
82
assembly.
Remove the bolts holding the under cutter head in place. (4 allen head bolts)
Remove the poly V pulley from the shaft of the under cutter head. (Note: A gear puller may
be needed for this operation.)
Version 1.0 © 2006 Logosol, Inc.
83
Logosol PH260 4 Head Planer/Moulder User Manual
Remove the bearing housing from the old bearing.
Remove old bearing. (Note: A gear puller may be required to remove this old bearing.
Replace the bearing, then apply a lubricant to the bearing housing before replacing.
Version 1.0 © 2006 Logosol, Inc.
Chapter 5: Maintenance
84
The Bearing back in place.
5.10
Feed Motor Maintenance
The feed motor drives a planetary gear that provides the ability to speed up or slow down the feeding
rate of the machine. This planetary gear requires a lightweight transmission fluid to run properly. The
fluid level can be checked via an opening on the side of the planetary gear. If you need to add fluid,
remove the allen head recessed cover and fill until the fluid runs out this opening. Replace the cover.
WARNING: Do not turn the feed motor adjustment knob unless the feed motor is running!
The feed motor must have play in it as it is moving with the thicker material that passes through the
machine. It is held in place by a single bolt in the end of the rubber feed roller. This bolt has some
lock-tite on it to keep it from backing out during use. If removing this bolt, put some lock-tite on it when
putting it back in place. Do not over tighten this bolt.
To remove the feed motor, pick up on it and rock it off the rubber feed roller shaft.
Version 1.0 © 2006 Logosol, Inc.
85
5.11
Logosol PH260 4 Head Planer/Moulder User Manual
Troubleshooting Guide
Version 1.0 © 2006 Logosol, Inc.
Chapter 5: Maintenance
Version 1.0 © 2006 Logosol, Inc.
86
Part
VI
Chapter 6: Planing Tips
6
Chapter 6: Planing Tips
6.1
Overview
88
This chapter provides tips on using the PH260 to accomplish a variety of tasks, such as planing narrow
stock, planing stock greater than 2 inches in height, planing wood with a lot of pitch, setting up for
Tongue and Groove planing, etc.
6.2
Sizing Stock
This planer/moulder works best as a finishing planer/moulder. You can take rough lumber right out of
the stack and plane it smooth. However, to acheive the best results with this machine, it is best to
have your stock as close to the size of the finished product as possible. If you are planing with lumber
that has a wide variance on thickness, it is best to run this lumber through either this planer or another
planer to size it to a uniform thickness before finish planing and moulding it with this planer.
Note that there is a size limiting plate on the infeed end of the planer. Two bolts hold this in place and
this plate can be moved up or down. This plate limits how thick of a board you can run through the
planer. Use this plate to protect your machine. Do not remove this plate as allowing material too thick
to run through the machine will place strain on the feeding system. Determine the thickest stock
allowed and set this limiting plate accordingly.
The planer can handle a wider variance on the width of the stock, though, again, it is best to have the
width closer to the finished size of the material. With types of wood that are prone to splinter, if you are
taking too deep of a cut on the side, the wood can splinter and pull into the left side cutter. Avoid this
by reducing the depth of cut that is taken off of that side of the stock. The L-Bracket that fits on the
moveable side cutter is a limiting plate for the width also. It holds two bearings that guide the material
through the machine, but also, if material is put into the machine that is too wide for the settings of the
planer, it will impact this bracket, or the plate that the bracket is mounted on and not be able to move
through the machine.
DO NOT FORCE MATERIAL THROUGH THE PLANER! If material will not move through the
machine, there is a reason. Stop and see if the material is too wide or thick and correct either the
settings or re-size the material before running it through the machine.
For certain applications such as flooring, the lumber might need to have one side ripped to provide a
straight edge. The planer will not make a crooked board straight. If straight material coming out of the
planer is a requirement, then straight material will have to be put into the machine. Putting lumber
through a straight line rip will take the wane out of a board. Place the ripped edge against the right
side fence when feeding this ripped material through the machine.
6.3
Planing Narrow Stock
The PH260 can handle very thin stock. However, the planer is shipped with a plate in the machine that
limits the amount the two side heads can come together. A block is positioned in the machine across
the two tubes that the left side head moves on. This block is held in place by two bolts underneath the
block. To plane narrow stock, remove this support block by removing these two bolts and then taking
out the top and bottom of this block.
Version 1.0 © 2006 Logosol, Inc.
89
Logosol PH260 4 Head Planer/Moulder User Manual
1.
2.
3.
4.
5.
Support Block
Support Block base
Moveable Side Cutter Traverse Tubes
Second Right Side Cutter Fence
Bolts - remove these to take this support block out of planer
It is recommended that this support block be placed back in the machine when not planing narrow
stock as this block provides support to boards as they move through the machine and across this wide
space in the cast iron table.
6.4
Planing stock thicker than 2 Inches
The planer can mould and plane stock thicker than two inches with the side heads. To accomplish this
two cutter heads must be stacked. When placing these cutter heads in the machine, be sure to place
the cutting knives on the second head halfway between the two knives on the first cutter head on that
spindle.
1. Additional TB90 Cutter Head stacked on original Cutter Head.
2. Original TB90 Cutter Head
A. Rotation of Cutter Head
Spacers can be used to add height to the top head, however, it is best if there is some overlap of the
knives, especially with straight knives.
Version 1.0 © 2006 Logosol, Inc.
Chapter 6: Planing Tips
6.5
90
Tongue & Groove
When setting up this machine for Tongue and Groove material, start with several short pieces of stock
similar in size (width and thickness) of the material you will be turning into Tongue & Groove. First set
the side cutters to the initial height by measuring with straight edges from the cast iron table to the
bottom of the groove. After installing the knives, run a short test board through and then cut it in half
and test the match. To determine how much to move the heads up or down if the match is not correct,
put the two boards together and find a thickness shim that will bring the head that is low to the same
level.
1. Piece of T&G board - this side is higher
2. Piece of T&G board - lower than other piece
3. Shims that are the same height as the difference in the workpieces
A. Difference in height of two pieces
B. Rub finger across top and shims and workpiece to see if height is same. You should be
able to not feel any difference when the correct height shims are place here.
For tongue and groove that you have kept a sample from a previous run of this material, place the
tongue and groove board from this previous run in the machine and match the knife height to match
this original board.
6.6
Planing Wood With a lot of Pitch
Certain woods, such as yellow heart pine or white pine can contain a lot of pitch or sap. When planing
woods with a lot of sap, keep in mind that this sap will react with the cast iron table, will increase knife
wear, and will gum up the feed rollers. Use the following techniques to minimize the effects of sap on
your planer:
Spray beds of the planer and feed rollers with a silicone spray. This will have to be done
periodically in order to be continually effective.
Clean the feed rollers occasionally with a wire brush. Keep this brush handy and use it to
clean the gummed up sap out of the feed rollers periodically.
Check the back of knives for pitch buildup also. Keep the knives free from pitch buildup.
Spray them with silicone spray as well.
Use mineral spirits or kerosene to clean sap from planer parts. Remember that if you are
selling chips for use with animals that you will need to keep the cleaning fluid from
contaminating your chips.
Version 1.0 © 2006 Logosol, Inc.
91
6.7
Logosol PH260 4 Head Planer/Moulder User Manual
Using 300mm knives in top and bottom heads
The 300mm knives for the under cutter can also be placed in the top head. This allows you to use a
lower priced knife in the top cutter head, especially if all of your lumber is under 12" in width. If you are
planing narrow stock (under 6") then you can rotate the knives from the top to bottom head and get
twice the knife life out of these knives. To use the under cutter knives in the top head, it is
recommended to get a set of chip breakers for the bottom head to use in the top head.
Logosol Part Number: 7502-001-0150 Chipbreaker 300mm
7000-002-8300 Undercutter 300mm Knives
6.8
Adjusting Feed Speed
It is best to start planing new material at the lowest feeding speed. Remember to adjust the feeding
speed only when the feed motor is running. You can read more about adjusting the speed in the
section: Adjusting Feed Speed 91 .
Once the planer is set up for the new material begin to adjust the feeding speed as material is moving
through the machine. Adjust the feed rate until you begin to see chatter marks on the wood, or the
finish is not smooth. Reduce the rate back down until you see the finish you want on the wood.
Remember that different types of wood will require different feed rates for the same type of knives.
Also, the condition of the knives will affect the feed rate.
Also, as you are adjusting the feed rate, notice if chips are building up at an excessive rate inside the
machine. If they are building up quicker than the vacuum system can remove them slow the feed rate.
With some knives, especially when planing thick material, the vacuum system will not be able to keep
up with the planing speed without some modification to the system. One way to compensate is to slow
the feeding speed down in order to give the vacuum system time to remove the chips adequately.
Version 1.0 © 2006 Logosol, Inc.
Part
VII
93
7
Logosol PH260 4 Head Planer/Moulder User Manual
Parts Listing
Version 1.0 © 2006 Logosol, Inc.
Parts Listing
Version 1.0 © 2006 Logosol, Inc.
94
95
Logosol PH260 4 Head Planer/Moulder User Manual
Version 1.0 © 2006 Logosol, Inc.
Part
VIII
97
8
Logosol PH260 4 Head Planer/Moulder User Manual
Installing Phase Converter
If the PH260 you are installing is a 3-phase unit, you will need 3-phase power from the power company
or a generator, or you will have to supply 3-phase power via a phase converter.
In many areas in the U.S. 3-phase power is not available, or it is very expensive to install. Plus the
resulting monthly bill may involve additional charges from the power company, such as minimum
monthly charges, demand billing based on peak usage and higher per-kilowatt-hour rates. For this
reason 3-phase power for just one machine may not be economical from the power company even if
the installation is minimal. A Rotary phase converter can supply the power you need for the energy
efficient 3-phase version of the PH260.
The phase converter we sell at Logosol is built by GWM Corporation in Harrisonville, MO.
The Website for GWM is: http://www.gwm4-3phase.com/
We have sized a phase converter made by GWM that is sufficient for our planer and chip collector. If
you are selecting a phase converter from another company, use the following specs to size the phase
converter:
60 Amp
220 Volt
20 HP Motor
Please note that if you are using other 3-phase equipment on this phase converter along with the
ph260 and chip collector, then you may need to select a larger phase converter for your installation.
The specific model we use is: RTG 256, GWM TEFC (Totally Enclosed Fan Cooled) Rotary Phase
Converter
RTG 256 GWM TEFC Rotary Phase Converter
Here are installation instructions for a phase converter:
The phase converter is installed to a 100 Amp 220 Volt Single Phase Service from the Electric Panel in
your building.
Two 100-amp 230V services will be needed from the power panel. Follow Local Electrical Code
Version 1.0 © 2006 Logosol, Inc.
Installing Phase Converter
98
regulations in sizing the conduit and wire to be used in providing this service.
Make supply power and ground connections to the power distribution block inside the RPC according
to instructions supplied with the RPC. As mentioned in the RPC installation instructions, the power
panel breaker should not be the means used to turn the RPC on and off. Install a disconnect switch or
contactor in series with the supply leads to the RPC. The RPC will generate a third phase leg called
T3, which together with L1 and L2 sourced by a second 100-amp breaker comprise the three-phase
supply voltage for the planer and chip extractor. Take L1, L2 and T3 to a small main-lug-only 3-phase
distribution panel and use 1) a 50-amp three-pole breaker to feed the planer and 2) a 20-amp threepole breaker to feed the chip extractor.
The electrical supply connections for the planer are made inside the electrical control box on the side
of the machine. Remove the cover of the box and lay it down right in front of the box. Route the three
phase conductors to the right end of the 3-phase power distribution buss bar and terminate them at the
three right-most breakers in the breaker lineup. There is an attached label that reads
L3 L2 L1
to guide the installer to the correct location for this connection. Note: It may be necessary to utilize fork
crimp-on terminals on the ends of the wires to facilitate making a good connection. The ground lead of
the incoming power supply is to be connected at the green grounding block located inside the box
under the contactors.
Note: There is a bus bar that reads L3 L2 L1 all the way across the bottom of the breakers. The
service should be installed into the first 3 slots on the back of the first set of breakers. This buss bar
will feed the other breakers. No additional wiring is needed to feed these other breakers.
After making power connections, replace the control box cover and turn on the source breakers. The
control power indicator light on the control console should light, indicating the unit'
s readiness for
operation. Start the feeding motor on the planer and check for correct rotation direction. All motors will
be either rotating the right direction or the wrong direction. If the direction is wrong, turn off the feeding
motor, switch off the supply breakers, and reverse two of the three supply voltage leads, either at the
breaker or at the planer. Turn power back on and check rotation direction again.
The correct rotation direction will also need to be checked for the chip extractor. If it is rotating
backwards, follow the same procedure to correct.
Phase Converter Wiring diagram from GWM Corporation:
Version 1.0 © 2006 Logosol, Inc.
99
Logosol PH260 4 Head Planer/Moulder User Manual
Index
-B-
-110 mm open end wrench
12 mm open end wrench
16 amp breakers 21
30, 36
41
-330 mm open end wrench
3-phase power 97
41
-4-
-C-
4 mm allen head wrench
4 sides(S4S) 28
30, 36, 41
-55mm allen head
34
-77000-002-8410
7000-003-8410
beaded V-Groove 60, 64
bearing 80
belt 74
Bevel Edge 33
board 28, 56
bolts 19
bottom cutter 20, 29, 67
Bottom Cutter Head 29, 30
bottom head 91
bottom relief knives 34
box 18, 19
Buss Bar 21
38
38
-99. Row of motor indicator lights - these lights indicate
if motor has been started 20
-D-
-AAddress 6
adjust 31
adjusting screw 33
adjustment screws 38
Anatomy 33
Anatomy of a planer knife
assembly 19
CARBIDE 33, 38
carriage screws 34
cast iron table 31
Chip Breaker 31, 64, 65
Chip Breaker Lock bolts 33
chip deflector 19
clean 73
control console 97
Control Panel 20, 27, 56
crank 19, 52
crate 16
custom knives 60
cutter head 45
cutter heads 46
cutting depth 34
Cutting edge 38
depth of cut 39
direction 46, 97
Direction of Cut 41
38
-Eelectric supply 21
electrical breaker box 21
Electrical Control Panel 20
email 6
© 2006 Logosol, Inc.
Index
Emergency stop button
20, 27, 28
-L-
-FFace of knife 41
Feed Motor 18, 84
feed roller 76
feed speed 91
feeding 59
feeding rate 57
Feeding Rollers 20, 22
fence 48, 50
fences 59
First Side Cutter Fence 48
four sided moulding 59
gauge 19
Gib 64
Gloves 30, 36, 41
green ground bar 21
Guide 5
GWM Corporation 97
GWM TEFC 97
-Nnylon inserts
-H-
-Kknife blade 31
knives 29
© 2006 Logosol, Inc.
31
-O38
Overview
5
-P-
-Iinfeed pressure rollers
Installation 5
-MMadison 6
Metric 39
milling 48
motor indicator light 20
moulding knives 36, 60, 64
MS 6
-G-
handles 19
height adjusting screw
Help 6
hinges 19
horizontal 64
large spacer rings 47
left side cutter 20
lid 19
lid switch 27
Lock Bolts 31, 69
locking 47
Logosol 5
lower 46
lubrication 73
55
packing 16
Part Number 33
parts 18, 19
parts box 37
path of the wood 50
PH260 5
phase converter 97
pitch 90
planer knife 33
Planer Knife Setting Block 36
planetary gear 57
power connections 97
Power Indication LIght 20
pressure 76
100
101
Logosol PH260 4 Head Planer/Moulder User Manual
pressure roller
54
-Rraising 45
removeing side cutter 43
Replacement 33, 38
restarted 28
right side cutter 20
Right Side Cutter Head 42
right side fence 58
rotation 28, 54
rotation direction 22
rough lumber 28
-Ssafety 73
sap 90
scale 39
Second Side Cutter Fence 48
setting block 37
setup 28
sharpen 77
shims 44, 45
shipping 16
Side Cutter 55, 78
side cutter head 52
Side Cutter Heads 41, 61
side cutters 41
silicon spray 73
small carpenter's square 30
snipe 59
spacer plates 34
spacers 19, 45
speed 57
spindle 78
stacking 89
start button 20
starting 28
Stationary Side Cutter 42, 43
stock 88
stop 28
Stop Button 20, 57
Stop Button 20
stopping 57
straight line rip 88
straight planer knives 29, 36
Straight Planing Knives 31
-TTable Bed Crank Handle 21
takeoff adjusting plates 34
TB90 61
thickness 39
thickness spacers 44
Tongue & Groove 90
tools 30
top cutter 20, 65
Top Cutter Chip Breaker Lock bolts
top cutter head 36, 38
troubleshooting 85
38
-Uunder cutter 80
Unpacking 5, 16
-Vvariance
88
-WWarning! 29, 36, 41
wiring 97
Wiring diagram 97
- Yyellow indexing plate
21
© 2006 Logosol, Inc.
LOGOSOL, INC.