1
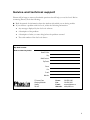
user manual 2011 Phason Inc. All rights reserved. Printed in Canada 27045101 2011-11-09 i Limited warranty Software Phason Inc. (Phason) warrants for a period of 90 days from the date of purchase that the software product will execute its programming instructions when properly installed on the personal computer or workstation indicated on this package. Phason does not warrant that the operation of the software will be uninterrupted or error free. Should this software product fail to execute its programming instructions during the warranty period, the purchaser’s remedy shall be to return the software CD (media) to Phason for replacement. Should Phason be unable to replace the media within a reasonable amount of time, the purchaser’s alternate remedy shall be a refund of the purchase price upon return of the product and all copies. Media Phason warrants the media upon which this product is recorded to be free from defects in materials and workmanship Below normal use for a period of 90 days from the date of purchase. Should the media prove to be defective during the warranty period, the purchaser’s remedy shall be to return the media to Phason for replacement. Should Phason be unable to replace the media within a reasonable amount of time, the purchaser’s alternate remedy shall be a refund of the purchase price upon return of the product and all copies. Notice of warranty claims The purchaser must notify Phason in writing of any warranty claim no later than 30 days after the warranty period expires. Limitation of warranty Phason makes no other express warranty, whether written or oral, with respect to this product. Any implied warranty of merchantability or fitness is limited to the 90 days of this written warranty. Some states or provinces do not allow limitations on how long an implied warranty lasts, so the above limitation or exclusion may not apply to you. This warranty gives specific legal rights and you may have other rights, which vary from state to state, or province to province. Exclusive remedies The remedies provided above are the purchaser’s sole and exclusive remedies. Phason shall not be liable for any direct, indirect, special, incidental, or consequential damages (including lost profit) whether based on warranty, contract, tort, or any other legal theory. Some states or provinces do not allow the exclusion or limitation of incidental or consequential damages, so the above limitation or exclusion may not apply to you. Warranty service Warranty service may be obtained from the Phason office location indicated in the user manual or service booklet. ii Service and technical support Phason will be happy to answer all technical questions that will help you use See Level. Before contacting Phason, check the following: Read the manual for information about the window with which you are having trouble. If you still have a problem with See Level, collect the following information: Any messages displayed by the See Level software A description of the problem A description of what you were doing before the problem occurred The serial number of the See Level Sensor My dealer’s name: How to contact my dealer: Street/PO Box City State/Province Zip/Postal Phone Fax E-mail Web site 2 Terracon Place Winnipeg, Manitoba Canada R2J 4G7 Phone: Fax: E-mail: Web site: 204-233-1400 204-233-3252 [email protected] www.phason.ca iii About the manual This manual describes the features of See Level and how to use them. In addition to reading this manual, you should be familiar with Microsoft Windows™—how to perform basic Windows functions such as opening and closing windows, finding and opening files, saving and closing files, as well as using a mouse and keyboard. Styles used in the manual The following styles are used in this manual: All buttons and tabs are bolded. For example: click OK to save the changes. All filenames and directories are in a monospace font. For example, the default directory is C:\Program Files\Phason\SeeLevel. Hint/tip This is a hint or tip. It contains helpful information that may make it easier for you to set up or use See Level. Note This is a note. It contains important information that may help you better understand See Level. A copy of the manual is also on the See Level installation CD. The PDF (Portable Document Format) file installs in C:\Program Files\Phason\SeeLevel\HelpDocs during a normal installation. There is also a link to it in the Start menu. iv Table of contents Chapter 1: Introducing See Level ................................................................................................... 1 Introducing See Level ............................................................................................................................... 2 See Level features ................................................................................................................................ 2 See Level Sensor features .................................................................................................................... 2 See Level system components ............................................................................................................. 3 Computer requirements ........................................................................................................................ 3 How See Level works ........................................................................................................................... 3 See Level windows.................................................................................................................................... 4 Chapter 2: Installing and configuring See Level ............................................................................ 8 Installing See Level ................................................................................................................................... 9 Registering See Level ........................................................................................................................... 9 Configuring See Level ............................................................................................................................. 12 Configuring site identification ............................................................................................................. 12 Configuring See Level options ........................................................................................................... 13 Adding, editing, and removing containers ......................................................................................... 15 Setting See Level alerts ...................................................................................................................... 18 Chapter 4: Monitoring levels ........................................................................................................ 21 Monitoring levels ..................................................................................................................................... 22 Understanding data accuracy ............................................................................................................ 22 Using the See Level Status Viewer ..................................................................................................... 23 Creating reports ...................................................................................................................................... 23 Appendixes ................................................................................................................................... 28 Appendix A: Worksheets ......................................................................................................................... 29 Appendix B: Troubleshooting ................................................................................................................. 32 Index........................................................................................................................................................ 33 v vi Chapter 1: Introducing See Level This chapter introduces you to See Level and the layout of this manual. Read this chapter before reading the rest of the manual. Introducing See Level About the manual See Level windows Phason 1 Chapter 1: Introducing See Level Introducing See Level See Level allows you to monitor levels in up to 32 containers from a central computer. No more climbing tanks or estimating levels. Easy-to-read viewers and reports display levels, forecasts, and alerts. The See Level system is like having gauges on all your storage containers! See Level works with the See Level Sensors to monitor levels in containers (cylindrical tanks, square or rectangular pits, or lagoons). The See Level Sensors use ultrasonic technology to accurately measure levels. Some examples of See Level applications include: Monitoring water levels Monitoring manure levels See Level features Automatic level monitoring Programmable alarms with notification and logging See Level Status Viewer – a graphic display of all containers, showing the current level and status. Informative reports – review and print information for any previous period See Level Summary Report – lists the daily height, volume, and percentage full. For each container, there is an estimate of the remaining days, height, and volume, based on the average usage/fill rate. Alarm History Report – lists all alarms for the selected date range. See Level Sensor features Low-maintenance design Easy installation in new or existing storage containers up to 32 feet deep Large operating range: -22 to 104°F (-30 to 40°C) Rugged enclosure (corrosion resistant, water resistant, and fire retardant) Two-year limited warranty 2 Phason Introducing See Level See Level system components B D E A C A See Level software B Personal computer – contact Phason technical support for a complete list of computer requirements. C RS485-FD Converter D See Level Sensor (SLS) – a See Level system can have up to 32 See Level Sensors. E Power supply – a 12 VDC adapter (PA12-800) can provide power for 1 see level sensor. A Regulated Power Supply (RPS) can provide power for up to 11 See Level Sensors. Computer requirements Customers who need to purchase a computer to run See Level must purchase one that meets certain requirements. For the latest computer and system requirements, contact Phason Customer Support at 204-233-1400 or [email protected]. How See Level works The See Level Sensor uses an ultrasonic transducer to sense (measure) the level in the container. The sensor emits ultrasonic pulses that are reflected by the surface of the fluid, or other substance being monitored. The reflected pulse is called an echo. The sensor measures the time the pulses take to reflect back to the sensor and then sends the data to the See Level software. See Level analyzes the data and converts it to reliable measurements of the level, which it displays in height and volume. 2011-11-09 3 Chapter 1: Introducing See Level See Level windows There are five main windows in See Level. Communication Center Status information Communication messages --Settings Manager Configuration Manager See Level Reports Status Viewer Settings Manager Configuration Manager See Level Reports Status Viewer Set up alert levels Enter site identification Configure options Configure containers Create reports View levels and alerts Communication Center The Communication Center is the main window for See Level. The Communication Center displays all the communication messages from the See Level software and See Level Sensors. A B C D A This button opens the Settings Manager. B This button opens the Configuration Manager. C This button opens See Level Reports window. D This button opens the Status Viewer. 4 Phason See Level windows Configuration Manager The Configuration Manager is where you configure the system options and See Level Sensors. From the Configuration Manager, you can: Enter site identification (en page 12) Configure See Level options (on page 13) Add, edit, and remove containers (on page 15) Settings Manager The Settings Manager is where you set up alerts and view status information (on page 18). 2011-11-09 5 Chapter 1: Introducing See Level See Level Reports The See Level Reports window is where you create reports (on page 23). Status Viewer The Status Viewer displays up to date information and status for all your containers. 6 Phason See Level windows 2011-11-09 7 Chapter 2: Installing and configuring See Level This chapter explains how to install and configure See Level. Configuration includes the communication options, container dimensions, and alert levels. Installing See Level Configuring See Level Phason 8 Installing See Level Installing See Level See Level has an installation wizard that guides you through the installation. 1. Insert the See Level CD into your computer’s CD or DVD-ROM drive. The Installation Wizard should start automatically. If it does not start, find and start the file Install_SeeLevel.EXE on the CD-ROM. 2. Follow the instructions on the screen. 3. When the installation is complete, remove the CD from the drive. Registering See Level You need to register See Level if: You are starting See Level for the first time You had computer problems and uninstalled and then reinstalled See Level Registering the See Level means entering your information and obtaining a product key. There are three registration methods. Web (online registration): allows you to register and get your product key over the Internet. Web registration is available 24 hours a day, 7 days per week. Fax or mail: allows you to print the registration information and then fax or mail it to Phason. When we receive your information, we will contact you with your product key. Phone: allows you to call Phason to get your product key. Phone registration is available from 8:00 AM to 4:30 PM Central Time, Monday to Friday, excluding holidays. To register over the Internet (web registration) 1. Start See Level. The Software Registration Wizard displays. 2. Beside Serial number, type the last six digits of the serial number printed on your installation CD. 3. Click Next. The Registration Wizard displays the license terms and conditions. 4. Read the license agreement and then select I Agree. 5. Click Next. The Registration Wizard displays the registration options. 2011-11-09 9 Chapter 2: Installing and configuring See Level Phason 6. Select Web registration and then click Register on the Web. Your web browser opens to the Phason registration page. 7. Enter your information in the web form and then click Next. Your web browser displays your registration information, including the product key you need to enter in the Registration Wizard. 8. Click Select product key. 9. On your keyboard, press CTRL+C to copy the product key. 10. On the Registration Wizard, beside Product key, press CTRL+V to paste the product key. The Enable software button should become available. If the button does not become available, delete all the information beside Product key and then repeat steps 8 to 10. 11. Click Enable software. An information window displays 12. Click OK to close the window. 13. Click Exit to close the Registration Wizard. To register by fax, mail, or e-mail 1. Start See Level. The Software Registration Wizard displays. 2. Beside Serial number, type the last six digits of the serial number printed on your installation CD. 3. Click Next. The Registration Wizard displays the license terms and conditions. 4. Read the license agreement and then select I Agree. 5. Click Next. The Registration Wizard displays the registration options. 6. Click Print for fax or mail. The Registration Wizard displays the registration form. 7. Enter your information in the form and then click Print preview. The Registration Information window displays your information. 8. Print your information so you can register by fax or mail, or save it so you can register by e-mail. 9. Send your registration information to Phason. When you receive your product key, return to the Registration Wizard. 10. Beside Product key, type the product key given to you by Phason. The Enable software button should become available. If the button does not become available, make sure you typed all the numbers correctly. 11. Click Enable software. An information window displays 10 2011-11-09 Installing See Level 12. Click OK to close the window. 13. Click Exit to close the Registration Wizard. To register by phone 1. Start See Level. The Software Registration Wizard displays. 2. Beside Serial number, type the last six digits of the serial number printed on your installation CD. 3. Click Next. The Registration Wizard displays the license terms and conditions. 4. Read the license agreement and then select I Agree. 5. Click Next. The Registration Wizard displays the registration options. 6. Click Register by phone. The Registration Wizard displays the information you need to give Phason. 7. Call Phason and give them your information. 8. Beside Product key, type the product key given to you by Phason. The Enable software button should become available. If the button does not become available, make sure you typed all the numbers correctly. 9. Click Enable software. An information window displays 10. Click OK to close the window. 11. Click Exit to close the Registration Wizard. 2011-11-09 11 Chapter 2: Installing and configuring See Level Phason Configuring See Level Configuring See Level includes the following. Configure the site identification Go to the Configuration Manager’s Identification tab. Enter the company name and location. Configure the See Level options Go to the Configuration Manager’s Options tab. Select the Communication Center options and units of measure. Add See Level Sensors Go to the Configuration Manager’s Containers tab. Add each See Level Sensor, and select the type of storage container. Set up alerts Go to the Settings Manager. Set up warnings and alarms for each storage container. Configuring site identification To personalize your See Level software, you can enter your business name and location. Company name and location The company name is how you identify your site or system. The business name displays on the Communication Center and at the top of all reports. You can also enter or change the city, state, and country. To configure site identification 1. Open the Configuration Manager. 2. Beside Company Name, enter the name of your site or company. 3. Enter your site location. 4. Click Close to return to the Communication Center. 12 2011-11-09 Configuring See Level Configuring See Level options See Level has four options you need to configure: Update interval Serial port Units of measure (linear/distance and liquid volume) Communication Center colors Update interval At each update interval, See Level requests information from the See Level Sensors and then updates the data file. After updating the file, See Level updates the Communication Center and the Status Viewer. Default: 10 minutes; Range: 10 to 60 minutes Serial port Serial ports are “communication channels” your computer uses to “talk” with some types of external devices. Computers can have several serial ports, named COM1, COM2, and so on. Select the port that has the RS485 Converter connected to it. If you are unsure which port the RS485 Converter is connected to, start at COM1 and then return to the Communication Center. Make sure all the communication wiring is correctly installed and the See Level Sensors have power before you try to communicate with them. Use Test Bench Ultra to check communications and troubleshoot any communication issues. You will find Test Bench Ultra in the Start menu. If you selected the wrong port, you will see messages similar to the ones below. Communications error for <Container Name>. No response received. Unable to open the serial port COM1. Open configuration and select a valid port Units of measure The units of measure affect how See Level displays usage data. There are two units of measure: liquid volume (litres or gallons) and distance (feet or metres). 2011-11-09 13 Chapter 2: Installing and configuring See Level Phason Communication Center colors See Level allows you to choose the display colors of the Communication Center. You can choose the normal text and warning text colors. Choose colors that are easily visible. When you change the colors, the change takes effect the next time a message is posted to the Communication Center. When you start See Level, all previous messages are the normal text color. The Configuration Manager is where you configure the options. A B C D A This is the update interval. At each update interval, See Level updates the Communication Center. You can adjust the interval by clicking Up or Down. B This is where you select the serial port. You must select the correct serial port (the one the RS485 Converter is connected to) so that See Level can communicate with the See Level Sensors. C These are the units of measure See Level is using. D These are the colors See Level is using for normal and warning text in the Communication Center. To configure See Level options 1. Open the Configuration Manager and then select the Options tab. 2. Beside Update Interval, enter how often you want See Level to update level information, or click the Up or Down to adjust the value. 14 2011-11-09 Configuring See Level 3. Beside Serial Port, select the port that has the RS485 Converter connected to it. For more information, read Serial port on page 13. 4. Below Units of Measure, select the units of measure you want to use. 5. Beside Normal Text, select the color you want to use. Repeat this step for Warning Text. 6. Click Close to return to the Communication Center. Adding, editing, and removing containers Adding containers means entering a description, the sensor address, and the dimensions. There are three types of containers; the following table lists the dimensions you must enter for each type of container. Tank (cylindrical) Pit (rectangular) Lagoon Height Diameter Sensor offset Height Width Length Sensor offset Depth Top width Top length Bottom width Bottom length Sensor offset Write down the dimensions in the worksheets starting on page 29. The sensor offset is the distance from the top of the container to the bottom of the sensor. A long straightedge or level and a plumb line are helpful for measuring the sensor offset. Description The description is how you will identify the See Level Sensor in the software. A good description is much easier to remember than an eight-digit address (see below). 2011-11-09 15 Chapter 2: Installing and configuring See Level Phason Sensor address The address, which is programmed at the factory, is a unique code the software uses to locate and identify the device. The address is in the following format: XXXXXXXX, where X is either a number or letter. The address is printed on the outside of the enclosure, just above the knockouts. Usage type Usage type lets See Level know the pattern of use for the container: generally fills or generally empties. See Level uses the configuration when calculating days, height, and volume remaining. An example of a container that generally fills is a manure storage lagoon. An example of a container that generally empties is a water reservoir. A B C D F E G H I 16 2011-11-09 Configuring See Level A This is a list of containers at your site. B These buttons open the See Level Configuration window, which is where you add or edit containers. C This button removes the selected container. D This is where you enter a description for the container. E This is where you enter the address of the See Level Sensor. F This is where you select the type of container. G This is where you select the usage type for the container. H This is where you enter the dimensions for the container. I These buttons zoom in or out from the display. You can also adjust the view by clicking and dragging the mouse over the display, or using the mouse wheel. To add containers 1. Open the Configuration Manager and then select the Containers tab. 2. Click Add. The See Level Configuration window displays. 3. Beside Description, enter a descriptive name for the container. 4. Beside Sensor Address, enter the address of the sensor. 5. Beside Container, select the type of container. The display changes to the type of container you selected. 6. Below Dimensions, enter the dimensions for the container, or click the Up or Down to adjust the existing values. 7. Click OK to save the configuration and return to the Configuration Manager. 8. Click Close to return to the Communication Center. To edit containers 1. Open the Configuration Manager and then select the Containers tab. 2. Select the container you want to edit and then click Edit. The See Level Configuration window displays. 3. Make any required changes. 4. Click OK to save the configuration and return to the Configuration Manager. 5. Click Close to return to the Communication Center. 2011-11-09 17 Chapter 2: Installing and configuring See Level Phason To remove containers 1. Open the Configuration Manager and then select the Containers tab. 2. Select the device you want to remove and then click Remove. A confirmation window displays. 3. To remove the container, click Yes. To cancel and return to the Configuration Manager, click No. 4. Click Close to return to the Communication Center. Setting See Level alerts See Level has four programmable alerts: high level alarm, high level warning, low level warning, and low level alarm. High level alarm – occurs when the level is above the high alarm level. High level warning – occurs when the level is above the high warning level, but is less than the high alarm level. Low level warning – occurs when the level is below warning level, but is higher than the low alarm level. Low level alarm – occurs when the level is below the low alarm level. High alarm level High warning level Low warning level Low alarm level When there is an alarm or warning, See Level displays a message in the Communication Center and the Status Viewer. See Level maintains a record of all alarms, which you can view in the Alarm History Report. For more information about reports, read Creating reports on page 23. 18 2011-11-09 Configuring See Level The Settings Manager is where you set up alarms A C B C 2011-11-09 19 Chapter 2: Installing and configuring See Level A Phason This is where you select the container you want to set up. B This is the latest level information for the selected container. See Level calculates the height and days remaining until the container is empty or full, depending if it is configured as generally fills or generally empties. The calculations are based on average use or fill rates. If there is an alert, it displays in the top left. C These are the alert levels. You can change the levels by clicking Up or Down. To set up alerts 1. Open the Settings Manager. 2. Beside Container, select the container you want to set up. The Settings Manager loads the information for selected container. 3. Make the changes to the alert settings. To enable an alert, select its checkbox. To disable an alert, deselect and remove the check mark. To change an alert level, select the old setting and then enter a new one, or click Up or Down to adjust the value. 4. Click Close to save the settings and return to the Settings Manager. 5. Click Close to return to the Communication Center. 20 2011-11-09 Chapter 4: Monitoring levels This chapter explains how to view and analyze the data See Level collects. Monitoring levels Creating reports Phason 21 Chapter 4: Monitoring levels Phason Monitoring levels There are several things you can do regularly to monitor your system and help ensure you get the most-accurate information from it. Check the Communication Center on a regular basis to make sure there are no communication problems or alerts. Check the Status Viewer often to make sure the levels are where they should be, and there are no alerts. Review the See Level and Alarm History Reports daily to verify levels and see if there have been any alarms. Understanding data accuracy The two main things that affect the accuracy of data are: container dimensions and the amount of data collected. Container dimensions Container dimensions affect the accuracy of all the information See Level displays. See Level uses the dimensions to calculate the level and capacity of the containers. If the dimensions are in the wrong unit of measure, or are not correct, the information See Level displays will not be correct. Amount of data collected See Level needs to collect data to calculate levels and other information. If the computer is not on, See Level is not running, or a See Level Sensor is not communicating, See Level cannot collect accurate data. 22 2011-11-09 Creating reports Using the See Level Status Viewer The See Level Status Viewer displays level and alert information for all containers at your site. The See Level Status Viewer starts automatically when you start See Level. If the viewer is not visible, check the taskbar at the bottom of the screen, or click the Status Viewer button on the Communication Center. See Level calculates the height remaining until the container is empty or full, depending if it is configured as generally fills or generally empties. The calculations are based on average use or fill rates. If you see the message “Unable to determine level”, See Level cannot communicate with the See Level Sensor, or it is not working properly. For more information, see Appendix B: Troubleshooting on page 32. Creating reports See Level has two reports: See Level Summary Report (see page 24) Alarm History Report (see page 25) The reports are in HTML, a file format commonly used on the Internet. You can view HTML reports using a web browser, print them, or e-mail them off-site for evaluation. The See Level Summary Report is also available in CSV format. You can import CSV reports into a third-party reporting, database, or spreadsheet program, or e-mail them off-site for evaluation. CSV reports are not suitable for normal viewing. 2011-11-09 23 Chapter 4: Monitoring levels Phason See Level Summary Report The See Level Summary Report lists the daily height, volume, and percentage full. The report is sorted by container and date. For each container, there is an estimate of the remaining days, height, and volume, based on the average usage/fill rate. Information about the report Information about each selected container and its settings The volume, height, and percentage full for the end of each day of the date range. An estimate of the remaining days, height, and volume 24 2011-11-09 Creating reports Alarm History Report The Alarm History Report is a list of all alarms for the selected date range, sorted by date and time. The list includes not only high and low level alarms, but also any configuration and communication alarms. Information about the report All alarms for the date range, sorted by date and time. If there are no alarms on a specific day, the report does not list any information for that day. The Alarm History Report automatically includes all containers. You do not have to select containers for the report. 2011-11-09 25 Chapter 4: Monitoring levels Phason The See Level Reports window is where you create reports. C A B D E F A This is where you select the date range. B This is where you select the type of report. C This is where you select the container(s) for the See Level Summary Report. You do not need to select containers for the Alarm History Report; it displays information for all containers. D This is where you can change the format for the See Level Summary Report. You cannot change the format for the Alarm History Report; it is available only in HTML format. E This button creates the report. F This button opens the folder where See Level stores the reports. To create reports 1. Open the See Level Reports window. 2. Below Start Date, click The calendar appears. 26 . 2011-11-09 Creating reports 3. Select a start date: To move forward and backward through the months, click or . To select a specific month, click the month on the calendar and then select the month you want to go to. To move forward and backward through the years, click the year on the calendar and then click or . 4. Repeat steps 2 and 0 for the end date. 5. Below Report Selector, select the type of report you want to create. 6. For See Level Summary Reports only, Below Container Selection, select the containers you want in the report. 7. Click Create. The Save As dialog displays. Unless you select a different location, See Level stores reports in the following directory: C:\Documents and Settings\All Users\Application Data\Phason\SeeLevel\Reports. 8. Click Save. Your report displays. 2011-11-09 27 Appendixes Appendix A: Worksheets Appendix B: Troubleshooting Phason 28 Appendix A: Worksheets Appendix A: Worksheets Enter the container dimensions in the worksheets starting on the following page. Use the information in the worksheets when configuring See Level. The first entry in each table is an example of how to fill in the worksheet When you enter the dimensions, you need to enter them as feet or metres, depending on what you have selected in the Options tab of the Configuration Manager. If your measurements contain inches or centimetres (for example one foot, six inches), you will need to convert them to feet or metres. For example, if the length is 50 feet, 9 inches, you would enter 50.75 The chart below shows some common conversions for inches to feet and centimetres to metres. Inches Feet Centimetres Metres 1 2 3 4 5 6 7 8 9 10 11 0.08 0.17 0.25 0.33 0.42 0.50 0.58 0.67 0.75 0.83 0.92 10 20 30 40 50 60 70 80 90 0.10 0.20 0.30 0.40 0.50 0.60 0.70 0.80 0.90 Make sure you measure and enter the dimensions in the same unit of measure selected in the Configuration Manager. For more information, read Configuring See Level options on page 13. The sensor offset is the distance from the top of the container to the bottom of the sensor. A long straightedge or level and a plumb line are helpful for measuring the sensor offset. 2011-11-09 29 Appendixes Phason Tank worksheet Dimensions Container name Sensor address Cistern 01234567 Height Diameter Sensor offset 10 20 1 Pit worksheet Dimensions Container name Sensor address Storage pit 12345678 30 Height Width Length Sensor offset 4 12 16 0 2011-11-09 Appendix A: Worksheets Lagoon worksheet Container name Sensor address Depth Top width Top length Bottom width Bottom length Sensor offset Dimensions Water reservoir 87654321 25 100 200 50 150 3.5 2011-11-09 The top width must be greater than or equal to the bottom width. The top length must be greater than or equal to the bottom length. 31 Appendixes Phason Appendix B: Troubleshooting If you are having problems using See Level, look up the problem in the table below and then follow the instructions to resolve the problem. If you have a problem that is not listed here, try to determine what might be causing the problem. If you cannot resolve the problem, call your dealer or Phason’s Customer Support (see Service and technical support at the front of the manual). Problem Possible cause “Unable to determine level” in the See Level Status Viewer and/or "Communications error..." message in the Communication Center See Level is not receiving data from the See Level Sensor. Low level alarm in the Communication Center and See Level Viewer Low level warning in the Communication Center and See Level Viewer High level warning in the Communication Center and See Level Viewer High level alarm in the Communication Center and See Level Viewer Inaccurate level measurements The level detected in the container is below the low alarm level. The level detected in the container is below the low warning level. 32 Possible resolution Make sure the sensor is properly wired, including the communication wiring. For more information, read the SLS installation guide and RS485-FD installation guide. Make sure the sensor is not damaged. Gently remove any dust or dirt from the sensor face using a soft brush. For more information, read the SLS installation guide. The level detected in the container is above the high warning level. The level detected in the container is above the high alarm level. Incorrect container dimensions Make sure the container dimensions are correct. For more information, read Adding, editing, and removing containers on page 15. 2011-11-09 Index A accuracy .......................................................... 22 adding containers ...................................... 15–17 M monitoring levels ... 22, See also creating reports address ............................................................ 16 N Alarm History Report ....................................... 25 normal text color ..............................................14 alarms .................................................... See alerts alerts .......................................................... 18–20 C Communication Center ..................................... 4 communications ........................... See serial port O options........................................................ 13–15 R registering See Level .................................... 9–11 removing containers.........................................18 computer requirements ..................................... 3 Configuration Manager ...................................... 4 configuring alerts ...................................................... 18–20 containers.............................................. 15–17 See Level options .................................. 13–15 site identification ......................................... 12 S See Level Reports window .............................4, 6 See Level Summary Report .............................24 serial port..........................................................13 Settings Manager ....................................... 4, 5–6 site identification...............................................12 containers adding ................................................... 15–17 Status Viewer............................................4, 6, 23 CSV reports ..................................................... 23 T E editing containers ............................................ 17 F features .............................................................. 2 H HTML reports ................................................... 23 I installing See Level ............................................ 9 theory of operation .............................................3 U units of measure ...............................................13 update interval ..................................................13 usage type ........................................................16 V viewing levels ...................................................23 W warning text color .............................................14 warnings ................................................. See alerts Phason 33 Phason Inc. 2 Terracon Place Winnipeg, Manitoba, Canada R2J 4G7 Phone: Fax: 204-233-1400 204-233-3252 E-mail: Site Web: [email protected] www.phason.ca