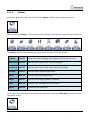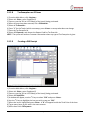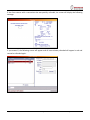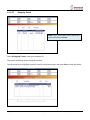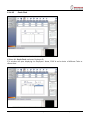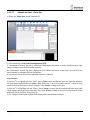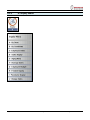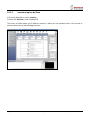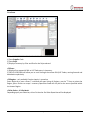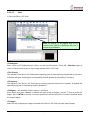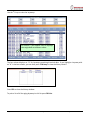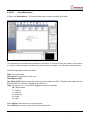
1
Retail-1® Point of Sale
Stage 9.1
P.O.S. User Manual
11450 boul. Côte De Liesse, Dorval, QC H9P 1A9 Canada
telephone 514.631.3336 | fax 514.631.7722 | www.gemmar.com
Confidential and Proprietary, Gemmar Systems International Inc.
Last revised: March 25, 2015
Table of Contents
9.1.1
Getting Started with Retail-1® Point of Sale.......................................................................... 7
9.1.1.1
Accessing Retail-1® Point of Sale............................................................................................. 7
9.1.1.2
Navigation............................................................................................................................... 8
9.1.1.3
Main Menus............................................................................................................................ 9
9.1.1.4
Hotkeys ................................................................................................................................. 10
9.1.1.5
The Sub-Menus & Working Window .................................................................................... 11
9.1.1.6
The Operator Instructions .................................................................................................... 14
9.1.1.7
Calendar................................................................................................................................ 15
9.1.1.8
Common Functions in Retail-1® ........................................................................................... 16
9.1.1.9
Communication Center ........................................................................................................ 17
9.1.1.10 Media Center ......................................................................................................................... 18
9.1.1.11 Exiting out of the Retail-1® application ................................................................................. 19
9.1.2
A- Register Menu ............................................................................................................... 21
9.1.2.1
Sales ....................................................................................................................................... 22
9.1.2.2
Dividing a Sale between Two or More Associates ................................................................ 23
9.1.2.3
Sale with a Line Discount....................................................................................................... 24
9.1.2.4
Sale - All Discounted Merchandise ........................................................................................ 24
9.1.2.5
Sale Including Promotional Merchandise ............................................................................. 25
9.1.2.6
Put a Bill on Hold ................................................................................................................... 26
9.1.2.7
Tax Exemptions on Specific Items ......................................................................................... 26
9.1.2.8
Tax Exemption on All Items ................................................................................................... 27
9.1.2.9
Creating a Gift Receipt.......................................................................................................... 27
9.1.2.10 Record a Sale and a Return (An Exchange) ........................................................................... 28
9.1.2.11 Create a Layaway Sale ........................................................................................................... 28
9.1.2.12 Record a Refund .................................................................................................................... 29
9.1.2.13 Inventory Inquiry While In a Sale .......................................................................................... 33
9.1.2.14 Post Void a Transaction ......................................................................................................... 34
9.1.2.15 Update an Existing Layaway .................................................................................................. 35
9.1.2.15.1 Layaway Pick Up ............................................................................................................. 35
9.1.2.15.2 Layaway Deposit ............................................................................................................ 36
9.1.2.15.3 Modify a Layaway .......................................................................................................... 36
9.1.2.16 Layaway Aging ....................................................................................................................... 37
9.1.2.17 Paid Out/Paid In .................................................................................................................... 40
9.1.2.18 Gift Certificates...................................................................................................................... 41
9.1.2.19 Holds ...................................................................................................................................... 42
9.1.2.19.1 Hold Entry....................................................................................................................... 43
9.1.2.19.2 Hold – Pick Up ................................................................................................................ 44
9.1.2.19.3 Hold Cancellation ........................................................................................................... 45
9.1.2.20 Payment on Account – (Optional Module) ........................................................................... 46
9.1.2.21 Employee Purchase ............................................................................................................... 47
9.1.2.21.1 Employee Purchase Sales ............................................................................................... 48
9.1.2.21.2 Employee Purchase Layaway ......................................................................................... 48
Stage 9.1 POS User Manual
www.gemmar.com
Page 2 of 186
9.1.2.21.3 Employee Purchase Refund ........................................................................................... 49
9.1.2.22 Refund a Gift Receipt ............................................................................................................ 49
9.1.3
B- Inventory Menu ............................................................................................................. 50
9.1.3.1
Receive Merchandise ............................................................................................................ 51
9.1.3.2
Transfer Menu ....................................................................................................................... 52
9.1.3.2.1
Transfer Out ................................................................................................................... 53
9.1.3.2.2
Confirm Merchandise Being Transferred Out................................................................ 54
9.1.3.2.3
To Confirm Received Merchandise ................................................................................ 55
9.1.3.2.4
View Transfer(s) In Transit ............................................................................................. 56
9.1.3.2.5
Warehouse Request ....................................................................................................... 57
9.1.3.2.6
Convert Transfer File ...................................................................................................... 57
9.1.3.2.7
Outgoing Transit............................................................................................................. 58
9.1.3.3
Physical Inventory ................................................................................................................. 59
9.1.3.3.1
Prepare Count Sheet ...................................................................................................... 60
9.1.3.3.2
Count Sheet Entry .......................................................................................................... 61
9.1.3.3.3
Scanner/Manual Entry ................................................................................................... 62
9.1.3.3.4
Batch List ........................................................................................................................ 63
9.1.3.3.5
MSI Download ................................................................................................................ 63
9.1.3.4
Purchase Orders ................................................................................................................... 64
9.1.3.4.1
Decentralized Ordering (Entering a Purchase Order) .................................................... 65
9.1.3.4.2
Purchase Order Receipt ................................................................................................. 66
9.1.3.4.3
Print Open PO ................................................................................................................ 66
9.1.3.4.4
PO Request ..................................................................................................................... 67
9.1.3.4.5
PO Inquiry....................................................................................................................... 68
9.1.3.4.6
Receiving by Sku ............................................................................................................. 69
9.1.3.4.7
PO Report ....................................................................................................................... 70
9.1.3.4.8
Convert P.O. File............................................................................................................. 70
9.1.3.5
Print Tickets ........................................................................................................................... 71
9.1.3.6
Store Supply Ordering ........................................................................................................... 72
9.1.3.7
Consumption Menu ............................................................................................................... 73
9.1.3.7.1
Consumption .................................................................................................................. 74
9.1.3.7.2
Consumption Report ...................................................................................................... 75
9.1.3.7.3
End of Roll ...................................................................................................................... 76
9.1.3.8
Multiple Remnants Entry ...................................................................................................... 77
9.1.4
C- Management Menu ....................................................................................................... 78
9.1.4.1
Daily Cash Control ................................................................................................................. 79
9.1.4.2
Daily Cash Declaration........................................................................................................... 80
9.1.4.3
No Sale Function (Open Cash Drawer) .................................................................................. 81
9.1.4.4
Staff Menu ............................................................................................................................. 82
9.1.4.4.1
Employee File/ Condensed Employee File ..................................................................... 83
9.1.4.4.2
Punch Clock .................................................................................................................... 84
9.1.4.4.3
Scheduling ...................................................................................................................... 85
9.1.4.4.4
Employee Hours Worked ............................................................................................... 88
9.1.4.4.5
Weekly Employee Hours Worked .................................................................................. 90
Stage 9.1 POS User Manual
www.gemmar.com
Page 3 of 186
9.1.4.4.6
Print Today’s Punch Clock .............................................................................................. 91
9.1.4.5
Cashing a Check ..................................................................................................................... 92
9.1.4.6
Reports .................................................................................................................................. 93
9.1.4.6.1
Daily Transmission Listing .............................................................................................. 94
9.1.4.6.2
Employee Total Sales Listing .......................................................................................... 95
9.1.4.6.3
Total Sales by Sku ........................................................................................................... 96
9.1.4.6.4
Total Sales by Class Listing ............................................................................................. 97
9.1.4.6.5
Journal ............................................................................................................................ 98
9.1.4.6.6
Employee Purchase ........................................................................................................ 99
9.1.4.6.7
Refund/Exchange ......................................................................................................... 100
9.1.4.6.8
Style/Color Ranking ...................................................................................................... 101
9.1.4.6.9
Miscellaneous Fee Report ............................................................................................ 102
9.1.4.7
Multiple Cash out Menu (If Option Turned On) .................................................................. 103
9.1.4.7.1
Multiple Cash out – Check Out .................................................................................... 104
9.1.4.7.2
Multiple Cash out - Declare ......................................................................................... 106
9.1.4.8
Activate Special Promotion ................................................................................................ 107
9.1.4.9
Customize Menu................................................................................................................. 107
9.1.5
D- Inquiry Menu................................................................................................................108
9.1.5.1
Inventory Inquiry by Store................................................................................................... 109
9.1.5.1.1
Code ............................................................................................................................. 111
9.1.5.1.2
Supplier/Style/Color/Size ............................................................................................. 114
9.1.5.1.3
Supplier/Style ............................................................................................................... 114
9.1.5.1.4
Class/Supplier............................................................................................................... 115
9.1.5.1.5
Desc 1/Desc 2 ............................................................................................................... 115
9.1.5.2
Inventory Inquiry by Coordinate ......................................................................................... 116
9.1.5.3
Employee Net Sales per Hour.............................................................................................. 118
9.1.5.4
Sales Inquiry Menu .............................................................................................................. 119
9.1.5.4.1
Store Net Sales by Hour ............................................................................................... 120
9.1.5.4.2
Sales Inquiry by Department........................................................................................ 121
9.1.5.4.3
Sales Inquiry by Category ............................................................................................. 122
9.1.5.4.4
Sales Inquiry by Style ................................................................................................... 123
9.1.5.5
Aging Menu ........................................................................................................................ 124
9.1.5.5.1
Outstanding Gift Certificate Aging (If option is turned on) .............................................. 125
9.1.5.5.2
Outstanding Credit Note Aging (If option turned on) ...................................................... 126
9.1.5.5.3
Outstanding Layaway Aging ......................................................................................... 127
9.1.5.5.4
Outstanding Hold Aging ............................................................................................... 130
9.1.5.5.5
Paid In/Paid Out Inquiry ............................................................................................... 130
9.1.5.6
Average Sales....................................................................................................................... 131
9.1.5.7
Employee Budget ................................................................................................................ 132
9.1.5.8
Feature Inquiry .................................................................................................................... 134
9.1.5.9
Parameter Inquiry ............................................................................................................... 135
9.1.5.10 Charge Sales ........................................................................................................................ 136
9.1.6
E- Maintenance Menu .......................................................................................................137
9.1.6.1
Control File .......................................................................................................................... 138
Stage 9.1 POS User Manual
www.gemmar.com
Page 4 of 186
9.1.6.2
Miscellaneous Bill Codes ..................................................................................................... 138
9.1.6.3
Store Selection .................................................................................................................... 138
9.1.6.4
Reason Menu....................................................................................................................... 139
9.1.6.5
Image Entry by Style ............................................................................................................ 139
9.1.6.6
Bill Messages ....................................................................................................................... 140
9.1.6.7
Update from Diskette .......................................................................................................... 140
9.1.6.8
Tender Menu ....................................................................................................................... 140
9.1.6.8.1
Tender Maintenance .................................................................................................... 140
9.1.6.8.2
Exchange Rate .............................................................................................................. 140
9.1.7
F- Polling Menu .................................................................................................................141
9.1.7.1
End of Day ........................................................................................................................... 142
9.1.7.2
Manual Polling ..................................................................................................................... 143
9.1.7.3
Close No Polling .................................................................................................................. 144
9.1.7.4
Reprint Polling .................................................................................................................... 144
9.1.7.5
Backup ................................................................................................................................. 144
9.1.7.6
Restore from Net ................................................................................................................. 144
9.1.7.7
Forced Update Poll .............................................................................................................. 144
9.1.7.8
Head Office Physical Inventory Count Sheet....................................................................... 144
9.1.8
G- Modules Menu .............................................................................................................145
9.1.8.1
Training Mode .................................................................................................................... 146
9.1.8.2
Store Traffic Counter ........................................................................................................... 146
9.1.8.3
Cutting table ........................................................................................................................ 147
9.1.8.4
Case Menu ........................................................................................................................... 148
9.1.8.4.1
Case Maintenance........................................................................................................ 149
9.1.8.4.2
Case Inquiry .................................................................................................................. 150
9.1.8.4.3
Case EOD Slip ............................................................................................................... 151
9.1.8.4.4
Close Case .................................................................................................................... 152
9.1.8.4.5
Case Report .................................................................................................................. 154
9.1.8.4.6
Download Case Details................................................................................................. 155
9.1.8.4.7
Case Built Report .......................................................................................................... 156
9.1.8.4.8
Scan Case...................................................................................................................... 157
9.1.8.4.9
Case Activity ................................................................................................................. 159
9.1.8.4.10 Total Case ..................................................................................................................... 160
9.1.8.5
Repair Menu ....................................................................................................................... 161
9.1.8.5.1
Repair Entry.................................................................................................................. 161
9.1.8.6
APPRAISAL .......................................................................................................................... 162
9.1.8.7
Markdown Menu ................................................................................................................ 163
9.1.8.7.1
Confirm Markdown ...................................................................................................... 163
9.1.8.7.2
Markdown Inquiry........................................................................................................ 165
9.1.8.8
On-Line Status ..................................................................................................................... 166
9.1.9
H- Customer Menu............................................................................................................167
9.1.9.1
Customer Maintenance ....................................................................................................... 168
9.1.9.1.1
Add a New Customer ................................................................................................... 168
9.1.9.1.2
Modify an Existing Customer ....................................................................................... 169
Stage 9.1 POS User Manual
www.gemmar.com
Page 5 of 186
9.1.9.1.3
Delete a Customer ....................................................................................................... 169
9.1.9.1.4
Customer Notes ........................................................................................................... 169
9.1.9.2
Customer Purchase Menu ................................................................................................... 170
9.1.9.2.1
Customer Purchase History.......................................................................................... 171
9.1.9.2.2
Customer Purchase Inquiry .......................................................................................... 172
9.1.9.3
Customer Selection ............................................................................................................. 173
9.1.9.4
Inactive Customer Report ................................................................................................... 174
9.1.9.5
Customer Utilities ................................................................................................................ 175
9.1.9.5.1
Change Customer Phone Number ............................................................................... 176
9.1.9.5.2
Purge Customer History ............................................................................................... 177
9.1.9.6
Customer Profile.................................................................................................................. 178
9.1.9.7
Update CD (Customer) ........................................................................................................ 179
9.1.9.8
Update CD (Detail)............................................................................................................... 179
9.1.10 I- E-Mail Menu ...................................................................................................................180
9.1.10.1 Send E-Mail Messages ......................................................................................................... 181
9.1.10.2 View Emails Received .......................................................................................................... 183
9.1.11 L- Utilities Menu ................................................................................................................184
9.1.11.1 Backup ................................................................................................................................. 185
9.1.11.2 Support ................................................................................................................................ 185
9.1.11.3 Upload PDT Files .................................................................................................................. 185
9.1.11.4 POS Version ......................................................................................................................... 185
9.1.11.5 GSI Update........................................................................................................................... 185
Stage 9.1 POS User Manual
www.gemmar.com
Page 6 of 186
9.1.1
Getting Started with Retail-1® Point of Sale
9.1.1.1
Accessing Retail-1® Point of Sale
After launching the application, you will be show the following screen:
Stage 9.1 POS User Manual
www.gemmar.com
Page 7 of 186
9.1.1.2
Navigation
Main Menus
Hotkeys
Sub Menus
Calendar
The Operator Instructions
indicate what to do next
Communication Center
Media Center
Tips for Navigation:
“CAPS LOCK” and “NUM LOCK” should always be on.
Your mouse is used to select options and move between menus.
The keyboard is used to type and to navigate within an open program in the working window.
Stage 9.1 POS User Manual
www.gemmar.com
Page 8 of 186
9.1.1.3
Main Menus
The main menus are located along the top portion of the screen
A- Register
The majority of the POS functions will take place in this menu, including all
sales, refunds, etc.
B- Inventory
Includes options such as inventory transfers and physical inventory counts
C- Management
Cash closing options, reports and other managerial functions
D- Inquiry
Inventory look-up by store, employee sales inquiries, etc.
E- File Maintenance
Data files related to this store (control file, employee file)
F- Polling
End of day reconciliation with head office
G- Modules
Training Mode, and any special modules that are active
H- Customer
Maintenance, purchase history, reports
I- E-mail
Messages between the store and the head office
L- Utilities
GSI support menus
Stage 9.1 POS User Manual
www.gemmar.com
Page 9 of 186
9.1.1.4
Hotkeys
At the top right of the screen, you can select the “Hotkeys” button to access shortcut options.
After you click on “Hotkeys”, the menu options will change to show you the hotkey functions as follows:
The hotkeys are shortcuts to commonly used menus or functions of the POS system.
Language
Shift+F1
Changes the system language from English to French and vice versa
Money Card Shift+F2
Shortcut to the “Money Card” menu (if installed)
Punch Clock Shift+F4
Shortcut to the “Punch Clock” entry screen (if activated)
Customer
Shift+F5
Shortcut to the Customer Profile menu
Inquiry
Shift+F6
Shortcut to the Store Inquiry menu
Images
Shift+F7
Shortcut to the Imaging module (if installed)
E-mail
Shift+F8
Shortcut to the “Messages to be sent” menu
Reprint
Shift+F9
Reprints the last transaction
To exit out of the hotkey menu and return to the main menu, select the “Main Menu” button at the top
right of the screen:
Stage 9.1 POS User Manual
www.gemmar.com
Page 10 of 186
9.1.1.5
The Sub-Menus & Working Window
When you select one of the sub-menus, the related program will open in your working window.
In the example below, the Store Inquiry program is open.
SubMenus
Stage 9.1 POS User Manual
Working Window
www.gemmar.com
Page 11 of 186
If you open more than one menu, the related program will appear in separate tabs within your working
window.
You can toggle/switch between all your open programs by selecting the desired tab at the bottom of the
working window.
A maximum of six tabs can be open at once in your working window. If you try to open more than six,
the following message will appear:
Stage 9.1 POS User Manual
www.gemmar.com
Page 12 of 186
Due to file access restrictions, certain programs cannot be opened simultaneously. For example, you
cannot have sales open at the same time as refund. Also, you cannot have the register program open
more than one time - the following message will appear:
To return to the previous menu, select the “Back” button at the bottom of the sub-menus. You can also
use the “Escape” key.
Stage 9.1 POS User Manual
www.gemmar.com
Page 13 of 186
9.1.1.6
The Operator Instructions
The Operator Instructions (located below the sub-menus) will always indicate to you what to do next.
Here are some examples:
Stage 9.1 POS User Manual
www.gemmar.com
Page 14 of 186
9.1.1.7
Calendar
The calendar (located on the right side of your screen) serves two purposes.
(1) For your information. The current month is the default view and today’s date will be highlighted.
You will also be shown the previous and next months. You can go directly to a specific month/year
by selecting it from the drop-down lists above the calendars.
(2) To populate date fields in Retail-1®. To do so, double-click on the calendar date (instead of manually
inputting dates). See example below:
When you are using specific functions in the system, for example, entering a sale, the calendar will
change to display information for this transaction.
Stage 9.1 POS User Manual
www.gemmar.com
Page 15 of 186
9.1.1.8
Common Functions in Retail-1®
Enter key moves the cursor forward one field on the current screen.
Back Space key moves the cursor backward in the current field, deleting the immediate left character in
the field.
Arrow keys move you forward and backward in the current field without deleting any information.
Escape key is to go back to the previous screen/ menu.
Cap locks must be on at all times when using the Retail-1® application.
Stage 9.1 POS User Manual
www.gemmar.com
Page 16 of 186
9.1.1.9
Communication Center
The option tabs in the communication center serve as shortcuts to specified websites or web pages.
Tab
Function
Messages
GemX
Web Analytics
Scrolling message, special greeting (if active). See example above
Link to the Gem X website for Money Card (if active)
Link to special reporting options (if active)
E-Mail
Help
Intranet
Link to your company’s email (if installed)
Access to “online help” – point of sale user manual
Link to your company’s intranet (if installed)
When you select a tab within the communication center, you can double-click to maximize the tab into
your working window. See example below. Select “Min” to close the tab back down to the
communication center.
Note: you can still select menus in
Retail-1® and proceed with certain
functions while keeping
communication center tabs maximized.
Stage 9.1 POS User Manual
www.gemmar.com
Page 17 of 186
9.1.1.10
Media Center
When using the Retail-1® Imaging module, the Media Center will display product images when in the
Inquiry by Store (Menu DA).
Media
Center
Stage 9.1 POS User Manual
www.gemmar.com
Page 18 of 186
9.1.1.11
Exiting out of the Retail-1® application
To close a menu, select the “Close” button for the selected program/tab. Make sure you select the
correct “close” button.
This close button will close the entire P.O.S. application
This close button will only close the active tab/program
Stage 9.1 POS User Manual
www.gemmar.com
Page 19 of 186
If you try to close the entire application without first closing all open tabs, the following message will be
displayed.
We recommend that you select “No” so you can
go back in the software and close every open tab.
Depending on the settings your head office has established for your POS system, you may be forced to
enter a password before you can exit Retail-1® POS.
Stage 9.1 POS User Manual
www.gemmar.com
Page 20 of 186
9.1.2
A- Register Menu
Stage 9.1 POS User Manual
www.gemmar.com
Page 21 of 186
9.1.2.1
Sales
1) From the Main Menu, Select <A-Register>.
2) Select <A - Sales>, enter Employee ID.
3) Once the Customer window appears, enter Customer Information. If you do not wish to enter
Customer Information, press <Enter> to bypass.
4) Manually enter or scan the SKU or UPC Code(s) of the item(s) being purchased. To change quantity or
price, select <F2 Modify> after the item has been entered. Use the ↑ key to access the quantity field and
make necessary changes.
NOTE: If a SKU or UPC is entered incorrectly, select <F6 - Void/Gift>, after the SKU or UPC has been
entered. Use the ↑↓ keys to choose <Void Line>, when highlighted press <Enter>. Now use the ↑↓ keys
to highlight the item you wish to void, then press <Enter> to void. If by mistake you enter a SKU twice
into the system, simply follow through and complete the line before choosing <F6 -Void/Gift>.
5) Once all items have been entered, click on <F9 Payment> to proceed with the payment.
6) Select the letter corresponding to the specific method of payment being used by the customer.
Cash: Enter amount tendered
Check: Take necessary identification.
Credit Card: Take necessary identification.
Bankcard: Take necessary identification.
US/CND Funds: Displays US/CND Funds needed.
Stage 9.1 POS User Manual
www.gemmar.com
Page 22 of 186
Gift Certificate: Enter Certificate Reference Number. When more than one method of payment is
presented, (i.e., Cash and a Gift Certificate) enter the Gift Certificate as the first method of
payment*.
Credit Notes: Enter Credit Note Reference Number (Found in the center of the Credit Note). If
invalid, enter Reference Number twice and the system will accept it if this option is turned on,
then enter the amount of the Credit Note. When more than one method of payment is
presented, (i.e., Credit Card and a Credit Note) enter the Credit Note as the first method of
payment*.
*Note: In the system file (HBF), there is a field “Second Method of Payment for CN/GC/MC (Y/N)".
If this field is set to N, you must enter the gift certificate/credit note as the first method of
payment. If set to Y, it doesn't have to be the first method of payment.
Layaway: The system suggests a minimum deposit amount. This amount may be overridden
Money Card: Take necessary identification.
NOTE:
[F2] Details: Brings you back to the details of the receipt. You may add items by entering the additional
SKUs or UPCs. You may void items by using the <F6 Void/Gift> Function and highlighting the line you
wish to void
[F3] Notes: Use this option before completing the sale to add comments to the bill.
7) Enter the amount of the payment and press <Enter> to complete the transaction.
8) Press any key to process another sale.
NOTE: At any time during the sale the receipt can be voided by pressing <Esc> and choosing a reason
code for Voiding
9.1.2.2
Dividing a Sale between Two or More Associates
1) From the Main Menu, click <Register>.
2) Select <A - Sales>, enter Employee ID.
3) Instead of entering a SKU/UPC, enter an asterisk (*) followed by the number of Employees having
helped to sell the item(s) (ex. *2,*3… *20).
4) A window will appear prompting for the Employee Codes, enter them.
5) Enter or scan the SKU or UPC code(s) of the items being purchased.
6) Repeat steps 3-5 if change in Employee is required.
7) Continue to the payment as above
NOTE: If you have multiple SKUs, enter all non-sharing ones first to reduce key strokes.
Stage 9.1 POS User Manual
www.gemmar.com
Page 23 of 186
9.1.2.3
Sale with a Line Discount
1) In the Main Menu, click on <Register>.
2) Select <A - Sales> and then enter the Employee’s ID.
3) Enter manually or with the scanner the UPC codes or SKU of the articles being purchased.
4) Select <F1 Discount> after having entered the specific item to be discounted.
5) Select the reason for applying the discount using the arrow keys (↑↓) or mouse and press <Enter>.
6) Enter the amount of the discount in $ or in % and then press the <Enter> key to apply.
7) Enter the customer’s remaining items (if need be) or click on <F9 Payment>.
NOTE: It is possible that a discounted transaction will require an authorization code to complete the
process. This authorization code is determined by the Head Office.
9.1.2.4
Sale - All Discounted Merchandise
1) From the Main Menu, click on <Register>.
2) Select <A - Sales> and then enter the Employee’s ID.
3) Enter manually or with the scanner the UPC codes or SKU of the articles being purchased.
4) Once all of the items have been entered, click on <F8 Subtotal>.
5) Select <A Discount>.
6) Select the reason for applying the discount by using the arrow keys (↑↓) or mouse and press <Enter>.
7) Enter the amount of the discount in $ or in % and then press the <Enter> key to apply.
8) Select <E Payment>.
9) Select the letter corresponding to the specific method of payment being used by the customer.
NOTE: It is possible that a discounted transaction will require an authorization code to complete the
process. This authorization code is determined by the Head Office.
Stage 9.1 POS User Manual
www.gemmar.com
Page 24 of 186
9.1.2.5
Sale Including Promotional Merchandise
First Method - Use when selling multiple items for one single price:
1) From the Main Menu, click <Register>.
2) Select <A - Sales>, enter Employee ID.
3) Select <F5 Promotion>, **Promotion** will appear.
4) Enter or scan the SKU or UPC Code(s) of the item(s) on Promotion.
5) When all items have been entered, click <F5 Promotion> to end the Promotion.
6) Enter the total amount for the Promotion.
7) Enter additional item(s) if any or click <F9 Payment.>
Second Method - Use to tag an item as a "gift with purchase":
1) From the Main Menu, click <Register>.
2) Select <A - Sales>, enter Employee ID.
3) Enter or scan the SKU or UPC Code of the item that is a "gift with purchase".
4) Select <F2 Modify Line>.
5) Select <F5 Promotion>.
6) Press <Enter> to accept.
7) The letter “P” will appear on screen beside the price of the item that is free. This amount will now
appear as a discount on the payment screen.
8) Enter additional items or click <F9 Payment>.
Stage 9.1 POS User Manual
www.gemmar.com
Page 25 of 186
9.1.2.6
Put a Bill on Hold
1) From the Main Menu, click <Register>.
2) Select <A - Sales>, enter Employee ID.
3) Enter or scan the SKU or UPC Code(s) of the item(s) being purchased.
4) Select <F7 Hold>; the receipt is now On Hold.
5) Proceed with the next sale(s).
6) To retrieve the Bill on Hold, Select <F7 Hold> when prompted for your Employee ID, instead of
entering your Employee ID.
9.1.2.7
Tax Exemptions on Specific Items
1) From the Main Menu, click <Register>.
2) Select <A - Sales>, enter Employee ID.
3) Enter or scan the SKU or UPC Code of the item that is tax-exempt.
4) Select <F2 Modify >.
5) Select <F4 Tx Override>.
6) Enter “0” for the Tax(es) which are exempt, press <Enter> to accept what does not change.
7) Enter the Tax Exemption #.
8) Press <Enter> at the price. That item will now register without tax.
9) Select <F9 Payment> and choose the Reason Code for Tax Override.
NOTE: The system will enforce Customer information when any type of Tax Exemption is given.
Stage 9.1 POS User Manual
www.gemmar.com
Page 26 of 186
9.1.2.8
Tax Exemption on All Items
1) From the Main Menu, click <Register>.
2) Select <A - Sales>, enter Employee ID.
3) Enter or scan the SKU or UPC Code(s) of the item(s) being purchased.
4) When all items have been entered, click <F8 Subtotal>.
5) Select <C Tx Override>.
6) Enter “0” for the Tax(es) which are exempt, press <Enter> to accept what does not change.
7) Enter the Tax Exemption #.
8) Select <F9 Payment> and choose the Reason Code for Tax Override.
NOTE: The system will enforce Customer information when any type of Tax Exemption is given.
9.1.2.9
Creating a Gift Receipt
1) From the Main Menu, click <Register>.
2) Select <A - Sales>, enter Employee ID.
3) Enter or scan the SKU or UPC Code(s) of the item(s) being purchased.
4) Select <F6 Void/Gift>.
5) A window will appear, use the ↑↓ keys to select “Gift” and press <Enter>.
6) Use the ↑↓ keys to highlight the item you wish to tag as a “Gift”.
7) When the item is highlighted press <Enter>. A "G” will appear beside the Total Price of the item.
8) Tag as many items as you wish in the same manner.
9) When done click <F9 Payment>.
Stage 9.1 POS User Manual
www.gemmar.com
Page 27 of 186
NOTE: The system will print a Regular Sales Receipt as well as Special Gift Receipt(s)-one for each item
tagged. The Gift Receipt contains a Reference Number identifying the Gift item (price and both taxes).
This Reference Number is to be used when the item is refunded at any location
9.1.2.10
Record a Sale and a Return (An Exchange)
1) From the Main Menu, click <Register>.
2) Select <A - Sales>, enter Employee ID.
3) Enter or scan the SKU or UPC Code(s) of the item(s) being purchased.
4) Enter or scan the SKU or UPC Code of the item being returned.
5) Select <F2 Modify Line>.
6) Re-enter the price using a minus (-) sign, then press <Enter>.
7) Select <F9 Payment>
NOTE: If the Return amount is greater than the Purchase amount, an Authorization Code is required to
complete the transaction
9.1.2.11
Create a Layaway Sale
1) From the Main Menu, click <Register>.
2) Select <A - Sales>, enter Employee ID.
3) Enter or scan the SKU or UPC Code(s) of the item(s) being put on Layaway.
4) Select <F9 Payment>
5) Select <M Layaway>.
6) Enter Customer Information when prompted.
7) The system will display the suggested deposit amount.
8) If you wish to change the amount, enter the new amount and press <Enter>. If you do not wish to
change the amount, press <Enter>.
9) Choose the method of payment.
10) Press “Y” for a duplicate copy of the receipt.
Stage 9.1 POS User Manual
www.gemmar.com
Page 28 of 186
9.1.2.12
Record a Refund
Note: If the option “Valid Refund” in the system file
(HBF) is set to either Y or P, see below for procedures.
1) From the Main Menu, click <Register>.
2) Select <B - Refund>, enter Employee ID.
3) Enter the Bill # of the original receipt.
Stage 9.1 POS User Manual
www.gemmar.com
Page 29 of 186
4) A question will be asked “Complete refund (Y/N)”. If you answer “Y” all SKU’s that were on the
original receipts will appear, if you answer “N” you will manually enter (or scan) the SKU/s.
5) Enter the Customer’s information
6) Enter manually or scan the SKU or UPC Code(s) of the item(s) being returned. Do NOT enter a
negative price here. The system already knows you are in the Refund Mode. If the customer is also
making a purchase at the same time, complete the Refund, and then process the Sale in the Sales
module.
7) Select <F9 Refund> to complete the Refund.
8) Enter the Reason Code for the Refund.
9) Select the appropriate method of Refund. Then press <Enter> to accept the amount.
10) Press any key to process the next Sale or [N] to process another Refund.
Stage 9.1 POS User Manual
www.gemmar.com
Page 30 of 186
“Valid Refund”: This system file field (menu HBF) controls whether refunds are validated at the POS.
N: Refunds will work as usual – as per procedures described above.
Y: At the POS, the user will not be able to refund the same items twice when the original bill number exists at the
store. The user will be able to select which items to refund for partial refunds or they can chose to do a complete
refund. Once an item is refunded, they will not be able to refund it again. The same bill # cannot be fully
refunded more than once. The user cannot dismantle ‘promotions’ for a refund. For example, if the Sale includes
an F5-Promotion, all items in the F5 Promotion must be returned; the Promotion Package cannot be refunded
individually.
P: Same as when set to Y but also allows the ability to refund items sold within a promotional package individually
at the point of sale. This includes all promotions (the F5-Promo function at the POS and/or by the promotions
created at head office in menu DOA).
Note: The advantages of this field at Y or P will only apply if the refund is done in the store where the initial sale
took place. This also applies to employee purchase refunds in which the discounts are automatically calculated.
When “Valid Refund” is set to Y or P, the following screen will appear as soon as the transaction number
is entered:
Here you have the option to select F1-Complete for a complete refund, or you can select which item is
to be refunded.
Capture customer information and complete the transaction as usual.
Stage 9.1 POS User Manual
www.gemmar.com
Page 31 of 186
If the client returns with a transaction that was partially refunded, the screen will display the following
message:
If you answer Y, the following screen will appear and all items already refunded will appear in red and
cannot be refunded again:
Stage 9.1 POS User Manual
www.gemmar.com
Page 32 of 186
9.1.2.13
Inventory Inquiry While In a Sale
1) While in a sale click <F11 Inquiry>
2) See the “Inquiry” section of this manual under “Inventory By Store” for more details on the various
search methods.
3) After having found the SKU, select <F9 Accept SKU> to accept the SKU and it will automatically appear
in the entry box of the sale
4) Hit <Enter> to accept the SKU in the sale.
Stage 9.1 POS User Manual
www.gemmar.com
Page 33 of 186
9.1.2.14
Post Void a Transaction
1) From the Main Menu, click <Register>
2) Select <C - Post Void> followed by the employee’s ID
3) Enter the transaction number that you wish to void
4) The transaction will appear on screen and the system will ask if this “IS THIS THE TRANSACTION TO
BE VOIDED (Y/N)”.
5) Enter <Y> and the transaction will be voided.
NOTE: You cannot Post Void a Layaway Transaction or a transaction that occurred before the last
polling whether it was manual polling or end of day polling
Stage 9.1 POS User Manual
www.gemmar.com
Page 34 of 186
9.1.2.15
Update an Existing Layaway
1) From the Main Menu, click<Register>
2) Select <D - Layaway>, enter the Employee ID
NOTE: <F5 Aging> can be selected immediately after Step 2 for Aging on any/all Layaways
3) Enter Layaway Number (top right hand side of receipt). If unknown, press <Enter> once, and enter
Customer Phone Number instead.
9.1.2.15.1
Layaway Pick Up
For full pick up – entire layaway
1) Select <F1 Pick Up>
2) Select <F1 Full>
3) Select the desired method of payment
OR
For partial pick up
1) Select <F1 Pick Up>
2) Select <F2 Partial>
3) Highlight the item (s) being Picked Up and press <Enter>. They will be tagged with an asterisk (*).
4) Select <F9 Payment>
5) Select the desired method of payment.
Stage 9.1 POS User Manual
www.gemmar.com
Page 35 of 186
9.1.2.15.2
Layaway Deposit
1) Select <F2 Deposit>
2) Enter the amount
3) Choose method of payment.
4) Another receipt will be issued with the same Reference Number and the new balance amount.
9.1.2.15.3
Modify a Layaway
Select <F3 Modify>, then:
To Delete an Item(s)
1) Select <F6 Void Line> and use the ↑↓ keys to select the item. Press <Enter> when the item is
highlighted.
2) Select <F9 Payment> to record the Payment.
To Add Regular Priced Item(s)
1) Enter or scan the SKU or UPC Code(s) of the item(s).
2) Select <F9 Payment> to record the Payment.
To Add Discounted Item(s)
1) Enter or scan the SKU or UPC Code of the item.
2) Select <F1 Discount>.
3) Select the Reason for the Discount, enter the amount of Discount in $ or %, and press <Enter>.
4) Repeat steps 1-3 as required.
5) Select <F9 Payment> to record the Payment.
To Modify Price on SKUs Newly Entered
1) Enter or scan the SKU or UPC Code(s) of the item(s).
2) Select <F2 Modify Price> to change the incorrect price.
3) Select <F9 Payment> to record the Payment.
To Add Promotional Items
See the “Sale Including Promotional Merchandise” section of this manual
To Add Tax Exempt Items
See the “Tax Exempt on Specific Items” section of this manual
NOTE: If a Layaway is being Modified and Picked Up, first complete the modification and then go back
into the Layaway and do the pickup
Stage 9.1 POS User Manual
www.gemmar.com
Page 36 of 186
9.1.2.16
Layaway Aging
When you are in the layaway module you can select F5 Aging, and a box will appear with 4 options.
Note: This menu is also accessible thru menu DEC-Layaway Aging Inquiry.
Customer Order, Layaway or Both (C/L/B):
C: Displays only layaways that correspond to customer orders.
L: Displays only regular layaways.
B: Displays all existing layaways, whether they are customer orders or regular layaways.
Refer to 3.11.5 Customer Orders for more details.
Deposit (B/Y/N):
B: Displays both layaways that have deposits and those that do not have deposits.
Y: Displays only layaways with deposits.
N: Displays only layaways with no deposit.
Past Due (B/Y/N):
B: Displays both layaways past due and those not past due.
Y: Displays only the layaways that are past due.
N: Displays only the layaways that are not past due.
Layaway Aging Date C/M:
C: The layaway aging date will be calculated from the original creation date.
M: The layaway aging date will be calculated from the last date of the modified layaway number.
Stage 9.1 POS User Manual
www.gemmar.com
Page 37 of 186
Use the ↑↓ keys to view the Layaways.
As asterisk (*) will appear next to layaways
that originated as customer orders.
The last column displays an “H” for layaways containing historical data. If you highlight a layaway with
an “H” in the last column, you can then press F7-History to view the history details.
Press ESC to close the history window.
To print a list of all the aging layaways in this list press F8-Print.
Stage 9.1 POS User Manual
www.gemmar.com
Page 38 of 186
Here is an example of the printed list:
Stage 9.1 POS User Manual
www.gemmar.com
Page 39 of 186
9.1.2.17
Paid Out/Paid In
1) From the Main Menu, click<Register>
2) Select <E - Paid Out/Paid In>, enter the Employee ID
To Withdraw $
1) Under “Out”, enter amount being withdrawn.
2) Enter Reason.
3) Select <F8 Print> to print or select <F1 Modify> to modify if necessary.
To Deposit $
1) Under “In”, enter amount being deposited.
2) Enter Reason.
3) Select <F8 Print> or select <F1 Modify> if necessary.
To Declare Taxes
1) Under “Out” enter amount Paid for the article(s).
2) Enter the amount of the Taxes Paid for the article(s).
3) Enter Reason.
4) Select <F8 Print> or select <F1 Modify> if necessary.
Stage 9.1 POS User Manual
www.gemmar.com
Page 40 of 186
9.1.2.18
Gift Certificates
1) From the Main Menu, click<Register>
2) Select <F - Gift Certificates>, enter the Employee ID
3) Enter Customer Information.
4) In the “Amount” field, a window will appear displaying the denominations available in Gift
Certificates.
5) Enter the quantities of the denomination(s) being purchased. Press <Enter> to close the window.
6) Enter a Discount in $ or % (if necessary), press <Enter> to bypass.
7) Enter or bypass the "From" and "To" fields.
8) Enter the Reference Number(s) of the Certificate(s) sold.
9) Choose the form of Payment.
Stage 9.1 POS User Manual
www.gemmar.com
Page 41 of 186
9.1.2.19
Holds
1) From the Main Menu, click<Register>
2) Select <G - Hold>
Stage 9.1 POS User Manual
www.gemmar.com
Page 42 of 186
9.1.2.19.1
Hold Entry
3) Select <A - Hold Entry>, and enter Employee ID.
4) Enter Customer’s Information.
5) Enter or scan the SKU or UPC Code(s) of the item(s) as well as the quantities.
6) Select <F9 Update> to save changes.
7) A “Comments” box will appear. If you choose to enter any additional information regarding this
transaction, you can do so here, otherwise press <Enter> to bypass. Any “Comments” will print on the
receipt [i.e.: you promise a 15% discount to the customer as long as he/she returns before 5:00pm to
pick up the hold].
8) The system will now prompt you for an expiry date. Press <Enter> to accept the date displayed, or
make necessary changes.
9) The receipt along with an automatic duplicate will print.
Stage 9.1 POS User Manual
www.gemmar.com
Page 43 of 186
9.1.2.19.2
Hold – Pick Up
3) Select <B - Hold - Pick Up>, and enter Employee ID.
4) Enter the Hold Reference Number and select <F1 Pick Up>.
5) Any “Comments” created at the time of “Entry” will appear on the screen; press <Enter> to continue.
6) You will then be automatically taken into the Sales Function, with the SKU(s) from the Hold already
inputted. Make any necessary modifications.
7) Select <F9 Payment>.
8) Choose the form of Payment.
Stage 9.1 POS User Manual
www.gemmar.com
Page 44 of 186
9.1.2.19.3
Hold Cancellation
3) Select <C - Hold Cancellation>, enter Employee ID.
4) Enter the Hold Reference Number.
5) Select <F1 Cancel> to Cancel.
NOTE: Any holds that have expired will automatically print after Polling, allowing the cashier the
opportunity to cancel them if necessary.
NOTE: No deposit is necessary for a Hold
Stage 9.1 POS User Manual
www.gemmar.com
Page 45 of 186
9.1.2.20
Payment on Account – (Optional Module)
1) From the Main Menu, click<Register>
2) Select <Payment On Account>, enter Employee ID.
3) Enter Customer Information.
4) At “Payment” enter the amount the customer wishes to pay.
5) Once in the Payment field, the Employee can press <F2 App. Payment> to apply payment to a chosen
bill. NOTE: If using Accounts receivable “pay by Invoice”, a window will display the outstanding invoices
from which the Employee can choose by using the. Once they have chosen the invoice select <F9
Update>.
6) Select <F9 Payment>
7) Choose the form of Payment.
Stage 9.1 POS User Manual
www.gemmar.com
Page 46 of 186
9.1.2.21
Employee Purchase
Stage 9.1 POS User Manual
www.gemmar.com
Page 47 of 186
9.1.2.21.1
Employee Purchase Sales
1) From the Main Menu, click <Register>
2) Select <H - Emp. Purchase>.
3) Select <A - Sales>, enter Employee ID.
4) In the window that appears, enter the Employee CODE of the Employee making the purchase.
5) Enter or scan the SKU or UPC Code(s). The discount will automatically be taken off the price(s).
6) Select <F9 Payment>.
7) Choose the form of Payment.
NOTE: All other functions are the same as a Customer Sale
9.1.2.21.2
Employee Purchase Layaway
1) From the Main Menu, click<Register>
2) Select <H - Emp. Purchase>.
3) Select <B – Layaway>, enter the Layaway Reference Number.
4) Refer to the “Updating an Existing Layaways” section of this manual for the remainder of the process
Stage 9.1 POS User Manual
www.gemmar.com
Page 48 of 186
9.1.2.21.3
Employee Purchase Refund
1) From the Main Menu, click<Register>
2) Select <H - Emp. Purchase>.
3) Select <C - Refund>, enter Employee ID.
4) Refer to the “Record a Refund” section of this manual for the remainder of the process
NOTE: Unlike an Employee Sale, in Employee Refund you must enter the discount.
automatically deducted from the price!
9.1.2.22
It is not
Refund a Gift Receipt
1) From the Main Menu, click<Register>
2) Select <I - Gift Return>, enter Employee ID.
3) Enter the Bill # and the Employees on the Original Sales Receipt, and then enter the Employee ID
numbers.
4) Enter Customer Information.
5) Enter or scan the SKU or UPC Code of the Gift being returned.
6) A window will appear, in it, enter (scan) the Gift Reference Number.
7) Select <b> to complete the Refund and select the appropriate method of refund.
NOTE: You have the ability to return more than one Gift at a time. The system will refund the exact
amount the customer paid for the Gift taking into account any and all Discounts or Promotions given at
the time of the sale. The customer does not have to return the Gift to the same store it was purchased.
Stage 9.1 POS User Manual
www.gemmar.com
Page 49 of 186
9.1.3
B- Inventory Menu
Stage 9.1 POS User Manual
www.gemmar.com
Page 50 of 186
9.1.3.1
Receive Merchandise
1) From the Main Menu, select <Inventory>.
2) Select <A - Receipt>, enter Employee ID.
3) Enter Document Number to be received.
Completed? (Y/N)
Enter “Y" if merchandise received matches exactly with Distribution Document.
1) Attach printed slip to Document.
Enter “N” if merchandise received does not match the Distribution Documents (Over or short).
1) Attach printed slip to Document.
2) Enter or scan the SKU or UPC Code(s) of the merchandise that does not match and enter quantity
“Short” or “Over”.
3) Once complete, select <F1 Update>.
Stage 9.1 POS User Manual
www.gemmar.com
Page 51 of 186
9.1.3.2
Transfer Menu
1) From the Main Menu, select <Inventory>.
2) Select <B - Transfer Menu>
Stage 9.1 POS User Manual
www.gemmar.com
Page 52 of 186
9.1.3.2.1
Transfer Out
1) Select <A - Transfers Out>, enter Employee ID.
2) Enter the Store Number where merchandise is being transferred.
3) Enter or scan the SKU(s) or UPC Code(s) of item(s) being transferred.
4) Enter the quantity being transferred or scan each item individually
5) Repeat steps 3 & 4 for each item being transferred.
6) Select <F1 Update> when the transfer is done.
7) Choose the reason for Transfer.
8) Enter “Y” for Duplicate Receipt or “N” if no duplicate is needed.
9) Attach one receipt to the merchandise being transferred. If a duplicate receipt was printed, keep it in
the store for future reference.
Stage 9.1 POS User Manual
www.gemmar.com
Page 53 of 186
9.1.3.2.2
Confirm Merchandise Being Transferred Out
1) Select <B - Confirm Out>, enter Employee ID.
2) Enter Transfer Reference Number, or press <Enter> to open a window listing all Unconfirmed
Transfers.
Completed? (Y/N)
Enter “Y” if all items requested are available to be transferred.
1) A receipt will print “Transfer Completed”, attach this to your Transfer Receipt.
Enter “N” if unable to transfer all items as requested.
1) A window will open, displaying the SKU(s) in the Transfer, allowing you to make the appropriate
changes to the quantities. Enter the quantities you have available to transfer.
2) Select <F9 Update> when done.
3) Two receipts will print; the first receipt is a Variance Report, the second is the New Transfer Receipt.
4) Staple the Variance Report to the Original Transfer Receipt and send the New Transfer Receipt, along
with the items, to the corresponding store.
Stage 9.1 POS User Manual
www.gemmar.com
Page 54 of 186
9.1.3.2.3
To Confirm Received Merchandise
1) Select <C - Confirm In>, enter Employee ID.
2) Enter Reference Number of Transfer Received, or press <Enter> to open a window listing all
Unconfirmed Transfers.
3) Enter the Store Number of where the merchandise came from.
Completed? (Y/N)
Enter “Y” if merchandise received matches exactly with the transfer.
1) A receipt will print, “Transfer Completed”, attach this to the Transfer Receipt you received with the
merchandise.
Enter “N” if merchandise received does not match with the Transfer.
1) Enter or scan the SKU(s) or UPC Code(s) of the merchandise that does not match and enter quantity
“Short” or “Over”.
2) Select <F9 Update> when done.
3) A receipt will print, “Uncompleted Transfer”, defining the variance.
4) Sign and attach to the Transfer Receipt you received with the merchandise.
Stage 9.1 POS User Manual
www.gemmar.com
Page 55 of 186
9.1.3.2.4
View Transfer(s) In Transit
1) Select <D - In Transit>, enter Employee ID.
2) A window will open listing all incoming Transfer(s).
3) Use the ↑↓ keys to highlight the Transfer you wish to inquire upon.
4) When it is highlighted, press <Enter> to view the Details of the Transfer.
Stage 9.1 POS User Manual
www.gemmar.com
Page 56 of 186
9.1.3.2.5
Warehouse Request
1) Select <E - Warehouse Request>, enter Employee ID.
2) Enter Department Number.
3) Enter Warehouse Number.
4) Enter or scan the SKU(s) or UPC Code(s) you wish to request.
5) Enter quantity(s).
6) Select <F9 Update> when done.
9.1.3.2.6
Convert Transfer File
1) Select <F - Convert Tran. File>, enter Employee ID.
2) The system will now ask you if ‘You are ready to Convert Y/N?’ If the download from the PDT is
complete, answer ‘Y’. If the download is incomplete, answer ‘N’.
NOTE: May only be used in conjunction with the PDT Device
Stage 9.1 POS User Manual
www.gemmar.com
Page 57 of 186
9.1.3.2.7
Outgoing Transit
Note: if the “Force Case” field is active, this
menu will not be available.
Select R-Outgoing Transit, enter your employee ID.
The screen will display all the out-going transfers.
Use the arrow keys to highlight a specific transfer reference number and press Enter to view the details.
Stage 9.1 POS User Manual
www.gemmar.com
Page 58 of 186
9.1.3.3
Physical Inventory
1) From the Main Menu, select <Inventory>.
2) Select <C - Physicals>
Stage 9.1 POS User Manual
www.gemmar.com
Page 59 of 186
9.1.3.3.1
Prepare Count Sheet
Select <A - Count Sheet>, enter Employee ID.
<F1 By Supplier>
1) Enter Supplier
2) Enter Style
<F2 By Class>
1) Enter Department
2) Enter Class
<F8 Print>
Prints Count Sheet
Stage 9.1 POS User Manual
www.gemmar.com
Page 60 of 186
9.1.3.3.2
Count Sheet Entry
1) Select <B - Count Sheet Entry>, enter Employee ID.
2) Enter Batch Number on the Count Sheet.
3) Enter quantities for each item.
4) Select <F2 Update> when complete.
Stage 9.1 POS User Manual
www.gemmar.com
Page 61 of 186
9.1.3.3.3
Scanner/Manual Entry
1) Select <C - Scanner / Manual>, enter Employee ID.
2) Enter Batch Number or press <Enter> for the system to assign a Batch Number.
3) Enter or scan the SKU(s) or UPC Code(s).
4) Enter Quantity(s) or scan each item
5) Select <F9 Update> when done.
6) Repeat Step 2- 5 for all consecutive Batches.
<F1 Add>
1) Enter or scan the SKU or UPC Code(s) to Add to the Batch.
2) Select <F9 Update> when done.
<F2 Modify>
1) Use the ↑↓ keys to select the SKU, make necessary changes to the quantity.
2) Select <F9 Update> when done.
<F3 Delete>
1) Use the ↑↓ keys to select the SKU to be Deleted and press <Enter> when it is highlighted. An asterisk
(*) will appear beside the item.
2) Repeat the above process for each SKU you wish to delete.
3) Select <F9 Update> when done.
Stage 9.1 POS User Manual
www.gemmar.com
Page 62 of 186
<F4 View>
Use the ↑↓ keys to move through the Batch, in order to view which items the Batch may contain.
<F8 Print>
Prints the Batch.
9.1.3.3.4
Batch List
1) Select <D - Batch List>, enter Employee ID.
2) Enter the Batch Numbers you wish to print.
3) Select <F1 Print>.
9.1.3.3.5
MSI Download
To be used after an MSI is downloaded into the POS.
Stage 9.1 POS User Manual
www.gemmar.com
Page 63 of 186
9.1.3.4
Purchase Orders
1) From the Main Menu, select <Inventory>.
2) Select <D - Purchase Order>.
Stage 9.1 POS User Manual
www.gemmar.com
Page 64 of 186
9.1.3.4.1
Decentralized Ordering (Entering a Purchase Order)
1) Select <A - Decentralized>, enter Employee ID.
2) Use the ↑↓ keys to highlight the P.O.# you wish to work with, then select <F9> when done.
3) Choose one of the options listed below, and depending on your choice, this is how the system will
sort the P.O.:
A) P.O.#
B) Code
C) Supplier Style
D) Department
E) Description
4) Enter quantities to order.
5) Select <F9 Update> when done; a receipt will print listing the items you ordered and their quantities.
NOTE: Use at the store level to enter quantities for predetermined items in an existing Purchase Order
at head office.
Stage 9.1 POS User Manual
www.gemmar.com
Page 65 of 186
9.1.3.4.2
Purchase Order Receipt
1) Select <B - Receiving>, enter Employee ID.
2) Enter P.O. Number.
3) Enter the Packing Slip #.
4) Enter a specific Style Number or select <F2 Next Style> to toggle between the multiple styles existing
on the P.O.
5) Enter specific quantities received, or select <F3 Received as Ordered>.
6) Once the quantities received are entered for each style, the system automatically updates this
information and you will be asked if you want to print “Y” or “N”.
“Y” will generate a report of the articles you have just received.
“N” will generate a copy of the entire purchase order with all of the quantities received that day.
9.1.3.4.3
Print Open PO
Select <C - Print Open Po S>, enter Employee ID. All incomplete Purchase Orders will print.
Note: In versions 11.3+, we have added a selection by Supplier which will only print the purchase orders
for the selected supplier. To print all suppliers, leave the field blank. The report will no longer print
automatically; the user must select F8-Print when ready.
Stage 9.1 POS User Manual
www.gemmar.com
Page 66 of 186
9.1.3.4.4
PO Request
1) Select <D - P.O. Request>, enter Employee ID
2) Press <Enter> for the P.O. Request #, and the system will assign a number.
3) Enter Vendor code or press <Enter> for selection.
4) Enter the required dates.
5) Enter the Product Code or press <Enter> for selection.
6) Enter quantity and press <Enter>.
7) Select <F1 P.O.> to print the Purchase Order when complete.
Stage 9.1 POS User Manual
www.gemmar.com
Page 67 of 186
9.1.3.4.5
PO Inquiry
1) Select <E - P.O. Inquiry>, enter Employee ID
2) Select <F1 Request> for Purchase Orders by PO Number or <F2 Supplier> for Purchase Orders by
Supplier
3) Enter Request # or Supplier # or press <Enter> to list Open P.O. Request(s).
4) If you pressed enter a box will pop open with all P.O. Requests for you to choose the Purchase Order
by using the and then press <Enter>
5) Select <F8 Print>.
Stage 9.1 POS User Manual
www.gemmar.com
Page 68 of 186
9.1.3.4.6
Receiving by Sku
1) Select <F - Receiving By SKU>, enter Employee ID
2) Enter P.O. Number.
3) Enter the Packing Slip #.
4) Enter or scan the SKU or UPC Code and the system will default a quantity received of one.
5) While receiving, if <F2 Modify> is selected, the system will bring the cursor back to the quantity
received of the last SKU entered, allowing you to Modify the quantity.
6) When all items are entered, select <F9 Update> and a report will print of all of the items you have
received.
7) While receiving, if <F8 Print Variance> is selected, the system will print a Variance Report of all items
received to date.
Stage 9.1 POS User Manual
www.gemmar.com
Page 69 of 186
9.1.3.4.7
PO Report
1) Select <G - PO Report>, enter Employee ID
2) Enter a specific P.O Number and the system will automatically print the P.O. you requested OR
3) Press <Enter> to have the system look through all existing Purchase Orders. Then choose between “C”
for complete purchase orders, “N” for Incomplete or “A” for all purchase orders, depending on the
needed results.
Note: in versions 11.3+, the UPC code will print on the report underneath the SKU.
9.1.3.4.8
Convert P.O. File
1) Select <H - Convert PO File>, enter Employee ID
2) The system will ask you if ‘You are ready to Convert Y/N?’. If the download from the PDT is
complete, answer ‘Y’. If the download is incomplete, answer ‘N’.
NOTE: May only be used in conjunction with the PDT Device
Stage 9.1 POS User Manual
www.gemmar.com
Page 70 of 186
9.1.3.5
Print Tickets
1) From the Main Menu, select <Inventory>.
2) Select <E - Print Tickets>.
3) Enter the SKU or select <F7 Scan> and scan through the Inventory.
4) Selecting <F1 By Sku> or <F2 By Style> will alternate between SKU or Supplier fields.
5) Enter the quantity of tickets for that particular SKU.
6) Select <F8 Print>.
NOTE: May only be used in conjunction with a separate Ticket printer
Stage 9.1 POS User Manual
www.gemmar.com
Page 71 of 186
9.1.3.6
Store Supply Ordering
1) From the Main Menu, select <Inventory>.
2) Select <F - Store Supplies>.
3) Use the ↑↓ keys to move through the list; enter the necessary quantities for the items you wish to
Order.
4) Select <F1 Last Order> on a certain item to see if and when it was Last Ordered.
5) Select <F4 Print> and a copy of your Order will print.
Stage 9.1 POS User Manual
www.gemmar.com
Page 72 of 186
9.1.3.7
Consumption Menu
1) From the Main Menu, select <Inventory>.
2) Select <G - Consumption>.
Stage 9.1 POS User Manual
www.gemmar.com
Page 73 of 186
9.1.3.7.1
Consumption
1) Select <A - Consumption>, enter Employee ID.
2) Enter or scan the SKU or UPC Code(s) and enter a quantity in either the “Consumed” or “Perished”
Field. A consumed item is being used for in-store use and will be later sold whereas a perished item is
not suitable for sale now and never will be.
3) Once everything is entered, press <F1 Update> and a Report will be generated.
Stage 9.1 POS User Manual
www.gemmar.com
Page 74 of 186
9.1.3.7.2
Consumption Report
1) Select <B - Consumption Report>, enter Employee ID.
2) Enter the dates for which you want a Report generated; this will print automatically.
Stage 9.1 POS User Manual
www.gemmar.com
Page 75 of 186
9.1.3.7.3
End of Roll
NOTE: This is a special module for the Fabric industry
1) Select <C - End of Roll>, enter Employee ID.
2) Enter or scan the SKU or UPC Code(s) for the Rolls of Fabric that are at/near the end and cannot be
sold.
3) When all items have been entered, select <F8 Update> and a Report of these items will automatically
print.
Stage 9.1 POS User Manual
www.gemmar.com
Page 76 of 186
9.1.3.8
Multiple Remnants Entry
NOTE: This is a special module for the Fabric industry and there is special setup required at Head Office
(i.e.: Supplier RRR has to be created for the remnants, etc.)
1) From the Main Menu, select <Inventory>.
2) Select <H - Multiple Remnants Entry>.
Stage 9.1 POS User Manual
www.gemmar.com
Page 77 of 186
9.1.4
C- Management Menu
Stage 9.1 POS User Manual
www.gemmar.com
Page 78 of 186
9.1.4.1
Daily Cash Control
1) From the Main Menu, select <Management>.
2) Select <A - Daily Cash Control>, enter Employee ID
3) Select <F1 Print> for the report.
Stage 9.1 POS User Manual
www.gemmar.com
Page 79 of 186
9.1.4.2
Daily Cash Declaration
1) From the Main Menu, select <Management>.
2) Select <B - Cash Declaration>, enter Employee ID
3) Use the ↑↓ to highlight the line “Cash”, press <Enter> and a window will open up. Enter the amounts
for each denomination and press <Enter> after each entry. If an error is made, use the ↑↓ keys to bring
you to that entry and type in correct amount. Press <Enter> through to the end.
4) Use the ↑↓ to highlight the line “Check”, press <Enter> to open up the window and then enter each
check amount pressing <Enter> after each one. Press <Enter> through to the end. Do the same for
Credit Cards, Coupons, Store Card, Etc.
5) For Travelers Checks and US/CDN Funds simply enter total amount received.
Stage 9.1 POS User Manual
www.gemmar.com
Page 80 of 186
6) When all amounts have been registered for all of the necessary tender types, select <F2 Update>. A
Report will print and the screen will display any/all Variances between the Declaration and the Register.
7) Press [F2] if any Modifications need to be made; make any/all necessary Modifications.
8) Press [F9] to confirm the deposit when all modifications have been made; Daily Deposit report will
print.
9.1.4.3
No Sale Function (Open Cash Drawer)
1) From the Main Menu, select <Management>.
2) Select <C - No Sale Function>, enter Employee ID
3) Cash drawer will automatically open; sign corresponding receipt; give “Reason”.
Stage 9.1 POS User Manual
www.gemmar.com
Page 81 of 186
9.1.4.4
Staff Menu
1) From the Main Menu, select <Management>.
2) Select <D - Staff Menu>, enter Employee ID
Stage 9.1 POS User Manual
www.gemmar.com
Page 82 of 186
9.1.4.4.1
Employee File/ Condensed Employee File
Select <A - Employee Menu> and then <A - Employee File> or <B - Condensed Employee File> and enter
Employee ID.
To Add a New Employee
1) Select <F1 Add>.
2) Enter Employee Information; enter through to the end
To Modify an Existing Employee
1) Select <F2 Modify>.
2) Enter Employee Code.
3) Make necessary modifications; enter through to the end
To Scan Through Employees
1) Select <F7 Scan>.
2) You can either press the space bar to see a list of all employees and then you the ↑↓ keys to highlight
a particular employee or you can continue selecting <F7 Scan> to go through the employees.
To Print all Employees
Select <F8 Print>; a list will print of all Employees in the system.
Stage 9.1 POS User Manual
www.gemmar.com
Page 83 of 186
9.1.4.4.2
Punch Clock
1) Select <B - Punch Clock> and enter Employee ID.
2) A window will open displaying the Employee’s Name, CODE # and a choice of different Tasks to
choose from.
Stage 9.1 POS User Manual
www.gemmar.com
Page 84 of 186
3) Choose the appropriate Task using the ↑↓ keys, when highlighted press <Enter> to accept.
4) Press <ESC> to Exit.
NOTE: Shift + F4 can be used to access the Punch Clock while in any Menu
9.1.4.4.3
Scheduling
1) Select <C - Scheduling> and enter Employee ID.
2) Enter the Date you wish to begin the schedule with
F1-Schedule
1) Select <F1 Schedule>.
2) Use the ↑↓ keys to highlight the Day and the Employee you wish to schedule hours for; when
highlighted press <Enter>.
3) A window will open displaying the Employee’s Name, CODE # and a choice of different Tasks to
choose from.
4) Enter the appropriate time period (IN and OUT) using military hours, and choose a corresponding
Task using the ↑↓ keys; when highlighted press <Enter> to accept.
5) Repeat the above process for each time period.
6) Press <ESC> when done scheduling for this Employee.
7) Repeat Steps 2 through 6 for each consecutive Employee/Day.
Stage 9.1 POS User Manual
www.gemmar.com
Page 85 of 186
F2-Print One Employee Schedule
1) Select <F2 Print One>.
2) Use the ↑↓ keys to highlight the employee to be printed; press <Enter> to print
This prints the Employee’s Schedule for the entire week.
F3-Print All Employee Schedules
Select <F3 Print All>. – Automatically prints all Employees Schedules for the entire week
Stage 9.1 POS User Manual
www.gemmar.com
Page 86 of 186
F4-Print One Day
1) Select <F4 Print One Day>.
2) Use the ↑↓ keys to highlight the Day to be printed; press <Enter> to Print Employees’ Schedules for
the specified Day.
F5-Graph Mode
1) Select <F5 Graph Mode>.
2) Use the ↑↓ keys to alternate Employee.
3) Use PG/UP & PG/DOWN to alternate days.
Stage 9.1 POS User Manual
www.gemmar.com
Page 87 of 186
9.1.4.4.4
Employee Hours Worked
1) Select <D - Hours Worked> and enter Employee ID.
2) Enter Date or press <Enter> to accept the Date displayed.
3) Use the ↑↓ keys to highlight the Employee you wish to modify.
4) Enter the Actual Hours; when done press <Enter>.
5) In the window that opens, enter the appropriate Hours in Selling/Non-Selling Time Slots; press
<Enter> when done.
6) Another window will open displaying various Reasons the Clock Hours do not match exactly with the
Scheduled Hours. Use the ↑↓ keys to highlight the appropriate Reason and press <Enter> to accept.
7) Repeat Steps 3-6 for each consecutive Employee.
8) Press [ESC] when complete.
NOTE: Be sure that if the Punch Clock hours are higher than the Scheduled hours, you must make a
correction in the Actual column. It is important that your manager confirm all of the hours before
polling. If not, the information will be invalid to head office.
Stage 9.1 POS User Manual
www.gemmar.com
Page 88 of 186
9) Enter the employee’s hours worked for the day split between hours worked doing sales (Selling Time)
and hours worked doing other non-sales tasks (Non Selling Time) if applicable.
10) Select a reason code from the Payroll Break Down window for the employee hours (i.e.: Regular
Hours, Overtime, etc.)
Stage 9.1 POS User Manual
www.gemmar.com
Page 89 of 186
9.1.4.4.5
Weekly Employee Hours Worked
1) Select <E - Weekly Hours> and enter Employee ID.
2) Enter Date or press <Enter> to accept the displayed Date.
3) Use the ↑↓ keys to highlight the employee (Emp.Cod. or Emp.Name) you wish to modify and press
<Enter>.
4) Enter the Actual Hours in the window that opens, enter the appropriate Hours in Selling/Non-Selling
Time Slots; press <Enter> when done.
5) Another window will open displaying various Reasons for the task. Use the ↑↓ keys to highlight the
appropriate Reason and press <Enter> to accept.
7) Repeat Steps 3-6 for each consecutive Employee.
8) Press [F8] to Print.
Stage 9.1 POS User Manual
www.gemmar.com
Page 90 of 186
9.1.4.4.6
Print Today’s Punch Clock
1) Enter Employee ID, Enter date
2) Select <Print Punch Clock> and today’s Punch Clock Hours will print
Stage 9.1 POS User Manual
www.gemmar.com
Page 91 of 186
9.1.4.5
Cashing a Check
1) From the Main Menu, select <Management>.
2) Select <E - Cash Check>, enter Employee ID
3) Enter Check Number.
4) Enter Amount of Check.
5) Enter Customer specifics on both lines.
6) Select <F1 Update> to Update Transaction.
7) Sign Receipt and attach to Check.
Stage 9.1 POS User Manual
www.gemmar.com
Page 92 of 186
9.1.4.6
Reports
1) From the Main Menu, select <Management>.
2) Select <F - Reports>
Stage 9.1 POS User Manual
www.gemmar.com
Page 93 of 186
9.1.4.6.1
Daily Transmission Listing
1) Select <A - Transmission List> and enter Employee ID.
2) Enter the date you wish to print, the report defining each transaction will print automatically.
Stage 9.1 POS User Manual
www.gemmar.com
Page 94 of 186
9.1.4.6.2
Employee Total Sales Listing
1) Select <B - Emp. Total Sales Listing> and enter Employee ID.
2) Enter Dates or press <Enter> to accept the Dates displayed.
3) Enter the Employee Code of a specific Employee, or press <Enter> to print all Employees; a report will
print listing the Employee(s) and their respective Net Sales Totals.
Stage 9.1 POS User Manual
www.gemmar.com
Page 95 of 186
9.1.4.6.3
Total Sales by Sku
1) Select <C - Sales By Sku> and enter Employee ID.
2) Enter Dates or press <Enter> to accept the Dates displayed.
3) A window will open, enter in a specific SKU; a Total Units Sold amount will be displayed.
4) If you wish to print a report for all SKUs Sold, press <ESC> once.
5) Enter Dates or press <Enter> to accept the Dates displayed; a report listing all SKUs Sold will print.
Stage 9.1 POS User Manual
www.gemmar.com
Page 96 of 186
9.1.4.6.4
Total Sales by Class Listing
1) Select <D - Sales By Class> and enter Employee ID.
2) Enter Dates or press <Enter> to accept the Dates displayed.
3) A report will print listing Total Sales by Class.
Stage 9.1 POS User Manual
www.gemmar.com
Page 97 of 186
9.1.4.6.5
Journal
1) Select <E - Journal> and enter Employee ID.
2) Enter Bill Number or press <Enter> for Date. If you press <Enter> on Bill Number and Date, it will
default to today’s date and you can make additional selections.
3) You will be prompted to enter "Y/N" for Print All:
Y= if you wish to Print All Transactions.
N= to Print only one Transaction.
4) To move from Bill to Bill, use the ↑↓ keys
5) Select <F8 Print> to Print.
Stage 9.1 POS User Manual
www.gemmar.com
Page 98 of 186
9.1.4.6.6
Employee Purchase
1) Select <F - Employee Purchase> and enter Employee ID.
2) Enter Dates or press <Enter> to accept the Dates displayed.
3) Enter a specific Employee ID or press <Enter> to print all Employees; a Report will print listing the
Employee(s) and their respective purchases.
Stage 9.1 POS User Manual
www.gemmar.com
Page 99 of 186
9.1.4.6.7
Refund/Exchange
1) Select <G - Refund/Exchange> and enter Employee ID.
2) Enter Dates or press <Enter> to accept the Dates displayed.
3) Enter "Y/N" for Summary.
Y= Only a Summary Report for the specified dates will print.
N= Both Detailed Report and Summary Report for the specified dates will print.
Stage 9.1 POS User Manual
www.gemmar.com
Page 100 of 186
9.1.4.6.8
Style/Color Ranking
1) Select <H - Style/Color Ranking> and enter Employee ID.
2) Enter Dates or press <Enter> to accept the Dates displayed.
3) Enter a denomination for Category, Department, and Class or press <Enter> to bypass.
4) Enter the number of Styles to be printed out.
5) Enter either "T/B" to get either the top sales (best) or bottom sales (worse).
6) Key in a price or <Enter> through.
7) Enter either “U/P” to categorize either by units sold or revenue (Price).
8) Select only the styles on-hand (Y) or select all (N).
9) Enter (Y) to Include Employee Purchases or enter (N) to exclude them.
10) The Style/Color Ranking Report will now print.
Stage 9.1 POS User Manual
www.gemmar.com
Page 101 of 186
9.1.4.6.9
Miscellaneous Fee Report
1) Select <I - Misc. Fee Report> and enter Employee ID.
2) Enter the From Date and To Date for which you want a report.
3) Enter the Miscellaneous Bill Code for which you want to report on or press <Enter> for all
Miscellaneous Bill Codes.
4) Choose Y(es) or N(o) for Summary Only.
5) Choose Y(es) or N(o) to Included Employee Purchases.
Stage 9.1 POS User Manual
www.gemmar.com
Page 102 of 186
9.1.4.7
Multiple Cash out Menu (If Option Turned On)
1) From the Main Menu, select <Management>.
2) Select <G - X-Cash Out>
Stage 9.1 POS User Manual
www.gemmar.com
Page 103 of 186
9.1.4.7.1
Multiple Cash out – Check Out
1) Select <A - Check Out>, enter Employee ID.
2) The system will ask Do Cash Declaration Now (Y/N):
Y = Generates a Deposit Slip with a Reference # and allows the cashier to access the Declaration right
away, in order to enter his/her tender amounts.
N = Generates a Deposit Slip with a Reference # the cashier can use at a later time, once their till has
been counted, to complete his/her Declaration.
If you chose N skip to next section (Multiple Cash Out - Declare).
If you chose Y:
3) Use the ↑↓ to highlight the line “Cash”, press <Enter> and a window will open up. Enter the amounts
for each denomination and press <Enter> after each entry. If an error is made, use the ↑↓ keys to bring
you to that entry and type in correct amount. Press <Enter> through to the end.
4) Use the ↑↓ to highlight the line “Check”, press <Enter> to open up the window and then enter each
check amount pressing <Enter> after each one. Press <Enter> through to the end. Do the same for Debit
and Credit Cards, Coupons, Store Card, Etc.
5) For Travelers Checks and US/CDN Funds simply enter total amount received.
Stage 9.1 POS User Manual
www.gemmar.com
Page 104 of 186
6) When all amounts have been registered for all of the necessary tender types, select <F2 Update>.
NOTE: In the operator instruction box it will say “Final Amounts will be confirmed when Store Settles”.
This means at the end of the day when all X-Cash Outs are done the final total will be confirmed.
Each X-Cash Out is assigned a “Cash Out” number. A report will print with the Cash Out Number and it
should be put with the cash to be confirmed at the end of the day.
Stage 9.1 POS User Manual
www.gemmar.com
Page 105 of 186
9.1.4.7.2
Multiple Cash out - Declare
This is used when you have said No to “Do Declaration Now” in <A - Cash Out> above.
1) Select <B - Declare>, enter the same Employee ID used in previous step.
2) A window will open displaying reference #’s. Use the ↑↓ keys to highlight the necessary reference #
from the list; when highlighted press <Enter> to accept.
3) Use the ↑↓ keys to highlight the line “Cash”, press <Enter> and a window will open up. Enter the
amounts for each denomination and press <Enter> after each entry. If an error is made, use the ↑↓ keys
to bring you to that entry and type in correct amount. Press <Enter> through to the end.
4) Use the ↑↓ keys to highlight the line “Debit Card”, press <Enter> to open up the window and then
enter each amount pressing <Enter> after each one. Press <Enter> through to the end. Do the same for
Checks, Credit Cards, Coupons, Store Card, Etc.
5) For Travelers Checks and US/CDN Funds simply enter total amount received.
6) Select <F2 Modify> (If there is a Variance)
7) Press <F9 Deposit> (If there is No Variance]). The reference # is not “complete”.
NOTE: The last cashier of the day, must, after completing his/her declaration, close the cash for the day
by completing a Daily Cash Control and a Daily Cash Declaration. All reference #s must be complete at
this stage, otherwise a printout of undeclared cashes with accompanying ref. #s will appear. With
Multiple Cash Outs, the Daily Cash Control and Declaration are simply cumulative reports. The Daily
Cash Control will continue to show sales throughout the day even when Cash Outs have been done.
There is no input necessary for the Daily Cash Declaration. A final Declaration is automatically generated
based upon the totals inputted for each Multiple Cash Out completed during the day.
Stage 9.1 POS User Manual
www.gemmar.com
Page 106 of 186
9.1.4.8
Activate Special Promotion
1) From the Main Menu, select <Management>.
2) Select <G - Activate Promotion> and enter Employee ID
3) A window will open listing all Promotion Types. Use the ↑↓ keys to highlight a Promotion and enter
I = Inactive; to de-activate a certain Promotion.
A = Active; to activate a certain Promotion.
4) Select <F1 Print> to print.
9.1.4.9
Customize Menu
1) From the Main Menu, select <Management>.
2) Select <H - Customize Menu>
NOTE: These programs are set up by your Head Office, at your Head Office and any questions relating
to items in this menu should be addressed to them.
Stage 9.1 POS User Manual
www.gemmar.com
Page 107 of 186
9.1.5
D- Inquiry Menu
Stage 9.1 POS User Manual
www.gemmar.com
Page 108 of 186
9.1.5.1
Inventory Inquiry by Store
1) From the Main Menu, select <Inquiry>.
2) Select <A - By Store>, enter Employee ID
This screen is broken down into 5 different sections in which you can manually enter in the criteria or
you can choose one of the following functions:
Stage 9.1 POS User Manual
www.gemmar.com
Page 109 of 186
F1-In Store
1) Enter Supplier Code.
2) Enter Style.
3) Displays inventory by Color and Size for the Style selected.
<F2 Scan>
1) Displays first sequential SKU or UPC Code entry in Inventory.
2) PG/UP & PG/DWN will allow you to scroll through the various SKU/UPC Codes; moving forward and
backwards respectively.
<F3 Region> - only available if region inquiry is turned on
Enter Region # or press <Enter>, a window will open listing all Regions, use the ↑↓ keys to select the
Region, press <Enter> to accept. Inventory Quantities listed will only be for the stores specified within
the chosen Region.
<F4 On Order>, <F4 On Hand>
Depending upon your Selection, either On Hand or On Order Quantities will be displayed.
Stage 9.1 POS User Manual
www.gemmar.com
Page 110 of 186
9.1.5.1.1
Code
1) Enter the SKU or UPC Code.
Note: An asterisk (*) will appear next to the
current price field for a SKU/style that has a
temporary markdowns.
<F1 Selection>
Enter a SKU or UPC Code and press <Enter> to view the information. Select <F1 – Selection> again to
return to the previous screen to inquire upon another SKU or UPC Code.
<F2 In Transit>
This indicates if the SKU or UPC Code you are inquiring upon is presently being transferred to your store.
A window will open displaying the corresponding Transfer Number(s) (excluding C-Transfers).
<F3 Layaway>
This indicates if the SKU or UPC Code you are inquiring upon has been put on Layaway. A window will
open displaying the corresponding Layaway Number(s).
<F4 Region> - only available if region inquiry is turned on
Enter Region # or press <Enter>, a window will open listing all Regions, use the ↑↓ keys to select the
Region, press <ENTER> to accept. Inventory quantities listed will only be for the stores specified within
the chosen Region.
<F5 Image>
Select this key to display any Images attached to the SKU or UPC Code you have inquired upon.
Stage 9.1 POS User Manual
www.gemmar.com
Page 111 of 186
<F6 Request> - Customer Order
1) Enter Customer Information.
2) Enter Quantity Ordered
3) Send Request to Head Office (Y/N):
Y = Will advise Head Office of your Request for the merchandise. Enter ‘Comments’ if necessary,
if not press <Enter> to bypass.
N = Will not advise Head Office of your Request for the merchandise.
Stage 9.1 POS User Manual
www.gemmar.com
Page 112 of 186
4) The system will display the suggested deposit amount, press <Enter> to accept the amount displayed.
5) If you wish to change the amount, enter the new amount and press <Enter>. If you do not wish to
leave a deposit, enter “0” for the amount.
6) Choose the method of payment.
7) Press “Y” for duplicate, if required.
<F7 On Order>
Depending upon your Selection, either On Hand or On Order Quantities will be displayed.
<F8 Holds>
This indicates if the SKU or UPC Code you are inquiring upon has been put on Hold. A window will open
displaying the corresponding Hold Number(s).
Stage 9.1 POS User Manual
www.gemmar.com
Page 113 of 186
9.1.5.1.2
Supplier/Style/Color/Size
1) Press <Enter> until you are at the first ‘Supplier’ field.
2) Enter the Supplier Code.
3) Enter Style/Color/Size if known, if not press <Enter> to bypass these fields
4) A box will pop up asking (G)roup or (R)egular. Group is only used if you are using Sub-SKUs. R for
Regular is a popular selection.
5) If you bypassed the Style/Color/Size fields a window will then pop up listing all styles for this supplier.
6) Use the ↑↓ keys to select the Style you wish to inquire on and then press <Enter> to view the
information at the color/size level
7) Refer to above section “CODE” for details concerning the same functions.
9.1.5.1.3
Supplier/Style
1) Press <Enter> until you are at the second ‘Supplier’ field
2) Enter the Supplier Code.
3) Enter the Style if known, if not press <Enter> to bypass this field
4) A window will pop up asking (G)roup or (R)egular. Group is only used if you are using Sub-SKUs.
Most often R for Regular will be the choice.
5) If you bypassed the Style field a box will then pop up listing all styles for this supplier.
6) Use the ↑↓ keys to select the Style you wish to inquire on and then press <Enter> to view the
information at the color/size level.
7) The same functions as “CODE” (above) will then be available to you.
Stage 9.1 POS User Manual
www.gemmar.com
Page 114 of 186
9.1.5.1.4
Class/Supplier
1) Press <Enter> until you are at the ‘Class’ field.
2) Enter the Class Code.
3) Enter the Supplier Code if known, if not press <Enter> to bypass this field.
4) If you bypassed the Supplier field, a window will then pop up listing all styles for this class.
5) Use the ↑↓ keys to select the Style you wish to inquire on and then press <Enter> to view the
information at the color/size level.
6) The same functions as “CODE” (above) will then be available to you.
9.1.5.1.5
Desc 1/Desc 2
1) Press <Enter> until you are at the ‘Desc. 1’ or the ‘Desc. 2’ field.
2) Enter a short description.
3) A window will then pop up listing all styles that have this description.
4) Use the ↑↓ keys to select the Style you wish to inquire on and then press <Enter> to view the
information at the color/size level.
5) The same functions as “CODE” (above) will then be available to you.
Stage 9.1 POS User Manual
www.gemmar.com
Page 115 of 186
9.1.5.2
Inventory Inquiry by Coordinate
1) From the Main Menu, select <Inquiry>.
2) Select <B - By Coordinate>, enter Employee ID
<F1 Scan>
Displays the available Coordinates.
Stage 9.1 POS User Manual
www.gemmar.com
Page 116 of 186
<F2 OH Analysis>
Use the ↑↓ keys to view items On Hand for a specified Coordinate code.
Stage 9.1 POS User Manual
www.gemmar.com
Page 117 of 186
9.1.5.3
Employee Net Sales per Hour
1) From the Main Menu, select <Inquiry>.
2) Select <C - Employee Sales>, enter Employee ID
3) Enter the Date or press <Enter> to accept the date displayed.
4) Enter the start and end times.
5) Answer (Y)es or (N)o to Include Employee Purchases in the results.
6) Enter a specific Employee Code or press [F3] for next employee.
7) The employee’s net sales per hour period will be displayed.
Stage 9.1 POS User Manual
www.gemmar.com
Page 118 of 186
9.1.5.4
Sales Inquiry Menu
1) From the Main Menu, select <Inquiry>.
2) Select <D - Sales Inquiry>
Stage 9.1 POS User Manual
www.gemmar.com
Page 119 of 186
9.1.5.4.1
Store Net Sales by Hour
1) Select <A - Sales By Hour> followed by the Employee ID
2) Enter Start Date or press <Enter> to accept the date displayed.
3) Enter the Start Time and End Time.
4) Answer (Y)es or (N)o to Include Employee Purchases in the results.
5) The store’s net sales per hour will be displayed.
Stage 9.1 POS User Manual
www.gemmar.com
Page 120 of 186
9.1.5.4.2
Sales Inquiry by Department
1) Select <B - By Department> followed by the Employee ID
2) Enter the From Date and To Date or press <Enter> to accept the dates displayed.
3) Answer (Y)es or (N)o to Include Employee Purchases in the results
4) Total sales by department will be displayed, including quantity sold.
5) Select <F1> to print.
Stage 9.1 POS User Manual
www.gemmar.com
Page 121 of 186
9.1.5.4.3
Sales Inquiry by Category
1) Select <C - By Category> followed by the Employee ID
2) Enter the From Date and To Date or press <Enter> to accept the dates displayed.
3) Answer (Y)es or (N)o to Include Employee Purchases in the results
4) Total sales by Category will be displayed, including quantity sold
5) Select <F1> to print
Stage 9.1 POS User Manual
www.gemmar.com
Page 122 of 186
9.1.5.4.4
Sales Inquiry by Style
1) Select <By Style> followed by the Employee ID
2) Enter the From Date and To Date or press <Enter> to accept the dates displayed.
3) Enter a specific department code or press <Enter> for all
4) Answer (Y)es or (N)o to Include Employee Purchases in the results
5) Total sales by Style will be displayed, including quantity sold
6) Select <F1Print> to print
Stage 9.1 POS User Manual
www.gemmar.com
Page 123 of 186
9.1.5.5
Aging Menu
1) From the Main Menu, select <Inquiry>.
2) Select <E - Aging Menu>
Stage 9.1 POS User Manual
www.gemmar.com
Page 124 of 186
9.1.5.5.1
Outstanding Gift Certificate Aging (If option is turned on)
1) Select <A - Certificate Aging> followed by the Employee ID
2) Enter the Certificate Number, or press <Enter> to enter Customer Phone Number.
3) Press <Enter> one more time to list all outstanding Gift Certificates.
4) Use the ↑↓ keys to view gift certificates.
5) Press <F8> to Print.
Stage 9.1 POS User Manual
www.gemmar.com
Page 125 of 186
9.1.5.5.2
Outstanding Credit Note Aging (If option turned on)
1) Select <B - Credit Note Aging> followed by the Employee ID
2) Enter the Credit Note Number, or press <Enter> to enter Customer Phone Number.
3) Press <Enter> one more time to list all Outstanding Credit Notes
4) Use the ↑↓ keys to view Credit Notes.
5) Press <F8> to Print.
Stage 9.1 POS User Manual
www.gemmar.com
Page 126 of 186
9.1.5.5.3
Outstanding Layaway Aging
When you are in the layaway module you can select F5 Aging, and a box will appear with 4 options.
Note: This menu is also accessible thru menu DEC-Layaway Aging Inquiry.
Customer Order, Layaway or Both (C/L/B):
C: Displays only layaways that correspond to customer orders.
L: Displays only regular layaways.
B: Displays all existing layaways, whether they are customer orders or regular layaways.
Refer to 3.11.5 Customer Orders for more details.
Deposit (B/Y/N):
B: Displays both layaways that have deposits and those that do not have deposits.
Y: Displays only layaways with deposits.
N: Displays only layaways with no deposit.
Past Due (B/Y/N):
B: Displays both layaways past due and those not past due.
Y: Displays only the layaways that are past due.
N: Displays only the layaways that are not past due.
Layaway Aging Date C/M:
C: The layaway aging date will be calculated from the original creation date.
M: The layaway aging date will be calculated from the last date of the modified layaway number.
Stage 9.1 POS User Manual
www.gemmar.com
Page 127 of 186
Use the ↑↓ keys to view the Layaways.
As asterisk (*) will appear next to layaways
that originated as customer orders.
The last column displays an “H” for layaways containing historical data. If you highlight a layaway with
an “H” in the last column, you can then press F7-History to view the history details.
Press ESC to close the history window.
To print a list of all the aging layaways in this list press F8-Print.
Stage 9.1 POS User Manual
www.gemmar.com
Page 128 of 186
Here is an example of the printed list:
Stage 9.1 POS User Manual
www.gemmar.com
Page 129 of 186
9.1.5.5.4
Outstanding Hold Aging
1) Select <D - Hold>
2) A list of all Holds will be displayed
Use the ↑↓ keys to view holds.
Select F8 to print
9.1.5.5.5
Paid In/Paid Out Inquiry
1) Select <E - Paid In/Paid Out>
2) Select:
<F1 In> to view Paid In’s
<F2 Out> to view Paid Out’s
<F3 All> to view both Paid In’s and Paid Out’s
Stage 9.1 POS User Manual
www.gemmar.com
Page 130 of 186
9.1.5.6
Average Sales
1) From the Main Menu, select <Inquiry>.
2) Select <F - Average Sales> followed by Employee ID
3) Enter required Dates.
4) Enter a specific Employee Code or press <Enter> to list all.
5) “Totals Only Y/N”
Y= Will only Print/Display the last recorded transaction date for the employee(s) for the dates
requested
N= Will Print/Display all information for all employees for the dates requested
6) If you had entered through the Employee #, use the ↑↓ keys to move from one employee to another.
7) Press <F2> to zoom to a specific employee code or the store totals
8) Press <F1> to print
Stage 9.1 POS User Manual
www.gemmar.com
Page 131 of 186
9.1.5.7
Employee Budget
1) From the Main Menu, select <Inquiry>.
2) Select <G - Employee Budget> followed by Employee ID
3) Enter the From and To Dates.
4) Enter a specific Employee Code or press <Enter> to list all.
Stage 9.1 POS User Manual
www.gemmar.com
Page 132 of 186
5) To move from one Employee to another use the ↑↓ keys.
6) Press <Enter> to see Budget details for an Employee.
7) Press <F1> if you wish to print
Stage 9.1 POS User Manual
www.gemmar.com
Page 133 of 186
9.1.5.8
Feature Inquiry
1) From the Main Menu, select <Inquiry>.
2) Select <H - Feature Inquiry> followed by Employee ID
3) Enter a specific Feature Code, or press <Enter> to have a window with available features to choose
from. Use the ↑↓ keys to highlight a Feature in the window and press <Enter> to accept it.
4) Once all of your Features have been entered, select either <F1 ‘Or’ Process> or <F2 ‘And’ Process> to
have the system begin the Search.
<F1 ‘Or’ Process> will bring up information where at least one of the features entered will match
the supplier/style displayed.
<F2 ‘And’ Process> will bring up information where all the features entered will match the
supplier/style displayed
5) Select <F9 By Sku> to see the information at the SKU level instead of the Supplier/Style Level
6) To move from one Style or SKU to another use the ↑↓ keys.
7) Press <Enter> once a Style or SKU is highlighted and you will be brought to the Store Inquiry screen
with all of the same options as the inquiry ‘By Store’.
Stage 9.1 POS User Manual
www.gemmar.com
Page 134 of 186
9.1.5.9
Parameter Inquiry
1) From the Main Menu, select <Inquiry>.
2) Select <I - Parameter Inquiry> followed by Employee ID
3) Enter a specific Parameter Code or press <Enter> to bring up a list of parameters to inquire on
4) After entering the Parameter, enter the Range you want to view within this Parameter.
5) Once all of your Parameters and respective Ranges have been entered, press either <F1 ‘Or’
Process> or <F2 ‘And’ Process> to have the system begin the Search.
<F1 ‘Or’ Process> will bring up information where at least one of the Parameters and Ranges
entered will match the Supplier / Style displayed.
<F2 ‘And’ Process> will bring up information where all of the Parameters and Ranges entered will
match the Supplier / Style displayed.
Stage 9.1 POS User Manual
www.gemmar.com
Page 135 of 186
9.1.5.10
Charge Sales
NOTE: This is a custom report that works in conjunction with a special module that was designed for a
customer.
1) From the Main Menu, select <Inquiry>.
2) Select <J - Charge Sales> followed by Employee ID
3) Enter the From and To Dates for the report and the report will print.
Stage 9.1 POS User Manual
www.gemmar.com
Page 136 of 186
9.1.6
E- Maintenance Menu
Stage 9.1 POS User Manual
www.gemmar.com
Page 137 of 186
9.1.6.1
Control File
This function is completely maintained by Head Office. The POS should not have to access it. If any
modifications are required, please contact the proper Head Office personnel or GSI Support.
9.1.6.2
Miscellaneous Bill Codes
This function is completely maintained by Head Office. The POS should not have to access it. If any
modifications are required, please contact the proper Head Office personnel.
9.1.6.3
Store Selection
1) From the Main Menu, select <Maintenance>.
2) Select <C - Store Selection> followed by Employee ID
3) Enter the necessary store numbers
4) Press <F8 Update> when complete
Stage 9.1 POS User Manual
www.gemmar.com
Page 138 of 186
9.1.6.4
Reason Menu
This function is completely maintained by Head Office. The POS should not have to access it. If any
modifications are required, please contact the proper Head Office personnel.
9.1.6.5
Image Entry by Style
1) From the Main Menu, select <Maintenance>.
2) Select <E - Image Entry> followed by Employee ID
3) Enter Supplier Code or press <Enter> and a window will open displaying a list of Supplier Code(s). Use
the ↑↓ keys to select a Supplier/Style and press <Enter>. The Image of the article will appear on screen.
[F1] View Image
Displays the Image for the Supplier and Style entered.
[F2] Scan
Allows you to scan through the available Suppliers and Styles with Images attached to them.
Stage 9.1 POS User Manual
www.gemmar.com
Page 139 of 186
9.1.6.6
Bill Messages
This function is completely maintained by Head Office. The POS should not have to access it. If any
modifications are required, please contact the proper Head Office personnel.
9.1.6.7
Update from Diskette
1) From the Main Menu, select <File Maintenance>.
2) Select <G - Update From Diskette> followed by Employee ID
3) When the Message “Please insert Update Diskette in Drive A:
Press any key when “ready”” appears please insert Disk #1; Insert any consecutive disks as required.
9.1.6.8
Tender Menu
9.1.6.8.1
Tender Maintenance
This function is completely maintained by Head Office. The POS should not have to access it. If any
modifications are required, please contact the proper Head Office personnel or GSI Support
9.1.6.8.2
Exchange Rate
This function is completely maintained by Head Office. The POS should not have to access it. If any
modifications are required, please contact the proper Head Office personnel or GSI Support
Stage 9.1 POS User Manual
www.gemmar.com
Page 140 of 186
9.1.7
F- Polling Menu
Stage 9.1 POS User Manual
www.gemmar.com
Page 141 of 186
9.1.7.1
End of Day
1) From the Main Menu, select <Polling>.
2) Select <A - End of Day>
NOTE: At this point, the system will open a window displaying any employees not punched out. Press
<Enter> and the system will automatically punch out those employees and go into polling.
Stage 9.1 POS User Manual
www.gemmar.com
Page 142 of 186
9.1.7.2
Manual Polling
1) From The Main Menu, Select <Polling>.
2) Select <B - Manual Polling>
3) A Window Will Pop Up Warning You That Any Transactions Processed Prior To Manual Polling Cannot
Be Post Voided. Press <Enter> and the System Will Automatically Go Into Manual Polling
Stage 9.1 POS User Manual
www.gemmar.com
Page 143 of 186
9.1.7.3
Close No Polling
1) From the Main Menu, select <Polling>.
2) Select <C - Close No Polling>
NOTE: In a network or peer-to-peer environment this function should be used by all Cashes before
putting the designated polling cash into polling (usually Cash 01) when setting up for Polling each night
9.1.7.4
Reprint Polling
Use this function when the printer jams and you do not receive your reports from polling
1) From the Main Menu, select <Polling>.
2) Select <D - Reprint Polling>
3) Enter the Date for the Reports of Markdowns, Transfers and Punch Clock Hours you wish to have
printed. These Reports will then automatically print.
9.1.7.5
Backup
NOTE: Do not use unless instructed by GSI Support
1) From the Main Menu, select <Polling>.
2) Select <F - Backup>
9.1.7.6
Restore from Net
NOTE: Do not use unless instructed by GSI Support
1) From the Main Menu, select <Polling>.
2) Select <G - Restore From Net>
9.1.7.7
Forced Update Poll
NOTE: Do not use unless instructed by GSI Support
1) From the Main Menu, select <Polling>.
2) Select <H - Forced Update Poll>
9.1.7.8
Head Office Physical Inventory Count Sheet
This is used to reprint a Physical Inventory count Sheet that was sent from Head Office through polling,
if necessary.
1) From the Main Menu, select <Polling>.
2) Select <I - Bo Physical Inventory>
Stage 9.1 POS User Manual
www.gemmar.com
Page 144 of 186
9.1.8
G- Modules Menu
Stage 9.1 POS User Manual
www.gemmar.com
Page 145 of 186
9.1.8.1
Training Mode
1) From the Main Menu, select <Modules>.
2) Select <A - Training Mode>
3) Enter an Authorization Code.
4) “Training Mode” will now flash at the top of the screen. You may now process any/all transactions.
These transactions will not affect your regular cash register.
5) To exit the Training Mode, press <Close> until this is displayed:
‘Are You Sure you want to exit Training Mode Y/N’.
If you answer ‘Y’, you will be returned to the regular Main Menu.
9.1.8.2
Store Traffic Counter
NOTE: This function may only be used in conjunction with either a Bunyard-Malenfant or Prodco Store
Traffic Counter
1) From the Main Menu, select <Modules>.
2) Select <B – STC Menu> followed by your Employee ID
3) Enter the Start Date you wish to have the Store Traffic Counter display information for and this
information will then be displayed.
4) If you press <F1>, this will display the information for the next day within the seven day week.
5) If you press <F2>, this will display the information for the previous day within the seven day week.
6) If you press <F3>, this will display the information totals for the entire week.
Stage 9.1 POS User Manual
www.gemmar.com
Page 146 of 186
9.1.8.3
Cutting table
NOTE: This function is used in the Fabric Industry
1) From the Main Menu, select <Modules>.
2) Select <B - Cutting Table>
3) You must enter the Customer Information, this cannot be bypassed.
4) Enter or scan the SKU or UPC Code.
5) Enter the quantity and press <Enter> to accept it.
6) If you wish to apply a Discount to the last item entered, you must press <F1 Discount> prior to
pressing <Enter> to accept the quantity. Select the Reason for the Discount using the ↑↓ keys.
7) Enter amount of Discount either in $ or %, then press <Enter> to accept.
8) To modify an existing SKU, press <F2 Modify>, and use the ↑↓ keys to highlight the specific SKU.
Once highlighted, press <Enter> to accept. The system will now allow you to modify the quantity and
the price for that SKU.
9) To void an existing SKU, press <F6 Void>, and use the ↑↓ keys to highlight the specific SKU. Once
highlighted, press <Enter> to accept. That SKU has been voided.
10) When all items have been entered, press <F9 Update>. A Cutting Table Receipt will automatically
print.
11) To add to this existing Cutting Table Receipt, simply re-access the Cutting Table Module using the
same Customer Information, and enter in any new SKU(s), pressing <F9 to Update> when done.
12) To pick-up the Cutting Table Receipt, use the Sales Module. Enter the same Customer Information
from the creation of the Cutting Table Receipt, and the SKU(s) will automatically be inputted on the
Sales Screen. Make any necessary modifications.
Stage 9.1 POS User Manual
www.gemmar.com
Page 147 of 186
9.1.8.4
Case Menu
NOTE: This menu is for the Jewelry Industry and requires daily jewelry case counts.
1) From the Main Menu, select <Modules>.
2) Select <Case Menu>
Stage 9.1 POS User Manual
www.gemmar.com
Page 148 of 186
9.1.8.4.1
Case Maintenance
1) Select <A - Maintenance>. This screen allows you to create or modify Case Codes
This maintenance is created and controlled by head office. It contains a listing of all cases in the system.
It is only for inquiry purposes; therefore you cannot make any changes. You can only view and/or print.
The following explains each of the fields:
Code: The case number
Description: The description of the case
Count Option (Y/N):
Non Selling (Y/N): Whether items from this case can be sold at the POS. Therefore, you cannot sell any
items that are in a case that is flagged as Non Selling “Y”.
Type: The type of case. A case can be flagged as one of the following:
M – Merchandise
T – Trade In
L – Layaway
K – Break-up
D – Build
H – Hold
Select F4-Scan, and press enter to view the cases.
Select F8-Print if you wish to print a list of this maintenance.
Stage 9.1 POS User Manual
www.gemmar.com
Page 149 of 186
9.1.8.4.2
Case Inquiry
1) Select <B - Case Inquiry>. In this menu, you can view the contents of a case.
2) Select whether you prefer to see the case contents listed by SKU number or by UPC number. Enter S
for SKU or U for UPC.
3) Use the arrow keys to select the case. Press <Enter> to accept.
4) The SKUs/UPCs within the selected case will appear on the right side. You will also see the
description and the on hand quantity.
Select F8-Print to print a list if required
Stage 9.1 POS User Manual
www.gemmar.com
Page 150 of 186
9.1.8.4.3
Case EOD Slip
Select <C - Case EOD Slip>. When you select this option, the system will automatically print the “End of
Day” case count slip.
This can be used to enter individual case counts at the end of each day for example.
The list includes the case number, the case description and a space where you can write the quantity for
each case.
When you have completed the counts, the next step is to go to the Close Case menu to enter your case
counts in the “Close Case” menu.
Stage 9.1 POS User Manual
www.gemmar.com
Page 151 of 186
9.1.8.4.4
Close Case
1) Select <D - Close Case>. After you enter your employee ID, the system will display the following
window:
2) You are shown a list of all cases that have inventory. Enter the total quantity for each case. See
example below.
Stage 9.1 POS User Manual
www.gemmar.com
Page 152 of 186
3) Select F9-Terminate to print a list of the case quantities you’ve entered so far if required. Note that if
you have not entered any quantities at all, and you select F9, the system will print a blank report.
4) When you have completed entering the counts for all cases, select F1-Update. You will be asked to
select the type of print out:
A-Print All – To print the counts for all cases
B-Print Balanced – To print only the case(s) for which the count(s) balanced
C-Print Unbalanced- To print only the case(s) for which the count(s) was not balanced
Select the option according to your needs and the report will automatically print.
Stage 9.1 POS User Manual
www.gemmar.com
Page 153 of 186
9.1.8.4.5
Case Report
1) Select <E - Case Report>. In this option, you can print out the details of specific cases.
2) Enter the case number or range of case numbers you wish on the report. Select F8-Print.
3) The report will show each case (as per the range of case number you indicated), the SKU(s)/UPC(s)
within and the quantity for each item. There is also a total quantity by case.
Stage 9.1 POS User Manual
www.gemmar.com
Page 154 of 186
9.1.8.4.6
Download Case Details
You should only use this option if instructed to do so by your Head Office. This program is used to
create physical inventory records to send to your Head Office.
Select <F - Download Case Dtl>
After you enter your employee ID, the download will automatically start. You will see “UPDATE IN
PROGRESS” in the operator instructions. A window will also appear to display the percentage
completion of the file download.
Stage 9.1 POS User Manual
www.gemmar.com
Page 155 of 186
9.1.8.4.7
Case Built Report
1) Select <G - Case Built Report>. In this menu, you can print a list of case items that were built.
2) Select the “From” and “To” dates or press enter to accept only today’s date.
A list will automatically print showing you the following:
•
•
•
•
•
•
•
Date
Bill number
Customer
Type
Status
Sku
Sku description
If there are no builds in your system, a receipt will print indicating “NO BUILDS FOUND”
Stage 9.1 POS User Manual
www.gemmar.com
Page 156 of 186
9.1.8.4.8
Scan Case
1) Select <H - Scan Case>. In this inquiry, you can view the entered case counts (from the Close Case
menu)
2) Enter the case number. Your cursor will then go to the SKU/UPC field.
3) One by one, scan/enter the items, the quantity and press enter. The entries will then appear in the
bottom portion of the screen.
If the item scanned is not part of the case, a message will appear in the operator instructions: “Incorrect
Entry”.
Stage 9.1 POS User Manual
www.gemmar.com
Page 157 of 186
If all the items that are part of the case have been scanned, the following window will appear to advise
you that you have completed scanning the entire case:
Press any key to continue.
F1-Print Scan Item – To print what has been scanned so far.
F2-Print Missing Item – To print what has not been scanned yet, therefore only the missing items.
NOTE: This Scan Case menu does not affect the Close Case menu. Therefore, the scan case function can
be executed several times a day without interfering with the Case Closing.
Stage 9.1 POS User Manual
www.gemmar.com
Page 158 of 186
9.1.8.4.9
Case Activity
1) Select <Case Activity>. This option is useful if you want to see all the activity (sales, transfers, etc.) for
certain cases between specific dates.
2) Scan/Enter the UPC/SKU if you just want the activity for a particular item, or press enter to bypass to
widen your selections;
3) Enter the “From Case” number
4) Enter the “To Case” number
5) Enter the “From” and “To” Dates, or press enter to accept only today’s date.
6) Select F8-Print to print a list of case activity
The report will show you the following information by case:
• Sku
• Bill number or type of transaction
• Date & Time
• Quantity
Stage 9.1 POS User Manual
www.gemmar.com
Page 159 of 186
9.1.8.4.10
Total Case
1) Select <Total Case>. This option allows you to see how many total units you have per case.
2) Enter the “From” and “To” Case numbers. A list will appear on the right side showing the case
number, the case description and the quantity for the range of cases you selected.
3) You can navigate on screen to view the information or you can use the option F8-Print to get a
printed list. The list will show you the case number, the case description, and the total quantity by case.
Stage 9.1 POS User Manual
www.gemmar.com
Page 160 of 186
9.1.8.5
Repair Menu
NOTE: These functions are a gateway to a Visual Basic Module which allows the user to access a Jewelry
Repair System. These functions cannot be used without the Visual Basic Module in place.
1) From the Main Menu, select <Modules>.
2) Select <E - Repair Menu>
9.1.8.5.1
Repair Entry
1) Select <A - Repair Entry>
Stage 9.1 POS User Manual
www.gemmar.com
Page 161 of 186
9.1.8.6
APPRAISAL
NOTE: This menu is for the Jewelry Industry
1) From the Main Menu, select <Modules>.
2) Select <F – Appraisal Entry>
Stage 9.1 POS User Manual
www.gemmar.com
Page 162 of 186
9.1.8.7
Markdown Menu
If you are using batch markdowns, a report such as the one below will print after polling. This is a
notification that you have markdowns to confirm and print if ticket printer is available.
If you get this notification then you must go into:
1) From the Main Menu, select <Modules>.
2) Select <G - Markdown Menu>
9.1.8.7.1
Confirm Markdown
1) Select <A - Confirm Markdown>
Stage 9.1 POS User Manual
www.gemmar.com
Page 163 of 186
2) Enter the batch number that appeared on your report and the item(s) being marked down will show
on the screen
3) You must enter through the complete markdown screen in order to update the markdowns. This
notifies Head Office through polling that you have reviewed the list.
4) Once complete, press <F1 – Update> and a Markdown Complete Report will print.
5) If you have a ticket printer installed on your register, you will be prompted if you wish to print tickets
or not. If you do not wish to print tickets enter N, if you wish to print tickets enter Y.
Stage 9.1 POS User Manual
www.gemmar.com
Page 164 of 186
9.1.8.7.2
Markdown Inquiry
This option is used to generate reports on Markdowns.
1) Select <B - Markdown Inquiry> and enter Employee ID
2) Enter the report type you wish to run
A = All markdowns for the dates selected
O = Outstanding (not confirmed) markdowns for the dates selected
C = Completed markdowns for the dates selected
3) Enter Y for Details or N for a Summary
4) Enter the From Date and To Date you wish to report on.
5) Select <F8 print> to print your report.
Stage 9.1 POS User Manual
www.gemmar.com
Page 165 of 186
9.1.8.8
On-Line Status
1) From the Main Menu, select <Modules>.
2) Select <F - On-Line Status>
Notice the top screen has <F1 – Off Line>
option because the system is online (if flagged
in the control file, you should see a green
Online light on the top right of the screen). The
bottom screen has the option for <F1 – On
Line> because it is presently offline.
Stage 9.1 POS User Manual
www.gemmar.com
Page 166 of 186
9.1.9
H- Customer Menu
Stage 9.1 POS User Manual
www.gemmar.com
Page 167 of 186
9.1.9.1
Customer Maintenance
1) From the Main Menu, select <Customer>.
2) Select <A - Maintenance> Followed by Employee ID
9.1.9.1.1
Add a New Customer
1) Select <F1 Add>
2) Enter necessary Customer Information
Stage 9.1 POS User Manual
www.gemmar.com
Page 168 of 186
9.1.9.1.2
Modify an Existing Customer
1) Select <F2 Change>
2) Enter Customer Phone Number or press <F1> to search for the customer
3) Make necessary Modifications and then press <Enter> until the cursor returns to the Customer Phone
Number field.
NOTE: You may modify any/all Customer Information except, the Phone Number and the Name (both
first and last names).
9.1.9.1.3
Delete a Customer
1) Select <F3 Delete>
2) Enter Customer Phone Number or press <F1> to search for the customer
3) Press <Enter>
4) Answer “Y” to “Delete Customer (Y/N)” when prompted.
9.1.9.1.4
Customer Notes
1) Select <F4 Notes>
2) Enter Customer Phone Number or press <F1> to search for the customer
3) View notes
Stage 9.1 POS User Manual
www.gemmar.com
Page 169 of 186
9.1.9.2
Customer Purchase Menu
1) From the Main Menu, select <Customer>.
2) Select <B - Purchase Menu> followed by Employee ID
Stage 9.1 POS User Manual
www.gemmar.com
Page 170 of 186
9.1.9.2.1
Customer Purchase History
1) Select <A - Purchase History> followed by Employee ID
2) Enter Customer Phone Number or press <F1> to search for the customer
3) Select <F3> History and a list of purchases by month will appear
4) Use the ↑↓ keys to highlight the specific Month and press <Enter> and you will see the details of the
purchases
5) Select <F1> to toggle between Style # and Style Description
Stage 9.1 POS User Manual
www.gemmar.com
Page 171 of 186
9.1.9.2.2
Customer Purchase Inquiry
1) Select <Purchase Inquiry> followed by Employee ID
2) Enter Customer Code/phone number
3) You will be shown a list of classes that the customer has purchased from and subsequent recommend
current styles.
4) Use the ↑↓ keys to highlight a class and then choose either <F1 Purchased>, <F2 Recommend> or <F3
View Image>
<F1 Purchase>
Will show you the customer’s purchase for the class selected. Use the ↑↓ keys to highlight the style and
press <ENTER> to view the image.
<F2 Recommend>
Will show you a list of styles in the class selected based on this customer’s history. Use the ↑↓ keys to
highlight the desired supplier/style and press <ENTER> to view the size ranges available.
<F3 View Image>
Will display the image of the item highlighted.
Stage 9.1 POS User Manual
www.gemmar.com
Page 172 of 186
9.1.9.3
Customer Selection
1) From the Main Menu, select <Customer>.
2) Select <C - Customer Selection> followed by Employee ID
3) Inquiry Options (you may inquire upon one, many or none of these parameters)
• Phone Number
• Type (Mailing, Wholesale, Retail, Employee)
• Sex (Male, Female)
• Language (English, French)
• Area Code
• Accounts Receivable (A/R)
• Postal Code
• Optional Criteria
• Style Criteria
Example: Inquiry on all customers who purchased style ABCD from supplier XYZ
1) Press <Enter> until you are at the style criteria field
2) Enter Y for yes. NOTE: once you have entered wither Y/N for Style Criteria, a Sequence window will
open (see print screen above) asking you to choose fields for the report.
3) Enter supplier XYZ
4) Enter style ABCD and press <Enter>
5) Press <F2> to display the next customer
Stage 9.1 POS User Manual
www.gemmar.com
Page 173 of 186
9.1.9.4
Inactive Customer Report
1) From the Main Menu, select <Customer>.
2) Select <D - Inactive Report> followed by Employee ID
3) Enter the Start Date and the End Date.
4) A report will be generated based on these Dates with any Inactive Customers.
NOTE: Be very careful, this can generate a very large report and may take quite some time!
Stage 9.1 POS User Manual
www.gemmar.com
Page 174 of 186
9.1.9.5
Customer Utilities
1) From the Main Menu, select <Customer>.
2) Select <E - Customer Utilities> Followed by Employee ID
Stage 9.1 POS User Manual
www.gemmar.com
Page 175 of 186
9.1.9.5.1
Change Customer Phone Number
1) Select <A - Change Phone No.> followed by Employee ID
2) Enter customer phone number (Customer Code), initials, and details.
3) Enter new phone number.
4) Press <F1 Update> when done.
Stage 9.1 POS User Manual
www.gemmar.com
Page 176 of 186
9.1.9.5.2
Purge Customer History
NOTE: This function should only be used with authorization from Head Office
1) Select <B - Purge Customer>
2) Enter Password (supplied by Head Office).
3) Enter Date, and the system will purge all Customer Purchase History on and before this Date.
Stage 9.1 POS User Manual
www.gemmar.com
Page 177 of 186
9.1.9.6
Customer Profile
1) From the Main Menu, select <Customer>.
2) Select <F - Customer Profile> followed by Employee ID
3) Enter a specific Number of Customers, or press <Enter> to bypass.
4) Enter a Minimum Purchase amount, or press <Enter> to bypass.
5) Enter a specific Coordinate group, or press <Enter> to bypass.
6) Enter a specific Size, or press <Enter> to bypass.
7) Enter a specific Width, or press <Enter> to bypass.
8) Based upon your selections, the system will list all Customers that fit the criteria. Using <PG Up> or
<PG Down>, you can move up and down through this list.
If you wish to print this list, press <F1 Print> and you will receive a printout.
Stage 9.1 POS User Manual
www.gemmar.com
Page 178 of 186
9.1.9.7
Update CD (Customer)
1) From the Main Menu, select <Customer>.
2) Select <G - Update Cd (cust.)> followed by Employee ID
NOTE: This function should only be used with authorization and instructions from Head Office
9.1.9.8
Update CD (Detail)
1) From the Main Menu, select <Customer>.
2) Select <H - Update Cd (Detail)> followed by Employee ID
NOTE: This function should only be used with authorization and instructions from Head Office
Stage 9.1 POS User Manual
www.gemmar.com
Page 179 of 186
9.1.10
I- E-Mail Menu
Stage 9.1 POS User Manual
www.gemmar.com
Page 180 of 186
9.1.10.1
Send E-Mail Messages
1) From the Main Menu, select <Email>.
2) Select <A - Messages to Send> followed by Employee ID
<F1 ADD>
1) Enter the Name/Department of the person the Message is for, or press <Enter> to display a list of all
available Names/Departments. Use the ↓↑ keys to highlight the desired Name/Department and press
<Enter> to accept.
2) Enter the Subject of the Message.
3) “Hot E-Mail Y/N”:
Y = The Message is Urgent.
N = The Message is not Urgent.
4) “Confidential Y/N”:
Y = The Message can only be viewed by the person it has been sent to.
N = Anyone can view this Message.
5) Enter the Message.
6) Press <F5 Update> when done.
<F2 MODIFY>
1) A window will open displaying a Summary of all Messages, specifying if the Message is Confidential or
Non-Confidential.
2) Use the ↑↓ keys to highlight the Message to be Modified, press <Enter> to accept.
3) Modify the Message as necessary, press <F5 Update> when done.
Stage 9.1 POS User Manual
www.gemmar.com
Page 181 of 186
<F3 DELETE>
1) A window will open displaying a Summary of all Messages, specifying if the Message is Confidential or
Non-Confidential.
2) Use the ↑↓ keys to highlight the Message to be Deleted, press <Enter> to accept.
3) Press <F3 Delete>; Answer “Y” to Delete when prompted.
<F4 SCAN>
1) A window will open displaying a Summary of all Messages, specifying if the Message is Confidential or
Non-Confidential.
2) Use the ↑↓ keys to highlight the Message you wish to Scan, press <Enter> to accept.
<F5 UPDATE>
Updates the Message after you have created or modified it.
<F8 PRINT>
1) A window will open displaying a Summary of all Messages, specifying if the Message is Confidential or
Non-Confidential.
2) Use the ↑↓ keys to highlight the Message to Print, press <Enter> to accept.
3) Press <F8 Print>.
Stage 9.1 POS User Manual
www.gemmar.com
Page 182 of 186
9.1.10.2
View Emails Received
1) From the Main Menu, select <Email>.
2) Select <B - Received Inquiry> followed by Employee ID
<F3 DELETE>
1) A window will open displaying a Summary of all Messages, specifying if the Message is Confidential or
Non-Confidential.
2) Use the ↑↓ keys to highlight the Message to be Deleted, press <Enter> to accept.
3) Press <F3 Delete>; Answer “Y” to Delete when prompted.
<F4 SCAN>
1) A window will open displaying a Summary of all Messages, specifying if the Message is Confidential or
Non-Confidential.
2) Use the ↑↓ keys to highlight the Message you wish to Scan, press <Enter> to accept.
<F8 PRINT>
1) A window will open displaying a Summary of all Messages, specifying if the Message is Confidential or
Non-Confidential.
2) Use the ↑↓ keys to highlight the Message to Print, press <Enter> to accept.
3) Press <F8 Print>.
Stage 9.1 POS User Manual
www.gemmar.com
Page 183 of 186
9.1.11
L- Utilities Menu
Stage 9.1 POS User Manual
www.gemmar.com
Page 184 of 186
9.1.11.1
Backup
This is no longer used and will be removed
9.1.11.2
Support
1) From the Main Menu, select <Utilities>.
2) Select <Support>
These Functions are completely maintained by Head Office and GSI Support. The POS should not have
access to it. If any modifications are required, please contact the proper Head Office personnel or GSI
Support.
9.1.11.3
Upload PDT Files
This is another method used for Physical Inventories. Please see the Physical Inventory manual for more
information
1) From the Main Menu, select <Utilities>.
2) Select <Upload PDT Files>
9.1.11.4
POS Version
This is no longer used and will be removed
9.1.11.5
GSI Update
This is no longer used and will be removed
Stage 9.1 POS User Manual
www.gemmar.com
Page 185 of 186
Document Revisions
Date
Init.
Mar 21, 2012
P.C.
Mar 22, 2012
P.C.
June 11, 2012
P.C.
June 14, 2013
P.C.
June 18 2013
P.C.
Oct. 4, 2013
P.C.
Feb. 4, 2015
P.C.
Mar. 16, 2015
Mar. 25, 2015
P.C.
P.C.
Stage 9.1 POS User Manual
Revision
New document created & formatted to current standards (text + images)
Segment numbering for topics
Added topic “Getting Started with Retail-1® Point of Sale”
Corrected formatting problem with Calendar topic
Corrected formatting for printing (page alignment)
Moved revisions table to end of document and out of table of contents
Add note that an asterisk (*) will appear next to the current price field for a
SKU/style that has a temporary markdowns (DA-Store Inquiry)
Added note v11.3+ has supplier selection option in the Print Open PO menu
Added note v11.3+ UPC code will print on report under the SKU in the PO
Report.
Added note re: “Second Method of Payment for CN/GC/MC (Y/N)” when
using gift certificates and credit notes.
Corrected procedures for closing training mode.
Added new menu “BBR-Outgoing Transit”
Updated Layaway aging screen shot, revised procedural information and
added printed example of report.
Added procedures when “Valid Refund” (HBF) is at Y or P.
Formatting updates
Segment
Issue #
www.gemmar.com
Page 186 of 186
315538
9.1.1
9.1.1.7
315538
314820
9.1.5.1
319713
9.1.3.4.3
329495
9.1.3.4.7
329496
9.1.2.1
257845
9.1.8.1
9.1.3.2.7
9.1.2.16
9.1.5.5.3
9.1.2.12
331839
333811
337039
346321
353953
353953