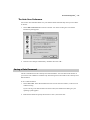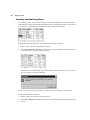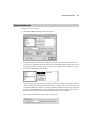
1
Title Page Informed Filler User’s Manual Shana Corporation 9744 - 45 Avenue Edmonton, Alberta, Canada T6E 5C5 Telephone: (780) 433-3690 Order Desk: (800) 386-7244 Fax: (780) 437-4381 E-mail: [email protected] Web: http://www.shana.com/ ® ® Copyright Shana Corporation 2001. All rights reserved. Informed, Informed Designer, Informed Filler, the Informed logo, the face of eBusiness, and the Shana logo are registered trademarks of Shana Corporation. All other trademarks are property of their respective owners. .... Contacting Support i Contacting Support Contact Shana Corporation has made every effort to make Informed Filler as easy and straightforward to use as possible. However, there are times when a feature or function does not seem to perform as expected. In such cases, Technical Support is available. Note Technical support is available only to registered users of Informed software. If you have not already faxed, e-mailed, or mailed your registration form to us, please have the following information ready (or include it with your fax/e-mail) when you contact Technical Support for the first time: ■ full name ■ company name (if there is one) ■ full address, including office/apt. number, street, city, state/province, country, and zip/ postal code ■ phone and fax numbers ■ e-mail address (if available) Also, whenever contacting Technical Support, please make sure you have (or include) the following information about your computer and software: ■ serial number of the Informed product you are using (this can be found by selecting About Informed Filler under the Help (Windows) or Apple (Macintosh) menu when the application is active. ■ type and version of the operating system your computer is using (Win98, WinNT, Mac OS 9 and so on ■ type of computer you are using (Pentium 300, i-Mac and so on) ■ the details of your question such as the commands you are using and the desired task that you are seeking to accomplish. If possible, please be sitting in front of your computer so that the support technician can talk you through the solution. .... ii Contacting Support Before you phone Shana Corporation’s Support Team… Read The Manuals The Informed manual set covers all of Informed’s features and tools. Sometimes the answer you need is in the manuals. Be sure you are consulting the correct manuals for the application you are using. Check the indices to see if you are looking in all the right places. If you still can’t find the answer you are looking for... Check our Home Page on the Internet We are constantly upgrading and adding to our web-based technical support services. Point your browser (URL) location to http://www.shana.com/ and visit the support section of the Shana web site. Searching our Technical Notes you will find many sub-sections covering things like functions, calculations, e-mail enabling, tips and tricks and many examples of how to set up common forms and settings. As well, there are many forms and examples you can download and try out yourself. Contact Us In the support section of the Shana web site you will find information on how to contact our technical support staff by e-mail (preferred), fax, mail and telephone. Please keep in mind that you may be charged for accessing our technical support. Please review the Technical Support Credits Policy and their related Terms and Conditions on the web site for more information. Training on Informed products Shana Corporation also offers training on Informed products through Shana’s Professional Services group. Further information can be obtained by contacting Shana’s Professional Services at [email protected]. Contents Contents Introduction i- 2 Informed Filler i- 2 The Informed Filler Manual Set i- 3 About This Manual i- 3 Conventions Used in This Manual i- 4 Finding Information i- 4 Notes i- 5 Commands and Control Names i- 5 Cross-platform Notes i- 5 Chapter 1 Overview 1- 2 How Forms are Designed 1- 2 Informed Plug-ins 1- 3 Distribution of Form Templates 1- 3 The Templates Folder 1- 4 Filling Out Forms 1- 5 Form Tracking 1- 6 Where Everything Goes 1- 7 Applications 1- 7 Plug-ins 1- 7 Templates Folder 1- 7 Preferences Folder 1- 8 On-line Help 1- 8 Spell Checking 1- 8 Informed Preferences 1- 9 Moving Folders 1- 9 .... Contents I .... II Contents Chapter 2 Document Management 2- 2 Informed Documents 2- 2 The Templates Folder 2- 3 Template Information 2- 3 Creating a New Data Document 2- 4 The Recent Templates List 2- 5 New Document Preferences 2- 5 Setting Passwords 2- 5 Opening a Data Document 2- 7 Opening a Recently Used Data Document 2- 8 Opening a Locked Data Document 2- 9 Opening a Data Document in Use 2- 9 Opening a Package 2- 9 Opening an XML File (Windows Only) 2- 10 Duplicate Template IDs 2- 11 Missing Fonts 2- 11 Closing a Data Document 2- 12 The Auto-Save Preference 2- 13 Saving a Data Document 2- 13 Saving Copies of a Data Document 2- 14 Saving as XML (Windows Only) 2- 14 Saving as TIFF 2- 15 Saving as PDF 2- 16 Collecting Data Documents 2- 17 Updating a Data Document 2- 17 Obtaining a New Template 2- 17 ODMA Support (Windows Only) 2- 18 How it Works 2- 19 Creating and Saving a New Document 2- 19 Retrieving an Existing Document 2- 19 Chapter 3 Filling Out Forms 3- 2 Activating a Record 3- 2 Accepting the Current Record 3- 3 Entering Information 3- 3 Font, Size, and Type Style 3- 5 Display Only Cells 3- 5 Entering Text 3- 5 Entering Character Values 3- 6 Entering Numbers 3- 6 Entering Names 3- 6 Entering Dates and Times 3- 7 Century Wrap Preference 3- 7 Entering Boolean Values 3- 8 Entering Checkbox Values 3- 9 Entering Pictures 3- 9 Reading Information From a File 3- 9 Setting a Cell’s Value for Multiple Records 3- 10 Errors When Using the Set Value Command 3- 11 Scrolling Fields 3- 11 Memorizing Values 3- 12 Tab Order 3- 12 Filling Out Tables 3- 13 Inserting and Removing Rows 3- 14 Expandable Rows in Tables 3- 15 Scrolling Tables 3- 15 Using Buttons 3- 16 Pages of a Form 3- 16 The Work Page 3- 16 Changing Pages 3- 17 Intelligent Features 3- 17 Calculations 3- 18 Data Verification 3- 19 Choice Lists 3- 20 Selecting a Choice 3- 21 Editing a Cell’s Choices 3- 22 Help Messages for Cells 3- 22 Help Messages on Windows 3- 22 Help Messages on Macintosh 3- 23 Check Formulas and the Help Dialog 3- 24 Lookups 3- 25 Lookup Errors 3- 26 Form Numbers 3- 27 Form Number Errors 3- 28 Chapter 4 Using Digital Signatures 4- 2 Signature Cells 4- 2 Security Preferences 4- 4 Signing Forms and Verifying Digital Signatures 4- 5 Verifying a Signature 4- 7 The Signature Icon 4- 9 Automatic Verification 4- 10 Working with Multiple Records 4- 10 Verifying Templates 4- 11 Logging Off Your Signing Service 4- 13 Signing Plug-ins 4- 13 I-Sign (POP) and I-Sign (IMAP) 4- 13 Configuring I-Sign 4- 14 Signing Forms with I-Sign 4- 14 Entrust 4- 15 .... Contents III .... IV Contents Crypto API for Microsoft CSP 4- 16 Requirements 4- 16 Signing 4- 17 Signature Verification 4- 17 Chapter 5 Attachments 5- 2 The Attachments Window 5- 2 Windows and Macintosh File Types 5- 3 Attaching Files 5- 4 Extracting Files 5- 5 Opening Attachments 5- 6 Deleting Attachments 5- 6 Attachments and Digital Signatures 5- 6 Chapter 6 Spell Checking 6- 2 Spelling Preferences 6- 2 Spell Checking Your Forms 6- 3 Spell Checking From the Record List 6- 6 Chapter 7 Annotation 7- 2 Placing, Moving, and Removing Notes 7- 3 Typing, Recording, and Playing Back Notes 7- 4 Textual Messages 7- 4 Voice messages 7- 5 How Design Changes Can Affect Notes 7- 6 Chapter 8 Record Management 8- 2 Collection of Records 8- 2 The Record List 8- 3 Contents of the Record List 8- 4 Adding and Removing Columns 8- 5 Changing a Column’s Position 8- 7 Changing a Column’s Width 8- 8 Changing a Column’s Title 8- 8 Changing a Column’s Alignment 8- 9 Selecting Records and Columns 8- 9 The Current Record Indicator 8- 10 Totalling or Averaging a Column 8- 11 Showing and Hiding the Totals Line 8- 13 Saving Record List Formats 8- 13 Removing a Record List Format 8- 14 Adding a New Record 8- 15 Editing an Existing Record 8- 15 Reverting a Record 8- 15 .... Contents Clearing a Record 8- 16 Duplicating a Record 8- 16 Finding Records 8- 16 Match Options 8- 18 Finding Words 8- 19 Finding Dates and Times 8- 19 Finding Names 8- 19 Finding Boolean and Checkbox Values 8- 20 Find Options 8- 20 Indexed cells 8- 21 Finding All Records 8- 22 Sorting Records 8- 22 Omitting Records 8- 23 Browsing Through Records 8- 24 Removing Records 8- 24 Tagging Records 8- 25 Adding Records to a Tagged Collection 8- 26 Removing a Tag 8- 27 Record Information 8- 27 Chapter 9 Printing Forms 9- 2 Page Setup 9- 2 Printing Forms 9- 4 Print Options 9- 5 Collating Forms 9- 6 Printing Repeating Forms 9- 6 Printing From the Record List 9- 8 Printing Records in a List 9- 9 Chapter 10 Mailing Forms 10- 2 Mail Preferences 10- 2 The Send Command 10- 3 Suggested Routes 10- 5 Adding Changing and Removing Suggested Routes 10- 6 Mail Cells 10- 8 Form Tracking 10- 8 Mail Plug-ins 10- 9 Windows Mail Plug-ins 10- 9 Macintosh Mail Plug-ins 10- 10 SMTP Mail 10- 10 Addressing using SMTP 10- 10 Configuring the SMTP Plug-in 10- 11 The SMTP Address Book 10- 12 V .... VI Contents Chapter 1 1 Form Tracking 11- 2 How it Works 11- 2 Tracking Forms 11- 3 Displaying a Form’s Tracking Status 11- 4 Chapter 12 Submitting Forms 12- 2 Overview 12- 2 The Submit Command 12- 2 Submitting Multiple Records 12- 3 Successful Submit Indication 12- 4 Errors When Submitting Records 12- 4 Chapter 13 Exchanging Information 13- 2 File Formats 13- 2 Delimited Text Files 13- 2 Quote Characters 13- 3 Merge Format 13- 3 Tables 13- 3 Multi-line Cell Values 13- 5 Limitations of the Delimited Text File Format 13- 5 Informed Interchange Files 13- 6 Informed Data Files 13- 6 XML Files (Windows Only) 13- 6 Exporting Records 13- 7 Importing Records 13- 9 The Import Process 13- 10 Importing Notes 13- 12 Chapter 14 Form Template Distribution 14- 2 Background 14- 2 How it Works 14- 2 Accessing Distribution Centers 14- 3 Checking for Revisions 14- 4 Revision Status 14- 5 Appendix A - Name Prefixes and Suffixes A- 2 Index X- 1 Introduction In this chapter: ■ ■ ■ ■ Informed Filler i-2 The Informed Filler Manual Set i-3 About This Manual i-3 Conventions Used in This Manual i-4 .... i-2 Introduction Introduction With the advancement of computer technology and forms software, electronic forms offer an efficient, intelligent, and secure alternative to the traditional paper based forms systems used in many organizations. Shana Corporation offers complete cross-platform electronic forms solutions for each step in the paper forms process—from the design stage to “fill, sign, and send.” Informed Filler and Informed Designer together provide everything you need to design, distribute, fill, route, approve, submit, and track electronic forms. Informed Filler Informed Filler In many organizations, “fill, sign, and send” is the most common process for a form. For example, a purchase order form might be filled out, signed by an approving manager, and sent to the purchasing department to be entered into the organization’s accounting or database system. Traditionally, this process has been performed using a paper forms system. This manual will show you how anything you do with a paper form can be done faster, more efficiently, and more accurately with Informed Filler. Informed Filler is a powerful tool for processing electronic forms—or templates— that have been created with Informed Designer. Using Informed Filler, you can electronically fill out and store any type of form, from expense forms and purchase orders to time cards and human resource forms. As you enter data, “intelligent” features such as calculations, database lookups, choice lists, and error checking work automatically to make filling out forms as fast and accurate as possible. You can also use Informed Filler’s spell checking feature to further ensure the accuracy of your data. With paper forms, associated information such as blueprints or diagrams are often attached to a form using a paper clip. Informed Filler provides the same capability by allowing you to attach electronic documents to electronic forms. The attached files become part of a record, just like the information in each of the blanks on the form. Once forms are filled out, you can sign them electronically with a digital signature, and mail them to other users right from within Informed Filler using your existing e-mail system. When the form is completed and approved, you can submit it directly into an accounting system, database, or information system, eliminating the costs of rekeying data. In a paper forms system, forms are stored in file cabinets or in stacks on someone’s desk, making it difficult and tedious to find a particular form or forms. Informed Filler’s powerful database features let you store your forms electronically, making it easy for you to search for, sort, and group records. And for better integration with other information systems, Informed Filler can import and export information in standard file formats. .... Introduction i-3 The Informed Filler Manual Set The Informed Filler Manual Set The Informed Filler manual set is designed to provide you with a complete reference to the features and functionality of Informed Filler. The manuals combine text and graphics to thoroughly document every aspect of the software. In addition to your Informed Filler Users Manual, the set also contains the Informed Filler Getting Started Guide. This guide provides you with instructions on installing and registering Informed Filler, and also describes the minimum hardware and software configurations required to use the Informed Filler application. About This Manual About This Manual This manual provides a complete reference to Informed Filler. General topics are organized in the following chapters: ■ Chapter 1, “Overview,” provides an introduction to the concept of electronic forms. It describes the Informed products and explains how each application works and integrates with the others to provide a complete electronic forms solution. The flexible nature of Informed’s architecture and how it can be customized to fit your organization’s environment is also discussed. ■ Chapter 2, “Document Management,” teaches you about the different types of Informed documents. Instructions are provided on how to open, close, and copy documents. ■ Chapter 3, “Filling Out Forms,” instructs you in how to fill out a form. You’ll learn about entering information into new or existing forms—or records, and about using the variety of intelligent features that make it easy for you to fill out a form. ■ Chapter 4, “Using Digital Signatures,” discusses Informed’s digital signature capabilities; specifically, how digital signatures work and the steps necessary to sign forms and verify digital signatures. You’ll also learn how to verify the authenticity of associated form templates. ■ Chapter 5, “Attachments,” provides information about how to attach files to records. The Attachments window is described as well as the Attach and Extract commands. ■ Chapter 6, “Spell Checking,” explains how to use Informed Filler’s spell checking feature to ensure the accuracy of data entered in cells. Setting spelling preferences and spell checking multiple records are also discussed. ■ Chapter 7, “Annotation,” shows you how to include annotated text or voice notes in addition to the information that you enter in the cells on your forms. ■ Chapter 8, “Record Management,” describes how to add, remove, find, change, duplicate, and tag records. The Record List is also described in detail. .... i-4 Introduction ■ Chapter 9, “Printing Forms,” explains how you print forms with Informed Filler. It describes the Page Setup and Print commands as well as various printing options. ■ Chapter 10, “Mailing Forms,” describes how you can use electronic mail systems to send forms to other users. This chapter also discusses Informed Filler’s routing feature and describes the various e-mail systems supported by Informed. ■ Chapter 11, “Form Tracking,” provides information on how to track an electronic form as it moves through your organization. ■ Chapter 12, “Submitting Forms,” explains how form data can be electronically submitted to, and stored in, other information systems. ■ Chapter 13, “Exchanging Information,” teaches you how to transfer information between different Informed documents, different applications, and even different computers. You’ll learn about the Import and Export commands, and the standard file formats that Informed understands. ■ Chapter 14, “Form Template Distribution,” describes how form templates can be stored and distributed in your organization, and how they can be accessed by users of Informed Filler. Informed Filler’s revision checking feature is also discussed. Conventions Used in This Manual Conventions Used in This Manual This section describes the conventions used in this manual to ensure that you can easily find and understand the information you need to perform specific tasks with Informed Filler. Finding Information In addition to the table of contents at the beginning of this manual, you’ll also find a table of contents at the beginning of each chapter, listing the main sections in that chapter. The example below shows the table of contents for Chapter 13, “Exchanging Information.” ■ ■ ■ File Formats 13-2 Exporting Records 13-7 Importing Records 13-12 Inside each chapter, the main topics are highlighted in a gray bar like the one at the beginning of this section, making it easy for you to quickly scan a page to find the topic of your choice. Subsections for each topic are highlighted with a large, bold font. .... Introduction i-5 Notes Throughout this manual, you’ll see paragraphs of text highlighted in gray boxes with the label “Note” in the left margin. These notes contain important information such as warnings, reminders, and specific conditions to be aware of. The following example shows a typical note. Note Important information about Informed Filler appears in highlighted gray boxes like this one. Commands and Control Names When specific instructions on how to perform a certain task are given in this manual, commands are shown in a different typeface from the rest of the text. The name of the menu where the command is found is also given in each instance. For example, when learning how to attach files to a record, you would read the following text: To show the Attachments window: 1. Choose View > Show Attachments, or click the paper clip indicator on the form window. The names of controls such as buttons and settings on dialog boxes are always shown in single quotes. For lengthy control names, this helps to differentiate the control name from the text that surrounds it. For example, when setting preferences for Informed Filler’s spell checking feature, you can select the ‘Always provide alternative spellings’ checkbox. Cross-platform Notes Although this manual has tried to be platform neutral, the cross-platform nature of Informed requires that special care be taken when documenting the features of Informed Filler. Throughout this manual you’ll see screens of dialog boxes and windows. Some of the screens show Windows dialog boxes and windows, others are from the Macintosh. In cases where a dialog box or window is substantially different between the two platforms, both versions are shown. In cases where a specific feature of Informed Filler is only applicable to one platform (Windows or Macintosh), an icon depicting either the Windows or Macintosh platform is displayed in the left margin next to the description of the feature. For example, Chapter 3, “Filling Out Forms,” describes entering pictures into a picture cell: “Informed Filler stores pictures in Windows Bitmap, Windows Metafile, Macintosh PICT, and Encapsulated PostScript. The Windows Metafile format is not supported on the Macintosh.” .... i-6 Introduction 1 1 Overview In this chapter: ■ ■ ■ ■ ■ ■ ■ ■ How Forms are Designed 1-2 Informed Plug-ins 1-3 Distribution of Form Templates 1-3 The Templates Folder 1-4 Filling Out Forms 1-5 Form Tracking 1-6 Where Everything Goes 1-7 Moving Folders 1-9 .... 1-2 Overview 1 Overview Like many software products, Informed Filler consists of different components, including an application, documents, preference files, and special files and folders that serve unique purposes. The organization of these components is flexible, allowing for custom configurations to better suit your specific needs. This chapter describes the different components of Informed Filler and how they are organized. Depending on how forms are designed and administered in your organization, some of the information here might be unnecessary for your use of Informed Filler. Regardless, understanding the information in this chapter can be of benefit to any Informed Filler user. How Forms are Designed How Forms are Designed The design of a form is called a form template. A form template is created using Informed Designer and stored in a form template document. The form designer creates a form template by typing text and drawing graphical objects—like fields and tables—using a variety of drawing tools. In addition to the graphical appearance of a form, a form template also contains cells. Cells are the placeholders for the information that you enter to fill out a form. To aid you when entering information, the form designer can configure cells to use a variety of “intelligent” features. These include automatic formatting, calculations, error checking, lookups, choice lists, on-line help, and other features that make it faster and more accurate to enter information. The design of a form template also involves linking the template to other services or systems used in your organization. For example, a template might be linked to an Oracle database so that you can “submit” completed forms electronically, therefore eliminating the need to rekey the form information into other systems. The use of other services such as electronic mail for sending forms, and security services for signing forms with digital signatures is also available. In addition to customizing a form itself, the form designer can also customize the commands and menus available in Informed Filler’s menus. That way, custom commands that are specific to the processing of the form can be added, and unnecessary commands can be removed. The electronic form begins looking more like a custom application rather than a custom form. Note Since the form designer can customize the menus that you see, any of the menu commands that are described in this manual can be named differently, positioned in a different menu, or even hidden altogether. .... Overview 1-3 Informed Plug-ins Informed Plug-ins Many of the services that Informed Filler can link to are accessed via Informed plug-ins. An Informed plug-in is a file that contains the code that interacts with a particular service. For example, in order to mail a completed form using a particular e-mail system, you must have the Informed mail plug-in for that e-mail system installed. Informed Filler comes with a variety of plug-ins for accessing e-mail systems, databases, signing services, and other information services. The table below lists the different types of plug-ins that Informed Filler can take advantage of. Informed Plug-ins Plug-in Type Mail Send form templates or completed forms using electronic mail. Data access Look up information from a database or data source. Submit completed forms to a database or data source. Obtain unique form numbers from a database or data source. Track forms with a database or data source. Signing Authorize and verify form templates using Informed Designer. Sign and verify completed forms. Data translation Import, export, or mail form data in a particular data format. Distribution Distribute form templates via a particular type of distribution center. Spelling Check the spelling of text on your template or the text entered on a completed form using an alternate spell checking system. Informed plug-ins must be installed in a folder named “Plug-ins.” The plug-ins folder must be located in your Informed folder Distribution of Form Templates Distribution of Form Templates In order to fill out a form of a particular type, Informed Filler must have access to the appropriate form template. Form templates can be stored in a distributed manner—stored locally on your computer, or they can be stored centrally on a file server and shared among all Informed Filler users. If you store your form templates locally on your computer, you have the freedom to take your computers anywhere and still have access to the templates you need. A network connection is not necessary to access templates. Furthermore, each time you access a template, it is not at the expense of network bandwidth. .... 1-4 Overview Centralized storage of form templates has converse advantages. Although access to templates requires a network connection, the distribution of a new revision of a template requires only that the form designer replace a single template on the network file server with the new version. You and all other Informed Filler users are instantly up to date since you all share the same template. If form templates are stored locally on your computer, the distribution of a new revision requires that you obtain the new version. The method with which Informed Filler users access form templates is often determined by the form designer (and possibly involves the input of a network administrator). Many factors, including the size of your organization, your network configuration, and the mobility of all users must be taken into account. To aid in the distribution of form template, Informed Designer and Informed Filler come with builtin forms distribution features. These features automate the distribution of new templates and revisions of existing templates. With proper configuration by the form designer, you can access templates at one or more distribution centers. A distribution center can be a file server or an FTP server. Since distribution centers are accessed via Informed distribution plug-ins, other types of distribution centers might be supported after this documentation is published. Once you’ve obtained a template from a distribution center, Informed Filler will automatically check periodically to see if a new revision of the template is available. If a new revision is available, you are automatically notified when you open or create a data document, and the new revision replaces the previous version. The Templates Folder The Templates Folder Regardless of whether you access templates on a shared file server or locally on your own computer, Informed Filler needs to know where the templates are located. Templates are located in the templates folder. On Windows, this folder is named “TEMPLATE.” On Macintosh, the folder is named “Templates.” Regardless of platform, the templates folder, by default, is located in your Informed folder. You can change the location of the templates folder using Informed Filler’s Preferences command. For information about moving your templates folder, see “Moving Folders,” later in this chapter. In addition to the templates themselves, information about templates is stored in separate template preferences files. These files contain information about your personal preferences. For example, Informed Filler allows you to list the information of multiple forms—or records—in a list format by displaying the Record List window. .... Overview 1-5 You can change which information is included on the Record List and its order and format according to your specific needs and personal preferences. Each different Informed Filler user might want to format the Record List differently. Since you can share templates among many Informed Filler users, it is important that personal preferences, like the format of the Record List, be stored separate from the template itself. For this reason, Informed Filler maintains a separate preferences file for each template. Template preferences files are stored in a folder named “TMPLPRFS” (Windows) or “Template Preferences” (Macintosh). This folder is found along with other items in another folder named “PREFS” (Windows) or “Preferences” (Macintosh). Like the templates folder, the default location for the preferences folder (that is, the folder that contains the template preferences folder) is inside the Informed folder. The preferences folder contains other items in addition to the template preferences folder. The Informed Filler user can store the preferences folder at its default location or at any other location. For information about the other items found in the preferences folder, see “Where Everything Goes” later in this chapter. For details about moving the preferences folder, see “Moving Folders.” Filling Out Forms Filling Out Forms To the Informed Filler user, form templates are like hidden files that need not be manipulated directly. Instead, Informed Filler automatically locates and opens templates when needed as you fill out new forms and open previously filled out forms. When you request a new document, Informed Filler presents a list of available templates to choose from. You select a template and a blank form appears, ready for filling. The information you enter to fill out a form is stored in a form data document. A form data document can store the information for one completed form, or many completed forms. A single completed form is called a record. For casual users who fill out very few forms, it is easiest to store one record in each data document. If you fill out many forms, storing all records for a particular type of form in one data document allows you to take advantage of Informed Filler’s powerful database features. .... 1-6 Overview While filling out forms, you benefit from the data entry and “intelligence” features that have been configured by the form designer. Features like automatic formatting, calculations, error checking, lookups, choice lists, and on-line help make it faster and more accurate to enter information. The entire processing of a form is automated using Informed Filler, from the initiation of a new form, to the approval and submission of the completed form. After entering information, you can sign the form electronically using a digital signature. A digital signature provides a means of later verifying the identity of the person who signed the form and the integrity of the signed data. If approval of the form is necessary, you can send the completed form to the appropriate person or place using electronic mail. The process of entering and signing information, sending the form to other people, and, if necessary, approving the form continues until the form is complete and approved. The completed form is then submitted electronically or printed. The flexible nature of Informed makes it ideal for automating both simple and complex forms processes. With the ability to easily exchange information between different forms and different applications, the form designer can design a comprehensive “forms system” that combines and integrates many different types of forms and different applications. Each contributes a particular feature or capability to the solution. Form Tracking Form Tracking For many types of forms, processing involves routing the form from person to person for approval purposes. Informed’s built-in form tracking capabilities make it easy for you to find out where a particular form is in the routing process. Whenever you send a form, Informed Filler connects to a central tracking database and records information, including your name and the name of the recipient, the form identification numbers (that is, the type of form and a unique number, such as an invoice number or purchase order number), and the date and time that the form was sent. Other information can be tracked as well. At any time, you can request the tracking status for any completed form. Informed Filler connects to the tracking database and retrieves the tracking information for the particular form. This information is displayed in a dialog box for your view. .... Overview 1-7 Where Everything Goes Where Everything Goes When you install Informed Filler, you are asked to specify a location for the “Informed” folder. The Informed folder contains the Informed Filler application, as well as other important components. The Informed folder is a special folder. It contains certain items that are required in order for Informed Filler to work properly. Some of the items in the Informed folder can be moved to different locations. The following sections describe the purpose of each item and the possible storage locations. For information about moving the Informed folder to a different location, please see “Moving Folders” later in this chapter. Applications On Windows, the Informed Filler application is comprised of the executable file (“FILLER.EXE”) and other associated files. These files are found in the Informed folder. On the Macintosh, the application is a single file and is named “Informed Filler®”. You can store the application locally on your computer, or you can access it from a file server or applications server. Plug-ins The plug-ins folder contains Informed plug-ins and associated files. Informed plug-ins provide access to external services such as electronic mail systems and databases. The plug-ins folder must be located inside your Informed folder. See “Informed Plug-ins” earlier in this chapter for more information about plug-ins. Templates Folder The templates folder (“TEMPLATE” on Windows, “Templates” on Macintosh) contains the templates available for use with Informed Filler. The location of the templates folder can be changed using Informed Filler’s Preferences command. For more information, see “The Templates Folder” earlier in this chapter. .... 1-8 Overview Preferences Folder The preferences folder (“PREFS” on Windows, “Preferences” on Macintosh) contains the following items: ■ The template catalog (“TMPLCAT.DAT” on Windows, “Template Catalog” on Macintosh) is a file that is maintained by Informed Filler. It contains a list of all of the templates contained in the templates folder. Informed Filler uses the template catalog to quickly find the correct template when the user opens a data or package document. ■ The template preferences folder (“TMPLPRFS” on Windows, “Template Preferences” on Macintosh) contains template preferences files. Template preferences files are maintained by Informed Filler. Each file contains user-specific preferences for the template of the same name. The purpose of template preferences is described earlier in “The Templates Folder.” ■ The Informed defaults file (“DEFAULTS.DAT” on Windows, “Informed Defaults” on Macintosh) is also maintained by Informed Filler. Like template preferences files, the Informed defaults file contains user-specific information that is associated with one or more templates. As explained in Chapter 3 of this manual, you can memorize a cell value so that the value is automatically entered each time you create a new blank form. The memorized value is stored in the Informed defaults file. ■ The distribution centers folder (“DISTCTRS” on Windows, “Distribution Centers” on Macintosh) contains the distribution center profiles needed to access the distribution centers in your organization. These files are created using Informed Designer. For detailed information about distribution center profiles and Informed’s built-in forms distribution capabilities, please see Chapter 14, “Form Template Distribution.” Although it is not recommended, you can move the preferences folder to a different location. For more information, please see “Moving Folders” later in this chapter. On-line Help If you choose to install on-line help, installation will include the necessary help files. On both Windows and Macintosh, the help files are installed in a folder named “Help” inside the Informed folder. The help files must remain in these locations. Note To view the on-line help files on Macintosh, you require a web browser and the Informed WebLink plug-in. Spell Checking If you choose to install Informed’s spell checking option, you’ll see a folder named “Spelling” in your Informed folder. The spelling folder contains the spell checking dictionaries and related files. .... Overview 1-9 Informed Preferences In addition to the items installed in the Informed folder, installation will also place a preferences file among your system related files. On Windows, this file is named “INFORMED.INI” and is found in your Windows folder. On the Macintosh, the file is named “Informed Preferences” and is found in your system’s Preferences folder. The Informed preferences file contains information necessary for Informed Filler to find items such as the Informed folder, the templates folder, and the preferences folder. Other preferences associated with Informed Filler are also stored in the Informed preferences file. Moving Folders Moving Folders When you install Informed Filler, the Informed preferences file is automatically updated with the locations of your Informed folder, templates folder, and preferences folder. When you run Informed Filler, it reads these locations from your Informed preferences file in order to locate the appropriate files. You can move the Informed folder, templates folder, or preferences folder to any location. However, you must then specify the new location using Informed Filler’s Preferences command. 1. Choose Edit > Preferences and click the Folders icon to display the Folders preferences panel. The location of the Informed folder is specified in the scrolling list at the top of the dialog. The location of the Template folder and Preferences folder is assumed to be inside the Informed folder unless otherwise specified. To specify a different location for any folder: 2. Highlight the folder you want to relocate in the scrolling list. .... 1-10 Overview 3. Click the ‘Browse’ button. A dialog appears allowing you to select a new location. 4. Select a folder in the scrolling list, then click ‘Select’ (Windows) or ‘Choose’ (Macintosh). Note Changing the location of a folder using Informed Filler’s Preferences command does not automatically move the contents of the folder to the new location. You must do this yourself. While using Informed Filler, if any of the Informed, templates, or preferences folders cannot be found at their expected locations, you will see a dialog message indicating so. You can look for the missing folder or cancel the operation. If you click ‘Locate,’ a dialog box appears allowing you to select the folder in its new location. This dialog box is the same one that appears when you click any of the ‘Browse’ buttons on the Preferences dialog box (see earlier). 2 Document Management In this chapter: ■ ■ ■ ■ ■ ■ ■ ■ ■ ■ ■ ■ ■ ■ Informed Documents 2-2 The Templates Folder 2-3 Template Information 2-3 Creating a New Data Document 2-4 Setting Passwords 2-5 Opening a Data Document 2-7 Duplicate Template IDs 2-11 Missing Fonts 2-11 Closing a Data Document 2-12 Saving a Data Document 2-13 Collecting Data Documents 2-17 Updating a Data Document 2-17 Obtaining a New Template 2-17 ODMA Support (Windows Only) 2-19 .... 2-2 Document Management 2 Document Management Informed provides rich document management features on its own and through other document management systems. This chapter describes how to manage Informed documents using both environments. Informed Documents Informed Documents The term document refers to a file that contains information. An Informed document is a file that contains information about a form. There are four types of Informed documents: form template documents, form data documents, package documents, and interchange documents. Form Template Documents (.ITP) A form template document contains a form template. A form template is the layout or framework of a form that’s created using Informed Designer. It contains all the intelligent features of the form as well as its graphic elements. You fill out a form by entering values in the blanks—or cells— on the template. In order to use templates with Informed Filler, you must place them in a folder named “Template” (Windows) or “Templates” (Macintosh) in your Informed folder. Form Data Documents (.IFM) A form data document contains only a form’s data. When you fill out forms with Informed Filler, the information entered is stored in a form data document. You can store one completed form—or record—in each data document, or you can store many records in a single data document and take advantage of Informed Filler’s built-in database capabilities. To open and manipulate a data document, you must have the appropriate template in your templates folder. A data document is the most common format to use when sending forms to other users. Package Documents (.IPK) A package document combines a form template and its associated data in a single file. It is created using Informed Filler and is used primarily when you mail a form to someone who doesn’t have the corresponding template. When Informed Filler opens a package, the data document and template (if needed) are extracted. If your templates folder does not already contain the template, the one extracted from the package is copied there and opened. The data document is opened into an untitled form window. Informed Interchange Documents (.IIF) Informed Interchange documents contain all the data for one or more completed forms (or records), and are used primarily for transferring information between different applications, and different versions of Informed. They are created and read using Informed Filler, and store all types of information including stylized text values, pictures, signatures, and annotations. .... Document Management 2-3 In addition to the Informed Interchange documents, Informed Filler can import and export form data stored in other standard formats, including tab-delimited and comma-delimited text. These formats are used primarily for transferring form data between Informed Filler and other applications. The Templates Folder The Templates Folder Although you don’t create and manipulate form template documents like you do form data documents, template documents are necessary to the use of Informed Filler. Whenever you create a new data document, you’re asked to select a template to use. When you open a data document, Informed Filler automatically locates and opens the appropriate template document. For these reasons, it is necessary that Informed Filler know where to find the templates that you use. By default, Informed Filler finds your templates in a folder named “Template” (Windows) or “Templates” (Macintosh) located in your Informed folder. Template Information Template Information Template information is used to identify which template is used with a particular data document. The template information includes a template name, template ID and a revision number. To view the template information for the current template: 1. Choose View > Template Information. The Template Information dialog appears. .... 2-4 Document Management The ‘Template name’ might offer a more descriptive title compared to the filename of the template document. ‘Unique template ID’ and ‘Revision number’ are intended to identify the template and its version. Since templates and data documents are separate files, the template ID is stored with each data document so that Informed Filler can automatically identify and open the appropriate template when a data document is opened. The Name and Organization information identify the person who created the form template. The form designer can also provide a brief description of the template. The form designer might also specify a privacy classification to indicate the sensitivity of the data on the form. The privacy classification (if specified) can be Low, Medium or High. Creating a New Data Document Creating a New Data Document The data for the forms that you fill out is stored in form data documents. To create a new untitled data document: 1. Choose File > New Document. The New Data Document dialog box appears, showing a list of all templates in your Template folder. 2. Select the template you want from the scrolling list then click ‘New.’ A new untitled data document for that template is created and displayed in a form window. 3. To select a template that is not in your templates folder, click ‘Add Other Template.’ The standard Open dialog appears, allowing you to select a template from any accessible volumes or disks. Informed Filler then copies and places the selected template in your templates folder. .... Document Management 2-5 You can also access template distribution centers to obtain new templates using the controls on the New Data Document dialog. For more information, see “Obtaining a New Template” later in this chapter. The Recent Templates List Another method of creating a new data document is to use the Recent Templates list. 1. Choose File > Recent Templates and select a template from the available items. New Document Preferences Informed Filler’s New Document preference allows you to specify what action will occur when you choose the New Document or Recent Template commands and select a template. The reason for having this preference is that some forms—such as vacation requests—might only be filled out once or twice a year. Rather than creating a brand new data document each time you fill out a vacation request, you can have Informed Filler open the old vacation request data document and add a new record to it. Alternately, you can have Informed Filler ask you what you would like to do. To set your New Document Preference: 1. Choose Edit > Preferences then click the ‘General icon in the scrolling list. The General Preferences panel appears. 2. Click the ‘When creating new documents’ drop-down list and select one of the following items: Create new data file When you choose File > New Document (or File > Recent Templates) and select a template, Informed Filler will create a new, blank data document with no records. Open last data file used When you choose File > New Document (or File > Recent Templates) and select a template, Informed Filler will open the last data file that was created with the selected template. Ask what to do When you choose File > New Document (or File > Recent Templates) and select a template, Informed Filler will ask if you want to create a new document using the selected template or open the last data file that was created with the selected template. 3. Click ‘OK.’ Setting Passwords Setting Passwords Passwords allow you to protect your data documents by preventing other users from opening and changing them with Informed Filler. If a data document has a non-blank password, you will be prompted to enter it when you attempt to open the document (see “Opening a Data Document”). .... 2-6 Document Management To set a password for a data document: 1. Choose Edit > Preferences then click the Security icon in the scrolling list. The dialog box changes to show the Security preferences panel. 2. Click the ‘Set Password’ button. The Set Password dialog box appears. 3. Type the password in the ‘New password’ text box then press Tab. 4. Type the password again in the ‘Confirm password’ text box then click ‘OK.’ If a password already exists, you must enter that password in the ‘Old password’ text box before entering the new password. .... Document Management 2-7 Opening a Data Document Opening a Data Document To open an existing data document: 1. Choose File > Open. The standard Open dialog for your operating system appears, showing the last directory that you browsed. 2. Select a data document, then click ‘OK.’ If the data document has a password, you’ll be asked to enter it before Informed Filler will open the document. When you open a data document, Informed Filler first examines the document’s Template ID. Informed Filler then looks in your templates folder for a template with the same Template ID as that in the data document. If found, the data document is opened along with the template and displayed in a form window. If your templates folder does not contain the needed template, Informed Filler might attempt to obtain one automatically from a distribution center in your organization. Chapter 14, “Form Template Distribution,” describes Informed Filler’s built-in forms distribution features. If the form designer has made the needed template available in one or more distribution centers, and if the distribution information is available in the data document that you’re attempting to open, Informed Filler will display the message shown on the following page: .... 2-8 Document Management This message indicates that the template you need is available from an accessible distribution center. If you click ‘Yes,’ Informed Filler will place a copy of the template in your templates folder, then continue to open it along with the data document. If your templates folder does not contain the needed template, and the template is not available from a distribution center, you’ll see a message asking if you’d like to look for the template. If you have the appropriate template located at a different place on your hard disk, you can locate and select it by clicking ‘OK’ on the message dialog. You locate and select a template using the standard Windows or Macintosh Open dialog box. When you select the correct template, Informed Filler copies it to your templates folder and then opens it along with the data document. Opening a Recently Used Data Document To open a data document that you’ve used recently: 1. Choose File > Recent Data Documents and select the file you want. Note If your New Document preference is set to ‘open last data file used’ you can also choose File > and select a file. Informed Filler will open the last data file that was created with the selected template. See “New Document Preferences” earlier in this chapter for details. Recent Templates .... Document Management 2-9 Opening a Locked Data Document If you choose to open a locked data document, or a data document that resides on a locked disk or volume, Informed Filler will warn you. If you continue, the data document will be opened as usual. However, you won’t be able to save any changes made. To save any changes, use the Save As command to save the data document, along with any changes made, into a new file. For more information about the Save As command, see “Saving Copies of a Data Document” later in this chapter. Opening a Data Document in Use You cannot open a data document that is already open for use by another user or application. If you attempt to do so, a warning message will appear. If you click ‘OK,’ another dialog box appears telling you that Informed Filler is waiting for the data document to become available. When the document becomes available, Informed Filler will open it automatically. To cancel the Open command instead, click ‘Cancel.’ Opening a Package A package document contains both a form data document and a form template document together in a single file. The purpose of package documents is to be able to save, mail, or transfer completed forms—or records—along with the appropriate form template in a single document. If a person sends you a form using e-mail, and is unsure whether or not you have the required form template, he or she might send you a package document instead of a data document. That way you will be able to open the form even if you don’t have the required template. .... 2-10 Document Management To open a package document: 1. Double-click the package document icon or… 2. Choose File > Open to display the Open dialog, then select the package and click ‘Open.’ When you open a package document, Informed Filler automatically extracts the form data and, if necessary, form template document. If your templates folder already contains a template with a Template ID that matches the one in the data document in the package, then that template is used. That is, the template in the package document is not extracted. If your templates folder does not contain the necessary template, Informed Filler will extract the template from the package, copy it to your templates folder, then open it along with the data document. Unlike data documents, when Informed Filler opens a package document, it does not open the document in place. That is, once you’ve opened the package and made changes to the data, saving your changes will not update the original data document in the package. Instead, Informed Filler will save the data in a new data document, just as though you were saving a new untitled data document. You’ll be asked to name the data document and specify its location the way you normally do. Opening an XML File (Windows Only) XML (Extensible Markup Language) provides a way of sharing both the format and data of a document over the World Wide Web, intranets and elsewhere. Informed allows you to save, open, import and export data documents as XML. This is extremely useful if your organization uses both Informed Filler on the desktop and Informed Filler (Java). For example, a form could be filled out with Informed Filler on the desktop and saved as an XML document. The same document could then be opened by someone using Informed Filler (Java), and vice versa. To open an XML file: 1. Choose File > Open. The standard Open dialog for your operating system appears. 2. Select the XML file and click ‘OK.’ Note You must have the appropriate template in your Template folder in order to open the document. If you don’t have the appropriate template, Informed Filler will ask you to locate it. .... Document Management 2-11 Duplicate Template IDs Duplicate Template IDs It is important that each of the templates in your templates folder have a unique template ID. If two templates have the same template ID, Informed Filler will not know which template to use when you open a data document or package with the same template ID. If Informed Filler detects two or more templates with the same template ID, it will select and use one of them and mark the others as duplicates. Once a duplicate template has been marked, it will appear with a small warning sign on Informed Filler’s New Data Document dialog box. The warning sign is an indication that you should choose the template that you want to use and remove the duplicates. Missing Fonts Missing Fonts When you open a template (as a result of opening a form data or package document, or creating a new data document), Informed Filler checks to make sure that the fonts used on the template are available in your system. Different systems on different computers can have different fonts installed. If a template is drawn on one computer, then transferred to different computer, that computer might not have the fonts that were originally used to draw the template. If Informed Filler detects that at least one font is missing from your system, you’ll see the following dialog box. .... 2-12 Document Management Any text that uses an unavailable font will display using a font that’s available in your system. Closing a Data Document Closing a Data Document 1. Choose File > Close, or click the window’s close box. The action that Informed Filler takes depends on the kind of document that you’re working with, and the work that has been done. If you’re closing a new data document that has not been changed, the document is closed immediately. If you’re closing a new document to which changes have been made, Informed Filler will warn you to save the changes. 2. Click ‘Yes’ to save the changes, click ‘No’ to close without saving changes, or click ‘Cancel’ to cancel the Close command and leave your document open for editing. If you click ‘Yes,’ you’ll see the standard Save dialog for your operating system. 3. Type a name for the new data document, select a location to store it, then click ‘OK.’ If you’re closing an existing data document (a document that was previously opened), Informed Filler first checks to see if you’ve made changes to the document. If your data document has not changed since you last opened it, then it’s closed immediately without warning. If you have made changes to the document, Informed Filler will ask if you want to save the changes before closing. .... Document Management 2-13 The Auto-Save Preference You can also have Informed Filler save your data documents automatically when you close them. To do this: 1. Choose Edit > Preferences then click the ‘General’ icon in the scrolling list. The General Preferences panel appears. 2. Click the ‘Save changes automatically’ checkbox then click ‘OK.’ Saving a Data Document Saving a Data Document The Save command saves the currently active data document—the front-most form window on your screen. This command is available only when changes have been made to the currently active data document. To save a data document: 1. Choose File > Save. If the data document has been saved at least once before, it will be saved without warning. If you’re saving a new data document for the first time, the standard Save dialog for your operating system appears. 2. Name the document and specify the location to store it, then click ‘OK.’ .... 2-14 Document Management Saving Copies of a Data Document Use the Save As command to save a copy of a data document with a different name, or at a different location. You can also use the Save As command to create a package document containing both the active data document and its accompanying template. 1. Choose File > Save As. You’ll see the standard Save As dialog for your operating system. 2. Enter a file name and location to save the file in. 3. Select the format you want to save the data in. If you select ‘Informed data’ only the form data is saved (this is the most common format). If you select ‘Informed package’ both the data and the template will be saved together. (See the following sections for information about the other Save as options.) 4. Select ‘All records,’ ‘Collected records,’ or ‘Current record’ from the ‘Include’ drop-down list. 5. Click ‘Save.’ After saving a new data document, Informed Filler will leave the new document open for editing and close the original document. If you save a new package document, however, the original data document will remain open instead. Saving as XML (Windows Only) XML (Extensible Markup Language) provides a way of sharing both the format and data of a document over the World Wide Web, intranets and elsewhere. Informed allows you to save, open, import and export data documents as XML. This is useful if your organization uses both Informed Filler on the desktop and Informed Filler (Java). For example, a form could be filled out with Informed Filler on the desktop and saved as an XML document. The same document could then be opened by someone using Informed Filler (Java), and vice versa. .... Document Management 2-15 To save a document as XML: 1. Create a new data document or open an existing one. 2. Choose File > Save As. The Save As dialog appears. 3. Enter a name and location to save the file in. 4. Select ‘XML File’ as the format to save the data in. 5. Specify which records to include by selecting an option form the ‘Include’ drop-down list. 6. Click ‘Save.’ Saving as TIFF The Save As TIFF feature allows you to save data records in the TIFF format. To use the Save As TIFF feature you must have the SaveAs (TIFF-PDF) plug-in installed in your Plug-ins folder. To save a form record as a TIFF file: 1. Open your data document and find the record that you want to save as a TIFF. 2. Choose File > Save As to display the Save As dialog. 3. Enter a name and location to save the file in. 4. Select ‘TIFF image’ as the format to save the data in, then click ‘Save.’ Note When you select ‘TIFF image’ the ‘Include’ drop-down list changes to ‘Current record.’ All other options are disabled. You have a number of options for the way your forms are saved including: Option Description Format 256 Color RGB, CCITT G4 Fax Resolution 72 dpi, 144 dpi, 288 dpi Multipage TIFFs Option to save multiple pages in a single TIFF file Page Range Specify the page range Show Prefs Option to always show the preference settings before saving Settings for this feature can be modified through the Preferences panel. 1. Choose Edit > Preferences to display the Preferences dialog. 2. Click the ‘TIFF-PDF’ icon in the scrolling list, then click the ‘Settings’ button. The SaveAs .... 2-16 Document Management TIFF/PDF Preferences panel appears. 3. Set your preferences for Format, Resolution, Saving Multipage TIFFs, Page Range and whether or not you want the preference settings dialog displayed each time before saving the TIFF image(s). 4. Click ‘OK’ to accept your new settings. 5. Click the ‘OK’ button to close the Preferences dialog box. Saving as PDF The Save As PDF feature allows you to save data records as PDF (Portable Document Format). To use the Save As PDF feature you must have the SaveAs (TIFF-PDF) plug-in installed in your Informed Plug-ins folder. To save a form record as a PDF file: 1. Open your data document and find the record that you want to save as a PDF. 2. Choose File > Save As to display the Save As dialog. 3. Enter a name and location to save the file in. 4. Select ‘PDF File’ as the format to save the data in, then click ‘Save.’ When you select ‘PDF File’ the ‘Include’ drop-down list changes to ‘Current record.’ All other options are disabled. Note The image files created with our PDF feature are bitmaps. As a result, text items cannot be selected in Acrobat Reader. .... Document Management 2-17 Collecting Data Documents Collecting Data Documents If you’re responsible for approving forms, you’ll likely receive forms one at a time from other people for approval purposes. If you want to retain a copy of these forms, you might want to collect them into a single data document. That way you can sort the forms, list them on the Record List, and use Informed Filler’s other database features. Informed Filler allows you to import the data from one data document into another. You can do this using Informed Filler’s Import command. If you use a Macintosh computer, you can drag a data document onto the form window that corresponds to the data document you want to collect into. For detailed information about Informed Filler’s Import command, see “Importing Records” in Chapter 13, “Exchanging Information.” Updating a Data Document Updating a Data Document As explained earlier (see “Opening a Data Document” and “Opening a Package”), Informed Filler automatically locates and opens the appropriate form template when you open a data document. Whenever Informed Filler opens a form template (as a result of opening a data or package document), it automatically checks to make sure that the data matches the template. If the template has changed since the last time you opened the data or package document, or if you’ve received a data or package document from someone else who has a different version of the template, Informed Filler might notice differences between the data and the template. For example, the template might contain a new cell for which there is no data in the data document. Or maybe a cell’s type has changed. If differences are detected, Informed Filler will update the data to match the template. The time that it takes to update the data depends on the particular differences and the number of records in the data document. You’ll see a progress dialog box during the update process. Obtaining a New Template Obtaining a New Template Chapter 14, “Form Template Distribution,” describes Informed’s built-in forms distribution features. After designing a new form template, the form designer can make the template available at one or more distribution centers. Different types of distribution centers are supported, including file servers and FTP servers. Obtaining a new template from a distribution center is an easy process. As explained earlier in “Opening a Data Document,” it can be as simple as clicking ‘Yes’ on a message dialog. Informed Filler does the rest for you. .... 2-18 Document Management The most common method of obtaining a new distributed template is by means of Informed Filler’s New Data Document dialog box. This dialog box appears when you choose the New Document command from Informed Filler’s File menu. To obtain a template from a distribution center: 1. Click the drop-down list at the top of the dialog and select ‘Services.’ The list changes to show the distribution centers that correspond to the distribution center profiles found in your distribution centers folder (named “DISTCTRS” on Windows, “Distribution Centers” on Macintosh). A distribution center profile is a file containing the information necessary to identify and connect to a distribution center. See Chapter 14 for information about distribution center profiles. 2. Select the center’s name in the list then click ‘Open.’ The scrolling list changes to show the available templates. 3. Select the template you want in the list then click ‘New.’ Informed Filler copies the distributed template to your templates folder and opens it, creating a new untitled data document. Once you’ve obtained a new template from a distribution center, Informed Filler will automatically notify you when a new version of the template is available. For detailed information about how revision checking works, and the various commands and preferences associated with template distribution, please see Chapter 14, “Form Template Distribution.” ODMA Support (Windows Only) ODMA Support (Windows Only) .... Document Management 2-19 The Informed ODMA (Open Document Management API) plug-in allows you to link Informed Filler to any ODMA-compliant document management application. This arrangement combines Informed Filler’s powerful form filling features with the organizational strengths of a document management system. Note The ODMA plug-in must be installed in your Plug-ins folder. How it Works A document management application is used to control and manage documents within an organization, thus streamlining and speeding up the access and flow of information. In a document management system, each document is assigned specific labels such as a document name, author and document type. These labels make it easy to store, search and retrieve information. When the ODMA plug-in is installed, you can fill out forms with Informed Filler, then save and retrieve the completed forms using your document management application’s interface, rather than storing your forms locally. Creating and Saving a New Document You create a new form data document the way you normally would with Informed Filler: 1. Choose File > New Document. The New Data Document dialog appears. 2. Select the form template you wish to use, then click ‘New.’ A form appears, ready for filling. 3. Fill in the form. After the form is completed, you can save it into your document management system right from within Informed Filler: 1. Make sure your document management application is running. 2. Choose File > Save in Informed Filler. Instead of the standard Windows Save dialog, you’ll see the Save dialog that corresponds to your document management system. 3. Enter the document information according to the rules defined for your document management system, then click ‘OK.’ Retrieving an Existing Document You can retrieve an existing data document from your document management system right from within Informed Filler: 1. Choose File > Open. Instead of the standard Windows Open dialog, you’ll see the Document .... 2-20 Document Management Retrieval dialog that corresponds to your document management system. 2. Select the document you want to open, then click ‘OK.’ The document management system will retrieve your form and open it in Informed Filler’s window. Details about specific document management systems are not included in this section. For information about your organization’s system, please see the documentation that came with the application, or consult the person who administers your document management system. 3 Filling Out Forms In this chapter: ■ ■ ■ ■ ■ ■ ■ ■ ■ Activating a Record 3-2 Accepting the Current Record 3-3 Entering Information 3-3 Memorizing Values 3-12 Tab Order 3-12 Filling Out Tables 3-13 Using Buttons 3-16 Pages of a Form 3-16 Intelligent Features 3-17 .... 3-2 Filling Out Forms 3 Filling Out Forms Forms contain areas where you enter information. These areas are called cells.The form designer specifies the type of information that you can store in each cell, as well as the desired formatting options. Calculations, choices, lookups, and other intelligent features are also added to a form. This chapter describes how to fill out a form. You’ll learn how to enter information and use the variety of intelligent features that make it easy for you to fill out a form. You can fill out new records or you can edit existing records. For information about creating, finding, removing, duplicating, and sorting records, see Chapter 8. Activating a Record Activating a Record Before you can change the information on a form, you must activate the current record. While a record is active, you can tab from cell to cell and enter information by typing on the keyboard or pasting from the Clipboard. The figure below shows a form that’s inactive (left) and active (right). The small pencil in the collection information box (see “Collection of Records” in Chapter 8) indicates visually that the record is active. Notice that the ‘Department to Charge’ cell is selected and ready to accept information. The form on the left is inactive and therefore has no current cell. To activate the current record: 1. Press the Tab key or… 2. Click any cell. Using the mouse, position the pointer over any cell, then press the mouse button. Informed Filler activates the record and shows a blinking insertion point in the cell that you .... Filling Out Forms 3-3 clicked. If you click a checkbox, picture, or signature cell, you’ll see a bold, blinking border inside the cell instead of a blinking insertion point. Once you’ve activated a record, you can enter information by tabbing from cell to cell and typing or pasting values. See “Entering Information” and “Tab Order” for more information. Accepting the Current Record Accepting the Current Record After you’ve entered a new record or made changes to the information on an existing record, you accept the record by pressing the Enter key on the numeric keypad. The pencil indicator no longer appears and the current cell on the form is deselected. If your Windows keyboard does not contain a numeric keypad, you can press Control-Enter. If your Macintosh computer does not have an Enter key, you can press Command-Return. Note If you choose a command such as Print or Close while a record is active, Informed Filler automatically accepts the record before performing the command. As you’ll learn later in this chapter, the form designer can create check formulas for the cells on a form. A check formula is a formula that examines the value of a cell to check for errors. When you attempt to accept a record, Informed Filler checks for errors in order to prevent accepting an invalid record. If an error is detected, a beep will sound and the record will remain active with the invalid cell value selected. Correct the mistake, then press the Enter key once again to accept the record. Entering Information Entering Information To fill out a form you enter information into each cell on the form. You can move between cells by pressing keys such as Tab or Shift-Tab, or by clicking a particular cell with the pointer. The cell which is currently selected is called the current cell; it’s the cell that’s ready to accept information. With the exception of checkbox, picture, and signature cells, the current cell will contain either a blinking insertion point or a selected cell value. Selected checkbox, picture, and signature cells contain a bold, blinking outline. Bold, blinking outline Blinking insertion point .... 3-4 Filling Out Forms After selecting a cell, you can enter information into it by: ■ ■ ■ typing pasting the Clipboard contents (choose Edit > Paste) selecting a choice from a choices palette or drop-down list (for certain cells) For information about using choice lists, see “Intelligent Features” later in this chapter. As you enter information, Informed Filler can help by automatically calculating, looking up, and checking values for you. These and other intelligent features make it easier to fill out forms quickly and accurately. Each cell on your form will accept a particular type of information. The form designer is responsible for properly naming and choosing the most appropriate type for each cell. Informed allows the use of nine different cell types. The following table lists these types with examples. Cell Types Cell Type Examples Text Character Number Name Date Time Boolean Business form #29 (555) 555-1212 101 Mr. John Smith 10/25/89 14:20 Yes 12345 - 123 Street, A Big City 02983-1283 $12,550.75 Jones, Mr. Tom F. Wednesday, November 8, 1989 03:15:04 PM Picture Signature When you enter information into a cell, the value you type or paste must be appropriate for the type of information that the cell holds. For example, you can’t type a name into a cell that stores numbers. If you enter an incorrect cell value, Informed Filler will beep and select the value when you attempt to accept the record or tab to a different cell. Associated with each cell type are a variety of formatting options that make it easier to enter information. Rather than typing formatted values, Informed Filler can do the formatting for you. For example, a cell might be formatted to display numbers with a currency symbol, thousand separators, and two decimal places of accuracy. Informed Filler would automatically convert a typed value, such as ‘1500,’ to the formatted value ‘$1,500.00.’ .... Filling Out Forms 3-5 Font, Size, and Type Style The form designer specifies the font, size, and type style attributes used to display information in each cell on the form. When you enter a value in a cell, the information is always displayed according to those specifications. However, by selecting certain options, the form designer can allow you to change these attributes cell by cell. To change the font, size, or type style: 1. Select the value in a cell. 2. Choose a new setting from the commands under the Cell menu. On Windows, you’ll only see the Font command. Choosing this command displays the Font dialog where you can select different fonts, sizes and type styles. On Macintosh, you’ll see the Font, Size and Type Style submenus. Which commands/submenus are available depends on which options the form designer has allowed. For example, if you are only allowed to change the font and type style, the Size controls will be unavailable. The following types styles are not available on Windows compatible computers: Outline, Shadow, Condensed, and Extended. Display Only Cells The form designer can prevent you from entering information into any cell by making the cell display only. Display only cells are usually calculated cells that obtain their values from other cells on the form. While tabbing from cell to cell, Informed Filler will skip past any display only cells. You are still permitted, however, to select a display only cell by clicking it with the pointer. To indicate that a cell is a display only cell, a line will appear through the pencil symbol in the collection information box when the cell is selected. While a display only cell is selected, Informed Filler will beep each time you try to enter or change the cell’s value. After three attempts, an alert message will notify you that the current cell is a display only cell. Entering Text The text cell type is used for cells that hold textual information such as an address, a comment, or a memo. Formatting options can automatically capitalize letters, words, or sentences in the information you enter. .... 3-6 Filling Out Forms When you enter information into a cell, you can type more lines than will actually fit in the cell area. When you press Tab to move to the next cell, the information that doesn’t fit is hidden. Text cells can also make use of a formatting option called ‘Allow auto-shrink.’ If this option is selected, Informed Filler will automatically shrink the type size of the information so that it fits entirely in the cell area. Entering Character Values The character cell type also stores textual values. However, unlike the text cell type, character values must match a specific format that the form designer defines. The character cell type is used commonly to store information such as telephone numbers, zip codes, or any values that are always formatted exactly the same way. When you enter a value into a character cell, Informed Filler will verify that the value matches the cell’s format. Format characters such as dashes and spaces are automatically entered for you. If you enter an incorrect value, Informed Filler will beep and select the value when you try to move to a different cell or accept the record. A message will appear picturing the required format. Entering Numbers The number cell type stores numbers in a variety of formats. Informed Filler automatically formats any number you enter according to the cell’s format. Format characters such as the currency symbol, thousand separators, and the decimal point are entered for you. Entering Names The name cell type stores names. A name has up to five parts: a prefix (such as Mister or Professor), a first name, a middle name, a last name, and a suffix (such as Junior). Multiple prefixes, middle names, and suffixes are allowed. A cell’s name format can include all parts or only selected parts in either full or abbreviated form. When you enter a name, Informed Filler identifies each part that you type, then formats the name according to the cell’s name format. You should enter the parts of a name in the following order: prefix, first name, middle name, last name, then suffix. If you type a comma after the first part, Informed Filler will interpret that part as the last name. .... Filling Out Forms 3-7 To help identify the parts of a name that you type, Informed Filler refers to a list of known prefixes and suffixes. This list can be found in Appendix A of this manual. Entering Dates and Times Informed Filler makes it easy to enter dates and times. Rather than typing a value in a particular format, you can type a date or time in any format you like. For example, to enter the date ‘January 1, 1999,’ you can type ‘jan 1 99’ or ‘1 1 99.’ Informed Filler interprets what you type and formats the date or time value according to the particular formatting options of the cell. To enter a date: 1. Select the cell that you want to enter the date in. 2. Type the date or… 3. Choose Edit > Insert Date. On Macintosh, Informed Filler will automatically enter today’s date in the correct format. On Windows, Informed Filler will display the Date Picker, allowing you to click and select the date you want. Century Wrap Preference Informed provides a preference to specify the treatment of dates that are entered with centuries of less than three digits. The default setting is 1950 - 2049. Any entries made with two digits are interpreted to be between 1950 and 2049. For example, 2/1/79 would result in Feb. 1, 1979 whereas 2/1/38 would result in Feb. 1, 2038. You can change the date range at any time. 1. Choose Edit > Preferences to display the General Preferences panel. .... 3-8 Filling Out Forms 2. Enter a new starting value in the text box. Informed will automatically update the end value. Entering Boolean Values A boolean cell can have one of two values. Depending on the format of a boolean cell, the cell’s value will display as Yes or No, True or False, or On or Off. Informed Filler ensures that you enter only values that are appropriate for that format. If you type only part of a value, Informed Filler converts it to its full form. For example, to enter ‘No’ into a Yes/No style boolean cell, you need only type the letter ‘n.’ Informed Filler converts the value to ‘No’ for you. .... Filling Out Forms 3-9 Entering Checkbox Values There are eight different checkbox styles. The following table lists each style in its checked and unchecked state. Rather than typing a value into a checkbox, simply click the cell with the pointer or press any key. The cell’s value will toggle between checked and unchecked. Entering Pictures You can enter a picture into a picture cell by using the Insert File command (see “Reading Information From a File”) or by pasting from the Clipboard. If you are using a Macintosh computer with Mac OS 7.5 or later, you can also enter a picture by using the drag and drop method. Informed Filler stores pictures in Windows Bitmap (.BMP), Windows Metafile (.WMF), Macintosh PICT (.PCT), and Encapsulated PostScript (.EPS). The Windows Metafile format is not supported on the Macintosh. Reading Information From a File Another way to fill in parts of a form is to use the Insert File command. This command allows you to import a text file into a text cell, or a picture into a picture cell. For the command to be available, the current cell must be a text or picture cell, and its ‘Display only’ option must be turned off. To insert a file: 1. Select the cell. 2. Choose Cell > Insert File. For picture cells only, pressing the Enter (Windows) or Return (Macintosh) key is a shortcut for selecting the Insert File command. The standard Open dialog appears, allowing you to select a file. For text cells, the selected text file will be inserted into the cell at the current insertion point. For picture cells, the selected picture replaces the current picture in the cell. .... 3-10 Filling Out Forms Setting a Cell’s Value for Multiple Records From time to time you might want to set the value of a single cell on more than one record. For example, if a customer pays ten outstanding invoices with one check, you have to mark each invoice as being paid. Instead of changing the value of the ‘Payment Status’ cell from ‘Unpaid’ to ‘Paid’ on each record individually, you can set the value of the cell for all ten records at once with the Set Value command. To set the value of a cell on multiple records: 1. Find and show that collection of records on the Record List. Make sure that the Record List contains only the records that you want to change (see Chapter 8, “Manipulating Records” for details about the collection of records and using the Record List). 2. With the Record List displayed, select the column that contains the cell you want to change. 3. Choose Cell > Set Value... to display the Set Value dialog box. 4. With the ‘This value’ option selected, enter the new value in the text box and click ‘OK.’ The value of the cell is changed for each selected record. If you are setting the value for many records, Informed Filler displays a progress dialog. If you want to change the value for a checkbox cell, the Set Value dialog box will look like this: Instead of typing a value, simply click either the ‘Checked’ or ‘Unchecked’ option. Note .... Filling Out Forms 3-11 If the selected column on the Record List corresponds to a table cell on the form, the ‘This value’ option will not be available. You can only use the ‘Its calculated value’ option. Please see “Calculations” for more details. You can use the Set Value command to change the value of any cell except for display only cells, or picture and signature cells. If the cell or Record List column that you select is one of these, the Set Value command will be unavailable. You can also use the Set Value command to reset the value of a calculated cell. For details, see “Calculations” later in this chapter. Errors When Using the Set Value Command As you’ll learn in “Data Verification” later in this chapter, the form designer can create a check formula for any cell so that Informed Filler automatically checks for mistakes when you fill out a form. A check formula is a formula that examines a cell value to determine if an error has been made. When you use the Set Value command to change a cell’s value for many records, it’s possible that the value you set might be invalid for one or more records in the collection, based on the cell’s check formula. If this occurs, Informed Filler leaves those records unchanged and tags them with the tag name “Set Value Errors.” For information on tagging records, see “Tagging Records” in Chapter 8. Scrolling Fields The form designer can include a scroll bar with any field on the form. A field that includes a scroll bar is called a scrolling field. A scrolling field allows you to enter more data than will display in the cell area. You view all the data by scrolling up and down using the scroll bar. The scroll bar is active, indicating that the cell area contains more data. Depending on which option the form designer has chosen, the scroll bar on a scrolling field might be visible at all times, or only when you select or tab into that cell. When a record that contains scrolling fields is filled out and printed, Informed Filler repeats the printing of the page or pages that contain the scrolling fields, until all the data in those fields has been printed. For example, if page 2 of a two page form contains a scrolling field, Informed Filler will print page 1, then page 2, then page 2 again until all the data in the scrolling field has been printed. The extra copies of page 2 will only contain the data in the scrolling field; all other fields will print blank. .... 3-12 Filling Out Forms Memorizing Values Memorizing Values Many forms contain information that is specific to the person filling out the form. For example, if you fill out a time card, information such as your name or employee number is always the same. Instead of typing an entry each time, you can type an entry once, and use Informed Filler’s Memorize command to “memorize” that value. The next time you add a new record to your data document, the “memorized” value is automatically filled in. To memorize a value: 1. Select the value in the cell. 2. Choose Cell > Memorize. The value you are memorizing appears as part of the Memorize command in the Cell menu. For example, if you fill in the value “Linda Green” in the ‘Name’ cell on your form, the Memorize command displays as Memorize “Linda Green” when the cell is selected. After choosing the Memorize command, the name “Linda Green” will be automatically filled in when you add a new record to your data document. Often different types of forms will contain some common information. For example, both purchase requisition and travel expense forms contain cells for employee information. For a particular employee, this information is the same on every record, both for purchase requisitions and travel expense forms. If the form designer has selected the ‘Memorization is shared’ option for a particular cell (such as the ‘Name’ cell), any value that you memorize for that cell is also memorized for the same cell on other forms. Note A cell’s memorized value is shared only if the ‘Memorization is shared’ option is selected by the form designer. The memorized value is shared only with cells on other forms that have the same cell name and the ‘Memorization is shared’ option selected. To cancel the effect of memorization, enter a blank value in a cell, then choose Cell > Memorize. Tab Order Tab Order Each form has a predefined tab order. The tab order determines the order in which you move from cell to cell each time you press the Tab key. The form designer sets up the tab order using Informed Designer. You can’t change a form’s tab order using Informed Filler. The following figure illustrates tab order. ABC Company 12233-44 Ave. New York, NY 98765 Sold To 1 Date Qty 2 Terms No. 8 PO Number 4 Description 5 Signature Ship Via Price 9 Shipping INVOICE 3-13 Ship To 3 7 .... Filling Out Forms Total 6 10 The circled numbers indicate an appropriate tabbing order for this form. 11 12 When you fill out a form, pressing the Tab key moves you from one cell to the next in the tab order. Pressing the Shift-Tab key moves you in the reverse direction. If your form contains more than one page, Informed Filler will automatically change pages when you move from a cell on one page to a cell on another. For cells that cannot have more than one line, pressing Enter (Windows) or Return (Macintosh) has the same effect as pressing Tab. Informed’s Quick-Tab feature allows you to bypass the normal tab order of a form. While filling out a form, pressing F2 (Windows) or Command-Tab (Macintosh) moves you to the next QuickTab cell in tab order. Pressing Shift-F2 (Windows) or Command-Shift-Tab (Macintosh) moves you to the previous Quick-Tab cell instead. Like the tab order of a form, you can’t change the QuickTab cells using Informed Filler. Quick-Tab cells are specified using Informed Designer. The first row of the first column cell in every table is a Quick-Tab cell. You can therefore automatically move from table to table on your form by pressing either of the F2/Command-Tab or Shift-F2/Command-Shift-Tab keys. The first field cell following a table is also a Quick-Tab cell. The form designer might also have configured conditional tabs for certain cells on the form. A conditional tab moves you to another area of the form, based on the information that you’ve entered in the cell you’re tabbing out of. For example, the form designer might configure conditional tabs for ‘Local’ and ‘Out of Town’ checkboxes on a travel expense form. If you select the ‘Local’ checkbox and then tab from that cell, you might tab past sections for claiming expenses such as ‘Hotel Accommodation’ and ‘Airline Travel,’ and go directly to sections for claiming expenses such as ‘Parking’ and ‘Fuel.’ Filling Out Tables Filling Out Tables Each table on your form has one or more columns and one or more rows. You fill out a table by tabbing from column to column and row to row, entering data in each cell. The direction that you tab in a table—either across the rows or down the columns—is configured by the form designer. The form designer also specifies when tabbing will leave a table. Normally, if you are tabbing across the rows, tabbing leaves the table when you tab through one empty row. However, the form designer can also configure the tab order so that tabbing leaves the table after you tab out of the first column of an empty row. .... 3-14 Filling Out Forms Inserting and Removing Rows Occasionally you may want to insert or remove a row in a table that already contains information. Informed Filler provides the Insert Row and Remove Row commands specifically for this purpose. As an example, consider the table of information shown in the following figure. Suppose that you want to add a new row between items A0-032 and A0-007. 1. Select any cell in the row containing item A0-007. 2. Choose Edit > Insert Row. Informed Filler will move all rows starting at the one containing the current cell down by one, then insert a blank row. If the last row in the table already contains information, Informed Filler won’t let you insert a new row. Instead, you’ll see this message: Before you can insert a row in a full table, you have to clear the information on the last row. To use the Remove Row command: 1. Select any cell in the row that you want to remove. 2. Choose Edit > Remove Row. Informed Filler moves the information in all remaining rows up by one row. .... Filling Out Forms 3-15 Expandable Rows in Tables If the form designer has selected the ‘Expandable rows’ option for a table, the spacing of individual rows can expand if you enter more data than the chosen row spacing can display. With this option selected, all rows in the table are expandable, but only the rows that contain extra data are affected. For example, if only one row in a table contains more information than it could normally display, only that row will expand. The other rows will retain their original spacing. Only the row with extra information expands. All other rows retain their original spacing. If all the rows in a table already contain data, Informed Filler will not allow you to expand any rows in the table, since that would cause the last row of the table to disappear. If you try to expand a row when all rows in the table already contain data, you’ll be alerted with a message. Scrolling Tables The form designer can include a scroll bar with any table on the form. A table that includes a scroll bar is called a scrolling table. Informed Filler automatically adds new rows to the scrolling table when you enter more data than the table can display. You can view all the data in the table by scrolling up and down using the scroll bar. You can view all the information by using the scroll bar. Depending on which option the form designer has chosen, the scroll bar on a scrolling table might be visible at all times, or only when you select or tab into the table. When a form that contains scrolling tables is filled out and printed, Informed Filler repeats the printing of the page or pages that contain the scrolling tables, until all the data in those tables has been printed. For example, if page 2 of a two page form contains a scrolling table, Informed Filler will print page 1, then page 2, then page 2 again until all the data in the scrolling table has been printed. The extra copies of page 2 will only contain the data in the scrolling table; all other fields will print blank. Note Scrolling tables do not store an infinite number of rows. It is recommended that the scrolling table feature be used to store only a few extra rows of data for best results .... 3-16 Filling Out Forms Using Buttons Using Buttons As an alternate method for invoking commands and actions, the form designer can include buttons on your form templates. Clicking a button invokes a command or action according to the button’s configuration. Clicking this button mails the form by invoking Informed Filler’s Send command. Clicking a button will often perform a command just as though you choose the command from a menu. For example, the mail button on the form above provides an alternative method for selecting Informed Filler’s Send command. Other buttons might select settings or perform custom actions as specified by the form designer. Like menu commands, a button is available only when its associated command or action is permitted. For example, if a button is configured to reveal the next record in the data document, this button will be unavailable if the current record is the last record. Pages of a Form Pages of a Form Each form has a work page and at least one numbered page. The numbered pages contain the form’s actual design. For example, the first and second pages of a two page form are the numbered pages. A form can have a maximum of 99 numbered pages, and each page can have up to 99 parts. The number of pages and the number of parts per page is determined during the design process using Informed Designer. You cannot change these attributes of a form using Informed Filler. The Work Page Every form contains one work page. Like the numbered pages of a form, the work page can contain graphics, text, and cells. The only difference between the work page and numbered pages is that the work page doesn’t print when you print a form. For instructions on how to print the work page, please see “Printing the Work Page” in Chapter 9. .... Filling Out Forms 3-17 There are two common uses of the work page. ■ A place to put instructions or information that’s useful while filling out a form. For example, suppose there are special instructions for distributing a form after it has been filled out. You might find these instructions on the work page. ■ A place to put cells that should not print with the rest of the form. You may need to enter or calculate cells that don’t appear on the form (but are required by other calculated cells). For example, you might find the employee wage rates for a check form on the work page. When you fill out a form, the work page functions like a numbered page. You can Tab to cells on the work page and change their values. When you print the form, the work page doesn’t print. Changing Pages On multi-page forms, Informed Filler automatically changes pages when you tab from a cell on one page to a cell on a different page. You can also use the page Tabs located along the top of the document window to change pages manually. To change from one page to another: 1. Click the Tab that corresponds to the page you wish to go to. If the form contains so many pages that all the Tabs cannot be displayed at once, a set of ‘left and right’ arrows will appear at the top right corner of the document window. Click the arrows to move forward or backward between the excess pages. Intelligent Features Intelligent Features Informed’s data intelligence features make it easy to fill out forms quickly and accurately. With Informed Filler, forms can automatically format, calculate, look up, and verify data. The following figure shows a completed form with various intelligent features identified. .... 3-18 Filling Out Forms Auto-incrementing numbers ABC Company 12345 - 123 St New York, NY 15243 Invoice # Sold To Mr. Smith 8273 Long Way San Francisco, CA 27363 Ship To Mr. Smith 27364 Short Way San Francisco, CA 82734 552 Default to today’s date Date Terms 9/14/96 Cash Qty Part 2 12 872 231 PO No. Ship By UPS Description Price Ext. Gadgets Widgets 79.23 771.10 158.46 9,253.20 Lookup in another form or data source Offer a list of choices Calculate cells INVOICE Shipping Total 8.00 $9,419.66 As explained in “Informed Documents” (see Chapter 2), the template of a form consists of both the graphical appearance of the form as well as its intelligent features. The form designer sets up the intelligence of a template using Informed Designer. Calculations Informed Filler automatically fills in calculated cells. A calculated cell is a cell that obtains its value based on other cells on your form. A cell’s calculation formula is evaluated whenever the value of any cell that participates in the formula changes. For example, suppose that a cell called ‘Extension’ is calculated as ‘Quantity * Price.’ Whenever you type a different value in either of the ‘Quantity’ or ‘Price’ cells, Informed Filler automatically calculates and displays the new value of ‘Extension.’ As explained in “Display Only Cells” earlier in this chapter, the form designer can prevent you from changing the value of any cell—including a calculated cell—by making the cell display only. If a calculated cell is not display only, you can change its value like any other cell. For example, if you have an invoice with a calculated cell called ‘Discount,’ on occasion you might want to give a customer more than the calculated discount. If the cell is non-display only, you can manually override the calculated value by typing a different value. To change the cell back to its calculated value: 1. Select the cell on the form or the column on the Record List. 2. Choose Cell > Set Value. The Set Value dialog appears. .... Filling Out Forms 3-19 3. Click the ‘Its calculated value’ radio button, then click ‘OK.’ Data Verification The form designer can enter error checking rules for any cell so that Informed Filler will automatically check for mistakes as you fill out a form. Each time you enter a cell value, Informed Filler checks the value according to the cell’s check formula. A check formula is a formula that examines a cell value to determine if an error has been made. For example, a check formula might check to ensure that a cell’s value is within a particular range. Some check formulas detect errors, whereas others warn you of specific conditions. In any case, you’ll hear a beep when you try to select a different cell or accept the record. Some check formulas will even present an alert dialog box with a message. Others will add a message to the cell’s help dialog (see “Help Messages for Cells”). The following figure shows an alert dialog box. Once an error has been reported, Informed Filler will allow you to move to a different cell even without first correcting the mistake. However, depending on how the designer has configured the form you might not be able to save, mail, print or submit a record until all errors have been corrected. Again, depending on how the form was configured, cells with missing or invalid data might appear filled in with color to indicate that there is a problem. Note If you’re unaware of how to correct an error, you can always revert or remove the record. For more information, see Chapter 8, “Manipulating Records.” Whenever an alert dialog box appears, Informed Filler will automatically add the message to the cell’s help dialog box. This allows you to later view the alert message by selecting the cell then choosing Cell > Help.... See “Help Messages for Cells” later in this chapter for more information. .... 3-20 Filling Out Forms Choice Lists Often a cell will take on a variety of common values. For example, the shipping method on an order form might always be Mail, UPS, or Federal Express. The form designer can enter a list of choices for any cell. Instead of typing a cell value, you can simply select a choice. Depending on how the form designer has configured a cell’s choice list, the choices are displayed either in a palette or in a drop-down list. Choices for ‘Ship Method’ displayed in a palette Choices for ‘Ship Method’ displayed in a drop-down list If the choices for a cell are configured to display in a drop-down list, you’ll see an arrow on the right side of the cell’s title section, indicating the presence of a choice list. Choice list indicator To display the choice list, click the arrow and hold the mouse button down. Depending on how the form designer has set up the form, choices in a palette will display automatically when you tab into the cell, or you may have to choose View > Show Choices. If you show the palette by choosing the Show Choices command, the palette will remain visible until you close it manually by choosing Hide Choices or by clicking the palette’s close box. If the palette is set to display automatically, Informed Filler will also hide the palette for you automatically when you select a different cell or accept the record. The form designer can add descriptive text to a cell’s list of choices that won’t appear in the cell once a choice is made. For example, if you select the choice ‘TurboMail (0003),’ only the text in parenthesis, in this example ‘0003,’ will appear in the cell. .... Filling Out Forms 3-21 Selecting a Choice Depending on whether a choice list is displayed in a drop-down list or in a palette, you use different methods to select a choice. To make a selection from a drop-down list: 1. Click the arrow indicator on the cell’s title section and drag the mouse until the choice you want is highlighted. 2. Release the mouse button, your choice appears in the cell. When choices are displayed in a palette, you can select a choice by double-clicking it in the list or by using the Up and Down arrow keys. Another convenient way to select a choice from either a choices palette or a drop-down list is to type the first few characters of the value. As you type characters, Informed Filler selects the choice that most closely matches the typed value. For example, suppose that the sales person cell on a sales slip has the choices listed in the following table. Sales Person Choices Sales Person Choices Brown, Tom Dawson, Greg Dickens, Sharon Johnson, Cindy Murphy, Karen Smith, John Young, Kevin Typing the letter ‘D’ would select ‘Dawson, Greg,’ the first choice that starts with that letter. Typing ‘Da’ would also select ‘Dawson, Greg.’ However, typing ‘Di’ would select ‘Dickens, Sharon’ instead. In each case, Informed Filler copies the entry into the cell as the selection is made. The only exception to this is when you type the first characters of choices that have descriptive text added to them. For example, if you have TurboMail (0003) as one of the choices, typing the letter ‘T’ selects the choice in the list but doesn’t automatically display the value (0003) until you tab out of the cell. Once you’ve selected the correct choice, press Tab to accept the selected choice and move to the next cell. If you press Tab without selecting a choice, Informed Filler leaves the cell blank and moves to the next cell. .... 3-22 Filling Out Forms Editing a Cell’s Choices Although you cannot edit or remove the original choices in a choice list, you may add extra items to a cell’s choice list, provided that the form designer allows that action. To add more choices to a choice list: 1. Choose Cell > Extra Choices to display the Edit Choices dialog box. 2. To add a new choice, type the entry in the text box below the scrolling list and click ‘Add.’ The new choice is added to the list in sorted order. Although there’s no practical limit to the number of choices a cell can have, we recommend that you enter no more than 40 or 50. 3. To change or remove an extra choice, first select the choice by clicking it in the scrolling list; the selected choice appears in the text box. To remove the selected choice, click ‘Delete.’ To change the selected choice, type the new value then click ‘Change.’ 4. After you’ve entered all choices for the selected cell, click ‘OK’ to dismiss the Edit Choices dialog box. The next time you tab into that cell, the choice list will show your extra choices as well as the original choices. Note When you add extra choices, they are only available for the cell that you added them in. In other words, the extra choices will not appear in other cells, even if they use the same choice list. Help Messages for Cells Each cell on a form can display a custom help message created by the form designer. The help message contains useful information or special instructions on filling in the cell. Help Messages on Windows On Windows, help messages are displayed in the status bar at the bottom of the Informed Filler window, on the Help palette and in tip windows. .... Filling Out Forms 3-23 To display the help message for a cell on Windows: 1. Select the cell. Any help message for that cell will appear automatically in the status bar at the bottom of the Informed Filler window. To view a help message in a tip window: 1. Hover the cursor over a cell until the message appears. mouse hovers here To display help messages on the Help palette: 1. Click the ‘?’ icon at the bottom left corner of the Informed Filler window or… 2. Choose View > Show Help or… 3. Use the Ctrl-? key combination. The Help palette appears. Help Messages on Macintosh On Macintosh, help messages can be shown on the Help palette or in Help balloons. To show help messages on the Help palette: 1. Select the cell. 2. Choose Cell > Help or press the Cmd-? key combination. The Help palette appears. .... 3-24 Filling Out Forms To display the Balloon help: 1. Choose Help > Show Balloons and point at the cell of interest. A balloon appears showing the cell’s help message: To turn off the Balloon help, choose Help > Hide Balloons. Check Formulas and the Help Dialog As discussed in “Data Verification,” a cell’s check formula can append a message to the help message. You might, therefore, see a different message on the help dialog depending on the value of the current cell. When a check formula uses an alert or help message, the message is added to the cell’s custom help message. The check formula message is separated from the cell’s help message by a dashed line on the Help dialog. The check formula message will remain part of the help message until you change the cell’s value. .... Filling Out Forms 3-25 Lookups The form designer can configure forms to look up information so that you don’t have to. Entering a part number on an invoice form, for example, could look up related inventory information in another data document or database and fill it in on the form. Lookups reduce the amount of typing necessary to fill out a form and improve the accuracy of the information entered. Value in lookup cell is searched for. Related information is filled in on the form. The cell in which you enter information that’s looked up is called the lookup cell. In the figure above, the part number cell is the lookup cell. Informed Filler can look up information in other form data documents and in other information systems. An information system can range anywhere from a small database running locally on your computer, to a high capacity, high performance SQL database running on a mainframe. The place where Informed Filler looks up information is called the lookup source. Lookups are configured by the form designer. Informed Designer and Informed Filler include built-in support for looking up into form data documents, or information available through Macintosh applications that support Apple events or AppleScript. Other types of lookup sources are accessed using Informed data access plug-ins. Data access plug-ins must be installed in your plug-ins folder. A lookup is performed whenever you enter a value in a lookup cell and press Tab to leave the cell. You might be prompted to enter some information, such as your name and a password, when the lookup is performed. This depends on the particular lookup source and how the connection is configured. The form designer can include the necessary connection information in the form template itself or leave it blank. For example, if the form designer did not include a user ID and password in the form template, you might see a connection dialog when the lookup is triggered. .... 3-26 Filling Out Forms The exact appearance of the connection dialog varies depending on the type of lookup source. When a lookup is performed, the value that you type in the lookup cell is searched for in the lookup source. If a single match is found, the related information is returned and entered automatically on the form. If the search fails, you’ll see a message indicating so. If multiple matches are found, you might see a dialog box requesting that you select a single match. If this happens, select the desired match then click ‘OK.’ Lookup Errors When you trigger a lookup, it is necessary that the lookup source be available to perform the lookup. If Informed Filler is unable to find or connect to the lookup source, you’ll see an error message indicating so. Depending on the type of lookup source, the specific error message and the options available will vary. For some lookup sources, the error is described and the lookup is canceled. For others, options include skipping the lookup and looking for the lookup source. .... Filling Out Forms 3-27 Clicking ‘Look’ allows you to try and locate the lookup source. For example, if the lookup source is a form data document and Informed Filler cannot find the document, clicking ‘Look’ on this dialog box allows you to browse any available volumes to locate the document. Clicking ‘Skip’ ignores the lookup that time only. This means that the error message will appear the next time the lookup is attempted. The ‘Disable’ option ignores the lookup until the data document is closed and later opened again. For some lookup sources, the ‘Look’ option is not available. Instead, you’ll see a button labeled ‘Retry.’ Clicking ‘Retry’ attempts to perform the lookup again. Form Numbers Forms such as invoices and purchase orders often contain unique numbers for identification purposes. Each time you fill out a form, you enter a new form number. The form designer can configure a cell that contains the form number to be an auto-incrementing cell Form numbers can be obtained from a variety of sources. For instance, the next available number might be stored in the form template itself, or it can be obtained from another application or data source. Data sources are accessed using Informed’s data access plug-ins. If the auto-incrementing cell obtains its number from another data source, you might be prompted for some information such as a name and password when the form number is requested. This depends on the particular form number source and how the connection is configured. The form designer can include the necessary connection information in the form template or leave it blank. For example, if the form designer did not include a user ID and password in the form template, you might see a connection dialog when the auto-increment is triggered. The exact appearance of the connection dialog varies depending on the type of form number source. .... 3-28 Filling Out Forms In cases where the source of your form numbers is unavailable, you can use the Assign Next Value command to obtain values at a later time. For example, suppose you’re waiting at an airport while on a business trip and you want to fill out an expense form that gets its number from an Oracle database back at your office. You can fill out the entire form except for the form number. Then, when you return to your office, you can connect to your network and choose Cell > Assign Next Value. Informed Filler obtains the next available value from the Oracle database, and fills in the cell on your form. The Assign Next Value command is also used for cells that are configured to auto-increment manually when you request a value. To manually obtain the next available value for a cell, first select the cell, then choose Cell > Assign Next Value. You can manually assign values to multiple records on the Record List. With the collected records displayed in the Record List window, select the column that contains the cells that require values and choose Cell > Assign Next Value. Informed Filler obtains the next available values and assigns them to the selected cells. For information on how to find a collection of records and how to use the Record List, see Chapter 8, “Manipulating Records.” Form Number Errors When a form number is requested, it is necessary that the source of the form number be available to generate the next available value. If Informed Filler is unable to find or connect to the form number source, you’ll see an error message indicating so. Depending on the type of form number source, the specific error message and the options available will vary. For some form number sources, the error is described and the auto-increment is canceled. For others, options include skipping the auto-increment and looking for the form number source. Clicking ‘Look’ allows you to try and locate the form number source. For example, if the form number source is another application and Informed Filler cannot find the application, clicking ‘Look’ on this dialog box allows you to browse any available volumes to locate the application. Clicking ‘Skip’ ignores the auto-increment that time only. This means that the error message will appear the next time a form number is requested. The ‘Disable’ option ignores the auto-increment until the data document is closed and later opened again. For some form number sources, the ‘Look’ option is not available. Instead, you’ll see a button labeled ‘Retry.’ Clicking ‘Retry’ attempts to perform the auto-increment again. 4 Using Digital Signatures In this chapter: ■ ■ ■ ■ ■ ■ Signature Cells 4-2 Security Preferences 4-4 Signing Forms and Verifying Digital Signatures 4-5 Verifying Templates 4-11 Logging Off Your Signing Service 4-12 Signing Plug-ins 4-13 .... 4-2 Using Digital Signatures 4 Using Digital Signatures Approval is often a necessary step in the processing of a form. Today, technology allows us to sign forms electronically with digital signatures. Signing electronically reduces the need to print forms and, in some ways, offers more security than paper signatures. A digital signature is like a special number that’s derived from information about the person signing and the data being signed. This number can reliably identify the signer and detect any changes in the signed data. The form designer configures a form for signing by drawing one or more signature cells on the form template. Each signature cell can sign the entire form or only certain parts of the form. With a properly configured form, you can easily sign completed forms and check the validity of signatures and templates. Informed supports digital signatures through the use of signing plug-ins. Regardless of which signing service you use, the process for signing forms, verifying signatures and verifying templates is essentially the same. Please see “Signing Plug-ins” at the end of this chapter for details about the different signing services supported by Informed. Signature Cells Signature Cells A signature cell is a cell that can store a digital signature. The form designer configures a form template for electronic signing by drawing one or more signature cells on the form. A signature cell can look just like the space for a signature on any paper form. Date signed Signature Like any cell, a signature cell has a tab position. The tab position determines where the cell appears in the tabbing order. You can select a signature cell like any other cell: by tabbing to the cell, or by clicking the cell with the mouse. When selected, a bold frame flashes in the cell’s interior. .... Using Digital Signatures 4-3 Each form can have more than one signature cell, and each signature cell can sign different information. For example, a form that has two sections which are often filled out by two different people could have two signature cells. Each cell would sign only those cells in its respective section. You could even have a third signature cell which signs the entire form including the other signatures. Form with three signatures 1st signature cell signs 1st section 2nd signature cell signs 2nd section 3rd signature cell signs all cells In addition to signing cells, the form designer can configure a signature cell to also sign any attachments. For information on attachments, see Chapter 5, “Attachments.” To see which cells on a form are signed by a particular signature cell: 1. Select the cell. 2. Choose Edit > Signatures > Show Signed Cells.This feature is useful if you are about to sign a form and want to see which cells you are signing, or if you are viewing a form that’s already been signed and want to see which cells have been signed by the existing signature. With the Show Signed Cells option selected, Informed Filler draws a red frame around each signed cell when you select the signature cell. Only those cells which are signed (or will be signed) by the selected signature cell are revealed. To turn the Show Signed Cells option off, choose Show Signed Cells again. .... 4-4 Using Digital Signatures Informed Filler also allows you to see whether or not any attachments are signed by a particular signature cell. If the selected signature cell does not contain an actual signature and the cell is configured to sign attachments, you’ll see a red frame around both the Attachments window and the paperclip indicator. This is to indicate that if you sign the record in that signature cell, all of the currently attached files will be signed as well. If the selected signature cell does contain a signature and the cell is configured to sign attachments, you’ll see a red frame around only those attached files that were present when the record was signed. Once a record has been signed with a signature that signs attachments, you can add other attachments without compromising the digital signature. Informed Filler knows which attachments a signature has signed. Once an attachment has been signed, you cannot delete it without first removing the signature. Security Preferences Security Preferences Informed allows you to specify various security preferences such as which signature service you wish to use and whether or not to display template authorization information when you verify data. To set your security preferences: 1. Choose Edit > Preferences and click the ‘Security’ icon in the scrolling list. The Security Preferences panel appears. .... Using Digital Signatures 4-5 2. Select your preferred signature service from the ‘Signature Service’ drop-down list. If you don’t specify a service, you’ll be asked to select one each time you sign a form. 3. If you want to display template authorization information when you verify data, click the ‘Display template authorization…’ checkbox. (See the following section for details.) 4. If you want Informed Filler to automate the verification process for you click the ‘Automatically verify signatures…’ checkbox. Rather than verifying each signature manually, Informed Filler will automatically verify all digital signatures on the form each time you display a different record in the form window. 5. For some signing services, once you’ve identified yourself, or logged on, the first time after launching Informed Filler, you’ll remain logged on until you quit Informed Filler. For security reasons, you can specify an automatic log off time by entering a value in the ‘Log off service after’ text box. 6. Click ‘OK’ to save your preferences. Signing Forms and Verifying Digital Signatures Signing Forms and Verifying Digital Signatures You can sign forms that contain signature cells using Informed Filler’s Sign command. You can sign one record at a time, or you can sign multiple records using the Record List window (see “Working with Multiple Records”). To sign a form: 1. Select the signature cell. 2. Choose Edit > Signatures > Sign. As a shortcut, you can also double-click an empty signature cell or press Enter (Windows) or Return (Macintosh) to choose the Sign command. If you have more than one signing plug-in installed and the form designer has not configured the signature .... 4-6 Using Digital Signatures cell to use a particular service, you’ll be first asked to select the service you want to use. 3. Select the service you want to use from the ‘Sign using’ drop-down list, then click ‘OK.’ If you are not already logged onto the signing service, Informed Filler will request that you identify yourself. The dialog box you see is specific to the signing service used. After you’ve identified yourself, Informed Filler creates the digital signature and stores it in the signature cell. The signature icon and your name appear in the cell. Depending on how the form designer configured the cell, you might also see the signing date next to the signer’s name. Note You should not trust the validity of the name and date displayed in a signature cell. Only by verifying the signature can you be sure of the date and the signer’s identity. The signing date may or may not be available depending on the signing service you’re using. Once you’ve signed a form, Informed Filler automatically locks all signed cells to prevent changes to the signed information. Although you can select a signed cell, you cannot change its value. The pencil in the collection information box provides a visual indication that the cell is locked. .... Using Digital Signatures 4-7 Verifying a Signature After signing a form, anyone with the same signature service installed on their computer can verify the digital signature. To verify a signature: 1. Select the signature cell. 2. Choose Edit > Signatures > Verify. The verification process involves re-creating parts of the digital signature using current data, then comparing the results with the original signature. If they match, the signature is valid. This means that the person identified on the verification dialog is truly the person who signed the form, and the signed data has not changed in any way. If verification of a digital signature fails, you’ll see a message dialog indicating so. Verification will fail if the originally signed data or the digital signature itself has been changed or tampered with. Like signing, you might be asked to identify yourself when you choose the Verify command. Depending on your setting of the ‘Display template authorization when verifying data’ preference, you’ll see either a dialog with additional options, or only the results of verifying the data signature. With the preference turned on, if the digital signature verifies successfully, Informed Filler will display the following dialog. Using the controls on the Verify Signature dialog box, you can identify the person who signed the data, you can verify the template you are currently using, and you can display information about the template that was used when the data was originally signed. To see the name of the person who signed the data: 1. Click the ‘Identify Data Signer’ button. Informed Filler displays the person’s name in a dialog. .... 4-8 Using Digital Signatures If you click the ‘Verify Template’ button, Informed Filler verifies your current template and displays the name of the person who authorized it. You can also verify your template by choosing Edit > Signatures > Verify Template. See “Verifying Templates” later in this chapter for details. When a completed form is signed with Informed Filler, information about the version of the template being used and the person who authorized it is included with the signature. To view this information, click the ‘More Info...’ button. The Template Authorization dialog box appears. The Template Authorization dialog box allows you to compare both the template ID and the revision number of the template you are currently using with those of the template that was used when the data was originally signed (which may be different). You can see the name of the person who authorized the template that was used when the completed form was signed by clicking the ‘Identify Original Authorizer’ button. Having access to the names of the people who authorized both templates is helpful if there is any discrepancy between the two templates. Using this information, you can quickly tell if either one of the templates was authorized by a person without proper authority. .... Using Digital Signatures 4-9 If the ‘Display template authorization when verifying data’ preference is turned off, only the identity of the data signature (the dialog box that appears when you click ‘Identify Data Signer’ on the Verify Signature dialog box) is displayed when you verify a signature. For information about verifying multiple digital signatures at the same time, please see “Working with Multiple Records” later in this chapter. The Signature Icon The signature icon is a standard icon that applications use to indicate the presence of a digital signature. With Informed Filler, the name of the signer, and optionally, the date that the form was signed, appears to the right of the signature icon. The state of a digital signature can be determined only by verifying the signature. For most signing services, the signature icon is a visual indicator of the signature’s validity. When you view a signed record, the signature icon will contain a question mark. This indicates that the validity of the signature is unknown. If the signature is successfully verified, you’ll see a checkmark inside the signature icon. An invalid signature will display an “x” in the signature icon. Note Each time you view a signed record, the signature icon contains a question mark (even if you’ve recently verified the signature). For example, if you verify the signature on record number 6 in your data document, the signature icon displays a checkmark. If you move to another record in the data document and then return to record 6, the signature icon will again contain a question mark. This is because, while difficult, it’s possible that the data could be tampered with between the time the signature was verified and the time you viewed the record again. In order to sign forms and verify digital signatures, you must have the signing service and the appropriate Informed signing plug-in installed on your computer. If either of these are missing, you can still open forms that contain signature cells. However, rather than seeing the standard signing service-specific signature icon, a generic signature icon will appear instead. .... 4-10 Using Digital Signatures Automatic Verification Rather than manually verifying each digital signature as you find or browse through different records, Informed Filler can automate the verification process for you. With the ‘Verify signatures on current record’ preference selected, Informed Filler will automatically verify all digital signatures on the form each time you display a different record in the form window. See “Security Preferences” earlier in this chapter for information about setting this preference. If Informed Filler detects an invalid signature during automatic verification, a message will appear indicating so. Since verifying a digital signature can take several seconds or more, you might want to use the auto-verification preference only if the computer you’re using is fast enough. Working with Multiple Records To work with more than one record, Informed Filler provides the Record List window. The Record List window displays records in a list, making it easy to see the information of multiple records at a glance. The Record List window also makes it easy to sign multiple records or verify multiple digital signatures at the same time. Like any cell, a signature cell can appear as a column on the Record List. For each record displayed, the name of the person who signed the record is shown in the signature cell’s column. If you need to sign more than one record, rather than signing each one individually, you can sign them all at once using the Record List. 1. Find the records you want to sign and display them in the Record List. 2. Select the signature cell column, then choose Edit > Signatures > Sign. As always, you’ll be asked to identify yourself in a manner according to the signing service you’re using. Informed .... Using Digital Signatures 4-11 Filler will then sign all records in the Record List. You can verify multiple digital signatures in the same way. 1. With a signature cell column selected on the Record List window, choose Edit > Signatures > Verify. Informed Filler will verify the digital signatures for all signed records on the Record List. After all signatures have been verified, you’ll see a message indicating the results. If one or more digital signatures are found to be invalid, Informed Filler will identify the corresponding records by selecting them on the Record List window. An exclamation mark will appear to the left of any invalid signatures on the Record List. Verifying Templates Verifying Templates Before distributing a template for use with Informed Filler, the form designer can authorize it so that you can verify its authenticity. Otherwise, the template is vulnerable to tampering. For example, suppose a loan application must go through two levels of screening before it can be approved. A loans officer interviews the client and then selects a ‘Not recommended’ checkbox on the application form and signs it with a digital signature. The application then goes to the bank manager who has the final authority to approve or reject the loan application. If a person wanted that loan to be approved, he could alter the form template used by the bank manager so that the application appears to have been recommended by the loans officer. To do so, he would simply use Informed Designer to change the title of the ‘Not recommended’ checkbox field to ‘Recommended,’ and the ‘Recommended’ title to ‘Not recommended.’ When the bank manager views the data with the altered template, it might look like this: .... 4-12 Using Digital Signatures Verifying the loans officer’s signature would show that the data on the form has not been altered because the value of the checkbox has not changed. However, by switching the cell titles on the form template, the meaning or context of those values is different. The bank manager would be misled to believe that approval of the loan application was recommended. In the example above, the tampering is fairly obvious and is used to illustrate the point. In real world situations, tampering could be much more subtle while causing serious security breaches. The form designer can raise the level of security in the electronic forms process by using digital signatures to authorize the form templates used in an organization. Authorizing templates provides the same authentication and tamper detection for form templates as signing completed forms with Informed Filler does for form data. When a form template has been authorized, you can verify it to make sure that it’s valid before you fill out your form. Verifying a template reveals the details of the person who authorized it for use. If you verify a template and see that it was authorized by a person without proper authority, it may be an indication that the template is not authentic, and should not be used. To verify the form template associated with the current data document: 1. Choose Edit > Signatures > Verify Template. If you are not already logged onto your signing service, you may be asked to do so. Informed Filler verifies the template and displays the name of the person who authorized it. If the signature fails to verify, you’ll see a different message indicating that the template, or the authorization signature itself, has been altered. .... Using Digital Signatures 4-13 When you sign a completed form with Informed Filler, information about the version of the template you are using and the person who authorized it is included with the signature that results from signing the completed form. This information can be displayed later when verifying the signature on the completed form. See “Signing Forms and Verifying Digital Signatures.” Logging Off Your Signing Service Logging Off Your Signing Service For some signing services, once you’ve identified yourself, or logged on, you’ll remain logged on until you quit Informed Filler. This allows you to sign forms and verify signatures without having to identify yourself each time. Care should be taken to never leave your computer unattended once you’ve logged on to your signing service. Otherwise a different person could use your computer to falsely sign forms using your identity. To disconnect, or log off, from your signing service: 1. Choose the Log Off Service command from Informed Filler’s Edit menu. Signing Plug-ins Signing Plug-ins Informed supports digital signature technology through the use of Informed signing plug-ins. At the time this documentation was prepared, Informed provided the following signing plug-ins: ■ ■ ■ ■ I-Sign™ (POP) I-Sign™ (IMAP) Entrust CryptoAPI for Microsoft CSP (Windows only) See the following sections for details about each signing plug-in. I-Sign (POP) and I-Sign (IMAP) I-Sign™ is Informed’s proprietary, built-in signing service that lets you create and verify digital signatures based on a user ID and password. I-Sign is available in two versions: I-Sign(POP) and I-Sign(IMAP). Most signing services require additional software and have fairly complex administration procedures. I-Sign is included free of charge with Informed, and is incredibly easy to set up and use. All you require is the I-Sign(POP) plug-in and a POP (Post Office Protocol) based mail system or the I-Sign(IMAP) plug-in and an IMAP (Internet Message Access Protocol) based mail system. .... 4-14 Using Digital Signatures I-Sign uses your POP or IMAP based e-mail system as a means to verify a person’s identity. If the user can log on to the mail system with the proper user name and password, then the user must be who he or she claims to be. Configuring I-Sign Before you can use I-Sign to sign a form, you must set up your I-Sign plug-in by specifying the address of your POP or IMAP host and your user ID. The following instructions apply to both the I-Sign(POP) and I-Sign(IMAP) plug-ins. 1. Choose Edit > Preferences to display the Preferences dialog. 2. Click the I-Sign (POP) or I-Sign (IMAP) icon in the scrolling list and click the ‘Set Preferences’ button. The I-Sign Setup dialog appears. 3. Enter your user ID and host name in the text boxes, then click ‘OK.’ Note If you do not specify your POP or IMAP host and user ID using the Preferences command, Informed Filler will display the I-Sign Preferences panel and request the information the first time you attempt to sign a form. Signing Forms with I-Sign To sign a form with I-Sign: 1. Choose Edit > Signatures > Sign. The Logon dialog appears, requesting that you log on to your mail system by entering a password. .... Using Digital Signatures 4-15 2. Enter your password, then click ‘OK.’ If you’ve logged onto your mail system successfully, I-Sign authorizes the form. Once you’ve logged on and signed a form, Informed Filler remembers your password until you quit the application. That way, if you choose to sign a form again, you can do so without having to enter your password. With that in mind, you should always log off your service if you’re going to leave your computer unattended. To log off from I-Sign: 1. Choose Edit > Signatures > Log Off Service. Like other signing services, I-Sign performs a data check to look for possible tampering when you verify a digital signature. Note I-Sign signatures are not considered legally binding. If this is an issue, it is strongly recommended that you implement Entrust or Microsoft CryptoAPI digital signing services. Entrust Entrust by Nortel is a scalable security product that can offer different strengths of security and different infrastructures for key management. In order for the Informed Entrust signing plug-in to work, you must have a properly configured version of the Entrust client software installed on your computer. You must also have an Entrust profile—a unique personal identity for signing purposes. When you sign a form, you are asked to log on to Entrust by typing your Entrust password. .... 4-16 Using Digital Signatures In addition to logging on to Entrust, the Log on dialog box also allows you to change your Entrust password and choose a different Entrust profile. To change your password: 1. Click the ‘Change Password...’ button. A dialog box appears requesting that you enter your old password and then the new password. To choose a different Entrust profile: 1. Click the ‘Find Profile...’ button. The method of finding a different profile depends on the method of key management used in your organization. Please contact your security or network administrator for more information. After you sign a form or verify a digital signature for the first time, Informed Filler remains logged on to Entrust. That way, if you later choose to sign a form again, Informed Filler can do so without requesting that you log on again. You should be careful to never leave your computer unattended after you’ve signed a form. Otherwise someone else might use your signing identity to sign forms. To log off from Entrust: 1. Choose Edit > Signatures > Log Off Service. Crypto API for Microsoft CSP Informed’s CryptoAPI plug-in allows you to sign forms and verify signatures and templates using the CryptoAPI cryptographic standard. Requirements ■ ■ ■ Informed Designer and Filler v2.7 or later Windows 95 (with Cryptographic capabilities installed), Windows 98 or Windows NT a digital signature certificate issued by a Cryptographic Service Provider that supports the CryptoAPI standard (e.g. VeriSign). The certificate should be installed into Internet Explorer. .... Using Digital Signatures 4-17 Signing To sign a form: 1. Enter the signature cell then either hit the ‘Enter’ key or double-click on the signature cell. Depending on the security setting chosen when your signing certificate was created, one of the following three things will happen: ■ the signature will take place without verification (low setting) ■ a dialog will appear asking for permission to sign (medium setting, shown below) ■ a dialog will appear asking for a password followed by a dialog asking for permission to sign (high setting) 2. In this case, click ‘OK’ to complete the signature. Once the signature has been created it is placed in the signature cell and looks like the one below: Signature Verification To verify a signature: 1. Double-click on an already signed cell. If the signature is valid, the following dialog will appear. .... 4-18 Using Digital Signatures 2. Click ‘OK’ to dismiss the dialog. 5 Attachments In this chapter: ■ ■ ■ ■ ■ ■ ■ The Attachments Window 5-2 Windows and Macintosh File Types 5-3 Attaching Files 5-4 Extracting Files 5-5 Opening Attachments 5-6 Deleting Attachments 5-6 Attachments and Digital Signatures 5-6 .... 5-2 Attachments 5 Attachments With paper forms, associated documents or information are often attached to a form using a paper clip. Informed Filler provides this same capability by allowing you to attach electronic documents to electronic forms. Any file, regardless of its size or content, can be attached to a record. Although not visible on the form itself, an attached file becomes part of a record just like the information in each of the cells and is stored with the record in the data document. If you mail a record to another person, the attached files, if any, are included. The recipient can extract the files so that they can be accessed or viewed using the appropriate application. This chapter explains how you can attach files to records. The Attachments window is described as well as the Attach and Extract commands. The Attachments Window The Attachments Window Just above the scroll bar along the right edge of the form window is a paper clip with a number below it. The number indicates the number of files that are attached to the current record. Files that are attached to a record are not visible on the form itself. Instead, attached files can be seen in the Attachments window. To show the Attachments window: 1. Choose View > Show Attachments or click the paper clip indicator on the form window. To close the Attachments window, choose View > Hide Attachments or click its close box. The Attachments window is like any window; it can be resized and repositioned on the screen the normal way. Each attached file, along with its size, is listed in the Attachments window. .... Attachments 5-3 Windows and Macintosh File Types Windows and Macintosh File Types Since Windows and Macintosh are two different operating systems, it is normal to expect differences in the way that files are stored with each one. Although these details are not important to the typical computer user, it is useful to understand certain differences as they relate to Informed Filler’s attachments feature. The type of a file determines the type of information that is contained in the file. On Windows, a file’s type is specified by the three character DOS extension in the file’s name. For example a text file has the extension “.TXT.” On Macintosh, a file’s type is stored separately from its name and is usually reflected in the appearance of its icon. Each file’s type is represented as a four character code that is maintained by Macintosh. This code is normally not visible to the user. A text file on the Macintosh has a file type of “TEXT.” If you attach a file to a record on one platform (Windows or Macintosh), and then mail the record to a user of the other platform (Macintosh or Windows), Informed Filler has to know which file type to use when the file is extracted. For example, if a Windows user attaches a file with the “.TXT” DOS extension to a record, Informed Filler uses the “TEXT” type when a Macintosh user extracts the file. Whenever a file is attached or extracted on the Macintosh, Informed Filler looks up the file’s type or extension to find the corresponding extension or type. If a Windows file is being extracted, the file’s DOS extension is looked up to find the corresponding Macintosh file type. If a Macintosh file is being attached, the corresponding DOS extension is looked up and stored so that it can be used later if a Windows user extracts the file. A list including many of the common DOS extensions and Macintosh file types is built into Informed Filler. In addition to this list, the Macintosh user can add others using the PC Exchange control panel. The information available in PC Exchange is utilized only if entries are found for the text file type and Informed’s data document type. The table below shows the settings you should use. DOS Extension Associated Application Macintosh File Type .TXT .IFM SimpleText Informed Filler™ Text document (TEXT) Form data document (IDoc) For detailed information about PC Exchange, please see the documentation that came with your Macintosh computer. .... 5-4 Attachments Attaching Files Attaching Files To attach files to a record, you can drag files onto the paper clip or the Attachments window or use the Attach command. To attach a file by dragging: 1. Click on the file’s icon and hold the mouse button down. 2. Drag the file onto the paper clip or the Attachments window. 3. When a highlighted frame appears, release the mouse button. To drag and attach multiple files at once, select them all, then drag the them onto the paper clip or Attachments window. To use the Attach command: 1. Choose File > Attach or… 2. Click the paper clip icon to display the Attachments window, then click ‘Add.’ The Attach dialog appears. On Windows, you will see a dialog similar to the one below: 3. Select the file you want then click ‘Open.’ The file appears in the Attachments window. Note If you hold down the Ctrl or Shift keys you can select multiple files at one time. .... Attachments 5-5 Macintosh users will see a dialog similar to the one below. 1. Select the file(s) you want, then click ‘Attach.’ The number of attachments appears below the paper clip icon on the form. Extracting Files Extracting Files When a file is attached to a record, the file’s content is stored along with the record’s data in the data document. Before you can access an attached file, you must extract the file. Extracting a file places a copy of the file at a location that you specify on your hard drive. To extract a file: 1. Select the file in the Attachments window. 2. Choose File > Extract. The standard Save dialog for your operating system appears. 3. Enter a file name and select a location to store the file, then click ‘OK.’ .... 5-6 Attachments Note You can extract multiple files at once by first selecting each of them in the Attachments window before choosing the Extract command. For each of the selected files, you’ll see the Save dialog allowing you to specify the name and location of each file separately. For Macintosh users with Mac OS 7.5 or later, you can simply drag an attached file from the Attachments window to a place on your hard drive. You can select and drag more than one item at the same time. Opening Attachments Opening Attachments To open an attachment: 1. Click the paper clip icon to display the Attachments window. 2. Double-click the file to open it. On Macintosh, you can click and drag one or more attachments onto the desktop, then double-click each item for individual viewing. Deleting Attachments Deleting Attachments To delete an attachment: 1. Click the file in the Attachments window. 2. Choose Edit > Clear or press the Delete key. If you’re running a Macintosh computer with Mac OS 7.5 or later installed, you can also delete an attachment by selecting it in the Attachments window and dragging it to the Trash. Attachments and Digital Signatures Attachments and Digital Signatures A signature cell can sign all cells on a form or only certain cells. Furthermore, the form designer can configure a signature cell to sign attachments in addition to information in cells. A signature that signs attachments includes the contents of any attached files with the data in cells that are signed when you sign a record. That way the integrity of attached files can also be protected. To see whether or not attachments are signed by a particular signature cell: 1. Select the signature cell. 2. Choose Edit > Signatures > Show Signed Cells. .... Attachments 5-7 If the selected signature cell is configured to sign attachments but does not contain an actual signature, you’ll see a red frame around the Attachments window. This indicates that if you sign the record in that signature cell, all of the currently attached files will be signed as well. If the selected signature cell does contain a signature and the cell is configured to sign attachments, you’ll see a red frame around only those attached files that were present when the record was originally signed Once a record has been signed with a signature that signs attachments, you can add other attachments without compromising the digital signature. Informed Filler knows which attachments a signature has signed and prevents you from deleting them. .... 5-8 Attachments 6 Spell Checking In this chapter: ■ Spelling Preferences 6-2 ■ Spell Checking Your Forms 6-3 ■ Spell Checking From the Record List 6-6 .... 6-2 Spell Checking 6 Spell Checking Informed Filler comes with a built-in spell checker and the spell checking plug-in needed to use it. These items are automatically installed when you install Informed Filler. You can ensure the accuracy of the data entered in text and name cells by checking for spelling mistakes on all pages of a form or only on particular sections. Informed Filler’s spell checker will detect misspelled words, double words, and other questionable occurrences. Spelling Preferences Spelling Preferences By setting Informed Filler’s spelling preferences, you can specify certain criteria used when spell checking is performed on your form. For example, you can choose which language dictionary to use and select various language options. To set Informed Filler’s spelling preferences: 1. Choose Edit > Preferences, then click the Spelling icon in the scrolling list. The Preferences dialog changes to show the Spelling Preferences panel. 2. Click the ‘Language’ drop-down list and make a select the dictionary you would like to use for spell checking. from the available choices. .... Spell Checking 6-3 3. By default, Informed Filler provides alternative spellings for questionable words when you perform spell checking. If you don’t want to see alternative spellings, turn off the ‘Always provide alternative spellings’ checkbox. 4. You can set various options for each of the dictionaries by clicking the ‘Language Options’ button. The Language Options dialog box appears. Depending on which language you’ve chosen, the dialog box will display different options. The following illustration shows the options available for the English dictionary. 5. Click the appropriate radio buttons or checkboxes, then click ‘OK.’ Note The options you select on the Language Options dialog box do not take effect until you click the ‘OK’ button on the Spelling Preferences panel. If you move your Informed folder or change the location of the Spelling folder, Informed Filler will not be able to find the spelling dictionaries when you attempt to spell check a form. If this happens, the ‘Language Options’ button on the Preferences dialog box changes to ‘Set Up Spelling.’ Click this button to select the ‘Spelling’ folder in its new location. Spell Checking Your Forms Spell Checking Your Forms Informed Filler allows you to check the spelling of data entered in text and name cells. When a spell check is performed, Informed Filler checks both words and names. Any questionable words on your form (that is, words that are not found in the spell checking dictionary you’ve chosen) are flagged and displayed on the Check Spelling dialog box. The only exceptions to this are display only cells and cells that have been signed with a digital signature. These cells are skipped when spell checking is performed. .... 6-4 Spell Checking To check the spelling on your form: 1. Choose Edit > Spelling > Check…. There are three ‘Check’ commands that you can choose: ■ ■ ■ Check Current Record - checks the currently active form record Check Collected Records - checks all records in the current collection Check Selection - checks the spelling in a selected cell on the form After choosing one of the submenu items, the Check Spelling dialog box appears. If no questionable words are found, the text boxes and scrolling list on the dialog remain blank, and only the ‘Done’ button is available. Click ‘Done’ to return to the record. If a questionable word is found, Informed Filler flags it and displays it in the ‘Word’ text box. If the ‘Always provide alternative spellings’ preference is turned on, Informed Filler will display a list of possible replacement words in the ‘Suggestions’ scrolling list. Below the list of suggestions is a status line that describes the type of questionable word. The ‘Context’ box at the bottom of the dialog displays the questionable word in context. .... Spell Checking 6-5 When a questionable word is found, you can replace it with a word from the ‘Suggestions’ scrolling list, you can skip the word, you can add the word to the dictionary, or you can type a different word in the ‘Word’ text box. To replace a questionable word with one of the alternative spellings: 1. Select the alternative in the ‘Suggestions’ scrolling list, then click ‘Replace’ or simply doubleclick the alternative word in the list. Informed Filler replaces the word and continues checking the form. You can skip a questionable word by clicking the ‘Skip’ button. Clicking ‘Skip’ passes over the word during the current spell check. The next time you spell check the form (without changing the questionable word), Informed Filler will flag and display the word again. To add a word to the dictionary: 1. Click the ‘Add’ button. This feature can be very helpful if you have an uncommon name or an unusual spelling that you enter into a name or text cell. For example, the last name “Brachi” is not very common and is not recognized in Informed Filler’s English dictionary. Normally, the word “Brachi” would be questioned when you spell check the form. By adding the word to the dictionary, Informed Filler accepts it as a valid word. As mentioned previously, when a questionable word is found, Informed Filler provides a list of alternative spellings in the ‘Suggestions’ scrolling list. If the word you are looking for is not in the list, you can check the dictionary for other alternatives. For example, if the word “surreal” was misspelled as “cureal,” the scrolling list might show the following alternatives: cruel, cure-all, and churl. Since neither of these are the correct word, you can try to find other alternatives by changing the spelling in the ‘Word’ text box and clicking the ‘Check’ button. If you change the spelling to “sureal” and click ‘Check,’ the ‘Suggestions’ scrolling list will show the correct spelling of “surreal” as an alternative. When spell checking is completed, and you’ve dealt with any questionable words, the Check Spelling dialog changes to show the ‘Done’ button. Click ‘Done’ to return to the form window. It’s possible that changing the value in a cell by spell checking can cause an error based on the cell’s check formula. If this occurs, Informed Filler will stop the spell checking operation and return you to the form window. The cell with the invalid value will be selected and an error message might be displayed (depending on the cell’s check formula). If the invalid value causes an error to occur in another cell on the form (such as a calculated cell), Informed Filler will alert you when spell checking is finished or, in the case of checking multiple records, when moving to the next record. .... 6-6 Spell Checking Spell Checking From the Record List Spell Checking From the Record List As explained in Chapter 8, “Manipulating Records,” the Record List window displays records in a list, making it easy to see the information for multiple records at a glance. You can also perform spell checking on records displayed in the Record List. To spell check from the Record List: 1. Choose Window > Show Record List to display the Record List. 2. Select one or more records, then choose Edit > Spelling > Check…. With the exception of the Check Selection command, the spell checking commands perform the same as when you spell check from the form window. Choosing Check Current Record checks the current record (identified by a black rectangle in the left margin of the Record List window) and choosing Check Collected Records checks all records in the collection. When you choose the Check Selection command with the Record List displayed, you’ll spell check a selection of records rather than a selection of text. After you choose one of the spell checking commands, the Check Spelling dialog appears and Informed Filler begins checking the requested records. If Informed Filler is checking the collected records or a selection of records, you’ll see the current record indicator moving down the Record List as each record is checked in succession. 3. When spell checking is completed the Check Spelling dialog changes to show the ‘Done’ button. Click ‘Done’ to return to the Record List window. 7 Annotation In this chapter: ■ Placing, Moving, and Removing Notes 7-3 ■ Typing, Recording, and Playing Back Notes 7-4 ■ How Design Changes Can Affect Notes 7-5 .... 7-2 Annotation 7 Annotation In addition to the information that you enter in each cell on a form, you can also include annotated notes or comments using Informed Filler’s annotation features. An annotated note is usually a comment of some sort that’s intended to bring something important to the reader’s attention. For example, you might attach a note to an invoice to instruct the shipper to hold the order until the customer’s account is paid. Traditionally, notes have been hand written either directly on the paper form, or on small pieces of yellow paper—sometimes called ‘yellow stickies’—and then stuck on the form. ABC Company 12345 - 123 Street Sold To Ship To Another company Another company New York, NY 8823 - 199 Street 8823 - 199 Street 56522 A Big Place, AB A Big Place, AB 39484 39484 Note: 5-Jul-90 INVOICE 98273 Federal Express Description Net 30 Part Qty Price 1-02 2 Widgets 102.20 204.40 2-23 1 Gadgets 45.12 Ext 45.12 249.52 Informed Filler uses the ‘yellow sticky’ analogy to show annotated notes. You can place and position notes on any form. You can enter a textual note, or if you’re using a Macintosh computer, you can record a voice message. A note appears on your screen much like a small piece of yellow paper appears attached to a paper form. The familiar appearance of a note is intended to make clear the distinction between a note and the information on the form itself. An annotated note should contain auxiliary information that’s .... Annotation 7-3 associated with the form to which it’s attached. For example, unlike the order date on a purchase order form (which appears on every purchase order form), a comment such as ‘Please get approval from Jane before submitting this purchase order.’ applies specifically to one particular form only. The remaining sections of this chapter describe the annotation features of Informed Filler. You’ll learn how to place and position notes, and how to record and playback messages. You’ll also learn how notes are affected when the design of a form is changed by the Informed Designer user. For information about importing and exporting notes, see Chapter 13, “Exchanging information.” Placing, Moving, and Removing Notes Placing, Moving, and Removing Notes Informed Filler allows you to place and position as many notes as you like. To place a new note: 1. Find the record that you want to annotate and bring the form window to the front. 2. Choose Edit > Place Note to display a blank note that is centered in the form window. Each note contains controls for entering, changing, and playing back messages. For instructions on using these controls, please see “Typing, Recording, and Playing Back Notes” later in this chapter. You can move a note to any position on your form by simply clicking and dragging it with the mouse. You should always position a note next to the information to which it specifically applies. For example, if you enter a note as a reminder that a customer’s telephone number has changed, you should position the note next to the new number. Once you’ve created a note, it will automatically appear whenever you see the record in the form window. .... 7-4 Annotation To remove an existing note: 1. Click on the note. The note color will turn blue to indicate that it is selected. 2. Choose Edit > Clear or press the Delete (or Backspace) key. To transfer a note to the Clipboard: 1. Select the note and choose Edit > Cut to remove the note and place it on the Clipboard. 2. After changing pages, choose Edit > Paste to transfer the note from the Clipboard back onto a different page on the form. Typing, Recording, and Playing Back Notes Typing, Recording, and Playing Back Notes Depending on which operating system you are running Informed Filler, different controls on notes will be available. Windows supports text notes, so only the control for viewing and editing text notes will be available. If you’re using a Macintosh computer, you can use controls for recording and playing back voice notes in addition to the text note control. Windows note Macintosh note First words of a text note Text note control Text note control Playback control Recording control Textual Messages Informed Filler displays the first few words of a textual note on the note itself. If the entire note doesn’t fit in the space provided, you’ll see only the first few words followed by an ellipsis (‘...’). To enter, view, or change the text of a note: 1. Click the note’s Text control. The Note dialog box appears. 2. Type a note in the blank window. .... Annotation 7-5 A textual note can be as long as you like. If you type past the end of a line, or if you press the Enter (Windows) or Return (Macintosh) key, Informed Filler will start a new line for you. If you enter more lines than the text box can display, you can use the scroll bar to scroll the text up or down. 3. Click ‘OK’ to add the note to your form. Voice messages If you’re using a Macintosh computer, you can also record a voice message. Recording a voice message is much like leaving a message on a telephone answering machine. You simply speak into a microphone and Informed Filler records your message. A voice annotated note can later be played by clicking the Playback control on the note itself. In order to use the voice annotation capabilities of Informed Filler, you must have a microphone attached to your computer before you can record a message. If you don’t have the required hardware and software, the Playback and Recording controls on the note will be unavailable. To record a voice message: 1. Click the note’s Recording control. The standard sound-input dialog box appears. 2. Click ‘Record’ to begin recording. As you speak, the message length is displayed on the soundinput dialog box. 3. When you’ve finished recording, click ‘Save.’ The recorded message is saved with the note. You can listen to a recorded voice message by clicking the Playback control on the note. To change the message, simply record over the old message by following the instructions described above. .... 7-6 Annotation How Design Changes Can Affect Notes How Design Changes Can Affect Notes It’s quite common for the design of a form to be revised and updated from time to time by the form designer. Certain design changes can affect the data that’s already stored in a data document (deleting a cell, for example). Other changes can affect notes that have been placed on the forms. For example, if a note is placed next to the right edge of a form, and the form designer reduces the form’s width, the note will automatically slide back onto the page when the form is next opened with Informed Filler. Notes are affected when a form template is changed by: ■ ■ size reduction of the form page removal from the form If the Informed Designer user removes a page of a form template that contains notes, the notes themselves will be moved onto the work page the next time the data document is opened with Informed Filler. You can then move the note from the work page back to a numbered page. For information on how to move notes between pages, see “Placing, Moving, and Removing Notes” earlier in this chapter. For an explanation of the work page, see “The Work Page” in Chapter 3. 8 Record Management In this chapter: ■ ■ ■ ■ ■ ■ ■ ■ ■ ■ ■ ■ ■ ■ ■ Collection of Records 8-2 The Record List 8-3 Adding a New Record 8-14 Editing an Existing Record 8-14 Reverting a Record 8-15 Clearing a Record 8-15 Duplicating a Record 8-16 Finding Records 8-16 Finding All Records 8-21 Sorting Records 8-21 Omitting Records 8-22 Browsing Through Records 8-23 Removing Records 8-24 Tagging Records 8-25 Record Information 8-27 .... 8-2 Record Management 8 Record Management Informed Filler allows you to store and manipulate completed forms using its built-in database. You can enter new forms or change existing forms. You can find, duplicate, remove, print, sort, and total forms as well. Chapter 3 explains how to fill out a form. In this chapter you’ll learn about storing and retrieving completed forms or records using the commands found in the Database menu. You’ll also learn about the Record List, a powerful tool for listing and manipulating multiple records. The List menu contains commands that let you to set up and customize the Record List to suit your own personal preferences. For information about printing forms, please see Chapter 9. Collection of Records Collection of Records The information that you enter to fill out forms is stored in form data documents. Each form data document contains a database that can store the information for one or more completed forms. The set of information (such as name, address, phone number) that you enter to complete a single form is called a record. The record that you see in the form window is called the current record. This is the record that you can edit by typing in each cell. The current record is always a member of the current collection of records. The collection represents a group of records that can consist of one record, all records, or a particular set of records in your data document. By using the Find, Find All, Omit, and Omit Others commands, you can add particular records to, or remove them from the collection. Certain commands like Print and Send allow you to select the current record or those records in the collection. And as you’ll learn later in this chapter, the Record List displays a list of the collected records. The figure below illustrates all records, the collected records, and the current record. Current record Collection All records Positioned at the lower left corner of the document window are two information boxes. They show you the number of records in the data document, the number of records in the collection, and which record in the collection is the current record. .... Record Management 8-3 Collection information box Record count information box The ‘7’ in the collection information box identifies the current record. It means you’re looking at the seventh record in the collection. The ‘14’ indicates the number of records in the collection. You can use the Record List, or the Next, Previous, First, and Last commands to browse through the records in the collection. For more information, see “The Record List” and “Browsing Through Records” later in this chapter. The Record List The Record List When you open a form data document, the form window automatically appears displaying the contents of the form. In this window, you fill out and edit records. The form window is not always suitable for browsing through different completed forms since you can see only one record at a time. To work with more than one record, Informed Filler provides the Record List window. The Record List window displays records in a list, making it easy to see the information of multiple records at a glance. The following figure shows a typical Record List window. You can move the Record List to any position on your screen by clicking and dragging the window’s title area. To view a different area of the Record List, click the scroll bar controls. To show the Record List: 1. Choose Window > Show Record to view record list details. While the Record List window is the front-most window, this command changes to Hide Record List. The Record List window can be customized to suit your own personal preferences. You can choose which columns appear on the Record List and in what order they appear. You can sort any column or calculate a column’s total or average. You can also save different Record List formats so you can easily switch between your most common formats (see “Saving Record List Formats” for more .... 8-4 Record Management information). You can even print the Record List to produce summary reports of your records. For information on printing the Record List, see Chapter 9, “Printing Forms.” Contents of the Record List Information on the Record List is divided into rows and columns. Each row represents one record. Each column corresponds to one cell on the form. You can choose which columns appear on the Record List and their order and alignment (see “Adding and Removing Columns”). The Record List always displays only those records in the current collection. As you use commands that affect the collected records, the contents of the Record List will change accordingly. For example, suppose that you use the Find command to find all invoices with a total amount greater than $500. After searching, Informed Filler will replace the contents of the collection—and therefore the Record List as well—with those records found. The information box near the lower left corner of the window indicates how many records are on the Record List. Although Informed Filler allows you to show picture cells on the Record List, the actual pictures themselves do not appear. Instead, if a picture exists for a particular record, an ‘X’ will show on the corresponding row on the Record List. Therefore, at a glance you can see which records have pictures and which do not. You can show both field cells and table cells in the Record List window. A field cell has one value, whereas a table cell can have multiple values, one for each row in the table. To indicate that a column represents a table cell, Informed Filler draws a small table icon next to the column heading on the Record List. Even though a table cell can have more than one value, only the value found on the first row of the table appears on the Record List. In the previous illustration, each row represents one invoice. The values in the Item Number column correspond to the values found on the first rows of the Item Number column on the different completed invoices. To see the remaining rows of the table, view the record in the form window. .... Record Management 8-5 The form designer can choose to index a cell so that searching with Informed Filler is faster. (See “Indexed cells” later in this chapter.) For indexed cells that are displayed on the Record List, you’ll see a small magnifying glass symbol near the right edge of the column title. You cannot change which cells are indexed with Informed Filler. Adding and Removing Columns Informed Filler allows you to choose which columns appear on the Record List. Initially, the Record List contains columns for up to 10 cells on the form; indexed cells first, then the remaining cells by tab order. You can add or remove columns, and you can change the alignment or width of any column. When the Record List window is open, you may add columns from a list of cell names by: 1. Selecting List > Add Columns to display the Add Columns dialog box. The scrolling list contains the names of all cells on your form. 2. To add a cell to the Record List, click the cell name. If you want to add more than one column, select each cell while holding down the Control (Windows) or Command (Macintosh) key. Pressing Shift while clicking selects the range of cells starting with the first cell currently selected and ending with the one you click. .... 8-6 Record Management 3. Specify the position of the selected cell(s) by clicking one of the ‘Position’ radio buttons.You can position the selected cell (or cells) either at the end of the Record List after the last column, or between two existing columns. Like Add Columns, the Add to Record List command adds a new column to the Record List. However, instead of choosing a cell from a list of cell names, you select a cell on the form window. This command is more convenient if you don’t know how the cells on your form have been named. To use the Add to Record List command: 1. From the form window, click in the cell that you want to add. 2. Choose Cell > Add to Record List. Informed Filler will add the selected cell to the end of the Record List. Click to select a cell on the form window... ...then choose Add to Record List. You can show as many columns on the Record List as you like. You can even show the same column more than once. If the total width of all columns exceeds the width of the Record List window, use the scroll bar along the bottom edge of the window to scroll the columns in either direction. To remove a column from the Record List: 1. Click the column heading. .... Record Management 8-7 2. Choose List > Remove Column. The column will no longer appear on the Record List. Note Removing a column from the Record List does not remove data from the database of records. Select the column to remove... ...then choose Remove Column. The remaining columns on the Record List will automatically move to occupy the original position of the removed column. Changing a Column’s Position To reset the positions of the columns on the Record List: 1. Remove the column. 2. Add it again using the Add Columns command and the ‘Before selected column’ option. As a shortcut, you can click and drag a column’s heading to the left or right while holding down the Alt (Windows) or Option (Macintosh) key. When you release the mouse button, the column is placed in the new position. .... 8-8 Record Management Click and drag while holding down the Alt/Option key... ...the column moves to a new position when you release the mouse button. Changing a Column’s Width When you add a new column to the Record List, Informed Filler automatically sets its width to approximately one inch. You can change the width of any column by dragging the right edge of its heading. Click and drag When you drag a column divider, only the size of the column on the left changes. The columns on the right, if any, move with the position of the column divider. If you hold the Control (Windows) or Command (Macintosh) key down while dragging a column divider, instead of moving the columns on the right, Informed Filler will change the widths of both adjacent columns. Changing a Column’s Title To change the title of any column on the Record List from its original cell name to a custom name: 1. Click the column heading on the Record List. 2. Choose List > Column Title to display the Column Title dialog box. .... Record Management 8-9 3. Type in a new name in the space provided. 4. When you have entered the name, click ‘OK.’ The new name replaces the cell name on the Record List. If you want to revert and use the cell name, click the ‘cell name’ radio button, then click ‘OK.’ Changing a Column’s Alignment You can change the alignment of each column on the Record List to improve the readability of the records. For example, it’s common to align the right sides of numbers in a column so that the decimal points line up. Or maybe you want to center a column of dates. Each column on the Record List can be left, center, or right aligned. To change a column’s alignment: 1. Select the column by clicking its heading. 2. Choose List > Alignment > (left, center or right). To change the alignment of multiple columns, select them all at the same time before choosing the new setting. Selecting Records and Columns You can select information on the Record List by clicking rows or columns. Many of the commands described later in this chapter can apply to information that is selected on the Record List. For example, you can remove a record by selecting it on the Record List, then choosing Database > Remove. Or you can sort a column by selecting it and choosing Sort.... Clicking a row selects the corresponding record, whereas clicking a column’s heading selects the entire column. You can’t select a row and a column at the same time. .... 8-10 Record Management When you click to select a row or column, Informed Filler will automatically deselect all others that are currently selected. Pressing the Control (Windows)/Command (Macintosh) or Shift keys while clicking allows you to select more than one row or column at the same time. You could, for example, select five records and then print them using the Print command. If you hold down the Control/Command key, Informed Filler will select the corresponding row or column in addition to those currently selected. If you press the Shift key instead, all columns or rows between the first one currently selected and the one clicked on (inclusive) are selected. Note The small rectangular region to the left of the column headings on the Record List window has a special purpose. As a shortcut, clicking it deselects all rows and columns on the Record List. You may also use Edit > Select All to select all records on the Record List. As you select and deselect records on the Record List, the rightmost information box along the bottom edge of the window changes to display the current number of selected records. The Current Record Indicator As defined earlier in this chapter (see “Collection of Records”), the current record is the one that appears in the form window. When you browse through the collected records using commands such as Next, Previous, First, and Last, the current record changes to reveal each different record in the form window. On the Record List window, the current record is identified by a small rectangular icon along the window’s left edge. .... Record Management 8-11 Current record indicator With the Record List window active, you can change the current record by clicking in the current record indicator area next to the desired record. You can also change the current record by doubleclicking a different row on the Record List. However, in addition to changing the current record, double-clicking will also bring the form window to the front. While you edit the current record on the form window, if that record is visible on the Record List, Informed Filler shows a pencil icon in place of the current record indicator. Pencil indicates that the current record is being edited. As you change the record by typing in each cell, the corresponding columns on the Record List are not updated. Informed Filler updates the contents of the Record List only when you accept the record by pressing Enter. Totalling or Averaging a Column Informed Filler can calculate the total or average of any column on the Record List. This feature is useful for summarizing the information in a collected set of records. For example, after finding all overdue invoices, you could total the amount due column to obtain the total amount overdue. To calculate totals or averages for each of the selected columns on the Record List: 1. Select the desired column or columns. 2. Choose List > Totals. The Totals dialog appears. .... 8-12 Record Management The Totals dialog box shows the current setting of the selected columns (totalled, averaged, or no totals). If you’ve selected two or more columns that are configured differently, the Totals dialog box will show no setting. 3. Choose a setting then click ‘OK.’ Informed Filler will calculate the results and display them below the last record on the Record List. Each value appears bold and aligned according to the column’s alignment. To indicate that a column is totalled or averaged, Informed Filler draws a small symbol to the right of the column’s heading. Totalled columns have a plus sign, whereas averaged columns have an ‘X’ with a bar over it (the statistical symbol for average). While totals are calculated, progress information is displayed on the totals line itself. The amount of time required to calculate the results depends on the number of records on the Record List. Note though, that Informed Filler lets you do other work at the same time. For example, you can edit a record while a column is totalled. Although you can total or average any column on the Record List, the resulting value will be informative only if the column contains numeric, boolean, or checkbox values. If a column represents a non-number cell, Informed Filler will attempt to convert each cell value to a numeric equivalent as the total or average is calculated. The result will be the sum of those values that look like numbers. For boolean values and checkboxes, the values Yes, True, On, and a checked checkbox become 1, whereas the values No, False, Off, and an unchecked checkbox become 0. Therefore, you can count the number of Yes, On, True, or checked check box values in a column by totalling the column. .... Record Management Note 8-13 When you total or average a column that represents a table cell (for example, the quantity sold cell on tabular invoice), the resulting total or average is calculated based on all values on all rows of the records on the Record List. It’s therefore possible, and often likely, that a total or average won’t match the values above it on the Record List. This is because the Record List shows only those values found on the first row of each record on the Record List. See “Contents of the Record List” earlier in this chapter for more information. Showing and Hiding the Totals Line When you total or average a column, Informed Filler automatically shows the totals line on the Record List. You can manually show and hide the totals line using the Show/Hide Totals command under the List menu. For example, you may want to temporarily hide the totals when printing the Record List. Saving Record List Formats As described earlier, you can customize the Record List by choosing which columns appear in it and what position they occupy. You can also change the names and widths of columns, and calculate totals or averages for any column. The configuration of columns that you specify is called a Record List format. These formats are useful if you need to print different summary reports from the Record List. Rather than configuring a special format each time you want to display the Record List in a particular way, Informed Filler allows you to save your custom formats so that you can instantly switch the Record List to the format you want. To save the new format after configuring the Record List: 1. Choose List > Formats > Save Format to display the Save Current Format dialog box. 2. Enter the name of your Record List format in the text box and click ‘OK.’ Informed Filler saves the current Record List format and displays the format name in the Formats submenu. .... 8-14 Record Management Names of Record List formats To switch from one format to another, simply choose the format name from the Formats submenu and Informed Filler will display the Record List in the appropriate format. Removing a Record List Format To remove one or more Record List formats: 1. Choose List > Formats > Remove Format to display the Remove Saved Format dialog box. 2. Select the formats that you want to remove and click ‘OK.’ Informed Filler removes the selected formats from the Formats submenu. .... Record Management 8-15 Adding a New Record Adding a New Record When you create a new untitled data document using File > New Document, Informed Filler automatically adds a new blank record ready for filling. To add a new record to an existing data document: 1. Choose Database > Add Record. Informed Filler will create a new blank record, fill in any default values and auto-incrementing cells, then select the first cell on the form. The new record is added after the last record in your data document. It also becomes the last record in the collection. 2. While the new record is active you can enter information to complete the form. A small pencil in the collection information box indicates that the record is active. For complete instructions on how to fill out a form, please see Chapter 3, “Filling Out Forms.” 3. When you finish filling out the new form, press the Enter key on the numeric keypad. Pressing Enter indicates to Informed Filler that you have finished entering information and that the record should be accepted. Editing an Existing Record Editing an Existing Record To edit an existing record: 1. Find the record using either the Find command or the various browsing commands (see “Finding Records and Browsing Through Records”). 2. With the form window in front, activate the record by pressing Tab or clicking to select a cell. While the record is active, you can move from cell to cell and enter or change information. A small pencil in the collection information box indicates that the record is active. 3. When you’re finished editing the record, press the Enter key on the numeric keypad, or Ctrl/ Return (Windows), or Cmd/Return (Macintosh) to accept the record. For complete instructions on how to fill out or edit a record, please see Chapter 3, “Filling Out Forms.” Reverting a Record Reverting a Record From time to time you might make unintentional changes to a record’s information. The Revert command reverts the current record to its most recent version prior to last activating the record. If you revert a newly created record, Informed Filler will clear the record to its blank state and fill in any default values. .... 8-16 Record Management To revert the current record: 1. Choose Database > Revert. 2. Click OK for confirmation before completing the operation. Clearing a Record Clearing a Record To erase the information on a new or existing record: 1. Choose Database > Clear Record. If the form window is in front, Clear Record will clear the current record. If the Record List window is in front, the single selected record will be cleared instead. If two or more records are selected at the same time, the Clear Record command will be unavailable. 2. Click OK for confirmation before completing the operation. Like the Add Record command, Clear Record automatically fills in the default cell values after clearing the record. The form window is then activated for editing. Note The Clear Record command does not clear any attachments, or the values of auto-incrementing cells. Duplicating a Record Duplicating a Record Duplicating an existing record lets you avoid retyping the same information. To duplicate a record: 1. Choose Database > Duplicate. If the form window is in front, Informed Filler will duplicate the current record. If the Record List window is in front, the single selected record will be duplicated instead. Informed Filler does not allow you to select and duplicate multiple records on the Record List simultaneously. Finding Records Finding Records Informed Filler lets you perform a search on any cell with the exception of pictures and signatures. To find records: 1. Choose Database > Find to display the Find dialog. .... Record Management Click to select a cell... 8-17 ...or a column... ...then choose the Find command. The Find dialog contains a text box where you type the value or text you are looking for. This value is called the search value. The scrolling list contains the names of all cells on the form. 2. From the srolling list, select the cell in which you want Informed Filler to search. Note If you select a cell on the form or a column on the Record List before choosing the Find command, Informed Filler will automatically select the corresponding cell on the Find dialog box. 3. After you enter the search value and choose the match and find options, click ‘Find’ to begin searching. As Informed Filler searches, the information box on the window in front displays progress information. If no records match, you’ll see a message indicating that no records were found. If at least one match is found, Informed Filler will act according to your choice of find option (see “Find Options”). .... 8-18 Record Management Match Options Match options allow you to find exact matches, partial matches, or ranges of values. For example, instead of searching for an exact telephone number, you might want to find all numbers that contain the area code ‘408.’ Or maybe you want to find all invoices with a total amount greater than or equal to $500. The ‘Match option:’ drop-down list offers ten different matching options. The following table lists each option with a brief description. Match Options Option Description starts with ends with contains is equal to is not equal to is greater than is greater than or equal to is less than is less than or equal to range finds values that start with the text search value finds values that end with the text search value finds values that contain the text search value finds values that match the search value exactly finds values that do not match the search value exactly finds values that are greater than the search value finds values that are greater than or equal to the search value finds values that are less than the search value finds values that are less than or equal to the search value finds values that are within a range of values All match options with the exception of ‘range’ accept a single search value. When you select ‘range,’ the Find dialog box changes to allow for two search values. With the ‘range’ option selected, Informed Filler will find all values that lie between and including the two search values. The second search value must be greater than the first. With the settings in the previous dialog box figure, Informed Filler will find all dates greater than or equal to Sept. 7, 1996, and less than or equal to Oct 8, 1996. .... Record Management 8-19 Finding Words When you find records by searching in a text cell, Informed Filler will try to match the search value with each individual word in the cells that are examined. For example, if you search for the value ‘Christmas bonus’ in the comment cell on your forms, Informed Filler will find all records with comments that contain both words (regardless of position and order). If you use match options such as ‘starts with’ or ‘ends with,’ the option is applied as each word of a cell is examined. Finding Dates and Times When you enter a date or time search value, you can type the value in any format you like. You can type a complete value or only certain parts of a value. If you enter a partial value, Informed Filler will ignore the parts that are missing. For example, suppose that you want to find all sales slips that were entered in May of 1996. You could either use the ‘range’ match option and enter ‘May 1, 1996’ as the first search value and ‘May 31, 1996’ as the second, or you could use the ‘equals’ match option and enter ‘May 1996’ as the single search value. Finding Names A name value consists of up to five different parts: the prefix, first name, middle name, last name, and suffix. Multiple prefixes, middle names, and suffixes are allowed. A name value displays on your form according to the format of the cell in which it’s stored. When you type a name search value, you can enter all parts or only certain parts of the name. Like dates and times, if you leave out a name part, Informed Filler will ignore that part when it compares name values. For example, you could enter the search value ‘Smith’ to find all names with a last name ‘Smith,’ whereas the search value ‘John Smith’ would find all names with a first name ‘John,’ and a last name ‘Smith.’ If you type a name that consists of only one part, Informed Filler will interpret that part as the last name. If you type more than one part, the order of each part is used to interpret the name. If a comma appears next to the first part, that part is assumed to be the last name. A list of known prefixes and suffixes is used to help properly identify each name part. This list can be found in Appendix A. .... 8-20 Record Management If you want to find all names that have a particular first name, you must enter the wild card symbol (*) as the last name when you type the search value. This is because, as explained above, if you type the first name alone, Informed Filler will assume that it’s the last name. By typing the first name followed by the wild card symbol, the name parts will be interpreted properly. For example, to find all names where the first name is ‘John,’ enter the search value ‘John *’ (note that there’s a space between ‘John’ and ‘*’). The wild card symbol tells Informed Filler to ignore the last name when comparing name values. To enter the wild card symbol, type the asterisk key. If you use an inequality match option (‘is less than,’ ‘is less than or equal to,’ ‘is greater than or equal to,’ or ‘is greater than’), Informed Filler will compare the parts of two names in the following order: last name, first name, middle name, prefix, then suffix. When a name part in the search value is found that doesn’t equal the corresponding part in the comparison value, the match option determines whether or not the name matches the search value. Finding Boolean and Checkbox Values Boolean and checkbox cells can take on one of two different values. When you find records using a boolean or checkbox cell, Informed Filler displays the two possible values on the Find dialog box. For example, if a boolean cell has the Yes/No format style, the Find dialog box will look like this: Rather than typing a search value, simply select the value by clicking either of the two choices. The only match option available is ‘equals.’ Find Options The ‘Find options:’ drop-down list contains six different find options. These options let you choose what happens when Informed Filler finds the records you’re searching for. Often you’ll want to collect records that match different search criteria. For example, you might want to find and print all invoices that you entered today along with those that are overdue. By using different find options and commands such as Omit and Omit Others, you can easily collect the specific records that you’re interested in. .... Record Management 8-21 ■ look through all records - Informed Filler will search through all records that match a particular search value and replace the collection with those found. ■ look through collected records - This option is useful if you want to find records that match more than one criteria. For example, suppose that you want to find all invoices for customers in New York that have a total charge greater than $500. First, search all records to find the invoices for customers in New York. Then search through the collected records to find only those with a total charge greater than $500. ■ add to collection - Select this option if you want to combine other records with those currently in the collection. For example, you might want to find and print all invoices for customers in both New York and Boston. First use the ‘look through all records’ option to find the invoices for customers in New York. Then find the invoices for customers in Boston using the ‘add to collection’ option. Informed Filler will add the records found to the collection. The collection would therefore contain all invoices for customers in New York and customers in Boston. ■ omit from collection - After it removes records from the collection, Informed Filler will display the number of records that were found and omitted. Since the collection must always contain at least one record, Informed Filler will automatically perform the Find All command if you attempt to omit all records. The Find All command places all records in the collection (see “Finding All Records”). Informed Filler warns you before performing the command. ■ go to first match in collection - Unlike the first four find options, this option does not change the contents of the collection. Instead, it searches for and reveals the first record in the collection that matches the search value. This option is useful if you want to browse through a set of collected records. Rather than using commands such as Next, Previous, First, and Last to view each record individually, you could use the Find command and the ‘go to first match in collection’ find option. Informed Filler finds the first record that matches and makes it the current record. If the Record List window is frontmost, you’ll see the record selected. ■ select matches in Record List- This option is available when the Record List window is frontmost. Informed Filler will select the records that match those on the Record List. After using the Find command with the ‘go to first match in collection’ find option, you can reveal the next record that matches by choosing Database > Find Again. This command repeats the find starting with the record immediately following the current record. Indexed cells When a form is created with Informed Designer, the designer can choose which cells have indexes. An index is a pre-sorted list of cell values that Informed Filler maintains automatically as you add, remove, and change records. Although you never see an index, you can certainly notice its effect when you use the Find command to find records. .... 8-22 Record Management If a cell is indexed, Informed Filler can quickly search through thousands of records to find a matching value. Depending on the speed of your computer and the number of records in your data document, searching can be as fast as one or two seconds. If a cell is not indexed, each record must be examined individually to find those that match the search value. Searching can take considerably longer if a cell is not indexed. Finding All Records Finding All Records Various commands allow you to browse through the records in your data document. You can use commands such as Next, Previous, First, and Last to view and edit each individual record in the collection. The records in the collection also appear listed on the Record List. To find all records in the collection: 1. Choose Database > Find All. The Find All command places all records in the collection, allowing you to list or browse through all records in your data document. Sorting Records Sorting Records With the exception of picture and signature cells, Informed Filler lets you sort any cell on your form. To sort the records in the collection: 1. Select the cell that you want to sort by either clicking it on the form window or selecting its column on the Record List. 2. Choose Database > Sort... to display the Sort dialog. 3. Choose the Ascending or Descending sort order, then click ‘OK.’ Informed Filler displays progress information as sorting occurs. .... Record Management 8-23 Once the sorting process has started, you can cancel the Sort command by clicking ‘Cancel’ on the progress dialog box. If you cancel sorting, the order of the records in the collection will remain unchanged. To sort records by two or more cells, simply sort each cell individually, starting with the least significant cell and ending with the most significant cell. Note The sorted order of records in the collection is not preserved as you add and change records, or when you close the data document. You can, however, tag the collected records using commands in Informed Filler’s Tags submenu. See “Tagging Records” later in this chapter for more information. A certain amount of memory is required to perform a sort. If Informed Filler can’t obtain the required memory, you’ll see a message indicating so. Omitting Records Omitting Records In addition to the ‘Omit from collection’ option of the Find command, Informed Filler provides two commands for omitting records from the collection. With the form window in front, the Omit command omits the current record that is visible in the window. The next record in the collection becomes the current record. If there’s no next record, the previous record is made current instead. To omit more than one record: 1. Select each record on the Record List. 2. Choose Database > Omit. The following figure shows the Record List window before and after omitting the selected records. Since the collection must always contain at least one record, Informed Filler won’t let you omit the last record. If there’s only one record in the collection, or if you’ve selected all records on the Record List, the Omit command will be unavailable. .... 8-24 Record Management The Omit Others command also omits records from the collection. If the form window is in front, all records except the current record are omitted. If the Record List window is in front, Omit Others omits all records that are not selected. If the collection contains one record, or if either all records or no records are selected on the Record List, the Omit Others command will be unavailable. Browsing Through Records Browsing Through Records The Database > Go To submenu contains five commands for browsing through the collection of records: Record, Next, Previous, First, and Last. The Record command allows you to move to a specific record in the collection. When you choose Informed Filler displays the Change Record dialog box. Database > Go To > Record, Type the number of the record that you want to go to, then click ‘OK.’ The number that you type must be within ‘1’ and the number of records in the collection. The record that you specified becomes the current record and is displayed in the form window. As a shortcut to choosing the Record command, you can double-click the record information box to display the Change Record dialog box. The Next and Previous commands move you one record forward or backward, respectively. The First and Last commands move you to the first or last records in the collection.You can also browse through collected records by clicking either arrow in the collection information box. Selects next record Selects previous record Clicking the right or left arrow performs the Next or Previous command, respectively. If the current record is the first one in the collection, the left arrow disappears. The right arrow disappears if the current record is the last one in the collection. Removing Records Removing Records The Remove command permanently removes records from your data document. You can remove the current record, or you can remove selected records on the Record List. If the form window is in front, the Remove command removes the current record only. .... Record Management 8-25 To remove more than one record: 1. Select each record from the Record List. 2. Choose Database > Remove.... You will be warned before the command is performed. 3. To continue, click ‘OK.’ If you hold down the Alt (Windows) or Option (Macintosh) key while choosing the Remove command, the current record is removed without your confirmation. After removing the current record, the next record in the collection will become the current record. If there’s no next record, the previous record will be made current instead. If you remove the last remaining record in the collection, Informed Filler will automatically perform the Find All command and display the following message: 4. Click ‘OK’ to continue. All remaining records in the data document will be placed in the collection. See “Finding All Records” for more information about the Find All command. Tagging Records Tagging Records Informed Filler’s Tag feature provides an easy way for you to identify unique collections of records so that they can be quickly recalled and viewed. For example, if you were processing a batch of expense forms and found that some of the expenses needed clarification before they could be paid, you could mark those particular records with a tag such as “Clarify before processing.” You could then process all the other expense forms first, and easily recall the collection of tagged records later by choosing the tag name from a list. To tag a collection of records: 1. Find the records, then choose Database > Tag Records... to display the Tag Collected Record dialog box. .... 8-26 Record Management 2. Type the name of the tag in the text box and click ‘OK.’ Your entire current collection will be tagged, and the name of the tag will be displayed in the Tags submenu. In certain cases, Informed Filler will automatically tag a collection of records for you. For example, if you submit a batch of records to your company database, and an error occurs that prevents some of the records from being accepted, Informed Filler will mark those records with a tag such as “Records not submitted” and insert the tag name in the Tags submenu. To recall a tagged collection of records, simply choose the tag name from the Tags submenu. Informed Filler returns the records associated with that tag as the current collection. Note Recalling a tagged collection is not the same as performing a find. For example, if you found 25 invoices over $100, and then tagged that collection as “Invoices over $100,” the tag only applies to those particular records. If you add another 20 invoices over $100 to your data document and then choose the “Invoices over $100” tag, Informed Filler will reveal only the original 25. Adding Records to a Tagged Collection Often, you might want to include additional records in a tagged collection. Suppose that you’ve processed all the expense forms for the month and tagged the collected records as “Expenses 09/ 96.” At the last minute, the VP of Sales and Marketing submits one that had been forgotten. After processing the extra form, you’ll want to include that record in your “Expenses 09/96” collection. To add records to an existing tagged collection: 1. Perform a search to return the tagged records as well as the records that you want to add. 2. Choose Database > Tags > Tag Records.... 3. Type the original tag name in the text box and click ‘OK.’ You’ll see a message asking you to confirm if you want to replace the original tag with the new one (the original collection plus the new records). .... Record Management 8-27 Removing a Tag If you no longer require a particular tag: 1. Remove it by choosing Database > Tags > Remove Tag....The Remove Tag dialog box appears. 2. Select the name of the tag that you want to remove and click ‘OK.’ Note When you remove a tag, you’re only removing a reference to that collection of records, not the records themselves. Record Information Record Information Each record in a data document has specific information stored with it. This information includes the creation date of the record, the last time it was modified and when it was last mailed, printed or submitted. To view the record information for the current record: 1. Choose View > Record Information. The Record Information dialog appears showing the details of the record. 2. Click ‘OK’ to dismiss the dialog. .... 8-28 Record Management 9 Printing Forms In this chapter: ■ Page Setup 9-2 ■ Printing Preferences 9-3 ■ Printing Forms 9-4 .... 9-2 Printing Forms 9 Printing Forms This chapter describes printing forms with Informed Filler. You can print forms on printers that are compatible with the Windows and Mac OS operating systems. For instructions on installing printer software and choosing your printer, please see your printer’s documentation. Page Setup Page Setup To specify your printer, paper, and orientation setup: 1. Choose File > Print Setup.... The Print Setup dialog appears. If you are printing from Windows, you will see a dialog box similar to the one shown below. If you’re using an Apple LaserWriter printer (or a printer that uses Apple’s LaserWriter driver), you’ll see a dialog box similar to the one shown below. 2. Select your options then click ‘OK.’ .... Printing Forms 9-3 Printing Preferences When printing forms, Informed Filler allows you to choose whether you want to print both the data and the template (the graphical image shown in the form window) or the data only. By default, both the template and the data for a form will be printed. This is useful for forms that are printed onto blank paper. When the data form is to be printed onto pre-printed paper forms, you can set the preference so that only the form data will print. To set your printing preferences: 1. Choose Edit > Preferences to display the Preferences dialog. 2. Click the ‘Printing’ icon in the scrolling list to display the Printing Preferences panel. 3. Click the ‘Print data only’ checkbox to print the form data without the template. The Printing Preferences panel contains two text boxes in which you can specify an offset adjustment for printing. This feature allows you to adjust the position of the form on the printed page. When printing data onto pre-printed forms, the offset adjustment feature is useful for accurately aligning the data with the blanks on the pre-printed form. The entire form is shifted by the distance specified in the ‘Offset Adjustment’ text boxes. Positive values shift the form down and to the right. Entering negative values has the opposite effect. .... 9-4 Printing Forms Printing Forms Printing Forms To print one or more forms: 1. Choose File > Print. The Print Job dialog appears. If you are printing from Windows, you will see a dialog box similar to the one shown below. If you’re printing from Macintosh, you’ll see a Print Job dialog box similar to this: The previous illustration shows the ‘General’ print options available. You can display printing options specific to Informed Filler by clicking the panel’s drop-down list and choosing the ‘Informed Filler’ option. .... Printing Forms 9-5 Some of the options pictured are not available when you print records in a list. For more information, see “Print Options” later in this chapter. When the size of a form is larger than the selected paper size, Informed Filler will tile the form onto multiple sheets of paper. For example, suppose that you’re printing a tabloid size form (11" by 17") on standard US letter sheets (8.5" by 11"). Informed Filler will produce four sheets of paper for each copy of the form that you print. If you choose a different paper size (see “Page Setup”), Informed Filler will automatically readjust the tiling to print properly on the new paper size. 2. After selecting your printing options, click ‘Print’ to begin printing. Informed Filler will display this progress dialog: You can cancel printing at any time by clicking ‘Cancel.’ Print Options Informed Filler’s print options allow you to: ■ ■ ■ ■ print either the current or collected records print a blank form print the form’s work page collate the printed forms To specify your print options: 1. Choose File > Print to display the Print Job dialog box. 2. Click the ‘Print’ drop down list from the ‘Print Options’ section and make a selection from the available options. .... 9-6 Printing Forms Print Options Print Option Action Current Record prints only the current record displayed in the form window Collected Records prints all records in the current collection Blank Form prints the form template without any data; use this option to print a blank copy of your form Work Page prints the work page instead of the numbered pages of the current record Collating Forms There are two different page ordering options for printing multiple page forms. When you print two or more records, the ‘Collate’ option determines the page ordering. If you leave this option unchecked, Informed Filler prints the records one page at a time—that is, all page ones, then all page twos, and so on. If you check the ‘Collate’ option, Informed Filler prints each complete record individually—that is, all pages of the first record, then all pages of the second record, and so on. By using this option, you can avoid having to manually collate each form. Printing Repeating Forms The form designer can repeat a form’s drawing area across and down the printed page. This feature is useful, for example, if you want to print mailing labels on sheets like the one shown in the following figure. .... Printing Forms 9-7 When you print more than one label, Informed Filler automatically fills the sheet starting at the top left of the page and working across and down. Therefore, printing five labels would produce a sheet like the one shown below. xxxxxxxxxxxxxxxxxxxxxxxxxxxxxx xxxxxxxxxxxxxxxxxxxxxxxxxxxxxx xxxxxxxxxxxxxxxxxxxxxxxxxxxxxx xxxxxxxxxxxxxxxxxxxxxxxxxxxxxx xxxxxxxxxxxxxxxxxxxxxxxxxxxxxx xxxxxxxxxxxxxxxxxxxxxxxxxxxxxx xxxxxxxxxxxxxxxxxxxxxxxxxxxxxx xxxxxxxxxxxxxxxxxxxxxxxxxxxxxx xxxxxxxxxxxxxxxxxxxxxxxxxxxxxx xxxxxxxxxxxxxxxxxxxxxxxxxxxxxx xxxxxxxxxxxxxxxxxxxxxxxxxxxxxx xxxxxxxxxxxxxxxxxxxxxxxxxxxxxx xxxxxxxxxxxxxxxxxxxxxxxxxxxxxx xxxxxxxxxxxxxxxxxxxxxxxxxxxxxx xxxxxxxxxxxxxxxxxxxxxxxxxxxxxx xxxxxxxxxxxxxxxxxxxxxxxxxxxxxx xxxxxxxxxxxxxxxxxxxxxxxxxxxxxx xxxxxxxxxxxxxxxxxxxxxxxxxxxxxx xxxxxxxxxxxxxxxxxxxxxxxxxxxxxx xxxxxxxxxxxxxxxxxxxxxxxxxxxxxx xxxxxxxxxxxxxxxxxxxxxxxxxxxxxx xxxxxxxxxxxxxxxxxxxxxxxxxxxxxx xxxxxxxxxxxxxxxxxxxxxxxxxxxxxx xxxxxxxxxxxxxxxxxxxxxxxxxxxxxx xxxxxxxxxxxxxxxxxxxxxxxxxxxxxx Informed Filler allows you to specify which area to begin printing. This means that instead of always starting with the drawing area that’s positioned at the top left corner of the page, you can choose any area as a starting point. For example, suppose that after printing five labels on a new sheet (as illustrated in the previous figure), you now want to print three more using the same sheet. You want the first address to print on the sixth label on the sheet. xxxxxxxxxxxxxxxxxxxxxxxxxxxxxx xxxxxxxxxxxxxxxxxxxxxxxxxxxxxx xxxxxxxxxxxxxxxxxxxxxxxxxxxxxx xxxxxxxxxxxxxxxxxxxxxxxxxxxxxx xxxxxxxxxxxxxxxxxxxxxxxxxxxxxx xxxxxxxxxxxxxxxxxxxxxxxxxxxxxx xxxxxxxxxxxxxxxxxxxxxxxxxxxxxx xxxxxxxxxxxxxxxxxxxxxxxxxxxxxx xxxxxxxxxxxxxxxxxxxxxxxxxxxxxx xxxxxxxxxxxxxxxxxxxxxxxxxxxxxx xxxxxxxxxxxxxxxxxxxxxxxxxxxxxx xxxxxxxxxxxxxxxxxxxxxxxxxxxxxx xxxxxxxxxxxxxxxxxxxxxxxxxxxxxx xxxxxxxxxxxxxxxxxxxxxxxxxxxxxx xxxxxxxxxxxxxxxxxxxxxxxxxxxxxx If the drawing area of your form is repeated, you can enter a value in the ‘Begin printing at label position’ text box on the Print Job dialog box. The ‘Begin printing at label position’ value determines on which drawing area printing will begin. .... 9-8 Printing Forms Printing From the Record List If the Record List window is in front, you can print either all records in the collection, or only those which are selected on the Record List. You can also choose whether to print the records in a list or as individual forms. To print from the record list: 1. Choose File > Print to display the following dialog box. 2. Click one of the ‘Forms,’ ‘List,’ or ‘Cancel’ buttons. ‘List’ allows Informed Filler to print a columnar list of the records on the Record List. If you select ‘Forms,’ the records are printed as individual forms. Clicking ‘Cancel’ cancels the Print command. After you click the ‘List’ or ‘Forms’ button, the Print Job dialog box appears. With at least one record selected on the Record List, the ‘Print’ drop-down list contains the ‘Current record,’ ‘Entire Record List,’ and ‘Selected records’ options. If no records are selected on the Record List, the ‘Selected records’ option is unavailable. If you’re printing the records on the Record List as forms, then the ‘Collate’ and ‘Begin printing at label position’ controls function the same as when printing from the form window (see “Print Options”). If you’re printing the records in a list, these controls are unavailable. .... Printing Forms 9-9 Printing Records in a List By printing the Record List in a list rather than as individual forms, you can produce summary reports similar to the one shown in the following figure. Each printed sheet contains a header that shows the current date, the name of the document, and the page number. If the total width of the Record List exceeds the printable width of a page, Informed Filler will automatically tile the Record List. For information about formatting the Record List to show the information that you want, see “The Record List” in Chapter 8, “Manipulating Records.” To print the Record List in a list: 1. Choose File > Print while the Record List window is active. 2. Click the ‘List’ button from the Informed Filler dialog. The Print Job dialog box appears. 3. Select the ‘Current record’, ‘Entire Record List’, or ‘Selected records only’ option from the ‘Print’ drop-down list, and click ‘Print.’ Note If you want to print only a selection of records from the collection, you must select those records on the Record List before you choose the Print command. Once the records are selected and the Print command is chosen, you can choose the ‘Selected records only’ option on the Print Job dialog box. .... 9-10 Printing Forms 10 Mailing Forms In this chapter: ■ ■ ■ ■ ■ ■ Mail Preferences 10-2 The Send Command 10-3 Suggested Routes 10-5 Mail Cells 10-8 Form Tracking 10-8 Mail Plug-ins 10-9 .... 10-2 Mailing Forms 10 Mailing Forms Many types of forms must be sent from person to person for approval and processing purposes. For example, it’s very common for a purchase requisition form to be filled out by the requestor, sent to a supervisor for approval, and then forwarded to the purchasing department. In large organizations, a single form might go through several levels of approval before the process is complete. Through the use of Informed mail plug-ins, Informed Filler connects directly to various electronic mail systems, making it easy for you to send completed e-forms right from within the Informed Filler environment. For details of the specific e-mail systems supported by Informed Filler, see “Mail Plug-ins” at the end of this chapter. Mail Preferences Mail Preferences Informed Filler can send forms using a variety of different e-mail systems. You can use Informed Filler’s Preferences command to specify your preferred mail system so that you’re not asked to select which one each time you send a form. To specify your preferred mail system: 1. Choose Edit > Preferences then click the Mail icon in the scrolling list. The dialog box changes to show the Mail Preferences panel. 2. Click the ‘Mail service’ drop-down list and make a selection from the available choices. The choices in the ‘Mail Service’ drop-down list correspond to the Informed mail plug-ins you have installed in your plug-ins folder. If you select the ‘User’s choice’ option, you’ll be asked to select a mail system each time you send a form. .... Mailing Forms 10-3 The ‘Suggested Routes’ button allows you to define your own suggested routes for your completed forms. See “Suggested Routes” later in this chapter for more information. The Send Command The Send Command When you send a form using Informed Filler’s Send command, Informed Filler automatically creates a file containing the record, or records, you want to send, then attaches the file to an e-mail message and sends it to the recipient. To mail one or more records: 1. Choose File > Send. If you have not previously specified your preferred mail system, you’ll be asked to select a mail system to use. 2. Select a mail system from the ‘Send using’ drop-down list and click ‘OK.’ The Send dialog that appears and the method of selecting recipients varies depending on which mail system you use. The following example shows the Send dialog box for SMTP-compliant mail systems. 3. Select which records to send by choosing an option from the ‘Send’ drop-down list. If the form window is active when you choose the Send command, the options include ‘Current record’ and ‘Collected records.’ When the Record List is active, you can select from the ‘Current record,’ ‘Entire Record List,’ or ‘Selected records’ options. .... 10-4 Mailing Forms 4. You specify one or more recipients using the method that corresponds to the mail system you’re using. You can also enter a subject and choose the format in which to send the record or records. The following table lists the data formats available in the ‘Send As’ drop-down list and gives a brief description of when you would use each one. Data Formats Note Data Format Description Informed data Informed data is Informed’s own proprietary format for storing form data. Each Informed data document is a database that contains all the data for one or more records. Use this format when mailing forms to another user who already has the appropriate template needed to view the data. This is the most common data format to use when sending forms. Informed package Informed package contains both the data and template for a form. Use this format if the person you are mailing the form to doesn’t have the appropriate template needed to view the data. Informed Interchange Informed Interchange files contain the data for one or more records and are used primarily for transferring information between different applications, and different versions of Informed Filler. Tab and comma delimited text The delimited text file format is a standard format that’s used primarily for transferring information between Informed Filler and other applications. Use the Comma or Tab delimited text formats when mailing forms to someone who needs to import the data into another application such as a spreadsheet, word processor, or another database. The form designer can lock the data format to prevent you from accidentally choosing an incorrect setting. If the data format has been locked, you will not be able to select a different format from the ‘Send as’ drop-down list. 5. Once you’ve selected one or more recipients and specified the subject, the send format, and which records to send, click ‘Send’ or ‘OK’ to initiate the send process. Note When Informed Filler creates the file that is attached to the e-mail message, it names the file according to the filename.ext format of DOS filenames. That way if the recipient of the form, or forms, uses a Windows compatible computer, the file attachment will have the correct file extension for use with Informed Filler. .... Mailing Forms 10-5 Suggested Routes Suggested Routes The form designer can pre-configure a list of suggested routes for a form template. Suggested routes are intended to provide guidance regarding the person or department that you might send a form to. You can send a form to a suggested route, or you can manually address a form to any person or place you like. If the form template you’re using has one or more suggested routes defined, choosing Send displays a different dialog box. A suggested route is a named step in the processing of a form. The route name is intended to identify the step and instruct the user as to where the form should be sent. For example, a time card form might be filled out by an employee, sent to a manager for approval, and then forwarded to the payroll department. To make it easy for each person in the process to know where to send the form next, suggested routes named “Send To Approving Manager” and “Send to Payroll” could be added to the form template. Also included with each suggested route are send parameters such as the names of recipients and a subject for the mail message. You specify which records to send by selecting an item from the ‘Send’ drop-down list. To send to a suggested route, simply select the route, then click ‘Send.’ If the suggested route is fully specified (that is, it includes one or more recipients), Informed Filler automatically sends the record or records. If no recipients have been specified for the suggested route, Informed Filler will display the Send dialog box for the mail system used by the route. After you select one or more recipients, click ‘Send.’ When the send process completes, Informed Filler displays a dialog box asking if you’d like to save the recipient(s) you specified with the suggested route. If you click ‘Yes,’ you will not have to specify the address(es) for that particular suggested route again. .... 10-6 Mailing Forms Even if the form template has one or more suggested routes, there might be instances where you want to send the form to someone or some place else. For example, if the supervisor you normally send forms to is away on vacation, you might want to re-route your form to his or her manager instead. Click the ‘Re-Route’ button on the Send dialog box to specify a different address. Again, the Send dialog box specific to the mail system you use appears, allowing you to address and send your form. Adding Changing and Removing Suggested Routes Informed Filler allows you to define your own suggested routes for your form templates by using the Preferences command. 1. Choose Edit > Preferences then click the Mail icon in the scrolling list. The dialog box changes to show the Mail Preferences panel. 2. Click the ‘Suggested Routes’ button. The Suggested Routes dialog box appears. The Suggested Routes dialog box contains various controls for editing suggested routes, and a scrolling list showing any suggested routes that are already configured. .... Mailing Forms 10-7 To add a suggested route: 1. Click ‘Add.’ The Suggested Route Details dialog box appears. 2. Type the name of the route in the ‘Route name’ text box. It is helpful if the route name describes the actual step in the routing process. 3. Specify the mail system to use by clicking the ‘Mail system’ drop-down list and making a selection from the available choices. The choices in the ‘Mail system’ drop-down list correspond to the Informed mail plug-ins you have installed in your plug-ins folder. 4. To specify a recipient, click the ‘Address...’ button. If you have the appropriate e-mail software installed, Informed Filler displays the Send dialog box for the selected mail system. Simply select one or more recipients by using the controls on the addressing dialog box. While the addressing dialog box is displayed, you can also specify a subject for the form, and select the data format that the form will be sent in. Note If the form designer has locked the data format to be used when mailing the form, that data format will take precedence over the one you specify for a suggested route. To edit an existing suggested route: 1. Select it in the scrolling list on the Suggested Routes dialog, then click the ‘Modify’ button. The Suggested Route Detail dialog box appears, allowing you to change the specific details for the selected route. To remove a suggested route 1. Select it in the scrolling list, then click ‘Remove.’ You can change the order of suggested routes in the scrolling list by clicking a route and dragging it either up or down with the mouse. .... 10-8 Mailing Forms Mail Cells Mail Cells To aid in addressing forms and specifying various send options, the form designer can take advantage of mail cells. A mail cell is a cell whose value is used to specify a send option or parameter. For example, when you mail a form, Informed Filler looks for a cell named ‘Mail Send To.’ If such a cell exists, the form is automatically addressed to the name in that cell. Other mail cells can be used to automatically enter other parameters such as the subject, with information on the form. The following table shows the four mail cells supported in Informed. Mail Cells Mail Cell Description Mail Send To The name of the mail recipient. The value in this cell must identify a valid user in the directory of your e-mail system. The subject of the mail message. The body of the mail message. The filename of the enclosure sent with the mail message. Mail Subject Mail Comment Mail Enclosure By calculating a mail cell, the form designer can have a formula automatically check for different conditions and automatically set certain parameters accordingly. For example, if a purchase order form needs to be sent to a supervisor for approval, the form designer could calculate the ‘Mail Send To’ cell so that the recipient of the form is based on the value of the purchase order. Form Tracking Form Tracking If the form designer has configured the form template to automatically track forms, Informed Filler will connect to the tracking server after the send process completes. Depending on how form tracking was configured, you may be requested to enter information, such as your name and password, when this occurs. For more information about form tracking, see Chapter 11, “Form Tracking.” .... Mailing Forms 10-9 Mail Plug-ins Mail Plug-ins Mail plug-ins allow you to send completed forms using an external electronic mail service. Informed provideds plug-ins for various mail systems on the Windows and Macintosh platforms. Windows Mail Plug-ins On Windows a single Informed mail-plug-in can provide access to multiple e-mail systems as shown in the following table. Plug-in Name Mail Systems Supported Mail (MAPI) Microsoft Exchange Microsoft Mail GroupWise Eudora Pro v2.2 other MAPI compliant systems Mail (Extended MAPI) Microsoft Exchange Microsoft Mail GroupWise Eudora Pro v2.2 other MAPI compliant systems Mail (SMTP)** SMTP compliant systems When addressing a form or specifying the recipients for a suggested route, the dialogs that appear are specific to the type of e-mail system that you’re using. Each mail system provides its own method for selecting recipients, specifying a subject and choosing various send options. **Informed provides built-in support for SMTP (Simple Mail Transfer Protocol) and displays its own address book and dialogs for addressing mail and selecting recipients. See “SMTP Mail” later in this chapter for more information. .... 10-10 Mailing Forms Macintosh Mail Plug-ins On Macintosh Informed Filler comes with the Mail (SMTP) plug-in to support SMTP compliant mail systems. Informed displays its own address book and dialogs for addressing mail selecting recipients. See SMTP Mail below for more information. SMTP Mail The SMTP (Simple Mail Transfer Protocol) plug-in allows Informed Filler to connect directly to your organization’s SMTP server for sending forms over the Internet. Addressing using SMTP When addressing mail using SMTP on Windows or Macintosh, you’ll see the following dialog: You select a recipient from the Names list, then click ‘To,’ ‘CC’, or ‘BCC’ to add the person to the Recipients list. To remove a recipient: 1. Select the name in the Recipients list, then click ‘Remove.’ You can also use the Select Recipients dialog to add new addresses to your address book. To enter an address that is not available in the Names list: 1. Click the ‘New’ button. The Add New Recipient dialog appears. .... Mailing Forms 10-11 2. Enter the recipient’s name and e-mail address in the appropriate text boxes. You can also choose to add the new recipient to your address book or simply use the recipient in the current message. 3. After entering all the recipient information, click “To,” “Cc,” or “Bcc.” The new recipient will appear in the ‘Recipients’ list on the Select Recipients dialog. Configuring the SMTP Plug-in You must specify your SMTP server and e-mail address before you can send forms using the SMTP plug-in. 1. Click the ‘Settings’ button on the Send dialog box and enter the appropriate information on the Mail System Settings dialog box. Note If you don’t know the address of your SMTP server, contact your e-mail administrator. .... 10-12 Mailing Forms The SMTP Address Book The list of addresses that you see on the SMTPMail Send dialog box can be obtained either from an internal SMTP address book that you create and maintain, or from an external address book such as the one associated with your e-mail system’s client. To configure your address book: 1. Choose Edit > Preferences to display the Preferences dialog, then click the Mail icon in the scrolling list. The Mail Preferences panel appears. 2. Select ‘Internet Mail (SMTP) from the ‘Mail Service’ drop-down list, then click the ‘Address Book’ button. The Address Books dialog appears. The default setting for the SMTPMail address book is ‘Personal book.’ You maintain this address book by manually adding, removing, changing, or importing addresses. To add a new address: 1. Click ‘New’ to display the Entry Properties dialog. 2. Type the recipient’s name and address in the appropriate text boxes, then click ‘OK.’ .... Mailing Forms 10-13 To remove an address: 1. Select it in the ‘Names’ list on the Address Books dialog, then click ‘Remove.’ To make changes to an existing address: 1. Select it in the ‘Names’ list, make the appropriate changes on the Entry Properties dialog, then click ‘OK.’ If you want to add addresses that already exist in another location, click the ‘Import’ button. The standard Open dialog box appears. Select a file to import, then click ‘OK’ (Windows) or ‘Open’ (Macintosh). The file is imported and the addresses are displayed in the internal SMTPMail address book. When you have finished adding or editing addresses, click ‘OK.’ Note The SMTP plug-in does not provide a “send later” capability. You must have a live TCP/IP connection to your SMTP server when sending forms. .... 10-14 Mailing Forms 11 Form Tracking In this chapter: ■ How it Works 11-2 ■ Tracking Forms 11-3 ■ Displaying a Form’s Tracking Status 11-4 .... 11-2 Form Tracking 11 Form Tracking The purpose of form tracking is to provide you with a quick and easy way to find out where a form is in the routing process. After filling out a form and sending it to the next step, you can choose a single command to see any subsequent steps that the form has travelled, and on whose desk the form currently sits. Form tracking provides a quick alternative to “physically” tracing the path of a form to find its current location. How it Works How it Works When you send a form to another person, the data of the form is stored in a file and attached to an electronic mail message. In order to track a form, the information detailing each step that the form travels must be stored in a central database that’s accessible by all Informed Filler users. As a form is sent from person to person, the tracking status for the form is updated. Informed Filler does this by storing information, including the sender and recipient names, the date and time that the form was sent, and attributes that identify the form, in the tracking database. When you request the tracking status of a form, Informed Filler connects to the tracking database and retrieves the tracking details pertaining to the particular form. Note If your organization uses HTTP for tracking, Informed Filler will launch your web browser and display the tracking information on a web page. Form tracking requires configuration using Informed Designer. Informed Filler can track forms using any database that is accessible via Informed data access plug-ins. .... Form Tracking 11-3 In order for form tracking to work, you must have the data access plug-in with which form tracking is configured installed in your plug-ins folder. You must also have the Tracking plug-in installed. These plug-ins are installed automatically when you install Informed Filler. Depending on the type of tracking database you use, you might also require additional database client software. The installation and configuration of this software is a function normally performed by the form designer or database administrator. Tracking Forms Tracking Forms If a template is configured for form tracking, any form that you send using that template will be tracked. When you send a form, Informed Filler will automatically open or connect to the tracking database and store the tracking information. In order to track a form, your computer must be connected to the network and the tracking database must be accessible. If you are not connected when you send a form (some e-mail systems allow you to send a message while disconnected from the mail server), Informed Filler will send the form, but the tracking database will not be updated. The tracking of a form occurs after the send process has completed. During the tracking process, Informed Filler displays a progress dialog box. Depending on how form tracking was configured for the template you are using, you might be asked to enter information necessary to connect to the tracking database. The specific dialog box that you see and the particular parameters that you are asked to enter vary depending on the type of database being used for tracking purposes. Below is the dialog box you might see if tracking is linked to a Sybase database. If you are unable to enter the information requested, please request help from the form designer or database administrator. .... 11-4 Form Tracking Displaying a Form’s Tracking Status Displaying a Form’s Tracking Status The tracking status of a form refers to the information that details each step that a form has travelled. For example, suppose that Joe fills out a form, signs it, then sends it to Sandy for approval. Sandy then approves the form and sends it to John for final approval. At this point, the tracking information would detail the dates and times that the form was sent from Joe to Sandy, and then from Sandy to John. Since the last routing step shows that the form was sent from Sandy to John, we know that John has yet to approve the form and forward it for processing. To display the tracking status for the current record: 1. Choose View > Tracking Status.... Informed Filler will connect to the tracking database and retrieve the tracking information. Note If your organization uses HTTP for tracking, Informed Filler will launch your web browser and display the tracking information on a web page. If no tracking information for the current record is found in the tracking database, you’ll see a message indicating so. Each row on the Tracking Status dialog box corresponds to one step that the form has travelled. Depending on how form tracking was configured, you might not see all information in the width of the scrolling list. If this occurs, you can select any row in the scrolling list and click the ‘Details’ button to display all information for that row. .... Form Tracking 11-5 The Tracking Details dialog box includes the standard tracking information as well as any custom information that the form designer has included when configuring the form template for tracking. As with tracking forms, you might be asked to provide connection or logon parameters necessary to connect to the tracking database when you choose the Tracking Status command. See “Tracking Forms” earlier for more information. 2. Click OK to close the Tracking Details and Form Tracking Status windows. .... 11-6 Form Tracking 12 Submitting Forms In this chapter: ■ Overview 12-2 ■ The Submit Command 12-2 .... 12-2 Submitting Forms 12 Submitting Forms Important steps in forms processing often involve accessing data in other information systems. When you fill out a form, for example, information might be ‘looked up’ in other places. When a form has been completed and approved, its data might be ‘submitted to’—or stored in—some other information system. This chapter explains how you can submit records using Informed Filler’s Submit command. For information about lookups, please see “Lookups” in Chapter 3, “Filling Out Forms.” Note Since the form designer can customize the menus you see in Informed Filler, it’s possible that the Submit command has been removed or its name changed. Overview Overview With paper forms, a form is submitted by re-keying its data into an information system such as an accounting system or database. With Informed, the form designer can configure form templates so that submission occurs electronically by the simple selection of a menu command or the click of a button. Electronic submission eliminates unnecessary data entry and associated errors. Access to other information systems is available through the data access plug-ins installed in your Plug-ins folder. Depending on the type of database or “data destination” that you submit records to, you may also require additional database client software. The installation and configuration of this software is a function normally performed by the form designer or database administrator. The Submit Command The Submit Command To submit a record: 1. Choose File > Submit. (The Submit command is available only if the form template has been configured for form submission by the form designer.) If the form window is active, the Submit command submits the current record. If the Record List is active, all selected records are submitted. For more information about submitting multiple records, see “Submitting Multiple Records” later in this chapter. When Informed Filler submits a record, it first connects to the data destination for which form submission is configured. You might be prompted to enter some information, such as your name and a password, when a record is submitted. This depends on the particular type of data destination .... Submitting Forms 12-3 and how the connection is configured. The form designer can include the necessary connection information in the form template itself or leave it blank. For example, for a template configured to submit to an Oracle database, if the form designer did not include a user ID and password in the template, you’ll see the Oracle connection dialog box when Informed Filler submits a record. The exact appearance of the connection dialog box varies depending on the particular type of data destination that the template is linked to. When a data destination receives a submitted record, it might reply with a message indicating that the record was successfully accepted, or it might report an error. This, again, depends on the type of data destination and the details of how form submission is configured. Submitting Multiple Records To submit multiple records to the configured data destination when the Record List is active: 1. Select the records that you want to submit (with the Record List in front) 2. Choose File > Submit. Informed Filler submits the selected records. If an error occurs during the submission process, a message appears indicating so, and the Submit command is halted. The record containing the error, along with any remaining selected records that weren’t submitted, are tagged with the tag name “Records not submitted.” For information about tagged records and how to use the Record List, see “Tagging Records” and “The Record List” in Chapter 8.” .... 12-4 Submitting Forms Successful Submit Indication You can confirm that a record was successfully submitted by viewing the record information. 1. Choose View > Record Information. The Record Information dialog appears showing the details of the record. A date and time next to the ‘Submitted’ label indicates that the record was submitted successfully. 2. Click ‘OK’ to dismiss the dialog. Errors When Submitting Records When you submit a record, it is necessary that the data destination to which the template is linked be available. If Informed Filler is unable to find or connect to the data destination, you’ll see an error message indicating so. Depending on the type of data destination, the specific error message and the options available will vary. For some data destinations, the error is described and the submission is canceled. For others, options include looking for the data destination. For some types of data destinations, errors can occur even when the data destination is found and a connection is made. If, for example, form submission is configured to insert information into a Sybase database and the required database table is not found or is unavailable, you’ll see an error dialog even though Informed Filler is able to connect to the database server. 13 Exchanging Information In this chapter: ■ File Formats 13-2 ■ Exporting Records 13-7 ■ Importing Records 13-9 .... 13-2 Exchanging Information 13 Exchanging Information Informed Filler allows you to easily transfer information between different Informed documents, different applications, and even different computers. You can export information to applications such as spreadsheets, accounting systems, or other databases. You can import information from other applications or computers to automatically complete forms without having to re-enter data. Transferring information from one form or application to another is a two step process. It involves first storing the information in a file using a standard format that’s understood by both the sending and receiving applications. This step is called exporting the data. Once the information has been exported, any application can then import it for further processing or storage. In this chapter you’ll learn about the standard file formats that Informed understands. You’ll also learn how to use the Import and Export commands. File Formats File Formats For purposes of exchanging information Informed Filler supports several file formats: delimited text, Informed Interchange, Informed data, IXL (Informed XML) and XML. Delimited Text Files A text file is divided into lines of information. Each line contains one or more values, each separated by a delimiter character. A single value corresponds to one cell or field of information (for example, the invoice number on an invoice form). Suppose that a form contains employee information consisting of the employee name, number, and salary. The following figure shows what might be the contents of a text file that contains the data for three completed employee records. Cell names (merge format) Name, Number, Salary "Smith, John", "1092", 34500.00 "Thompson, Karen", "0019", 37390.00 "Dawson, Bill", "0420", 44100.00 Comma delimiters Each cell value is separated from the next with a delimiter character. An application that imports a delimited text file uses the delimiter characters to separate a single line into individual values. Informed Filler supports the tab or comma delimiter characters. .... Exchanging Information 13-3 Quote Characters Often cell values are enclosed within quotation marks. This is particularly important if a delimiter character can occur within a cell’s value. For example, in the previous figure, the comma character separates the first and last parts of each name value. Since the comma is also the delimiter character, it’s important that each name value be enclosed within double quote characters. If quote characters were not used, the last and first names would instead be interpreted as the Name and Number cells, respectively. When you export records, Informed Filler automatically surrounds a cell value with double-quotes if the value contains a delimiter character. When you import records, these characters are ignored. For more information, see “Exporting Records” and “Importing Records” later in this chapter. Merge Format In the text file shown in the previous figure, the first line contains the cell names of the information in the file. Many applications require that this convention be followed. The cell names are used by an application that imports the text file to automatically identify the contents and organization of the file. This characteristic of a text file is often called the merge format. Tables Tables on a form contain rows and columns of data. On a form drawn with Informed Designer, each column represents one cell. A column cell can store multiple values, one for each row. When you export a record that contains a table, Informed Filler stores the contents of the table either column-wise or row-wise. This means that the information in the table is organized either column by column or row by row. You choose which method to use by clicking a control on the Export dialog box (see “Exporting Records” later in this chapter). If you choose to export tables by column, the rows of a column cell occur grouped together, each separated by a special row delimiter character. The ASCII code of the row delimiter character is decimal 29. The following figure illustrates how a table is exported by column. Name John Smith Telephone Date (408) 555-1290 Amount 1/23/90 55.00 2/11/90 120.50 2/15/90 279.90 Row delimiter characters Name, Telephone, Date, Amount John Smith, (408) 555-1290, 1/23/90|2/11/90|2/15/90, 55|120.5|279.9 .... 13-4 Exchanging Information For each column, Informed Filler automatically combines the values of each row and separates them with the row delimiter character (as shown on the previous page). When you import data, the row delimiter characters are used to divide a column into individual row values. Note When you export records that contain tables, if you intend to later import the information using Informed Filler, you must export tables by column and not by row. Informed Filler can’t import a text file that contains table information organized by row. When you export tables by row, Informed Filler stores the information from a table one row at a time. Each row is stored on a new line in the text file. If you include a field cell when you export a table, Informed Filler will repeat the field’s single value for each row of the table exported. For example, suppose that when you export the record shown in the previous figure, you choose to export tables by row instead of by column. The example below shows the text file that Informed Filler would create. Name,Telephone,Date,Amount John Smith,(408) 555-1290,1/23/90,55 John Smith,(408) 555-1290,2/11/90,120.5 John Smith,(408) 555-1290,2/15/90,279.9 Notice that the text file contains three lines of data, one for each row in the table. The Name and Telephone cell values are repeated on each line. If you export a record that contains more than one table, the table with the most rows filled out determines how many rows are exported. The following example shows how a record with two tables would be exported. Name John Smith Telephone Date (408) 555-1290 Amount Interests 1/23/90 55.00 Golf 2/11/90 120.50 Music 2/15/90 279.90 Art Antiques Fishing Name,Telephone,Date,Amount,Interests John Smith,(408) 555-1290,1/23/90,55,Golf John Smith,(408) 555-1290,2/11/90,120.5,Music John Smith,(408) 555-1290,2/15/90,279.9,Art John Smith,(408) 555-1290,,,Antiques John Smith,(408) 555-1290,,,Fishing .... Exchanging Information 13-5 In this example, the table of interests contains more rows than the table of transactions. The text file, therefore, contains five lines of data and not three. The values of the Date and Amount column cells are left blank on the fourth and fifth lines. As always, the field cell values are repeated on each line. The option to export tables by row is most useful when you’re exporting information to a relational database application or a spreadsheet. With relational databases, the information on many forms is often represented using more than one related file. If you were to store the form shown in the previous example in a relational database, you might use three files—or tables—to store the client, transaction, and interest information. When you transfer information from a form with tables to a relational database, it might be more appropriate to export and import each table separately. As you’ll learn in “Exporting Records” later in this chapter, you can choose which cells to export and their order. With this ability, and with the option to export tables by column or by row, you can more easily exchange information between Informed Filler and other standard applications. Multi-line Cell Values You can type more than one line into a text cell by pressing Enter or Return at the end of each line. Since the end of a line has a special meaning in a delimited text file (it separates records or rows of tables), an exported cell value cannot contain end-of-line or carriage return characters. Therefore, when you import and export records, Informed Filler automatically converts carriage return characters to vertical tabs (ASCII code 11). Most applications, such as word processors, will interpret each vertical tab character as the end of a line. Limitations of the Delimited Text File Format As its name implies, a delimited text file stores textual information only. When you export records from forms with pictures or signatures, Informed Filler automatically converts picture and signature values to text. Note, however, that only Informed Filler understands the format of pictures and signatures stored in this manner. A delimited text file containing pictures or signatures, therefore, can be imported only using Informed Filler. A stylized text value is a value that combines different fonts, sizes, and styles (bold, underline, italic, etc.). When the form is created, the form designer decides which text cells can allow style changes. As you fill out a form, style changes are made by choosing different settings from the Style submenus (see “Entering Text” in Chapter 3 for more information). In text format, a value such as: ‘This is a stylized text value,’ is stored as: ‘This is a stylized text value.’ .... 13-6 Exchanging Information If it’s important to preserve pictures or the style information of text, use the Informed Interchange format instead. Chapter 7, “Annotation,” explains how you can attach notes to any record. A note can be a comment or special instructions for a particular record. When you export records to a text file, all notes are ignored. You can include notes only if you use the Informed Interchange format. Informed Interchange Files Informed Interchange files contain the data for one or more records and are used primarily for transferring information between different versions of Informed, or between Informed Filler and other custom applications that understand this format. The Informed Interchange file format stores all types of information, including stylized text values, pictures, signatures, and annotation. It does not, however, store any files that have been attached to a record using Informed Filler’s attachments feature. Informed Data Files Informed data files are Informed’s own proprietary format. Each Informed data file is a database that contains all the data for one or more records. The Informed data file is not a standard format. Only Informed applications can understand and store information in this format. Although you can import files of this format, you cannot export records as Informed data files. If you’re transferring information to a different (non-Informed) application, use the delimited text format instead. XML Files (Windows Only) XML (Extensible Markup Language) provides a way of sharing both the format and data of a document over the World Wide Web, intranets and elsewhere. When you export as XML, the resulting file contains all data, pictures and digital signatures, but does not include any annotations or attachments that were part of the form. Note In order to import and export XML files, you must have MSXML.DLL v5.0 installed by Internet Explorer 4 SP2 or later. .... Exchanging Information 13-7 Exporting Records Exporting Records To export one or more records: 1. Choose File > Export. The Export dialog box appears. 2. The Export dialog box contains two scrolling lists. The list on the left shows all cells on your form. The list on the right contains the cells that will be included (and their order) when records are exported. This list is initially empty. You move cells from one list to the other by clicking the buttons located between the two lists. To move a single cell from one list to the other, select the cell’s name in the list then click the ‘Move’ button that points in the appropriate direction, or double-click the cell’s name. The cell is removed from the list in which it’s currently contained and added to the other list. Cells in the left list are sorted alphabetically. Cells in the right list appear in the order that you move them to that list. Clicking a ‘Move All’ button moves all cells from one list to another. 3. Select a data format from the ‘Data Format’ drop-down list. .... 13-8 Exchanging Information If you select ‘Tab delimited text’ or ‘Comma delimited text,’ you can further choose whether or not to use the merge format or quotes options. If you check the ‘Merge format’ checkbox, Informed Filler will list each cell name on the first line of a new text file. In order to import a text file of information, some applications require that the merge format option be used. Note If you intend to later import the exported data back into an Informed data document (using Informed Filler), you must use the merge format option when you export the records. When you export records, cell values that contain delimiter characters are automatically surrounded with double quotes (as in "value"). Delimiter characters include either of the comma or tab characters, depending on which data format you’ve chosen. If you select the ‘Use quotes’ option, all cell values with the exception of numbers will be surrounded with double quotes. If a quoted cell value itself contains a double quote, that character will be replaced with a single quote before the value is exported. When using a delimited text format, any date, time, number, name, picture, and signature values export according to the formats listed in the following table. Export Formats Data type Export format Date Time Number Name Picture Signature M/D/YY H:MM:SS AM General All parts in full form Informed-specific ASCII format Informed-specific ASCII format If you select the ‘Informed Interchange’ option Informed Filler lets you choose whether or not notes are to be included with the data of each record. If you check the ‘Include notes’ checkbox, any notes that are attached to the records being exported will also be included. When you later import the records, all notes will automatically appear on the same pages and at the same positions as they were on the original records. 4. Select the ‘Current record’ or ‘Collected records’ option. If the form window is in front, you can export either the current record or all records in the collection. If the Record List window is in front, you can export all records on the Record List or only those that are selected. .... Exchanging Information 13-9 5. Click one of the ‘Export to’ radio buttons to specify whether you want to export into a new or append the information to the end of an existing file. 6. If you export records from the same form template using the same options on a regular basis, you can click the ‘Save Settings’ button and Informed Filler will remember the current settings on the Export dialog box. The next time you choose the Export command, the options will automatically configure according to the last saved settings. 7. Click ‘Export’ to begin the export process. If you’re exporting to a new file, you’ll be asked to name the file and specify where to store it. If you’re exporting to an existing file, you’ll be asked to select the file to append the information to. Note When you export records to an existing file, Informed Filler doesn’t check to make sure that the information you’re exporting matches the information that already exists in the selected file. Therefore you could, for example, accidentally export invoice data to an existing file that contains information for purchase order forms. Please use caution when selecting the existing file. After you create a new file or select an existing file, Informed Filler will begin exporting the records. Progress information is displayed as exporting occurs. Importing Records Importing Records To import information into a data document: 1. Choose File > Import. The Import dialog for your operating system appears, allowing you to select which files to import. .... 13-10 Exchanging Information 2. Select the file format that you want to import from the ‘Files of Type’ drop-down list. The scrolling list of files will show only those files that match the selected data format. 3. Select the file you want in the scrolling list and click ‘OK’ to import the data. If you hold down the Shift or Ctrl keys you can select multiple files at one time. Note As a shortcut to the Import command you can drag a file onto the form window of the data document that you want to import into. The Import Process When Informed Filler imports a file, it starts by comparing the contents of the file with the form template used by the data document into which the data is being imported. By reading header information in the selected file, Informed Filler can identify and match the cells found in the file with those on the form template. If no cells match, the Import command is cancelled and the following message is displayed. If the above error occurs, it’s likely that you’ve selected the wrong file to import. For example, you may have attempted to import a file containing inventory data into your purchase order form. If at least one cell matches but there are extra or missing cells in the file being imported, you’ll see either or both of the following messages. .... Exchanging Information 13-11 These messages are meant to warn you that the data in the file being imported doesn’t exactly match the form template used by the data document that you’re importing into. Either cells on your form cannot be found in the file, or cells in the file are found that don’t exist on your form. Click the appropriate button to continue or cancel. If you choose to continue, any unrecognizable cells in the file being imported will be ignored. Cells that appear on your form but are missing in the file will be blank for the imported records. Note If a cell on your form is not found in the file being imported, and that cell has a default value, the cell won’t be blank for the imported records. Instead, the default value will be used. As records are imported, Informed Filler displays progress information. You can cancel the import process by clicking ‘Cancel.’ As each record is imported, Informed Filler checks to make sure that the data read matches with what is actually expected. It checks for extra or missing values, and for values that are incorrect in type. As an example, consider the comma delimited text file shown below. Name,Phone,Salary,Title,Start Date "Smith, John","498-0938",35950,"Product Filler","3/21/89" "Robertson, Dale","439-6628",39200 "Jones, Tom","482-7139",31990,"Senior Editor","9/17/89" "Harrison, Karen","42-1099",42500,"Area Supervisor","3/18/88" "Dawson, Janice","420-1029",28770,"Sales Rep.","abcdefg" "Roy, Dan","487-3092",33290,"Analyst","1/7/90","An extra value" .... 13-12 Exchanging Information Assume that the form into which the file is being imported contains the cells called ‘Name,’ ‘Phone,’ ‘Salary,’ ‘Title,’ and ‘Start Date.’ Also assume that these cells have the respective types name, character (with a format that accepts valid phone numbers only), number, date, and text. The following table lists the errors that Informed Filler would recognize while importing the previous text file. Errors in Text File Record Is Correct? 1 2 3 4 5 6 yes no yes no no no missing values for Title and Start Date invalid value for Phone invalid date value for Start Date too many values This table lists three types of detectable errors: too many values, not enough values, and invalid values. In addition to these errors, Informed Filler will also warn you when the number of values for a column cell exceeds the number of rows in the corresponding column on your form. In any case, when an error is detected, you’ll see a message that describes the error and offers three options. If the file being imported is an Informed Interchange file, the name of the user who originally exported or stored the record might appear on the message dialog. When an error is detected, you can choose to import the record anyway, skip the record and continue, or stop the import process. If you choose to import the record, any extra values are ignored. Missing or invalid values will be blank on the imported records. If any errors were detected, Informed Filler will report the number of records imported and the number of errors detected after all forms have been imported, or after you cancel or stop the import process. Importing Notes Chapter 7, “Annotation,” describes how you can attach a note or comment to any record that you fill out. As explained in “Exporting Notes” earlier in this chapter, Informed Filler can export notes along with the data of each record if you use the Informed Interchange data format. .... Exchanging Information 13-13 When you import records from an Informed Interchange file or an Informed data file, any notes found with the records are imported as well. Informed Filler tries to position the notes on the form according to where they were originally located. However, realize that this position is relevant only if the data document you’re importing the records into uses a form template that matches the one that the notes were originally attached to. If you’re transferring information between two different types of forms, the original position of each note might not be meaningful. If a note was originally positioned on a page that doesn’t exist in the form template of the data document that you’re importing into, instead of deleting the note, Informed Filler will automatically move it onto the work page. (For an explanation of the work page, please see “The Work Page” in Chapter 3.) .... 13-14 Exchanging Information 14 Form Template Distribution In this chapter: ■ ■ ■ ■ ■ Background 14-2 How it Works 14-2 Accessing Distribution Centers 14-3 Checking for Revisions 14-4 Revision Status 14-5 .... 14-2 Form Template Distribution 14 Form Template Distribution Once a form is designed, it is distributed to the Informed Filler users who fill it out. Forms distribution can be a significant cost for many organizations. Users must be notified of new form templates and these templates must be obtained before they can be filled out. The distribution of new versions of existing form templates can be more costly due to the frequency with which templates are revised. This chapter explains the form template distribution features that are built into Informed Designer and Informed Filler. Background Background Informed Filler allows form templates to be accessed either locally on your computer’s hard disk, or via a network file server. The location that Informed Filler looks for templates is, by default, in a folder named “TEMPLATE” (Windows) or “Templates” (Macintosh) located in your Informed folder. This location can be specified and changed using Informed Filler’s Preferences command. For more information, please see “Moving Folders” in Chapter 1 of this manual. Storing templates locally means that you can use the templates any time, even while disconnected from the network. Storing templates locally, however, means that you must copy the templates that you want to use to your hard disk both when the template is first created, and each time the template is revised. Accessing form templates from a central file server simplifies distribution. When a new template is designed, the forms designer places the template in the appropriate directory or folder on the designated file server. When a template is revised, the existing template on the file server is replaced with the new one. To fill out forms, however, you must have access to the file server. How it Works How it Works When using Informed’s built-in distribution features, the distribution of a form template is done via one or more distribution centers and assumes that you are storing templates locally for use with Informed Filler. A distribution center is a place where distributed form templates are stored. The forms designer maintains the distribution centers and the distributed templates that are available at each center. Informed supports different types of distribution centers. Access to a particular type of distribution center is provided through an Informed distribution plug-in. At the time this documentation was prepared, Informed Designer and Informed Filler included distribution plug-ins for accessing file servers and FTP servers. .... Form Template Distribution 14-3 In order to access a particular distribution center, you must have a distribution center profile for the center. A distribution center profile identifies a distribution center and includes the information necessary to connect to the center. The forms designer creates the distribution center profiles for the distribution centers used in your organization. These files must be installed in your “DISTCTRS” (Windows) or “Distribution Centers” (Macintosh) folder. This folder is found in your “PREFS” (Windows) or “Preferences” (Macintosh) folder which, by default, is located in your Informed folder. Accessing Distribution Centers Accessing Distribution Centers When you choose File > New Document, the dialog box shows controls for accessing distribution centers and selecting distributed form templates. Choosing ‘Services’ from the drop-down list reveals the distribution centers that correspond to the distribution center profiles installed in your distribution centers folder. The details of selecting distributed templates can be found in Chapter 2, “Document Management.” Once you’ve selected a distributed template, Informed Filler will copy it to your templates folder. The template is then available for use to fill out and manipulate forms. When you open a form data document, Informed Filler examines the Template ID to determine which template is required to view and manipulate the form data. It then searches your Templates folder for a template with a matching Template ID. If the required template is found, it is opened along with the data document. If the required template is not found, and distribution information is found in the data document, Informed Filler will connect to the distribution center and obtain the template. If the data document does not contain the distribution information needed to obtain the template, you are presented with a dialog box similar to the New Data Document dialog box. With this dialog box you can access a distribution center and select the appropriate form template to use. .... 14-4 Form Template Distribution Checking for Revisions Checking for Revisions Included in a distributed form template is a distribution list for the template. A distribution list is a list of distribution centers at which the template is available. Occasionally, Informed Filler will connect to a distribution center and check the distributed template for a new, available version. The form designer specifies how often a revision check occurs. If the form designer has allowed it, you can change the setting for how often Informed Filler performs a revision check. 1. Choose Edit > Preferences and click the Revisions icon to display the Revisions panel. The Revisions panel is available only if the form template is a distributed template. 2. Select an option from the ‘Check’ drop-down list. The options available include: ■ ■ ■ ■ ■ Each time the template is opened Once every day Once every week Once every month Never If you select the ‘Never’ setting, Informed Filler will not check for revisions. With this setting, the only way to check for a new revision is to click the ‘Check For New Revision’ button on the Revision Status dialog (see “Revision Status” at the end of this chapter). Note The form designer can lock this setting so that you cannot change it. If the setting is locked, you will not be able to choose a different setting. .... Form Template Distribution 14-5 The distribution list for a template can include more than one distribution center. The forms designer may have made the distributed template available at multiple distribution centers so that if operation of one center is interrupted, the distributed template can be accessed at a different center. When a revision check occurs, Informed Filler will attempt to check the distributed template at the first distribution center in the list. If this distribution center is inaccessible, it will try the next center in the list, and so on, until the revision check is successful. If Informed Filler is unable to connect to any of the centers in the template’s distribution list, a message will appear indicating so. The message you see might be the one shown below, or it might be a custom message specified by the form designer. To skip the revision check, click ‘Continue.’ Informed Filler will open and use your current version of the template. To cancel opening the template, click ‘Cancel’ instead. If a revision check occurs and Informed Filler detects that a new revision of the template is available, you’ll be notified with a message as shown below. You can update your copy of the template with the new revision, ignore the new revision and continue using your current version, or cancel the operation. If you choose the Update option, Informed Filler replaces your template with the new version. If the new version includes changes that affect the information that is contained on the form, Informed Filler will update the data in the active data document to reflect these changes. For more information, see “Updating a Data Document” in Chapter 2, “Document Management.” Revision Status Revision Status Each form template has a status and a status message. The forms designer sets these to provide you with an indication of the intended use of the template and any associated cautions. To see the status and status message for the active template: 1. Choose View > Revision Status. The Revision Status dialog appears. .... 14-6 Form Template Distribution The template’s status can be Current, Non-current, or Discontinued. Current implies that the template is the most up-to-date version. Non-current indicates that a newer version of the template is available, but you can still fill out forms using the non-current version. The discontinued status refers to a template that has become obsolete and should no longer be used to fill out new forms. To remind you of a template’s current status, the forms designer may configure the template to automatically display the status and status message whenever you request to add a new record. The forms designer can also prevent you from adding new records to discontinued templates. To see if a new revision of the template is available: 1. click the ‘Check for New Revision’ button. Informed Filler will perform a revision check and advise you of the template’s status. 2. Click ‘OK’ to close the message, then click ‘OK’ to close the Revision Status dialog. Note If a new version of the template is available, Informed Filler will advise you and ask if you want to download the new version. .... Index X-1 Index A activating a record 3-2 Add Record command 8-15 Add To Record List command 8-6 adding a new record 8-15 alert dialogs 3-19 annotation 7-2 affects of design changes 7-6 exporting notes 13-6 importing notes 13-12 moving notes 7-3 placing notes 7-3 recording a voice message 7-5 removing notes 7-4 text messages 7-4 voice message playback 7-5 voice messages 7-5 attaching files 5-4 attachments deleting 5-6 extracting files 5-5 file types 5-3 overview 5-2 signing 5-6 attachments window 4-4, 5-2 auto-save preference 2-13 auto-shrink option 3-6 averaging 8-11 averaging columns 8-11 B boolean cells entering 3-8 browsing through records 8-24 C calculation formula 3-18 calculations 3-18 cell name changing column name 8-9 cells auto-incrementing 3-27 boolean 8-20 calculated 3-18 choice lists in 3-20 described 3-2 display only 3-5, 3-18 entering 3-3 format of 3-4 help messages in 3-22 indexed 8-5, 8-21 lookup 3-25 mail 10-8 memorizing values in 3-12 selected 3-3 signature 4-2 types of 3-4 century wrap preference 3-7 changing pages 3-17 changing the location of folders 19 character cells entering 3-6 check box cells 3-8 check formulas 3-3, 3-11, 3-19 , 3-24, 6-5 checkbox 8-20 checkbox styles 3-9 checkbox values 8-20 checkboxes setting values for 3-10 choice lists 3-20 adding extra choices to 3-22 descriptive text in 3-20 selecting a choice 3-21 styles 3-20 Clear Record command 8-16 clearing a record 8-16 closing a data document 2-12-?? columns on Record List adding 8-5 changing alignment of 8-9 changing titles of 8-8 changing width of 8-8 removing 8-5 selecting 8-9 totalling 8-11 comma delimited text 13-2 commands Add Columns 8-5 Add Record 8-15 Add To Record List 8-6 Assign Next Value 3-28 Attach 5-4 Check Collected Records 6-4 Check Current Record 6-4 Check Selection 6-4 Clear 5-6 Clear Record 8-16 Close 2-12 Cut 7-4 Duplicate 8-16 Extra Choices 3-22 Find 8-16 Find All 8-21, 8-22, 8-25 Help 3-19 Hide Attachments 5-2 Hide Balloons 3-24 Hide Choices 3-20 Import 13-9 Insert Date 3-7 Insert File 3-9 Insert Row 3-14 New Document 14-3 Omit 8-23 Omit Others 8-24 Open 2-7 Paste 3-4, 7-4 Place Note 7-3 Preferences 2-6, 6-2 Record 8-24 Remove 8-9, 8-25 Remove Format 8-14 Remove Row 3-14 Remove Tag 8-27 Revert 8-16 Revision Status 14-5 .... Index Save 2-13 Save As 2-14 Save Format 8-13 Send 10-3 Set Value 3-10, 3-18 Show Attachments 5-2 Show Balloons 3-24 Show Choices 3-20 Show Record List 8-3 Sort 8-9, 8-22 Tag Records 8-25 Verify 4-11 Verify Template 4-8 creating a new data document 24- 2-5 CryptoAPI 4-16 current record 8-2 D data documents closing 2-12 collecting 2-17 creating new 2-4 described 2-2 opening 2-7- 2-9 saving 2-13 saving copies of 2-14 data formats 10-4 data verification 3-19 date cells entering 3-7 date picker 3-7 deleting attachments 5-6 delimited text files 13-2 limitations of 13-5 merge format of 13-3 multi-line values in 13-5 delimiter character 13-2 dialogs Attach 5-4 Browse 1-10 Check Spelling 6-4 Missing Fonts 2-12 New Data Document 2-4, 211, 2-18, 14-3 Note 7-5 Preferences 2-6 Remove Saved Format 8-14 Remove Tag 8-27 Revision Status 14-6 Save As 2-14 Save Current Format 8-13 Send 10-3 Set Password 2-6 Set Value 3-10, 3-19 Suggested Route Detail 10-7 Suggested Routes 10-6 Tag Collected Records 8-26 Template Information 2-3 Tracking Details 11-5 Tracking Status 11-4 digital signatures automatic verification 4-10 showing signed attachments 44 showing signed cells 4-3 signature icon 4-9 signing attachments 5-6 signing date 4-6 signing multiple records 4-10 verifying 4-5 display only cells 3-5 distribution center profiles 14-3 distribution centers 2-7, 2-18 , 14-3 described 14-2 distribution centers folder 1-8 Duplicate command 8-16 E editing a record 8-15 entering boolean cells 3-8 check box cells 3-8 X-2 date cells 3-7 number cells 3-6 picture cells 3-9 text cells 3-5 time cells 3-7 entering checkbox values 3-9 entering information 3-3 Entrust 4-15 error checking 3-19 exchanging information 13-2 file formats 13-2 expandable rows in tables 3-15 export options by column 13-3 by row 13-4 exporting records 13-7 extra choices adding 3-22 extracting files 5-5 F file formats delimited text files 13-2 Informed data 13-6 Informed Interchange 13-6 filling out forms overview 1-5 filling out tables 3-13 Find Again command 8-21 Find All command 8-21, 8-22, 825 Find command 8-16 find options 8-20 finding all records 8-22 boolean values 8-20 dates 8-19 names 8-19 words 8-19 finding records match options 8-18 search value 8-17 .... Index First 8-24 fonts changing 3-5 changing size 3-5 changing type style 3-5 missing 2-11 form numbers 3-27 errors obtaining 3-28 sources of 3-27 form template distribution 14-2 checking for revisions 14-4 overview 1-3, 14-2 revision status 14-5 form tracking 10-8, 11-2 described 11-2 overview 1-6 format of cells 3-4 forms entering information 3-3 H help on-line 1-8 help messages for cells 3-22 hiding totals 8-13 how forms are designed 1-2 I importing notes 13-12 importing records errors when 13-10, 13-12 indexed cells 8-21 Informed data files 13-6 Informed documents 2-2 form data 2-2 form template 2-2 interchange 2-2 package 2-2 Informed Filler application location of 1-7 Informed folder 1-7, 6-3, 14-3 Informed Interchange files 13-6 Informed overview 1-2 Informed preferences 1-9 intelligent features 1-2, 3-17- 328 calculations 3-18 choice lists 3-20 data verification 3-19 form numbers 3-27 help messages 3-22 lookups 3-25 Interchange documents described 2-2 invalid digital signatures 4-11 I-Sign 4-13 I-Sign preferences 4-14 X-3 multiple part pages 3-16 N name cells entering 3-6 finding with wild card symbol 8-20 new document preferences 2-5 Next 8-24 notes 7-2 number cells entering 3-6 numbered pages 3-16 O L language dictionaries 6-2 language options 6-3 Last 8-24 lookups errors performing 3-26 multiple matches 3-26 overview 3-25 obtaining a new template 2-17 ODMA support 2-19 Omit command 8-23 Omit Others command 8-24 omitting records 8-23 on-line help 1-8 opening a data document 2-7- 2-9 overview of Informed 1-2 M P mail cells 10-8 mail preferences 10-2 mail service 10-2 suggested routes 10-3 mailing forms 10-2 data formats 10-4 mail cells 10-8 mail preferences 10-2 specifying recipients 10-4 suggested routes 10-5 manipulating records 8-2 match options 8-18 memorizing values 3-12 Microsoft CSP 4-16 moving folders 1-9 moving notes 7-3 package documents described 2-2 opening 2-9 page controls 3-17 page setup 9-2 Page Setup command 9-2 pages 3-16 changing 3-17 numbered 3-16 of a form 3-16 work page 3-16 passwords changing 2-5- 2-6 entering 2-7 pencil indicator 3-2, 8-11, 8-15 picture cells .... Index entering 3-9 on the Record List 8-4 placing notes 7-3 playing notes 7-4 plug-ins data access 11-2, 12-2 described 1-3 distribution 14-2 mail 10-2 types of 1-3 plug-ins folder 1-7, 11-3 location of 1-3 preferences auto-save 2-13 century wrap 3-7 folders 1-9 I-Sign 4-14 mail 10-2 new document 2-5 printing 9-3 revision 14-4 revision checking 14-4 security 2-6, 4-4 spelling 6-2 preferences folder 1-8 Previous 8-24 print options 9-5 collate 9-6 repeating 9-6 printing blank forms 9-6 printing forms 9-2 collating 9-6 from the Record List 9-8 preferences 9-3 print options 9-5 repeating 9-6 tiling 9-5 printing labels 9-6 printing offset adjustment 9-3 printing preferences 9-3 offset adjustment 9-3 printing records in a list 9-9 Q quick-tabs 3-13 quote characters 13-3 R Record Information 8-27, 12-4 Record List 8-3 adding columns 8-5 changing column alignment 89 changing column titles 8-8 changing column width 8-8 contents of 8-4 current record indicator 8-10 formats 8-13 indexed cells on 8-5 picture cells on 8-4 printing from 9-8 removing columns 8-5 removing formats 8-14 saving formats 8-13 selecting records 8-9 showing and hiding 8-3 showing totals 8-13 table cells on 8-4 totalling columns 8-11 Record List window 1-4, 4-10 , 6-6 , 8-3, 12-3 recording notes 7-4 records accepting 3-3 activating 3-2 adding new 8-15 adding to tagged collection 826 browsing through 8-24 clearing 8-16 collection of 8-2 current 8-2 duplicating 8-16 editing 8-15 entering information 3-3 X-4 finding all 8-22 information boxes 8-2 omitting 8-23 recalling tagged collections 826 Record List 8-3 removing 8-24 removing tags 8-27 reverting 8-15 selecting on Record List 8-9 setting values for multiple 3-10 sorting 8-22 submitting 12-2 submitting multiple 12-3 tagging 8-25 tags 3-11 Remove command 8-9, 8-25 Remove Format command 8-14 Remove Tag command 8-27 removing notes 7-3 removing records 8-24 removing tags 8-27 Revert command 8-16 reverting a record 8-15 revision checking preferences 144 revision number 2-4 revision preferences 14-4 revision status 14-5 current 14-6 discontinued 14-6 non-current 14-6 S Save Format command 8-13 saving a data document 2-13- 214 scrolling fields 3-11 scrolling tables 3-15 security preferences 2-6, 4-4 selecting columns 8-9 Send command 10-3 send options collected records 10-3 current record 10-3 entire Record List 10-3 selected records 10-3 Show Record List command 8-3 signature cells 4-2 signing attachments 5-6 signing forms 4-5 Sort command 8-9, 8-22 sorting records 8-22 spell checking from the Record List 6-6 invalidating a check formula 65 language dictionaries 6-2 language options 6-3 overview 6-2 performing 6-3 questionable words 6-5 setting preferences 6-2 spelling folder 6-3 spelling preferences 6-2 Submit command 12-2 submitting forms 12-2 errors performing 12-4 overview 12-2 successful submission indicator 12-4 suggested routes adding 10-6 changing 10-6 described 10-5 removing 10-6 selecting 10-5 T tab delimited text 13-2 tab order described 3-12 tables expandable rows in 3-15 exporting 13-3 filling out 3-13 inserting and removing rows 314 scrolling 3-15 Tag Records command 8-25 tagged records 12-3 tagging records 8-25 template documents described 2-2 template ID 2-4, 14-3 duplicate 2-11 template information 2-3 revision number 2-4 template ID 2-7 template name 2-4 template name 2-4 template preferences folder 1-8 templates checking for revisions of 14-4 described 1-2 location of 14-2 obtaining new 2-17 verifying 4-11 templates folder 2-3, 2-7, 14-2 location of 1-4 text cells entering 3-5 text messages 7-4 tiling 9-5 time cells entering 3-7 times 8-19 tracking forms displaying tracking status 11-4 performing 11-3 types of cells 3-4 typing notes 7-4 U using buttons 3-16 using digital signatures 4-2 .... Index X-5 V verifying digital signatures 4-5 verifying templates 4-11 voice messages 7-5 W where everything goes 1-7 work page 3-16, 7-6 X XML File Exporting 13-6 Opening 2-10 Saving 2-14 Y yellow sticky (see annotation) 7-2 A Appendix A Name Prefixes and Suffixes .... A-2 Appendix A - Name Prefixes and Suffixes A Appendix A - Name Prefixes and Suffixes As described in Chapter 3, “Filling Out Forms,” Informed Filler allows you to store names using the name cell type. With the name cell type, Informed Filler always displays a name according to the cell’s format, even if you enter a name differently. For more information, see “Entering Names” in Chapter 3. In order to identify the different parts of a name, Informed Filler uses the list of prefixes and suffixes shown in the following tables. Prefixes Full Prefix Abbot Admiral Airman Ambassador Archbishop Archdeacon Army Assemblyman Assembywoman Assistant Associate Attorney Baron Baroness Baronet Bishop Brigadier Cadet Canon Cantor Captain Cardinal Chairman Chairperson Cancellor Chaplain Chief Colonel Commander Commodore Congressman Abbreviation Adm. Amn. Brig. Cdt. Capt. Col. Comm. Cong. Full Prefix Abbreviation Congresswoman Corporal Count Countess Dame Doctor Duke Duchess Excellency Ensign Father First Fleet General Governor Grade Her Highness His Holiness Honorable Judge Justice King Knight Lady Lieutenant Lord M. Madame Majesty Cong. Cpl. Dr. Gen. Gov. Hon. Lt. .... Appendix A - Name Prefixes and Suffixes Prefixes (continued) Full Prefix Abbreviation Full Prefix Major Marchioness Marquess Mayor Midshipman Minister Miss Mister Most Mother Mrs. Ms. Navy Of Officer Patriarch Pope President Prime Prince Princess Private Professor Queen Maj. Pvt. Prof. Rabbi Rear Representative Reverend Right Royal Seaman Second Secretary Senator Sergeant Sir Sister Specialist The Third Under Very Vice Viscount Viscountess Warrant Yeoman Full Suffix Abbreviation Full Suffix Junior Senior Esquire First Second Third Fourth Fifth B.A. B.Comm. B.Ed. B.Sc. C.A. C.P.A. Jr. Sr. Esq. I II III IV V D.D.S. D.V.M. J.M. LL.B. M.A. M.B.A. M.D. M.Ed. M.S. P.Eng. Pharm. Ph.D. R.E.T. R.N. Mr. Pres. Abbreviation Rep. Rev. Rt. Sec. Sen. Sgt. Spec. V. Suffixes Abbreviation A-3 .... A-4 Appendix A - Name Prefixes and Suffixes