1
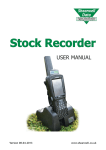
PSION WORKABOUT PRO USER MANUAL Erona Farms Ltd. Shearwell Canada Support RR# 3 Barrhead, Alberta Tel: 780 674 9564 Email: [email protected] www.eronafarms.ca or www.shearwell.co.uk Stock Recorder Guide G3 This document is split into a number of sections, covering the initial set up of the Stock Recorder with your PC, upgrading the Stock Recorder software, transferring data between FarmWorks on your PC and the Stock Recorder, linking other equipment to the Stock Recorder and use of the Stock Recorder software itself. Contents Initial Setup ‐ getting the PC connected to the Stock Recorder Introduction page 2 Automatic setup up for first use page 2 Manual set up for first use for Windows XP page 3 Manual set up for first use Windows Vista, 7 page 4 Upgrading Stock Recorder software Automatic upgrade page 6 Manual upgrade page 7 Transmitting and receiving data between FarmWorks on the PC and the Stock Recorder page 8 Entering FarmWorks on the Stock Recorder page 9 Using FarmWorks on the Stock Recorder page 9 Reading tags electronically page 10 Recording electronically and manually page 11 Tag options on the Psion page 11 Adding animals page 12 Linking EID’s to existing animals page 13 Looking up individual animal data and comments page 14 Initial Bluetooth setup page 15 Connecting Bluetooth devices page 16 Care and problem solving page 17 Contact details page 19 1 Initial Setup ‐ getting the PC connected to the Stock Recorder Introduction: Depending on your experience with PC’s generally, and due to different versions of Windows having different requirements and procedures, you may find this process difficult to follow – it’s worth getting it right first time – if you are at all unsure, please give us a call (contact numbers on the last page) and we’ll be happy to talk you through it. When the Stock Recorder is despatched the battery will have a certain amount of charge, but it’s worth charging it fully and leaving it connected to the mains throughout the installation procedure. Have the Stock Recorder handheld switched on, sat firmly in the cradle, with the cradle connected to the PC. The FarmWorks CD contains both the FarmWorks software for the PC and the compatible Stock Recorder software. To access the Stock Recorder software, insert the CD into your computer. Depending on the version of Windows or particular settings you have on your PC, you will be presented with various options. Automatic set up. If the program starts up automatically, choose the ‘Install / Upgrade Stock Recorder’ option. Alternatively you may be presented with the option to run ‘RunFarmWorksCD.exe’ – if so, click on this and choose the ‘Install / Upgrade Stock Recorder’ option. The program should then proceed to set up any necessary files and settings required to establish a link between the PC and Stock Recorder – please click ‘continue’ where necessary and accept the Windows Mobile Device Centre licence agreement. When prompted to set up a partnership Select ‘No’, I want to synchronise with two computers ‐> Next On ‘Select Synchronisation Settings’ screen, uncheck all options ‐> Next In ‘Ready to set up Windows mobile partnership screen’ accept defaults ‐> Set up The Stock Recorder should then be fully connected and synchronised, ready to receive data from and transmit data to your PC. Close the Microsoft Activesync (Windows XP) or Windows Mobile Device Centre (Windows Vista, 7) screen and ‘continue’; the Stock Recorder will be upgraded with the version of software compatible with the FarmWorks version on the CD (note that for a new purchase the latest version will already be on the Stock Recorder, so strictly speaking the upgrade process isn’t necessary. Under certain circumstances it may be necessary to configure settings manually 2 Manual set up. In Windows XP, to access the files referred to on the following pages right‐click on the ‘Start’ button in the bottom left corner of the screen, and left‐click ‘Explore’. The screen is split into two, and on the left side you should see a column of yellow ‘folders’. Scroll down toward the bottom of the left side of the screen and you will see your CD or DVD drive, containing the FarmWorks CD. Double left‐click on the CD drive, and you will see a yellow folder called ‘Stock Recorder CD’. Double left‐click on this folder and you will find all the files referred to below. In Windows Vista or Windows 7, on inserting the CD you will probably be presented with various options, one of which will be ‘open folder to view files’. Double left‐click on this option and you will see a yellow folder called ‘Stock Recorder CD’. Double left‐click on this folder and you will find all the files referred to below. Please note: If at any point the PC Firewall software reports that a new device is requesting access to the internet, select ‘Always enabled’ or similar. Connections between the Stock Recorder and PC are treated as an ‘internet connection’ by some Firewalls. Initial set up for users of Windows XP (manual set up) On the CD supplied there is a folder called ‘XP‐Psion Installation’. If you open this folder you will see the files you require below. Set up Activesync Run MSASYNC.EXE on Install disk. Click ‘Next’ twice. (Be patient at ‘92%’ on install) Ignore ‘Get Connected’ – Cancel, then OK to exit. Set Up Stock Recorder Utility Run USBSetupUtility on Install disk. Select ‘WORKABOUT PRO from the drop down list ‐> Next Accept default locations ‐> Next Select ‘USB connection to Windows CE’ ‐> Next Leave both boxes checked ‐> Next If file wceusbsh not found, then browse to C:\Program Files\Microsoft Activesync\Drivers ‐ Open If on XP, ignore warning about Logo testing ‐> Continue Anyway Follow on‐screen instructions. Turn on the Stock Recorder, put it in the cradle and connect it to the PC. 3 It should auto‐detect new hardware. If request for ‘search for current and updated drivers’, select ‘No not this time’ ‐> Next Select ‘Install software automatically’ ‐> Next If file ‘wceusbsh.sys’ is requested, then browse to C:\Program Files\Microsoft Activesync\Drivers ‐> Open ‐> OK If on XP, ignore warning about Logo testing ‐> Continue Anyway Finish Continue Exit Set Up Partnership Take the Stock Recorder out of the cradle, then put it back in. Check for the green ‘Active Sync’ logo in the bottom right hand corner of your PC screen, indicating that the PC recognises the Stock Recorder – if not present, go Start ‐ > All Programs ‐> Microsoft Activesync. Microsoft Activesync will open, and give the option to ‘Set up a Partnership’ ‐> select ‘Yes’. On the next screen, select ‘No’, I want to synchronise with two computers ‐> Next On ‘Select Synchronisation Settings’ screen, uncheck all options ‐> Next In ‘Ready to set up partnership screen’ accept defaults ‐> Set up The Stock Recorder should then be fully connected and synchronised, ready to receive data from and transmit data to your PC. Initial set up for users of Windows Vista or Windows 7 (manual set up): Some versions of Windows will automatically recognise the Stock Recorder. When you connect the cradle to the PC, turn on the Stock Recorder and place it in the cradle, if you receive a message asking you to set up the device you can skip the first section and proceed directly to the “set up device” section below. The Stock Recorder uses ‘Windows Mobile Device Centre’ (WMDC) to enable the Stock Recorder to communicate with the PC. WMDC is already installed as part of the operating system on your PC, but it needs additional ‘drivers’ to allow connection to specific devices. On the CD supplied there is a folder called ‘Vista‐W7‐Psion Installation’. If you open this folder you will see two files, ‘drvupdate‐x86.exe’ and ‘drvupdate‐amd64.exe’. To start the installation of the drivers, double‐click on ‘drvupdate‐x86.exe’ if your PC has a 32‐ bit operating system, or ‘drvupdate‐amd64.exe’ if your PC has a 64‐bit operating system. Permit any installation warnings and click on ‘run’. 4 Connect the cradle to the PC, turn on the Stock Recorder and place it in the cradle. Close the ‘found new hardware’ window. Right‐click ‘Computer’ and select ‘Manage’ then click on ‘continue’. Left‐click on ‘Device Manager’. Right‐click on Workabout Pro in ‘Other devices’. Select ‘Update Driver Software’. Select ‘Browse my computer for driver software’. Select ‘Let me pick from a list of device drivers’. Select ’Mobile Devices’ from ‘Common Hardware Types’. Select ‘Microsoft’ in the ‘manufacturer’ window. For Vista, select ‘Microsoft USB Sync (Microsoft Corporation)’ in the ‘Model’ window. For Windows 7, select ‘Microsoft USB Sync’ in the ‘Model’ window. Select ‘next’ and ‘yes’ to the warning. You are then asked to set up the device Select ‘No’, I want to synchronise with two computers ‐> Next Leave all connection options unticked ‐> Next In ‘Ready to set up Windows mobile partnership screen’ accept defaults ‐> Set up The Stock Recorder should now be ready to receive data from and transmit data to your PC. 5 To upgrade the program on the Stock Recorder, for users of Windows XP, Vista and 7. Very important: The versions of Stock Recorder and PC FarmWorks software on the CD you have been sent will be compatible. It is essential that you upgrade both if required. Please consult the upgrade release notes accompanying the CD to see the latest versions. Note that the latest version is always pre‐installed when a Stock Recorder is despatched, so for newly received units it is not necessary to run the upgrade. As ever, if in any doubt, please contact the support department. This process will overwrite existing data on the Stock Recorder handheld – if necessary import any new data on the Stock Recorder before proceeding, or that data will be lost. After importing, make a backup of your FarmWorks data on the PC (File>Backup) Exit FarmWorks and close any programs running on your PC. Connect the Stock Recorder handheld to the PC (if it’s not already) and switch it on. The FarmWorks CD contains both the FarmWorks software for the PC and the compatible Stock Recorder software. To access the Stock Recorder software, insert the CD into your computer. Depending on the version of Windows or particular settings you have on your PC, you will be presented with various options. Automatic upgrade. If the program starts up automatically, choose the ‘Install / Upgrade Stock Recorder’ option. Alternatively you may be presented with the option to run ‘RunFarmWorksCD.exe’ – if so, click on this and choose the ‘Install / Upgrade Stock Recorder’ option. The program should then proceed to upgrade any necessary files on the Stock Recorder – you may be prompted to click ‘continue’ where necessary, but other than that it should run to completion. To check the upgrade was successful: Start up FarmWorks on the PC, go to “Data Transfer” and export from the PC to the Stock Recorder as normal. Start up the program on the Stock Recorder and select the ‘information’ button. Check that the version number matches the latest you have been sent – if it does, the upgrade was successful and the Stock Recorder is ready to use. However, under certain circumstances it may be necessary to configure settings manually 6 Manual upgrade. On the CD you will find a folder called “Latest Version”. Double left‐click on this and the Startup and FarmWorks folders will appear in the right‐hand panel. Right‐click on the FarmWorks folder and select “copy”. Connect the Stock Recorder handheld to the PC (if it’s not already) and switch it on. Return to Windows Explorer on the PC and select the “Mobile device” on the left‐hand panel. The folder “Flash Disk” (amongst others) appears in the right‐hand panel. Right click on the folder “Flash Disk” and select “paste”. This will tell you that there is already a folder called FarmWorks, and do you wish to overwrite it? – confirm that you do. Note that if you are unable to paste directly into the Flash Disk folder (Windows Vista) you should double‐click on the Flash Disk folder to open it, where you will see the FarmWorks folder (along with folders called Startup and Documents and Settings) in the right‐hand panel of the screen. Right‐click on any part of the empty space in the right‐hand panel and select “paste”. Close down Windows Explorer (click in the cross in the top right corner of the screen) Start up FarmWorks on the PC, go to “Data Transfer” and export from the PC to the Stock Recorder as normal. Start up the program on the Stock Recorder and select the ‘information’ button. Check that the version number matches the latest you have been sent – if it does, the upgrade was successful and the Stock Recorder is ready to use. 7 Transmitting and Receiving Data 1. To send data between FarmWorks on the PC and the Stock Recorder, the program needs to be closed on the Stock Recorder. 2. The unit needs to be sitting in the cradle, powered on, connected to the PC and preferably with the cradle connected to the mains. PC to Handheld – transmit data 1. Always download from the PC before you use the handheld to ensure that the latest data is on the unit. 2. If you have had some new electronic cattle tags make sure that that file has been saved into FarmWorks. (not applicable in Canada). 3. Ensure that any drugs, markets, abattoirs, breeds that you may be using on the handheld have been entered onto FarmWorks on the PC. 4. On FarmWorks on the PC, go to Data Transfer>Workabout Pro>Transmit Data 5. A screen will come up, select Export Data 6. Note the warning screen – exporting will completely overwrite any data currently on your Stock Recorder – so if there is any data on the Stock Recorder not yet imported into the PC, do not proceed or you will lose it and it cannot be recovered. 7. If you are happy that all recently entered data on the Stock Recorder has been imported, click ‘OK’ to proceed with the export. 8. Click OK on the Export complete screen Handheld to PC – receive data 1. On FarmWorks on the PC, go to Data Transfer>Workabout Pro>Receive Data 2. A screen will come up, select Import Data 3. Click OK on the Import complete screen – if there were any warning messages created on import you have the option to review these now, or can look at them later through the Data Transfer>Workabout Pro menu. These warning messages are there for a reason – please ensure you do check them at some point (certainly before using the Stock Recorder again), and act upon them if necessary. 8 Entering FarmWorks on the Stock Recorder To start FarmWorks on the Stock Recorder, either touch the FarmWorks icon on the screen so that it is highlighted (FarmWorks will have a dark blue background with a dotted yellow line around the text) and then press the ‘Enter’ button, or double tap on the FarmWorks icon with your finger or the stylus. The program will take about ten seconds to start up. If you have previously had Bluetooth devices linked to the Stock Recorder, you will be presented with a ‘reconnect devices’ screen. If you want to reconnect to them, select as required, make sure they are turned on and fairly close by, then press ‘connect’. If you do not wish to reconnect, just tap on escape. You are then taken to the main menu screen. Using FarmWorks on the Stock Recorder Choosing Cattle or Sheep procedures as desired will display the following functions: Weighing – record the date that a reading was taken and either the weight, the weight and condition score or the weight and grade. Weaning weight can also be recorded. A second reading recorded against the same date as another reading will overwrite the first reading. Lambing / Calving – record the date of lambing / calving, the dam and sire, then whether the lamb was born dead or alive, the tag number, sex, breed and birth weight of the animal (default is 4kg for lambs, 50kg for calves). More detail below. Treatments – record the date of the treatment, the drug (including medicine batch), dosage, reason and person who carried out the treatment. Scanning – record number in utero and weeks pregnant. Movement – record the date of movement and the destination of the animal (also use this for movements to market or abattoir – do not use ‘sale’ or ‘death’, as at the time of recording, sale prices, kill weights etc cannot be known). Death – record the date of death, the cause and the resting place of the carcass. Purchase – record the date of purchase, where the animal was bought from, where it is being moved to, then the date of birth, sex, breed and tag number of the animal. More detail below. Sale – for private sale of stock ‐ record the date of movement, destination and sale price of the animal. Change Tag Number – record a different tag number for an animal. Review Data – identify and count animals through a race, display basic animal details. Tupping / Service – record date of service, sire and dam. TB testing (cattle only) – record first or second reading. 9 Drafting (sheep only) – animals passing through a drafting crate are read electronically and sent though one of up to three gates depending on their drafting details. This can be done by hand – i.e. a race reader and 3‐way drafting crate are not necessary for the function to operate. Other than drafting by weight, specific drafting groups must be set up through FarmWorks on the PC and exported to the Stock Recorder. Group – add animals to a new or existing management group. Wool Score (sheep only) – record a ‘score’ for an animal. Multiple Actions – perform combinations of (most of) the above functions in one pass, e.g. record the movement and weight of animals and add them to a management group. All of the functions are controlled through pressing where appropriate on the touch screen, and using the keypad if entering tag numbers manually or typing in comment text. The ‘enter’ button on the keypad will process any information already entered and take you down to the next input field – it can be used instead of tapping on the next input field on a screen. On every function, tags can be entered manually or read electronically. Reading tags electronically. Reading tags with the SDL300I internal reader. There are two modes of operation for the internal reader. It can be set to either continuously read for tags, or to only read for tags when prompted. To choose the mode enter the FarmWorks program on the handheld and go into “Options”, “RF Reader”, select the “SDL300I” then either “continuous read” or “press to read” as required. Either mode will only be activated when one of the functions within Sheep or Cattle procedures is selected, and the cursor or ‘focus’ is on a tag number field. As it suggests, continuous read will pick up any EID when one is within range, whereas press to read will detect EID’s by pressing and releasing the grey button on the right‐hand side of the Stock Recorder. Under continuous read, when the SDL300I detects an EID the handheld will emit an audible “click” and the tag number associated with the EID will appear on the handheld. Under press to read, when the right‐hand white button is pressed and released the handheld will emit short “chirrups” to signify that it is trying to detect an EID. When an EID is detected there will be a “click”, the noise will stop and the tag number associated with the EID will appear on the handheld. Continuous read is constantly trying to detect EID’s when the focus is on the tag number field, so uses substantially more power than press to read. 10 Reading tags with the SDL130 race reader. This is effectively the same as the continuous read method detailed above for the internal reader. It will only be activated when one of the functions within Sheep or Cattle procedures is selected, and the cursor or ‘focus’ is on a tag number field. The race reader will pick up an EID when one is within range, and the tag number field on the Stock Recorder will automatically be populated. Recording electronically and manually Electronically When recording electronically, and the tag number field is the last input field on the screen (the majority of screens), each read of the device will automatically save the record. The previous tag number will remain displayed until the next is read and recorded. Where ‘enter a tag number’ is referred to below, this assumes the tag is being entered by reading it electronically. Manually If recording manually you will need to press the <Enter> or the ‘Return’ (↵) key on the keyboard after typing in the tag number, then tap ‘save’ to save the record. Where ‘enter a tag number’ is referred to below, this assumes the tag is being entered by typing the number in manually. Numbering your sheep In FarmWorks, every sheep must have a tag number. Each animal can also have an EID (electronic identification) number from its RFID tag, as well as a management tag number, usually taken from a visual tag. All three identifiers are cross‐referenced in the software so there is very little chance of losing data or performance records if an animal loses its tags. Tag options on the Psion On the opening screen of the Stock Recorder go to Options > Tag Options. Put in the flock prefix you want to use when new sheep are entered into the program. Select either EID or Type. Numbering by ‐EID ‐ Option 1 – This option uses the last nine digits of the EID number as the animal’s tag number. This makes matching up your farm records with manifests, sales receipts and slaughter reports easier. If your sheep also wear a visual or dangle tag, then that number can be entered as the animal’s management Tag. A Management Tag can be typed into the Psion instead of scanned. 11 Numbering by –type‐ (type in your own number) ‐ Option 2 – This option allows you to type in any number you wish as the animal’s tag number. This can be any unique number or combination of numbers and letters. Sheep can also have an EID number from an RFID tag, as well as a management Tag number. When the RFID tag is scanned your own number will appear as the Tag Number. Adding Animals There are three ways to add animals through the Stock Recorder – please note that as this is an animal’s first record its method of ‘arrival’ must be correct – i.e. if it is recorded as an on‐ farm birth, this cannot be changed to a purchase at a later date (short of deleting the record entirely through FarmWorks on the PC, then re‐recording): 1. To record a purchase, use the Purchase screen – animals entered on the Stock Recorder through any other screen will be assumed to be an on‐farm birth. 2. To record a lambing or calving (and so automatically associate the offspring with the dam and sire) use the Lambing or Calving screen. 3. If you’re not concerned with recording specific purchase or parentage, and just want to get your current stock loaded into the system (typically when first setting the system up), you can add animals in any of the screens, as the processing associated with the tag number field is the same. However, the Review Data screen is probably the simplest, as this only has a tag number input field. Purchase: 1. Select the date of purchase. 2. Select where the animal was purchased from, i.e. the relevant holding or market. 3. Select where the animal is being moved to – typically your own holding, but it could be directly to a grasskeep holding or to a specific location within your own holding. 4. Tap ‘next’ 5. Enter date of birth, sex, breed and purchase price of the animal. The date of birth will, by default, be the 1st March that has just passed. 6. Enter the tag number of the animal. 7. Press ‘save’ – you will see that all the previous details are retained – provided they still apply, all you need to do is enter the individual tag number of the next animal. Lambing / Calving: 1. Select the lambing date. 2. Enter the dam’s tag number. 3. If a tupping or service has been recorded for the dam in an appropriate time frame, the sire will be prompted automatically. If not, the sire’s tag may be entered (optional). 12 4. It is optionally possible to record birth ‘traits’, such as ease of birth and milk production (tap on traits to enable scoring). 5. Press ‘add lamb’ or ‘add calf’ as applicable. 6. Enter the lamb or calf tag. 7. Select sex, breed, and birth weight (optional). 8. If the dam has had more than one offspring, select ‘save and add’ to record another for that dam, otherwise ‘save and escape’ to record offspring for the next dam. It is also possible to record if the lamb or calf was born dead or aborted. Review Data: 1. Enter the tag number 2. If the animal is not known you will be prompted to add the animal 3. Select Yes twice to confirm that you wish to add the animal 4. Select the DOB 5. Select the Sex 6. Select the Breed (any breeds that already exist for your animals will be displayed. To choose another select ‘Other’). If recording manually and adding sheep to the system, the flock number must be entered, followed by a single space and then the individual animal’s number, e.g. NMF 258 Linking EID numbers to existing animals (tag option in Psion set to “type” option 2) For those animals that are already on FarmWorks, EID's can be linked in any of the screens, though as with adding completely new animals, the ‘review data’ screen is probably the most simple if nothing else is to be recorded. 1. Read the device 2. type in the tag number carefully. If it is your own flock or herd number just type in the individual number, if not type in the whole number as for manual entry above, then click on ‘Lock’. Note: the number entered must be an exact match with that of an existing animal. If not, the Stock Recorder will treat this as a new animal, and you will be prompted to enter date of birth, sex and breed. 13 Looking up Individual Animal Data and Comments Individual records for any animal can be accessed from any screen where an animal’s tag number is highlighted – i.e. the tag number field is already populated and the focus is on that field. Press and release the grey button on the left‐hand side of the Psion. To add a comment, select ‘Add comment’ and type in the text. If you would like this message to pop up the next time that the animal’s tag is entered select yes, if not select no (either way the message will be stored against the animal’s record on the PC and on the Stock Recorder). Select ‘save’. To view information on an animal such as treatment or movement history, select Animal History and choose from there. 14 Initial Bluetooth setup Bluetooth is wireless technology that lets electronic gadgets talk to each other via radio waves. A device “with Bluetooth” means it contains a small computer chip with a Bluetooth radio and some software that allows it to connect wirelessly to other devices. The Stock Recorder can link to Bluetooth devices like weigh scales and tag readers. The Bluetooth Manager on the Stock Recorder finds the signal sent out by other devices and assigns each one a channel for communicating, known as the Bluetooth Serial Port (BSP). The instructions below are for setting up the initial link between your Stock Recorder and other equipment supplied by Shearwell. Follow the steps for each component and write down each corresponding BSP Channel. To find and assign a Bluetooth channel for your device: 1. Turn on the device you are trying to link to the Stock Recorder. Make sure it is close by. 2. On the Stock Recorder desktop find the computer icon. It may be called My Device or My Computer. 3. Double click the icon to open it. 4. Open Control Panel. 5. Find the Bluetooth symbol. It may be displayed as an icon or in a list of folders. 6. Double‐tap to open Bluetooth Device Properties. 7. Go to the ‘devices’ tab and press Scan. Now the Stock Recorder tries to find all the Bluetooth devices in the area. This may take up to a minute ‐ be patient! 8. When scanning is complete the screen will show all the Bluetooth devices in the area, including mobile phones. 9. Tap on the device you want, then tap Pair. 10. The Authentication screen opens. 11. All Shearwell products use 1111 as the default PIN. Type in the PIN and tap Next. 12. The Services screen will open. Tap in the Serial Port tick box. 13. The Serial Profile screen will open. Leave Encryption disabled. Leave Mode as serial. 14. Open the Port menu by tapping on the drop‐down selection box. On the list displayed find and tap on the next available BSP after BSP1. 15. The Serial Profile screen opens again. Tap Next. On the Services screen tap Done. 16. Go to the ‘paired’ tab and make a note of the BSP number assigned to that device, e.g. SDL130:124 Serial BSP4. 17. Repeat this process for each Bluetooth devices, e.g. race reader, weigh head, drafting crate etc. 15 Reconnecting the Bluetooth devices, or connecting for the first time Before connecting to an external Bluetooth device, e.g. race reader, weigh head, drafting crate, it is necessary to establish a link between the Stock Recorder and that device. Typically this only has to be done once, as the Stock Recorder remembers the settings used. To establish this link, please refer to the previous section – Initial Bluetooth Setup. If the Stock Recorder or external device has been turned off the Bluetooth link will have been disconnected. If this is the first time the external device has been used, it will never have been established. To connect or reconnect: 1. Turn on the reader, weigh head or drafting crate. 2. On the main screen of FarmWorks on the Psion select Options 3. Select RF Reader, Weigh Scale or Drafter as appropriate. 4. Select the appropriate device – for readers, the internal antenna is the SDL300I, a race reader the SDL130R, and a stick reader the SDL400S; the weigh scale is typically the JR3000, the drafting crate 3‐Way. 5. Make sure that the BSP (Bluetooth Serial Port) number matches that for the external device as listed on the Bluetooth Manager ‘paired’ screen. If these have been set in the past, the Stock Recorder will have remembered them. If this is the first time of use, set the BSP number to that noted during Initial Bluetooth Setup. 6. Press connect – you should receive the message ‘connection established’. Note: when supplied, the Stock Recorder will by default be set up to use the internal reader, the SDL300I. As this is connected internally, it does not have or need a BSP setting. Remember that should you configure the Stock Recorder to use a different reader, e.g. a race reader, if at a later date you want to use the internal reader you must set it back to do so under the Options>RF readers screen. 16 Care of the Stock Recorder 1. Do not use anything other than fingers or the stylus on the screen. 2. The screen has a thin screen protector on it. These can be replaced and purchased from Shearwell. 3. Batteries are expensive – at time of writing, the backup batteries are £25 and the main batteries are £72. Batteries will inevitably degrade over time, but we are advised that they will last longer if not allowed to completely drain, or be left in a drained state for any length of time. 4. The Stock Recorder is fairly robust, and should be adequately able to tolerate normal use on the farm. However, please remember that it is an expensive piece of electronic equipment, and should be treated as such. It would be worth checking that it is covered by your farm insurance. Problem solving Not able to get into FarmWorks on the Unit but it says that it is open 1. Using the stylus select the Windows key 2. Select Shortcuts 3. Select Task Manager 4. Select Stock Recorder 5. Tap the “Switch to” button and after a few moments the program should appear. Losing Bluetooth connection If you are unable to connect via Bluetooth to a reader, weigh scale or drafter to which you have previously been able, and when testing the connection on the relevant Stock Recorder options screen it tells you that the connection is established, the most likely cause is that either the Stock Recorder or external device didn’t ‘drop’ the Bluetooth link after previous use. Turn the external device off, both at the unit itself and at the mains if connected, then exit FarmWorks on the Stock Recorder and try a ‘warm reset’. Turn everything back on and try again. If that doesn’t work, make sure that each device is using a unique BSP (Bluetooth Serial Port) number, and check that the BSP matches that for the external device as listed on the Bluetooth Manager ‘paired’ screen. If it still won’t connect, it would be worth clearing that device from the ‘paired’ devices in the Bluetooth Manager, and re‐establishing the link from scratch. Screen Freezing This may happen for various reasons If the orange FN, blue FN, CTRL or ALT keys have been pressed by mistake, it will appear that pressing numbers or letters will do nothing. 17 Check for associated text displayed along the toolbar at the very bottom of the screen, e.g. “ALT KEY”. These keys have a cycle of three pushes .Press the key associated with the text until the text is no longer displayed on the bottom of the screen If that has no effect, reboot the unit by tapping the windows key at the bottom left hand corner of the screen, select shutdown, select warm reset. If this still does not work, reboot the unit by tapping the windows key at the bottom left hand corner of the screen, select shutdown, select cold reset. As a last resort press Orange FN, Blue FN and Enter keys and hold for about six seconds while the unit turns itself off and automatically restarts. If taking the last option or the cold reset option, when you restart FarmWorks you will get a message about ‘missing utilities’. Follow the onscreen instructions to re‐install them, then continue as normal. All data is saved automatically onto a flashpack so you will not lose data with resets. Unable to transfer data between PC and Stock Recorder If you have been able to transfer in the past, and you get a message beginning “Failed to open connection….”, basically your PC is telling you it can’t find the Stock Recorder. Check that everything is plugged in, and the Stock Recorder is sat snugly in the cradle (unclip the hand strap at the back, if one is attached). Assuming all connections appear complete, it is worth cleaning the copper contacts on the base of the Stock Recorder, and the ‘pins’ that it sits on in the cradle. If the battery on the Stock Recorder has been allowed to drain, charge it for at least ten minutes, then try to start up FarmWorks on the Stock Recorder. You will probably get a message along the lines of “Some utilities required by this program are missing and will be reinstalled”. Tap ‘ok’ to allow reinstallation, then let the program start up. Exit the program and try transferring again. If it still won’t transfer data, close FarmWorks and re‐start your PC, and perform a warm reset on the Stock Recorder (tap the windows key at the bottom left hand corner of the screen, select shutdown, select warm reset – you will not lose any data). Then try again. Other useful hints 1. Management tags can be added or used by typing a full‐stop and then the number – for example .21 – in any tag number field. 2. Volume can be adjusted by pressing the blue key until it is displayed in capitals on the bottom of the screen, and then pressing either the up Λ or down V button to increase or decrease volume. 18 Contact us: Erona Farms Ltd. / Shearwell Canada Support. RR# 3 Barrhead, Alberta T7N 1N4 Telephone: Fax: 780 674 9564 780 674 3870 Email: [email protected] [email protected] Website: www.eronafarms.ca www.eronafarms.ca/Support.html www.shearwell.co.uk 19