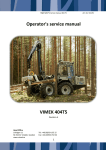
Download Operator's service manual
Transcript
Operator´s service manual Vimek 630 Operator’s service manual VIMEK 630 Revision A Head Office Lidvägen 11 SE-922 31 Vindeln www.vimek.se Tel: +46(0)933-135 15 Fax: +46(0)933-710 56 1 Art Nr.909713 Operator´s service manual Vimek 630 Art Nr.909713 Contents 3.1 Maintenance .......................................... 3 4 Safety ..................................................... 3 General ..................................................... 3 Daily inspection............................................ 4 Tightening torque ......................................... 5 Welding ..................................................... 5 1 1.1 1.2 1.3 1.4 1.5 1.6 1.7 1.8 1.9 1.10 1.11 1.12 1.13 1.14 1.15 1.16 1.17 1.18 2 2.1 2.2 2.3 2.4 2.5 2.6 2.7 2.8 2.9 3 4.1 4.2 4.3 4.4 4.5 4.6 Lubrication points ............................ 6 Pending axle .................................. 6 Drive joints .................................... 6 Rear axle chain .............................. 7 Front axle chain ............................. 7 Gearbox chain ............................... 7 Sliding surface throttle ring ............ 7 Gear axle ....................................... 8 Rear axle flex couplings ................. 8 Drive joints, trailer ......................... 8 Flex coupling, trailer ...................... 8 Cardan shaft .................................. 9 Bogie ............................................. 9 Pending axle, trailer ....................... 9 Out riggers .................................. 10 Rotator/Link ................................ 10 Grapple ....................................... 10 Crane .......................................... 11 1.17.1 Crane pillar ................................... 11 1.17.2 Crane/link..................................... 11 5 5.1 5.2 5.3 5.4 6 6.1 6.2 7 7.1 7.2 8 8.1 9 9.1 9.2 9.3 Wheel bearings, trailer ................ 11 Bolted joint .................................... 12 Hoses .......................................... 15 Oils ................................................ 16 Engine oil ..................................... 16 Hydraulic oil ................................ 17 Gearbox oil .................................. 18 Reduction gear............................. 18 T-gear .......................................... 19 T-gear, trailer ............................... 19 Filter .............................................. 20 Engine oil filter ............................ 20 Hydraulic oil filter ........................ 20 Fuel filter ..................................... 21 Air filter ....................................... 21 Brake system .................................. 22 Driving brake ............................... 22 Parking brake............................... 22 Transmission .................................. 23 Variator ....................................... 23 Variator belt ................................ 23 Tyres .............................................. 25 Air pressure ................................. 25 Chains ............................................ 26 Adjusting chain tension, front ...... 26 Adjusting chain tension, rear ........ 27 Adjusting chain tension, t-gear ..... 27 10 Battery ........................................... 28 Wheels machine .......................... 12 Ball joint ...................................... 12 Wheels trailer .............................. 13 Crane foot ................................... 13 Out riggers .................................. 13 Crane arm ................................... 14 Engine mounting ......................... 14 Load bunk ................................... 14 Bogie tap, trailer .......................... 14 10.1 10.2 10.3 General........................................ 28 Charging ...................................... 28 Battery change............................. 28 11 Hydraulics ...................................... 29 11.1 General........................................ 29 12 Safety equipment ........................... 29 12.1 Engine............................................ 15 2 Fire extinguisher .......................... 29 Operator´s service manual Vimek 630 Art Nr.909713 Maintenance Safety Observe all safety provisions in the machine’s instruction manual. Particularly important information in this service manual is marked with the following symbols: Risk of personal injury or damage to property Immediately stop any work Important information General In order for the machine to function problem-free over a long lifespan, the service and maintenance must be carried out according to the instructions in this service manual. The machine must be regularly lubricated according to the chapter "Maintenance Schedule". Difficult circumstances can necessitate a shorter service interval. Be observant for any wear and tear, and for any situations that could lead to machine damage. Hydraulic components are sensitive to contamination. Observe strict cleanliness when servicing hydraulic components. Clean any leaks immediately, to avoid damage to the surroundings. Spent oil, coolant, battery fluid, etc must be taken to the nearest recycling/deposit centre. Use environmentally-friendly diesel. Always turn off the engine during all service and maintenance work on the machine. Ensure that the motor cannot, in any circumstances, be accidentally turned on again. Secure machine parts during maintenance - risk of serious crushing injury. Ensure that the crane and the machine are situated in a position where no parts of the crane or machine can move - risk of serious personal injury. Faults that are discovered must be resolved before continued driving, if there is a risk of personal injury or damage to property! If in doubt of the appropriate action for daily inspection, damage or larger repairs, contact your VIMEK dealer or service organisation. 3 Operator´s service manual Vimek 630 Art Nr.909713 Daily inspection Inspect the machine and crane daily in respect of safety and function. Daily inspection, lubrication and simple repairs can be carried out by the driver. Pay particular attention to: Noticeable defects or changes to the outside of the machine, e.g. cracks or damage in supporting parts. Leakage from the hydraulic system, damage to hoses or cables. Leakage from the engine. In dusty situations, the air filter, cab filter, cooler and cooler filter must be checked daily. Check the following points daily: Oils 4.1–4.2 Brake system 6.1–6.2 Hydraulics 11.1 Safety equipment 12.1 4 Operator´s service manual Vimek 630 Art Nr.909713 Tightening torque Dimensions Tightening torque in Nm M6 M8 M10 M12 M14 M16 M18 M20 M24 Resistance class 4.6 8.8 3,7 9.8 8,9 24 17 47 30 81 48 128 74 197 103 275 144 385 249 665 10.9 14 33 65 114 181 277 386 541 935 12.9 17 40 79 136 217 333 463 649 1120 Welding Welding on the machine during warranty period must be done according to VIMEK’s instructions When welding the machine or crane, the following measures must be taken: Disconnect the battery’s + terminal Ensure that there is functioning fire fighting equipment available. Clean sufficiently around the welding area so as to eliminate the risk of fire. Connect the earthing cable as close to the welding location as possible. For repair welding of tracks and chains see separate manual. 5 Operator´s service manual Vimek 630 Art Nr.909713 1 Lubrication points As lubricant, we recommend a grease designed for slide bearings in work machines. The grease must be suitable for high pressure, impact loading and must maintain its lubrication capacities in temperatures from -25°C to +50°C. Use lithium grease fortified with EP additive. Take the load off the joints before lubricating. Use 2-3 pumps in each grease nipple. If it is difficult to insert the grease, it can help to move the joint backwards and forwards. Always replace clogged or broken grease nipples. 1.1 Pending axle 1 lubrication point … 1.2 Drive joints 2 lubrication points … 6 Operator´s service manual Vimek 630 1.3 Rear axle chain 1.4 1 Lubrication point (whole chain). Front axle chain 1.5 1 Lubrication point (whole chain). Gearbox chain 1.6 1 Lubrication point (whole chain). Sliding surface throttle ring 1 Lubrication point (pull the gaiter backwards and spray the axle). 7 Art Nr.909713 Operator´s service manual Vimek 630 1.7 Gear axle 1.8 2 Lubrication points. Spray axle according to arrows. Rear axle flex couplings 5 Lubrication points. Spray the flex couplings. … 1.9 Drive joints, trailer Disassemble protective plate. 2 Lubrication points. 1.10 Flex coupling, trailer Disassemble protective plate. 1 Lubrication point. Spray flex coupling. 8 Art Nr.909713 Operator´s service manual Vimek 630 Art Nr.909713 1.11 Cardan shaft 2+2+1 Lubrication points. Grease the couplings and the sliding surfaces. 1.12 Bogie 2 lubrication points (1 on each side). 1.13 Pending axle, trailer 1 lubrication point. 9 Operator´s service manual Vimek 630 1.14 Out riggers 4+4 Lubrication points. 1.15 Rotator/Link 2 Lubrication points. 1.16 Grapple 9 Lubrication points. 10 Art Nr.909713 Operator´s service manual Vimek 630 Art Nr.909713 1.17 Crane 1.17.1 Crane pillar 3 Lubrication points. Grease gear wheel and rack. … 1.17.2 Crane/link 8 lubrication points. … … 1.18 Wheel bearings, trailer Check daily that the caps not are damaged. 4 Lubrication points. Knock the caps loose and fill dem with grease. 11 Operator´s service manual Vimek 630 2 Bolted joint See section "Tightening torque" for the correct torque. 2.1 Wheels machine Check: 5 pcs wheel bolts (4x) M12. M12, 5 pcs 2.2 Ball joint Check: 2 pcs M14 (1 on each side) M12, 2 pcs 12 Art Nr.909713 Operator´s service manual Vimek 630 2.3 Wheels trailer Check: 5 pcs wheel bolts (4x) M12. M12, 5 pcs 2.4 Crane foot Check: 4 pcs M12. M12, 4 pcs 2.5 Out riggers Check: 2+2+2 pcs M12 M12, 2 pcs M12, 2 pcs M12, 2 pcs 13 Art Nr.909713 Operator´s service manual Vimek 630 2.6 Crane arm Check: 12 pcs M12. M12, 6 pcs M12, 6 pcs … 2.7 Engine mounting Check: Engine mount screws, 4 pcs M10. 2.8 Load bunk Check: 8 pcs (4 on each side) M16. M12, 4 pcs 2.9 Bogie tap, trailer Check: 4 pcs M8. M8, 2 pcs 14 Art Nr.909713 Operator´s service manual Vimek 630 Art Nr.909713 3 Engine These are only a few selected service points for the engine. For complete service and maintenance instructions, see the engine’s separate manual! 3.1 Hoses Check: Fuel hose in respect of cracks and leakage. Change when necessary. 15 Operator´s service manual Vimek 630 Art Nr.909713 4 Oils Old oil must always be managed and disposed of in accordance with applicable regulations. Pay attention to cleanliness to avoid the introduction of dirt particles into the system. Oljorna i en varmkörd maskin kan vara mycket varma. Risk för brännskada. For right amount and type of oil, check instruction manual. 4.1 Engine oil Check: Make sure the machine is on a level surface. Check the oil level before starting, or at least 5 minutes after stopping. Remove the dipstick, dry off any oil and replace. Remove the dipstick again and read the oil level on the stick. Top up with oil as required. Wait 5 minutes before performing any further checks. Byte: A warm engine facilitates emptying the oil. Unscrew the oil plug under the oil sump and collect the old oil. Change the oil filter (see chapter 6.1) Screw the oil plug back in and fill with new oil. See "Technical data" for the correct amount of oil. Check that the oil level reaches the upper mark on the dipstick. Check that there are no leaks around the oil plug and the filter. Oil fill Oil plug Dipstick … 16 Operator´s service manual Vimek 630 4.2 Art Nr.909713 Hydraulic oil Carry out continuous oil analysis through your oil supplier, to ensure the condition of the oil. Change when necessary. Always fill the oil through a filter. Check: Level pipe on hydraulic oil tank. Top up as required. Change: Unscrew the oil plug under the hydraulic oil tank and collect the old oil. Screw the oil plug back in. Fill with new oil. See "Technical data" for the correct amount and type of oil. Check the oil level. Check that there are no leaks. Filling Hydraulic oil tank Oil plug 17 Operator´s service manual Vimek 630 4.3 Art Nr.909713 Gearbox oil Check the oil level every 40 hour. Oil level should be about 100mm above the gearbox bottom (oil level is controlled trough the refill plug). Change: Make sure the machine is on a level surface. Remove the skidplate under the gearbox. Unscrew the oil plug (magnetic plug) under the gearbox and collect the old oil. Metallic filings on the magnet can indicate gearbox damage. Contact your VIMEK dealer for an assessment. Screw back the oil plug. Fill with new oil. See ”Technical data” for the correct amount and type of oil. Check that there are no leaks. Filling Oil plug … 4.4 Reduction gear Make sure the machine is on a level surface. Unscrew the draining plug and collect the old oil. Screw back the draining plug. Fill with new oil. See ”Technical data” for the correct amount and type. Check that there are no leaks. Filling Draining 18 Operator´s service manual Vimek 630 4.5 Art Nr.909713 T-gear Check: Remove the level plug. The oil level should be up to the level plugg. Fill if necessary. Level plug 4.6 T-gear, trailer When checking and filling oil in the t-gear the top plate must be removed. Check: Check the oil level with a dipstick. About half of the housing should be filled with oil. Fill if necessary. Filling 19 Operator´s service manual Vimek 630 Art Nr.909713 5 Filter Pay attention to cleanliness to avoid the introduction of dirt particles into the system. 5.1 Engine oil filter Filter change: Remove the filter with an oil filter tong. Clean up any oil spills. Clean the mounting surface. Spread oil on the new filter sealing. Tighten the new filter by hand. Do not use filter tongs. Run the engine for a while. Check the oil level. Top up as required. Check that there are no oil leaks around the filter. Oil filter 5.2 Hydraulic oil filter Filter change: Loosen the filter with an oil filter tong. Clean any leaks. Spread oil on the new filter sealing. Tighten the new filter by hand. Do not use filter tongs. Hydraulic oil filter 20 Operator´s service manual Vimek 630 5.3 Art Nr.909713 Fuel filter Filter change: Pinch the fuel hose to avoid unnecessary leaks. Remove the filter. Pay attention to cleanliness. Fit an new filter. Fuel filter 5.4 Air filter Filter change: Get to the filter by snapping up the two grey mountings and remove the lid. Clean the filter. Check: That there is no damage to the filter. Change when necessary. Lid Mounting Mounting 21 Operator´s service manual Vimek 630 Art Nr.909713 6 Brake system Bleed the brakes if they feel weak or light. 6.1 Driving brake Check: Brake effect. Adjust when necessary. Nipple Nipple position … 6.2 Parking brake Check: Brake effect. Adjust if necessary Adjustment: Adjust at the screw viewed in the picture. Make sure the parking brake isn´t braking when disabled. Adjusting screw 22 Operator´s service manual Vimek 630 Art Nr.909713 7 Transmission 7.1 Variator The condition of the variator is essential for the desired operation of the machine. A reduction in draft can be due to the variator. 2 1 3 1. Primary variator 2. Secondary variator 3. Variator belt When undertaking all variator work, ensure that the engine cannot be started. Risk of crushing! 7.2 Variator belt The width of the variator belt may not be less than 28 mm The variator belt should not be able to be compressed more than that the distance between the upper and the lower side are less than 100 mm (see picture below) Changing the variator belt is done without using any tools, in order to avoid damaging the variator discs. Never bend or break the belt more than necessary. When fitting a new belt, it must first be run in, in order to provide an optimal use-surface and subsequent longer lifespan. 100m m 23 Operator´s service manual Vimek 630 Art Nr.909713 Check: That the variator discs and band are clean and free of grease and oil. Clean when necessary. Wear of the belt. Change when necessary. Belt in respect of crack formation. Change when necessary. Change: Pull apart the secondary variator discs to ease the change. Do that by turning the outer disc counter clockwise and lifting the belt. Pull off the belt from the secondary variator. Spin the variators to make it easier. To fit the new belt you do as in the pictures below. 1 2 3 … … 24 Operator´s service manual Vimek 630 8 Tyres 8.1 Air pressure Check: Machine: 200 kPa (2 bar)/70 kPa (0,7 bar) Trailer: 250 kPa (2,5 bar) 70kPa (0,7bar) 200kPa (2bar) se 250kPa (2,5bar) 25 Art Nr.909713 Operator´s service manual Vimek 630 9 Chains 9.1 Adjusting chain tension, front 1. Remove the front skid plate (1). 2. Remove the big skid plate (2) under the machine. Remove the hood. 1 2 … 3. Loosen 4 screws (3) about 1 turn. 4. Equaly adjust both screws (4). - Check tension of the chain between front axle and gearbox. - The chain should be able to compress about 10 mm. 4 3 4 4 4 … 5. Tighten the screws (3). 6. Fit the skid plates and the hood. 26 Art Nr.909713 Operator´s service manual Vimek 630 9.2 Art Nr.909713 Adjusting chain tension, rear 1. Remove the protective plate between the hydraulic- and the fuel tank (1). 1 2 3 2. 3. 4. 5. 9.3 3 … … Loosen 4 screws (2) under the rear axis about 1 turn. Adjust both screws equally (3). - Check the tension of the chain between rear axle and gearbox. - The chain should be able to press up about 20 mm. Tighten the screws (2). Fit the protective plate. Adjusting chain tension, t-gear 1. Loosen the screws on the t-gear (1) 2. Adjust screws (2 & 3) until you can press down the chain (4) about 5 mm. Check that the chain is aligned to the sprockets. 1 1 1 1 2 4 3 … … 27 Operator´s service manual Vimek 630 Art Nr.909713 10 Battery 10.1 General Battery acid is very corrosive. Never short-circuit the battery poles. Risk of explosion. Use protective clothing and eye protection when working with batteries and battery acid. If battery acid gets onto skin or clothes, flush with water immediately. Do not disturb the battery cable shoes when the engine is running. Check: Battery fixing. Acid level in the battery. Fill with distilled water as required. That the poles and cable shoes are adequately protected. That the battery poles have not oxidised. Clean when necessary. Use contact grease on the poles. 10.2 Charging Stopping the main circuit breaker. Remove the cable shoe on the minus pole and then on the plus pole. Connect the charging equipment according to the battery charger’s manual. Refit in the reverse order. Use contact grease on the poles. 10.3 Battery change Screw hat Battery Stop the main circuit breaker. Remove the cable shoe on the minus pole and then on the plus pole. Loosen the mount by screwing the hats. The battery. Fit new battery. Mount in opposite order. Use contact grease on the poles. 28 Operator´s service manual Vimek 630 Art Nr.909713 11 Hydraulics 11.1 General Check daily: That there are no leaks in the system. Fix if necessary. That there are no damaged/broken hoses or connections. Change when necessary. 12 Safety equipment 12.1 Fire extinguisher Check: Best before date. Check daily: Pressure in the fire extinguisher. The extinguisher´s manometer must be within the green markings. 29 Operator´s service manual Vimek 630 Art Nr.909713 1.1 Pending axle* 1.2 Drive joints* 1.3 Rear axle chain** 1.4 Front axle chain** 1.5 Gearbox chain** 1.6 Slidig surface throttle ring*** 1.7 Gear axle** X X X X X X X X X X X X X X 1.8 Rear axle flex couplings** 1.9 Drive joints, trailer* X X X 1.10 Flex coupling, trailer** 1.11 Cardan shaft* 1.12 Bogie* 1.13 Pending axle trailer* 1.14 Out riggers* 1.15 Rotator/Link* 1.16 Grapple* 1.17.1 Crane pillar* 1.17.2 Crane/Link* 1.19 Wheel bearings, trailer* 2. Bolted joint 2.1 Wheels machine X X X X X X X X X X X X X X X X X X X 2.8 Load bunk X X X X X X X X X X X X X X X X X X X X X X X X 2.9 Bogie tap, trailer X X X 2.2 Ball joint 2.3 Wheels trailer 2.4 Crane foot 2.5 Out riggers 2.6 Crane arm 2.7 Engine mount 30 Separate manual 1000 hrs / Annually 640 hrs 320 hrs 160 hrs 80 hrs 40 hrs 1. Lubrication points 1st service (100 hrs) Maintenance schedule Operator´s service manual Vimek 630 4.2 Hydraulic oil X X See chapter 4.2 4.3 Gearbox oil Separate manual 1000 hrs / Annually 640 hrs 320 hrs 80 hrs 160 hrs X 40 hrs 4. Oils 4.1 Engine oil X 1st service 3. Engine N.B. See separate manual for complete service schedule! 3.1 Hoses Art Nr.909713 X X 4.4 Reduction gear X X X 4.5 T-gear 4.6 T-gear, trailer 5. Filter 5.1 Engine oil filter 5.2 Hydraulic oil filter 5.3 Fuel filter 5.4 Air filter X X X X X X X X 6. Brakes 6.1 Driving brake 6.2 Parking brake X X X X 7. Variator 7.2 Variator belt X X X X 8. Tyres 8.1 Air pressure 9. Chains *) **) ***) 9.1 Adjusting chain tension, front 9.2 Adjusting chain tension, rear 9.3 Adjusting chain tension, t-gear 10. Battery X X X X 10.2 Charging X X X X Use universal long term grease. Use CRC chain lube or similar. Use CRC silicone spray or similar. 31 Operator´s service manual Vimek 630 32 Art Nr.909713


