1
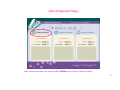
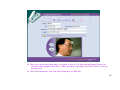
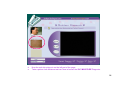
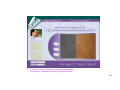
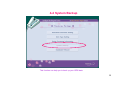
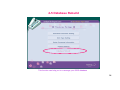
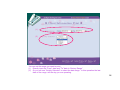
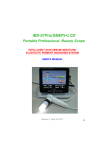
Intelligent Skin Diagnosis System
(for sebum/moisture/pigment analysis)
with Customer Management System
ISDS + CMS software User’s manual
•System requirement: a. IBM compatible PC
b. CPU: P4 with 20G HDD66MHz or up
c. RAM: 128M (or 256M) above
d. VGA memory: 32M above
Required OS: Windows 2000, Windows XP or above
0
Home page of the ISDS software
1
1. SKIN DIAGNOSIS ONLY
(Usage recommended for “Counter sale”)
Click “Skin Diagnosis Only” button, the system will lead you to complete the whole Sebum /
Moisture / Pigment diagnosis test and get test result.
2
(Skin Diagnosis Page)
After entering this page, let’s start the SMP SEBUM test by clicking “Sebum Analysis”
3
1-1 Sebum Analysis test procedures
Usage of Sebum test bar
a.
Be sure to clean the Sebum test bar
(mirror
side) with alcohol each time before use.
b. Touch the sebum test bar (mirror side) to
the skin part you want to test.
(Suggested test part: forehead)
c. Set lens to the normal (texture) inspection
mode.
Texture / normal inspection
(Surface inspection)
d. Contact the lens to the mirror side (The
direction arrow on test bar label should be
in the upward direction.) & freeze picture
(Press freeze button).
(1)
(2)
Firstly you will get a live picture in image window.
Please set the lens to normal (texture) inspection mode. Use the cleaned
sebum test bar (mirror side) to touch the skin part (suggested test part:
forehead) and contact the lens to the mirror side.
(3) Click “Freeze” button to get a frozen picture.
* If you are not satisfied with the frozen picture, you can click “Re-test” button
for live picture and re-freeze new picture.
e. Be sure to clean the Sebum test bar (mirror
side) with alcohol each time before use.
4
(4) And then click “Analyze” button to begin sebum analysis.
Computer is scanning & analyzing the sebum data.
5
(5) After auto analysis, you will get “Sebum” picture & test result (level & percentage).
(6) Now let’s start the SMP MOISTURE test by clicking “Moisture Analysis”
6
1-2 Moisture Analysis test procedures
Usage of Moisture test bar
(1)
(3)
(2)
(4)
a. Take off one small white round paper. Touch
properly the white plate of moisture test bar to
the black side and the black sticker paper will
be on the top of moisture test bar.
b. Touch the paper side to
the skin part you want to
test. (Suggested test
part: lower cheek)
c. Set lens to the normal
(texture) inspection mode.
(1)
(2)
Firstly you will get a live picture in image window.
Please set the lens to normal (texture) inspection mode. Use the clean
moisture test bar with black test paper to touch the skin part (Suggested
test part: lower cheek) and contact the lens to the paper side for a clear
picture.
(3) Click “Freeze” button to get a frozen picture.
* If you are not satisfied with the frozen picture, you can click “Re-test”
button for live picture & re-freeze new picture.
Texture / normal inspection
(Surface inspection)
d. Contact the lens to the
paper side (The direction
arrow on test bar label
should be in the upward
direction.) & freeze picture
(press freeze button)
e. Change the moisture test
paper after each test.
7
(4) And then click “Analyze” button to begin moisture analysis.
Computer is scanning & analyzing the moisture data.
8
(5) After auto analysis, you will get “Moisture” picture & test result (level & percentage).
(6) Now let’s start the SMP PIGMENT test by clicking “Pigment Analysis”
9
1-3 Pigment Analysis test procedures
(1)
(2)
Firstly you will get a live picture in
image window.
Please set the lens to melanin
(polarized) inspection mode.
Melanin / Polarized inspection
(deeper layer skin inspection)
(3)
Use the lens to test your skin
(pigment part) for a clear picture.
(Suggested test part: upper cheek)
Click “Freeze” button to get a frozen
picture.
* If you are not satisfied with the frozen picture, you can click “Re-test” button
for live picture & re-freeze new picture.
10
(4) And then click “Analyze” button to begin pigment analysis.
Computer is scanning & analyzing the pigment data.
11
(5) After auto analysis, you will get “Pigment” picture & test result (level & percentage).
(6) Now please click “Whole result” button
12
Whole result for sebum/moisture/pigment test
The whole result now
appears according to the
tested sebum / moisture /
pigment data
* The whole results are divided into 27 different combinations (skin types). The “Skin type”, “Cause for
skin type / problem”, “suggestion” appeared on this page are from “Skin type setting” of “SYSTEM
SETUP” which are defined and setup by the cosmetic company or user according to their own standard
know-how and the skin care products / treatment that they want to sell.
13
2. THE NEW CLIENT
Click “The New Client” button, the system will lead you to complete the data setup and
Sebum / Moisture / Pigment diagnosis test & get test result.
14
2-1 New Client data setup
(1)
New client data setup page. You can begin to input the new client data (name, tel,
cell phone, address, e-mail).
15
(2) After key-in all the new client data, if you have 1x lens or 1-5x lens with the Beauty Scope, you
can take a photograph for the client. When you get a clear image, just click “Freeze” to get the
frozen picture.
(3) After client data setup, click “Start Skin Diagnosis” for SMP test.
16
2-2 Sebum / Moisture / Pigment analysis
(1) Sebum Diagnosis
a. Take a real skin picture where you want to diagnose.
b. Set the lens to normal (texture) inspection mode.
Texture / normal inspection
(Surface inspection)
17
c. Contact the lens to the skin part you want to diagnose,
click “Freeze” button and then “OK” button.
(Suggested test part: forehead)
18
d. Now the real skin picture is on the left part of the page.
e. Take a picture from Sebum test bar. Now let’s start the SMP SEBUM Diagnosis.
19
Usage of Sebum test bar
a.
Be sure to clean the Sebum test bar
(mirror
side) with alcohol each time before use.
b. Touch the sebum test bar (mirror side) to
the skin part you want to test.
(Suggested test part: forehead)
c. Set lens to the normal (texture) inspection
mode.
Texture / normal inspection
(Surface inspection)
d. Contact the lens to the mirror side (The
direction arrow on test bar label should be
in the upward direction.) & freeze picture
(Press freeze button).
f. (Set the lens to normal inspection mode.) Use the cleaned sebum test bar
(mirror side) to touch the same skin part you want to diagnose (Suggested
test part: forehead) and contact the lens to the mirror side.
g. Click “Freeze” button to get a frozen picture.
* If you are not satisfied with the frozen picture, you can click “Re-test” button
for live picture and re-freeze new picture.
e. Be sure to clean the Sebum test bar (mirror
side) with alcohol each time before use.
20
h. Then click “Analyze” button to begin sebum analysis.
Computer is scanning & analyzing the sebum data.
21
i. After auto analysis, you will get “Sebum” picture & test result (level & percentage).
j. Now let’s start the SMP MOISTURE test by clicking “Moisture Diagnosis”.
22
2-2 Sebum / Moisture / Pigment analysis
(2) Moisture Diagnosis
a. Take a real skin picture where you want to diagnose.
b. Set the lens to normal (texture) inspection mode.
c. Contact the lens to the skin part you want to diagnose and
click “Freeze” button. (Suggested test part: lower cheek)
Texture / normal inspection
(Surface inspection)
23
d.
e.
Now the real skin picture is on the left part of the page.
Take a picture from Moisture test bar. Now let’s start the SMP MOISTURE Diagnosis.
24
Usage of Moisture test bar
(1)
(3)
(2)
(4)
a. Take off one small white round paper. Touch
properly the white plate of moisture test bar to
the black side and the black sticker paper will
be on the top of moisture test bar.
b. Touch the paper side to
the skin part you want to
test. (Suggested test
part: lower cheek)
c. Set lens to the normal
(texture) inspection mode.
f. (Set the lens to normal inspection mode.) Use the clean moisture test bar
with black test paper to touch the same skin part you want to diagnose
(Suggested test part: lower cheek) and contact the lens to the paper side
for a clear picture.
g. Click “Freeze” button to get a frozen picture.
* If you are not satisfied with the frozen picture, you can click “Re-test”
button for live picture and re-freeze new picture.
Texture / normal inspection
(Surface inspection)
d. Contact the lens to the
paper side (The direction
arrow on test bar label
should be in the upward
direction.) & freeze picture
(press freeze button)
e. Change the moisture test
paper after each test.
25
h. Then click “Analyze” button to begin moisture analysis.
Computer is scanning & analyzing the moisture data.
26
i. After auto analysis, you will get “Moisture” picture & test result (level & percentage).
j. Now let’s start the SMP PIGMENT test by clicking “Pigment Diagnosis”
27
2-2 Sebum / Moisture / Pigment analysis
(3) Pigment Diagnosis
(1)
(2)
Firstly you will get a live picture in
image window.
Please set the lens to melanin
(polarized) inspection mode.
Melanin / Polarized inspection
(deeper layer skin inspection)
(3)
Use the lens to test your skin
(pigment part) for a clear picture.
(Suggested test part: upper cheek)
Click “Freeze” button to get a frozen
picture.
* If you are not satisfied with the frozen picture, you can click “Re-test” button
for live picture & re-freeze new picture.
28
d. Then click “Analyze” button to begin pigment analysis.
Computer is scanning & analyzing the pigment data.
29
i. After auto analysis, you will get “Pigment” picture & test result (level & percentage).
j. Now please click “Whole result” button.
30
Whole result for sebum/moisture/pigment test
The whole result now appears according to the tested sebum / moisture / pigment data. And the
description of “Skin type”, “Cause for skin type / problem”, “suggestion” appeared on this page are from
“Skin type setting” of “SYSTEM SETUP” which are defined and setup by the cosmetic company or user
according to their own standard know-how and the skin care products / treatment that they want to sell.
31
Save data of this sebum/moisture/pigment test
You can just click “Save” button to save the diagnosis data of this test.
32
3. THE OLD CLIENT
Click “The Old Client” button, the system will lead you to find the history data of old client.
33
3-1 Search Old Client Information
You can search the old client information from 4 conditions: “Name”, “TEL”, “Cell Phone” or
“Address”. For example, if you search from “Name” condition, you can key in the name of this
client and then click “Search” button.
34
(1)
(2)
History data --- Click the right client you want to get and then click “History” button. You will
find the history data of this client. The system will keep the latest 5 records
for each client.
New Diagnosis --- If you want to directly make new diagnosis for this old client, click “New
Diagnosis” the system will lead you to make the SMP diagnosis like the
procedure from page 17 to 32.
35
3-2 History Information
In this page you will get diagnosis data for the latest 5 records. You can select any 2 dates
(records) you want to compare.
36
You can click any picture and the system will help you to make comparison of the selected
2 dates.
37
3-3 History Comparison
* Comparison of Sebum diagnosis result
38
* Comparison of Moisture diagnosis result
39
* Comparison of Pigment diagnosis result
40
3-4 Print the Diagnosis Result
In the “History Information” page, if you click
skin diagnosis result of the selected date.
in the selected date, you can print out the
41
3-5 Data update
If you change or re-new the data of this client, please remember to click “Update” button after
you insert the correct data.
42
4. SYSTEM SETUP & MAINTAIN
Click “System Setup & Maintain” button, the system will allow you to setup the data base
of your own software.
43
4-1 Standard Parameter Setting
There are 5 databases you can setup. Click “Standard Parameter Setting” button.
44
Originally this page shows you the default values. If you think necessary, you can adjust
to your desired value.
45
After changing the value, you can click “Save” to save your own parameter setting.
If you want to change back the parameter setting to its original default value, please just click
“Default”.
46
4-2 Skin Type Setting
Click “Skin Type Setting” button.
47
27 different skin type data setting
* The whole results are divided into 27 different combinations (skin types). Please set your own data
base in each blank column. The “Skin type”, “Cause for skin type / problem”, “suggestion” will be
defined and setup by the cosmetic company or user according to your own standard know-how and
the skin care products / treatment that you want to sell.
48
4-3 Setup Company Information
Click “Setup Company Information” button.
49
After inputting your company information, please click “Save” button to save this data.
50
4-4 System Backup
This function can help you to back up your ISDS data.
51
(1) Backup ISDS
You can save the data into your own file. Please specify your target file folder and file name.
And the file type shall be fixed to be *.rar.
52
(2) Recovery ISDS
If your computer system meets any abnormal condition, press “Recovery ISDS” button the
ISDS data can be recovered to your last backup date.
53
4-5 Database Rebuild
This function can help you to re-arrange your ISDS database
54
5. PRINT
Click “Print” button to enter print page.
55
(1)
(2)
You can set the range you want to print:
(1) Directly input the “From” date and “To” date in “History Range”
(2) Or you can use “Quickly Selected” to select the date range. In this operation the last
date of the range will the day you are operating.
56
5-1 List Print
After setting the date range, click “List Print” button.
57
This is the whole list of client information for the selected date range. You can directly
print it out.
58
5-2 Label Print
After setting the date range, if you click “Label Print” button.
59
This is the label list of each client for the selected date range. You can directly print it out.
60
5. EXIT
Click “EXIT” button to enter exit page.
61
Now the system is asking if you want to backup current ISDS system. For safety we strongly
suggest you to click “ Yes” to execute back-up. When back-up is completed or if you will not
make back-up, please click “No” to quit the ISDS system.
62
When you get this page, please click “Yes” to close ISDS system.
63